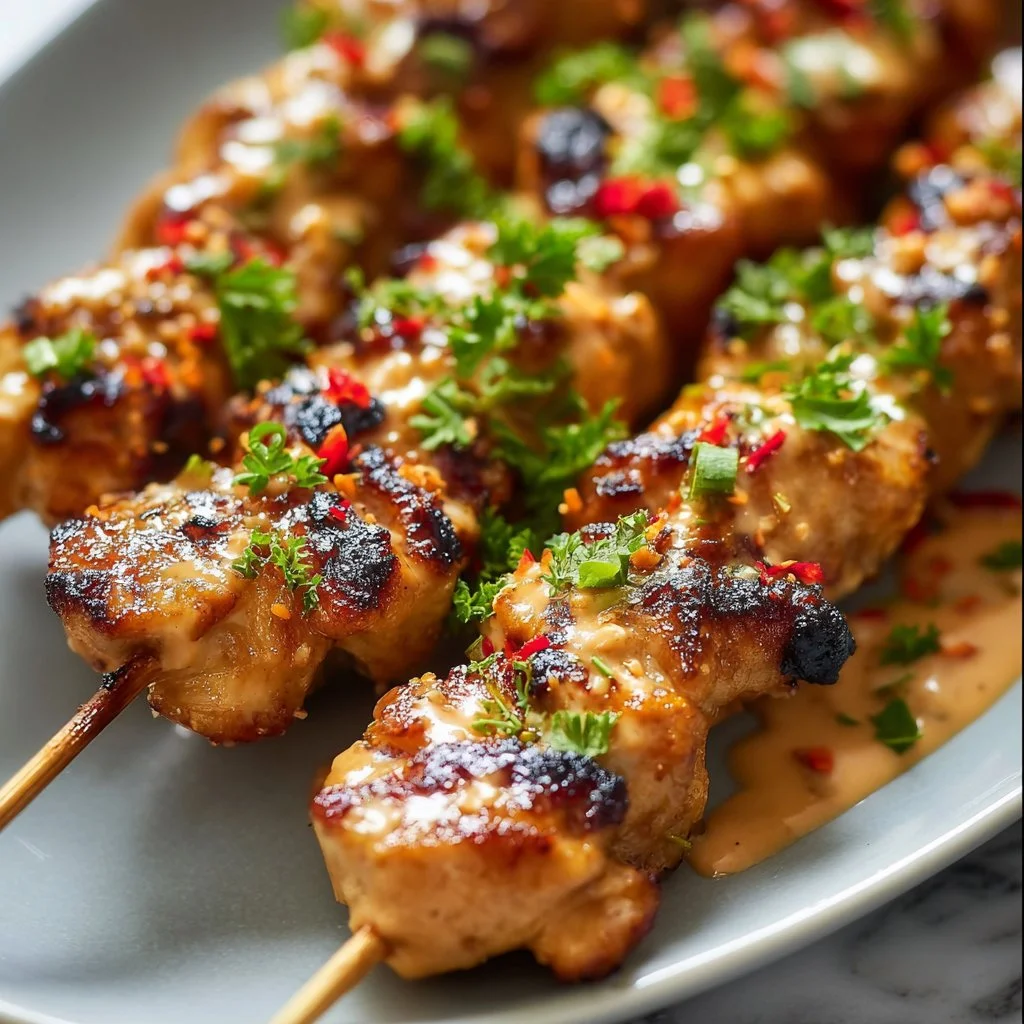
Bang Bang Chicken Skewers
Bang Bang Chicken Skewers: A Flavorful Journey to the Grill
Hello, fellow food enthusiasts! It’s Savannah here, and today I’m tickled to share one of my favorite recipes that brings the sizzle and spice right to your backyard or dining table: Bang Bang Chicken Skewers. If you’re in the mood for something that’s both elegant and easy to whip up, you’ve stumbled onto the right recipe!
Picture this: a warm summer evening, the sun dipping low, golden rays cascading onto your patio, laughter ringing in the air, and the tantalizing aroma of chicken grilling to perfection. These Bang Bang Chicken Skewers are truly the stars of the show, bringing together juicy chicken with a creamy, spicy sauce that you’ll want to drizzle (or slather) on everything! It’s all about having fun in the kitchen, and trust me, these skewers are an accessible way to bring a culinary flair without breaking a sweat.
The beauty of Bang Bang Chicken Skewers lies not just in their flavor, but also in their adaptability. They’re great for weeknight dinners, friendly gatherings, or even more formal occasions. Plus, the vibrant colors and the delightful presentation will make your plate pop! Whether you’re an experienced cook or a newbie looking to impress, I’m here to walk you through it step by step. So grab your apron, and let’s get started!
Personal Story
I first encountered Bang Bang Chicken Skewers at a friend’s birthday party a few summers ago. It was one of those magical evenings where everything just clicked: the lights were twinkling, the music was playing, and the food was simply divine. My friend’s mom had grilled these skewers to perfection, and as I took my first bite, the explosion of flavors danced merrily on my palate. The hint of sweetness from the chili sauce, the subtle heat of sriracha, and the creamy mayo brought a delightful balance that had me reaching back for seconds.
That moment sparked a mission: to recreate those skewers and bring that joyful experience to my own table. After some experimenting in the kitchen – a little trial and error here and there – I finally perfected my version. Each skewer now brings a wave of nostalgia and happiness, perfectly suited for gatherings or quiet dinners at home. So, here’s a recipe that invites you to replicate a moment of joy, flavor by flavor!
Ingredients
Here’s what you’ll need to make these crowd-pleasing Bang Bang Chicken Skewers:
-
1 lb Chicken Breast, cubed
A classic choice; chicken breast remains tender and juicy when marinated and grilled. You could substitute with chicken thighs for added flavor if you prefer a richer taste. -
1/2 cup Mayonnaise
Adds creaminess and richness to our sauce. For a lighter version, try using Greek yogurt instead, which will provide a similar tanginess with fewer calories. -
1/4 cup Sweet Chili Sauce
This is the backbone of our Bang Bang sauce, lending a perfect balance of sweetness. No sweet chili sauce? You can use hoisin sauce mixed with a bit of sugar as a substitute. -
1-2 tablespoons Sriracha (to taste)
Gives that signature kick! Feel free to adjust the amount based on your heat tolerance. For a milder flavor, switch to a less spicy hot sauce or omit it altogether. -
1 tablespoon Lime Juice
Fresh lime juice brightens the dish and enhances the flavors. In a pinch, lemon juice can be used as a zesty alternative. -
Salt and Pepper to taste
Essential for enhancing the overall flavors of the dish. Don’t skip this – it makes a huge difference! -
Skewers (wooden or metal)
Wooden skewers should be soaked in water for at least 30 minutes prior to using them to prevent burning. Metal skewers are great because they don’t require this step!
Step-by-Step Instructions
-
Prepare The Marinade:
In a medium bowl, combine the mayonnaise, sweet chili sauce, sriracha, lime juice, and a pinch of salt and pepper. Whisk until smooth and well-blended. The texture should be creamy yet pourable. This marinade is both a basting sauce for the chicken and a delicious dipping sauce for when the skewers are ready to serve. Yum! -
Marinate the Chicken:
Cube the chicken breast into bite-sized pieces (about 1-inch cubes). Add the chicken to the marinade, ensuring each piece is generously coated. Cover the bowl with plastic wrap and let it marinate in the fridge for at least 30 minutes. If you have time, marinating for a few hours will elevate the flavor even more! -
Skewer the Chicken:
Preheat your grill to medium-high heat. While it’s heating up, thread the cubed chicken onto your skewers. Leave a bit of space between each piece to ensure even cooking. If you’re using wooden skewers, remember those should be soaking in water for at least 30 minutes before threading. -
Grill The Skewers:
Place the skewers on the grill and cook for about 10-12 minutes, turning occasionally, until the chicken is golden brown and reaches an internal temperature of 165°F (75°C). If you fancy a bit of charring (who doesn’t!), feel free to cook a tad longer, but keep an eye on them to avoid burning. -
Baste and Brown:
During the last few minutes of grilling, brush a little of the remaining marinade on the skewers. This will enhance the flavor and add a beautiful glaze. You might want to reserve just a touch more marinade for an extra serving sauce — perfect for dipping! -
Serve Immediately:
Once the chicken is cooked through and beautifully charred, remove the skewers from the grill and let them rest for a minute. This step allows the juices to redistribute. Serve the skewers with any remaining sauce (it’s too good to waste!) and enjoy those satisfied smiles around the table!
Serving Suggestions
Plate these Bang Bang Chicken Skewers on a vibrant platter, perhaps over a bed of lightly dressed greens or alongside a fragrant rice dish. Drizzling the extra sauce over the skewers will not only enhance the presentation but compel your guests to reach for another! Consider garnishing with freshly chopped cilantro or green onions for an added pop of color and flavor.
Recipe Variations
-
Vegetarian Version: Swap out the chicken with cubed tofu or larger vegetable chunks (like zucchini, bell peppers, or mushrooms) for a delightful meat-free option.
-
Add a Simple Side: Serve with a refreshing cucumber salad or pickled vegetables to counterbalance the richness of the skewers.
-
Sriracha Alternative: For a smoky flavor, replace sriracha with chipotle sauce or harissa. It will add a different layer of complexity!
-
Flavor Twist: Incorporate different nut butters (think peanut or cashew) into the marinade for a nutty flavor, and up the creaminess. Just be mindful of allergens!
-
Asian Flair: If you want to go further with the Asian vibe, consider adding a splash of sesame oil for depth of flavor or some crushed peanuts for texture.
Chef’s Notes
Every recipe tells a story and, oh boy, do I have one with these Bang Bang Chicken Skewers! It’s evolved over time from that memorable birthday party into something I confidently serve at my own gatherings. I remember one summer night, I decided to attempt these skewers for a dinner with friends. To my horror, I realized I was out of sweet chili sauce—and panic set in! After a brief moment of ingenuity and a dash of this and that from my pantry, I mixed up a makeshift sauce that surprisingly was a hit. Now, I could tell you about my various mishaps in the kitchen, but I prefer to think of my kitchen as a playground; sometimes, the best flavors come from a little adventurous improvisation!
FAQs and Troubleshooting
Q: My chicken skewers are dry. What did I do wrong?
Don’t fret! Dry chicken usually means they were overcooked. Keep an eye on the grill, and use a meat thermometer to ensure that the internal temperature reaches 165°F (75°C) but no more. Marinating also helps keep the chicken juicy.
Q: My sauce is too spicy! How do I tone it down?
If you find the sauce too hot, a dash more mayonnaise can help balance out the heat. Alternatively, you can mix in a bit of honey or sugar for sweetness.
Q: Can I bake these skewers instead of grilling?
Absolutely! Preheat your oven to 400°F (200°C) and place the skewers on a baking sheet lined with parchment paper. Bake for about 20-25 minutes, turning them halfway through, until the chicken is cooked through.
Q: How do I store leftovers?
Place any leftover skewers in an airtight container and store them in the refrigerator for up to 3 days. They also make for a rewarding cold lunch the next day!
Nutritional Info (Optional)
While the specific nutritional content can vary based on brands and cooking methods, here’s a concise estimate for one serving (assuming 4 servings total) of Bang Bang Chicken Skewers:
- Calories: 320
- Protein: 30g
- Fat: 20g (mostly from the mayo)
- Carbohydrates: 10g
- Dietary Fiber: 1g
- Sugar: 4g
Bang Bang Chicken Skewers are not just a dish; they are a celebration of flavors, memories, and the joy of sharing meals with those you love. I hope you enjoy crafting these as much as I do! Let’s keep the flavors flowing, and don’t hesitate to share your own kitchen adventures with me. Happy cooking!
PrintBang Bang Chicken Skewers

Flavorful Bang Bang Chicken Skewers with a creamy, spicy sauce that’s perfect for grilling at any gathering.
- Prep Time: 10 minutes
- Cook Time: 12 minutes
- Total Time: 42 minutes
- Yield: 4 servings 1x
- Category: Appetizer
- Method: Grilling
- Cuisine: Asian
- Diet: Gluten-Free
Ingredients
- 1 lb Chicken Breast, cubed
- 1/2 cup Mayonnaise
- 1/4 cup Sweet Chili Sauce
- 1–2 tablespoons Sriracha (to taste)
- 1 tablespoon Lime Juice
- Salt and Pepper to taste
- Skewers (wooden or metal)
Instructions
- Prepare the Marinade: In a medium bowl, combine mayonnaise, sweet chili sauce, sriracha, lime juice, and a pinch of salt and pepper. Whisk until smooth and well-blended.
- Marinate the Chicken: Cube the chicken breast into bite-sized pieces. Add the chicken to the marinade, ensuring each piece is generously coated. Cover and let it marinate in the fridge for at least 30 minutes.
- Skewer the Chicken: Preheat your grill to medium-high heat. Thread the cubed chicken onto the skewers, leaving space between each piece.
- Grill The Skewers: Place the skewers on the grill and cook for about 10-12 minutes, turning occasionally until golden brown and cooked through.
- Baste and Brown: During the last few minutes of grilling, brush remaining marinade on the skewers.
- Serve Immediately: Let the skewers rest for a minute after grilling and serve them with any leftover sauce.
Notes
For a vegetarian version, substitute chicken with cubed tofu or vegetables. Enjoy with a refreshing side salad or rice.
Nutrition
- Serving Size: 1 skewer
- Calories: 320
- Sugar: 4g
- Sodium: 500mg
- Fat: 20g
- Saturated Fat: 5g
- Unsaturated Fat: 10g
- Trans Fat: 0g
- Carbohydrates: 10g
- Fiber: 1g
- Protein: 30g
- Cholesterol: 70mg
Keywords: Bang Bang Chicken, Chicken Skewers, Grill Recipes, Asian Cuisine, Appetizers, Party Food
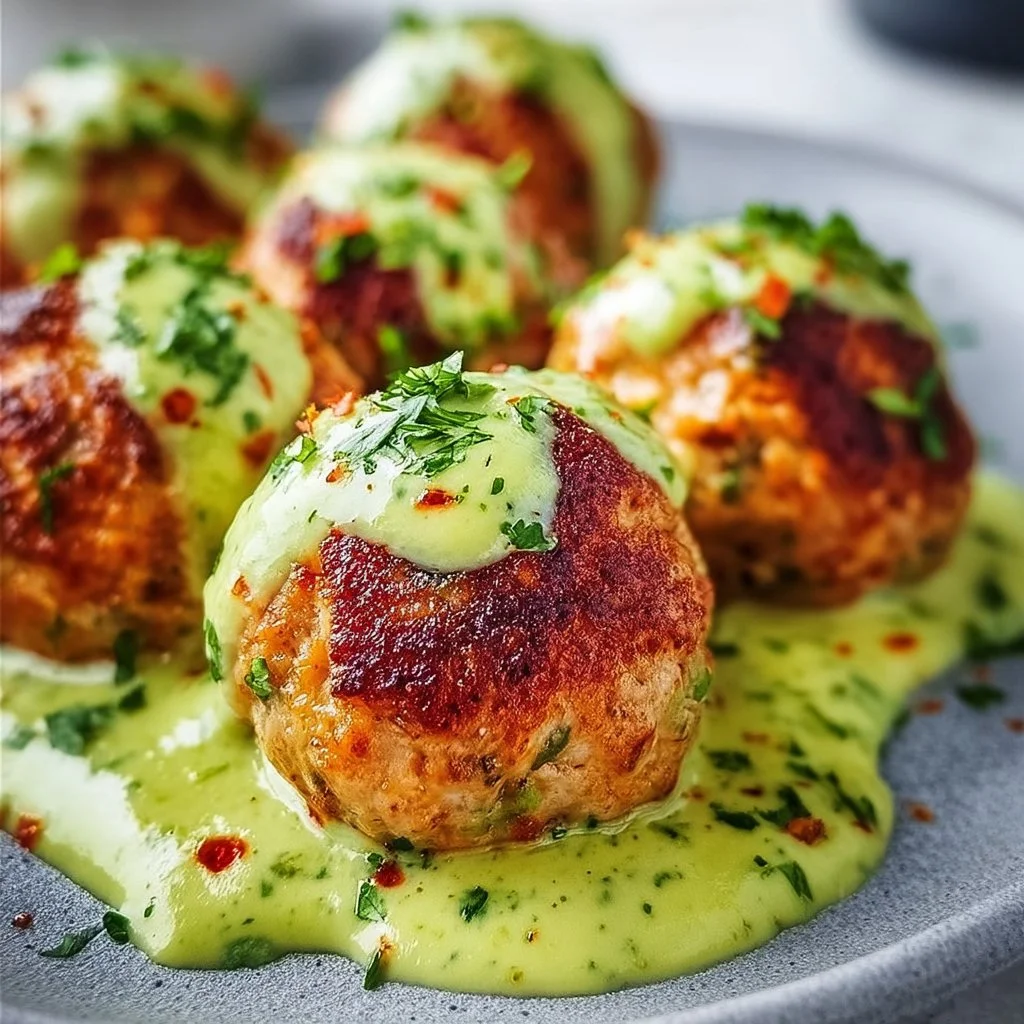
Salmon Balls with Creamy Avocado Sauce
# Salmon Balls with Creamy Avocado Sauce: A Delightful Treat for Any Occasion

Hello, my fabulous foodies! Today, we’re diving into a dish that is not only delightful but also packed with nutrients – Salmon Balls with Creamy Avocado Sauce. Whether you're planning a cozy dinner party or looking for a scrumptious snack to enjoy while binge-watching your favorite series, these little bites of joy are bound to impress. Let’s roll up our sleeves and get ready to create something truly special together!

## Introduction

There's something magical about salmon that just screams elegance, don’t you think? It’s rich, tender, and versatile, fitting perfectly into a variety of culinary creations. Today’s dish transforms this glorious fish into bite-sized balls that are crispy on the outside and luscious on the inside. And who can resist that creamy avocado sauce? I know I can’t!

Imagine sinking your teeth into a warm, golden salmon ball, bursting with flavors of fresh herbs and garlic, then taking a refreshing dip into that zesty avocado sauce. It’s a match made in culinary heaven! These little salmon treasures are perfect for parties, as appetizers, or even as a main dish paired with a beautiful salad. Plus, they come together in no time. Spoiler alert: your guests will be begging you for the recipe!

Let me take you on a journey into my kitchen memories where we’ll mix, roll, and create these delightful salmon balls, sure to leave everyone wanting more. Grab your apron, and let’s get to it!

## Personal Story

I still remember the first time I experimented with salmon in the kitchen. It was a rainy afternoon, the kind that’s perfect for cozy cooking. I had just returned from a vibrant farmers’ market, where I stumbled upon the freshest salmon, glistening like a jewel. As I set the scene with a few candles and soft music playing in the background, I felt inspired.

With no particular recipe in mind, I decided to play matchmaker with the ingredients I had on hand. As the aroma of garlic wafted through my kitchen, it hit me: salmon balls! What could be more fun than creating bite-sized pieces of happiness? I whipped up the mixture, rolled them into little balls, and fried them until golden. That evening, I gathered my friends and served crispy salmon balls with a creamy dip. The laughter and joy around the table were contagious. That moment ignited my passion for creating approachable yet elegant dishes, and I knew I had to share it with all of you!

## Ingredients

To craft these savory salmon balls, you’ll need the following ingredients:

- **1 lb fresh salmon, skin removed**
  *The star of the show! Fresh salmon has great flavor and texture. If you’re in a pinch, canned salmon can also work, just ensure it's well-drained.*

- **1/2 cup breadcrumbs**
  *These help bind your balls and give them that wonderful crunch. For a gluten-free option, you can use almond flour or crushed gluten-free crackers!*

- **1/4 cup green onions, chopped**
  *These add a mild onion flavor and a pop of color. If you don’t have green onions, diced shallots will do the trick!*

- **1/4 cup fresh parsley, chopped**
  *This herb brings freshness to the dish! You can substitute it with dill for a more traditional seafood flavor or basil for a different twist.*

- **1 egg**
  *The egg acts as a binder to hold everything together. For a vegan option, try a flaxseed egg (1 tbsp ground flaxseed mixed with 2.5 tbsp water) instead!*

- **1 clove garlic, minced**
  *Garlic is essential for flavor! If you’re a garlic lover, feel free to add an extra clove or two!*

- **1 tsp lemon juice**
  *Lemon juice brightens all the flavors. If you love lime, feel free to swap that in for a zesty twist!*

- **Salt and pepper to taste**
  *Seasoning is key! Add salt and pepper according to your preference, and don’t forget to taste as you go!*

For the **Creamy Avocado Sauce**:

- **1 ripe avocado**
  *The creaminess of the avocado is unmatched! Ensure your avocado is perfectly ripe for the best flavor and texture.*

- **1/4 cup Greek yogurt**
  *This adds a cool creaminess and a bit of tang. For a dairy-free version, you can substitute with coconut yogurt.*

- **1 tbsp lime juice**
  *Lime juice brightens the sauce and complements the creaminess! If you don’t have lime, lemon works just as well.*

- **Salt to taste**
  *Just a pinch makes all the difference!*

## Step-by-Step Instructions

Now let’s get cooking, shall we? Follow these steps for a delightful experience:

1. **Prep the Salmon:**
   Start by cutting your fresh salmon into chunks. This will make it easier for us to blend it into a delicious mixture.

2. **Cook the Salmon (Optional):**
   If you prefer a slightly cooked flavor in your balls, you can lightly poach the salmon. Just bring a pot of water to a gentle simmer, add the salmon, and let it cook for about 5-7 minutes until it's just opaque. If you want a more raw, fresh flavor, go straight to chopping raw salmon!

3. **Mix Ingredients:**
   In a large mixing bowl, combine the chopped salmon, breadcrumbs, green onions, parsley, minced garlic, and egg. Don’t forget that delightful lemon juice! Gently mix everything together until well combined. It’s okay if there are still some chunks of salmon for texture!

4. **Season To Taste:**
   Add in salt and pepper to your liking. Be sure to taste the mixture as you go — it should be savory, zesty, and packed with flavor!

5. **Shape the Balls:**
   Using your hands, scoop out spoonfuls of the mixture and roll them into golf ball-sized shapes. This is where we get our hands dirty, and I love it! To prevent sticking, you can lightly dampen your hands with water.

6. **Coat with Additional Breadcrumbs (Optional):**
   For an extra crispy crust, roll each salmon ball in a little more breadcrumbs before frying. Not necessary but definitely adds to the texture!

7. **Cook the Salmon Balls:**
   Heat a frying pan over medium heat and add enough oil to cover the bottom (about 1/4 inch). Once shimmering, carefully add the salmon balls. Cook for 4-5 minutes on each side until golden brown and crispy. Remember to keep an eye on the heat to prevent burning!

8. **Drain & Cool:**
   Once cooked, transfer the salmon balls to a plate lined with paper towels to absorb any excess oil.

9. **Make the Creamy Avocado Sauce:**
   While the salmon balls cool slightly, it’s time for the delicious sauce! In a small bowl, mash the ripe avocado and stir in the Greek yogurt, lime juice, and salt. Mix until smooth and creamy – feel free to taste and adjust seasoning!

## Serving Suggestions

Now that our salmon balls are ready and paired with that heavenly avocado sauce, it’s time to serve! Plate the salmon balls on a beautiful serving platter, dollop that creamy sauce in the center, and sprinkle some extra chopped parsley over the top for a pop of color. This dish looks stunning served with toothpicks for easy sharing, or alongside a fresh garden salad for a complete meal.

## Recipe Variations

Feel free to get creative with these salmon balls! Here are a few fun variations to consider:

1. **Spicy Salmon Balls:** Add a teaspoon of red pepper flakes or a dash of hot sauce to the mixture for a spicy kick.

2. **Mediterranean Twist:** Incorporate sun-dried tomatoes, olives, and feta into the salmon mixture for a Mediterranean flavor explosion.

3. **Crispy Baked Version:** Instead of pan-frying, bake your salmon balls at 375°F (190°C) for about 15-20 minutes until golden and cooked through.

4. **Herbed Cream Cheese Sauce:** For a different dip, instead of Greek yogurt, blend some cream cheese with fresh herbs and a hint of lemon juice!

## Chef’s Notes

Cooking is not just about the final dish; it’s about the experience, the memories, and the love you pour into it! The first time I made these salmon balls, they became an instant favorite in my household. Over time, I’ve played around with flavor profiles and textures, making them feel even more special every time. One time while preparing them for a gathering, I accidentally added twice the garlic — and let me tell you, they were a massive hit with my friends who adore garlic. I learned then that perfection is subjective and embracing imperfection can create unforgettable magic in the kitchen!

## FAQs and Troubleshooting

1. **What can I substitute for salmon?**
   If you’d like a lighter option, try using canned tuna. Remember to drain it well! You can also experiment with shredded chicken or plant-based alternatives.

2. **Why are my salmon balls falling apart?**
   If they’re crumbling, it might be due to the lack of a binder. Ensure you use the egg, and consider adding a bit more breadcrumbs if needed.

3. **Can I prepare these ahead of time?**
   Absolutely! You can prep the salmon mixture in advance and store it covered in the fridge for up to 24 hours. Shape and cook the balls right before serving for the best texture.

4. **How can I make these gluten-free?**
   Simply swap out regular breadcrumbs for gluten-free alternatives like almond flour, or use crushed gluten-free crackers instead!

## Nutritional Info (if applicable)

Each serving (2 salmon balls with sauce) contains approximately:
- **Calories:** 220
- **Protein:** 14g
- **Fat:** 15g
- **Carbohydrates:** 10g
- **Fiber:** 3g

So what are you waiting for? Gather your ingredients, put on your favorite playlist, and let the aromatic journey begin! I can’t wait for you to try these salmon balls with creamy avocado sauce. Here’s to elegant cooking that’s easy to achieve and deeply enjoyable. Happy cooking, friends!
Salmon Balls with Creamy Avocado Sauce

Delightful salmon balls paired with a creamy avocado sauce, perfect as appetizers or a main dish.
- Prep Time: 15 minutes
- Cook Time: 20 minutes
- Total Time: 35 minutes
- Yield: 4 servings 1x
- Category: Appetizer
- Method: Frying
- Cuisine: American
- Diet: Gluten-Free
Ingredients
- 1 lb fresh salmon, skin removed
- 1/2 cup breadcrumbs
- 1/4 cup green onions, chopped
- 1/4 cup fresh parsley, chopped
- 1 egg
- 1 clove garlic, minced
- 1 tsp lemon juice
- Salt and pepper to taste
- 1 ripe avocado
- 1/4 cup Greek yogurt
- 1 tbsp lime juice
- Salt to taste
Instructions
- Prep the Salmon: Start by cutting your fresh salmon into chunks.
- Cook the Salmon (Optional): Lightly poach the salmon if you prefer a slightly cooked flavor.
- Mix Ingredients: In a large bowl, combine the salmon, breadcrumbs, green onions, parsley, garlic, and egg. Add lemon juice!
- Season To Taste: Add salt and pepper according to your liking.
- Shape the Balls: Roll the mixture into golf ball-sized shapes.
- Coat with Additional Breadcrumbs (Optional): Roll in more breadcrumbs for extra crispiness.
- Cook the Salmon Balls: Fry in a pan with oil over medium heat for 4-5 minutes on each side.
- Drain & Cool: Transfer to a plate lined with paper towels to absorb excess oil.
- Make the Creamy Avocado Sauce: Mash the avocado and mix with Greek yogurt, lime juice, and salt.
Notes
Feel free to get creative with the ingredients and spices to suit your taste preferences!
Nutrition
- Serving Size: 2 salmon balls with sauce
- Calories: 220
- Sugar: 1g
- Sodium: 350mg
- Fat: 15g
- Saturated Fat: 2g
- Unsaturated Fat: 10g
- Trans Fat: 0g
- Carbohydrates: 10g
- Fiber: 3g
- Protein: 14g
- Cholesterol: 30mg
Keywords: salmon, avocado, appetizer, healthy bites, gluten-free