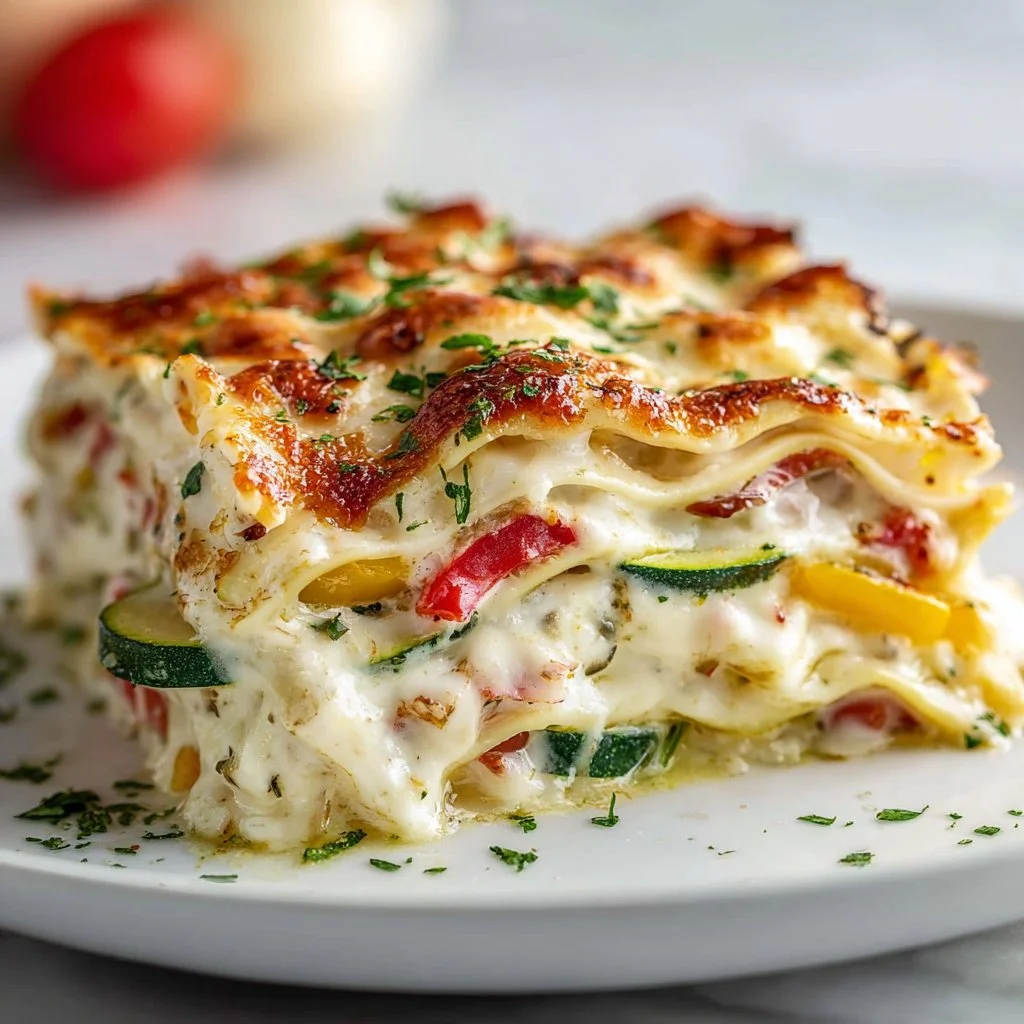
Creamy Vegetarian White Lasagna in 30 Minutes (Weeknights)
Loaded Veggie White Lasagna: A Comfort Food Classic with a Twist
Hello, fellow food lovers! Get ready to dive into a delicious and comforting dish that’s sure to become a staple in your kitchen: Loaded Veggie White Lasagna. As the cool, approachable chef here at Ivory Apron, I’m excited to whisk you away on a culinary journey that’s rich in flavor and warm in memories. This twist on classic lasagna is packed with vibrant vegetables, creamy layers, and oh-so-much cheese. So grab your apron, and let’s get started!
A Cozy Memory in the Kitchen
Back in my early cooking days, I remember hosting a big family dinner. It was holiday season, and I decided to take on the challenge of making a hearty lasagna from scratch. The kitchen was bustling with laughter and the occasional spill — you know how it goes! As I layered fresh pasta sheets with gooey cheese and savory veggie goodness, the aroma filled the house. My little cousin, wide-eyed and curious, watched me assemble the dish. When it came time to dig in, everyone gathered around the table, and we shared stories, jokes, and a lot of cheesy goodness.
That’s the magic of food, right? It brings people together! This Loaded Veggie White Lasagna isn’t just a recipe; it’s an experience. Whether you’re serving it on a special occasion or just a random Tuesday, it sparks joy and creates that cozy atmosphere we all crave.
Ingredients
Here’s what you’ll need to create this scrumptious dish:
- 1/2 cup (113g) butter: The foundation of our creamy sauce! For a lighter option, you can use olive oil.
- 1/2 cup (57g) all-purpose flour: This helps thicken our white sauce. If you’re looking for a gluten-free option, whole wheat flour or a gluten-free blend works great!
- 4 cups (946ml) milk: Use whole or 2% for richness. Almond milk can be a good dairy-free alternative, but choose unsweetened for a savory flavor.
- 1/4 teaspoon nutmeg: Just a pinch adds warmth and sophistication to the sauce without being overpowering.
- 1/2 teaspoon salt: Enhances flavor; remember to adjust if you use salted butter.
- 1/4 teaspoon black pepper: Adds a bit of kick! Feel free to use white pepper if you prefer a smoother look in the sauce.
- 1 tablespoon olive oil: For sautéing the veggies and adding flavor.
- 1 medium onion, chopped: A flavor base every good dish needs! Shallots work wonderfully too.
- 2 cloves garlic, minced: Fresh garlic brings a delightful aroma. Garlic powder is a good substitute in a pinch.
- 1 red bell pepper, chopped: Adds sweetness and color! You can swap this with green bell pepper or even diced tomatoes for a different twist.
- 1 yellow bell pepper, chopped: Enhances that gorgeous color and flavor. Any bell pepper will do for this recipe.
- 1 medium zucchini, chopped: Light and fresh, zucchini soaks up flavors well. Try yellow squash if that’s what you have on hand!
- 1 (10-ounce) package (283g) frozen spinach, thawed and squeezed dry: A classic lasagna ingredient! Fresh spinach can be used as an alternative; just chop and sauté it until wilted.
- 1 (15-ounce) container (425g) ricotta cheese: Creamy and rich, it adds a lush layer to our lasagna. Cottage cheese is a lighter option, but it will change the texture.
- 1/2 cup (50g) grated Parmesan cheese: For that umami depth and cheesy goodness! Nutritional yeast is a great vegan substitute here.
- 1 large egg, lightly beaten: Helps bind the ricotta cheese. If you’re vegan, substitute with flaxseed meal (1 tbsp mixed with 3 tbsp water) for a similar effect.
- 1/4 teaspoon salt: Again, adjust according to your taste preference.
- 1/4 teaspoon black pepper: A classic seasoning choice.
- 9 lasagna noodles: You can use traditional or whole wheat noodles! Or even go for no-boil varieties for quick prep.
- 3 cups (336g) shredded mozzarella cheese: This is the melting crown jewel of our dish! Feel free to use vegan cheese if you’re dairy-free.
Step-by-Step Instructions
Step 1: Create the Creamy Sauce
-
In a large saucepan, melt the butter over medium heat. Once melted, sprinkle in the flour, whisking constantly for 1-2 minutes until it turns golden. This is your roux, and it’s essential for thickening the sauce!
-
Gradually whisk in the milk, ensuring there are no lumps. Keep whisking until the mixture thickens and comes to a soft simmer. This will take about 5-7 minutes. Pro tip: Heating the milk beforehand can speed up this process!
-
Stir in the nutmeg, salt, and black pepper. Taste your sauce — it should be comforting and rich! Add more seasoning if needed.
Step 2: Sauté the Veggies
-
In a large skillet, heat the olive oil over medium heat. Add the chopped onion and cook until translucent, about 3-4 minutes. This will create a fragrant base for your veggies.
-
Toss in the minced garlic, red and yellow bell peppers, and zucchini. Sauté until the peppers soften, around 5-7 minutes. This is where your kitchen should start smelling heavenly!
-
Finally, add the thawed spinach, mixing it into the veggies. Cook for another 2-3 minutes to ensure everything is warmed through.
Step 3: Mix Ricotta Filling
- In a mixing bowl, combine the ricotta cheese, grated Parmesan cheese, beaten egg, salt, and pepper. Mix thoroughly until combined. This creamy layer is what dreams are made of!
Step 4: Layering the Lasagna
-
Preheat your oven to 375°F (190°C). In a 9×13 inch baking dish, start with a layer of the creamy sauce at the bottom. This prevents the noodles from sticking!
-
Place three lasagna noodles over the sauce, followed by half of the ricotta mixture, then half of the sautéed veggie mix, and half of the mozzarella cheese. Drizzle some sauce over the top.
-
Repeat the layers: noodles, remaining ricotta mixture, remaining veggies, more shredded mozzarella, and finish with a final layer of noodles topped with the remaining sauce and mozzarella. Can you hear the harmonious layers coming together?
Step 5: Bake Your Lasagna
-
Cover the dish with foil (avoid touching the cheese!). Bake for 25 minutes, then uncover and bake for an additional 15-20 minutes, until the cheese is bubbly and golden.
-
Allow the lasagna to cool for about 10 minutes before slicing. This step is crucial; it helps the layers set together beautifully!
Serving Suggestions
To serve, slice generous portions of your Loaded Veggie White Lasagna and place them on warm plates. Drizzle a little extra creamy sauce on top and garnish with fresh basil or parsley for a bright finish. Pair it with a simple side salad and a glass of your favorite wine. Voila! You just elevated your dinner game!
Recipe Variations
- Pesto Twist: Incorporate store-bought or homemade pesto into the ricotta mixture for an herby, flavorful spin.
- Protein Punch: Add in cooked chicken, turkey, or any protein of choice to the veggie layer for a heartier meal.
- Spicy Kick: Dice up some jalapeños or sprinkle crushed red pepper flakes in the sauce for a zesty kick.
- Mushroom Medley: Swap out some of the veggies with sautéed mushrooms for an earthy flavor and delightful texture.
- Vegan Delight: Use cashew cheese for the ricotta filling and a dairy-free mozzarella to keep it vegan and still ooey-gooey!
Chef’s Notes
Oh, where to begin? Did I tell you about the time I accidentally used powdered sugar instead of flour for my béchamel sauce? Let’s just say I corrected it in time, but not without a good laugh and a sticky counter! This recipe has evolved in my kitchen over the years, and it’s become a tradition to make this lasagna every holiday season. I love how versatile it is — you can throw in whatever veggies are about to wane in the fridge!
FAQs and Troubleshooting
Q: My lasagna noodles are sticking together; how can I prevent this?
A: When assembling, ensure you’re layering with enough sauce and cheese to create a barrier. Drizzling a bit of olive oil on the noodles can also help!
Q: Can I make this lasagna ahead of time?
A: Absolutely! Assemble it a day in advance, cover it well, and refrigerate. Just add a few extra minutes to the baking time when you’re ready to cook.
Q: Why is my cheese not melting properly?
A: Make sure you’re using good quality cheese and not overbaking it! Cover with foil to trap moisture for a bubbly, melt-in-your-mouth experience.
Q: Can I freeze leftovers?
A: Yes, this recipe freezes beautifully! Just wrap individual portions in plastic wrap and foil to protect from freezer burn. Let them thaw overnight in the fridge before reheating.
Nutritional Info
This dish is packed with veggies, making it a balanced option for a fulfilling meal. Each generous serving typically contains around:
- Calories: 450
- Protein: 25g
- Carbohydrates: 40g
- Fiber: 5g
- Fat: 22g
Of course, this can vary depending on the brands and specific ingredients you choose.
There you have it, my friends — a delectable Loaded Veggie White Lasagna that’s ready to dazzle your dinner table! With every layer, you’re not just cooking a meal; you’re creating memories and inviting warmth into your home. So tie on that apron, gather your loved ones, and let’s make some magic happen! Thank you for joining me on this culinary adventure at Ivory Apron. Happy cooking!
PrintLoaded Veggie White Lasagna

A comforting twist on classic lasagna packed with vibrant vegetables, creamy layers, and plenty of cheese.
- Prep Time: 30 minutes
- Cook Time: 45 minutes
- Total Time: 75 minutes
- Yield: 8 servings 1x
- Category: Main Course
- Method: Baking
- Cuisine: Italian
- Diet: Vegetarian
Ingredients
- 1/2 cup (113g) butter
- 1/2 cup (57g) all-purpose flour
- 4 cups (946ml) milk
- 1/4 teaspoon nutmeg
- 1/2 teaspoon salt
- 1/4 teaspoon black pepper
- 1 tablespoon olive oil
- 1 medium onion, chopped
- 2 cloves garlic, minced
- 1 red bell pepper, chopped
- 1 yellow bell pepper, chopped
- 1 medium zucchini, chopped
- 1 (10-ounce) package (283g) frozen spinach, thawed and squeezed dry
- 1 (15-ounce) container (425g) ricotta cheese
- 1/2 cup (50g) grated Parmesan cheese
- 1 large egg, lightly beaten
- 1/4 teaspoon salt
- 1/4 teaspoon black pepper
- 9 lasagna noodles
- 3 cups (336g) shredded mozzarella cheese
Instructions
- Create the creamy sauce: In a large saucepan, melt the butter over medium heat. Once melted, sprinkle in the flour, whisking constantly for 1-2 minutes until it turns golden. Gradually whisk in the milk and ensure there are no lumps. Stir in the nutmeg, salt, and black pepper.
- Sauté the veggies: In a large skillet, heat the olive oil over medium heat. Add the chopped onion and cook until translucent. Toss in the minced garlic, red and yellow bell peppers, and zucchini. Sauté until soft. Add the thawed spinach.
- Mix the ricotta filling: In a mixing bowl, combine ricotta cheese, grated Parmesan cheese, beaten egg, salt, and pepper until well combined.
- Layering the lasagna: Preheat your oven to 375°F (190°C). In a baking dish, start with a layer of creamy sauce, then three lasagna noodles, half of the ricotta, half of the veggie mix, and half of the mozzarella. Repeat the layers and finish with sauce and mozzarella on top.
- Bake your lasagna: Cover with foil and bake for 25 minutes. Uncover and bake for another 15-20 minutes until cheese is bubbly and golden. Allow to cool for 10 minutes before slicing.
Notes
For a vegan twist, substitute ricotta with cashew cheese and mozzarella with vegan cheese.
Nutrition
- Serving Size: 1 serving
- Calories: 450
- Sugar: 6g
- Sodium: 600mg
- Fat: 22g
- Saturated Fat: 10g
- Unsaturated Fat: 10g
- Trans Fat: 0g
- Carbohydrates: 40g
- Fiber: 5g
- Protein: 25g
- Cholesterol: 70mg
Keywords: lasagna, veggie lasagna, comfort food, Italian, vegetarian
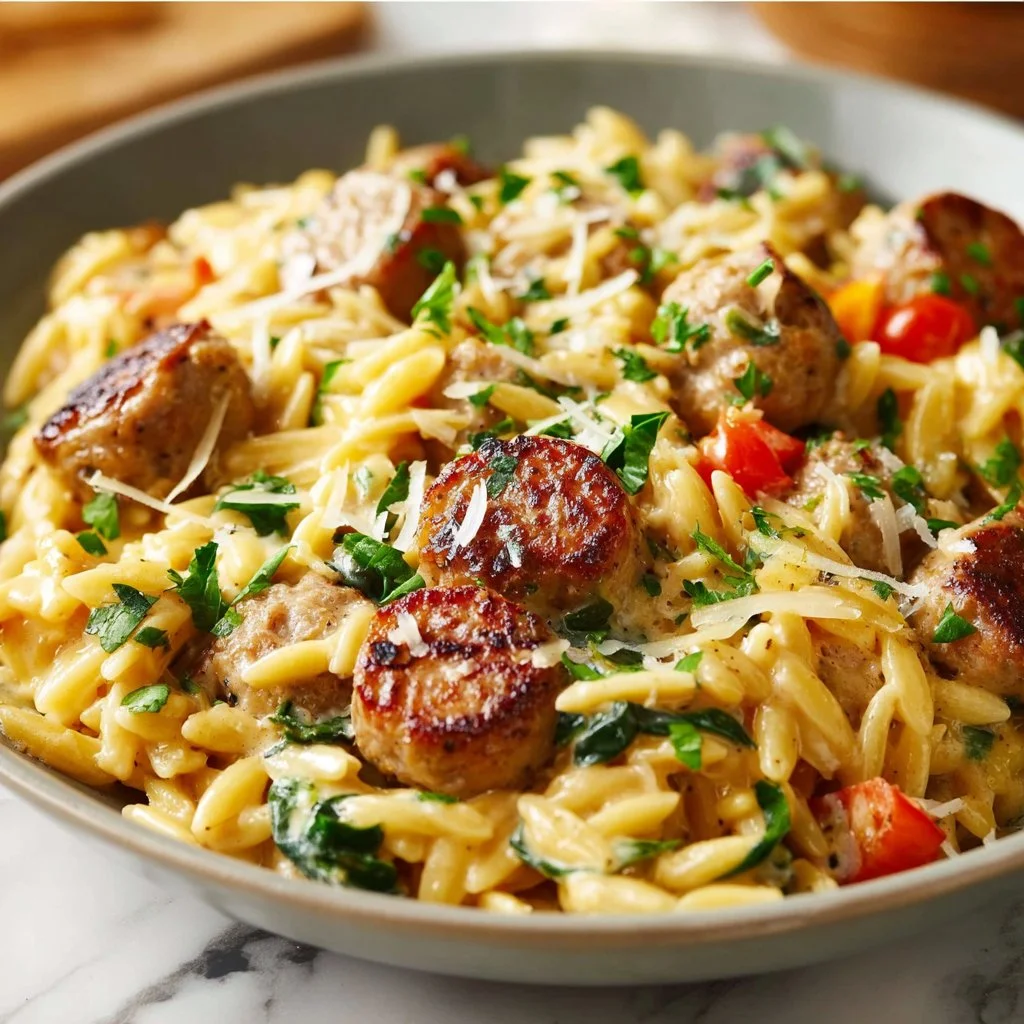
One-Pan Creamy Chicken Sausage Orzo (Weeknight Dinner)
Creamy Chicken Sausage Orzo: A One-Pan Meal to Savor
Hello, kitchen enthusiasts! Welcome back to Ivory Apron, where we transform everyday meals into delightful gatherings! Today, we’re diving into a one-pan wonder that promises to tickle your taste buds and simplify your evening routine: Creamy Chicken Sausage Orzo.
Picture this: a creamy, comforting dish that combines juicy slices of chicken sausage with tender orzo pasta, nestled in a whisper of fragrant spices and greens. Not only does it look fantastic on the plate, but it also comes together with minimal cleanup—a total win! This meal is perfect for those busy weeknights when you want something that feels special without a mountain of dishes waiting for you.
I remember the first time I made this dish for a friend who had just moved into a new apartment. It was a crisp autumn evening, the kind that begs for warmth and coziness. I chopped, sautéed, and stirred while the delicious aromas floated around the kitchen, creating a welcoming atmosphere. We enjoyed the meal gathered around my kitchen island, candlelight flickering, laughter echoing, and the table dotted with bowls of creamy goodness. That day reminded me of cooking’s true magic: it’s all about connection and the memories we whip up along the way.
Ready to get started? Let’s gather our ingredients and make some kitchen magic together!
Personal Story
Growing up, my family had a tradition of Sunday dinners—an event I would eagerly await all week. My parents would whip up their favorite recipes, filling our home with aromas that made my stomach rumble with anticipation. My dad was the self-proclaimed “king of pasta,” and although I loved his classic marinara, it was his creamy chicken concoctions that made my heart sing. This Creamy Chicken Sausage Orzo is inspired by those cherished Sunday nights.
I remember one particular Sunday when we decided to jazz up dinner by using the leftover chicken sausage from last week’s barbecue. We didn’t have much, just some orzo and a few odds and ends from the fridge, but as we poured our love into the pot, magic happened. The result was pure comfort, a dish that became a staple in our family, where each bite brought cozy nostalgia.
Now, whenever I prepare this orzo dish, I can’t help but reminisce about those treasured family dinners, the laughter, the warmth, and of course, the wonderfully creamy flavors. This meal encapsulates everything I cherished about those Sunday nights—minus the cleanup!
Ingredients
Let’s spark some joy with our ingredient lineup for Creamy Chicken Sausage Orzo. Each component plays a special role in crafting this flavorful dish, so let’s take a closer look:
-
1 tablespoon olive oil
A fundamental fat for sautéing that adds richness and depth. Feel free to swap it with avocado oil for a higher smoke point or a sprinkle of butter for flavor. -
12 oz chicken sausage, sliced (cheddar, feta, or your favorite variety)
Chicken sausage is leaner and still packs a punch of flavor! Use turkey sausage or a vegetarian blend if you prefer a different protein. -
½ cup onion, finely chopped
Onions are the backbone of flavor in many dishes. If you’re not a fan of the bite, shallots or leeks work well too. -
2 cloves garlic, minced
Garlic adds a warm, aromatic element. You can use garlic powder in a pinch—just remember one clove is equivalent to about 1/8 teaspoon of garlic powder. -
1 cup orzo pasta
This tiny pasta cooks quickly and absorbs flavors wonderfully. Don’t have orzo? Try using small shells or any short pasta you have on hand. -
2 cups low-sodium chicken broth
A liquid that infuses flavor into the dish. Vegetable broth can be substituted for a vegetarian version. -
½ cup heavy cream (or Greek yogurt for a lighter option)
For that luxurious creaminess! Greek yogurt is a fantastic swap for a lighter version while still providing tanginess. -
1 teaspoon dried thyme
A herb that brings warmth and earthiness. Basil or oregano are excellent substitutes if thyme isn’t available. -
½ teaspoon paprika
This adds a hint of warmth and color. Smoked paprika gives a deeper, richer profile if you’re feeling adventurous! -
½ teaspoon salt
Essential for enhancing flavors; adjust to taste, especially if your chicken broth is salted. -
½ teaspoon black pepper
A classic seasoning that elevates dishes; feel free to use white pepper for a milder kick. -
½ cup shredded cheddar cheese (or feta, depending on your sausage flavor)
Cheese adds richness and creaminess; feel free to experiment with gouda or mozzarella for different flavor notes. -
1 cup spinach or kale (for extra greens)
Adding these beautiful greens not only boosts nutrition but adds a splash of color! Any leafy green will work. -
½ cup sun-dried tomatoes (for a Mediterranean twist)
They bring a zing of sweetness and acidity. Fresh cherry tomatoes can give a similar flavor if you want a fresh vibe. -
½ teaspoon red pepper flakes (for heat)
Spice things up a notch! You can adjust the quantity to match your heat preference or skip it altogether for a mild undertone. -
Fresh parsley, chopped
A fresh herb that brightens the dish. Basil or dill can also add a unique flavor twist. -
Extra grated cheese and lemon zest (for brightness)
Those little touches of brightness elevate the dish—literally! Zest enhances flavor without adding acidity, creating a delightful balance.
Step-by-Step Instructions
Now that we have our ingredients ready, let’s embark on our cooking journey! Follow these simple steps to create your Creamy Chicken Sausage Orzo:
-
Heat the Olive Oil:
In a large, deep skillet over medium heat, drizzle the olive oil. Allow it to warm up until it shimmers just a bit. This is the starting point for building flavor, so don’t rush it! -
Sauté the Aromatics:
Toss in the chopped onions and garlic, stirring frequently for about 3-4 minutes until they become translucent. Make sure you watch closely; burned garlic can be bitter, and we want to set a loving, aromatic base! -
Brown the Chicken Sausage:
Add in the sliced chicken sausage, allowing them to brown beautifully, about 5-6 minutes. You want to develop that golden crust! If your sausage is pre-cooked, just focus on reheating it until warm. -
Incorporate the Orzo:
Next up, introduce the orzo pasta to the party, stirring it in with the other ingredients. Let it toast for a minute or two—that little bit of heat brightens up its flavor! -
Pour in the Broth:
Gradually add the chicken broth, stirring to combine everything well. Bring it to a gentle simmer, reducing heat to low. It’s pasta magic time as the orzo absorbs that rich broth and begins to soften! -
Season with Thyme, Paprika, and Salt:
Add in the dried thyme, paprika, salt, and black pepper. Stir and let it simmer for about 10-12 minutes until the orzo is tender and the broth has reduced slightly. Don’t be shy to taste along the way—seasoning is key! -
Stir in the Cream:
Once your orzo is al dente, pour in the heavy cream (or Greek yogurt), stirring until everything is beautifully combined. Reduce the heat to a low simmer, allowing it to thicken for a couple of minutes. -
Add the Greens and Cheese:
Mix in the spinach (or kale) and sun-dried tomatoes, allowing them to wilt in. Finally, sprinkle the shredded cheddar cheese (or feta) into the pot, stirring until it’s melted and luscious. -
Finish with Fresh Herbs and Zest:
Just before serving, add your chopped parsley and a zest of lemon to brighten the whole dish. It’s amazing how a simple squeeze can elevate your meal! -
Serve and Enjoy:
This delightful one-pan Creamy Chicken Sausage Orzo is ready to serve! Gather your loved ones around the table, and watch the smiles spread as they take their first bites. You did it!
Serving Suggestions
For a lovely presentation, serve the Creamy Chicken Sausage Orzo in deep bowls, garnishing with additional grated cheese and a sprinkle of fresh parsley. A wedge of lemon on the side adds a nice touch and allows everyone to adjust the brightness to their liking. Don’t forget a sprinkle of red pepper flakes for those who like an extra kick! Pair it with a fresh garden salad or some crusty bread for a complete meal—because what’s dinner without good company?
Recipe Variations
Here are a few fun twists to put your unique spin on this orzo dish:
-
Mediterranean Flair:
Swap the spinach for arugula and add Kalamata olives for a salty kick! -
A Bit of Heat:
Add diced jalapeños or fully cooked chorizo for an extra-spicy option. -
Vegan Delight:
Use plant-based sausage, coconut cream, and toss in any vegetables you have on hand for a vibrant, veggie-packed version. -
Pesto Kick:
Stir in a few tablespoons of basil pesto just before serving for a burst of fresh herb flavor. -
Mushroom Madness:
Sauté some mushrooms along with the onions for an earthy depth that complements the dish beautifully.
Chef’s Notes
One of my favorite things about this recipe is its versatility—feel free to customize it based on what’s hanging out in your fridge or what you’re craving! I remember one time—okay, maybe more than once—I was low on pantries, and it was one of those evenings when I needed to improvise. I tossed in leftover roasted veggies from earlier in the week, and it turned into the best accidental batch ever! The beauty of cooking is that it’s all about experimenting and discovering new delicious combinations.
Also, this meal is just as great the next day! It reheats beautifully and can be enjoyed for lunch or dinner. If you feel it’s too thick after refrigeration, add a splash of broth or water when reheating to loosen it up.
FAQs and Troubleshooting
-
What if my orzo isn’t cooking evenly?
Make sure to stir occasionally to prevent it from sticking. If it’s absorbing the broth too fast, a quick splash of additional broth will help! -
Can I use whole grain orzo?
Absolutely! Just be aware that whole grain may take a bit longer to cook, so you might need to adjust the liquid accordingly. -
How do I store leftovers?
Place any leftovers in an airtight container in the fridge for up to three days. Reheat gently on the stove with a little added broth to maintain creaminess. -
What can I do if the dish is too salty?
Adding a bit of sugar can help balance the flavors, or you can mix in more greens or orzo to mellow it out.
Nutritional Info
While I aim for balance rather than strict nutrition facts, a single serving of this Creamy Chicken Sausage Orzo generally offers a hearty mix of protein, healthy fats, and carbs. It’s a filling meal that can be tailored to meet various dietary preferences—like using whole wheat or gluten-free orzo—to help keep you on track with your goals!
And there you have it—a comforting, creamy, and delicious meal all in one pot! I can’t wait for you to gather your friends and family around your table to enjoy this dish. Remember, it’s all about connection, warmth, and a sprinkle of love in every bite. Until next time, keep stirring up joy in your kitchen!
PrintCreamy Chicken Sausage Orzo

A creamy and comforting one-pan meal that combines chicken sausage and orzo pasta, infused with fragrant spices and greens.
- Prep Time: 15 minutes
- Cook Time: 30 minutes
- Total Time: 45 minutes
- Yield: 4 servings 1x
- Category: Main Course
- Method: Baking
- Cuisine: Italian
- Diet: Paleo
Ingredients
- 1 tablespoon olive oil
- 12 oz chicken sausage, sliced
- ½ cup onion, finely chopped
- 2 cloves garlic, minced
- 1 cup orzo pasta
- 2 cups low-sodium chicken broth
- ½ cup heavy cream
- 1 teaspoon dried thyme
- ½ teaspoon paprika
- ½ teaspoon salt
- ½ teaspoon black pepper
- ½ cup shredded cheddar cheese
- 1 cup spinach or kale
- ½ cup sun-dried tomatoes
- ½ teaspoon red pepper flakes
- Fresh parsley, chopped
- Extra grated cheese and lemon zest
Instructions
- Heat the olive oil in a large, deep skillet over medium heat until it shimmers.
- Sauté the chopped onions and garlic, stirring frequently for about 3-4 minutes until translucent.
- Brown the chicken sausage, allowing them to cook for about 5-6 minutes until browned.
- Incorporate the orzo pasta, stirring to toast it for a minute or two.
- Pour in the chicken broth, stirring to combine and bringing it to a gentle simmer.
- Season with thyme, paprika, salt, and black pepper, letting it simmer for about 10-12 minutes until the orzo is tender.
- Stir in the heavy cream, reducing heat and allowing it to thicken for a couple of minutes.
- Add the spinach and sun-dried tomatoes, followed by the shredded cheese, stirring until melted.
- Finish with fresh parsley and lemon zest before serving.
- Serve hot and enjoy!
Notes
This meal reheats beautifully, so leftovers can be enjoyed later. Add a splash of broth if it thickens too much when reheating.
Nutrition
- Serving Size: 1 serving
- Calories: 350
- Sugar: 5g
- Sodium: 400mg
- Fat: 12g
- Saturated Fat: 4g
- Unsaturated Fat: 6g
- Trans Fat: 0g
- Carbohydrates: 45g
- Fiber: 3g
- Protein: 15g
- Cholesterol: 30mg
Keywords: creamy orzo, chicken sausage, one-pan meal, comfort food, quick dinner
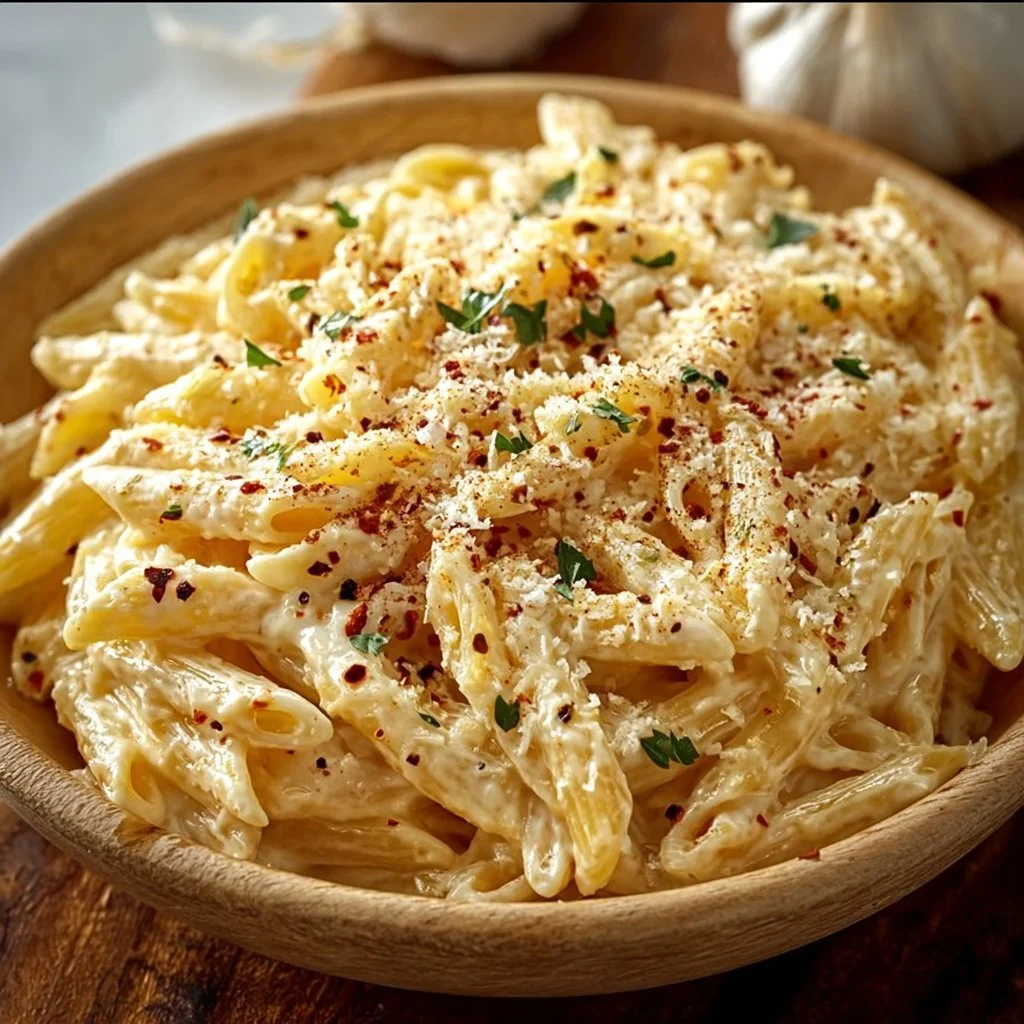
One Pot Creamy Garlic Pasta
# One Pot Creamy Garlic Pasta: A Dish for Every Occasion

## Introduction

Hello, fellow food lovers! Today, I’m thrilled to guide you through a dish that intertwines simplicity, flavor, and delightful memories: **One Pot Creamy Garlic Pasta**. If there's anything I've learned in my culinary journey, it’s that comfort food doesn’t have to be complicated to be extraordinary.

Picture this: it’s a bustling weeknight, and you’ve just returned from a long day. The thought of slaving over a multi-pot meal feels daunting, but that craving for something creamy and satisfying just won’t fade. Cue the One Pot Creamy Garlic Pasta! With just a handful of ingredients and a single pot, you can whip up a delicious meal that delivers both comfort and elegance.

I’ve always believed that good meals bring people together, and that's precisely what this dish does. Whether it’s a cozy dinner for one or an effortless gathering with friends, a bowl of creamy garlic pasta feels like a warm hug. The best part? You can enjoy the deliciousness without spending hours in the kitchen.

This dish is all about elevating the mundane to something magical. The creamy sauce clings to every noodle, and the fragrant garlic dances in the air as it cooks. It’s a quick fix for everything from a casual date night to a last-minute dinner party menu. So, let’s embark on this culinary adventure together!

## Personal Story

Before I share the recipe, let me take you back to one of my favorite kitchen memories. I remember one chilly evening during my college days when I had some friends over for a study session. We were cramming for finals, surrounded by textbooks, coffee cups, and a general sense of impending doom. Honestly, it would have been a recipe for disaster if it weren’t for my simple kitchen magic.

With a few ingredients from the pantry—pasta, garlic, and cheese—I decided to whip up my famous creamy garlic pasta. I still laugh thinking about how I tossed everything into one pot on the stove, and as the aroma filled our cramped little apartment, the tension of studying melted away. We laughed, we savored each bite, and instead of feeling stressed, we transformed our study session into a cozy pasta party filled with warmth and camaraderie.

From that day forward, this dish became my go-to for feeding friends and family, proving that delicious food can elevate even the most ordinary of moments!

## Ingredients

Here’s what you’ll need for this fabulous dish:

- **8 oz pasta**: Any pasta you fancy (spaghetti, penne, or fettuccine work beautifully). Whole wheat or gluten-free options can be great choices as well.

- **4 cloves garlic, minced**: Fresh garlic provides a punch of flavor that jarred options can't match. If you're short on fresh garlic, garlic powder can work in a pinch (1 teaspoon per clove).

- **2 cups milk**: Whole milk gives a rich creaminess, but you can substitute with low-fat milk or unsweetened almond milk for a lighter version.

- **1 cup Parmesan cheese, grated**: Freshly grated cheese melts better and contributes to a creamier sauce. Grana Padano is an excellent substitute if you're out of Parmesan.

- **2 tablespoons olive oil**: This adds depth of flavor while cooking. You could also use butter for a richer finish, but that would change the overall flavor profile a bit.

- **Salt and pepper to taste**: Seasoning enhances all flavors in the dish! Always taste as you go to get it just right.

- **Fresh parsley, chopped (for garnish)**: It adds a pop of color and freshness. Feel free to swap it for basil or chives based on your preference.

## Step-by-Step Instructions

Alright, my culinary friends! Let’s dive into the cooking process. Grab your favorite pot, and let’s get cooking!

1. **Heat the Olive Oil**: Begin by pouring your olive oil into a large pot over medium heat. Let it warm up for about a minute, then add the minced garlic. Sauté for about 30 seconds until fragrant (but not browned!). You’ll want just a hint of golden—think “lightly toasted” to keep those beautiful garlic notes from becoming bitter.

2. **Add the Pasta**: Throw in the pasta right into the pot (no boiling first!). Stir it to coat with that delicious garlic oil, letting the pasta soak up that flavor for about a minute. This step is key for infusing every strand with garlicky goodness!

3. **Pour in the Milk**: Now it’s time to add the milk. Keep stirring as you pour it in. This will create a creamy base and allow the pasta to cook right in the sauce—less cleanup and maximum flavor!

4. **Season It Up**: Generously season with salt and pepper. Don’t be shy! Remember, pasta absorbs a bit of the saltiness from the cooking liquid. You can always adjust the seasoning later.

5. **Simmer and Stir**: Increase the heat slightly and bring the mixture to a gentle simmer. Stir occasionally to prevent sticking (and also to make your kitchen smell absolutely divine!). The pasta should typically take about 10-12 minutes to cook, depending on the type you're using. Keep an eye on it and add a splash of water if it becomes too thick.

6. **Add The Cheese**: Once the pasta is tender and the sauce has thickened to a creamy consistency, turn off the heat. Stir in the grated Parmesan cheese until it melts into the sauce. The cheese will elevate the dish, making it silky and luxurious!

7. **Finishing Touches**: Taste your creation and adjust seasoning as needed—maybe a pinch more salt? Top with freshly chopped parsley and give it a final stir. Hello, stunning presentation!

8. **Serve Immediately**: Plate your creamy garlic pasta hot. You want that sauce clinging to the pasta, looking irresistible.

## Serving Suggestions

To serve, twirl a generous helping of the creamy garlic pasta onto a plate and sprinkle a bit more fresh parsley on top for color and flair. If you’re feeling fancy, grate extra Parmesan on top! It adds a delightful salinity that pairs beautifully with the richness of the dish.

Pair your pasta with a simple side salad or some crusty garlic bread to soak up any leftover sauce, and you’ve got an impressive yet effortless meal ready to surprise your guests or elevate your dinner table!

## Recipe Variations

Feeling creative? Here are a few ways to mix things up:

1. **Add Protein**: Toss in some cooked chicken, shrimp, or sautéed mushrooms for an extra protein boost.

2. **Veggie Power**: Mix in some spinach or peas during the last few minutes of cooking for added color and nutrition.

3. **Spice it Up**: A pinch of red pepper flakes during cooking can add a lovely kick if you like things spicy.

4. **Different Cheeses**: Swap out Parmesan for a different cheese like goat cheese or feta for a tangy twist.

5. **Herb Infusion**: Use fresh thyme or rosemary for a fragrant herbal finish in place of parsley.

## Chef’s Notes

I must admit, this recipe has evolved over the years! I initially made it very basic, but I found myself wanting to experiment with flavors and textures. I started adding seasonal vegetables and different cheese varieties, and before long, it became a versatile canvas for whatever I had on hand. Once, I even slipped in some sun-dried tomatoes and fresh spinach—total game changer!

Oh, and every time I serve this dish, I share my college story. It always brings a smile and reminds everyone that food is about connections—not just flavors. I hope you find your special memories wrapped up in this one pot wonder!

## FAQs and Troubleshooting

1. **What if my pasta is sticking together?**
   - If you find your pasta sticking, try adding a bit more milk or a splash of water while stirring. Always keep it moving! If you're facing this after it's cooked, toss in a teaspoon of olive oil before serving to break up the strands.

2. **Can I make this dish ahead of time?**
   - Absolutely! This pasta can be made ahead, but it's best served fresh. If storing, keep it in an airtight container in the fridge and reheat with a little added milk to restore creaminess.

3. **What if my sauce is too thick?**
   - Don’t fret! Just mix in some additional milk or water gradually until you reach your desired consistency.

4. **Can I use a non-dairy milk?**
   - Yes! Unsweetened almond or oat milk works splendidly. Just remember, it might alter the flavor slightly, but it’s a great option for dairy restrictions.

## Nutritional Info

*(Per serving, based on 4 servings):
- Calories: 400
- Total Fat: 15g
- Saturated Fat: 8g
- Cholesterol: 30mg
- Sodium: 600mg
- Total Carbohydrates: 56g
- Dietary Fiber: 2g
- Sugars: 2g
- Protein: 12g)*

## Conclusion

And there you have it—your very own One Pot Creamy Garlic Pasta! Cooking this dish is not just about the final product but the experience of creating something special in your kitchen. So don your apron, gather your loved ones, and let’s set the table for some beautiful moments ahead. From busy weeknights to relaxed weekends, this pasta dish is your invitation to indulge in a little creamy, garlicky bliss. Enjoy every bite, and remember, good food is all about showing up. Happy cooking!
One Pot Creamy Garlic Pasta

A simple and delicious creamy garlic pasta made in one pot, perfect for any occasion.
- Prep Time: 10 minutes
- Cook Time: 15 minutes
- Total Time: 25 minutes
- Yield: 4 servings 1x
- Category: Main Course
- Method: Baking
- Cuisine: Italian
- Diet: Vegetarian
Ingredients
- 8 oz pasta (spaghetti, penne, or fettuccine)
- 4 cloves garlic, minced
- 2 cups milk (whole or unsweetened almond)
- 1 cup Parmesan cheese, grated
- 2 tablespoons olive oil
- Salt and pepper to taste
- Fresh parsley, chopped (for garnish)
Instructions
- Heat the olive oil in a large pot over medium heat. Add the minced garlic and sauté for 30 seconds until fragrant.
- Add the pasta directly to the pot and stir to coat with garlic oil for about a minute.
- Pour in the milk while stirring to create a creamy base.
- Season generously with salt and pepper.
- Simmer the mixture, stirring occasionally, until the pasta is tender (about 10-12 minutes).
- Add the grated Parmesan cheese, stirring until melted and creamy.
- Top with chopped parsley and adjust seasoning if needed.
- Serve immediately, enjoying the creamy sauce clinging to the pasta.
Notes
This pasta can be customized by adding protein like chicken or shrimp and mixing in vegetables like spinach or peas.
Nutrition
- Serving Size: 1 serving
- Calories: 400
- Sugar: 2g
- Sodium: 600mg
- Fat: 15g
- Saturated Fat: 8g
- Unsaturated Fat: 5g
- Trans Fat: 0g
- Carbohydrates: 56g
- Fiber: 2g
- Protein: 12g
- Cholesterol: 30mg
Keywords: pasta, creamy, garlic, one pot, quick dinner, comfort food