
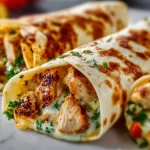
Cheesy Garlic Chicken Wraps
Cheesy Garlic Chicken Wraps: Elevate Your Snack Game!
Hey there, fellow food enthusiast! 🌟 Today, we’re diving into the delicious world of Cheesy Garlic Chicken Wraps — a dish that’s both simple and scrumptious! Imagine crispy, garlicky goodness wrapped up in a warm embrace of melted cheese, tender chicken, and fresh veggies. Sounds dreamy, right? Whether you’re preparing a quick lunch, a satisfying snack, or a showstopper for your next gathering, these wraps will not only please your palate but also fill your home with mouthwatering aromas.
Now, I know what you might be thinking: “Isn’t cooking something elaborate or fancy?” But trust me, cooking can be elegant without the intimidation factor. I started my cooking journey with simple ingredients, and these wraps are a prime representation of that ethos. They’re a perfect fusion of flavors with a kick of garlic, and they come together faster than you can say “Cheesy Garlic Chicken”!
So, grab your apron, pull on some tunes, and let’s start whipping up these fabulous wraps. With just a few ingredients, you’ll create a meal that feels like a restaurant experience right at your kitchen table. Ready? Let’s get cooking!
Personal Story
One of my fondest culinary memories goes back to my early days of hosting friends for movie nights. I was always looking for that perfect finger food, something that would impress while still being comfortable and cozy. That’s when these Cheesy Garlic Chicken Wraps entered the scene!
I remember one particular rainy Friday evening, the kind that screams for comfort food and a good flick. I had just finished up a long week and wanted to unwind with a warm dish that felt like a giant hug. I slathered garlic and shredded chicken into wraps and baked them until crispy. The aroma alone was enough to get my friends excited! As we gathered around the living room, munching on those ooey-gooey wraps, I realized that food isn’t just about sustenance — it’s about creating moments and memories. Laughing, sharing stories, and enjoying each bite, we quickly knew that these wraps would be a recurring favorite for all future get-togethers.
That experience taught me a valuable lesson: It’s the simplest recipes that often hold the most significance. So, let’s bring that magic to your kitchen!
Ingredients
To create these delightful wraps, you’ll need the following ingredients:
-
2 cups cooked chicken, shredded
Whether it’s rotisserie chicken for convenience or leftover grilled chicken from last night, this ingredient is your protein base. Got leftover turkey? Perfect switch! -
1 cup shredded cheese (cheddar or mozzarella)
Cheddar offers a sharpness that blends wonderfully with garlic, while mozzarella brings that gooey stretchiness we all crave. Want to spice it up? Try pepper jack for a kick! -
4 large lettuce leaves or low carb wraps
If you’re aiming for a low-carb option, go for lettuce for a fresh touch. Prefer something heartier? Whole wheat or spinach wraps work beautifully! -
3 cloves garlic, minced
Garlic adds an unbeatable flavor punch! If you’re garlic-shy, feel free to scale back, but remember — good garlic makes everything better! -
1 tablespoon olive oil
This helps to sauté the garlic and chicken, enhancing the flavor. Don’t have olive oil? Use melted butter or avocado oil — both will lend a rich taste! -
Salt and pepper, to taste
Seasoning is key! Play with your palate — add more salt, or toss in some Italian seasoning for an aromatic twist.
Step-by-Step Instructions
Get ready to bring those flavors to life! Follow these steps, and you’ll be devouring Cheesy Garlic Chicken Wraps in no time!
-
Preheat your oven: Set it to 375°F (190°C). This is where the magic begins!
-
Sauté the garlic: In a large skillet, heat the olive oil over medium heat. Add the minced garlic and sauté for about 1-2 minutes until fragrant. Be careful not to burn it; burnt garlic can taste bitter!
-
Add the chicken: Toss the shredded chicken into the skillet. Stir to combine and coat the chicken in the garlicky goodness. Let it heat through for about 3-5 minutes. Be sure to season it with salt and pepper; this is the moment to layer in those flavors!
-
Make the cheese meld: When the chicken is heated thoroughly, sprinkle the shredded cheese on top. Cover the skillet with a lid to allow the cheese to melt — this should take about 2-3 minutes. If you don’t have a lid, simply lower the heat and keep an eye on it!
-
Build your wraps: Take your lettuce leaves or low-carb wraps and lay them flat on a clean surface. Spoon the cheesy chicken mixture onto the center of each leaf or wrap.
-
Wrap it up: Fold the sides of the wrap over the filling and then roll it up from the bottom. If using lettuce leaves, you can use toothpicks to hold them together, making them easier to grab!
-
Bake for a crispy finish: Arrange the wraps on a baking sheet and pop them in the oven for about 5-10 minutes, just until the edges are lightly crispy and golden. If you want extra crispy, turn on the broiler for the last minute — but keep a close eye!
-
Serve and enjoy: Remove from the oven, let cool for a minute, and enjoy them as they are or with your favorite dipping sauce — ranch, salsa, or garlic aioli, perhaps?
Serving Suggestions
Plating is the final touch to elevate your wraps! Arrange your Cheesy Garlic Chicken Wraps on a platter with a sprinkle of fresh parsley or a drizzle of balsamic glaze for a little flair. Serve with a side of fresh veggies or a simple salad for a delightful balance.
For an extra pop, serve them with small bowls of dipping sauces — think garlic aioli, zesty sour cream, or spicy salsa. This interactive element not only excites your guests but allows them to customize their bites!
Recipe Variations
Feel like shaking things up? Here are some creative twists you can try:
-
Buffalo Chicken Wraps: Add a few tablespoons of your favorite hot sauce to the chicken mixture for a spicy kick.
-
Veggie-Packed Wraps: Add sautéed peppers and onions for added color and crunch, or toss in some spinach for an extra boost of nutrients.
-
Herbed Chicken: Infuse fresh herbs like thyme, basil, or cilantro into the chicken while sautéing for a refreshing twist.
-
Cheesy Spinach & Artichoke Wraps: Stir in some chopped artichoke hearts and fresh spinach before wrapping for a creamy, decadent alternative.
Chef’s Notes
Each time I make these wraps, I’m reminded of that cozy movie night with friends. It’s funny how food can transport us back in time! Over the years, I’ve tweaked this recipe many times, experimenting with different cheeses and proteins. Sometimes I even sneak in some roasted veggies — why not? It’s all about creativity and adapting to what you have available in your kitchen.
Pro tip? These wraps are excellent for meal prep! Make a double batch, store them in the fridge, and you’ve got a quick meal ready to reheat at a moment’s notice. You can even enjoy them cold — they’re that delicious!
FAQs and Troubleshooting
1. What’s the best way to store leftovers?
Place any leftover wraps in an airtight container in the fridge. They are best enjoyed within 2-3 days. Reheat them in the oven for best results.
2. Can I freeze these wraps?
Absolutely! Assemble them, but don’t bake before freezing. Once they’re frozen, you can bake them straight from the freezer — just add a few extra minutes to the cooking time.
3. How can I avoid soggy wraps?
Ensure your wraps are squeezed dry after washing and avoid over-saturating them with sauces before baking. If using lettuce, keep them cold until you’re ready to serve.
4. Can I substitute the chicken with another protein?
For sure! This recipe works wonders with turkey, shrimp, or even tofu for a vegetarian option. Just remember to adjust your cooking times as needed.
Nutritional Info (Optional)
While I don’t have the exact nutritional breakdown for these wraps, they are packed with protein from the chicken and healthy fats from the olive oil. Think of it this way: with a balance of protein, veggies, and healthy fats, you’re nourishing both your body and soul.
And there you have it! A delightful, approachable recipe for Cheesy Garlic Chicken Wraps that’s sure to become a regular feature in your culinary adventures. Cooking is not just about the food on your plate; it’s about the love and memories we create along the way. So, gather those around you, celebrate the art of sharing a meal, and enjoy every bite!
Happy cooking, and welcome to the wonderful world of Ivory Apron! 🍽️
PrintCheesy Garlic Chicken Wraps
Delicious wraps filled with cheesy garlic chicken, fresh veggies, and baked to crispy perfection.
- Prep Time: 10 minutes
- Cook Time: 15 minutes
- Total Time: 25 minutes
- Yield: 4 servings 1x
- Category: Snack
- Method: Baking
- Cuisine: American
- Diet: High Protein
Ingredients
- 2 cups cooked chicken, shredded
- 1 cup shredded cheese (cheddar or mozzarella)
- 4 large lettuce leaves or low carb wraps
- 3 cloves garlic, minced
- 1 tablespoon olive oil
- Salt and pepper, to taste
Instructions
- Preheat your oven to 375°F (190°C).
- Sauté the garlic in olive oil over medium heat for 1-2 minutes until fragrant.
- Add the shredded chicken to the skillet and season with salt and pepper. Heat through for 3-5 minutes.
- Make the cheese meld by sprinkling it on top and covering the skillet for 2-3 minutes.
- Build your wraps by placing the cheesy chicken mixture on the lettuce leaves or wraps.
- Wrap them up and secure with toothpicks if using lettuce.
- Bake in the oven for 5-10 minutes until crispy and golden.
- Serve and enjoy with your favorite dipping sauces!
Notes
For a spicier version, add hot sauce to the chicken mixture. These wraps are great for meal prep and can be frozen before baking.
Nutrition
- Serving Size: 1 serving
- Calories: 450
- Sugar: 1g
- Sodium: 350mg
- Fat: 20g
- Saturated Fat: 8g
- Unsaturated Fat: 9g
- Trans Fat: 0g
- Carbohydrates: 20g
- Fiber: 2g
- Protein: 30g
- Cholesterol: 70mg
Keywords: cheesy wraps, garlic chicken, easy snacks, meal prep, baked wraps
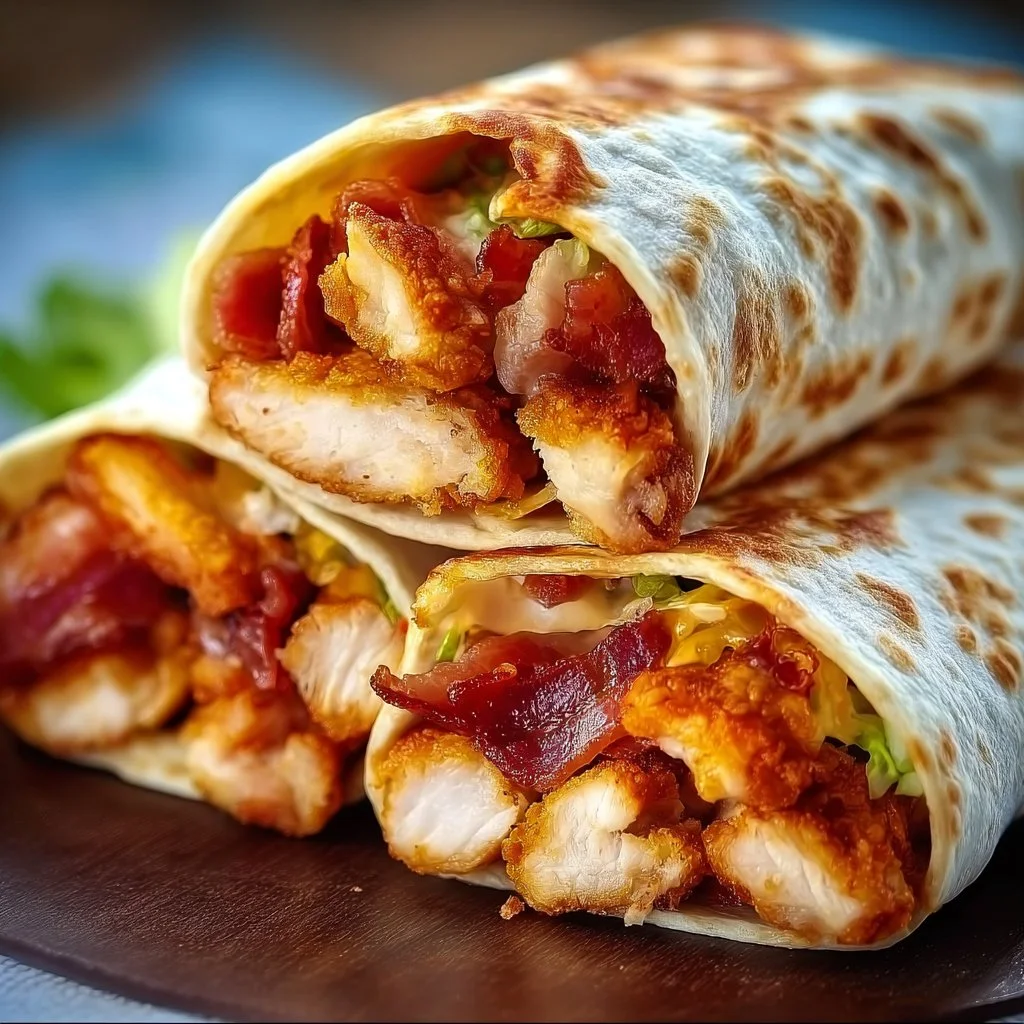
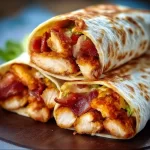
Chicken Bacon Wraps
# Irresistible Chicken Bacon Wraps: Your New Go-To Recipe

## Introduction

Hello, culinary adventurers! Today, I’m thrilled to share a recipe that’s not only delicious but also brings an element of comfort to the table: **Chicken Bacon Wraps**. Imagine tender chicken enveloped in savory bacon, a creamy layer of cheese, and a burst of freshness from veggies. It’s a dish that brings smiles, sparks conversation, and—dare I say—it might just become a staple in your recipe repertoire!

I remember the first time I whipped up these wraps for a cozy gathering with friends. The kitchen was filled with delightful aromas, and the laughter that flowed was as plentiful as the food on the table. I had decided to make them on a whim, using whatever ingredients I had on hand. They turned out so scrumptious that I knew I was onto something special. The beauty of Chicken Bacon Wraps is they strike the perfect balance between indulgent and approachable; they're a celebration of flavors and textures that will leave your guests wanting more.

Whether you’re hosting a casual dinner or simply want to elevate your weeknight meal, this recipe is here for you. So, tie on that apron, pour yourself a lovely glass of something refreshing, and let’s get cooking!

---

## Personal Story

One of my fondest kitchen memories revolves around these Chicken Bacon Wraps. It was a crisp autumn evening, and I had invited my closest friends over for a cozy dinner party. The mood was electrified by fragrant candles and a hint of pumpkin spice in the air, setting the perfect backdrop for connection.

I rummaged through my fridge and, realizing I had chicken, bacon, and all the good stuff, I decided to create something delightful. As I crafted these wraps, my friends mingled in the living room, laughter underscoring the clinking of glasses. When it came time to serve the Chicken Bacon Wraps, you could see the intrigue on their faces; they practically devoured them! Seeing the joy on their faces as they took their first bites made every minute spent in the kitchen worthwhile. Those wraps became a staple at our gatherings, a symbol of friendship and fond memories—all created around a table filled with delicious food.

---

## Ingredients

Let’s gather all the good stuff! Here are the ingredients you’ll need to create these mouthwatering Chicken Bacon Wraps, including some tips and tricks along the way:

- **Chicken Breasts (2-3, boneless and skinless)**
  The star of the show! Aim for organic or free-range chicken for the best flavor. If you’re short on chicken breasts, feel free to use thighs for a juicier bite.

- **Bacon (6-8 strips)**
  Ah, bacon! It adds a delicious crunch and savory smokiness. For a healthier twist, turkey bacon is a great substitute, though it may not crisp up as much.

- **Cream Cheese (4 oz, softened)**
  This creamy goodness adds a rich texture and flavor. You can use herbed cream cheese for an extra flavor punch or even Greek yogurt if you're looking for a lighter option.

- **Cheddar Cheese (1 cup, shredded)**
  A classic pairing that melts beautifully. If you prefer a sharper taste, use aged cheddar, or mix it up with pepper jack for a spicy kick!

- **Spinach or Lettuce (1 cup, chopped)**
  Adding greens brings some freshness and color! Swap spinach for arugula for peppery notes, or go with romaine for a nice crunch.

- **Salt and Pepper (to taste)**
  Always season to your preference! Feel free to explore spicier seasonings like paprika or garlic powder for an added depth of flavor.

---

## Step-by-Step Instructions

Let’s get down to it! Follow these steps to make your Chicken Bacon Wraps:

1. **Preparation Time**
   Begin by preheating your oven to 400°F (200°C). This ensures that the bacon crisps up perfectly while the chicken cooks through nicely—my golden rule of oven culinary magic!

2. **Pound the Chicken**
   Place your chicken breasts between two sheets of plastic wrap or parchment paper. Using a meat mallet or rolling pin, gently pound them to an even thickness of about 1 inch. This ensures even cooking, and it’s a wonderful stress reliever—give it a little extra “love” if you need to!

3. **Season the Chicken**
   Season both sides of the chicken breasts with salt and pepper. Don’t be shy—this chicken will be the canvas for all that yummy flavor. If you like, sprinkle on any spices that you fancy!

4. **Spread the Cream Cheese**
   In a small bowl, soften the cream cheese in the microwave for about 15 seconds until spreadable. Add in some herbs or spices if you’re feeling creative! Now, spread a generous layer on one side of each chicken breast, followed by a sprinkle of shredded cheddar cheese.

5. **Add Spinach and Bacon**
   Top the cheese with a layer of chopped spinach or lettuce. Now, here comes the smoky goodness! Lay 2-3 strips of bacon over the greens. The bacon adds flavor and essential moisture to your wraps. It’s a game changer—trust me!

6. **Roll It Up**
   Carefully roll the chicken tightly, starting from the edge with the cream cheese. Tuck in the sides as you go to keep the filling in. Secure them with toothpicks or wrap them tightly in kitchen twine for that fancy flair!

7. **Wrap with Bacon**
   Here’s where it gets savory! Wrap additional bacon strips around each chicken roll, ensuring they’re well covered. Secure with toothpicks if necessary, so they maintain their shape while baking.

8. **Bake to Perfection**
   Place the wrapped chicken in a greased baking dish. Bake in your preheated oven for about 25-30 minutes or until the chicken reaches an internal temperature of 165°F (74°C). The bacon should be perfectly crispy. Check halfway through: if bacon is getting too crispy, shield it with aluminum foil!

9. **Rest and Slice**
   Once baked, let the chicken rest for about 5 minutes before slicing. This helps retain those juicy flavors. Serve whole or slice to showcase all that deliciousness inside.

---

## Serving Suggestions

To plate your Chicken Bacon Wraps, arrange them artfully on a rustic wooden board or a lovely white platter for that elegant contrast. Drizzle a tangy dipping sauce like ranch or honey mustard for an added punch! You can garnish with freshly chopped herbs or a sprinkle of cracked pepper. Serve these wraps alongside a simple salad or roasted veggies for a complete meal that looks as stunning as it tastes.

---

## Recipe Variations

Feeling adventurous? Here are some tasty twists to personalize your Chicken Bacon Wraps:

- **Spicy Kick**: Add jalapeños or Sriracha to the cream cheese for an extra spicy layer.
- **Mediterranean Delight**: Include feta cheese and sun-dried tomatoes instead of cheddar for a Mediterranean flair.
- **BBQ Bliss**: Brush BBQ sauce over the chicken before rolling for a smoky, tangy finish!
- **Vegetarian Version**: Swap chicken for thick slices of eggplant or tofu that have been marinated and grilled.
- **Sweet & Savory**: Add a layer of apricot or peach preserves beneath the cream cheese for a sweet contrast!

---

## Chef’s Notes

As I reminisce about the evolution of these Chicken Bacon Wraps, I can’t help but smile. There have been countless iterations, ranging from spicy to sweet. Each time I make them, I tweak ingredients and experiment with different flavors. Food is all about creativity, and I encourage you to embrace the process! The best recipes come from a space of joy and discovery. And remember, if you have leftovers (which is rare!), they make for a killer lunch the next day!

---

## FAQs and Troubleshooting

### Q: Why is my bacon not crispy?
A: If your bacon isn’t crisping up, it could be because the chicken was rolled too tightly. Allow some space for the bacon to cook. You can always broil the wraps for a minute or two at the end for extra crispiness.

### Q: Can I make these wraps ahead of time?
A: Absolutely! You can prepare and assemble the wraps, refrigerate them, and bake when ready. Just increase the cooking time slightly if they’re cold from the fridge.

### Q: What’s the best way to store leftovers?
A: Store any leftovers in an airtight container in the refrigerator for up to 3 days. Reheat in the oven at 350°F until warmed through for the best results!

### Q: Can I freeze these wraps?
A: Yes! Assemble, wrap tightly in foil and plastic wrap, and freeze. When ready to enjoy, bake from frozen, adding extra time until fully cooked.

---

## Nutritional Info

While I’m not a nutritionist, a single serving of these Chicken Bacon Wraps generally contains a hearty dose of protein, healthy fats, and essential vitamins from the greens. Enjoy in moderation as a part of a balanced diet.

---

There you have it! Delicious, crowd-pleasing Chicken Bacon Wraps that will undoubtedly become a cherished recipe in your kitchen. I can’t wait for you all to try these, make them your own, and create memories just like I did. Happy cooking, friends!
Irresistible Chicken Bacon Wraps
Delicious Chicken Bacon Wraps featuring tender chicken, crispy bacon, creamy cheese, and fresh veggies.
- Prep Time: 15 minutes
- Cook Time: 30 minutes
- Total Time: 45 minutes
- Yield: 4 servings 1x
- Category: Main Course
- Method: Baking
- Cuisine: American
- Diet: Paleo
Ingredients
- 2–3 boneless, skinless Chicken Breasts
- 6–8 strips of Bacon
- 4 oz Cream Cheese, softened
- 1 cup Cheddar Cheese, shredded
- 1 cup Spinach or Lettuce, chopped
- Salt and Pepper, to taste
Instructions
- Preheat your oven to 400°F (200°C).
- Place your chicken breasts between two sheets of plastic wrap or parchment paper and pound to an even thickness.
- Season both sides of the chicken breasts with salt and pepper.
- In a small bowl, soften the cream cheese in the microwave and spread it on one side of each chicken breast.
- Add a layer of chopped spinach or lettuce over the cheese, then 2-3 strips of bacon.
- Roll the chicken tightly starting from the edge with the cream cheese, tucking in the sides.
- Wrap each roll with additional bacon strips and secure with toothpicks.
- Place in a greased baking dish and bake for 25-30 minutes or until the chicken is cooked through.
- Let rest for 5 minutes before slicing.
Notes
Try adding jalapeños for a spicy kick or feta cheese for a Mediterranean twist!
Nutrition
- Serving Size: 1 wrap
- Calories: 400
- Sugar: 2g
- Sodium: 600mg
- Fat: 28g
- Saturated Fat: 10g
- Unsaturated Fat: 13g
- Trans Fat: 0g
- Carbohydrates: 3g
- Fiber: 1g
- Protein: 30g
- Cholesterol: 90mg
Keywords: chicken, bacon, wraps, easy dinner, comfort food