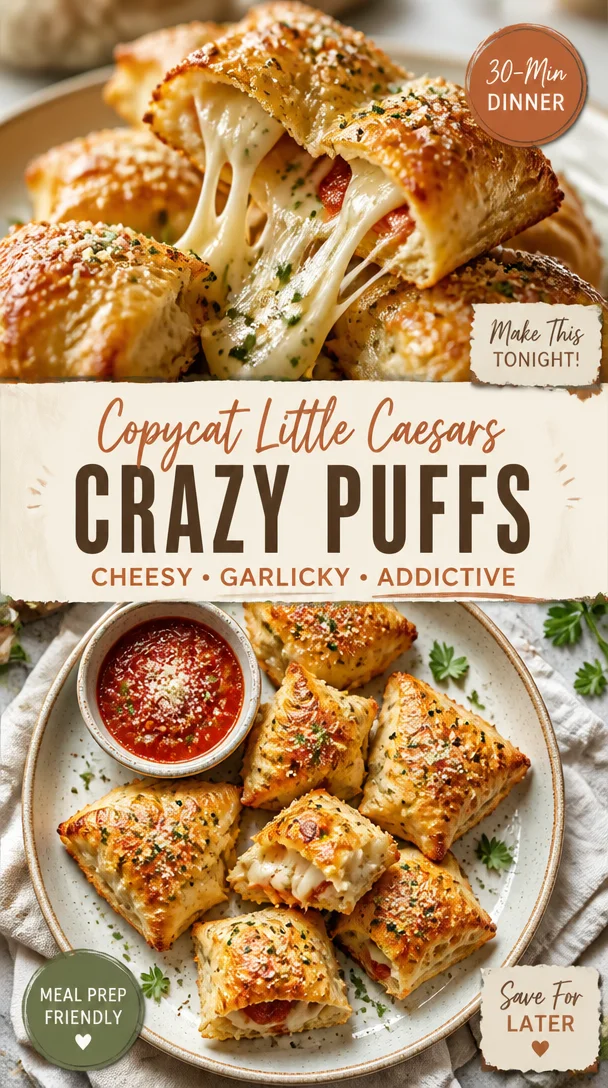
Copycat Little Caesars Crazy Puffs: 30-Minute Cheesy Bites
Little Caesars Crazy Puffs Recipe: A Flavorful Twist on a Classic Favorite
Hello, fellow foodies! Today, we’re diving into a fun and delightful recipe that I’m sure will become a family favorite in your household—Little Caesars Crazy Puffs. Imagine this: light, airy pillows of pizza dough stuffed with gooey cheese, zesty pepperoni, and your favorite pizza fixings, all baked to perfection and brushed with a buttery garlic blend. Sounds dreamy, right? Let’s roll up our sleeves and bring a little piece of pizza heaven into our kitchens!
When I first stumbled upon the idea of Crazy Puffs during a late-night snack session, I had one of those “aha!” moments. I was craving pizza, yet I wanted something easy to grab and pop in my mouth while I binge-watched my favorite show. You know how that goes! One bite became two, and before I knew it, I was contemplating how to recreate this snack at home. Spoiler alert: they turned out deliciously addictive, and I haven’t looked back since!
Let’s talk about the best part—this recipe is incredibly simple! With just a handful of ingredients that you might already have in your kitchen, you can transform your everyday pizza dough into these heavenly Crazy Puffs. I can’t wait to share my tips and tricks with you, so let’s get started!
A Fun Kitchen Memory
As I reflected on my Crazy Puffs adventure, a nostalgic memory came rushing back. I remember a rainy Saturday afternoon with my little cousin, Emily, who was just starting to show interest in cooking. We decided to knead some pizza dough from scratch—let me tell you, it wasn’t pretty! We ended up with more flour on our faces than in the mixing bowl, giggling uncontrollably as we worked through our culinary chaos.
We eventually crafted our dough into something resembling pizza and topped it with everything we could find in the fridge. As the smell of baking bread and melted cheese filled the kitchen, we jumped up and down in anticipation. It was one of those moments where cooking became more than just a task; it transformed into a cherished memory. That spirit of fun and exploration is what I want to channel today with these Crazy Puffs. So, let’s roll up our sleeves and get to it!
Ingredients
Here’s what you’ll need to create these scrumptious Crazy Puffs:
-
1 pound of your favorite pizza dough
You can use store-bought or homemade! Just make sure it’s at room temperature for easier handling. If you want a healthier option, try whole wheat dough. -
1 cup zesty pizza sauce
Zesty sauce adds a kick! Feel free to substitute with marinara or your favorite dipping sauce if you prefer something milder. -
2 cups shredded mozzarella cheese
Mozzarella is classic for that gooey, stretchy cheese effect. You can mix in provolone or even a dairy-free option if you want a different flavor profile! -
8 ounces pepperoni or turkey pepperoni slices
Pepperoni is a staple, but turkey pepperoni offers a leaner alternative. You can also swap it out for veggies or cooked sausage if you’re feeling adventurous! -
4 tablespoons unsalted butter (melted to perfection)
Butter gives a rich flavor and a beautiful sheen to your puffs. If you need a dairy-free version, try olive oil instead! -
1 tablespoon minced garlic for strong flavor
Garlic amps up the flavor. If you love it, feel free to add more! If you’re not a fan, you can skip this. -
¼ cup freshly grated Parmesan cheese
Parmesan adds a delightful nutty flavor. If you’re looking to keep it dairy-free, nutritional yeast is a great substitute! -
1 teaspoon fine sea salt
Always use salt to enhance flavors, but adjust to your preference based on the saltiness of your dough and sauces. -
1 teaspoon Italian herb blend
A versatile blend! Customize it with your preferred dried herbs like thyme or basil for a unique flavor twist. -
1 teaspoon freshly cracked black pepper
Black pepper provides a little heat! If you like it spicier, add some cayenne or red pepper flakes. -
1 teaspoon dried oregano leaves
Oregano is a classic pizza herb. If fresh is available, you can use it for an upgraded flavor! -
2 tablespoons finely chopped fresh parsley (optional)
Parsley adds a refreshing note and a pop of color. Feel free to skip this if you want to keep it simple! -
1 teaspoon red pepper flakes
If you like some heat, toss in the red pepper flakes. They can easily be adjusted according to your spice preference. -
½ teaspoon smoked paprika
Smoked paprika brings a lovely depth and smokiness to the Crazy Puffs.
Step-by-Step Instructions
Let’s prepare these Crazy Puffs step by step. Roll up your sleeves, tie on that apron, and let’s get cooking!
-
Preheat Your Oven
First things first, preheat your oven to 400°F (200°C). A hot oven is crucial for that perfect golden-brown crust. -
Prep Your Dough
Lightly flour your work surface and roll out the pizza dough into a rectangle about 1/4 inch thick. You want it to have a nice thickness to hold in all those delicious fillings. -
Cut the Dough
Using a sharp knife or pizza cutter, slice your rolled-out dough into squares—about 3 inches by 3 inches is ideal. Don’t worry about making them perfect; a little rustic charm is welcomed! -
Fill with Goodness
On each square, place a spoonful of zesty pizza sauce, a sprinkle of mozzarella cheese, and a couple of slices of pepperoni. Don’t overfill—trust me! You want them to seal well, keeping all the cheesy goodness inside. -
Seal Those Puffs
Fold the square over to create a triangle or a pocket. Use your fingers to pinch the edges together. To ensure a good seal, you can press down with a fork or your fingers. Be gentle though; you want them to maintain their fluffy shape! -
Brush with Butter
In a small bowl, mix the melted butter with minced garlic. Brush this mixture generously over the top of each puff. This adds incredible flavor and gives them a beautiful, golden color while they bake. -
Sprinkle with Delights
Now, sprinkle the tops of your Crazy Puffs with a mix of the grated Parmesan cheese, Italian herb blend, sea salt, oregano, black pepper, and smoked paprika. This adds an extra layer of flavor that elevates these puffs from good to absolutely irresistible! -
Bake Away
Place your puffs on a lined baking sheet, making sure they have enough space to expand as they bake. Pop them into the oven and bake for 15-20 minutes, or until they’re puffed up and golden brown. -
Finish with Freshness
Once baked, take them out and if you chose to, sprinkle the parsley over the top while they’re still warm. This adds a lovely freshness to the dish! -
Let Cool and Enjoy
Allow your Crazy Puffs to cool for a few minutes (if you can resist!). Serve them warm with extra pizza sauce on the side for dipping. Trust me; they’re best enjoyed fresh from the oven.
Serving Suggestions
For a beautiful presentation, arrange your Crazy Puffs on a colorful platter. Serve them alongside a small bowl of zesty pizza sauce for dipping that beautifully contrasts against the cheesy, golden puffs. You can also sprinkle some fresh parsley over the top for a pop of color!
Recipe Variations
- Veggie Crazy Puffs: Swap the pepperoni for a mix of sautéed bell peppers, mushrooms, and olives for a vegetarian option.
- Cheesy Garlic Puffs: Omit the pepperoni and sprinkle a blend of mozzarella and cheddar cheese with garlic for that ultimate cheesy experience.
- Spicy Buffalo Puffs: Mix in some shredded cooked chicken and buffalo sauce for a spicy twist on the original.
- Caprese Puffs: Stuff your Crazy Puffs with tomatoes, fresh mozzarella, and basil for a fresh Italian flavor.
- Chili Cheese Puffs: Add a spoonful of chili and shredded cheese inside for a hearty snack with a kick!
Chef’s Notes
Oh, the joy of experimenting in the kitchen! I remember when I first made these Crazy Puffs; I tried adding different fillings from what I had on hand. I once added a little bit of spinach and artichokes, and oh boy, it was a game changer! Not every experiment turned out as planned, though. I once tried to get fancy and stuffed them with too much sauce; needless to say, it turned into a gooey mess. Lesson learned: less is often more!
Over time, this recipe has evolved to reflect what I love about casual cooking—keeping it fun, easy, and delicious. Cooking is all about joy and creativity, so don’t hesitate to make it your own!
FAQs and Troubleshooting
1. Why are my Crazy Puffs not puffy?
If your puffs do not rise or appear too flat, it’s likely a result of overworking the dough or not letting it rise properly. Ensure you allow the dough to rest at room temperature for easier handling.
2. Can I freeze the puffs?
Absolutely! You can freeze them before baking. Just freeze them on a baking sheet until solid, then transfer them to a zip-top bag. When you’re ready, bake them from frozen, adding a few minutes to the bake time.
3. How do I make them crispy?
To achieve a crispier exterior, bake until golden brown, and consider brushing them with a little olive oil before baking instead of butter.
4. What if my dough rips during filling?
Don’t worry! Just patch it up with a little extra dough or dough scraps. It’s all part of the kitchen fun; embrace those imperfections!
Nutritional Info
While precise nutritional values can vary based on specific ingredients and substitutions, one serving of Crazy Puffs (approximately two puffs) typically contains around 250-300 calories. However, they’re meant to be enjoyed as a treat, so savor every bite without guilt!
There you have it, my friends! Little Caesars Crazy Puffs—a delightful snack that’s not only easy to whip up but also filled with flavors that will have everyone licking their fingers. I hope you enjoy making these as much as I did. Remember to gather your loved ones around the table, share some laughs, and create those little beautiful moments that good food is all about. Happy cooking, and let’s keep exploring delicious dishes together!
PrintLittle Caesars Crazy Puffs

A flavorful twist on a classic favorite—light, airy pillows of pizza dough stuffed with gooey cheese and zesty pepperoni.
- Prep Time: 15 minutes
- Cook Time: 20 minutes
- Total Time: 35 minutes
- Yield: 4 servings 1x
- Category: Snack
- Method: Baking
- Cuisine: American
- Diet: Vegetarian
Ingredients
- 1 pound pizza dough
- 1 cup zesty pizza sauce
- 2 cups shredded mozzarella cheese
- 8 ounces pepperoni or turkey pepperoni slices
- 4 tablespoons unsalted butter (melted)
- 1 tablespoon minced garlic
- ¼ cup freshly grated Parmesan cheese
- 1 teaspoon fine sea salt
- 1 teaspoon Italian herb blend
- 1 teaspoon freshly cracked black pepper
- 1 teaspoon dried oregano leaves
- 2 tablespoons finely chopped fresh parsley (optional)
- 1 teaspoon red pepper flakes
- ½ teaspoon smoked paprika
Instructions
- Preheat your oven to 400°F (200°C).
- Lightly flour your work surface and roll out the pizza dough into a rectangle about 1/4 inch thick.
- Using a sharp knife, slice the rolled-out dough into squares, about 3 inches by 3 inches.
- On each square, place a spoonful of pizza sauce, a sprinkle of mozzarella cheese, and a couple of slices of pepperoni.
- Fold the square over to create a triangle or pocket and pinch the edges together.
- In a small bowl, mix the melted butter with minced garlic and brush over the top of each puff.
- Sprinkle the tops with Parmesan cheese, Italian herb blend, sea salt, oregano, black pepper, and smoked paprika.
- Place the puffs on a lined baking sheet and bake for 15-20 minutes until golden brown.
- Once baked, optionally sprinkle parsley over the top while warm.
- Allow to cool for a few minutes, then serve warm with extra pizza sauce for dipping.
Notes
Experiment with different fillings like sautéed vegetables or chicken for variations.
Nutrition
- Serving Size: 2 puffs
- Calories: 300
- Sugar: 2g
- Sodium: 600mg
- Fat: 14g
- Saturated Fat: 7g
- Unsaturated Fat: 5g
- Trans Fat: 0g
- Carbohydrates: 32g
- Fiber: 2g
- Protein: 12g
- Cholesterol: 30mg
Keywords: Crazy Puffs, Little Caesars, Snack, Pizza, Appetizer
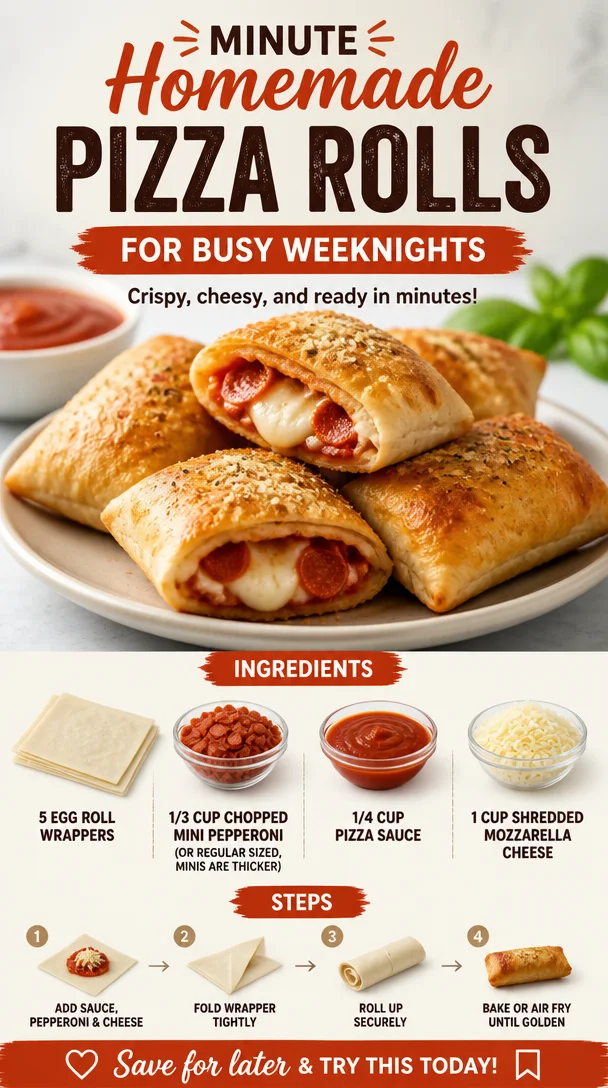
Minute Homemade Pizza Rolls for Busy Weeknights
Homemade Pizza Rolls: A Slice of Comfort
Hello, friends! Today, we’re diving into the delightful world of homemade pizza rolls, a dish that brings the comforting essence of pizza into a crispy, golden package. Whether you’re gearing up for game night, hosting a cozy gathering, or just craving a snack, these pizza rolls are sure to hit the spot. So, grab your apron, and let’s create some magic in the kitchen!
A Bite of Nostalgia
I remember the first time I discovered the beauty of pizza rolls. I was in middle school, and my best friend had invited me over for an after-school snack. We rummaged through her freezer and stumbled upon a bag of frozen pizza rolls. I was skeptical at first—how could something so tiny be so satisfying? But as soon as I popped one in my mouth, I was hooked! That cheesy, pepperoni-filled bite, with its crispy exterior, was a revelation.
Years later, I found myself wanting to recreate that nostalgic delight from scratch. Why? Because there’s something incredibly satisfying about making food at home—it’s like crafting little pieces of love. And the best part? You can control the ingredients, making it a fun activity to do with friends or family. So let’s roll up our sleeves and get ready to make some homemade pizza rolls that are better than any frozen variety!
Ingredients
Here’s what you’ll need to whip up these delightful pizza rolls:
-
5 egg roll wrappers
Perfect for that satisfying crunch! If you can’t find egg roll wrappers, you can substitute with wonton wrappers for a slightly smaller roll. -
1/3 cup chopped mini pepperoni (or regular-sized, sliced)
Mini pepperoni adds a fun bite-sized flair, but regular pepperoni works just as well. Feel free to swap in some cooked sausage or veggies for a different twist! -
1/4 cup pizza sauce
Use your favorite store-bought sauce or whip up a quick homemade version. Feel free to choose a spicy marinara or garlic-infused option to amp up the flavor! -
1 cup shredded mozzarella cheese
This is the classic cheese choice! You can substitute with provolone or a dairy-free cheese for a vegan option.
Now that we have our ingredients lined up, let’s get cooking!
Step-by-Step Instructions
-
Preheat Your Oven
Start by preheating your oven to 400°F (200°C). This is crucial for achieving that perfect golden-brown crust! -
Prepare the Filling
In a mixing bowl, combine the mini pepperoni (or your chosen protein), pizza sauce, and shredded mozzarella cheese. Make sure everything is well-mixed. This ensures each pizza roll is bursting with flavor. -
Assemble the Pizza Rolls
Take one egg roll wrapper and place it on a clean, dry surface in a diamond shape (one point facing you). Add a generous tablespoon of your filling mixture in the center. Here’s a little chef hack: dampen the edges of the wrapper with a bit of water to help seal the rolls. -
Roll It Up
Fold the bottom corner up over the filling, tucking it tightly. Then, fold in the sides and roll it up toward the top corner, sealing it completely. Think of it like wrapping a burrito, but cuter! Repeat this process with the remaining wrappers and filling. -
Bake the Rolls
Line a baking sheet with parchment paper and arrange your pizza rolls seam side down. For that extra golden crunch, brush them lightly with olive oil. Bake in the preheated oven for about 15-20 minutes, flipping halfway through to ensure even browning. -
Serve and Enjoy
Once they’re crispy and golden, remove them from the oven and let them cool for a minute before serving. I like to pair these with a warm dipping sauce, like marinara or ranch, for that extra punch of flavor.
And there you have it—your very own homemade pizza rolls, ready to impress!
Serving Suggestions
When it comes to serving your pizza rolls, presentation can elevate the experience! Arrange them on a vibrant platter, perhaps with some fresh herbs sprinkled around for a pop of color. Serve them alongside a small bowl of pizza sauce or your favorite dipping sauce. This little touch goes a long way in making your homemade treats feel even more special.
Recipe Variations
Feeling adventurous? Here are a few creative twists to try with your pizza rolls:
- Veggie Lovers: Swap out the pepperoni for sautéed mushrooms, bell peppers, and spinach for a flavorful veggie version.
- Spicy Kick: Add some sliced jalapeños to the filling for a spicy punch that’ll wake up your taste buds.
- Cheesy Garlic: Mix in some garlic powder and Parmesan with the mozzarella for a savory, cheesy explosion.
- Buffalo Chicken: Add shredded cooked chicken mixed with buffalo sauce for a spicy take on pizza rolls.
- Breakfast Edition: Consider using scrambled eggs, crumbled sausage, and cheese for a fun breakfast twist!
Chef’s Notes
Over time, I’ve found that these pizza rolls are a hit at every gathering! They not only feed the hunger but also spark conversation. I remember one night with friends—we ended up in a mini pizza roll competition to see who could create the most unique filling. Trust me, after a few rounds, we had everything from sweet BBQ chicken to loaded nacho cheese. It reminded me that cooking isn’t just about making food—it’s an experience to be shared.
FAQs and Troubleshooting
1. My pizza rolls didn’t seal properly. What went wrong?
It sounds like you might need to add a bit more water to the edges when rolling. Make sure to seal them tightly to prevent any leakage while baking.
2. Can I make these ahead of time?
Absolutely! You can assemble these rolls a few hours ahead and place them in the refrigerator until you’re ready to bake them. Just extend the baking time a tad if they’re cold.
3. What should I do if my rolls are too soggy?
This can happen if they’re overfilled or if the filling is too wet. Make sure to measure the filling and consider using less sauce if you find the consistency has become too runny.
4. Can I freeze these?
Yes! These pizza rolls freeze beautifully. Just assemble them, and once they’re frozen solid, transfer them to a zip-top bag. Bake straight from the freezer, adding a few minutes to the baking time.
Nutritional Info
While I believe in enjoying food without counting calories, here’s a quick rundown based on the ingredients we used:
- Calories: Approximately 200 calories per serving (2 rolls)
- Carbohydrates: 25g
- Protein: 10g
- Fat: 8g
This nutritional information can vary based on the specific ingredients you choose, so feel free to adjust as needed.
Let’s roll up those sleeves—it’s time to make some homemade pizza rolls that will leave you smiling and savoring every bite! Cooking is meant to be fun, so enjoy the process, and don’t forget to gather around the table!
PrintHomemade Pizza Rolls
Delightful homemade pizza rolls bringing the comfort of pizza into a crispy, golden package.
- Prep Time: 15 minutes
- Cook Time: 20 minutes
- Total Time: 35 minutes
- Yield: 4 servings 1x
- Category: Snack
- Method: Baking
- Cuisine: Italian
- Diet: Vegetarian
Ingredients
- 5 egg roll wrappers
- 1/3 cup chopped mini pepperoni (or regular-sized, sliced)
- 1/4 cup pizza sauce
- 1 cup shredded mozzarella cheese
Instructions
- Preheat your oven to 400°F (200°C).
- Combine the mini pepperoni, pizza sauce, and shredded mozzarella cheese in a mixing bowl.
- Take one egg roll wrapper and place it on a clean surface in a diamond shape.
- Fold the bottom corner up over the filling tightly, then fold in the sides and roll it up toward the top corner.
- Line a baking sheet with parchment paper and arrange the pizza rolls seam side down, brushing them lightly with olive oil.
- Bake in the preheated oven for about 15-20 minutes, flipping halfway through.
- Serve and enjoy once they’re crispy and golden.
Notes
These pizza rolls are perfect for gatherings and can be made ahead of time. They freeze beautifully and can be baked straight from the freezer.
Nutrition
- Serving Size: 2 rolls
- Calories: 200
- Sugar: 1g
- Sodium: 300mg
- Fat: 8g
- Saturated Fat: 3g
- Unsaturated Fat: 4g
- Trans Fat: 0g
- Carbohydrates: 25g
- Fiber: 1g
- Protein: 10g
- Cholesterol: 15mg
Keywords: pizza rolls, homemade snacks, comfort food, game night snacks, easy recipes
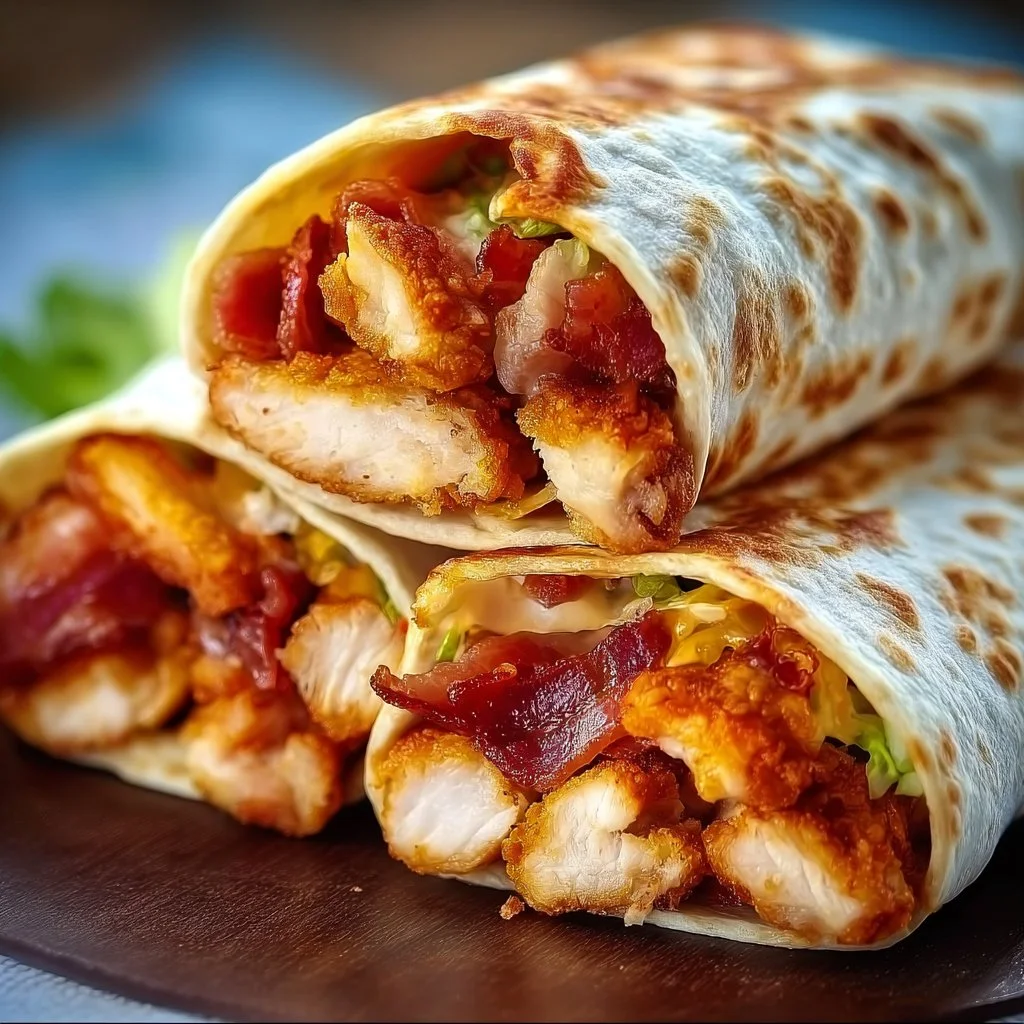
Chicken Bacon Wraps
# Irresistible Chicken Bacon Wraps: Your New Go-To Recipe
## Introduction
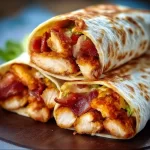
Hello, culinary adventurers! Today, I’m thrilled to share a recipe that’s not only delicious but also brings an element of comfort to the table: **Chicken Bacon Wraps**. Imagine tender chicken enveloped in savory bacon, a creamy layer of cheese, and a burst of freshness from veggies. It’s a dish that brings smiles, sparks conversation, and—dare I say—it might just become a staple in your recipe repertoire!
I remember the first time I whipped up these wraps for a cozy gathering with friends. The kitchen was filled with delightful aromas, and the laughter that flowed was as plentiful as the food on the table. I had decided to make them on a whim, using whatever ingredients I had on hand. They turned out so scrumptious that I knew I was onto something special. The beauty of Chicken Bacon Wraps is they strike the perfect balance between indulgent and approachable; they're a celebration of flavors and textures that will leave your guests wanting more.
Whether you’re hosting a casual dinner or simply want to elevate your weeknight meal, this recipe is here for you. So, tie on that apron, pour yourself a lovely glass of something refreshing, and let’s get cooking!
---
## Personal Story
One of my fondest kitchen memories revolves around these Chicken Bacon Wraps. It was a crisp autumn evening, and I had invited my closest friends over for a cozy dinner party. The mood was electrified by fragrant candles and a hint of pumpkin spice in the air, setting the perfect backdrop for connection.
I rummaged through my fridge and, realizing I had chicken, bacon, and all the good stuff, I decided to create something delightful. As I crafted these wraps, my friends mingled in the living room, laughter underscoring the clinking of glasses. When it came time to serve the Chicken Bacon Wraps, you could see the intrigue on their faces; they practically devoured them! Seeing the joy on their faces as they took their first bites made every minute spent in the kitchen worthwhile. Those wraps became a staple at our gatherings, a symbol of friendship and fond memories—all created around a table filled with delicious food.
---
## Ingredients
Let’s gather all the good stuff! Here are the ingredients you’ll need to create these mouthwatering Chicken Bacon Wraps, including some tips and tricks along the way:
- **Chicken Breasts (2-3, boneless and skinless)**
The star of the show! Aim for organic or free-range chicken for the best flavor. If you’re short on chicken breasts, feel free to use thighs for a juicier bite.
- **Bacon (6-8 strips)**
Ah, bacon! It adds a delicious crunch and savory smokiness. For a healthier twist, turkey bacon is a great substitute, though it may not crisp up as much.
- **Cream Cheese (4 oz, softened)**
This creamy goodness adds a rich texture and flavor. You can use herbed cream cheese for an extra flavor punch or even Greek yogurt if you're looking for a lighter option.
- **Cheddar Cheese (1 cup, shredded)**
A classic pairing that melts beautifully. If you prefer a sharper taste, use aged cheddar, or mix it up with pepper jack for a spicy kick!
- **Spinach or Lettuce (1 cup, chopped)**
Adding greens brings some freshness and color! Swap spinach for arugula for peppery notes, or go with romaine for a nice crunch.
- **Salt and Pepper (to taste)**
Always season to your preference! Feel free to explore spicier seasonings like paprika or garlic powder for an added depth of flavor.
---
## Step-by-Step Instructions
Let’s get down to it! Follow these steps to make your Chicken Bacon Wraps:
1. **Preparation Time**
Begin by preheating your oven to 400°F (200°C). This ensures that the bacon crisps up perfectly while the chicken cooks through nicely—my golden rule of oven culinary magic!
2. **Pound the Chicken**
Place your chicken breasts between two sheets of plastic wrap or parchment paper. Using a meat mallet or rolling pin, gently pound them to an even thickness of about 1 inch. This ensures even cooking, and it’s a wonderful stress reliever—give it a little extra “love” if you need to!
3. **Season the Chicken**
Season both sides of the chicken breasts with salt and pepper. Don’t be shy—this chicken will be the canvas for all that yummy flavor. If you like, sprinkle on any spices that you fancy!
4. **Spread the Cream Cheese**
In a small bowl, soften the cream cheese in the microwave for about 15 seconds until spreadable. Add in some herbs or spices if you’re feeling creative! Now, spread a generous layer on one side of each chicken breast, followed by a sprinkle of shredded cheddar cheese.
5. **Add Spinach and Bacon**
Top the cheese with a layer of chopped spinach or lettuce. Now, here comes the smoky goodness! Lay 2-3 strips of bacon over the greens. The bacon adds flavor and essential moisture to your wraps. It’s a game changer—trust me!
6. **Roll It Up**
Carefully roll the chicken tightly, starting from the edge with the cream cheese. Tuck in the sides as you go to keep the filling in. Secure them with toothpicks or wrap them tightly in kitchen twine for that fancy flair!
7. **Wrap with Bacon**
Here’s where it gets savory! Wrap additional bacon strips around each chicken roll, ensuring they’re well covered. Secure with toothpicks if necessary, so they maintain their shape while baking.
8. **Bake to Perfection**
Place the wrapped chicken in a greased baking dish. Bake in your preheated oven for about 25-30 minutes or until the chicken reaches an internal temperature of 165°F (74°C). The bacon should be perfectly crispy. Check halfway through: if bacon is getting too crispy, shield it with aluminum foil!
9. **Rest and Slice**
Once baked, let the chicken rest for about 5 minutes before slicing. This helps retain those juicy flavors. Serve whole or slice to showcase all that deliciousness inside.
---
## Serving Suggestions
To plate your Chicken Bacon Wraps, arrange them artfully on a rustic wooden board or a lovely white platter for that elegant contrast. Drizzle a tangy dipping sauce like ranch or honey mustard for an added punch! You can garnish with freshly chopped herbs or a sprinkle of cracked pepper. Serve these wraps alongside a simple salad or roasted veggies for a complete meal that looks as stunning as it tastes.
---
## Recipe Variations
Feeling adventurous? Here are some tasty twists to personalize your Chicken Bacon Wraps:
- **Spicy Kick**: Add jalapeños or Sriracha to the cream cheese for an extra spicy layer.
- **Mediterranean Delight**: Include feta cheese and sun-dried tomatoes instead of cheddar for a Mediterranean flair.
- **BBQ Bliss**: Brush BBQ sauce over the chicken before rolling for a smoky, tangy finish!
- **Vegetarian Version**: Swap chicken for thick slices of eggplant or tofu that have been marinated and grilled.
- **Sweet & Savory**: Add a layer of apricot or peach preserves beneath the cream cheese for a sweet contrast!
---
## Chef’s Notes
As I reminisce about the evolution of these Chicken Bacon Wraps, I can’t help but smile. There have been countless iterations, ranging from spicy to sweet. Each time I make them, I tweak ingredients and experiment with different flavors. Food is all about creativity, and I encourage you to embrace the process! The best recipes come from a space of joy and discovery. And remember, if you have leftovers (which is rare!), they make for a killer lunch the next day!
---
## FAQs and Troubleshooting
### Q: Why is my bacon not crispy?
A: If your bacon isn’t crisping up, it could be because the chicken was rolled too tightly. Allow some space for the bacon to cook. You can always broil the wraps for a minute or two at the end for extra crispiness.
### Q: Can I make these wraps ahead of time?
A: Absolutely! You can prepare and assemble the wraps, refrigerate them, and bake when ready. Just increase the cooking time slightly if they’re cold from the fridge.
### Q: What’s the best way to store leftovers?
A: Store any leftovers in an airtight container in the refrigerator for up to 3 days. Reheat in the oven at 350°F until warmed through for the best results!
### Q: Can I freeze these wraps?
A: Yes! Assemble, wrap tightly in foil and plastic wrap, and freeze. When ready to enjoy, bake from frozen, adding extra time until fully cooked.
---
## Nutritional Info
While I’m not a nutritionist, a single serving of these Chicken Bacon Wraps generally contains a hearty dose of protein, healthy fats, and essential vitamins from the greens. Enjoy in moderation as a part of a balanced diet.
---
There you have it! Delicious, crowd-pleasing Chicken Bacon Wraps that will undoubtedly become a cherished recipe in your kitchen. I can’t wait for you all to try these, make them your own, and create memories just like I did. Happy cooking, friends!
Irresistible Chicken Bacon Wraps
Delicious Chicken Bacon Wraps featuring tender chicken, crispy bacon, creamy cheese, and fresh veggies.
- Prep Time: 15 minutes
- Cook Time: 30 minutes
- Total Time: 45 minutes
- Yield: 4 servings 1x
- Category: Main Course
- Method: Baking
- Cuisine: American
- Diet: Paleo
Ingredients
- 2–3 boneless, skinless Chicken Breasts
- 6–8 strips of Bacon
- 4 oz Cream Cheese, softened
- 1 cup Cheddar Cheese, shredded
- 1 cup Spinach or Lettuce, chopped
- Salt and Pepper, to taste
Instructions
- Preheat your oven to 400°F (200°C).
- Place your chicken breasts between two sheets of plastic wrap or parchment paper and pound to an even thickness.
- Season both sides of the chicken breasts with salt and pepper.
- In a small bowl, soften the cream cheese in the microwave and spread it on one side of each chicken breast.
- Add a layer of chopped spinach or lettuce over the cheese, then 2-3 strips of bacon.
- Roll the chicken tightly starting from the edge with the cream cheese, tucking in the sides.
- Wrap each roll with additional bacon strips and secure with toothpicks.
- Place in a greased baking dish and bake for 25-30 minutes or until the chicken is cooked through.
- Let rest for 5 minutes before slicing.
Notes
Try adding jalapeños for a spicy kick or feta cheese for a Mediterranean twist!
Nutrition
- Serving Size: 1 wrap
- Calories: 400
- Sugar: 2g
- Sodium: 600mg
- Fat: 28g
- Saturated Fat: 10g
- Unsaturated Fat: 13g
- Trans Fat: 0g
- Carbohydrates: 3g
- Fiber: 1g
- Protein: 30g
- Cholesterol: 90mg
Keywords: chicken, bacon, wraps, easy dinner, comfort food