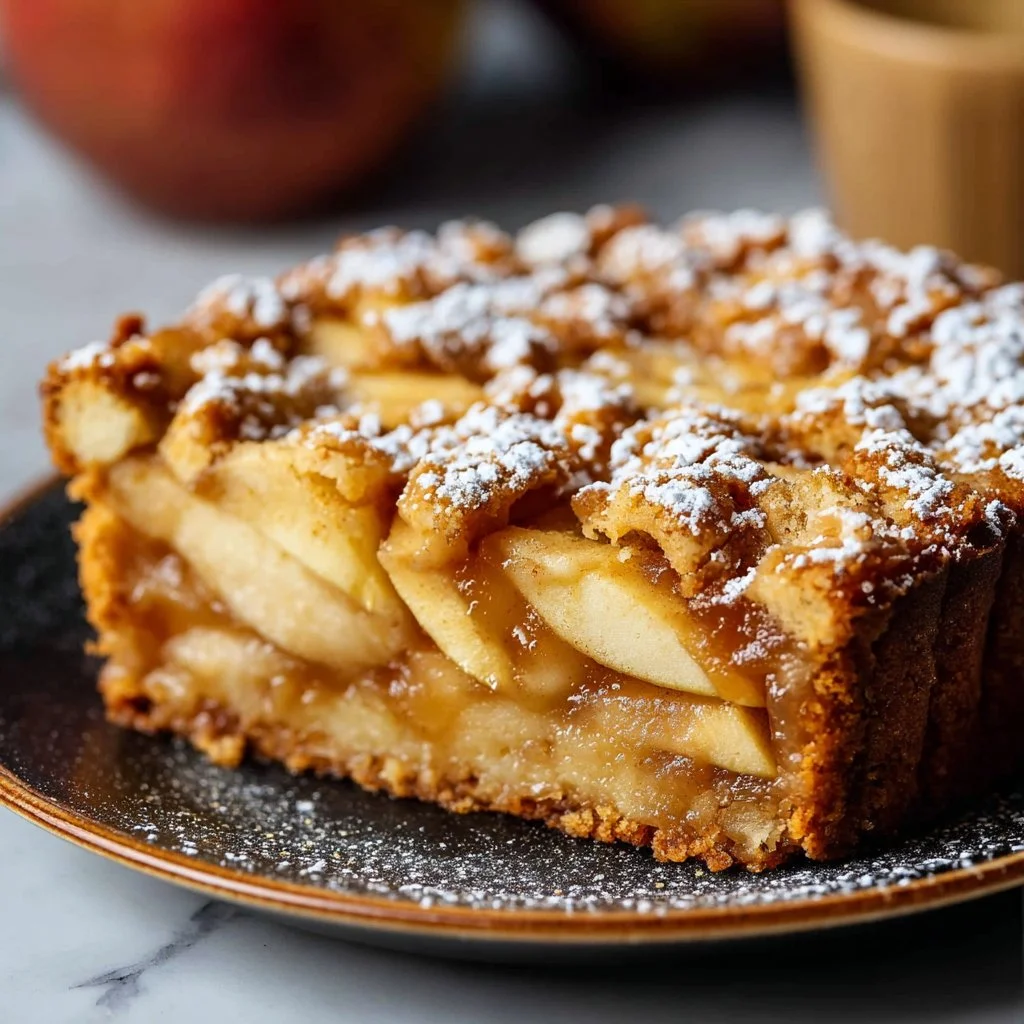
Jamie Oliver Apple Pie Cake Recipe
Jamie Oliver’s Apple Pie Cake: A Sweet Slice of Nostalgia
Hello, food lovers! If you’ve ever wandered through the sweet aroma of a bustling bakery or basked in the warm glow of a family kitchen, then you know that nothing quite compares to the comfort of homemade treats. Today, I’m excited to share a recipe that not only tastes divine but also comes with a sprinkle of sweet nostalgia: Jamie Oliver’s Apple Pie Cake.
Imagine this: a cozy autumn afternoon, the leaves are rustling outside, and all you can smell is the delightful scent of baked apples wafting through your home. This cake is not just a dessert; it’s a warm hug on a plate — perfect for gatherings, celebrations, or simply savoring during a moment of solitude with a good book. With its tender cake surrounding soft, spiced apples, each slice tells a story of comfort and care.
What makes this recipe even better is its approachability. You don’t need to be a pastry chef to whip up this delightful treat. It’s designed for everyone, from novice bakers to seasoned pros, ensuring that anyone can achieve that “wow” factor with ease. And who doesn’t love a recipe that brings people together? So, grab your apron, and let’s dive into the heart of this delicious journey!
Personal Story
Let me take you back to my childhood. Picture this: I’m a little girl, eagerly peeking over the kitchen counter, watching my grandmother transform a humble pile of apples into something magical. She had a way of turning the ordinary into the extraordinary. As she peeled, sliced, and mixed, there was an enchanting rhythm to her movements. The smell of cinnamon and sugar dancing in the air always made my heart skip a beat.
Every Sunday, without fail, she would bake her famous apple pie. It was our family tradition, and as I helped her toss the apple slices in brown sugar and spices, I felt I was part of something truly special. When it was time to taste, we would gather around the table, laughter and stories flowing freely as we savored every bite of that warm pie. Those moments instilled in me a love for cooking and the significance of sharing food with loved ones.
That’s why when I discovered Jamie Oliver’s Apple Pie Cake, it felt like a wonderful way to recreate those cherished memories. With a few simple ingredients and a little love, we can all bring a taste of nostalgia and joy to our tables!
Ingredients
Let’s talk about what you’ll need to create this scrumptious cake. Here’s your shopping list:
-
1 box (425g) yellow cake mix
A convenient base for this recipe, yellow cake mix provides a light, fluffy texture. You can use white cake mix if you prefer a subtler flavor. -
1½ cups (360ml) water
Essential for mixing with the cake mix, water adds moisture. You can swap it with apple juice for an extra fruity twist! -
⅓ cup (80ml) vegetable oil
This helps keep the cake moist. Canola oil or melted coconut oil also works well as substitutes. -
3 large eggs
Eggs add richness and stability to the cake. For a vegan option, use flax eggs (1 tablespoon of ground flaxseed mixed with 2.5 tablespoons of water per egg) instead. -
6 apples, peeled and sliced
A mix of tart and sweet apples like Granny Smith and Fuji adds depth. You can also use pears for a delightful twist. -
3 tbsp (45g) brown sugar
Adds a caramel-like sweetness that pairs beautifully with apples. White sugar can be used in a pinch but lacks that deep flavor. -
1 tsp cinnamon
This warm spice elevates the apple’s natural sweetness. Feel free to add nutmeg or allspice for a more complex flavor profile. -
1 tbsp (15ml) lemon juice
Brightens the flavors and prevents the apples from browning. Substitute with lime juice if needed. -
¾ cup (95g) all-purpose flour
Helps create the cake structure. For a gluten-free option, use a 1:1 gluten-free blend. -
½ cup (100g) brown sugar
Used for the crumb topping, it gives a nice crunch. You can also mix in some oats for added texture! -
¼ tsp salt
Just a pinch to enhance all the other flavors! -
½ cup (115g) cold butter, cubed
This forms the delicious crumble on top. You can substitute with cold margarine or a vegan butter alternative if you’re looking for a dairy-free version.
Step-by-Step Instructions
Ready to bake? Let’s walk through the steps together!
-
Preheat Your Oven
Start by preheating your oven to 350°F (175°C). This ensures that your cake bakes evenly. -
Prepare the Cake Mixture
In a large mixing bowl, combine the yellow cake mix, water, vegetable oil, and eggs. Mix until just combined, being careful not to overmix. Overmixing can lead to a dense cake, and I like my cakes light and airy! -
Slice Those Apples
While the cake batter rests for a moment, grab your apples! Peel and slice them into thin wedges. The thinner, the better—they’ll soften beautifully while baking. -
Toss with Brown Sugar and Cinnamon
In a separate bowl, combine your sliced apples with 3 tablespoons of brown sugar, cinnamon, and lemon juice. Toss until all the apple slices are evenly coated. Feel free to sneak a slice or two; quality control is important! -
Layer the Cake and Apples
Pour half of the cake batter into a greased 9×13-inch baking pan. Then, layer on your delicious apple mixture, spreading it evenly over the batter. Pour the remaining cake batter on top of the apples, ensuring they’re covered. -
Make the Crumble Topping
In a small bowl, combine the flour, brown sugar, and pinch of salt. Add your cold cubed butter and use your fingers to work it into the dry ingredients until it resembles coarse crumbs. Sprinkle this topping generously over the cake batter. -
Bake to Perfection
Place your cake in the preheated oven and bake for 45-50 minutes, or until a toothpick comes out clean from the center. The top should be golden brown and the kitchen should be filled with irresistible aromas! -
Cool and Serve
Allow the cake to cool for about 15 minutes in the pan, then slice it into squares and serve warm. Trust me, the warm apples and buttery crumble are a match made in heaven!
Serving Suggestions
To make your presentation truly stunning, consider serving this cake with a dollop of whipped cream or a scoop of vanilla ice cream. Drizzle some caramel sauce on top for even more decadence. Make it festive by garnishing with fresh mint leaves or a sprinkle of powdered sugar. Your guests will think they’re at a fancy bakery!
Recipe Variations
Here are some fun twists to keep things fresh:
- Nutty Banana Twist: Add a mashed ripe banana to the batter for a delicious banana-apple flavor combo.
- Caramel Delight: Swirl in a cup of caramel sauce into the apple layer for a decadent touch.
- Spiced Up: Experiment with different spices like cardamom or ginger for a warming aromatic kick.
- Berry Bliss: Mix in a cup of fresh berries for added color and tartness.
- Vegan-Friendly: Substitute eggs with flax eggs and use plant-based butter to make this cake vegan!
Chef’s Notes
This recipe has evolved from being a family favorite to a staple at my dinner parties. The first time I made it, I discovered the magic of combining spices with sweet fruits. If you find yourself with an abundance of apples, this recipe is your go-to! I still giggle thinking about the time I accidentally used baking soda instead of baking powder. The cake rose like a mountain! Thankfully, it still tasted divine.
FAQs and Troubleshooting
1. Why is my cake dense?
Dense cakes often come from overmixing the batter or using too much flour. Make sure to mix just until combined and measure flour correctly.
2. Can I make this ahead of time?
Absolutely! You can prepare the cake a day ahead and store it covered at room temperature. Just warm it up in the oven before serving.
3. My apples are floating. What went wrong?
Floating apples can indicate that the cake batter was too thin, or the apples were too juicy. Ensure your batter is thicker and a good ratio of dry to wet ingredients.
4. Can I freeze the leftovers?
Yes! This cake freezes wonderfully. Just wrap it tightly in plastic wrap and then foil. Defrost in the fridge before enjoying.
Nutritional Info
(Optional – adjust as needed)
- Servings: 12
- Calories: 320
- Carbohydrates: 45g
- Protein: 3g
- Fat: 14g
- Sugar: 22g
There you have it! Jamie Oliver’s Apple Pie Cake, a delightful treat that brings smiles, warmth, and a dash of nostalgia to every gathering. I hope you feel inspired to tie your apron and bring this delicious recipe to life in your own kitchen. Happy baking, and remember: good food isn’t just about the recipe; it’s about the love and intention you put into making it!
PrintJamie Oliver’s Apple Pie Cake
A delightful cake surrounded by soft, spiced apples, perfect for gatherings and cozy moments.
- Prep Time: 20 minutes
- Cook Time: 50 minutes
- Total Time: 70 minutes
- Yield: 12 servings 1x
- Category: Dessert
- Method: Baking
- Cuisine: American
- Diet: Vegetarian
Ingredients
- 1 box (425g) yellow cake mix
- 1½ cups (360ml) water
- ⅓ cup (80ml) vegetable oil
- 3 large eggs
- 6 apples, peeled and sliced
- 3 tbsp (45g) brown sugar
- 1 tsp cinnamon
- 1 tbsp (15ml) lemon juice
- ¾ cup (95g) all-purpose flour
- ½ cup (100g) brown sugar
- ¼ tsp salt
- ½ cup (115g) cold butter, cubed
Instructions
- Preheat your oven to 350°F (175°C).
- Combine the yellow cake mix, water, vegetable oil, and eggs in a large mixing bowl. Mix until just combined.
- Peel and slice the apples into thin wedges.
- Toss the sliced apples with brown sugar, cinnamon, and lemon juice.
- Pour half of the cake batter into a greased 9×13-inch baking pan and layer the apple mixture on top.
- Pour the remaining cake batter on top of the apples.
- Mix flour, brown sugar, and salt in a small bowl. Add cold cubed butter and work it into the dry ingredients to form crumbs.
- Sprinkle the crumble topping over the cake batter.
- Bake for 45-50 minutes, or until a toothpick comes out clean.
- Cool for about 15 minutes in the pan, then slice and serve warm.
Notes
Serve with whipped cream or vanilla ice cream and drizzle with caramel sauce for extra decadence.
Nutrition
- Serving Size: 1 slice
- Calories: 350
- Sugar: 22g
- Sodium: 200mg
- Fat: 14g
- Saturated Fat: 8g
- Unsaturated Fat: 6g
- Trans Fat: 0g
- Carbohydrates: 45g
- Fiber: 3g
- Protein: 5g
- Cholesterol: 30mg
Keywords: apple pie cake, dessert, baking, Jamie Oliver, cozy dessert, fall recipes
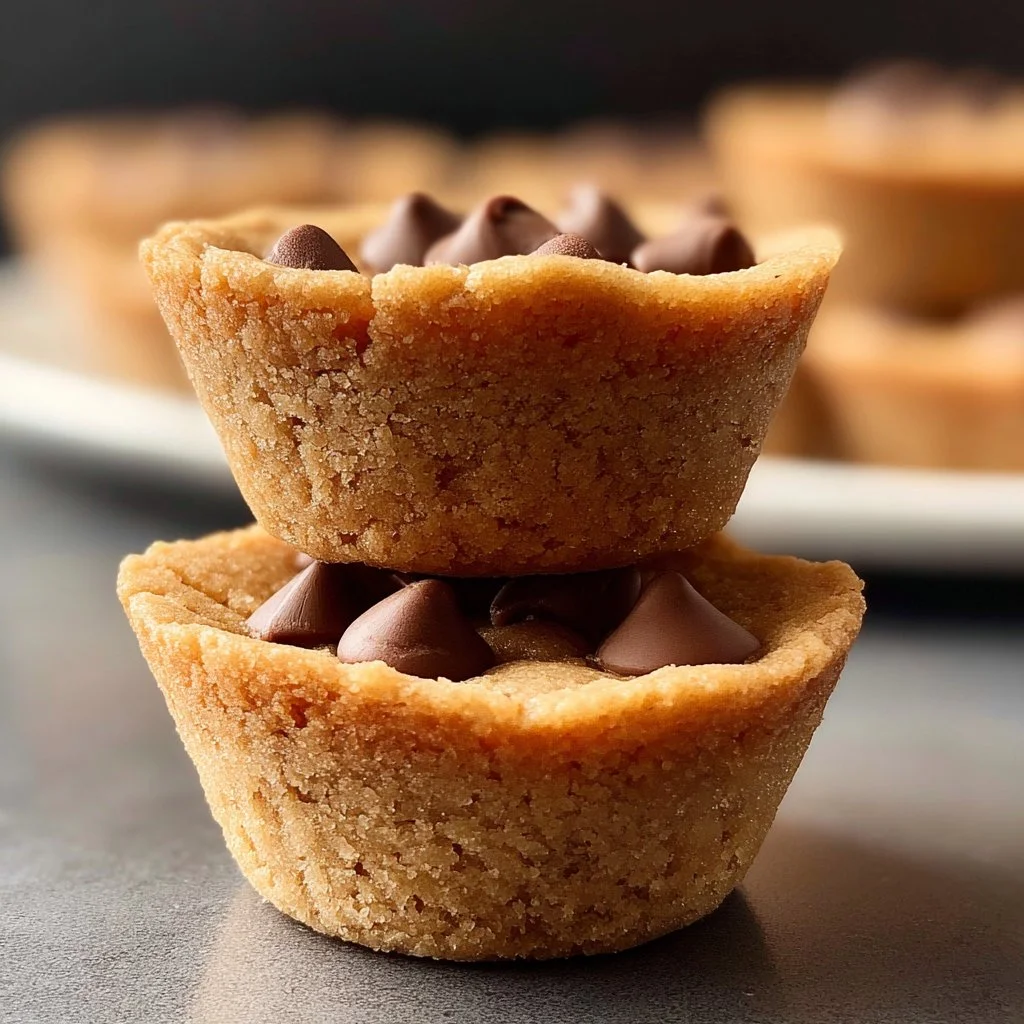
2 Ingredient Cookie Cups
The Perfect 2-Ingredient Cookie Cups: A Deliciously Simple Treat
Hello, fellow foodies! Welcome back to Ivory Apron, where we’re all about making cooking feel elegant yet accessible. Today, I have a delightful treat that’s sure to leave your taste buds dancing: 2-Ingredient Cookie Cups! Yes, you heard that right—only two ingredients! This recipe is perfect for those hectic weeks when you crave something sweet but don’t have the time or energy to whip up a full-on patisserie display.
Imagine a warm, gooey cookie cup filled with your favorite treats, all baked in the comfort of your own kitchen. These little lovelies are not only easy to make but are also gluten-free and can be customized to fit any dietary need. Plus, they come together quicker than you can decide which movie to binge-watch next!
Now, let me share with you a little backstory. A few years back, I was hosting a last-minute gathering and realized I had a serious cookie craving but zero time to bake an intricate dessert. After rummaging through my pantry, I discovered I had two simple ingredients: peanut butter and brown sugar. It was a match made in heaven! The deliciousness that ensued made me realize that sometimes, simplicity can lead to the most flavorful outcomes. That evening, everyone raved about my quick-fix cookie cups, and I knew I had to share this easy recipe with all of you!
So, grab your apron, and let’s dive into the world of 2-ingredient cookie cups. Whether you’re treating yourself, hosting friends, or looking for a fun cooking project with the kids, these cookie cups are a perfect solution!
Personal Story
A few summers ago, my friend Jenna and I decided to have a bake-off at her place, armed with ingredients we could find in her kitchen. Picture this: flour dust swirling in the air, laughter bouncing off the walls, and a large bowl filled with all sorts of permissions—flour, sugar, chocolate chips you name it!
Halfway through our flour fight, we realized we were missing a crucial element: time! Our delicious dreams were quickly turning into panic. As we sifted through her pantry, we stumbled on a jar of natural peanut butter and a bag of brown sugar sitting innocuously on a high shelf. Jenna, ever the optimist, said, “Why not try it?” At that moment, I felt like a culinary magician as my mind raced with possibilities.
Within minutes, we had dollops of dough pressed into muffin tins, filling her kitchen with a warm, nutty aroma. When those cookie cups emerged golden-brown and perfectly formed, it felt like the universe was smiling down on us (or maybe it was just the smell of cookies). That simple concoction became our go-to recipe for lazy afternoons when the sweet tooth kicked in without a full cookie lineup. To this day, every bite brings back that joyous summer memory of fun, creativity, and tasty success!
Ingredients
Here’s the kicker—this cookie recipe uses just two ingredients! You probably have both of these in your pantry right now:
-
1 cup natural peanut butter
- Chef Insight: Go for the creamy stuff for a classic texture, but if you prefer chunky peanut butter, that works remarkably well too! It adds a delightful texture to your cookie cups. If you’re allergic or not a fan of peanuts, almond butter or cashew butter are fantastic alternatives. Just make sure they’re natural, meaning minimal added ingredients.
-
1 cup brown sugar
- Substitution Tip: If you’re out of brown sugar, you can easily make your own! Just mix white sugar with a tablespoon of molasses—voila! A great way to keep your baking running smooth! Light brown sugar lends a milder taste, while dark brown sugar gives a deeper molasses flavor, which can be a delicious twist on the classic.
These two simple ingredients create a soft, tender base that’s incredibly versatile!
Step-by-Step Instructions
Now, are you ready to whip these up? Let’s guide you through the process step by step!
Step 1: Preheat the Oven
Preheat your oven to 350°F (175°C). (Chef tip: This step is crucial to get your cookie cups perfectly baked with that delightful golden hue.)
Step 2: Combine the Ingredients
In a mixing bowl, combine 1 cup natural peanut butter and 1 cup brown sugar. You can use a spatula or, if you’re feeling adventurous, mix it by hand! Get in there, and don’t be afraid to embrace the sticky goodness. The mixture will be thick and a tad challenging to combine, but that’s part of the fun!
Step 3: Form Your Cookie Cups
Once you have a nice, cohesive dough, it’s time to form your cookie cups! Lightly grease a muffin tin with a touch of cooking spray or oil. Using a small scoop or your hands, create small balls of dough and press them into the bottom of each cup. Make sure to push down in the center to create a well for your desired filling.
Step 4: Bake
Place the muffin tin in the preheated oven and bake for about 10-12 minutes. Keep an eye out for them—your kitchen will smell amazing! When they are lightly golden and set, take them out and allow them to cool in the pan for a few minutes.
Step 5: Fill and Serve
After a few minutes, gently remove the cookie cups from the muffin tin and place them on a cooling rack. Now is the fun part! Once they’ve cooled slightly, fill each cup with your favorite treats: chocolate chips, candy, fruit, or a dollop of jam. The options are endless!
Final Presentation
If you’re feeling fancy, a dusting of powdered sugar on top elevates the look without adding complexity. Place them on a beautiful platter and watch your guests’ eyes light up!
Serving Suggestions
These cookie cups are perfect for any occasion! Serve them warm with a scoop of vanilla ice cream on top for a delightful sundae-inspired treat. Alternatively, serve them alongside a cup of coffee or tea for a cozy afternoon. They’re undeniably fun to eat—bite into one, and you’ll find a soft center and delightful morsels waiting within!
Recipe Variations
The beauty of these 2-Ingredient Cookie Cups is their versatility! Here are a few tasty variations to try:
- Chocolate Drizzle: Melt some chocolate and drizzle it over the top for a decadent touch.
- Nut Medley: Mix in chopped nuts like walnuts or almonds into the dough for added crunch.
- Stuffed Surprise: Use a layer of Nutella or caramel sauce inside the cookie cups for a gooey center.
- Seasonal Touch: Add a pinch of cinnamon or pumpkin spice for a warm, autumn-inspired flavour.
Feel free to get creative—experimenting is half the fun!
Chef’s Notes
You know, baking has a funny way of teaching us patience, especially when it comes to not eating the finished product right away! I can’t tell you how many times I’ve tried to sneak a taste before they were fully cooled down. The first time I made these cookie cups, I definitely burned my tongue while trying to get that warm, gooey filling!
Over the years, I’ve played around with the recipe and found that chilling the dough slightly before baking creates a sturdier cup. So, if you’re in a hurry, just bake as is, but if you want that perfect form, let the dough chill for about 30 minutes in the fridge before forming your cookie cups.
And remember, if they don’t turn out as expected on your first try, don’t fret! Every kitchen adventure is a chance to learn. The best part is that even less-than-perfect cookie cups are still delicious!
FAQs and Troubleshooting
Q: Why aren’t my cookie cups holding their shape?
A: This can happen if the dough is too warm or if you didn’t press it firmly enough into the muffin tin. Try chilling the dough for 30 minutes before baking the next time!
Q: Can I use a different nut butter?
A: Absolutely! Almond butter and even sunflower seed butter can be great substitutes. Just make sure they’re of similar consistency to peanut butter for best results.
Q: How do I store leftover cookie cups?
A: Store them in an airtight container at room temperature for up to three days. If you want to keep them longer, refrigerate them—though I doubt they’ll last that long once you start eating them!
Q: Can I double the recipe?
A: For sure! This recipe is easy to scale up. Just remember to bake them in batches if your oven doesn’t fit more than one muffin tin!
Nutritional Info
(If applicable, feel free to add specific nutritional info based on the ingredients used, including calories, fat content, and other vitamins/minerals.)
So there you have it! A delicious and straightforward recipe for something that feels special, yet comes together in no time. I hope you enjoy making these 2-Ingredient Cookie Cups as much as I enjoyed sharing them with you. Remember, it’s not about culinary perfection but rather enjoying the process and the memories created along the way. Happy baking, and until next time—keep those aprons on and your hearts open to the joy of cooking!
Print2-Ingredient Cookie Cups

Easy and delicious cookie cups made with just two simple ingredients: natural peanut butter and brown sugar.
- Prep Time: 10 minutes
- Cook Time: 12 minutes
- Total Time: 22 minutes
- Yield: 12 servings 1x
- Category: Dessert
- Method: Baking
- Cuisine: American
- Diet: Gluten-Free
Ingredients
- 1 cup natural peanut butter
- 1 cup brown sugar
Instructions
- Preheat your oven to 350°F (175°C).
- Combine 1 cup natural peanut butter and 1 cup brown sugar in a mixing bowl.
- Form small balls of dough and press them into a greased muffin tin.
- Bake in the preheated oven for 10-12 minutes.
- Fill each cookie cup with your favorite treats once they have cooled slightly.
Notes
Chilling the dough before baking creates a sturdier cookie cup. Store leftovers in an airtight container at room temperature for up to three days.
Nutrition
- Serving Size: 1 cookie cup
- Calories: 200
- Sugar: 12g
- Sodium: 50mg
- Fat: 10g
- Saturated Fat: 2g
- Unsaturated Fat: 8g
- Trans Fat: 0g
- Carbohydrates: 20g
- Fiber: 1g
- Protein: 5g
- Cholesterol: 0mg
Keywords: cookie cups, two ingredient cookies, easy dessert, gluten-free treats, peanut butter cookies
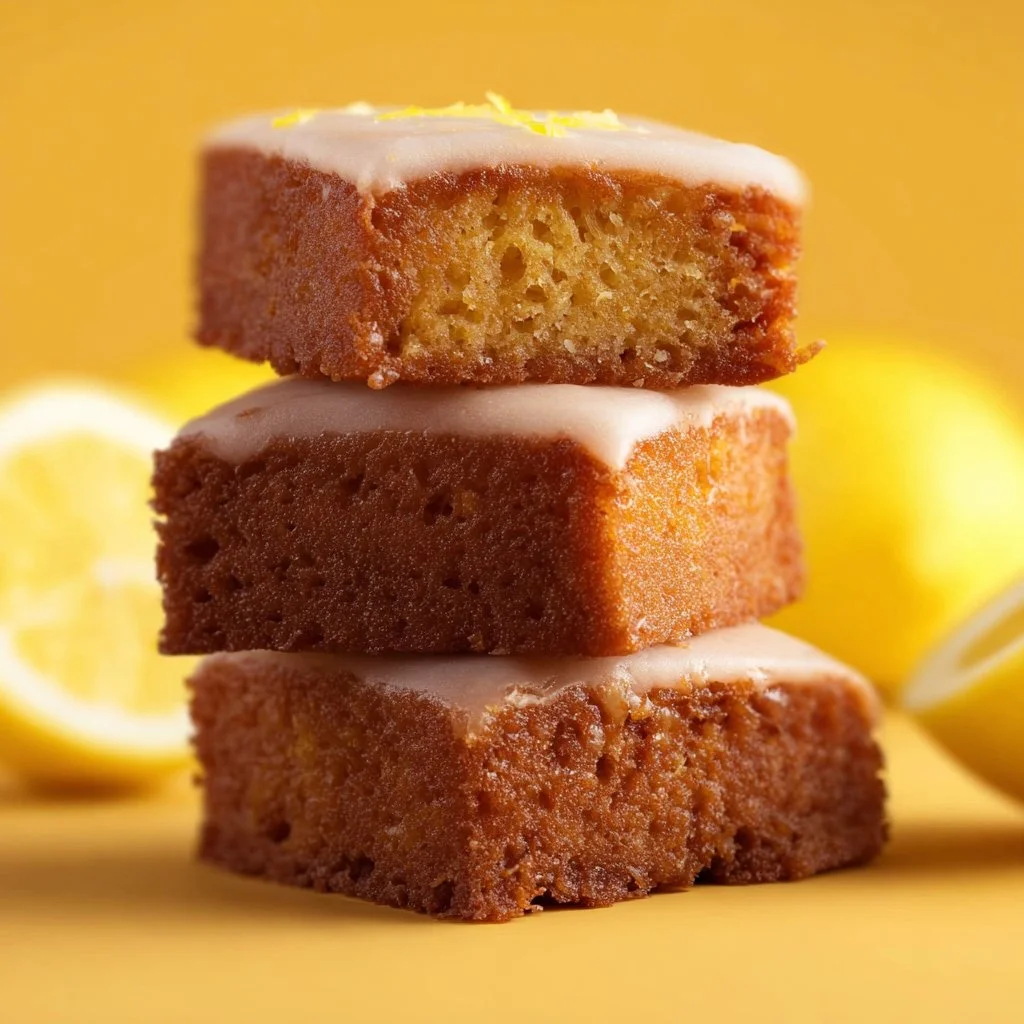
Lemon Brownies
# The Zesty Magic of Lemon Brownies: A Slice of Sunshine

Hello, my fellow food enthusiasts! Today, we’re diving into the delightful, sunshiny world of Lemon Brownies. If you’ve never tasted these treats, you’re in for a real treat. Picture this: a dense, fudgy brownie meets the bright, zesty goodness of fresh lemons. Yes, my friends, these are not your typical brownies. They are a refreshing twist that’ll make your taste buds dance and your friends beg for the recipe.

So, why lemon brownies, you ask? Well, there’s something about the tangy sweetness of lemons that lifts the spirits and brightens any gathering. Plus, they’re versatile enough to be enjoyed year-round, whether you’re hosting a summer picnic, celebrating a birthday, or simply indulging your sweet tooth on a quiet evening at home.

Let’s set the table for a delicious adventure that’s effortless yet elegant. Grab your apron, and let’s get this fusion of richness and citrus going!

## My Lemon Brownie Story

Every time I make lemon brownies, I’m transported back to a sun-drenched afternoon in my grandmother's kitchen. She was the queen of desserts, and her approach was always simple: use the freshest ingredients, add a dash of love, and sprinkle in some joy. It was one such afternoon that she introduced me to her secret lemon brownie recipe, which she had perfected over the years.

Sitting on a stool, watching her work magic in the kitchen, my hands would impatiently lick the remnants of the bowl. The blend of sugar, butter, and lemon zest filled the air with a sweet citrus aroma that made my heart sing. After what felt like an eternity, she pulled a golden batch from the oven, the tops lightly glistening like little sunbursts. We sat at her kitchen table, devouring them warm, the bright lemon flavor brightening up the whole meal.

That memorable experience instilled in me not just a love for lemon desserts but also a passion for sharing food with family and friends, a tradition I carry on today with each bite of these delicious lemon brownies. Let’s recreate that magic in our kitchens!

## Ingredients

Let’s gather our star ingredients for these Lemon Brownies:

- **1 cup unsalted butter, melted**: The base of any good brownie! Unsalted butter allows you to control the saltiness of the recipe. If you're in a pinch, you can substitute with coconut oil or margarine for a dairy-free version.

- **2 cups granulated sugar**: This core ingredient gives the brownies their sweetness. You could use coconut sugar or honey for a slightly different flavor profile, but keep in mind that you may need to adjust the quantity.

- **4 large eggs**: Eggs bring richness and help bind everything together. For a vegan alternative, you can replace each egg with a flax egg (1 tablespoon ground flaxseed mixed with 2.5 tablespoons water).

- **1 tablespoon vanilla extract**: Vanilla is the unsung hero in many desserts, adding depth and warmth. Feel free to experiment with almond extract for a unique spin!

- **2 cups all-purpose flour**: This provides the structure we want in our brownies. If gluten is a concern, a 1:1 gluten-free flour blend will work well here.

- **1 teaspoon baking powder**: This helps the brownies rise slightly, creating a light texture. If you run out, you can use baking soda, but reduce the quantity to 1/3 teaspoon.

- **1/2 teaspoon salt**: A touch of salt enhances sweetness. If using salted butter, you can skip this!

- **1/4 cup lemon juice**: Bright, tart, and essential for flavor. Use fresh lemon juice for the best results; bottled does not compare.

- **Zest of 2 lemons**: The zest is where much of the lemon flavor resides; it brings vibrancy. If you're in a bind, lime zest can also provide a pleasant twist!

#### For the glaze:
- **1 cup powdered sugar**: This gives the glaze its sweetness and smooth texture. You can substitute with maple powder for a different flavor.

- **2 tablespoons lemon juice**: The key to achieving that tangy glaze!

- **Zest of 1 lemon**: Extra lemon goodness that deepens the flavor.

## Step-by-Step Instructions

Now that we have our ingredients ready, let’s embark on our baking adventure.

1. **Preheat Your Oven**: Start by preheating your oven to 350°F (175°C). This is crucial—it ensures even baking. While your oven warms up, you can prepare your pan!

2. **Prepare Your Pan**: Grease a 9x13-inch baking dish with a touch of butter or line it with parchment paper for easy removal. This little step ensures your glorious brownies won’t stick around after baking!

3. **Mix the Wet Ingredients**: In a large mixing bowl, whisk together the melted unsalted butter and granulated sugar until combined. It should be shiny and smooth. This is where flavor starts blossoming! Add in the eggs, one at a time, stirring well after each addition. Then, stir in the vanilla extract.

4. **Add the Dry Ingredients**: In a separate bowl, whisk together the flour, baking powder, and salt. This step is essential to evenly distribute the baking powder, ensuring our brownies rise perfectly. Gradually fold the dry ingredients into the butter mixture, being careful not to overmix; otherwise, they could be tough.

5. **Incorporate the Lemon**: Fold in the fresh lemon juice and lemon zest until just combined. The batter will be creamy and slightly thick, which is just what we want! Take a moment to appreciate that beautiful citrus aroma swirling around you.

6. **Pour into the Pan**: Spread the batter evenly into your prepared baking dish and smooth the top with a spatula. You can tap the pan gently to remove any air bubbles.

7. **Bake**: Slide your pan into the preheated oven and let those babies bake for about 25–30 minutes. Keep an eye on them; you want the edges to be set while the center remains slightly gooey.

8. **Cool and Glaze**: Once baked, allow the brownies to cool in the pan for about 10 minutes before transferring them to a wire rack to cool completely. Meanwhile, whisk together the powdered sugar, lemon juice, and lemon zest for the glaze. Once cooled, drizzle it over your brownies like a beautiful sunny glaze.

9. **Slice and Serve**: Use a sharp knife to cut the brownies into squares or rectangles. Feel free to dust with a sprinkle of extra powdered sugar for that extra touch of refinement.

## Serving Suggestions

For serving, I love to arrange the brownies on a beautiful platter, garnished with fresh mint leaves or thin lemon slices for an extra pop of color. You can serve them warm with a scoop of vanilla ice cream on the side for a delightful contrast or enjoy them chilled as a refreshing treat on a hot day. The presentation can be simple yet elegant, and don’t forget to add a cheerful napkin to complete the experience!

## Recipe Variations

Want to switch things up a bit? Here are some delightful variations for your lemon brownies:

1. **Blueberry Lemon Brownies**: Toss in a cup of fresh blueberries for a burst of color and flavor.

2. **Coconut Lemon Brownies**: Add shredded coconut to the batter for a tropical twist.

3. **Lemon Poppy Seed Brownies**: Incorporate a tablespoon of poppy seeds for an interesting texture.

4. **Cream Cheese Swirl**: Add dollops of cream cheese frosting to the batter before baking and swirl it in for added richness.

5. **Gluten-Free Option**: Use a gluten-free flour blend to make these delightful brownies accessible for everyone!

## Chef’s Notes

These Lemon Brownies are a recipe near and dear to my heart that has evolved over the years. I played around with the ratios, finding the perfect balance of sweet and tart. Originally, I used a simpler approach, but after experimenting, I realized that the layers of flavor truly shine with the addition of zest and vanilla. Every time I tweak it, I’m reminded of that sunny afternoon in Grandma's kitchen, which adds an extra layer of joy to each batch I make. Also, just a little heads-up—don't forget to save some lemon zest for garnishing. It’s the finishing touch that transforms your dessert from good to show-stopping!

## FAQs and Troubleshooting

### 1. **Why are my lemon brownies too dense?**
If your brownies are coming out dense, it could be due to over-mixing the batter or the flour being packed too tightly. Be gentle when folding in your dry ingredients!

### 2. **How do I tell when they are done baking?**
You’re looking for a light golden color on top! Insert a toothpick into the center; if it comes out clean or with a few moist crumbs, they’re ready!

### 3. **Can I make these in advance?**
Absolutely! These brownies actually taste better the next day once they get a chance to set. Store them in an airtight container in the fridge to keep them fresh.

### 4. **What if I don’t have fresh lemons?**
While fresh lemons yield the best flavor, if you must, bottled lemon juice can work in a pinch, but the zest will be missed!

## Nutritional Info (Optional)

*(This section can be tailored as you see fit.)*

Warm lemon brownies, a delightful mix of sweet and tart goodness, deliver a dessert experience like no other. With comforting fudginess and vibrant lemon flavor, they evoke joy, nostalgia, and a sense of togetherness. So, gather your loved ones, tie on your apron, and prepare to indulge in a treat that’s as refreshing as a bright summer day.

Cheers to good food and great company!
Lemon Brownies

Delicious lemon brownies that blend rich brownie texture with zesty lemon flavor, perfect for any gathering.
- Prep Time: 15 minutes
- Cook Time: 30 minutes
- Total Time: 45 minutes
- Yield: 12 servings 1x
- Category: Dessert
- Method: Baking
- Cuisine: American
- Diet: Vegetarian
Ingredients
- 1 cup unsalted butter, melted
- 2 cups granulated sugar
- 4 large eggs
- 1 tablespoon vanilla extract
- 2 cups all-purpose flour
- 1 teaspoon baking powder
- 1/2 teaspoon salt
- 1/4 cup lemon juice
- Zest of 2 lemons
- 1 cup powdered sugar (for glaze)
- 2 tablespoons lemon juice (for glaze)
- Zest of 1 lemon (for glaze)
Instructions
- Preheat your oven to 350°F (175°C).
- Prepare a 9×13-inch baking dish by greasing it or lining with parchment paper.
- Mix the melted unsalted butter and granulated sugar until shiny and smooth. Add in the eggs one at a time, stirring well after each.
- Add the flour, baking powder, and salt in a separate bowl, then fold into the butter mixture without overmixing.
- Incorporate the lemon juice and zest until just combined.
- Pour the batter into the prepared pan and smooth the top.
- Bake for about 25–30 minutes until edges are set and the center is slightly gooey.
- Cool in the pan for 10 minutes before transferring to a wire rack to cool completely.
- Whisk together powdered sugar, lemon juice, and zest for the glaze, then drizzle over the cooled brownies.
- Slice into squares and serve.
Notes
Serve warm with ice cream, or enjoy chilled. Garnish with fresh mint or lemon slices for a pop of color.
Nutrition
- Serving Size: 1 brownie
- Calories: 200
- Sugar: 18g
- Sodium: 150mg
- Fat: 8g
- Saturated Fat: 5g
- Unsaturated Fat: 2g
- Trans Fat: 0g
- Carbohydrates: 27g
- Fiber: 0g
- Protein: 2g
- Cholesterol: 45mg
Keywords: lemon brownies, dessert, sweet treat, summer dessert, lemon recipes