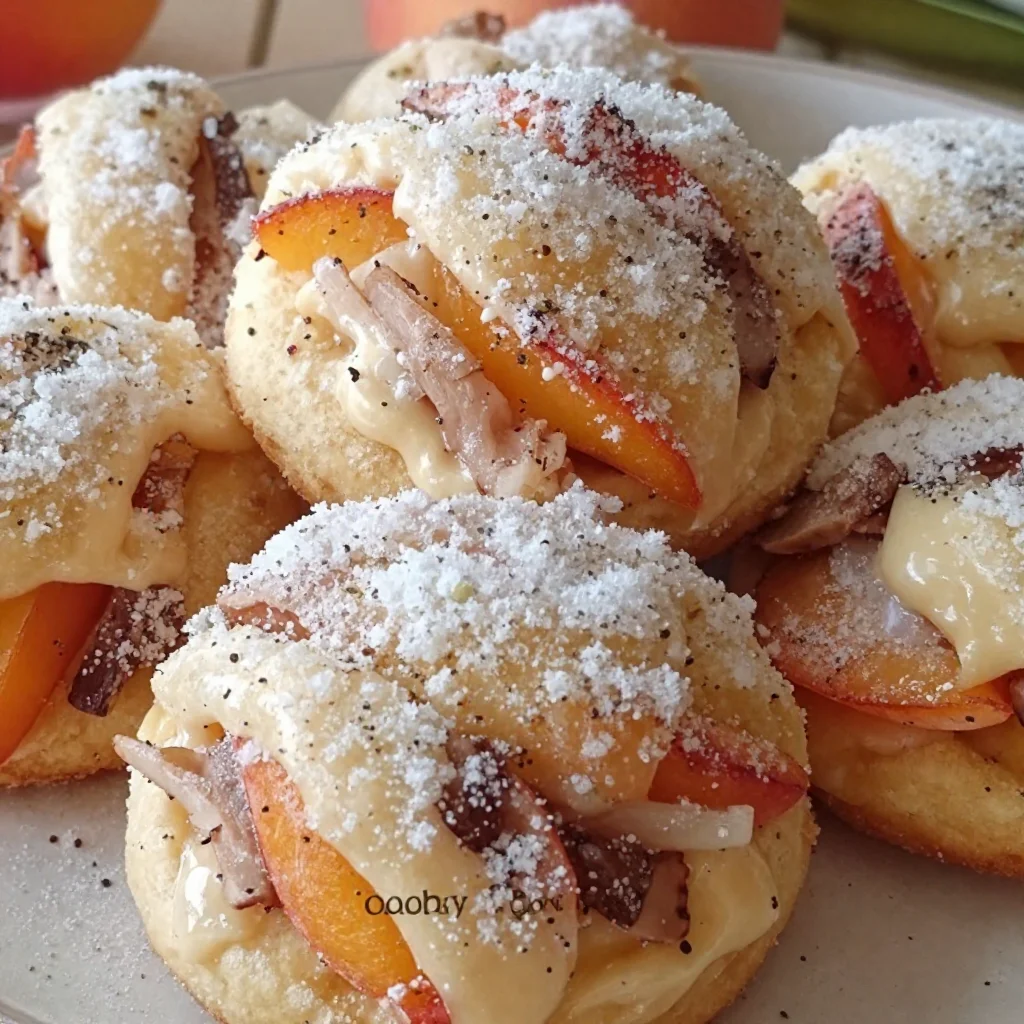
Ingredient Italian Peach Cookies (Pesche Dolci) for Summer
Sweet Summer Bites: Italian Peach Summer Cookies (Pesche Dolci)
Hello, lovely foodies! Today, we’re diving into a treat that’s as delightful as a summer afternoon — Italian Peach Summer Cookies, or Pesche Dolci. These cookies bring the essence of summer right to your kitchen, with their soft, pillowy texture and fruity filling. They’re like a warm embrace from the sun, and let me tell you, they are perfect for sharing with family and friends at any gathering.
Imagine this: the sun is shining, a gentle breeze is blowing, and you’re sitting on your porch with a plate of these delicious cookies accompanied by a refreshing drink. That’s the vibe I want to create for you with today’s recipe. So, let’s roll up our sleeves, tie on those aprons, and make something truly special together!
A Nostalgic Taste of Home
Growing up, my family had a little tradition during the summer. Each year, we’d pack our bags and head off to my grandparents’ home for a week filled with sunshine, laughter, and, of course, incredible food. My grandmother was a master pastry chef — she could whip up desserts that would make your heart sing. One of my fondest memories is standing beside her in the kitchen, flour dusting our noses as we crafted Pesche Dolci together. She’d always say, “Cooking is love made visible,” and as we baked, I could feel that love with each scoop of peach preserves and sprinkle of sugar.
I remember the joy of forming those little dough balls and filling them with sweet peach goodness! Each bite was a delicious reminder of those sun-kissed afternoons spent together. Now, I want to bring that joy to your kitchen, so you can create your own cherished memories around these delectable Italian cookies!
Ingredients
Here’s what you’ll need to make these delightful Pesche Dolci:
-
2 cups all-purpose flour
A staple in many kitchens! If you need a gluten-free option, try using a gluten-free flour blend, but keep in mind that the texture might differ slightly. -
1 cup sugar
Simple granulated sugar is all you need here. For a lower-calorie option, you can substitute with coconut sugar or a sugar substitute like erythritol. -
1/2 cup unsalted butter, softened
Butter brings richness to the cookies. If you’re dairy-free, use a non-dairy butter or coconut oil for a twist on the flavor. -
2 large eggs
Eggs add moisture and fat, helping the cookies rise. For vegan alternatives, you can use flax eggs (1 tablespoon ground flaxseed mixed with 2.5 tablespoons water per egg, let it sit for 5 minutes). -
1/2 cup milk
Whole milk is the go-to, but feel free to use almond milk or oat milk for a dairy-free version. -
2 teaspoons baking powder
This is our leavening agent, helping the cookies puff up beautifully! Make sure it’s fresh for the best results. -
1 teaspoon vanilla extract
Vanilla adds a lovely warmth to the cookies. You can also try almond extract for a nutty twist! -
1/4 teaspoon salt
Don’t skip the salt! It enhances sweetness and balances the flavors. -
1 cup peach preserves or filling
The star of our recipe! If you’re feeling adventurous, homemade peach preserves can elevate this dish even more. You can also use any other stone fruit preserves. -
Peach syrup (made from peach juice or brandy and sugar)
This sweet syrup adds a lovely drizzle for serving. You can make your own by simmering peach juice with a bit of sugar until thickened. -
Granulated sugar for rolling
For that signature sweet finish, this rolling sugar gives the cookies a delightful crunch.
Step-by-Step Instructions
Ready to make magic in the kitchen? Let’s get started!
Step 1: Preheat the Oven
Preheat your oven to 350°F (175°C). This is a crucial step — a well-heated oven ensures even baking. While it heats, line two baking sheets with parchment paper. This will help prevent sticking and make cleanup a breeze!
Step 2: Mix the Dry Ingredients
In a medium mixing bowl, whisk together the flour, baking powder, and salt. This helps aerate the flour, providing a lighter texture. Make sure there are no lumps in your flour for perfectly soft cookies!
Step 3: Cream the Butter and Sugar
In a large mixing bowl, beat the softened unsalted butter with sugar until it’s light and fluffy — about 3-5 minutes. This step is where the magic happens! Creaming the butter and sugar incorporates air, giving your cookies that delightful softness.
Step 4: Add the Eggs and Vanilla
Next, add the eggs one at a time, mixing well after each addition, followed by the vanilla extract. You want a smooth, creamy blend here. If you’re feeling a little adventurous, give the mixture a quick taste—just a tiny dab to make sure you’re on the right track!
Step 5: Combine Wet and Dry Ingredients
Gradually add the dry mixture to the buttery goodness, alternating with the milk. Start and end with the dry ingredients, mixing until just combined. Overmixing can lead to dense cookies, and we want them to be light and airy, so be gentle!
Step 6: Fill with Peach Preserves
Now comes the fun part! Using your hands (don’t be afraid to get a little messy!), scoop out a tablespoon of dough and flatten it slightly in your palm. Add a small spoonful of peach preserves in the center. Pinch the dough closed around the filling, rolling it into a ball. Place the dough balls onto the lined baking sheets, spacing them a few inches apart.
Step 7: Roll in Sugar
In a shallow dish, add some granulated sugar. Gently roll each cookie ball in the sugar, coating them evenly. This will create that beautiful crunchy exterior, perfectly contrasting with the soft interior.
Step 8: Bake to Perfection
Pop those trays into your preheated oven and bake for 15-18 minutes, or until the bottoms are lightly golden. The aroma of sweet peaches and vanilla will fill your kitchen during this time—get ready for the compliments!
Step 9: Drizzle with Peach Syrup
Once baked, remove the cookies from the oven and let them cool on a wire rack. Before serving, drizzle them with the peach syrup for that extra burst of flavor. It’s like a little summer in each bite!
Serving Suggestions
Plate your Pesche Dolci with a light dusting of powdered sugar on top for a charming finish. These cookies are perfect alongside a steaming cup of coffee or a refreshing iced tea. I also love to pair them with fresh summer fruits or a scoop of vanilla ice cream for an indulgent dessert!
Recipe Variations
- Peach Melba Twist: Add a swirl of raspberry preserves in with the peach filling for a gorgeous, colorful surprise!
- Nutty Delight: Incorporate finely chopped almonds or pistachios into the dough for an added crunch.
- Spiced Cookies: Add a pinch of cinnamon or nutmeg to the dough for a warm, comforting flavor.
- Lemon Zest: Stir in zest from a lemon into the cookie dough for a refreshing citrus twist.
- Vegan Swap: Use flax eggs and coconut oil for a delicious vegan version that still packs a flavorful punch!
Chef’s Notes
As with any recipe passed down through generations, I’ve made a few adjustments over time. My grandmother used to roll her cookies in almond flour instead of sugar, giving them a nutty flavor that I still adore! Whenever I make these cookies, I think of her, and how cooking brings us closer — even when we’re miles apart. So have fun with this recipe, and don’t be afraid to make it your own!
FAQs and Troubleshooting
Q: My cookies flattened out instead of puffing up! What went wrong?
A: This usually happens if the butter is too soft or if the dough was overmixed. Make sure your butter is softened but not melted, and mix just until combined.
Q: Can I store these cookies? How should I do it?
A: Absolutely! These cookies store well in an airtight container at room temperature for up to a week. You can also freeze them for later enjoyment. Just be sure to thaw them completely before serving.
Q: I can’t find peach preserves. Can I use fresh peaches instead?
A: Fresh peaches can be used, but they will require cooking down with sugar to create a preserves-like consistency. Simply simmer diced peaches with a little sugar until they break down into a chunky sauce.
Q: What’s the best way to ensure even baking?
A: Rotating your baking sheets halfway through baking helps, as does placing the sheets on the middle rack of your oven. Avoid overcrowding the baking sheets to allow proper air circulation.
Nutritional Info
Calories per cookie (approximate): 150
Total carbohydrates: 22g
Total fat: 6g
Protein: 2g
Note: Nutritional values may vary based on ingredients and portion sizes.
Now that you’re armed with this delightful Pesche Dolci recipe, it’s time to hit the kitchen and create something wonderful! Remember to embrace the mess, enjoy the process, and most importantly, savor every sweet bite. Happy baking, friends! 🍑✨
PrintItalian Peach Summer Cookies (Pesche Dolci)
Delightful Italian cookies filled with sweet peach preserves, perfect for summer gatherings.
- Prep Time: 20 minutes
- Cook Time: 18 minutes
- Total Time: 38 minutes
- Yield: 24 cookies 1x
- Category: Dessert
- Method: Baking
- Cuisine: Italian
- Diet: Vegetarian
Ingredients
- 2 cups all-purpose flour
- 1 cup sugar
- 1/2 cup unsalted butter, softened
- 2 large eggs
- 1/2 cup milk
- 2 teaspoons baking powder
- 1 teaspoon vanilla extract
- 1/4 teaspoon salt
- 1 cup peach preserves or filling
- Peach syrup (for drizzling)
- Granulated sugar for rolling
Instructions
- Preheat the oven to 350°F (175°C) and line two baking sheets with parchment paper.
- Mix the flour, baking powder, and salt in a medium mixing bowl.
- Cream the butter and sugar in a large mixing bowl until light and fluffy.
- Add the eggs one at a time, mixing well after each addition, followed by the vanilla extract.
- Combine the dry ingredients with the wet ingredients, alternating with the milk.
- Fill cookie dough balls with peach preserves by scooping a tablespoon of dough, flattening it, adding preserves, and rolling it into a ball.
- Roll each ball in sugar to coat.
- Bake for 15-18 minutes, or until the bottoms are lightly golden.
- Drizzle with peach syrup before serving.
Notes
These cookies can be stored in an airtight container for up to a week.
Nutrition
- Serving Size: 1 cookie
- Calories: 150
- Sugar: 9g
- Sodium: 120mg
- Fat: 6g
- Saturated Fat: 4g
- Unsaturated Fat: 2g
- Trans Fat: 0g
- Carbohydrates: 22g
- Fiber: 0g
- Protein: 2g
- Cholesterol: 30mg
Keywords: cookies, peach, summer dessert, Italian cookies, Pesche Dolci
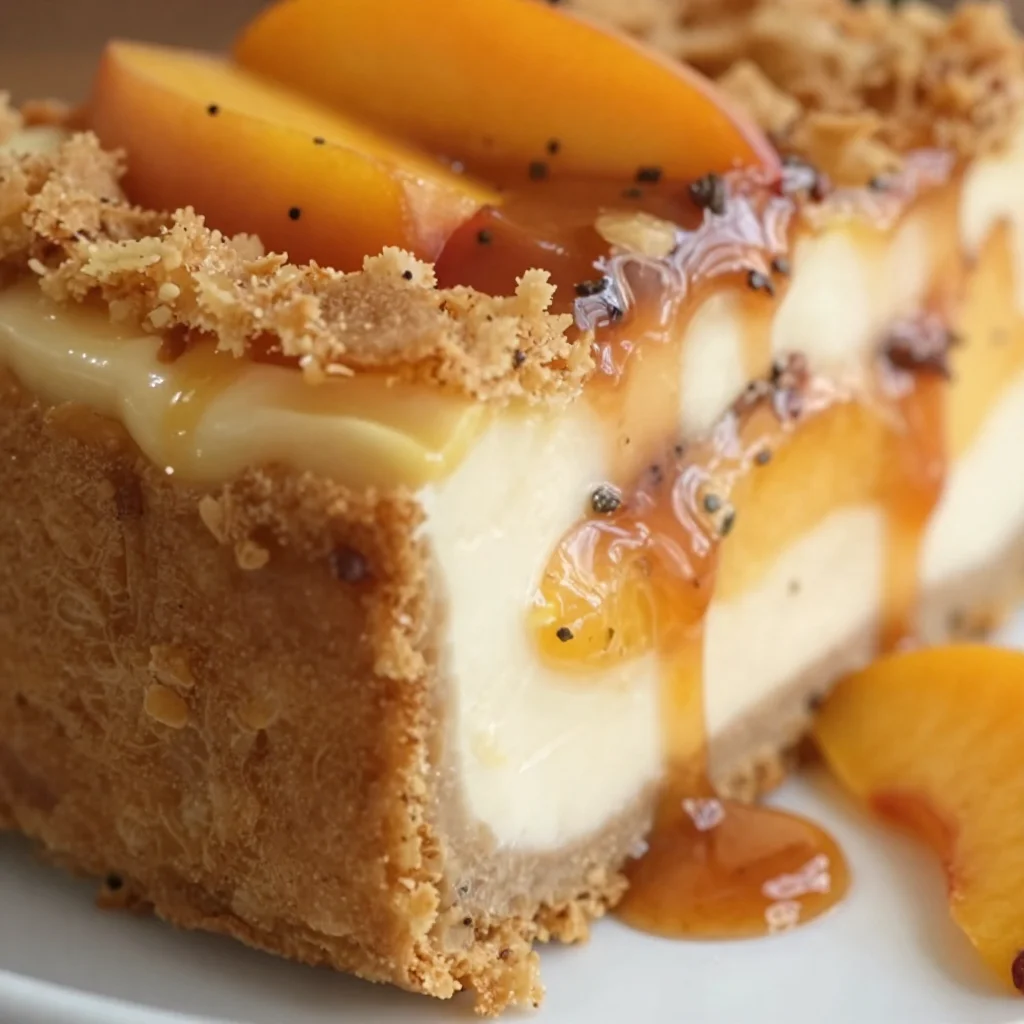
Ingredient Peach Cobbler Cheesecake
Sweet Harmony: Peach Cobbler Cheesecake Recipe
Hello, dear friends! Today, I’m excited to bring you a delightful fusion of two classic desserts: Peach Cobbler and Cheesecake. Yes, you heard that right! This Peach Cobbler Cheesecake combines the creamy decadence of cheesecake with the warm, comforting essence of summer peaches and that buttery, crumbly topping we all love. It’s like a dreamy hug on a plate, and let me tell you, it’s a showstopper that’ll impress your guests or make a quiet evening at home feel extra special.
A Slice of Nostalgia
Before we jump into this enticing recipe, I want to share a little story with you. Growing up, my family would gather every summer for a big peach-picking weekend. The smell of ripe peaches filled the air, and the sun-kissed fruits glistened like jewels on the trees. We would spend the day plucking peaches and brainstorming all the delicious things we could make with them.
One summer, my grandmother introduced me to her famous peach cobbler. I can still picture her in the kitchen, humming to her favorite tunes as she mixed and poured. She taught me that cooking is about love, creativity, and, most importantly, sharing. Her cobbler was always a hit, and the leftovers (if there were any!) would mysteriously vanish by morning. This recipe is a tribute to those cherished memories and the joy of sharing good food with loved ones.
Ingredients
Here’s what you’ll need to create this Peach Cobbler Cheesecake masterpiece:
-
1 ½ cups graham cracker crumbs
These provide the perfect buttery base and a subtle crunch. If you’re feeling adventurous, try using crushed vanilla wafers for a twist! -
½ cup unsalted butter, melted
This binds the crumbs together and gives the crust its delicious richness. Make sure it’s unsalted to control the overall saltiness of the dessert. -
2 cups cream cheese, softened
The star of our cheesecake! It creates that rich, creamy texture. If you’re looking for a lighter option, you can use Neufchâtel cheese (it’s lower in fat!). -
1 cup granulated sugar
This sweetens our cheesecake filling. If you’re trying to cut back on sugar, consider using a sweetener like monk fruit or a reduced-sugar alternative. -
1 teaspoon vanilla extract
For that warm, aromatic flavor that makes everything better! A splash of almond extract can also elevate the taste. -
3 large eggs
They add structure and help set the cheesecake. Want an egg-free version? You can substitute each egg with ¼ cup unsweetened applesauce. -
2 cups fresh peaches, sliced
Use ripe, juicy peaches for the best flavor. If peaches are out of season, frozen peaches work too—just make sure to thaw and drain them well first! -
½ cup brown sugar
This gives an extra caramel-like flavor to the peaches and enhances their sweetness. Don’t have brown sugar? A mix of white sugar and a bit of molasses can do the trick! -
1 teaspoon cinnamon
A warm spice that complements the peaches perfectly. Feel free to experiment with nutmeg or even pumpkin pie spice! -
1 tablespoon cornstarch
This helps thicken the peach mixture and gives it that delectable saucy quality. Arrowroot powder can be substituted if preferred. -
1 tablespoon lemon juice
A splash of acidity to balance the sweetness. Lime juice can be a nice alternative and adds a fun twist!
Step-by-Step Instructions
Alright, let’s get cooking! Follow these steps to create your Peach Cobbler Cheesecake.
-
Preheat Your Oven:
Begin by preheating your oven to 325°F (163°C). This allows the cheesecake to bake evenly, creating that perfectly creamy texture we all love. -
Prepare the Crust:
In a mixing bowl, combine the graham cracker crumbs and melted butter until the mixture resembles wet sand. Press this mixture firmly into the bottom of a 9-inch springform pan. Make sure it’s compact, as this will hold everything together. Plus, a little tip: you can use the bottom of a measuring cup to smooth it out perfectly! -
Bake the Crust:
Pop the crust into your preheated oven for about 8-10 minutes or until it’s lightly golden. This helps set the crust, ensuring it holds up against the creamy cheesecake filling. Let it cool while we work on the filling. -
Make the Filling:
In a mixing bowl, beat the softened cream cheese until smooth (about 2 minutes). Gradually add the granulated sugar and beat until combined. We want that mixture creamy and dreamy! Scrape down the sides of the bowl to catch any lumps—no one likes unexpected lumps in their cheesecake! -
Add Vanilla and Eggs:
Stir in the vanilla extract. Then, add the eggs, one at a time, beating on low speed after each addition until just combined. Be careful not to over-mix here; we want a light and fluffy texture, not an airy one. -
Prepare the Peach Layer:
In a small bowl, toss the sliced peaches with brown sugar, cinnamon, cornstarch, and lemon juice. Let them sit for about 10 minutes until they’re nice and juicy. The natural flavors will meld beautifully, creating an incredible topping for our cheesecake. -
Layer It Up:
Pour half of the cheesecake mixture over the cooled crust, then carefully layer half of the peach mixture on top. Follow with the remaining cheesecake filling and sprinkle the rest of the peaches on top. Don’t worry about perfection; this is all part of the charm! -
Bake the Cheesecake:
Bake in the oven for about 60-70 minutes until the edges are set, but the center still slightly jiggles (it will set more as it cools). Here’s a little chef hack: to prevent cracking, you can place a shallow pan of water in the oven alongside the cheesecake. It creates steam and keeps your cheesecake from drying out. -
Cool and Chill:
Once it’s done, turn off the oven and leave the cheesecake inside for an additional hour, cracking the door slightly. This allows it to cool gradually, reducing the chances of cracks. After an hour, let it cool fully before transferring it to the refrigerator to chill for at least 4 hours (or overnight if you can handle the wait!).
Serving Suggestions
When it’s finally time to serve your Peach Cobbler Cheesecake, carefully run a knife around the edge of the springform pan before releasing the sides. You can serve it plain, or dress it up with a dollop of whipped cream or a scoop of vanilla ice cream on the side—you can never go wrong with that classic combination!
Recipe Variations
- Add Crunch: Mix in some chopped pecans or walnuts to the peach layer for added texture.
- Flavor Substitutions: Try using blueberries or raspberries instead of peaches for a berry cobbler cheesecake surprise.
- Healthy Twist: Swap out the graham crackers for almond flour or oat flour to make a gluten-free crust without sacrificing flavor.
- Celebrate Fall: Feel free to mix in some pumpkin puree into the cheesecake batter for a seasonal variation!
- Dairy-Free Delight: Use cashew cream and a dairy-free butter substitute to make a vegan version without sacrificing creaminess.
Chef’s Notes
This recipe has evolved from my traditional peach cobbler. Initially, I had a simple, straightforward way of making it, but over the years it morphed into a creamy cheesecake that carries that nostalgic flavor of my grandma’s cobbler. I’m constantly amazed at how the simplest of ingredients can turn into something so exquisite. I still remember one time making it for a picnic—by the time we reached our destination, the cheesecake was gone! Everyone raved about it, wanting the recipe immediately. I couldn’t help but smile, knowing it brought a little joy to their day!
FAQs and Troubleshooting
Q: Why does my cheesecake have cracks on the surface?
A: Cracking can happen due to overmixing the batter or baking it at too high of a temperature. Always mix on low speed and try to bake it in a water bath for extra moisture.
Q: How do I know my cheesecake is done?
A: The edges should be set, but the center will still have a slight jiggle when you gently shake the pan. It will firm up more as it cools.
Q: Can I freeze my Peach Cobbler Cheesecake?
A: Absolutely! To freeze, cover the cooled cheesecake tightly with plastic wrap and then again with aluminum foil. It can be frozen for up to 2 months. Just thaw in the fridge overnight before serving.
Q: What if I don’t have fresh peaches?
A: No worries! Frozen peaches work perfectly. Just be sure to thaw and drain any excess liquid to avoid a soggy cheesecake.
Conclusion
And there you have it, my dear friends! A beautiful Peach Cobbler Cheesecake that’s sure to become a treasured recipe in your collection. Not only does it blend two beloved desserts into one, but it also carries with it a personal story—a reminder of the joy that comes from gathering around the table and sharing moments with those we love.
So, gather your favorite people, tie on your apron, and get ready to create something incredible. And remember, as you whip up this delightful dessert, it’s not just about the ingredients; it’s about the love and intention you put into it. Enjoy every bite, and happy cooking!
PrintPeach Cobbler Cheesecake
A delightful fusion of creamy cheesecake and warm, comforting peach cobbler, perfect for impressing guests or enjoying at home.
- Prep Time: 20 minutes
- Cook Time: 70 minutes
- Total Time: 90 minutes
- Yield: 8 servings 1x
- Category: Dessert
- Method: Baking
- Cuisine: American
- Diet: Vegetarian
Ingredients
- 1 ½ cups graham cracker crumbs
- ½ cup unsalted butter, melted
- 2 cups cream cheese, softened
- 1 cup granulated sugar
- 1 teaspoon vanilla extract
- 3 large eggs
- 2 cups fresh peaches, sliced
- ½ cup brown sugar
- 1 teaspoon cinnamon
- 1 tablespoon cornstarch
- 1 tablespoon lemon juice
Instructions
- Preheat your oven to 325°F (163°C).
- Combine the graham cracker crumbs and melted butter until the mixture resembles wet sand. Press into the bottom of a 9-inch springform pan.
- Bake the crust for about 8-10 minutes until lightly golden. Let it cool.
- Beat the softened cream cheese until smooth, then gradually add the granulated sugar and mix.
- Stir in the vanilla extract and add the eggs one at a time, mixing on low speed until just combined.
- Toss the sliced peaches with brown sugar, cinnamon, cornstarch, and lemon juice, then let sit for about 10 minutes.
- Pour half of the cheesecake mixture over the cooled crust, layer half of the peach mixture on top, then add the remaining cheesecake filling and the rest of the peaches.
- Bake in the oven for about 60-70 minutes until the edges are set but the center still jiggles.
- Cool the cheesecake inside the oven for an hour with the door slightly cracked, then refrigerate for at least 4 hours.
Notes
Serve plain or with whipped cream or vanilla ice cream. You can also mix in nuts for added texture or swap fruits for variations.
Nutrition
- Serving Size: 1 slice
- Calories: 400
- Sugar: 25g
- Sodium: 300mg
- Fat: 25g
- Saturated Fat: 15g
- Unsaturated Fat: 5g
- Trans Fat: 0g
- Carbohydrates: 45g
- Fiber: 2g
- Protein: 6g
- Cholesterol: 90mg
Keywords: peach cobbler, cheesecake, dessert, summer dessert, fruity cheesecake
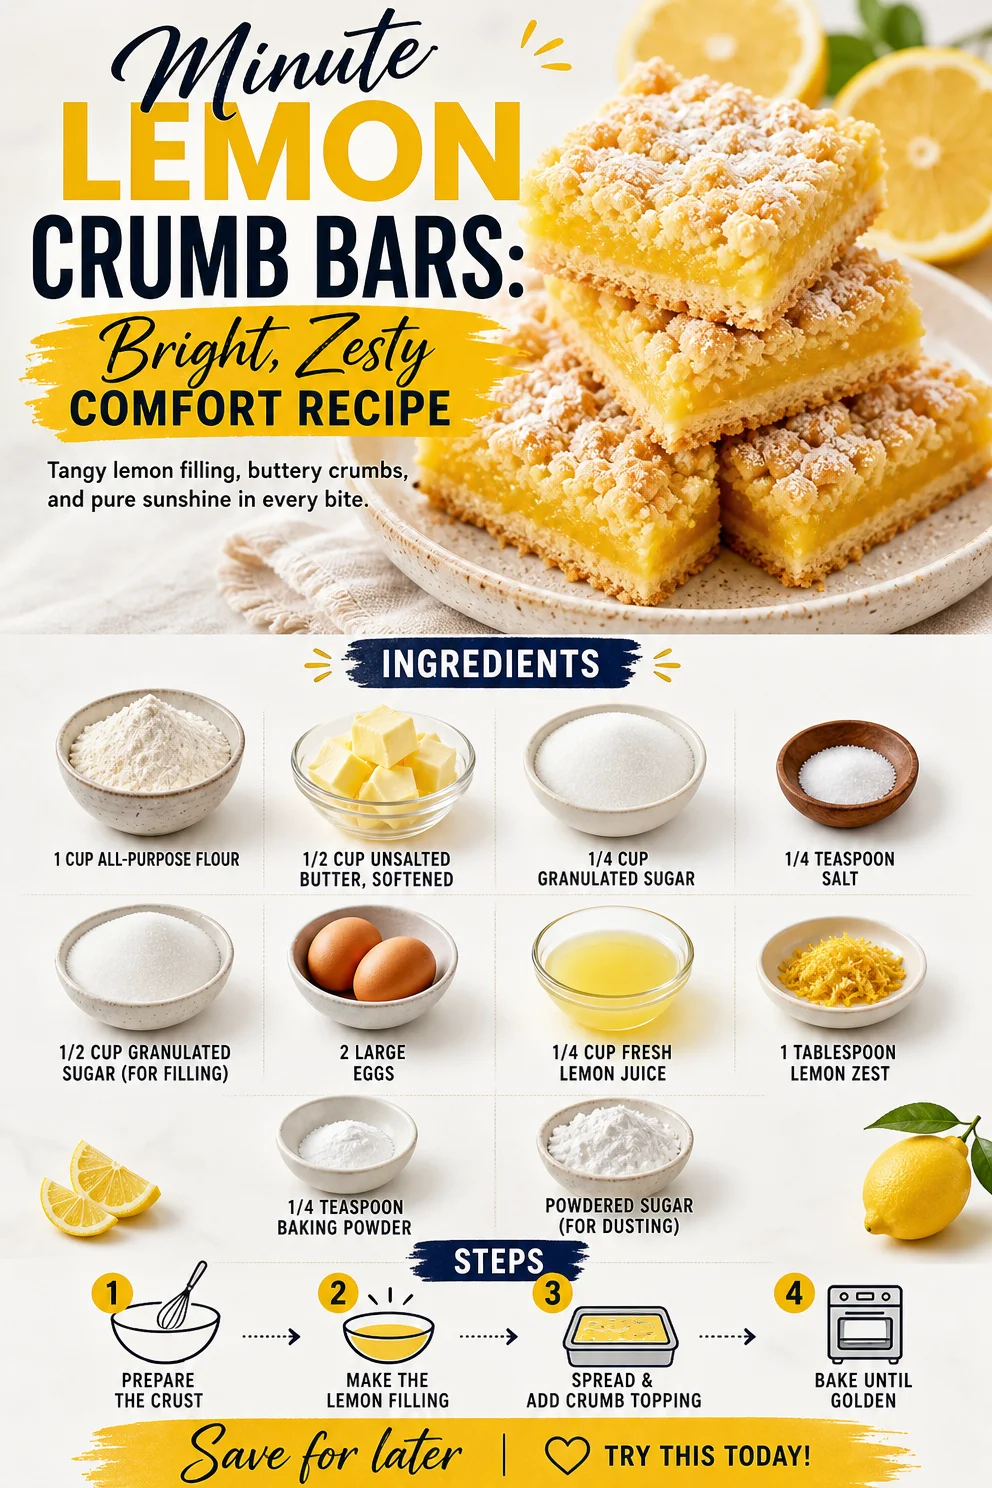
Minute Lemon Crumb Bars: Bright, Zesty Comfort Recipe
Easy Lemon Crumb Bars: A Slice of Sunshine
Hello, my fellow food enthusiasts! If there’s one thing I love more than whipping up delicious meals, it’s sharing the joy that food can bring. Today, we’re diving into a treat that’s as refreshing as a summer breeze—Lemon Crumb Bars. These bars are a delightful blend of tangy lemon filling and buttery crumb crust, perfect for brightening up your day or impressing your guests at your next gathering.
Lemon Crumb Bars hold a special place in my heart. I remember the first time I baked them for a friends’ brunch. The sun was shining, and I had just switched to a new recipe I found in an old cookbook. As I sprinkled the powdered sugar on top, I felt like a culinary artist crafting a masterpiece. When my friends took their first bite, I’ll never forget their reactions—eyes lighting up, smiles spreading wide, and a chorus of “Wow, these are amazing!” filling the kitchen. It was pure joy to see how a simple dessert could spark happiness. That laughter and those satisfied faces inspired me to keep perfecting this recipe, making it a staple for my gatherings and a shining star in my recipe collection.
Now, let’s jump right into the recipe. Grab your apron and your favorite mixing bowl, and let’s create something delicious together!
Ingredients
To make these delicious Lemon Crumb Bars, you’ll need:
-
1 cup all-purpose flour
- The backbone of the crumb crust! You can swap it with whole wheat flour for a nuttier flavor or gluten-free flour if you’re avoiding gluten. Just make sure to adjust the liquid slightly as gluten-free flour can absorb more moisture.
-
1/2 cup unsalted butter, softened
- Butter adds richness to your bars. If you’re in a pinch, coconut oil can be a suitable substitute for a dairy-free version, giving it a slight tropical twist!
-
1/4 cup granulated sugar
- This sweetens the crumb crust. If you prefer, you can use brown sugar for a slight caramel flavor.
-
1/4 teaspoon salt
- Always remember to balance your flavors! A touch of salt elevates sweetness and enhances the natural flavor of the lemon.
-
1/2 cup granulated sugar (for filling)
- This is all about that sweet-tangy filling! Adjust this to taste if you want a more tart experience.
-
2 large eggs
- Eggs help bind the filling and create a fluffy texture. For a vegan option, you can use flax eggs (1 tablespoon ground flaxseed mixed with 2.5 tablespoons water for each egg).
-
1/4 cup fresh lemon juice
- Fresh is best! It gives you that vibrant lemon flavor. Bottled lemon juice will work in a pinch, but fresh lemon juice is really where the magic happens.
-
1 tablespoon lemon zest
- This is where you capture the energy of lemons! Zest adds an extra layer of citrus goodness. Always zest before juicing your lemons.
-
1/4 teaspoon baking powder
- A little boost for the filling to ensure it doesn’t sit too dense—a fluffy, tender cake is the goal.
-
Powdered sugar (for dusting)
- A final touch! It makes everything look so pretty and finishes off your bars perfectly.
Step-by-Step Instructions
Now that we have our ingredients ready, it’s time to get those hands moving!
-
Preheat Your Oven: Start by preheating your oven to 350°F (175°C). This ensures that your bars bake evenly and gives you that wonderfully warm, inviting atmosphere while you cook!
-
Make the Crust: In a mixing bowl, combine 1 cup of all-purpose flour, 1/4 cup of granulated sugar, and a pinch of salt. Mix these dry ingredients together. Take your softened butter and cut it into the flour mixture. You want a crumbly texture—almost like wet sand. A quick tip: use a pastry cutter or your fingers for the best results.
-
Press and Bake: Take your crumbly mixture and press it evenly into the bottom of an 8×8-inch baking dish. Make sure to compact it well; nobody wants a crust that falls apart! Bake this in your preheated oven for about 15 minutes, until it’s lightly golden. While it’s baking, you can prepare your filling.
-
Prepare the Filling: In another bowl, whisk together the eggs and the remaining granulated sugar (1/2 cup). Add the fresh lemon juice, zest, and baking powder. Make sure everything is well combined! The mixture should be a lovely, sunny yellow.
-
Pour and Bake Again: Once your crust is out of the oven, pour the lemon filling over it while it’s still hot. Back into the oven it goes for another 20-25 minutes. You’ll know it’s done when the filling is set but slightly jiggly in the center (it will firm up as it cools).
-
Cool and Dust: Let the bars cool in the pan on a wire rack. Once cooled completely, dust with powdered sugar. For an elegant presentation, use a fine sieve—this will give you that dreamy frosting-like look.
Serving Suggestions
Cut your Lemon Crumb Bars into squares and serve them on a lovely platter. You can add a slice of lemon or a sprig of mint on top of each piece for a little color. Cozy up with some herbal tea or a refreshing lemonade, and you have the perfect afternoon treat!
Recipe Variations
-
Berry Lemon Bars: Add in fresh blueberries or raspberries to the filling for a fruity twist. They add a lovely color and flavor contrast!
-
Coconut Lemon Bars: Mix shredded coconut into the crumb crust for added texture and a hint of tropical flair.
-
Herbal Infusion: Infuse your lemon juice with fresh herbs like thyme or basil for an unexpected and delightful flavor pairing.
-
Chia Seed Switch: If you’re looking for a healthier option, consider adding chia seeds to your filling for a nutritious kick!
-
Spicy Kick: Incorporate a pinch of cayenne pepper or chili powder into the crust for an intriguing spicy undertone that complements the tart sweetness.
Chef’s Notes
I have to laugh sometimes at how these bars have evolved in my kitchen! I remember the first time I accidentally added too much lemon juice, thinking “more is better.” While the result was outrageous and sour (let’s just say I learned a valuable lesson!), it sparked a new exploration in flavor. Now, I have a perfect balance where every bite celebrates both the tartness and the sweetness of lemon. So, don’t be afraid to experiment! After all, cooking is all about finding what inspires you.
FAQs and Troubleshooting
1. My filling was too runny; what went wrong?
- If your filling didn’t set, it’s usually because it needed a bit more time in the oven. Remember, the filling will continue to firm up as it cools.
2. Can I make these bars dairy-free?
- Absolutely! Just substitute the butter with coconut oil or a dairy-free margarine.
3. How should I store my Lemon Crumb Bars?
- Store them in an airtight container in the fridge for up to a week. They can also be frozen for up to three months—just thaw them in the fridge overnight before serving.
4. What can I do if there’s a lemony aftertaste?
- This can sometimes happen if the lemon juice is overly concentrated. Make sure to balance your sugar with the acidity of the lemon and start with the recommended amount.
Nutritional Info (per serving)
- Calories: 180
- Total Fat: 7g
- Saturated Fat: 4g
- Cholesterol: 50mg
- Sodium: 60mg
- Total Carbohydrates: 27g
- Dietary Fiber: 1g
- Sugars: 12g
- Protein: 2g
Now that you have a delicious recipe for Lemon Crumb Bars, it’s time to brighten your day or impress your guests! Baking should be fun, so get creative, follow your instincts, and enjoy every moment in the kitchen. We’re not just making food; we’re creating memories. So tie on that apron and get baking—joy is just a slice away!
PrintEasy Lemon Crumb Bars

A refreshing treat made with tangy lemon filling and buttery crumb crust, perfect for gatherings.
- Prep Time: 10 minutes
- Cook Time: 35 minutes
- Total Time: 45 minutes
- Yield: 16 servings 1x
- Category: Dessert
- Method: Baking
- Cuisine: American
- Diet: Vegetarian
Ingredients
- 1 cup all-purpose flour
- 1/2 cup unsalted butter, softened
- 1/4 cup granulated sugar
- 1/4 teaspoon salt
- 1/2 cup granulated sugar (for filling)
- 2 large eggs
- 1/4 cup fresh lemon juice
- 1 tablespoon lemon zest
- 1/4 teaspoon baking powder
- Powdered sugar (for dusting)
Instructions
- Preheat your oven to 350°F (175°C).
- Mix the flour, 1/4 cup of sugar, and pinches of salt in a bowl.
- Cut the softened butter into the flour mixture until crumbly.
- Press the crumbly mixture into an 8×8-inch baking dish.
- Bake for 15 minutes until lightly golden.
- Whisk together the eggs and 1/2 cup of sugar in another bowl.
- Add the lemon juice, zest, and baking powder, and mix well.
- Pour the filling over the crust while still hot.
- Bake again for 20-25 minutes until set but slightly jiggly in the center.
- Cool in the pan on a wire rack, then dust with powdered sugar.
Notes
For a dairy-free version, substitute butter with coconut oil. Store bars in an airtight container in the fridge for up to a week.
Nutrition
- Serving Size: 1 square
- Calories: 180
- Sugar: 12g
- Sodium: 60mg
- Fat: 7g
- Saturated Fat: 4g
- Unsaturated Fat: 2g
- Trans Fat: 0g
- Carbohydrates: 27g
- Fiber: 1g
- Protein: 2g
- Cholesterol: 50mg
Keywords: lemon bars, dessert, easy recipe, summer treat, baking
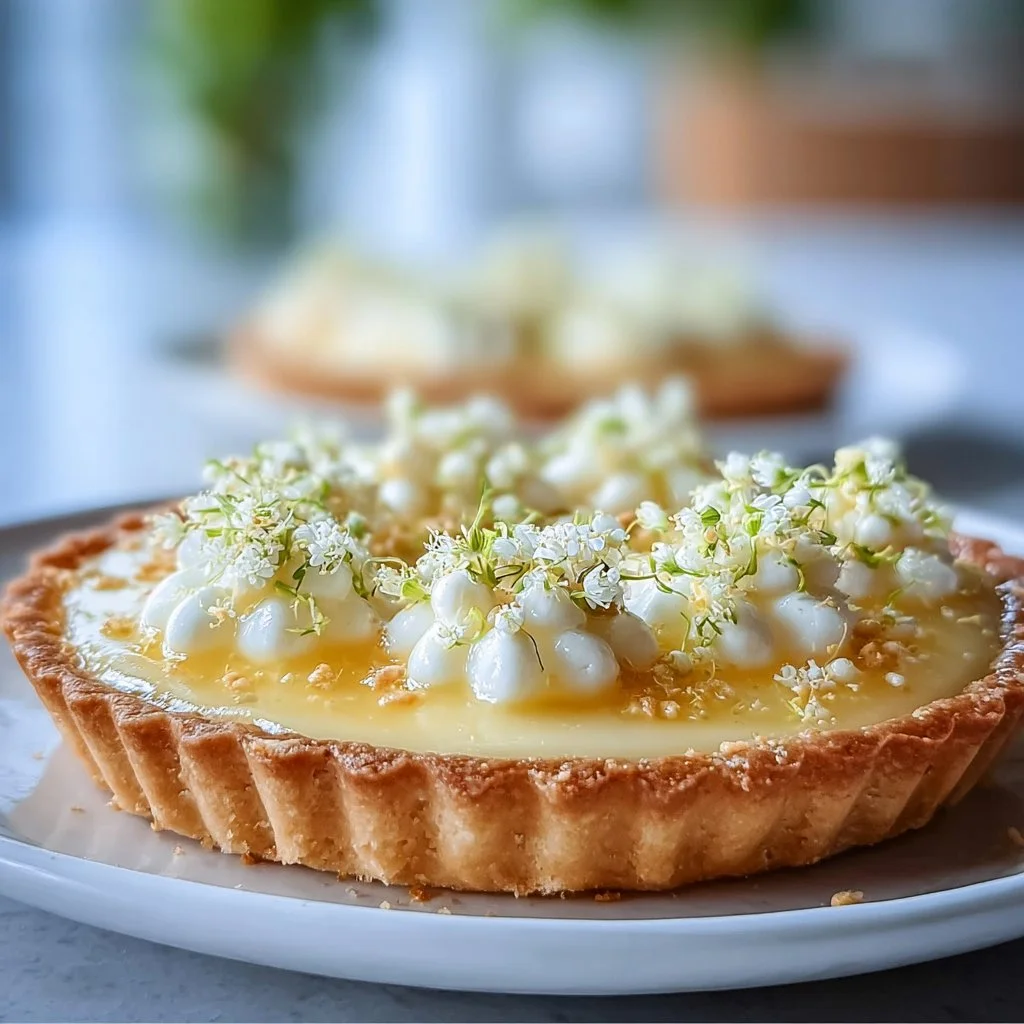
Elderflower Tart
A Taste of Elegance: Creating Your Own Delightful Elderflower Tart
Hello, friends! Today, I’m excited to share a recipe that embodies elegance and simplicity: the Elderflower Tart. This delightful dessert is a perfect showcase of fresh flavors, with a refreshing twist brought by the delicate notes of elderflower. Whether you’re planning a stylish dinner party or just looking to impress your family on a regular Tuesday night, this tart will undoubtedly steal the spotlight at your table.
A Slice of Nostalgia
I’ll never forget the first time I tasted an elderflower-infused dessert. I was at a quaint little café tucked away in the English countryside during college. It was one of those serene afternoons where the sun danced through the leaves, and everything felt just right. I ordered a slice of elderflower tart—not quite knowing what to expect—and with the first bite, I was transported. The creamy lemon curd blended effortlessly with the sweet floral essence of elderflower, creating a taste sensation that was both comforting and refreshing.
I remember savoring that tart while chatting with friends about dreams, life decisions, and where we’d go after graduation. It was an inspiring moment—one that ignited my passion for creating desserts that not only taste incredible but also evoke fond memories. Now, that same excitement fills my kitchen every time I make this elderflower tart.
Ingredients
Let’s gather our ingredients! Here’s what you’ll need to create this stunning tart:
-
1 cup all-purpose flour: The foundation of your tart crust. You can substitute with a gluten-free flour blend if needed, just remember to add a pinch of xanthan gum to help with structure.
-
1/2 cup unsalted butter, cold and cubed: Chilled butter makes for a flaky crust. If you’re lactose intolerant, feel free to use a dairy-free butter substitute.
-
1/4 cup powdered sugar: This sweetener helps create a tender, melt-in-your-mouth crust. If you’re out of powdered sugar, you can blend granulated sugar in a food processor until fine.
-
1/4 teaspoon salt: Enhances the flavors in your crust. A pinch of sea salt works wonders too if you prefer!
-
2-3 tablespoons cold water: This is key for bringing your dough together. If your kitchen is especially warm, add more water as needed to achieve a workable dough.
-
1 cup lemon curd: The zingy, creamy filling that pairs beautifully with elderflower. Store-bought works just fine, but nothing beats homemade if you have the time!
-
1/2 cup elderflower syrup: This sweet elixir embodies the flowery notes that make this tart stand out. If you can’t find elderflower syrup, a splash of lavender syrup is a fantastic alternative.
-
Fresh berries for garnish (optional): They add color and a burst of freshness. Choose your favorites—blueberries, raspberries, or strawberries all complement the tart beautifully.
Step-by-Step Instructions
Now that we’ve rounded up our ingredients, it’s time to get cooking! Follow these step-by-step instructions for creating your own beautiful elderflower tart:
-
Make the Tart Crust: In a mixing bowl, combine the all-purpose flour, powdered sugar, and salt. Whisk them together to combine. Next, add in the cold, cubed butter. Using a pastry cutter or your fingertips, work the butter into the flour mixture until it resembles coarse crumbs (think peas!).
Chef’s Tip: Keep the butter as cold as possible. If your kitchen is warm, pop the bowl in the refrigerator for a few minutes to chill.
-
Bring it Together: Gradually add the cold water, one tablespoon at a time, mixing with a fork until the dough just comes together. Avoid overworking it! Once formed, shape the dough into a disc, wrap it in plastic wrap, and chill in the fridge for at least 30 minutes.
-
Roll out the Dough: After chilling, remove the dough and place it on a lightly floured surface. Roll it out to about 1/8-inch thickness. Don’t worry if it cracks a little; just patch it up as you fit it into your tart pan.
Chef’s Hack: To get it into your tart pan easily, roll the dough around your rolling pin and then unroll it over the pan!
-
Form the Crust: Gently press the dough into the corners of the tart pan, trimming any excess hanging over the edges. Prick the bottom of the crust with a fork to prevent it from puffing up during baking.
-
Blind Bake: Place a layer of parchment paper on top of the crust, fill it with pie weights or dried beans, and bake in a preheated oven at 375°F (190°C) for about 15-20 minutes. Remove the parchment and weights, and bake for an additional 5-10 minutes, until the crust is golden brown.
Chef’s Insight: Letting the crust cool completely will ensure that the filling doesn’t make it soggy.
-
Prepare the Filling: While the crust is cooling, mix the lemon curd and elderflower syrup in a bowl until well combined. If you’re using homemade lemon curd, this is where you’ll taste it and adjust the sweetness if needed!
-
Fill the Tart: Pour the elderflower-lemon mixture into the cooled crust, spreading it out evenly.
-
Chill and Set: Refrigerate the tart for at least 2 hours, allowing it to set properly.
-
Garnish Thoughtfully: When ready to serve, top with fresh berries for that pop of color and freshness.
Serving Suggestions
When it comes to plating your elderflower tart, remember that presentation is key. For a simple yet stunning display, slice your tart into wedges and arrange them on a beautiful cake stand. Garnish each slice with a few fresh berries and a sprig of mint for an added touch of elegance. If you want to elevate the experience, a dusting of powdered sugar or a dollop of whipped cream on the side is a lovely addition!
Recipe Variations
Feeling adventurous? Here are some creative twists you can try with your elderflower tart:
-
Berry Blast: Add a layer of mixed berry compote on top of the lemon curd before chilling for a fruity surprise.
-
Almond Shortbread Crust: Substitute half of the all-purpose flour with finely ground almonds for a nutty flavor.
-
Lemon-Lavender Fusion: Infuse a hint of lavender into the lemon curd for a floral pop alongside the elderflower.
-
Tartlets: Instead of a whole tart, adapt the recipe into mini tartlets for cute individual servings.
-
Vegan Twist: Use a plant-based butter and aquafaba (chickpea brine) for the lemon curd to create a vegan version.
Chef’s Notes
Every recipe holds a little bit of personal magic! The first time I made this elderflower tart for a gathering, I was nervous. Would everyone like it? I watched as my friends took their first bites, and the room filled with delighted smiles and “Mmm”s. It made me realize how food opens the door to connection and joy!
Since then, I’ve experimented with different flavor pairings. You could say this tart is a reflection of my culinary journey—always evolving, always warm, inviting, and ready to make people smile around the table.
FAQs and Troubleshooting
1. Why did my tart crust shrink during baking?
- This happens if the dough was overworked or not chilled enough. Make sure to chill the dough well before baking and avoid handling it too much.
2. Can I make this tart ahead of time?
- Absolutely! This tart keeps beautifully in the fridge for up to three days, making it perfect for parties!
3. What should I do if my lemon curd is too runny?
- If your lemon curd is too liquid, you can cook it a bit longer over low heat to thicken it up. Just be careful not to scorch it!
4. How do I store leftovers?
- Store any leftover tart in an airtight container in the refrigerator for up to three days. Avoid stacking anything on top to keep it intact!
Nutritional Info
Per serving (1 slice, based on 10 slices total):
- Calories: Approx. 210
- Total Fat: 10g
- Saturated Fat: 6g
- Carbohydrates: 30g
- Fiber: 1g
- Sugar: 8g
- Protein: 2g
Ready to tie on your apron and create something beautiful? I can’t wait for you to try this elderflower tart. It’s not just dessert; it’s an invitation to slow down, savor, and create joyful memories around your table. Happy baking!
PrintElderflower Tart
A delightful elderflower tart featuring a creamy lemon curd filling and a flaky crust, perfect for impressing guests or enjoying on a quiet evening.
- Prep Time: 30 minutes
- Cook Time: 30 minutes
- Total Time: 2 hours
- Yield: 10 servings 1x
- Category: Dessert
- Method: Baking
- Cuisine: British
- Diet: Vegetarian
Ingredients
- 1 cup all-purpose flour
- 1/2 cup unsalted butter, cold and cubed
- 1/4 cup powdered sugar
- 1/4 teaspoon salt
- 2–3 tablespoons cold water
- 1 cup lemon curd
- 1/2 cup elderflower syrup
- Fresh berries for garnish (optional)
Instructions
- Make the Tart Crust: In a mixing bowl, combine the all-purpose flour, powdered sugar, and salt. Whisk them together to combine. Add in the cold, cubed butter and work it into the flour mixture until it resembles coarse crumbs.
- Bring it Together: Gradually add the cold water, one tablespoon at a time, mixing with a fork until the dough just comes together. Shape into a disc, wrap in plastic wrap, and chill in the fridge for at least 30 minutes.
- Roll out the Dough: On a lightly floured surface, roll the dough out to about 1/8-inch thickness and fit it into your tart pan.
- Form the Crust: Press the dough into the corners of the tart pan, and prick the bottom with a fork.
- Blind Bake: Place parchment paper over the crust, fill with pie weights, and bake at 375°F (190°C) for 15-20 minutes. Remove weights and bake for another 5-10 minutes until golden brown.
- Prepare the Filling: Mix the lemon curd and elderflower syrup in a bowl until well combined.
- Fill the Tart: Pour the mixture into the cooled crust.
- Chill and Set: Refrigerate the tart for at least 2 hours.
- Garnish Thoughtfully: Top with fresh berries before serving.
Notes
For variations, consider adding mixed berry compote, using almond flour for the crust, or creating mini tartlets.
Nutrition
- Serving Size: 1 slice
- Calories: 210
- Sugar: 8g
- Sodium: 100mg
- Fat: 10g
- Saturated Fat: 6g
- Unsaturated Fat: 4g
- Trans Fat: 0g
- Carbohydrates: 30g
- Fiber: 1g
- Protein: 2g
- Cholesterol: 30mg
Keywords: elderflower, tart, dessert, lemon curd, baking, elegant dessert
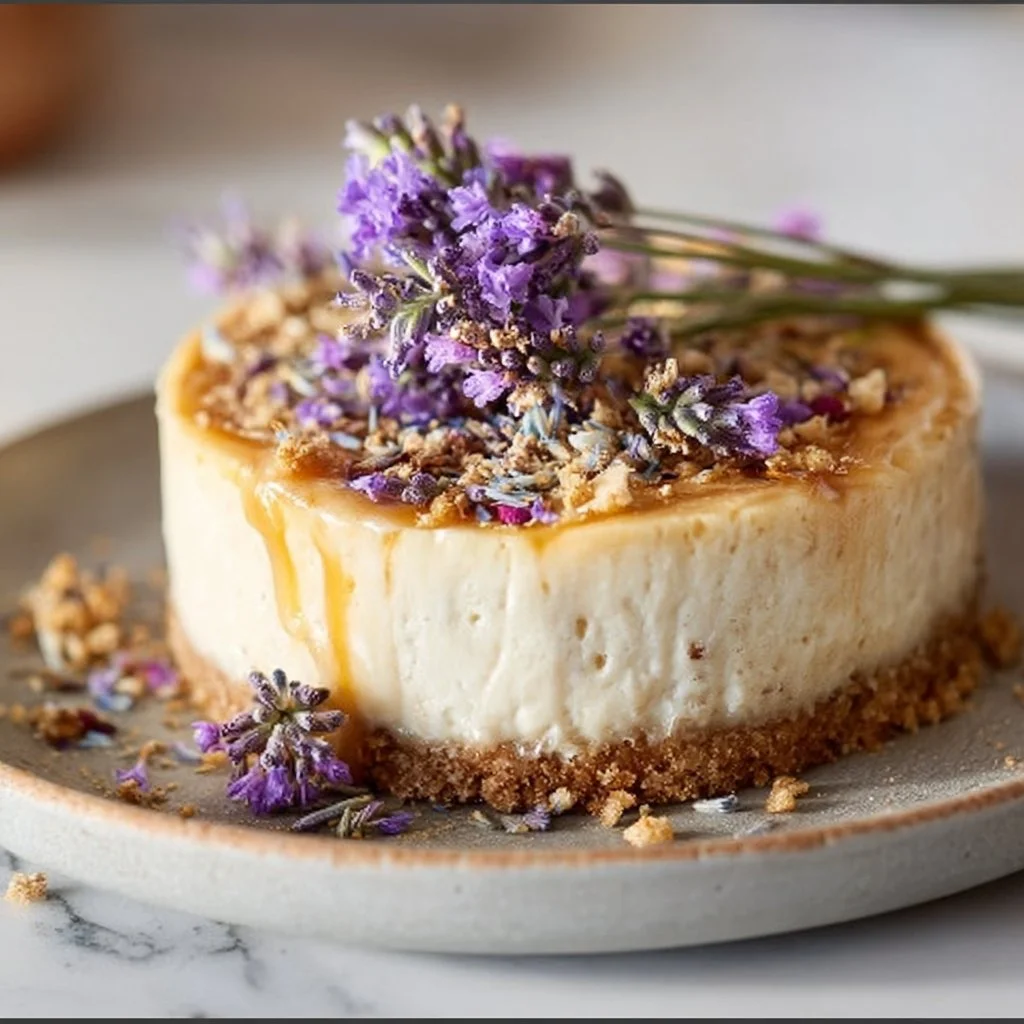
Honey Lavender Cheesecake Recipe
Indulge in Elegance: Honey Lavender Cheesecake Recipe
Hello, fellow food lovers! Today, we’re diving into a sweet and dreamy world of flavors with my Honey Lavender Cheesecake. This delightful dessert perfectly combines the floral essence of lavender with the luscious sweetness of honey, creating a cheesecake that’s not just a feast for the palate, but also a visual delight. I can’t wait to share this recipe with you, so grab your apron and let’s get started!
A Sweet Memory
Before we jump into the recipe, I have to share a charming little story that inspired this dish. One sunny afternoon, I found myself wandering through a local farmer’s market—one of my favorite weekend rituals. As I strolled past colorful stalls, a delicate aroma caught my attention. It was a vendor selling lavender-infused honey, and the moment I tasted it, I was transported to a blissful moment in my childhood.
My grandmother—a culinary wizard in her own right—had a habit of incorporating unique flavors into her desserts. One summer, she decided to experiment with lavender in her cooking. We spent evenings in her cozy kitchen, blending ingredients and laughing, as the aroma of her sweet concoctions wafted through the air. That lavender honey sparked a memory, and I promised myself that one day, I would create a dessert that brought that feeling of warmth and nostalgia back. Today, we’ll bring that dream to life with this luscious Honey Lavender Cheesecake.
Ingredients
To make this exquisite cheesecake, we’ll need the following ingredients:
For the Crust:
-
1 ½ cups graham cracker crumbs
This forms the base of your cheesecake, providing a sweet, crunchy texture. If you’re looking for alternatives, digestive biscuits or crushed Oreos work beautifully, too. -
¼ cup granulated sugar
This adds sweetness to the crust. You can replace it with coconut sugar for a hint of caramel flavor or omit it entirely if you prefer a less sweet crust. -
6 tbsp unsalted butter (melted)
The butter binds the crumbs together. You can substitute it with coconut oil for a dairy-free option.
For the Filling:
-
3 (8 oz) packages cream cheese, softened
Cream cheese brings that rich, creamy texture we all love in cheesecake. Neufchâtel cheese can be used for a lighter version. -
¾ cup honey
This is the star of our recipe, adding sweetness and flavor. If you’re looking for a vegan option, you can use maple syrup or agave nectar. -
1 cup heavy cream
Heavy cream helps achieve that velvety texture. For a lighter alternative, you can use Greek yogurt, but be aware it may change the tanginess. -
3 large eggs
Eggs provide structure and stability. For a vegan alternative, use a flaxseed meal or a commercial egg replacer. -
1 tsp vanilla extract
This adds depth to the flavor. If you have the opportunity, vanilla beans would be a fantastic upgrade! -
1 tbsp dried culinary lavender
Dried lavender gives our cheesecake its unique flavor. If you can’t find it, feel free to use lavender extract instead. -
2 tbsp cornstarch
This helps to set the cheesecake. If you’re looking for a gluten-free option, you can use arrowroot powder.
For the Honey Lavender Syrup (Optional Topping):
-
½ cup honey
A sweet drizzle to enhance your cheesecake. -
1 tbsp dried culinary lavender
Keep that floral note alive! -
¼ cup water
This helps to create the syrup base.
Step-by-Step Instructions
Step 1: Prepare the Crust
-
Preheat your oven to 350°F (175°C). Let’s get that warm haven ready for our cheesecake!
-
In a large bowl, combine the graham cracker crumbs, sugar, and melted butter. Mix until everything is well combined; it should resemble damp sand.
-
Press the mixture into the bottom of a 9-inch springform pan. You want to create an even layer that’s firmly packed, so don’t be shy about applying a bit of elbow grease. A flat-bottomed glass works wonderfully for this!
-
Bake the crust for about 10 minutes, or until it’s lightly golden. This helps to caramelize the sugars and gives it a delicious crunch. Once it’s done, remove it from the oven and allow it to cool while you whip up the filling.
Step 2: Make the Filling
-
In a large mixing bowl, beat the softened cream cheese using a hand mixer or a stand mixer. You want it to be smooth and creamy—no lumps allowed! This should take about 2-3 minutes.
-
Add in the honey, and mix until it’s fully incorporated. Feel free to taste along the way. We want that perfect balance of sweetness!
-
Next, add the heavy cream and continue mixing until silky smooth. The heavy cream adds richness, so ensure it’s blended well!
-
Incorporate the eggs one at a time. Mix on low speed after each addition until just combined. You want to avoid incorporating too much air, which can lead to cracks.
-
Add the vanilla extract, dried lavender, and cornstarch. Again, mix until just combined. The lavender will give a subtle flavor that is sophisticated yet comforting.
Step 3: Bake the Cheesecake
-
Pour the filling over the cooled crust in the springform pan. Gently tap the pan on the counter to release any air bubbles—this will ensure a dense and creamy texture.
-
Bake the cheesecake for about 50-60 minutes, or until the edges are set but the center still jiggles slightly. Remember, it’s going to set more as it cools!
-
Turn off the oven and crack the door open; let the cheesecake cool in the oven for about an hour. This helps to prevent sudden temperature changes, which can cause cracking.
-
Once cooled, transfer it to the fridge and chill for at least 4 hours, ideally overnight. Trust me; the flavors will develop beautifully during that time!
Step 4: Make the Honey Lavender Syrup (Optional)
-
In a small saucepan, combine honey, dried lavender, and water. Bring it to a gentle boil over medium heat.
-
Reduce the heat and let it simmer for about 5 minutes, stirring occasionally, until thickened slightly. Strain the syrup through a fine-mesh sieve to remove the lavender buds, and allow it to cool.
Serving Suggestions
When it’s time to serve, remove the cheesecake from the springform pan and transfer it to a beautiful serving platter. Drizzle the honey lavender syrup over the top and garnish with a few sprigs of fresh lavender or some small edible flowers for that elegant touch! Slice into pieces and watch as everyone’s eyes light up.
Recipe Variations
-
Lemon Zest Twist: Add the zest of one lemon to the filling for a bright, citrusy contrast to the floral notes.
-
Chocolate Drizzle: For a richer dessert, drizzle melted dark chocolate over the cheesecake before serving.
-
Nutty Crust: Mix in some finely chopped almonds or pecans with your graham cracker crumbs for additional flavor and texture.
-
Spiced Notes: Incorporate a pinch of cardamom or cinnamon into the filling for a warm spice that complements the lavender beautifully.
-
Fruit Toppings: Fresh berries or candied citrus slices can provide a pop of flavor and color on top!
Chef’s Notes
This recipe has evolved beautifully over time! I’ve played around with different flavors, textures, and components. One of my personal favorites is swapping honey for a tart fruit puree as a topping—it brings a whole new level of freshness to the cheesecake. Also, don’t be surprised if you start serving this at every gathering; trust me, friends and family will come knocking just to get a slice!
FAQs and Troubleshooting
1. Why did my cheesecake crack?
Cracking often occurs due to rapid changes in temperature. Make sure to cool it gradually in the oven and avoid over-mixing your batter.
2. Can I make this in advance?
Absolutely! In fact, making it the day before allows the flavors to meld beautifully, so it’s perfect for planning ahead.
3. How do I store leftovers?
Store any uneaten cheesecake in an airtight container in the refrigerator for up to 5 days. It can also be frozen for longer storage—just be sure to wrap it well!
4. What can I use instead of cream cheese?
You can try a dairy-free cream cheese for a vegan option, though the texture may vary slightly. Silken tofu blended until creamy is another alternative, though it will change the flavor a bit.
Nutritional Info
While I won’t include exact nutritional information here, I encourage you to enjoy this cheesecake in moderation and savor each delightful bite. Indulgence is part of the joy of cooking!
That’s it for today, my culinary friends! Thank you so much for joining me on this journey of flavors and memories. I hope my Honey Lavender Cheesecake brings joy to your kitchen and becomes a staple in your dessert rotation. Remember, cooking is all about love and sharing. So, gather your friends and family around the table, slice up that cheesecake, and create some sweet memories! Happy baking!
PrintHoney Lavender Cheesecake
A delightful cheesecake combining the floral essence of lavender with the sweetness of honey for a dreamy dessert experience.
- Prep Time: 20 minutes
- Cook Time: 60 minutes
- Total Time: 80 minutes
- Yield: 8 servings 1x
- Category: Dessert
- Method: Baking
- Cuisine: American
- Diet: Vegetarian
Ingredients
- 1 ½ cups graham cracker crumbs
- ¼ cup granulated sugar
- 6 tbsp unsalted butter (melted)
- 3 (8 oz) packages cream cheese, softened
- ¾ cup honey
- 1 cup heavy cream
- 3 large eggs
- 1 tsp vanilla extract
- 1 tbsp dried culinary lavender
- 2 tbsp cornstarch
- ½ cup honey (for syrup)
- 1 tbsp dried culinary lavender (for syrup)
- ¼ cup water (for syrup)
Instructions
- Preheat your oven to 350°F (175°C).
- Combine the graham cracker crumbs, sugar, and melted butter in a large bowl.
- Press the mixture into the bottom of a 9-inch springform pan.
- Bake the crust for about 10 minutes until lightly golden.
- Beat the softened cream cheese until smooth and creamy.
- Add honey and mix until fully incorporated.
- Incorporate the heavy cream and mix until silky smooth.
- Add the eggs one at a time, mixing on low speed after each addition.
- Mix in vanilla extract, dried lavender, and cornstarch until just combined.
- Pour the filling over the cooled crust.
- Bake for 50-60 minutes, or until the edges are set but the center jiggles slightly.
- Turn off the oven and crack the door open, letting the cheesecake cool for about an hour.
- Chill in the fridge for at least 4 hours, ideally overnight.
- Combine honey, dried lavender, and water in a saucepan for the syrup; bring to a gentle boil.
- Simmer for about 5 minutes until thickened slightly, then strain and cool.
Notes
For a richer flavor, try adding lemon zest, chocolate drizzle, or a nutty crust variation. Store leftovers in an airtight container in the refrigerator.
Nutrition
- Serving Size: 1 slice
- Calories: 350
- Sugar: 25g
- Sodium: 300mg
- Fat: 20g
- Saturated Fat: 10g
- Unsaturated Fat: 8g
- Trans Fat: 0g
- Carbohydrates: 35g
- Fiber: 1g
- Protein: 5g
- Cholesterol: 100mg
Keywords: cheesecake, dessert, lavender, honey, baking
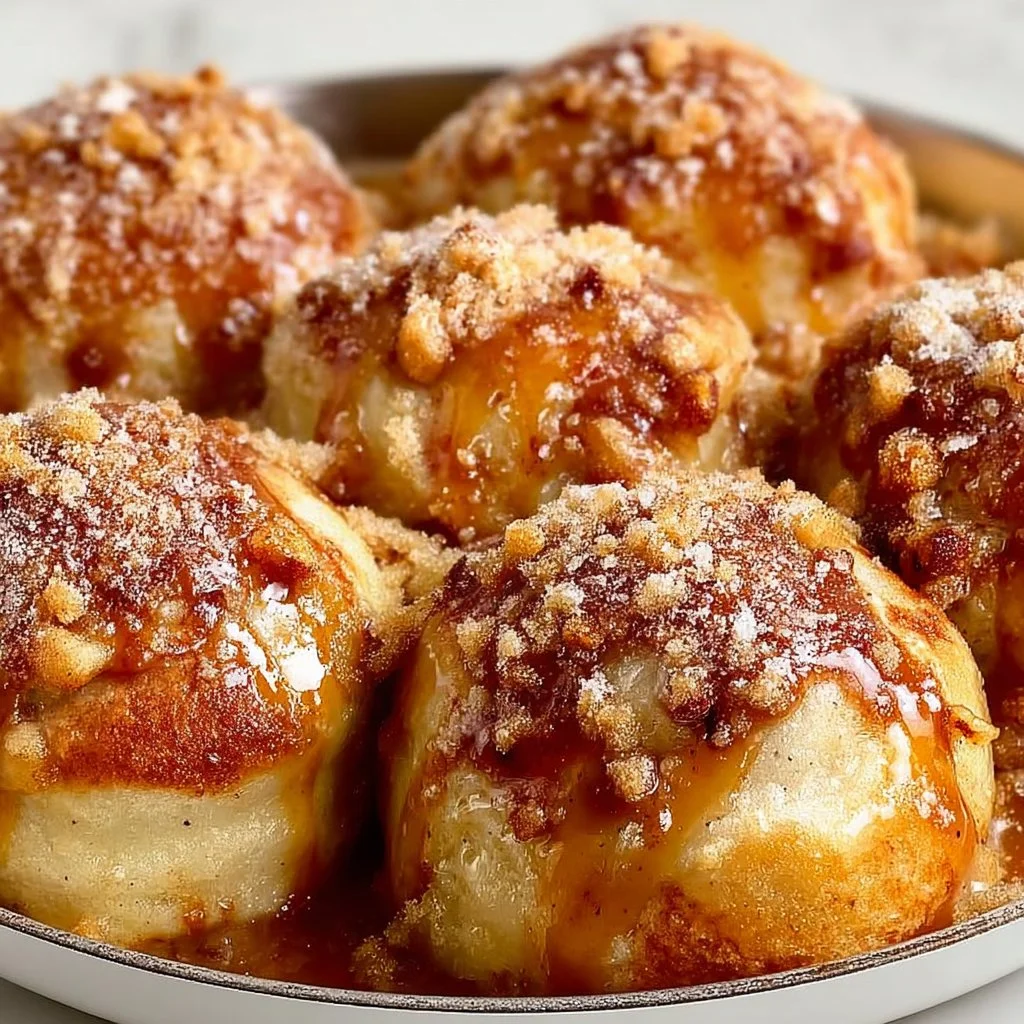
Simple Caramel Apple Pie Bombs
Simple Caramel Apple Pie Bombs: A Nostalgic Delight
Hello, and welcome back to my kitchen! Today, we’re diving into a dessert that merges nostalgia with absolute deliciousness — Simple Caramel Apple Pie Bombs. Picture this: sweet, tender apples enveloped in a buttery pie crust, drizzled with warm caramel, and baked to golden perfection. 🍏✨
Let’s face it; we all have those cherished memories of autumn gatherings filled with laughter, warm cider, and, of course, delicious treats. Caramel apple pie has always been a family favorite. It’s the kind of dessert that brings everyone together, a symbol of comfort and joy. And while we could whip up a traditional apple pie, sometimes, we crave something that’s bit-sized, portable, and oh-so-fun to eat! That’s where these delightful bombs come in!
As I was recalling my childhood, I remembered making caramel apples with my grandma during those cool fall afternoons. We’d dip crisp apples into rich, gooey caramel, relishing every sticky moment. Fast forward to today, and I’ve taken that classic idea and turned it into these irresistible pie bombs. They encapsulate that same joy, making them perfect for any occasion — from cozy nights at home to festive gatherings with friends.
So, grab your apron, and let’s create some sweetness that’s sure to put a smile on your face and warmth in your heart!
Personal Story
I vividly remember the yearly family tradition of baking pies with my grandma. Each fall, we’d gather in her sunny kitchen, surrounded by the sweet aroma of baking apples, cinnamon, and a hint of caramel wafting through the air. Those afternoons were filled with laughter as we would mix flour, sugar, and spice while sharing stories about our day.
One particular year, I can recall our experiment with caramel apples — we had so much fun dipping each apple in the warm, gooey caramel, and inevitably, we ended up with sticky fingers and lots of giggles. It was truly a cherished memory, and I believe that my love for baking was born in those moments spent with her.
When I came up with the idea for these Simple Caramel Apple Pie Bombs, I couldn’t help but smile at the nostalgia. They’re a fun and modern twist on our classic recipe, bringing back those sweet memories while allowing us to enjoy them in a delightful little package. Every bite sings of those warm afternoons shared over baked treats, reminding us that food is more than just sustenance — it’s about creating bonds and celebrating life’s small joys.
Ingredients
Here’s what you’ll need to create these delectable bites:
-
1 package refrigerated pie crusts: Convenient and time-saving, these crusts provide a flaky, buttery base. If you want to go homemade, a buttery flaky crust works beautifully as well!
-
2 cups peeled and diced apples: Choose your favorite apples! Tart varieties like Granny Smith bring a lovely contrast to the sweet caramel. Honeycrisp adds a delightful crunch. You can substitute them with pears for a different flavor profile.
-
1 cup caramel sauce: This is where the magic happens! You can use store-bought caramel for convenience, or if you’re feeling adventurous, I’ll share a quick recipe for a homemade caramel sauce later.
-
1 teaspoon cinnamon: A warm spice that complements apples wonderfully. If you’re a cinnamon lover, feel free to add a dash more. Alternatively, you could use apple pie spice!
-
1/4 cup sugar: This enhances the sweetness of the apples, balancing out the flavors. Consider swapping granulated sugar for brown sugar to add a touch of molasses flavor.
-
1 egg (for egg wash): This gives your pie bombs that beautiful golden finish when baked. If you’re avoiding eggs, a splash of milk or a vegan butter rub can work too!
-
Flour (for dusting): Just a little sprinkle to keep everything from sticking while you’re rolling out your crust.
With these ingredients, you’re well on your way to creating a delightful treat that’s sure to impress.
Step-by-Step Instructions
Now, let’s get cooking! Follow these detailed steps for creating your Simple Caramel Apple Pie Bombs:
-
Preheat the Oven: Start by preheating your oven to 375°F (190°C). This is the perfect temperature for crisping up your pastry. While the oven warms, lay your pie crusts on a lightly floured surface.
-
Roll Out the Crusts: If your refrigerated pie crusts are a bit thick, use a rolling pin to gently roll them out until they’re about 1/8 inch thick. This ensures every bite is flaky. Don’t have a rolling pin? A wine bottle works in a pinch!
-
Prepare the Filling: In a mixing bowl, combine the peeled and diced apples, sugar, cinnamon, and caramel sauce. Stir everything together until the apples are well-coated. Let it sit for about 10 minutes; this allows the flavors to mingle and the apples to release some juices.
-
Cut the Crusts: Using a round cookie cutter or a large glass, cut the pie crust into circles — about 4 to 5 inches in diameter. This will be the base of our bombs. Gather the scraps, reroll them, and cut out more circles!
-
Fill the Crusts: Place about a tablespoon of the apple filling in the center of each circle of pie crust. Be cautious not to overfill! You want these bombs to close up easily.
-
Seal It Up: Brush the edges of the pie crust circles with the beaten egg (this acts as glue!). Then, fold the crust over the filling, forming a half-moon shape. Use a fork to crimp the edges tightly, ensuring they are well-sealed. This is where you can get creative; use your fingers to pinch or twist the edges for a fun design!
-
Egg Wash and Bake: Place your sealed bombs on a parchment-lined baking sheet. Brush the tops with the egg wash to achieve a beautiful golden color when baked. Pop them in the oven and bake for about 20-25 minutes or until they are golden brown and bubbly.
-
Let Them Cool: Once baked, remove your pie bombs from the oven and let them cool for about 5-10 minutes. The caramel will be molten and can cause a little splatter!
-
Serve Warm: Drizzle some extra caramel sauce over the top for that little extra touch of sweetness!
And voila! You’ve created your very own Simple Caramel Apple Pie Bombs that are not only delicious but also a total crowd-pleaser!
Serving Suggestions
To serve, present your pie bombs on a rustic wooden board or a classic white platter – it’s all about that beautiful contrast! Drizzle some caramel sauce, and add a scoop of vanilla ice cream or a dollop of whipped cream on the side. Consider garnishing with a sprinkle of cinnamon or a sprinkle of chopped pecans for added texture and flavor. Trust me, your guests will be asking for seconds!
Recipe Variations
Feeling adventurous? Here are a few ways to change up your Caramel Apple Pie Bombs:
-
Add Nuts: Incorporate chopped walnuts or pecans into your filling for an extra crunch.
-
Spiced Up Flavor: Add a pinch of nutmeg or ginger to the apple filling for a spiced twist.
-
Chocolate Drizzle: Drizzle melted chocolate over the tops for a decadent finish. Chocolate and caramel are a match made in heaven!
-
Savory Edition: Swap out apples for cooked diced butternut squash and add sage or rosemary for a savory take.
-
Mini Versions: Use mini-muffin tins to create bite-sized bombs. Just adjust your baking time accordingly!
Chef’s Notes
One of my favorite adaptations of this recipe is swapping out traditional caramel sauce for salted caramel. Crisp, tart apples paired with the complexity of sea salt take these bombs to a whole new level. And speaking of adaptations, if you end up with extra filling, don’t throw it away! It’s perfect for topping yogurt, pancakes, or even just spooning straight from the bowl. Trust me, it’s that good!
Every time I make these pie bombs, I think back to those afternoons with my grandma. The excitement of pulling golden, bubbling bites from the oven — it never gets old! Kitchen messes may happen (I once spilled a full bowl of caramel on the counter), but it’s those little mishaps that make cooking memorable and fun.
FAQs and Troubleshooting
1. What if my pie bombs are leaking during baking?
This can happen if they’re overfilled or not sealed properly. Make sure to crimp the edges well and leave some space for expansion when filling.
2. How do I store leftovers?
Keep them in an airtight container in the fridge for up to 3 days. Reheat in the oven for a few minutes to regain that crispy texture.
3. Can I make these in advance?
Absolutely! You can prepare and seal them a day ahead, store them in the fridge, and bake them fresh right before serving!
4. What if I don’t have pie crust?
You can replace it with puff pastry, crescent roll dough, or even biscuit dough in a pinch. Each gives a unique texture and flavor!
Creating Simple Caramel Apple Pie Bombs is more than just a recipe; it’s an experience filled with laughter, warmth, and delicious memories. So, tie on your apron, gather your loved ones, and let’s bake something beautiful together! Happy cooking! 🍏❤️
PrintSimple Caramel Apple Pie Bombs

A fun and modern twist on the classic caramel apple pie, these bite-sized bombs are filled with tender apples and warm caramel, all encased in a flaky pie crust.
- Prep Time: 15 minutes
- Cook Time: 25 minutes
- Total Time: 40 minutes
- Yield: 4 servings 1x
- Category: Dessert
- Method: Baking
- Cuisine: American
- Diet: Vegetarian
Ingredients
- 1 package refrigerated pie crusts
- 2 cups peeled and diced apples
- 1 cup caramel sauce
- 1 teaspoon cinnamon
- 1/4 cup sugar
- 1 egg (for egg wash)
- Flour (for dusting)
Instructions
- Preheat the oven to 375°F (190°C).
- Roll out the refrigerated pie crusts on a lightly floured surface.
- Combine the diced apples, sugar, cinnamon, and caramel in a mixing bowl.
- Cut the pie crust into circles using a round cutter.
- Place about a tablespoon of filling in the center of each crust circle.
- Brush the edges with beaten egg and fold over to seal.
- Place on a baking sheet and brush tops with egg wash.
- Bake for 20-25 minutes until golden brown.
- Let cool for 5-10 minutes before serving.
Notes
For an extra touch, drizzle additional caramel sauce over the top before serving. Leftover filling works well as a topping for yogurt or pancakes.
Nutrition
- Serving Size: 1 serving
- Calories: 320
- Sugar: 20g
- Sodium: 150mg
- Fat: 14g
- Saturated Fat: 4g
- Unsaturated Fat: 9g
- Trans Fat: 0g
- Carbohydrates: 40g
- Fiber: 2g
- Protein: 3g
- Cholesterol: 37mg
Keywords: caramel, apple, pie, dessert, fall treats, nostalgic, baking

Easy Classic Strawberry Rhubarb Pie
The Essence of Flavor: Easy Classic Strawberry Rhubarb Pie
Hello there, fellow food lovers! Today, I’m excited to whisk you away on a delicious journey into the world of baking with my beloved Easy Classic Strawberry Rhubarb Pie. This pie isn’t just a dessert; it’s a nostalgic trip down memory lane, bursting with flavors that scream summer and warmth.
Imagine this: a golden-brown flaky crust cradling a vibrant, bubbling filling of sweet strawberries and tart rhubarb. Every slice is a celebration of contrasts — the sweetness of the strawberries mingling beautifully with the slight tang of the rhubarb, all enhanced by a hint of citrus. And the flaky crust? It’s just the cherry on top! This recipe is a staple in my kitchen and a crowd-pleaser at any gathering. Not only is it incredibly elegant for entertaining, but it also holds a special place in my heart, reminding me of sunny afternoons spent with loved ones.
Now, whether you’re a seasoned baker or just starting to explore the world of pie-making, fear not! I’ll guide you through every step, sharing tips and stories along the way. You won’t need a culinary degree to impress your friends or family with this stunning dessert. So, tie on your apron, grab your mixing bowl, and let’s make some magic happen in the kitchen!
Personal Story
Growing up, my family had a tradition of gathering in the kitchen every summer. I can still picture my grandmother, apron tied snugly around her waist, presiding over a countertop laden with fresh produce. Rhubarb was her star ingredient, and every year she’d whip up a batch of strawberry rhubarb pie that seemed to disappear faster than it was made. I remember the way the warm aroma would waft through the house, drawing everyone in like moths to a flame. She taught me that baking was more than just a process; it was about love, family, and shared memories.
One summer afternoon, determined to prove I was ready to tackle the pie on my own, I gathered the ingredients, following her handwritten recipe with much excitement. The pie made it into the oven, and all that was left was the waiting — the hardest part! When I finally pulled it out, golden and bubbly, I felt like a kitchen magician. That first slice took me right back to those sunlit afternoons, and the joy on my family’s faces was all the affirmation I needed. From that moment on, each pie I made carried a piece of that memory, inviting everyone to linger a little longer around the table.
Ingredients
Here’s what you’ll need to make this scrumptious Easy Classic Strawberry Rhubarb Pie:
For the Pie Crust:
-
1 cup (2 sticks) unsalted butter, cold and diced
Tip: Unsalted butter allows you to control the salt content in your pie. For a richer flavor, you can use European-style butter. -
2½ cups all-purpose flour
Substitution: For a nutty flavor, try using half whole wheat flour. -
1 Tablespoon sugar
Chef Insight: A hint of sugar in the crust enhances its flavor, making it perfect for sweet fillings. -
1 teaspoon salt
Tip: This balances the sweetness of the filling, ensuring every bite is seasoned well. -
½ cup ice water or buttermilk (plus more if needed)
Chef Insight: Ice water keeps the butter cold, which helps form a flaky crust. Buttermilk adds a tangy flavor if you want something unique!
For the Filling:
-
3 cups sliced rhubarb (½ inch slices)
Tip: Fresh rhubarb is ideal, but you can use frozen as well—just thaw and drain excess moisture. -
2½ cups chopped strawberries
Substitution: Swap with raspberries for a deeper flavor or blueberries for something a bit sweeter. -
⅓ cup granulated sugar
Chef Insight: Adjust the sugar to taste based on the sweetness of your fruits. -
⅓ cup brown sugar
Tip: Brown sugar adds a depth of flavor that granulated sugar lacks. -
¼ cup cornstarch
Substitution: You can use flour as a thickener, but cornstarch gives a clearer filling. -
¼ teaspoon salt
Tip: This enhances the natural flavors of the fruits. -
Zest of 1 orange
Chef Insight: A zest of citrus brightens up the filling and balances the tartness of the rhubarb. -
1 Tablespoon orange juice or orange liqueur
Tip: Use liqueur for an adult twist—Grand Marnier is a great option! -
1 teaspoon sugar (for assembling pie)
Tip: Sprinkle this over the crust for a nice caramelized finish. -
1 teaspoon flour (for assembling pie)
Chef Insight: This absorbs excess moisture and helps the filling set nicely. -
2 Tablespoons unsalted chilled butter, cubed (for assembling pie)
Tip: This little touch ensures a rich filling. -
1 large egg, whisked (for egg wash)
Tip: An egg wash gives the crust a beautiful golden color. -
1 Tablespoon milk or cream (for egg wash)
Substitution: You can also use a plant-based milk if you prefer. -
Coarse sugar (for sprinkling)
Tip: A sprinkle of coarse sugar adds a delightful crunch and sparkle!
Step-by-Step Instructions
-
Make the Pie Crust:
Start by grabbing a large mixing bowl. Combine the flour, sugar, and salt. Add the cold, diced butter, using your fingers or a pastry cutter to incorporate it until the mixture resembles coarse crumbs. Remember: the colder the butter, the flakier your crust. -
Add the Ice Water:
Gradually add the ice water (or buttermilk), stirring gently until the dough begins to hold together. Be careful not to overwork it; we want to keep those delicious butter chunks intact. If it needs more moisture, add a little more water, one tablespoon at a time. -
Chill the Dough:
Divide the dough into two parts, shape them into disks, wrap in plastic, and chill in the refrigerator for at least 1 hour. Chilling helps stabilize the dough and makes it easier to roll out. -
Prepare the Filling:
In a large bowl, combine the sliced rhubarb, chopped strawberries, granulated sugar, brown sugar, cornstarch, salt, orange zest, and orange juice (or liqueur). Gently toss everything together until the fruit is well coated. Allow it to sit for about 15 minutes while the juices develop. -
Preheat the Oven:
Preheat your oven to 425°F (220°C). A hot oven is crucial for a beautifully baked crust. -
Roll out the Dough:
On a lightly floured surface, roll out one disk of dough into a circle roughly 12 inches in diameter. Transfer it to a 9-inch pie dish. Don’t be shy; use your fingers to press it into the dish and crimp the edges stylishly. -
Assemble the Pie:
Pour the fruit filling into the prepared pie crust, ensuring it’s evenly distributed. Sprinkle the additional teaspoon of flour over the filling, followed by the cubed butter. -
Roll the Top Crust:
Roll out the second disk of dough and place it over the filling. You can slice some ventilation slits or create a lattice top for that classic pie look. If you’re going for the classic full crust, make sure to cut slits for steam to escape! -
Brush and Sprinkle:
Brush the top crust with the whisked egg and milk mixture. Sprinkle with coarse sugar for that lovely sparkle. -
Bake:
Bake the pie for 15 minutes at 425°F (220°C), then reduce the oven temperature to 350°F (175°C) and bake for an additional 35-45 minutes, or until the filling is bubbly and the crust is golden brown. Tip: If the edges brown too quickly, shield them with aluminum foil. -
Cool and Serve:
Once out of the oven, let your pie cool completely for at least 2 hours. The filling will set properly as it cools.
Serving Suggestions
Slice up that heavenly pie and serve it warm or at room temperature, perhaps with a scoop of vanilla ice cream or a dollop of freshly whipped cream. For an extra touch, garnish each slice with fresh mint leaves or sprinkle a little more orange zest on top. Remember, presentation matters, but it doesn’t have to be perfect — a rustic charm can be just as inviting!
Recipe Variations
-
Add a Crunch: Throw in some chopped nuts like pecans or walnuts to the filling for added texture.
-
Berry Mix-Up: Use a combination of different berries like blueberries or blackberries if strawberries aren’t available.
-
Spice It Up: Add a pinch of cinnamon or nutmeg to the filling for a hint of warmth; it complements the fruit beautifully.
-
Zesty Lemon Twist: Substitute lemon juice for orange juice to give a bright flavor contrast to the pie.
-
Gluten-Free Crust: For a gluten-free option, replace all-purpose flour with a gluten-free blend specifically designed for baking.
Chef’s Notes
This pie has seen many iterations in my kitchen, adapting to what’s in season or what I have on hand. I fondly recall one Thanksgiving when I decided to add a touch of maple syrup to the filling for a fall twist—let me tell you, it was a hit! Each time I make this easy classic strawberry rhubarb pie, I’m reminded not only of my grandmother but of the joy of experimenting in the kitchen. Embrace your own twists; there’s no wrong way to share the love when it comes to baking!
FAQs and Troubleshooting
Q: Why is my pie crust tough?
A: This usually happens when the dough is overworked or too much water is added. Aim for a light hand and keep that butter cold!
Q: My filling is runny. What went wrong?
A: Ensure you’re using enough cornstarch or flour to thicken your filling, especially if the fruit is exceptionally juicy. Letting the pie cool for a couple of hours helps it set as well!
Q: Can I freeze the pie?
A: Absolutely! You can freeze unbaked pies or baked ones. Just ensure it’s well-wrapped. Thaw in the fridge before baking or serving.
Q: What if I don’t have rhubarb?
A: No worries! You can replace it with more strawberries or use other tart fruits like cherries or tart apples.
Nutritional Info
(Note: Nutritional info is approximate and varies based on the specific ingredients and brands you use.)
- Calories per slice (1/8 of the pie): 290
- Total Fat: 15g
- Saturated Fat: 9g
- Cholesterol: 50mg
- Sodium: 150mg
- Total Carbohydrates: 37g
- Dietary Fiber: 2g
- Sugars: 15g
- Protein: 3g
So there you have it! Your guide to creating an Easy Classic Strawberry Rhubarb Pie that’ll have everyone singing your praises. Make sure to invite friends over because this pie is best when shared. Happy baking, and as always, let’s make beautiful memories around the table!
PrintEasy Classic Strawberry Rhubarb Pie

A nostalgic pie featuring a flaky crust filled with sweet strawberries and tart rhubarb.
- Prep Time: 20 minutes
- Cook Time: 50 minutes
- Total Time: 70 minutes
- Yield: 8 servings 1x
- Category: Dessert
- Method: Baking
- Cuisine: American
- Diet: Vegetarian
Ingredients
- 1 cup (2 sticks) unsalted butter, cold and diced
- 2½ cups all-purpose flour
- 1 tablespoon sugar
- 1 teaspoon salt
- ½ cup ice water or buttermilk (plus more if needed)
- 3 cups sliced rhubarb (½ inch slices)
- 2½ cups chopped strawberries
- ⅓ cup granulated sugar
- ⅓ cup brown sugar
- ¼ cup cornstarch
- ¼ teaspoon salt
- Zest of 1 orange
- 1 tablespoon orange juice or orange liqueur
- 1 teaspoon sugar (for assembling pie)
- 1 teaspoon flour (for assembling pie)
- 2 tablespoons unsalted chilled butter, cubed (for assembling pie)
- 1 large egg, whisked (for egg wash)
- 1 tablespoon milk or cream (for egg wash)
- Coarse sugar (for sprinkling)
Instructions
- Make the Pie Crust: Combine flour, sugar, and salt, then add cold butter and mix until coarse.
- Add the Ice Water: Gradually mix in ice water until dough holds together.
- Chill the Dough: Divide, wrap in plastic, and chill for at least 1 hour.
- Prepare the Filling: Toss together rhubarb, strawberries, sugars, cornstarch, salt, orange zest, and orange juice.
- Preheat the Oven: Heat to 425°F (220°C).
- Roll out the Dough: Roll one disk into a 12-inch circle and place in a pie dish.
- Assemble the Pie: Fill with fruit mixture, sprinkle with flour and butter.
- Roll the Top Crust: Cover with second disk, slice ventilation slits.
- Brush and Sprinkle: Add egg wash and sprinkle coarse sugar on top.
- Bake: Bake for 15 minutes at 425°F, then reduce to 350°F and bake for 35-45 minutes.
- Cool and Serve: Let cool for at least 2 hours before serving.
Notes
Serve with vanilla ice cream or whipped cream for a delightful dessert.
Nutrition
- Serving Size: 1 slice
- Calories: 290
- Sugar: 15g
- Sodium: 150mg
- Fat: 15g
- Saturated Fat: 9g
- Unsaturated Fat: 6g
- Trans Fat: 0g
- Carbohydrates: 37g
- Fiber: 2g
- Protein: 3g
- Cholesterol: 50mg
Keywords: pie, strawberry, rhubarb, dessert, summer
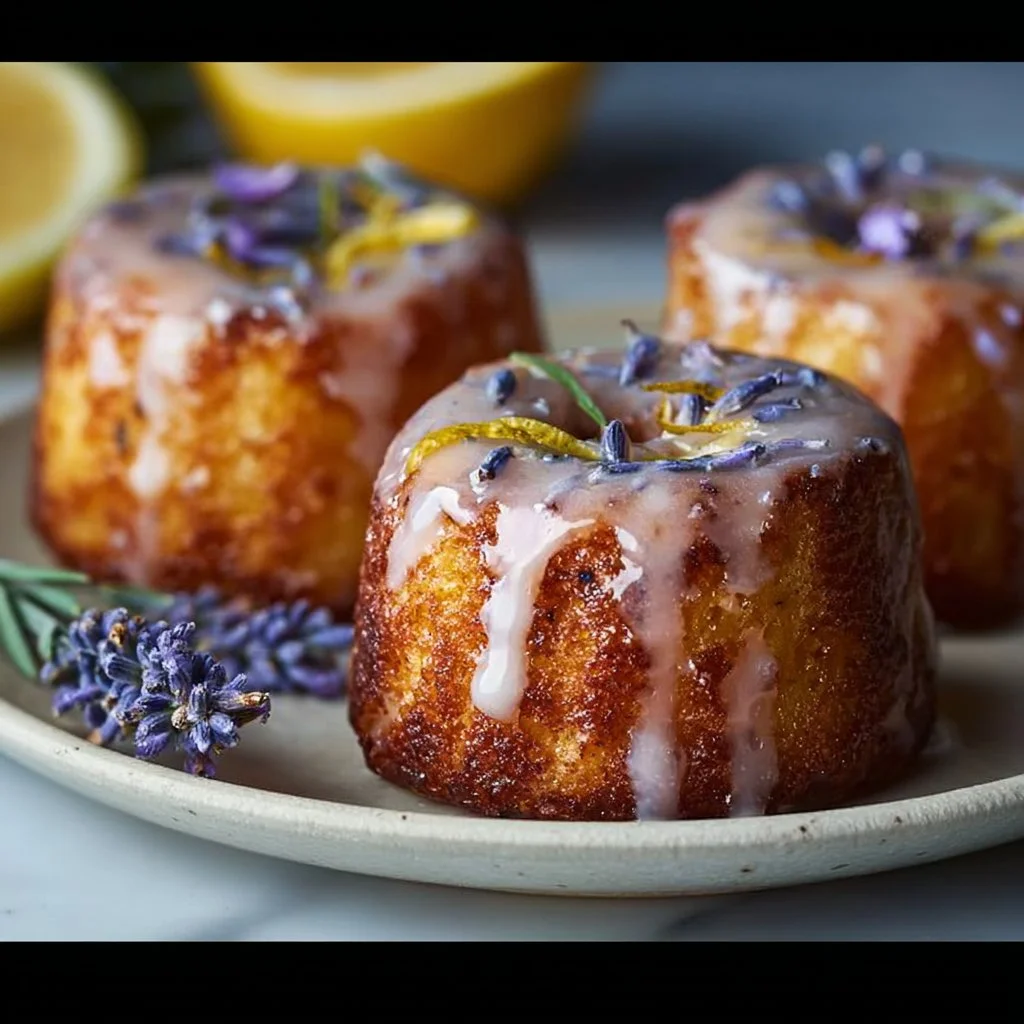
Mini Lemon Cakes With Lavender Glaze
Delightful Mini Lemon Cakes with Lavender Glaze: A Journey of Flavors!
Hello, lovely foodies! Today, we’re stepping into the bright and cheerful world of desserts with a truly special treat: Mini Lemon Cakes with Lavender Glaze. If you’ve ever enjoyed the sun-drenched taste of fresh lemons while being enveloped in the delicate aroma of lavender, you know we’re in for a delightful culinary experience!
Picture this: it’s a warm afternoon, the sun is shining, and you’re enjoying a breezy gathering with friends or family. The air is filled with laughter, soft chatter, and the sweet scent of something delectable baking in the oven. These mini lemon cakes are not just a food item; they are the centerpiece of those beautiful moments when everyone gathers around the table, ready to share stories and enjoy each other’s company.
The joy of creating these cakes lies not only in how they taste but also in how simple they are to make! Using fresh ingredients that are easy to find, you can whip up these delightful treats that look polished yet are approachable for any home cook. So, tie on your apron and let’s embark on this tasty journey together!
Personal Story
Growing up, my grandmother had a garden filled with vibrant lavender and zesty lemons. Her backyard was our secret escape, where we spent countless afternoons picking herbs, smelling blossoms, and watching her prepare beautiful dishes. I distinctly remember one sunny day when she decided to teach me how to bake lemon cupcakes. The house filled with the zesty aroma of lemon zest mixed with buttery bliss, and soon, golden treats emerged from the oven.
As if that weren’t enough, we drizzled a sweet lavender frosting over the warm cakes. I can still hear the voice of my grandmother saying, “Baking is about making memories, Savannah. These cakes are sweet like life, so let’s share them and spread joy.” From that day on, a love affair with lemon cakes began! Now, I’m excited to share my own twist on the classic — mini lemon cakes with a super refreshing lavender glaze.
Ingredients
For the Mini Lemon Cakes:
-
1 1/3 cups all-purpose flour
Whether you’re using bleached or unbleached flour, both work well in this recipe. You could also use a gluten-free blend, keeping in mind that it might change the texture slightly. -
1/2 tsp kosher salt
A pinch of salt enhances the sweetness and flavor of the cake. Don’t skip it! -
1/8 tsp baking soda
This little pinch will help lift our cakes, making them fluffy and light. -
1/2 cup unsalted butter, softened
Softened butter is key to achieving creamy, light cakes. If you’re short on time, cube the butter and microwave it for 10 seconds. -
2/3 cup granulated sugar
Bringing sweetness and texture to our mini cakes, using granulated sugar allows for a perfect golden color. -
1/3 cup packed light brown sugar
This adds warmth and depth to the flavor—brown sugar has a hint of molasses that complements the lemon beautifully. -
1 tbsp grated lemon zest (from 2 lemons)
Make sure to zest the lemons lightly and avoid the bitter white pith. The zest is where the flavor magic lies! -
2 large eggs, at room temperature
Room temperature eggs blend better, ensuring that your batter is smooth and silky. -
1/4 cup sour cream, at room temperature
This adds moisture and a subtle tanginess; you can substitute with Greek yogurt if needed. -
1/4 cup whole milk, at room temperature
Milk helps to keep the cake moist; almond milk is a good non-dairy substitute here. -
1 tsp vanilla extract
A hint of vanilla compliments the lemon’s brightness wonderfully.
For the Lavender Glaze:
-
1/4 cup whole milk
As with the cake, room temperature milk makes for a smoother glaze. -
1/2 tsp culinary lavender
Make sure to use culinary-grade lavender for safe edible use. If you can’t find it, try substituting with dried chamomile! -
1 1/2 cups powdered sugar
Sweetening our glaze perfectly, powdered sugar dissolves smoothly and creates that heavenly glaze texture. -
1/4 tsp kosher salt
Just a pinch helps balance the sweetness of the glaze. -
1/8 tsp vanilla extract, as needed
Adjust as needed for flavor; I recommend a splash! -
Edible flowers and lemon zest (for garnish)
These are entirely optional but definitely add a sophisticated and beautiful touch to your presentation.
Step-by-Step Instructions
Step 1: Preheat Your Oven
Start by preheating your oven to 350°F (175°C). This is a crucial step to get those cakes baked evenly. While that’s warming up, it’s the perfect time to gather all your ingredients and prep your workspace.
Step 2: Prepare the Muffin Tin
Grease a mini muffin tin with a touch of butter or line it with cupcake liners. If you’re using a non-stick pan, just a light coating is enough to ensure they pop out easily once baked.
Step 3: Mix the Dry Ingredients
In a medium bowl, whisk together the flour, salt, and baking soda. This step ensures that all the baking soda gets evenly distributed throughout the cake batter. Set this aside while you mix the wet ingredients.
Step 4: Cream the Butter and Sugars
In a large mixing bowl, beat the softened unsalted butter with granulated and brown sugars until the mixture is fluffy and light—about 3-4 minutes. The color will change to a pale yellow, indicating that it’s well-mixed. Pro tip: Use a stand mixer if you have one—it saves your arm some workout!
Step 5: Add the Eggs and Zest
Next, crack in the room temperature eggs one at a time, blending well after each addition. Fold in the lemon zest, releasing that delightful citrus aroma.
Step 6: Incorporate Sour Cream and Milk
Pour in the sour cream, milk, and vanilla extract. Mix until just combined—over-mixing here can lead to dense cakes.
Step 7: Combine Dry and Wet Ingredients
Gradually add the dry ingredients to the wet mixture. Gently fold them in, stopping just before the flour is fully incorporated. It’s okay if a little bit of dry flour remains; we want to keep that cake light and airy!
Step 8: Fill the Muffin Tin
With a spoon or a small scoop, divide the batter evenly among the mini muffin cups. They should fill about 2/3 of the way full.
Step 9: Bake!
Bake the mini cakes in the preheated oven for 12-15 minutes or until they are golden brown and a toothpick comes out clean. Your kitchen will smell amazing during this time—trust me!
Step 10: Cool Down
Once baked, remove the mini cakes from the oven and allow them to cool in the pan for about 5 minutes before transferring them to a wire rack to cool completely.
Making the Lavender Glaze
Step 11: Prepare the Lavender Milk
In a small saucepan, heat the milk over medium heat until warm but not boiling. Add the culinary lavender and let it steep for about 5 minutes—this infuses the milk with a delicate floral flavor. Strain the milk into a bowl, discarding the lavender.
Step 12: Make the Glaze
In another bowl, mix the powdered sugar with the warm lavender-infused milk and kosher salt. Stir until you achieve a smooth glaze. If it’s too thick, add a little more milk; if it’s too thin, whisk in more powdered sugar.
Step 13: Glaze the Cakes
Once your mini lemon cakes are completely cool, dip each one into the glaze or drizzle it generously over the top. Allow the glaze to set for a few minutes before garnishing.
Serving Suggestions
To plate these mini lemon cakes, arrange them on a beautiful serving platter or cake stand. You can create an inviting display by garnishing with a sprinkle of lemon zest or placing edible flowers beside them. This simple touch transforms your dessert into a work of art, ready to impress your guests!
Recipe Variations
- Coconut Lemon Cakes: Swap out the milk for coconut cream in both the batter and the glaze for a tropical twist.
- Blueberry Lemon Cakes: Fold in fresh or frozen blueberries into the batter before baking for an extra burst of flavor.
- Lemon Almond Cakes: Add a teaspoon of almond extract and replace half the flour with almond flour for a nutty, delicious flavor.
- Vegan Version: Substitute eggs with flax eggs (1 tbsp flaxseed meal + 2.5 tbsp water for each egg) and replace dairy with plant-based milk and vegan butter.
Chef’s Notes
Over the years, I’ve played around with this recipe and have discovered that lemon is such a versatile flavor. Each variation brings a new layer of joy to the table. The lavender glaze, in particular, holds a special place in my heart, reminding me of those idyllic afternoons spent in my grandmother’s garden, surrounded by blooms and laughter.
One funny kitchen story comes to mind: I once tried to create lavender-infused sugar by tossing in fresh lavender with my sugar and leaving it in a cupboard. Instead of the delicate flavor I aimed for, I accidentally created a funky, floral mess. The lesson? Always use culinary-grade ingredients!
FAQs and Troubleshooting
-
Why are my mini cakes dense?
If your cakes are dense, it might be due to over-mixing the batter or using cold ingredients. Make sure all your ingredients, especially eggs and dairy, are at room temperature. -
How can I make the glaze less sweet?
To reduce the sweetness of the glaze, you can add a little more milk or lemon juice, which will add delicious tanginess and balance against the sugar. -
Can I store these cakes?
Absolutely! Store the mini cakes in an airtight container at room temperature for up to 3 days or in the refrigerator for up to a week. For best results, glaze them just before serving. -
What other flavors can I combine with lemon?
Lemon pairs beautifully with herbs like thyme or rosemary, or you can even create a shortcut by adding a splash of limoncello to the batter or glaze for an adult twist!
Nutritional Info (Optional)
Calories: 120 per mini cake
Fat: 4g
Carbohydrates: 19g
Protein: 2g
Final Thoughts
There you have it, my friends! Mini Lemon Cakes with Lavender Glaze are not just a dessert; they are a celebration of life’s little moments. Using fresh ingredients and simple techniques, you can create something that looks as good as it tastes. So, let’s gather around the table and enjoy the fruits of our labor together!
Happy baking, and remember: the joy of cooking lies in sharing delicious food with loved ones. Cheers! 🍋💛
PrintMini Lemon Cakes with Lavender Glaze
Delightful mini lemon cakes topped with a sweet lavender glaze, perfect for gatherings or a sweet treat.
- Prep Time: 15 minutes
- Cook Time: 15 minutes
- Total Time: 30 minutes
- Yield: 24 mini cakes 1x
- Category: Dessert
- Method: Baking
- Cuisine: American
- Diet: Vegetarian
Ingredients
- 1 1/3 cups all-purpose flour
- 1/2 tsp kosher salt
- 1/8 tsp baking soda
- 1/2 cup unsalted butter, softened
- 2/3 cup granulated sugar
- 1/3 cup packed light brown sugar
- 1 tbsp grated lemon zest (from 2 lemons)
- 2 large eggs, at room temperature
- 1/4 cup sour cream, at room temperature
- 1/4 cup whole milk, at room temperature
- 1 tsp vanilla extract
- 1/4 cup whole milk (for the glaze)
- 1/2 tsp culinary lavender
- 1 1/2 cups powdered sugar
- 1/4 tsp kosher salt (for the glaze)
- 1/8 tsp vanilla extract (for the glaze)
- Edible flowers and lemon zest (for garnish)
Instructions
- Preheat your oven to 350°F (175°C).
- Prepare a mini muffin tin by greasing it with butter or lining with cupcake liners.
- Mix the flour, salt, and baking soda in a medium bowl.
- Cream the softened butter with granulated and brown sugars until fluffy.
- Add the eggs one at a time, blending well after each.
- Incorporate sour cream, milk, and vanilla extract, mixing until just combined.
- Combine dry ingredients with wet mixture, folding gently until just combined.
- Fill the muffin tin with batter, filling each cup about 2/3 full.
- Bake for 12-15 minutes or until golden brown and a toothpick comes out clean.
- Cool in the pan for 5 minutes before transferring to a wire rack.
- Prepare the lavender milk by heating milk and steeping with culinary lavender.
- Make the glaze by mixing powdered sugar with the lavender-infused milk and salt.
- Glaze the cooled mini cakes by dipping or drizzling the glaze over them.
Notes
Store in an airtight container for up to 3 days at room temperature or up to a week in the refrigerator. Glaze just before serving for best results.
Nutrition
- Serving Size: 1 cake
- Calories: 120
- Sugar: 5g
- Sodium: 200mg
- Fat: 4g
- Saturated Fat: 2g
- Unsaturated Fat: 2g
- Trans Fat: 0g
- Carbohydrates: 19g
- Fiber: 0g
- Protein: 2g
- Cholesterol: 20mg
Keywords: mini cakes, lemon, lavender, dessert, baking
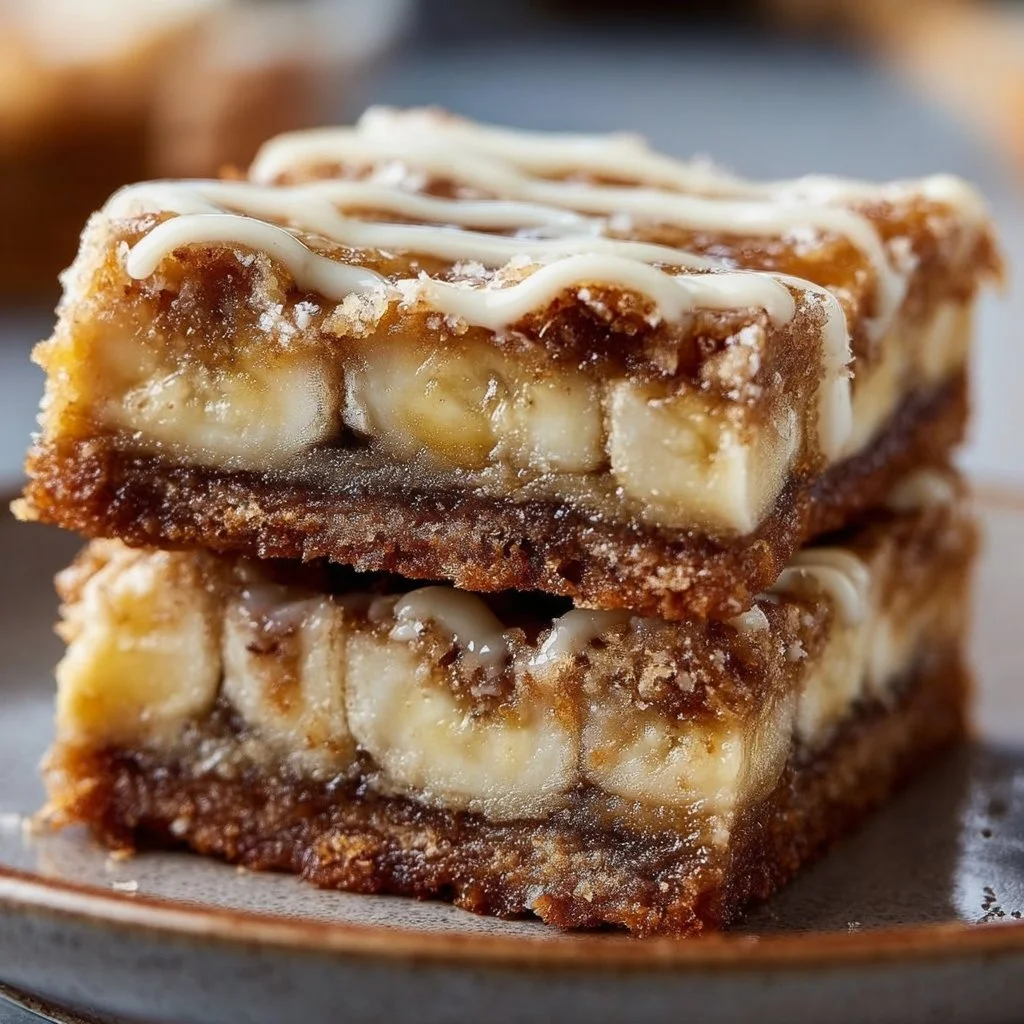
Ooey Gooey Banana Bars
Ooey Gooey Banana Bars: A Sweet and Comforting Treat
Hey there, fellow foodies! If you’re anything like me, bananas seem to mysteriously multiply in your fruit bowl. One day, you have just a few perfectly ripe bananas, and the next day, they look at you with their sad, spotty faces, practically begging to be used in some delicious way! Well, don’t you worry—I’m here to help you turn those bananas into something ooey, gooey, and utterly irresistible.
Today, we’re diving into the world of Ooey Gooey Banana Bars! These delightful treats are like a hug in dessert form—sweet, comforting, and the perfect balance of chewy and soft. Not only are they easy to prepare, but they also fill your kitchen with an aroma that could lure anyone into the room. This recipe is the embodiment of cozy indulgence, and today, I’m excited to share it with you. Whether you’re looking for a snack for your afternoon coffee, a sweet treat to impress your friends, or a mouth-watering dessert for the family, you’re in the right place.
So, grab your apron and let’s get baking!
Personal Story
Ah, the banana bar! My first experience with these scrumptious little squares takes me back to my childhood kitchen. I must’ve been no older than ten when my grandmother decided to whip up a batch of her famous banana bars. I still remember the way her kitchen felt—a warm, familiar space filled with laughter and the rich essence of vanilla and sugar. She had a magic touch; no one could ever replicate her recipes quite like she did!
One rainy afternoon, we dove into the world of banana baking together. All I remember was the fun we had mashing those bananas, sneaking spoonfuls of batter, and her radiant smile as we pulled the bars from the oven. The gooey centers and the smell of warm caramelized sugar were simply divine. As we shared those bars with the family, I felt a profound connection—not only to food but to the joy of gathering together, sharing stories, and, of course, indulging in life’s sweet moments.
Now, let’s carry that spirit into your kitchen as we create your very own batch of Ooey Gooey Banana Bars!
Ingredients
Before we get started, let’s gather our ingredients. Here’s what you’ll need:
Ingredients List:
-
3 ripe bananas, mashed
- Ripe bananas are sweeter and break down more easily, making them perfect for this recipe. If you don’t have people who eat bananas when they’re ripe, just stick them in a paper bag for a day or two, or bake them for a few minutes until they’re soft!
-
1/2 cup unsalted butter, melted
- I prefer unsalted butter for its versatility, but if you only have salted, just skip adding any salt later! This butter will provide richness and moisture.
-
1 cup brown sugar
- Brown sugar gives the bars that lovely caramel flavor. You can use white sugar, but I highly recommend sticking with brown for that melt-in-your-mouth experience.
-
1 large egg
- The egg is your binder—helping everything come together into a cohesive, gooey treat! For a vegan option, try using a "flax egg" (1 tablespoon ground flaxseed mixed with 2.5 tablespoons water) as a substitute.
-
1 teaspoon vanilla extract
- Vanilla enhances all the other flavors—don’t skip it! If you want to get fancy, try using homemade vanilla extract or a splash of almond extract for a different twist.
-
1 cup all-purpose flour
- This is the base of our bars! If you’re looking for gluten-free alternatives, a 1:1 gluten-free flour blend can do the trick.
-
1 teaspoon baking soda
- This is our leavening agent. It helps the bars rise and become fluffy while granting a lovely texture.
-
1/2 teaspoon salt
- Just a pinch enhances all the sweetness!
-
1/2 cup peanut butter (for drizzling on top)
- This adds an incredible element of indulgence! If you’re not a fan of peanut butter, try drizzling melted chocolate or a caramel sauce instead.
Now that we have our ingredients, let’s get our hands a little messy!
Step-by-Step Instructions
-
Preheat the Oven:
Start by preheating your oven to 350°F (175°C). This step is essential because we want our banana bars to bake evenly and perfectly. And trust me, your anticipation will build as the kitchen fills with that sweet banana aroma! -
Prepare the Baking Dish:
Grab an 8×8 inch baking dish (or any similarly sized dish). Grease it lightly with some butter or line it with parchment paper for easy removal. Honestly, who wants to wrestle with stuck bars? -
Mash the Bananas:
In a large mixing bowl, mash those ripe bananas with a fork or potato masher. Aim for a consistency that’s mostly smooth, with a few chunks to enhance the texture. Fun fact: the more you mash them, the sweeter your bars will be! -
Mix in the Wet Ingredients:
Stir in the melted butter until combined. Next, mix in the brown sugar, followed by the egg and vanilla extract. Ensure everything is well combined—you want that delightful flavor to spread throughout the batter. -
Combine the Dry Ingredients:
In a separate bowl, whisk together the flour, baking soda, and salt. Then, gently fold the dry mixture into the wet mixture. Be careful not to overmix—you want the bars to remain soft and gooey, not tough! -
Pour and Spread:
Pour the batter into the prepared baking dish, spreading it out evenly with a spatula. Now, this is the moment where you can be a little extra! Drizzle the peanut butter over the top in a zigzag pattern. If the peanut butter is too thick to drizzle, warm it slightly in the microwave for easier pouring. -
Bake:
Place the dish in the preheated oven and bake for about 25-30 minutes. Keep an eye on them! The bars are done when the edges are golden and a toothpick inserted into the center comes out with a few moist crumbs. -
Cool and Cut:
Once baked, remove the bars from the oven and allow them to cool in the pan for about 10 minutes. Once they’re slightly cooled, use a sharp knife to cut them into squares. Trust me; the cool-down period is torture, but the excitement is worth it!
Each step brings us closer to banana heaven! Feel free to sing or dance a little while you wait—your kitchen deserves a soulful serenade!
Serving Suggestions
Ah, the moment of truth has arrived! When serving your Ooey Gooey Banana Bars, consider a simple yet effective presentation. You can either serve them warm with a scoop of vanilla ice cream on the side or dust them with powdered sugar for a touch of elegance. For another layer of flavor, drizzle a bit more warm peanut butter or chocolate sauce on top just before serving.
And don’t forget to plate them on your favorite serving platter to add a personal touch to your gathering. They’ll look beautiful and inviting!
Recipe Variations
Want to mix things up? Here are a few delightful variations to suit your taste:
- Nutty Appeal: Add 1/2 cup of chopped walnuts or pecans to the batter for an additional crunch.
- Chocolate Lovers: Fold in 1/2 cup of chocolate chips for a deliciously chocolatey twist!
- Tropical Banana Bars: Add shredded coconut and chopped pineapple for a tropical vibe!
- Oatmeal Swirl: Incorporate a 1/2 cup of rolled oats into the batter for wholesome goodness.
- Spicy Banana Bars: Enhance the flavor profile by adding a teaspoon of cinnamon or nutmeg to the dry ingredients for a warm spiciness.
Feel free to experiment and see what delightful combinations you can come up with!
Chef’s Notes
These Ooey Gooey Banana Bars have been a staple in my kitchen for years, and like all good recipes, they’ve evolved over time. I’ve swapped in different nut butters, played around with spices, and even topped them with fresh fruit. Each adaptation has led to some beautiful kitchen memories with friends and family.
And speaking of memories, I once made these for a potluck dinner, completely forgetting to add the egg! I was mortified, but thankfully, everyone loved them just the same, and the "oops!" turned into a great conversation starter! Embrace your imperfections; in the kitchen and in life, it’s those little moments that create the best stories.
FAQs and Troubleshooting
-
Why are my banana bars too dense?
- Overmixing the batter is often the culprit! Mix until just combined to keep them soft and gooey.
-
Can I use frozen bananas?
- Absolutely! Thaw the bananas and drain excess liquid before mashing them, and you’re good to go.
-
What’s the best way to store these bars?
- Store in an airtight container at room temperature for up to three days. For longer storage, you can refrigerate them for up to a week or freeze them individually wrapped for up to 3 months!
-
Can I make this recipe vegan?
- Yes! Substitute the egg for a flax egg or any egg replacement you prefer, and use a vegan butter alternative.
Nutritional Info (if applicable)
While I love indulging in these banana bars, it’s always helpful to know what you’re eating. The estimates below give you an idea of what each bar contains, but keep in mind the figures can vary based on your substitutes:
- Calories: Approximately 180
- Fat: 8g
- Carbohydrates: 26g
- Protein: 3g
- Fiber: 1g
There you have it! Your Ooey Gooey Banana Bars are ready to be enjoyed. Thank you for letting me share this delicious recipe with you. May your cooking adventures be filled with joy, laughter, and sweet memories! Happy baking, friend! 🍌✨
PrintOoey Gooey Banana Bars
These delightful banana bars are sweet, comforting, and the perfect balance of chewy and soft. Easy to make and irresistibly delicious!
- Prep Time: 10 minutes
- Cook Time: 30 minutes
- Total Time: 40 minutes
- Yield: 12 servings 1x
- Category: Dessert
- Method: Baking
- Cuisine: American
- Diet: Vegetarian
Ingredients
- 3 ripe bananas, mashed
- 1/2 cup unsalted butter, melted
- 1 cup brown sugar
- 1 large egg
- 1 teaspoon vanilla extract
- 1 cup all-purpose flour
- 1 teaspoon baking soda
- 1/2 teaspoon salt
- 1/2 cup peanut butter (for drizzling on top)
Instructions
- Preheat the oven to 350°F (175°C).
- Prepare an 8×8 inch baking dish by greasing it or lining it with parchment paper.
- Mash the bananas in a large mixing bowl until mostly smooth.
- Mix in the melted butter, followed by the brown sugar, egg, and vanilla extract.
- Combine the flour, baking soda, and salt in a separate bowl and then fold into the wet ingredients.
- Pour the batter into the prepared baking dish and drizzle with peanut butter.
- Bake for 25-30 minutes until the edges are golden.
- Cool for 10 minutes before cutting into squares.
Notes
For a vegan option, substitute the egg with a flax egg and use plant-based butter. Enjoy warm with ice cream or powdered sugar!
Nutrition
- Serving Size: 1 bar
- Calories: 180
- Sugar: 15g
- Sodium: 200mg
- Fat: 8g
- Saturated Fat: 3g
- Unsaturated Fat: 5g
- Trans Fat: 0g
- Carbohydrates: 26g
- Fiber: 1g
- Protein: 3g
- Cholesterol: 20mg
Keywords: banana bars, dessert, sweet treats, baking, comfort food
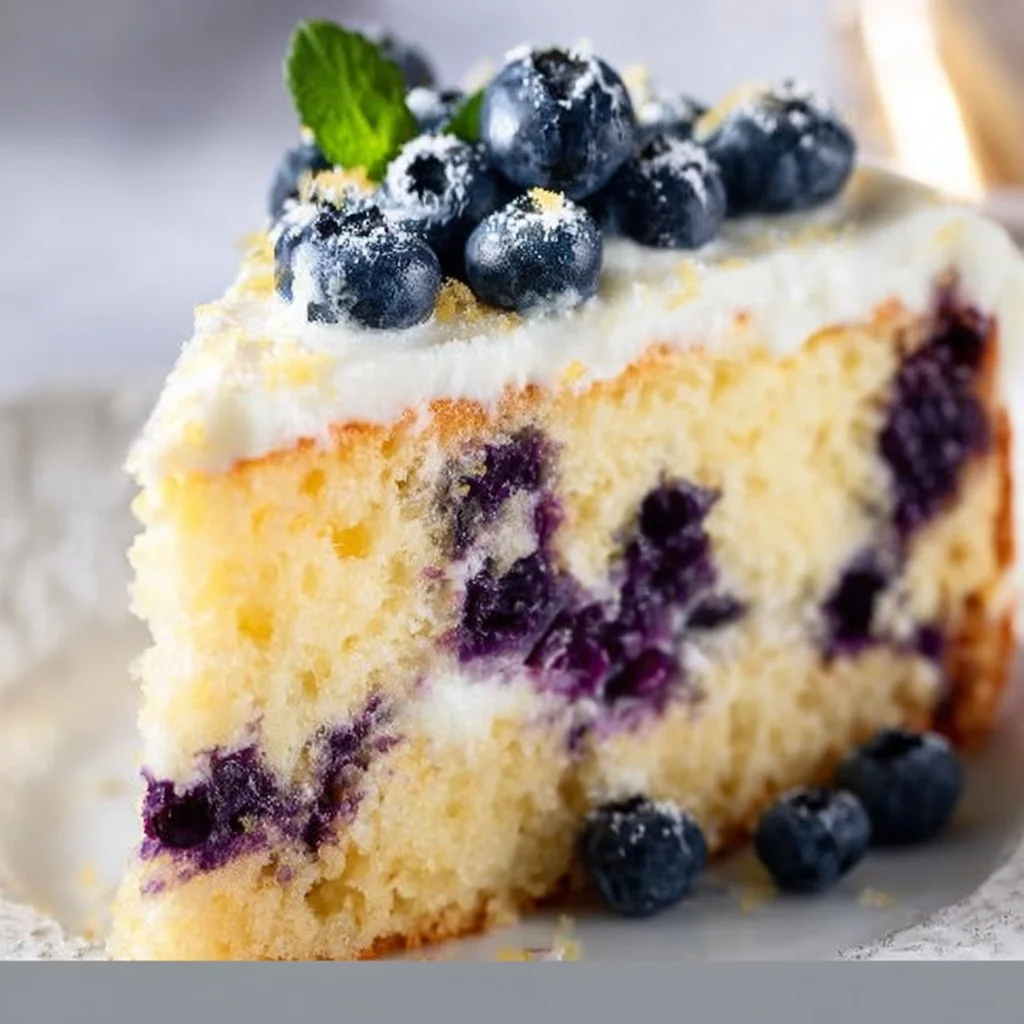
Lemon Blueberry Cake
Lemon Blueberry Cake: A Bright Slice of Happiness
Hello, fellow food lovers! It’s Savannah here, and I’m thrilled to share a recipe that brings a sunny burst of flavor right to your table: Lemon Blueberry Cake. This delightful dessert combines the refreshing tang of lemons with the sweetness of juicy blueberries, creating a treat that feels like summer sunshine in every bite. Whether you’re celebrating a special occasion or just treating yourself to something special, this cake is the perfect choice. So, tie on your apron, and let’s get baking!
A Slice of Nostalgia: My Lemon Blueberry Memory
The first time I had lemon blueberry cake was at a friend’s backyard party on a warm summer afternoon. The sun was shining, and the laughter of friends filled the air as we gathered around the table, decorated with blooming flowers and colorful plates. My friend’s mom had baked this cake, and as soon as I took my first bite, I was transported. The cake was incredibly moist, with bursts of blueberries and a zesty lemon flavor that felt refreshing and uplifting.
I remember asking for the recipe, and my friend’s mom happily shared, explaining her little secrets. Since then, I’ve made this cake countless times, tweaking it and making it my own. Each time I bake it, I’m reminded of that beautiful summer day—a reminder that food not only nourishes but also shares memories and brings people together.
Ingredients: The Building Blocks of Flavor
Here’s what you’ll need to create this luscious Lemon Blueberry Cake, along with some tips to ensure your baking experience is seamless:
For the Cake
-
3 cups cake flour (360 grams)
Soft and delicate, cake flour helps create that light, fluffy texture. If you don’t have cake flour, you can substitute it with all-purpose flour, but for a lighter cake, consider adding a tablespoon of cornstarch for each cup. -
2 teaspoons baking powder
This is your leavening agent, making the cake rise beautifully. Be sure it’s fresh for the best results! -
1/2 teaspoon baking soda
Works with the acidity of the lemon juice to give the cake some lift. -
1/2 teaspoon salt
A little salt enhances all the flavors, balancing the sweetness. -
3/4 cup buttermilk (180 ml) (room temperature)
Buttermilk adds moisture and tang. If you don’t have any, you can substitute with regular milk by adding a teaspoon of lemon juice or vinegar to sour it slightly. -
1/3 cup lemon juice (80 ml) (freshly squeezed)
Freshly squeezed is key here! Bottled lemon juice lacks the vibrant flavor that makes this cake shine. -
1 cup unsalted butter (226 grams) (softened to room temperature)
Softened butter helps to cream easily and gives the cake a rich flavor. If you forget to take it out, pop it in the microwave for a few seconds but be careful not to melt it! -
1 3/4 cups granulated sugar (350 grams)
Sweetness is essential! This helps create a nice crunchy crust while keeping the inside moist. -
2 tablespoons lemon zest
This adds intense lemon flavor. Make sure to zest only the yellow part of the lemon for the best taste. -
2 teaspoons vanilla extract
A touch of vanilla rounds out the cake’s flavor beautifully. -
4 large eggs (room temperature)
Eggs help bind everything together. Take them out of the fridge ahead of time so they can mix in smoothly. -
2 cups blueberries (fresh)
I highly recommend using fresh blueberries for a juicy burst of flavor. If using frozen, make sure to thaw and dry them to avoid excess moisture in the batter. -
2 teaspoons cake flour (or all-purpose flour)
Tossing the blueberries in a little flour prevents them from sinking to the bottom of the cake.
For the Cream Cheese Frosting
-
1/2 cup unsalted butter (112 grams) (softened)
Adds creaminess and helps the frosting whip up nice and fluffy. -
8 oz brick-style cream cheese (226 grams)
Full-fat cream cheese gives the best texture and taste. Avoid "light" versions for frosting. -
1 teaspoon lemon juice (freshly squeezed)
Just a hint of lemon to brighten up the cream cheese filling! -
3 – 4 cups powdered sugar (330-440 grams) (sifted)
Sweetness and body! Start with 3 cups, and you can add more to achieve your desired thickness. -
1 tablespoon whipping cream (as needed)
If your frosting is too thick, a splash of whipping cream can help smooth it out.
For the Topping
-
3/4 cup unsalted butter (168 grams) (softened)
Another layer of butter for richness. -
12 ounces brick-style cream cheese (340 grams) (full fat)
Same as above, make sure it’s at room temperature for smooth frosting. -
1 1/2 teaspoons lemon juice (freshly squeezed)
Enhancing the lemon flavor once again! -
4 1/2 – 5 1/2 cups powdered sugar (495 – 605 grams) (sifted)
Depending on how sweet you love your frosting! -
1-2 tablespoons whipping cream (as needed)
For a smooth consistency in your topping.
With all your ingredients ready, let’s make some magic in the kitchen!
Step-by-Step Instructions: Let’s Bake!
Step 1: Preheat and Prep
Start by preheating your oven to 350°F (175°C). Grease and flour two 9-inch round cake pans. You want to make sure your cakes come out cleanly, and greasing them is key! I like to line the bottoms with parchment paper for extra insurance.
Step 2: Combine Dry Ingredients
In a medium bowl, whisk together the cake flour, baking powder, baking soda, and salt. This helps to evenly distribute the leavening agents throughout the flour, ensuring your cake rises nicely.
Step 3: Blend Butter and Sugar
In a large bowl, cream together the softened butter and granulated sugar until the mixture is light and fluffy. This should take about 3–5 minutes. The incorporation of air is important for a light cake. Tip: Use a stand mixer if you have one! It saves your arms from a workout.
Step 4: Add in the Eggs and Zest
One by one, add the eggs, mixing well after each addition. Then, mix in the lemon zest and vanilla extract. You’ll start to notice the aromatic zest mingling with the butter—pure bliss!
Step 5: Mix Liquid Ingredients
Once combined, gradulally add the buttermilk and lemon juice. Mix until just combined. Be careful not to overmix at this stage; we want our cake light and airy!
Step 6: Combine Dry and Wet Ingredients
Now, it’s time to incorporate the dry mixture! Slowly add the flour mixture to the wet ingredients in three parts. Make sure to mix until just combined to keep the cake from becoming dense.
Step 7: Prepare the Blueberries
Before you put the blueberries in the batter, toss them gently in 2 teaspoons of flour. This helps keep them from sinking while baking. Gently fold the blueberries into the batter, taking care not to smash them.
Step 8: Bake
Divide the batter evenly between the prepared cake pans and smooth the tops with a spatula. Bake in the preheated oven for 25-30 minutes or until a toothpick inserted into the center comes out clean. Lower the temperature to 325°F (160°C) if your oven runs hot; you want a nice golden edge without burning.
Step 9: Cool
After the cakes are baked, remove them from the oven and cool in the pans for about 10 minutes. Then, carefully transfer them to a wire rack to cool completely. Cooling is crucial for a frosting-ready surface!
Step 10: Make the Cream Cheese Frosting
While the cakes cool, let’s whip up that delicious frosting. In a large bowl, beat the softened butter and cream cheese together until it’s smooth and creamy. Gradually add the sifted powdered sugar, along with the lemon juice. If it feels too thick, add the whipping cream until the desired consistency is reached.
Step 11: Frost the Cake
Once the cakes are completely cool, place one layer on your serving platter. Spread a good layer of cream cheese frosting on top. Gently place the second layer on top and frost the top and sides of the cake. Chef hack: For a clean cut, run your knife under hot water before slicing the cake!
Serving Suggestions: Presentation Matters
When it’s time to serve, slice the cake into generous pieces and use a spatula to serve. A light dusting of powdered sugar over the top can add a beautiful finishing touch. For an extra pop, garnish with fresh blueberries and a few lemon zest curls! Serve it with a scoop of vanilla ice cream or a dollop of whipped cream for a little extra indulgence.
Recipe Variations: Switch it Up!
Love the flavor but want to add your own twist? Here are a few easy variations:
- Nutty Crunch: Add 1 cup of chopped nuts (like walnuts or pecans) for crunch.
- Lemon-Lime Twist: Replace half of the lemon juice with lime juice for a unique twist!
- Berry Medley: Swap out some blueberries for raspberries or blackberries for a mixed berry delight.
- Gluten-Free Option: Swap the cake flour for a gluten-free baking blend, and make sure your baking powder is certified gluten-free.
- Less Sugar: Reduce the sugar by a third and use an equal amount of honey or maple syrup for a healthier cake.
Chef’s Notes: It’s All About Experience
Over the years, this recipe has transformed in many kitchens, from my friend’s backyard to my own table. The first time I made it, I got a little overenthusiastic with the flour while mixing in the blueberries, and they ended up a little squished! The result was a “marbled” effect that still tasted heavenly. The lesson? Baking is forgiving, and sometimes the mistakes make the best stories!
FAQs and Troubleshooting
1. My cake didn’t rise—what went wrong?
This can happen if your baking powder or baking soda is old or expired. Double-check their freshness! Remember, proper mixing at each stage is also key to incorporating air.
2. Can I use frozen blueberries?
Absolutely! Just be sure to thaw them and pat dry before tossing them in flour to avoid excess moisture in the batter.
3. Why is my frosting too runny?
If your frosting is too runny, simply add more sifted powdered sugar until it thickens up to your desired consistency.
4. How do I store my cake?
Store any leftover cake in an airtight container in the refrigerator for up to 3-5 days. You can also freeze it for up to 3 months. Just thaw it in the fridge overnight before serving!
Nutritional Info
(Note: Nutritional values are estimates and can vary. Always check with a nutritionist for specific dietary needs.)
- Calories: Approximately 400-450 per slice (depending on size and frosting)
- Fat: 20-25g
- Carbohydrates: 50g
- Protein: 5g
- Sugar: 30g
So, there you have it! Your guide to creating this beautiful Lemon Blueberry Cake that’s sure to be a hit every time. Remember, cooking is all about joy and connection. So, gather your loved ones, enjoy the process, and let’s make some delicious memories together. Happy baking! 🍰✨
PrintLemon Blueberry Cake
A delightful dessert that combines the refreshing tang of lemons with the sweetness of juicy blueberries, creating a treat reminiscent of summer sunshine.
- Prep Time: 20 minutes
- Cook Time: 30 minutes
- Total Time: 50 minutes
- Yield: 12 servings 1x
- Category: Dessert
- Method: Baking
- Cuisine: American
- Diet: Vegetarian
Ingredients
- 3 cups cake flour (360 grams)
- 2 teaspoons baking powder
- 1/2 teaspoon baking soda
- 1/2 teaspoon salt
- 3/4 cup buttermilk (180 ml)
- 1/3 cup lemon juice (80 ml)
- 1 cup unsalted butter (226 grams)
- 1 3/4 cups granulated sugar (350 grams)
- 2 tablespoons lemon zest
- 2 teaspoons vanilla extract
- 4 large eggs
- 2 cups blueberries (fresh)
- 2 teaspoons cake flour (or all-purpose flour)
- 1/2 cup unsalted butter (112 grams)
- 8 oz brick-style cream cheese (226 grams)
- 1 teaspoon lemon juice (freshly squeezed)
- 3 – 4 cups powdered sugar (330–440 grams)
- 1 tablespoon whipping cream (as needed)
- 3/4 cup unsalted butter (168 grams)
- 12 ounces brick-style cream cheese (340 grams)
- 1 1/2 teaspoons lemon juice (freshly squeezed)
- 4 1/2 – 5 1/2 cups powdered sugar (495 – 605 grams)
- 1–2 tablespoons whipping cream (as needed)
Instructions
- Preheat your oven to 350°F (175°C) and grease two 9-inch round cake pans.
- Combine the cake flour, baking powder, baking soda, and salt in a medium bowl.
- Blend the softened butter and granulated sugar until light and fluffy.
- Add the eggs one by one, mixing well after each addition, then mix in the lemon zest and vanilla extract.
- Mix the buttermilk and lemon juice gradually into the wet ingredients.
- Combine the dry ingredients with the wet mixture in three parts, mixing until just combined.
- Prepare the blueberries by tossing them in 2 teaspoons of flour before folding them into the batter.
- Bake for 25-30 minutes or until a toothpick comes out clean.
- Cool the cakes in the pans for about 10 minutes before transferring to a wire rack to cool completely.
- Make the cream cheese frosting by beating the softened butter and cream cheese until smooth, adding powdered sugar and lemon juice until the desired consistency is reached.
- Frost the cooled cakes, layering with frosting in between and on top.
Notes
For a beautiful presentation, dust with powdered sugar and garnish with fresh blueberries.
Nutrition
- Serving Size: 1 slice
- Calories: 400
- Sugar: 30g
- Sodium: 350mg
- Fat: 25g
- Saturated Fat: 10g
- Unsaturated Fat: 9g
- Trans Fat: 0g
- Carbohydrates: 50g
- Fiber: 1g
- Protein: 5g
- Cholesterol: 105mg
Keywords: lemon blueberry cake, dessert, summer, baking, cream cheese frosting