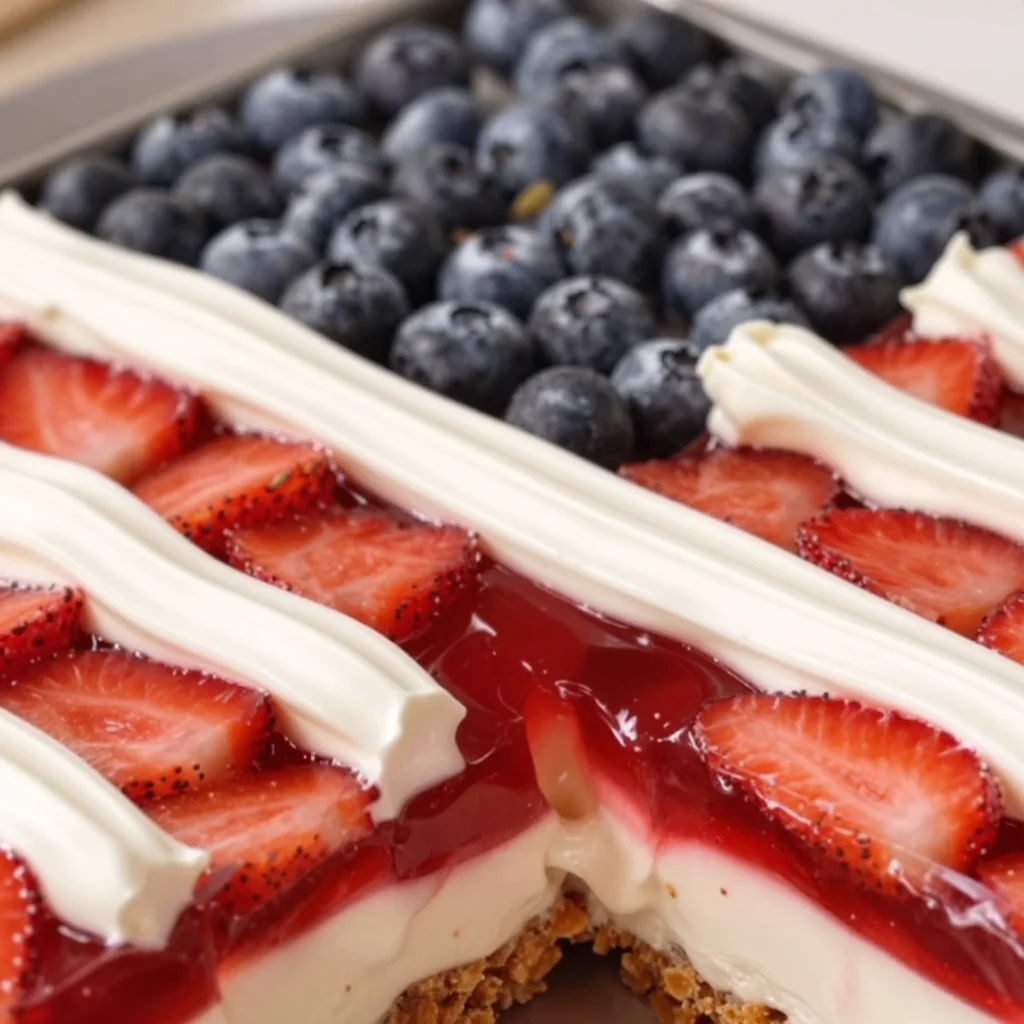
Beginner-Friendly No-Bake Strawberry Pretzel Jello Salad
The Best Strawberry Pretzel Jello Salad Recipe
Hello there, fellow foodies! Today, I’m thrilled to share with you one of the most delightful recipes that holds a treasure trove of memories for me: Strawberry Pretzel Jello Salad. This beautiful dish, with its salty-sweet crunch, luscious creaminess, and vibrant strawberry flavor, is not just a dessert; it’s a nostalgic journey that will transport you back to sunny picnics and family gatherings.
A Sweet Memory
Let me take you back to my childhood, where every summer was marked by family reunions and outdoor barbecues. One particular gathering stands out in my mind. The sun was shining, laughter filled the air, and my Aunt Clara arrived with a vibrant dish that instantly caught everyone’s attention—her famous Strawberry Pretzel Jello Salad.
As kids, we didn’t quite grasp the culinary artistry involved, but we knew one thing: this dish was magic. The combination of the crunchy pretzel crust, silky cream cheese layer, and jello top was simply irresistible. I remember sitting with my cousins, eagerly waiting for Aunt Clara to set down the salad, our eyes wide with anticipation. Once it hit the table, there was hardly a moment to waste before we dove in, savoring every bite.
That memory encapsulates the heart of this recipe—bringing people together over food that is as comforting as it is delicious. Today, I hope to recreate that same joy for you with my favorite Strawberry Pretzel Jello Salad recipe!
Ingredients
Before we get started, here’s what you’ll need to whip up this masterpiece. Don’t worry; each ingredient has its own charm, and I’ve included some fun tips along the way!
-
2 1/2 cups pretzels, coarsely chopped
A classic ingredient that gives this dish its signature salty crunch. Feel free to use any type of pretzel—rods, twists, or even gluten-free pretzels for a dietary swap. Just make sure they’re coarsely chopped to maintain that delightful texture! -
1/4 cup granulated white sugar
This sugar will blend with the pretzels and butter, adding a touch of sweetness to the salty base. If you prefer a healthier alternative, you can swap it out for coconut sugar or a sugar substitute. -
1/2 cup butter, melted
Butter binds the crust together and adds richness. For a lighter option, you can use unsalted margarine or even a plant-based butter. -
16 ounces Tru Whip or Cool Whip
This is the key to keeping your dessert light and fluffy. I personally prefer Cool Whip due to its texture—just keep an eye out for those pesky MSG ingredients. If you want a homemade alternative, you can whip heavy cream with a touch of powdered sugar instead. -
8 ounces cream cheese
The creamy heart of this salad! Make sure it’s softened to room temperature so it blends smoothly. If you’re looking for a lighter version, you can use whipped cream cheese or Neufchâtel. -
1 cup granulated white sugar
This sugar plays a vital role in sweetening the cream cheese layer. If you’re feeling adventurous, feel free to experiment with agave or maple syrup! -
6 ounces instant strawberry jello
The star of the show! This ingredient adds a burst of flavor and that stunning bright red hue. You can easily switch it up with other flavors like raspberry or peach if you’re in the mood for a twist. -
2 cups boiling water
This will dissolve your jello and bring everything together. -
1 quart strawberries, hulled and sliced (fresh or frozen that have been thawed)
Strawberries lend their freshness and bright flavor. If they’re out of season, you can use frozen strawberries, but make sure to thaw and drain them well to avoid excess liquid.
Step-by-Step Instructions
Alright, let’s dive into the fun part! Follow these steps, and I promise you’ll have a show-stopping Strawberry Pretzel Jello Salad ready in no time.
-
Preheat and Prep
Preheat your oven to 350°F (175°C). Grab a 9×13 baking dish and have it ready for your crust. Trust me, the perfect layer of pretzel goodness needs the right home! -
Make the Pretzel Crust
In a mixing bowl, combine the coarsely chopped pretzels, melted butter, and 1/4 cup of granulated sugar. Mix until the pretzels are well coated—your kitchen will start to smell fantastic already! -
Bake the Crust
Pour that crunchy mixture into your baking dish and press it down firmly. You want it to be evenly distributed so every bite has that delicious crunch. Bake for about 10 minutes or until the edges are slightly golden. Keep an eye on it! -
Prepare the Cream Cheese Layer
While the pretzel crust cools, let’s make the cream cheese layer. In a mixing bowl, beat the softened cream cheese and 1 cup of granulated sugar until smooth and creamy. Add in the whipped topping (Cool Whip or Tru Whip) and mix until fully combined. This duo is going to be so creamy and dreamy! -
Spread the Cream Cheese Mixture
Once your pretzel crust has cooled completely, spread the creamy mixture evenly over the pretzel crust. Grab a spatula and work your magic! Make sure it’s smooth, leaving a little space around the edges to keep it looking lovely. -
Prepare the Jello Layer
In a separate bowl, dissolve the instant strawberry jello in 2 cups of boiling water. Stir it well until it’s fully dissolved, then let it cool for a few minutes. -
Add the Strawberries
Once the jello has slightly cooled (but not set!), stir in the hulled and sliced strawberries. This is where the magic happens! The fresh strawberries will shine through, and your jello will shimmer beautifully. -
Pour the Jello Layer
Gently pour the strawberry mixture over the cream cheese layer, ensuring it spreads evenly. This is where patience comes in—allow the jello to settle evenly without mixing it into the cream cheese layer beneath. -
Chill
Cover the dish with plastic wrap or a lid and pop it in the fridge for at least 4 hours, or until the jello is fully set. This step is crucial for achieving that lovely layered effect. -
Slice and Serve
Once set, slice yourself a generous portion, and if you’re feeling extra fancy, top it with a dollop of whipped topping or a sprinkle of crushed pretzels for added crunch.
Serving Suggestions
For plating, use a sharp knife to make clean cuts through the layers, exposing those breathtaking colors. Serve it chilled, and for an added touch of elegance, you can garnish with fresh mint leaves or a dusting of powdered sugar. Trust me, these little touches elevate the experience!
Recipe Variations
Here are a few creative twists you can try to make this dish your own:
- Berry Mixer: Swap in different berries like raspberries or blackberries for a flavor twist. You could even mix them for a delightful blend!
- Change the Jello Flavor: Try peach or blue raspberry jello for an unexpected flavor profile.
- Nutty Pretzel Crust: Add crushed nuts like pecans or almonds to your pretzel crust for an added crunch and flavor.
- Use Yogurt: Replace the cream cheese layer with Greek yogurt for a lighter version, perfect for a warm day.
- Vegan-Friendly: Use dairy-free cream cheese and whipped topping to create a plant-based version that everyone can enjoy.
Chef’s Notes
One of the most fun parts about cooking is how recipes evolve over time. This Strawberry Pretzel Jello Salad has seen countless iterations in my kitchen. From adding fresh herbs to the strawberry layer (yes, basil pairs surprisingly well!) to trying out flavored cream cheeses, every attempt has added a personal touch. And oh, the mishaps! I once forgot to add the boiling water to the jello and ended up with a lovely strawberry-flavored gelatin blob that wouldn’t set! But hey, that’s kitchen life for you; we learn and laugh!
FAQs and Troubleshooting
1. Why did my jello not set properly?
If your jello didn’t set, it might be due to not dissolving it thoroughly in boiling water or using more than the recommended water. Make sure to follow the jello package instructions closely!
2. Can I use fresh strawberries instead of frozen?
Absolutely! Fresh strawberries work beautifully, and as long as they’re in season, you’ll get the best flavor. If using frozen, be sure to thaw and drain them well.
3. How long can I keep this salad?
In the fridge, it can last about 3-5 days, so feel free to make it ahead of time for events. Just make sure it’s covered well to prevent it from absorbing other fridge smells!
4. What can I do if it’s too sweet?
If you find it too sweet, you can balance it out by adding a bit of lemon juice to the cream cheese layer before mixing. This adds brightness and cuts through the sweetness perfectly!
Nutritional Info
While this sweet treat is a crowd favorite, keep in mind it does have its indulgences. One serving (approximately 1/12 of the dish) typically contains about 200 calories, depending on the exact brands and quantities used. It’s best enjoyed in moderation!
There you have it—the BEST Strawberry Pretzel Jello Salad you’ll ever make! I hope this recipe brings as much joy to you and your loved ones as it has to me through the years. So tie on that apron, gather your ingredients, and dive into this delightful dish. Happy cooking!
PrintThe Best Strawberry Pretzel Jello Salad
A nostalgic dessert salad featuring a crunchy pretzel crust, creamy cheese layer, and vibrant strawberry jello topping.
- Prep Time: 15 minutes
- Cook Time: 10 minutes
- Total Time: 240 minutes
- Yield: 12 servings 1x
- Category: Dessert
- Method: Baking
- Cuisine: American
- Diet: Vegetarian
Ingredients
- 2 1/2 cups pretzels, coarsely chopped
- 1/4 cup granulated white sugar
- 1/2 cup butter, melted
- 16 ounces Tru Whip or Cool Whip
- 8 ounces cream cheese, softened
- 1 cup granulated white sugar
- 6 ounces instant strawberry jello
- 2 cups boiling water
- 1 quart strawberries, hulled and sliced
Instructions
- Preheat your oven to 350°F (175°C) and prepare a 9×13 baking dish.
- Combine pretzels, melted butter, and 1/4 cup sugar in a mixing bowl.
- Press the pretzel mixture into the baking dish and bake for about 10 minutes.
- Beat cream cheese and 1 cup of sugar until smooth, then mix in whipped topping.
- Spread the cream cheese mixture over the cooled pretzel crust.
- Dissolve the jello in boiling water and let cool slightly.
- Stir in the sliced strawberries into the cooled jello mixture.
- Pour the strawberry jello mixture over the cream cheese layer.
- Chill in the refrigerator for at least 4 hours.
- Slice and serve with optional toppings of whipped topping or crushed pretzels.
Notes
Can be made ahead of time and stored in the fridge for 3-5 days. Ensure it is covered to avoid absorbing other fridge odors.
Nutrition
- Serving Size: 1 serving
- Calories: 200
- Sugar: 20g
- Sodium: 300mg
- Fat: 10g
- Saturated Fat: 5g
- Unsaturated Fat: 5g
- Trans Fat: 0g
- Carbohydrates: 25g
- Fiber: 1g
- Protein: 3g
- Cholesterol: 30mg
Keywords: strawberry, dessert, jello salad, pretzel salad, summer recipes, picnic food
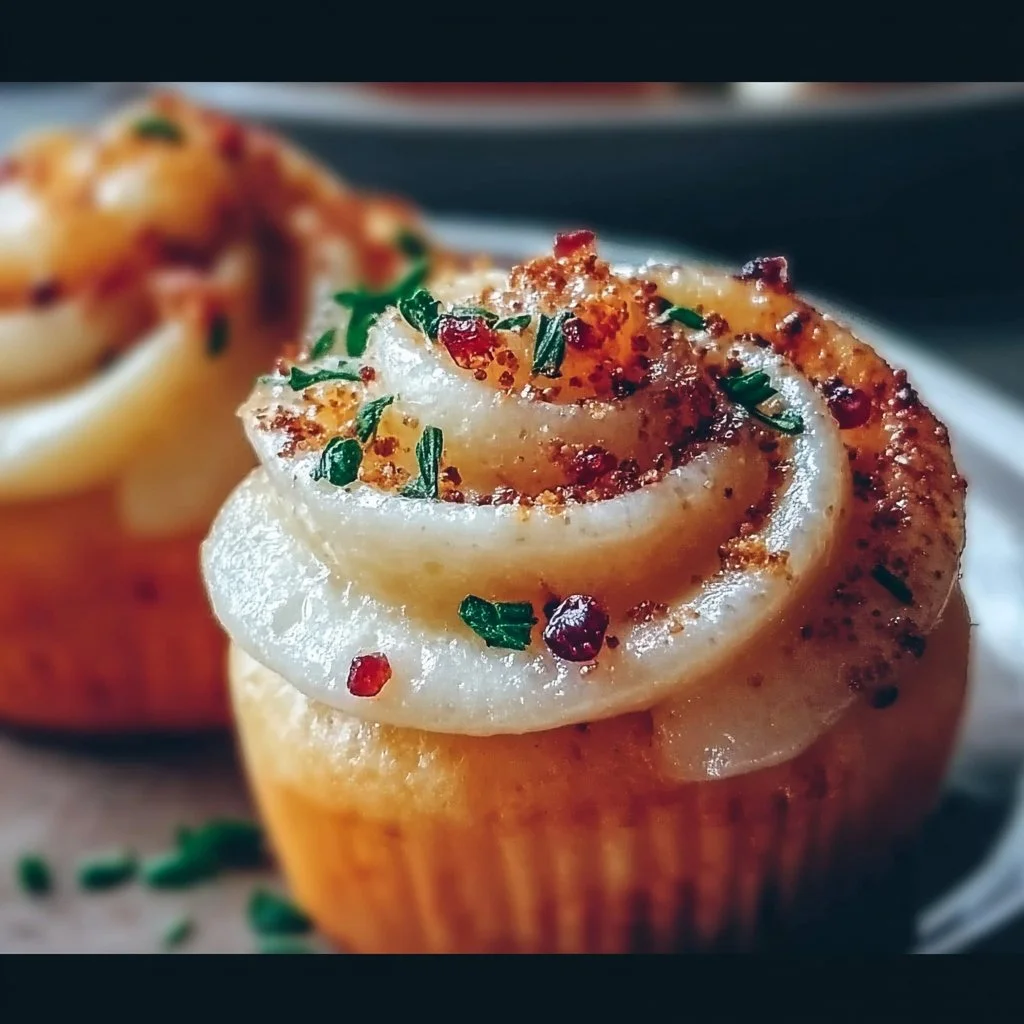
Pin by Vital Vibes on Cupcake Heaven 🧁 in 2026 | Recipes, Cooking, Cooking recipes
Cupcake Heaven: Your Ultimate Guide to Delectable Cupcake Recipes
Hello, fellow food lovers! Savannah Pierce here, and I’m absolutely thrilled to dive into one of my all-time favorite sweet treats—cupcakes! These delightful little cakes may be small, but they carry a world of flavor and creativity in each bite. Whether it’s a classic vanilla buttercream or a decadent chocolate ganache, cupcakes are the perfect canvas for your baking artistry.
Cupcakes have a special place in my heart, evoking memories of birthday parties, festive gatherings, and cozy evenings spent with family. Their versatility and charm make them ideal for any occasion. From sweet celebrations to casual bake-offs, every batch tells a story. Today, I want to take you on a journey into "Cupcake Heaven," where we’ll explore delightful recipes, tips, and tricks to elevate your cupcake game.
So, grab your mixing bowls and preheat that oven—we’re about to create something magical! With just a few quality ingredients and a sprinkle of love, you’ll be whipping up cupcakes that not only look stunning but also taste out of this world. Let’s get into the sweet details!
Personal Story
Ah, the nostalgia! I can still remember the first time I took a bite of my grandmother’s famous chocolate cupcakes. It was my birthday, and she had baked a dozen mini masterpieces, each with a swirl of rich frosting and a cherry on top—a simple yet divine affair. As I bit into that soft, moist cake, a burst of chocolate flavor danced on my palate. The joy I felt that day was amplified by the laughter of family, the whiff of vanilla wafting through the kitchen, and of course, the love that was poured into each cupcake.
Fast forward to now, when I host dinner parties and celebrations, and I find myself channeling those nostalgic moments. Cupcakes allow me to evoke that same warmth and joy for my friends and family. The best part? I’ve tweaked those recipes over the years, infusing them with fresh ingredients and modern flavors while keeping the tradition alive! Let’s make some cupcake magic, shall we?
Ingredients
Here’s a classic list of ingredients you’ll need for a delightful batch of cupcakes—these specific choices ensure a soft, delectable texture and irresistible flavors!
Base Ingredients:
- All-Purpose Flour: The backbone of our cupcakes! It provides structure. For a gluten-free option, swap with almond flour or a gluten-free flour blend.
- Granulated Sugar: Sweetness is key! You can use coconut sugar or honey, but keep in mind they may alter the final texture slightly.
- Baking Powder: This is what gives your cupcakes that lovely rise. Double-check the expiration date; old baking powder can lead to flat cakes!
- Salt: Just a pinch enhances sweetness and balances flavors—don’t skip it!
- Unsalted Butter: Adds richness and moisture. If you want a dairy-free cupcake, olive oil is a great substitute.
- Eggs: Vital for binding moisture. For a vegan twist, flax eggs work wonderfully (1 flaxseed meal + 2.5 tablespoons of water = 1 egg).
- Milk: Enhances flavor and moistness. You can use almond milk, oat milk, or any non-dairy alternative.
- Vanilla Extract: This elevates the flavor profile! Use pure vanilla extract for a more natural taste, or get creative and try almond extract for a hint of nuttiness.
Optional Frosting Ingredients:
- Powdered Sugar: This dreamy ingredient gives our frosting that fluffy texture. For a healthier option, powdered erythritol works well.
- Cream Cheese: Perfect for a tangy frosting! You could substitute with vegan cream cheese for a dairy-free version.
- Heavy Cream: Utilized to achieve that light, airy frosting; coconut cream works like a charm if you’re dairy-free.
Step-by-Step Instructions
Now, let’s get baking! Preheat that oven to 350°F (175°C) and prepare your cupcake pans with liners. With everything ready, here’s how to whip up delicious cupcakes:
-
Mix the Dry Ingredients: In a medium bowl, whisk together the all-purpose flour, baking powder, and salt. This ensures even distribution and helps aerate the flour for fluffier cupcakes.
-
Cream the Butter and Sugar: In a large mixing bowl, cream the softened unsalted butter and granulated sugar until light and fluffy—about 3–4 minutes. This step incorporates air, resulting in a soft texture!
-
Add the Eggs and Vanilla: Beat in the eggs one at a time, mixing well after each addition. Add the vanilla extract, and remember to scrape the sides of the bowl to incorporate all that buttery goodness.
-
Combine Dry & Wet Ingredients: Gradually add the dry mixture to the wet ingredients, alternating with milk. Start and finish with the flour. This helps maintain moisture while ensuring your batter isn’t over-mixed. Mix until just combined!
-
Fill the Cupcake Liners: Use a scoop or a measuring cup to fill each cupcake liner about two-thirds full—this allows room for rising but prevents overflow.
-
Bake: Pop them in the oven and bake for 18–20 minutes or until a toothpick inserted in the center comes out clean. Your kitchen will smell heavenly at this point—trust me!
-
Cool: Let the cupcakes cool in the pan for 5 minutes before transferring them to a wire rack. Allow them to cool completely before frosting.
-
Prepare Your Frosting: In a bowl, combine your cream cheese (or butter), powdered sugar, and a splash of heavy cream. Beat until creamy and easy to spread—adjust with more sugar or heavy cream for your desired consistency!
-
Frosting Fun: Once cooled, use a piping bag to frost your cupcakes. Start from the center and spiral outward for an elegant look—don’t worry about being perfect; it’s all about the love!
Serving Suggestions
To make your cupcakes shine, consider placing them on a decorative platter, perhaps adorned with fresh fruit or edible flowers for that wow-factor. Alternatively, you can display them in cute individual boxes for a delightful take-home treat at gatherings.
Recipe Variations
Feeling adventurous? Here are some fun twists on your classic cupcake recipe:
-
Red Velvet: Add cocoa powder and a splash of red food coloring for a gorgeous hue. Top with cream cheese frosting for the classic finish!
-
Lemon Zest: Incorporate fresh lemon zest into your batter for a bright, zesty flavor. Pair with a lemon buttercream for a refreshing lift.
-
Chocolate Chip: Fold in semi-sweet chocolate chips or chunks into the batter for an indulgent twist!
-
Spiced Maple: Substitute maple syrup for sugar and add cinnamon for a cozy autumn flavor. A maple buttercream will complement this beautifully.
-
Nutty Delight: Fold in crushed nuts or swap flour for almond flour for an interesting texture.
Chef’s Notes
Baking cupcakes has been a delightful journey for me. I remember the first time I tried to recreate my grandmother’s chocolate cupcakes; let’s just say it wasn’t pretty! The kitchen ended up looking like a flour bomb went off, but the laughter we shared that day overshadows any kitchen mishap. It’s in those moments I learned—baking is about joy, not just the end product. Over the years, I’ve perfected the recipes, but it’s always those messy, learning experiences that I treasure most.
FAQs and Troubleshooting
Q: Why are my cupcakes not rising?
A: Make sure your baking powder is fresh! Also, avoid over-mixing the batter once you’ve added the flour—this can lead to dense cupcakes.
Q: How do I store leftover cupcakes?
A: Store them in an airtight container at room temperature for 2–3 days. For longer storage, pop them in the fridge or freezer—just remember to let them come back to room temperature before enjoying!
Q: Can I use coconut flour instead of all-purpose flour?
A: Coconut flour is much more absorbent, so if you try to swap it, use only a 1/4 of what you’d normally use and add an extra egg or more liquid to balance.
Q: My frosting is too runny. What can I do?
A: If this happens, simply add more powdered sugar until you reach your desired consistency. If it’s too thick, add a drop of milk or cream.
Nutritional Info
(Nutritional info can vary based on ingredients and portion sizes.)
- Calories per cupcake (without frosting): Approximately 180
- Total Fat: 6g
- Saturated Fat: 3.5g
- Cholesterol: 43mg
- Carbohydrates: 28g
- Sugar: 14g
- Protein: 2g
And there you have it—a delightful journey into the realm of cupcakes! I hope you now feel inspired to grab that apron and whip up your very own batch of Cupcake Heaven. Every bite is a celebration, and I’m so glad to share this delicious experience with you. Remember, good food isn’t just about taste; it’s about connection, laughter, and the stories we share around the table. Happy baking!
PrintCupcake Heaven: Your Ultimate Guide to Delectable Cupcake Recipes
Explore the world of cupcakes with this delightful recipe guide, featuring classic and modern flavors that evoke nostalgia and joy.
- Prep Time: 15 minutes
- Cook Time: 20 minutes
- Total Time: 35 minutes
- Yield: 12 servings 1x
- Category: Dessert
- Method: Baking
- Cuisine: American
- Diet: Vegetarian
Ingredients
- 2 cups All-Purpose Flour
- 1 1/2 cups Granulated Sugar
- 1 tbsp Baking Powder
- 1/2 tsp Salt
- 1/2 cup Unsalted Butter, softened
- 3 Eggs
- 1 cup Milk
- 2 tsp Vanilla Extract
- Optional: 2 cups Powdered Sugar (for frosting)
- Optional: 8 oz Cream Cheese (for frosting)
- Optional: 1/4 cup Heavy Cream (for frosting)
Instructions
- Preheat the oven to 350°F (175°C) and prepare your cupcake pans with liners.
- Mix the dry ingredients: In a medium bowl, whisk together the flour, baking powder, and salt.
- Cream the butter and sugar: In a large mixing bowl, cream the softened butter and granulated sugar until light and fluffy.
- Add the eggs and vanilla: Beat in the eggs one at a time, mixing well after each addition, then add the vanilla extract.
- Combine dry and wet ingredients: Gradually add the dry mixture to the wet ingredients, alternating with milk.
- Fill the cupcake liners about two-thirds full.
- Bake for 18–20 minutes or until a toothpick comes out clean.
- Cool in the pan for 5 minutes, then transfer to a wire rack until cool.
- Prepare your frosting by beating together cream cheese, powdered sugar, and heavy cream.
- Frost with a piping bag, starting from the center and spiraling outward.
Notes
Consider using fresh fruit or edible flowers for decoration.
Nutrition
- Serving Size: 1 cupcake
- Calories: 180
- Sugar: 14g
- Sodium: 200mg
- Fat: 6g
- Saturated Fat: 3.5g
- Unsaturated Fat: 0.5g
- Trans Fat: 0g
- Carbohydrates: 28g
- Fiber: 0g
- Protein: 2g
- Cholesterol: 43mg
Keywords: cupcakes, baking, dessert, sweet treats, celebration
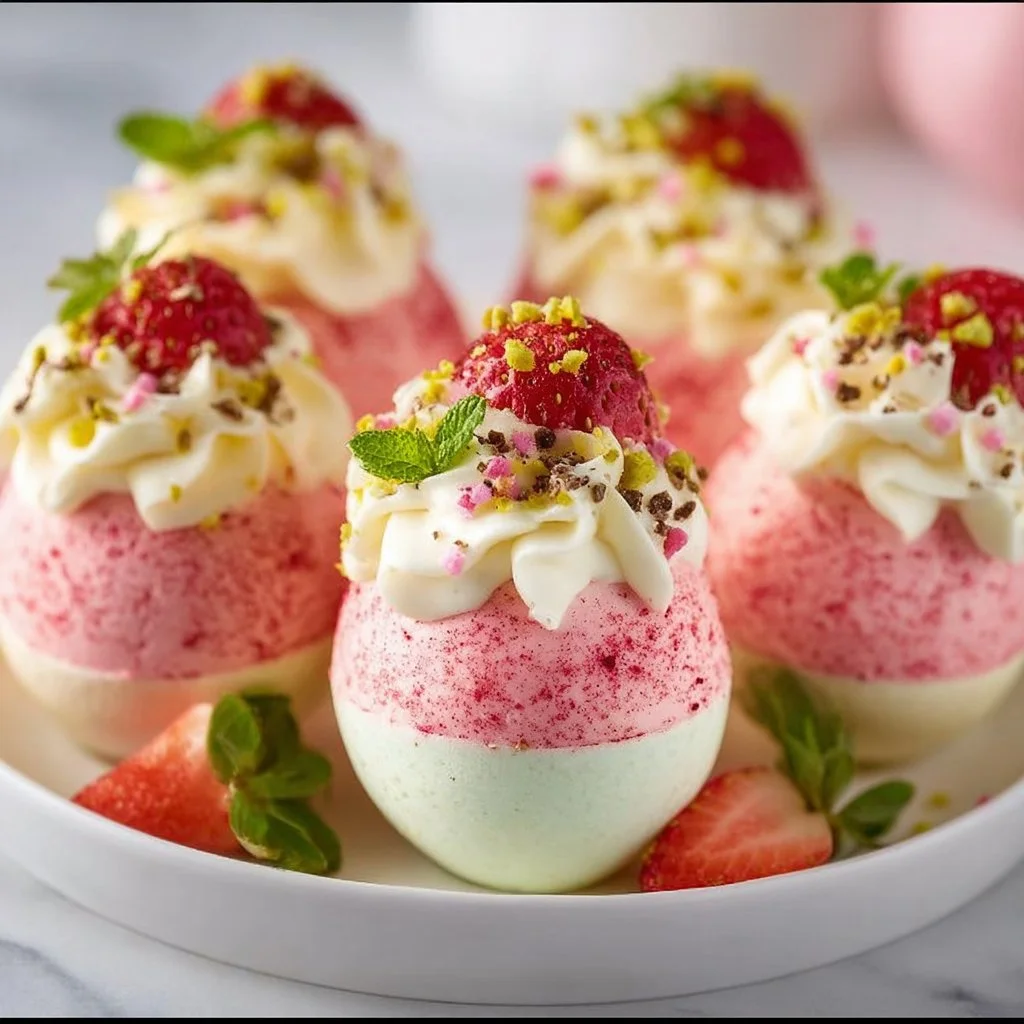
Strawberry Shortcake Easter Egg Bombs
# Strawberry Shortcake Easter Egg Bombs: A Sweet Spring Surprise!

## Introduction

Spring is in the air, and with it comes a sense of renewal, colorful blooms, and a delightful array of seasonal flavors. There’s something magical about this time of year. The warm sunshine beckons us outdoors, family gatherings become more frequent, and the delicious promise of vibrant strawberries fills the markets. Those sweet, juicy gems inspire me every year, especially when I think about one of my all-time favorite desserts: strawberry shortcake.

What if I told you that you could take that classic dessert and give it a fun, whimsical twist? Enter: **Strawberry Shortcake Easter Egg Bombs!** These charming treats are not only a showstopper for your Easter brunch or spring gatherings, but they also merge the beloved flavors of strawberry shortcake with the playful spirit of Easter. They’re perfect for kids (and kids at heart), adding a hint of surprise and a touch of nostalgia to your dessert table.

I want to bring you into my kitchen as I whip up these tasty delights! We’re going to melt, blend, mold, and most importantly, have fun while creating something that brings smiles to everyone who bites into them. Ready to dive in and create a memorable treat that combines the creamy goodness of strawberries, the rich sweetness of white chocolate, and the playful crunch of shortcake? Let’s get started!

## Personal Story

Growing up, Easter was always a big deal in our family. My grandmother would go all out with an extravagant spread, replete with colorful decorations, an Easter egg hunt, and of course, dessert! Strawberry shortcake was her pièce de résistance. I remember standing in the kitchen, watching her slice through those fluffy layers of cake as the sweet aroma of freshly whipped cream filled the air.

I still see her, apron tied neatly around her waist, expertly blending strawberries and cream, her laughter echoing as we would scoop up the leftover filling with spoons — it was a family tradition that bonded us through the simple joys of food. A few years back, I wanted to recreate that experience and add a playful twist to the traditional dessert for my niece and nephew who were coming for Easter. We decided to make **Strawberry Shortcake Easter Egg Bombs!** They loved the surprise inside and the playful presentation, and I knew I had struck gold. Thus, my very own Easter tradition was born!

## Ingredients

To make these delightful treats, you’ll need the following ingredients:

- **2 cups white chocolate chips**
  Smooth and creamy, white chocolate adds sweetness and acts as the perfect shell for our Easter egg bombs. If you’re looking for a dairy-free option, try using vegan white chocolate instead!

- **1 cup strawberries, pureed**
  Fresh strawberries bring that bright, fruity flavor. If strawberries aren’t in season, feel free to use frozen strawberries — just thaw them and drain the excess liquid.

- **1/2 cup heavy cream**
  This will be whipped into fluffy goodness that adds richness to our filling. For a lighter option, you can substitute with coconut cream or a whipped topping.

- **1/2 cup shortcake crumbs**
  These bits of deliciousness add the classic shortcake texture. You can easily make your own shortcakes or use store-bought for convenience. Gluten-free options are also available with almond flour shortcakes!

- **1 teaspoon vanilla extract**
  This aromatic essence enhances the flavors, making everything taste more amazing! You can also use almond extract for a twist.

- **Easter egg chocolate molds**
  These are vital for shaping your bombs. You can find them in any craft or baking supply store. If you don’t have egg molds, you can use small cups or even muffin tins to shape them.

## Step-by-Step Instructions

Ready to bring your Strawberry Shortcake Easter Egg Bombs to life? Let’s break it down:

1. **Melt the white chocolate.**
   Begin by placing the white chocolate chips in a microwave-safe bowl. Heat them in the microwave in 30-second increments, stirring between each interval, until smooth. This gentle melting process prevents seizing, so don’t rush it! Alternatively, you can use a double boiler for this step.

2. **Prepare the molds.**
   Using a pastry brush or the back of a spoon, carefully coat the inside of your Easter egg molds with a layer of melted white chocolate. Aim for about 1/8 inch thick. Be sure to cover all areas to avoid gaps. Pop the molds in the refrigerator for 10 minutes to let the chocolate set.

3. **Mix the filling.**
   In a separate bowl, whip the heavy cream until soft peaks form. Gently fold in the strawberry puree, shortcake crumbs, and vanilla extract until everything is combined. You want a luscious, fluffy filling that will be bursting with flavor!

4. **Fill the molds.**
   Once the chocolate in your molds is set, spoon in a dollop of the strawberry shortcake filling, filling each half about 3/4 full. You’ll have some room left for the top chocolate layer.

5. **Seal with chocolate.**
   Take the remaining melted white chocolate and cover each filled mold, ensuring that the egg is completely sealed. This prevents any filling from leaking out once you pop them out later. Be generous — you want a lovely, thick shell!

6. **Chill again.**
   Pop the molds back into the refrigerator for at least 30 minutes or until the white chocolate is firm and set. This is the perfect time to tidy up the kitchen or sip on a refreshing beverage 😄!

7. **Unmold your creations.**
   Once fully set, gently pop each egg out of the molds. If you find them stubborn, gently tap them against a countertop or warm the outside of the mold slightly with your hands.

8. **Decorate and delight!**
   Feel free to dust the eggs with some edible glitter, drizzle more melted chocolate on top, or even sprinkle crushed shortcake crumbs for an elegant finishing touch. Arrange them on a platter and watch everyone’s eyes light up at the colorful presentation!

## Serving Suggestions

To serve these delightful Strawberry Shortcake Easter Egg Bombs, go for a charming presentation! Arrange them on a beautiful platter surrounded by Spring flowers or colorful shredded paper for that extra festive touch. You can also serve them alongside fresh strawberry slices and a dollop of whipped cream for an indulgent dessert experience. Get creative with the garnishes — fresh mint leaves make a lovely addition!

## Recipe Variations

- **Chocolate Strawberry Delight:** Swap out the white chocolate for milk or dark chocolate for a richer flavor.
- **Fruit Fusion:** Mix in pureed raspberries or blueberries with your strawberries for a burst of different fruit flavors.
- **Nutty Crunch:** Add crushed nuts to your shortcake crumbs for added texture; almonds or pistachios work beautifully!
- **Dairy-Free Option:** Use almond milk chocolate, coconut cream, and vegan shortcakes for a delightful dairy-free rendition.
- **Churro Style:** Roll your chocolate-covered eggs in cinnamon sugar for a fun churro twist!

## Chef’s Notes

As I developed this recipe, I couldn’t help but reminisce about those family gatherings where laughter echoed and delicious food filled the air. This recipe evolved to become a staple in my kitchen, where I could watch the little ones’ eyes light up as they discovered each surprise. The whimsical nature of these Strawberry Shortcake Easter Egg Bombs brings joy not only to them but to me as well.

Food has a special way of connecting us, doesn’t it? As we blend flavors and create delicious memories, we cultivate a space of belonging and love. And isn’t that what it’s all about?

## FAQs and Troubleshooting

- **Why is my chocolate not setting properly?**
  If your chocolate seems too soft, it might need more time in the refrigerator. Make sure to let it chill well until it’s fully set.

- **Can I assemble these in advance?**
  Absolutely! You can prepare these Easter egg bombs a day in advance. Just store them in an airtight container in the fridge until you're ready to serve.

- **How do I fix chocolate that’s seized?**
  If your chocolate seized while melting, try adding a small amount of vegetable oil (1 teaspoon at a time) to help restore its consistency.

- **I can’t find Easter egg molds; what can I use instead?**
  No problem! Small muffin tins or even paper cups will work just fine. Just make sure to adjust the filling amount so they don't overflow.

## Nutritional Info

While indulgent treats often hold a high caloric content, you can savor the joy in moderation. Each egg bomb offers a burst of flavor without compromising on taste!

---

Let this guide inspire your next culinary adventure, dear friends — ready your aprons, gather the family, and create some magical memories around your table with these Strawberry Shortcake Easter Egg Bombs. Happy cooking, and I can’t wait to see how yours turn out!
Strawberry Shortcake Easter Egg Bombs
Delightful treats combining strawberry shortcake flavors with the fun of Easter egg surprises.
- Prep Time: 30 minutes
- Cook Time: 10 minutes
- Total Time: 40 minutes
- Yield: 12 servings 1x
- Category: Dessert
- Method: No-Bake
- Cuisine: American
- Diet: Vegetarian
Ingredients
- 2 cups white chocolate chips
- 1 cup strawberries, pureed
- 1/2 cup heavy cream
- 1/2 cup shortcake crumbs
- 1 teaspoon vanilla extract
- Easter egg chocolate molds
Instructions
- Melt the white chocolate.
- Prepare the molds.
- Mix the filling.
- Fill the molds.
- Seal with chocolate.
- Chill again.
- Unmold your creations.
- Decorate and delight!
Notes
You can prepare these in advance and store them in an airtight container. If you can’t find Easter egg molds, muffin tins or paper cups will work as alternatives.
Nutrition
- Serving Size: 1 egg bomb
- Calories: 250
- Sugar: 20g
- Sodium: 50mg
- Fat: 15g
- Saturated Fat: 9g
- Unsaturated Fat: 4g
- Trans Fat: 0g
- Carbohydrates: 30g
- Fiber: 1g
- Protein: 3g
- Cholesterol: 15mg
Keywords: strawberry shortcake, Easter dessert, chocolate molds, spring recipes, festive treats