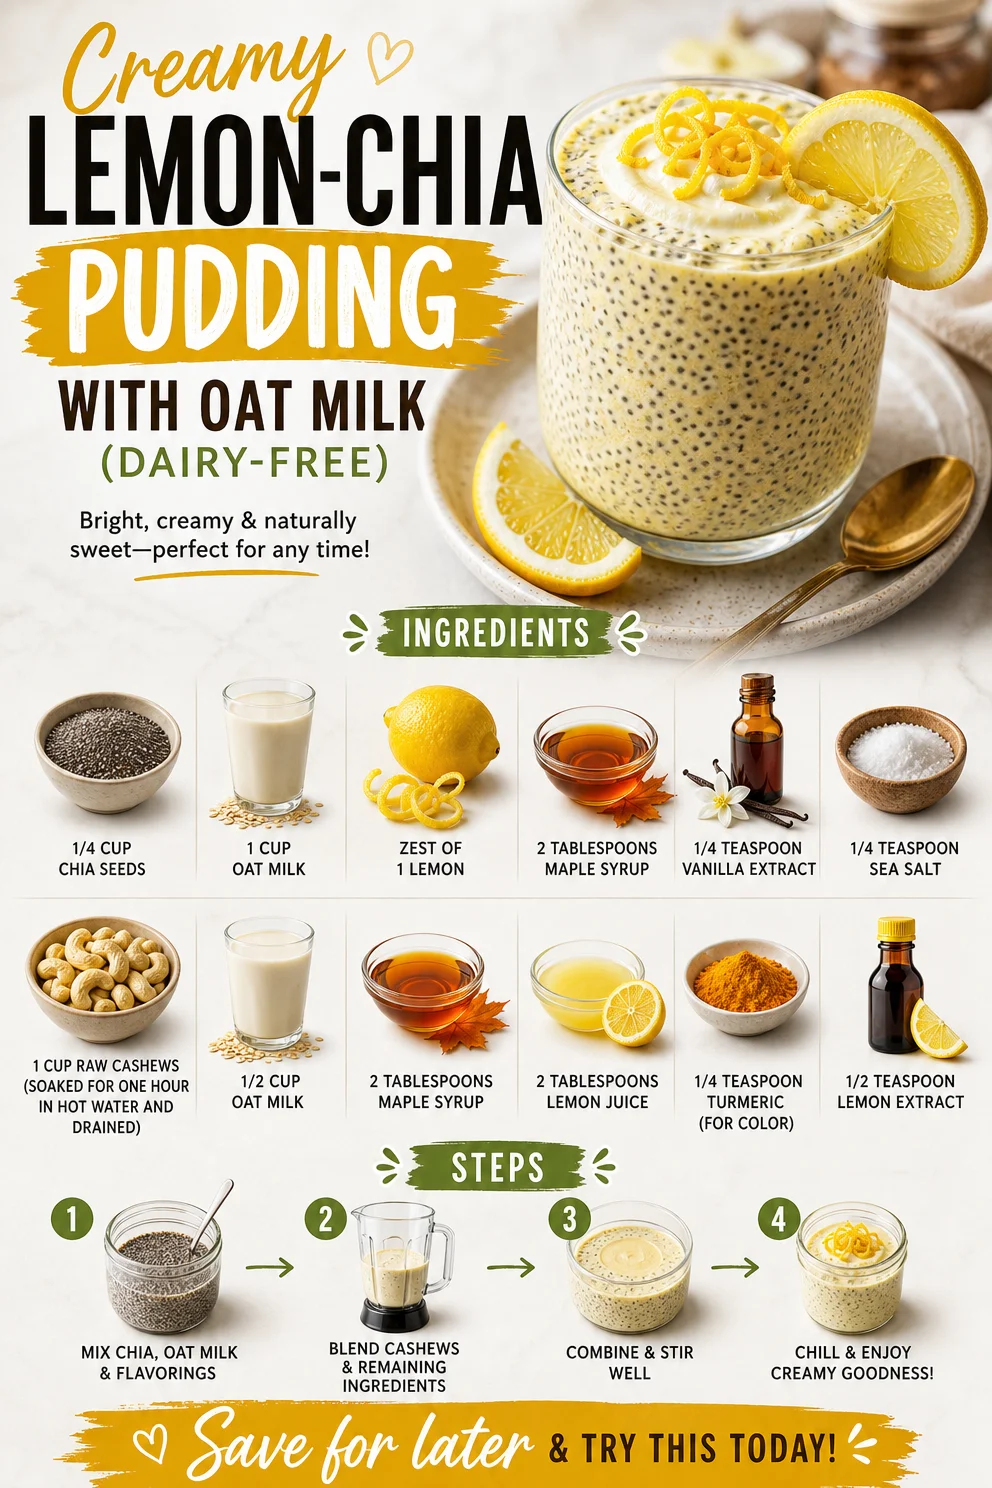
Creamy Lemon-Chia Pudding with Oat Milk (Dairy-Free)
A Citrus Delight: Lemon Cream Chia Pudding with Oat Milk
Hello, fellow foodies! Today, I’m excited to share a recipe that feels like a ray of sunshine on a summer afternoon—Lemon Cream Chia Pudding with Oat Milk. If you’re looking for a dessert that’s not just a treat for the taste buds but also a wholesome snack, you’ve landed in the right spot. This dish checks all the boxes: it’s creamy, zesty, and oh-so-satisfying!
A Bright Memory
One of my favorite culinary memories involves my grandmother and her famous lemon meringue pie. Growing up, I always loved when she’d invite me into her cozy kitchen. The scent of fresh lemons would fill the air as we zested them together, laughing and sharing stories. I’ll never forget the way she’d whisk the egg whites until they formed the perfect fluffy peaks—magic in the making!
Lemon desserts were a staple in our family, and each slice of pie felt like a hug. This Lemon Cream Chia Pudding echoes those flavors, allowing me to channel my grandmother’s spirit of sharing joy through food.
Ingredients
Here’s what you’ll need to whip up this delightful treat:
-
1/4 Cup Chia Seeds
Chia seeds are the star of this pudding—they absorb liquid and expand, creating that wonderfully creamy texture. No chia seeds? You can try flaxseeds, but the texture will vary. -
1 Cup Oat Milk
Creamy and delightful, oat milk makes this dessert vegan and dairy-free. If you’re not an oat fan, almond milk works equally well! -
Zest of 1 Lemon
This brings a lovely, vibrant flavor. Don’t skip it! If you don’t have fresh lemons, bottled lemon zest can do in a pinch, but fresh is always best. -
2 Tablespoons Maple Syrup
A natural sweetener that adds delicious flavor. Feel free to swap for agave syrup or honey if you’re not vegan. -
1/4 Teaspoon Vanilla Extract
A dash of vanilla complements the lemon beautifully. If you’re looking for a fun twist, try a hint of almond extract instead for a different flavor profile. -
1/4 Teaspoon Sea Salt
A little salt balances the sweetness, bringing out the overall flavors. -
1 Cup Raw Cashews (soaked for one hour in hot water and drained)
These cashews are the magic behind the creamy layer of this pudding. No cashews? Soaked hemp seeds can work as a smooth alternative. -
1/2 Cup Oat Milk
More oat milk to blend with the cashews—keeping it cozy and creamy! -
2 Tablespoons Maple Syrup
Sweetness is essential, and this adds structure to the creamy layer. -
2 Tablespoons Lemon Juice
Fresh lemon juice provides an extra zing. Substitute with lime juice for a refreshing twist. -
1/4 Teaspoon Turmeric (for color)
Just a pinch adds a golden hue without altering the flavor too much. You can skip this if you prefer, but it’s a fun addition! -
1/2 Teaspoon Lemon Extract
For an extra punch of lemon flavor—this is optional but highly recommended!
Step-by-Step Instructions
Let’s get to cooking! Here’s how to create this dreamy pudding:
-
Prepare the Chia Seed Base: In a medium bowl, add your chia seeds and one cup of oat milk. Stir well to combine and make sure there are no clumps. Set this aside for about 10-15 minutes to allow the seeds to absorb the liquid and get all soft and gooey. If you want a quicker result, mix it up a bit more to help the seeds hydrate.
-
Make the Lemon Cream Layer: While you wait for the chia pudding to set, let’s make the lemon cream. In a blender, combine the soaked cashews, the remaining half cup of oat milk, 2 tablespoons of maple syrup, lemon juice, turmeric, lemon extract, and a pinch of sea salt. Blend until the mixture is smooth and creamy; you might need to scrape down the sides of the blender a couple of times.
-
Taste and Adjust: Always give your creamy mixture a taste! If you’d like it sweeter, add a touch more maple syrup or a squeeze of lemon juice for extra zing.
-
Layering the Pudding: Now for the fun part! Once your chia base has thickened, take a glass or a bowl and add a layer of the chia pudding first. Then spoon in a layer of the lemon cream. Repeat until you’ve filled your serving dish, finishing off with a layer of the lemon cream on top.
-
Chill and Set: Cover your pudding with plastic wrap or a lid and pop it in the fridge for at least an hour to let the flavors meld together and the texture firm up a bit more.
-
Serve It Up: Once chilled, grab your pudding from the fridge and prepare to dig in! Don’t forget to give it a little stir for a beautiful marbled effect.
Serving Suggestions
To elevate the presentation, serve your pudding in clear glass cups or jars for that “wow” factor. Garnish with a sprinkle of fresh lemon zest, a few mint leaves, or a few slices of fresh fruit like strawberries or blueberries. These tiny additions not only make it look stunning but add extra flavor and freshness!
Recipe Variations
Feel free to get creative! Here are some fun variations to try:
- Berry Bliss: Top with fresh or frozen berries for a fruity twist.
- Nutty Delight: Add chopped walnuts or almonds on top for a satisfying crunch.
- Chocolate Lovers: Stir in cocoa powder for a chocolatey version (adjust sweetness to taste).
- Matcha Magic: Blend a teaspoon of matcha powder into the lemon cream for that gorgeous green color and a health boost.
- Coconut Dream: Replace oat milk with coconut milk for a tropical feel.
Chef’s Notes
This recipe reflects my journey of discovering how simple ingredients can create something extraordinary. It’s ever-evolving too! Initially, I started with just vanilla chia pudding but then decided it needed a zesty upgrade — thus, the lemon cream layer was born.
One time, I was in a rush hosting friends and forgot to soak the cashews. Gasp! But I managed to blend them quickly with hot water, and to my surprise, it turned out just as creamy and delightful. A little kitchen slip-up can sometimes lead to the best discoveries!
FAQs and Troubleshooting
Q: My chia pudding isn’t thickening. What did I do wrong?
A: It may be that the chia seeds didn’t absorb enough liquid. Give it a little longer to soak, or add more chia seeds next time!
Q: Can I store leftovers?
A: Yes! You can store it in the fridge for up to 3 days. Just remember that the chia will continue to absorb moisture, so it may thicken further.
Q: What can I use instead of cashews?
A: If you’re looking for nut-free options, soaked sunflower seeds or silken tofu can create a similar creamy texture.
Q: How can I make this recipe less sweet?
A: Cut back on the maple syrup by half or use a sugar substitute. You can also increase the lemon juice for a tangier taste.
Nutritional Info
While I won’t dive too deep into the nutritional breakdown, this recipe is a healthful choice! Chia seeds are packed with omega-3 fatty acids and fiber, while cashews provide healthy fats and protein. You’re getting a delicious treat that nourishes your body without sacrificing flavor.
So there you have it, my friends! A Lemon Cream Chia Pudding with Oat Milk that embodies summer vibes and comfort all in one bite. I hope you feel inspired to give it a try and bring joy to your own table. Happy cooking!
PrintLemon Cream Chia Pudding with Oat Milk
A creamy and zesty lemon chia pudding made with oat milk, perfect for a refreshing dessert or wholesome snack.
- Prep Time: 15 minutes
- Cook Time: 1 hours
- Total Time: 75 minutes
- Yield: 4 servings 1x
- Category: Dessert
- Method: Chilling
- Cuisine: Vegan
- Diet: Vegan
Ingredients
- 1/4 cup Chia Seeds
- 1 cup Oat Milk
- Zest of 1 Lemon
- 2 tablespoons Maple Syrup
- 1/4 teaspoon Vanilla Extract
- 1/4 teaspoon Sea Salt
- 1 cup Raw Cashews (soaked for one hour in hot water and drained)
- 1/2 cup Oat Milk
- 2 tablespoons Maple Syrup
- 2 tablespoons Lemon Juice
- 1/4 teaspoon Turmeric (for color)
- 1/2 teaspoon Lemon Extract
Instructions
- Prepare the Chia Seed Base: In a medium bowl, add your chia seeds and one cup of oat milk. Stir well to combine and make sure there are no clumps. Set aside for about 10-15 minutes.
- Make the Lemon Cream Layer: In a blender, combine the soaked cashews, the remaining half cup of oat milk, 2 tablespoons of maple syrup, lemon juice, turmeric, lemon extract, and a pinch of sea salt. Blend until smooth and creamy.
- Taste and Adjust: Give your creamy mixture a taste and adjust sweetness or acidity as necessary.
- Layering the Pudding: In a serving dish, alternate layers of chia pudding and lemon cream until filled.
- Chill and Set: Cover with plastic wrap or a lid and refrigerate for at least 1 hour.
- Serve It Up: Enjoy your chilled pudding, giving it a stir for a marbled effect.
Notes
Serve in clear cups for an impressive presentation; garnish with lemon zest or mint.
Nutrition
- Serving Size: 1 serving
- Calories: 300
- Sugar: 10g
- Sodium: 100mg
- Fat: 14g
- Saturated Fat: 2g
- Unsaturated Fat: 11g
- Trans Fat: 0g
- Carbohydrates: 29g
- Fiber: 8g
- Protein: 8g
- Cholesterol: 0mg
Keywords: chia pudding, lemon dessert, vegan recipes, oat milk desserts, healthy snacks
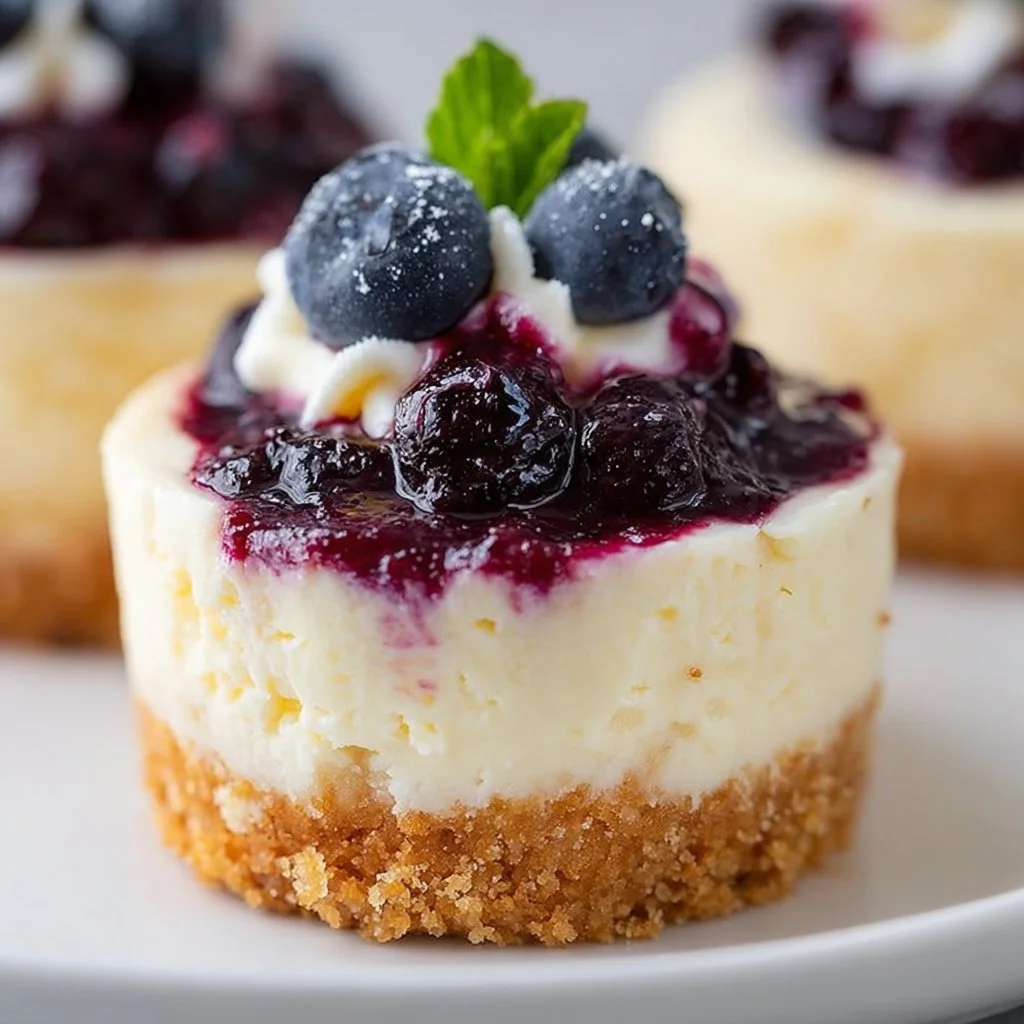
Healthy Mini Lemon Blueberry Cheesecakes
Delightfully Healthy Mini Lemon Blueberry Cheesecakes: A Bite of Brilliance!
Hello, fellow food lovers! Savannah Pierce here, and I’m thrilled to invite you into my kitchen for a delightful exploration of flavor with these Healthy Mini Lemon Blueberry Cheesecakes. They’re the perfect balance of creamy goodness, bright citrus zing, and fresh blueberry bursts, all in a charming, portion-controlled format that will impress at your next gathering or cozy night in. So grab your apron, and let’s cook up something special together!
A Taste of Nostalgia
Ah, cheesecakes. The very word brings back memories of my childhood—those sunny summer afternoons spent in my grandmother’s kitchen. She had a certain magic about her, effortlessly mixing cream cheese and sugar, while I stood at her side, eagerly anticipating the fruits of our labor. I can still picture her pulling out the classic cheesecake, garnished with fresh fruits and a sprinkle of zest, and my heart would flutter with excitement.
When I embarked on my journey to create Ivory Apron, I knew I wanted to revisit that experience, but with a healthier twist. Enter the Mini Lemon Blueberry Cheesecake, inspired by my grandmother’s timeless recipe but loaded with fresh, vibrant flavors and guilt-free ingredients. These dainty desserts are perfect for satisfying your sweet tooth while keeping it light and refreshing. Just like my grandmother, I want you to experience the joy of creating and sharing beautiful treats that make memories linger long after the last bite.
Ingredients
Let’s talk about what goes into these mouthwatering mini cheesecakes. Here’s what you’ll need:
-
1 cup graham cracker crumbs
These provide a delightful crunch and a slightly sweet flavor. If you’re looking for gluten-free options, crushed almond or oat flour works beautifully as a substitute! -
1/4 cup melted butter
This binds the crumbs together and adds richness. For a lighter option, you can use coconut oil or unsweetened applesauce. -
16 oz cream cheese, softened
A classic cheesecake base! Using full-fat cream cheese will give you the creamiest texture. However, you can swap this for low-fat cream cheese or even vegan cream cheese for a plant-based version. -
1/2 cup Greek yogurt
This adds a tangy note and makes the cheesecake lighter. If you’d like a dairy-free alternative, coconut yogurt is a great choice! -
1/2 cup powdered sugar
This sweetens the mix while keeping it silky smooth. Feel free to substitute with honey or agave syrup for a more natural sweetener, just adjust the amount to taste. -
1 tablespoon lemon juice
Freshly squeezed is best! It brightens the flavors and complements the blueberries wonderfully. Bottled lemon juice will work in a pinch, but nothing beats the zing of fresh! -
1 teaspoon lemon zest
Adds that extra citrus aroma and depth. Use a microplane or zester to capture just the yellow outer layer of the lemon peel—this prevents bitterness. -
1 cup fresh blueberries
Bursting with flavor, these little gems add freshness and a vibrant pop to every bite. Frozen blueberries can be used, just make sure to thaw and drain them first.
Step-by-Step Instructions
Let’s get right into the fun part—making these delectable mini cheesecakes!
Step 1: Prepare the Crust
In a mixing bowl, combine 1 cup graham cracker crumbs with 1/4 cup melted butter. Stir until fully combined and the mixture resembles wet sand. If it feels too dry, add a touch more melted butter.
Step 2: Form the Crust
Grab a muffin tin and line it with muffin liners for easy removal. Spoon about a tablespoon of the graham cracker mixture into each liner. Using the back of a spoon or your fingers, press down firmly to create a compact, even layer. Don’t worry if it’s not perfect; a little rustic charm adds character!
Step 3: Blend the Cheesecake Filling
In a large bowl, beat 16 oz cream cheese with an electric mixer until smooth and creamy. Add in 1/2 cup Greek yogurt, 1/2 cup powdered sugar, 1 tablespoon lemon juice, and 1 teaspoon lemon zest. Beat on medium speed until well combined, scraping down the sides of the bowl as needed. This is where the magic happens!
Step 4: Incorporate Blueberries
Gently fold in 1 cup fresh blueberries, being careful not to crush them. You want those beautiful bursts of blueberry flavor intact!
Step 5: Fill the Cups
Spoon the cheesecake filling onto the prepared crusts, filling each cup to just about the top. Prefer a little extra? Go for it—just be prepared for a delightful treat!
Step 6: Chill!
Place the muffin tin in the refrigerator and let them chill for at least 4 hours or until set. This is crucial! The long chill time allows the flavors to meld beautifully and firms up the cheesecake.
Step 7: Serve and Enjoy
Once they’re set, remove the mini cheesecakes from the muffin tin. Carefully peel away the liners and place them on a serving platter. Garnish with additional blueberries or a sprig of mint for that lovely pop of color.
Serving Suggestions
These mini cheesecakes shine when served fresh and chilled. A sprinkle of lemon zest and a few extra blueberries on top adds an inviting touch that makes them Instagram-ready! You can also serve them with a dollop of whipped cream or a drizzle of homemade lemon glaze for those who love a decadent finish.
Recipe Variations
Feeling adventurous? Here are a few twists to try:
- Berry Medley: Substitute blueberries with raspberries or strawberries for a mix of fresh fruits.
- Zesty Twist: Add a splash of orange juice and zest alongside the lemon for an extra burst of flavor.
- Nutty Crust: Swap graham cracker crumbs with crushed pecans or walnuts for a nutty flavor profile.
- Choco-Citrus Delight: Swirl in some melted dark chocolate into the filling for a rich, chocolatey layer.
Chef’s Notes
This recipe has evolved over the years. What started as a standard cheesecake has transformed into this indulgently light and healthier version, thanks to my pursuit of balance. One particularly amusing kitchen moment I recall was the time I mistook salt for sugar in a cheesecake recipe and ended up with a rather unfortunate outcome. So, always double-check those tiny containers!
FAQs and Troubleshooting
-
Why did my cheesecakes not set properly?
If they’re too soft, they may need more chilling time. Ideally, let them sit overnight for best results! -
Can I make these gluten-free?
Absolutely! Use gluten-free graham crackers or nut-based crusts instead. -
What if I don’t have muffin liners?
No worries! Just use a well-greased muffin tin, and gently run a knife around the edge to release them. -
How do I store leftovers?
These mini cheesecakes can be stored in an airtight container in the fridge for up to five days (if they last that long!). They’re great for meal prep—just pull one out for a sweet snack!
Now you’re all set to whip up these delightful Healthy Mini Lemon Blueberry Cheesecakes and share them with your friends and family! Cooking should be fun, and I hope this recipe inspires you to gather around the table and create beautiful moments. Happy cooking! 🥳
PrintHealthy Mini Lemon Blueberry Cheesecakes
Delightfully creamy mini cheesecakes with bright lemon flavor and fresh blueberries, perfect for indulgence without guilt.
- Prep Time: 15 minutes
- Cook Time: 0 minutes
- Total Time: 240 minutes
- Yield: 12 servings 1x
- Category: Dessert
- Method: Chilling
- Cuisine: American
- Diet: Vegetarian
Ingredients
- 1 cup graham cracker crumbs
- 1/4 cup melted butter
- 16 oz cream cheese, softened
- 1/2 cup Greek yogurt
- 1/2 cup powdered sugar
- 1 tablespoon lemon juice
- 1 teaspoon lemon zest
- 1 cup fresh blueberries
Instructions
- Prepare the Crust: In a mixing bowl, combine graham cracker crumbs with melted butter. Stir until fully combined.
- Form the Crust: Line a muffin tin with muffin liners. Spoon the graham cracker mixture into each liner and press down to form a compact layer.
- Blend the Cheesecake Filling: In a large bowl, beat cream cheese until smooth. Add Greek yogurt, powdered sugar, lemon juice, and lemon zest. Beat until well combined.
- Incorporate Blueberries: Gently fold in fresh blueberries.
- Fill the Cups: Spoon the cheesecake filling onto the prepared crusts.
- Chill! Place the muffin tin in the refrigerator for at least 4 hours or until set.
- Serve and Enjoy: Remove from muffin tin, peel away liners, and garnish with additional blueberries.
Notes
Serve chilled with lemon zest or blueberries on top for an appealing presentation. These cheesecakes can be made gluten-free by substituting graham crackers.
Nutrition
- Serving Size: 1 cheesecake
- Calories: 220
- Sugar: 10g
- Sodium: 160mg
- Fat: 12g
- Saturated Fat: 7g
- Unsaturated Fat: 4g
- Trans Fat: 0g
- Carbohydrates: 26g
- Fiber: 1g
- Protein: 4g
- Cholesterol: 30mg
Keywords: cheesecake, lemon, blueberry, dessert, healthy dessert
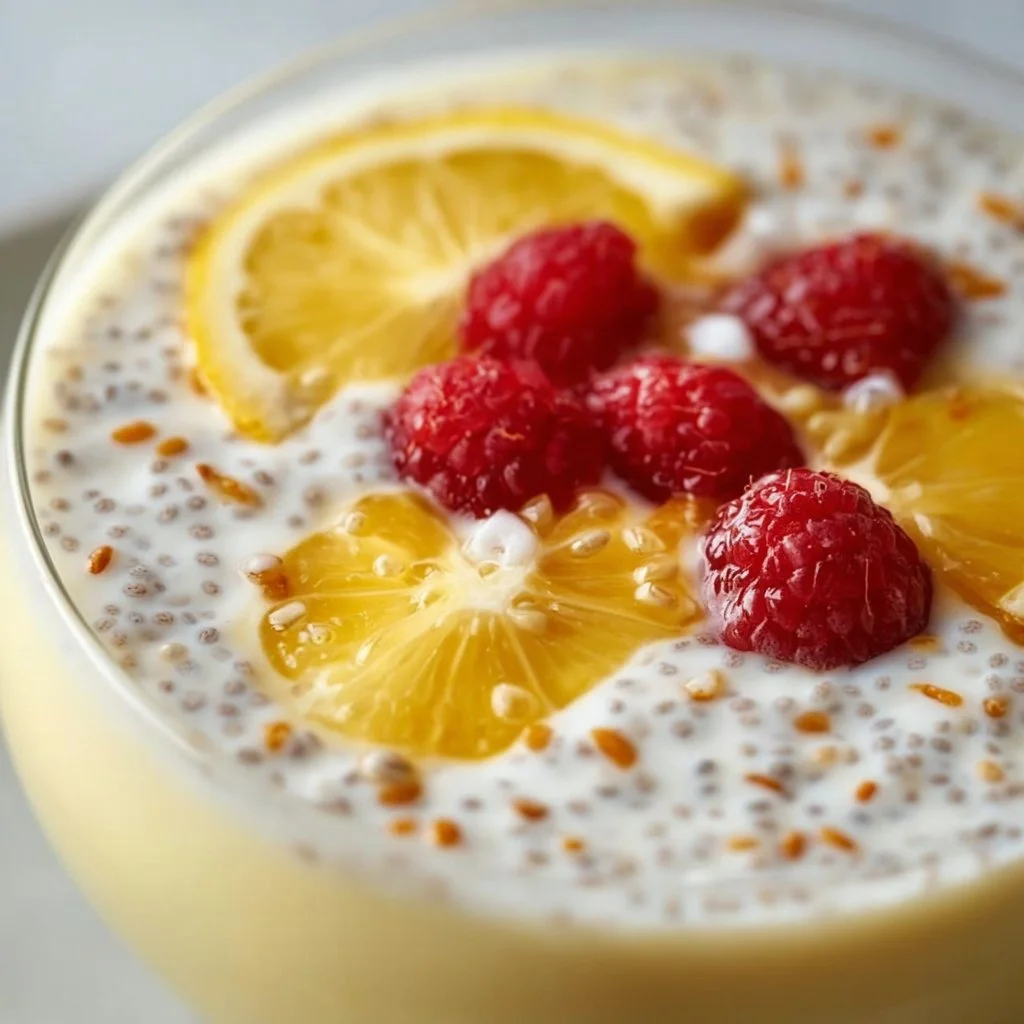
Yummy Lemon Cream Chia Pudding
Yummy Lemon Cream Chia Pudding: A Refreshing Treat for Any Occasion
Hello, my culinary comrades! 🍋 Today, we’re diving into a delightful treat that’s as refreshing as a summer breeze and as simple as can be—the Yummy Lemon Cream Chia Pudding! Now, I know what you might be thinking: “Chia pudding? Really?” But trust me, this dish is anything but ordinary. With its creamy texture, zesty lemon flavor, and eye-catching presentation, it’s sure to win hearts and taste buds alike.
Chia seeds have long been celebrated for their health benefits. They’re packed with omega-3 fatty acids, fiber, and antioxidants, making them a superfood that’s well-deserved of a place on your table. But here’s the best part: when combined with creamy yogurt or coconut milk and zesty lemon, chia seeds transform into a luscious treat that feels indulgent yet is totally good for you. Perfect for breakfast, a snack, or even a light dessert, this recipe is versatile and oh-so-satisfying.
As we whip up this lemon cream chia pudding, I want you to feel inspired and empowered in your kitchen. I’ll share my tips and tricks along the way, so you can create a dish that feels both elegant and approachable. So grab your apron (you know I love an ivory apron moment), and let’s get cooking!
Personal Story
I’ll never forget the first time I tasted chia pudding. It was at a cozy little café tucked away in the heart of the city, and I was on one of those brunch outings with friends that turned into a leisurely affair. As we chatted and sipped on our lattes, someone ordered the chia pudding, and I was immediately intrigued by the smooth, creamy layer topped with bright fruit. One bite, and I was hooked!
I can still picture sitting at that cafe, sunlight pouring through the windows, with the delicious tartness of lemon cutting through the creamy sweetness. After that day, I found myself wanting to recreate that feeling at home. I experimented with various flavors, but it was the zesty lemon that truly stole the show. That nostalgic café experience inspired this very recipe—a bit of sunshine that you can make in your own kitchen anytime you please!
Ingredients
Let’s gather our ingredients! Here’s what you’ll need to whip up this Yummy Lemon Cream Chia Pudding:
-
Chia Seeds (½ cup)
These little powerhouses are packed with fiber and omega-3s. If you’re in a pinch, you can swap them for ground flaxseed, but the texture will be different. -
Coconut Milk or Greek Yogurt (1 cup)
Either option brings a creamy richness to the pudding. Use coconut milk for a dairy-free option or Greek yogurt for a protein boost (plus creaminess!). -
Fresh Lemon Juice (¼ cup)
Freshly squeezed lemon juice is a game-changer! If you’re in a hurry and don’t have fresh lemons, bottled juice works, but the flavor won’t be as vibrant. -
Honey or Maple Syrup (2-3 tablespoons)
Sweeten to your liking! Feel free to adjust the sweetness. For a vegan option, stick with maple syrup. -
Vanilla Extract (1 teaspoon)
This adds a warm note to the pudding, making it feel extra special. If you’re out of vanilla extract, almond extract can be a lovely alternative. -
Pinch of Salt
A touch of salt enhances all the flavors, making the lemon pop! Don’t skip it.
Step-by-Step Instructions
Ready to make some magic? Let’s get cookin’!
-
Prepare the Base:
In a medium-sized bowl, combine the chia seeds, coconut milk (or Greek yogurt), lemon juice, and honey (or maple syrup). Whisk everything together until well blended. Don’t worry if it looks a bit separated at first; the chia seeds will work their magic soon!Tip: If using Greek yogurt, you may want to start with less and adjust the consistency to your liking—once soaked, chia seeds will expand and thicken the mixture!
-
Let It Set:
Cover the bowl with plastic wrap or a lid and let it sit in the refrigerator for at least 4 hours, or preferably overnight. The longer it sits, the creamier and more satisfying it becomes.Chef Hack: For a quick version, let it sit for 20-30 minutes while you clean up!
-
Give It a Stir:
Once set, take the pudding out and give it a good stir. You’ll notice the chia seeds have expanded and created a gel-like consistency. That’s what we want! If it’s too thick for your liking, simply stir in a little more coconut milk or yogurt until you reach your desired consistency. -
Add a Touch of Flavor:
Stir in the vanilla extract and a pinch of salt if you haven’t already. Trust me, it elevates the flavor profiles to a whole new level! -
Serve It Up:
Spoon the creamy pudding into your favorite bowls or glasses. I like using clear containers so you can see those beautiful layers.Presentation Tip: You can layer in some fresh berries or granola (more on that later!) for an eye-catching effect!
Serving Suggestions
Now that your silky pudding is ready, let’s talk presentation. I love layering the pudding in a parfait style. Start with a base of the lemon cream chia pudding, then alternate layers with fresh berries like blueberries or raspberries for a pop of color and flavor. Drizzle a bit of honey on top and sprinkle some toasted coconut flakes or granola for crunch. It’s not just delicious, it’s a feast for the eyes!
Recipe Variations
Feeling adventurous? Here are a few fun twists on this recipe to keep things interesting:
-
Berry Bliss: Add a handful of blended strawberries or raspberries to the pudding for a berry-infused lemon flavor.
-
Tropical Escape: Mix in some pineapple juice along with the lemon for a tropical vibe, or top with sliced kiwi for an exotic twist.
-
Matcha Magic: Add a teaspoon of matcha powder for a green, energizing boost.
-
Lavender Love: Infuse the pudding with a teaspoon of culinary lavender for a fragrant herbal note that complements the lemon beautifully.
-
Nutty Crunch: Top the pudding with roasted nuts or seeds for extra texture and nutrition.
Chef’s Notes
This lemon cream chia pudding has become a staple in my kitchen. It’s incredible how something so simple can evoke such joy! Each time I whip it up, I’m reminded of that sunny café day. I’ve even had friends who were initially hesitant about chia pudding give it a try—and watch their faces transform as they taste it for the first time!
It’s been through a few iterations, too. Initially, I made it with just coconut milk, but adding Greek yogurt took the creaminess over the top. Plus, the versatility of flavors means it never gets boring!
FAQs and Troubleshooting
-
Why is my chia pudding too thick?
This can happen if you let it sit too long or if you added too many chia seeds. If your pudding looks like concrete, just mix in some coconut milk or yogurt to loosen it up. -
Can I make it ahead of time?
Absolutely! This pudding is perfect for meal prepping. Just store it in an airtight container in the refrigerator, and it’ll last for about 3-5 days. -
What if I don’t like the texture of chia pudding?
If you’re not a fan of the texture, try blending the pudding after it’s set for a smoother consistency. -
Can I use other flavors besides lemon?
Yes! Feel free to substitute other fruit juices or purees. Just keep the ratios similar—if it’s a thicker puree, you may need to adjust the liquid.
Nutritional Info (if applicable)
(For a typical serving of this Yummy Lemon Cream Chia Pudding, the nutritional info might roughly look like this: Data will vary based on exact ingredients used)
- Calories: 215
- Protein: 5g
- Carbohydrates: 30g
- Fats: 10g
- Fiber: 12g
There you have it, my lovely foodies! A Yummy Lemon Cream Chia Pudding that’s not only delightful but also simple enough to make any day shine a little brighter. Whether you enjoy it for breakfast, a snack, or dessert, I hope it brings a bit of sunshine into your kitchen. Happy cooking, and remember—good food isn’t just about feeding the body; it’s about nourishing the soul. 💛
PrintYummy Lemon Cream Chia Pudding
A refreshing treat that’s creamy and zesty, perfect for breakfast or dessert.
- Prep Time: 10 minutes
- Cook Time: 0 minutes
- Total Time: 240 minutes
- Yield: 4 servings 1x
- Category: Dessert
- Method: Chilling
- Cuisine: American
- Diet: Vegan
Ingredients
- ½ cup Chia Seeds
- 1 cup Coconut Milk or Greek Yogurt
- ¼ cup Fresh Lemon Juice
- 2–3 tablespoons Honey or Maple Syrup
- 1 teaspoon Vanilla Extract
- Pinch of Salt
Instructions
- In a medium-sized bowl, combine the chia seeds, coconut milk (or Greek yogurt), lemon juice, and honey (or maple syrup). Whisk everything together until well blended.
- Cover the bowl with plastic wrap or a lid and let it sit in the refrigerator for at least 240 minutes, or preferably overnight.
- Once set, take the pudding out and give it a good stir.
- Stir in the vanilla extract and a pinch of salt.
- Spoon the creamy pudding into your favorite bowls or glasses.
Notes
For presentation, layer with fresh berries or granola.
Nutrition
- Serving Size: 1 serving
- Calories: 215
- Sugar: 10g
- Sodium: 25mg
- Fat: 10g
- Saturated Fat: 8g
- Unsaturated Fat: 2g
- Trans Fat: 0g
- Carbohydrates: 30g
- Fiber: 12g
- Protein: 5g
- Cholesterol: 0mg
Keywords: chia pudding, lemon pudding, healthy dessert, vegan dessert, easy recipe
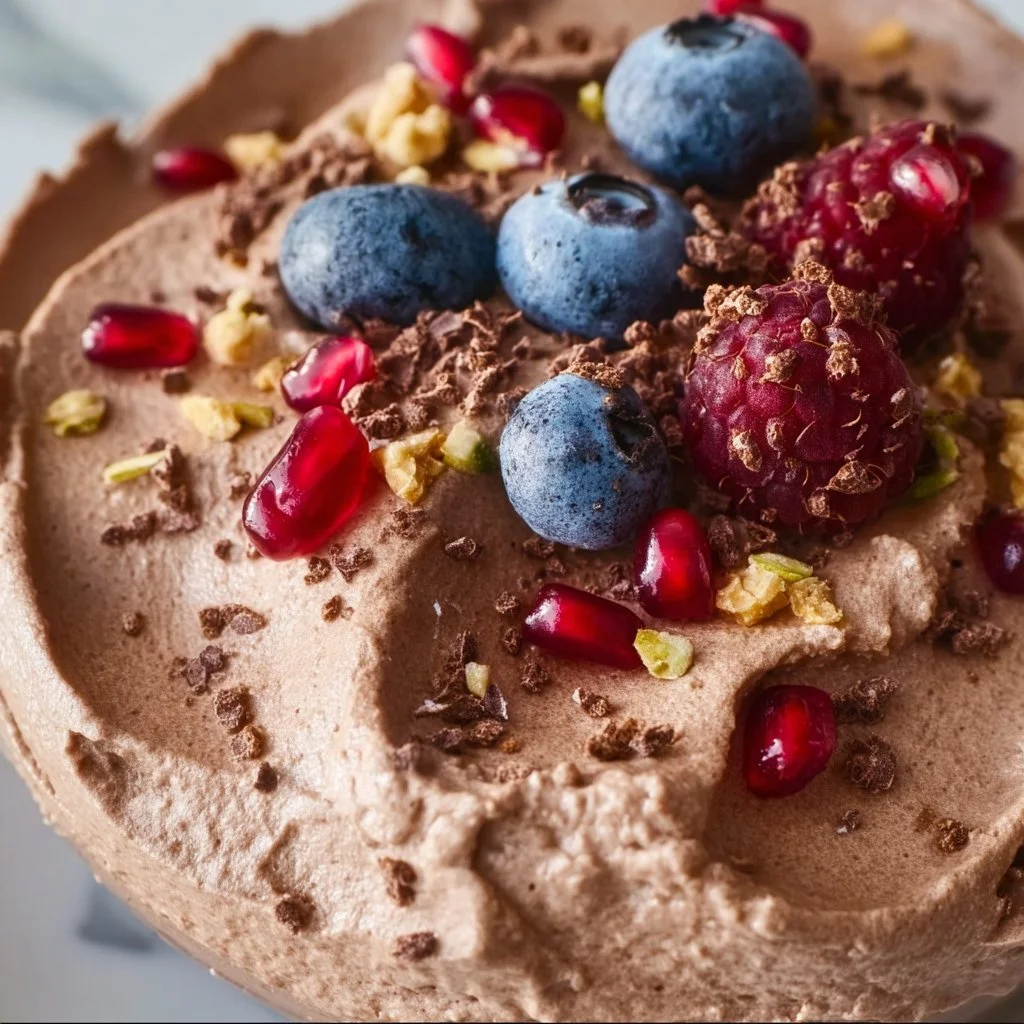
Whipped Chocolate Protein Fluff
Whipped Chocolate Protein Fluff: A Light and Luxurious Treat
Hello foodies! Today, I’m thrilled to share with you an incredibly fun and delightful recipe that’s not only a treat for your taste buds but also packed with protein: Whipped Chocolate Protein Fluff! If you’re looking for a guilt-free dessert or a post-workout snack that feels like a celebration, you’ve come to the right place.
I promise you, this fluffy concoction will make your heart sing and your taste buds dance. So, tie on your apron, grab your mixing bowl, and let’s get whipping!
A Sweet Memory
Before we dive into the recipe, let me share a little story that brings this dish to life for me. I remember one summer evening, gathering with friends after a long, fun day outside. We had just returned from a playful hike—tired and a bit sun-kissed. One of my friends, a fitness enthusiast, whipped up a chocolatey dessert that left us all in awe. It was light, airy, and tastefully satisfying without weighing us down.
The way it transformed our energy levels was magical. We slathered it over fresh fruit, inhaled it straight from the bowl, and even challenged each other to create our own versions. That night not only satisfied my sweet tooth but also sparked my love for experimenting with protein-packed desserts. Fast forward a few years, and here we are, creating my version of that enchanting dish.
Ingredients
Ready to whip up some magic? Here’s what you’ll need:
-
1 cup unsweetened almond milk: A great dairy-free alternative that adds a nutty flavor without overpowering the chocolate. If you’re not a fan of almonds, unsweetened coconut or oat milk works wonders too!
-
1 scoop chocolate protein powder: This is where the cozy, chocolaty goodness comes from! You can use your favorite brand—just be sure it’s a flavor you love. If you’re looking for a plant-based option, look for a pea or brown rice protein.
-
1 tablespoon cocoa powder: This adds another layer of richness to your fluff, intensifying that chocolate flavor. If you’re feeling adventurous, try using dark cocoa powder for a deeper taste.
-
1 tablespoon sweetener of choice: Maple syrup, agave, or stevia; the choice is yours! Adjust the sweetness to your liking, keeping in mind that your protein powder might already have some sweeteners.
-
1 teaspoon vanilla extract: This little ingredient adds a warm, aromatic quality that enhances the overall taste. Trust me, even a splash of vanilla makes everything better!
-
1 cup whipped coconut cream or whipped aquafaba: This is what gives the fluff its dreamy consistency. Whipped coconut cream is luscious, while aquafaba is a fantastic vegan option made from chickpea brine—light and fluffy without any coconut flavor!
Step-by-Step Instructions
Now that we’ve gathered our ingredients, let’s get to the fun part—whipping it all together!
-
Prepare Your Whipped Base: If using coconut cream, refrigerate a can of coconut milk overnight. When you’re ready to whip, scoop out the solidified cream into a mixing bowl, discarding the liquid. For aquafaba, pour the chickpea brine into a bowl and whip it until soft peaks form.
Chef’s Tip: To help your whipped cream or aquafaba form soft peaks more easily, make sure your mixing bowl and beaters are cold.
-
Mixing the Chocolate Base: In a separate bowl, combine 1 cup of unsweetened almond milk, 1 scoop of chocolate protein powder, 1 tablespoon of cocoa powder, and 1 tablespoon of your chosen sweetener. Whisk these ingredients together until they’re smooth and well-combined.
Chef’s Hack: If your protein powder clumps together, try sifting it into the bowl to avoid any lumps down the line. Also, you can use a hand mixer for an easier incorporation!
-
Combining the Mixtures: Gently fold the chocolate base into the whipped coconut cream or aquafaba. Use a rubber spatula and take your time to incorporate the ingredients without deflating the fluffiness of the whipped base.
Pro Insight: Be gentle during this step! The goal is to preserve as much air as possible to keep that light and airy texture.
-
Add Vanilla: After the mixtures are combined to your liking, add in the teaspoon of vanilla extract. Fold it gently through the fluff so that it’s evenly distributed.
-
Taste Test: Before serving, take a small taste test. This is where you can adjust sweetness levels if needed! Just remember, the flavors will intensify a bit after chilling.
Chef’s Note: If you find it’s a bit too rich, you can always add a splash more almond milk to lighten it up further.
-
Chill It: Transfer your whipped chocolate protein fluff into a serving bowl or individual dessert cups. Chill it in the fridge for at least 30 minutes to help it firm up a little, making it even more delectable!
Final Touch: While it’s chilling, clean up your kitchen—this will help you unwind and get excited for the final product!
Serving Suggestions
When you’re ready to serve, scoop generous dollops of the whipped chocolate protein fluff into cute dessert cups or bowls. Top it off with a sprinkle of shaved chocolate, crushed nuts, fresh berries, or a drizzle of your favorite syrup for a beautiful presentation that promises to impress.
Remember, our goal here is casual elegance—food that feels special yet approachable!
Recipe Variations
Looking to switch things up? Here are a few fun variations you can try out:
-
Mint Chocolate Protein Fluff: Add a drop of peppermint extract to the mix for a refreshing minty twist!
-
Mocha Delight: Mix in a shot of espresso for that caffeinated kick, turning your fluff into a mocha dream.
-
Peanut Butter Swirl: For those who love peanut butter, fold in a couple of tablespoons into the finished fluff for a nutty taste explosion.
-
Fruit Flavors: Blend in some strawberry or raspberry puree for a fruity take on your fluff—it will be delicious!
-
Chocoholic’s Dream: For the ultimate chocolate experience, fold in mini chocolate chips for added texture.
Chef’s Notes
Honestly, this Whipped Chocolate Protein Fluff has come a long way since my first attempt. I didn’t realize how simple it could be to get such a delightful dessert on the table! It’s become a staple in my household and has seen many variations inspired by seasonal ingredients or cravings.
One time, in a moment of kitchen chaos, I accidentally used sweetened coconut cream instead of the unsweetened version. Let’s just say it turned out extra sweet, but sometimes it’s those messy moments that lead to the tastiest surprises!
FAQs and Troubleshooting
-
Can I use dairy milk instead of almond milk?
Absolutely! Feel free to swap it out with any milk you enjoy. Just keep in mind that it may slightly alter the flavor. -
What if my whipped coconut cream isn’t thickening?
Make sure you’re using chilled coconut cream. If it’s too runny, you can try beating it more vigorously, or even refrigerate it again for a bit. -
How long does the fluff last in the fridge?
It should stay good for about 3-4 days, covered. Just re-whip a bit before serving if it separates. -
Can I make this fluff without a mixer?
Yes! You can absolutely use a whisk and some elbow grease. It will take longer, but it’s definitely doable.
Nutritional Info
While I won’t go into specific numbers here, I can assure you that this fluffy indulgence packs a protein punch, keeping you satisfied without the guilt.
So there you have it! A light and delightful dessert that’s fun to make, easy to customize, and absolutely delicious! I can’t wait to hear how yours turns out. Enjoy whipping up this Whipped Chocolate Protein Fluff, and remember, food is all about sharing joy—so gather those around your table and indulge in the goodness together! Happy cooking! ✨
PrintWhipped Chocolate Protein Fluff
A light and luxurious protein-packed dessert that feels like a celebration with every delightful spoonful.
- Prep Time: 10 minutes
- Cook Time: 0 minutes
- Total Time: 40 minutes
- Yield: 4 servings 1x
- Category: Dessert
- Method: Whipping
- Cuisine: American
- Diet: Vegetarian
Ingredients
- 1 cup unsweetened almond milk
- 1 scoop chocolate protein powder
- 1 tablespoon cocoa powder
- 1 tablespoon sweetener of choice
- 1 teaspoon vanilla extract
- 1 cup whipped coconut cream or whipped aquafaba
Instructions
- Prepare your whipped base: If using coconut cream, refrigerate a can of coconut milk overnight. When you’re ready to whip, scoop out the solidified cream into a mixing bowl, discarding the liquid. For aquafaba, pour the chickpea brine into a bowl and whip it until soft peaks form.
- Mixing the chocolate base: In a separate bowl, combine 1 cup of unsweetened almond milk, 1 scoop of chocolate protein powder, 1 tablespoon of cocoa powder, and 1 tablespoon of your chosen sweetener. Whisk these ingredients together until they’re smooth and well-combined.
- Combining the mixtures: Gently fold the chocolate base into the whipped coconut cream or aquafaba. Use a rubber spatula and take your time to incorporate the ingredients without deflating the fluffiness of the whipped base.
- Add vanilla: After the mixtures are combined to your liking, add in the teaspoon of vanilla extract. Fold it gently through the fluff so that it’s evenly distributed.
- Taste test: Before serving, take a small taste test. Adjust sweetness levels if needed, keeping in mind that flavors will intensify after chilling.
- Chill it: Transfer your whipped chocolate protein fluff into a serving bowl or individual dessert cups. Chill it in the fridge for at least 30 minutes to help it firm up a little.
Notes
Serve with toppings like shaved chocolate, crushed nuts, or fresh berries for an elegant finish.
Nutrition
- Serving Size: 1 serving
- Calories: 200
- Sugar: 6g
- Sodium: 100mg
- Fat: 9g
- Saturated Fat: 8g
- Unsaturated Fat: 1g
- Trans Fat: 0g
- Carbohydrates: 25g
- Fiber: 2g
- Protein: 10g
- Cholesterol: 0mg
Keywords: whipped dessert, protein fluff, chocolate dessert, healthy dessert, guilt-free treat
Creamy fruit salad recipe
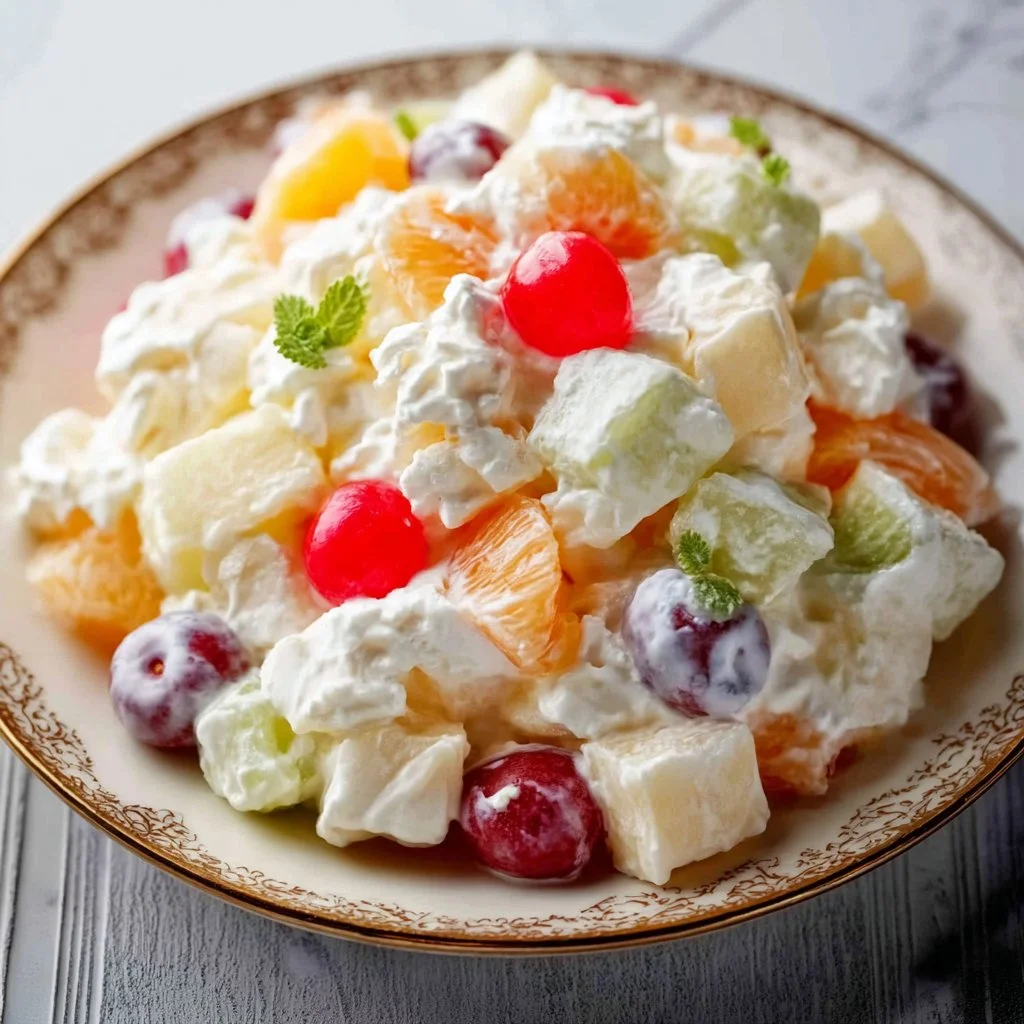
Creamy Fruit Salad: A Wholesome Twist on a Classic Delight
Hello, wonderful food lovers! Today, I’m excited to share a dish that’s not just about flavor but also about the joyous memories tied to every scoop. Fruit salad may seem like an effortless creation, but when it’s tossed with a creamy dressing and sprinkled with a sprinkle of love, it transforms into a delightful experience.
Picture this: the sun is shining, the day is warm, and you’re hosting a little get-together in your backyard. The air is filled with laughter, and the sweet scent of seasonal blooms surrounds you. As your guests lounge under the sun, you bring out a big bowl of creamy fruit salad—bright, refreshing, and colorful, it’s an instant crowd-pleaser! This isn’t just any fruit salad; it’s a celebration of summer, a nostalgic nod to family picnics, and the perfect cool treat to complement any gathering. Whether you’re prepping for an afternoon BBQ, a brunch with friends, or just looking to elevate your weekday meals, this creamy fruit salad brings smiles all around.
Let’s dig deep into one of my favorites—a recipe that’s easy enough for a weeknight yet stunning enough to impress at any gathering. With luscious fruits combined in a creamy yogurt dressing, it’s the ultimate combination of health and indulgence. Grab your apron, and let’s create something beautiful together!
Personal Story
I still remember the first time I tasted creamy fruit salad. I was about eight years old, and my family had gathered at my grandparents’ house for our annual summer picnic. Grandma always had a knack for making everything feel special—even the simplest of dishes. As each of us piled our plates high with sandwiches, fresh-cut veggies, and all sorts of goodies, I could see the colorful fruit salad glistening under the sun.
Grandma’s secret wasn’t just the impeccable mixture of fruits; it was the creamy dressing that brought everything together. It had a perfect balance of sweetness and tang, and as I took my first bite, I was hooked. I remember the excitement of mixing my favorite fruits together: the juicy strawberries, crunchy apples, and sweet pineapple, all enveloped in that creamy goodness. To this day, whenever I whip up a batch of creamy fruit salad, I’m transported back to that sunlit afternoon filled with love, laughter, and tasty treats.
Ingredients
Here’s what you’ll need to whip up this delightful creamy fruit salad:
-
1 Medium Apple
Tip: Granny Smith or Honeycrisp are great choices for a touch of tartness or sweetness. Slice them just before serving to maintain their crunchiness! -
1 Cup Blueberries
Insider Insight: These little gems are packed with antioxidants. Fresh is best, but frozen will work too! Just be sure to thaw them first and drain any excess moisture. -
1 Tablespoon Lemon Juice
Chef’s Tip: A splash of lemon juice adds brightness and prevents the apples and bananas from browning. It’s a small step that makes a big difference! -
1 Cup Grapes
Substitution Idea: Red, green, or even black grapes, whatever you have on hand! For a fun twist, try freezing them for a refreshing crunch. -
1 Cup Strawberries
Note: Fresh strawberries should be hulled and sliced. If they’re out of season, consider using frozen—just let them thaw and drain well! -
1 Cup Pineapple Chunks
Chef Insight: Fresh pineapple adds a bright sweetness, but canned works in a pinch. Just make sure it’s packed in juice, not syrup, to keep it light! -
1/2 Cup Greek Yogurt
Substitutions: Use regular yogurt for a lighter option or dairy-free yogurt for a vegan twist! The creaminess is what makes this salad special! -
1/2 Cup Marshmallows (Optional)
Fun Fact: Mini marshmallows add a delightful sweetness and texture contrast! If you’re looking to keep things healthier, feel free to leave them out!
Step-by-Step Instructions
Step 1: Prepare Your Ingredients
Start by washing all your fruits thoroughly. Slice your apple and strawberries, and halve the grapes. If you’re using fresh pineapple, cut it into bite-sized chunks. Lay everything out on your counter for easy access. That little bit of prep makes a world of difference!
Step 2: Mix the Fruits
Grab a large mixing bowl, and toss in the apple slices, blueberries, grapes, strawberries, and pineapple chunks. Make sure you’re gentle during this step; the last thing you want is to turn your beautiful berries into a mushy mess!
Step 3: Add the Dressing
In a separate bowl, mix the Greek yogurt and lemon juice until smooth. If you’re feeling adventurous, you can add a drizzle of honey for extra sweetness or a pinch of cinnamon for an unexpected twist! Once combined, pour this creamy dressing over your fruits.
Step 4: Fold Gently
Using a spatula, or even your hands if you’re feeling playful, fold the fruits with the yogurt dressing. Be delicate. You want to coat the fruits while keeping their integrity intact. This is where the magic happens—watch as the fruits glisten in that creamy goodness!
Step 5: Taste and Adjust
Here comes the fun part. Grab a spoon and taste your creamy creation! Does it need a splash more lemon juice for zing? Maybe a touch more honey or even a sprinkle of cinnamon? This is your masterpiece; adjust the flavors until you find that perfect harmony.
Step 6: Chill and Serve
If you can resist the urge to dive in, let the salad chill in the fridge for at least 30 minutes. This resting time helps all the flavors meld together beautifully. If you’re adding marshmallows, wait until just before serving to mix them in, so they stay fluffy!
Step 7: Plate and Enjoy
Spoon the creamy fruit salad into individual bowls or a beautiful serving platter. Don’t forget to garnish with a few mint leaves or an extra sprinkle of chopped nuts for that touch of elegance!
Serving Suggestions
When it comes to serving, presentation is key! For an upscale touch, use clear glass bowls to show off the vibrant colors of the fruits. A sprinkle of chopped fresh mint on top adds not only visual appeal but also a refreshing aroma! Serve this creamy fruit salad chilled and watch your guests dig in!
Recipe Variations
Looking to shake things up? Here are some creative twists to personalize your creamy fruit salad:
- Tropical Style: Substitute the apples with mango chunks and add in some shredded coconut for a tropical feel!
- Nutty Addition: Toss in some chopped pecans or almonds for added crunch and richness.
- Berry Medley: Swap out the standard fruits for all berries—blackberries, raspberries, and strawberries—for a berry bonanza.
- Citrus Burst: Add segments of orange or grapefruit for an extra burst of flavor that contrasts beautifully with the creaminess.
- Chia-Pudding Twist: Mix in some chia seeds for an added health boost; they will absorb some of the moisture and add a delightful texture!
Chef’s Notes
As with all recipes, this creamy fruit salad has evolved over the years. During my experimenting, I found that the addition of a touch of vanilla extract in the yogurt dressing takes it to the next level! Plus, on those hot summer days, this fruit salad doesn’t just cool you down—it also feels nostalgic, reminding me of those sunny picnics with family. And let me tell you, it’s a surefire way to impress any guest or even treat yourself after a long day!
FAQs and Troubleshooting
Why is my fruit salad turning brown?
This happens due to oxidation, especially with apples and bananas. Tossing them in a bit of lemon juice as we discussed helps prevent this!
Can I use frozen fruit?
Absolutely! Just remember to thaw and drain any excess moisture for the best texture.
How long does this salad keep in the fridge?
Typically, this salad should last about 3 days in an airtight container. However, for the best flavor and texture, it’s best enjoyed fresh.
What can I do if the yogurt is too thick?
If your Greek yogurt is too thick, simply whisk in a splash of milk or almond milk until you achieve the desired creaminess.
Nutritional Info (Optional)
While I usually shy away from specifics, a typical serving of this creamy fruit salad offers a delightful blend of vitamins and minerals, coming in around 150-200 calories, depending on the ingredient variations. Full of fiber and antioxidants, this dish is bursting with goodness and has a refreshing effect on not just the palate but the body as well!
So, there you have it—a creamy fruit salad that’s perfect for every occasion. Tie on your apron, gather those delicious fruits, and let’s create some culinary magic. I can’t wait to see you all at the table, enjoying the fruits of your labor—literally! Until next time, happy cooking!
PrintCreamy Fruit Salad
A delightful and refreshing creamy fruit salad perfect for summer gatherings, packed with vibrant fruits and a creamy yogurt dressing.
- Prep Time: 15 minutes
- Cook Time: 0 minutes
- Total Time: 45 minutes
- Yield: 4 servings 1x
- Category: Dessert
- Method: No-Cook
- Cuisine: Global
- Diet: Vegetarian
Ingredients
- 1 Medium Apple
- 1 Cup Blueberries
- 1 Tablespoon Lemon Juice
- 1 Cup Grapes
- 1 Cup Strawberries
- 1 Cup Pineapple Chunks
- 1/2 Cup Greek Yogurt
- 1/2 Cup Marshmallows (Optional)
Instructions
- Prepare Your Ingredients: Wash all fruits, slice the apple and strawberries, and halve the grapes.
- Mix the Fruits: In a large mixing bowl, toss in the apple slices, blueberries, grapes, strawberries, and pineapple chunks.
- Add the Dressing: In a separate bowl, mix the Greek yogurt and lemon juice until smooth.
- Fold Gently: Using a spatula, fold the fruits with the yogurt dressing without breaking them.
- Taste and Adjust: Adjust flavors as needed with more lemon juice or honey.
- Chill and Serve: Let salad chill in the fridge for at least 30 minutes before serving.
- Plate and Enjoy: Spoon into serving dishes and garnish with mint if desired.
Notes
Try adding a splash of vanilla extract to the yogurt for extra flavor, or toss in some nuts for added crunch.
Nutrition
- Serving Size: 1 serving
- Calories: 175
- Sugar: 20g
- Sodium: 50mg
- Fat: 3g
- Saturated Fat: 1g
- Unsaturated Fat: 2g
- Trans Fat: 0g
- Carbohydrates: 35g
- Fiber: 4g
- Protein: 6g
- Cholesterol: 5mg
Keywords: fruit salad, creamy salad, summer recipe, healthy dessert, easy dessert