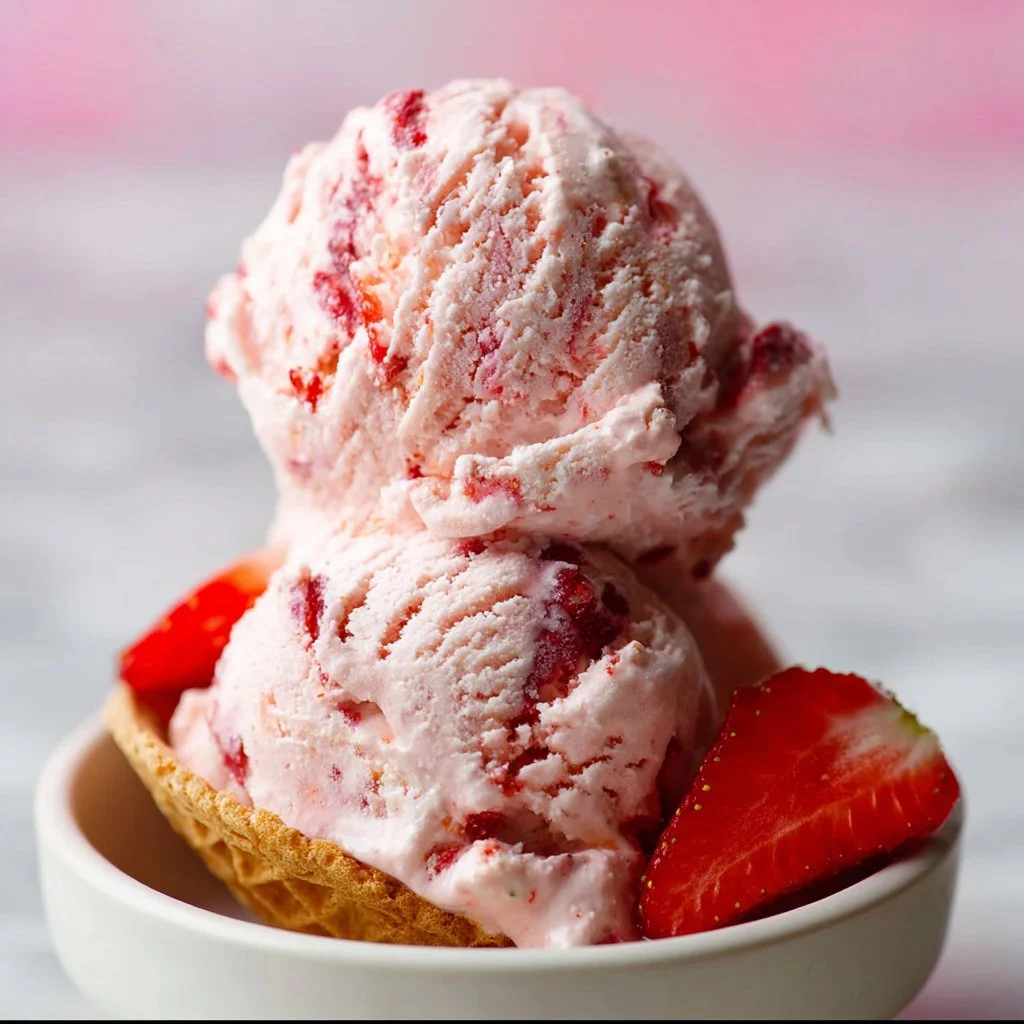
Fresh Strawberry Ice Cream – Vegan Recipe
Fresh Strawberry Ice Cream – Vegan Delight
Introduction
Hello, fellow food lovers! I’m so excited you’re joining me today as we dive into the delightful world of homemade ice cream. There’s something about ice cream that brings instant joy, isn’t there? The way it melts in your mouth, the burst of flavor—oh, it’s pure magic! Today, we’re making Fresh Strawberry Ice Cream, a vegan treat that’s not just delicious but also perfectly creamy. Plus, this recipe happens to be super simple and requires only a handful of fresh ingredients.
Growing up, summer days meant endless hours spent at the local strawberry farm. Picking ripe berries, getting a bit messy, and laughing with friends and family are some of my happiest memories. We’d come home with baskets brimming with strawberries, ready to create something delicious. One of my absolute favorite things to do was to whip up a batch of strawberry ice cream. But it wasn’t just any ice cream—it was a luscious, creamy concoction that felt indulgent yet was somehow still wholesome.
Fast forward to today, and I’m thrilled to share my vegan version with you. Trust me, whether you’re a full-time vegan or just dipping your toes into plant-based recipes, you’re going to love this! It’s creamy, refreshing, and the perfect way to cool off on a warm day. So grab your strawberries and let’s make some magic happen in the kitchen together!
Personal Story
I remember one summer afternoon, my friends and I decided to host an impromptu ice cream party. We had buckets of strawberries from our local farm and a brand-new ice cream maker that was just begging to be used. As we crushed the strawberries together, laughter filled the kitchen, and we each added our favorite ingredients to the mix. My go-to was always coconut milk for that rich, creamy texture. As we watched the ice cream churn and transform before our eyes, we squealed with delight! That day was all about connection—good friends and good food, topped off with a homemade strawberry ice cream that tasted like summer in a bowl.
Ever since then, I’ve been inspired to recreate that joy in the kitchen, and this vegan strawberry ice cream recipe brings me right back to those carefree days. I hope it does the same for you!
Ingredients
Let’s gather our ingredients! Here’s what you’ll need for your delicious vegan Fresh Strawberry Ice Cream:
-
2 cups fresh strawberries, hulled and sliced
Sweet, vibrant, and bursting with flavor! Fresh strawberries will yield the best results, but if you’re out of season, frozen strawberries can work in a pinch. Just let them thaw before you start. -
1 can (14 ounces) coconut milk, full fat
This is the secret to creamy, dreamy ice cream! Full-fat coconut milk gives the right texture and adds a subtle coconut flavor. If you’re not a fan of coconut, you can replace it with cashew milk or another creamy dairy-free milk, but adjust the consistency with a thickener like cashew butter. -
1/2 cup maple syrup or agave nectar
A natural sweetener that adds a delightful caramel-like flavor. If you’re looking for a different twist, consider subbing honey or brown sugar, although honey isn’t vegan. -
1 tablespoon lemon juice
Brightens the flavor of the strawberries, balancing the sweetness. Fresh lemon juice is best, but bottled will work too. -
1 teaspoon vanilla extract
Adds a wonderful depth of flavor. If you have vanilla bean paste or extract, go for it! -
Pinch of salt
Just a touch to enhance all the flavors. You won’t even taste it, but it makes a world of difference!
Step-by-Step Instructions
Now that we have our ingredients ready, let’s jump into the how-to! Following these simple steps will yield an ice cream that’s so good, you’ll want to make it again and again.
-
Prepare the Strawberries: Start by hulling and slicing your fresh strawberries. Toss them into a mixing bowl, and if you’d like, sprinkle a tablespoon of maple syrup over them. Let them sit for about 10-15 minutes. This allows the strawberries to macerate and release their juices, intensifying their sweetness. Simple, right?
-
Blend the Mixture: Once your strawberries are prepped, grab a blender or food processor. Add the macerated strawberries, along with the coconut milk, maple syrup (or agave), lemon juice, vanilla extract, and salt. Blend on high until everything is smooth and creamy. If you’re feeling adventurous, reserve a few strawberry slices to fold in later for extra texture.
-
Taste Test: Here’s the chef’s secret: always taste your mixture before it’s frozen! Adjust the sweetness or acidity to your liking by adding more maple syrup or lemon juice if needed. Remember, the mixture will taste less sweet once it’s frozen, so have fun with it!
-
Chill the Base: Pour the blended mixture into a bowl and cover it with plastic wrap. Let it chill in the refrigerator for about an hour. This step is crucial because it helps the ice cream develop a smooth texture later on.
-
Churn It Up: Once your base is chilled, it’s time to churn! Pour the mixture into your ice cream maker and churn according to the manufacturer’s instructions (usually about 20-25 minutes). If you don’t have an ice cream maker, no worries! Simply pour the mixture into a shallow container and freeze it. Every 30 minutes, stir vigorously with a fork to break up ice crystals until it reaches your desired consistency.
-
Transfer and Freeze: Once the mixture has thickened to a soft-serve consistency, transfer it to an airtight container. Smooth the top with a spatula, and cover it with plastic wrap before sealing the lid. Place it in the freezer for at least 4 hours, or until it’s firm.
-
Scoop and Enjoy: After the ice cream has set, it’s time for the best part—scooping it out! If it’s too hard to scoop, let it sit at room temperature for about 10 minutes to soften slightly. Then, dive right in!
Serving Suggestions
Serve your Fresh Strawberry Ice Cream in elegant bowls or whimsical waffle cones. For an extra touch, consider garnishing with fresh mint leaves or a drizzle of chocolate sauce for a sophisticated flair. You could even layer it with homemade granola for added crunch and texture—yum!
Recipe Variations
-
Berry Medley: Swap out some or all of the strawberries for mixed berries like blueberries, raspberries, or blackberries for a berry blast!
-
Coconut Crunch: Fold in some toasted coconut flakes at the end of churning for an added layer of decadent flavor and texture.
-
Chocolate Swirl: Drizzle some melted dark chocolate into the mixture before freezing for a strawberry chocolate swirl that’s pure indulgence.
-
Minty Fresh: Add a teaspoon of fresh mint extract for a refreshing twist, or toss in a handful of finely chopped fresh mint leaves into the mixture.
-
Creamy Banana: Substitute half of the strawberries with ripe bananas for a creamier, banana-strawberry version!
Chef’s Notes
This recipe has evolved beautifully over the years. Initially, I experimented with loads of additives, but I found that simple, high-quality ingredients truly shine. One time, I accidentally forgot the lemon juice, and while the ice cream was still good, it lacked that zesty brightness that ties everything together. I’ve learned that each element contributes to the final dish, so don’t skip the lemon juice, even if it seems small!
An unexpected kitchen mishap: once I got a bit too ambitious and decided to churn the mixture while chatting with a friend. Let’s just say the blend managed to splatter all over my kitchen—big lesson in multitasking!
FAQs and Troubleshooting
-
Why is my ice cream too hard or icy?
If your ice cream is hard, it may have frozen too long. To achieve a creamy texture, stir or churn every 30 minutes if you’re not using an ice cream maker. Also, adding a bit of vodka (a tablespoon) can help reduce iciness while retaining the flavors. -
Can I use other milk alternatives?
Absolutely! Feel free to use any dairy-free milk you love, just ensure it has a creamy consistency. Almond milk and soy milk can work, but coconut milk yields the best texture. -
How do I store leftovers?
Keep the ice cream in an airtight container in the freezer. It’s best consumed within a week or two, as homemade ice cream often doesn’t have preservatives, which help store-bought last longer. -
What can I do if I can’t find fresh strawberries?
Frozen strawberries can save the day! Just let them thaw and drain excess liquid before using, so you don’t wind up with a watery mixture.
Nutritional Info
While I usually skip the nutritional info, it’s good to know that per serving (based on approximately 8 servings), you’re looking at about:
- Calories: 160
- Total Fat: 7g
- Carbohydrates: 24g
- Sugars: 18g
- Protein: 1g
This delicious vegan treat is dairy-free, gluten-free, and made with wholesome ingredients that allow you to enjoy dessert without guilt!
Conclusion
And there you have it—your very own Fresh Strawberry Ice Cream recipe straight from my heart to your kitchen! I hope this sweet treat brings as much joy and nostalgia to your table as it does to mine. Remember, creating beautiful food doesn’t have to be complex or stressful; it’s all about enjoying the process and sharing those moments with the people you love. So get in there, tie your apron, and let’s make some ice cream magic happen! Cheers to beautiful flavors and sweet memories!
PrintFresh Strawberry Ice Cream – Vegan Delight
A delightful and creamy vegan strawberry ice cream made with fresh ingredients, perfect for summer days.
- Prep Time: 15 minutes
- Cook Time: 30 minutes
- Total Time: 45 minutes
- Yield: 8 servings 1x
- Category: Dessert
- Method: Churning
- Cuisine: Vegan
- Diet: Vegan
Ingredients
- 2 cups fresh strawberries, hulled and sliced
- 1 can (14 ounces) coconut milk, full fat
- 1/2 cup maple syrup or agave nectar
- 1 tablespoon lemon juice
- 1 teaspoon vanilla extract
- Pinch of salt
Instructions
- Prepare the strawberries: Hull and slice your fresh strawberries. Toss them into a mixing bowl, and if you’d like, sprinkle a tablespoon of maple syrup over them. Let sit for 10-15 minutes.
- Blend the mixture: Add the macerated strawberries, along with the coconut milk, maple syrup, lemon juice, vanilla extract, and salt into a blender. Blend on high until smooth and creamy.
- Taste test: Always taste your mixture before it’s frozen and adjust sweetness or acidity as needed.
- Chill the base: Pour the blended mixture into a bowl, cover with plastic wrap, and chill in the refrigerator for about 60 minutes.
- Churn it up: Pour the mixture into your ice cream maker and churn according to instructions (usually 20-25 minutes). If using a shallow container, freeze and stir every 30 minutes.
- Transfer and freeze: Transfer to an airtight container and freeze for at least 240 minutes, or until firm.
- Scoop and enjoy: Let the ice cream sit at room temperature for about 10 minutes before scooping, then serve as desired.
Notes
For added flavors, consider variations like berry medley, coconut crunch, or a chocolate swirl.
Nutrition
- Serving Size: 1 serving
- Calories: 160
- Sugar: 18g
- Sodium: 10mg
- Fat: 7g
- Saturated Fat: 5g
- Unsaturated Fat: 2g
- Trans Fat: 0g
- Carbohydrates: 24g
- Fiber: 1g
- Protein: 1g
- Cholesterol: 0mg
Keywords: strawberry ice cream, vegan ice cream, homemade dessert
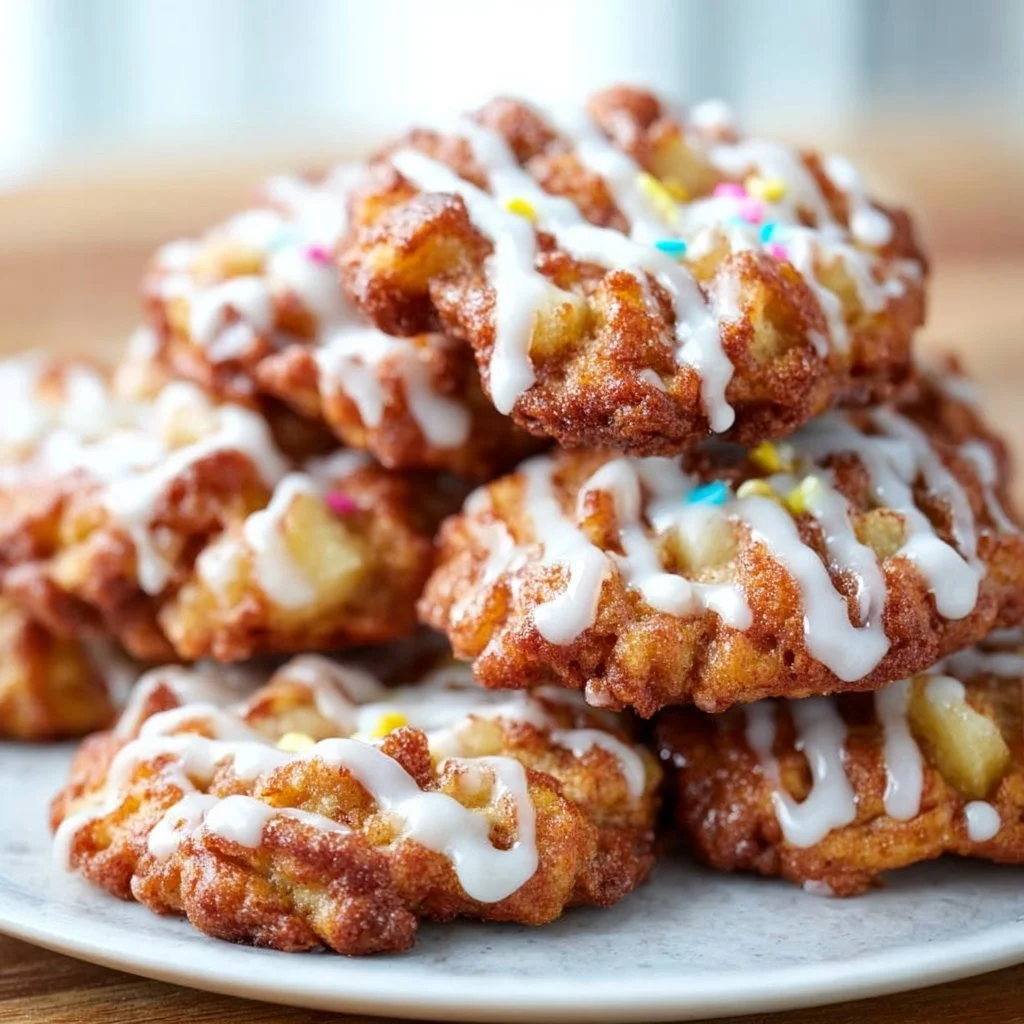
Keto Apple Fritter Cookies
Keto Apple Fritter Cookies: A Guilt-Free Delight
Hey there, food lovers! Welcome back to Ivory Apron, where we’re all about making the kitchen a place of joy and creativity. Today, I’m thrilled to share a delectable treat that fits perfectly into the keto lifestyle: Keto Apple Fritter Cookies! These cookies are soft, chewy, and packed with delightful apple flavor, making them the ideal sweet bite without the guilt.
I have to admit—I have a soft spot for apple fritters. Growing up, our family had a tiny bakery down the street that served the most glorious warm apple fritters, coated in powdered sugar and bursting with flavor. Just walking by would send that sweet, cinnamon aroma wafting through the air, beckoning all passersby to indulge. I can still picture those cold autumn days when a fresh batch would emerge from the oven, and we’d gather around the table with warm treats, chatting and laughing.
So, while I can’t replicate that exact experience, I’ve created a keto-friendly version that keeps the spirit of those fritters alive. These Keto Apple Fritter Cookies deliver on flavor while being low in carbs and high in happiness! Let’s dive right into this simple recipe that’s perfect for any occasion—whether you’re hosting friends, treating yourself on a cozy evening, or looking for a wholesome snack. Grab your apron, and let’s get cooking!
Personal Story
One memory stands out vividly from my childhood: after school on Fridays, my friends and I would race to that little bakery, laughter trailing behind us like a sweet aroma. We’d save our allowances during the week, bargaining over just how many fritters we could indulge in. I can still feel the warm, slight crunch on the outside and that soft, spiced center as I bit into one of those beauties, my heart overflowing with joy—a simple pleasure that felt like a hug from my grandma.
As I grew older and began my own culinary journey, I realized how much I loved reimagining the flavors of my childhood into healthier options. Coating fritters in sugar and deep-frying them wasn’t going to cut it anymore; it was time to create something my present self would love, too. And that’s how my Keto Apple Fritter Cookies came to life! They bring back those delightful memories while being a nourishing choice we can feel good about.
Ingredients
Here’s what you’ll need for these luscious Keto Apple Fritter Cookies:
-
1 cup almond flour
- Almond flour serves as the base for these cookies, providing both structure and a lovely nutty flavor. If you’re allergic to nuts, feel free to use sunflower seed flour instead for a nut-free option.
-
1/2 cup erythritol (or your preferred sweetener)
- Erythritol is a natural sweetener that doesn’t spike blood sugar, making it keto-friendly. You can substitute it with monk fruit sweetener or stevia if you prefer, but remember to adjust the quantities as they vary in sweetness!
-
1/2 teaspoon baking powder
- This little leavening agent will provide a delightful lift to your cookies. If you’re out of baking powder, a combination of baking soda and vinegar will also do the trick!
-
1/2 teaspoon cinnamon
- Cinnamon adds that warm, cozy flavor reminiscent of apple pie. Feel free to sprinkle a little extra on top for added pizzazz!
-
1/4 teaspoon salt
- Just a pinch of salt brings out the sweetness and enhances flavors. You can use sea salt or Himalayan pink salt, whichever you have on hand.
-
1/4 cup unsweetened applesauce
- Applesauce keeps the cookies moist and adds extra apple flavor. If you’re out, mashed banana can work as a sweet alternative, although it’s not strict keto.
-
1/4 cup melted coconut oil
- Coconut oil brings a subtle tropical flavor and keeps the cookies tender. If you prefer, you could use unsalted butter or ghee for a rich taste!
-
1 teaspoon vanilla extract
- A splash of vanilla elevates the overall flavor. For a twist, consider using almond extract for a lovely nutty note.
-
1/2 cup diced apples
- Fresh apples are the star here, giving you juicy bursts of flavor in every bite! Choose your favorite variety, but I’d recommend tart ones like Granny Smith to balance the sweetness. Feel free to use unsweetened apple pieces or even dried apples if fresh isn’t available.
Step-by-Step Instructions
Let’s Get Cooking!
-
Preheat the Oven
Start by preheating your oven to 350°F (175°C). A hot oven will help our cookies become deliciously golden! -
Prepare Your Baking Sheet
Line a baking sheet with parchment paper. This will prevent the cookies from sticking and make cleanup a breeze—our little kitchen hack for effortless cookie enjoyment! -
Mix the Dry Ingredients
In a large bowl, whisk together the almond flour, erythritol, baking powder, cinnamon, and salt. Mixing these dry ingredients thoroughly ensures even distribution of flavors and perfect texture! -
Combine the Wet Ingredients
In a separate bowl, stir together the unsweetened applesauce, melted coconut oil, and vanilla extract. Let the coconut oil cool slightly before adding it to avoid cooking the applesauce. You want everything to blend harmoniously without any lumps! -
Join the Mixtures
Pour your wet mixture into the dry ingredients and mix until thoroughly combined. You want a lovely dough that is cohesive and not too sticky. If the dough feels a little dry, don’t hesitate to add a teaspoon of water, just to make it easier to work with. -
Fold in the Apples
Gently fold in the diced apples. It’s like giving them a warm hug! Make sure each piece of apple is lovingly coated in the dough. This is where the real magic happens—the promise of delicious bites. -
Scoop the Dough
Using a cookie scoop or spoon, drop rounded tablespoons of dough onto the prepared baking sheet, spacing them about two inches apart. If you want those gorgeous cookie rounds, slightly flatten them with the palm of your hand before baking! -
Bake
Place the baking sheet in the preheated oven and bake for about 12-15 minutes, or until the edges are golden. Your kitchen will start smelling heavenly, and you won’t be able to wait to dig in! -
Cool & Enjoy
Once they’re out of the oven, let the cookies cool on the baking sheet for about 5 minutes before transferring them to a wire rack. This step is crucial—allowing them to cool helps them set and stay intact! Enjoy the patience it takes to wait—good things come to those who wait, after all!
Serving Suggestions
To serve, I love piling these cookies high on a beautiful plate or tray and garnishing them with a sprinkle of cinnamon. If you’re feeling particularly generous, drizzling them with a little sugar-free caramel or a dollop of whipped cream makes for an elegant twist. Pair them with a warm cup of herbal tea or coffee, and you’ve got yourself a cozy treat that’s perfect for sharing—or savoring all to yourself!
Recipe Variations
Here are some ideas to get your creative cooking juices flowing:
-
Spiced Up Pumpkin: Swap out the diced apples for canned pumpkin puree and add a dash of nutmeg and allspice for a festive fall flavor.
-
Nutty Fritter Cookies: Toss in some chopped pecans or walnuts for added crunch!
-
Coconut Delight: Stir in shredded unsweetened coconut for a tropical twist. Who wouldn’t love a macaron-meets-fritter vibe?
-
Berry-licious Version: Replace the apples with diced berries such as strawberries or blueberries for a tangy note that’s equally delicious.
-
Choco-Chip Goodness: For the sweet tooth in you, fold in sugar-free chocolate chips for an indulgent takeaway and a touch of color!
Chef’s Notes
One of the beauties of cooking is that it never truly has to stick rigidly to the original recipe—instead, it should be a canvas for your creativity! Over the years, I’ve learned that adding a pinch of love and a dash of experimentation can result in the most memorable flavors. These cookies started as a way to enjoy a childhood treat but have evolved into a go-to favorite, and seeing how you can make them your own just fills my heart with warmth and excitement.
Oh, and speaking of memories, I recall one time mixing the wrong sweetener—let’s just say I learned the hard way that some sweeteners are much sweeter than others. But hey, at least my friends had a good laugh while munching on "super-sweet" fritters!
FAQs and Troubleshooting
1. My cookies spread too much; what went wrong?
If your cookies spread out too much, it could be that the dough is too warm or there’s too much moisture. Try chilling the dough for 15-30 minutes before scooping it onto the baking sheet.
2. Can I use a different flour?
While almond flour is key for the keto aspect, you can potentially use coconut flour, but keep in mind that coconut flour absorbs more moisture. You might need to adjust the liquids in the recipe.
3. How can I keep my cookies fresh?
Store them in an airtight container at room temperature for a couple of days, or you can freeze them for up to 3 months. Who doesn’t love having homemade cookies on hand ready to be enjoyed?
4. What can I substitute for erythritol?
If erythritol isn’t available, feel free to use other keto-friendly sweeteners like monk fruit or stevia. Just be mindful of conversion rates and sweetness levels to maintain the right taste.
Nutritional Info (per cookie)
These values are approximate and will vary based on ingredient selection:
- Calories: 102
- Protein: 2g
- Fat: 9g
- Carbohydrates: 4g
- Fiber: 2g
- Net Carbs: 2g
And there you have it, my lovely friends—Keto Apple Fritter Cookies that are bound to delight everyone at your table! Thank you for joining me in this delightful journey through flavors and memories. I hope you enjoy making these cookies as much as I enjoyed sharing my love of cooking with you. Until next time, keep those aprons on and let the good food flow! 🍏✨
PrintKeto Apple Fritter Cookies

Deliciously soft and chewy cookies that deliver the delightful flavor of apple fritters while being keto-friendly.
- Prep Time: 10 minutes
- Cook Time: 15 minutes
- Total Time: 25 minutes
- Yield: 12 servings 1x
- Category: Dessert
- Method: Baking
- Cuisine: American
- Diet: Keto
Ingredients
- 1 cup almond flour
- 1/2 cup erythritol (or your preferred sweetener)
- 1/2 teaspoon baking powder
- 1/2 teaspoon cinnamon
- 1/4 teaspoon salt
- 1/4 cup unsweetened applesauce
- 1/4 cup melted coconut oil
- 1 teaspoon vanilla extract
- 1/2 cup diced apples
Instructions
- Preheat the oven to 350°F (175°C).
- Line a baking sheet with parchment paper.
- Mix the almond flour, erythritol, baking powder, cinnamon, and salt in a large bowl.
- Combine the applesauce, melted coconut oil, and vanilla extract in a separate bowl.
- Pour the wet mixture into the dry ingredients and mix until thoroughly combined.
- Fold in the diced apples gently.
- Scoop rounded tablespoons of dough onto the prepared baking sheet.
- Bake for about 12-15 minutes, until golden.
- Cool on the baking sheet for 5 minutes before transferring to a wire rack.
Notes
Serve with a sprinkle of cinnamon or a drizzle of sugar-free caramel for an elegant touch.
Nutrition
- Serving Size: 1 cookie
- Calories: 102
- Sugar: 1g
- Sodium: 75mg
- Fat: 9g
- Saturated Fat: 4g
- Unsaturated Fat: 5g
- Trans Fat: 0g
- Carbohydrates: 4g
- Fiber: 2g
- Protein: 2g
- Cholesterol: 0mg
Keywords: keto cookies, apple fritters, low carb dessert, healthy baking, sugar-free treats