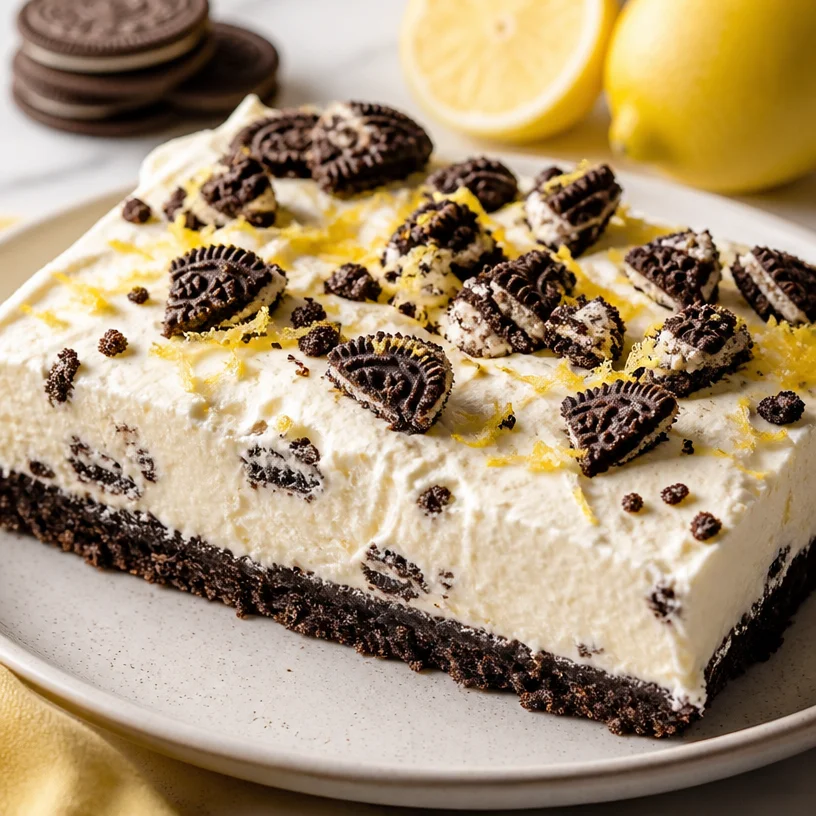
Indulge in the Heavenly Oreo Lemon Dessert: A Burst of Zesty Delight
Hello, dear food lovers! If you’ve ever found yourself drifting through a bakery window, mesmerized by the delightful treats inside, you’re not alone! I remember when I first experienced that swirl of excitement. There’s just something magical about desserts that not only look stunning but also sing with flavor. Enter: the Heavenly Oreo Lemon Dessert—a concoction that brings together the rich, satisfying crunch of Oreos and the bright, zesty notes of lemon in a way that tickles your taste buds and warms your heart.
A Slice of Nostalgia
One of my earliest baking memories involves my grandmother, who was an absolute magician when it came to desserts. She had a special way of making everyone feel like they were her favorite grandchild, especially when the kitchen was filled with the sweet aroma of something decadent baking in the oven. One sunny afternoon, we decided to get our hands a little messy and whip up a version of lemon cheesecake that I’d seen in a cookbook.
While we were mixing and mingling flavors, the idea that dessert could be so layered and complex yet simple and approachable was born. I love how food has this beautiful ability to evoke memories and create connections. Flash forward a few decades, and I find myself in my own kitchen, eager to share a recipe that would make my grandmother proud—this Heavenly Oreo Lemon Dessert is both indulgent and fresh, just like those precious moments spent with her.
Ingredients
Before we dive into the delectable step-by-step process, let’s gather our ingredients! Here’s what you’ll need to create this heavenly delight:
-
1 package of Oreo cookies
The star of our crust! Feel free to use regular or double-stuffed Oreos. If you want a gluten-free version, swap in gluten-free chocolate sandwich cookies. -
1/2 cup of unsalted butter, melted
This binds our crust together and adds richness. Don’t have unsalted butter on hand? Just reduce the salt in the recipe slightly if you substitute salted butter. -
1 package (8 oz) cream cheese, softened
It gives our dessert that luscious texture. Make sure it’s softened to avoid lumps—nobody wants a bumpy cheesecake! -
1 cup powdered sugar
This sweetens our filling and gives it a smooth finish. For a lower-sugar option, try substituting with a sugar alternative. -
1 cup heavy whipping cream
The secret to a beautifully fluffy filling. Can’t find heavy cream? You can substitute with coconut cream for a dairy-free option. -
1/4 cup lemon juice
Freshly squeezed is best for maximum brightness! If you’re in a pinch, bottled lemon juice will do. -
1 tablespoon lemon zest
This adds a punch of intense lemon flavor. If you don’t have a zester, a fine grater will work just fine! -
1 teaspoon vanilla extract
It rounds out our flavors beautifully. Always opt for pure vanilla extract when possible for the best taste!
Step-by-Step Instructions
Now, let’s get cooking! Here’s how to prepare your Heavenly Oreo Lemon Dessert from start to finish:
-
Preheat the Oven:
Start by preheating your oven to 350°F (175°C). This is such an important step to ensure an even bake! -
Make the Crust:
Crush the Oreo cookies into fine crumbs. You can do this by placing them in a food processor or putting them in a zip-top bag and rolling over them with a rolling pin. This is one of my favorite mess-free hacks! Once they’re crumbly, mix in the melted butter until you have a mixture that resembles wet sand. -
Press the Crust:
In a 9-inch round baking dish or square pan, firmly press the Oreo mixture into the bottom to form a crust. The key here is to ensure it’s packed tightly so it holds together when you slice it. Give it a little love with a spatula! -
Bake the Crust:
Pop it in the preheated oven for about 8-10 minutes. This will make it nice and crisp. While that bakes, let’s move on to the filling. -
Prepare the Filling:
In a large mixing bowl, use an electric mixer to beat the softened cream cheese until it’s smooth and creamy. This should be about 2-3 minutes—don’t skip this step, as it’s essential for avoiding any cream cheese lumps! -
Add Sugar, Lemon Juice, and Vanilla:
Once the cream cheese is smooth, add in the powdered sugar, lemon juice, lemon zest, and vanilla extract. Mix until well combined—this is where the magic begins to happen! -
Whip the Cream:
In a separate bowl, whip the heavy cream until stiff peaks form. When it’s ready, gently fold the whipped cream into the cream cheese mixture using a spatula. This lightens up the filling beautifully! -
Assemble Your Dessert:
Pour the lemon mixture over the cooled Oreo crust, spreading it evenly. For a little added flair, use the back of a spoon or spatula to create swoops and swirls in the filling. -
Chill:
Cover with plastic wrap and refrigerate for at least 4 hours, or overnight if you can resist. This allows the flavors to meld beautifully. -
Serve:
Once chilled, slice your dessert and serve. You can garnish with additional lemon zest or whipped cream for a touch of elegance!
Serving Suggestions
When it comes to serving your Heavenly Oreo Lemon Dessert, presentation is everything! For a lovely touch, place each slice on a decorative plate. You might even add a dollop of freshly whipped cream or a sprinkle of crushed Oreos on top for a bit of visual appeal. A few lemon slices or zest alongside can also brighten up the dish—a feast for both the eyes and the palate!
Recipe Variations
Here are a few creative twists to consider when making your Heavenly Oreo Lemon Dessert:
-
Berry Bliss:
Add layers of fresh berries (like raspberries or blueberries) into the filling for a refreshing burst of flavor. -
Coconut Cream:
Swap in coconut cream for the heavy whipping cream for a tropical twist that complements the lemon beautifully. -
Chocolate Drizzle:
Drizzle some melted chocolate (dark or white) over the top right before serving for a decadent touch. -
Nutty Crunch:
Incorporate chopped nuts (like almonds or pistachios) into the crust for a delightful crunch. -
Lemon Blueberry Swirl:
Fold in a homemade blueberry sauce with the filling for a visually stunning dessert.
Chef’s Notes
One of the reasons this dessert has become a favorite in my household is the happy mixture of flavors and textures. I giggle thinking about a time I tried making it during a family gathering, and the tartness of the lemon matched perfectly with the sweet Oreo base, creating smiles all around. Through the years, I’ve played with different flavor combinations, and it’s amazing how a simple recipe can evolve into so many variations while still keeping that balance of taste. Remember, cooking is an art—don’t hesitate to make it your own!
FAQs and Troubleshooting
Q: My dessert turned out too watery. What went wrong?
A: This can happen if the cream cheese isn’t well softened before mixing or if the heavy cream wasn’t whipped properly. Be patient when beating your cream cheese and make sure to whip the cream until it’s stiff!
Q: Can I make this a day in advance?
A: Absolutely! In fact, making it a day before allows the flavors to meld beautifully, giving you an even tastier dessert.
Q: How do I store leftovers?
A: Store any leftovers in an airtight container in the refrigerator for up to 4 days. However, I doubt you’ll have much left once your guests get a taste!
Q: Can I freeze this dessert?
A: Yes, you can freeze it! Just cover it well with plastic wrap and store it in a freezer-safe container for up to a month. Thaw it in the fridge overnight before serving.
Nutritional Information
For those who are health-conscious, here’s a quick glance at the nutritional side of things. (Note: This may vary based on brands and portion size.)
- Calories: Approximately 280 per serving
- Total Fat: 20g
- Saturated Fat: 10g
- Cholesterol: 50mg
- Carbohydrates: 24g
- Sugars: 18g
- Protein: 3g
And there you have it—a delightful journey of flavors encapsulated in the Heavenly Oreo Lemon Dessert! May this recipe inspire you to create lasting memories around your dining table, just as it does in mine. Happy cooking, and remember, good food is about showing up. Enjoy every sweet moment!
PrintHeavenly Oreo Lemon Dessert

A delightful dessert combining the rich crunch of Oreos with zesty lemon flavors, perfect for any occasion.
- Prep Time: 15 minutes
- Cook Time: 10 minutes
- Total Time: 240 minutes
- Yield: 8 servings 1x
- Category: Dessert
- Method: Chilling
- Cuisine: American
- Diet: Vegetarian
Ingredients
- 1 package of Oreo cookies
- 1/2 cup of unsalted butter, melted
- 1 package (8 oz) cream cheese, softened
- 1 cup powdered sugar
- 1 cup heavy whipping cream
- 1/4 cup lemon juice
- 1 tablespoon lemon zest
- 1 teaspoon vanilla extract
Instructions
- Preheat the oven to 350°F (175°C).
- Crush the Oreo cookies into fine crumbs and mix with melted butter.
- Press the cookie mixture into the bottom of a 9-inch round baking dish.
- Bake the crust for about 8-10 minutes until crisp.
- Beat softened cream cheese in a large mixing bowl until smooth.
- Add powdered sugar, lemon juice, lemon zest, and vanilla extract, mixing until well combined.
- Whip the heavy cream until stiff peaks form, then gently fold it into the cream cheese mixture.
- Pour the lemon mixture over the cooled Oreo crust, spreading it evenly.
- Chill in the refrigerator for at least 4 hours or overnight.
- Serve chilled, garnished with lemon zest or whipped cream if desired.
Notes
For best results, allow the dessert to chill overnight to meld flavors.
Nutrition
- Serving Size: 1 slice
- Calories: 280
- Sugar: 18g
- Sodium: 250mg
- Fat: 20g
- Saturated Fat: 10g
- Unsaturated Fat: 5g
- Trans Fat: 0g
- Carbohydrates: 24g
- Fiber: 1g
- Protein: 3g
- Cholesterol: 50mg
Keywords: Oreo, Lemon, Dessert, Cheesecake, No Bake, Easy Dessert