
Kiwi Mint Cold Brew Green Tea: Quick Summer Refresher
Chill Out with Kiwi Mint Cold Brew Green Tea
Welcome back, kitchen adventurers! Today, we’re diving into a refreshingly vibrant drink that’s perfect for those warm afternoons when all you want is something cool, crisp, and delicious: Kiwi Mint Cold Brew Green Tea. Picture this: it’s a sunny day, the kind that beckons you to your balcony or backyard, and you’re lounging with a drink that not only looks stunning but tastes like a burst of garden freshness. That’s exactly what we’re creating today!
This recipe is not just about a drink; it’s about the joy of taking a moment to pause, refresh, and enjoy life’s little pleasures. Cold brewing green tea brings out its smooth, soothing flavor without any bitterness, while ripe kiwis add a delightful tang and fresh mint elevates the whole experience. Trust me, you’ll want this drink waiting for you whenever you need to cool down. Let’s get started on this beautiful concoction together!
My Kiwi and Mint Inspiration
Let me take you back a few summers ago when I was visiting my favorite farmer’s market. It was one of those mornings where the sun was beaming, and the air was alive with the chatter of vendors and customers eagerly exploring fresh produce. I stumbled upon a stall overflowing with vibrant kiwis and fragrant mint. The colors alone caught my attention, but as I wandered closer, the sweet scent of mint filled the air, beckoning me closer.
That day, a lovely vendor asked if I’d ever tried kiwis in drinks. The thought sparked a brilliant idea! I asked her for suggestions, and after a quick chat about flavors and memories, I decided to experiment at home. I brewed a batch of green tea, added sliced kiwis, and tossed in fresh mint leaves. The result? A drink that reminded me of summer afternoons spent with family, laughter, and the delicious flavors of nature. I knew I had to share this gem with you!
Ingredients
Let’s gather our essentials. For this recipe, you’ll need the following ingredients:
-
4 cups cold water
Chef Insight: Start with filtered or spring water for the cleanest flavors. The quality of your water can make a big difference. -
4 green tea bags or 2 tablespoons of loose leaf green tea
Substitution Tip: If you’re not a green tea fan, feel free to swap for white tea or herbal tea for a caffeine-free version! -
2 ripe kiwis, peeled and thinly sliced
Chef Insight: Look for firm kiwis that yield slightly when pressed—they’re perfect for slicing. Not ripe enough? Let them sit on the counter for a couple of days. -
A handful of fresh mint leaves
Substitution Tip: You can swap mint for basil for a different flavor profile, but mint brings a lightness that pairs perfectly with the kiwi. -
Honey or another sweetener to taste (optional)
Chef Insight: If you prefer natural sweetness, honey or agave are great options. If you’re looking for a sugar-free choice, try stevia or monk fruit. -
Ice cubes for serving
Chef Insight: Freeze some kiwis in your ice cubes ahead of time for a fun touch when serving!
Step-by-Step Instructions
Let’s roll up our sleeves and make this Kiwi Mint Cold Brew Green Tea. Ready? Here we go:
-
Cold Brew the Tea
In a large pitcher or jar, pour in your cold water. Drop in the green tea bags or add the loose leaf tea using a tea infuser. Cover it and let it steep in the refrigerator for at least 4 hours or overnight. Tip: The longer it steeps, the more flavorful it becomes, but avoid steeping past 12 hours to prevent any bitterness from developing. -
Prepare the Kiwi and Mint
While your tea is brewing, it’s time to work on the fruit. Peel your kiwis and slice them thinly. You’re aiming for beautiful half-moon shapes that will infuse the drink with their flavor. Chef hack: If you want extra kiwi flavor, toss a few slices in the pitcher while your tea steeps to enhance the infusion! -
Get Your Mint Ready
Take your handful of fresh mint leaves and give them a gentle slap or twist between your hands. Why? This helps release their oils and fragrance, giving your drink that fresh minty kick! Add these leaves into the pitcher with the brewing tea and kiwis. -
Strain and Sweeten
Once your tea has steeped to perfection, remove the tea bags or strain out the loose leaves. Taste your tea and determine if you’d like to add a touch of honey or your preferred sweetener. Start with a teaspoon and adjust according to your taste! Pro tip: If you’re using a liquid sweetener like honey, make sure the tea is still a bit warm to help it dissolve more easily. -
Serving Time
Fill a glass with ice cubes or the frozen kiwi cubes we talked about earlier. Pour your Kiwi Mint Cold Brew Green Tea over the ice and garnish with a sprig of fresh mint and a few extra kiwi slices for presentation. Cheers to summer sips!
Serving Suggestions
To elevate your presentation, consider using tall, clear glasses that showcase the beautiful hues of your tea and the vibrant pops of green from the kiwi and mint. You can also prepare a matching platter of light snacks, like cucumber sandwiches or fresh fruit. This combo makes for a delightful and refreshing experience, perfect for casual get-togethers or a lovely afternoon moment to yourself.
Recipe Variations
Feeling adventurous? Here are some tasty variations you can explore with your Kiwi Mint Cold Brew Green Tea:
- Citrus Twist: Add slices of lime or lemon for a zesty kick. Both citrus fruits pair beautifully with the sweetness of kiwi.
- Berry Blend: Toss in some sliced strawberries or blueberries for an additional layer of fruitiness.
- Spiced Kick: Infuse your brew with a hint of ginger for a warm twist against the coolness of the tea.
- Tropical Fusion: Use coconut water instead of regular water for a tropical vibe!
- Chia Boost: Add a tablespoon of chia seeds for added texture and health benefits—give it a stir and let it sit for a few minutes.
Chef’s Notes
This recipe has grown with me over the years. It started as a simple thirst-quencher and has blossomed into a signature drink for my summer parties. I still chuckle at the time I accidentally over-stepped the tea—let’s just say, coffee drinkers for some reason completely lose their minds when they taste something bitter! Sweetened with just the right amount of honey, it’s a delightful balance.
Another thing to note? The flavors only get better the next day, which makes it an excellent make-ahead option for gatherings. I often prepare a bigger batch for brunches; it’s a crowd-pleaser every time!
FAQs and Troubleshooting
-
How long should I steep the tea?
Ideally, you should allow it to steep for 4 to 12 hours in the fridge. The longer it steeps, the more flavor you’ll get, but don’t go overboard; too long can lead to bitterness. -
What if my kiwi isn’t ripe?
You can leave it at room temperature for a few days to ripen further, or use softer fruits like ripe mango or strawberries in a pinch! -
Can I make this tea hot?
Absolutely! Just steep the green tea in hot water as you typically would, then add the sliced kiwi and mint afterward. Thirsting for warm comfort! -
How can I store any leftovers?
Store the infused tea in an airtight container in the fridge for up to 3 days. It won’t have the same refreshing taste as when freshly made, but it will still be delicious.
Nutritional Info
For a serving size of 1 cup (approximately 250 ml) of Kiwi Mint Cold Brew Green Tea, including minimal honey:
- Calories: ~50 (without sweetener)
- Sugar: ~6g (depending on added sweetener)
- Carbohydrates: ~10g
- Vitamin C: ~13% DV (due to kiwis)
Bring on the sunshine and relaxation! With this Kiwi Mint Cold Brew Green Tea, you’re set for delightful summer sipping. Remember, it’s not just about making a drink; it’s about creating moments that matter and enjoying the simpler things in life. So tie on that apron, gather your ingredients, and let’s make this summer one to remember! Cheers!
PrintKiwi Mint Cold Brew Green Tea

A refreshing and vibrant drink made with cold brewed green tea, ripe kiwis, and fresh mint, perfect for warm afternoons.
- Prep Time: 15 minutes
- Cook Time: 240 minutes
- Total Time: 255 minutes
- Yield: 4 servings 1x
- Category: Beverage
- Method: Cold Brewing
- Cuisine: Beverage
- Diet: Vegan
Ingredients
- 4 cups cold water
- 4 green tea bags or 2 tablespoons loose leaf green tea
- 2 ripe kiwis, peeled and thinly sliced
- A handful of fresh mint leaves
- Honey or another sweetener to taste (optional)
- Ice cubes for serving
Instructions
- Cold Brew the Tea: In a large pitcher or jar, pour in your cold water. Drop in the green tea bags or add the loose leaf tea using a tea infuser. Cover it and let it steep in the refrigerator for at least 240 minutes or overnight.
- Prepare the Kiwi and Mint: While your tea is brewing, peel your kiwis and slice them thinly. Toss a few slices in the pitcher to enhance the infusion.
- Get Your Mint Ready: Take your handful of fresh mint leaves and gently slap or twist between your hands to release their oils, then add them into the pitcher with the brewing tea and kiwis.
- Strain and Sweeten: Once your tea has steeped, remove the tea bags or strain out the loose leaves. Adjust sweetness to taste with honey or preferred sweetener.
- Serving Time: Fill a glass with ice cubes or frozen kiwi cubes. Pour your tea over the ice and garnish with mint and kiwi slices.
Notes
The flavors only improve the next day, making it an excellent make-ahead option for gatherings. Adjust the sweetener to your taste preference.
Nutrition
- Serving Size: 1 serving
- Calories: 50
- Sugar: 6g
- Sodium: 5mg
- Fat: 0g
- Saturated Fat: 0g
- Unsaturated Fat: 0g
- Trans Fat: 0g
- Carbohydrates: 10g
- Fiber: 1g
- Protein: 0g
- Cholesterol: 0mg
Keywords: refreshing drink, cold brew tea, kiwi mint tea
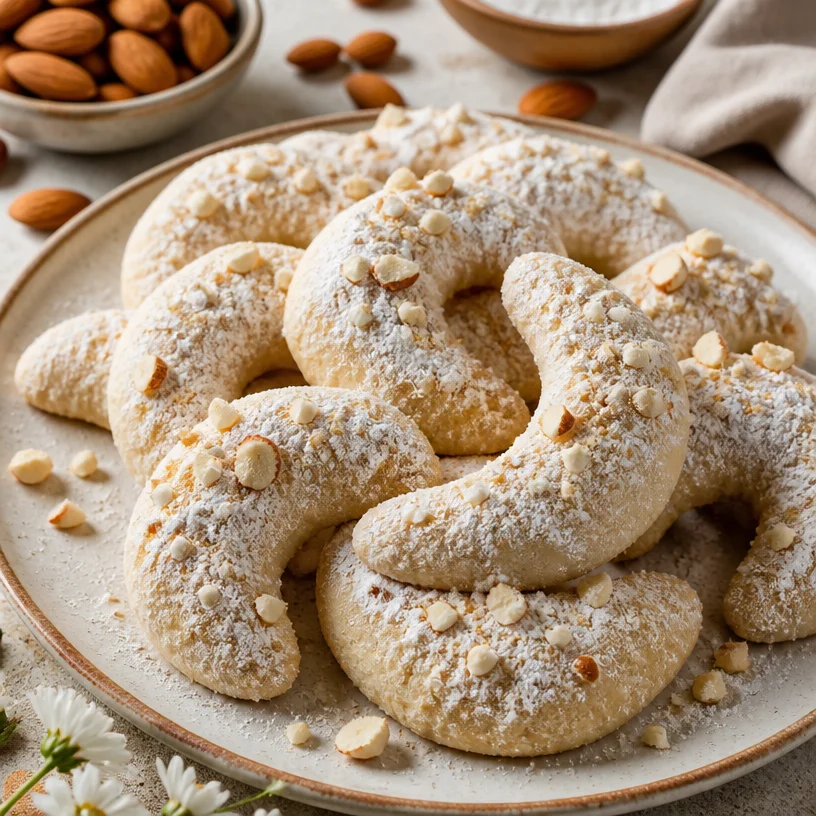
Almond Crescent Cookies: Easy, Crisp Tea-Time Treat
The Sweet Aroma of Nostalgia: Almond Crescent Cookies
Hello friends! Today, we’re diving into a delightful little corner of my kitchen to whip up a batch of Almond Crescent Cookies. These charming little treats have a special place in my heart, and I can’t wait to share the joy of creating them with you. Perfectly buttery, with a lovely hint of almond and a gentle sweetness, these cookies are not just a dessert – they’re a memory, a hug in cookie form.
A Walk Down Memory Lane
Let me take you back to a sunny afternoon in my childhood kitchen. The warm scent of freshly baked cookies dances through the air, blending with the laughter of friends and family. My grandmother, the heart of our home, would invite us into her kitchen, her bright blue apron swaying as she twirled around, mixing, rolling, and baking. It was a time when the world outside slowed down, and our only concern was the tantalizing cookies cooling on the counter.
Among her treasured recipes, the Almond Crescent Cookies stood out. She taught me the delicate process of shaping the dough into crescent moons, rolling them in a cloud of powdered sugar, and the way to savor the crisp edges with each bite. Now, every time I bake these cookies, I feel that same warmth, reliving those lovely moments. So, let’s create some delicious nostalgia together!
Ingredients You’ll Need
Here’s what you’ll need to gather for these wonderful cookies:
-
1 cup unsalted butter, softened
- This adds rich creaminess to the cookies. Make sure it’s at room temperature for easy mixing. If you’re in a pinch, you can substitute it with an equal amount of coconut oil for a dairy-free option.
-
1/2 cup powdered sugar
- This gives the cookies a light, sweet taste and a melt-in-your-mouth texture. For a healthier alternative, try using powdered erythritol or another sweetener of your choice.
-
1 teaspoon vanilla extract
- Adds a warm, aromatic flavor to balance the sweetness. If you want to experiment, a touch of bourbon or rum extract could add an interesting twist.
-
1 teaspoon almond extract
- The star of the show! It lends that classic, nostalgic flavor. You could use hazelnut extract for a different nutty flavor altogether if desired.
-
2 1/4 cups all-purpose flour
- This provides structure to our cookies. For a gluten-free version, you can use a gluten-free 1:1 baking blend with xanthan gum.
-
1/4 teaspoon salt
- A little pinch enhances the flavors and balances the sweetness. Using sea salt can give an extra dash of flavor!
-
1/2 cup chopped almonds
- These add a delightful crunch and flavor. Feel free to substitute with other nuts like walnuts or pistachios for a unique variation.
-
Additional powdered sugar for dusting
- This is what makes these cookies so visually appealing! You could infuse the sugar with a bit of cinnamon for an interesting flavor twist.
Step-by-Step Instructions
Now that we have our ingredients all prepped and ready, let’s get those elbows greased up and dive into the baking process!
-
Preheat Your Oven
- Start by preheating your oven to 350°F (175°C). This ensures that when we pop our cookies in, they’ll bake evenly right from the get-go!
-
Cream the Butter and Sugar
- In a large mixing bowl, combine the softened butter and powdered sugar. Using an electric mixer, beat them together on medium speed until the mixture is light and fluffy—this usually takes about 2-3 minutes. It’s crucial to incorporate air for those lovely, tender cookies!
-
Add the Flavorings
- Now, pour in the vanilla and almond extracts. Mix just until combined. Take a moment here to breathe in that intoxicating aroma; it’s the heart of our cookies!
-
Incorporate the Dry Ingredients
- In a separate bowl, whisk together the flour and salt. Gradually add the flour mixture to the butter mixture in about three additions, mixing on low speed until just combined. Be careful not to overmix; we want to keep those cookies light and flaky!
-
Fold in the Almonds
- Sprinkle in the chopped almonds and gently fold them into the dough with a spatula. This is where those delightful crunches come from! If you want to get a bit adventurous, you can lightly toast the almonds before adding them for an enhanced nutty flavor.
-
Shape the Cookies
- Using your hands, scoop about a tablespoon of dough and roll it into a crescent shape, or, if you’re feeling fun, you could create little balls and then shape them into crescents! Place them on a lined baking sheet, leaving some space in between for spreading.
-
Bake the Cookies
- Pop the sheets into your preheated oven and bake for 12-15 minutes, or until the edges are golden. Keep an eye on them, as they can turn from perfect to too crispy in the blink of an eye!
-
Dust with Powdered Sugar
- Allow the cookies to cool for about 5 minutes on the baking sheet before transferring them to a wire rack. While they’re still warm, gently sift powdered sugar over the top. This makes them look absolutely gorgeous and transforms them into a sprinkle of happiness!
Serving Suggestions
To serve these lovely Almond Crescent Cookies, I recommend placing them on a beautiful platter or in a delightful basket lined with a colorful cloth. Pair them with a steaming cup of tea or coffee, or for an extra treat, bring out some homemade hot cocoa. These cookies are perfect for gatherings, holiday celebrations, or simply enjoying with loved ones on a cozy afternoon.
Recipe Variations
-
Chocolate Dipped Almond Crescents: Melt some dark or white chocolate and dip half of each cooled cookie before they set on a wire rack for a decadent twist.
-
Cinnamon Almond Crescents: Add a teaspoon of ground cinnamon to the dough for a spice-infused treat that’s perfect for fall baking.
-
Orange Zest Addition: Incorporate a teaspoon of fresh orange zest to the mix for a lively citrus note.
-
Nut-Free Version: Simply omit the chopped almonds and replace them with miniature chocolate chips for a delightful sweetness.
-
Matcha Almond Cookies: Add a tablespoon of matcha powder for a unique and vibrant twist; think green and gorgeous!
Chef’s Notes
These Almond Crescent Cookies have quite the history in my kitchen. They started as a special holiday treat but have since become a staple of my baking repertoire. I often find new friends and family loving these cookies during festive gatherings or casual weekend afternoons. They’re enjoyed straight from the oven but even better when shared!
And here’s a little kitchen story—I once tried to multitask and ended up rolling my cookie dough too thin. Unfortunately, they flattened out instead of holding their crescent shape. Instead of tossing them, I embraced the mistake and dusted them with powdered sugar, presenting them as ‘Almond Dust Clouds’. Life’s too short not to laugh at your baking blunders, right?
FAQs and Troubleshooting
-
Why are my cookies flat?
- If your dough is too soft, it could be over-creamed or have too much butter. Make sure to chill the dough for 30 minutes before baking if this happens!
-
Can I freeze the dough?
- Absolutely! You can shape the cookies, freeze them on a baking sheet, and then transfer them to a freezer-safe bag. When you’re ready to bake, just pop them into the oven without thawing!
-
What’s the best way to store these cookies?
- Store them in an airtight container at room temperature for up to a week. If they last that long!
-
How can I tell if they’re done baking?
- Look for the edges to turn a light golden brown. The centers might seem soft, but they’ll firm up as they cool!
Nutritional Info (Optional)
- Serving Size: 1 cookie
- Calories: Approximately 95
- Total Fat: 6g (Saturated Fat: 4g)
- Carbohydrates: 10g (Sugars: 3g)
- Protein: 1g
These Almond Crescent Cookies are so much more than just a dessert; they’re a sprinkle of love that brings us together – a sweet reminder of cherished moments spent sharing food and laughter. I can’t wait for you to try this recipe, and I’d love to hear how they turn out! Let’s keep that kitchen bustling, tie on those aprons, and bake up some memories! Happy baking!
PrintAlmond Crescent Cookies

Deliciously buttery cookies with a hint of almond, perfect for cherishing memories and sharing with loved ones.
- Prep Time: 15 minutes
- Cook Time: 15 minutes
- Total Time: 30 minutes
- Yield: 24 cookies 1x
- Category: Dessert
- Method: Baking
- Cuisine: American
- Diet: Vegetarian
Ingredients
- 1 cup unsalted butter, softened
- 1/2 cup powdered sugar
- 1 teaspoon vanilla extract
- 1 teaspoon almond extract
- 2 1/4 cups all-purpose flour
- 1/4 teaspoon salt
- 1/2 cup chopped almonds
- Additional powdered sugar for dusting
Instructions
- Preheat your oven to 350°F (175°C).
- Cream the butter and powdered sugar until light and fluffy.
- Add the vanilla and almond extracts and mix until combined.
- Incorporate the flour and salt gradually into the butter mixture.
- Fold in the chopped almonds.
- Shape the dough into crescent shapes and place on a lined baking sheet.
- Bake for 12-15 minutes until golden on the edges.
- Dust with powdered sugar while warm.
Notes
For a different flavor twist, try adding chocolate, cinnamon, or orange zest.
Nutrition
- Serving Size: 1 cookie
- Calories: 95
- Sugar: 3g
- Sodium: 50mg
- Fat: 6g
- Saturated Fat: 4g
- Unsaturated Fat: 2g
- Trans Fat: 0g
- Carbohydrates: 10g
- Fiber: 0g
- Protein: 1g
- Cholesterol: 30mg
Keywords: cookies, almond, crescents, dessert, baking, nostalgic

Beginner-Friendly 5-Ingredient No-Bake Almond Pralines
The Sweet Symphony of Almond Pralines: A Delightful Recipe
Hello, fellow foodies! Today, I’m bringing you a recipe that is close to my heart and has been a cherished part of my kitchen repertoire: Almond Pralines. These delightful treats are not just simple to make; they also carry with them a deliciously rich flavor that can brighten any day. There’s something magical about the crunch of the almonds coated in a sweet, caramelized sugar that just evokes joy. Let’s get ready to create this sweet treat that’s perfect for sharing or enjoying on your own—because we all deserve a little indulgence now and then!
A Personal Taste of Nostalgia
I remember the first time I made Almond Pralines like it was yesterday. I was a teenager, freshly inspired by a cooking show I had binge-watched over the weekend. My friends were coming over for a movie night, and I wanted to impress them with something sweet that wasn’t just store-bought cookies. So, I rallied my courage and gathered the ingredients. With a little guidance from my mom, I stirred the bubbling sugar mixture while keeping an eye on the almond-toasting process.
When I finally pulled those golden, crunchy nuggets from the pan and let them cool, the pride I felt was palpable! I remember watching my friends’ eyes widen in delight as they tasted the pralines. That night, laughter filled the kitchen, and the smell of warm caramel clung to the air. From that moment on, those Almond Pralines became a staple for all gatherings: birthdays, holidays, or just a Wednesday night. Each batch spurred new memories, confirming that food truly is a love language.
Ingredients You’ll Need
Now, let’s gather the ingredients for these delectable Almond Pralines. Here’s what you’ll need:
-
250 g – 1 ¾ cups almonds (unpeeled)
Unsalted almonds work best for this recipe. If you prefer a toasted flavor, feel free to toast them lightly in the oven before starting the praline process. You can also swap in other nuts, but the classic crunchy almond is my favorite! -
250 g – 1 ¼ cups granulated sugar
This is the backbone of our praline! For a less sweet version, you might experiment with coconut sugar, but it will give a different flavor profile. Always use a fine-grained sugar for the best texture. -
1 tsp cocoa powder
This ingredient adds a hint of depth to the flavors without dominating the taste. Feel free to skip it if you’re in the mood for a purely nutty flavor, or use a dash of cinnamon for a warm kick! -
1 tbsp water
Water helps in melting the sugar and creating the syrup. You can use a splash of your favorite liqueur instead for a fun twist, just remember to keep the proportions similar!
Step-by-Step Instructions
Ready to create something magical? Let’s dive into making these Almond Pralines!
-
Prepare Your Workspace:
Before you start cooking, make sure your counter is clear. Gather all your ingredients, and keep your utensils handy, including a spatula and a baking sheet lined with parchment paper. This step saves you from scrambling later! -
Toast the Almonds (Optional):
If you’re toasting your almonds, preheat your oven to 350°F (175°C). Spread the almonds on a baking sheet in a single layer and toast them for about 10 minutes, or until they are golden fragrant, stirring halfway. Keep a close eye on them; burnt almonds are no fun! Keep them to the side to cool while you prepare the sugar mixture. -
Make the Sugar Syrup:
In a medium saucepan, combine the sugar, cocoa powder, and water. Stir it together until well combined, and then place it over medium heat. As the mixture begins to heat, don’t stir! Instead, let the sugar dissolve naturally as it bubbles. Watch closely until the mixture turns a lovely amber color. This can take about 5-10 minutes, so don’t get distracted. If you’re unsure, use a candy thermometer—you’re aiming for about 240°F (115°C), the soft ball stage. -
Add the Almonds:
Once your sugar syrup reaches that gorgeous golden hue, remove it from the heat immediately. Quickly add the almonds, stirring to coat them evenly in that luscious syrup. Be careful; it’s hot! The mixture will be sticky and gooey—perfect! -
Cool and Set:
Immediately pour the nut mixture onto the lined baking sheet and spread it out into a thin layer. Let it cool completely at room temperature. Once it’s hardened, you can break it into pieces. The pralines should be chunky and irregular for that homemade charm, but you can always chop them more finely if you prefer tiny bits! -
Enjoy or Store:
These Almond Pralines can be enjoyed right away, but they also store beautifully in an airtight container for up to two weeks. Just make sure they’re completely cool before sealing!
Serving Suggestions
When it comes to serving these Almond Pralines, I always love to place them in a beautiful bowl on the table for everyone to share. You can also garnish your dessert plates with a sprinkle of sea salt or a dusting of powdered sugar for an elegant touch. Think about adding them to a cheese platter or enjoying them with a scoop of vanilla ice cream for a delightful dessert duo!
Recipe Variations
Want to switch things up a bit? Here are a few creative twists and dietary swaps you can try:
-
Chocolate-Covered Almonds: After the pralines cool, dip them in melted dark chocolate for an indulgent treat!
-
Spiced Pralines: Add a pinch of cayenne or nutmeg for a spicy twist that will surprise your taste buds.
-
Nut-Free Option: Substitute the almonds with sunflower seeds for a nut-free version that’s still crunchy and delightful!
-
Maple Pralines: Use maple sugar instead of granulated sugar for a unique, earthy flavor profile.
-
Dairy-Free: Keep it dairy-free by ensuring all ingredients, especially any suggested substitutes, are labeled dairy-free.
Chef’s Notes
Every time I make these Almond Pralines, I’m reminded of how simple ingredients can create something so delightful. I’ve played around with different nut varieties and flavorings, occasionally even adding a touch of sea salt to the hot mixture for a sweet-and-salty kick. The best part? People always remember the first time they tried these little nuggets of joy! They are the perfect conversation starter for any gathering.
FAQs and Troubleshooting
Q: What do I do if my sugar crystallizes?
A: If your sugar mixture starts to crystallize, try lowering the heat and stirring it gently. A little bit of corn syrup in the initial mix can also help prevent crystallization.
Q: Can I use blanched almonds?
A: Absolutely! Blanched almonds will give you a slightly different texture since they won’t have the skin, but they’ll still be delicious.
Q: How can I store these pralines?
A: Store them in an airtight container at room temperature. If they start to get sticky, a bit of wax paper between layers can help.
Q: My pralines are too hard; what did I do wrong?
A: If your syrup cooked too long, it could lead to hard, crunchy pralines. Cooking them to the soft ball stage will give you that melt-in-your-mouth texture you crave!
Nutritional Info (optional)
While I love reaching for these treats now and then, remember that moderation is key. Each praline is packed with nutrients from almonds while being a sugar-laden delight. Balancing your indulgences is always a good approach!
Well, there you have it—your deep dive into the world of Almond Pralines! I hope you find as much joy in making (and sharing) these sweet treats as I do. Tie on your apron, crank up some music, and let’s bring a little sweetness into our kitchens and lives! Happy cooking!
PrintAlmond Pralines

Delightfully rich Almond Pralines, coated in sweet caramelized sugar, perfect for sharing or indulging on your own.
- Prep Time: 10 minutes
- Cook Time: 15 minutes
- Total Time: 25 minutes
- Yield: 12 servings 1x
- Category: Dessert
- Method: Baking
- Cuisine: American
- Diet: Vegetarian
Ingredients
- 250 g – 1 ¾ cups unsalted almonds (unpeeled)
- 250 g – 1 ¼ cups granulated sugar
- 1 tsp cocoa powder
- 1 tbsp water
Instructions
- Prepare your workspace by gathering all your ingredients and utensils, including a spatula and a lined baking sheet.
- Toast the almonds by preheating your oven to 350°F (175°C) and spreading them on a baking sheet for about 10 minutes until golden.
- Make the sugar syrup by combining sugar, cocoa powder, and water in a medium saucepan and heating over medium heat without stirring.
- Add the almonds to the syrup once it reaches a golden hue, stirring to coat them evenly.
- Cool the mixture by pouring it onto a lined baking sheet and spreading it into a thin layer, then let it cool completely.
- Enjoy the Almond Pralines immediately or store them in an airtight container for up to two weeks.
Notes
For a chocolate twist, dip cooled pralines in melted dark chocolate. Experiment with different nuts and spices for unique flavors.
Nutrition
- Serving Size: 1 praline
- Calories: 150
- Sugar: 12g
- Sodium: 1mg
- Fat: 7g
- Saturated Fat: 0.5g
- Unsaturated Fat: 6g
- Trans Fat: 0g
- Carbohydrates: 18g
- Fiber: 2g
- Protein: 3g
- Cholesterol: 0mg
Keywords: Almond, Pralines, Dessert, Sweet Treats, Caramel
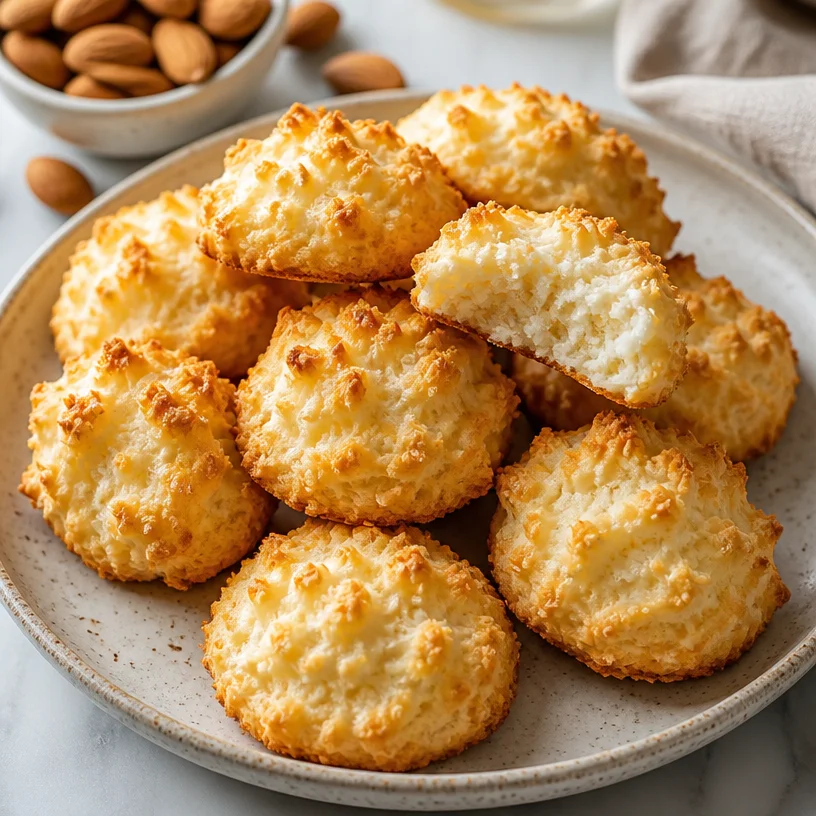
Beginner-Friendly Almond Cloud Cookies (15-Minute Bake)
Almond Cloud Cookies: A Whimsical Treat That Dances on Your Taste Buds
Hello, my fellow foodies! Today, we’re diving into the delightful realm of Almond Cloud Cookies—a treat that’s as whimsical as a cloud and as comforting as a hug from a loved one. These cookies are light, airy, and packed with almond flavor that will make your taste buds sing! What could be better than a dessert that feels like a little indulgence but is surprisingly simple to whip up?
A Little Taste of Nostalgia
Let me take you back to my grandmother’s kitchen. Picture this: I was a curious kid, standing on a stool, peering over the counter as she carefully measured out ingredients. The joy on her face when she pulled those puffy, golden cookies from the oven was infectious. Almond Cloud Cookies were an absolute favorite in our family. We would gather around the table, and she’d serve them warm with a sprinkle of powdered sugar, her eyes sparkling with delight as we munched on them, crumbs flying everywhere!
Those moments instilled in me a love for baking—not just for the delectable cookies but for the laughter, stories, and connections that were shared over a plate of homemade goodness. When I recreate these cookies in my own kitchen today, I’m reminded of those sweet memories and the joy that baking can bring, not just to our taste buds, but to our hearts. So, are you ready to create some clouds of your own? Let’s get started!
Ingredients
Here’s what you’ll need to make these ethereal Almond Cloud Cookies:
-
2 cups almond flour
- A nutty, gluten-free alternative to traditional flour. It gives these cookies their distinct flavor and texture. If you’re looking for a substitution, you could try hazelnut flour for a unique twist, but the texture may vary slightly.
-
1 cup sugar
- Sweetness in its most universal form! You can use granulated sugar, but feel free to swap in coconut sugar for a caramel-like taste or for a lower glycemic index. Just keep in mind, it might slightly change the color of your cookies.
-
3 egg whites
- These little wonders are what give our cookies that light, airy cloud-like texture. If you’re vegan, aquafaba (the liquid from canned chickpeas) is a fantastic substitute—3 tablespoons of aquafaba equals one egg white!
-
1 teaspoon vanilla extract
- Vanilla adds a warm, comforting aroma and flavor. For an extra touch of elegance, you could infuse your vanilla with a splash of almond extract, which will amplify the almond taste in these cookies.
-
1/4 teaspoon salt
- Just a pinch! Salt enhances the overall flavor, balancing out the sweetness. If you’re feeling adventurous, a dash of sea salt on top just before baking adds a delightful contrast.
Step-by-Step Instructions
Ready to kitchen magic? Here we go!
-
Preheat the Oven
- Start by preheating your oven to 325°F (163°C). This is essential—I can’t stress enough how important it is to have your oven ready, like a warm embrace on a cozy day!
-
Prepare Your Baking Sheet
- Line a baking sheet with parchment paper. This not only prevents sticking but also helps in evenly baking your cookies. A little tip? Lightly spray the parchment with cooking spray for an even smoother release.
-
Combine Dry Ingredients
- In a large mixing bowl, whisk together the almond flour and sugar until they’re well combined. No lumps allowed in the cloud!
-
Beat the Egg Whites
- In a separate bowl, using a mixer, beat the egg whites until they form soft peaks. You want the texture to be fluffy and light, like a gentle spring breeze. This should take about 2-3 minutes. A pro tip: Ensure your bowl and whisk are completely clean and dry—any bit of oil can prevent your egg whites from whipping up perfectly.
-
Incorporate the Wet Ingredients
- Gently fold the beaten egg whites into the almond flour mixture using a spatula. This step is crucial, so take your time and do it slowly! You want to maintain the airiness of the egg whites while ensuring everything is combined nicely.
-
Add Vanilla and Salt
- Once combined, add the vanilla extract and salt. Gently fold these in as well until everything is well blended.
-
Scoop and Shape
- Using a cookie scoop or two spoons, drop dough rounds onto your prepared baking sheet, leaving space between each one to allow for spreading. If you’re feeling fancy, lightly dust the tops with powdered sugar before baking for that delightful finish.
-
Bake to Perfection
- Place the baking sheet in the oven and bake for about 15-18 minutes, or until the edges start to turn a light golden brown. Keep an eye on them—oven temperatures can vary!
-
Cool and Enjoy
- Once baked, remove the cookies from the oven and allow them to cool on the baking sheet for about 5 minutes before transferring them to a wire rack to cool completely. This cooling step allows for their cloud-like texture to set just right.
Serving Suggestions
For a presentation that will have your guests oohing and aahing, stack several Almond Cloud Cookies on a ceramic cake stand, dust them with powdered sugar, and garnish with a few sprigs of fresh mint or edible flowers. Pair these cookies with a cup of tea or a nice cold glass of milk for the perfect treat!
Recipe Variations
Feeling adventurous? Here are a few ways you can shake things up with this cookie recipe:
- Chocolate Chip Variation: Add half a cup of mini chocolate chips to the batter for a sweet touch of decadence.
- Citrus Zest: Grate some lemon or orange zest into the dough for a bright citrus flavor that complements the almond beautifully.
- Spiced Clouds: Incorporate a teaspoon of ground cinnamon or cardamom into the mixture for a warm spice note.
- Nutty Delight: Mix in chopped pistachios or walnuts for added texture and richness!
- Dairy-Free: Swap the regular sugar for maple sugar or coconut sugar for a more wholesome dessert option.
Chef’s Notes
Every time I make these cookies, I remember my grandmother’s laughter echoing in the kitchen. Through the years, I’ve slightly tweaked the recipe, experimenting with different nut flours and flavors. I learned that a little creativity goes a long way in the kitchen. One day, I added a pinch of espresso powder to the batter, and to my surprise, it added a whole new layer of depth—who knew almond and coffee could dance so well together?
FAQs and Troubleshooting
1. Why are my cookies too flat?
- If your cookies spread too much, it could be due to overmixing the egg whites or not using enough almond flour. Make sure you’re gently folding the mixtures together and measuring accurately.
2. How can I store these cookies?
- Almond Cloud Cookies can be stored in an airtight container at room temperature for up to a week—if they last that long! For longer storage, you can freeze them layered with parchment paper and sealed in a freezer bag for up to three months.
3. Can I replace almond flour with regular flour?
- I wouldn’t recommend it as the texture and flavor will change dramatically. However, if you need to avoid nuts, try a gluten-free flour blend that’s suitable for baking, but do keep in mind that this recipe is crafted specifically for almond flour.
4. What’s the best way to know when they are done?
- The cookies should have lightly golden edges and might appear slightly underbaked in the center. They will continue to firm up as they cool, yielding that lovely chewy texture!
Nutritional Info (if applicable)
Each cookie contains approximately:
- Calories: 90
- Fat: 5g
- Carbohydrates: 8g
- Fiber: 1g
- Protein: 2g
(Please note this is an estimation based on the recipe’s ingredients.)
And there you have it! An enchanting journey into the world of Almond Cloud Cookies. I hope these little treats bring as much joy to your kitchen as they have in mine. So grab your apron, gather your ingredients, and let’s make some delicious memories! Happy baking, friends!
PrintAlmond Cloud Cookies

Light and airy Almond Cloud Cookies packed with almond flavor, reminiscent of cherished family memories.
- Prep Time: 10 minutes
- Cook Time: 18 minutes
- Total Time: 28 minutes
- Yield: 24 cookies 1x
- Category: Dessert
- Method: Baking
- Cuisine: American
- Diet: Gluten-Free
Ingredients
- 2 cups almond flour
- 1 cup sugar
- 3 egg whites
- 1 teaspoon vanilla extract
- 1/4 teaspoon salt
Instructions
- Preheat the oven to 325°F (163°C).
- Line a baking sheet with parchment paper.
- In a large mixing bowl, whisk together the almond flour and sugar.
- In a separate bowl, beat the egg whites until they form soft peaks.
- Gently fold the beaten egg whites into the almond flour mixture.
- Add the vanilla extract and salt, folding until well blended.
- Scoop dough rounds onto the prepared baking sheet, leaving space between each.
- Bake for about 15-18 minutes, until edges are light golden brown.
- Allow to cool on the baking sheet for 5 minutes before transferring to a wire rack.
Notes
For a touch of elegance, dust with powdered sugar before serving.
Nutrition
- Serving Size: 1 cookie
- Calories: 90
- Sugar: 8g
- Sodium: 5mg
- Fat: 5g
- Saturated Fat: 0.5g
- Unsaturated Fat: 4.5g
- Trans Fat: 0g
- Carbohydrates: 8g
- Fiber: 1g
- Protein: 2g
- Cholesterol: 0mg
Keywords: almond, cookies, gluten-free, dessert, baking, light
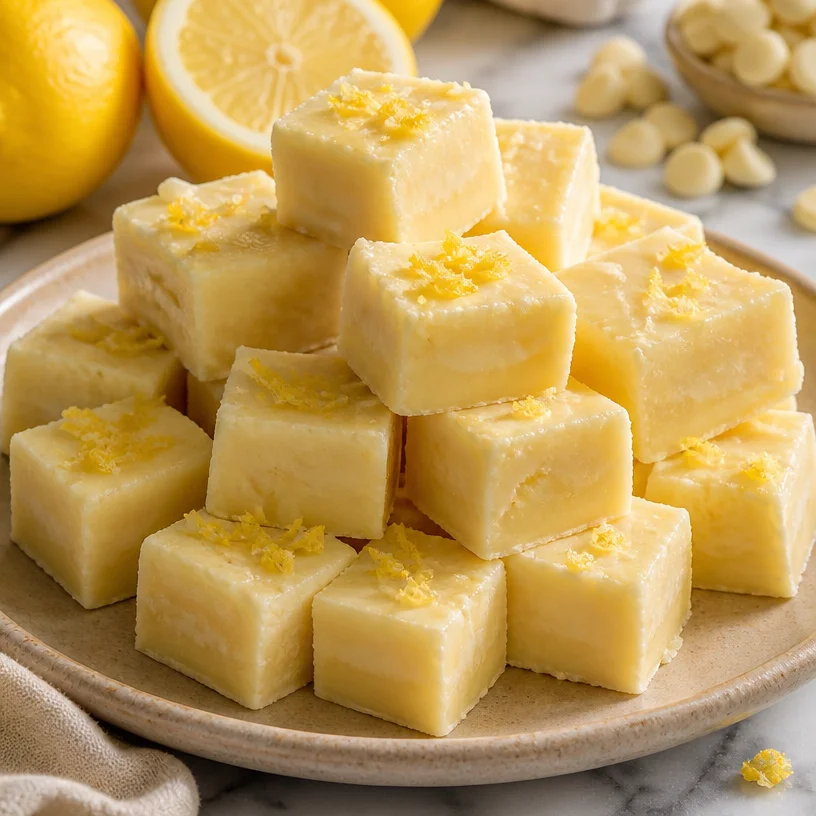
Ingredient No-Bake Lemon Fudge: Quick, Creamy & Zesty
No Bake Easy Lemon Fudge Recipe
Introduction
Hello, dear food lovers! If you’re anything like me, the moment the sun shines a little brighter, your thoughts drift to zesty treats infused with sunshine and sweetness. Today, we’re diving into a glorious dessert that not only brightens your day but is also a breeze to make—No Bake Easy Lemon Fudge! Imagine creamy, luscious fudge that melts in your mouth, bursting with tangy lemon goodness. This recipe is perfect for quick gatherings, summer picnics, or simply indulging in a well-deserved treat without stepping foot in a hot kitchen.
For me, the best recipes are those that tell a story, and this lemon fudge does just that. I remember a summer day when my grandmother and I decided to whip up something sweet. We gathered in her cozy kitchen, fragrances of citrus and vanilla dancing in the air. It was a spontaneous baking adventure; we mixed up a concoction of flavors and, much to our delight, came up with a sweet treat that was a perfect balance of sweet and tart. This lemon fudge reminds me of those sunny afternoons spent chatting and laughing, creating delicious memories over the kitchen counter.
So, whether you’re preparing for a garden party, a family celebration, or just want a sweet bite after a long day, this No Bake Easy Lemon Fudge is just what you need. Get ready to tie on your apron, and let’s dive into this delightful recipe that brings joy—and a touch of nostalgia—every time it’s made!
Personal Story
One of my fondest memories involves an impromptu visit from one of my closest friends during college. She had just returned from a trip to a lemon orchard and couldn’t stop raving about the fresh, zesty lemons she’d picked. I decided to surprise her with a homemade treat to welcome her back.
With a handful of ingredients and a desire to celebrate her trip, I grabbed my grandmother’s old recipe for lemon fudge. We spent the afternoon together, zesting lemons and melting chocolate, laughter filling the air as we sampled spoonfuls of the citrusy goodness. As I stirred, I felt that same sense of warmth and creativity my grandmother had passed down to me. And those moments of connection and joy are what cooking is all about, aren’t they? So, let’s bring that same energy to the kitchen as we create our No Bake Easy Lemon Fudge!
Ingredients
Here’s what you’ll need to whip up this delicious lemon fudge:
-
2 cups white baking chips
These create the creamy base of the fudge. If you want a richer flavor, feel free to substitute with chocolate chips for a delightful touch of contrast! -
8 oz white almond bark
This adds a smooth, velvety texture. In a pinch, you can use additional white chocolate chips or a different coating chocolate—just be mindful of the consistency! -
1 can (14 oz) sweetened condensed milk
This is the magic ingredient that sweetens the fudge and brings it all together. If you’re looking for a dairy-free option, you can try coconut milk, but it may subtly change the flavor profile. -
1/4 teaspoon salt
A touch of salt enhances sweetness and balances flavors. If you’re on a low-sodium diet, feel free to skip or reduce this. -
2 tablespoons lemon juice
Freshly squeezed is best, as it bursts with vibrant flavor! Store-bought lemon juice can work, but I always recommend fresh for that extra zing. -
1 tablespoon lemon zest, divided
This adds depth and aromatic essence. Make sure to zest only the yellow part of the skin to avoid bitterness—your taste buds will thank you!
Step-by-Step Instructions
Now, let’s roll up our sleeves and get cooking! Follow these steps to create your own No Bake Easy Lemon Fudge:
-
Prepare Your Baking Pan
Start by lining an 8-inch square baking dish with parchment paper, leaving some overhang for easy removal later. This step ensures that your fudge releases effortlessly, making it a breeze to slice. You can also lightly grease the pan if you’re short on parchment—whatever works best for you! -
Melt the White Baking Chips and Almond Bark
In a medium saucepan over low heat, combine the white baking chips and the white almond bark. Stir constantly to avoid burning. Patience is key here; keep the heat low, and you’ll achieve a smooth, velvety texture! Alternatively, you can melt them in the microwave in 30-second intervals, stirring between each burst. -
Mix in Sweetened Condensed Milk
Once everything is melted and well-combined, pour in the sweetened condensed milk. Stir until completely incorporated. This will make your fudge incredibly rich and creamy. Don’t be afraid to dive in with the spatula! -
Add Lemon Juice and Zest
Now it’s time for the star ingredients—add in the lemon juice and half of the zest. Stir well to combine, allowing those bright flavors to meld into the fudge mixture. The aroma will be simply divine! -
Season with a Pinch of Salt
Sprinkle in the 1/4 teaspoon of salt. This will enhance the sweetness and balance the tartness of the lemon, creating that perfect contrast. You’ll be surprised at how much a little salt can elevate flavors! -
Pour the Mixture into the Pan
Gently pour the fudge mixture into the prepared baking pan, using a spatula to spread it out evenly. Give it a little jiggle to level the top, and this is where you can sprinkle the remaining lemon zest on top for an extra pop of color and flavor! -
Chill Until Set
Place the dish in the refrigerator for at least 4 hours, or until the fudge is firm. This waiting game is tough, but trust me, it’s worth it! If you’re impatient, simply pop it in the freezer for a quicker set. -
Slice and Enjoy
Once it’s set, remove the fudge from the pan using the parchment overhang. Transfer it to a cutting board and slice it into cute little squares. The joy is in the presentation, so have fun with it! Place your fudge on a beautiful plate, perhaps dusted with a little extra lemon zest or powdered sugar.
Serving Suggestions
This No Bake Easy Lemon Fudge is the perfect treat for any occasion. Serve it on a lovely platter garnished with fresh lemon slices, and watch your guests dive in! Pair it with a refreshing cup of herbal tea or lemon-infused water for a delightful afternoon treat.
Recipe Variations
Want to get creative? Here are a few playful twists you can try with your lemon fudge:
- Coconut Lime Fudge: Replace lemon juice with lime juice and add shredded coconut for a tropical flair.
- Berry-Infused Fudge: Swirl in a berry puree (like raspberry or blueberry) for a fruity ribbon effect.
- White Chocolate Raspberry: Add dried raspberries to the fudge mixture for a burst of flavor and a beautiful color contrast.
- Nutty Crunch: Stir in chopped nuts like macadamia nuts or pistachios for a delightful crunch.
- Chocolate Lemon: Drizzle melted dark chocolate over the top for an elegant finish and a flavor twist!
Chef’s Notes
As I reflect on this recipe, I can’t help but chuckle at the countless times I’ve made variations of this fudge. I remember one kitchen mishap where I misread the ingredient labels and accidentally threw in cayenne pepper instead of lemon zest! Let’s just say, the surprise was not as delightful as intended! Over the years, I’ve perfected this No Bake Easy Lemon Fudge, ensuring it’s a crowd-pleaser every time.
This treat has also become a staple at my family gatherings—everyone looks forward to that little bite of lemony goodness! And what’s great is that it’s so easy to whip up ahead of time; it always feels like I have a hidden gem stashed away in the fridge!
FAQs and Troubleshooting
1. Why isn’t my fudge setting?
If your fudge remains too soft, it may need more chilling time. Ensure you let it sit long enough in the refrigerator, or try freezing it for a quicker set.
2. Can I use dark chocolate instead of white?
Absolutely! This recipe is flexible. Dark chocolate will change the flavor profile, adding a rich intensity. Just be mindful of balancing the sweetness with lemon.
3. How do I know when to cut the fudge?
The fudge should be firm to the touch and hold its shape once chilled. If it’s still sticky to the touch, give it a little more time to chill.
4. What should I do if my fudge is too hard after refrigerating?
If you find your fudge is too hard, it might have chilled longer than necessary. You can microwave individual pieces for about 5-10 seconds for a softer texture before serving.
Nutritional Info
(Optional, can be added if desired)
Conclusion
Now that you’ve got this simple yet delightful recipe for No Bake Easy Lemon Fudge, you’re set to impress your family and friends with your culinary skills without even breaking a sweat in the kitchen! Remember, cooking is about enjoying the process — and sharing those beautiful moments with others. So grab those sunny lemons, tie on your apron, and let’s create some sweet, unforgettable memories together. Cheers to delicious treats and happy gatherings around the table!
PrintNo Bake Easy Lemon Fudge

A creamy, luscious lemon fudge that melts in your mouth, perfect for summer gatherings and quick sweet fixes.
- Prep Time: 15 minutes
- Cook Time: 10 minutes
- Total Time: 240 minutes
- Yield: 16 servings 1x
- Category: Dessert
- Method: No Bake
- Cuisine: American
- Diet: Vegetarian
Ingredients
- 2 cups white baking chips
- 8 oz white almond bark
- 1 can (14 oz) sweetened condensed milk
- 1/4 teaspoon salt
- 2 tablespoons lemon juice
- 1 tablespoon lemon zest, divided
Instructions
- Prepare your baking pan by lining an 8-inch square baking dish with parchment paper.
- Melt the white baking chips and almond bark in a medium saucepan over low heat, stirring constantly.
- Mix in the sweetened condensed milk once melted.
- Add the lemon juice and half of the lemon zest, stirring well.
- Season with a pinch of salt.
- Pour the mixture into the prepared baking pan and spread it out evenly.
- Chill until set in the refrigerator for at least 4 hours.
- Slice and enjoy your lemon fudge!
Notes
For a dairy-free option, coconut milk can be used instead of sweetened condensed milk.
Nutrition
- Serving Size: 1 square
- Calories: 200
- Sugar: 18g
- Sodium: 50mg
- Fat: 9g
- Saturated Fat: 4g
- Unsaturated Fat: 4g
- Trans Fat: 0g
- Carbohydrates: 25g
- Fiber: 0g
- Protein: 2g
- Cholesterol: 10mg
Keywords: lemon fudge, no bake dessert, summer treat, easy recipe
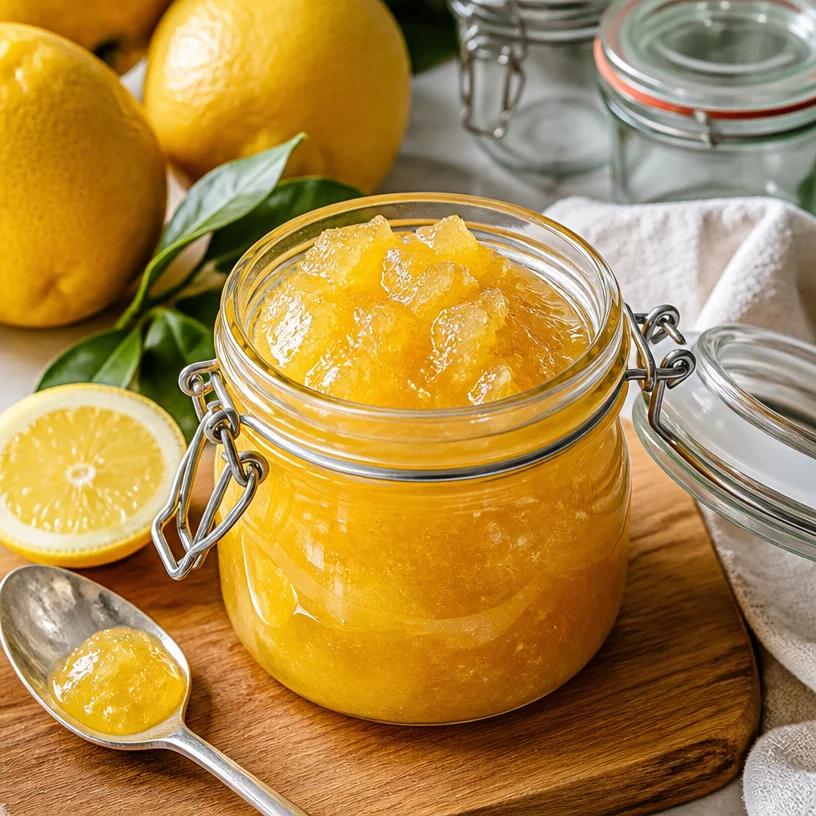
Ingredient Lemon Jam: Quick, Budget-Friendly Spread
The Golden Simplicity of Homemade Lemon Jam: A Two-Ingredient Wonder
Welcome to the beautiful world of homemade lemon jam! If you’ve ever wandered into a kitchen and thought about the aroma of citrus wafting through the air, you’re in for a real treat. Today, we’re diving into a vibrant, sunny recipe that encapsulates the essence of those bright lemons in a jar. But hold on tight, because this isn’t just any jam; it requires only two ingredients and a sprinkle of love. Get ready to embrace the tangy sweetness that adds a burst of flavor to your breakfast toast, yogurt, or even as a filling for pastries!
But before we spoon out the lemony goodness, let me share a little story of how this delightful recipe became a staple in my kitchen.
A Nostalgic Dive into Lemon Jam
Growing up, my grandmother had a lovely lemon tree in her backyard that was bursting with fruit. It was a wonderland of yellow citrus, and we’d often spend summer afternoons picking lemons, laughing, and getting lost in daydreams while the sun warmed our backs. One sunny Saturday, she decided it was time to make her famous lemon jam.
As she sliced the tangy fruits, the zest filled the room, creating a magical atmosphere that drew everyone in. I remember proudly standing by her side, diligently measuring sugar and sneaking spoonfuls of the sweet mixture as it cooked. The jam was a treasure, transforming our breakfasts into something special. Whether spread on warm toast or mixed into a simple yogurt, that lemon jam had the magical ability to elevate every meal.
Fast forward to today, and I still cherish those memories. This recipe is a homage to her simple yet profound culinary wisdom — just two ingredients can create something extraordinary. Let’s make that jam!
Ingredients
To make this lemon jam, you’ll need just a few simple ingredients:
-
8-10 Large Thick-Skinned Lemons: These lemons are the stars of the show! Varieties like "Citrons," "Lemonade," or "Femminello" work wonderfully. Their thick skin is ideal for yielding zest and juice, which is crucial for flavor. If you can’t find these, any firm, juicy lemons will work—just avoid the very soft ones that are past their prime.
-
Sugar: The sweet (and slightly magical) counterpart to the tartness of the lemons. White granulated sugar is perfect, but you can also try brown sugar for a hints of molasses or even coconut sugar for a healthier alternative. The amount of sugar can vary depending on how tart your lemons are, so taste as you go!
-
Canning Jars: Ideally, you want to store your delicious lemon jam in sterilized canning jars. These jars keep the jam fresh for longer, and they’re great for gifting too!
-
Cheesecloth: This isn’t strictly necessary but will come in handy to strain out any unwanted bits if you want a smoother texture.
Step-by-Step Instructions
-
Prep the Lemons: Start by washing your lemons thoroughly. You want to scrub off any wax or pesticide residue. After they’re cleaned, cut them in half and juice them into a bowl. Strain the juice to remove seeds and to catch anything you don’t want in your jam.
Tip: Save the lemon peels! They are rich in flavor and can be used later to enhance your jam or for zesting.
-
Zest Away: Using a microplane or a zester, grate the outer yellow skin of the lemon halves. You need about 1-2 tablespoons of lemon zest, which will add a punch of flavor to your jam.
Chef Hack: If you’ve never zested before, make sure to zest only the yellow portion of the skin, avoiding the white pith underneath as it can be bitter.
-
Mix it Up: In a medium pot, combine your lemon juice, zest, and sugar. This is where the magic begins! Stir well over medium heat until the sugar is fully dissolved.
Commentary: As the mixture heats up, you’ll start to notice that tantalizing aroma wafting through your kitchen. This is your indication that good things are coming!
-
Bring to a Boil: Raise the heat and bring your mixture to a gentle boil. Keep stirring occasionally to ensure it doesn’t burn on the bottom. You want to cook it for about 10-15 minutes, or until it has thickened.
Hack: To check the consistency, dip a spoon into the mix and drop a small amount onto a cold plate. If it holds its shape, it’s ready!
-
Prepare the Jars: While your jam is cooking, sterilize your canning jars. You can do this by placing them in boiling water for several minutes or running them through the dishwasher.
-
Jar it Up: Carefully pour the hot lemon jam into your prepared jars using a funnel to prevent spills. Leave a little bit of room at the top – about half an inch should do.
-
Seal and Cool: Once filled, wipe the rims of the jars clean to ensure a good seal, then cap them with the lids. Let them cool on the counter. As they cool, you’ll hear that satisfying “pop” sound as the vacuum seal forms.
Serving Suggestions
When it comes to serving, the world is your oyster (or should I say jam?). For a classic treat, spread a generous dollop over a warm slice of bread or toasted scone. It also makes for a lovely addition to yogurt parfaits, pancakes, or even ice cream!
Don’t be afraid to play around with presentation: a little sprig of mint or a thin slice of lemon on top can add that special touch when serving guests.
Recipe Variations
Here are some fun variations you can try with this golden jam:
-
Herb-Infused Lemon Jam: Toss in a few sprigs of fresh herbs like rosemary or thyme while cooking for an aromatic twist. Remove before jarring.
-
Spicy Lemon Jam: Add a pinch of red chili flakes or a small chopped jalapeño for a sweet-and-spicy kick!
-
Berry Citrus Jam: Mix in crushed strawberries or blueberries during the cooking process for a fruity twist.
-
Coconut Lemon Jam: Replace half of the sugar with shredded coconut for a tropical take.
-
Vanilla Lemon Jam: Add in a split vanilla bean while cooking to introduce warm, sweet notes that balance the tartness.
Chef’s Notes
There’s a special kind of joy that comes with preserving. I remember the first time I made this jam; I was giddy seeing my friends’ faces light up when they tasted it. Over the years, I’ve tweaked this recipe, often experimenting with citrus varieties and added ingredients. Each batch has its own story—a memory created through each stir, each spoon, and every delicious spread.
Sometimes the kitchen can feel chaotic, especially when juggling a dozen things at once. But remember to enjoy the process! Those moments of laughter and the occasional splatter just add to the charm of homemade cooking.
FAQs and Troubleshooting
-
What can I do if my lemon jam didn’t thicken?
If your jam hasn’t thickened, you can return it to the pot, bring it to a gentle boil, and cook for another 5-10 minutes. -
Can I use bottled lemon juice?
While it’s best to use fresh lemons for the best flavor, you can substitute with bottled lemon juice in a pinch. Keep in mind it won’t have the same robust taste! -
How long will the lemon jam last?
If properly canned and sealed, it can last up to a year in a cool, dark place. Once opened, store in the fridge for about 2 weeks. -
What’s the best way to serve this jam?
There’s no wrong way! Try it on toast, pancakes, or even stirred into salad dressings for added citrusy zing.
Nutritional Info
Calories per tablespoon: approximately 50
Sugar: 13g per tablespoon (adjust depending on your sugar choice)
And there you have it, my lemon-loving friends! Making homemade lemon jam is simple, delicious, and a delightful way to capture summer’s bliss in a jar. Share it with friends, slather it on pastries, or just savor it while dreaming of sun-filled afternoons. Now, go ahead and tie on that apron; I can’t wait to hear about your lemon jam adventures! Happy cooking!
PrintHomemade Lemon Jam

A simple and vibrant recipe for homemade lemon jam using just two ingredients.
- Prep Time: 15 minutes
- Cook Time: 15 minutes
- Total Time: 30 minutes
- Yield: 4 servings 1x
- Category: Condiment
- Method: Canning
- Cuisine: American
- Diet: Vegetarian
Ingredients
- 8–10 Large Thick-Skinned Lemons
- Sugar (to taste)
- Canning Jars
- Cheesecloth (optional)
Instructions
- Prep the lemons by washing and juicing them into a bowl, straining out seeds.
- Zest using a microplane to obtain 1-2 tablespoons of lemon zest.
- Mix lemon juice, zest, and sugar in a pot over medium heat until dissolved.
- Bring to a gentle boil, stirring occasionally, and cook for 10-15 minutes until thickened.
- Prepare your canning jars by sterilizing them.
- Jar the hot lemon jam into prepared jars using a funnel.
- Seal the jars and let cool on the counter.
Notes
Store in sealed jars for up to a year. If it doesn’t thicken, return to the pot and boil for an additional 5-10 minutes.
Nutrition
- Serving Size: 1 tablespoon
- Calories: 50
- Sugar: 13g
- Sodium: 0mg
- Fat: 0g
- Saturated Fat: 0g
- Unsaturated Fat: 0g
- Trans Fat: 0g
- Carbohydrates: 13g
- Fiber: 0g
- Protein: 0g
- Cholesterol: 0mg
Keywords: lemon jam, homemade jam, citrus recipe, two ingredient jam

Lemon Rolls
Warm, Zesty Lemon Rolls
Hello there, fellow food enthusiast! Welcome back to the charming world of Ivory Apron, where cooking becomes a delightful journey rather than a daunting task. Today, we’re diving into something irresistibly sweet and zesty: Lemon Rolls. These lovely rolls are soft, fluffy, and packed with a bright lemon flavor that takes your taste buds on a sunlit adventure. Whether it’s for a weekend brunch or a cozy afternoon treat with coffee, lemon rolls are sure to shine.
A Sunny Memory
Ah, lemon rolls! They remind me of a cherished after-school ritual from my childhood. Growing up, my grandma and I shared a secret garden where we cultivated our favorite herbs and, of course, a few lemon trees along the fence. On particularly sunny days, we would pick those juicy lemons together, giggling as the tangy scent filled the air.
One day, after harvesting the lemons, we decided to bake something special. We tackled a recipe that had been passed down through generations but added our twist of lemon zest and juice. As the rolls baked, the sweet and citrusy aroma is forever etched in my memory. We chatted about everything from school to life lessons, and after what felt like hours, we sat down with a plateful of warm lemon rolls, the icing just slightly melted. Every bite reminded us of sunny days spent together, and a beautifully simple truth: good food brings people closer.
Ingredients
Let’s gather the stars of our show! Here’s what you’ll need to whip up these delightful lemon rolls:
-
2 cups all-purpose flour
A versatile staple that provides structure. You can substitute with whole wheat flour if you want a nuttier flavor; however, adjust the liquid slightly as whole wheat flour absorbs more moisture. -
1/2 cup sugar
Sweetness is key! You can also use coconut sugar or a sugar substitute, but keep an eye on the quantity since they can vary in sweetness. -
1/2 teaspoon salt
A crucial component that enhances flavors. Don’t skip this! You can use sea salt or kosher salt too. -
1 packet instant yeast (about 2 1/4 teaspoons)
This helps our rolls to rise beautifully and create that fluffy texture. If you can’t find instant yeast, active dry yeast works perfectly too—just bloom it in warm milk first. -
3/4 cup warm milk
The warmth activates the yeast. You might use non-dairy milk, like almond milk, for a vegan option, but ensure it’s warm, not hot! -
1/4 cup melted butter
Adds richness and flavor. If you’re looking to lighten it up, try using unsweetened applesauce or coconut oil as substitutes. -
1 egg
This gives richness and helps bind the dough. For egg-free versions, a flaxseed meal mixed with water works great! -
1 tablespoon lemon zest
The zest amplifies the lemony goodness. Make sure to avoid the bitter white pith when zesting! -
1/4 cup lemon juice
Brightens up our rolls. Freshly squeezed is always best, but bottled in a pinch works, just watch for added sugars. -
1 cup powdered sugar
This sugar will make our icing heavenly. If you need a low-sugar option, powdered erythritol can work well. -
2 tablespoons lemon juice (for icing)
It gives our icing that lovely tang. If you’re feeling playful, a splash of vanilla extract would be a delightful addition! -
1 tablespoon milk (for icing)
This thins the icing to the perfect drizzly consistency. Use any milk you like, even plant-based!
Step-by-Step Instructions
Let’s jump into the fun part: making our lemon rolls! Follow these steps for a delightful baking experience:
-
Activate the Yeast: In a small bowl, combine the warm milk with the instant yeast and a pinch of sugar. Let it sit for about 5-10 minutes until it’s frothy. This step is crucial; if your yeast doesn’t foam, it might be expired or the milk was too hot or too cold.
-
Mix Dry Ingredients: In a large mixing bowl, whisk together the flour, sugar, and salt. This helps distribute the yeast and ensures a consistent dough.
-
Combine Wet Ingredients: Add the melted butter, egg, lemon zest, and lemon juice to the dry ingredients. Pour in the activated yeast mixture.
-
Knead the Dough: Combine everything until it comes together. Transfer to a floured surface and knead for about 5-7 minutes until you have a smooth, elastic dough. If the dough is too sticky, sprinkle a little more flour as needed.
-
First Rise: Place the dough in a lightly greased bowl, cover with a clean kitchen towel, and let it rise in a warm place for about 1 hour, or until it has doubled in size. A warm spot near your oven works like a charm!
-
Prepare the Filling: While the dough rises, blend your lemon filling. In a small bowl, mix together more sugar, lemon juice, and lemon zest. This mixture will be spread onto the rolled dough for a burst of flavor!
-
Shape the Rolls: Punch down the risen dough gently to release excess air. Roll it out into a rectangle about 1/4 inch thick. Spread the lemon filling evenly over the dough. Roll it tightly from the long side, creating a log.
-
Cutting: Using a sharp knife or dental floss, cut the log into 1-inch thick pieces. Arrange these rolls in a greased baking dish. They should be snug but not crammed together.
-
Second Rise: Cover the rolls again and let them rise for another 30-40 minutes. They’ll puff up nicely during this time.
-
Bake: Preheat your oven to 350°F (175°C). Bake the rolls for 20-25 minutes, or until golden brown. The aroma will be heavenly!
-
Make the Icing: While they bake, whisk together powdered sugar, lemon juice, and milk. The consistency should be thick but spreadable. Adjust as needed!
-
Drizzle the Icing: Once the rolls are cool enough to touch (but still warm!), drizzle the icing on top. Watch it melt into every crevice—heavenly!
Serving Suggestions
To serve these lemon rolls beautifully, plate them in a charming cake stand or a rustic wooden dish. Dust with a sprinkle of powdered sugar for an elegant touch. Pair them with fresh berries, whipped cream, or a dollop of lemon curd for extra indulgence! They also make gorgeous gifts wrapped in parchment paper and tied with twine—who wouldn’t love that kind of surprise?
Recipe Variations
Feeling adventurous? Here are a few twist ideas to elevate your lemon roll game:
- Lavender Lemon Rolls: Add dried culinary lavender to your filling for a delicate floral note.
- Blueberry Lemon Rolls: Toss fresh or frozen blueberries into your filling for a fruity burst.
- Almond Lemon Rolls: Incorporate almond extract into the icing for a deeper flavor profile.
- Vegan Lemon Rolls: Substitute the egg with ground flaxseed and use plant-based milk and butter to make these rolls completely vegan!
- Spicy Lemon Rolls: Add a pinch of cayenne pepper into the filling for a sweet and spicy contrast.
Chef’s Notes
These lemon rolls have become a staple in my home, transforming over the years. Originally, grandma insisted on a lavish cream cheese frosting, but I found that a simple lemon glaze keeps the focus on the delightful citrus flavor. Plus, every baking session brings back those sun-soaked afternoons in the garden, making these rolls extra special.
And oh, if you ever find the dough too sticky—don’t panic! That’s just the flour’s personality showing off. Instead of stressing, sprinkle in a bit more flour as needed and keep kneading until you find that perfect balance.
FAQs and Troubleshooting
Let’s tackle some common questions:
-
Why didn’t my rolls rise?
Ensure your yeast is fresh and not expired. The milk should be warm (not hot) to activate the yeast effectively. A warm rising environment (like an oven with the light on) can help, too! -
The dough is too sticky, what should I do?
Sprinkle a touch more flour as you knead it. Adjust the flour and liquid balance next time if you regularly face this issue. -
Can I make these ahead of time?
Absolutely! You can prepare the dough, let it rise, shape the rolls, and then refrigerate overnight. Bake them fresh in the morning for the best taste. -
What if I want a less sweet glaze?
You can cut back the powdered sugar or substitute it with less sweet alternatives like maple syrup or honey, mixing in more lemon juice to achieve your desired taste.
Nutritional Info
(You might want to calculate the nutritional information based on the ingredients used. Each serving will vary based on portion sizes and any substitutions).
There you have it! A splendid journey into creating fluffy, bright, and utterly delicious lemon rolls. Remember, cooking is about joy, creativity, and gathering loved ones around the table. So, head to the kitchen, tie on your apron, and let’s embrace the magic of cooking. Happy baking!
PrintWarm, Zesty Lemon Rolls

Delightfully soft and fluffy lemon rolls packed with bright lemon flavor, perfect for brunch or an afternoon treat.
- Prep Time: 15 minutes
- Cook Time: 30 minutes
- Total Time: 45 minutes
- Yield: 12 servings 1x
- Category: Dessert
- Method: Baking
- Cuisine: American
- Diet: Vegetarian
Ingredients
- 2 cups all-purpose flour
- 1/2 cup sugar
- 1/2 teaspoon salt
- 1 packet instant yeast (about 2 1/4 teaspoons)
- 3/4 cup warm milk
- 1/4 cup melted butter
- 1 egg
- 1 tablespoon lemon zest
- 1/4 cup lemon juice
- 1 cup powdered sugar
- 2 tablespoons lemon juice (for icing)
- 1 tablespoon milk (for icing)
Instructions
- Activate the yeast: In a small bowl, combine the warm milk with the instant yeast and a pinch of sugar. Let it sit for about 5-10 minutes until it’s frothy.
- Mix dry ingredients: In a large mixing bowl, whisk together the flour, sugar, and salt.
- Combine wet ingredients: Add the melted butter, egg, lemon zest, and lemon juice to the dry ingredients. Pour in the activated yeast mixture.
- Knead the dough: Combine everything until it comes together and knead for about 5-7 minutes until smooth.
- First rise: Place the dough in a greased bowl and let it rise for about 1 hour, or until doubled.
- Prepare the filling: Mix sugar, lemon juice, and lemon zest for the filling.
- Shape the rolls: Roll out the dough, spread the filling, and roll it tightly.
- Cutting: Cut the log into 1-inch thick pieces and arrange in a greased baking dish.
- Second rise: Let rolls rise for another 30-40 minutes.
- Bake: Preheat oven to 350°F (175°C) and bake for 20-25 minutes.
- Make the icing: Whisk powdered sugar, lemon juice, and milk until thick but spreadable.
- Drizzle the icing on top of the rolls once they cool enough to touch.
Notes
These rolls can be made ahead of time and refrigerated overnight before baking. For a less sweet glaze, reduce powdered sugar or substitute with maple syrup.
Nutrition
- Serving Size: 1 roll
- Calories: 220
- Sugar: 15g
- Sodium: 150mg
- Fat: 8g
- Saturated Fat: 4g
- Unsaturated Fat: 3g
- Trans Fat: 0g
- Carbohydrates: 30g
- Fiber: 1g
- Protein: 3g
- Cholesterol: 35mg
Keywords: lemon rolls, dessert, baking, brunch, sweet rolls

No-Bake Oreo Lemon Dessert: Creamy, Tangy Comfort Treat
Indulge in the Heavenly Oreo Lemon Dessert: A Burst of Zesty Delight
Hello, dear food lovers! If you’ve ever found yourself drifting through a bakery window, mesmerized by the delightful treats inside, you’re not alone! I remember when I first experienced that swirl of excitement. There’s just something magical about desserts that not only look stunning but also sing with flavor. Enter: the Heavenly Oreo Lemon Dessert—a concoction that brings together the rich, satisfying crunch of Oreos and the bright, zesty notes of lemon in a way that tickles your taste buds and warms your heart.
A Slice of Nostalgia
One of my earliest baking memories involves my grandmother, who was an absolute magician when it came to desserts. She had a special way of making everyone feel like they were her favorite grandchild, especially when the kitchen was filled with the sweet aroma of something decadent baking in the oven. One sunny afternoon, we decided to get our hands a little messy and whip up a version of lemon cheesecake that I’d seen in a cookbook.
While we were mixing and mingling flavors, the idea that dessert could be so layered and complex yet simple and approachable was born. I love how food has this beautiful ability to evoke memories and create connections. Flash forward a few decades, and I find myself in my own kitchen, eager to share a recipe that would make my grandmother proud—this Heavenly Oreo Lemon Dessert is both indulgent and fresh, just like those precious moments spent with her.
Ingredients
Before we dive into the delectable step-by-step process, let’s gather our ingredients! Here’s what you’ll need to create this heavenly delight:
-
1 package of Oreo cookies
The star of our crust! Feel free to use regular or double-stuffed Oreos. If you want a gluten-free version, swap in gluten-free chocolate sandwich cookies. -
1/2 cup of unsalted butter, melted
This binds our crust together and adds richness. Don’t have unsalted butter on hand? Just reduce the salt in the recipe slightly if you substitute salted butter. -
1 package (8 oz) cream cheese, softened
It gives our dessert that luscious texture. Make sure it’s softened to avoid lumps—nobody wants a bumpy cheesecake! -
1 cup powdered sugar
This sweetens our filling and gives it a smooth finish. For a lower-sugar option, try substituting with a sugar alternative. -
1 cup heavy whipping cream
The secret to a beautifully fluffy filling. Can’t find heavy cream? You can substitute with coconut cream for a dairy-free option. -
1/4 cup lemon juice
Freshly squeezed is best for maximum brightness! If you’re in a pinch, bottled lemon juice will do. -
1 tablespoon lemon zest
This adds a punch of intense lemon flavor. If you don’t have a zester, a fine grater will work just fine! -
1 teaspoon vanilla extract
It rounds out our flavors beautifully. Always opt for pure vanilla extract when possible for the best taste!
Step-by-Step Instructions
Now, let’s get cooking! Here’s how to prepare your Heavenly Oreo Lemon Dessert from start to finish:
-
Preheat the Oven:
Start by preheating your oven to 350°F (175°C). This is such an important step to ensure an even bake! -
Make the Crust:
Crush the Oreo cookies into fine crumbs. You can do this by placing them in a food processor or putting them in a zip-top bag and rolling over them with a rolling pin. This is one of my favorite mess-free hacks! Once they’re crumbly, mix in the melted butter until you have a mixture that resembles wet sand. -
Press the Crust:
In a 9-inch round baking dish or square pan, firmly press the Oreo mixture into the bottom to form a crust. The key here is to ensure it’s packed tightly so it holds together when you slice it. Give it a little love with a spatula! -
Bake the Crust:
Pop it in the preheated oven for about 8-10 minutes. This will make it nice and crisp. While that bakes, let’s move on to the filling. -
Prepare the Filling:
In a large mixing bowl, use an electric mixer to beat the softened cream cheese until it’s smooth and creamy. This should be about 2-3 minutes—don’t skip this step, as it’s essential for avoiding any cream cheese lumps! -
Add Sugar, Lemon Juice, and Vanilla:
Once the cream cheese is smooth, add in the powdered sugar, lemon juice, lemon zest, and vanilla extract. Mix until well combined—this is where the magic begins to happen! -
Whip the Cream:
In a separate bowl, whip the heavy cream until stiff peaks form. When it’s ready, gently fold the whipped cream into the cream cheese mixture using a spatula. This lightens up the filling beautifully! -
Assemble Your Dessert:
Pour the lemon mixture over the cooled Oreo crust, spreading it evenly. For a little added flair, use the back of a spoon or spatula to create swoops and swirls in the filling. -
Chill:
Cover with plastic wrap and refrigerate for at least 4 hours, or overnight if you can resist. This allows the flavors to meld beautifully. -
Serve:
Once chilled, slice your dessert and serve. You can garnish with additional lemon zest or whipped cream for a touch of elegance!
Serving Suggestions
When it comes to serving your Heavenly Oreo Lemon Dessert, presentation is everything! For a lovely touch, place each slice on a decorative plate. You might even add a dollop of freshly whipped cream or a sprinkle of crushed Oreos on top for a bit of visual appeal. A few lemon slices or zest alongside can also brighten up the dish—a feast for both the eyes and the palate!
Recipe Variations
Here are a few creative twists to consider when making your Heavenly Oreo Lemon Dessert:
-
Berry Bliss:
Add layers of fresh berries (like raspberries or blueberries) into the filling for a refreshing burst of flavor. -
Coconut Cream:
Swap in coconut cream for the heavy whipping cream for a tropical twist that complements the lemon beautifully. -
Chocolate Drizzle:
Drizzle some melted chocolate (dark or white) over the top right before serving for a decadent touch. -
Nutty Crunch:
Incorporate chopped nuts (like almonds or pistachios) into the crust for a delightful crunch. -
Lemon Blueberry Swirl:
Fold in a homemade blueberry sauce with the filling for a visually stunning dessert.
Chef’s Notes
One of the reasons this dessert has become a favorite in my household is the happy mixture of flavors and textures. I giggle thinking about a time I tried making it during a family gathering, and the tartness of the lemon matched perfectly with the sweet Oreo base, creating smiles all around. Through the years, I’ve played with different flavor combinations, and it’s amazing how a simple recipe can evolve into so many variations while still keeping that balance of taste. Remember, cooking is an art—don’t hesitate to make it your own!
FAQs and Troubleshooting
Q: My dessert turned out too watery. What went wrong?
A: This can happen if the cream cheese isn’t well softened before mixing or if the heavy cream wasn’t whipped properly. Be patient when beating your cream cheese and make sure to whip the cream until it’s stiff!
Q: Can I make this a day in advance?
A: Absolutely! In fact, making it a day before allows the flavors to meld beautifully, giving you an even tastier dessert.
Q: How do I store leftovers?
A: Store any leftovers in an airtight container in the refrigerator for up to 4 days. However, I doubt you’ll have much left once your guests get a taste!
Q: Can I freeze this dessert?
A: Yes, you can freeze it! Just cover it well with plastic wrap and store it in a freezer-safe container for up to a month. Thaw it in the fridge overnight before serving.
Nutritional Information
For those who are health-conscious, here’s a quick glance at the nutritional side of things. (Note: This may vary based on brands and portion size.)
- Calories: Approximately 280 per serving
- Total Fat: 20g
- Saturated Fat: 10g
- Cholesterol: 50mg
- Carbohydrates: 24g
- Sugars: 18g
- Protein: 3g
And there you have it—a delightful journey of flavors encapsulated in the Heavenly Oreo Lemon Dessert! May this recipe inspire you to create lasting memories around your dining table, just as it does in mine. Happy cooking, and remember, good food is about showing up. Enjoy every sweet moment!
PrintHeavenly Oreo Lemon Dessert

A delightful dessert combining the rich crunch of Oreos with zesty lemon flavors, perfect for any occasion.
- Prep Time: 15 minutes
- Cook Time: 10 minutes
- Total Time: 240 minutes
- Yield: 8 servings 1x
- Category: Dessert
- Method: Chilling
- Cuisine: American
- Diet: Vegetarian
Ingredients
- 1 package of Oreo cookies
- 1/2 cup of unsalted butter, melted
- 1 package (8 oz) cream cheese, softened
- 1 cup powdered sugar
- 1 cup heavy whipping cream
- 1/4 cup lemon juice
- 1 tablespoon lemon zest
- 1 teaspoon vanilla extract
Instructions
- Preheat the oven to 350°F (175°C).
- Crush the Oreo cookies into fine crumbs and mix with melted butter.
- Press the cookie mixture into the bottom of a 9-inch round baking dish.
- Bake the crust for about 8-10 minutes until crisp.
- Beat softened cream cheese in a large mixing bowl until smooth.
- Add powdered sugar, lemon juice, lemon zest, and vanilla extract, mixing until well combined.
- Whip the heavy cream until stiff peaks form, then gently fold it into the cream cheese mixture.
- Pour the lemon mixture over the cooled Oreo crust, spreading it evenly.
- Chill in the refrigerator for at least 4 hours or overnight.
- Serve chilled, garnished with lemon zest or whipped cream if desired.
Notes
For best results, allow the dessert to chill overnight to meld flavors.
Nutrition
- Serving Size: 1 slice
- Calories: 280
- Sugar: 18g
- Sodium: 250mg
- Fat: 20g
- Saturated Fat: 10g
- Unsaturated Fat: 5g
- Trans Fat: 0g
- Carbohydrates: 24g
- Fiber: 1g
- Protein: 3g
- Cholesterol: 50mg
Keywords: Oreo, Lemon, Dessert, Cheesecake, No Bake, Easy Dessert

Lemon Muffins with Streusel
The Joy of Baking: Lemon Muffins with Streusel
Hello there, my fellow food enthusiasts! Today, we’re diving into the delightful world of baking with a recipe that’s bright, zesty, and utterly comforting: Lemon Muffins with Streusel. These little gems are not just a morning treat; they’re perfect for any time of day. So grab your apron, and let’s transform our kitchens into a lemony haven!
A Memory to Cherish
I’ll never forget the first time I baked lemon muffins. It was a sunny Saturday morning, and the scent of lemon wafted through my kitchen like a gentle breeze—exciting and invigorating! My dear friend, Mia, had come over, and we decided to whip something up together. Mia has this infectious laugh that can light up any room, and as we mixed the ingredients, we shared silly stories of our culinary mishaps.
As the muffins baked, we were practically bouncing with anticipation. When they finally came out of the oven, golden brown and topped with that crunchy streusel, we couldn’t wait to dig in. One bite, and it was pure magic—tart yet sweet, with a buttery crunch. We ended up devouring the whole batch and laughing about how we’d need to make another one soon, right there and then! Those lemon muffins not only filled our bellies with joy; they filled our hearts with wonderful memories—something every dish should do.
The Ingredients You’ll Need
Let’s gather our ingredients together! Here’s what you’ll need:
-
1 and 1/2 cups all-purpose flour: This forms the base of your muffins. If you’re looking for a gluten-free option, try using a 1:1 gluten-free flour blend.
-
1/2 cup granulated sugar: This adds sweetness and moisture. You can swap it for coconut sugar for a more earthy flavor.
-
2 teaspoons baking powder: Essential for that lovely rise! Ensure it’s fresh for the best results.
-
1/2 teaspoon baking soda: This will enhance the rise and help create a light texture.
-
1/4 teaspoon salt: A little pinch to balance the sweetness. Sea salt can add an extra touch of flavor!
-
1/2 cup buttermilk: This is the secret to a moist muffin. If you don’t have it on hand, you can make your own by mixing one tablespoon of vinegar or lemon juice with enough milk to make 1/2 cup.
-
1/4 cup vegetable oil: Adds richness and keeps the muffins tender. For a healthier option, you could use melted coconut oil.
-
1 large egg: Binds everything together to create a lovely texture.
-
2 teaspoons lemon zest: This brings a burst of fresh lemon flavor. Always zest before juicing for ease!
-
1 teaspoon vanilla extract: Adds depth and warmth to the flavor profile.
-
1/4 cup lemon juice: Freshly squeezed is best! This acidity lifts the flavors in the muffins.
-
For Streusel:
- 1/4 cup brown sugar: This adds a nice caramel note.
- 1/4 cup flour: Helps to bind the streusel.
- 2 tablespoons butter: Use cold butter for that irresistible crumbly texture.
- 1/2 teaspoon cinnamon: A pinch for warmth and comfort; feel free to adjust to your taste!
Step-by-Step Instructions
Ready to bake? Let’s do this!
-
Preheat Your Oven: Start by preheating your oven to 375°F (190°C). Don’t forget to line your muffin tin with cupcake liners or grease it well! It makes for easy cleanup.
-
Mix the Dry Ingredients: In a large bowl, whisk together the flour, granulated sugar, baking powder, baking soda, and salt. Make sure everything is well combined. Pro tip: stir just until combined to prevent dense muffins!
-
Combine the Wet Ingredients: In another bowl, mix the buttermilk, vegetable oil, egg, lemon zest, lemon juice, and vanilla extract until well blended. The zesty aroma will be divine!
-
Get Mixing: Pour the wet mixture into the dry ingredients. Gently fold them together until just combined. It’s okay if there are a few lumps—overmixing can lead to tough muffins!
-
Prepare the Streusel: While the batter rests for a moment, let’s whip up that delicious streusel topping. In a small bowl, combine the brown sugar, flour, butter, and cinnamon. Use your fingertips or a pastry cutter to mix them until you achieve a crumbly texture—this is where the magic happens!
-
Fill the Muffin Tin: Scoop the muffin batter into your prepared muffin tin, filling each well about two-thirds full. Don’t be shy—give them a generous scoop!
-
Top with Streusel: Sprinkle the streusel topping generously over each muffin. Trust me; this adds a delightful crunch that you won’t want to skip!
-
Bake: Place in the preheated oven and bake for about 18-22 minutes, or until the tops are golden brown and a toothpick inserted into the center comes out clean. The smell wafting from your kitchen will make it hard to wait!
-
Cool Down: Once baked, let the muffins cool in the pan for a few minutes before transferring them to a wire rack. This helps them finish baking and prevents the bottoms from getting soggy.
-
Serve and Enjoy: Now comes the best part—enjoying your freshly baked lemon muffins!
Serving Suggestions
These lemon muffins are lovely on their own, but to elevate them even more, consider serving them warm with a dollop of butter or a light dusting of powdered sugar. Presentation can transform a simple muffin into something special. Arrange them on a pretty cake stand or platter and add fresh berries or mint leaves for a pop of color—your guests will feel truly special!
Recipe Variations
Feeling adventurous? Here are some twists to make these muffins your own:
-
Blueberry Lemon Muffins: Add a cup of fresh or frozen blueberries for a burst of flavor.
-
Lemon Poppy Seed Muffins: Stir in a tablespoon of poppy seeds for crunch and visual appeal.
-
Lemon Almond Muffins: Replace half of the granulated sugar with almond flour for a nutty flavor.
-
Glazed Lemon Muffins: Drizzle a simple lemon glaze (mix powdered sugar with lemon juice) over the muffins for an extra sweet touch.
-
Vegan Option: Substitute the egg with a flax egg (1 tablespoon ground flaxseed mixed with 3 tablespoons water) and use almond milk instead of buttermilk.
Chef’s Notes
As I reflect on my journey, I remember how intimidated I felt trying to bake muffins for the first time. But I learned that baking is just like anything else—practice makes perfect! These lemon muffins have evolved in my kitchen over the years. I’ve fiddled with flavors, experimented with ingredients, and now they hold a special place in my heart (and my recipe book!). What started as a simple idea has now become a family favorite, and I’m thrilled to share it with you.
FAQs and Troubleshooting
-
Why did my muffins turn out dense?
- Overmixing can lead to dense muffins. Be gentle when combining your wet and dry ingredients!
-
Can I use other citrus fruits?
- Absolutely! Oranges and limes work beautifully—just adjust the quantity to balance their sweetness.
-
How do I store leftover muffins?
- Place them in an airtight container at room temperature for up to 3 days. You can refrigerate them for a longer shelf life, but they’ll lose some of their fluff.
-
Why didn’t my muffins rise?
- Check the freshness of your baking powder and baking soda. If they’re expired, your muffins might not rise as they should.
Now that you’ve armed yourself with this delightful Lemon Muffins with Streusel recipe, it’s time to create your own kitchen memories. I can’t wait to hear about your baking adventures! Remember, it’s all about the joy of creating—and enjoying—good food together. Let’s get baking, shall we? 🍋✨
PrintLemon Muffins with Streusel

Delightful, zesty lemon muffins topped with a crunchy streusel, perfect for any time of the day.
- Prep Time: 15 minutes
- Cook Time: 22 minutes
- Total Time: 37 minutes
- Yield: 12 muffins 1x
- Category: Breakfast
- Method: Baking
- Cuisine: American
- Diet: Vegetarian
Ingredients
- 1 and 1/2 cups all-purpose flour
- 1/2 cup granulated sugar
- 2 teaspoons baking powder
- 1/2 teaspoon baking soda
- 1/4 teaspoon salt
- 1/2 cup buttermilk
- 1/4 cup vegetable oil
- 1 large egg
- 2 teaspoons lemon zest
- 1 teaspoon vanilla extract
- 1/4 cup lemon juice
- For Streusel:
- 1/4 cup brown sugar
- 1/4 cup flour
- 2 tablespoons butter
- 1/2 teaspoon cinnamon
Instructions
- Preheat your oven to 375°F (190°C) and line the muffin tin with cupcake liners or grease it.
- Mix the dry ingredients: whisk together flour, granulated sugar, baking powder, baking soda, and salt in a large bowl.
- Combine the wet ingredients: mix buttermilk, vegetable oil, egg, lemon zest, lemon juice, and vanilla extract in another bowl.
- Pour the wet mixture into the dry ingredients and gently fold until just combined.
- Prepare the streusel by combining brown sugar, flour, butter, and cinnamon in a small bowl until crumbly.
- Fill the muffin tin with the batter, filling each well about two-thirds full.
- Top with the streusel mixture over each muffin.
- Bake for 18-22 minutes, or until golden brown and a toothpick comes out clean.
- Cool the muffins in the pan for a few minutes before transferring to a wire rack.
- Serve and enjoy your freshly baked lemon muffins!
Notes
Serve warm with a dollop of butter or dust with powdered sugar for an elevated treat.
Nutrition
- Serving Size: 1 muffin
- Calories: 250
- Sugar: 10g
- Sodium: 150mg
- Fat: 10g
- Saturated Fat: 2g
- Unsaturated Fat: 7g
- Trans Fat: 0g
- Carbohydrates: 34g
- Fiber: 1g
- Protein: 3g
- Cholesterol: 25mg
Keywords: lemon muffins, breakfast, baking, muffins, streusel

Minute Lemon Rolls with Gooey Sticky Citrus Glaze
Sticky Lemon Rolls: A Bright Treat for Your Table
Hello, dear friends! If you’ve ever craved a sweet treat that’s not only delicious but also brightens your day, you’re in for a special treat with these Sticky Lemon Rolls. Fluffy, tangy, and oh-so-sweet, these rolls are everything you need for a cozy brunch or a delightful dessert.
Imagine waking up to the warm aroma of freshly baked rolls infused with lemon zest and sweetness, and then drizzling them with a creamy lemon glaze. It’s pure magic! Whether you’re looking to impress guests or simply want a comforting homemade indulgence, these rolls are the perfect recipe to tie on your apron for.
A Trip Down Memory Lane
Let me take you back to my childhood, where one of my fondest memories revolves around baking with my grandmother. Every Saturday morning, I would race to her kitchen, the excitement bubbling inside me like a pot of boiling water. She’d whip up her famous cinnamon rolls, and I was always her eager assistant.
One day, as I watched her kneading the dough, I noticed a fresh lemon resting on her counter. Curiously, I asked, “Why not add some lemon next time?” With a twinkle in her eye, she responded, “Why not indeed? Let’s make something new!” That impulsive suggestion kicked off our “Lemon Roll Saturdays,” where we experimented with fresh flavors and learned that cooking is all about creativity and joy.
Fast forward to today, and here I am, recreating that delightful spirit of experimentation with my own twist—to these Sticky Lemon Rolls! They blend nostalgia with bright, vibrant flavors, hoping to create stories around your table as they did around mine.
Ingredients
Here’s what you’ll need to whip up a batch of these fantastic Sticky Lemon Rolls:
-
2 cups all-purpose flour
A versatile base for your dough. If you’re looking for a gluten-free option, try using a gluten-free all-purpose blend! -
1/4 cup granulated sugar
Sweetens the dough just enough without overpowering the lemon flavor. You can substitute with coconut sugar for a lower glycemic option. -
1 packet (2 1/4 teaspoons) active dry yeast
The magic ingredient that makes your rolls fluffy! Remember, it should be fresh, or it won’t rise. -
1/2 teaspoon salt
Enhances the flavor of the dough. You can use sea salt for a finer taste. -
1/2 cup milk
Adds richness and moisture to the dough. Almond or oat milk works as a dairy-free alternative. -
1/4 cup unsalted butter
The fat that makes everything better! If you prefer a vegan version, try using coconut oil. -
1 large egg
Acts as a binder and contributes to a tender texture. For a vegan swap, try a flax egg (1 tablespoon ground flaxseed + 3 tablespoons water). -
Zest of 1 lemon
Adds a bright and refreshing flavor. Pro tip: Use a microplane to avoid the bitter pith! -
1/4 cup fresh lemon juice
We’re using fresh juice for a vibrant zing! Bottled lemon juice won’t give you the same fresh taste. -
1/2 cup cream cheese
This luscious ingredient brings richness to the glaze. You can substitute non-dairy cream cheese for a dairy-free version. -
1 cup powdered sugar
Sweetness for the glaze! You can replace it with a sugar-free powdered blend if needed. -
1 tablespoon lemon juice (for glaze)
A little extra tartness to balance the sweetness. Fresh is always best!
Step-by-Step Instructions
Let’s dive into creating the magic of these Sticky Lemon Rolls! Follow me step by step:
-
Activate the Yeast
In a small bowl, combine the warm milk (around 110°F or just slightly warmer than body temperature), 1 teaspoon of the sugar, and the active dry yeast. Stir gently, and let it sit for about 5-10 minutes until it’s frothy. This means your yeast is active and ready to rise! -
Make the Dough
In a mixing bowl, combine the flour, remaining sugar, and salt. Stir well! Add in the yeast mixture, softened butter, egg, lemon zest, and fresh lemon juice. Mix until a dough begins to form. (I find that using a dough whisk helps make this process a breeze!) -
Knead the Dough
Turn your dough onto a floured surface. Knead it for about 8-10 minutes until it’s smooth and elastic. Take a moment here—give it a gentle tap with your palm. This is where the love and energy go into the rolls! -
First Rise
Place the dough in a lightly greased bowl, cover it with a clean kitchen towel, and let rise in a warm place for about 1-2 hours or until it doubles in size. Use this time to sip on your morning coffee or tea; you deserve it! -
Preheat Your Oven
Preheat your oven to 375°F (190°C) so it’s nice and warm when your rolls are ready to bake. -
Roll Out the Dough
After the dough has risen, punch it down and transfer it onto a lightly floured surface. Roll it out into a rectangle (about 12×8 inches). Keep it about 1/4 inch thick. The more you spread it out evenly, the better it will rise! -
Create a Sticky Filling
Spread softened cream cheese evenly over the dough. Drizzle with more lemon juice and sprinkle some sugar on top. You can even sprinkle a dash of lemon zest here for added punch! -
Roll it Up
Tightly roll the dough from the long end into a log and pinch the edges to seal. Then slice the log into 1-1.5 inch pieces. Use a sharp knife or dental floss for clean cuts! -
Second Rise
Place the rolls in a greased baking dish (a 9×13 inch works perfectly) and let them rise again for about 30 minutes until they’re slightly puffed. It’s worth the wait—I promise! -
Bake
Pop those beauties into the preheated oven and bake for 20-25 minutes or until golden brown on top. Your house will smell divine! -
Prepare the Glaze
While the rolls are baking, get your glaze ready! Beat the cream cheese until smooth and add in powdered sugar and lemon juice. Mix until you achieve a velvety consistency. -
Glaze the Rolls
Once the rolls are out of the oven and still warm, slather the glaze all over them. Watch it melt into the crevices—it’s a sight to behold!
Serving Suggestions
To serve, I recommend plating the rolls on a gorgeous cake stand or a rustic wooden board. Feel free to garnish with some extra lemon zest or fresh berries for color. Trust me; it elevates your presentation and makes your guests go “ooh” and “ahh.”
Recipe Variations
Want to mix things up? Here are a few variations to try:
- Blueberry Lemon Rolls: Add fresh blueberries into the filling for a delicious twist.
- Ginger Lemon Rolls: Sprinkle in some grated fresh ginger for a spicy kick!
- Lemon Poppy Seed Rolls: Stir in poppy seeds into your dough for an added texture and flavor.
- Lemon Lavender Rolls: Add dried culinary lavender for a floral touch that pairs beautifully with lemon.
Chef’s Notes
This recipe has come a long way from that kitchen memory with my grandmother. It started with just cinnamon rolls, but as I grew to love freshness and tanginess, lemon became my beloved star ingredient. There have been some epic kitchen mishaps—like the time I forgot the yeast! Spoiler: flat rolls aren’t great, but they make for funny stories!
FAQs and Troubleshooting
-
Why didn’t my dough rise?
A common culprit is inactive yeast. Always check the expiration date! Make sure you’re using warm (not hot) milk when activating the yeast. -
Can I make these ahead of time?
Absolutely! You can prepare the dough, fill and roll the rolls, and then refrigerate them overnight before baking. Just let them come to room temperature for about 30 minutes before putting them in the oven. -
How do I store leftovers?
Keep any leftover rolls in an airtight container at room temperature for up to 2 days, or refrigerate them for a week. You can also freeze them! Just thaw and warm them gently before serving. -
What if my glaze is too runny?
If your glaze is too thin, don’t panic! Add a bit more powdered sugar until you reach the desired consistency.
Nutritional Info (Optional)
While I usually focus on the joy of baking rather than strict nutritional content, each roll comes out to approximately 200 calories. Just remember, they’re truly best enjoyed with family and friends!
So there you have it, dear friends! These Sticky Lemon Rolls are a blend of heartwarming memories, delightful flavors, and the perfect recipe for bringing people together. I can’t wait to hear about the stories you create around your table with them. Happy baking! 🍋🥐
PrintSticky Lemon Rolls

Fluffy, tangy, and sweet rolls infused with lemon zest, perfect for brunch or dessert.
- Prep Time: 15 minutes
- Cook Time: 25 minutes
- Total Time: 45 minutes
- Yield: 12 servings 1x
- Category: Dessert
- Method: Baking
- Cuisine: American
- Diet: Vegetarian
Ingredients
- 2 cups all-purpose flour
- 1/4 cup granulated sugar
- 1 packet (2 1/4 teaspoons) active dry yeast
- 1/2 teaspoon salt
- 1/2 cup milk
- 1/4 cup unsalted butter
- 1 large egg
- Zest of 1 lemon
- 1/4 cup fresh lemon juice
- 1/2 cup cream cheese
- 1 cup powdered sugar
- 1 tablespoon lemon juice (for glaze)
Instructions
- Activate the yeast by combining warm milk, 1 teaspoon sugar, and yeast in a bowl. Let it sit until frothy.
- Make the dough by mixing flour, remaining sugar, and salt. Add the yeast mixture, butter, egg, zest, and lemon juice, and mix until dough forms.
- Knead the dough on a floured surface for 8-10 minutes until smooth and elastic.
- Place the dough in a greased bowl, cover, and let it rise in a warm place for 1-2 hours until doubled in size.
- Preheat your oven to 375°F (190°C).
- Roll out the dough into a rectangle about 12×8 inches.
- Spread softened cream cheese, drizzle lemon juice, and sprinkle sugar on the rolled-out dough.
- Roll the dough tightly from the long end into a log and slice into 1-1.5 inch pieces.
- Place the rolls in a greased baking dish and let them rise for about 30 minutes until puffed.
- Bake for 20-25 minutes or until golden brown.
- Prepare the glaze by beating cream cheese and mixing in powdered sugar and lemon juice.
- Glaze the warm rolls and enjoy!
Notes
You can prep the dough the night before and refrigerate it before baking.
Nutrition
- Serving Size: 1 roll
- Calories: 200
- Sugar: 8g
- Sodium: 150mg
- Fat: 8g
- Saturated Fat: 4g
- Unsaturated Fat: 3g
- Trans Fat: 0g
- Carbohydrates: 28g
- Fiber: 1g
- Protein: 3g
- Cholesterol: 30mg
Keywords: lemon rolls, sticky rolls, brunch recipes, dessert recipes, baking