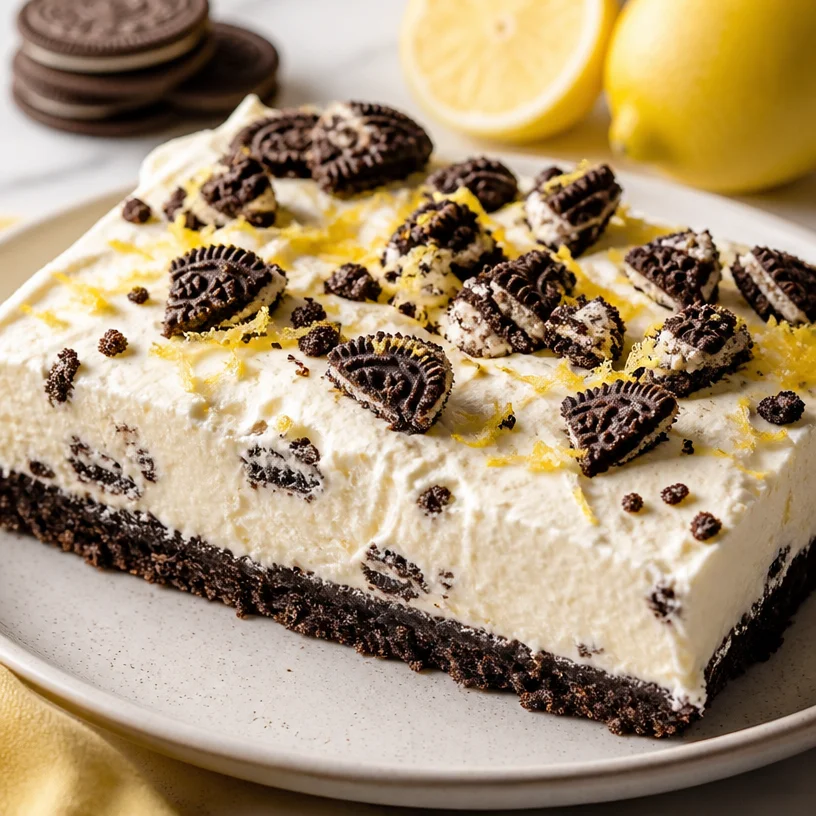
No-Bake Oreo Lemon Dessert: Creamy, Tangy Comfort Treat
Indulge in the Heavenly Oreo Lemon Dessert: A Burst of Zesty Delight
Hello, dear food lovers! If you’ve ever found yourself drifting through a bakery window, mesmerized by the delightful treats inside, you’re not alone! I remember when I first experienced that swirl of excitement. There’s just something magical about desserts that not only look stunning but also sing with flavor. Enter: the Heavenly Oreo Lemon Dessert—a concoction that brings together the rich, satisfying crunch of Oreos and the bright, zesty notes of lemon in a way that tickles your taste buds and warms your heart.
A Slice of Nostalgia
One of my earliest baking memories involves my grandmother, who was an absolute magician when it came to desserts. She had a special way of making everyone feel like they were her favorite grandchild, especially when the kitchen was filled with the sweet aroma of something decadent baking in the oven. One sunny afternoon, we decided to get our hands a little messy and whip up a version of lemon cheesecake that I’d seen in a cookbook.
While we were mixing and mingling flavors, the idea that dessert could be so layered and complex yet simple and approachable was born. I love how food has this beautiful ability to evoke memories and create connections. Flash forward a few decades, and I find myself in my own kitchen, eager to share a recipe that would make my grandmother proud—this Heavenly Oreo Lemon Dessert is both indulgent and fresh, just like those precious moments spent with her.
Ingredients
Before we dive into the delectable step-by-step process, let’s gather our ingredients! Here’s what you’ll need to create this heavenly delight:
-
1 package of Oreo cookies
The star of our crust! Feel free to use regular or double-stuffed Oreos. If you want a gluten-free version, swap in gluten-free chocolate sandwich cookies. -
1/2 cup of unsalted butter, melted
This binds our crust together and adds richness. Don’t have unsalted butter on hand? Just reduce the salt in the recipe slightly if you substitute salted butter. -
1 package (8 oz) cream cheese, softened
It gives our dessert that luscious texture. Make sure it’s softened to avoid lumps—nobody wants a bumpy cheesecake! -
1 cup powdered sugar
This sweetens our filling and gives it a smooth finish. For a lower-sugar option, try substituting with a sugar alternative. -
1 cup heavy whipping cream
The secret to a beautifully fluffy filling. Can’t find heavy cream? You can substitute with coconut cream for a dairy-free option. -
1/4 cup lemon juice
Freshly squeezed is best for maximum brightness! If you’re in a pinch, bottled lemon juice will do. -
1 tablespoon lemon zest
This adds a punch of intense lemon flavor. If you don’t have a zester, a fine grater will work just fine! -
1 teaspoon vanilla extract
It rounds out our flavors beautifully. Always opt for pure vanilla extract when possible for the best taste!
Step-by-Step Instructions
Now, let’s get cooking! Here’s how to prepare your Heavenly Oreo Lemon Dessert from start to finish:
-
Preheat the Oven:
Start by preheating your oven to 350°F (175°C). This is such an important step to ensure an even bake! -
Make the Crust:
Crush the Oreo cookies into fine crumbs. You can do this by placing them in a food processor or putting them in a zip-top bag and rolling over them with a rolling pin. This is one of my favorite mess-free hacks! Once they’re crumbly, mix in the melted butter until you have a mixture that resembles wet sand. -
Press the Crust:
In a 9-inch round baking dish or square pan, firmly press the Oreo mixture into the bottom to form a crust. The key here is to ensure it’s packed tightly so it holds together when you slice it. Give it a little love with a spatula! -
Bake the Crust:
Pop it in the preheated oven for about 8-10 minutes. This will make it nice and crisp. While that bakes, let’s move on to the filling. -
Prepare the Filling:
In a large mixing bowl, use an electric mixer to beat the softened cream cheese until it’s smooth and creamy. This should be about 2-3 minutes—don’t skip this step, as it’s essential for avoiding any cream cheese lumps! -
Add Sugar, Lemon Juice, and Vanilla:
Once the cream cheese is smooth, add in the powdered sugar, lemon juice, lemon zest, and vanilla extract. Mix until well combined—this is where the magic begins to happen! -
Whip the Cream:
In a separate bowl, whip the heavy cream until stiff peaks form. When it’s ready, gently fold the whipped cream into the cream cheese mixture using a spatula. This lightens up the filling beautifully! -
Assemble Your Dessert:
Pour the lemon mixture over the cooled Oreo crust, spreading it evenly. For a little added flair, use the back of a spoon or spatula to create swoops and swirls in the filling. -
Chill:
Cover with plastic wrap and refrigerate for at least 4 hours, or overnight if you can resist. This allows the flavors to meld beautifully. -
Serve:
Once chilled, slice your dessert and serve. You can garnish with additional lemon zest or whipped cream for a touch of elegance!
Serving Suggestions
When it comes to serving your Heavenly Oreo Lemon Dessert, presentation is everything! For a lovely touch, place each slice on a decorative plate. You might even add a dollop of freshly whipped cream or a sprinkle of crushed Oreos on top for a bit of visual appeal. A few lemon slices or zest alongside can also brighten up the dish—a feast for both the eyes and the palate!
Recipe Variations
Here are a few creative twists to consider when making your Heavenly Oreo Lemon Dessert:
-
Berry Bliss:
Add layers of fresh berries (like raspberries or blueberries) into the filling for a refreshing burst of flavor. -
Coconut Cream:
Swap in coconut cream for the heavy whipping cream for a tropical twist that complements the lemon beautifully. -
Chocolate Drizzle:
Drizzle some melted chocolate (dark or white) over the top right before serving for a decadent touch. -
Nutty Crunch:
Incorporate chopped nuts (like almonds or pistachios) into the crust for a delightful crunch. -
Lemon Blueberry Swirl:
Fold in a homemade blueberry sauce with the filling for a visually stunning dessert.
Chef’s Notes
One of the reasons this dessert has become a favorite in my household is the happy mixture of flavors and textures. I giggle thinking about a time I tried making it during a family gathering, and the tartness of the lemon matched perfectly with the sweet Oreo base, creating smiles all around. Through the years, I’ve played with different flavor combinations, and it’s amazing how a simple recipe can evolve into so many variations while still keeping that balance of taste. Remember, cooking is an art—don’t hesitate to make it your own!
FAQs and Troubleshooting
Q: My dessert turned out too watery. What went wrong?
A: This can happen if the cream cheese isn’t well softened before mixing or if the heavy cream wasn’t whipped properly. Be patient when beating your cream cheese and make sure to whip the cream until it’s stiff!
Q: Can I make this a day in advance?
A: Absolutely! In fact, making it a day before allows the flavors to meld beautifully, giving you an even tastier dessert.
Q: How do I store leftovers?
A: Store any leftovers in an airtight container in the refrigerator for up to 4 days. However, I doubt you’ll have much left once your guests get a taste!
Q: Can I freeze this dessert?
A: Yes, you can freeze it! Just cover it well with plastic wrap and store it in a freezer-safe container for up to a month. Thaw it in the fridge overnight before serving.
Nutritional Information
For those who are health-conscious, here’s a quick glance at the nutritional side of things. (Note: This may vary based on brands and portion size.)
- Calories: Approximately 280 per serving
- Total Fat: 20g
- Saturated Fat: 10g
- Cholesterol: 50mg
- Carbohydrates: 24g
- Sugars: 18g
- Protein: 3g
And there you have it—a delightful journey of flavors encapsulated in the Heavenly Oreo Lemon Dessert! May this recipe inspire you to create lasting memories around your dining table, just as it does in mine. Happy cooking, and remember, good food is about showing up. Enjoy every sweet moment!
PrintHeavenly Oreo Lemon Dessert
A delightful dessert combining the rich crunch of Oreos with zesty lemon flavors, perfect for any occasion.
- Prep Time: 15 minutes
- Cook Time: 10 minutes
- Total Time: 240 minutes
- Yield: 8 servings 1x
- Category: Dessert
- Method: Chilling
- Cuisine: American
- Diet: Vegetarian
Ingredients
- 1 package of Oreo cookies
- 1/2 cup of unsalted butter, melted
- 1 package (8 oz) cream cheese, softened
- 1 cup powdered sugar
- 1 cup heavy whipping cream
- 1/4 cup lemon juice
- 1 tablespoon lemon zest
- 1 teaspoon vanilla extract
Instructions
- Preheat the oven to 350°F (175°C).
- Crush the Oreo cookies into fine crumbs and mix with melted butter.
- Press the cookie mixture into the bottom of a 9-inch round baking dish.
- Bake the crust for about 8-10 minutes until crisp.
- Beat softened cream cheese in a large mixing bowl until smooth.
- Add powdered sugar, lemon juice, lemon zest, and vanilla extract, mixing until well combined.
- Whip the heavy cream until stiff peaks form, then gently fold it into the cream cheese mixture.
- Pour the lemon mixture over the cooled Oreo crust, spreading it evenly.
- Chill in the refrigerator for at least 4 hours or overnight.
- Serve chilled, garnished with lemon zest or whipped cream if desired.
Notes
For best results, allow the dessert to chill overnight to meld flavors.
Nutrition
- Serving Size: 1 slice
- Calories: 280
- Sugar: 18g
- Sodium: 250mg
- Fat: 20g
- Saturated Fat: 10g
- Unsaturated Fat: 5g
- Trans Fat: 0g
- Carbohydrates: 24g
- Fiber: 1g
- Protein: 3g
- Cholesterol: 50mg
Keywords: Oreo, Lemon, Dessert, Cheesecake, No Bake, Easy Dessert
Minute Puff Pastry Donuts: Easy Cronuts for Busy Nights
Easy Puff Pastry Donuts: The Best Homemade Cronuts!
There’s something magical about a freshly made donut. The airy dough, the sweet glaze, and that first bite that takes you straight to pastry heaven! Today, I want to share a recipe that not only satisfies your sweet tooth but also brings a touch of elegance to your baking. Welcome to my kitchen, where we’re going to whip up the most delightful puff pastry donuts—aka cronuts! Perfect for breakfast, brunch, or any time you need a little indulgence.
Puff pastry donuts are the ultimate fusion of a croissant’s flaky goodness and a donut’s sweet charm. Imagine biting into a warm cronut, the outside crisp and golden, the inside soft and airy, and a luscious glaze that drips tantalizingly as you take another bite. Sounds divine, right? Trust me; once you make these beauties, they’ll become a staple in your treat rotation.
Now, don’t be intimidated by the idea of making donuts at home. With a little guidance and the magic of store-bought puff pastry, you can create these delightful treats with ease. Invite your friends over or treat yourself; either way, it’s time to roll up our sleeves and get cooking together!
My Puff Pastry Journey
Ah, puff pastry. The first time I tackled it was during a bustling holiday season when my ambition outpaced my experience. I decided I would make everything from scratch for a family gathering. I vividly remember the chaos in my kitchen: flour clouded the air, dough scattered on the countertops, and my loyal pup, Bella, hoping for a crumb. It was a mess, but my puff pastry turned out surprisingly well, and my family was impressed!
Fast forward to today, and I take the trusty shortcut of using pre-made puff pastry. The aroma of frying donuts always brings me back to that holiday gathering. It reminds me of the joy food brings us and how even amidst the hustle and bustle, we can create memories that linger just like the sweetness of warm donuts.
Now, let’s recreate that magic together in a much simpler way!
Ingredients
-
2 Sheets Puff Pastry, thawed
Puff pastry is the star of our show! Choose a high-quality brand for the best results. If you want a healthier option, look for whole wheat puff pastry. -
1 Egg, whisked
This is our egg wash; it gives our donuts that beautiful golden color. If you’re looking for an egg-free option, try using a bit of milk or plant-based milk blended with water instead. -
Vegetable Oil for Frying
Any neutral oil will do, like canola or sunflower. If you’re feeling adventurous, peanut oil adds a lovely flavor! -
Flour for Dusting
A little flour helps prevent sticking. Use all-purpose flour for the best results!
For the Glaze
-
2 cups Powdered Sugar
The base of a luscious glaze! If you’re watching your sugar intake, consider using monk fruit sweetener or a sugar-free powdered sugar alternative. -
1 1/2 tbsp. Milk
This helps loosen the glaze to the perfect drizzling consistency. You can also use almond or oat milk for a dairy-free version. -
1/2 tsp. Salt
A pinch of salt balances the sweetness beautifully. -
1 tsp. Vanilla Extract
This adds a warm, cozy flavor. Substitute with almond extract for a fun twist!
Step-by-Step Instructions
-
Roll Out the Puff Pastry
Begin by lightly dusting your work surface with flour. To ensure an even thickness, roll out each sheet of puff pastry gently. We’re aiming for about 1/8 inch thick. This step ensures that your donuts will rise beautifully! -
Cut into Shapes
Using a donut cutter or two different sizes of round cutters, cut out the donut shapes. The inner hole can be as large or small as you like; a smaller center hole will create a crisper donut. Gather the scraps and re-roll to cut more donuts—no waste here! -
Prepare the Frying Oil
In a deep skillet or a Dutch oven, pour enough vegetable oil to submerge the donuts—about 2 inches deep. Heat the oil over medium heat until it reaches 350°F (175°C). Tip: You can drop a small piece of dough into the oil to check if it’s ready. If it sizzles and rises, you’re good to go! -
Fry the Donuts
Carefully add the donuts to the hot oil in batches to avoid overcrowding. Fry for about 2-3 minutes on each side or until golden brown. Use a slotted spoon to flip them gently. Chef’s hack: If you notice any bubbles forming on the surface, it means the oil is hot enough for frying! -
Drain and Cool
Remove the donuts from the oil and place them on a paper towel-lined plate to drain excess oil. Let them cool for a few minutes; the glaze will stick better to warm donuts! -
Whip Up the Glaze
In a medium bowl, combine the powdered sugar, milk, salt, and vanilla extract. Whisk until smooth and glossy. If it’s too thick, add a splash more milk until you achieve the desired consistency. -
Glaze the Donuts
Dunk each warm donut into the glaze, rotating it gently to coat completely. Allow any excess glaze to drip off before placing it on a wire rack to set.
Serving Suggestions
Plate your puff pastry donuts on a beautiful cake stand or a simple plate to really elevate the presentation. Dust with a bit of extra powdered sugar for that picture-perfect touch, or garnishthem with fresh berries for a pop of color. Pairing them with a lovely cup of coffee or tea makes for an indulgent afternoon treat.
Recipe Variations
- Chocolate Glazed Cronuts: Mix melted chocolate with butter and dip your cooled donuts into this rich glaze for a decadent chocolate treat.
- Filled Cronuts: Before frying, use a piping bag to fill your pastry rings with pastry cream, whipped cream, or even jam for a surprise inside.
- Cinnamon Sugar Cronuts: After frying, roll the warm donuts in a mixture of cinnamon and sugar for a sweet, cozy flavor.
- Savory Cronuts: Add herbs and spices to your dough and fill them with creamy ricotta and spinach before frying for a savory twist!
- Vegan Cronuts: Substitute the egg wash with a plant-based egg replacement and use dairy-free milk and oil for frying.
Chef’s Notes
These easy puff pastry donuts are my go-to whenever I want to impress friends or just need a sweet escape. I’ve watched countless faces light up after one bite, and there’s nothing like it! Over the years, I’ve experimented with different fillings and glazes, and even though this basic recipe is perfection, I love how it allows for creativity.
Just the other day, I had an unexpected guest, and with nothing but a few pantry staples and these simple puff pastry donuts, we created an impromptu little dessert party! Laughter echoed in the kitchen as we shared stories and tried all the different glazes—those moments are what cooking is all about.
FAQs and Troubleshooting
1. Why did my donuts turn out greasy?
If your donuts feel greasy, your oil may not have been hot enough. Make sure to monitor the temperature closely and let the oil reach 350°F before frying.
2. Can I bake these instead of frying?
While frying gives cronuts their signature texture, you can bake them at 400°F for 12-15 minutes. Just remember they’ll have a different texture than their fried counterparts but will still be delicious!
3. How do I store leftovers?
Store your donuts in an airtight container at room temperature for up to two days. If they last longer than that (good luck!), keep them in the fridge. Just reheat them a bit to bring back the texture!
4. What can I do about the sogginess?
If your donuts seem soggy from the glaze, let them sit on a wire rack for a few minutes after glazing. This will help the glaze set and reduce the moisture.
Nutritional Info
Calories per donut (approx.): 200-250
Total Fat: 14g
Carbohydrates: 25g
Protein: 2g
Cooking is about experimenting and enjoying the process—so go ahead and personalize these lovely puff pastry donuts in your own style. So grab your apron, gather your ingredients, and let’s create sweet moments in the kitchen together. Happy cooking!
PrintEasy Puff Pastry Donuts: The Best Homemade Cronuts!

Indulge in these delightful puff pastry donuts, also known as cronuts, that fuse the flakiness of croissants with the sweetness of donuts, perfect for any occasion.
- Prep Time: 15 minutes
- Cook Time: 30 minutes
- Total Time: 45 minutes
- Yield: 12 servings 1x
- Category: Dessert
- Method: Frying
- Cuisine: American
- Diet: Vegetarian
Ingredients
- 2 Sheets Puff Pastry, thawed
- 1 Egg, whisked
- Vegetable Oil for Frying
- Flour for Dusting
- 2 cups Powdered Sugar
- 1 1/2 tbsp. Milk
- 1/2 tsp. Salt
- 1 tsp. Vanilla Extract
Instructions
- Roll Out the Puff Pastry: Lightly dust your work surface with flour and roll out each sheet of puff pastry to about 1/8 inch thickness.
- Cut into Shapes: Use a donut cutter to cut out donut shapes and gather scraps to re-roll.
- Prepare the Frying Oil: Heat vegetable oil in a deep skillet to 350°F (175°C).
- Fry the Donuts: Carefully add the donuts to the hot oil and fry for 2-3 minutes on each side until golden brown.
- Drain and Cool: Remove the donuts and place them on a paper towel-lined plate to drain excess oil.
- Whip Up the Glaze: Combine powdered sugar, milk, salt, and vanilla extract in a bowl and whisk until smooth.
- Glaze the Donuts: Dunk each warm donut in the glaze and let excess drip off before placing on a wire rack.
Notes
These cronuts can be customized with various fillings and glazes. Serve with coffee or tea for a delightful treat.
Nutrition
- Serving Size: 1 donut
- Calories: 225
- Sugar: 12g
- Sodium: 150mg
- Fat: 14g
- Saturated Fat: 4g
- Unsaturated Fat: 8g
- Trans Fat: 0g
- Carbohydrates: 25g
- Fiber: 1g
- Protein: 2g
- Cholesterol: 30mg
Keywords: puff pastry, cronuts, donuts, homemade, dessert
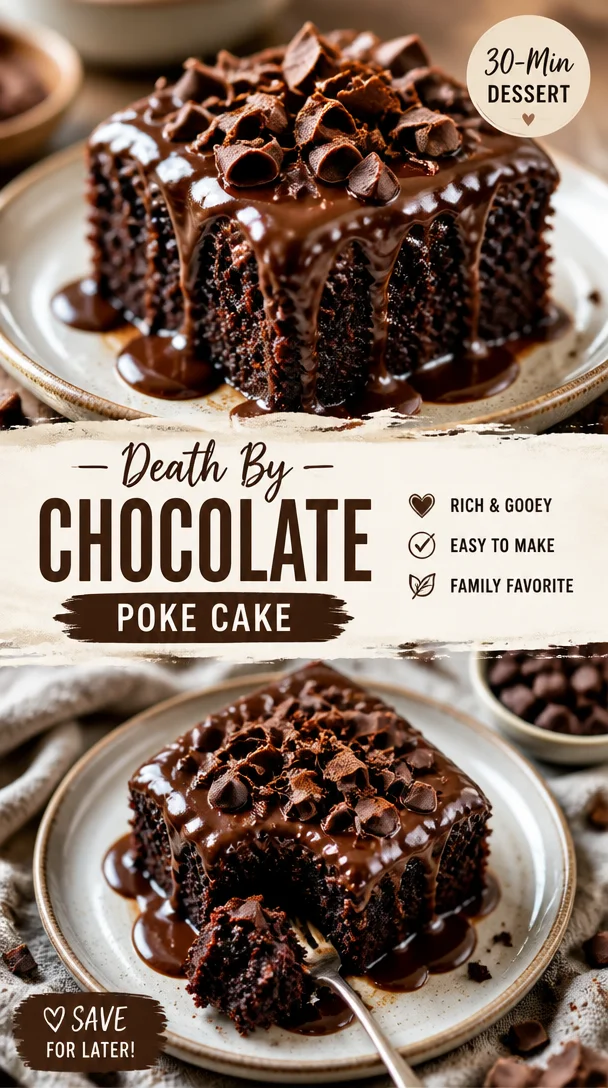
Death By Chocolate Poke Cake
Death By Chocolate Poke Cake: A Decadent Delight
Hello, my fellow food lovers! Today, we’re diving into a dessert that will make your heart sing and your taste buds dance – the Death By Chocolate Poke Cake. Imagine sinking your fork into a rich, moist chocolate cake that’s generously soaked in chocolate pudding, layered with whipped topping, and studded with chocolate chips. Sounds heavenly, right? Well, it is!
A Chocolate Lover’s Dream
Growing up, one of my fondest memories is of my family gatherings around the holidays. The chatter, the laughter, and of course, the dessert table! There was always one dish that stole the spotlight every time – my mom’s Chocolate Poke Cake. It was the ultimate indulgence, a cake that beckoned you in with its chocolatey allure.
I remember the first time I helped my mom make it. I was probably around 10 years old, standing on a chair to reach the mixing bowl, my tiny hands covered in flour and cocoa powder. As we poured the warm pudding over the baked cake, the excitement was palpable. I couldn’t wait to dig in! That cake always brought our family together, and it remains a cherished memory close to my heart. Now, I carry that tradition forward, and I can’t wait for you to experience the joy of creating your own Death By Chocolate Poke Cake.
Ingredients
For this delicious cake, you will need:
-
1 box chocolate cake mix: This is the backbone of our poke cake. If you’re feeling adventurous, you could use homemade chocolate cake for a richer flavor, but the box mix makes it super easy!
-
Ingredients required to prepare the cake (usually eggs, water, and oil): Always check the back of your cake mix box for specifics. If you’re out of eggs, you can substitute each egg with 1/4 cup of unsweetened applesauce for a rich, moist cake!
-
1 cup chocolate pudding mix: Instant pudding works best for this recipe. It provides a creamy consistency. If you fancy a different flavor, vanilla pudding works, but then you’d lose that rich chocolate kick.
-
2 cups milk: Whole milk adds richness, but you can swap it with almond milk or oat milk for a dairy-free option. Just ensure you’re using an unsweetened version for the right flavor profile.
-
1 cup whipped topping: This is what keeps the cake light and fluffy. If you’re feeling extra, homemade whipped cream is a fantastic, indulgent substitute!
-
1 cup chocolate chips: Mini chocolate chips are great for even distribution, or use dark chocolate chips for an intense hit of chocolate.
-
Chocolate syrup for drizzling: This delightful drizzle elevates the cake visually and adds extra sweetness. If you’re looking for a healthier alternative, try a homemade chocolate sauce with less sugar.
Step-by-Step Instructions
Ready to get baking? Let’s dive into the steps of making this chocolate masterpiece!
-
Preheat your Oven: Start by preheating your oven to 350°F (175°C). This ensures an even bake — nobody wants a gooey cake where it shouldn’t be!
-
Prepare the Cake Mix: In a large mixing bowl, combine the chocolate cake mix with the water, eggs, and oil as directed on the box. Mix on medium speed for about 2 minutes until the batter is smooth. Here’s where you can let loose and really whip up some air into that batter!
-
Bake the Cake: Pour the batter into a greased 9×13 inch baking dish. Bake it in the preheated oven for 30-35 minutes, or until a toothpick inserted into the center comes out clean. (Pro Tip: Don’t open the oven door too soon; this can cause your cake to sink!)
-
Cool the Cake: Once baked, remove the cake from the oven and let it cool in the pan for about 15 minutes. This allows it to set properly and makes it easier to poke!
-
Poke the Cake: Now for the fun part! Use the handle of a wooden spoon or a large fork to poke holes all over the surface of the cake. Aim for a pattern, but random works too! The more holes, the more pudding can seep in!
-
Mix the Pudding: While the cake cools, whisk together the chocolate pudding mix and milk in a separate bowl. Make sure there are no lumps! Once combined, let it rest for a few minutes until it thickens up slightly.
-
Pour the Pudding: Gently pour the chocolate pudding over the poked cake, making sure it seeps into all the holes. This is what makes the cake ultra moist and decadently chocolatey!
-
Chill the Cake: Cover the cake with plastic wrap and let it chill in the refrigerator for at least 2 hours (or overnight if you can resist!). This allows the pudding to set fully and brings all the flavors together.
-
Add the Topping: Before serving, spread the whipped topping evenly over the pudding layer. Add your chocolate chips on top for that delightful crunch!
-
Drizzle with Chocolate Syrup: Last but not least, drizzle chocolate syrup artfully over the top. Don’t be shy – the more, the merrier!
Serving Suggestions
Slice your Death By Chocolate Poke Cake into generous squares and serve with an extra dollop of whipped topping on the side. It’s perfect for potlucks, birthdays, or a casual weeknight dessert. Consider serving with a scoop of vanilla ice cream for that wonderful contrast of flavors!
Recipe Variations
Ready to get creative? Here are some variations to try:
-
Nutty Surprise: Fold in chopped nuts like walnuts or hazelnuts into the chocolate pudding before pouring it over the cake for an added crunch.
-
Mint Chocolate: Add a few drops of mint extract to the pudding mixture for a refreshing twist that pairs beautifully with chocolate.
-
Peanut Butter Delight: Swirl in some creamy peanut butter into the whipped topping or sprinkle crushed peanut butter cups on top for a Reese’s-inspired version!
-
Coffee Infusion: Replace a portion of the milk with brewed coffee for a mocha-style cake that’s simply irresistible.
-
Sprinkles Galore: For a fun celebratory touch, add colorful sprinkles to the topping for festive flair.
Chef’s Notes
This recipe has been a staple in my home for years and has undergone some delightful transformations. When I first tried making it vegan, I swapped the eggs for applesauce and used coconut whipped cream instead of regular whipped topping. It was a hit with both my vegan friends and non-vegan guests alike!
Another funny memory I have is the time I attempted to make a "healthier" version (I know, what was I thinking?) by reducing the sugar and using whole wheat cake mix. Let’s just say, while it was still edible, lush and moist it was not! Lesson learned: sometimes you just need to indulge – and this cake is the perfect excuse!
FAQs and Troubleshooting
Q: My cake sank in the middle. What went wrong?
A: This could be due to underbaking or opening the oven door too early. Make sure to bake it fully until a toothpick comes out clean!
Q: Can I use homemade pudding instead of instant?
A: Absolutely! Just pour the warm pudding over the poked cake and let it soak in. Be mindful to chill the cake longer since homemade pudding may have a different consistency.
Q: How long will this cake stay fresh?
A: In the refrigerator, it should last for about 3-4 days, though trust me, it won’t last long once you share it!
Q: Can I freeze this cake?
A: Yes! Just cover it well with plastic wrap and foil. To serve, thaw it in the refrigerator overnight and enjoy. However, note that the whipped topping may not be as fresh as when originally made.
Nutritional Info
(Optional)
For those conscious of their nutritional intake, a slice of Death By Chocolate Poke Cake typically contains:
- Calories: Approximately 400
- Total Fat: 20g
- Saturated Fat: 10g
- Sugar: 30g
- Protein: 5g
(Note: Nutritional values will vary depending on ingredients used.)
And there you have it! The perfect dessert to welcome chocolate lovers into your home. I hope you enjoy making and sharing this Death By Chocolate Poke Cake as much as I have. Tie on your apron, get ready to indulge, and may your kitchen be filled with laughter and delicious aromas! Happy baking!
PrintDeath By Chocolate Poke Cake

A rich, moist chocolate cake soaked in chocolate pudding, layered with whipped topping, and topped with chocolate chips.
- Prep Time: 15 minutes
- Cook Time: 35 minutes
- Total Time: 50 minutes
- Yield: 12 servings 1x
- Category: Dessert
- Method: Baking
- Cuisine: American
- Diet: Vegetarian
Ingredients
- 1 box chocolate cake mix
- Ingredients required to prepare the cake (usually eggs, water, and oil)
- 1 cup chocolate pudding mix
- 2 cups milk
- 1 cup whipped topping
- 1 cup chocolate chips
- Chocolate syrup for drizzling
Instructions
- Preheat your Oven to 350°F (175°C).
- Prepare the Cake Mix by combining the chocolate cake mix with the required ingredients.
- Bake the Cake in a greased 9×13 inch baking dish for 30-35 minutes.
- Cool the Cake in the pan for about 15 minutes.
- Poke the Cake using the handle of a wooden spoon.
- Mix the Pudding by whisking together the chocolate pudding mix and milk.
- Pour the Pudding over the poked Cake.
- Chill the Cake in the refrigerator for at least 2 hours.
- Add the Topping by spreading the whipped topping over the pudding layer.
- Drizzle with Chocolate Syrup before serving.
Notes
Consider serving with a scoop of vanilla ice cream for contrast.
Nutrition
- Serving Size: 1 serving
- Calories: 400
- Sugar: 30g
- Sodium: 300mg
- Fat: 20g
- Saturated Fat: 10g
- Unsaturated Fat: 6g
- Trans Fat: 0g
- Carbohydrates: 52g
- Fiber: 2g
- Protein: 5g
- Cholesterol: 50mg
Keywords: chocolate cake, poke cake, dessert, chocolate dessert

Peach Cobbler Cheesecake Bars
Peach Cobbler Cheesecake Bars: A Slice of Summer Bliss
Hello, fellow food lovers! Today, we’re diving into a delightful fusion of two beloved desserts—peach cobbler and cheesecake—creating a dessert that is perfect for any gathering. Peach Cobbler Cheesecake Bars are where creamy, rich cheesecake meets the sweet, warm flavors of summer peaches, all sitting atop a buttery graham cracker crust. These bars are not just a treat for the taste buds; they evoke memories of family gatherings, picnics at the park, and the joyous essence of summertime.
Personal Story
I remember one vibrant summer evening when my family gathered for our annual peach-picking trip. There’s something magical about roaming through rows of sun-kissed peach trees, the air filled with the sweet, fragrant aroma of ripe fruit. We picked peaches to our hearts’ content, laughing and sharing stories, as tiny drops of sweat trickled down our brows under the bright sun.
Once we were home, we had a grand feast, and my mom was determined to showcase our haul. That’s when she introduced the idea of combining peach cobbler and cheesecake. The first bite was pure bliss—the creamy cheesecake elevating the sweet, juicy peaches. That summer treat became a family staple, and now I’m thrilled to share my version of this flavor-packed dessert in a convenient bar format.
Ingredients
Let’s gather our ingredients! Here’s what you’ll need to make these Peach Cobbler Cheesecake Bars shine:
-
2 cups graham cracker crumbs
These form the base of our bars. If you’re feeling adventurous, try using crushed cookies like Oreos for a chocolatey twist! -
1/4 cup sugar
This will sweeten the crust just a tad. Feel free to adjust the quantity based on your desired sweetness. -
1/2 cup butter, melted
The butter brings richness to the crust. For a healthier alternative, you can use coconut oil. -
2 (8 oz) packages cream cheese, softened
Cream cheese provides that luxurious texture we love in cheesecake. Make sure it’s softened to avoid lumps! -
1 cup sugar
This is for the cheesecake filling itself. You can use brown sugar for a caramel-like flavor. -
2 large eggs
These help bind everything together. If you’re looking for an egg-free option, you can use flax eggs (1 tablespoon ground flaxseed + 2.5 tablespoons water = 1 egg). -
1 teaspoon vanilla extract
Vanilla enhances all the delicious flavors; use a high-quality extract for the best taste. -
2 cups fresh peaches, sliced
Fresh is best! However, you can also use frozen peaches—just make sure to thaw and drain them well. -
1 teaspoon cinnamon
Cinnamon adds warmth and pairs beautifully with the peaches. Feel free to experiment with other spices like nutmeg! -
1/4 cup brown sugar
Sprinkled on top, this creates a delightful caramelized finish. You can also swap it with maple syrup for a different flair.
Step-by-Step Instructions
Alright, let’s get cooking! Follow these easy steps to create your Peach Cobbler Cheesecake Bars:
-
Preheat Your Oven
Start by preheating your oven to 325°F (160°C). This allows for an even bake and ensures your bars set perfectly. -
Make the Crust
In a mixing bowl, combine 2 cups of graham cracker crumbs, 1/4 cup of sugar, and 1/2 cup of melted butter. Mix until all crumbs are coated, and the mixture resembles wet sand.
Chef Tip: If you want a little extra flavor, consider adding a pinch of salt to your mixture. -
Press the Mixture
Press the crumb mixture firmly into the bottom of a lined 9×13-inch baking pan. Make sure to create an even layer using the back of a measuring cup.
Camera Tip: Grab that measuring cup and make it your best friend here; a smooth crust is essential! -
Bake the Crust
Bake the crust in the preheated oven for about 10 minutes, just until it’s lightly golden. This step locks in that buttery goodness. Once baked, let it cool slightly. -
Prepare the Cheesecake Filling
While the crust cools, beat 2 packages of softened cream cheese and 1 cup of sugar in a bowl until smooth and creamy. Add in 2 large eggs, 1 teaspoon of vanilla extract, and mix until everything is well combined.
Hacks: Use an electric mixer or a hand whisk, but don’t overmix—just until combined is perfect! -
Fold in the Peaches
Gently fold in 2 cups of sliced fresh peaches and 1 teaspoon of cinnamon into the cheesecake mixture.
Peach Hint: If your peaches are too firm, try letting them ripen for a day or two before using them. -
Pour and Spread
Pour the peach cheesecake filling over the cooled crust, spreading it evenly across the top. -
Top with Brown Sugar
Sprinkle 1/4 cup of brown sugar on top of the filling for a sweet, caramelized finish. This is where it really gets exciting! -
Bake Again
Return the pan to the oven and bake for about 40-45 minutes, or until the center is set and slightly jiggles when you tap the pan.
It’s tempting, but avoid opening the oven door too often to prevent any sinking! -
Cool and Chill
Let the bars cool at room temperature for about an hour, then refrigerate them for at least 4 hours—overnight is even better—to ensure they set.
Serving Suggestions
When you’re ready to serve, lift the bars out of the pan using the parchment paper. Cut them into squares and serve them chilled or at room temperature. For a finishing touch, consider topping each bar with a dollop of whipped cream or a scoop of vanilla ice cream. Drizzle a bit of caramel sauce over the top for added decadence!
Recipe Variations
Looking to mix things up? Here are a few delicious variations:
- Berry Cobbler Cheesecake Bars: Swap the peaches for a mix of fresh berries like blueberries and raspberries for a colorful twist.
- Nutty Additions: Fold in some crushed pecans or walnuts into the cheesecake for extra crunch and a bit more flavor.
- Spiced Peach: Add a dash of nutmeg or ginger to the peach filling for a cozy, spiced-up variation.
- Vegan Version: Use vegan cream cheese, flax eggs, and coconut oil to make this treat plant-based and just as delightful!
Chef’s Notes
This Peach Cobbler Cheesecake Bar recipe has been a labor of love, evolving over the years just like my own cooking journey. I remember the first few tries when the filling would spill over, or the crust was too crumbly. No matter, each mishap in the kitchen was just a fun kitchen adventure waiting to happen! Now, I blend nostalgia with innovation—always pushing to make it easier without losing the elegant charm we love.
FAQs and Troubleshooting
Q: Why did my cheesecake crack?
A: Cracks often happen due to rapid temperature changes or overmixing. When baking cheesecakes, aim for a gentle mix and cool gradually with the oven off.
Q: Can I use frozen peaches instead of fresh?
A: Absolutely! Just make sure to thaw and drain them well to avoid excess moisture in the filling.
Q: How do I know when the cheesecake bars are done?
A: A slight jiggle in the center is your friend! It’ll continue to set as it cools down, so don’t worry if it looks a bit wobbly!
Q: Can I make these bars ahead of time?
A: Yes! These cheesecake bars are great for make-ahead desserts. Just store them in the fridge for up to 3 days, or you can freeze them for up to a month.
Nutritional Info
While I focus on helping you create beautiful, delightful meals, if you’re interested in a general idea of the nutrition content per serving, these bars are packed with deliciousness and joy—not to mention a little bit of sugar and fat that makes life sweeter!
Now, dear reader, I invite you to tie on your apron and step into your own kitchen adventures! I can’t wait to see you whip up these Peach Cobbler Cheesecake Bars and create new memories around your table. Remember, it’s not just about the food; it’s about the connections you create—and that’s where the real magic happens. Happy baking!
PrintPeach Cobbler Cheesecake Bars

Delightful Peach Cobbler Cheesecake Bars are a fusion of creamy cheesecake and sweet summer peaches atop a buttery graham cracker crust.
- Prep Time: 15 minutes
- Cook Time: 55 minutes
- Total Time: 70 minutes
- Yield: 12 servings 1x
- Category: Dessert
- Method: Baking
- Cuisine: American
- Diet: Vegetarian
Ingredients
- 2 cups graham cracker crumbs
- 1/4 cup sugar
- 1/2 cup butter, melted
- 2 (8 oz) packages cream cheese, softened
- 1 cup sugar
- 2 large eggs
- 1 teaspoon vanilla extract
- 2 cups fresh peaches, sliced
- 1 teaspoon cinnamon
- 1/4 cup brown sugar
Instructions
- Preheat your oven to 325°F (160°C).
- Combine 2 cups of graham cracker crumbs, 1/4 cup of sugar, and 1/2 cup of melted butter in a bowl.
- Press the mixture firmly into the bottom of a lined 9×13-inch baking pan.
- Bake the crust in the preheated oven for about 10 minutes until lightly golden.
- Beat 2 packages of softened cream cheese and 1 cup of sugar until smooth and creamy.
- Add in 2 large eggs and 1 teaspoon of vanilla extract; mix until well combined.
- Fold in 2 cups of sliced peaches and 1 teaspoon of cinnamon.
- Pour the peach cheesecake filling over the cooled crust.
- Sprinkle 1/4 cup of brown sugar on top.
- Bake again for about 40-45 minutes, or until the center is set.
- Cool at room temperature for about an hour, then refrigerate for at least 4 hours.
Notes
For best results, refrigerate overnight before serving. Top with whipped cream or caramel sauce for added decadence.
Nutrition
- Serving Size: 1 bar
- Calories: 320
- Sugar: 20g
- Sodium: 300mg
- Fat: 18g
- Saturated Fat: 10g
- Unsaturated Fat: 6g
- Trans Fat: 0g
- Carbohydrates: 36g
- Fiber: 1g
- Protein: 5g
- Cholesterol: 50mg
Keywords: peach cobbler, cheesecake, summer dessert, bars

Easy Baklava Recipe
Easy Baklava Recipe: A Sweet Journey to Your Table
Hello, fellow foodies! Savannah here, and I am absolutely thrilled to dive into the world of baklava with you today! If you’re new to this iconic Middle Eastern pastry, prepare to be enchanted. Baklava is a delicious layered dessert made with flaky phyllo dough, chopped nuts, and a sticky honey syrup that comes together like magic. It’s the kind of treat that feels both elegant and comforting, perfect for special occasions or a sweet addition to your afternoon tea. So, gather your ingredients and let’s make some baklava together!
A Sweet Memory: The First Time I Made Baklava
I remember the first time I tried to make baklava in my tiny apartment kitchen. I was excited but also a bit intimidated—after all, phyllo dough has a reputation for being finicky, right? I still recall the smell of melted butter wafting through my space as I carefully layered each sheet, envisioning my creation transforming into a golden delight. I had a friend visiting, and as we snacked on the crispy edges while it baked, we giggled at our culinary misadventures, grateful we’d opted for pre-chopped nuts to save time. Fast forward to the final product—perfectly golden, sweet, and so sumptuous. Each bite was like a warm hug from the inside out! Since that day, baklava has become a staple in my home, both for entertaining friends and for those cozy days when I want something special to enjoy with a cup of tea.
Ingredients for Baklava
Here’s what you’ll need to create this delightful dessert:
-
Phyllo Dough (1 package, 16 ounces): This is the heart of your baklava! Thaw according to package instructions before you start. If you’re feeling adventurous and won’t mind some extra time, you can make your own, but pre-made is perfectly fine!
-
Butter (1 1/4 cups, melted): This luscious ingredient is critical for layering your phyllo sheets with flavor and richness. If you’re looking for a lighter option, consider using olive oil instead, though the flavor will vary.
-
Walnuts (8 ounces, finely chopped): They add a lovely crunch and nutty flavor to the baklava. You could substitute with pecans if you prefer a sweeter taste.
-
Pistachios (8 ounces, shelled and finely chopped): They contribute both texture and a pop of color to contrast with the walnuts. Feel free to get creative with your nut choices; almonds or cashews are delicious alternatives!
-
Ground Cinnamon (1 teaspoon): This adds warmth and spice to the mixture. For a more unique flavor, consider using nutmeg or even cardamom!
-
Granulated Sugar (1 cup): This sweetens the filling and helps create that syrupy goodness. For a healthier option, you could use coconut sugar or a sugar substitute—but be mindful of the flavor change.
-
Water (3/4 cup): This is essential for making your syrup.
-
Honey (1/2 cup): Nothing compares to the rich sweetness it provides. If you’re looking for vegan alternatives, you might try maple syrup, but again, keep in mind the taste.
-
Lemon Juice (2 tablespoons): This adds a touch of brightness to balance out the sweetness of the syrup.
-
Fresh Orange Peel (1 2-inch piece): This subtle citrus note infuses the syrup with a refreshing flavor. If you don’t have orange, lemon zest works just as beautifully.
Step-by-Step Instructions for Making Baklava
Now that we’ve gathered our ingredients, it’s time to get cooking! Follow these steps to create your baklava masterpiece.
-
Preheat Your Oven: Start by preheating your oven to 350°F (175°C). This ensures that your baklava bakes evenly and turns out golden and delicious.
-
Prep the Phyllo: Unroll your phyllo dough carefully, keeping it covered with a damp towel to prevent it from drying out. Working with phyllo can be delicate, but don’t stress! If a sheet tears, just patch it with another—your baklava will still taste fabulous.
-
Butter Your Baking Dish: Grab a 9×13-inch baking dish (or a similar size) and brush it generously with melted butter. This is crucial for preventing sticking and creating those flaky layers.
-
Layer the Phyllo: Place one sheet of phyllo dough in the dish and brush it with more melted butter. Repeat this process, layering about 8-10 sheets, brushing each one with butter. This creates a lovely flaky base.
-
Prepare the Nut Mixture: In a bowl, combine the finely chopped walnuts, pistachios, ground cinnamon, and a couple of tablespoons of sugar. Mix well and then evenly spread half of the nut mixture over the phyllo layers.
-
Continue Layering: Add another 5-7 sheets of buttered phyllo on top of the nut mixture—remember to butter each sheet well. Follow with the remaining nut mixture and another layer of phyllo, keeping the same buttering routine.
-
Finish with Phyllo: Once you’ve added all your filling, top everything off with 6-8 more buttered sheets of phyllo. The top layer is your protective layer, so make sure it’s well-buttered for that beautiful golden finish.
-
Slice Before Baking: Using a sharp knife, cut through the layers into diamond or square shapes. This allows the syrup to soak in later, and it gives your baklava that classic appearance.
-
Bake the Baklava: Place your dish into the preheated oven and bake for about 45-50 minutes or until the top is golden brown and crispy. Your kitchen will smell heavenly during this time!
-
Prepare the Syrup: While the baklava bakes, it’s time to make the syrup. In a saucepan, combine water, granulated sugar, honey, lemon juice, and the fresh orange peel. Bring it to a boil and then reduce the heat, letting it simmer for about 10-15 minutes until slightly thickened.
-
Soak the Baklava: Once the baklava is done baking, remove it from the oven and pour the hot syrup over the hot baklava. Allow it to sit and soak for at least 4-5 hours, or better yet, overnight! The longer it sits, the more syrup it will absorb, making it even more delicious.
Serving Suggestions
When it comes to serving your baklava, presentation is key! Arrange the pieces on a beautiful serving platter, maybe with some fresh mint leaves sprigged around for that lovely touch of green. Drizzle a little extra honey over the top, or sprinkle with some additional chopped nuts for that gourmet look. Have some tea or Turkish coffee on hand to complement the sweetness of the baklava. It’s the perfect pairing!
Recipe Variations
Feeling adventurous? Here are a few ways you can customize your baklava:
-
Chocolate Drizzle: For all the chocolate lovers out there—melt some chocolate and drizzle it over the completed baklava for a rich twist.
-
Spiced Nut Blend: Experiment with different spices in your nut mixture, such as nutmeg or cardamom, for a warm flavor profile.
-
Fruits and Nuts: Add dried fruits like raisins or cranberries to the nut mix for extra sweetness and texture.
-
Nut-Free Option: If you’re dealing with nut allergies, try finely chopped sunflower seeds or pumpkin seeds instead. The texture will be different, but still tasty!
-
Pastry with a Twist: Layer some freshly sliced apples or pears between the phyllo and nut mixture. It’s a fun way to add a fruity layer that complements the spices beautifully.
Chef’s Notes
Ah, baklava has certainly evolved in my kitchen—from an ambitious baking project to a beloved family recipe. I’ve swapped ingredients based on what’s on hand and played with flavors, and each time, it’s a delicious success. The joy of making baklava is not just in the end result, but in the stories shared while layering those delicate sheets of phyllo. While making it once felt like a daunting task, I can confidently say it’s one of the most rewarding desserts you could ever whip up! I promise you, once you get the hang of it, you’ll find joy in sharing this treat with loved ones, as I do.
FAQs and Troubleshooting
1. My baklava is soggy! What did I do wrong?
A: This might happen if you didn’t allow the syrup to cool before pouring it over the hot baklava, or if you didn’t let the baklava absorb the syrup sufficiently. Allow it some time to sit overnight, and it will soak in beautifully.
2. How do I know when my baklava is done baking?
A: Look for a rich golden brown color on the top layers. If it’s still pale after 45-50 minutes, give it a few extra minutes. Just keep an eye on it so it doesn’t burn!
3. Can I freeze baklava?
A: Yes, absolutely! Freeze it before adding syrup, then wrap it tightly in plastic wrap and store in an airtight container. When you’re ready to enjoy, thaw, bake until warm, and then add the syrup!
4. What can I substitute if I don’t have phyllo dough?
A: While phyllo dough is traditional for baklava, you can try using puff pastry as a different texture alternative. However, the result will be somewhat different in taste and texture.
Nutritional Info
While I won’t provide exact nutritional info here, keep in mind that baklava, while delicious, is indulgent. A piece of this lovely dessert is best savored slowly. Be mindful of portion sizes since it’s rich and sweet!
Now that you’ve got the full scoop on making baklava, I can’t wait for you to give it a try! Remember, cooking and baking can be as much about the process—and the laughter shared in the kitchen—as it is about the final dish. So roll up those sleeves, tie on your apron, and let’s create something beautiful together. Happy baking!
PrintEasy Baklava Recipe

A delicious layered dessert made with phyllo dough, chopped nuts, and honey syrup, perfect for special occasions or afternoon tea.
- Prep Time: 30 minutes
- Cook Time: 50 minutes
- Total Time: 80 minutes
- Yield: 24 servings
- Category: Dessert
- Method: Baking
- Cuisine: Middle Eastern
- Diet: Vegetarian
Ingredients
- Phyllo Dough (1 package, 16 ounces, thawed)
- Butter (1 1/4 cups, melted)
- Walnuts (8 ounces, finely chopped)
- Pistachios (8 ounces, shelled and finely chopped)
- Ground Cinnamon (1 teaspoon)
- Granulated Sugar (1 cup)
- Water (3/4 cup)
- Honey (1/2 cup)
- Lemon Juice (2 tablespoons)
- Fresh Orange Peel (1 piece, 2-inch)
Instructions
- Preheat your oven to 350°F (175°C).
- Prep the phyllo by unrolling it and covering it with a damp towel.
- Butter your baking dish generously with melted butter.
- Layer one sheet of phyllo in the dish and brush with butter, repeating with 8-10 sheets.
- Prepare the nut mixture by combining walnuts, pistachios, cinnamon, and sugar.
- Spread half of the nut mixture over the phyllo layers.
- Continue layering with 5-7 more sheets of buttered phyllo and the remaining nut mixture.
- Finish with 6-8 more buttered sheets of phyllo on top.
- Slice the baklava into diamond or square shapes.
- Bake for 45-50 minutes until golden brown and crispy.
- Prepare the syrup by simmering water, sugar, honey, lemon juice, and orange peel.
- Soak the baked baklava with hot syrup and let it sit for at least 4-5 hours or overnight.
Notes
Allow baklava to soak longer for better flavor absorption. Serve with fresh mint and a drizzle of honey for a gourmet touch.
Nutrition
- Serving Size: 1 piece
- Calories: 250
- Sugar: 18g
- Sodium: 60mg
- Fat: 16g
- Saturated Fat: 6g
- Unsaturated Fat: 10g
- Trans Fat: 0g
- Carbohydrates: 30g
- Fiber: 2g
- Protein: 3g
- Cholesterol: 30mg
Keywords: baklava, dessert, phyllo dough, Middle Eastern, sweet treat, layered dessert, nuts, honey

Blueberry Cream Cheese Bars: Quick, Creamy Summer Recipe
Blueberry Cream Cheese Bars: An Incredible Ultimate Recipe
Hello fellow food lovers! Today, we’re diving into the world of desserts, specifically a delight that sings of summer and makes your heart feel like it’s dancing—Blueberry Cream Cheese Bars. Picture this: a buttery, flaky crust cradling a velvety cream cheese filling, all topped with luscious blueberries. It’s a symphony of flavors that are as beautiful as a sunset, and I can’t wait to share this recipe with you. So grab your apron, roll up those sleeves, and let’s make something magical together!
A Sweet Little Memory
As I sit here reflecting on my love for these Blueberry Cream Cheese Bars, I’m transported back to a summer afternoon spent at my grandmother’s house. The sun was just dipping low in the sky, casting a golden glow on everything, and the air was filled with the sweet scent of blooming flowers. Grandma had just returned from the farmer’s market with the juiciest blueberries, and I remember the excitement of helping her in the kitchen.
She would have me mix the creamy cheese filling, and I can still hear her guidance ringing in my ears: “Savannah, cooking is all about love and intention!” After we poured the gooey mixture over the crust, we piled on those bright berries. I can still taste that perfect bite—sweet, creamy, and oh-so-light. It felt like a hug from the inside. Now, whenever I make these bars, I’m reminded of those sweet moments and the joy of creating something delicious for the people I love. It’s more than just a recipe; it’s a connection to warmth and nostalgia.
Ingredients
Let’s talk ingredients! Each one plays a vital role in creating the alchemy of flavors and textures that make these bars shine. Here’s what you’ll need:
For the Crust:
-
1 ½ cups all-purpose flour
This is the backbone of your crust. If you want a gluten-free option, you can substitute with almond flour or a gluten-free blend. Just note that the texture might slightly vary! -
½ cup granulated sugar
Adds sweetness to balance the tart blueberries. You can use coconut sugar for a more caramel-like flavor. -
½ cup unsalted butter, melted
Provides that rich, creamy flavor essential for a decadent crust. If you’re dairy-free, coconut oil will work beautifully here. -
¼ teaspoon salt
Enhances the overall flavor and balances the sweetness. Always essential in baking!
For the Cream Cheese Filling:
-
8 ounces cream cheese, softened
This creates the smooth, creamy base. Choose a high-quality cream cheese for the best flavor. If you’re avoiding dairy, cashew cream can be a clever substitute. -
1 cup powdered sugar
Sweetens the filling without that grainy texture granulated sugar might add. You can also make your own by blending granulated sugar finely in a blender. -
1 teaspoon vanilla extract
Adds warmth and depth to your filling. If you’re feeling adventurous, use almond extract for a fun twist. -
2 large eggs
These bind the filling and give it that lovely, custardy texture. For a vegan version, try using aquafaba (the liquid from chickpeas).
For the Blueberry Topping:
-
2 cups fresh blueberries
The star of the show! Fresh is best, but you can also use frozen blueberries—just thaw them and pat dry to avoid excess moisture. -
1 tablespoon cornstarch
This helps thicken the juices released by the blueberries. Arrowroot starch can be an alternative if you prefer a non-GMO option. -
1 tablespoon lemon juice
Brightens and elevates the blueberries’ flavor. Lime juice can be used if you want a different citrus twist. -
2 tablespoons granulated sugar
Just the right amount of sweetness to complement the tartness of the blueberries. Adjust based on your preference, especially if your berries are particularly sweet.
Step-by-Step Instructions
Are you ready to get cooking? Let’s turn those beautiful ingredients into an incredible treat!
1. Preheat Your Oven
Start by preheating your oven to 350°F (175°C). Preheating is crucial because it ensures that your bars bake evenly. If you toss the batter into a cold oven, it could lead to uneven baking.
2. Prepare the Crust
In a medium bowl, mix together the flour, granulated sugar, melted butter, and salt until combined. You want a crumbly mixture that holds together when pressed. If it feels too dry, add a splash of water. Lightly press this mixture into the bottom of a greased 9×9 inch baking dish. Don’t be afraid to get your hands in there; this is where the love happens! Bake for 10-12 minutes until it’s lightly golden. This layer doesn’t need to be fully cooked yet, but it should start to set.
3. Make the Cream Cheese Filling
While the crust is baking, let’s whip up that luscious cream cheese filling! In a mixing bowl, add softened cream cheese, powdered sugar, vanilla extract, and eggs. Beat until smooth and creamy. This is the time to channel your inner pastry chef; the goal is a perfectly velvety texture. Don’t worry if you have a few tiny lumps; they’ll bake out.
4. Pour the Cream Cheese Mixture
Once your crust is out of the oven and has cooled slightly, pour the cream cheese mixture on top, spreading it out evenly. This is where the magic begins, as the filling will create a creamy landscape atop your crust!
5. Prepare the Blueberry Topping
In a medium bowl, mix blueberries with cornstarch, lemon juice, and granulated sugar. Toss gently until the blueberries are evenly coated. This step not only adjusts the sweetness but also helps the blueberries maintain their shape during baking.
6. Add the Blueberries
Gently spoon the blueberry mixture over the cream cheese filling. Use a spatula or the back of a spoon to spread them out evenly. No need to overdo it—let those berries shine!
7. Bake!
Bake everything in the oven for about 35-40 minutes, or until the filling is set and the blueberries are bubbly. The bars will puff slightly and then settle as they cool. If you see the edges turning golden, you’re in great shape!
8. Let It Cool
Once out of the oven, allow the bars to cool completely in the pan. This helps them firm up for cleaner slicing later. Patience, my friend—good things come to those who wait! Chill in the fridge for at least a couple of hours (or overnight if you can resist) for perfect texture and flavor.
Serving Suggestions
When it’s time to serve, slice the bars into squares for that perfect bite! You can serve them chilled straight from the fridge or at room temperature. A dusting of powdered sugar or a dollop of whipped cream adds a lovely finish if you’re feeling fancy. Pair them with a scoop of vanilla ice cream for a little extra indulgence, or alongside a cup of iced tea for a delightful afternoon treat!
Recipe Variations
Feeling adventurous? Here are a few creative twists you can try with these Blueberry Cream Cheese Bars:
- Add Zest! Incorporate lemon or lime zest into the cream cheese filling for a zesty kick.
- Nutty Crust: Add chopped nuts or switch to almond flour for a nutty twist in the crust.
- Berry Medley: Use a mix of berries—raspberries, strawberries, or blackberries—in place of blueberries.
- Chocolate Drizzle: After cooling, drizzle melted dark chocolate on top of the bars for an irresistible treat.
- Spice It Up: Add a pinch of cinnamon or nutmeg to the cream cheese filling for a warm, aromatic flavor profile.
Chef’s Notes
These Blueberry Cream Cheese Bars hold a special place in my heart, and over the years, they’ve been through their share of kitchen adventures. I once tried to make them with a graham cracker crust, thinking I was being oh-so-creative, but let me tell you, nothing beats the buttery goodness of a traditional crust. It’s the little things like that which remind me to stick to what works!
Another fun story? The time I accidentally swapped granulated sugar for salt in the blueberry topping. You can imagine the surprised reactions at dinner! That’s why double-checking ingredients is a must—learn from my blunders!
FAQs and Troubleshooting
1. My crust is too crumbly! What did I do wrong?
This can happen if you didn’t add enough butter or if you overworked the dough. Ensure you blend everything until just combined, and consider adding a touch more melted butter next time.
2. The cream cheese filling is too lumpy!
Ensure your cream cheese is softened properly (room temperature is key). You can use a mixer to beat it until creamy, making sure not to overmix after adding the eggs.
3. Why are my blueberries sinking?
Sinking can happen if your blueberries are too wet. Rinse them and dry well before tossing them with cornstarch. Alternatively, fold some of the blueberries into the cream cheese mixture for a layered effect!
4. Can I freeze these bars?
Absolutely! These bars freeze wonderfully. Just wrap them tightly in plastic wrap and then foil, and they’ll be good in the freezer for up to three months. Thaw in the fridge before serving.
Nutritional Info
While I don’t always stress the numbers, I know it can be useful to some! A typical serving (based on 16 squares) is approximately:
- Calories: 220
- Total Fat: 12g
- Saturated Fat: 7g
- Carbohydrates: 25g
- Sugars: 12g
- Protein: 3g
And there you have it—an incredible recipe for Blueberry Cream Cheese Bars that are sure to impress! Whether it’s for a summer picnic or a cozy evening at home, these bars bring joy and sweetness to any moment. Thank you for cooking alongside me today! Let’s make magic happen in the kitchen, one delicious bite at a time. Happy baking!
PrintBlueberry Cream Cheese Bars

Delightful Blueberry Cream Cheese Bars with a buttery crust and creamy filling, bringing a taste of summer into every bite.
- Prep Time: 15 minutes
- Cook Time: 50 minutes
- Total Time: 65 minutes
- Yield: 16 servings 1x
- Category: Dessert
- Method: Baking
- Cuisine: American
- Diet: Vegetarian
Ingredients
- 1 ½ cups all-purpose flour
- ½ cup granulated sugar
- ½ cup unsalted butter, melted
- ¼ teaspoon salt
- 8 ounces cream cheese, softened
- 1 cup powdered sugar
- 1 teaspoon vanilla extract
- 2 large eggs
- 2 cups fresh blueberries
- 1 tablespoon cornstarch
- 1 tablespoon lemon juice
- 2 tablespoons granulated sugar
Instructions
- Preheat your oven to 350°F (175°C).
- In a medium bowl, mix together the flour, granulated sugar, melted butter, and salt until combined. Press the mixture into a greased 9×9 inch baking dish and bake for 10-12 minutes.
- While the crust is baking, prepare the cream cheese filling by beating together softened cream cheese, powdered sugar, vanilla extract, and eggs until smooth.
- Pour the cream cheese mixture over the crust once cooled slightly.
- In another bowl, mix blueberries with cornstarch, lemon juice, and granulated sugar until coated.
- Spread the blueberry mixture over the cream cheese layer.
- Bake for about 35-40 minutes or until the filling is set and the blueberries are bubbly.
- Cool completely in the pan before slicing into squares.
Notes
These bars can be frozen for up to three months. Thaw in the fridge before serving.
Nutrition
- Serving Size: 1 square
- Calories: 220
- Sugar: 12g
- Sodium: 150mg
- Fat: 12g
- Saturated Fat: 7g
- Unsaturated Fat: 3g
- Trans Fat: 0g
- Carbohydrates: 25g
- Fiber: 1g
- Protein: 3g
- Cholesterol: 50mg
Keywords: Blueberry, Cream Cheese, Dessert, Bars, Summer, Baking
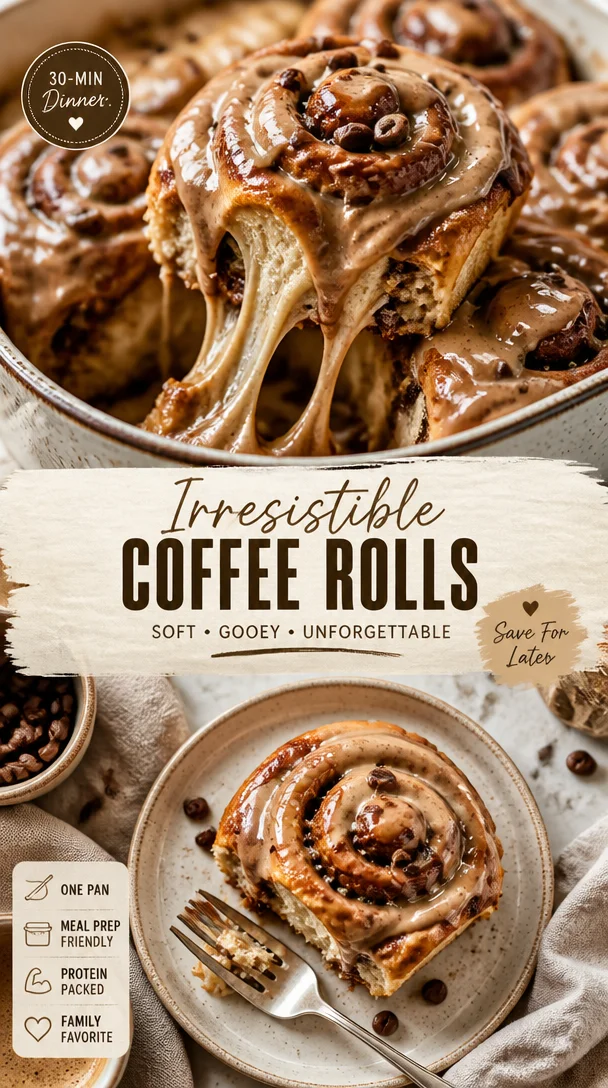
Coffee Rolls
Indulge in Delightful Coffee Rolls: A Cozy Recipe for Your Kitchen
Hello, my fellow food lovers! Today, we’re diving into the warm and inviting world of Coffee Rolls. Imagine soft, pillowy rolls, tantalizingly infused with the essence of coffee, swirled with cinnamon and a rich cream cheese frosting that leaves your taste buds dancing. If you’re anything like me, coffee is more than just a beverage—it’s an experience, a moment of indulgence. And what could be better than incorporating that experience into a beloved baked good? These Coffee Rolls are sure to become a cherished recipe in your kitchen, perfect for brunch gatherings, lazy Sundays, or that midnight snack craving!
Let’s embark on this journey together, shall we?
A Taste of Nostalgia
Growing up, my mornings were filled with the warm aroma of freshly brewed coffee wafting from the kitchen. My mom had a knack for baking, often treating us to her homemade cinnamon rolls, which were delicious but sometimes a bit of a process! One rainy Saturday, I remember watching her hustle in the kitchen with flour dusting her cheeks. She decided to experiment with a new recipe that she had stumbled upon—a coffee-infused twist on her traditional rolls.
As the rolls baked, I could hardly contain my excitement. The sweet smell of cinnamon met the bold scent of coffee, wrapping us in a cozy embrace. When she pulled them out of the oven, golden and fluffy, we couldn’t wait to dig in. Each bite was a warm hug, with a hint of coffee cutting through the sweetness. That moment ignited my passion for combining flavors, and from then on, coffee became a staple in my baking repertoire. Now, I’m thrilled to share this beloved recipe that holds such a special place in my heart!
Ingredients
Before we roll into the recipe, let’s gather our ingredients. Here’s what you’ll need:
-
¼ cup all-purpose flour: This will act as the base for our Tangzhong, a flour-water paste that keeps our rolls soft and moist. If you’re out of all-purpose, you can use bread flour for a slightly denser roll.
-
¾ cup water: Make sure it’s warm but not hot. It will help activate our yeast, making those rolls nice and fluffy.
-
3 ½ cups all-purpose flour: The star of our rolls! Measure this carefully for the best texture. Remember, spoon the flour into your measuring cup instead of scooping straight from the bag to avoid excess flour.
-
⅓ cup granulated sugar: This adds sweetness and helps activate the yeast, giving our rolls structure.
-
2 teaspoon instant yeast: Make sure it’s fresh! Old yeast may not rise well, and that’s crucial for fluffy rolls.
-
¾ teaspoon fine sea salt: This enhances all the flavors in our rolls and balances the sweetness.
-
½ cup whole milk (slightly warmed): Milk adds richness to our dough. If you’re dairy-free, almond milk or oat milk can do the trick!
-
1 tsp instant coffee granules: This is where the magic begins! You can swap it with espresso powder for a richer coffee flavor.
-
1 large egg (room temperature): This helps bind our dough and adds to the richness.
-
1/2 tsp vanilla extract: A dash of vanilla elevates all the flavors.
-
Tangzhong: Don’t skip this! It’s a flour and water mixture (made with the ¼ cup flour and ¾ cup water) that keeps our rolls super soft.
-
4 tablespoon unsalted butter (room temperature): For a rich flavor and softness. It’s important to let it soften at room temperature for easy incorporation.
-
5 tbsp unsalted butter (room temperature): This will be used in our filling for that melty goodness.
-
2/3 cup dark brown sugar (or light brown sugar): Dark brown sugar adds a nice depth of flavor; however, light brown works just fine too!
-
2 tsp ground cinnamon: The quintessential spice in any cinnamon roll; it pairs perfectly with coffee!
-
1 ½ tsp instant coffee granules: More coffee flavor for the filling—yes, please!
-
2 oz cream cheese (softened): This is for our dreamy frosting.
-
4 tbsp unsalted butter (softened): We’ll mix this with the cream cheese for a delightful frosting.
-
1 cup powdered sugar: To sweeten our frosting to perfection.
-
4 tbsp heavy cream: A drizzle in the frosting makes it luxuriously smooth.
-
¾ tsp instant coffee granules: Just a touch more for extra coffee kick in the frosting!
Step-by-Step Instructions
Now that we have our ingredients ready, let’s get rolling! Follow these steps for delicious results:
-
Prepare the Tangzhong: In a small saucepan, combine the ¼ cup all-purpose flour and ¾ cup water. Cook over medium heat, stirring constantly until the mixture thickens and is paste-like. It should resemble a smooth batter. Set it aside to cool.
-
Mix the Dough: In a large mixing bowl, combine 3 ½ cups of flour, granulated sugar, instant yeast, and sea salt. Whisk together—this is where you harness good vibes and positive energy to infuse into your dough!
-
Combine Wet Ingredients: In another bowl, mix together the slightly warmed milk, instant coffee granules, egg, and vanilla extract. Whisk until well combined. Then, mix in the cooled Tangzhong.
-
Bring It All Together: Gradually add the wet ingredients into the dry ingredients. Use a wooden spoon to combine until a dough starts to form. It may be sticky—don’t fret!
-
Knead: Once you have a cohesive dough, it’s time to knead! Turn the dough onto a floured surface and knead for about 8-10 minutes, or until smooth and elastic. A little shoulder workout never hurt anyone, right? If the dough is too sticky, feel free to sprinkle on a bit of flour as needed.
-
Let It Rise: Form a ball and place it in a lightly greased bowl. Cover it with a clean kitchen towel and let it rise in a warm place for about 1-2 hours or until doubled in size. This is the perfect time to sip on your coffee!
-
Prepare the Filling: In a separate bowl, mix together the softened butter, dark brown sugar, ground cinnamon, and instant coffee granules until combined. It should be a spreadable paste—feel free to use a spatula or your hands!
-
Roll Out the Dough: After your dough has risen, punch it down gently to release the air. On a floured surface, roll it out into a large rectangle, about 1/4 inch thick.
-
Spread the Filling: Evenly spread the filling across the dough rectangle. Make sure to leave a small border around the edges to prevent spillage!
-
Roll It Up: Starting from one of the long sides, roll the dough tightly into a log. Pinch the seam to seal it. Use a sharp knife or a serrated cutter to slice the log into 12 equal rolls.
-
Second Rise: Arrange your rolls in a greased baking dish, spaced out. Cover them again with the towel and let them rise for another 30-45 minutes, aligning with your coffee refill.
-
Bake: Preheat your oven to 350°F (175°C). Once your rolls have risen, bake them in the preheated oven for about 25-30 minutes, or until golden brown.
-
Make the Frosting: While your rolls are baking, whip up the cream cheese frosting. Beat the softened cream cheese and unsalted butter together until smooth. Gradually mix in the powdered sugar, heavy cream, and instant coffee granules until creamy and spreadable.
-
Frost and Enjoy: Once your rolls come out of the oven, let them cool for a few minutes before generously spreading the cream cheese frosting over the top. The frosting will melt into those beautiful, fluffy rolls—heaven in every bite!
Serving Suggestions
For a delightful presentation, serve your Coffee Rolls warm in a beautiful platter. Drizzle with extra frosting, if desired, and garnish with a sprinkle of cinnamon or finely chopped nuts for added texture. Pair these delightful rolls with freshly brewed coffee or chai tea to elevate the experience. Trust me, your brunch guests will be raving about them!
Recipe Variations
-
Nutty Coffee Rolls: Add chopped walnuts or pecans to the filling for a crunchy texture.
-
Choco-Coffee Bliss: Fold some chocolate chips into the filling for a decadent treat.
-
Dairy-Free Option: Swap whole milk for a dairy-free alternative and use vegan butter for the filling and frosting!
-
Spiced Twist: Add cardamom or nutmeg to the cinnamon filling for a warm, spiced flavor.
-
Fruit-Filled Rolls: Mix in apple or pear slices into the filling for a fruity undertone that pairs beautifully with coffee.
Chef’s Notes
You know, the beauty of baking is that it’s an adventure—sometimes things don’t go as planned, and that’s okay! I once forgot to add the sugar to my coffee rolls, and instead of a sweet treat, I ended up with… well, a lesson learned and quite a bitter batch! But that’s what makes the kitchen so special—the discoveries and the memories that are created along the way.
Also, I love to share these rolls with friends—it feels like a warm hug shared amongst laughter. This recipe has evolved over the years, adapting to seasonal flavors and personal touches. I can’t wait to see how you make it your own!
FAQs and Troubleshooting
1. Why aren’t my rolls rising?
Make sure your yeast is fresh! You can test it by mixing it with warm water and sugar; it should bubble up within a few minutes. If the dough is too cold, it may take longer to rise—find a quiet, warm place for optimum rising.
2. Can I make the dough ahead of time?
Absolutely! You can prepare the dough, let it rise, and then shape it into rolls. Place the unbaked rolls in the refrigerator overnight. Allow them to come to room temperature and rise again before baking.
3. How do I store the rolls?
These rolls are best enjoyed fresh but can be stored in an airtight container at room temperature for up to three days. You can also freeze them! Just thaw completely and reheat before serving.
4. My rolls turned out dense. What went wrong?
This could be due to too much flour or not kneading enough! Be sure to measure your flour accurately, and don’t skip the kneading process—it develops the gluten structure that lifts your rolls.
Nutritional Info (Optional)
While I like to indulge in these delightful rolls, I always rebel against the scales! For those tracking, an average coffee roll (without frosting) is roughly 250-300 calories. Remember, these are meant for joyous occasions, so savor each bite!
Conclusion
And there you have it—a warm journey into the world of Coffee Rolls! I hope you feel inspired to tie on your apron and whip up a batch of these delightful treats. They are more than just a dessert; they’re a way to create cherished memories around the table, just like the ones I shared with my family.
Grab your loved ones, pour some coffee, and let’s make some beautiful moments. Happy baking, friends!
PrintDelightful Coffee Rolls

Indulge in soft, pillowy Coffee Rolls infused with coffee, swirled with cinnamon, and topped with rich cream cheese frosting.
- Prep Time: 15 minutes
- Cook Time: 30 minutes
- Total Time: 45 minutes
- Yield: 12 servings 1x
- Category: Dessert
- Method: Baking
- Cuisine: American
- Diet: Vegetarian
Ingredients
- ¼ cup all-purpose flour
- ¾ cup warm water
- 3 ½ cups all-purpose flour
- ⅓ cup granulated sugar
- 2 teaspoons instant yeast
- ¾ teaspoon fine sea salt
- ½ cup whole milk (slightly warmed)
- 1 teaspoon instant coffee granules
- 1 large egg (room temperature)
- ½ teaspoon vanilla extract
- 4 tablespoons unsalted butter (room temperature)
- 5 tablespoons unsalted butter (for filling, room temperature)
- 2/3 cup dark brown sugar
- 2 teaspoons ground cinnamon
- 1 ½ teaspoons instant coffee granules (for filling)
- 2 oz cream cheese (softened)
- 4 tablespoons unsalted butter (for frosting, softened)
- 1 cup powdered sugar
- 4 tablespoons heavy cream
- ¾ teaspoon instant coffee granules (for frosting)
Instructions
- Prepare the Tangzhong: In a small saucepan, combine the ¼ cup all-purpose flour and ¾ cup warm water. Cook over medium heat until the mixture thickens. Set aside to cool.
- Mix the Dough: In a large mixing bowl, combine 3 ½ cups of flour, granulated sugar, instant yeast, and sea salt. Whisk together.
- Combine Wet Ingredients: In another bowl, mix together the warmed milk, instant coffee granules, egg, and vanilla extract. Whisk until well combined, then mix in the cooled Tangzhong.
- Bring It All Together: Gradually add the wet ingredients into the dry ingredients. Use a wooden spoon to combine until a dough starts to form.
- Knead: Turn the dough onto a floured surface and knead for about 8-10 minutes until smooth and elastic.
- Let It Rise: Place dough in a greased bowl, cover, and let rise for 1-2 hours until doubled in size.
- Prepare the Filling: Combine softened butter, dark brown sugar, ground cinnamon, and instant coffee granules in a bowl.
- Roll Out the Dough: Punch down the risen dough, roll it out into a rectangle about ¼ inch thick.
- Spread the Filling: Evenly spread the filling on the dough, leaving a border around the edges.
- Roll It Up: Starting from one long side, roll the dough into a log and slice into 12 equal rolls.
- Second Rise: Arrange rolls in a greased baking dish, cover, and let rise for another 30-45 minutes.
- Bake: Preheat oven to 350°F (175°C) and bake rolls for 25-30 minutes until golden brown.
- Make the Frosting: Beat softened cream cheese and unsalted butter together until smooth, then mix in powdered sugar, heavy cream, and instant coffee until creamy.
- Frost and Enjoy: Let the rolls cool slightly, then generously spread cream cheese frosting on top before serving.
Notes
For a delightful presentation, serve warm and garnish with a sprinkle of cinnamon or nuts. Pairs beautifully with coffee or chai tea.
Nutrition
- Serving Size: 1 roll
- Calories: 300
- Sugar: 12g
- Sodium: 250mg
- Fat: 14g
- Saturated Fat: 8g
- Unsaturated Fat: 4g
- Trans Fat: 0g
- Carbohydrates: 38g
- Fiber: 1g
- Protein: 4g
- Cholesterol: 30mg
Keywords: coffee rolls, cinnamon rolls, breakfast pastries, dessert recipes, baking
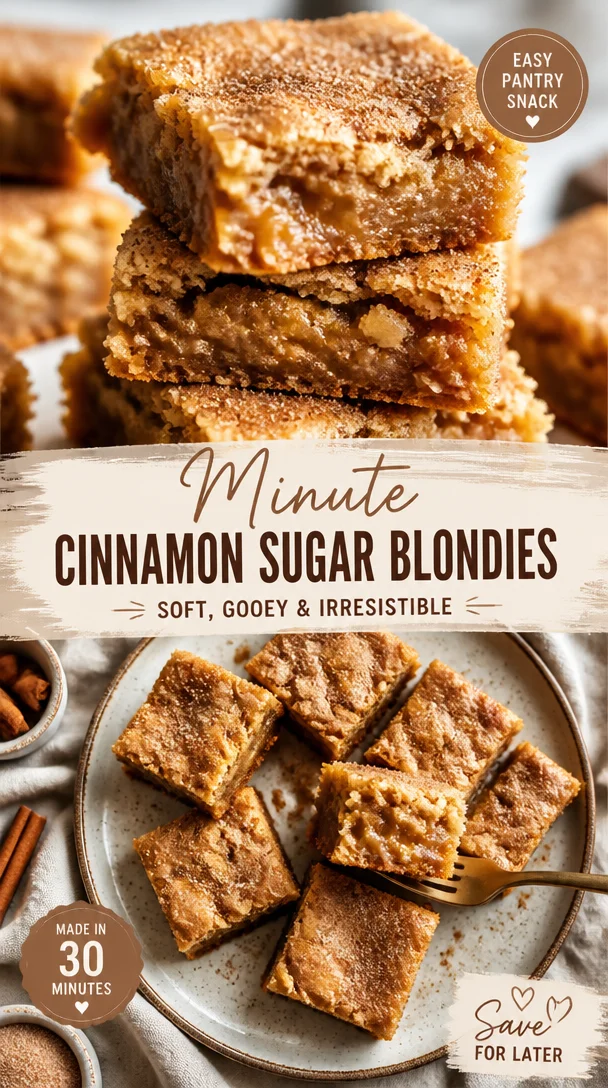
Minute Cinnamon Sugar Blondies (Easy Pantry Snack)
Sweet, Chewy Cinnamon Sugar Blondies: Your New Favorite Treat!
Hello, sweet friends! Welcome back to the warmth of my kitchen! If you’re searching for a dessert that holds a delightful balance of comfort and indulgence, look no further than these Cinnamon Sugar Blondies. They are chewy, loaded with rich, buttery goodness, and topped with a sprinkle of cinnamon sugar to create that perfect finishing touch.
This recipe sings all the right notes for any occasion—be it a cozy night in, a casual gathering with friends, or just a special midweek treat for yourself. Trust me, these blondies are so delicious that you’ll find yourself baking them again and again! So, grab your apron, pour yourself a warm drink, and let’s dive into this delightful treat!
A Sweet Memory
As a little girl, one of my favorite memories was baking with my grandmother on chilly Sunday afternoons. The kitchen would be filled with the comforting aroma of melted butter and sugar as we whipped up her famous desserts. The best days were when we made her legendary blondies. The moment those warm, gooey bars emerged from the oven, we’d sprinkle them with cinnamon sugar—her secret touch—that created a heavenly blend of flavors.
With each bite, I was reminded of her love and the joyful moments we shared. Now, I pass this cherished recipe down to you, with a few of my twists, and hope it brings you as much warmth and happiness as it did for me!
Ingredients
Let’s gather our ingredients! Each one plays a vital role in crafting our perfect blondies. Here’s what you’ll need:
-
1 cup brown sugar: This gives the blondies their rich, caramel-like flavor. You can substitute with light brown sugar for a milder taste or even coconut sugar for a healthier twist.
-
1/2 cup butter, melted: Melted butter creates that sought-after chewy texture. Unsalted butter is best for control over the sweetness, but if you use salted, just omit the extra salt in the recipe.
-
1 large egg: The binding agent! If you’re vegan, you can swap in a flax egg (1 tablespoon ground flaxseed mixed with 2.5 tablespoons water) for a great substitute.
-
1 teaspoon vanilla extract: This adds depth and enhances the sweetness. Pure vanilla extract is always recommended, but imitation can work in a pinch.
-
1 cup all-purpose flour: The base of your blondies. For a gluten-free option, try a 1:1 gluten-free blend.
-
1/2 teaspoon baking powder: This is key for fluffiness. If you’re out, baking soda can work, but use only a quarter teaspoon.
-
1/4 teaspoon salt: Just a touch to enhance all the flavors.
-
1 tablespoon cinnamon sugar (for topping): A glorious finish! Combine cinnamon and granulated sugar to taste; feel free to adjust it for your preference!
Step-by-Step Instructions
Ready to get those sweet smells wafting through the kitchen? Let’s make our Cinnamon Sugar Blondies!
-
Preheat Your Oven: First things first, preheat your oven to 350°F (175°C). This ensures even baking—no half-baked blondies here!
-
Prepare Your Pan: Grease an 8×8-inch baking pan with butter or line it with parchment paper for easy removal. This will help those blondies come out perfectly!
-
Mix the Wet Ingredients: In a mixing bowl, combine your melted butter and brown sugar. Whisk until smooth and creamy—this should take about a minute. The warmth of the melted butter will help dissolve the sugar, leading to a chewy texture.
-
Add the Egg and Vanilla: Next, crack in your egg and pour in the vanilla extract. Give it a good whisk until fully incorporated. Your batter should look shiny and smooth!
-
Combine Dry Ingredients: In a separate bowl, whisk together the flour, baking powder, and salt. This step helps to evenly disperse the baking powder throughout the flour, avoiding any pesky lumps.
-
Incorporate Dry into Wet: Gradually add the dry mixture into the wet ingredients, folding gently until just combined. Avoid overmixing to keep those blondies tender.
-
Spread the Batter: Pour the luscious batter into your prepared baking pan. Use a spatula to evenly spread it out. You’ll notice the rich color and glossy texture—yum!
-
Sprinkle with Cinnamon Sugar: Here’s where the magic happens! Generously sprinkle the cinnamon sugar mixture over the top of your batter. This will create a delightful crust that’s both crunchy and sweet.
-
Bake Away: Place your pan in the preheated oven and bake for 20–25 minutes. Keep a close eye on them, as different ovens can vary in cooking time. They’re done when the edges look golden and the center has set but is still slightly soft to the touch.
-
Cool & Cut: Once out of the oven, let the blondies cool in the pan for about 10 minutes before transferring them to a wire rack. This cooling period helps firm them up for easy slicing. Cut into squares or rectangles, and get ready to enjoy!
Serving Suggestions
When it comes to serving these blondies, the options are as plentiful as the smiles they’ll bring! Plate them with a scoop of vanilla ice cream on the side for a delightful contrast. You can also drizzle a little warm caramel sauce or chocolate ganache over them for an extra layer of indulgence. Trust me, no one will be able to resist!
Recipe Variations
Want to mix things up? Here are a few fun ideas to customize your blondies:
-
Nutty Delight: Add a half-cup of chopped walnuts or pecans to the batter for a delightful crunch.
-
Choco-Lover’s Dream: Fold in semi-sweet chocolate chips or butterscotch chips to create an irresistible sweet sensation.
-
Cranberry Bliss: Toss in a half-cup of dried cranberries for a tart contrast that pairs beautifully with the sweetness.
-
Spiced Up: Add a pinch of nutmeg or allspice to your cinnamon sugar mix for a warm, autumn twist.
-
Caramel Swirl: Drizzle some caramel into the batter before baking for pockets of gooey goodness!
Chef’s Notes
Oh, the stories my kitchen could tell! I can’t help but chuckle thinking about that time I accidentally mistook baking soda for powdered sugar while whipping up a batch of these blondies. Let’s just say they were a little less fluffy than I intended, but the flavor was still spot on!
These blondies have come a long way since my grandmother’s original recipe. Over time, I’ve tinkered and adjusted various elements to create these perfectly chewy treats. It’s amazing how a little bit of experimentation can spark joy in the kitchen!
FAQs and Troubleshooting
Q: Why are my blondies dry?
A: Overbaking is often the culprit! Make sure to watch the timer, and remove them from the oven as soon as they look set but still soft in the center.
Q: How can I store leftovers?
A: Keep your blondies in an airtight container at room temperature for up to 3 days. You can also freeze them (wrapped individually) for up to 2 months. Just thaw at room temperature or pop them in the microwave for a few seconds when you’re ready to enjoy!
Q: Can I double the recipe?
A: Absolutely! Just bake in a 9×13-inch pan and adjust the baking time as needed, checking for doneness as you go.
Q: Can I make these gluten-free?
A: Yes! Use a 1:1 gluten-free flour blend, and the blondies will be just as delicious!
Nutritional Info
While I believe in treating yourself, it’s always nice to know what’s in your food! A typical serving (one blondie) contains approximately:
- Calories: 200
- Fat: 8g
- Carbs: 30g
- Protein: 2g
- Sugar: 15g
(Note: Values may vary based on exact ingredients and portion sizes!)
And there you have it, friends! Your very own Cinnamon Sugar Blondies, ready to spread happiness and bring a bit of sweetness into your life. I can’t wait for you to try this recipe and savor every bite—remember to share your delightful creations with me! Let’s keep the spirit of food and sharing alive, one scrumptious treat and kitchen adventure at a time. Happy baking! 🍪✨
PrintSweet Chewy Cinnamon Sugar Blondies

Delightfully chewy blondies topped with a crunchy cinnamon sugar crust, perfect for any occasion.
- Prep Time: 10 minutes
- Cook Time: 25 minutes
- Total Time: 35 minutes
- Yield: 16 servings 1x
- Category: Dessert
- Method: Baking
- Cuisine: American
- Diet: Vegetarian
Ingredients
- 1 cup brown sugar
- 1/2 cup butter, melted
- 1 large egg
- 1 teaspoon vanilla extract
- 1 cup all-purpose flour
- 1/2 teaspoon baking powder
- 1/4 teaspoon salt
- 1 tablespoon cinnamon sugar (for topping)
Instructions
- Preheat your oven to 350°F (175°C).
- Prepare an 8×8-inch baking pan with butter or parchment paper.
- Mix the melted butter and brown sugar until smooth and creamy.
- Add the egg and vanilla extract and whisk until fully incorporated.
- Combine the flour, baking powder, and salt in a separate bowl.
- Incorporate the dry mixture into the wet ingredients, folding gently.
- Spread the batter into the prepared baking pan evenly.
- Sprinkle the cinnamon sugar over the top of the batter.
- Bake for 20–25 minutes, until golden on the edges.
- Cool in the pan for 10 minutes before transferring to a wire rack and slicing.
Notes
Serve with vanilla ice cream or drizzle with warm caramel sauce for an indulgent treat.
Nutrition
- Serving Size: 1 blondie
- Calories: 200
- Sugar: 15g
- Sodium: 100mg
- Fat: 8g
- Saturated Fat: 5g
- Unsaturated Fat: 3g
- Trans Fat: 0g
- Carbohydrates: 30g
- Fiber: 1g
- Protein: 2g
- Cholesterol: 35mg
Keywords: blondies, dessert, cinnamon sugar, baking, sweet treat

Tall, Creamy New York Cheesecake in 4 Simple Steps
Tall and Creamy New York Cheesecake: A Slice of Heaven
Hello, fellow food lover! Today, I’m inviting you into the wonderful world of cheesecake—specifically, the iconic Tall and Creamy New York Cheesecake. This dessert is more than just a sweet treat; it’s a slice of nostalgia, comfort, and celebration all packed into one creamy delicacy that has a reputation for being the “queen of the desserts.” Whether you’re hosting a gathering, celebrating a birthday, or just treating yourself after a long day, this cheesecake has got your back!
The Magic of Cheesecake
Before we dive into the recipe, let’s take a moment to appreciate what makes cheesecake so special. Have you ever noticed how a single slice can brighten up even the gloomiest of days? For me, cheesecake evokes memories of family gatherings where the dessert table was always the highlight. I can still picture my grandmother carefully releasing her prized cheesecake from the springform pan, her eyes twinkling with joy as we all gathered around—spoons at the ready—for that first bite. It was always a moment to savor.
This Tall and Creamy New York Cheesecake is set to be a showstopper, boasting a rich and creamy texture that sets it apart from other desserts. It’s decadent without being heavy—sure to impress your family and friends. So, let’s roll up our sleeves and create some sweet magic!
Ingredients
Here’s what you’ll need to craft this unforgettable cheesecake:
-
32 ounces cream cheese (4 packages), room temperature
This is the star of the show! Make sure it’s at room temperature for a smooth, creamy consistency. If you need a lighter alternative, try using mascarpone cheese mixed with cream cheese. -
5 large eggs, room temperature
Eggs help the cheesecake achieve its tall, airy texture. If you’re short on eggs, you can replace each egg with 1/4 cup of unsweetened applesauce for a lower-cholesterol option. -
2 cups sour cream, room temperature
Sour cream adds that signature tanginess—essential for balancing the sweetness. You can substitute with Greek yogurt for a similar effect with a protein boost! -
8 tablespoons butter, room temperature
Butter takes the crust to the next level! If you’re looking for a dairy-free option, you can use coconut oil or a vegan butter substitute. -
1 1/2 cups sugar
Sugar sweetens everything perfectly. For a healthier twist, try using coconut sugar or honey (just remember that honey is sweeter, so use a bit less). -
2 tablespoons cornstarch
Cornstarch helps the cheesecake set properly and prevents cracks. If you’re in a pinch, you can swap it with arrowroot powder. -
2 vanilla beans
Nothing beats the aroma and flavor of fresh vanilla beans! If you can’t find them, 1 1/2 teaspoons of pure vanilla extract will do. -
1 teaspoon fresh lemon juice
A touch of lemon juice brightens up the flavors. If you don’t have fresh lemons on hand, bottled juice works but is less vibrant.
Step-by-Step Instructions
Now, let’s dive into the fun part—making this cheesecake! Follow these steps, and you’ll be a cheesecake master in no time.
-
Preheat the Oven
Preheat your oven to 325°F (160°C). A properly preheated oven ensures even baking, which is crucial for our enchanting cheesecake. -
Prep the Pan
Grease a 9-inch springform pan with a bit of butter. Line the bottom with parchment paper for easy release after baking. Trust me—nobody wants to lose a piece of cheesecake to the pan! -
Make the Crust
In a bowl, mix together 2 cups of crushed graham crackers (or your choice of cookies) with 8 tablespoons of melted butter and 1/4 cup of sugar. Press this mixture firmly into the bottom of your springform pan and slightly up the sides. This crust is the crunchy counterpart to the creamy filling! -
Mix the Cream Cheese
In a large mixing bowl, beat the 32 ounces of room-temperature cream cheese with an electric mixer on medium speed until it is smooth and creamy—about 3-4 minutes. Make sure to scrape down the sides to incorporate everything thoroughly. -
Incorporate the Sugar
Gradually add in the 1 1/2 cups of sugar, mixing until well combined. At this point, you can also add in the scraped seeds of your vanilla beans for that rich flavor. -
Add the Eggs
Now, it’s time to beat in the 5 large eggs one at a time, mixing well after each addition. This is key to achieving that light, airy texture! Don’t overmix; just combine until smooth. -
Blend in the Cream and Cornstarch
Gently fold in the 2 cups of sour cream, the 2 tablespoons of cornstarch, and 1 teaspoon of lemon juice until smooth. This mixture should look heavenly and creamy! -
Pour the Filling
Carefully pour the cheesecake batter into the prepared crust, smoothing the top with a spatula. It should look beautiful, and it will be once it’s baked! -
Bake It
Bake in your preheated oven for about 75-90 minutes. You’ll know it’s done when the edges are set, but the center still has a slight jiggle. Remove it from the oven and allow it to cool at room temperature. -
Cool the Cheesecake
Once cooled, cover the cheesecake with plastic wrap and refrigerate it for at least 4 hours, but preferably overnight. Patience pays off with cheesecakes!
Serving Suggestions
When it’s finally time to indulge, plate that glorious cheesecake with grace! Use a sharp knife to cut clean slices, wiping the knife between cuts for neat pieces. Serve each slice with a dollop of whipped cream or a drizzle of raspberry coulis for that extra flair. A sprinkle of fresh berries doesn’t hurt either!
Recipe Variations
Why stop at classic? Here are a few fun twists to take your cheesecake to the next level:
- Chocolate Chip Cheesecake: Mix in 1 cup of chocolate chips to the batter for a delightful treat.
- Fruit-Topped: Add fresh fruit like strawberries or blueberries on top for a refreshing finish.
- Caramel Swirl: Drizzle caramel sauce on top of the batter before baking and gently swirl with a knife.
- Coffee Lovers: Incorporate 2 tablespoons of instant coffee granules for a tasty coffee-flavored cheesecake.
- Lemon Zest: Add the zest of one lemon to the batter for a bright, citrusy zing.
Chef’s Notes
Cheesecake may seem intimidating, but it’s honestly one of the most rewarding desserts to make! I’ve had my fair share of flat, cracked cheesecakes (who hasn’t?), but remember, every great chef falls short sometimes. The key is to learn from those experiences. Over the years, I’ve experimented with different flavors and crusts, but the classic remains my absolute favorite.
Each time I make this cheesecake, it takes me back to my early kitchen days, where I learned that cooking is about joy—enjoying the process and, of course, enjoying delicious food!
FAQs and Troubleshooting
-
Why did my cheesecake crack?
Cracking can happen if the oven temperature is too high or if the cheesecake bakes too rapidly. Avoid opening the oven door during baking to minimize sudden temperature changes. -
How can I store leftover cheesecake?
Cover the cheesecake tightly with plastic wrap and store it in the refrigerator. It should stay fresh for up to a week (if it lasts that long!). -
Can I freeze cheesecake?
Absolutely! Wrap slices individually in plastic wrap, then foil, and store in an airtight container. When ready to enjoy, let it thaw in the refrigerator overnight. -
How do I know when my cheesecake is done?
Look for a slightly jiggly center but firm edges. The center should set as it cools.
Nutritional Info (if applicable)
While rich and creamy desserts aren’t typically low-calorie, knowing what you’re enjoying can help. Each slice has around 450 calories, depending on how many toppings you add. Remember, balance in life (and food) is key!
Conclusion
I hope this Tall and Creamy New York Cheesecake recipe enriches your kitchen adventures just as it has mine. Remember, cooking should be a beautiful experience filled with laughter, creativity, and a sprinkle of love. Gather your ingredients, tie on your apron, and let’s bake something memorable together. Cheers to many delightful moments shared around the table with this stunning cheesecake!
So tell me: What’s your favorite cheesecake memory? I’d love to hear your stories! Happy baking!
PrintTall and Creamy New York Cheesecake

A rich and creamy cheesecake that is a perfect balance of sweetness and tanginess, making it a beloved dessert for any occasion.
- Prep Time: 30 minutes
- Cook Time: 90 minutes
- Total Time: 120 minutes
- Yield: 12 servings 1x
- Category: Dessert
- Method: Baking
- Cuisine: American
- Diet: Vegetarian
Ingredients
- 32 ounces cream cheese, room temperature
- 5 large eggs, room temperature
- 2 cups sour cream, room temperature
- 8 tablespoons butter, room temperature
- 1 1/2 cups sugar
- 2 tablespoons cornstarch
- 2 vanilla beans (or 1 1/2 teaspoons vanilla extract)
- 1 teaspoon fresh lemon juice
- 2 cups crushed graham crackers
- 1/4 cup sugar (for crust)
Instructions
- Preheat the oven to 325°F (160°C).
- Grease a 9-inch springform pan with butter and line the bottom with parchment paper.
- Mix together the crushed graham crackers, melted butter, and 1/4 cup of sugar. Press into the bottom of the springform pan.
- Beat the cream cheese with an electric mixer until smooth and creamy, about 3-4 minutes.
- Add in the sugar gradually and mixed until well combined.
- Incorporate the eggs one at a time, mixing until smooth after each addition.
- Fold in the sour cream, cornstarch, and lemon juice until smooth.
- Pour the cheesecake batter into the prepared crust, smoothing the top.
- Bake for 75-90 minutes, until the edges are set and the center has a slight jiggle.
- Cool the cheesecake at room temperature, then refrigerate for at least 4 hours or overnight before serving.
Notes
For best results, allow the cheesecake to cool completely before refrigerating. Serve with whipped cream or fresh fruit for added flavor.
Nutrition
- Serving Size: 1 slice
- Calories: 450
- Sugar: 30g
- Sodium: 300mg
- Fat: 28g
- Saturated Fat: 17g
- Unsaturated Fat: 9g
- Trans Fat: 0g
- Carbohydrates: 45g
- Fiber: 1g
- Protein: 8g
- Cholesterol: 120mg
Keywords: cheesecake, New York cheesecake, dessert
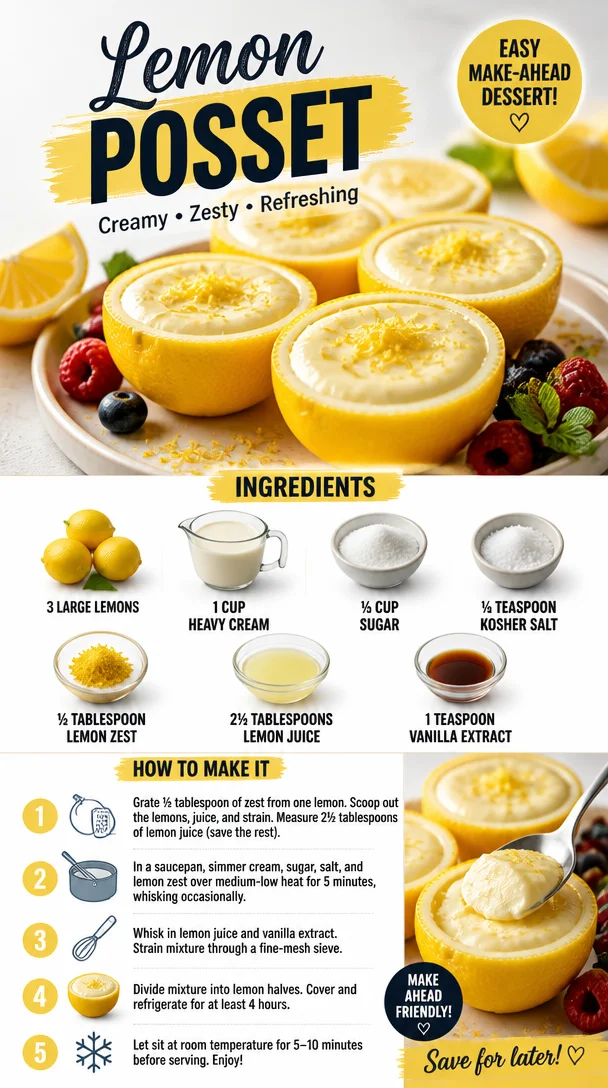
Lemon Posset
Indulge in Elegance: Whip Up a Delightful Lemon Posset
Hello, lovely foodies! Today, I’m thrilled to share one of my absolute favorite treats that embodies simplicity and sophistication: Lemon Posset. This creamy, luscious dessert feels like a warm hug on a plate, and the best part? It’s so easy to make that you’ll wonder why you haven’t been whipping it up all along!
If you’re new to the world of possets, you’re in for a delightful surprise. Imagine velvety cream infused with refreshing lemon zest and juice, all perfectly balanced with a touch of sweetness. Seriously, each bite is like a sunny day in dessert form!
A Slice of Nostalgia: My First Lemon Posset
Let me take you back to a warm summer’s evening. Picture this: I was a young culinary enthusiast, eager to impress my friends with a homemade dessert for our casual gathering. I wanted something that would put smiles on their faces without sending me into a tornado of chaos in the kitchen. That’s when I stumbled upon the wonderful world of lemon posset.
With just a handful of ingredients, I felt like a culinary magician turning basic elements into something truly spectacular. The moment I served it, I watched as everyone took their first spoonful. As they savored the sweet-tart flavors, the room filled with laughter and compliments. I was hooked! That night solidified my love for desserts that were both simple and elegant. Since then, lemon posset has become a staple not only on my table but in my heart as well.
Ingredients You’ll Need
Gather these simple yet essential ingredients to make your lemon posset shine:
- 3 Large Lemons: The star of the show, lemons provide that zesty brightness we adore. Opt for organic if you can, as they tend to have more flavor and less wax on the skin.
- 1 Cup Heavy Cream: This luscious cream is what gives the posset its rich texture. If you must, you can substitute with full-fat coconut milk for a dairy-free version.
- ⅓ Cup Sugar: Sweetness is key! I recommend granulated sugar, but feel free to experiment with honey or agave for a more natural option.
- ¼ Teaspoon Kosher Salt: Just a pinch! It brings out the flavors and balances the sweetness.
- ½ Tablespoon Lemon Zest: Zest is where the lemon’s essential oils shine. Use a microplane for the best results. You can substitute with lime zest for a fun twist!
- 2½ Tablespoons Lemon Juice: Freshly squeezed is always best. Use the juicer to ensure you get every drop!
- 1 Teaspoon Vanilla Extract: This adds a warm undertone to the posset. If you want to keep it more citrusy, you can skip this.
Step-by-Step Instructions
Let’s make this gorgeous Lemon Posset together!
-
Zest and Juice the Lemons: Start by zesting your lemons, then cut them in half and juice them. Pro Tip: Roll the lemons on the countertop before cutting to release more juice!
-
Combine the Cream and Sugar: In a saucepan, combine the heavy cream and sugar over medium heat. Stir gently until the sugar is dissolved. There’s no need to bring it to a boil; just warm it until the sugar is fully incorporated. This step will keep the creamy texture while ensuring the flavors marry beautifully.
-
Add Salt and Zest: Once your cream mixture is warm and sugared, add the kosher salt and lemon zest. Stir to combine and let it simmer for another minute. The zest will infuse your cream with a lovely lemony aroma—it’s heavenly!
-
Incorporate the Lemon Juice: Now, remove the saucepan from heat and stir in the freshly squeezed lemon juice. This is where the magic happens. Watch as the cream thickens slightly; this is the sign of a successful posset!
-
Strain the Mixture: To ensure a silky-smooth consistency, strain the mixture through a fine-mesh sieve into a measuring cup or bowl. This step removes the zest, leaving you with pure, luscious cream.
-
Chill the Posset: Pour the strained posset into your serving cups or bowls. Let them cool to room temperature before refrigerating for at least 4 hours, or until set. Note this is a great make-ahead dessert—wonderful for hosting!
-
Serve and Enjoy: When you’re ready to serve, garnish with a little extra zest, fresh berries, or whipped cream. Delightful!
Serving Suggestions
For presentation, consider serving your posset in delicate glass cups to showcase its creamy texture and zesty hue. A sprinkle of lemon zest or a handful of fresh berries on top not only adds color but also a burst of freshness that complements the dish beautifully.
Recipe Variations
Feeling inspired to shake things up? Here are a few fun variations to try:
- Berry Twists: Add a fruit puree (like raspberry or blueberry) at the bottom of your cups for a delightful layer of flavor.
- Herb Infusion: Infuse your heavy cream with a sprig of rosemary or mint while warming it for an aromatic twist.
- Lime Posset: Swap out the lemons for limes for a refreshing and tropical take.
- Chocolate Drizzle: For a decadent treat, drizzle melted dark chocolate over the top before serving.
- Spiced Citrus: Add a pinch of ground cardamom or ginger when warming the cream for a warm, spiced flavor.
Chef’s Notes
This lemon posset recipe has been with me through thick and thin in my culinary journey! Over the years, I’ve perfected my technique and learned the importance of patience while letting it chill. I still giggle at the time I forgot to strain the mixture, resulting in a zestier dessert than intended—my friends loved it, but I learned my lesson! Long story short? Sometimes a little unexpected twist can make food all the more memorable.
FAQs and Troubleshooting
-
Why didn’t my posset set? If your posset didn’t set, it may be due to insufficient chilling time. It needs to cool completely in the fridge. Also, ensure you used enough fat in your cream—heavy cream is essential for that firm consistency.
-
Can I use low-fat cream? I highly recommend sticking with heavy cream for the best texture and flavor. Low-fat alternatives can end up too runny.
-
How long can I store leftovers? Your lemon posset will keep in the fridge for up to 3 days. Just cover it with plastic wrap to keep it fresh!
-
Can I double or halve the recipe? Absolutely! You can adjust the ingredients as desired. Just make sure to maintain the same ratios for the best results!
Nutritional Info
While I always recommend indulging in treats with mindfulness, here’s a rough estimate per serving of lemon posset:
- Calories: 220
- Total Fat: 21g
- Saturated Fat: 13g
- Sugar: 10g
- Protein: 1g
Whether you savor it alone or share it with loved ones, this lemon posset is a testament to effortless elegance in the kitchen. Remember, cooking is not just about the food but the stories we create around it. So tie on that apron, gather those ingredients, and let’s whip up something beautiful together! Enjoy every delicious bite, my friends!
PrintLemon Posset
A creamy and luscious dessert infused with refreshing lemon zest and juice, simple to make and delightfully elegant.
- Prep Time: 15 minutes
- Cook Time: 10 minutes
- Total Time: 240 minutes
- Yield: 4 servings 1x
- Category: Dessert
- Method: Chilling
- Cuisine: French
- Diet: Vegetarian
Ingredients
- 3 Large Lemons
- 1 Cup Heavy Cream
- ⅓ Cup Sugar
- ¼ Teaspoon Kosher Salt
- ½ Tablespoon Lemon Zest
- 2½ Tablespoons Lemon Juice
- 1 Teaspoon Vanilla Extract
Instructions
- Zest and juice the lemons.
- Combine the heavy cream and sugar in a saucepan over medium heat.
- Add salt and zest to the warm cream mixture.
- Incorporate the lemon juice after removing from heat.
- Strain the mixture through a fine-mesh sieve.
- Chill the posset in serving cups for at least 4 hours.
- Serve with garnish of lemon zest or berries.
Notes
For variations, add fruit purees, herbs, or chocolate drizzles. This dessert can be made ahead of time.
Nutrition
- Serving Size: 1 serving
- Calories: 220
- Sugar: 10g
- Sodium: 50mg
- Fat: 21g
- Saturated Fat: 13g
- Unsaturated Fat: 5g
- Trans Fat: 0g
- Carbohydrates: 24g
- Fiber: 0g
- Protein: 1g
- Cholesterol: 80mg
Keywords: lemon posset, dessert, easy recipe, creamy dessert, summer dessert