Indulge in No-Bake Cookie Dough Bars: A Delicious Adventure in Your Kitchen
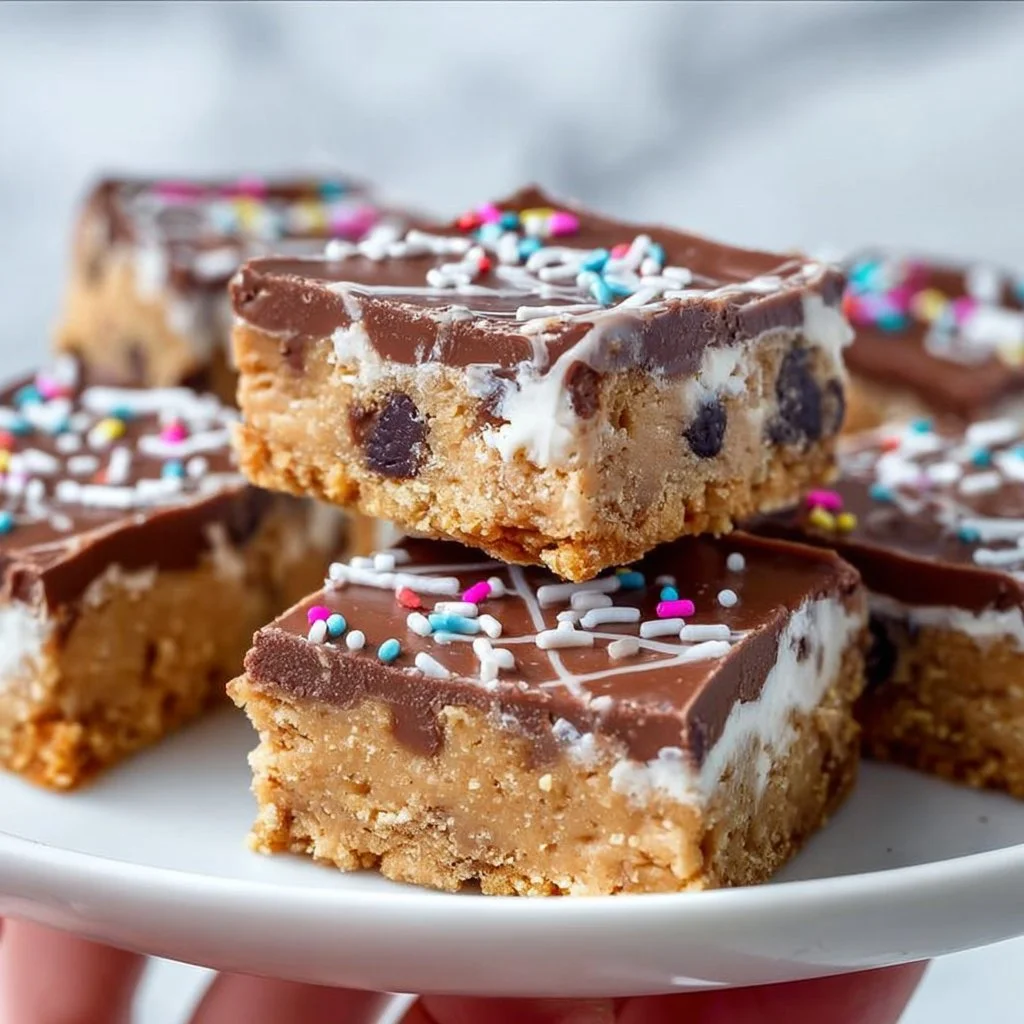
Hey there, fellow food lovers! If you’re anything like me, you’ve had that moment where you find yourself scrolling through endless recipes, craving something sweet, yet wanting it to be easy and fuss-free. Well, today is your lucky day! I’m excited to share with you my all-time favorite recipe for No-Bake Cookie Dough Bars. Picture this: bite-sized morsels of cookie dough goodness that you can whip up in minutes—no oven required. Perfect for a late-night snack, an impromptu gathering, or simply to satisfy those chocolate cravings (which we all know can be quite insatiable).
These bars embody what I love about cooking: they’re simple yet indulgent, and they’re a fun way to create a treat that feels homemade without putting yourself through the wringer in the kitchen. With just a handful of wholesome ingredients, you’ll be able to dig into a dessert that’s creamy, sweet, and oh-so-satisfying. So, tie on your apron and let’s get started on this sweet adventure!
Personal Story
The inspiration behind these No-Bake Cookie Dough Bars comes from my childhood. I remember spending weekends in the kitchen with my grandmother, who had an undeniable talent for whipping up desserts that felt like a warm hug. One afternoon, she introduced me to the joys of cookie dough—sneaking spoonfuls from the mixing bowl while she baked classic chocolate chip cookies. It was pure magic! I can still hear her laughter and the clattering of pots and pans as we made joyful messes together.
Fast forward to now, and I’ve taken that nostalgic memory and put a modern twist on it. These bars remind me of those carefree days, but they also align with my passion for creating approachable, elegant dishes. Whether you’re hosting a casual get-together or enjoying a cozy night in, these No-Bake Cookie Dough Bars bring a delightful taste of nostalgia into the present.
Ingredients
Here’s what you need to create these scrumptious bars:
-
1 cup almond flour
A versatile and gluten-free option that provides a lovely nutty flavor. If you need a substitute, you can use oat flour or all-purpose flour, but keep in mind that the texture may slightly change. -
1/2 cup maple syrup
This natural sweetener offers a rich flavor that balances perfectly with the other ingredients. You can swap it with agave nectar or honey if you prefer, but ensure you’re okay with the flavor variations. -
1/2 cup peanut butter or almond butter
This is where the creaminess comes from! I love the taste of peanut butter, but almond butter will give you a lighter flavor. For a nut-free option, sunflower seed butter works beautifully too. -
1/2 cup dark chocolate chips
Adds that heavenly burst of sweetness and richness! If you’re looking for a dairy-free version, make sure to use vegan chocolate chips. -
1 teaspoon vanilla extract
This ingredient elevates the overall flavor and adds a warm, aromatic essence. You can skip it if you’re in a pinch or substitute with almond extract for a different twist. -
Pinch of salt
A little salt helps balance the sweetness of the bars. Trust me; it makes a world of difference! If you’re avoiding sodium, you can omit it, but I wouldn’t recommend it.
Step-by-Step Instructions
Step 1: Gather Your Ingredients
First things first—before diving in, let’s make sure we have all these beautiful ingredients at hand! Set your workspace with everything ready so you can whip these bars up like a pro.
Step 2: Mix the Base
In a mixing bowl, combine the almond flour and salt. Make sure there are no clumps! The smoother the mixture, the better your bars will be. Add in the peanut butter and mix until you have a thick, paste-like consistency. This is where your fork or spatula becomes your best friend—don’t be shy!
Step 3: Sweeten the Mixture
Now it’s time to incorporate the maple syrup and vanilla extract. Pour them in and mix everything together until you achieve a well-combined dough. Remember, don’t rush this part; letting your ingredients really blend together makes all the difference!
Step 4: Fold in the Chocolate Chips
Once mixed, gently fold in the dark chocolate chips. Use your spatula to ensure an even distribution throughout your dough. This is where the indulgent magic happens—feel free to steal a few chocolate chips for yourself, I promise I won’t tell!
Step 5: Press the Dough into a Pan
Now, choose a square baking dish (about 8×8 inches works great) and line it with parchment paper for easy removal later. Pour your dough mixture into the dish and press it down firmly using your palms or a spatula. This step is essential, as it ensures your bars have a nice structure once they set.
Step 6: Chill
Pop your pan into the refrigerator and let it chill for at least an hour. This waiting can feel like the toughest part, but it’s essential for the bars to firm up and become sliceable.
Step 7: Slice and Serve
Once chilled, remove the bars from the fridge and lift them out using the parchment paper. Cut them into squares or bars, depending on your preference.
Step 8: Enjoy!
Now, it’s time to indulge! Serve these bars at room temperature, or even chilled for a refreshing twist.
Serving Suggestions
Place the bars on a lovely platter and sprinkle with a touch of sea salt to enhance their beauty and flavors. Pair with a dollop of whipped cream or a scoop of vanilla ice cream if you’re feeling extra indulgent. They also make for a fabulous addition to a charcuterie board!
Recipe Variations
- Nut-Free Delight: Replace peanut or almond butter with sunflower seed butter for a nut-free version.
- Protein Punch: Add a scoop of your favorite protein powder for an added health boost.
- Coconut Cream: Incorporate shredded coconut into the dough for a tropical twist.
- Spicy Kick: Add a tiny pinch of cayenne pepper for a surprising, spicy kick.
- Fruit Fusion: Mix in chopped dried fruits like cranberries or apricots for a chewy texture.
Chef’s Notes
I can’t tell you how many times I’ve made these bars with different flavors, simply because I love experimenting! One time, in the middle of summer, I added a handful of crushed graham crackers for a s’mores-inspired treat—let’s just say it was a hit! Remember, this recipe is your playground. Don’t hesitate to make it your own!
FAQs and Troubleshooting
Q: Why are my bars too crumbly?
A: If your bars are falling apart, they might need just a bit more moisture. Try adding a little more maple syrup or nut butter until the mixture sticks together better.
Q: Can I use a different sweetener?
A: Absolutely! You can use honey, agave, or even a sugar alternative like stevia or erythritol, keeping in mind that they may alter the final taste slightly.
Q: How should I store the bars?
A: Store these in an airtight container in the fridge for about a week or freeze them for longer-lasting treats. Just make sure to separate layers with parchment paper to keep them from sticking!
Q: Can I bake these bars instead of chilling them?
A: Though the magic of these bars lies in their no-bake nature, you could experiment with baking in a low oven (around 350°F for 10-15 minutes) for a slightly different texture. Keep an eye on them to prevent overcooking!
Nutritional Info
(Optional and can vary based on specific brands and ingredients used. A rough estimate per bar if cut into 12 servings)
- Calories: 130
- Protein: 4g
- Fat: 8g
- Carbohydrates: 12g
- Fiber: 2g
So, there you have it! Your ultimate guide to making No-Bake Cookie Dough Bars! With a dash of nostalgia and a sprinkle of creativity, I hope this recipe finds a special place in your kitchen. Remember, cooking should be a joyful experience—embrace the process, share the love, and most importantly, enjoy every sweet bite! Happy baking!
PrintNo-Bake Cookie Dough Bars
Indulge in these delicious No-Bake Cookie Dough Bars, a perfect treat that embodies simplicity and nostalgia.
- Prep Time: 15 minutes
- Cook Time: 0 minutes
- Total Time: 75 minutes
- Yield: 12 servings 1x
- Category: Dessert
- Method: No-Bake
- Cuisine: American
- Diet: Vegetarian
Ingredients
- 1 cup almond flour
- 1/2 cup maple syrup
- 1/2 cup peanut butter or almond butter
- 1/2 cup dark chocolate chips
- 1 teaspoon vanilla extract
- Pinch of salt
Instructions
- Gather Your Ingredients
- Mix the Base
- Sweeten the Mixture
- Fold in the Chocolate Chips
- Press the Dough into a Pan
- Chill
- Slice and Serve
- Enjoy!
Notes
For a nut-free version, use sunflower seed butter instead. Experiment with different flavors like coconut, protein powder, or dried fruits.
Nutrition
- Serving Size: 1 bar
- Calories: 130
- Sugar: 7g
- Sodium: 50mg
- Fat: 8g
- Saturated Fat: 1.5g
- Unsaturated Fat: 6g
- Trans Fat: 0g
- Carbohydrates: 12g
- Fiber: 2g
- Protein: 4g
- Cholesterol: 0mg
Keywords: no-bake, dessert, cookie dough, easy recipe, quick treat