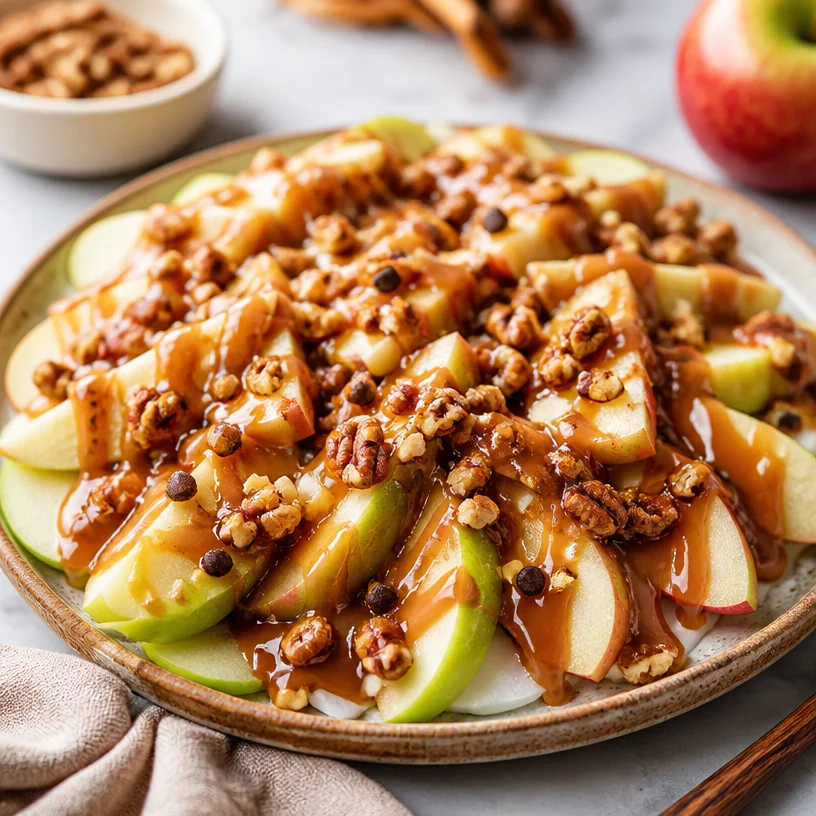
Minute Caramel Apple Nachos Recipe (Fall Treat)
Indulge in Delight: Caramel Apple Nachos
Welcome, friends! Today, we’re diving into a dish that embodies both comfort and decadence, perfect for gatherings, movie nights, or even just a cozy evening at home. Let’s talk about Caramel Apple Nachos! This sweet treat is a delightful twist on the traditional nachos we know and love but with a sweet, fruity flair that will leave your taste buds dancing. Imagine crunchy apple slices drizzled with warm caramel, topped with a sprinkle of nuts, and perhaps a dash of chocolate—need I say more?
My journey into crafting Caramel Apple Nachos started from a simple, nostalgic memory from my childhood. Every fall, my family and I would visit a local orchard, our arms loaded with apples, and our cheeks rosy from the crisp air. One memorable afternoon, we stumbled upon a small stand offering caramel-dipped apples, which became an instant favorite of mine. I can still hear the laughter and excitement as we tore into those sticky, gooey treats! Fast forward to today, and I’ve transformed that cherished experience into a satisfying dessert that’s as beautiful as it is delicious.
So, gather your ingredients, tie on your apron, and let’s make some culinary magic happen!
Ingredients
-
Apples
Crisp, tart apples like Granny Smith are ideal, but feel free to use any variety you love. Honeycrisp, Fuji, or Gala apples are great sweet options. If you want a lower-carb alternative, you can try slicing up some pears! -
Caramel Sauce
You can opt for store-bought caramel for convenience, but making your own is super easy too! Just melt some sugar and cream, and you’ll have a luscious, homemade drizzle. For those who prefer healthier options, you can substitute with almond butter or date syrup. -
Nuts
Chopped pecans, walnuts, or almonds add a wonderful crunch. Use whatever you have on hand! To make it nut-free, you can sprinkle on some seeds like pumpkin or sunflower seeds instead. -
Chocolate Drizzle (optional)
Because who doesn’t love a chocolatey touch? You can melt chocolate chips or use a store-bought chocolate syrup. Dark chocolate offers a rich flavor contrast, whereas white chocolate adds a creamy sweetness. -
Sea Salt
Just a pinch enhances all the flavors and balances the sweetness beautifully. If you’re feeling adventurous, consider flavored salt like smoked or rosemary salt!
Step-by-Step Instructions
Step 1: Preparing the Apples
Start by washing your apples thoroughly. Give them a gentle rub to remove any wax or residues. Use a sharp knife to slice them into thin wedges—about 1/4 inch thick works wonderfully. Make sure to remove the core as you slice. Honestly, I love leaving the skins on for color and texture, but you can peel them if you prefer. Remember, these nachos are all about that crunch!
Step 2: Melting the Caramel
If you’re using store-bought caramel, simply warm it up in the microwave for about 30 seconds, stirring halfway through. If you’re making it from scratch, add 1 cup of sugar to a saucepan over medium heat. Stir constantly until it melts and turns a golden brown—just be careful not to burn it! Then, stir in 1/2 cup of heavy cream and whisk until smooth. Voila, you have homemade caramel!
Step 3: Arranging the Apple Slices
On a large platter or individual plates, start arranging your apple slices in a circular pattern, overlapping slightly—get creative with it! Create a visually appealing display; this is where the fun begins. Your guests will be itching to dig in when they see this masterpiece!
Step 4: Drizzling the Caramel
Grab that warm caramel sauce and drizzle generously over the apple slices. Use a spoon or a squeeze bottle for precision. And don’t hold back; let that caramel cascade down like a sweet waterfall!
Step 5: Adding the Crunch
Now for the nuts! Sprinkle your choice of chopped nuts over the sticky caramel. The crunch is a game-changer—each bite will be a delightful contrast to the smooth caramel and crisp apples.
Step 6: Final Touches
If you’re feeling ambitious, add a chocolate drizzle for that extra flair. Just make sure it’s melted and warm for that perfect flow. Finish with a sprinkle of sea salt for that gourmet touch. It’s that contrast of sweet and salty that truly elevates these nachos!
Serving Suggestions
When it comes to serving these Caramel Apple Nachos, presentation is key! For a more casual gathering, serve them directly on a large board, inviting friends to dive in. You can add a few extra apple slices and a small bowl of caramel on the side for dipping. Alternatively, create individual servings in small bowls for a more polished look—this way, every guest has their little piece of paradise. Just grab a fork and enjoy!
Recipe Variations
Feeling adventurous? Here are some fun twists to keep every batch exciting:
- Nut-Free Delight: Swap nuts for crumbly graham crackers or granola for a crunchy topping.
- Dried Fruits: Add a handful of raisins or dried cranberries for an unexpected sweet burst.
- Spicy Kick: Drizzle with a touch of chili oil or cayenne pepper for a sweet and spicy combo.
- Vegan Version: Use dairy-free caramel sauce and top with coconut flakes for a tropical twist!
- Flavor Infusions: Mix in some cinnamon or pumpkin spice into the caramel for a warm, cozy flavor.
Chef’s Notes
Every time I make Caramel Apple Nachos, I think back to those orchard visits. It’s funny how a simple dish can encapsulate so many memories, isn’t it? Over the years, I’ve played with textures and flavors, incorporating things like pomegranate seeds or hints of citrus zest. It’s rewarding to see how something so creative can continue to evolve. Who would’ve thought nachos could be so magical?
FAQs and Troubleshooting
1. My caramel sauce turned out grainy. What happened?
This usually happens when the sugar crystallizes. Try to ensure you’re constantly stirring as it melts and keep the heat consistent. If it does crystallize, don’t worry—just add a bit more cream and keep stirring over low heat until smooth.
2. Can I make this ahead of time?
While it’s best fresh, you can prep the apples in advance. Just toss them in a bit of lemon juice to prevent browning. Keep everything else separate and assemble just before serving to maintain that crispy texture.
3. What can I use if I don’t have apples?
Pears or bananas are excellent substitutes! Just keep in mind that bananas may brown faster, so prepare them right before serving.
4. Can I make a healthier version?
Absolutely! Opt for fresh fruit, a drizzle of honey, or yogurt instead of caramel, and skip the nuts if you’re avoiding added fats.
Nutritional Info
Nutritional values will vary depending on the specific ingredients you use, but generally, each serving of Caramel Apple Nachos is rich in fiber thanks to the apples and can be adjusted for sugar and fat levels depending on your toppings.
So there you have it—Caramel Apple Nachos, a splendid treat that brings a spark of joy to any gathering. Whether you’re recreating old memories or crafting new ones, this dish is the perfect centerpiece for any occasion. So go ahead, gather your friends, and let the deliciousness unfold! Happy cooking!
PrintCaramel Apple Nachos
Indulge in a delicious twist on traditional nachos with crunchy apple slices drizzled with warm caramel and topped with nuts and chocolate.
- Prep Time: 15 minutes
- Cook Time: 5 minutes
- Total Time: 20 minutes
- Yield: 4 servings 1x
- Category: Dessert
- Method: No Cooking
- Cuisine: American
- Diet: Vegetarian
Ingredients
- 3 Crisp tart apples (Granny Smith, Honeycrisp, Fuji, Gala)
- 1 cup Caramel sauce (store-bought or homemade)
- 1/2 cup Chopped nuts (pecans, walnuts, almonds, or seeds for nut-free option)
- 1/4 cup Chocolate drizzle (optional)
- Pinch of Sea salt
Instructions
- Prepare the apples by washing and slicing into thin wedges.
- Heat the caramel sauce in the microwave for about 30 seconds, or prepare homemade caramel by melting sugar and cream together.
- Arrange the apple slices on a large platter in a circular pattern.
- Drizzle the warm caramel sauce generously over the apple slices.
- Sprinkle the chopped nuts on top for added crunch.
- Optionally, drizzle melted chocolate over the nachos and finish with a sprinkle of sea salt.
Notes
For a nut-free option, substitute nuts with graham crackers or granola. Prepare apples with lemon juice to prevent browning if made ahead.
Nutrition
- Serving Size: 1 serving
- Calories: 350
- Sugar: 25g
- Sodium: 150mg
- Fat: 15g
- Saturated Fat: 5g
- Unsaturated Fat: 8g
- Trans Fat: 0g
- Carbohydrates: 55g
- Fiber: 5g
- Protein: 3g
- Cholesterol: 10mg
Keywords: caramel apple nachos, dessert, sweet treats, fall recipe, party food
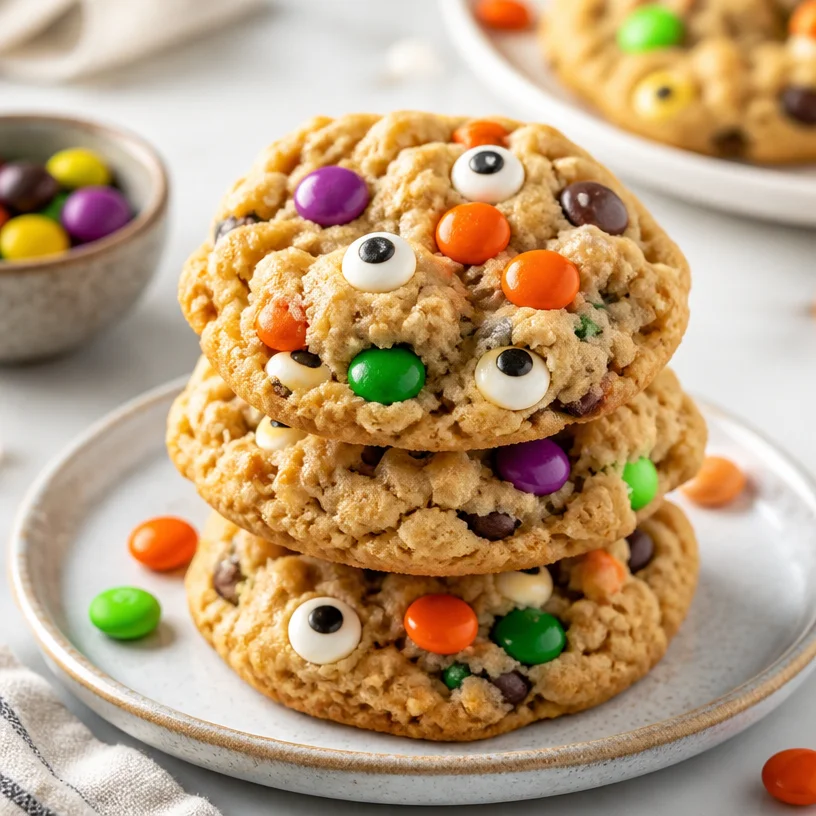
Monster Cookies
Monster Cookies: A Whimsical Treat for Every Occasion!
Hello, dear food lovers! Today, we’re diving into the delightful world of Monster Cookies — a whimsical treat that’s not just for Halloween, but perfect for any occasion where smiles and sweet cravings collide. Imagine cookies loaded with oats, chocolate, and, of course, candy eyes peering at you from the platter. Isn’t that just irresistible? Whether you’re baking with kids, celebrating a birthday, or just wanting to push the gray days away, these colorful delights have your back. Grab your apron, and let’s dive into the art of cookie-making!
My Monster Cookie Memory
Let’s take a little stroll down memory lane, shall we? I can still remember the first time I baked Monster Cookies. It was a rainy Saturday, and my younger cousin was over for a sleepover. Armed with a family-sized box of oats and a few bags of colorful candies, we decided to create something magnificent. The best part? We got carried away with the candy eyes! A kitchen disaster turned into a full-fledged monster celebration as we emerged with monstrous creations adorned with googly eyes staring back from every plate. These cookies were not only delicious; they were an expression of our childlike energy, creativity, and, of course, giggles. Since that day, Monster Cookies have held a special spot in my heart, and now, I want to share that joy with you!
Ingredients
Before we get to the fun part of mixing and baking, let’s gather our ingredients. Here’s what you’ll need to whip up a batch of these delightful Monster Cookies:
-
1 cup of unsalted butter, softened: This gives the cookies a rich flavor. If you’re vegan, you can substitute it with coconut oil or a vegan butter.
-
1 cup of brown sugar: For that deep, caramel-like sweetness. If you don’t have brown sugar, you can replace it with white sugar and a splash of molasses.
-
1/2 cup of granulated sugar: To balance the richness. This sugar can be replaced with coconut sugar for a more natural option.
-
2 large eggs: They bind the ingredients together and add moisture. You can substitute each egg with a tablespoon of ground flaxseed mixed with three tablespoons of water for a vegan version.
-
1 teaspoon of vanilla extract: This adds depth to the flavor. Pure vanilla extract is ideal, but imitation vanilla works too in a pinch.
-
2 cups of all-purpose flour: The backbone of our cookies. You could swap it out for a gluten-free flour blend if you’re catering to gluten sensitivities.
-
1 teaspoon of baking soda: This helps the cookies rise and ensures a chewy texture. No substitutes needed for this one!
-
1/2 teaspoon of salt: Enhances the overall flavor. If you’re watching your sodium intake, consider using sea salt sparingly.
-
2 cups of old-fashioned oats: Chewy and hearty, oats are the star! Instant oats can work, but they won’t give the same texture.
-
1 cup of chocolate chips: Feel free to use dark, milk, or white chocolate! For a fun twist, try adding butterscotch or peanut butter chips.
-
1 cup of candy eyes: These are essential for the monster effect! If you can’t find candy eyes, just chop up some colorful candies.
Step-by-Step Instructions
Now that we’ve got all our ingredients prepped and ready to go, it’s time to turn these ingredients into mouthwatering Monster Cookies! Ready? Let’s bake!
-
Preheat the Oven: Preheat your oven to 350°F (175°C). This ensures that your cookies bake evenly. While waiting, enjoy the anticipation of that warm, sweet aroma soon to waft through your kitchen!
-
Cream the Butter and Sugars: In a large mixing bowl, add your softened butter, brown sugar, and granulated sugar. Using a hand mixer or stand mixer, cream them together until the mixture is light and fluffy. This step introduces air into the batter, making your cookies soft and chewy. Don’t skimp on this!
-
Add Eggs and Vanilla: Next, crack the eggs into the bowl and pour in the vanilla extract. Mix until combined. The mixture should look smooth and silky. If you’re using flax eggs, blend them separately before adding to the mixture to ensure even mixing.
-
Combine Dry Ingredients: In another bowl, whisk together the flour, baking soda, and salt. This ensures even distribution of the baking soda and salt throughout the dough. Gradually add this dry mixture to your wet ingredients, mixing until just combined. Be careful not to overmix, as that can lead to tough cookies!
-
Fold in the Oats and Chocolate Chips: Add the oats and chocolate chips (or your chosen mix-ins) into the dough. Using a spatula or wooden spoon, fold them in gently. Here’s a chef hack: reserve a handful of chocolate chips to sprinkle on top before baking for extra visual pop!
-
Add the Candy Eyes: Now, for the fun part! Gently fold in your candy eyes, ensuring they’re evenly distributed in the dough. Be careful not to crush them!
-
Scoop the Dough: Using a cookie scoop or a spoon, drop generous portions of dough onto a baking sheet lined with parchment paper. Leave enough space between each mound for spreading—about two inches should do.
-
Bake: Place the baking sheet in your preheated oven and bake for 10-12 minutes, or until the cookies are slightly golden around the edges but still soft in the center. The delicious smell will drive you wild!
-
Cool: Let the cookies sit on the baking sheet for 5 minutes before transferring them to a wire rack to cool completely. This resting period helps them set beautifully.
Serving Suggestions
When it comes to serving your Monster Cookies, presentation is key. Arrange them on a colorful platter, perhaps alongside some milk or a fun dip like chocolate ganache. Get creative! You might even stack them for a towering display. A sprinkle of sea salt on top can elevate the flavor, balancing out the sweetness beautifully. For an extra festive touch, consider garnishing with sprigs of mint or edible flowers. Trust me; your guests will be smitten!
Recipe Variations
Monster Cookies are incredibly versatile! Here are some fun variations to consider:
-
Nutty Monster Cookies: Add 1 cup of chopped nuts like walnuts or pecans for crunch.
-
Peanut Butter Twist: Substitute half the butter with peanut butter to give your cookies a nutty flavor.
-
Add Dried Fruit: For a chewy texture and tartness, throw in 1 cup of dried cranberries or cherries.
-
Spice it Up: Add 1 teaspoon of cinnamon or a pinch of cayenne for a fun flavor kick.
-
Mini Monster Cookies: Scoop smaller portions for bite-sized cookies, perfect for parties!
Chef’s Notes
Throughout my baking journey, these Monster Cookies have evolved. Initially, they were just a fun way to get my cousin involved in the kitchen, but over the years, we’ve experimented! I once had a baking mishap where I mixed up the sugar measurements. Little did I know, the extra sweetness created a different kind of monster! Sometimes the kitchen can surprise you in the best ways. Don’t be afraid to play and explore different flavors; you never know what delightful concoction you might whip up!
FAQs and Troubleshooting
1. Why are my cookies flat?
Flat cookies can be a result of overly softened butter or too much liquid. Make sure your butter is just softened, not melted. Also, double-check your flour measurements, making sure to sift it if necessary.
2. Can I freeze Monster Cookie dough?
Absolutely! Feel free to scoop the dough onto baking sheets, freeze until firm, then transfer to a Ziplock bag. They can be stored for up to 3 months. Bake directly from the freezer, adding a minute or two to the baking time.
3. How do I store leftover cookies?
Keep your cookies in an airtight container at room temperature for up to a week. For longer storage, consider freezing them as mentioned above!
4. Can I make these gluten-free?
Definitely! Substitute the all-purpose flour with a gluten-free blend. Be cautious with your baking soda, as it might react differently depending on the mix!
Nutritional Info
While I believe in enjoying every bite without guilt, here’s a quick glance at the nutritional info (per cookie, based on 24 cookies):
- Calories: 150
- Total Fat: 7g
- Saturated Fat: 4g
- Carbohydrates: 20g
- Fiber: 1g
- Sugars: 9g
- Protein: 2g
Remember, indulge and enjoy!
And there you have it, my lovely friends – Monster Cookies that will make your heart sing and your taste buds dance! These cookies embody a spirit of playfulness and creativity that I absolutely adore. Now, tie on your apron, gather your loved ones, and bring a little whimsy to your kitchen. Happy baking! 🍪✨
PrintMonster Cookies

A whimsical treat perfect for any occasion, these Monster Cookies are loaded with oats, chocolate, and colorful candy eyes!
- Prep Time: 15 minutes
- Cook Time: 12 minutes
- Total Time: 27 minutes
- Yield: 24 cookies 1x
- Category: Dessert
- Method: Baking
- Cuisine: American
- Diet: Vegetarian
Ingredients
- 1 cup of unsalted butter, softened
- 1 cup of brown sugar
- 1/2 cup of granulated sugar
- 2 large eggs
- 1 teaspoon of vanilla extract
- 2 cups of all-purpose flour
- 1 teaspoon of baking soda
- 1/2 teaspoon of salt
- 2 cups of old-fashioned oats
- 1 cup of chocolate chips
- 1 cup of candy eyes
Instructions
- Preheat the oven: Preheat your oven to 350°F (175°C).
- Cream the butter and sugars: In a large mixing bowl, add the softened butter, brown sugar, and granulated sugar. Cream them together until light and fluffy.
- Add eggs and vanilla: Crack the eggs into the bowl and pour in the vanilla extract. Mix until combined.
- Combine dry ingredients: In another bowl, whisk together the flour, baking soda, and salt. Gradually add this dry mixture to your wet ingredients.
- Fold in the oats and chocolate chips: Add the oats and chocolate chips into the dough and fold them in gently.
- Add the candy eyes: Gently fold in the candy eyes, ensuring they’re evenly distributed.
- Scoop the dough: Drop generous portions of dough onto a baking sheet lined with parchment paper.
- Bake: Place the baking sheet in the oven and bake for 10-12 minutes.
- Cool: Let the cookies sit on the baking sheet for 5 minutes before transferring them to a wire rack.
Notes
For a nutty flavor, consider adding chopped nuts. These cookies are versatile and can be made gluten-free by using a gluten-free flour blend.
Nutrition
- Serving Size: 1 cookie
- Calories: 150
- Sugar: 9g
- Sodium: 100mg
- Fat: 7g
- Saturated Fat: 4g
- Unsaturated Fat: 2g
- Trans Fat: 0g
- Carbohydrates: 20g
- Fiber: 1g
- Protein: 2g
- Cholesterol: 30mg
Keywords: cookies, monster cookies, baking, fun treats, snacks
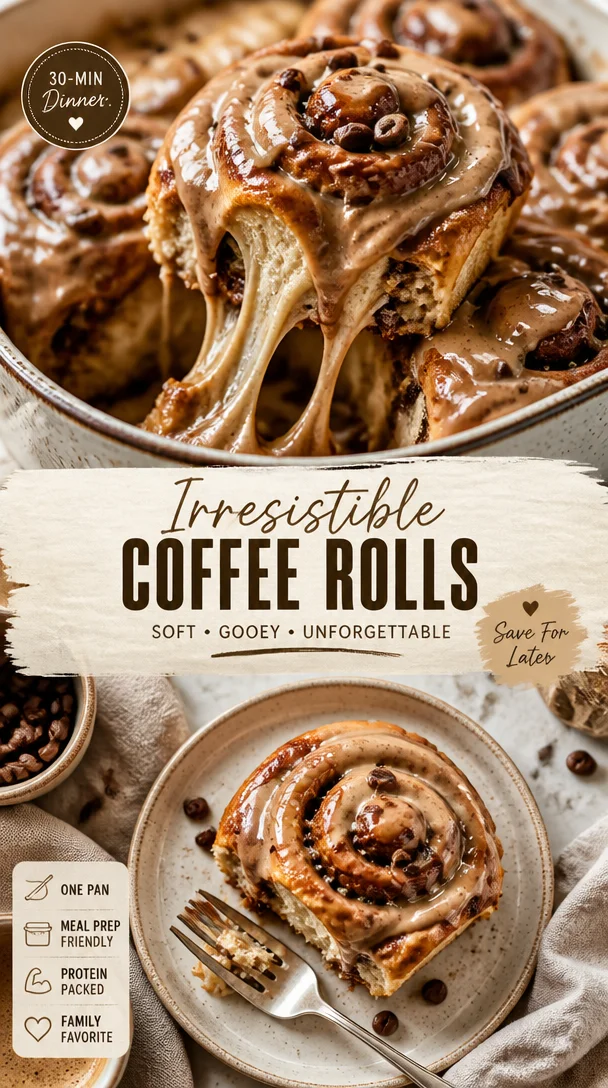
Coffee Rolls
Indulge in Delightful Coffee Rolls: A Cozy Recipe for Your Kitchen
Hello, my fellow food lovers! Today, we’re diving into the warm and inviting world of Coffee Rolls. Imagine soft, pillowy rolls, tantalizingly infused with the essence of coffee, swirled with cinnamon and a rich cream cheese frosting that leaves your taste buds dancing. If you’re anything like me, coffee is more than just a beverage—it’s an experience, a moment of indulgence. And what could be better than incorporating that experience into a beloved baked good? These Coffee Rolls are sure to become a cherished recipe in your kitchen, perfect for brunch gatherings, lazy Sundays, or that midnight snack craving!
Let’s embark on this journey together, shall we?
A Taste of Nostalgia
Growing up, my mornings were filled with the warm aroma of freshly brewed coffee wafting from the kitchen. My mom had a knack for baking, often treating us to her homemade cinnamon rolls, which were delicious but sometimes a bit of a process! One rainy Saturday, I remember watching her hustle in the kitchen with flour dusting her cheeks. She decided to experiment with a new recipe that she had stumbled upon—a coffee-infused twist on her traditional rolls.
As the rolls baked, I could hardly contain my excitement. The sweet smell of cinnamon met the bold scent of coffee, wrapping us in a cozy embrace. When she pulled them out of the oven, golden and fluffy, we couldn’t wait to dig in. Each bite was a warm hug, with a hint of coffee cutting through the sweetness. That moment ignited my passion for combining flavors, and from then on, coffee became a staple in my baking repertoire. Now, I’m thrilled to share this beloved recipe that holds such a special place in my heart!
Ingredients
Before we roll into the recipe, let’s gather our ingredients. Here’s what you’ll need:
-
¼ cup all-purpose flour: This will act as the base for our Tangzhong, a flour-water paste that keeps our rolls soft and moist. If you’re out of all-purpose, you can use bread flour for a slightly denser roll.
-
¾ cup water: Make sure it’s warm but not hot. It will help activate our yeast, making those rolls nice and fluffy.
-
3 ½ cups all-purpose flour: The star of our rolls! Measure this carefully for the best texture. Remember, spoon the flour into your measuring cup instead of scooping straight from the bag to avoid excess flour.
-
⅓ cup granulated sugar: This adds sweetness and helps activate the yeast, giving our rolls structure.
-
2 teaspoon instant yeast: Make sure it’s fresh! Old yeast may not rise well, and that’s crucial for fluffy rolls.
-
¾ teaspoon fine sea salt: This enhances all the flavors in our rolls and balances the sweetness.
-
½ cup whole milk (slightly warmed): Milk adds richness to our dough. If you’re dairy-free, almond milk or oat milk can do the trick!
-
1 tsp instant coffee granules: This is where the magic begins! You can swap it with espresso powder for a richer coffee flavor.
-
1 large egg (room temperature): This helps bind our dough and adds to the richness.
-
1/2 tsp vanilla extract: A dash of vanilla elevates all the flavors.
-
Tangzhong: Don’t skip this! It’s a flour and water mixture (made with the ¼ cup flour and ¾ cup water) that keeps our rolls super soft.
-
4 tablespoon unsalted butter (room temperature): For a rich flavor and softness. It’s important to let it soften at room temperature for easy incorporation.
-
5 tbsp unsalted butter (room temperature): This will be used in our filling for that melty goodness.
-
2/3 cup dark brown sugar (or light brown sugar): Dark brown sugar adds a nice depth of flavor; however, light brown works just fine too!
-
2 tsp ground cinnamon: The quintessential spice in any cinnamon roll; it pairs perfectly with coffee!
-
1 ½ tsp instant coffee granules: More coffee flavor for the filling—yes, please!
-
2 oz cream cheese (softened): This is for our dreamy frosting.
-
4 tbsp unsalted butter (softened): We’ll mix this with the cream cheese for a delightful frosting.
-
1 cup powdered sugar: To sweeten our frosting to perfection.
-
4 tbsp heavy cream: A drizzle in the frosting makes it luxuriously smooth.
-
¾ tsp instant coffee granules: Just a touch more for extra coffee kick in the frosting!
Step-by-Step Instructions
Now that we have our ingredients ready, let’s get rolling! Follow these steps for delicious results:
-
Prepare the Tangzhong: In a small saucepan, combine the ¼ cup all-purpose flour and ¾ cup water. Cook over medium heat, stirring constantly until the mixture thickens and is paste-like. It should resemble a smooth batter. Set it aside to cool.
-
Mix the Dough: In a large mixing bowl, combine 3 ½ cups of flour, granulated sugar, instant yeast, and sea salt. Whisk together—this is where you harness good vibes and positive energy to infuse into your dough!
-
Combine Wet Ingredients: In another bowl, mix together the slightly warmed milk, instant coffee granules, egg, and vanilla extract. Whisk until well combined. Then, mix in the cooled Tangzhong.
-
Bring It All Together: Gradually add the wet ingredients into the dry ingredients. Use a wooden spoon to combine until a dough starts to form. It may be sticky—don’t fret!
-
Knead: Once you have a cohesive dough, it’s time to knead! Turn the dough onto a floured surface and knead for about 8-10 minutes, or until smooth and elastic. A little shoulder workout never hurt anyone, right? If the dough is too sticky, feel free to sprinkle on a bit of flour as needed.
-
Let It Rise: Form a ball and place it in a lightly greased bowl. Cover it with a clean kitchen towel and let it rise in a warm place for about 1-2 hours or until doubled in size. This is the perfect time to sip on your coffee!
-
Prepare the Filling: In a separate bowl, mix together the softened butter, dark brown sugar, ground cinnamon, and instant coffee granules until combined. It should be a spreadable paste—feel free to use a spatula or your hands!
-
Roll Out the Dough: After your dough has risen, punch it down gently to release the air. On a floured surface, roll it out into a large rectangle, about 1/4 inch thick.
-
Spread the Filling: Evenly spread the filling across the dough rectangle. Make sure to leave a small border around the edges to prevent spillage!
-
Roll It Up: Starting from one of the long sides, roll the dough tightly into a log. Pinch the seam to seal it. Use a sharp knife or a serrated cutter to slice the log into 12 equal rolls.
-
Second Rise: Arrange your rolls in a greased baking dish, spaced out. Cover them again with the towel and let them rise for another 30-45 minutes, aligning with your coffee refill.
-
Bake: Preheat your oven to 350°F (175°C). Once your rolls have risen, bake them in the preheated oven for about 25-30 minutes, or until golden brown.
-
Make the Frosting: While your rolls are baking, whip up the cream cheese frosting. Beat the softened cream cheese and unsalted butter together until smooth. Gradually mix in the powdered sugar, heavy cream, and instant coffee granules until creamy and spreadable.
-
Frost and Enjoy: Once your rolls come out of the oven, let them cool for a few minutes before generously spreading the cream cheese frosting over the top. The frosting will melt into those beautiful, fluffy rolls—heaven in every bite!
Serving Suggestions
For a delightful presentation, serve your Coffee Rolls warm in a beautiful platter. Drizzle with extra frosting, if desired, and garnish with a sprinkle of cinnamon or finely chopped nuts for added texture. Pair these delightful rolls with freshly brewed coffee or chai tea to elevate the experience. Trust me, your brunch guests will be raving about them!
Recipe Variations
-
Nutty Coffee Rolls: Add chopped walnuts or pecans to the filling for a crunchy texture.
-
Choco-Coffee Bliss: Fold some chocolate chips into the filling for a decadent treat.
-
Dairy-Free Option: Swap whole milk for a dairy-free alternative and use vegan butter for the filling and frosting!
-
Spiced Twist: Add cardamom or nutmeg to the cinnamon filling for a warm, spiced flavor.
-
Fruit-Filled Rolls: Mix in apple or pear slices into the filling for a fruity undertone that pairs beautifully with coffee.
Chef’s Notes
You know, the beauty of baking is that it’s an adventure—sometimes things don’t go as planned, and that’s okay! I once forgot to add the sugar to my coffee rolls, and instead of a sweet treat, I ended up with… well, a lesson learned and quite a bitter batch! But that’s what makes the kitchen so special—the discoveries and the memories that are created along the way.
Also, I love to share these rolls with friends—it feels like a warm hug shared amongst laughter. This recipe has evolved over the years, adapting to seasonal flavors and personal touches. I can’t wait to see how you make it your own!
FAQs and Troubleshooting
1. Why aren’t my rolls rising?
Make sure your yeast is fresh! You can test it by mixing it with warm water and sugar; it should bubble up within a few minutes. If the dough is too cold, it may take longer to rise—find a quiet, warm place for optimum rising.
2. Can I make the dough ahead of time?
Absolutely! You can prepare the dough, let it rise, and then shape it into rolls. Place the unbaked rolls in the refrigerator overnight. Allow them to come to room temperature and rise again before baking.
3. How do I store the rolls?
These rolls are best enjoyed fresh but can be stored in an airtight container at room temperature for up to three days. You can also freeze them! Just thaw completely and reheat before serving.
4. My rolls turned out dense. What went wrong?
This could be due to too much flour or not kneading enough! Be sure to measure your flour accurately, and don’t skip the kneading process—it develops the gluten structure that lifts your rolls.
Nutritional Info (Optional)
While I like to indulge in these delightful rolls, I always rebel against the scales! For those tracking, an average coffee roll (without frosting) is roughly 250-300 calories. Remember, these are meant for joyous occasions, so savor each bite!
Conclusion
And there you have it—a warm journey into the world of Coffee Rolls! I hope you feel inspired to tie on your apron and whip up a batch of these delightful treats. They are more than just a dessert; they’re a way to create cherished memories around the table, just like the ones I shared with my family.
Grab your loved ones, pour some coffee, and let’s make some beautiful moments. Happy baking, friends!
PrintDelightful Coffee Rolls

Indulge in soft, pillowy Coffee Rolls infused with coffee, swirled with cinnamon, and topped with rich cream cheese frosting.
- Prep Time: 15 minutes
- Cook Time: 30 minutes
- Total Time: 45 minutes
- Yield: 12 servings 1x
- Category: Dessert
- Method: Baking
- Cuisine: American
- Diet: Vegetarian
Ingredients
- ¼ cup all-purpose flour
- ¾ cup warm water
- 3 ½ cups all-purpose flour
- ⅓ cup granulated sugar
- 2 teaspoons instant yeast
- ¾ teaspoon fine sea salt
- ½ cup whole milk (slightly warmed)
- 1 teaspoon instant coffee granules
- 1 large egg (room temperature)
- ½ teaspoon vanilla extract
- 4 tablespoons unsalted butter (room temperature)
- 5 tablespoons unsalted butter (for filling, room temperature)
- 2/3 cup dark brown sugar
- 2 teaspoons ground cinnamon
- 1 ½ teaspoons instant coffee granules (for filling)
- 2 oz cream cheese (softened)
- 4 tablespoons unsalted butter (for frosting, softened)
- 1 cup powdered sugar
- 4 tablespoons heavy cream
- ¾ teaspoon instant coffee granules (for frosting)
Instructions
- Prepare the Tangzhong: In a small saucepan, combine the ¼ cup all-purpose flour and ¾ cup warm water. Cook over medium heat until the mixture thickens. Set aside to cool.
- Mix the Dough: In a large mixing bowl, combine 3 ½ cups of flour, granulated sugar, instant yeast, and sea salt. Whisk together.
- Combine Wet Ingredients: In another bowl, mix together the warmed milk, instant coffee granules, egg, and vanilla extract. Whisk until well combined, then mix in the cooled Tangzhong.
- Bring It All Together: Gradually add the wet ingredients into the dry ingredients. Use a wooden spoon to combine until a dough starts to form.
- Knead: Turn the dough onto a floured surface and knead for about 8-10 minutes until smooth and elastic.
- Let It Rise: Place dough in a greased bowl, cover, and let rise for 1-2 hours until doubled in size.
- Prepare the Filling: Combine softened butter, dark brown sugar, ground cinnamon, and instant coffee granules in a bowl.
- Roll Out the Dough: Punch down the risen dough, roll it out into a rectangle about ¼ inch thick.
- Spread the Filling: Evenly spread the filling on the dough, leaving a border around the edges.
- Roll It Up: Starting from one long side, roll the dough into a log and slice into 12 equal rolls.
- Second Rise: Arrange rolls in a greased baking dish, cover, and let rise for another 30-45 minutes.
- Bake: Preheat oven to 350°F (175°C) and bake rolls for 25-30 minutes until golden brown.
- Make the Frosting: Beat softened cream cheese and unsalted butter together until smooth, then mix in powdered sugar, heavy cream, and instant coffee until creamy.
- Frost and Enjoy: Let the rolls cool slightly, then generously spread cream cheese frosting on top before serving.
Notes
For a delightful presentation, serve warm and garnish with a sprinkle of cinnamon or nuts. Pairs beautifully with coffee or chai tea.
Nutrition
- Serving Size: 1 roll
- Calories: 300
- Sugar: 12g
- Sodium: 250mg
- Fat: 14g
- Saturated Fat: 8g
- Unsaturated Fat: 4g
- Trans Fat: 0g
- Carbohydrates: 38g
- Fiber: 1g
- Protein: 4g
- Cholesterol: 30mg
Keywords: coffee rolls, cinnamon rolls, breakfast pastries, dessert recipes, baking

Cookie Butter Cookies
Indulge in Whimsy: Cookie Butter Cookies
Welcome, dear friends! I am beyond thrilled to share with you one of the easiest, but oh-so-delightful treats that has taken my kitchen by storm: Cookie Butter Cookies. If you’re a fan of that aromatic, spiced goodness that is cookie butter (think Biscoff!), you’re going to love this recipe. With just a handful of ingredients, you can whip up soft, melt-in-your-mouth cookies that not only taste like a dream but also make your kitchen smell like a cookie bakery in full swing!
Picture this: a cozy evening with the aroma of warm cookies wafting through your home, a cup of tea or coffee in your hand, and your loved ones gathered around. Sounds perfect, right? This recipe is my little secret to creating those sweet moments that linger long after the last crumb has vanished. So, let’s dive into the delicious world of cookie butter cookies and make some magic happen!
A Whimsical Memory
Let me take you back to a rainy afternoon I spent in my grandmother’s kitchen. I was just a small child, but watching her bake was nothing short of mesmerizing. She had a knack for instilling magic into every loaf of bread and batch of cookies. One day, while rummaging through her pantry, we stumbled upon a jar of cookie butter. I was intrigued by the notion that something so sweet and spiced could exist.
“Let’s make cookies with this,” she said, and I’ll never forget the joy and wonder we shared as we blended the creamy, caramel-like spread with flour and sugar. It turned that gloomy day into a delightful cooking adventure filled with laughter and sprinkles of sugar. To this day, every time I use cookie butter, I am transported back to that cozy kitchen, and it inspires me to create and share recipes that bring joy and warmth to others.
Ingredients
Now, let’s gather our ingredients! Here’s what you’ll need to rustle up these delightful cookies:
-
1 cup cookie butter (Biscoff)
Cookie butter is the star of this show! If you can’t find Biscoff, any cookie butter works, or you can make your own by blending crushed cookies with a little oil. Just remember, the more spiced the cookie butter, the richer the flavor! -
1/2 cup brown sugar
This adds moisture and a lovely depth of flavor. If you’re out of brown sugar, you can use granulated sugar, but the cookies will be less chewy. -
1/4 cup granulated sugar
A little extra sweetness to balance things out. This sugar can also be replaced with coconut or raw sugar for a different nuance. -
1 egg
The binding agent that holds everything together. If you want to keep these cookies vegan, you can use a flax egg (1 tablespoon ground flaxseed mixed with 2.5 tablespoons of water), or even applesauce! -
1 teaspoon vanilla extract
A splash of vanilla elevates everything! If you want an extra kick, try adding almond extract instead—delicious! -
1 1/4 cups all-purpose flour
This binds our cookies. If you want an earthy twist, swap out a portion for whole wheat flour or almond flour, but keep in mind that it may change the texture a bit. -
1/2 teaspoon baking soda
This is essential for those lovely soft cookie interiors. If you are out of baking soda, double the amount of baking powder, but don’t forget to adjust the flour! -
1/4 teaspoon salt
A pinch of salt helps enhance the sweet flavors and balances the cookie butter’s sweetness. You can use sea salt or kosher salt for a different texture. -
1/2 cup chocolate chips (optional)
This is where you can let your creativity shine! Dark, semi-sweet, or even white chocolate—choose your favorite! For dairy-free, go for vegan chocolate chips.
Step-by-Step Instructions
Let’s get those ovens preheated to 350°F (175°C) because we’re about to embark on a baking adventure! Here’s how to whip up your cookie butter cookies, one step at a time:
-
Mix the Sugars and Cookie Butter
In a large mixing bowl, combine your cookie butter, brown sugar, and granulated sugar. Using a hand mixer or stand mixer, blend them together until the mixture becomes smooth and creamy. This usually takes about 1-2 minutes. Trust me, this is the base of deliciousness! -
Add the Egg and Vanilla
Crack that egg into the bowl and add the vanilla extract. Mix until well combined—the batter should look silky and inviting. You could even take this moment to sneak a taste (just a tiny one, for quality control!). -
Sift the Dry Ingredients
In a separate bowl, whisk together the flour, baking soda, and salt. Sifting helps aerate the flour, ensuring a light and fluffy texture. Gradually add the dry mixture to the wet ingredients, mixing carefully until there’s no flour left visible. This is the time when it all starts to come together! -
Incorporate Chocolate Chips
Fold in your choice of chocolate chips with a rubber spatula or wooden spoon. You want them evenly distributed, so take your time here—it’s worth it! -
Scoop the Dough
Using a cookie scoop or two spoons, drop rounded tablespoons of dough onto a lined baking sheet. Leave enough space in between because these babies will spread out in the oven, becoming soft and chewy pockets of joy. -
Bake
Pop those trays in your preheated oven for about 10-12 minutes. You want them to be golden on the edges but still soft in the center because they’ll continue to cook a bit after you take them out. -
Cool Down
Once baked, let them cool on the baking sheet for 5 minutes before transferring them to a wire rack. This step is crucial for ensuring they set perfectly!
Serving Suggestions
When it comes to plating these cookie butter cookies, simplicity is key. Stack them on a beautiful plate, perhaps with a sprinkling of sea salt on top for an elegant touch. You could even place them in a glass jar with a ribbon tied around it for a charming gift! Consider serving them with a scoop of vanilla ice cream or a dollop of whipped cream for a bit of decadence.
Recipe Variations
Feeling adventurous? Here are some delightful variations you can try:
-
Nutty Delight: Add 1/2 cup of chopped nuts (like walnuts or pecans) to the dough for an added crunch.
-
Spiced Perfection: Incorporate a teaspoon of cinnamon or a pinch of nutmeg into the dry ingredients to elevate those warm flavors!
-
Coconut Twist: Swap out half of the flour for shredded coconut for a tropical vibe.
-
Fruity Fun: Fold in dried fruits like cranberries or raisins for a chewy texture and a burst of flavor.
-
Caramel Surprise: Add a few caramel bits to the dough for a fun surprise in every bite.
Chef’s Notes
These cookie butter cookies hold a special place in my heart because they capture the essence of simplicity and joy in baking. Every time I make them, it transports me back to the kitchen with my grandmother. You know, there’s something about using cookie butter that makes baking feel a little more like child’s play. It’s fun, it’s messy, and it’s bound to bring a smile to anyone’s face. Plus, they’ve become a favorite treat among my friends, often ending with some friendly cookie wars to see whose version is best!
FAQs and Troubleshooting
1. Why are my cookies flat?
Flat cookies usually mean the butter got too warm or you didn’t use enough flour. Make sure to measure accurately and consider chilling the dough for 30 minutes before baking for thicker cookies!
2. Can I freeze the dough?
Absolutely! You can freeze the dough before baking. Just scoop out the dough, place it on a parchment-lined tray, and freeze them until solid. Transfer to a freezer bag and bake straight from the freezer, adding a couple of extra minutes to the baking time.
3. Why are my cookies too dry?
Overbaking often leads to dry cookies. Remember: if you take them out while they still look slightly underbaked in the middle, that’s okay. They’ll firm up as they cool.
4. How can I make these gluten-free?
Substituting the all-purpose flour for a gluten-free all-purpose blend usually works beautifully! Just make sure your cookie butter is gluten-free, too!
Nutritional Info
For those curious about the nutritional aspect, here’s an approximate rundown per cookie (assuming about 24 cookies total, depending on size):
- Calories: 120
- Protein: 1.5g
- Carbohydrates: 18g
- Fat: 5.5g
- Fiber: 1g
- Sugar: 8g
And there you have it—cookie butter cookies that will charm anyone lucky enough to have one (or two!). I hope this recipe brings sweetness to your kitchen, invites conversation to your table, and inspires you to create your own beautiful memories. Happy baking, friends! Let’s make life just a little sweeter, one cookie at a time!
PrintCookie Butter Cookies

Delightful, soft cookies made with cookie butter for a warm, sweet treat.
- Prep Time: 15 minutes
- Cook Time: 12 minutes
- Total Time: 27 minutes
- Yield: 24 cookies 1x
- Category: Dessert
- Method: Baking
- Cuisine: American
- Diet: Vegetarian
Ingredients
- 1 cup cookie butter (Biscoff)
- 1/2 cup brown sugar
- 1/4 cup granulated sugar
- 1 egg
- 1 teaspoon vanilla extract
- 1 1/4 cups all-purpose flour
- 1/2 teaspoon baking soda
- 1/4 teaspoon salt
- 1/2 cup chocolate chips (optional)
Instructions
- Mix the sugars and cookie butter in a large mixing bowl until smooth and creamy.
- Add the egg and vanilla extract, mixing until well combined.
- Sift the flour, baking soda, and salt in a separate bowl, then gradually incorporate this into the wet mixture.
- Incorporate the chocolate chips until evenly distributed.
- Scoop rounded tablespoons of dough onto a lined baking sheet, leaving space between each.
- Bake in a preheated oven at 350°F (175°C) for 10-12 minutes until golden on the edges.
- Cool on the baking sheet for 5 minutes before transferring to a wire rack.
Notes
You can freeze the dough before baking for later enjoyment. Chill the dough for thicker cookies if needed.
Nutrition
- Serving Size: 1 cookie
- Calories: 120
- Sugar: 8g
- Sodium: 100mg
- Fat: 5.5g
- Saturated Fat: 2g
- Unsaturated Fat: 3.5g
- Trans Fat: 0g
- Carbohydrates: 18g
- Fiber: 1g
- Protein: 1.5g
- Cholesterol: 30mg
Keywords: cookies, cookie butter, dessert, sweet treat, baking
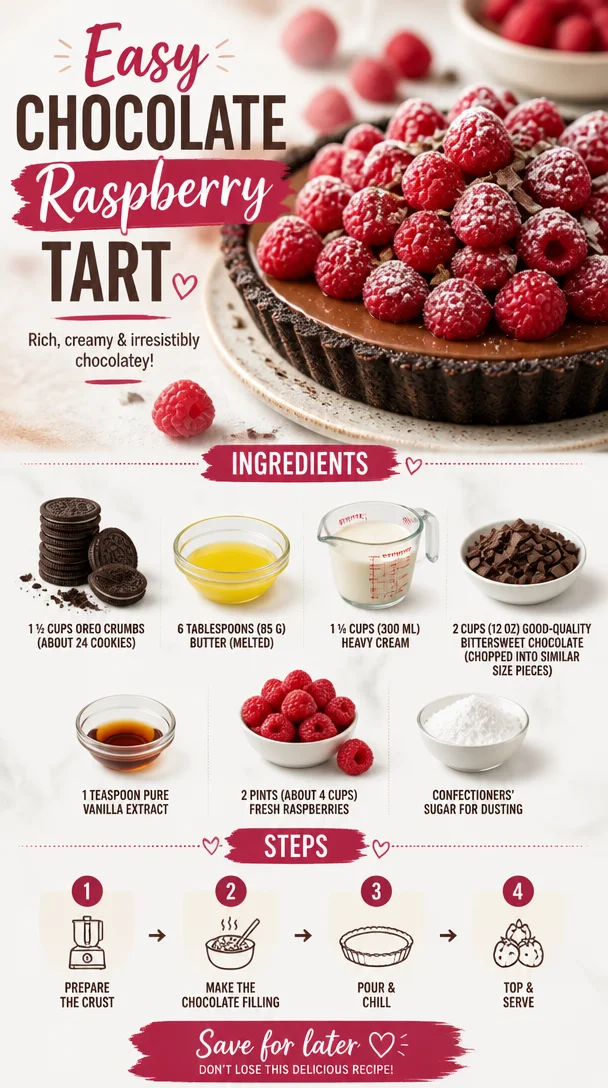
Easy Chocolate Raspberry Tart
Decadent Delight: Easy Chocolate Raspberry Tart
Hello and welcome, fellow foodies! If you’re in the mood for something indulgent, delicious, and oh-so-chic, then let’s talk about one of my all-time favorite desserts — the Easy Chocolate Raspberry Tart. Simple to whip up yet impressively elegant, this tart is a showstopper for any gathering, whether you’re hosting a chic soirée or a cozy dinner with loved ones. So grab your apron, and let’s dive into this delightful chocolatey creation!
Introduction
There’s something magical about dessert, isn’t there? It’s the sweet ending to a beautiful meal, the special treat that brings a smile to our faces, and let’s be honest, the perfect excuse to indulge a little bit. When it comes to desserts that capture elegance without the fuss, this Easy Chocolate Raspberry Tart reigns supreme.
Imagine a velvety chocolate filling cradled in a buttery Oreo crust, topped with vibrant, fresh raspberries that pop in both flavor and color. Together, they create a beautiful harmony of taste — rich yet refreshing, decadent yet light. Each slice tells a story of indulgence that feels just right, no matter the occasion.
What I adore about this tart is how effortlessly it comes together. You don’t need any advanced culinary skills to pull it off; just a bit of love, attention to detail, and maybe a glass of wine to sip on as you create this edible masterpiece. It’s the perfect balance of sophistication and simplicity, making it a must-have recipe in your collection.
Now, let’s talk about the heartwarming personal memory I have with this dish that adds a sprinkle of nostalgia to every bite.
Personal Story
I vividly remember the first time I made this Easy Chocolate Raspberry Tart for my best friend’s birthday. We were both in college, broke but brimming with enthusiasm and dreams of becoming gourmet chefs. On that warm summer afternoon, I laid out the ingredients on our tiny kitchen counter, excitedly chatting with her about our plans while the sun streamed through the windows. As I crushed the Oreos into crumbs, we shared laughter and memories. It felt like a scene from a movie — two aspiring chefs concocting a delicious creation that would bring smiles and joy.
When the tart was finally ready, and we saw the rich chocolate filling juxtaposed with the vibrant raspberries, we couldn’t contain our excitement. We plated it up, dusting it with confectioners’ sugar like true chefs, and sat down to enjoy it together. The combination of smooth chocolate and tart raspberries was heavenly! It was a special moment filled with friendship and the joys of cooking that shaped my passion for sharing food with loved ones.
Now, let’s get into the details of creating this unforgettable dessert so you can make your own delicious memories!
Ingredients
Here’s what you’ll need for this heavenly Easy Chocolate Raspberry Tart. I’ve added some chef insights and substitution tips to guide you along the way.
-
1 ½ cups Oreo crumbs (about 24 cookies)
These provide a rich, chocolatey crust that’s super easy to make. If you’re not a fan of Oreos, feel free to use a homemade chocolate cookie or even graham cracker crumbs mixed with cocoa powder for an alternate twist. -
6 Tablespoons (85 g) butter (melted)
The melted butter brings everything together, adding richness and moisture. You can substitute it with coconut oil for a dairy-free option, but be mindful of the flavor it might impart. -
1 ¼ cups (300 ml) heavy cream
The heavy cream is the backbone of the chocolate filling, making it smooth and rich. If you’re looking for a lighter option, you can use full-fat coconut milk, but the texture will be slightly different. -
2 cups (12 oz) good-quality bittersweet chocolate (chopped into similar size pieces)
I recommend a chocolate with at least 60% cacao for a well-balanced flavor. If you prefer milk chocolate, feel free to use that, but reduce the sugar in the recipe slightly since it’ll be sweeter. -
1 teaspoon pure vanilla extract
This enhances the chocolate flavor and adds warmth. Don’t skip it! However, if you’re out, almond extract can work in a pinch for an intriguing twist. -
2 pints (about 4 cups) fresh raspberries
The fresh raspberries not only add a beautiful pop of color but also a fabulous tartness that cuts through the richness of the chocolate. If fresh berries are out of season, frozen raspberries can work; just thaw and drain any excess moisture. -
Confectioners’ sugar for dusting
This is optional but adds a lovely final touch. You can also use cocoa powder for a deeper chocolate flavor.
Step-by-Step Instructions
Ready to get baking? Here’s a detailed walkthrough for making your Easy Chocolate Raspberry Tart!
-
Prepare the Oreo Crust
Start by preheating your oven to 350°F (175°C). While it heats, combine the Oreo crumbs and melted butter in a mixing bowl. Use a fork or your hands to mix until the crumbs are evenly moistened.Chef Insight: Make sure that the consistency resembles wet sand. You want it to hold together when pressed. Once mixed, firmly press the crumb mixture into the bottom and up the sides of a 9-inch tart pan to create an even layer. Bake for about 10 minutes until set, then let it cool completely while you prepare the filling.
-
Make the Chocolate Ganache
In a medium saucepan, heat the heavy cream over medium heat until it just begins to simmer — you’ll see bubbles forming around the edges. Remove it from the heat and pour it over the chopped bittersweet chocolate in a heatproof bowl. Let it sit for a minute to soften the chocolate.Tip: This is the perfect time to check the texture of your chocolate. If you’re using chocolate chips, they will melt easily, but chopped chocolate bars create a smoother ganache.
-
Stir in Vanilla
After a minute, stir gently until the chocolate is completely melted and the mixture is smooth. Add the vanilla extract and stir to incorporate.Hack: If your ganache has lumps, you can give it a quick blitz with an immersion blender to smooth it out!
-
Pour the Mixture into the Cool Crust
Pour the luscious chocolate ganache into the cooled Oreo crust, spreading it into an even layer. Allow it to set at room temperature for a bit before transferring it to the refrigerator to chill for at least 2 hours, or until firm to the touch.Chef Tip: For an easier release from the tart pan, gently run a knife around the edges before slicing. It makes for a clean cut!
-
Add the Fresh Raspberries
Just before serving, take the tart out of the refrigerator and decorate the top with fresh raspberries. Dust with confectioners’ sugar for that extra wow factor. -
Slice and Serve
Use a sharp knife to slice the tart into wedges, serving it alongside extra raspberries if desired.Pro Tip: If the chocolate gets too solid in the fridge, let it sit at room temperature for a few minutes before slicing for cleaner cuts.
Serving Suggestions
When you serve this tart, think of the presentation! Place a slice on a dessert plate and garnish it with a few fresh raspberries on the side for a pop of color. A dollop of whipped cream or a scoop of vanilla ice cream also pairs splendidly with the tart — the creamy elements balance the rich chocolate beautifully.
Recipe Variations
-
Nutty Crust Variation
Swap out half the Oreo crumbs for finely ground almonds or walnuts for a nutty twist! -
Mint Chocolate Version
Add a drop or two of peppermint extract to the ganache mixture for a refreshing mint chocolate experience. -
Dairy-Free Delight
Use dairy-free chocolate and coconut cream instead of heavy cream to create a vegan-friendly version that doesn’t skimp on flavor. -
Fruit Medley Topping
Mix it up with different fruits! Strawberries or blueberries can provide a delightful change and add a fresh twist to the tart. -
Espresso Infusion
Add a teaspoon of instant espresso powder to the ganache to enhance the chocolate flavor for coffee lovers.
Chef’s Notes
This Easy Chocolate Raspberry Tart has a special place in my heart, and it’s evolved over time. Initially, I used to struggle with cooling the chocolate too quickly, which led to a lumpy ganache. But as I learned to gently heat the cream and give the ganache time to meld, I found that patience truly makes for a richer and smoother filling. Plus, this recipe has become a beloved favorite among friends and family, often making an appearance at birthdays and holiday gatherings. That’s what I cherish about cooking — sharing food that carries love and intention.
FAQs and Troubleshooting
-
Why did my ganache turn out grainy?
This can happen if the chocolate gets too hot or if it’s not stirred enough. Always heat the cream gently and let the chocolate sit to soften before stirring. -
Can I make this tart ahead of time?
Absolutely! You can prepare the tart a day in advance. Just keep it covered in the refrigerator until you’re ready to serve. -
What if my crust crumbled when I tried to slice it?
If the crust crumbles, it may be due to not enough butter binding it together. Next time, consider adding an extra tablespoon of melted butter to the crust mixture. -
How do I store leftovers?
Store any leftovers in the refrigerator in an airtight container for up to four days. However, I doubt it’ll last that long — it’s hard to resist!
Nutritional Info
While this tart is undoubtedly rich and indulgent, it’s all about balance in the kitchen. Each slice contains a delightful mix of flavors with quality ingredients that elevate your sweet indulgence.
So there you have it, my sweet friends! The Easy Chocolate Raspberry Tart is more than just a dessert; it’s a memory maker, a show-stopper, and an absolute treat that you’ll confidently serve time and again. Whether it’s a special occasion or just a Tuesday, let’s gather around the table and enjoy the beautiful moments that good food can create. Happy baking!
PrintEasy Chocolate Raspberry Tart
A simple yet elegant dessert featuring a rich chocolate filling in a buttery Oreo crust, topped with fresh raspberries.
- Prep Time: 20 minutes
- Cook Time: 10 minutes
- Total Time: 130 minutes
- Yield: 8 servings 1x
- Category: Dessert
- Method: Baking
- Cuisine: American
- Diet: Vegetarian
Ingredients
- 1 ½ cups Oreo crumbs (about 24 cookies)
- 6 Tablespoons (85 g) butter (melted)
- 1 ¼ cups (300 ml) heavy cream
- 2 cups (12 oz) good-quality bittersweet chocolate (chopped into similar size pieces)
- 1 teaspoon pure vanilla extract
- 2 pints (about 4 cups) fresh raspberries
- Confectioners’ sugar for dusting (optional)
Instructions
- Preheat your oven to 350°F (175°C). Combine the Oreo crumbs and melted butter in a mixing bowl. Mix until evenly moistened.
- Press the crumb mixture into the bottom and sides of a 9-inch tart pan. Bake for about 10 minutes until set, then let it cool.
- Heat the heavy cream over medium heat until it simmers, then pour it over the chopped bittersweet chocolate. Let it sit for a minute.
- Stir gently until the chocolate is completely melted and smooth. Add the vanilla extract and stir to incorporate.
- Pour the ganache into the cooled Oreo crust. Let it set at room temperature, then refrigerate for at least 2 hours.
- Decorate the tart with fresh raspberries just before serving. Dust with confectioners’ sugar if desired.
- Slice the tart into wedges and serve alongside extra raspberries or whipped cream.
Notes
This tart can be made a day ahead of time. Store in the refrigerator and cover to keep it fresh.
Nutrition
- Serving Size: 1 slice
- Calories: 350
- Sugar: 20g
- Sodium: 250mg
- Fat: 18g
- Saturated Fat: 10g
- Unsaturated Fat: 6g
- Trans Fat: 0g
- Carbohydrates: 45g
- Fiber: 2g
- Protein: 4g
- Cholesterol: 30mg
Keywords: chocolate tart, raspberry dessert, easy dessert, chocolate raspberry tart
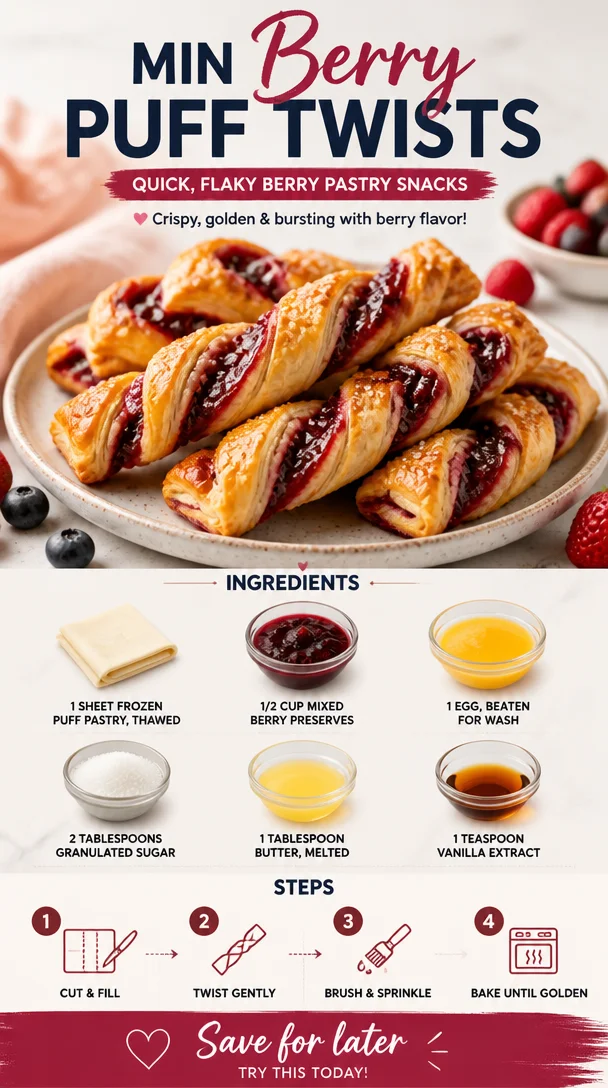
Min Berry Puff Twists: Quick, Flaky Berry Pastry Snacks
Indulge in Sweet Simplicity: Berry Puff Twists
Hello there, fellow foodies! Today, we’re diving into a delightful treat that perfectly balances simplicity with elegance. Imagine biting into a warm, flaky pastry filled with luscious, fruity goodness—the ultimate indulgence for both special occasions and a cozy night in. Say hello to my Berry Puff Twists! These adorable pastries are not just delicious, but they also offer that ‘wow’ factor that’s sure to impress your loved ones without sending you into a culinary panic. Let’s explore why this recipe is a staple in my kitchen and how you can master it effortlessly.
A Sweet Slice of Nostalgia
I still remember the first time I made puff pastry treats. It was a crisp autumn afternoon, and I had invited a few friends over for a casual gathering. Excited to showcase my culinary skills, I decided to fill the kitchen with the warm aroma of baking. Drawing inspiration from my childhood, I turned to my secret stash of berry preserves—a family heirloom passed down through my grandmother.
As we gathered around the table, the moment those golden puff pastry twists came out of the oven, their glossy tops shimmering, I could feel my heart race. With the first bite, a symphony of flavors unfolded—sweet, tangy berries enveloped in buttery, flaky pastry. The laughter and chatter as we devoured those treats made it one of those unforgettable memories. Fast-forward to today, and I still whip up these Berry Puff Twists whenever I want to create warm, cozy moments!
What You’ll Need
Here’s a quick look at the ingredients you’ll need to recreate this feast at home:
-
1 sheet frozen puff pastry, thawed
This is your foundation for easy, flaky layers. You can use homemade pastry if you’re feeling adventurous, but store-bought is a time-saver on busy days! -
1/2 cup mixed berry preserves
Bursting with flavor, berry preserves add sweetness and depth. Substitute with raspberry, strawberry, or even peach preserves for a unique twist. -
1 egg, beaten for wash
This egg wash gives your pastry that golden, glossy finish. If you’re vegan, a splash of almond or soy milk works too! -
2 tablespoons granulated sugar
A sprinkle of sugar elevates the sweetness and adds a delightful crunch. For a healthier alternative, you can substitute with coconut sugar. -
1 tablespoon butter, melted
Butter brings richness to the party! You can swap in vegan butter or even coconut oil for a dairy-free option. -
1 teaspoon vanilla extract
Vanilla enhances the flavor profile beautifully. Feel free to use almond extract for a fun flavor surprise!
Step-by-Step Instructions
Let’s get cooking! Follow these step-by-step directions, and you’ll have those delicious Berry Puff Twists on your table in no time!
-
Preheat Your Oven
Preheat your oven to 400°F (200°C). Ensuring your oven is hot enough is crucial to achieving that puff and flaky texture you crave. -
Prepare Your Puff Pastry
Once your puff pastry is thawed, roll it out on a lightly floured surface. You want to ensure it’s cold, so if it feels warm, pop it back in the fridge for a few moments. The colder, the better for maximum flakiness! -
Cut the Pastry
Using a sharp knife or pizza cutter, cut your pastry into strips—about 1 inch wide and 6 inches long. Don’t overthink it! Imperfections can make your dish feel homemade. -
Add the Berry Preserves
Spoon a small amount of mixed berry preserves onto the center of each strip. You want just enough to give flavor without making a mess. If you’re feeling generous, go wild—who doesn’t love extra sweetness? -
Twist the Pastry
Here comes the fun part! Fold the strips over the preserves, pinching the edges to seal them tightly. Then, twist each strip several times to create those adorable twists. Keep it loose! You want to let the filling peek through—trust me, it’s the prettiest part. -
Brush with Egg Wash
Place your twists on a parchment-lined baking sheet, leaving some space in between. Brush each one with the beaten egg wash for that sun-kissed glow when baked. -
Sprinkle with Sugar
Finally, here comes the sugar! Sprinkle granulated sugar over each twist. This step adds a delightful crunch, enhancing the overall texture. Who doesn’t love a bit of sparkle? -
Bake Until Golden
Pop your baking tray in the oven and let those beauties bake for about 15-20 minutes or until they’re golden brown and incredibly fragrant. The smell will drive you wild!
Serving Suggestions
Once your Berry Puff Twists are out of the oven and cooled slightly, it’s time to serve! Arrange them on a beautiful plate, perhaps garnishing with fresh mint leaves or a dusting of powdered sugar for that extra touch of elegance. These treats are perfect as an afternoon snack with tea, a festive addition to brunch, or as a dessert centerpiece for your next gathering.
Recipe Variations
Looking to switch things up? Here are a few creative twists on this classic recipe:
-
Nutty Decision: Add a sprinkle of chopped toasted almonds or hazelnuts with the preserves for extra crunch and flavor.
-
Chocolate Dream: Replace the berry preserves with chocolate hazelnut spread for a decadent dessert option. Who could resist that?
-
Seasonal Fruits: Experiment with seasonal fruit preserves like apricot or even fig for a gourmet twist.
-
Savory Surprise: Use savory fillings, such as cream cheese mixed with fresh herbs, for an irresistible appetizer option.
Chef’s Notes
Over the years, my Berry Puff Twists have morphed into a family favorite, adored by friends and relatives alike. They’ve traveled from cozy evenings at home to lively summer picnics and festive holiday gatherings. I once accidentally mixed up the egg wash with coffee creamer once (oops!), which led to some amusing reactions, but it resulted in a surprisingly delicious treat. These moments keep the journey alive and make cooking an adventure worth embarking on!
FAQs and Troubleshooting
1. My pastry didn’t puff up! What went wrong?
This could happen if your oven wasn’t hot enough or if the pastry was too warm before baking. Never underestimate the power of a preheated oven!
2. Can I make these a day ahead of time?
Absolutely! You can prepare the twists in advance and keep them in the fridge, covered with plastic wrap. Bake them fresh just before serving for that scrumptious aroma and crisp texture.
3. What can I use if I don’t have puff pastry?
You could try using phyllo dough, but keep in mind that the texture will be different. Alternatively, biscuit dough can offer a fun, fluffy base.
4. How can I store leftovers?
Store any uneaten twists in an airtight container at room temperature for up to 3 days. For longer storage, pop them in the freezer for up to a month. Just remember to warm them back up in the oven to regain that puffiness!
And there you have it—a delightful treat that tastes just as good as it looks! Your Berry Puff Twists are ready to shine, whether for a casual evening treat or a show-stopping dessert. I hope you enjoy every step of the process and feel inspired to create beautiful, tasty moments in your kitchen. Let’s cherish those little yet special gatherings around the table—because good food is all about connection, creativity, and love. Happy baking!
PrintBerry Puff Twists

Warm, flaky pastries filled with luscious berry preserves, perfect for any occasion.
- Prep Time: 15 minutes
- Cook Time: 20 minutes
- Total Time: 35 minutes
- Yield: 4 servings 1x
- Category: Dessert
- Method: Baking
- Cuisine: American
- Diet: Vegetarian
Ingredients
- 1 sheet frozen puff pastry, thawed
- 1/2 cup mixed berry preserves
- 1 egg, beaten for wash
- 2 tablespoons granulated sugar
- 1 tablespoon butter, melted
- 1 teaspoon vanilla extract
Instructions
- Preheat your oven to 400°F (200°C).
- Prepare your puff pastry by rolling it out on a lightly floured surface.
- Cut the pastry into strips—about 1 inch wide and 6 inches long.
- Add a small amount of mixed berry preserves onto the center of each strip.
- Twist the strips over the preserves, pinching the edges to seal.
- Brush each twist with the beaten egg wash.
- Sprinkle granulated sugar over each twist.
- Bake for about 15-20 minutes or until golden brown.
Notes
Serve warm, optionally garnished with fresh mint leaves or powdered sugar.
Nutrition
- Serving Size: 1 serving
- Calories: 250
- Sugar: 10g
- Sodium: 200mg
- Fat: 10g
- Saturated Fat: 5g
- Unsaturated Fat: 4g
- Trans Fat: 0g
- Carbohydrates: 30g
- Fiber: 1g
- Protein: 3g
- Cholesterol: 40mg
Keywords: berry pastry, puff pastry, dessert, baking, easy recipes
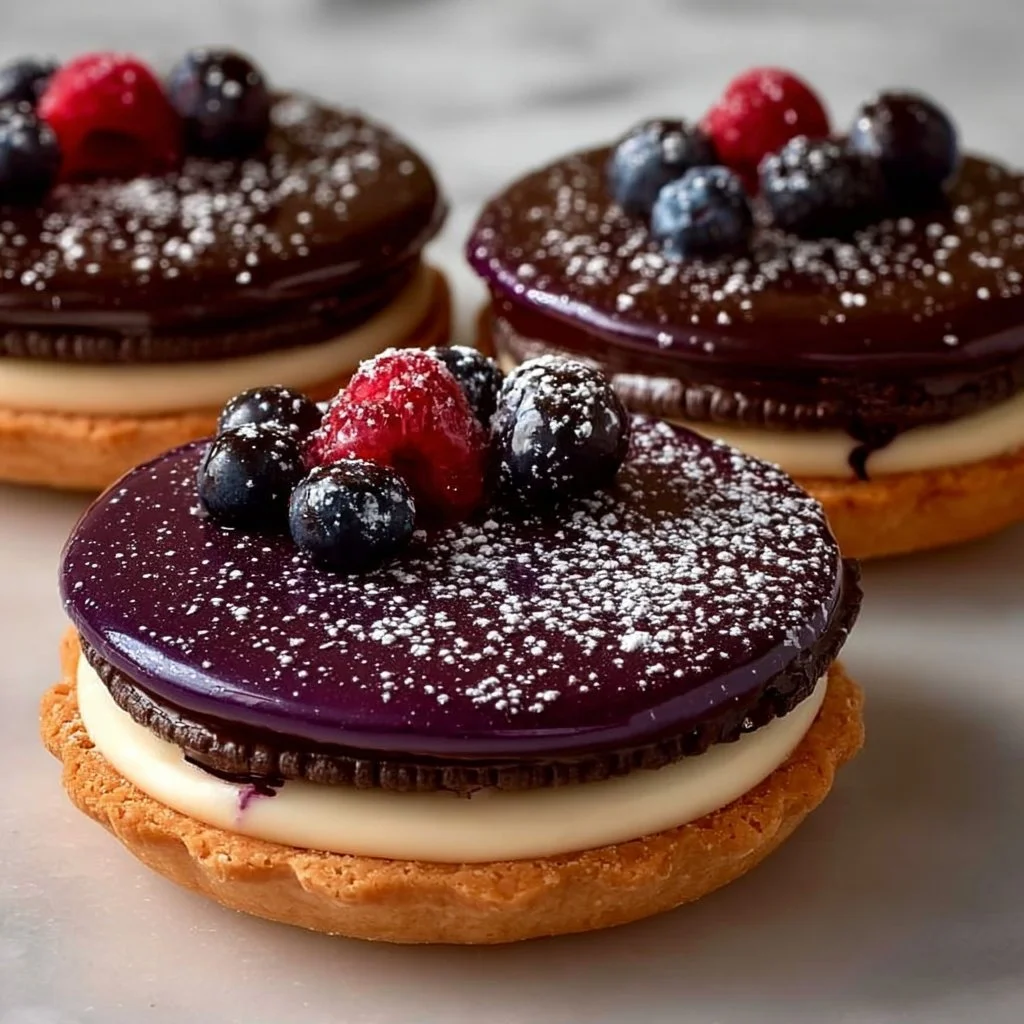
Pin by Nic Karlsson on oreo | Delicious desserts, Cool desserts, Interesting recipes
Indulge in Delight: The Ultimate Oreo Dessert
Hello, dessert lovers! If you’re anything like me, the mere mention of Oreos ignites a nostalgia that takes you back to childhood—whether it was dunking them in milk or stacking them high on a plate after a burst of playful, afternoon cookie crumbling. Today, we’re diving into a super indulgent Oreo dessert that’s sure to impress your friends, family, or even just yourself on a cozy night in. Get ready to tie on your apron and dive into nostalgia with a twist!
A Sweet Memory
Let me take you back a few years—imagine me as a young chef, experimenting with flavors and trying to impress my friends with my cooking skills. My kitchen would often echo with laughter, the sound of clinking glass as we toasted to good food and even better company. One evening, we decided to have an Oreo-themed dessert night. I distinctly remember mixing crushed Oreos into a creamy cheesecake filling. The excitement as everyone took their first bite remains palpable. It led to an impromptu dessert-off that ended in friendly debates over the best cookie pairings and flavor combinations. This dessert brings back those sweet, carefree moments. And now, I’m thrilled to share my deliciously indulgent Oreo dessert recipe with you!
Ingredients
Here’s what you’ll need for this delightful treat:
-
Oreo Cookies (36 cookies)
The classic chocolate wafers with a creamy filling. You can also use gluten-free Oreos if needed for a gluten-free version. -
Cream Cheese (16 oz, softened)
This is the base for our creamy filling. Make sure it’s softened to mix easily. For a lighter option, you can substitute with low-fat cream cheese. -
Powdered Sugar (1 cup)
Adds sweetness and a smooth texture to the filling. If you’re looking to cut down on sugar, you can use a sugar substitute as a 1:1 replacement. -
Heavy Whipping Cream (1 cup)
For a light and fluffy topping. It’s essential to use heavy cream here for that rich texture. Non-dairy options like coconut cream work well for a dairy-free version. -
Vanilla Extract (1 tsp)
A hint of vanilla ties all the flavors together beautifully. Use pure vanilla extract for best results, but a vanilla-flavored syrup can be an alternative. -
Chocolate Syrup (optional)
Drizzle it on top for extra decadence. You can also use caramel syrup or a berry coulis for a different twist.
Step-by-Step Instructions
Alright, let’s get our hands dirty! Follow these easy steps to create your Oreo masterpiece.
-
Prepare Your Oreo Crust
Start by preheating your oven to 350°F (175°C). Grab about 24 Oreos, place them in a food processor, and pulse until you achieve fine crumbs. You want it to feel like sand—soft but holds together. Transfer the crumbs to a mixing bowl, and mix in 4 tablespoons of melted butter until fully combined.Chef Tip: If you don’t have a food processor, slipping the Oreos into a ziplock bag and crushing them with a rolling pin works like a charm!
-
Press the Crust into a Pan
Grab a 9-inch springform pan. Pour the Oreo crumb mixture into the bottom and press it down firmly with the back of a measuring cup. Make sure it’s compact and even.Chef Hack: If you want to elevate your crust even more, you can bake it in the preheated oven for 10 minutes to enhance the flavor.
-
Make the Creamy Filling
In a large bowl, beat the softened cream cheese with an electric mixer until it’s smooth and creamy. Gradually mix in the powdered sugar and vanilla extract until well combined.Chef Tip: Remember to scrape down the sides of the bowl to ensure everything is mixed evenly. Nobody wants clumps of powdered sugar in their delightful filling!
-
Fold in the Heavy Cream
In a separate bowl, whip the heavy cream until stiff peaks form (that’s when you can turn the bowl upside down, and it won’t fall out!). Gently fold this whipped cream into the cream cheese mixture using a spatula.Chef Hack: This method adds air and lightness to your filling. Go slow and cautious with the folding—I want those beautiful fluffy clouds intact!
-
Add Crushed Oreos
Fold in another 12 crushed Oreos into the creamy filling for texture and that signature Oreo flavor.Chef Note: You can reserve a few chunks for decorating the top!
-
Assemble Your Dessert
Pour the creamy filling over your crust in the springform pan, spreading it evenly with a spatula. Take a moment to admire that gorgeous contrast of dark crust and creamy white filling. -
Chill to Perfection
Cover your dessert with plastic wrap and refrigerate for at least 4 hours, but preferably overnight. This helps to set the filling nicely. -
Serve With Style
Once set, carefully remove the springform pan sides. Transfer your Oreo dessert to a pretty cake stand. Drizzle with chocolate syrup and sprinkle the reserved crushed Oreos on top for that extra “wow” factor.
Serving Suggestions
When it comes to plating this Oreo dessert, simplicity is key! You want the inviting layers to speak for themselves. Serve slices on a white plate to make the colors pop, perhaps alongside a scoop of vanilla ice cream or fresh berries for a touch of freshness. A sprig of mint on top can add an elegant touch!
Recipe Variations
Feeling adventurous? Here are a few fun twists on this Oreo dessert:
- Peanut Butter Surprise: Add a half cup of creamy peanut butter to the filling for a delicious PB and Oreo combo.
- Minty Fresh: Mix in mint extract or crushed mint Oreos for a refreshing mint flavor.
- Fruit Forward: Layer crushed strawberries or raspberries between the crust and filling for a fruity refresh.
- Brownie Crust: Swap out the Oreo crust for a brownie base for an ultra-decadent treat.
Chef’s Notes
This Oreo dessert has been my go-to for gatherings and parties for years! I once made it for a potluck, and it disappeared within minutes. I love how simple it is yet how stunning it looks on the table! Don’t be surprised if you find yourself making it every week—after all, who can resist Oreos piled high in a creamy filling?
One time, I had a little mishap when I forgot to let the cream cheese soften—dreadful! It was a lesson learned, and my friends ended up with little lumps in the filling. Now, I always remember to soften all my dairy beforehand—not a mistake I’ll make again!
FAQs and Troubleshooting
1. What if my cream cheese is lumpy?
No worries! If you didn’t let it soften enough, use the mixer at a high speed. It should blend smoothly; don’t overdo it, though!
2. My filling isn’t stiff enough after chilling; what went wrong?
Ensure that your heavy cream was whipped to stiff peaks before folding it in. If it’s still too soft, it may need more chilling time.
3. Can I make this ahead?
Absolutely! In fact, it’s best when made a day ahead, allowing the flavors to meld beautifully.
4. How do I store leftovers?
Make sure to cover your dessert tightly with plastic wrap or store it in an airtight container in the fridge. Enjoy within 3–4 days!
Nutritional Info (Optional)
Calories: 320 per slice
Protein: 4g
Fat: 22g
Carbs: 30g
Sugar: 18g
(Values will vary based on ingredient choices.)
There you have it! An indulgent Oreo dessert that combines nostalgia with modern-day flair, designed to create beautiful moments in your kitchen and around your table. I can’t wait to see how you make this recipe your own, so don’t forget to share your culinary adventures! Until next time, happy cooking and keep those aprons handy!
PrintThe Ultimate Oreo Dessert
Indulge in this nostalgic Oreo dessert featuring a creamy filling, a crunchy crust, and a decadent presentation that’s perfect for any gathering.
- Prep Time: 15 minutes
- Cook Time: 10 minutes
- Total Time: 240 minutes
- Yield: 8 servings 1x
- Category: Dessert
- Method: Chilling, Baking
- Cuisine: American
- Diet: Vegetarian
Ingredients
- 36 Oreo Cookies
- 16 oz Cream Cheese, softened
- 1 cup Powdered Sugar
- 1 cup Heavy Whipping Cream
- 1 tsp Vanilla Extract
- Chocolate Syrup (optional)
- 4 tbsp Butter, melted (for crust)
Instructions
- Preheat your oven to 350°F (175°C).
- Crush about 24 Oreos in a food processor until fine crumbs form.
- Mix the Oreo crumbs with 4 tablespoons of melted butter until combined.
- Press the crumb mixture into the bottom of a 9-inch springform pan.
- Beat the softened cream cheese with an electric mixer until smooth and creamy.
- Gradually mix in the powdered sugar and vanilla extract until well combined.
- Whip the heavy cream until stiff peaks form, then gently fold it into the cream cheese mixture.
- Fold in another 12 crushed Oreos to the creamy filling.
- Pour the filling over your crust and spread evenly.
- Refrigerate for at least 4 hours or overnight to set.
- Remove the sides of the springform pan and drizzle with chocolate syrup before serving.
Notes
Pairs beautifully with vanilla ice cream or fresh berries. Can be made a day in advance for optimal flavor.
Nutrition
- Serving Size: 1 slice
- Calories: 320
- Sugar: 18g
- Sodium: 300mg
- Fat: 22g
- Saturated Fat: 12g
- Unsaturated Fat: 6g
- Trans Fat: 0g
- Carbohydrates: 30g
- Fiber: 1g
- Protein: 4g
- Cholesterol: 60mg
Keywords: Oreo dessert, cheesecake recipe, creamy dessert, chocolate dessert, nostalgic dessert
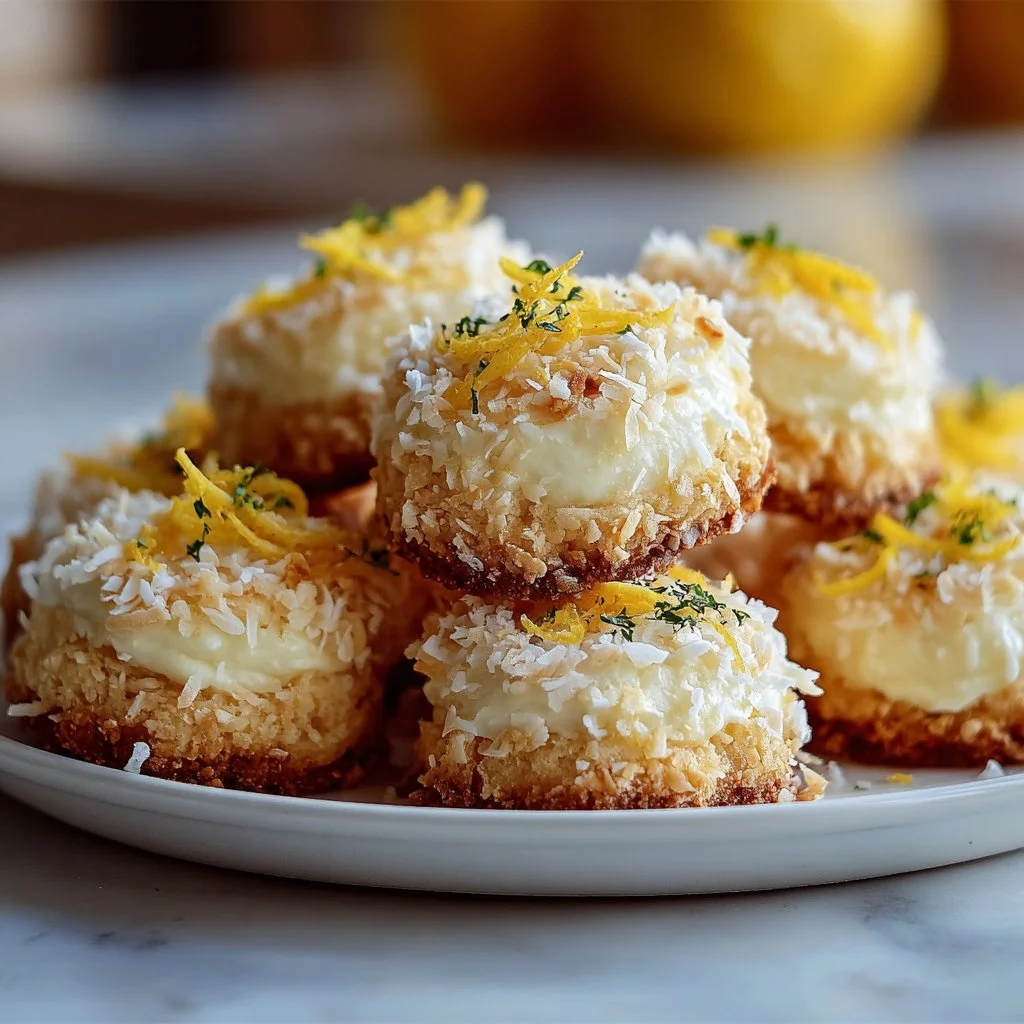
Lemon Coconut Cheesecake Cookies
# Lemon Coconut Cheesecake Cookies: A Sweet Slice of Sunshine

Hello, dear foodies! Today, I’m bubbling over with excitement to share with you a recipe that feels like a little sun-kissed getaway – Lemon Coconut Cheesecake Cookies! These delightful bites are more than just sweets; they carry a memory that is as rich in flavor as it is in sentiment. Picture yourself on a warm afternoon, the sun flickering through the trees, the tantalizing smell of citrus wafting through the kitchen, and a plate of cookies waiting to be savored. Let’s dive in, because these cookies are about to take your taste buds on a joyful ride!

## A Sunny Kitchen Memory

Growing up, my family had an unspoken tradition every summer: the “Baking Day.” We’d gather in the kitchen, flour dusting the countertops and laughter filling the air. My job was always to zest the lemons – a job I took so seriously. I loved watching the bright yellow zest spark against the white of the sugar, and the tantalizing aroma that filled the room was something else. On one particular Baking Day, we decided to experiment, throwing together a blend of our favorite flavors: lemon, cream cheese, and coconut. As the cookies baked, we sprawled on the floor, flipping through magazines, excitedly brainstorming names for our creation. “Lemon Coconut Cheesecake Cookies!” I shouted, and from that moment on, they earned a special place in our home. To this day, every bite of these cookies takes me back to those golden afternoons, overflowing with joy and sweetness.

## Ingredients

To embark on this delightful baking journey, gather the following ingredients:

- **1 cup all-purpose flour**
  The backbone of our cookies, providing structure. If you're gluten-free, swap it with a mix of almond flour and coconut flour for a soft, chewy texture.

- **1/2 cup unsweetened shredded coconut**
  This adds a tropical twist! You can use sweetened if you prefer a sweeter cookie, but adjust the sugar accordingly.

- **1/4 cup granulated sugar**
  Sweetness is key! For a healthier option, you can replace this with coconut sugar – it has a lovely caramel flavor.

- **1/2 cup cream cheese, softened**
  Cream cheese gives our cookies that cheesecake-like richness. Make sure it’s room temperature for smooth mixing, or use mascarpone for a slightly different flavor!

- **1/4 cup butter, softened**
  Butter brings moisture and flavor. If you need a dairy-free version, coconut oil works wonderfully!

- **1 large egg**
  This binds our ingredients together. If you’re vegan, a flaxseed or chia seed egg (1 tablespoon ground seeds mixed with 3 tablespoons water) will do the trick.

- **1 tablespoon lemon zest**
  This brightens the flavor profile! Don’t skip it; the zest is where all the lemony magic happens.

- **1 teaspoon vanilla extract**
  A classic flavor booster! If you’re feeling adventurous, try using almond extract for a different twist.

- **1/2 teaspoon baking powder**
  This helps the cookies rise nicely, making them tender and fluffy.

- **1/4 teaspoon salt**
  A pinch of salt enhances all the flavors beautifully!

## Step-by-Step Instructions

Now that we have our ingredients on hand, let’s jump into the fun part – baking these heavenly cookies!

### Step 1: Preheat Your Oven
Preheat your oven to 350°F (175°C). This little step helps your cookies bake evenly right from the start!

### Step 2: Prep Your Baking Sheet
Line a baking sheet with parchment paper. This ensures our cookies don’t stick and makes cleanup a breeze. Plus, a lined sheet gives you perfectly rounded edges every time!

### Step 3: Mix the Wet Ingredients
In a large mixing bowl, cream together the softened butter and cream cheese until the mixture is light and fluffy. This usually takes about 2-3 minutes of good mixing! Add in the granulated sugar, lemon zest, and vanilla extract, and beat until combined. You’ll know you’re there when the mixture is smooth and smells divine!

### Step 4: Add the Egg
Crack that large egg into the mix, and stir until fully incorporated. It’ll help bring all these fabulous flavors together.

### Step 5: Combine the Dry Ingredients
In a separate bowl, whisk together the all-purpose flour, shredded coconut, baking powder, and salt. Mixing your dry ingredients ensures they distribute evenly throughout the dough.

### Step 6: Bring It All Together
Gradually add your dry mixture to the wet ingredients, folding gently until you can no longer see any flour. Try not to overmix; we want our cookies to stay tender and oh-so-chewy.

### Step 7: Scoop and Bake
Use a cookie scoop or a tablespoon to drop dollops of dough onto your prepared baking sheet, spacing them about 2 inches apart. The cookies will spread slightly, so give them a little room to breathe! Bake them in your preheated oven for about 12-15 minutes, or until they’re golden brown on the edges and slightly soft in the center.

### Step 8: Cool Your Cookies
Once they’re out of the oven, let them cool on the baking sheet for about 5 minutes before transferring them to a wire rack to cool completely. This part is key – it allows them to set while still being delightfully warm!

## Serving Suggestions

To serve these lovely cookies, arrange them on a beautiful platter, perhaps with a sprig of fresh mint or a dusting of powdered sugar on top for that extra elegant touch. They pair wonderfully with a cup of tea or lemonade, making them perfect for summer gatherings or cozy evenings at home.

## Recipe Variations

1. **Add a Chocolate Twist:** Fold in some white chocolate chips for a creamy, decadent variation that perfectly complements the lemon and coconut.

2. **Coconut Lime Cookies:** Replace the lemon zest with lime zest for a refreshing twist, perfect if you’re feeling adventurous!

3. **Nutty additions:** Mix in chopped macadamia nuts or pecans for a satisfying crunch.

4. **Frosted Delight:** Top your cooled cookies with a light lemon glaze or cream cheese frosting for a truly extravagant treat.

5. **Spiced Version:** Add a pinch of nutmeg or even ginger for a warm, spiced cookie that’s perfect for fall.

## Chef's Notes

As with many recipes, these cookies have evolved over time in my kitchen. Initially, they were a simple lemon drop cookie, but after years of experimenting (and tasting!), they grew into these Lemon Coconut Cheesecake delights. I love how baking can turn a simple idea into something extraordinary – it’s all about experimentation and, of course, love. One of my fondest memories was baking several batches for a wedding; when I finally saw the dessert table brimming with cookies, my heart swelled with pride.

## FAQs and Troubleshooting

1. **Why are my cookies spreading too much?**
   This usually happens if your butter is too warm or the dough isn’t chilled. Make sure your butter is just softened and consider chilling your dough for about 30 minutes before baking.

2. **What if my cookies are too dry?**
   This can happen if there was too much flour added. Always spoon your flour into the measuring cup instead of scooping directly from the bag. For a super moist cookie, ensure your butter and cream cheese are at room temperature.

3. **Can I freeze the dough?**
   Absolutely! Just scoop the dough onto a baking sheet and freeze until solid. Then, transfer them to a freezer-safe bag. Bake from frozen, just adding a couple of minutes to your baking time.

4. **How can I tell when cookies are done?**
   Look for edges that are set and slightly browned. Remember, they’ll continue to firm as they cool on the baking sheet!

## Nutritional Info

To be mindful of your delicious indulgence, each cookie has approximately:
- **Calories:** 120
- **Fat:** 6g
- **Carbohydrates:** 15g
- **Protein:** 1g
- **Sugar:** 5g

---

There you have it! A delectable batch of Lemon Coconut Cheesecake Cookies that are sure to become a dear staple in your baking repertoire. Whether you’re sharing them with friends, family, or simply savoring them on your own, these cookies embody everything I love about cooking – joy, connection, and warmth. So, tie on that apron, channel your inner sunny chef, and let’s create something some sweet together!
Lemon Coconut Cheesecake Cookies

Delightful lemon coconut cheesecake cookies that embody the essence of summer with their bright flavors and soft texture.
- Prep Time: 15 minutes
- Cook Time: 15 minutes
- Total Time: 30 minutes
- Yield: 24 cookies 1x
- Category: Dessert
- Method: Baking
- Cuisine: American
- Diet: Vegetarian
Ingredients
- 1 cup all-purpose flour
- 1/2 cup unsweetened shredded coconut
- 1/4 cup granulated sugar
- 1/2 cup cream cheese, softened
- 1/4 cup butter, softened
- 1 large egg
- 1 tablespoon lemon zest
- 1 teaspoon vanilla extract
- 1/2 teaspoon baking powder
- 1/4 teaspoon salt
Instructions
- Preheat your oven to 350°F (175°C).
- Line a baking sheet with parchment paper.
- In a large mixing bowl, cream together the softened butter and cream cheese until light and fluffy.
- Add in the granulated sugar, lemon zest, and vanilla extract, and beat until combined.
- Crack the large egg into the mix, and stir until fully incorporated.
- Whisk together the all-purpose flour, shredded coconut, baking powder, and salt in a separate bowl.
- Gradually add the dry mixture to the wet ingredients, folding gently until no flour is visible.
- Scoop dollops of dough onto your prepared baking sheet, spacing them about 2 inches apart.
- Bake for about 12-15 minutes, or until golden brown on the edges and slightly soft in the center.
- Let them cool on the baking sheet for 5 minutes before transferring to a wire rack.
Notes
For a gluten-free option, use almond flour and coconut flour. Adjust sugar when using sweetened coconut. Can freeze cookie dough for later use.
Nutrition
- Serving Size: 1 cookie
- Calories: 120
- Sugar: 5g
- Sodium: 50mg
- Fat: 6g
- Saturated Fat: 4g
- Unsaturated Fat: 2g
- Trans Fat: 0g
- Carbohydrates: 15g
- Fiber: 1g
- Protein: 1g
- Cholesterol: 30mg
Keywords: cookies, desserts, lemon, coconut, cheesecake
Pin by Vital Vibes on Cupcake Heaven 🧁 in 2026 | Recipes, Cooking, Cooking recipes
Cupcake Heaven: Your Ultimate Guide to Delectable Cupcake Recipes
Hello, fellow food lovers! Savannah Pierce here, and I’m absolutely thrilled to dive into one of my all-time favorite sweet treats—cupcakes! These delightful little cakes may be small, but they carry a world of flavor and creativity in each bite. Whether it’s a classic vanilla buttercream or a decadent chocolate ganache, cupcakes are the perfect canvas for your baking artistry.
Cupcakes have a special place in my heart, evoking memories of birthday parties, festive gatherings, and cozy evenings spent with family. Their versatility and charm make them ideal for any occasion. From sweet celebrations to casual bake-offs, every batch tells a story. Today, I want to take you on a journey into "Cupcake Heaven," where we’ll explore delightful recipes, tips, and tricks to elevate your cupcake game.
So, grab your mixing bowls and preheat that oven—we’re about to create something magical! With just a few quality ingredients and a sprinkle of love, you’ll be whipping up cupcakes that not only look stunning but also taste out of this world. Let’s get into the sweet details!
Personal Story
Ah, the nostalgia! I can still remember the first time I took a bite of my grandmother’s famous chocolate cupcakes. It was my birthday, and she had baked a dozen mini masterpieces, each with a swirl of rich frosting and a cherry on top—a simple yet divine affair. As I bit into that soft, moist cake, a burst of chocolate flavor danced on my palate. The joy I felt that day was amplified by the laughter of family, the whiff of vanilla wafting through the kitchen, and of course, the love that was poured into each cupcake.
Fast forward to now, when I host dinner parties and celebrations, and I find myself channeling those nostalgic moments. Cupcakes allow me to evoke that same warmth and joy for my friends and family. The best part? I’ve tweaked those recipes over the years, infusing them with fresh ingredients and modern flavors while keeping the tradition alive! Let’s make some cupcake magic, shall we?
Ingredients
Here’s a classic list of ingredients you’ll need for a delightful batch of cupcakes—these specific choices ensure a soft, delectable texture and irresistible flavors!
Base Ingredients:
- All-Purpose Flour: The backbone of our cupcakes! It provides structure. For a gluten-free option, swap with almond flour or a gluten-free flour blend.
- Granulated Sugar: Sweetness is key! You can use coconut sugar or honey, but keep in mind they may alter the final texture slightly.
- Baking Powder: This is what gives your cupcakes that lovely rise. Double-check the expiration date; old baking powder can lead to flat cakes!
- Salt: Just a pinch enhances sweetness and balances flavors—don’t skip it!
- Unsalted Butter: Adds richness and moisture. If you want a dairy-free cupcake, olive oil is a great substitute.
- Eggs: Vital for binding moisture. For a vegan twist, flax eggs work wonderfully (1 flaxseed meal + 2.5 tablespoons of water = 1 egg).
- Milk: Enhances flavor and moistness. You can use almond milk, oat milk, or any non-dairy alternative.
- Vanilla Extract: This elevates the flavor profile! Use pure vanilla extract for a more natural taste, or get creative and try almond extract for a hint of nuttiness.
Optional Frosting Ingredients:
- Powdered Sugar: This dreamy ingredient gives our frosting that fluffy texture. For a healthier option, powdered erythritol works well.
- Cream Cheese: Perfect for a tangy frosting! You could substitute with vegan cream cheese for a dairy-free version.
- Heavy Cream: Utilized to achieve that light, airy frosting; coconut cream works like a charm if you’re dairy-free.
Step-by-Step Instructions
Now, let’s get baking! Preheat that oven to 350°F (175°C) and prepare your cupcake pans with liners. With everything ready, here’s how to whip up delicious cupcakes:
-
Mix the Dry Ingredients: In a medium bowl, whisk together the all-purpose flour, baking powder, and salt. This ensures even distribution and helps aerate the flour for fluffier cupcakes.
-
Cream the Butter and Sugar: In a large mixing bowl, cream the softened unsalted butter and granulated sugar until light and fluffy—about 3–4 minutes. This step incorporates air, resulting in a soft texture!
-
Add the Eggs and Vanilla: Beat in the eggs one at a time, mixing well after each addition. Add the vanilla extract, and remember to scrape the sides of the bowl to incorporate all that buttery goodness.
-
Combine Dry & Wet Ingredients: Gradually add the dry mixture to the wet ingredients, alternating with milk. Start and finish with the flour. This helps maintain moisture while ensuring your batter isn’t over-mixed. Mix until just combined!
-
Fill the Cupcake Liners: Use a scoop or a measuring cup to fill each cupcake liner about two-thirds full—this allows room for rising but prevents overflow.
-
Bake: Pop them in the oven and bake for 18–20 minutes or until a toothpick inserted in the center comes out clean. Your kitchen will smell heavenly at this point—trust me!
-
Cool: Let the cupcakes cool in the pan for 5 minutes before transferring them to a wire rack. Allow them to cool completely before frosting.
-
Prepare Your Frosting: In a bowl, combine your cream cheese (or butter), powdered sugar, and a splash of heavy cream. Beat until creamy and easy to spread—adjust with more sugar or heavy cream for your desired consistency!
-
Frosting Fun: Once cooled, use a piping bag to frost your cupcakes. Start from the center and spiral outward for an elegant look—don’t worry about being perfect; it’s all about the love!
Serving Suggestions
To make your cupcakes shine, consider placing them on a decorative platter, perhaps adorned with fresh fruit or edible flowers for that wow-factor. Alternatively, you can display them in cute individual boxes for a delightful take-home treat at gatherings.
Recipe Variations
Feeling adventurous? Here are some fun twists on your classic cupcake recipe:
-
Red Velvet: Add cocoa powder and a splash of red food coloring for a gorgeous hue. Top with cream cheese frosting for the classic finish!
-
Lemon Zest: Incorporate fresh lemon zest into your batter for a bright, zesty flavor. Pair with a lemon buttercream for a refreshing lift.
-
Chocolate Chip: Fold in semi-sweet chocolate chips or chunks into the batter for an indulgent twist!
-
Spiced Maple: Substitute maple syrup for sugar and add cinnamon for a cozy autumn flavor. A maple buttercream will complement this beautifully.
-
Nutty Delight: Fold in crushed nuts or swap flour for almond flour for an interesting texture.
Chef’s Notes
Baking cupcakes has been a delightful journey for me. I remember the first time I tried to recreate my grandmother’s chocolate cupcakes; let’s just say it wasn’t pretty! The kitchen ended up looking like a flour bomb went off, but the laughter we shared that day overshadows any kitchen mishap. It’s in those moments I learned—baking is about joy, not just the end product. Over the years, I’ve perfected the recipes, but it’s always those messy, learning experiences that I treasure most.
FAQs and Troubleshooting
Q: Why are my cupcakes not rising?
A: Make sure your baking powder is fresh! Also, avoid over-mixing the batter once you’ve added the flour—this can lead to dense cupcakes.
Q: How do I store leftover cupcakes?
A: Store them in an airtight container at room temperature for 2–3 days. For longer storage, pop them in the fridge or freezer—just remember to let them come back to room temperature before enjoying!
Q: Can I use coconut flour instead of all-purpose flour?
A: Coconut flour is much more absorbent, so if you try to swap it, use only a 1/4 of what you’d normally use and add an extra egg or more liquid to balance.
Q: My frosting is too runny. What can I do?
A: If this happens, simply add more powdered sugar until you reach your desired consistency. If it’s too thick, add a drop of milk or cream.
Nutritional Info
(Nutritional info can vary based on ingredients and portion sizes.)
- Calories per cupcake (without frosting): Approximately 180
- Total Fat: 6g
- Saturated Fat: 3.5g
- Cholesterol: 43mg
- Carbohydrates: 28g
- Sugar: 14g
- Protein: 2g
And there you have it—a delightful journey into the realm of cupcakes! I hope you now feel inspired to grab that apron and whip up your very own batch of Cupcake Heaven. Every bite is a celebration, and I’m so glad to share this delicious experience with you. Remember, good food isn’t just about taste; it’s about connection, laughter, and the stories we share around the table. Happy baking!
PrintCupcake Heaven: Your Ultimate Guide to Delectable Cupcake Recipes

Explore the world of cupcakes with this delightful recipe guide, featuring classic and modern flavors that evoke nostalgia and joy.
- Prep Time: 15 minutes
- Cook Time: 20 minutes
- Total Time: 35 minutes
- Yield: 12 servings 1x
- Category: Dessert
- Method: Baking
- Cuisine: American
- Diet: Vegetarian
Ingredients
- 2 cups All-Purpose Flour
- 1 1/2 cups Granulated Sugar
- 1 tbsp Baking Powder
- 1/2 tsp Salt
- 1/2 cup Unsalted Butter, softened
- 3 Eggs
- 1 cup Milk
- 2 tsp Vanilla Extract
- Optional: 2 cups Powdered Sugar (for frosting)
- Optional: 8 oz Cream Cheese (for frosting)
- Optional: 1/4 cup Heavy Cream (for frosting)
Instructions
- Preheat the oven to 350°F (175°C) and prepare your cupcake pans with liners.
- Mix the dry ingredients: In a medium bowl, whisk together the flour, baking powder, and salt.
- Cream the butter and sugar: In a large mixing bowl, cream the softened butter and granulated sugar until light and fluffy.
- Add the eggs and vanilla: Beat in the eggs one at a time, mixing well after each addition, then add the vanilla extract.
- Combine dry and wet ingredients: Gradually add the dry mixture to the wet ingredients, alternating with milk.
- Fill the cupcake liners about two-thirds full.
- Bake for 18–20 minutes or until a toothpick comes out clean.
- Cool in the pan for 5 minutes, then transfer to a wire rack until cool.
- Prepare your frosting by beating together cream cheese, powdered sugar, and heavy cream.
- Frost with a piping bag, starting from the center and spiraling outward.
Notes
Consider using fresh fruit or edible flowers for decoration.
Nutrition
- Serving Size: 1 cupcake
- Calories: 180
- Sugar: 14g
- Sodium: 200mg
- Fat: 6g
- Saturated Fat: 3.5g
- Unsaturated Fat: 0.5g
- Trans Fat: 0g
- Carbohydrates: 28g
- Fiber: 0g
- Protein: 2g
- Cholesterol: 43mg
Keywords: cupcakes, baking, dessert, sweet treats, celebration
Ooey Gooey Banana Bars
Ooey Gooey Banana Bars: A Sweet and Comforting Treat
Hey there, fellow foodies! If you’re anything like me, bananas seem to mysteriously multiply in your fruit bowl. One day, you have just a few perfectly ripe bananas, and the next day, they look at you with their sad, spotty faces, practically begging to be used in some delicious way! Well, don’t you worry—I’m here to help you turn those bananas into something ooey, gooey, and utterly irresistible.
Today, we’re diving into the world of Ooey Gooey Banana Bars! These delightful treats are like a hug in dessert form—sweet, comforting, and the perfect balance of chewy and soft. Not only are they easy to prepare, but they also fill your kitchen with an aroma that could lure anyone into the room. This recipe is the embodiment of cozy indulgence, and today, I’m excited to share it with you. Whether you’re looking for a snack for your afternoon coffee, a sweet treat to impress your friends, or a mouth-watering dessert for the family, you’re in the right place.
So, grab your apron and let’s get baking!
Personal Story
Ah, the banana bar! My first experience with these scrumptious little squares takes me back to my childhood kitchen. I must’ve been no older than ten when my grandmother decided to whip up a batch of her famous banana bars. I still remember the way her kitchen felt—a warm, familiar space filled with laughter and the rich essence of vanilla and sugar. She had a magic touch; no one could ever replicate her recipes quite like she did!
One rainy afternoon, we dove into the world of banana baking together. All I remember was the fun we had mashing those bananas, sneaking spoonfuls of batter, and her radiant smile as we pulled the bars from the oven. The gooey centers and the smell of warm caramelized sugar were simply divine. As we shared those bars with the family, I felt a profound connection—not only to food but to the joy of gathering together, sharing stories, and, of course, indulging in life’s sweet moments.
Now, let’s carry that spirit into your kitchen as we create your very own batch of Ooey Gooey Banana Bars!
Ingredients
Before we get started, let’s gather our ingredients. Here’s what you’ll need:
Ingredients List:
-
3 ripe bananas, mashed
- Ripe bananas are sweeter and break down more easily, making them perfect for this recipe. If you don’t have people who eat bananas when they’re ripe, just stick them in a paper bag for a day or two, or bake them for a few minutes until they’re soft!
-
1/2 cup unsalted butter, melted
- I prefer unsalted butter for its versatility, but if you only have salted, just skip adding any salt later! This butter will provide richness and moisture.
-
1 cup brown sugar
- Brown sugar gives the bars that lovely caramel flavor. You can use white sugar, but I highly recommend sticking with brown for that melt-in-your-mouth experience.
-
1 large egg
- The egg is your binder—helping everything come together into a cohesive, gooey treat! For a vegan option, try using a "flax egg" (1 tablespoon ground flaxseed mixed with 2.5 tablespoons water) as a substitute.
-
1 teaspoon vanilla extract
- Vanilla enhances all the other flavors—don’t skip it! If you want to get fancy, try using homemade vanilla extract or a splash of almond extract for a different twist.
-
1 cup all-purpose flour
- This is the base of our bars! If you’re looking for gluten-free alternatives, a 1:1 gluten-free flour blend can do the trick.
-
1 teaspoon baking soda
- This is our leavening agent. It helps the bars rise and become fluffy while granting a lovely texture.
-
1/2 teaspoon salt
- Just a pinch enhances all the sweetness!
-
1/2 cup peanut butter (for drizzling on top)
- This adds an incredible element of indulgence! If you’re not a fan of peanut butter, try drizzling melted chocolate or a caramel sauce instead.
Now that we have our ingredients, let’s get our hands a little messy!
Step-by-Step Instructions
-
Preheat the Oven:
Start by preheating your oven to 350°F (175°C). This step is essential because we want our banana bars to bake evenly and perfectly. And trust me, your anticipation will build as the kitchen fills with that sweet banana aroma! -
Prepare the Baking Dish:
Grab an 8×8 inch baking dish (or any similarly sized dish). Grease it lightly with some butter or line it with parchment paper for easy removal. Honestly, who wants to wrestle with stuck bars? -
Mash the Bananas:
In a large mixing bowl, mash those ripe bananas with a fork or potato masher. Aim for a consistency that’s mostly smooth, with a few chunks to enhance the texture. Fun fact: the more you mash them, the sweeter your bars will be! -
Mix in the Wet Ingredients:
Stir in the melted butter until combined. Next, mix in the brown sugar, followed by the egg and vanilla extract. Ensure everything is well combined—you want that delightful flavor to spread throughout the batter. -
Combine the Dry Ingredients:
In a separate bowl, whisk together the flour, baking soda, and salt. Then, gently fold the dry mixture into the wet mixture. Be careful not to overmix—you want the bars to remain soft and gooey, not tough! -
Pour and Spread:
Pour the batter into the prepared baking dish, spreading it out evenly with a spatula. Now, this is the moment where you can be a little extra! Drizzle the peanut butter over the top in a zigzag pattern. If the peanut butter is too thick to drizzle, warm it slightly in the microwave for easier pouring. -
Bake:
Place the dish in the preheated oven and bake for about 25-30 minutes. Keep an eye on them! The bars are done when the edges are golden and a toothpick inserted into the center comes out with a few moist crumbs. -
Cool and Cut:
Once baked, remove the bars from the oven and allow them to cool in the pan for about 10 minutes. Once they’re slightly cooled, use a sharp knife to cut them into squares. Trust me; the cool-down period is torture, but the excitement is worth it!
Each step brings us closer to banana heaven! Feel free to sing or dance a little while you wait—your kitchen deserves a soulful serenade!
Serving Suggestions
Ah, the moment of truth has arrived! When serving your Ooey Gooey Banana Bars, consider a simple yet effective presentation. You can either serve them warm with a scoop of vanilla ice cream on the side or dust them with powdered sugar for a touch of elegance. For another layer of flavor, drizzle a bit more warm peanut butter or chocolate sauce on top just before serving.
And don’t forget to plate them on your favorite serving platter to add a personal touch to your gathering. They’ll look beautiful and inviting!
Recipe Variations
Want to mix things up? Here are a few delightful variations to suit your taste:
- Nutty Appeal: Add 1/2 cup of chopped walnuts or pecans to the batter for an additional crunch.
- Chocolate Lovers: Fold in 1/2 cup of chocolate chips for a deliciously chocolatey twist!
- Tropical Banana Bars: Add shredded coconut and chopped pineapple for a tropical vibe!
- Oatmeal Swirl: Incorporate a 1/2 cup of rolled oats into the batter for wholesome goodness.
- Spicy Banana Bars: Enhance the flavor profile by adding a teaspoon of cinnamon or nutmeg to the dry ingredients for a warm spiciness.
Feel free to experiment and see what delightful combinations you can come up with!
Chef’s Notes
These Ooey Gooey Banana Bars have been a staple in my kitchen for years, and like all good recipes, they’ve evolved over time. I’ve swapped in different nut butters, played around with spices, and even topped them with fresh fruit. Each adaptation has led to some beautiful kitchen memories with friends and family.
And speaking of memories, I once made these for a potluck dinner, completely forgetting to add the egg! I was mortified, but thankfully, everyone loved them just the same, and the "oops!" turned into a great conversation starter! Embrace your imperfections; in the kitchen and in life, it’s those little moments that create the best stories.
FAQs and Troubleshooting
-
Why are my banana bars too dense?
- Overmixing the batter is often the culprit! Mix until just combined to keep them soft and gooey.
-
Can I use frozen bananas?
- Absolutely! Thaw the bananas and drain excess liquid before mashing them, and you’re good to go.
-
What’s the best way to store these bars?
- Store in an airtight container at room temperature for up to three days. For longer storage, you can refrigerate them for up to a week or freeze them individually wrapped for up to 3 months!
-
Can I make this recipe vegan?
- Yes! Substitute the egg for a flax egg or any egg replacement you prefer, and use a vegan butter alternative.
Nutritional Info (if applicable)
While I love indulging in these banana bars, it’s always helpful to know what you’re eating. The estimates below give you an idea of what each bar contains, but keep in mind the figures can vary based on your substitutes:
- Calories: Approximately 180
- Fat: 8g
- Carbohydrates: 26g
- Protein: 3g
- Fiber: 1g
There you have it! Your Ooey Gooey Banana Bars are ready to be enjoyed. Thank you for letting me share this delicious recipe with you. May your cooking adventures be filled with joy, laughter, and sweet memories! Happy baking, friend! 🍌✨
PrintOoey Gooey Banana Bars
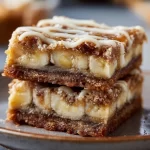
These delightful banana bars are sweet, comforting, and the perfect balance of chewy and soft. Easy to make and irresistibly delicious!
- Prep Time: 10 minutes
- Cook Time: 30 minutes
- Total Time: 40 minutes
- Yield: 12 servings 1x
- Category: Dessert
- Method: Baking
- Cuisine: American
- Diet: Vegetarian
Ingredients
- 3 ripe bananas, mashed
- 1/2 cup unsalted butter, melted
- 1 cup brown sugar
- 1 large egg
- 1 teaspoon vanilla extract
- 1 cup all-purpose flour
- 1 teaspoon baking soda
- 1/2 teaspoon salt
- 1/2 cup peanut butter (for drizzling on top)
Instructions
- Preheat the oven to 350°F (175°C).
- Prepare an 8×8 inch baking dish by greasing it or lining it with parchment paper.
- Mash the bananas in a large mixing bowl until mostly smooth.
- Mix in the melted butter, followed by the brown sugar, egg, and vanilla extract.
- Combine the flour, baking soda, and salt in a separate bowl and then fold into the wet ingredients.
- Pour the batter into the prepared baking dish and drizzle with peanut butter.
- Bake for 25-30 minutes until the edges are golden.
- Cool for 10 minutes before cutting into squares.
Notes
For a vegan option, substitute the egg with a flax egg and use plant-based butter. Enjoy warm with ice cream or powdered sugar!
Nutrition
- Serving Size: 1 bar
- Calories: 180
- Sugar: 15g
- Sodium: 200mg
- Fat: 8g
- Saturated Fat: 3g
- Unsaturated Fat: 5g
- Trans Fat: 0g
- Carbohydrates: 26g
- Fiber: 1g
- Protein: 3g
- Cholesterol: 20mg
Keywords: banana bars, dessert, sweet treats, baking, comfort food