
Seasonal Summer Berry Poke Cake: 5-Ingredient Quick Dessert
The Ultimate Summer Berry Poke Cake: A Burst of Flavor and Nostalgia
Hello, fellow food lovers! I can’t tell you how excited I am to share one of my all-time favorite summer desserts with you — the delightful Summer Berry Poke Cake. Think of sunshine, fresh-picked berries, and the joy of gatherings with loved ones. This lovely dessert doesn’t just taste amazing; it also has a special place in my heart, and I can’t wait to dive into the details of how it all came together.
The Memory That Inspired It All
Growing up, my grandmother was the queen of summer desserts. There was always something sweet and fruity wafting through her kitchen — from cobblers to pies, but her poke cake was the one that stole my heart. I vividly remember the sweet aroma of yellow cake baking, mingling with that fresh berry scent wafting through the air. Every summer, we would gather for family picnics, and she would proudly unveil her signature poke cake drenched in red raspberry Jell-O, topped with whipped cream and the freshest berries.
Eating that cake was always a delight, but the best memories revolved around us sitting around the picnic table, laughing and sharing stories while enjoying the splendid flavors that only summer can bring. When I created my version of her poke cake, it brought back all those warm and fuzzy feelings. I made it a little more vibrant with an extra punch of colorful berries. So, roll up your sleeves and let’s channel that summer nostalgia into the kitchen!
Ingredients
Here’s what you’ll need to create this mouthwatering cake:
-
1 box yellow cake mix
This is your base! You could switch it up with a gluten-free cake mix or even a lemon cake mix if you want to add a citrusy twist. -
1 cup water
Perfect for mixing the cake. Use cold or room temperature water; both work well, though cold water keeps the batter smooth. -
1/3 cup vegetable oil
This adds moisture and richness. If you’re looking to be a bit healthier, you could substitute with unsweetened applesauce! -
3 large eggs
Eggs provide structure. If you have egg allergies, you can use flax eggs as a binder (1 tablespoon ground flaxseed mixed with 2.5 tablespoons water equals 1 egg). -
1 cup fresh strawberries, chopped
These sweet gems are essential for that summery flavor. If strawberries are out of season, feel free to swap them for blackberries or your berry of choice! -
1 cup fresh blueberries
Antioxidant-rich and bursting with flavor, they add a delightful joy to the cake! They can also be substituted with diced peaches for a tropical flair. -
1 cup raspberry Jell-O mix
Essential for infusing flavor and color, this is what makes the cake “poke”! You could also use another flavor, like strawberry or cherry. -
1 cup boiling water
This is what dissolves the Jell-O mix, allowing it to soak beautifully into the cake. -
1 cup whipped topping
For that luscious frosting! You can use homemade whipped cream if you prefer, which will elevate the texture. -
1/2 cup fresh berries for garnish
Choose whatever berries you love — a rainbow of colors makes for an Instagram-worthy dessert!
Step-by-Step Instructions
Now that we’ve rounded up our ingredients, let’s embark on our sweet journey:
-
Preheat your Oven:
Start by preheating your oven to 350°F (175°C). This will ensure your cake bakes evenly and comes out perfectly golden. -
Mix Your Batter:
In a large mixing bowl, combine the yellow cake mix, water, vegetable oil, and eggs. Whisk until smooth. This is the fun part — get your family involved and let everyone take turns mixing. It’s a great way to create lasting memories (and get everyone a bit messy!). -
Pour and Bake:
Grease a 9×13-inch baking pan and pour in the cake batter. Bake it in the preheated oven for 25-30 minutes or until a toothpick inserted into the center comes out clean. While it’s baking, you’ll have the perfect opportunity to let the delicious aroma fill your home. -
Cool the Cake:
Once baked, allow the cake to cool in the pan for about 10-15 minutes. You want it to be warm, but not hot, before you start poking holes in it. -
Poke the Holes:
Using the handle of a wooden spoon or a straw, gently poke holes all over the top of the cake, about 1 inch apart. This is what allows that delicious Jell-O mixture to seep into the cake — trust me, it’s worth it. -
Prepare the Jell-O Mixture:
In a separate bowl, dissolve the raspberry Jell-O in 1 cup of boiling water, stirring until fully dissolved. This is where the magic begins! -
Pour the Jell-O Over the Cake:
Carefully pour the Jell-O mixture over the cake evenly, ensuring it fills in all the holes. You’ll see it start to seep into the cake, creating irresistible pockets of fruity goodness. -
Let It Chill:
Next, let the cake cool in the refrigerator for at least 2-3 hours (or overnight if you can wait that long!). This helps the flavors mingle and makes it easier to cut clean slices. -
Top It Off:
Once chilled, remove the cake from the fridge and spread the whipped topping over the top. Decorate with the fresh berries for a stunning finish. -
Slice and Serve:
You’re ready to slice into this summer delight. Serve it in generous squares and watch as your guests smile with delight!
Serving Suggestions
To elevate your serving experience, plate the slices on colorful dessert plates, and add a sprig of mint on top for a lovely pop of color. Pair slices with a scoop of vanilla ice cream or a dollop of extra whipped cream — because who can ever say no to ice cream, right?
Recipe Variations
The beauty of the Summer Berry Poke Cake is its versatility. Consider these fun variations:
- Tropical Twist: Replace berries with diced pineapple and mango for a tropical version.
- Lemon Burst: Swap out the yellow cake for lemon cake and use lemon Jell-O for a zesty kick.
- Chocolate Lover’s Dream: Use chocolate cake mix and raspberry Jell-O for a delicious chocolate-berry fusion.
- Vegan Version: Replace eggs with flax eggs, and use plant-based whipped cream.
Chef’s Notes
You know what’s great about this recipe? It’s not just a cake; it’s an experience! Each summer’s gathering and celebration becomes intertwined with this beloved poke cake. I’ll never forget the year I accidentally forgot to poke holes in the cake. My friends loved it anyway, but I resolved never to make that mistake again!
Over time, I’ve played around with flavors — from peach to lemon — but I always circle back to my original love for a strawberry-blueberry-raspberry combination. Each version reminds me of those warm summer afternoons spent with family.
FAQs and Troubleshooting
Q1: What if my cake comes out too dense?
Sometimes, if you overmix your batter, it can result in a dense cake. Just mix until the ingredients are incorporated!
Q2: Can I use frozen berries?
Absolutely! Fresh berries are great, but frozen will work too. Just ensure they’re thawed and drained before you use them to avoid excess moisture.
Q3: How do I store leftover cake?
Cover any leftover cake with plastic wrap or aluminum foil and keep it in the refrigerator for up to 3 days. Although, let’s be honest — it rarely lasts that long!
Q4: How can I tell when the cake is fully baked?
A toothpick inserted into the center of the cake should come out clean or with just a few moist crumbs. If there’s wet batter clinging to it, bake for a few more minutes and check again.
Nutritional Info
(Disclaimer: Nutritional information will vary depending on brands and ingredients used, but here’s a general ballpark per slice):
- Calories: approx. 260
- Fat: 10g
- Carbohydrates: 40g
- Protein: 2g
- Sugars: 15g
There you have it, my lovely friends! A cheerful Summer Berry Poke Cake that brings back memories of warm afternoons and joyful gatherings. So, tie on your apron and get baking! Let’s make some sweet memories this summer — one poke cake at a time!
PrintUltimate Summer Berry Poke Cake

A delightful summer dessert bursting with fresh berries and nostalgic flavors, perfect for gatherings.
- Prep Time: 15 minutes
- Cook Time: 30 minutes
- Total Time: 180 minutes
- Yield: 12 servings 1x
- Category: Dessert
- Method: Baking
- Cuisine: American
- Diet: Vegetarian
Ingredients
- 1 box yellow cake mix
- 1 cup water
- 1/3 cup vegetable oil
- 3 large eggs
- 1 cup fresh strawberries, chopped
- 1 cup fresh blueberries
- 1 cup raspberry Jell-O mix
- 1 cup boiling water
- 1 cup whipped topping
- 1/2 cup fresh berries for garnish
Instructions
- Preheat your oven to 350°F (175°C).
- Mix the yellow cake mix, water, vegetable oil, and eggs in a large mixing bowl until smooth.
- Pour the cake batter into a greased 9×13-inch baking pan and bake for 25-30 minutes.
- Cool the cake in the pan for about 10-15 minutes.
- Poke holes in the cake using a wooden spoon handle.
- Prepare the Jell-O mixture by dissolving it in 1 cup of boiling water.
- Pour the Jell-O mixture over the cake, ensuring it seeps into the holes.
- Let the cake cool in the refrigerator for at least 2-3 hours.
- Top the chilled cake with whipped topping and decorate with fresh berries.
- Slice and serve!
Notes
For additional variations, consider using diced pineapple and mango for a tropical twist, or lemon cake with lemon Jell-O for a zesty kick.
Nutrition
- Serving Size: 1 slice
- Calories: 260
- Sugar: 15g
- Sodium: 200mg
- Fat: 10g
- Saturated Fat: 1.5g
- Unsaturated Fat: 8g
- Trans Fat: 0g
- Carbohydrates: 40g
- Fiber: 1g
- Protein: 3g
- Cholesterol: 50mg
Keywords: Summer, Berry, Poke Cake, Dessert, Refreshing, Nostalgic
Lemon Blueberry Cheesecake Dump Cake
A Sweet Slice of Nostalgia: Lemon Blueberry Cheesecake Dump Cake
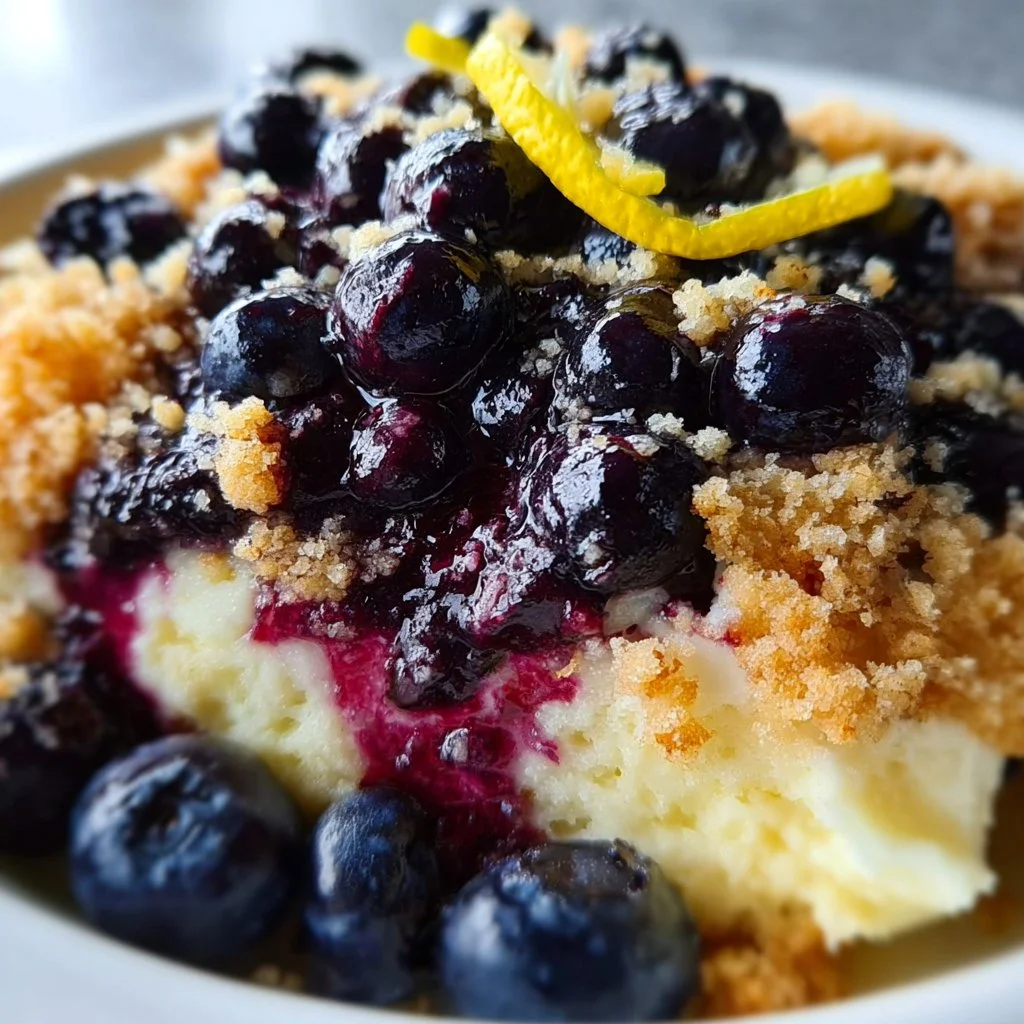
Hello, fellow foodies! Savannah Pierce here, and today we’re diving into a delightful dessert that brings together the bright, zesty flavors of lemon and the sweet-tart goodness of blueberries—introducing the Lemon Blueberry Cheesecake Dump Cake! This easy-to-make treat is sure to tickle your taste buds and warm your heart, reminding you of sunny days and cherished memories spent gathered around the table with loved ones.
A Slice of Childhood
Let me take you back to my childhood kitchen, where my love for baking blossomed. My grandmother, with her silver hair pulled back in a loose bun, was the queen of quick desserts. I remember watching her whip up cakes without fuss, and one day, she introduced me to her ‘throw-it-all-in’ cake method. “Savannah," she’d say, “the best cakes happen without too much thinking.”
I can still hear her laughter as she added a splash of this and a dash of that, her hands dusted with flour, her apron splattered with evidence of our culinary adventures. Her Lemon Blueberry Cheesecake Dump Cake was a favorite. It was the cake people would ask for at family gatherings, and I knew I wanted to create something equally special to honor her legacy.
So, today, as we flip through the pages of this recipe together, I invite you to create your own memories. Let’s bake with joy and share the fruits of our labor (and a sprinkle of love) with those we cherish!
Ingredients
Here’s what you’ll need to create this scrumptious Lemon Blueberry Cheesecake Dump Cake:
-
1 Box Yellow Cake Mix
A convenient base that brings a sweet, buttery flavor. You can substitute with gluten-free cake mix to suit dietary needs. -
1 Can of Lemon Pie Filling
This is where the magic happens! It adds rich lemon flavor. If you’re feeling adventurous, you can use homemade lemon curd instead. -
2 Cups Fresh Blueberries
Sweet and juicy, these little gems are the star of our show! If fresh blueberries aren’t available, frozen ones work just as well—just don’t worry about thawing them first. -
8 Ounces Cream Cheese, Softened
Creamy perfection! It adds richness to the cake. Feel free to use Neufchâtel cheese for a lower-fat option. -
1/2 Cup Sugar
A touch of sweetness to balance the tartness of the lemon. You can reduce it by a couple of tablespoons if you prefer less sweetness. -
1 Teaspoon Vanilla Extract
This adds warmth and depth to the flavor. Always use pure vanilla for the best taste, but artificial will work in a pinch. -
1/4 Cup Butter, Melted
Adds moisture and richness. If you’re going dairy-free, coconut oil could be a great substitute!
Step-by-Step Instructions
Now let’s get our hands a little messy and make this decadent dessert! Follow these steps closely, but don’t forget to have fun!
-
Preheat the Oven
Preheat your oven to 350°F (175°C). This is important as it ensures even baking. While that’s heating, take a moment to inhale the aroma of anticipation! -
Prepare the Baking Dish
Grab a 9×13 inch baking dish and grease it lightly. You want the cake to slide out easily. If you prefer, line it with parchment paper for an even smoother release. -
Mix the Cream Cheese Mixture
In a mixing bowl, beat the softened cream cheese with the sugar and vanilla extract until smooth and creamy. A hand mixer or a stand mixer works best here, but a whisk will also do the job if you’re feeling strong! -
Layer the Lemon Pie Filling
Spread the lemon pie filling on the bottom of the prepared baking dish. This tart layer will act as a base for your cake. Make sure to cover the entire surface evenly—the lemon flavor will seep into the cake. -
Add the Blueberries
Sprinkle your fresh blueberries over the lemon layer. You can add them neatly or scatter them for a more rustic look—no judgment here! -
Sprinkle the Cake Mix
Now for the dump part! Sprinkle the dry yellow cake mix evenly over the blueberries. No need to mix; just let the magic happen in the oven! -
Drizzle with Butter
Finally, drizzle the melted butter over the cake mix. This will create a golden, delicious crust as it bakes. Don’t worry about covering it completely; those little gaps will crisp up beautifully. -
Bake
Place the dish in the oven and bake for 35-40 minutes or until the top is golden and bubbling. Your kitchen will soon be filled with an intoxicating aroma that brings both comfort and excitement. -
Cool and Serve
Once baked, allow the cake to cool for about 15 minutes. This will make it easier to serve while still being warm and gooey!
Serving Suggestions
Plating this beauty is a breeze! Serve warm, either directly from the baking dish (because who has time for fancy dishes during a sweet craving?) or transfer it to a serving platter. A dollop of whipped cream or a scoop of vanilla ice cream on top makes for a stunning finish! Add a sprinkle of fresh blueberries or lemon zest for that aesthetic touch—it’ll feel like a slice of heaven on a plate!
Recipe Variations
- Berry Delight: Swap blueberries for a mix of berries! Raspberries and blackberries go splendidly well with lemon.
- Peachy Keen: Use canned or diced fresh peaches instead of lemon pie filling for a peach cheesecake dump cake.
- Coconut Cream: Replace the cream cheese with coconut cream for a tropical twist.
- Lemon Blueberry Muffin: Transform this into muffins by pouring the batter into muffin tins and adjusting bake time to about 20-25 minutes.
Chef’s Notes
My goodness, every time I whip up this Lemon Blueberry Cheesecake Dump Cake, I’m transported back to my grandmother’s kitchen! It’s been a hit at every family gathering, and the best part? It’s so easy that even the newest home cooks can impress their friends. Over the years, I’ve tweaked the recipe to enhance the lemon flavor or to add in whatever juicy fruit is in season. No matter how it’s made, I always encourage a big scoop of ice cream on top—it makes every forkful feel like a celebration!
FAQs and Troubleshooting
Q: Can I make this cake ahead of time?
A: Absolutely! You can prepare the components and layer them in the dish ahead of time, then store it in the fridge. Just pop it in the oven when you’re ready to bake!
Q: What if my cake mix clumps?
A: If you notice clumps, simply use a whisk to break them up before you sprinkle it over the fruit. It’ll bake up just fine!
Q: How do I know when the cake is done?
A: The top should be golden brown, and a toothpick inserted into the center should come out mostly clean with a few moist crumbs.
Q: Can I freeze leftovers?
A: You can! Just be sure to let the leftover cake cool completely, then cover tightly to prevent freezer burn. It’s best enjoyed within a few months.
Nutritional Info (Optional)
While every dessert should be enjoyed in moderation, here’s a rough breakdown per serving (based on 12 servings):
- Calories: 250
- Total Fat: 10g
- Saturated Fat: 5g
- Carbohydrates: 35g
- Sugars: 15g
- Protein: 3g
There you have it, my sweet friends—a Lemon Blueberry Cheesecake Dump Cake that’s sure to become a favorite in your home! As you tie on your apron and dive into this delightful recipe, remember that cooking is about sharing love and joy. I can’t wait to hear about the memories you create around your table! Happy baking!
PrintLemon Blueberry Cheesecake Dump Cake

A delightful dessert that combines zesty lemon and sweet blueberries in an easy-to-make dump cake.
- Prep Time: 15 minutes
- Cook Time: 40 minutes
- Total Time: 55 minutes
- Yield: 12 servings 1x
- Category: Dessert
- Method: Baking
- Cuisine: American
- Diet: Vegetarian
Ingredients
- 1 Box Yellow Cake Mix
- 1 Can of Lemon Pie Filling
- 2 Cups Fresh Blueberries
- 8 Ounces Cream Cheese, Softened
- 1/2 Cup Sugar
- 1 Teaspoon Vanilla Extract
- 1/4 Cup Butter, Melted
Instructions
- Preheat the oven to 350°F (175°C).
- Prepare a 9×13 inch baking dish by greasing it lightly.
- Mix the softened cream cheese with the sugar and vanilla extract until smooth and creamy.
- Layer the lemon pie filling on the bottom of the prepared baking dish.
- Add the fresh blueberries over the lemon layer.
- Sprinkle the dry yellow cake mix evenly over the blueberries.
- Drizzle the melted butter over the cake mix.
- Bake for 35-40 minutes until the top is golden and bubbling.
- Cool for about 15 minutes before serving.
Notes
Serve warm with whipped cream or ice cream for a stunning finish. Feel free to experiment with different fruits!
Nutrition
- Serving Size: 1 serving
- Calories: 250
- Sugar: 15g
- Sodium: 150mg
- Fat: 10g
- Saturated Fat: 5g
- Unsaturated Fat: 3g
- Trans Fat: 0g
- Carbohydrates: 35g
- Fiber: 1g
- Protein: 3g
- Cholesterol: 25mg
Keywords: dump cake, cheesecake, lemon blueberry, dessert, easy dessert