
Protein-Packed Greek Yogurt Blondie Brownies (One-Bowl)
Indulge in Healthy Decadence: Greek Yogurt Blondie Brownies
Hello, fellow food lovers! Today, we’re diving into a recipe that’s all about balance—healthy enough for a guilt-free snack yet decadent enough to satisfy that sweet tooth. Meet my Greek Yogurt Blondie Brownies! These delightful treats are the perfect blend of rich flavors and wholesome ingredients, allowing you to indulge without remorse.
Imagine this: a soft, chewy brownie that’s melted in your mouth, bursting with notes of peanut butter and a hint of chocolate—oh, yes, please! And the secret? We’re using Greek yogurt to add moisture and creaminess while packing an extra protein punch. So, get your apron on, pour a little something sparkling, and let’s whip up these beauties together!
A Sweet Memory to Share
I still remember the first time I discovered the power of Greek yogurt in baking. It was at a cozy little café in my hometown, where I’d often meet friends for coffee and pastries after our Saturday morning farmer’s market excursions. One day, I stumbled upon their special: Greek Yogurt Brownies. Intrigued, I ordered one and was blown away. It was rich, fudgy, and had this wonderful moist texture. That little box of goodies sparked a flurry of ideas back in my own kitchen.
That inspired me to combine two of my go-to flavors—peanut butter and chocolate—in a blondie version, swapping out the butter and oil for creamy Greek yogurt. The result? An absolute game changer! And I think you’re going to love it just as much as I do.
Let’s Gather Our Ingredients
Before we unleash the magic, here’s what you’ll need to bring this gorgeous recipe to life:
-
1 ¼ cups thick Greek yogurt (divided): The star of our show! Greek yogurt adds moisture and richness while providing protein. For a dairy-free version, opt for coconut yogurt—just pick one without added sugars.
-
½ cup maple syrup: This natural sweetener brings a warm, caramel flavor. You can swap it with honey or agave syrup, but be sure to adjust the moisture a bit since honey is denser.
-
⅓ cup crunchy peanut butter: We want those delightful nutty chunks! Feel free to use almond butter or sunflower seed butter if you’re looking for a nut-free option.
-
1 cup oat flour: This gluten-free alternative is light and gives the blondies a lovely texture. You can make your own oat flour by blending rolled oats in a blender until fine.
-
2 tsp baking powder: Our rising agent! Make sure it’s fresh for the best fluffiness.
-
¼ tsp salt: A pinch of salt balances the sweetness and enhances all the flavor elements.
-
½ cup cocoa powder: This adds a rich chocolatey depth. You can use raw cacao powder for an extra health boost.
-
¼ cup dark chocolate (chopped): Because who doesn’t love bits of chocolate? You can trade this for chocolate chips if that’s what you have on hand.
Step-by-Step Instructions
Now that we have everything prepped, let’s get these blondies baking!
-
Preheat the Oven: First things first, preheat your oven to 350°F (175°C). Grease an 8-inch square baking dish or line it with parchment paper for easy removal.
-
Mix the Wet Ingredients: In a large mixing bowl, combine 1 cup of the Greek yogurt, maple syrup, and peanut butter. Whisk them together until smooth and creamy. This step is key—getting a good emulsification means a more consistent batter!
-
Combine the Dry Ingredients: In another bowl, mix oat flour, baking powder, salt, and cocoa powder. Stir well to break up any clumps—you want these ingredients to blend seamlessly into your wet mix.
-
Mix Everything Together: Pour the dry mixture into the wet mixture. Gently fold the ingredients together until just combined. Overmixing can lead to dense blondies, and we want them soft and chewy!
-
Chocolate Touch: Fold in the chopped dark chocolate. This will add delightful pockets of melted chocolate that feel like little surprises as you bite into it.
-
Transfer to Baking Dish: Spread the batter evenly in your prepared baking dish. Use a spatula to smooth out the top—don’t worry about perfection; we want rustic charm here!
-
Bake: Pop your dish in the oven and bake for 20-25 minutes, or until a toothpick inserted in the center comes out with a few moist crumbs. Don’t overbake; you want chewy, not dry!
-
Cool: Allow your blondies to cool in the pan for about 10 minutes before transferring to a wire rack. This helps set the structure and makes slicing much easier.
-
Slice and Serve: Once cooled, slice into squares. You can make them as big or as small as you like! They’re perfect for sharing—or enjoying all on your own!
Serving Suggestions
Plate your Greek Yogurt Blondie Brownies on a colorful dish and serve them warm for an extra melty treat. A dollop of the remaining Greek yogurt on top with a drizzle of maple syrup or a sprinkle of sea salt can elevate the experience. Garnish with fresh berries or a few extra chocolate shavings for that "wow" factor!
Recipe Variations
Here are some delicious twists you can try with your blondies:
- Nutty Variation: Add a ¼ cup of chopped nuts like walnuts or pecans for crunch.
- Fruit Fusion: Fold in ½ cup of mashed banana or apple sauce for added moisture and sweetness.
- Flavor Swap: Experiment by swapping peanut butter for almond or cashew butter for a different nutty profile.
- Spicy Kick: Add a pinch of cinnamon or a dash of cayenne pepper for a delightful twist!
- Cheesy Goodness: Mix in ¼ cup of cream cheese for a rich, creamier texture.
Chef’s Notes
Baking is an art and a science—it’s amazing how creatively we can adjust recipes! This Greek Yogurt Blondie Brownies recipe has evolved from my original brown butter version; the yogurt simply makes everything lighter and healthier! Baking is also about experimentation; don’t hesitate to play around and make it your own! I remember when I first started using Greek yogurt in desserts—my family was skeptical, but they were pleasantly surprised by how much they loved it!
FAQs and Troubleshooting
1. My blondies turned out too dry. What went wrong?
Overbaking is usually the culprit. Make sure to check for doneness around the 20-minute mark, using a toothpick for precision.
2. Can I store leftovers?
Absolutely! Store your blondies in an airtight container at room temperature for up to 3 days. For longer storage, wrap them individually and freeze for up to a month.
3. My batter seems too runny; what should I do?
Sometimes, Greek yogurt can vary in thickness. If your mixture seems too loose, add a tablespoon of oat flour at a time until you reach the desired consistency.
4. Can I substitute Greek yogurt for sour cream?
Yes! Sour cream can substitute Greek yogurt in this recipe with similar results in moisture and richness.
Nutritional Info
(Approximation per blondie based on common ingredient values: 120 calories, 5g protein, 4g fat, 15g carbs; may vary based on ingredient choices.)
Now you’re armed with all the tips and tricks to create the most delectable Greek Yogurt Blondie Brownies ever! I hope you enjoy making them as much as I do. Don’t forget to invite friends to share your creation; after all, good food is all about good company!
Happy baking, and remember: life is short, eat the brownie (or two)!
PrintGreek Yogurt Blondie Brownies

Indulge in a healthy yet decadent treat with these Greek Yogurt Blondie Brownies, combining rich flavors of peanut butter and chocolate for a guilt-free snack.
- Prep Time: 15 minutes
- Cook Time: 25 minutes
- Total Time: 40 minutes
- Yield: 12 servings 1x
- Category: Dessert
- Method: Baking
- Cuisine: American
- Diet: Healthy
Ingredients
- 1 ¼ cups thick Greek yogurt (divided)
- ½ cup maple syrup
- ⅓ cup crunchy peanut butter
- 1 cup oat flour
- 2 tsp baking powder
- ¼ tsp salt
- ½ cup cocoa powder
- ¼ cup dark chocolate (chopped)
Instructions
- Preheat the oven to 350°F (175°C).
- Grease an 8-inch square baking dish or line with parchment paper.
- Combine Greek yogurt, maple syrup, and peanut butter until smooth.
- Mix oat flour, baking powder, salt, and cocoa powder in a separate bowl.
- Pour the dry ingredients into the wet mixture and gently fold together.
- Fold in the chopped dark chocolate.
- Spread the batter evenly in the prepared baking dish.
- Bake for 20-25 minutes until a toothpick comes out with moist crumbs.
- Cool for 10 minutes before transferring to a wire rack.
- Slice into squares and serve.
Notes
Serve with a dollop of Greek yogurt and drizzle of maple syrup for added flavor.
Nutrition
- Serving Size: 1 blondie
- Calories: 120
- Sugar: 8g
- Sodium: 100mg
- Fat: 4g
- Saturated Fat: 1g
- Unsaturated Fat: 3g
- Trans Fat: 0g
- Carbohydrates: 15g
- Fiber: 2g
- Protein: 5g
- Cholesterol: 5mg
Keywords: blondies, healthy brownies, Greek yogurt, peanut butter, dessert
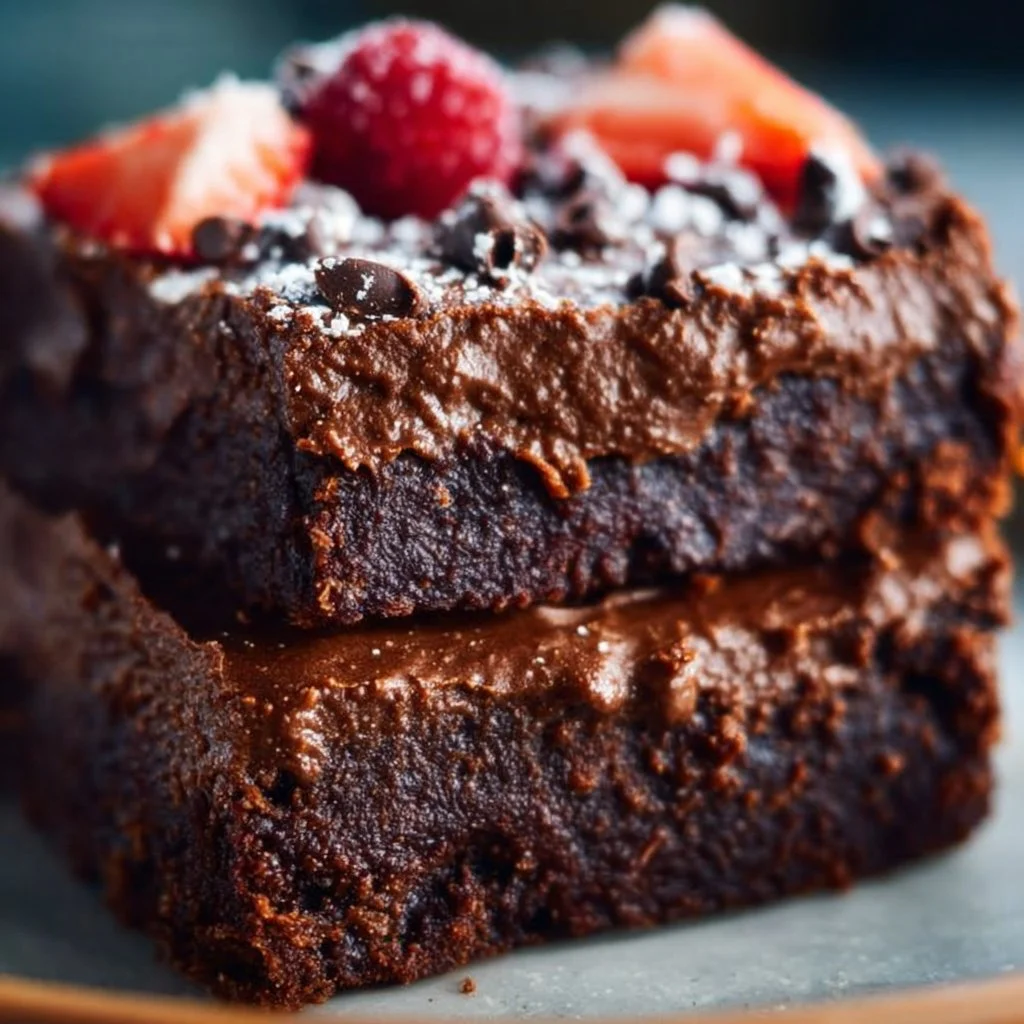
The Best Keto Brownie Recipe
The Best Keto Brownie Recipe: Indulge Without the Guilt
Hey there, lovely foodies! Today, we’re diving into a world of rich chocolatey goodness with a twist — a Keto Brownie recipe that will elevate your dessert game without the carb crash. Now, I know what you might be thinking: "Keto? Brownies? How can that possibly be delicious?" Trust me, my friend, I am here to assure you that these brownies are not only delicious but are also super easy to whip up!
When I first embarked on my culinary journey, I stumbled upon the idea of Keto cooking. I was intrigued by the challenge of creating decadent desserts without the traditional carbs. And then, out of sheer curiosity (and perhaps a craving for something a little sweet!), I made my first batch of Keto brownies. The kitchen filled with the warm, inviting scent of chocolate, and the result? Pure magic! Each bite was fudgy, rich, and utterly satisfying. I’m getting goosebumps just thinking about it!
So, whether you’re on a Keto journey, just looking to cut back on carbs, or craving something delightful, this recipe is here to save the day. Grab your apron and let’s make something that not only satisfies your sweet tooth but also allows you to enjoy a guilt-free treat!
Personal Story
Let me take you back to one of my fondest culinary memories. It was a rainy Saturday afternoon, and I had invited a few close friends over for a cozy gathering. We dished out hot tea and warm blankets while the soundtrack of the rain tickled our eardrums. My mission? To impress them with a homemade dessert.
Now, brownies were always a staple in my dessert repertoire. But this time, I wanted to switch things up, embrace the Keto lifestyle, and surprise everyone with a healthier yet delicious alternative. I set to work, heart racing with excitement, as I melted butter and whisked cocoa powder. Soon, the kitchen was alive with laughter and delightful chaos, friends peering over my shoulder to grab a taste of the batter.
When I finally cut into those gooey, chocolatey brownies, the room fell silent. The first bite brought smiles that said it all – I’d created something special. That day, we didn’t just enjoy dessert; we forged moments, sharing stories and laughter that would linger long after the last crumb had disappeared. And ever since, these Keto brownies have become my secret weapon for gatherings, proving that delicious treats can indeed be crafted with care and intention!
Ingredients
Now, let’s gather our star players for this mouthwatering Keto brownie recipe. Here’s what you’ll need:
-
1/2 cup almond flour
A fantastic low-carb alternative to traditional flour, almond flour provides a nutty flavor and moist texture to our brownies. If you don’t have almond flour, coconut flour can work, but use half the amount. -
1/2 cup cocoa powder
This is where the chocolate magic happens! Use unsweetened cocoa powder for that rich, deep chocolate flavor. If you’re a fan of dark chocolate, choose a higher cocoa percentage. -
1/4 cup erythritol (or your preferred sweetener)
Erythritol is a fantastic zero-calorie sweetener that mimics sugar’s sweetness without the carbohydrates. You can swap it out for other low-carb sweeteners like monk fruit or stevia; just check the conversion guidelines as sweetness levels vary. -
1/4 cup unsalted butter, melted
Butter adds richness and depth to the flavor. If you’re looking for a dairy-free option, coconut oil works beautifully here too! -
2 large eggs
Eggs bind the ingredients and give our brownies that delightful fudgy texture. If you’re vegan, flax eggs (1 tablespoon flaxseed meal mixed with 2.5 tablespoons water) can be an alternative. -
1 teaspoon vanilla extract
A dash of vanilla always enhances the flavor of chocolate. Use pure vanilla extract for the best results; it brings warmth and complexity to the recipe. -
1/2 teaspoon baking powder
This is our rising agent that helps create that lovely, soft texture. Ensure your baking powder is fresh for the best rise! -
1/4 teaspoon salt
A pinch of salt balances sweetness and brings out the flavor of the chocolate, so don’t skip this step!
Step-by-Step Instructions
Now that we have our ingredients ready, let’s get cooking! Here’s how to make these decadent Keto brownies step by step.
-
Preheat the Oven
Preheat your oven to 350°F (175°C). You want it nice and warm, setting the stage for our brownies to come to life! -
Prepare the Pan
Grab an 8×8 inch baking dish and line it with parchment paper, allowing some overhang. This will make it easy to lift the brownies out later. Lightly grease the parchment with a bit of coconut oil or cooking spray to prevent sticking. -
Combine the Dry Ingredients
In a medium bowl, whisk together the almond flour, cocoa powder, erythritol, baking powder, and salt. This ensures all of those dry ingredients are evenly distributed, creating a uniform batter. Plus, who doesn’t love the airy texture of freshly whisked dry goods? -
Mix the Wet Ingredients
In another bowl, beat the eggs, melted butter, and vanilla extract together until well combined. You want this mixture to be homogenous, giving you a rich base for your brownies. -
Blend It All Together
Gradually add the dry ingredients into the wet mixture. Stir gently to combine and form a thick batter. It’s okay if there are a few lumps; just ensure all the dry bits are incorporated! -
Pour and Spread
Transfer the brownie batter into your prepared baking dish, using a spatula to spread it evenly. Don’t be shy with that spatula — smooth it out for a beautiful finish! -
Bake
Pop the dish into your preheated oven and let it bake for 20–25 minutes. Your kitchen will soon be filled with the enchanting aroma of chocolate wafting through the air! -
Check for Doneness
The brownies are done when a toothpick inserted into the center comes out with a few moist crumbs (not wet batter!). This ensures that fudgy texture we’re after. If the toothpick comes out clean, you’ve overcooked them slightly. -
Cool and Slice
Let the brownies cool in the pan for about 10–15 minutes before lifting them out using the parchment paper. Place them on a wire rack to cool completely for the best slicing experience. Trust me, patience here pays off!
Serving Suggestions
Once your brownies have cooled, it’s time to serve up these delicious morsels. Cut into squares or bars, and for that extra flair, dust a little unsweetened cocoa powder on top or add a dollop of whipped cream (sweetened with a bit of erythritol, of course!). Serve them warm with a scoop of low-carb vanilla ice cream for an indulgent treat your friends will rave about!
Recipe Variations
Feeling adventurous? Here are a few creative twists you can try:
- Nutty Crunch: Fold in some chopped nuts like walnuts or pecans for added texture and flavor.
- Chocolate Chips: Stir in sugar-free chocolate chips if you want that extra gooeyness!
- Minty Fresh: Add a few drops of peppermint extract for a refreshing mint brownie twist.
- Spicy Kick: A pinch of cayenne or cinnamon can add a warm kick to your brownies.
- Swirls of Cream Cheese: Before baking, dollop cream cheese batter over the top and swirl it in for a cheesecake brownie hybrid!
Chef’s Notes
Over the years, this recipe has evolved to become my go-to treat for all occasions. Initially, I played around with different types of sweeteners, exploring what worked best for sweetness and texture. After a dozen variations, I settled on erythritol as the perfect fit.
Oh, and let me tell you about the time I invited some friends over for a game night and accidentally swapped the almond flour for coconut flour. The look on everyone’s faces when they took a bite was priceless! Surprise! Turns out that a dense coconut brownie wasn’t what I was aiming for. We laughed it off, but my friends have never let me live down that “experiment!”
FAQs and Troubleshooting
1. My brownies turned out dry. What went wrong?
Overbaking can easily dry out brownies. Make sure to check them a few minutes before the recommended baking time.
2. Can I use regular sugar instead of erythritol?
Absolutely! If you’re not concerned about carbs and prefer regular sugar, just substitute it in a 1:1 ratio — but remember, this won’t be Keto anymore.
3. Why are my brownies crumbly?
If your batter was too dry or you used too much almond flour, this might be the case. Ensure precise measurements, and remember, a little bit of wet will go a long way in keeping those brownies fudgy!
4. How do I store leftovers?
Store your brownies in an airtight container at room temperature for up to three days or in the fridge for a week. They also freeze well, so feel free to stash some away for later!
In the world of desserts, Keto brownies prove that you don’t have to sacrifice taste for health. So go ahead, whip up a batch, celebrate with friends, and relish the joy that comes from baking something truly special. Remember, good food isn’t just about the meal; it’s about the magic of sharing moments and creating memories. Happy baking, my fellow foodies! 🍫✨
PrintThe Best Keto Brownie Recipe: Indulge Without the Guilt
Delicious and fudgy Keto brownies that satisfy your sweet tooth without the carbs.
- Prep Time: 15 minutes
- Cook Time: 25 minutes
- Total Time: 40 minutes
- Yield: 16 servings 1x
- Category: Dessert
- Method: Baking
- Cuisine: American
- Diet: Keto, Gluten-Free
Ingredients
- 1/2 cup almond flour
- 1/2 cup cocoa powder
- 1/4 cup erythritol (or your preferred sweetener)
- 1/4 cup unsalted butter, melted
- 2 large eggs
- 1 teaspoon vanilla extract
- 1/2 teaspoon baking powder
- 1/4 teaspoon salt
Instructions
- Preheat your oven to 350°F (175°C).
- Grab an 8×8 inch baking dish and line it with parchment paper.
- In a medium bowl, whisk together the almond flour, cocoa powder, erythritol, baking powder, and salt.
- In another bowl, beat the eggs, melted butter, and vanilla extract together until well combined.
- Gradually add the dry ingredients into the wet mixture and stir gently to combine.
- Transfer the brownie batter into your prepared baking dish and smooth it out with a spatula.
- Pop the dish into your preheated oven and let it bake for 20–25 minutes.
- Check for doneness with a toothpick; it should come out with a few moist crumbs.
- Let the brownies cool for about 10–15 minutes before lifting them out and cooling completely on a wire rack.
Notes
Serve with a dusting of cocoa or whipped cream. Great for gatherings and can be stored for up to a week in an airtight container.
Nutrition
- Serving Size: 1 piece
- Calories: 150
- Sugar: 1g
- Sodium: 150mg
- Fat: 12g
- Saturated Fat: 5g
- Unsaturated Fat: 7g
- Trans Fat: 0g
- Carbohydrates: 8g
- Fiber: 3g
- Protein: 4g
- Cholesterol: 50mg
Keywords: Keto brownies, low-carb dessert, chocolate dessert, fudgy brownies