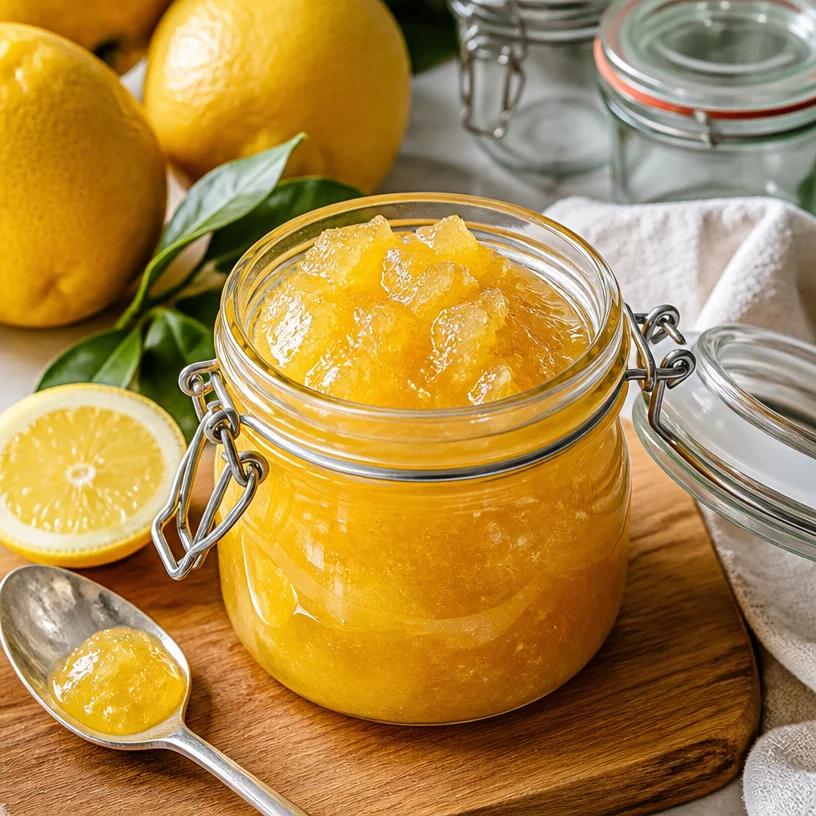
Ingredient Lemon Jam: Quick, Budget-Friendly Spread
The Golden Simplicity of Homemade Lemon Jam: A Two-Ingredient Wonder
Welcome to the beautiful world of homemade lemon jam! If you’ve ever wandered into a kitchen and thought about the aroma of citrus wafting through the air, you’re in for a real treat. Today, we’re diving into a vibrant, sunny recipe that encapsulates the essence of those bright lemons in a jar. But hold on tight, because this isn’t just any jam; it requires only two ingredients and a sprinkle of love. Get ready to embrace the tangy sweetness that adds a burst of flavor to your breakfast toast, yogurt, or even as a filling for pastries!
But before we spoon out the lemony goodness, let me share a little story of how this delightful recipe became a staple in my kitchen.
A Nostalgic Dive into Lemon Jam
Growing up, my grandmother had a lovely lemon tree in her backyard that was bursting with fruit. It was a wonderland of yellow citrus, and we’d often spend summer afternoons picking lemons, laughing, and getting lost in daydreams while the sun warmed our backs. One sunny Saturday, she decided it was time to make her famous lemon jam.
As she sliced the tangy fruits, the zest filled the room, creating a magical atmosphere that drew everyone in. I remember proudly standing by her side, diligently measuring sugar and sneaking spoonfuls of the sweet mixture as it cooked. The jam was a treasure, transforming our breakfasts into something special. Whether spread on warm toast or mixed into a simple yogurt, that lemon jam had the magical ability to elevate every meal.
Fast forward to today, and I still cherish those memories. This recipe is a homage to her simple yet profound culinary wisdom — just two ingredients can create something extraordinary. Let’s make that jam!
Ingredients
To make this lemon jam, you’ll need just a few simple ingredients:
-
8-10 Large Thick-Skinned Lemons: These lemons are the stars of the show! Varieties like "Citrons," "Lemonade," or "Femminello" work wonderfully. Their thick skin is ideal for yielding zest and juice, which is crucial for flavor. If you can’t find these, any firm, juicy lemons will work—just avoid the very soft ones that are past their prime.
-
Sugar: The sweet (and slightly magical) counterpart to the tartness of the lemons. White granulated sugar is perfect, but you can also try brown sugar for a hints of molasses or even coconut sugar for a healthier alternative. The amount of sugar can vary depending on how tart your lemons are, so taste as you go!
-
Canning Jars: Ideally, you want to store your delicious lemon jam in sterilized canning jars. These jars keep the jam fresh for longer, and they’re great for gifting too!
-
Cheesecloth: This isn’t strictly necessary but will come in handy to strain out any unwanted bits if you want a smoother texture.
Step-by-Step Instructions
-
Prep the Lemons: Start by washing your lemons thoroughly. You want to scrub off any wax or pesticide residue. After they’re cleaned, cut them in half and juice them into a bowl. Strain the juice to remove seeds and to catch anything you don’t want in your jam.
Tip: Save the lemon peels! They are rich in flavor and can be used later to enhance your jam or for zesting.
-
Zest Away: Using a microplane or a zester, grate the outer yellow skin of the lemon halves. You need about 1-2 tablespoons of lemon zest, which will add a punch of flavor to your jam.
Chef Hack: If you’ve never zested before, make sure to zest only the yellow portion of the skin, avoiding the white pith underneath as it can be bitter.
-
Mix it Up: In a medium pot, combine your lemon juice, zest, and sugar. This is where the magic begins! Stir well over medium heat until the sugar is fully dissolved.
Commentary: As the mixture heats up, you’ll start to notice that tantalizing aroma wafting through your kitchen. This is your indication that good things are coming!
-
Bring to a Boil: Raise the heat and bring your mixture to a gentle boil. Keep stirring occasionally to ensure it doesn’t burn on the bottom. You want to cook it for about 10-15 minutes, or until it has thickened.
Hack: To check the consistency, dip a spoon into the mix and drop a small amount onto a cold plate. If it holds its shape, it’s ready!
-
Prepare the Jars: While your jam is cooking, sterilize your canning jars. You can do this by placing them in boiling water for several minutes or running them through the dishwasher.
-
Jar it Up: Carefully pour the hot lemon jam into your prepared jars using a funnel to prevent spills. Leave a little bit of room at the top – about half an inch should do.
-
Seal and Cool: Once filled, wipe the rims of the jars clean to ensure a good seal, then cap them with the lids. Let them cool on the counter. As they cool, you’ll hear that satisfying “pop” sound as the vacuum seal forms.
Serving Suggestions
When it comes to serving, the world is your oyster (or should I say jam?). For a classic treat, spread a generous dollop over a warm slice of bread or toasted scone. It also makes for a lovely addition to yogurt parfaits, pancakes, or even ice cream!
Don’t be afraid to play around with presentation: a little sprig of mint or a thin slice of lemon on top can add that special touch when serving guests.
Recipe Variations
Here are some fun variations you can try with this golden jam:
-
Herb-Infused Lemon Jam: Toss in a few sprigs of fresh herbs like rosemary or thyme while cooking for an aromatic twist. Remove before jarring.
-
Spicy Lemon Jam: Add a pinch of red chili flakes or a small chopped jalapeño for a sweet-and-spicy kick!
-
Berry Citrus Jam: Mix in crushed strawberries or blueberries during the cooking process for a fruity twist.
-
Coconut Lemon Jam: Replace half of the sugar with shredded coconut for a tropical take.
-
Vanilla Lemon Jam: Add in a split vanilla bean while cooking to introduce warm, sweet notes that balance the tartness.
Chef’s Notes
There’s a special kind of joy that comes with preserving. I remember the first time I made this jam; I was giddy seeing my friends’ faces light up when they tasted it. Over the years, I’ve tweaked this recipe, often experimenting with citrus varieties and added ingredients. Each batch has its own story—a memory created through each stir, each spoon, and every delicious spread.
Sometimes the kitchen can feel chaotic, especially when juggling a dozen things at once. But remember to enjoy the process! Those moments of laughter and the occasional splatter just add to the charm of homemade cooking.
FAQs and Troubleshooting
-
What can I do if my lemon jam didn’t thicken?
If your jam hasn’t thickened, you can return it to the pot, bring it to a gentle boil, and cook for another 5-10 minutes. -
Can I use bottled lemon juice?
While it’s best to use fresh lemons for the best flavor, you can substitute with bottled lemon juice in a pinch. Keep in mind it won’t have the same robust taste! -
How long will the lemon jam last?
If properly canned and sealed, it can last up to a year in a cool, dark place. Once opened, store in the fridge for about 2 weeks. -
What’s the best way to serve this jam?
There’s no wrong way! Try it on toast, pancakes, or even stirred into salad dressings for added citrusy zing.
Nutritional Info
Calories per tablespoon: approximately 50
Sugar: 13g per tablespoon (adjust depending on your sugar choice)
And there you have it, my lemon-loving friends! Making homemade lemon jam is simple, delicious, and a delightful way to capture summer’s bliss in a jar. Share it with friends, slather it on pastries, or just savor it while dreaming of sun-filled afternoons. Now, go ahead and tie on that apron; I can’t wait to hear about your lemon jam adventures! Happy cooking!
PrintHomemade Lemon Jam
A simple and vibrant recipe for homemade lemon jam using just two ingredients.
- Prep Time: 15 minutes
- Cook Time: 15 minutes
- Total Time: 30 minutes
- Yield: 4 servings 1x
- Category: Condiment
- Method: Canning
- Cuisine: American
- Diet: Vegetarian
Ingredients
- 8–10 Large Thick-Skinned Lemons
- Sugar (to taste)
- Canning Jars
- Cheesecloth (optional)
Instructions
- Prep the lemons by washing and juicing them into a bowl, straining out seeds.
- Zest using a microplane to obtain 1-2 tablespoons of lemon zest.
- Mix lemon juice, zest, and sugar in a pot over medium heat until dissolved.
- Bring to a gentle boil, stirring occasionally, and cook for 10-15 minutes until thickened.
- Prepare your canning jars by sterilizing them.
- Jar the hot lemon jam into prepared jars using a funnel.
- Seal the jars and let cool on the counter.
Notes
Store in sealed jars for up to a year. If it doesn’t thicken, return to the pot and boil for an additional 5-10 minutes.
Nutrition
- Serving Size: 1 tablespoon
- Calories: 50
- Sugar: 13g
- Sodium: 0mg
- Fat: 0g
- Saturated Fat: 0g
- Unsaturated Fat: 0g
- Trans Fat: 0g
- Carbohydrates: 13g
- Fiber: 0g
- Protein: 0g
- Cholesterol: 0mg
Keywords: lemon jam, homemade jam, citrus recipe, two ingredient jam