Queso Chicken Enchiladas for a Quick and Cheesy Dinner Delight
Queso Chicken Enchiladas for a Quick and Cheesy Dinner Delight
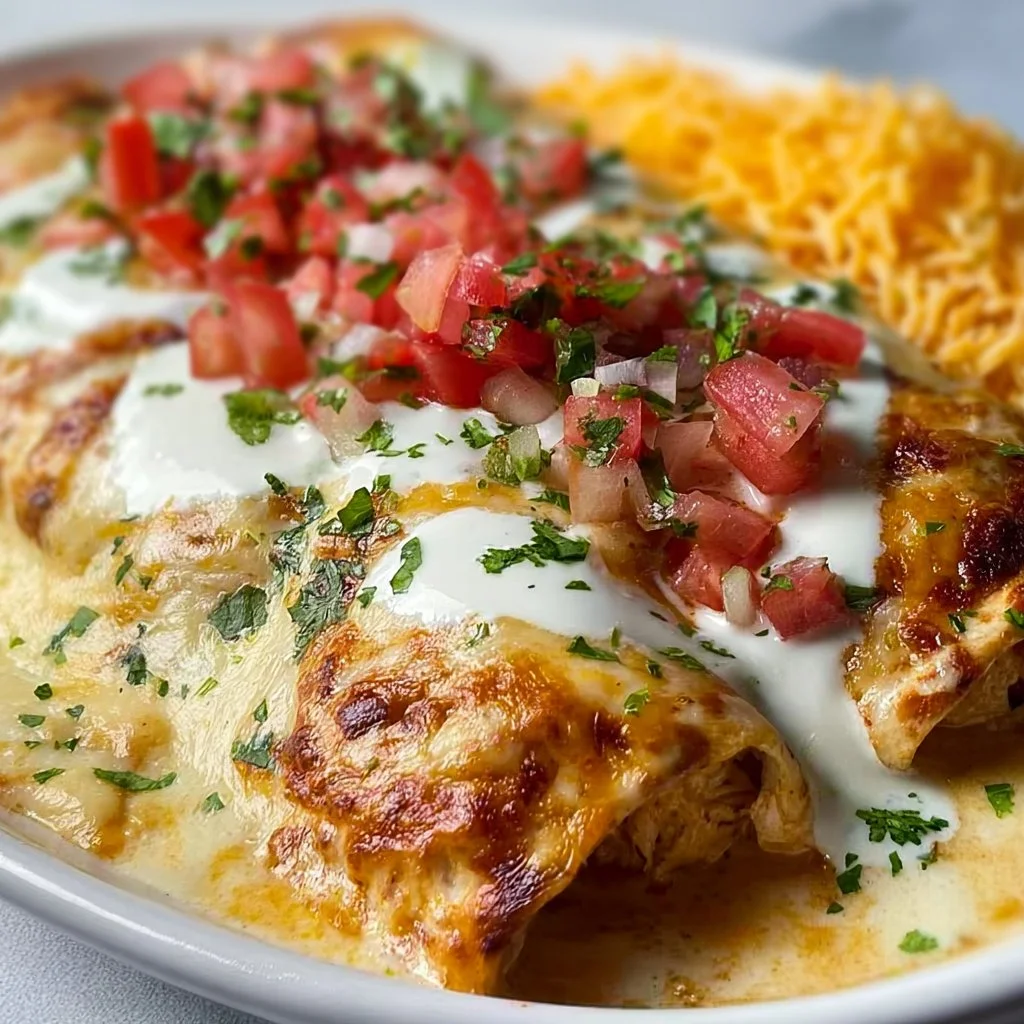
Hello, fellow food lovers! If there’s one dish in my recipe arsenal that never fails to bring a smile to my face — and to the faces of my loved ones — it’s my Queso Chicken Enchiladas. With their creamy queso sauce, tender chicken, and cheesy goodness, these enchiladas are not just a meal; they’re a cozy hug in a tortilla. Whether you’re looking to whip up a weeknight dinner for the family or impress your friends at the next gathering, this recipe has you covered.
Cooking for me has always been about more than just feeding people; it’s about connecting, sharing stories, and creating memories around the table. I fondly remember the first time I made these enchiladas. It was a chilly autumn evening, and I wanted to make something comforting after what felt like a long week. I rifled through my pantry, found a few staple ingredients, and voila! My Queso Chicken Enchiladas were born. The aroma that filled my kitchen was intoxicating, and the laughter that followed at the dinner table was priceless.
Are you ready to dive into this cheesy delight? Let’s gather our ingredients and start cooking! You’ll be so glad you did.
Personal Story
Looking back, one of my fondest memories of making these enchiladas was the first time I prepared them for my close-knit group of friends during a cooking night. The atmosphere was relaxed; we sipped on sparkling water and reminisced about our college days, laughter and stories filling the air. As the enchiladas baked in the oven, the scent wafted through the house, coaxing everyone into the kitchen. When I finally pulled out that bubbling pan of cheesy goodness, the cheers were exhilarating!
The platter was nearly wiped clean in minutes, and every bite was accompanied by compliments and joyful exclamations. It was the perfect blend of nostalgia and new memories. This dish has since become a staple when I’m hosting, always reminding me that great food brings people together. And let me tell you, there’s nothing better than watching someone take a bite and smile with delight!
Ingredients
To make these tasty Queso Chicken Enchiladas, gather these simple yet delicious ingredients:
-
4 Burrito Size Flour Tortillas
Flour tortillas lend a pillowy texture to the enchiladas, but corn tortillas are a fabulous gluten-free alternative. Just remember to warm them up slightly on a skillet to keep them from cracking! -
2 Cups Shredded Chicken
Feel free to use rotisserie chicken for a quicker prep, or if you’re in the mood, poach or bake some chicken breasts. Leftover turkey also works brilliantly here! -
1 Packet Taco Seasoning
You can batch-make your own seasoning mix with spices like cumin, chili powder, and garlic for a personalized touch! Store-bought is convenient, but homemade can really amp up the flavor! -
1 Cup Sour Cream
Creamy, tangy, and rich, this plays well with the queso. Substitute with Greek yogurt for a healthier twist if desired! -
1 Cup Shredded Cheddar Cheese
Sharp Cheddar adds a delightful bite. For extra creaminess, mix in some Monterey Jack cheese — it melts like a dream! -
1 Can Chopped Green Chilies
These add a nice mild heat. Feel free to adjust the quantity based on your heat preference or even substitute with jalapeños for a kick! -
1 Can Diced Tomatoes with Green Chilies (Undrained)
The liquid helps keep the enchiladas moist. You can use regular diced tomatoes if you prefer! -
16 oz Queso Blanco Velveeta
This is the star of the dish! It melts beautifully, creating that indulgent creamy sauce. If you’re feeling adventurous, try using a block of cheese from the deli — just ensure it has good melting properties.
Step-by-Step Instructions
-
Preheat Your Oven
Preheat your oven to 350°F (175°C). This step is vital to ensure your enchiladas get that lovely golden finish while baking. -
Prepare the Filling
In a mixing bowl, combine the shredded chicken, taco seasoning, sour cream, chopped green chilies, and half of the shredded cheese. Mix well until everything is beautifully coated. This filling is so flavorful, you might find yourself sneaking bites before even wrapping it up! -
Assemble the Enchiladas
On a warm tortilla, spoon about ¼ cup of the chicken mixture into the center. Roll tightly from one end to the other and place seam-side down in a greased baking dish. Repeat with the remaining tortillas. There’s something therapeutic about rolling these babies up — just imagine the joy they’re going to bring! -
Make the Queso Sauce
In a saucepan over medium heat, melt the Velveeta queso. Add the diced tomatoes (with their juice) and stir until completely melted and combined. I like to add a touch of milk or chicken broth if I want a thinner sauce. Keep stirring to prevent it from sticking! -
Pour the Queso Sauce
Once your queso is smooth, pour it over the rolled enchiladas in the baking dish, making sure to cover them generously. You want every bite to be infused with that gooey goodness! -
Top with Cheese
Sprinkle the remaining shredded cheese on top of the enchiladas, allowing for that glorious cheesy crust we all crave. -
Bake
Place the baking dish in your preheated oven and bake for 20-25 minutes or until the cheese is bubbly and slightly golden on the edges. Your kitchen is going to smell divine — trust me! -
Serve
Once they’re done, let them sit for a few minutes before serving. This allows everything to set just a touch, making for easier cutting. Pair with a fresh salad or some tortilla chips for crunch!
Serving Suggestions
For plating these enchiladas, grab a large serving spoon and scoop them out onto a beautiful platter. Garnish with a sprinkle of fresh cilantro or a dollop of sour cream for a pop of color and flavor. Serve alongside a crisp green salad or some homemade salsa for added freshness. And don’t forget the margaritas — they pair oh-so-well!
Recipe Variations
- Spicy Kick: Add sliced jalapeños to the filling or substitute spicy taco seasoning to elevate the heat.
- Veggie Lovers: Replace the chicken with black beans, corn, or sautéed vegetables for a delicious vegetarian option.
- Creamy Avocado Sauce: Instead of queso, make a creamy avocado sauce to drizzle over the enchiladas before serving for a fresh twist.
- Herb Infusion: Add chopped fresh herbs like cilantro or chives to the filling for an aromatic upgrade.
- Different Cheeses: Swap out the cheddar and use pepper jack for a hint of spice or feta for a Mediterranean flair.
Chef’s Notes
These Queso Chicken Enchiladas are one of those recipes that have truly evolved in my kitchen. I started with a basic version many years ago, but over time, I’ve added little twists and turned it into something that feels uniquely mine. I also have to admit, there have been times where I tried using every cheese in my fridge, resulting in an accidental but delicious fusion of flavors!
One of my funniest kitchen stories related to this dish happened when I made them for a big family gathering. I mistakenly used a spicy bean dip instead of queso, and let’s just say they definitely left an impression! Lesson learned: always double-check your ingredients.
FAQs and Troubleshooting
Q: What if my enchiladas break when rolling?
A: Make sure to warm up your tortillas before filling them. This helps prevent breakage. If they do break, just layer the ingredients like a lasagna — it’ll still taste fantastic!
Q: Can I make these ahead of time?
A: Absolutely! You can assemble them and store them in the fridge covered for up to a day before baking. Just add a few extra minutes to the baking time since they’ll be cold from the fridge.
Q: What can I substitute for Velveeta?
A: If you want a more natural cheese option, try a block of cream cheese paired with a melting cheese like Monterey Jack or mozzarella. Just blend the cream cheese smooth before adding!
Q: How do I make them less greasy?
A: Opt for lower-fat cheese options or use Greek yogurt instead of sour cream to lighten them up a bit. You can also drain the diced tomatoes well to reduce moisture if necessary.
Nutritional Info
While everyone’s dietary needs can vary, here’s a rough estimate per serving (based on 4 servings):
- Calories: 450
- Protein: 28g
- Carbohydrates: 45g
- Fat: 20g
Remember to adjust based on your ingredient choices and serving sizes!
So there you have it, my beloved Queso Chicken Enchiladas — not just a meal, but a delightful experience in the kitchen and around the table! Whether you’re making these for a casual night or a special occasion, they’re sure to bring joy and warmth. Now, tie on your apron, turn up the music, and let’s make something delicious! Happy cooking!
PrintQueso Chicken Enchiladas

Creamy and cheesy Queso Chicken Enchiladas perfect for a cozy dinner, filled with tender chicken and topped with a luscious queso sauce.
- Prep Time: 15 minutes
- Cook Time: 25 minutes
- Total Time: 40 minutes
- Yield: 4 servings 1x
- Category: Main Course
- Method: Baking
- Cuisine: Mexican
- Diet: Gluten-Free Option Available
Ingredients
- 4 Burrito Size Flour Tortillas
- 2 Cups Shredded Chicken
- 1 Packet Taco Seasoning
- 1 Cup Sour Cream
- 1 Cup Shredded Cheddar Cheese
- 1 Can Chopped Green Chilies
- 1 Can Diced Tomatoes with Green Chilies (Undrained)
- 16 oz Queso Blanco Velveeta
Instructions
- Preheat your oven to 350°F (175°C).
- Combine the shredded chicken, taco seasoning, sour cream, chopped green chilies, and half of the shredded cheese in a mixing bowl.
- On a warm tortilla, spoon about ¼ cup of the chicken mixture into the center, roll tightly, and place seam-side down in a greased baking dish.
- Melt the Velveeta queso in a saucepan over medium heat, adding diced tomatoes and stirring until combined.
- Pour the queso sauce over the rolled enchiladas, covering them generously.
- Sprinkle the remaining shredded cheese on top of the enchiladas.
- Bake for 20-25 minutes until cheese is bubbly and golden.
- Let sit for a few minutes before serving.
Notes
Serve with fresh cilantro, sour cream, or a crisp salad. Feel free to modify the recipe to suit your taste, such as adding spicy elements or veggie substitutes.
Nutrition
- Serving Size: 1 serving
- Calories: 450
- Sugar: 4g
- Sodium: 800mg
- Fat: 20g
- Saturated Fat: 10g
- Unsaturated Fat: 6g
- Trans Fat: 0g
- Carbohydrates: 45g
- Fiber: 2g
- Protein: 28g
- Cholesterol: 80mg
Keywords: enchiladas, chicken, queso, cheesy, dinner, comfort food
Easy Stromboli Dinner Recipe
Easy Stromboli Dinner Recipe: Your New Favorite Family Meal
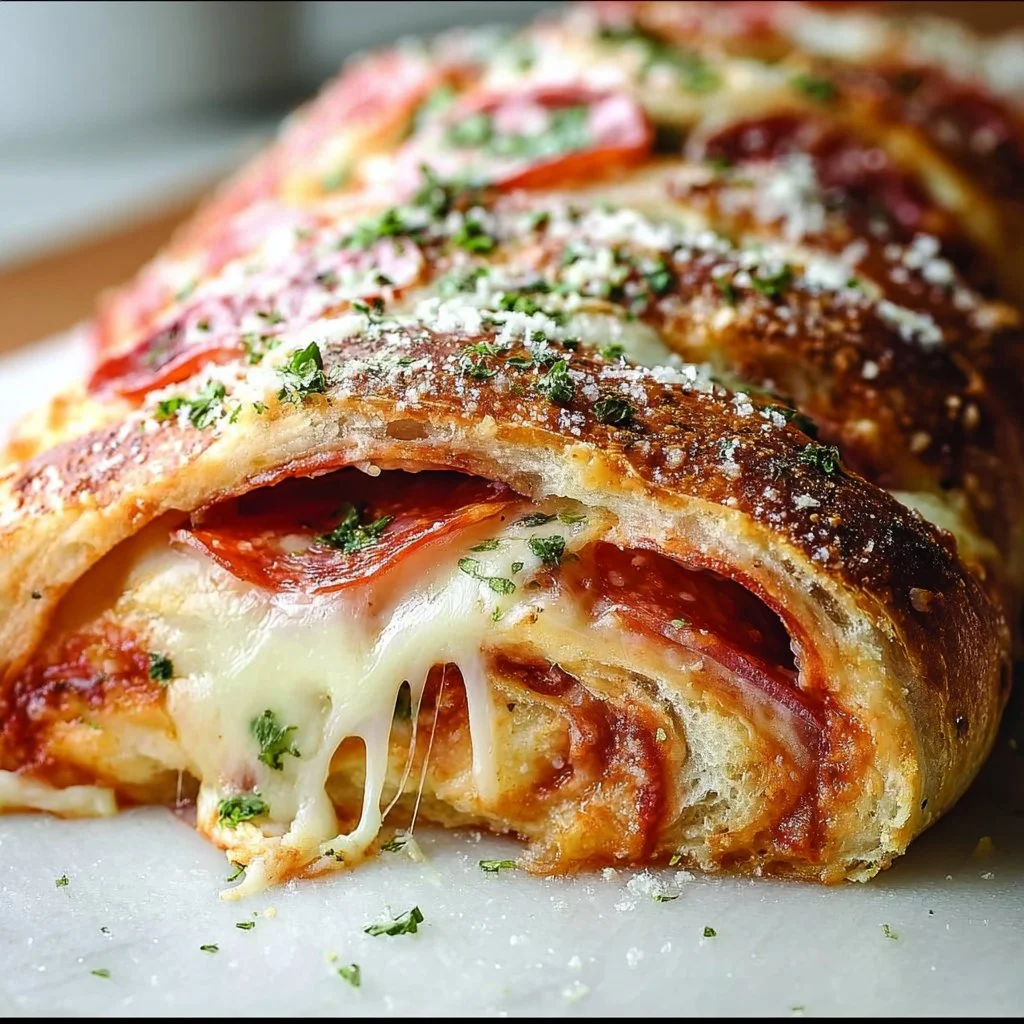
Hello, my friends! Are you ready to roll up your sleeves and dive into a delightful dinner that’s not only easy to make but will also impress your family and friends? Today, I’m thrilled to share a scrumptious Easy Stromboli recipe that’s sure to become a staple in your kitchen. A delicious Italian favorite, Stromboli is a stuffed bread roll, perfect for any occasion—from cozy weeknight dinners to festive gatherings.
What I love most about Stromboli is its versatility. You can fill it with just about anything you have on hand, making it the perfect dish for using up leftovers or customizing to your taste. Imagine golden, flaky bread enfolding your favorite meats, cheeses, and veggies all melded together in a gooey, flavorful harmony. Plus, it’s a fun meal to make together with family or friends, turning cooking into a delightful experience rather than just a chore.
I remember the first time I made Stromboli—it was an impromptu dinner party for a few close friends. I had a houseful of giggles and stories, and I wanted to create something that felt festive yet easy. So, I rolled up some pizza dough with pepperoni, mozzarella, and a few hidden veggies, baked it until it was perfectly golden, and then allowed the delicious aromas to envelop us. The best part? Everyone got to enjoy tearing it apart and dipping it into marinara sauce as we shared stories around the table. Before I knew it, I was handed requests for the recipe and promises of Stromboli-themed dinner parties. And that, my friends, is how I knew I had struck gold.
Let’s bring that magic to your kitchen! Grab your apron, and let’s get ready to make your very own Easy Stromboli.
Personal Story
As a child, my family had a tradition of making homemade pizzas every Friday night. My mom would unwittingly become a kitchen magician, conjuring mouthwatering pies while dad handled the grill. I distinctly remember one Friday when we decided to mix things up and try making Stromboli instead. The kitchen was filled with laughter and the wafting smells of garlic and melting cheese. We set our toppings out like a mini buffet—pepperoni, green peppers, mushrooms, and yes, even some leftover meatball bits we couldn’t let go to waste!
As we rolled the dough, I marveled at how a simple mixture of ingredients could transform into something so delightful. Plus, I had the joy of creating my own masterpiece—one half with extra cheese, the other loaded with veggies. What I loved most was pulling it from the oven, the cheese bubbling with anticipation, and the satisfaction of breaking it apart for my siblings and friends. Those moments of warmth and connection around the dinner table stay with me to this day. Stromboli isn’t just food; it’s a way to bring people together—whatever the occasion may be!
Ingredients
Here’s what you’ll need to make your own Easy Stromboli:
-
Pizza Dough (1 pound)
The base of your Stromboli! You can use store-bought dough for convenience or make your own. If using pre-made dough, take it out of the fridge an hour before to come to room temperature. -
Mozzarella Cheese (1 cup, shredded)
The classic choice! Mozzarella melts beautifully, giving you that gooey texture we all crave. For a twist, you can substitute with provolone or a sharp cheddar. -
Pepperoni (1 cup, sliced)
A staple in many Stromboli recipes, but don’t feel limited! Swap it with some cooked Italian sausage, salami, or even turkey pepperoni if you’re aiming for a lighter option. -
Bell Peppers (1/2 cup, diced)
Sweet and colorful! Feel free to use any bell pepper variety—red, green, yellow, or orange. If you’re in the mood for something spicy, throw in some jalapeños! -
Onion (1/4 cup, diced)
For flavor depth, onions are fabulous. You could also caramelize them beforehand for an extra layer of sweetness or use scallions for a milder taste. -
Garlic (2 cloves, minced)
Because garlic makes everything better! If you’re feeling lazy, garlic powder can be a quick alternative. -
Olive Oil (1 tablespoon)
A splash of good-quality olive oil elevates the flavors. You might consider using infused oils like garlic or chili for a kick! -
Parmesan Cheese (1/4 cup, grated)
This isn’t crucial, but a sprinkle of Parmesan adds a lovely salty finish. If you’re out, any hard cheese can do! -
Italian Seasoning (1 teaspoon)
A mix of herbs like oregano, basil, and thyme. If you’re fresh out, feel free to use your favorite spice blend! -
Salt and Pepper (to taste)
Essential for balancing the flavors! Don’t skip adding them; flavor matters immensely.
Chef Insight:
Stromboli is remarkably forgiving! Feel free to experiment with your favorite ingredients or even change up the seasoning according to what you’re in the mood for. It’s all about making it delicious and your own!
Step-by-Step Instructions
Now, let’s dive into the fun part—making your Easy Stromboli! Follow these steps, and you’ll have a delicious dinner in no time:
Step 1: Preheat the Oven
First things first, preheat your oven to 400°F (200°C). This gives us a delightful, crispy crust, ensuring that all that gooey melted cheese is sealed beautifully inside.
Step 2: Prepare Your Dough
Roll out your pizza dough on a well-floured surface into a rectangle. Aim for about 12×15 inches or so, but don’t stress over this. You want it thin enough to hold the filling but thick enough to prevent it from tearing.
Step 3: Add Olive Oil and Seasoning
Brush your rolled-out dough with 1 tablespoon of olive oil. This isn’t just for flavor; it also helps in achieving that lovely golden color. Sprinkle your Italian seasoning, salt, and pepper evenly over the dough.
Step 4: Layer Your Ingredients
Now for the fun part! Start from one of the short ends of your rectangle. Layer on mozzarella cheese, followed by pepperoni, bell peppers, onions, and finally, sprinkle some minced garlic over the top. The key is to keep the fillings about an inch away from the edges to prevent any spillage when rolling!
Step 5: Roll it Up
Starting from the filled end, roll the dough tightly but gently. You want it snug, but don’t rush; being too forceful can cause the dough to tear. Once you reach the end, pinch the seams to seal it up. If you’ve got any edges hanging out, no worries—just fold those in like tucking a burrito.
Step 6: Bake the Stromboli
Place your Stromboli seam side down on a parchment-lined baking sheet. For extra flair (and flavor!), brush a little more olive oil on top and sprinkle with Parmesan cheese. Make a few small diagonal slashes on top with a sharp knife. This helps the steam escape and gives it those lovely golden stripes!
Step 7: Bake to Perfection
Pop your Stromboli into the oven and let it bake for 25-30 minutes, until golden brown and the cheese is gooey. Keep an eye on it in the last few minutes; ovens can vary!
Step 8: Cool and Slice
Once your Stromboli is golden, remove it from the oven and let it cool for about 5-10 minutes. This is crucial—cutting it too soon can unleash a cheesy eruption! Then, slice it into thick pieces and get ready for the feast.
Chef Tip:
To help the cheese stay within the Stromboli, you can add a thin layer of tomato sauce (cooled) before layering the cheese and toppings. Just be careful not to get too wild with the sauce to avoid soggy bread.
Serving Suggestions
When it comes to serving your Easy Stromboli, simplicity is key! Arrange the slices on a large platter, making them visually captivating. Pair it with a delightful marinara or a homemade garlic dipping sauce—both add a great touch. A fresh side salad or a simple arugula salad drizzled in olive oil and lemon juice balances the meal perfectly. Lay out some napkins and let everyone dive in!
Recipe Variations
Now, it’s time to get creative! Here are a few delicious twists you could explore with your Stromboli:
-
Veggie Lovers’ Delight: Load it up with all kinds of vegetables! Spinach, mushrooms, olives, and zucchini make for superb additions.
-
BBQ Chicken Stromboli: Start with shredded rotisserie chicken slathered in your favorite BBQ sauce, along with red onions and cheddar cheese.
-
Buffalo Chicken Style: Mix shredded chicken with buffalo sauce and top with blue cheese crumbles for a flavorful kick.
-
Caprese Style: Fill with fresh mozzarella, tomatoes, and basil, drizzling balsamic glaze before baking for an Italian classic twist.
-
Breakfast Stromboli: Swap traditional fillings with scrambled eggs, crumbled sausage, and cheddar cheese for a fun breakfast variant!
Chef’s Notes
I cherish how adaptable Stromboli is. Over the years, I’ve fueled my creativity here—from classic meats and cheeses to experimenting with global flavors. A notable story comes to mind: one evening, I tried a tropical island-inspired version, incorporating ham, pineapple, and a hint of teriyaki sauce! We laughed over our “Hawaiian Stromboli” and vowed to bring it back for a future dinner party.
Stromboli truly embodies the spirit of home cooking—always flexible, easily shared, and made with love. There’s something therapeutic about rolling dough, stuffing it full of ingredients, and watching it bake to golden perfection!
FAQs and Troubleshooting
Q1: Can I make Stromboli ahead of time?
A1: Absolutely! You can prepare the Stromboli and roll it up, cover it tightly with plastic wrap, and refrigerate for up to 24 hours before baking.
Q2: What should I do if my dough tears?
A2: Don’t panic! Simply patch it with a little extra dough or gently press it together. It won’t affect the flavor!
Q3: How do I freeze leftover Stromboli?
A3: Wrap it tightly in aluminum foil or plastic wrap after it’s cooled and freeze for up to three months. To reheat, unwrap, place in a preheated oven at 350°F (175°C), and heat until warmed through.
Q4: My Stromboli is soggy—what did I do wrong?
A4: This might be caused by too much filling or sauce. Make sure to adjust the amount of wet ingredients and let your fillings cool before assembling.
Nutritional Info
While the nutritional details may vary depending on the ingredients used, a serving of homemade Stromboli is typically around:
- Calories: 350-450 (varies based on fillings)
- Carbohydrates: 40g
- Protein: 15g
- Fat: 15-20g
- Fiber: 2g
Eating good food isn’t just about the calories; it’s about the experience and the joy it brings!
And there you have it! This Easy Stromboli recipe is your gateway to a world of culinary creativity and warm gatherings. Remember, it’s not just about feeding the stomach; it’s about filling hearts with love and laughter. Now, let’s get cooking!
PrintEasy Stromboli Dinner

A delicious Italian stuffed bread roll filled with pepperoni, mozzarella, and veggies, perfect for cozy dinners or festive gatherings.
- Prep Time: 15 minutes
- Cook Time: 30 minutes
- Total Time: 45 minutes
- Yield: 4 servings 1x
- Category: Main Course
- Method: Baking
- Cuisine: Italian
- Diet: Non-Vegetarian
Ingredients
- 1 pound Pizza Dough
- 1 cup Mozzarella Cheese, shredded
- 1 cup Pepperoni, sliced
- 1/2 cup Bell Peppers, diced
- 1/4 cup Onion, diced
- 2 cloves Garlic, minced
- 1 tablespoon Olive Oil
- 1/4 cup Parmesan Cheese, grated
- 1 teaspoon Italian Seasoning
- Salt and Pepper, to taste
Instructions
- Preheat the oven to 400°F (200°C).
- Roll out the pizza dough on a floured surface into a rectangle.
- Brush the dough with olive oil and sprinkle with Italian seasoning, salt, and pepper.
- Layer mozzarella cheese, pepperoni, bell peppers, onions, and garlic on the dough.
- Roll the dough tightly from the filled end and pinch the seams to seal.
- Place it seam side down on a parchment-lined baking sheet.
- Brush with olive oil, sprinkle with Parmesan, and make diagonal slashes on top.
- Bake for 25-30 minutes until golden brown and cheese is gooey.
- Cool for 5-10 minutes before slicing.
Notes
For a twist, mix up the fillings with your favorite ingredients or add a layer of cooled tomato sauce before the cheese.
Nutrition
- Serving Size: 1 serving
- Calories: 400
- Sugar: 2g
- Sodium: 800mg
- Fat: 20g
- Saturated Fat: 8g
- Unsaturated Fat: 10g
- Trans Fat: 0g
- Carbohydrates: 40g
- Fiber: 2g
- Protein: 20g
- Cholesterol: 50mg
Keywords: stromboli, easy dinner, Italian recipe, family meal, stuffed bread