
Minute Lemon Rolls with Gooey Sticky Citrus Glaze
Sticky Lemon Rolls: A Bright Treat for Your Table
Hello, dear friends! If you’ve ever craved a sweet treat that’s not only delicious but also brightens your day, you’re in for a special treat with these Sticky Lemon Rolls. Fluffy, tangy, and oh-so-sweet, these rolls are everything you need for a cozy brunch or a delightful dessert.
Imagine waking up to the warm aroma of freshly baked rolls infused with lemon zest and sweetness, and then drizzling them with a creamy lemon glaze. It’s pure magic! Whether you’re looking to impress guests or simply want a comforting homemade indulgence, these rolls are the perfect recipe to tie on your apron for.
A Trip Down Memory Lane
Let me take you back to my childhood, where one of my fondest memories revolves around baking with my grandmother. Every Saturday morning, I would race to her kitchen, the excitement bubbling inside me like a pot of boiling water. She’d whip up her famous cinnamon rolls, and I was always her eager assistant.
One day, as I watched her kneading the dough, I noticed a fresh lemon resting on her counter. Curiously, I asked, “Why not add some lemon next time?” With a twinkle in her eye, she responded, “Why not indeed? Let’s make something new!” That impulsive suggestion kicked off our “Lemon Roll Saturdays,” where we experimented with fresh flavors and learned that cooking is all about creativity and joy.
Fast forward to today, and here I am, recreating that delightful spirit of experimentation with my own twist—to these Sticky Lemon Rolls! They blend nostalgia with bright, vibrant flavors, hoping to create stories around your table as they did around mine.
Ingredients
Here’s what you’ll need to whip up a batch of these fantastic Sticky Lemon Rolls:
-
2 cups all-purpose flour
A versatile base for your dough. If you’re looking for a gluten-free option, try using a gluten-free all-purpose blend! -
1/4 cup granulated sugar
Sweetens the dough just enough without overpowering the lemon flavor. You can substitute with coconut sugar for a lower glycemic option. -
1 packet (2 1/4 teaspoons) active dry yeast
The magic ingredient that makes your rolls fluffy! Remember, it should be fresh, or it won’t rise. -
1/2 teaspoon salt
Enhances the flavor of the dough. You can use sea salt for a finer taste. -
1/2 cup milk
Adds richness and moisture to the dough. Almond or oat milk works as a dairy-free alternative. -
1/4 cup unsalted butter
The fat that makes everything better! If you prefer a vegan version, try using coconut oil. -
1 large egg
Acts as a binder and contributes to a tender texture. For a vegan swap, try a flax egg (1 tablespoon ground flaxseed + 3 tablespoons water). -
Zest of 1 lemon
Adds a bright and refreshing flavor. Pro tip: Use a microplane to avoid the bitter pith! -
1/4 cup fresh lemon juice
We’re using fresh juice for a vibrant zing! Bottled lemon juice won’t give you the same fresh taste. -
1/2 cup cream cheese
This luscious ingredient brings richness to the glaze. You can substitute non-dairy cream cheese for a dairy-free version. -
1 cup powdered sugar
Sweetness for the glaze! You can replace it with a sugar-free powdered blend if needed. -
1 tablespoon lemon juice (for glaze)
A little extra tartness to balance the sweetness. Fresh is always best!
Step-by-Step Instructions
Let’s dive into creating the magic of these Sticky Lemon Rolls! Follow me step by step:
-
Activate the Yeast
In a small bowl, combine the warm milk (around 110°F or just slightly warmer than body temperature), 1 teaspoon of the sugar, and the active dry yeast. Stir gently, and let it sit for about 5-10 minutes until it’s frothy. This means your yeast is active and ready to rise! -
Make the Dough
In a mixing bowl, combine the flour, remaining sugar, and salt. Stir well! Add in the yeast mixture, softened butter, egg, lemon zest, and fresh lemon juice. Mix until a dough begins to form. (I find that using a dough whisk helps make this process a breeze!) -
Knead the Dough
Turn your dough onto a floured surface. Knead it for about 8-10 minutes until it’s smooth and elastic. Take a moment here—give it a gentle tap with your palm. This is where the love and energy go into the rolls! -
First Rise
Place the dough in a lightly greased bowl, cover it with a clean kitchen towel, and let rise in a warm place for about 1-2 hours or until it doubles in size. Use this time to sip on your morning coffee or tea; you deserve it! -
Preheat Your Oven
Preheat your oven to 375°F (190°C) so it’s nice and warm when your rolls are ready to bake. -
Roll Out the Dough
After the dough has risen, punch it down and transfer it onto a lightly floured surface. Roll it out into a rectangle (about 12×8 inches). Keep it about 1/4 inch thick. The more you spread it out evenly, the better it will rise! -
Create a Sticky Filling
Spread softened cream cheese evenly over the dough. Drizzle with more lemon juice and sprinkle some sugar on top. You can even sprinkle a dash of lemon zest here for added punch! -
Roll it Up
Tightly roll the dough from the long end into a log and pinch the edges to seal. Then slice the log into 1-1.5 inch pieces. Use a sharp knife or dental floss for clean cuts! -
Second Rise
Place the rolls in a greased baking dish (a 9×13 inch works perfectly) and let them rise again for about 30 minutes until they’re slightly puffed. It’s worth the wait—I promise! -
Bake
Pop those beauties into the preheated oven and bake for 20-25 minutes or until golden brown on top. Your house will smell divine! -
Prepare the Glaze
While the rolls are baking, get your glaze ready! Beat the cream cheese until smooth and add in powdered sugar and lemon juice. Mix until you achieve a velvety consistency. -
Glaze the Rolls
Once the rolls are out of the oven and still warm, slather the glaze all over them. Watch it melt into the crevices—it’s a sight to behold!
Serving Suggestions
To serve, I recommend plating the rolls on a gorgeous cake stand or a rustic wooden board. Feel free to garnish with some extra lemon zest or fresh berries for color. Trust me; it elevates your presentation and makes your guests go “ooh” and “ahh.”
Recipe Variations
Want to mix things up? Here are a few variations to try:
- Blueberry Lemon Rolls: Add fresh blueberries into the filling for a delicious twist.
- Ginger Lemon Rolls: Sprinkle in some grated fresh ginger for a spicy kick!
- Lemon Poppy Seed Rolls: Stir in poppy seeds into your dough for an added texture and flavor.
- Lemon Lavender Rolls: Add dried culinary lavender for a floral touch that pairs beautifully with lemon.
Chef’s Notes
This recipe has come a long way from that kitchen memory with my grandmother. It started with just cinnamon rolls, but as I grew to love freshness and tanginess, lemon became my beloved star ingredient. There have been some epic kitchen mishaps—like the time I forgot the yeast! Spoiler: flat rolls aren’t great, but they make for funny stories!
FAQs and Troubleshooting
-
Why didn’t my dough rise?
A common culprit is inactive yeast. Always check the expiration date! Make sure you’re using warm (not hot) milk when activating the yeast. -
Can I make these ahead of time?
Absolutely! You can prepare the dough, fill and roll the rolls, and then refrigerate them overnight before baking. Just let them come to room temperature for about 30 minutes before putting them in the oven. -
How do I store leftovers?
Keep any leftover rolls in an airtight container at room temperature for up to 2 days, or refrigerate them for a week. You can also freeze them! Just thaw and warm them gently before serving. -
What if my glaze is too runny?
If your glaze is too thin, don’t panic! Add a bit more powdered sugar until you reach the desired consistency.
Nutritional Info (Optional)
While I usually focus on the joy of baking rather than strict nutritional content, each roll comes out to approximately 200 calories. Just remember, they’re truly best enjoyed with family and friends!
So there you have it, dear friends! These Sticky Lemon Rolls are a blend of heartwarming memories, delightful flavors, and the perfect recipe for bringing people together. I can’t wait to hear about the stories you create around your table with them. Happy baking! 🍋🥐
PrintSticky Lemon Rolls

Fluffy, tangy, and sweet rolls infused with lemon zest, perfect for brunch or dessert.
- Prep Time: 15 minutes
- Cook Time: 25 minutes
- Total Time: 45 minutes
- Yield: 12 servings 1x
- Category: Dessert
- Method: Baking
- Cuisine: American
- Diet: Vegetarian
Ingredients
- 2 cups all-purpose flour
- 1/4 cup granulated sugar
- 1 packet (2 1/4 teaspoons) active dry yeast
- 1/2 teaspoon salt
- 1/2 cup milk
- 1/4 cup unsalted butter
- 1 large egg
- Zest of 1 lemon
- 1/4 cup fresh lemon juice
- 1/2 cup cream cheese
- 1 cup powdered sugar
- 1 tablespoon lemon juice (for glaze)
Instructions
- Activate the yeast by combining warm milk, 1 teaspoon sugar, and yeast in a bowl. Let it sit until frothy.
- Make the dough by mixing flour, remaining sugar, and salt. Add the yeast mixture, butter, egg, zest, and lemon juice, and mix until dough forms.
- Knead the dough on a floured surface for 8-10 minutes until smooth and elastic.
- Place the dough in a greased bowl, cover, and let it rise in a warm place for 1-2 hours until doubled in size.
- Preheat your oven to 375°F (190°C).
- Roll out the dough into a rectangle about 12×8 inches.
- Spread softened cream cheese, drizzle lemon juice, and sprinkle sugar on the rolled-out dough.
- Roll the dough tightly from the long end into a log and slice into 1-1.5 inch pieces.
- Place the rolls in a greased baking dish and let them rise for about 30 minutes until puffed.
- Bake for 20-25 minutes or until golden brown.
- Prepare the glaze by beating cream cheese and mixing in powdered sugar and lemon juice.
- Glaze the warm rolls and enjoy!
Notes
You can prep the dough the night before and refrigerate it before baking.
Nutrition
- Serving Size: 1 roll
- Calories: 200
- Sugar: 8g
- Sodium: 150mg
- Fat: 8g
- Saturated Fat: 4g
- Unsaturated Fat: 3g
- Trans Fat: 0g
- Carbohydrates: 28g
- Fiber: 1g
- Protein: 3g
- Cholesterol: 30mg
Keywords: lemon rolls, sticky rolls, brunch recipes, dessert recipes, baking
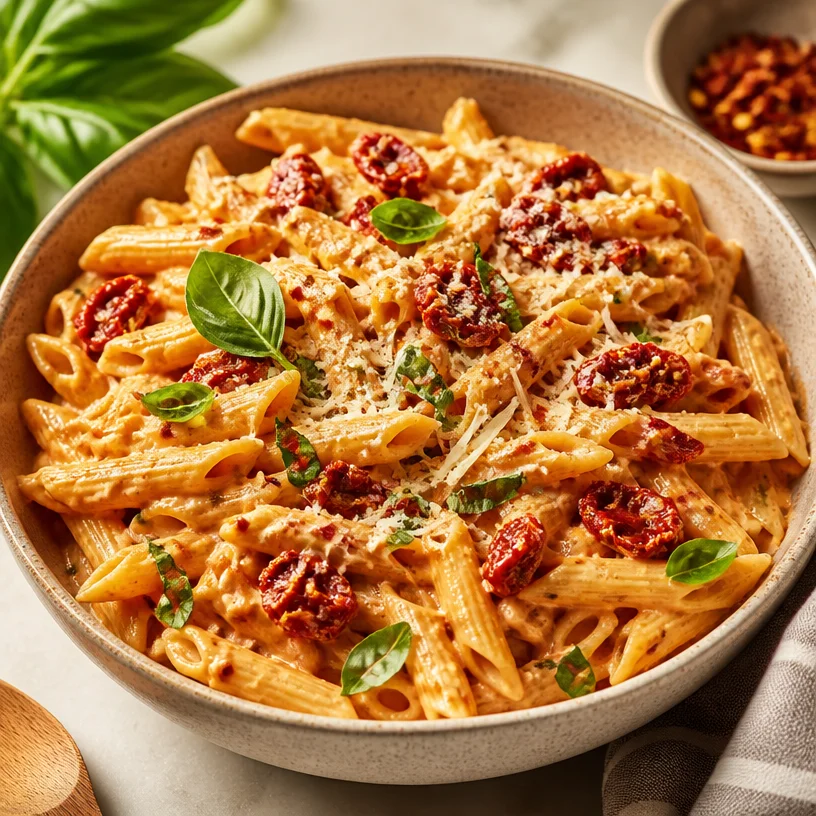
Minute Creamy Vegan Sun-Dried Tomato Pasta Weeknight
Creamy Vegan Sun-Dried Tomato Pasta: A Deliciously Simple Dish
Introduction
Hey there, fellow food lovers! I’m thrilled to welcome you back to my little corner of the culinary world. If there’s one dish that can whisk you away to the sun-drenched coasts of Italy with just a single bite, it’s got to be pasta. Today, we’re diving into a delightful recipe that’s not only creamy and dreamy but also completely vegan: Creamy Vegan Sun-Dried Tomato Pasta!
Now, I know what you might be thinking: “Vegan pasta? Can it really be creamy without all the dairy?” Oh yes, my friend! This dish combines the inherent richness of cashews and the tangy flavor of sun-dried tomatoes to create a sauce that’ll have you swooning. Whether you’re hosting a dinner party, having a cozy night in, or seeking a quick weeknight meal that delights, this pasta is going to be a standout on your table.
This recipe is straightforward and packed full of flavor—but best of all, it’s perfect for any occasion. You know what they say: cooking is about connection, and I truly believe every plate can create a little magic if we allow it. So let’s roll up our sleeves, grab our aprons, and create something beautiful together!
Personal Story
I still remember the first time I had sun-dried tomatoes. It was during one of my early culinary explorations—one summer evening at a quaint little bistro that dotted the outskirts of my hometown. As the sun set, bathing everything in golden light, a plate of sun-dried tomato pasta made its way across the table. The vibrant red of the tomatoes against golden pasta was a feast for the eyes, and each bite tasted like a warm embrace.
From that moment on, I was hooked! I made it my mission to recreate that magic at home. However, life had other plans, and I eventually transitioned to a plant-based diet. This twist inspired me to adapt that beloved dish into today’s creamy vegan version. After many trials and a few missteps (sorry, kitchen!), I am excited to share this delightful vegan pasta recipe with you.
Ingredients
Let’s gather our ingredients and get acquainted with these stars of the show. Each element plays a crucial role, not only in taste but also in creating that dreamy texture you crave.
-
8 oz pasta of choice: Use any shape you love! Whole wheat, gluten-free, or even chickpea pasta are fantastic options. Each adds its own flair and nutrients to the dish.
-
1 cup raw cashews (soaked for 2-4 hours): Cashews bring creaminess without dairy. Soaking them softens their texture, making them easy to blend into a silky sauce. If you’re short on time, feel free to use boiled cashews instead.
-
1 cup sun-dried tomatoes (packed in oil, drained): These little flavor bombs infuse our pasta with tangy sweetness. If you can’t find the oil-packed variety, you can use dry sun-dried tomatoes—just soak them in hot water for about 30 minutes before using.
-
1 cup vegetable broth: This is the flavor base of our creamy sauce. Homemade or store-bought broth works fine. If you’re looking for a lighter version, you can use water, but the broth will enhance the flavors.
-
2 cloves garlic: Fresh garlic brings a punch to our pasta. Feel free to use more if you adore that savory aroma!
-
1 tablespoon nutritional yeast: This ingredient lends a cheesy, umami flavor that really ties the creamy sauce together. If you’re not a fan or can’t find it, you can skip it, but you’ll miss that depth!
-
Salt and pepper to taste: These are essential for seasoning. I suggest starting with a pinch, and then tasting as you go for that perfect balance.
-
Fresh basil for garnish: A sprinkle of fresh basil adds vivid color and fragrant notes. Don’t skip this step—it elevates the entire dish!
-
Vegan parmesan for garnish (optional): For those craving that cheesy touch, a sprinkle of vegan parmesan will do the trick.
-
Red pepper flakes for garnish (optional): If you like a hint of heat, these little flakes provide just the right kick!
Step-by-Step Instructions
Alright, my fellow chefs, let’s roll up those sleeves and get to cooking. Grab your favorite pot and blender, and we’ll transform these simple ingredients into a masterpiece.
-
Cook the Pasta: Bring a large pot of salted water to a boil. Add your pasta and cook according to the package instructions until al dente. Remember to reserve about ½ cup of the pasta cooking water before draining it. This starchy water can help your sauce adhere beautifully to the pasta later on! Once cooked, drain and set aside.
-
Prepare the Creamy Sauce: While the pasta is cooking, let’s whip up our creaminess! Drain the soaked cashews and toss them into your blender. Add the drained sun-dried tomatoes, vegetable broth, garlic cloves, and nutritional yeast. Blend until the mixture reaches a rich and creamy consistency. Scrape down the sides as needed—it’s all about that silky finish!
-
Adjust the Sauce: If the sauce seems too thick, don’t stress! Just add a splash of that reserved pasta water until it reaches your desired creaminess. Want a thicker sauce? Blend in a few more cashews or a splash more broth. Taste the sauce and season with salt and pepper. Here’s a tip: flavor while blending can morph as it cooks, so don’t be shy—adjust as needed!
-
Heat the Sauce: In a large skillet over medium heat, pour in your creamy mixture. Cook for about 2-3 minutes, stirring occasionally, until heated through. This helps enhance the flavors.
-
Combine and Toss: Add the drained pasta to the skillet. Gently toss the pasta in the creamy sauce, ensuring every noodle is coated in that luscious goodness. If it seems too thick, drizzle a bit more reserved pasta water into the skillet and stir until you find that perfect creamy texture.
-
Finishing Touches: Once everything’s combined, remove from heat. Toss in some fresh basil and, if you like it spicy, sprinkle red pepper flakes for that little bit of zing!
Serving Suggestions
To plate, serve generous portions of the creamy vegan sun-dried tomato pasta in shallow bowls. Add a sprinkle of vegan parmesan and more fresh basil on top for a pop of color. Feeling fancy? Use a twirled fork to create a beautiful nest of pasta in the center of the plate. It’s all about that presentation, darling!
Recipe Variations
-
Pasta Primavera: Toss in some sautéed seasonal vegetables like zucchini, bell peppers, or spinach for a delicious veggie boost.
-
Lemon Zest: Add a zing of brightness by incorporating the zest of half a lemon before serving. It pairs beautifully with the sun-dried tomatoes!
-
Nut-Free Option: Replace cashews with silken tofu or one can of chickpeas for a creamy yet nut-free sauce.
-
Make it Pesto: Stir in a couple spoonfuls of your favorite vegan pesto instead of the sun-dried tomatoes for a herby twist.
-
Spicy Arrabbiata Style: Add crushed red pepper to the creamy blend for a spicy variant that keeps the flavor punchy!
Chef’s Notes
Over the years, this creamy vegan sun-dried tomato pasta has journeyed with me, adapting and changing over countless dinners and gatherings. I remember one dinner party where a friend brought over her non-vegan sister. She took one bite, paused, and said, "Are you sure this is vegan?"
It’s moments like this that make cooking so delightful—the little surprises that happen when you pour love into your food. This dish has become my go-to for impressing guests without spending hours in the kitchen. So, whether it’s a casual weeknight dinner or a fancy affair, this pasta is sure to steal the spotlight!
FAQs and Troubleshooting
1. My pasta sauce turned out too thick; what can I do?
No worries! If your sauce ends up thicker than desired, simply stir in a splash of the reserved pasta cooking water bit by bit until you reach the desired consistency.
2. Can I make the sauce ahead of time?
Absolutely! The cream sauce can be refrigerated for up to three days. Just give it a quick re-blend with a splash of water or broth to regain that smooth texture before mixing it with your freshly cooked pasta.
3. What if I don’t have nutritional yeast?
While nutritional yeast enhances the cheesy flavor, feel free to substitute with garlic powder or omit it altogether. You won’t have the exact same flavor, but it’ll still taste amazing!
4. I have leftovers. How do I store them?
Store any leftovers in an airtight container in the fridge for up to 3 days. When reheating, add a splash of water or vegetable broth to keep the creaminess intact.
Nutritional Info
(per serving; makes 4 servings)
- Calories: 370
- Protein: 12g
- Carbohydrates: 44g
- Dietary Fiber: 5g
- Sugars: 3g
- Fats: 18g
There you have it: a creamy and satisfying dish that’s perfect for any occasion. I hope you enjoy making this vegan sun-dried tomato pasta as much as I’ve enjoyed sharing it with you. Remember, cooking is all about joy, creativity, and bringing people together. So grab your apron, invite a friend, and enjoy the deliciousness you create together. Happy cooking!
PrintCreamy Vegan Sun-Dried Tomato Pasta

A deliciously simple vegan pasta dish featuring creamy cashew sauce and tangy sun-dried tomatoes, perfect for any occasion.
- Prep Time: 15 minutes
- Cook Time: 20 minutes
- Total Time: 35 minutes
- Yield: 4 servings 1x
- Category: Main Course
- Method: Blending
- Cuisine: Italian
- Diet: Vegan
Ingredients
- 8 oz pasta of choice
- 1 cup raw cashews (soaked for 2–4 hours)
- 1 cup sun-dried tomatoes (packed in oil, drained)
- 1 cup vegetable broth
- 2 cloves garlic
- 1 tablespoon nutritional yeast
- Salt and pepper to taste
- Fresh basil for garnish
- Vegan parmesan for garnish (optional)
- Red pepper flakes for garnish (optional)
Instructions
- Cook the Pasta: Bring a large pot of salted water to a boil. Add your pasta and cook according to the package instructions until al dente. Reserve about ½ cup of pasta cooking water before draining. Drain and set aside.
- Prepare the Creamy Sauce: While the pasta is cooking, drain the soaked cashews and toss them into your blender. Add the drained sun-dried tomatoes, vegetable broth, garlic cloves, and nutritional yeast. Blend until creamy.
- Adjust the Sauce: If the sauce is too thick, add a splash of reserved pasta water until desired creaminess is reached. Taste and season with salt and pepper.
- Heat the Sauce: In a large skillet over medium heat, pour in your creamy mixture. Cook for 2-3 minutes until heated through.
- Combine and Toss: Add the drained pasta to the skillet. Toss until the pasta is coated in the sauce. Adjust with more reserved water if too thick.
- Finishing Touches: Remove from heat. Toss in fresh basil and sprinkle red pepper flakes for extra zing.
Notes
This dish can be made ahead; refrigerate the sauce for up to 3 days. Re-blend with a splash of water before mixing with pasta.
Nutrition
- Serving Size: 1 serving
- Calories: 370
- Sugar: 3g
- Sodium: 350mg
- Fat: 18g
- Saturated Fat: 2g
- Unsaturated Fat: 16g
- Trans Fat: 0g
- Carbohydrates: 44g
- Fiber: 5g
- Protein: 12g
- Cholesterol: 0mg
Keywords: vegan pasta, sun-dried tomatoes, creamy sauce, plant-based meals
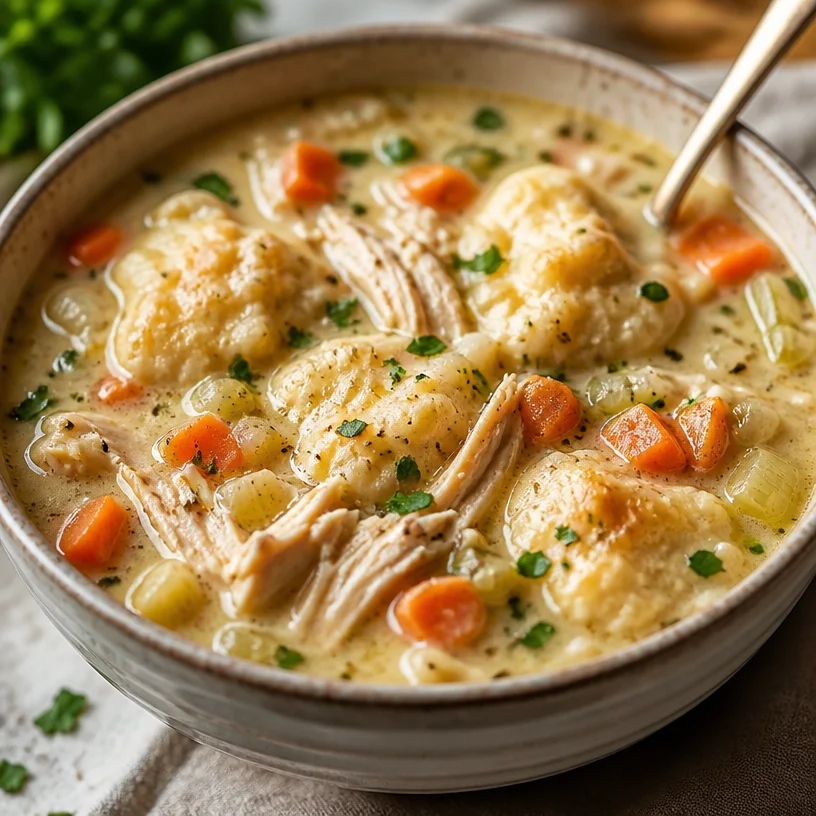
One-Pot Chicken Dumpling Soup in 30 Minutes (Weeknight)
The Comfort of Chicken Dumpling Soup: A Cozy Classic
Hello, fellow foodies! Grab your aprons and settle in, because today we’re diving into a bowl of comfort that’s sure to warm your heart and soul: Chicken Dumpling Soup! This dish embodies everything I love about cooking—it’s hearty, nourishing, and wrapped in nostalgia. Whether you’re facing a chilly evening or just craving something warm and fulfilling, Chicken Dumpling Soup is a classic that never disappoints.
There’s something magical about the way chicken broth envelops fluffy dumplings and tender vegetables, creating a symphony of flavors in every spoonful. And the best part? You don’t have to slave away in the kitchen for hours to create this delightful meal. With a few simple ingredients and a splash of love, you can whip up this comforting favorite in no time.
Picture this: The nostalgic smell of simmering broth, the soft chatter of family around the dining table, and that first, cozy sip of rich, savory goodness. That’s the essence of a home-cooked Chicken Dumpling Soup. But even beyond the dish itself, there’s a richness in the memories it creates. So, let’s gather our ingredients and get cooking—because this isn’t just about the meal; it’s about the stories we share and the moments we cherish around the table.
Personal Story
Ah, Chicken Dumpling Soup—there’s a whole world of memories wrapped in each bite, especially from my childhood. I remember a chilly Saturday afternoon when my grandmother decided it was the perfect day for her famous chicken soup. The air was crisp, and snowflakes were gently falling outside, but inside, the kitchen was warm and filled with the most inviting aroma.
Grandma would start with a whole chicken simmering away in a pot—the sound of bubbling broth was like music to my ears. As she prepped the vegetables, I’d nip in and out of the kitchen, stealing tiny tastes of carrots and sneaking bits of dumpling dough. The best part? When I had the honor of helping her roll out the dumplings. I remember giggling when our dough would stick to the counter and her gentle reminders to wipe my flour-covered hands.
Those moments spent together in the kitchen crafting something so comforting left a lasting imprint on my heart. Now, I get to recreate that cherished recipe for you, taking you back to those warm winter afternoons. Let’s gather our ingredients and start cooking—it’s time to bring a touch of nostalgia to your kitchen!
Ingredients
To create this irresistible Chicken Dumpling Soup, here’s what you’ll need:
-
1 rotisserie chicken, shredded
A cooked rotisserie chicken is a timesaver in the kitchen and adds amazing flavor. You can substitute it with any leftover chicken or poach your own for a fresh twist. -
1 can refrigerated biscuit dough
This is the star of our dumplings! If you prefer a healthier option, try using whole-grain biscuit dough or even homemade dumplings if you’re feeling adventurous. -
4 cups chicken broth
Use high-quality, low-sodium chicken broth for a wholesome base. Homemade broth works wonders, too—try simmering leftover chicken bones with aromatics! -
1 cup heavy cream
This ingredient brings a luxurious, creamy texture to the soup. For a lighter option, swap it with half-and-half or coconut milk for a dairy-free version. -
2 carrots, diced
Carrots add sweetness and color. Feel free to mix in any seasonal vegetables you love! Peas or corn work beautifully. -
2 celery stalks, diced
Celery adds crunch and depth to the flavor. If you’re out, fennel or green beans can also be great substitutes. -
1 onion, chopped
Onions are essential for that aromatic base. Shallots or leeks can serve as delightful alternatives if you want to switch up the flavor. -
1 teaspoon dried thyme
Thyme brings warmth to the soup. If you have fresh thyme, use it! About a tablespoon will add even more vibrant flavor. -
Salt and pepper to taste
Seasoning is key! Always adjust based on your personal taste—taste as you go! -
Fresh parsley, chopped for garnish
Garnishing with fresh herbs elevates the dish. If parsley isn’t available, try chives or even dill for a different flavor profile.
Step-by-Step Instructions
Ready to embark on this delightful cooking adventure? Let’s get started:
-
Prepare the Broth:
In a large pot over medium heat, pour in your chicken broth. If you’re using homemade broth, now’s the time to bring all those delicious flavors to life. For an even deeper flavor, add a bay leaf while it’s warming. -
Sauté the Aromatics:
Add the chopped onions, diced carrots, and celery to the broth. Sauté the vegetables for about 5-7 minutes until they start to soften, making your kitchen burst with tantalizing aromas. Stir them occasionally to prevent sticking—this base is crucial for flavor! -
Add the Shredded Chicken:
Toss in the shredded rotisserie chicken and let it mingle with the veggies for a couple of minutes. This allows all those savory juices to combine and enrich the soup. -
Stir in the Cream and Seasoning:
Pour in the heavy cream, ensuring you mix it well. This is where the soup gets its creamy richness. Then, add in your dried thyme, salt, and pepper to taste. Let it simmer for about 10 minutes, stirring occasionally. Lowering the heat also helps to keep that lovely cream from curdling—nobody wants that! -
Prepare the Dumplings:
While your soup is simmering away, it’s time to tackle the dumplings. Pop open your can of refrigerated biscuit dough and cut each biscuit into quarters. This way, they’ll be fluffy and bite-sized! -
Dumpling Time!
After the soup has simmered, gently drop the cut biscuit pieces into the soup one by one, making sure not to overcrowd. Allow the dumplings to cook for about 10-12 minutes, covered with a lid. They’ll puff up beautifully, soaking in all the savory goodness. -
Final Touches:
Once the dumplings are nice and fluffy, taste the soup one last time. Adjust seasonings if needed, then finish it off with a sprinkle of freshly chopped parsley. Voilà! Your Chicken Dumpling Soup is ready to be served.
Serving Suggestions
Presentation is key when serving this delightful soup! Ladle generous portions into deep bowls, allowing the fluffy dumplings to float on top. A sprinkle of fresh parsley not only adds color but also brings a burst of freshness. Serve alongside crusty bread or warm dinner rolls for an inviting meal that beckons your guests to dig in.
Recipe Variations
Feeling a bit adventurous? Here are some creative twists to make this Chicken Dumpling Soup uniquely yours:
- Spicy Kick: Add a pinch of red pepper flakes for a subtle heat or toss in some diced jalapeños for a more pronounced kick!
- Herbed Dumplings: Mix chopped fresh herbs (like dill or chives) into the biscuit dough before cooking—herbed dumplings are a delightful surprise!
- Add Greens: Toss in some fresh spinach or kale just before serving for added nutrients and a pop of color.
- Coconut Twist: Substitute the cream with coconut milk and add lime juice for a tropical spin that’s refreshing and delicious.
- Mushroom Medley: Introduce some sautéed mushrooms into the broth for a hearty umami depth that complements the chicken perfectly.
Chef’s Notes
Ah, this Chicken Dumpling Soup recipe has seen an evolution over time! I remember the first time I attempted to make it from scratch, and it turned into a giant dumpling disaster—let’s just say some were more doughy than delightful! A good friend suggested simplifying the process with biscuit dough, and that’s when I discovered the magic of quick, homemade comfort food.
The best part of creating this dish is the joy of sharing it. I often find that family and friends request it during cold seasons or when someone’s feeling under the weather. It’s become a comfort food icon in my circle, and I hope it can become one in yours too! Don’t be afraid to play around with it; cooking should be about creativity and enjoying the process.
FAQs and Troubleshooting
-
What if my dumplings aren’t cooking through?
Ensure your soup is simmering gently; if it’s boiling too vigorously, it can cause the dumplings to be doughy. Cover them well and give them the full recommended cooking time. -
Can I freeze the leftovers?
Yes, but keep in mind that the dumplings may become slightly soggy when reheated. It’s often best to freeze the soup without the dumplings and add fresh ones when you’re ready to enjoy it again. -
How do I make this soup gluten-free?
Swap the biscuit dough for gluten-free dumplings or make a quick dumpling mix using gluten-free flour. Just ensure your chicken broth is certified gluten-free! -
Can I use fresh chicken instead of rotisserie chicken?
Absolutely! Just make sure to poach it in the broth until fully cooked and then shred. This can enhance the flavor even further since all the juices will infuse the broth.
Nutritional Info
While this Chicken Dumpling Soup is comfort food at its finest, nutritional info can vary based on your specific ingredients. However, a typical serving (about 1.5 cups) offers around 400–500 calories, approximately 15–20 grams of protein, and a healthy dose of vitamins from the vegetables. For a more precise count, you can calculate the nutritional content based on the specific brands and ingredients you use.
And there you have it! A delicious Chicken Dumpling Soup that’s not just a meal, but a heartfelt experience waiting to happen. I’m so excited for you to try this recipe! So tie on your apron, pour a warm drink, and let’s create something comforting together. Happy cooking, my friends!
PrintChicken Dumpling Soup

A cozy and hearty soup featuring fluffy dumplings and tender vegetables in a rich chicken broth.
- Prep Time: 15
- Cook Time: 30
- Total Time: 45
- Yield: 4 servings 1x
- Category: Main Course
- Method: Simmering
- Cuisine: American
- Diet: N/A
Ingredients
- 1 rotisserie chicken, shredded
- 1 can refrigerated biscuit dough
- 4 cups chicken broth
- 1 cup heavy cream
- 2 carrots, diced
- 2 celery stalks, diced
- 1 onion, chopped
- 1 teaspoon dried thyme
- Salt and pepper to taste
- Fresh parsley, chopped for garnish
Instructions
- Prepare the broth: In a large pot over medium heat, pour in your chicken broth.
- Sauté the aromatics: Add the chopped onions, diced carrots, and celery to the broth.
- Add the shredded chicken: Toss in the shredded rotisserie chicken and let it mingle.
- Stir in the cream and seasoning: Pour in the heavy cream, mixing well.
- Prepare the dumplings: Cut the biscuit dough into quarters.
- Dumpling time! Gently drop the cut biscuit pieces into the soup.
- Final touches: Once the dumplings are fluffy, sprinkle with parsley and serve.
Notes
For a healthier option, use whole-grain biscuit dough. You can also substitute heavy cream with coconut milk for a dairy-free version.
Nutrition
- Serving Size: 1.5 cups
- Calories: 450
- Sugar: 5g
- Sodium: 800mg
- Fat: 24g
- Saturated Fat: 12g
- Unsaturated Fat: 8g
- Trans Fat: 0g
- Carbohydrates: 40g
- Fiber: 2g
- Protein: 20g
- Cholesterol: 80mg
Keywords: Chicken soup, dumplings, comfort food, cozy meal, winter recipe
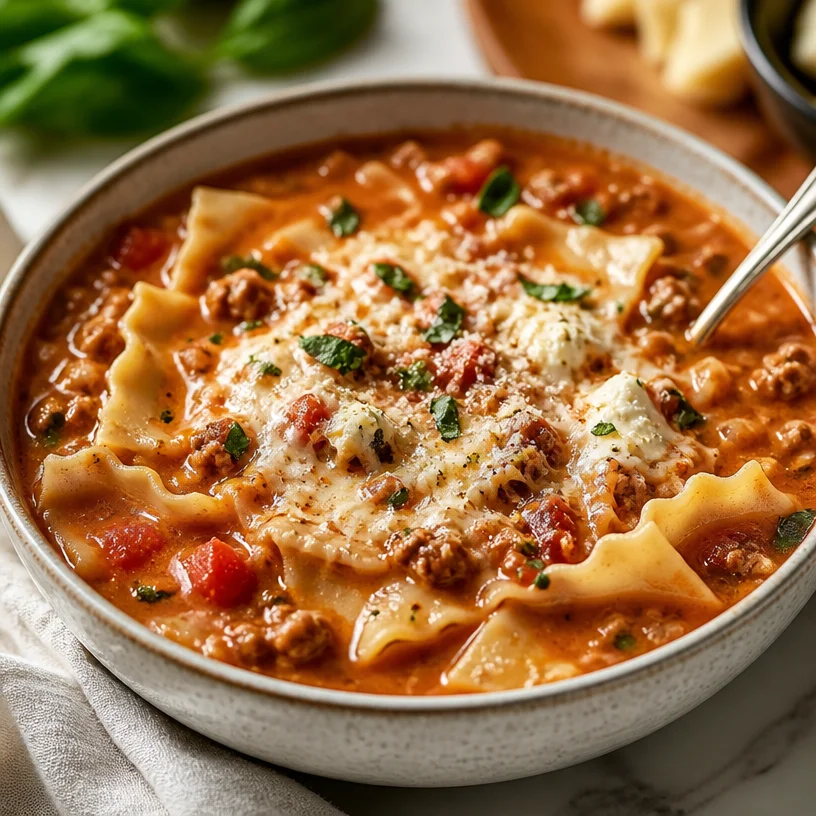
One-Pot Creamy Lasagna Soup in 30 Minutes (Weeknight Meal)
Easy Creamy Lasagna Soup
Introduction
Hey there, my fellow kitchen adventurers! If you’re anything like me, there are days when you just want to dive into a cozy, comforting bowl of soup that warms your soul. Well, I’ve got just the recipe for you: Easy Creamy Lasagna Soup! Imagine the rich flavors of traditional lasagna, but in a delightful, slurp-worthy soup form. It’s the best of both worlds—combining hearty lasagna with the ease of a soup that’s perfect for any day of the week.
This creamy indulgence is a dish that’s as easy to make as it is to enjoy. With a delightfully smooth texture and tantalizing flavors that will make your taste buds sing, this soup has become a staple in my kitchen. Plus, it’s a fantastic way to use up pantry staples and create an impressive dish for family and friends.
In this post, I’ll walk you through my journey into the delicious world of lasagna soup, share some cooking tips and tricks, and offer up a few variations to get those creative juices flowing. Grab your apron, and let’s get cooking!
Personal Story
I still remember the first time I excitedly made this lasagna soup for my friends. It was a chilly autumn evening, and I wanted to create something that not only tasted delicious but also brought everyone together in my cozy little kitchen. I recall throwing open the windows to let in the brisk air while lighting a few candles to set the mood.
As the delicious aroma of garlic and ground beef filled the room, my pals began to wander in, drawn by the lovely scents wafting through the air. We had a wonderful time mixing laughter with cooking, and soon enough, we were gathered around the table, bowls of this creamy goodness in hand.
Everyone dug into the soup, and I watched their expressions shift from curiosity to pure delight. The delightful combination of flavors and textures made this soup a hit. In that moment, I realized that cooking is more than just about the food; it’s about connecting with others. This Easy Creamy Lasagna Soup has since earned its place as a cherished recipe in my kitchen, a dish that brings friends closer while warming our hearts!
Ingredients
Let’s get into this creamy goodness! Here are all the ingredients you’ll need:
-
1 tablespoon olive oil
A staple in any kitchen, olive oil adds richness to your soup. For a different flavor, try avocado oil or even a butter blend. -
1 medium onion (finely diced)
Onions provide the aromatic base for your soup. If you’re not a fan of onion, feel free to substitute with shallots or leeks for a milder flavor. -
1 pound ground beef (80/20)
This blend ensures juicy flavor! If you’re looking for a lighter option, ground turkey or chicken can work wonders too; just keep an eye on the cooking time. -
5 cloves garlic (minced)
Garlic makes everything better! If you love garlic, toss in an extra clove or two—just be ready for strong flavors! -
½ teaspoon red pepper flakes
Spice it up! This adds a bit of heat; adjust based on your personal palate (or omit if you’re keeping it mild). -
1 teaspoon dried oregano
A classic herb that gives your soup depth. Thyme or Italian seasoning are great substitutes if you want to mix things up. -
2 tablespoons tomato paste
Intensifies the tomato flavor and adds a touch of sweetness. No tomato paste? Use ketchup in a pinch—just reduce the amount for balance. -
25 ounces tomato basil pasta sauce
The star of this soup! If you’re feeling ambitious, homemade sauce can elevate this dish even more! -
28 ounces diced canned tomatoes
Adds texture and brightness. If you’re using fresh tomatoes, aim for about 4 cups diced. -
4 cups chicken broth
The base of your soup! Feel free to use vegetable broth for a vegetarian option. -
2 teaspoons kosher salt (divided or more to taste)
Always season to your liking! If you’re watching your sodium, use low-sodium broth or omit some salt. -
12 lasagna noodles (uncooked and broken into 2” pieces)
This adds that signature lasagna flair. Use gluten-free pasta if necessary, or even break up spaghetti if you’re in a bind! -
½ cup heavy cream (optional)
For that luxurious creaminess. Replace it with half-and-half for a lighter touch, or use coconut cream if you’re dairy-free. -
1 cup shredded mozzarella cheese
The melty goodness that ties it all together! Use any cheese that melts well; provolone or fontina are fantastic alternatives! -
½ cup parmesan cheese (freshly grated)
Adds a nutty, savory flavor. Avoid pre-grated for the freshest taste – but if that’s all you have, it’ll still work. -
½ cup ricotta cheese
A staple in lasagna that adds creaminess. You could substitute with cottage cheese or skip it entirely for a lighter soup. -
6 tablespoons fresh basil (finely chopped)
A splash of freshness! Use parsley or spinach if basil isn’t accessible.
Step-by-Step Instructions
Now, let’s bring this delicious soup to life! Follow these steps for a creamy lasagna experience:
-
Sauté the Aromatics:
In a large pot, heat the olive oil over medium heat. Once warm, toss in the finely diced onion and sauté until translucent, about 4-5 minutes. This is where the magic begins! The aroma of onions sizzling will start to fill your kitchen. -
Add the Garlic and Ground Beef:
Next up, stir in the minced garlic and ground beef. Break the beef apart with a spatula, cooking until it’s browned all the way through (about 7-8 minutes). The smell of garlic and beef is simply irresistible—don’t forget to taste-test a tiny piece (you know, for quality control!) -
Spice it Up:
Sprinkle in the red pepper flakes and dried oregano. Stir everything around for a minute to let the spices bloom; this boosts the flavor exponentially. I promise, you’ll love this step! -
Incorporate Tomato:
Add in the tomato paste, mixing well to incorporate it with the beef mixture. This step intensifies the flavor even more. Now, pour in the tomato basil pasta sauce and canned diced tomatoes. Stir to combine and let those flavors mingle for a couple of minutes. -
Add Broth and Seasoning:
Gradually pour in the chicken broth, scraping the bottom of the pot to lift any flavorful bits. Season with 1 teaspoon of kosher salt (you can always add more later based on your taste) and bring it to a simmer. While it simmers, give it a taste! This is your base, so play with the seasoning here. -
Toss in the Noodles:
Once it’s bubbling, toss in the broken lasagna noodles. Stir occasionally and let it simmer for about 10 minutes until the noodles are al dente. If you prefer a thicker soup, cook just a bit longer; remember, the noodles will continue to absorb liquid! -
Cream it Up:
In the final minutes of cooking, drizzle in the heavy cream and stir well. This step is crucial for that creamy lasagna feel we’re aiming for. Now, add in half of your shredded mozzarella and the parmesan cheese. Stir until melted and beautifully combined. Enjoy the delicious aroma wafting through your kitchen! -
Finish it Off:
Remove from heat and fold in the ricotta cheese and fresh basil. This last moment of mixing will add that lovely creaminess and brightness to your soup. Trust me, it makes a world of difference!
Serving Suggestions
Now that your Easy Creamy Lasagna Soup is ready and begging to be served, let’s make it look oh-so-inviting! Grab your favorite soup bowls and ladle in a generous portion. Top each bowl with a sprinkle of remaining shredded mozzarella, a few dollops of ricotta, and extra fresh basil. Not only does this look stunning, but it also adds layers of flavor. Serve with a slice of crusty artisan bread or a fresh garden salad for a complete meal.
Recipe Variations
Looking to switch things up? Here are a few creative twists for your Easy Creamy Lasagna Soup:
- Vegetarian Twist: Swap out the ground beef for mushrooms or a mix of your favorite vegetables like zucchini and bell peppers.
- Spicy Italian Sausage: For a kick, use spicy Italian sausage instead of ground beef, and adjust your red pepper flakes accordingly.
- Creamy Spinach Lasagna Soup: Stir in fresh spinach leaves just before serving for added nutrients and an extra pop of color.
- Cheesy Overload: Go wild with different types of cheeses, like fontina, gouda, or adding cheese into the mix while cooking and on top before serving.
Chef’s Notes
As I reflect on my journey with this recipe, I realize how adaptable it is! The base is incredibly forgiving. If I’ve learned anything from my years in the kitchen, it’s that cooking is about experimenting and having fun. Initially, I was intimidated by the thought of making lasagna—so many layers, so many steps! This soup made it simple and absolutely divine.
I also have to chuckle when I remember a particular lasagna soup ‘fail’ when I accidentally added too much garlic. Let’s just say there was enough garlic in that batch to keep a pack of vampires at bay! Laughter echoed through my kitchen that night, and it turned into an impromptu garlic bread feast as a result.
FAQs and Troubleshooting
Here are some frequently asked questions to help you along the way:
1. Can I make this soup ahead of time?
Absolutely! This soup can be made a day in advance and stored in the fridge. Just reheat gently when you’re ready to serve. However, I recommend storing the noodles separately if you don’t want them to absorb too much liquid.
2. My soup is too thick; what do I do?
Don’t panic! Add additional chicken broth or water until it reaches your desired consistency.
3. How can I make it gluten-free?
Simply use gluten-free pasta, and you’re good to go! Just keep an eye on the cooking time since gluten-free noodles often have different cooking requirements.
4. What other toppings can I use?
Feel free to experiment! Crushed red pepper for heat, Italian herbs for freshness, or even a drizzle of balsamic reduction can really elevate the dish.
Nutritional Info
While I typically leave the nutrition specifics to your own research, keep in mind that this lasagna soup is packed with protein from the beef and cheeses, along with a good dose of vitamins from the tomatoes and basil. It’s a comforting dish that can be enjoyed in moderation as part of a balanced diet.
So there you have it! This Easy Creamy Lasagna Soup is ready to make its way into your home and heart. I hope you enjoy it as much as I do! Happy cooking, and may your kitchen always be filled with laughter and love.
PrintEasy Creamy Lasagna Soup

A cozy and comforting lasagna soup that combines the rich flavors of traditional lasagna in a creamy, slurp-worthy bowl.
- Prep Time: 15 minutes
- Cook Time: 30 minutes
- Total Time: 45 minutes
- Yield: 4 servings 1x
- Category: Main Course
- Method: Stovetop
- Cuisine: Italian
- Diet: Beef
Ingredients
- 1 tablespoon olive oil
- 1 medium onion (finely diced)
- 1 pound ground beef (80/20)
- 5 cloves garlic (minced)
- ½ teaspoon red pepper flakes
- 1 teaspoon dried oregano
- 2 tablespoons tomato paste
- 25 ounces tomato basil pasta sauce
- 28 ounces diced canned tomatoes
- 4 cups chicken broth
- 2 teaspoons kosher salt (divided or more to taste)
- 12 lasagna noodles (uncooked and broken into 2” pieces)
- ½ cup heavy cream (optional)
- 1 cup shredded mozzarella cheese
- ½ cup parmesan cheese (freshly grated)
- ½ cup ricotta cheese
- 6 tablespoons fresh basil (finely chopped)
Instructions
- Sauté the aromatics: In a large pot, heat the olive oil over medium heat. Toss in the finely diced onion and sauté until translucent, about 4-5 minutes.
- Add the garlic and ground beef: Stir in the minced garlic and ground beef, cooking until browned (about 7-8 minutes).
- Spice it up: Sprinkle in the red pepper flakes and dried oregano. Stir for a minute.
- Incorporate tomato: Add the tomato paste and mix well, then pour in the tomato basil pasta sauce and canned diced tomatoes. Stir and let flavors mingle.
- Add broth and seasoning: Gradually pour in the chicken broth, scraping the bottom of the pot and seasoning with kosher salt. Bring to a simmer.
- Toss in the noodles: Once bubbling, add the broken lasagna noodles and simmer for about 10 minutes until al dente.
- Cream it up: Drizzle in the heavy cream, add half the shredded mozzarella and parmesan. Stir until melted.
- Finish it off: Remove from heat and fold in the ricotta cheese and fresh basil.
Notes
For added flavor, serve with extra mozzarella and fresh basil on top. This soup can be made ahead of time and stored in the fridge.
Nutrition
- Serving Size: 1 serving
- Calories: 400
- Sugar: 6g
- Sodium: 500mg
- Fat: 20g
- Saturated Fat: 10g
- Unsaturated Fat: 8g
- Trans Fat: 0g
- Carbohydrates: 30g
- Fiber: 4g
- Protein: 25g
- Cholesterol: 70mg
Keywords: lasagna, soup, creamy soup, Italian recipe, comfort food
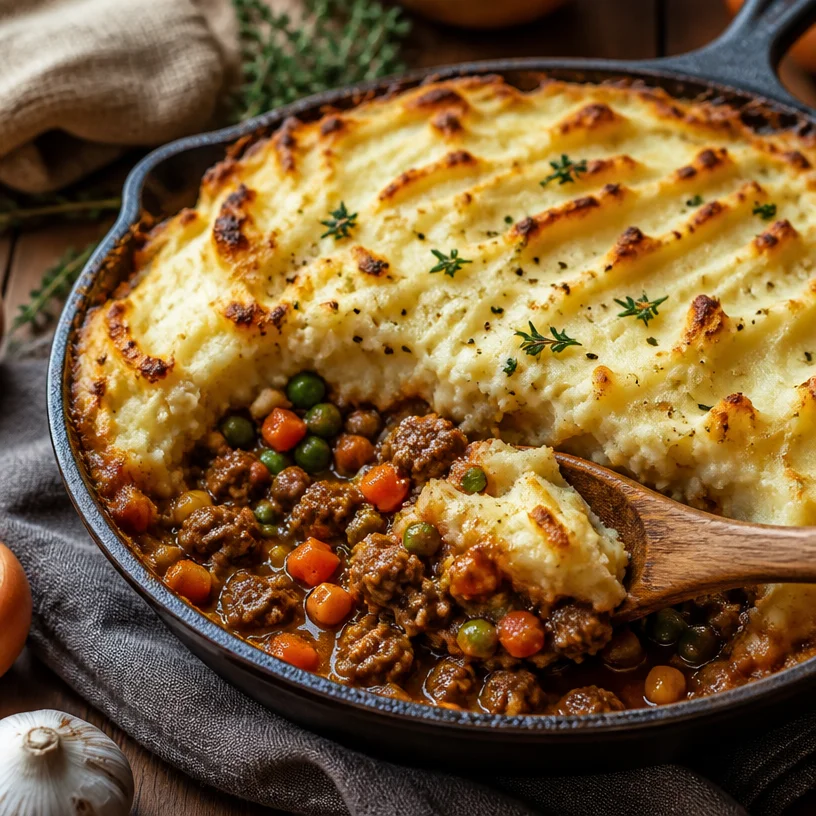
Minute One-Pan Shepherd’s Pie for Busy Weeknights
Easy Shepherd’s Pie: Comfort Food with a Twist
Hello, my lovely foodies! Today, I’m super excited to share with you a delightful recipe that’s truly close to my heart — Easy Shepherd’s Pie. This dish is the epitome of cozy comfort food, perfect for those chilly evenings when you want something hearty and delicious. The best part? It’s so simple to make! So let’s roll up our sleeves, gather our ingredients, and dive into the warmth of the kitchen together.
A Cozy Little Story
Growing up, my family had a tradition of gathering around the dinner table every Sunday. No matter how busy life got, Sunday dinners were sacred. My mom would whip up a big pot of Shepherd’s Pie because she knew it was a crowd-pleaser. I can still remember the aroma wafting through the house, making my stomach rumble before we even sat down.
I’d help her in the kitchen, peeling potatoes and stirring the filling. Those moments were about more than just food; they were about love, laughter, and bonding. As we’d dig into that savory pie, I’d watch my family’s eyes light up with each bite. It’s one of those meals that warms your heart and brings people together, and it’s a tradition I’m thrilled to carry forward.
So today, I invite you to share in that spirit of togetherness as we create our own Easy Shepherd’s Pie. Trust me, your family will cherish it just as much as mine did!
Ingredients
Here’s what you’ll need to make this comforting delight:
-
1 lb ground lamb or beef
You can choose between lamb for a more traditional taste, or beef for a heartier option. If you’re looking for a leaner choice, ground turkey works too! -
2 cups mixed vegetables (carrots, peas, corn)
Fresh or frozen, these veggies add color and nutrition. If you’re feeling adventurous, you can substitute with green beans or diced bell peppers. -
1 onion, chopped
Onions give the dish a fantastic depth of flavor. Yellow onions are great, but red onions can add a bit of sweetness. -
2 cloves garlic, minced
Garlic is a flavor powerhouse! Feel free to adjust the amount to suit your palate — more for garlic lovers! -
1 cup red wine
A splash of red wine enriches the sauce with complexity. If you prefer not to use alcohol, replace it with beef broth for a non-alchoholic version. -
2 cups mashed potatoes
Home-cooked is best! Or you can use store-bought for a quick shortcut. Any mashed potato recipe works, so feel free to add herbs or cheese. -
1 cup beef broth
This will keep your shepherd’s pie moist and flavorful. Chicken broth can also work if you’re using chicken. -
2 tablespoons Worcestershire sauce
This adds that umami kick we all love. For a vegetarian option, try soy sauce or a vegan Worcestershire sauce. -
Salt and pepper to taste
Always essential for bringing out flavors. Adjust according to your preference! -
Olive oil for cooking
A light drizzle of olive oil gives a wonderful flavor and helps in sautéing. You can opt for any cooking oil or butter if you prefer.
Step-by-Step Instructions
-
Prep your Ingredients:
Start by gathering all your ingredients on the counter. Pre-chop your vegetables, and have everything ready to go. This makes the cooking process smooth and fun! -
Cook the Meat:
In a large skillet or frying pan, heat a tablespoon of olive oil over medium heat. Add the chopped onion and minced garlic. Sauté them together until they’re soft and fragrant — about 3-5 minutes. Then, add the ground lamb or beef, breaking it up with a spatula. Cook until browned, about 7-10 minutes. This is where your kitchen starts to smell incredible! -
Add the Vegetables:
Toss in your mixed veggies. Stir well to combine everything while letting those flavors meld together for another 5 minutes. -
Pour in the Red Wine:
Now, here comes the fun part! Pour in the red wine and let it simmer for 5 minutes. You want to reduce the wine just a bit, concentrating those lovely flavors. If you prefer not using wine, add a splash of beef broth and let it steam off a little. -
Combine Broth & Season:
After the wine has reduced, add the beef broth and Worcestershire sauce. Season with salt and pepper. Let this simmer gently for about 10 minutes, allowing everything to get cozy. If the mixture seems too runny, you can thicken it with a bit of cornstarch mixed with water. -
Prepare the Mash:
While your meat and veggies are bubbling away, if you’re making homemade mashed potatoes, now’s the time to whip them up. You want them to be creamy and smooth. If you’re using store-bought, follow the package instructions to warm them up. -
Assemble the Pie:
Preheat your oven to 400°F (200°C). In a baking dish, spread the meat and vegetable mixture evenly at the bottom. Then, dollop the mashed potatoes on top, spreading them out gently to cover everything. Don’t worry about being perfect — rustic is beautiful! -
Bake to Perfection:
Pop the assembled shepherd’s pie into the oven and bake for about 25-30 minutes, or until the top is golden and the edges are bubbling. You can broil for an extra 2-3 minutes if you want that nice crusty top. -
Serve It Up:
Once done, take the pie out of the oven and let it rest for a few minutes. This helps all those delicious juices settle in. Then, use a large spoon to serve it up!
Serving Suggestions
When it comes to serving Shepherd’s Pie, I like to keep it simple. A hearty slice on a plate alongside a fresh green salad with a tangy vinaigrette makes for a beautiful balance. You can also serve it with a dollop of crème fraîche or a sprinkle of fresh herbs, like parsley or chives, to elevate the dish even further.
Recipe Variations
Here are a few fun twists you can try with your Shepherd’s Pie:
-
Vegetarian Version: Substitute the meat with lentils or diced mushrooms, and use vegetable broth instead of beef broth. You can also add more vegetables like zucchini or spinach.
-
Cheesy Mash: Mix some shredded cheese into your mashed potatoes for an indulgent creamy top.
-
Spicy Kick: Add a teaspoon of chili flakes or a dash of hot sauce to the meat mixture for a little heat!
-
Curry Twist: Mix in some curry powder with the vegetables for a unique flavor profile that adds warmth and spice.
-
Root Veggie Mash: Swap regular potatoes for sweet potatoes, parsnips, or a blend for added natural sweetness and nutrition.
Chef’s Notes
This recipe is one of those that has naturally evolved over time. I’ve tried countless variations, but my simple, cozy version always takes me back to my mom’s kitchen. I love how easy it is to modify depending on what’s in my fridge. Plus, it’s a fantastic way to use up leftover veggies!
One time, I had a mishap with some overly salty broth — yikes! It made me get creative by adding a bit of cream to the mash, which balanced everything beautifully. So, don’t be afraid to make adjustments based on your taste preferences or what you have available.
FAQs and Troubleshooting
-
Q: What if my meat is too dry?
A: If your meat filling becomes dry, add a little more beef broth or red wine to bring moisture back into the dish before topping it with the mash. -
Q: Can I freeze Shepherd’s Pie?
A: Absolutely! It’s great for meal prep. Assemble it, cover it tightly, and pop it in the freezer. Just adjust the baking time when you’re ready to cook it from frozen. -
Q: My potatoes are lumpy. What did I do wrong?
A: Lumpy mashed potatoes usually come from not mashing them enough or using cold butter. For the creamiest mash, use hot potatoes, and mash until smooth! -
Q: Can I make this in advance?
A: Yes! You can prepare the filling ahead of time and store it in the fridge. Just assemble and bake when you’re ready to serve.
Nutritional Info (Optional)
While I usually focus on the comfort of enjoying your food, a serving of this Easy Shepherd’s Pie contains roughly 450 calories, depending on the specific ingredients used. It’s a satisfying meal that provides a good mix of protein, carbs, and veggies!
So there you have it, my delightful food lovers! Easy Shepherd’s Pie is not just a recipe; it’s a way to create cherished moments around your table. I hope you enjoy making it as much as I do. Remember to have fun, and don’t stress about perfection — it’s all about feeling good and sharing those joyful flavors with your loved ones. Happy cooking, and let’s savor the warmth of togetherness through every delicious bite!
PrintEasy Shepherd’s Pie

A hearty and comforting shepherd’s pie made with your choice of ground lamb or beef, mixed vegetables, and topped with creamy mashed potatoes.
- Prep Time: 15 minutes
- Cook Time: 40 minutes
- Total Time: 55 minutes
- Yield: 4 servings 1x
- Category: Main Course
- Method: Baking
- Cuisine: British
- Diet: None
Ingredients
- 1 lb ground lamb or beef
- 2 cups mixed vegetables (carrots, peas, corn)
- 1 onion, chopped
- 2 cloves garlic, minced
- 1 cup red wine
- 2 cups mashed potatoes
- 1 cup beef broth
- 2 tablespoons Worcestershire sauce
- Salt and pepper to taste
- Olive oil for cooking
Instructions
- Prep your ingredients: Gather all your ingredients and pre-chop your vegetables.
- Cook the meat: Heat olive oil in a skillet, add onion and garlic, then cook until soft. Add ground meat and cook until browned.
- Add the vegetables: Stir in mixed veggies and cook for another 5 minutes.
- Pour in the red wine and let it simmer for 5 minutes to reduce.
- Combine broth and season: Add beef broth and Worcestershire sauce, season with salt and pepper, and simmer for 10 minutes.
- Prepare the mash: Make your mashed potatoes, aiming for a creamy texture.
- Assemble the pie: Spread the meat mixture in a baking dish, top with mashed potatoes.
- Bake to perfection: Bake at 400°F (200°C) for 25-30 minutes until golden.
- Serve it up: Let the pie rest for a few minutes before serving.
Notes
This recipe can be customized with various vegetables or by using a vegetarian option. It’s also great for meal prep and can be frozen.
Nutrition
- Serving Size: 1 serving
- Calories: 450
- Sugar: 5g
- Sodium: 600mg
- Fat: 20g
- Saturated Fat: 7g
- Unsaturated Fat: 10g
- Trans Fat: 0g
- Carbohydrates: 35g
- Fiber: 4g
- Protein: 25g
- Cholesterol: 70mg
Keywords: Shepherd's Pie, comfort food, hearty meal, family recipe

Bang Bang Chicken Skewers: 15-Minute Weeknight Dinner
Bang Bang Chicken Skewers: A Flavorful Adventure
Hello, fellow foodies! Are you ready to embark on a delicious journey with me? Today, we’re making Bang Bang Chicken Skewers! Imagine succulent chicken pieces, tender and juicy, smothered in a creamy, spicy sauce that has that perfect balance of sweetness and heat. It’s a dish that’s not only bursting with flavor but is also incredibly fun to make and share. Whether you’re hosting friends, having a family dinner, or just want to enjoy a tasty treat, these skewers are sure to elevate your meal.
Cooking has always been a way for me to express love and creativity, and Bang Bang Chicken Skewers hold a special place in my heart. I remember the first time I made these for a small gathering at my home. The sun was setting, and I had set up my patio with twinkling lights, creating a perfect ambiance. As I grilled the chicken skewers, the fragrance danced in the air, drawing my friends closer, and as we savored our first bite, smiles lit up their faces. The combination of flavors was an instant hit! It was one of those moments where I truly felt the magic of cooking – it brought people together around great food.
With that in mind, let’s dive into this recipe and bring some of that magic to your table!
Ingredients
Here’s what you’ll need for your Bang Bang Chicken Skewers:
-
1 pound chicken breast, cubed
- The star of the dish! Chicken breast is lean and cooks quickly, making it perfect for skewers. If you prefer a more tender option, you can also use chicken thighs for extra juiciness.
-
1 tablespoon olive oil
- Perfect for seasoning and keeping the chicken moist while cooking. Feel free to swap it for vegetable or canola oil if that’s what you have on hand.
-
1/4 teaspoon salt
- Essential for balancing flavors; it enhances the chicken’s natural taste. You could also use garlic salt for an extra punch.
-
1/4 teaspoon black pepper
- A must-have for seasoning; it adds a nice warmth. Want a kick? Consider adding some red pepper flakes!
-
1/2 cup mayonnaise
- This creamy base brings richness to our sauce. If you’re looking for a lighter option, try Greek yogurt as a healthier substitute.
-
2 tablespoons sweet chili sauce
- The sweet-and-spicy element. It adds a lovely glaze as well! If you want it spicier, use extra sriracha in its place.
-
1 tablespoon sriracha
- This fiery ingredient gives the dish its signature zing! Adjust according to your heat preference.
-
1 tablespoon lime juice
- Fresh lime juice brightens up the flavors. In a pinch, lemon juice could work nicely.
-
Skewers
- Wooden or metal, either will do! If using wooden skewers, remember to soak them in water for about 30 minutes to prevent burning.
Step-by-Step Instructions
Step 1: Prepare the Chicken
Start by washing and patting dry your chicken breasts. Once they’re nice and dry, cube them into bite-sized pieces, about 1 to 1.5 inches. This size ensures they cook evenly. While you’re chopping, feel free to share any kitchen stories or misadventures with friends (it makes the cooking process more enjoyable)!
Step 2: Marinate
In a bowl, combine the cubed chicken with olive oil, salt, and black pepper. Mix well to ensure every piece is coated. Marinating the chicken enhances the flavor and tenderness. Let it sit for at least 15 minutes; however, if you have time, longer marination is better!
Step 3: Prepare the Sauce
In another bowl, it’s sauce time! Whisk together mayonnaise, sweet chili sauce, sriracha, and lime juice until smooth and creamy. Taste it along the way; adjust the sweet or spicy level based on your preference. This sauce is where the magic happens—creamy, spicy, and perfectly tangy!
Step 4: Skewering Time
Now that your chicken is marinated and your sauce is ready, it’s time to thread the chicken onto the skewers. Using metal skewers? Just slide the cubes on! Prefer wooden skewers? Make sure they’ve been soaked. Leave a little space between each piece for even cooking. If you want to have fun with it, add bell peppers or zucchini between the chicken pieces!
Step 5: Grill or Bake
Heat your grill to medium-high or preheat your oven to 400°F (200°C). If you’re using an outdoor grill, aim for that beautiful char; it adds incredible flavor! Place the skewers on the grill or a baking sheet if you’re oven-baking. Cook for about 10-12 minutes, turning halfway through. You’ll know they’re done when the chicken is cooked through and opaque.
Step 6: Sauce it Up!
Once the chicken skewers are done, remove them from the heat. Drizzle or brush those beautiful skewers with the remaining Bang Bang sauce. Give them a moment to soak up that flavor, and watch your friends’ eyes widen with anticipation when they see the scrumptious presentation!
Serving Suggestions
Plate your Bang Bang Chicken Skewers with a sprinkle of fresh herbs like cilantro or green onions for added freshness. These skewers pair beautifully with jasmine rice or a crunchy slaw to balance the richness of the sauce. Don’t forget a wedge of lime on the side to squeeze on top for that extra zing!
Recipe Variations
Want to mix things up? Here are some creative twists to try:
- Add Veggies: Alternate with cherry tomatoes, bell peppers, or red onions on the skewers for extra color and nutrients.
- Switch Proteins: Try shrimp or tofu for a delightfully different take!
- Change the Heat: Use a different hot sauce for variety—try chipotle or chili garlic sauce!
- Sweeten the Deal: Add a drizzle of honey to your sauce for extra sweetness.
- Make It Smooth: Blend the sauce until smooth for a luxurious feel instead of leaving it creamy.
Chef’s Notes
When I first developed this recipe, I was living in a cozy apartment with limited space. Balancing a frying pan on my tiny stovetop while dodging the cat at my feet made for quite the amusing evening! Over the years, I’ve honed this recipe, always excited to share it with friends. Every time I make it, I’m reminded of how food can transform any gathering into a memorable event. I encourage you to unleash your creativity and make this dish your own!
FAQs and Troubleshooting
1. My chicken skewers are dry. What went wrong?
Dry chicken can often be traced back to cooking too long or using overly lean cuts. Always check for doneness with a meat thermometer—165°F (75°C) is your friend here!
2. How can I prepare these skewers ahead of time?
You can marinate the chicken the night before and store it in the fridge. Assemble and cook them when you’re ready to serve!
3. What do I do if my skewers burn?
If you’re grilling over direct heat, starting too high can cause burning. Try moving them to a cooler part of the grill or turning down the heat.
4. Can I bake them instead of grilling?
Absolutely! Baking is a great alternative. Place them on a lined baking sheet and roast them in a preheated oven at 400°F (200°C) until cooked through, about 12-15 minutes.
Nutritional Info (optional)
Per serving (based on skewers made with chicken breast):
- Calories: ~275
- Protein: ~30g
- Carbohydrates: ~5g
- Fat: ~15g
Now, grab your apron, fire up that grill, and get ready for a flavor explosion! Whether it’s a casual weeknight dinner or a gathering with friends, these Bang Bang Chicken Skewers are sure to impress. Happy cooking, and let’s continue to create beautiful memories around the table!
PrintBang Bang Chicken Skewers

Succulent chicken skewers smothered in a creamy, spicy sauce that balances sweetness and heat.
- Prep Time: 15 minutes
- Cook Time: 12 minutes
- Total Time: 27 minutes
- Yield: 4 servings 1x
- Category: Main Course
- Method: Grilling
- Cuisine: Asian
- Diet: Gluten-Free
Ingredients
- 1 pound chicken breast, cubed
- 1 tablespoon olive oil
- 1/4 teaspoon salt
- 1/4 teaspoon black pepper
- 1/2 cup mayonnaise
- 2 tablespoons sweet chili sauce
- 1 tablespoon sriracha
- 1 tablespoon lime juice
- Skewers
Instructions
- Prepare the Chicken: Start by washing and patting dry your chicken breasts. Cube them into bite-sized pieces, about 1 to 1.5 inches.
- Marinate: In a bowl, combine the cubed chicken with olive oil, salt, and black pepper. Mix well and let it sit for at least 15 minutes.
- Prepare the Sauce: In another bowl, whisk together mayonnaise, sweet chili sauce, sriracha, and lime juice until smooth.
- Skewering Time: Thread the marinated chicken onto the skewers, leaving a little space between each piece.
- Grill or Bake: Heat your grill to medium-high or preheat your oven to 400°F (200°C). Cook for about 10-12 minutes, turning halfway through.
- Sauce it Up!: Once done, remove the skewers from heat and brush with the remaining sauce, allowing it to soak in.
Notes
Serve with a sprinkle of fresh herbs and a wedge of lime for an extra zing.
Nutrition
- Serving Size: 1 skewer
- Calories: 275
- Sugar: 5g
- Sodium: 400mg
- Fat: 15g
- Saturated Fat: 2g
- Unsaturated Fat: 10g
- Trans Fat: 0g
- Carbohydrates: 6g
- Fiber: 0g
- Protein: 30g
- Cholesterol: 70mg
Keywords: Bang Bang Chicken, Chicken Skewers, Grilled Chicken, Spicy Chicken Recipe, Easy Dinner
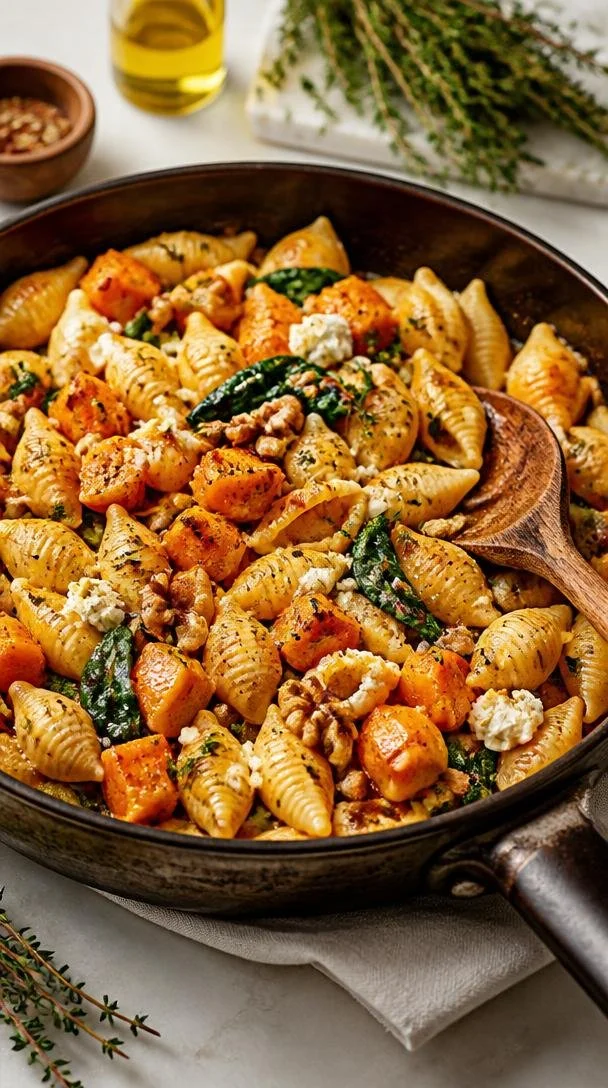
One-Pan 30-Minute Pumpkin Feta Pasta (Weeknight Recipe)
Pumpkin Feta Pasta: A Cozy Fall Delight
Hello, fellow food lovers! Today, I’m excited to share with you a dish that truly embodies the spirit of comfort and warmth as the leaves begin to turn and the air gets a bit cooler. It’s a dish that’s not just about feeding people but about nurturing those you love with flavors that dance on the palate. Let’s dive into making Pumpkin Feta Pasta — a delightful combination of creamy, savory, and slightly sweet, all wrapped up in those adorable pasta shells!
A Little Backstory
I’ll never forget the first time I whipped up a version of this Pumpkin Feta Pasta. It was a crisp autumn evening, the kind that calls for cozy sweaters and hearty meals. I had a few friends over for a casual dinner party, and as I stared at a half a butternut squash sitting on my countertop, inspiration struck. I thought, “What if I roasted this beauty and turned it into a luscious sauce?” The kitchen filled with the scents of garlic and thyme, mingling with laughter and spirited conversation. Watching my friends take that first bite, their eyes lighting up as they experienced that perfect balance of flavors, was a priceless memory. It reminded me of why I started this adventure in the first place — to create beautiful moments around the table.
Ingredients
Now, let’s gather our ingredients! Each element in this dish plays a vital role in creating that soul-warming experience.
- 360g pasta shells: The stars of our dish! Shells hold onto the sauce beautifully. You can substitute with any pasta shape you love. I often go for orecchiette when I want a twist.
- 1kg butternut squash pumpkin: Sweet, nutty, and so versatile! If you’re in a pinch, you can use canned pumpkin puree, but nothing beats fresh roasted squash.
- 8 garlic cloves: Roasted garlic adds a sweet, mellow flavor. If you prefer a stronger profile, feel free to up the amount or use raw garlic, but I recommend roasting for a more delicate taste.
- 180g feta cheese: I adore the creamy, tangy nature of Bulgarian feta here, but feel free to use goat cheese for a different flavor or even vegan feta to keep it plant-based.
- 2 big handfuls baby spinach: Adds a pop of color and a nutritious flair! Kale could work too; just be sure to sauté it a bit longer to soften.
- 1 handful walnuts: A wonderful crunchy contrast! Pecans or even pine nuts can make great substitutions if you want to mix things up.
- ¼ cup extra virgin olive oil: For roasting and bringing everything together! You can swap it with melted butter for a rich flavor kick.
- 8 sprigs of thyme: Fresh herbs elevate any dish! In a pinch, try dried thyme but halve the amount, as it’s more concentrated.
- Salt and pepper to taste: Essential seasonings; don’t skip them!
- Chili flakes (optional): Add some heat according to your taste! A pinch or two will create a lovely warmth.
Step-by-Step Instructions
Let’s get cooking! Trust me; you’ll want to stick around for this.
-
Preheat Your Oven: Start by preheating your oven to 400°F (200°C). A hot oven is key for roasting that butternut squash beautifully!
-
Prepare the Squash: Cut the butternut squash in half lengthwise and scoop out the seeds. Drizzle on some olive oil, sprinkle with salt, pepper, and thyme. Place the squash cut side down on a baking sheet lined with parchment paper. This helps with even cooking and caramelization.
-
Roast the Squash: Pop it in the oven and roast for about 30-40 minutes, or until fork-tender. The sugars will caramelize, creating that lovely depth of flavor.
-
Cook the Pasta: While the squash is roasting, bring a large pot of salted water to a boil. Cook your pasta shells according to package instructions until al dente. Remember to save about a cup of pasta water before draining! It’s liquid gold for binding our sauce.
-
Sauté the Garlic: In a large skillet, drizzle in some olive oil and heat it over medium heat. Toss in the whole garlic cloves and sauté them until they’re golden and fragrant. This usually takes about 5-7 minutes. It’s amazing how the aroma fills your kitchen and sets the stage for what’s coming!
-
Combine It All: Once the squash is done roasting, scoop the flesh into a blender or food processor along with the sautéed garlic. Add in your feta cheese, maybe half the spinach, and a splash of that reserved pasta water. Blend until smooth and creamy. This is the magic sauce!
-
Mix the Pasta: In the skillet, combine the pasta shells and the pumpkin sauce. Stir to coat the pasta thoroughly. If it appears too thick, you can always add more pasta water to achieve your desired consistency. Season with salt, pepper, and chili flakes according to your taste.
-
Add Spinach and Walnuts: Toss in the remaining spinach and walnuts. The heat will wilt the spinach just perfectly, providing that fresh element to our dish.
-
Serve Up the Love: Take a moment to appreciate your creation! Plating is everything!
Serving Suggestions
Serve your Pumpkin Feta Pasta warm, garnished with a sprinkle of extra feta, a drizzle of olive oil, and perhaps some more chili flakes for that extra flair. Adding fresh thyme leaves on top can really elevate the presentation.
Recipe Variations
Here are a few ways to mix things up:
- Creamy Vegan Option: Replace feta with a cashew cream or silken tofu blended with nutritional yeast for a rich, creamy texture.
- Add Protein: Toss in some roasted chicken or sautéed shrimp for a heartier entrée!
- Savory Swaps: Try swapping out the walnuts for crispy prosciutto or bacon bits for a savory crunch.
- Herb Infusion: Experiment with herbs — sage offers a lovely autumnal touch, while basil can brighten up the flavors.
- Add a Twist: For a spicy kick, toss in some roasted red pepper or sun-dried tomatoes to the sauce before blending.
Chef’s Notes
I love how this recipe has evolved over the years. Initially, I made a simple pumpkin sauce, but it felt like it needed a vibrant addition. Enter feta cheese! The moment I introduced that tangy creaminess, the dish transformed into something truly special. Plus, the colors remind me of a warm pumpkin patch, always inspiring me to gather friends around my table.
And a funny little kitchen mishap: the first time I made this, I forgot to reserve pasta water and nearly had a panic moment! I ended up using some chicken broth instead, which actually added another layer of flavor! So, if you forget to save that pasta water, don’t fret — improvise!
FAQs and Troubleshooting
Q: Can I use other pasta shapes?
Absolutely! Shells, fusilli, or even spaghetti work wonderfully. Just keep an eye on the cooking time to achieve the perfect texture.
Q: What if I don’t like feta?
No problem! Swap it with goat cheese, ricotta, or even a vegan cheese alternative.
Q: Is this dish easy to reheat?
Definitely! It stores well in an airtight container in the fridge for up to three days. When reheating, add a splash of water or stock to revive that creamy texture.
Q: Can I prep this dish in advance?
You can roast the squash and prepare the sauce ahead of time. Store in the fridge and cook the pasta fresh when you’re ready to eat!
Nutritional Info
(If applicable, you might want to calculate the nutrition based on specific ingredients used. Alternatively, you can skip this section if you prefer!)
Wrap-Up
I hope this Pumpkin Feta Pasta becomes a staple in your kitchen as it has in mine! Cooking is about creativity, experimentation, and connection. It’s about filling your space with warmth — and nothing says that better than a dish that nourishes both body and soul. So, grab your apron, gather your loved ones, and let’s create some delicious memories together. Cheers to cooking with intention!
PrintPumpkin Feta Pasta

A delightful combination of creamy, savory, and slightly sweet pumpkin and feta cheese, wrapped in pasta shells, perfect for a cozy fall meal.
- Prep Time: 15 minutes
- Cook Time: 40 minutes
- Total Time: 55 minutes
- Yield: 4 servings 1x
- Category: Main Course
- Method: Baking
- Cuisine: Italian
- Diet: Vegetarian
Ingredients
- 360g pasta shells
- 1kg butternut squash pumpkin
- 8 garlic cloves
- 180g feta cheese
- 2 big handfuls baby spinach
- 1 handful walnuts
- ¼ cup extra virgin olive oil
- 8 sprigs of thyme
- Salt and pepper to taste
- Chili flakes (optional)
Instructions
- Preheat your oven to 400°F (200°C).
- Prepare the butternut squash by cutting it in half lengthwise and scooping out the seeds.
- Drizzle olive oil, sprinkle with salt, pepper, and thyme, then place the squash cut side down on a baking sheet.
- Roast for about 30-40 minutes, until fork-tender.
- Cook pasta shells in a large pot of salted water until al dente, saving about a cup of pasta water.
- Sauté garlic cloves in olive oil over medium heat until golden and fragrant, about 5-7 minutes.
- Combine the roasted squash, sautéed garlic, feta cheese, and half the spinach in a blender, and blend until smooth.
- Mix the pasta shells with the pumpkin sauce until well-coated, adding reserved pasta water as needed.
- Add remaining spinach and walnuts, tossing to combine.
- Serve warm with extra feta and a drizzle of olive oil.
Notes
For a vegan option, replace feta with cashew cream or silken tofu. This dish can be prepped ahead by roasting the squash and preparing the sauce in advance.
Nutrition
- Serving Size: 1 serving
- Calories: 350
- Sugar: 5g
- Sodium: 400mg
- Fat: 12g
- Saturated Fat: 4g
- Unsaturated Fat: 6g
- Trans Fat: 0g
- Carbohydrates: 45g
- Fiber: 3g
- Protein: 15g
- Cholesterol: 30mg
Keywords: pumpkin pasta, feta cheese, fall recipes, cozy meals, vegetarian pasta
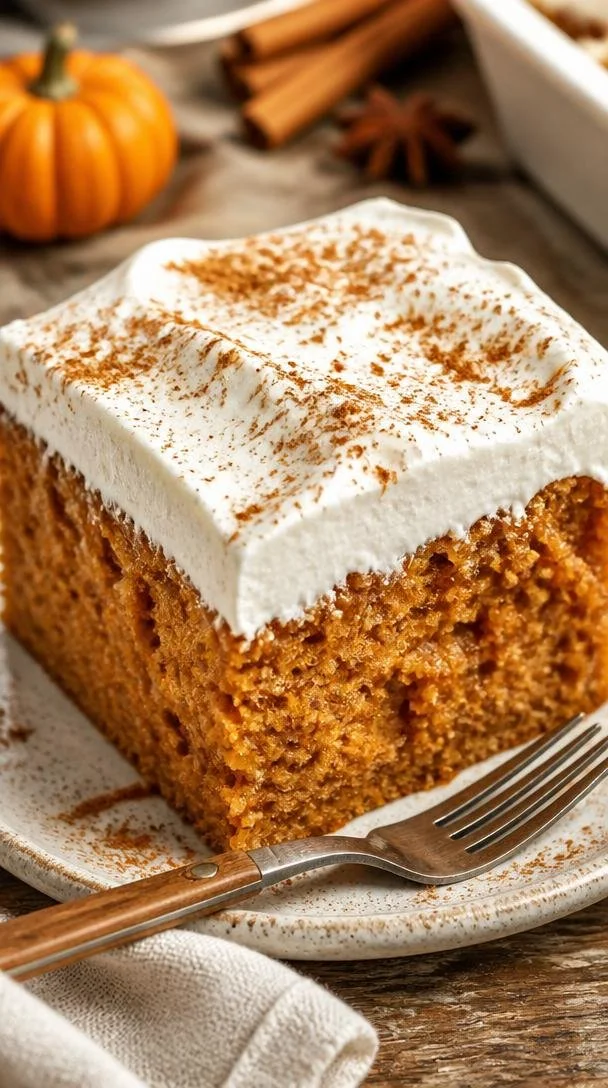
Minute Pumpkin Spice Poke Cake: Cozy Fall Dessert
Pumpkin Spice Poke Cake – Easy and Delicious Recipe
Introduction
Hello, my lovely foodies! With the air becoming crisp and cozy sweaters making their much-awaited appearance, it’s officially fall—a season that stirs up warm memories and a craving for everything pumpkin. You might have guessed it already; today, we are diving into the world of delightful desserts with my favorite Pumpkin Spice Poke Cake! This recipe combines all the warm, inviting flavors of pumpkin spice with a moist, decadent cake that literally begs to be slathered with cream cheese frosting.
Now, let me start by telling you why this cake holds a special place in my heart. Imagine a bustling kitchen filled with laughter, the sweet scent of cinnamon wafting through the air, and the excitement of a family gathering for the first autumn dinner. That’s how I discovered the glory that is the Pumpkin Spice Poke Cake! This cake not only dazzles the taste buds but also serves as a delicious centerpiece for any fall gathering. It’s big, it’s bold, and it’s begging to be devoured!
What I love about this poke cake is how easy it is to make, yet it feels fancy enough to serve at a holiday gathering or a cozy dinner party. Picture yourself tieing on that ivory apron, pouring a little something sparkling for your guests, and lifting the mood with this delicious delight. Are you ready? Let’s roll up our sleeves and get started on this fabulous fall dessert!
Personal Story
Ah, the memories attached to this beautiful cake are quite sweet. I recall one particular fall evening when I decided to host an impromptu dinner party for my friends. The leaves outside were a vibrant tapestry of orange, red, and yellow, and as I polished the dining table, my mind was racing with ideas. What dish could reflect the essence of fall?
After a brief moment of pondering the traditional pumpkin pie, an idea struck me—why not create a cake that embodies all that warm, spiced goodness but with a twist? That’s when the Pumpkin Spice Poke Cake was born! I whipped up the batter, plunged holes into the warm cake, and let the luscious cream soak in like a warm hug. As I served the cake, I watched as my friends’ faces lit up with joy. That moment was the perfect reminder of how food has the power to bring people together and create memories, one delicious bite at a time.
Ingredients
Here’s what you’ll need to create this scrumptious Pumpkin Spice Poke Cake:
-
1 box spice cake mix (or homemade spice cake)
Spice cake mix is packed with the warm flavors of cinnamon, nutmeg, and allspice. If you’re feeling adventurous, you can make your own spice cake from scratch! -
1 can (15 oz) pumpkin puree
Pumpkin puree gives the cake a rich flavor and moist texture. Be sure to avoid pumpkin pie filling, as it contains added sugars and spices. -
1 cup water
Water helps create the perfect batter consistency. You can substitute it with milk for an even richer flavor. -
1/2 cup vegetable oil
This ingredient adds moisture. You can use melted coconut oil or melted butter as a substitution for added flavor. -
4 large eggs
Eggs provide structure and help bind the ingredients together. For an egg-free option, try using unsweetened applesauce (1/4 cup per egg). -
1 cup sweetened condensed milk
This is what makes this cake a poke cake! This milk adds sweetness and richness. If you’re looking for a lighter option, you can try evaporated milk, but the texture may vary slightly. -
1 ½ cups cream cheese frosting
Cream cheese frosting is the crowning glory of this cake. You can use store-bought or whip up your favorite homemade version! -
1 tsp cinnamon (for garnish)
To sprinkle on top for a lovely finishing touch. You can also use pumpkin pie spice for an extra flavor boost.
Step-by-Step Instructions
Now, let’s get into the nitty-gritty of making this delightful dessert! Follow along with these steps, and I promise you’ll be a pumpkin spice pro in no time!
-
Preheat Your Oven
Start by preheating your oven to 350°F (175°C). This step is crucial for baking perfection because a hot oven helps the cake rise beautifully. -
Prepare Your Pan
Grease and flour a 9×13-inch baking dish. You want your cake to slide out easily when it’s time to serve. You can also line with parchment paper for easy removal. -
Mix Your Ingredients
In a large mixing bowl, combine the spice cake mix, pumpkin puree, water, vegetable oil, and eggs. Gently blend until moistened; then mix on medium speed for about 2 minutes. Pro tip: making sure not to over mix will help keep your cake light and fluffy! -
Pour the Batter
Pour the batter into your prepared baking dish, spreading it evenly with a spatula. Pop it into the preheated oven and bake for 25-30 minutes. You’ll notice that delicious aroma filling your kitchen in no time! -
Check for Doneness
To ensure your cake is perfectly baked, insert a toothpick into the center. If it comes out clean or with just a few moist crumbs, your dessert is ready to be pulled from the oven! -
Poke It
Once your cake has cooled for about 10-15 minutes, take a wooden skewer or the handle of a wooden spoon, and poke holes all over the cake. This is where the magic happens—the holes will allow the sweetened condensed milk to seep beautifully into the cake. -
Pour the Sweetened Condensed Milk
Drizzle the sweetened condensed milk evenly over the cake. Don’t be shy here! Allow it to soak in for at least 30 minutes. This soaking time is what makes this poke cake so uniquely moist and flavorful. -
Frosting Time
After the cake has soaked up all that condensed milk goodness, it’s time to frost! Spread the cream cheese frosting over the top evenly. You can use a knife or a spatula for this step. I like to add a little swirl for visual flair! -
Garnish Your Creation
Finish things off with a light sprinkle of cinnamon on top of the frosting. Just enough to dazzle! -
Chill Out
For an even more heavenly experience, place your cake in the fridge for an hour before serving. This gives the frosting a chance to firm up and the flavors to meld.
Congratulations, you’ve created a Pumpkin Spice Poke Cake that’s as stunning as it is scrumptious!
Serving Suggestions
When it comes to serving this delightful treat, simplicity is key. I love to present slices on rustic wooden platters with a sprinkle of cinnamon around the edges for an elegant touch. A dollop of whipped cream alongside each slice, or an optional drizzle of caramel sauce, will add an extra layer of indulgence. This cake is best enjoyed with a cup of hot coffee or spiced cider, bringing a cozy and inviting vibe to your table.
Recipe Variations
Feeling adventurous? Here are a few alternatives to shake things up!
- Add Chocolate Chips: Fold in 1 cup of mini chocolate chips into the batter for a decadent surprise.
- Nutty Crunch: Include ½ cup chopped walnuts or pecans in the frosting for added texture and flavor.
- Maple Syrup: Swap the sweetened condensed milk for maple syrup for a delightful twist on sweetness.
- Gluten-Free Option: Use a gluten-free spice cake mix for a gluten-free version of this delicious dessert!
- Dairy-Free Delight: Use coconut cream for the frosting and almond milk in the cake mix for a delightful dairy-free alternative.
Chef’s Notes
Over the years, this Pumpkin Spice Poke Cake has become a staple at my fall gatherings, and it never fails to impress! I initially started experimenting with different ingredients and techniques, and what I love is how easily this recipe evolves. Sometimes I play around with frosting flavors, like adding orange zest or spices to enhance that fall vibe. The best part is that no matter how you tweak it, the essence of this cake—the warm spices and luscious texture—remains delightful.
And let me tell you about the time I forgot to poke holes in the cake. Oh boy! It was like serving a beautiful, but dry cake! Don’t make the same mistake! Remember, poking those holes is what makes this cake a showstopper.
FAQs and Troubleshooting
Q: My cake came out dry. What did I do wrong?
A: Overbaking is usually the culprit. Make sure to check for doneness with a toothpick a few minutes before the timer goes off.
Q: Can I use a different frosting?
A: Absolutely! While cream cheese frosting pairs beautifully with pumpkin spice, you could try whipped cream, chocolate frosting, or even a simple glaze. Just keep that flavor balance in mind!
Q: How do I store leftovers?
A: If there are any leftovers, store them in an airtight container in the fridge for up to 4 days. You can serve it chilled straight from the fridge, or warm it up for a few seconds in the microwave.
Q: Can I freeze this cake?
A: Yes, you can freeze the unfrosted cake for up to 3 months. Just make sure to wrap it tightly in plastic wrap.
Nutritional Info (optional)
For those of you who like to keep track, the estimated nutritional information per serving (1 slice) is approximately:
- Calories: 350
- Total Fat: 16g
- Saturated Fat: 6g
- Cholesterol: 70mg
- Sodium: 300mg
- Carbohydrates: 49g
- Fiber: 1.5g
- Sugars: 30g
- Protein: 4g
Let’s embrace the warmth of fall together through this delicious Pumpkin Spice Poke Cake! I can’t wait for you to try it, share your experiences, and create new memories around your own beautiful table. Remember, cooking is all about intention and love, so don’t shy away from making every moment special. Happy baking!
PrintPumpkin Spice Poke Cake

A moist and decadent pumpkin spice poke cake soaked in sweetened condensed milk and topped with cream cheese frosting, perfect for fall gatherings.
- Prep Time: 15 minutes
- Cook Time: 30 minutes
- Total Time: 45 minutes
- Yield: 12 servings 1x
- Category: Dessert
- Method: Baking
- Cuisine: American
- Diet: Vegetarian
Ingredients
- 1 box spice cake mix
- 1 can (15 oz) pumpkin puree
- 1 cup water
- 1/2 cup vegetable oil
- 4 large eggs
- 1 cup sweetened condensed milk
- 1 ½ cups cream cheese frosting
- 1 tsp cinnamon (for garnish)
Instructions
- Preheat your oven to 350°F (175°C).
- Prepare a 9×13-inch baking dish by greasing and flouring it.
- Mix the spice cake mix, pumpkin puree, water, vegetable oil, and eggs in a large mixing bowl until moistened; then mix on medium speed for about 2 minutes.
- Pour the batter into your prepared baking dish, spreading it evenly.
- Bake for 25-30 minutes until a toothpick comes out clean.
- Poke holes in the cake with a wooden skewer after cooling for 10-15 minutes.
- Pour sweetened condensed milk evenly over the cake and let it soak for at least 30 minutes.
- Frost the top with cream cheese frosting.
- Garnish with a sprinkle of cinnamon.
- Chill in the fridge for an hour before serving.
Notes
For a lighter option, consider using evaporated milk. Variations include adding chocolate chips or swapping sweetened condensed milk for maple syrup.
Nutrition
- Serving Size: 1 slice
- Calories: 350
- Sugar: 30g
- Sodium: 300mg
- Fat: 16g
- Saturated Fat: 6g
- Unsaturated Fat: 8g
- Trans Fat: 0g
- Carbohydrates: 49g
- Fiber: 1.5g
- Protein: 4g
- Cholesterol: 70mg
Keywords: pumpkin spice, poke cake, fall dessert, cream cheese frosting, autumn recipe

Minute Pesto Pizza Recipe for Weeknight Dinners
The Ultimate Pesto Pizza: A Flavorful Journey from Garden to Table
Hello there, pizza lovers! Are you ready to take your taste buds on an epic journey? Today, we’re diving into the world of homemade pesto pizza—a dish that brings together a vibrant sauce, fresh ingredients, and that satisfying crust we all crave. Not only is this pizza reminiscent of sun-drenched summer afternoons, but it also offers the thrill of crafting a gourmet meal right in your own kitchen. So, grab your apron, and let’s make something magical!
A Slice of Nostalgia
Let me share a special memory that always brings a smile to my face. I remember the first time I made pesto pizza for a friends’ gathering. It was a warm, sunny day, and I had just picked a bundle of basil from my garden. The aroma wafted through the air, intoxicating and fresh. I spent the afternoon in the kitchen, rhythmically chopping and blending my homemade pesto while listening to our favorite tunes—an essential ingredient to any kitchen adventure! When I finally whipped up that pizza and pulled it from the oven, the vibrant colors and scents had my friends flocking to the table. We devoured that pizza, each bite bursting with flavor, and the laughter flowed just as freely as the wine. It was a reminder that good food creates lasting memories, and I can’t wait for you to create some of your own!
Ingredients
Here’s what you’ll need to craft this delightful pesto pizza:
- Kosher Salt: Essential for enhancing flavors. Use coarse kosher salt for seasoning your dough and sauce.
- 1 Garlic Clove: Gives your pesto that iconic kick. If you’re not a fan of garlic, try using roasted garlic for a milder sweetness.
- 2 Cups Tightly Packed Basil Leaves (about 3 oz): The star of our pesto! Fresh basil adds brightness and a fragrant aroma. If you can’t find it, you can substitute with baby spinach or arugula for a different twist.
- 1/4 Cup Toasted Pine Nuts: Add richness and a subtle crunch. If pine nuts are out of budget or unavailable, try walnuts or sunflower seeds as alternatives.
- 1/4 Cup Olive Oil: This high-quality oil is crucial for a silky pesto. Replace it with avocado oil if you’d like a milder flavor.
- Freshly Ground Black Pepper: A must-have for seasoning. The fresher, the better!
- 1 oz Grated Parmesan (about 1/4 cup): Adds depth to your pesto. Pecorino Romano can also work wonderfully.
- 1/2 Recipe Artisan Pizza Dough (one 15 oz dough ball): The foundation of our pizza. You can make it from scratch, or take a shortcut with store-bought dough if you prefer.
- 1/4 Cup Pesto: You can use store-bought or the homemade pesto you just made.
- 1 1/2 oz Shredded Parmesan: For that wonderful cheesy layer.
- 3 oz Fresh Mozzarella, Torn into Small Pieces: The gooey, melty cheese we all adore! Feel free to use burrata for an even creamier option.
- 2 oz Fresh Goat Cheese: Adds a tangy bite and lovely creaminess. Substitute with feta if you want a sharper flavor or omit for a simpler cheese profile.
Step-by-Step Instructions
Now let’s get cooking! Follow these steps carefully to create a stunning pesto pizza.
-
Make Your Dough (if homemade):
- If you’re in the mood for a little kitchen workout, start by preparing your artisan pizza dough. Mix together flour, water, yeast, and salt, and let it rise until it’s doubled in size (usually about an hour to an hour and a half). If you’re using store-bought dough, simply let it sit at room temperature for about 30 minutes before using.
-
Prepare the Pesto:
- In a food processor, combine the garlic, basil leaves, toasted pine nuts, 1/4 cup of olive oil, freshly ground black pepper, and grated Parmesan. Pulse until smooth. You can add a little more oil if the mixture is too thick—adjust until you get a creamy consistency that you love!
-
Preheat Your Oven:
- Set your oven to its highest setting—typically around 475°F to 500°F. If you have a pizza stone, place it in the oven to preheat as well. A hot oven is key for crispy crust!
-
Shape the Pizza:
- On a floured surface, turn out your pizza dough. Gently stretch it into a circle or rectangle, depending on your preference. Aim for about 12 inches in diameter for a classic pizza shape. Make sure to create a slightly thicker edge for that perfect crust!
-
Add the Pesto:
- Spread 1/4 cup of your freshly made pesto over the stretched dough, leaving a little room at the edges for the crust. Don’t rush this part; a generous layer of pesto gets you that burst of flavor in every bite!
-
Layer the Cheeses:
- Sprinkle the shredded Parmesan evenly over the pesto. Next, arrange the torn mozzarella pieces across the top, followed by dollops of fresh goat cheese. The more cheese, the better!
-
Season to Taste:
- Add a little sprinkle of salt and freshly ground pepper over the top to enhance the flavors just before baking.
-
Bake the Pizza:
- Carefully transfer the pizza to the oven (or onto the preheated pizza stone). Bake for about 12-15 minutes, or until the cheeses are bubbling and the crust is golden brown. Keep an eye on it to avoid overcooking!
-
Finish and Serve:
- Once the pizza is out of the oven, let it cool for a minute, then slice and serve hot. You can drizzle a little more olive oil or some extra fresh basil for a lovely finish.
Serving Suggestions
Presentation can elevate your dining experience! For serving this gorgeous pesto pizza, I recommend placing it on a wooden cutting board for that rustic feel, and topping it with a sprinkle of fresh basil leaves. Add a side salad of mixed greens drizzled in lemon vinaigrette to contrast the rich flavors of the pizza. And don’t forget a chilled glass of white wine or a sparkling drink to bring it all together!
Recipe Variations
Feel free to play around with this basic structure! Here are a few fun twists:
- Veggie Lovers: Add seasonal vegetables like roasted zucchini, red peppers, or cherry tomatoes for an extra burst of flavor and nutrition.
- Meat Lovers: Top with slices of prosciutto or crumbled sausage for a savory addition.
- Spicy Kick: Add crushed red pepper flakes or a drizzle of chili oil to spice things up!
- Vegan Option: Substitute cheeses with a vegan cheese alternative and use nutritional yeast in your pesto for a cheesy flavor.
- Pesto Swaps: Try different greens in your pesto, like arugula or spinach, for a unique flavor profile each time.
Chef’s Notes
This pesto pizza recipe has evolved over the years, thanks to the feedback from my friends and family. At first, I even tried adding tomato sauce, but it diluted the wonderful pesto flavor! Now, I keep it simple and flavorful. One of my go-to tips is to always have a jar of pesto on hand—it makes a fantastic dipping sauce for bread or drizzled over grilled veggies too. Don’t shy away from sprinkling leftovers on soups or pasta dishes for that extra zing!
FAQs and Troubleshooting
1. My pizza dough didn’t rise. What went wrong?
- Double-check that your yeast is fresh. If it doesn’t foam in water with sugar, it’s likely expired. Ensure your dough is in a warm, draft-free environment while it proofs.
2. How can I prevent my pizza from getting soggy?
- Make sure to bake your pizza in a preheated oven, and avoid overloading the toppings. Also, pre-baking the crust for a few minutes before adding sauce and toppings helps create a barrier.
3. Can I freeze leftovers?
- Absolutely! Slice any uneaten pizza, wrap it tightly in plastic wrap, and then aluminum foil before freezing. When you’re ready to eat, just pop it in the oven at 375°F until warmed through.
4. How do I store leftover pesto?
- If you have pesto left over, pour it into an ice cube tray and freeze it! You’ll have single servings ready whenever you need a burst of flavor for another meal.
Nutritional Info
While specific nutritional information will vary based on your substitutions and portion sizes, a slice of this delightful pesto pizza is sure to be a hearty and wholesome treat packed with flavor.
So there you have it—a delicious pesto pizza recipe that invites you to gather around the table, share stories, and create new memories. I can’t wait to hear how your pizza turns out, so let’s get to it! Tie on that apron, roll up those sleeves, and let’s make this happen. Happy cooking!
PrintThe Ultimate Pesto Pizza

A delicious homemade pesto pizza featuring fresh basil, rich cheeses, and a crispy crust, perfect for any gathering.
- Prep Time: 20 minutes
- Cook Time: 15 minutes
- Total Time: 35 minutes
- Yield: 4 servings 1x
- Category: Main Course
- Method: Baking
- Cuisine: Italian
- Diet: Vegetarian
Ingredients
- Kosher Salt (for seasoning)
- 1 Garlic Clove
- 2 Cups Tightly Packed Basil Leaves (about 3 oz)
- 1/4 Cup Toasted Pine Nuts
- 1/4 Cup Olive Oil
- Freshly Ground Black Pepper
- 1 oz Grated Parmesan (about 1/4 cup)
- 1/2 Recipe Artisan Pizza Dough (one 15 oz dough ball)
- 1/4 Cup Pesto
- 1 1/2 oz Shredded Parmesan
- 3 oz Fresh Mozzarella, Torn into Small Pieces
- 2 oz Fresh Goat Cheese
Instructions
- Make your dough (if homemade): Mix together flour, water, yeast, and salt, and let it rise until doubled in size (about 60-90 minutes). If using store-bought dough, let it sit at room temp for 30 minutes.
- Prepare the pesto: In a food processor, combine garlic, basil leaves, pine nuts, olive oil, black pepper, and Parmesan. Pulse until smooth.
- Preheat your oven: Set to 475°F to 500°F. If using a pizza stone, place it in the oven to preheat.
- Shape the pizza: Turn out your dough onto a floured surface and stretch it to about 12 inches in diameter.
- Add the pesto: Spread 1/4 cup of pesto over the stretched dough, leaving room at the edges.
- Layer the cheeses: Sprinkle shredded Parmesan, arrange mozzarella pieces, and dollop fresh goat cheese.
- Season to taste: Add a sprinkle of salt and black pepper over the top.
- Bake the pizza: Transfer to the oven and bake for 12-15 minutes, until cheeses are bubbling and crust is golden.
- Finish and serve: Let cool for a minute, slice, and serve hot. Optionally drizzle with olive oil or garnish with fresh basil.
Notes
Experiment with toppings and feel free to make this recipe your own! Serve with a side salad and a chilled drink.
Nutrition
- Serving Size: 1 serving
- Calories: 400
- Sugar: 2g
- Sodium: 350mg
- Fat: 18g
- Saturated Fat: 7g
- Unsaturated Fat: 9g
- Trans Fat: 0g
- Carbohydrates: 48g
- Fiber: 3g
- Protein: 16g
- Cholesterol: 30mg
Keywords: pesto pizza, homemade pizza, Italian cuisine, vegetarian recipes, comfort food

Copycat Little Caesars Crazy Puffs: 30-Minute Cheesy Bites
Little Caesars Crazy Puffs Recipe: A Flavorful Twist on a Classic Favorite
Hello, fellow foodies! Today, we’re diving into a fun and delightful recipe that I’m sure will become a family favorite in your household—Little Caesars Crazy Puffs. Imagine this: light, airy pillows of pizza dough stuffed with gooey cheese, zesty pepperoni, and your favorite pizza fixings, all baked to perfection and brushed with a buttery garlic blend. Sounds dreamy, right? Let’s roll up our sleeves and bring a little piece of pizza heaven into our kitchens!
When I first stumbled upon the idea of Crazy Puffs during a late-night snack session, I had one of those “aha!” moments. I was craving pizza, yet I wanted something easy to grab and pop in my mouth while I binge-watched my favorite show. You know how that goes! One bite became two, and before I knew it, I was contemplating how to recreate this snack at home. Spoiler alert: they turned out deliciously addictive, and I haven’t looked back since!
Let’s talk about the best part—this recipe is incredibly simple! With just a handful of ingredients that you might already have in your kitchen, you can transform your everyday pizza dough into these heavenly Crazy Puffs. I can’t wait to share my tips and tricks with you, so let’s get started!
A Fun Kitchen Memory
As I reflected on my Crazy Puffs adventure, a nostalgic memory came rushing back. I remember a rainy Saturday afternoon with my little cousin, Emily, who was just starting to show interest in cooking. We decided to knead some pizza dough from scratch—let me tell you, it wasn’t pretty! We ended up with more flour on our faces than in the mixing bowl, giggling uncontrollably as we worked through our culinary chaos.
We eventually crafted our dough into something resembling pizza and topped it with everything we could find in the fridge. As the smell of baking bread and melted cheese filled the kitchen, we jumped up and down in anticipation. It was one of those moments where cooking became more than just a task; it transformed into a cherished memory. That spirit of fun and exploration is what I want to channel today with these Crazy Puffs. So, let’s roll up our sleeves and get to it!
Ingredients
Here’s what you’ll need to create these scrumptious Crazy Puffs:
-
1 pound of your favorite pizza dough
You can use store-bought or homemade! Just make sure it’s at room temperature for easier handling. If you want a healthier option, try whole wheat dough. -
1 cup zesty pizza sauce
Zesty sauce adds a kick! Feel free to substitute with marinara or your favorite dipping sauce if you prefer something milder. -
2 cups shredded mozzarella cheese
Mozzarella is classic for that gooey, stretchy cheese effect. You can mix in provolone or even a dairy-free option if you want a different flavor profile! -
8 ounces pepperoni or turkey pepperoni slices
Pepperoni is a staple, but turkey pepperoni offers a leaner alternative. You can also swap it out for veggies or cooked sausage if you’re feeling adventurous! -
4 tablespoons unsalted butter (melted to perfection)
Butter gives a rich flavor and a beautiful sheen to your puffs. If you need a dairy-free version, try olive oil instead! -
1 tablespoon minced garlic for strong flavor
Garlic amps up the flavor. If you love it, feel free to add more! If you’re not a fan, you can skip this. -
¼ cup freshly grated Parmesan cheese
Parmesan adds a delightful nutty flavor. If you’re looking to keep it dairy-free, nutritional yeast is a great substitute! -
1 teaspoon fine sea salt
Always use salt to enhance flavors, but adjust to your preference based on the saltiness of your dough and sauces. -
1 teaspoon Italian herb blend
A versatile blend! Customize it with your preferred dried herbs like thyme or basil for a unique flavor twist. -
1 teaspoon freshly cracked black pepper
Black pepper provides a little heat! If you like it spicier, add some cayenne or red pepper flakes. -
1 teaspoon dried oregano leaves
Oregano is a classic pizza herb. If fresh is available, you can use it for an upgraded flavor! -
2 tablespoons finely chopped fresh parsley (optional)
Parsley adds a refreshing note and a pop of color. Feel free to skip this if you want to keep it simple! -
1 teaspoon red pepper flakes
If you like some heat, toss in the red pepper flakes. They can easily be adjusted according to your spice preference. -
½ teaspoon smoked paprika
Smoked paprika brings a lovely depth and smokiness to the Crazy Puffs.
Step-by-Step Instructions
Let’s prepare these Crazy Puffs step by step. Roll up your sleeves, tie on that apron, and let’s get cooking!
-
Preheat Your Oven
First things first, preheat your oven to 400°F (200°C). A hot oven is crucial for that perfect golden-brown crust. -
Prep Your Dough
Lightly flour your work surface and roll out the pizza dough into a rectangle about 1/4 inch thick. You want it to have a nice thickness to hold in all those delicious fillings. -
Cut the Dough
Using a sharp knife or pizza cutter, slice your rolled-out dough into squares—about 3 inches by 3 inches is ideal. Don’t worry about making them perfect; a little rustic charm is welcomed! -
Fill with Goodness
On each square, place a spoonful of zesty pizza sauce, a sprinkle of mozzarella cheese, and a couple of slices of pepperoni. Don’t overfill—trust me! You want them to seal well, keeping all the cheesy goodness inside. -
Seal Those Puffs
Fold the square over to create a triangle or a pocket. Use your fingers to pinch the edges together. To ensure a good seal, you can press down with a fork or your fingers. Be gentle though; you want them to maintain their fluffy shape! -
Brush with Butter
In a small bowl, mix the melted butter with minced garlic. Brush this mixture generously over the top of each puff. This adds incredible flavor and gives them a beautiful, golden color while they bake. -
Sprinkle with Delights
Now, sprinkle the tops of your Crazy Puffs with a mix of the grated Parmesan cheese, Italian herb blend, sea salt, oregano, black pepper, and smoked paprika. This adds an extra layer of flavor that elevates these puffs from good to absolutely irresistible! -
Bake Away
Place your puffs on a lined baking sheet, making sure they have enough space to expand as they bake. Pop them into the oven and bake for 15-20 minutes, or until they’re puffed up and golden brown. -
Finish with Freshness
Once baked, take them out and if you chose to, sprinkle the parsley over the top while they’re still warm. This adds a lovely freshness to the dish! -
Let Cool and Enjoy
Allow your Crazy Puffs to cool for a few minutes (if you can resist!). Serve them warm with extra pizza sauce on the side for dipping. Trust me; they’re best enjoyed fresh from the oven.
Serving Suggestions
For a beautiful presentation, arrange your Crazy Puffs on a colorful platter. Serve them alongside a small bowl of zesty pizza sauce for dipping that beautifully contrasts against the cheesy, golden puffs. You can also sprinkle some fresh parsley over the top for a pop of color!
Recipe Variations
- Veggie Crazy Puffs: Swap the pepperoni for a mix of sautéed bell peppers, mushrooms, and olives for a vegetarian option.
- Cheesy Garlic Puffs: Omit the pepperoni and sprinkle a blend of mozzarella and cheddar cheese with garlic for that ultimate cheesy experience.
- Spicy Buffalo Puffs: Mix in some shredded cooked chicken and buffalo sauce for a spicy twist on the original.
- Caprese Puffs: Stuff your Crazy Puffs with tomatoes, fresh mozzarella, and basil for a fresh Italian flavor.
- Chili Cheese Puffs: Add a spoonful of chili and shredded cheese inside for a hearty snack with a kick!
Chef’s Notes
Oh, the joy of experimenting in the kitchen! I remember when I first made these Crazy Puffs; I tried adding different fillings from what I had on hand. I once added a little bit of spinach and artichokes, and oh boy, it was a game changer! Not every experiment turned out as planned, though. I once tried to get fancy and stuffed them with too much sauce; needless to say, it turned into a gooey mess. Lesson learned: less is often more!
Over time, this recipe has evolved to reflect what I love about casual cooking—keeping it fun, easy, and delicious. Cooking is all about joy and creativity, so don’t hesitate to make it your own!
FAQs and Troubleshooting
1. Why are my Crazy Puffs not puffy?
If your puffs do not rise or appear too flat, it’s likely a result of overworking the dough or not letting it rise properly. Ensure you allow the dough to rest at room temperature for easier handling.
2. Can I freeze the puffs?
Absolutely! You can freeze them before baking. Just freeze them on a baking sheet until solid, then transfer them to a zip-top bag. When you’re ready, bake them from frozen, adding a few minutes to the bake time.
3. How do I make them crispy?
To achieve a crispier exterior, bake until golden brown, and consider brushing them with a little olive oil before baking instead of butter.
4. What if my dough rips during filling?
Don’t worry! Just patch it up with a little extra dough or dough scraps. It’s all part of the kitchen fun; embrace those imperfections!
Nutritional Info
While precise nutritional values can vary based on specific ingredients and substitutions, one serving of Crazy Puffs (approximately two puffs) typically contains around 250-300 calories. However, they’re meant to be enjoyed as a treat, so savor every bite without guilt!
There you have it, my friends! Little Caesars Crazy Puffs—a delightful snack that’s not only easy to whip up but also filled with flavors that will have everyone licking their fingers. I hope you enjoy making these as much as I did. Remember to gather your loved ones around the table, share some laughs, and create those little beautiful moments that good food is all about. Happy cooking, and let’s keep exploring delicious dishes together!
PrintLittle Caesars Crazy Puffs

A flavorful twist on a classic favorite—light, airy pillows of pizza dough stuffed with gooey cheese and zesty pepperoni.
- Prep Time: 15 minutes
- Cook Time: 20 minutes
- Total Time: 35 minutes
- Yield: 4 servings 1x
- Category: Snack
- Method: Baking
- Cuisine: American
- Diet: Vegetarian
Ingredients
- 1 pound pizza dough
- 1 cup zesty pizza sauce
- 2 cups shredded mozzarella cheese
- 8 ounces pepperoni or turkey pepperoni slices
- 4 tablespoons unsalted butter (melted)
- 1 tablespoon minced garlic
- ¼ cup freshly grated Parmesan cheese
- 1 teaspoon fine sea salt
- 1 teaspoon Italian herb blend
- 1 teaspoon freshly cracked black pepper
- 1 teaspoon dried oregano leaves
- 2 tablespoons finely chopped fresh parsley (optional)
- 1 teaspoon red pepper flakes
- ½ teaspoon smoked paprika
Instructions
- Preheat your oven to 400°F (200°C).
- Lightly flour your work surface and roll out the pizza dough into a rectangle about 1/4 inch thick.
- Using a sharp knife, slice the rolled-out dough into squares, about 3 inches by 3 inches.
- On each square, place a spoonful of pizza sauce, a sprinkle of mozzarella cheese, and a couple of slices of pepperoni.
- Fold the square over to create a triangle or pocket and pinch the edges together.
- In a small bowl, mix the melted butter with minced garlic and brush over the top of each puff.
- Sprinkle the tops with Parmesan cheese, Italian herb blend, sea salt, oregano, black pepper, and smoked paprika.
- Place the puffs on a lined baking sheet and bake for 15-20 minutes until golden brown.
- Once baked, optionally sprinkle parsley over the top while warm.
- Allow to cool for a few minutes, then serve warm with extra pizza sauce for dipping.
Notes
Experiment with different fillings like sautéed vegetables or chicken for variations.
Nutrition
- Serving Size: 2 puffs
- Calories: 300
- Sugar: 2g
- Sodium: 600mg
- Fat: 14g
- Saturated Fat: 7g
- Unsaturated Fat: 5g
- Trans Fat: 0g
- Carbohydrates: 32g
- Fiber: 2g
- Protein: 12g
- Cholesterol: 30mg
Keywords: Crazy Puffs, Little Caesars, Snack, Pizza, Appetizer