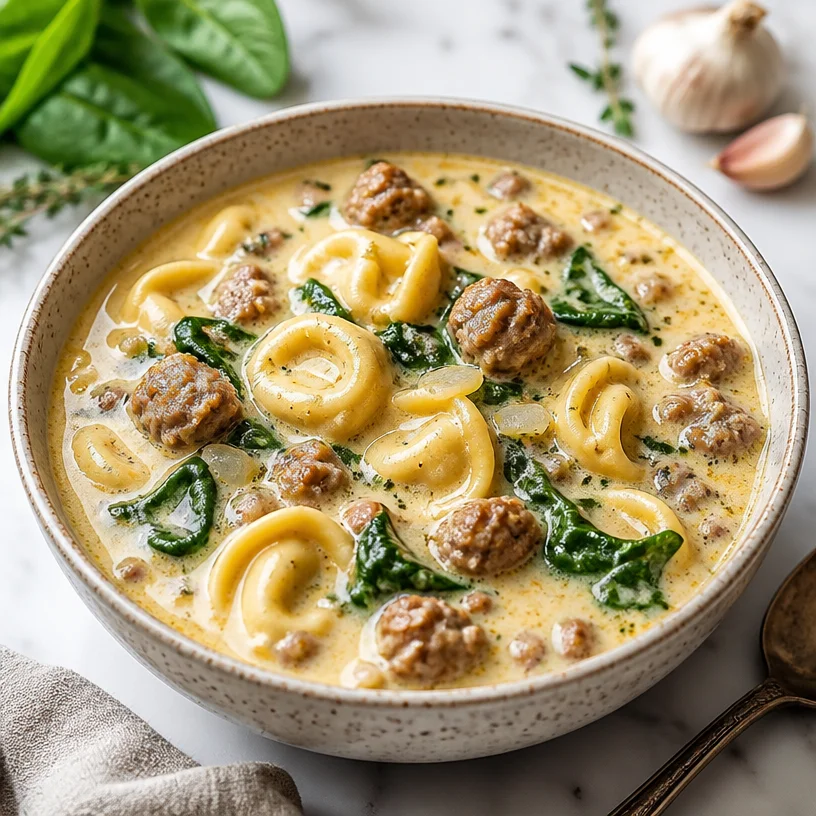
Minute Creamy Tortellini Soup for Busy Weeknights
The Cozy Comfort of Creamy Tortellini Soup
Hello, fellow food lovers! Today, I’m thrilled to share a dish that has become a cherished staple in my kitchen: Creamy Tortellini Soup. Imagine this: a rich, warm bowl of soup that wraps you in a hug, filled with tender cheese tortellini, savory sausage, and vibrant greens. It’s the epitome of comfort food, and it’s perfect for any occasion—whether you’re having a quiet dinner at home or entertaining friends on a chilly evening.
When I first came across a recipe for tortellini soup, it immediately caught my attention. I’ve always loved tortellini; those delightful little pasta pillows filled with cheese, bursting with flavor with every bite. But pairing them with a creamy, savory broth? That was a game changer for me. I knew I had to create my own version that included all of my favorite ingredients, enhancing the dish with layers of flavor and a bit of flair, of course!
Let me take you back to one of my most memorable kitchen moments. It was a rainy day, and I was a budding cook, still learning the ropes. I had invited some friends over for a cozy gathering, and I needed a dish that would impress without taking hours of prep. As I scrolled through my recipe collection, I stumbled upon a tortellini soup recipe. With just a few ingredients, I thought, “What do I have to lose?”
It was during that first pot of creamy goodness that I realized food has an incredible power to bring people together. As I ladled the soup into bowls and served slices of crusty bread on the side, my friends’ eyes lit up with delight. The laughter, the endless seconds for soup, and the warm atmosphere enveloped us like a comforting blanket. It reminded me that cooking is not just about the dishes we create but about the memories we make around the table. Now, let’s dive into this incredible recipe!
Ingredients
Here’s what you’ll need for this delightful Creamy Tortellini Soup:
-
Cheese Tortellini
- Use store-bought or homemade if you’re feeling adventurous! Fresh tortellini offers a fantastic texture, but dried or frozen works just as well.
-
Sausage
- I love using Italian sausage for the robust flavor, but feel free to substitute turkey or chicken sausage for a lighter option or omit it completely for a vegetarian version.
-
Spinach
- Baby spinach is tender and mild, but kale or Swiss chard can add more texture and depth. Fresh herbs can replace spinach for a burst of flavor.
-
Cream
- Heavy cream gives the soup its luscious richness. You can substitute half-and-half for a lighter version or even coconut milk for a dairy-free option.
-
Broth
- A good-quality chicken or vegetable broth enhances the flavor immensely. Homemade broth is ideal, but store-bought works perfectly too! Low-sodium options allow you to control the saltiness.
Step-by-Step Instructions
Now, let’s get cooking!
-
Sauté the Sausage
- In a large pot over medium heat, add a splash of olive oil. Crumble in your sausage, breaking it up with a wooden spoon. Cook for about 5–7 minutes until browned and cooked through. The aroma of the sausage sizzling is heavenly!
-
Add Aromatics
- Throw in a diced onion and a couple of minced garlic cloves. Sauté until the onion becomes translucent and fragrant, which usually takes about 3–4 minutes. Pro tip: add a pinch of salt during this stage—it helps the onions sweat and develop flavor more quickly!
-
Introduce the Broth
- Pour in about 4 cups of broth. Bring the mixture to a gentle simmer. This is where all those flavors start to meld—so let it simmer for about 5 minutes.
-
Tortellini Time!
- Add your cheese tortellini to the pot and cook according to package directions (usually about 3–5 minutes). The tortellini will cook quickly, absorbing the delicious broth!
-
Make it Creamy
- Stir in the cream, allowing the soup to bubble gently. Watch as it turns into a beautiful shade of creamy goodness. If you like your soup extra creamy, feel free to add in more cream or a splash of milk.
-
Add the Spinach
- Fold in the fresh spinach and let it wilt for a couple of minutes. This adds so much freshness to your soup; plus, you’re sneaking in a nice dose of greens!
-
Season to Taste
- Taste your soup and adjust the seasoning with salt, pepper, and a sprinkle of nutmeg for warmth and depth. If you’re feeling fancy, toss in some fresh basil or parsley to elevate it!
-
Serve and Enjoy!
- Your armor of deliciousness is ready! Ladle the soup into bowls, and if you want to be a plating superstar, add a sprinkle of shaved Parmesan and a drizzle of olive oil on top.
Serving Suggestions
Serve this Creamy Tortellini Soup hot, paired with a slice of crusty bread or a side salad for a delightful meal. Don’t forget to offer a sprinkle of fresh herbs or a dollop of pesto on top for an extra pop of flavor!
Recipe Variations
Here are a few creative twists to think about when making this soup:
-
Spicy Kick: Add crushed red pepper flakes to the sausage while cooking for some heat.
-
Mushroom Medley: Sauté some sliced mushrooms with the onions for an earthy depth.
-
Herb Infusion: Swap out the spinach for a blend of fresh herbs like basil, thyme, and parsley for a garden-fresh flavor.
-
Lemon Zest: A squeeze of fresh lemon juice (or zest) brightens up the creaminess and adds a refreshing touch.
-
Gluten-Free: Use gluten-free tortellini to cater to dietary needs while keeping it delicious!
Chef’s Notes
This recipe has evolved over the years, influenced by countless dinner parties and kitchen experiments. One particularly funny kitchen mishap involved me thinking I had chicken broth but pouring in leftover vegetable juice instead—I wasn’t so sure about the outcome. But you know what? It turned out surprisingly delightful, teaching me that sometimes it’s the unexpected moments that bring about the best flavors!
Every time I make this soup, I think of those dear friends who laughed and stuffed themselves silly, asking for seconds and thirds. And every time I ladle out that creamy goodness, I’m reminded that food is about connection, laughter, and warmth.
FAQs and Troubleshooting
1. My soup is too thick. What should I do?
- If your soup is thicker than you’d like, simply add more broth or water a little at a time until you reach your desired consistency.
2. Can I make this soup ahead of time?
- Absolutely! Make the soup, and once it cools, store it in an airtight container in the fridge for up to 3-4 days. Just remember to reheat gently on the stove, and you can add a splash more cream to rejuvenate that creamy texture.
3. Why is my tortellini mushy?
- Mushy tortellini can occur if they are cooked too long. Always follow the package instructions carefully, and add them to the pot towards the end of your cooking time.
4. Can I freeze this soup?
- Yes, you can freeze the soup, but for optimal texture, I recommend freezing it before adding the cream and spinach. Thaw it overnight in the fridge and then add cream and fresh greens just before serving.
Nutritional Info
(Serves 4)
- Calories: ~400 per serving
- Protein: 20g
- Carbohydrates: 40g
- Fat: 20g
Happy cooking, my friends! I hope this Creamy Tortellini Soup warms your kitchen and your hearts as much as it does mine. Feel free to share your culinary creations and any fun stories you have while making this dish—I’d love to hear all about your experiences! Now tie on that ivory apron and let’s create some delicious memories together!
PrintCreamy Tortellini Soup

A warm, comforting soup filled with cheese tortellini, savory sausage, and fresh spinach in a creamy broth.
- Prep Time: 15 minutes
- Cook Time: 30 minutes
- Total Time: 45 minutes
- Yield: 4 servings
- Category: Main Course
- Method: Stovetop
- Cuisine: Italian
- Diet: Vegetarian (if sausage is omitted)
Ingredients
- Cheese Tortellini
- Sausage
- Spinach
- Cream
- Broth
Instructions
- Sauté the sausage in a large pot over medium heat with a splash of olive oil, cooking for about 5–7 minutes until browned.
- Add aromatics like a diced onion and minced garlic; sauté for 3–4 minutes until the onion is translucent.
- Introduce about 4 cups of broth and bring to a gentle simmer for 5 minutes.
- Add cheese tortellini to the pot and cook according to package directions (3-5 minutes).
- Make it creamy by stirring in the heavy cream and allowing it to bubble gently.
- Add spinach and let it wilt for a couple of minutes.
- Season the soup to taste with salt, pepper, and possibly a sprinkle of nutmeg.
- Serve the soup in bowls and garnish with shaved Parmesan and olive oil if desired.
Notes
For a lighter version, substitute half-and-half or coconut milk for the cream. This soup can also be frozen before adding cream and spinach.
Nutrition
- Serving Size: 1 serving
- Calories: 400
- Sugar: 5g
- Sodium: 600mg
- Fat: 20g
- Saturated Fat: 10g
- Unsaturated Fat: 8g
- Trans Fat: 0g
- Carbohydrates: 40g
- Fiber: 3g
- Protein: 20g
- Cholesterol: 60mg
Keywords: creamy soup, tortellini, comfort food, Italian recipes, easy soup

Minute Monster Meatball Sliders for Weeknight Feasts
Monster Meatball Sliders: A Fun and Flavorful Feast
Hello, foodies! If you’re ready to take your dining experiences to a new level of fun and flavor, then you’re in for a treat! Today, I’m absolutely thrilled to share one of my all-time favorite recipes that perfectly combines nostalgia with a dash of creativity: Monster Meatball Sliders! These sliders are not only delicious but also incredibly fun to serve — perfect for parties, family gatherings, or even a cozy movie night at home.
As I was developing this recipe, I couldn’t help but reminisce about the weekend get-togethers at my grandmother’s house. Her kitchen was always filled with the incredible aroma of rich tomato sauce simmering on the stove, and giant meatballs rolling around like they had a life of their own! The atmosphere was always lively, filled with laughter and animated conversations over plates piled high with spaghetti and homemade meatballs.
Inspired by those cherished memories, I wanted to create something that encapsulated the childhood warmth of those gatherings but with a twist that would bring a smile to everyone’s face — hence the Monster Meatball Sliders! Imagine a perfectly seasoned meatball, snugly tucked into a fluffy slider bun, all topped off with gooey mozzarella and a touch of marinara. With a bit of creativity, these sliders become a playful dish that even the littlest foodies will adore. So, let’s dig in and get our hands a bit messy!
A Fond Kitchen Memory
One sunny afternoon while experimenting with recipes, I came across a few leftover meatballs from a previous dinner party. Rather than letting them go to waste, I decided to transform them into sliders. I can still picture the surprised faces of my friends when I plopped these glorious little sandwiches in front of them, complete with olive “eyes” and a light-hearted monster theme. Everyone couldn’t help but laugh and immediately dug in!
That day lit a little spark inside me — food isn’t just about sustenance; it’s about creating an experience, a memory that brings people together. These Monster Meatball Sliders became a staple at my gatherings, a fun way to evoke joy around the table. The blend of classic flavors with a whimsical presentation makes this dish a delightful addition to any table.
Ingredients
To make your Monster Meatball Sliders, you’ll need the following ingredients:
- Meatballs:
- You can use store-bought or homemade meatballs. If you’re feeling adventurous, making them from scratch using ground beef, breadcrumbs, cheese, and seasoning will elevate this dish immensely!
- Slider Buns:
- Opt for soft slider buns or mini brioche rolls. These add just the right touch of sweetness and texture. For a gluten-free option, use gluten-free buns or lettuce wraps.
- Mozzarella:
- Fresh mozzarella balls (bocconcini) work wonderfully for that melt-in-your-mouth factor. If you want something sharper, use provolone or cheddar for a flavor twist!
- Marinara Sauce:
- A good-quality marinara sauce is essential. You can easily swap this with pesto or a homemade tomato sauce for added flair.
- Olive Eyes:
- Black olives are perfect for creating those adorable little eyes! Feel free to use green olives for a pop of color or skip them altogether if you’re not a big olive fan.
Step-by-Step Instructions
Let’s get cooking! Follow these simple steps, and you’ll be well on your way to crafting your very own Monster Meatball Sliders.
-
Preheat the Oven:
- Begin by preheating your oven to 375°F (190°C). A warm oven is essential for that toasty bun experience!
-
Prepare the Meatballs:
- If you’re making your own meatballs, mix together your ground meat, breadcrumbs, eggs, minced garlic, and Italian seasoning. Roll them into golf ball-sized rounds. If you’re using store-bought, just set them aside while you prepare the rest.
-
Bake the Meatballs:
- Place your meatballs on a baking sheet lined with parchment paper. Bake them for about 20 minutes or until they are browned and cooked through. This step helps to lock in moisture and flavor!
-
Heat the Marinara Sauce:
- While the meatballs are baking, gently heat your marinara sauce in a small saucepan over medium heat. I sometimes like to add a pinch of red pepper flakes for that extra kick!
-
Assemble the Sliders:
- Once your meatballs are ready, slice your slider buns in half. Spread a spoonful of marinara sauce on the bottom half of each slider bun. Then, place a meatball on top, followed by a generous layer of mozzarella.
-
Melt the Cheese:
- Place the sliders in the oven for about 5-7 minutes until the cheese is bubbly and golden. This is the time to grab a kitchen towel and get ready to plate!
-
Add the Olive Eyes:
- Once out of the oven, use a toothpick or skewer to add two black olives to each slider — our deliciously cute monster eyes! It’s all about the presentation here—get creative!
-
Complete the Sliders:
- Top off each slider with the other half of the bun, and voilà! Your delicious Monster Meatball Sliders are ready to be devoured.
Serving Suggestions
When it comes to serving these sliders, I love to plate them on a large wooden board or platter for that family-style feel. You can add a sprinkle of fresh parsley or dried oregano on top for a garnish, and serve with extra marinara for dipping. Pair these sliders with a crisp green salad or a side of sweet potato fries to round out the meal.
Recipe Variations
Looking to mix it up a bit? Here are some fun variations to try:
- Buffalo Style: Toss your meatballs in buffalo sauce prior to baking for a zesty spin, and top with blue cheese crumbles instead of mozzarella.
- Vegetarian Option: Substitute meatballs with a plant-based meatball or roasted vegetables with spices to create a veggie-friendly version.
- Beachy Flavor: Use seafood meatballs made with crab or shrimp, and serve with a zesty lemon aioli!
- Cheesy Goodness: Go wild with cheese! Mix in cheddar or pepper jack instead of mozzarella for a flavorful punch.
Chef’s Notes
One of the first times I made these sliders, I thought I’d impress everyone with a fancy herb-infused sauce. However, I realized my friends loved the simple, comforting flavors of classic marinara more than anything else! It’s a reminder that sometimes simplicity wins, and that’s perfectly okay. If I could share one piece of advice, it’s to never hesitate to experiment, but also honor the classics that bring back nostalgic memories!
FAQs and Troubleshooting
-
What if my meatballs are dry?
- If your meatballs turn out dry, ensure you’re not overcooking them. Drizzling a bit of olive oil or adding moisture (like milk) to the mixture can help too!
-
Can I make this ahead of time?
- Absolutely! You can make the meatballs and sauce ahead of time, store them in the fridge, and assemble the sliders just before serving for that warm, fresh taste.
-
What are some good sides to pair with these sliders?
- Fresh salads, crispy fries, or even a charcuterie board work wonderfully. You’ll want something light to balance the hearty sliders.
-
How can I make this gluten-free?
- Simply swap out traditional breadcrumbs for gluten-free breadcrumbs, and check that your slider buns are gluten-free!
Nutritional Info
While I don’t always focus on the numbers, if you’re curious, a typical Monster Meatball Slider has approximately 250 calories, 12g protein, and 15g of fat per serving. Adjust portions based on your needs!
And there you have it—your guide to crafting delightful Monster Meatball Sliders! I hope this recipe brings as much joy to your table as it has to mine. Don your apron, roll up those sleeves, and let the kitchen festivities begin. Celebrate the art of cooking and the joy of eating together. Until next time, happy cooking!
PrintMonster Meatball Sliders

Fun and delicious sliders featuring seasoned meatballs, mozzarella, and marinara sauce served in fluffy buns, perfect for parties or family gatherings.
- Prep Time: 15 minutes
- Cook Time: 30 minutes
- Total Time: 45 minutes
- Yield: 4 servings
- Category: Appetizer
- Method: Baking
- Cuisine: American
- Diet: None
Ingredients
- Meatballs (store-bought or homemade)
- Soft slider buns or mini brioche rolls
- Fresh mozzarella balls (bocconcini)
- Good-quality marinara sauce
- Black olives for eyes
Instructions
- Preheat the oven to 375°F (190°C).
- Prepare the meatballs by mixing ground meat, breadcrumbs, eggs, minced garlic, and Italian seasoning, rolling them into golf ball-sized rounds.
- Bake the meatballs on a parchment-lined baking sheet for about 20 minutes or until browned.
- Heat the marinara sauce in a small saucepan over medium heat.
- Assemble the sliders by slicing the buns, spreading marinara, and adding a meatball and mozzarella.
- Melt the cheese in the oven for 5-7 minutes until bubbly.
- Add two black olives to each slider for eyes.
- Complete the sliders by placing the other half of the bun on top.
Notes
Feel free to experiment with meatball variations, including buffalo style or vegetarian options.
Nutrition
- Serving Size: 1 slider
- Calories: 250
- Sugar: 3g
- Sodium: 600mg
- Fat: 15g
- Saturated Fat: 7g
- Unsaturated Fat: 6g
- Trans Fat: 0g
- Carbohydrates: 20g
- Fiber: 1g
- Protein: 12g
- Cholesterol: 30mg
Keywords: meatball sliders, party food, fun recipes, family gathering, comfort food
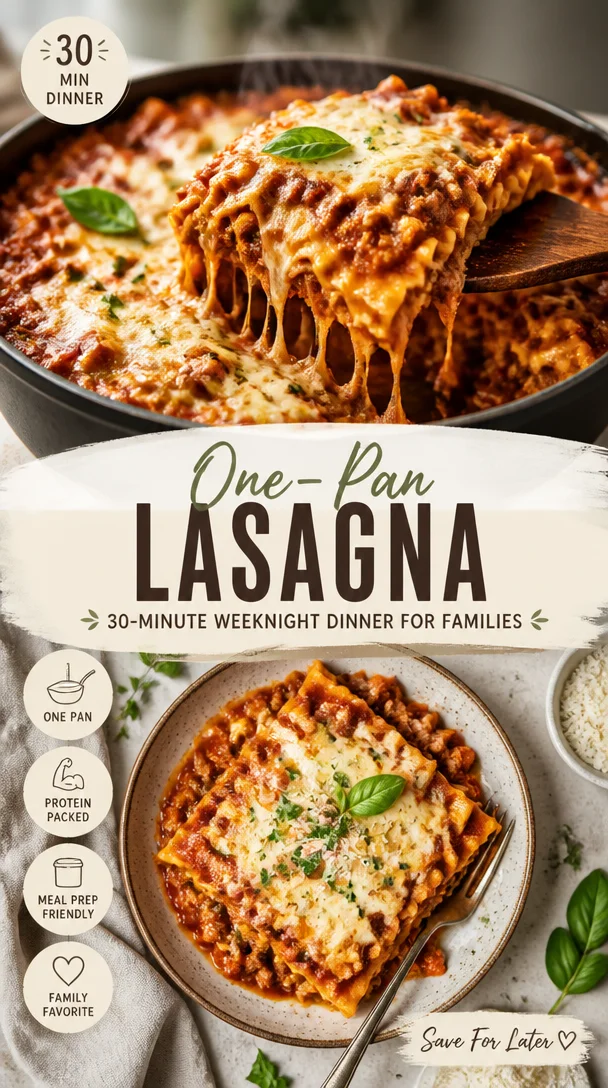
One-Pan Lasagna: 30-Minute Weeknight Dinner for Families
Quick & Easy Lasagna That’ll Make You the Dinner Hero
Hello, my culinary comrades! If you’re looking for a dish that combines comfort with elegance and a sprinkle of nostalgia, you’ve landed in the right place. I’m excited to share my Quick & Easy Lasagna recipe with you — the kind of lasagna that feels like a warm hug from grandma while also being simple enough to whip up on a busy weeknight.
Imagine this: it’s a chilly evening, you’ve come home from a long day, and the kitchen is beckoning you to create something magical. Trust me; this lasagna is your ticket to becoming the dinner hero of the night! With layers of rich marinara, gooey cheese, and perfectly seasoned meat, it’s a crowd-pleaser that even the pickiest eaters will adore.
Personal Story
Let me take you back to my childhood. I remember those Sunday afternoons at my grandmother’s house—the tantalizing aroma of her famous lasagna wafting through the air, mingling with laughter and the clinking of forks on plates. The dining room table was an explosion of colors: vibrant salads, crusty bread, and that bubbling pan of lasagna at the center, a true showstopper.
Grandma would always say, “Food is love!” And the way she prepared lasagna was the epitome of that saying. It was a labor of love, a medley of flavors carefully layered to bring together friends and family. While I loved her version, I knew that not everyone has hours to create such a masterpiece. Thus, this Quick & Easy Lasagna was born! It retains the heart of grandma’s recipe but cuts down on the time and effort.
Ingredients
Here’s what you’ll need to make this lasagna shine:
-
12 ounces Lasagna Noodles
You can use regular or no-boil noodles. No-boil noodles are a time-saver, absorbing moisture from the sauce and creating perfect layers. -
1 pound Ground Beef
While I use ground beef, feel free to swap it with Italian sausage for a flavor boost! It adds a lovely depth and a bit of spice. -
24 ounces Marinara Sauce
Homemade sauce is fantastic, but a quality store-bought option works beautifully too. Look for one with minimal ingredients for the best flavor. -
1 tablespoon Italian Seasoning
This blend typically includes herbs like basil, oregano, and thyme. If you have fresh herbs on hand, use those for an even more vibrant flavor! -
15 ounces Ricotta Cheese
So creamy and delicious! If you prefer a lighter option, try cottage cheese—just be sure to drain it well. -
1 large Egg
This helps bind the ricotta but can be omitted if you prefer a firmer texture in your lasagna. -
1 teaspoon Salt
Essential for bringing all the flavors together. Adjust this based on the saltiness of your marinara sauce. -
1 dash Pepper
Just a pinch for balance; you can tweak this depending on your spice preference. -
2 cups Shredded Mozzarella Cheese
Because what’s lasagna without that glorious cheesy melt? You can get creative and use provolone or a blend of your favorites. -
1/4 cup Grated Parmesan Cheese
This adds a nice, nutty flavor and a bit of crunch on top. It’s the cherry on top of our lasagna sundae!
Step-by-Step Instructions
Now that we’ve gathered our ingredients, let’s dive into the cooking! Follow these simple steps for a lasagna that looks as good as it tastes.
-
Preheat the Oven
Preheat your oven to 375°F (190°C). A hot oven ensures optimal cooking for our layers, creating that beautiful crust on top! -
Cook the Lasagna Noodles
- For regular noodles: Boil a large pot of salted water. Add your lasagna noodles and cook according to the package instructions until al dente (usually around 8-10 minutes). Drain and lay them flat on a kitchen towel to prevent sticking.
- For no-boil noodles: You can skip this step! They’ll soak up moisture later.
-
Brown the Ground Beef
In a large skillet, heat a tablespoon of olive oil over medium heat. Add your ground beef and cook until browned, breaking it apart with a spatula (about 5-7 minutes). Once browned, drain excess fat if necessary. -
Mix in Marinara and Seasoning
To the skillet with the ground beef, stir in the marinara sauce and Italian seasoning. Let it simmer for about 5 minutes, allowing those flavors to marry beautifully. -
Prepare the Ricotta Filling
In a mixing bowl, combine the ricotta cheese, egg, salt, and a sprinkle of pepper. Mix until smooth and creamy. This filling is the heart of our lasagna—don’t skimp on this step! -
Assemble the Lasagna
In a 9×13-inch baking dish, start by spreading a thin layer of the meat sauce on the bottom (this prevents sticking). Follow with a layer of noodles, a generous spread of the ricotta mixture, another layer of meat sauce, and a sprinkle of mozzarella. Repeat this layering until all ingredients are used, finishing with a layer of noodles topped with remaining meat sauce and a mountain of mozzarella and parmesan cheese. -
Bake It
Cover the baking dish with aluminum foil (to prevent sticking, you can spray the foil with cooking spray). Bake for 25 minutes, then remove the foil and bake for an additional 15 minutes or until the cheese is golden and bubbly. The irresistible aroma will fill your kitchen and lead everyone to the dining table! -
Let it Rest
Once your lasagna is baked to bubbly perfection, let it sit for about 15 minutes. This helps the layers set, making serving a breeze.
Serving Suggestions
To plate this beauty, cut it into squares, and serve alongside a crisp green salad or some garlic bread. Don’t forget to garnish with fresh basil leaves or a sprinkle of extra parmesan for that wow factor!
Recipe Variations
Want to shake things up? Here are some creative twists on this classic lasagna:
-
Veggie Delight: Substitute half the ground beef with roasted vegetables like zucchini, bell peppers, and mushrooms for a flavorful vegetarian lasagna.
-
Pesto Twist: Mix some pesto into the ricotta for an herby, vibrant flavor that elevates your dish.
-
Spicy Kick: Add red pepper flakes to the ground beef for a hint of heat that’ll surprise your taste buds.
-
Cheesy Spinach: Mix sautéed spinach into the ricotta layer for added nutrition and a lovely green color.
-
Gluten-Free Swap: Use gluten-free lasagna noodles or zucchini slices in place of noodles for a lighter, keto-friendly version.
Chef’s Notes
Over the years, this lasagna has been a go-to recipe for me, especially during potlucks and family gatherings. Each time I prepare it, I’m reminded of those cozy Sunday afternoons at grandma’s. It’s funny how a simple dish can evoke such warmth, compassion, and community!
I’ve played around with variations, and I’m always amazed at how this remarkable recipe can adapt to different tastes and dietary needs. It’s a reflection of how cooking is about evolution, just like us!
FAQs and Troubleshooting
-
Why is my lasagna watery?
This can happen if the noodles are undercooked or if too much sauce is used. Make sure to cook your noodles al dente and use just the right amount of marinara—remember, balance is key! -
Can I make this ahead of time?
Absolutely! You can prepare the lasagna the day before and store it in the fridge. Just pop it in the oven when you’re ready to enjoy! -
What if I don’t have ricotta cheese?
No worries! Cottage cheese, as mentioned, is a perfect substitute. You can also blend in a bit of cream cheese for a richer flavor. -
How do I store leftovers?
Store any leftovers in an airtight container in the fridge for up to 3 days. Reheat it in the microwave or oven; it’s just as delightful on day two!
Nutritional Info
While I like to enjoy cooking my food without fixating on the numbers, here’s a rough estimate per serving:
- Calories: ~350
- Protein: ~20g
- Carbohydrates: ~30g
- Fat: ~15g
Note: Nutritional values may vary based on ingredient substitutions and brands used.
So there you have it—my Quick & Easy Lasagna that’s sure to make you the dinner hero! It’s simple, savory, and oh-so satisfying. Whether you’re cooking for a crowd or just for yourself, this dish invites love and warmth into your kitchen. Tie on that apron and let’s create some memories around your table! Bon appétit!
PrintQuick & Easy Lasagna

A comforting and elegant lasagna that is quick to prepare, perfect for a busy weeknight while still delivering rich flavors.
- Prep Time: 15 minutes
- Cook Time: 40 minutes
- Total Time: 55 minutes
- Yield: 8 servings 1x
- Category: Main Course
- Method: Baking
- Cuisine: Italian
- Diet: Meat
Ingredients
- 12 ounces Lasagna Noodles
- 1 pound Ground Beef
- 24 ounces Marinara Sauce
- 1 tablespoon Italian Seasoning
- 15 ounces Ricotta Cheese
- 1 large Egg
- 1 teaspoon Salt
- 1 dash Pepper
- 2 cups Shredded Mozzarella Cheese
- 1/4 cup Grated Parmesan Cheese
Instructions
- Preheat your oven to 375°F (190°C).
- Cook lasagna noodles in a large pot of salted water until al dente or skip if using no-boil noodles.
- Brown the ground beef in a skillet with olive oil, breaking it apart until browned.
- Mix in marinara sauce and Italian seasoning, letting it simmer for 5 minutes.
- Prepare the ricotta filling by combining ricotta cheese, egg, salt, and pepper until smooth.
- Assemble the lasagna in a 9×13-inch baking dish, layering ingredients as desired.
- Bake for 25 minutes covered with foil, then remove foil and bake for an additional 15 minutes until cheese is golden.
- Let the lasagna rest for about 15 minutes before serving.
Notes
Serve with a green salad or garlic bread, and consider garnishing with fresh basil or extra Parmesan.
Nutrition
- Serving Size: 1 serving
- Calories: 350
- Sugar: 6g
- Sodium: 600mg
- Fat: 15g
- Saturated Fat: 7g
- Unsaturated Fat: 6g
- Trans Fat: 0g
- Carbohydrates: 30g
- Fiber: 2g
- Protein: 20g
- Cholesterol: 50mg
Keywords: lasagna, quick dinner, comfort food, easy recipe, weeknight meal
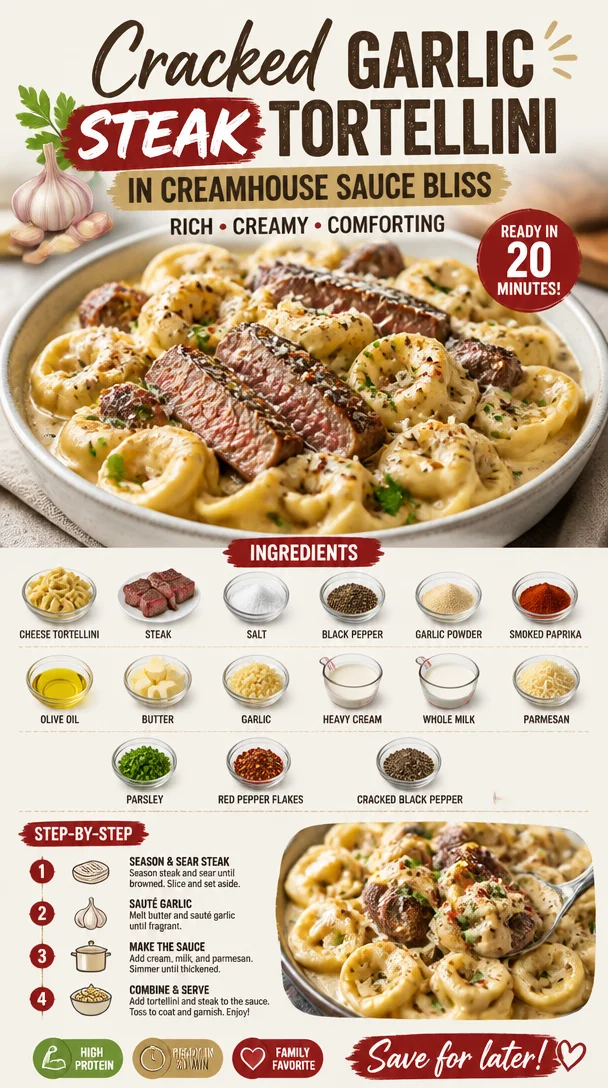
Cracked Garlic Steak Tortellini in Creamhouse Sauce Bliss
Cracked Garlic Steak Tortellini in Creamhouse Sauce Bliss
Hello, fellow food enthusiasts! Today, I’m sharing a recipe that’s not just a dish; it’s a delightful experience. Imagine tender cheese tortellini enveloped in a rich cream sauce, adorned with perfectly seared steak and a hint of garlicky goodness. Quite honestly, there’s nothing better than a plate of Cracked Garlic Steak Tortellini in Creamhouse Sauce Bliss. This dish is perfect for those cozy weeknights when you want to impress without the stress.
A Culinary Memory Worth Sharing
Let me take you back to a balmy summer evening when I decided to host a dinner party for my closest friends. It was one of those nights when everything just seemed to click. I had just returned from the farmer’s market with a bounty of fresh ingredients, and of course, I had a fresh batch of cheese tortellini. As I prepped the meal, the aroma of sizzling steak mingling with garlic hit the air, and it felt like magic. Every bite we took was met with laughter and stories, making it a celebration of good food and even better company.
That evening taught me two things: first, that simple ingredients can create extraordinary moments, and second, never underestimate the power of a good cream sauce! The star of our meal was a variation of this very recipe, bringing joy and warmth to our gathering. Today, I’d like to rekindle that joy by sharing this timeless recipe with you.
Ingredients
Here’s what you need to whip up this dish that’s all about comfort and flavor:
-
20 oz cheese tortellini
Fresh or refrigerated varieties yield the best texture and taste. You could also use frozen, but make sure to cook it according to package instructions. -
1 lb steak (sirloin or ribeye)
Sirloin is leaner; ribeye is more tender and packed with flavor. Opt for grass-fed if you’re looking for a more robust flavor! -
Salt and black pepper
Essential for seasoning the steak and balancing the dish. Kosher salt is preferred for its larger grains, but you can use table salt if that’s all you have. -
1 tsp garlic powder
While fresh garlic is ideal for the sauce, a sprinkle of garlic powder enhances the steak. -
1 tsp smoked paprika
Adds a hint of smokiness that pairs beautifully with the creamy sauce. If you want a bit more heat, try using hot paprika instead! -
2 tbsp olive oil
Essential for searing the steak, bringing in a nice crust. Can be substituted with vegetable oil for a different flavor profile, but olive oil is my go-to. -
4 tbsp butter
Creates a creamy sauce base and adds depth of flavor. For a dairy-free version, you can use vegan butter. -
5 cloves garlic, minced
Adds aromatic richness to the sauce; trust me, more garlic is never a bad idea! -
1 cup heavy cream
Contributes to that velvety smoothness we all crave. You can swap it for half-and-half for a lighter version, but it won’t be quite as dreamy. -
3/4 cup whole milk
Balances the richness of the sauce, making it easy to devour. If you’re looking for a dairy-free option, coconut milk can work, though it will change the flavor slightly. -
1 1/4 cups parmesan, shredded or freshly grated
Brings a savory, cheesy flavor that ties everything together. Always taste your parmesan — there’s nothing like that nutty goodness! -
Parsley, chopped (optional)
Brightens the dish with color and freshness. Fresh basil could be a fantastic substitute! -
Red pepper flakes (optional)
For a spicy kick that can elevate the dish. Adjust the level of heat to your liking — I like to keep it mild! -
Cracked black pepper (optional garnish)
Elevates the flavor with a little pop. Freshly cracked is always better than pre-ground!
Step-by-Step Instructions
Let’s get cooking! Grab your apron and let’s dive into the steps of creating this creamy delight:
-
Cook the Tortellini:
Start by bringing a large pot of salted water to a boil. Add the cheese tortellini, cooking it according to the package instructions. Fresh pasta usually takes about 3-5 minutes, but keep an eye on them. Once they float to the top, they’re ready! Drain and set aside, but don’t rinse— we want to keep that starchy goodness!Chef Tip: While the tortellini cooks, prep your other ingredients to keep things moving smoothly.
-
Prepare the Steak:
While the pasta is cooking, take your steak out of the fridge to let it come to room temperature for about 15 minutes. This ensures even cooking. Pat the steak dry with a paper towel, then season generously with salt, black pepper, garlic powder, and smoked paprika on both sides.Chef Insight: Searing a steak at room temperature helps achieve a beautiful crust.
-
Sear the Steak:
In a large skillet, heat 2 tablespoons of olive oil over medium-high heat. Once hot, add the steak. Let it sear without moving it around for about 3-4 minutes on one side until nicely browned. Flip and sear for another 3-4 minutes for medium-rare.Chef Hack: Use a meat thermometer—130°F is your magic number for medium-rare! Once cooked, remove the steak from the skillet and let it rest on a cutting board for at least 5 minutes before slicing.
-
Create the Sauce:
In the same skillet (don’t wipe it out; we want those delicious drippings!), melt the 4 tablespoons of butter over medium heat. Add minced garlic and sauté for about 1-2 minutes until fragrant. Pour in the heavy cream and whole milk, stirring gently to combine.Pro Tip: Scrape the bottom of the skillet to incorporate all those tasty bits into the sauce!
-
Cheese It Up:
Gradually whisk in the parmesan cheese until it melts and incorporates into a creamy sauce. Season with salt and pepper to taste. If it’s too thick, add a splash of milk until you reach your desired consistency.Chef Insight: If your sauce is clumpy, you may need to lower the heat and whisk continuously!
-
Combine Everything:
Now, add the drained tortellini to the skillet, tossing gently to coat in the creamy sauce. Slice your perfectly rested steak against the grain and lay it over the tortellini, spooning some of that lovely sauce over the top.Chef Tip: Don’t skip the slicing step! Cutting against the grain helps tenderize the steak.
Serving Suggestions
Plate up your Cracked Garlic Steak Tortellini with an artistic flair! Twirl the tortellini in the center of the plate, nestling in the slices of steak. Drizzle with extra cream sauce and a sprinkle of chopped parsley for a pop of color. Your guests will think you’re a culinary wizard!
Recipe Variations
Want to switch things up? Here are a few delicious twists:
- Add Veggies: Toss in sautéed spinach or roasted cherry tomatoes for a pop of color and nutrition.
- Make it Spicy: Add a diced jalapeño to the sauce or use spicier sausage instead of steak.
- Go Vegetarian: Substitute the steak with sautéed mushrooms or zucchini slices for a hearty yet plant-based version.
- Herbed Cream Sauce: Incorporate fresh herbs like basil or thyme to the sauce for an aromatic twist.
Chef’s Notes
This recipe has evolved over time, and it’s become one of my go-to comfort meals! The combination of steak and tortellini was inspired by those cozy Italian restaurants where you feel right at home. Plus, I’ve learned that the secret to a truly great pasta dish lies in the way you layer flavors. Remember, it doesn’t have to be perfect — just make it with love!
FAQs and Troubleshooting
1. My sauce is too thick; what do I do?
Simply whisk in a bit more milk or cream until you reach your desired consistency!
2. Can I use a different type of cheese?
Absolutely! Fontina, pecorino, or even a good quality cheddar can work. Just be sure to adjust the seasonings as needed.
3. What if I overcooked the steak?
If your steak is overcooked, slice it thinly and mix it into the sauce. The creaminess can help mask a little of the dryness!
4. Is there a way to make this dish dairy-free?
Yes! Use dairy-free butter, coconut milk or oat milk, and a dairy-free cheese alternative to create a similarly satisfying dish while keeping it dairy-free.
Nutritional Info (Optional)
Per serving, you’ll find a hearty portion of protein, healthy fats, and comfort carbs, making this a fulfilling dish! While exact nutrition can vary based on exact ingredients, this dish typically contains about 600-700 calories per serving.
There you have it, friends! Your culinary adventure awaits with this Cracked Garlic Steak Tortellini in Creamhouse Sauce Bliss. Tag me on social media when you make it; I can’t wait to see how you make it your own. Remember, no matter how simple or complex your dish, the heart of cooking lies in sharing it with others. So tie on that apron, pour a glass of your favorite drink, and let’s create something fabulous together!
PrintCracked Garlic Steak Tortellini in Creamhouse Sauce Bliss
A delightful dish featuring tender cheese tortellini enveloped in a rich cream sauce with perfectly seared steak and a hint of garlicky goodness.
- Prep Time: 15 minutes
- Cook Time: 20 minutes
- Total Time: 35 minutes
- Yield: 4 servings 1x
- Category: Main Course
- Method: Searing and Saucing
- Cuisine: Italian
- Diet: Meat
Ingredients
- 20 oz cheese tortellini
- 1 lb steak (sirloin or ribeye)
- Salt and black pepper
- 1 tsp garlic powder
- 1 tsp smoked paprika
- 2 tbsp olive oil
- 4 tbsp butter
- 5 cloves garlic, minced
- 1 cup heavy cream
- 3/4 cup whole milk
- 1 1/4 cups parmesan, shredded or freshly grated
- Parsley, chopped (optional)
- Red pepper flakes (optional)
- Cracked black pepper (optional garnish)
Instructions
- Cook the Tortellini: Start by bringing a large pot of salted water to a boil. Add the cheese tortellini, cooking it according to the package instructions. Once they float to the top, they’re ready! Drain and set aside.
- Prepare the Steak: Take your steak out of the fridge to let it come to room temperature for about 15 minutes. Pat the steak dry and season generously with salt, black pepper, garlic powder, and smoked paprika on both sides.
- Sear the Steak: In a large skillet, heat 2 tablespoons of olive oil over medium-high heat. Add the steak and let it sear without moving it for about 3-4 minutes on one side. Flip and sear for another 3-4 minutes for medium-rare. Let it rest before slicing.
- Create the Sauce: In the same skillet, melt 4 tablespoons of butter over medium heat. Add minced garlic and sauté for 1-2 minutes. Pour in the heavy cream and whole milk, stirring gently to combine.
- Cheese It Up: Gradually whisk in the parmesan cheese until melted. Season with salt and pepper to taste. If it’s too thick, add a splash of milk.
- Combine Everything: Add the drained tortellini to the skillet and toss gently to coat in the sauce. Slice the rested steak against the grain and lay it over the tortellini.
Notes
For a dairy-free version, substitute with vegan butter, coconut milk, and dairy-free cheese alternatives. Consider adding sautéed vegetables or using spicier sausage for variations.
Nutrition
- Serving Size: 1 serving
- Calories: 650
- Sugar: 3g
- Sodium: 800mg
- Fat: 35g
- Saturated Fat: 15g
- Unsaturated Fat: 15g
- Trans Fat: 0g
- Carbohydrates: 45g
- Fiber: 2g
- Protein: 35g
- Cholesterol: 90mg
Keywords: steak tortellini, cream sauce, Italian recipe, comfort food, dinner party
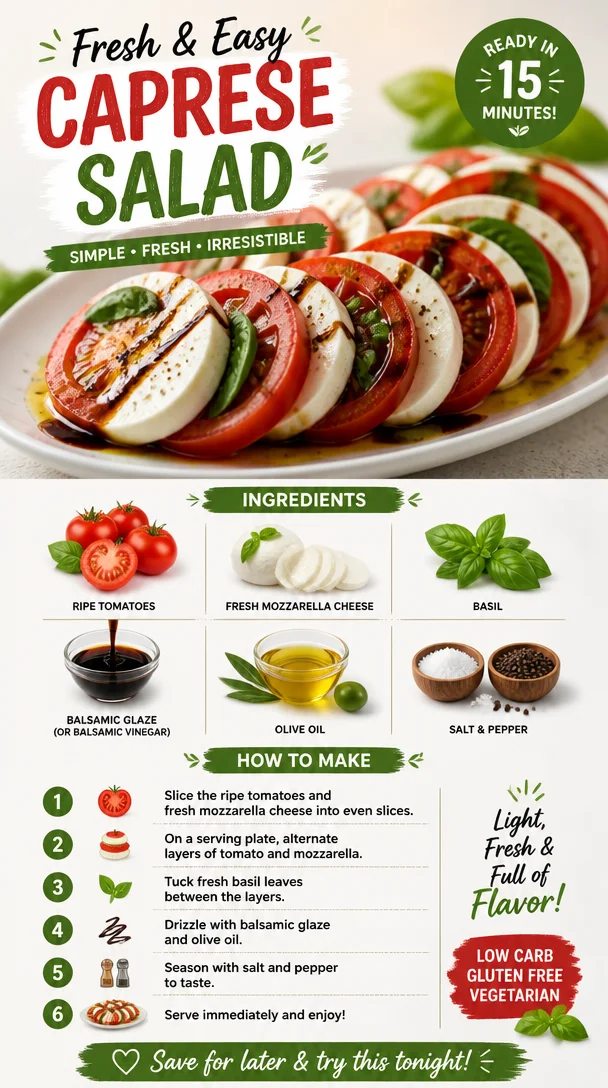
Caprese Salad
Caprese Salad: The Perfect Summer Delight
Hello, dear food lovers! Today, I’m super excited to share one of my all-time favorite dishes: Caprese Salad. This vibrant Italian classic embodies everything I adore about cooking: simplicity, fresh ingredients, and the ability to create a beautiful dish that delights the senses. Whether you’re hosting a summer get-together or just treating yourself to a fresh, light meal, Caprese Salad is a surefire winner that never fails to impress.
Picture this: the sun is shining, birds are chirping, and you’re gathering around the table with your loved ones. There’s something magical about summer evenings, isn’t there? The air is filled with laughter, the clinking of glasses, and the enticing aroma of delicious food wafting from the kitchen. And right in the center of your table? A stunning platter of Caprese Salad, inviting everyone to dig in. Each bite brings together the juicy sweetness of ripe tomatoes, the creaminess of fresh mozzarella, and the fragrant burst of aromatic basil—all drizzled with a tangy balsamic glaze that ties everything together beautifully.
This salad isn’t just food; it’s an experience. It’s the taste of summer, the essence of Italian cuisine, and a simple way to showcase the beauty of fresh ingredients. So, let’s dive into the heart of this dish and learn how to create a Caprese Salad that not only looks exquisite but tantalizes the taste buds too.
A Nostalgic Memory
Ah, Caprese Salad and me—we go way back! I remember the first time I had a truly authentic Caprese Salad. It was during a summer trip to the Amalfi Coast with my family. We stumbled upon a quaint little trattoria nestled between vibrant lemon trees and azure waters. It was there that I was introduced to the wonders of fresh mozzarella and sun-ripened tomatoes. The dish arrived on a rustic wooden table, its colors popping against the Mediterranean backdrop.
With each bite, my taste buds danced with delight. The mozzarella was soft and creamy, the tomatoes juicy and sweet, and the basil brought in such a fragrant freshness. It was a simple dish, but the quality of the ingredients made all the difference. I learned then that sometimes the best meals are born from the best ingredients—and that lesson has stayed with me. Since that day, Caprese Salad has become my go-to summer dish, and now, I’m thrilled to share it with you!
Ingredients
Let’s gather our ingredients and get ready to create this delicious salad. Here’s what you’ll need:
-
Ripe Tomatoes
Look for the ripest, juiciest tomatoes you can find. Heirloom tomatoes are an excellent choice for their flavor and vibrant colors. If you can’t find fresh ones, cherry tomatoes will do in a pinch—just cut them in half for a sweet bite! -
Fresh Mozzarella Cheese
For that creamy texture, fresh mozzarella is key. Look for the balls packed in water for the best flavor. If you’d like a lower-fat option, you could try part-skim mozzarella, but keep in mind it won’t have the same luxurious creaminess. -
Basil
Fresh basil adds an aromatic lift that is essential to this dish. If you can’t find fresh basil, try substituting with a sprinkle of dried basil, but it won’t have quite the same impact! -
Balsamic Glaze (or Balsamic Vinegar)
A drizzle of balsamic glaze elevates the salad with a sweet tang. If you prefer a less sweet option, you can go with traditional balsamic vinegar; just be mindful to use it sparingly, as it’s stronger in flavor. -
Olive Oil
A good quality extra virgin olive oil is crucial for drizzling over your salad—think of it as the finishing touch! It adds flavor and richness. -
Salt and Pepper
Simple yet essential! Use fresh cracked black pepper and flaky sea salt to season your salad. A pinch of salt can really enhance the flavors of the tomatoes.
Step-by-Step Instructions
Step 1: Prepare Your Ingredients
Start by washing your tomatoes under cool, running water. Pat them dry with a clean towel. If you’re using large tomatoes, slice them into thick rounds (about 1/4 to 1/2 inch thick). For cherry tomatoes, halving them will create delightful little bite-sized pieces.
Step 2: Slice the Mozzarella
Next, let’s take care of that creamy mozzarella! Slice the fresh mozzarella into similar-sized rounds to match the tomatoes. If you happen to have mozzarella pearls, they’re fantastic for an easy, rustic salad presentation.
Step 3: Arrange the Salad
Now comes the fun part! On a large serving platter, alternate layers of tomato slices and mozzarella. You can arrange them in a circle, line them up, or just pile them haphazardly—there’s no right or wrong here! As you layer, tuck in fresh basil leaves in between. This not only adds flavor but also makes the salad look stunning.
Step 4: Drizzle with Olive Oil and Balsamic
Once you have beautifully arranged your salad, it’s time to dress it up! Drizzle a generous glug of extra virgin olive oil over the entire salad. Then follow that with a drizzle of balsamic glaze (or vinegar, if that’s what you have). Don’t be shy—this is what brings all the flavors together!
Step 5: Season to Taste
Finally, it’s time to add the finishing touches. Season your Caprese Salad with a sprinkle of flaky sea salt and a few cracks of fresh black pepper. This little moment is where your salad becomes magic, accentuating the flavors of all those fresh ingredients.
Step 6: Serve and Enjoy
Now, step back and admire your creation—it’s a beauty! Serve your Caprese Salad immediately at room temperature for the best flavor. Watch it disappear as everyone digs into this delightful dish!
Serving Suggestions
When it comes to plating, keep it simple yet elegant. A beautiful wooden board or a flat white platter truly showcases your colorful layers. You might even consider garnishing the salad with a few extra basil leaves or a sprinkle of crushed red pepper flakes for a hint of heat. Serve alongside some crusty bread or grilled chicken for a complete meal, or enjoy it solo as a refreshing appetizer.
Recipe Variations
-
Caprese Skewers: Assemble cherry tomatoes, mozzarella balls, and fresh basil onto skewers for a fun appetizer!
-
Avocado Twist: Add slices of creamy avocado for a rich texture and flavor boost.
-
Pesto Drizzle: Swap out the balsamic for a fresh basil pesto drizzle for an herbaceous twist.
-
Mediterranean Style: Include Kalamata olives and slices of roasted red bell pepper for a Mediterranean flair.
-
Grilled Caprese: Grill the tomatoes and mozzarella for a smoky flavor profile—perfect for summer barbecues!
Chef’s Notes
Caprese Salad holds a special place in my heart, not just for its fresh flavors but also for the stories it gathers around the table. Over the years, I’ve played around with different ingredients and variations to make this dish my own. I once hosted an Italian night for friends and made Caprese Salad a centerpiece dish. I told everyone to bring their favorite Italian wines—needless to say, we ended up spending the night laughing over great food and even better company! Remember, cooking isn’t just about following a recipe; it’s about making memories and sharing love through the food you create.
FAQs and Troubleshooting
1. My tomatoes are bland. How can I fix this?
Make sure to choose fully ripe, in-season tomatoes—they should be vibrant in color and firm yet slightly yielding when pressed. If you end up with a lackluster tomato, a sprinkle of salt and a dash of balsamic can help enhance the flavor right away!
2. Can I make Caprese Salad in advance?
While this salad is best enjoyed fresh, you can slice your tomatoes and mozzarella in advance. Just store them separately in the fridge and assemble right before serving to keep everything fresh.
3. The basil is bruised and wilting. What did I do wrong?
Basil is delicate, so be gentle while handling it. Store it in a glass of water on your countertop—similar to a bouquet—rather than the fridge, which can cause wilting.
4. There’s too much balsamic glaze on my salad! How can I fix it?
No worries! Add more fresh ingredients—like extra tomatoes and mozzarella—to balance out the flavors. Just remember that less is often more when it comes to dressings.
Nutritional Info
While I generally lean toward the more relaxed side of eating, it’s always good to know what’s going on in our meals. A standard serving of Caprese Salad (without additional toppings) can be about:
- Calories: 300 (depending on oil and portion size)
- Protein: 16g
- Fat: 20g (largely healthy fats from olive oil and mozzarella)
- Carbohydrates: 8g
So, there you have it—a refreshing dive into the world of Caprese Salad! I hope you find joy in preparing, sharing, and indulging in this delightful dish. Remember, cooking is all about bringing people together, so gather your loved ones and let the magic of good food create lasting memories. Happy cooking!
PrintCaprese Salad
A vibrant Italian classic salad made with fresh mozzarella, ripe tomatoes, and aromatic basil, drizzled with balsamic glaze.
- Prep Time: 10 minutes
- Cook Time: 0 minutes
- Total Time: 10 minutes
- Yield: 4 servings
- Category: Salad
- Method: No Cooking
- Cuisine: Italian
- Diet: Vegetarian
Ingredients
- Ripe Tomatoes
- Fresh Mozzarella Cheese
- Basil
- Balsamic Glaze (or Balsamic Vinegar)
- Olive Oil
- Salt and Pepper
Instructions
- Prepare your ingredients by washing the tomatoes and slicing them.
- Slice the mozzarella into rounds.
- Arrange the salad by alternating layers of tomato and mozzarella on a platter.
- Drizzle olive oil and balsamic glaze over the salad.
- Season with salt and pepper to taste.
- Serve immediately at room temperature.
Notes
For variations, try adding avocado, olives, or grilled ingredients.
Nutrition
- Serving Size: 1 serving
- Calories: 300
- Sugar: 5g
- Sodium: 300mg
- Fat: 20g
- Saturated Fat: 6g
- Unsaturated Fat: 12g
- Trans Fat: 0g
- Carbohydrates: 8g
- Fiber: 2g
- Protein: 16g
- Cholesterol: 30mg
Keywords: Caprese Salad, Italian Salad, Fresh Ingredients, Summer Salad

Prosciutto and Burrata Pizza
Elevate Your Weeknight Dinner with Prosciutto and Burrata Pizza
Hello and welcome, my fellow food enthusiasts! Today, I’m thrilled to take you on a delectable journey into the world of homemade pizza. We’re diving into a delicious creation that combines the luxurious flavors of prosciutto and burrata cheese—with a twist that will elevate your weeknight dinner to something spectacular. Let’s roll up those sleeves and get cooking because nothing brings people together quite like a slice of pizza topped with love and creativity!
When I think of pizza, I think of cozy weekends spent with friends, the smell of dough rising in the kitchen, and those glorious moments when your family gathers around the kitchen table, eagerly awaiting their first slice. It’s where culinary art meets memories that linger long after the last bite has been taken.
So, let’s talk about this Prosciutto and Burrata Pizza, a dish that not only tantalizes the taste buds but also tells a story. One of my fondest memories of pizza dates back to my college days. One evening, my friends and I decided to host a little pizza night challenge. Each of us had to create our own version of pizza with whatever ingredients we could find in the pantry. I went for a rich, creamy burrata and savory prosciutto combination, and let me tell you, it was an absolute hit! That evening led to laughter, spontaneous dance parties in the kitchen, and maybe a little food fight—memories to cherish forever. Now, every time I make this pizza, I’m reminded of the joy and camaraderie that cooking can bring.
Alright, let’s get to work on our delicious dish!
Ingredients
To create this delightful Prosciutto and Burrata Pizza, gather the following ingredients:
-
2 cups all-purpose flour
- This is your base for the pizza dough. You can substitute with whole wheat flour for a nuttier flavor or gluten-free flour to fit dietary needs.
-
1 packet active dry yeast (2 ¼ teaspoons)
- This little packet is what makes the dough rise and obtain that perfect chewy texture. If you’re out of yeast, you can try using baking powder, but the texture will be different.
-
1 teaspoon sugar
- A dash of sweetness helps activate the yeast and boosts flavor. Brown sugar offers a deeper flavor profile if you’re feeling adventurous!
-
1 teaspoon salt
- Essential for flavoring your dough. Without it, your pizza can taste a bit bland. Use sea salt or kosher salt for a gourmet touch.
-
3/4 cup warm water
- This is crucial for dissolving the yeast. The water should be warm but not hot—think baby bath warm. Too hot will kill the yeast!
-
2 tablespoons olive oil
- Adds richness to the dough and helps achieve that crispy crust. Extra virgin olive oil is always a beautiful choice here.
-
4 oz prosciutto, sliced
- This salty, savory delight adds depth to your pizza. You can substitute it with crispy bacon or even smoked salmon for a playful twist.
-
8 oz burrata cheese
- The star of our show! This creamy cheese adds a luxurious feel to the dish. If burrata isn’t available, fresh mozzarella will do the trick.
-
2 cups arugula
- This peppery green adds a fresh bite. Spinach could be a milder alternative, but arugula’s distinct flavor makes it special.
-
1 tablespoon honey
- A drizzle at the end adds a lovely sweetness that contrasts beautifully with the salty prosciutto. Maple syrup could work if you’re out of honey.
-
Black pepper to taste
- This is just the finishing touch to enhance all those flavors. Feel free to add a pinch of chili flakes if you enjoy a little heat!
Step-by-Step Instructions
Now that we have our ingredients, it’s time to get cooking! Follow these steps to create your Prosciutto and Burrata Pizza:
-
Activate the Yeast: In a small bowl, combine the warm water, sugar, and yeast. Let it sit for about 5-10 minutes until it’s foamy and bubbly. This is the yeast doing its thing—don’t skip this part!
-
Make the Dough: In a large bowl, whisk together the flour and salt. Make a well in the center and pour in the yeast mixture along with the olive oil. Using your hands or a wooden spoon, mix until a shaggy dough forms. If it’s too sticky, add a little more flour, one tablespoon at a time.
-
Knead the Dough: On a floured surface, turn out the dough and knead it for about 5-7 minutes until it’s smooth and elastic. Think of this as your mini workout, and trust me, your dough will thank you! If it’s too sticky, don’t be afraid to sprinkle flour on your hands or your work surface.
-
Let it Rise: Place the kneaded dough into a lightly greased bowl, cover it with a clean kitchen towel, and let it rise in a warm spot for about 1 hour, or until it’s doubled in size. I recommend placing it in the oven (turned off) with the light on to create a cozy environment.
-
Preheat the Oven: About 20 minutes before the dough is done rising, preheat your oven to 475°F (245°C) with a pizza stone or baking sheet inside. This ensures a crispy bottom crust when baking.
-
Roll out the Dough: Once the dough has risen, punch it down and turn it out onto a floured surface. Roll it out to your desired thickness—thinner for a crispy base, thicker for a chewier crust. You can also shape it into a rectangle if using a baking sheet!
-
Assemble Your Pizza: Transfer your rolled-out dough onto parchment paper (if you’re not using a pizza stone). Now, lay on the prosciutto slices evenly, followed by chunks of creamy burrata. If you haven’t already, tear the burrata open to expose that lovely creamy center.
-
Bake the Pizza: Carefully slide your assembled pizza onto the preheated stone or baking sheet in the oven. Bake for about 10-12 minutes or until the edges are golden brown and the cheese is melting gloriously.
-
Finish with Arugula and Honey: Once the pizza is out of the oven, immediately top with fresh arugula, drizzle with honey, and season with fresh black pepper. Don’t be shy with that pepper; it truly elevates the dish!
Serving Suggestions
To serve your Prosciutto and Burrata Pizza, slice it into generous pieces and plate it on a rustic wooden board or a simple white platter. The contrast of the creamy burrata and vibrant arugula makes for a stunning presentation. You could even garnish with some extra black pepper and a sprinkle of fresh herbs like basil or microgreens for that finished touch.
Recipe Variations
-
Vegan Twist: Swap the burrata with cashew cheese or a vegan cream cheese alternative and omit the prosciutto. Add roasted veggies for a delightful plant-based pizza.
-
Spicy Kick: Add sliced jalapeños or a drizzle of chili oil before baking for an extra kick of heat.
-
Herbed Crust: Mix in dried herbs like oregano or thyme into your flour before kneading the dough for an aromatic crust.
-
Mediterranean Style: Top your pizza with cherry tomatoes, olives, and a sprinkle of feta for a fresh Mediterranean flair.
-
Pesto Base: Instead of tomato sauce, spread a layer of pesto on the dough before adding the toppings for a flavor explosion!
Chef’s Notes
This Prosciutto and Burrata Pizza is one of my favorite go-to recipes for gatherings or a cozy night in because it strikes the right balance between casual and sophisticated. Over time, I’ve played with different toppings—like adding figs in the fall or roasted artichokes for springtime. The memories created in the kitchen while preparing this dish with friends and family remind me of the joy that food brings to our lives. Plus, it’s a fantastic conversation starter, sparking stories about where you found that perfect cheese or your favorite pizza experiences from travels abroad.
FAQs and Troubleshooting
-
What if my dough doesn’t rise?
- If your dough isn’t rising, first check the freshness of your yeast. If it’s too old, it won’t activate. The water temperature needs to be warm (not hot!) to activate the yeast successfully.
-
How do I get a crispy crust?
- Make sure your oven is fully preheated, and your baking surface is hot before sliding in the pizza. Bake it at a high temperature, and avoid adding too much liquid to the toppings, as that could make the crust soggy.
-
Can I prepare the dough in advance?
- Absolutely! You can make the dough ahead of time and store it in the refrigerator for up to 24 hours. Just allow it to come to room temperature before rolling it out.
-
What if my burrata is too firm?
- Burrata should be soft and creamy at room temperature. If yours feels too firm, let it sit at room temperature for about 30 minutes before using to allow it to soften up.
Nutritional Information
(This will vary based on portion size and toppings used but here’s a rough estimate per slice)
- Calories: 250
- Total Fat: 12g
- Saturated Fat: 5g
- Carbohydrates: 30g
- Fiber: 1g
- Protein: 8g
That’s it, my friends! Whether you’re feeding friends, family, or simply treating yourself, this Prosciutto and Burrata Pizza will surely become a favorite in your household. So, tie on that apron, get into the kitchen, and let’s create some magic around the table together! Happy cooking!
PrintProsciutto and Burrata Pizza

A luxurious pizza featuring prosciutto and creamy burrata, perfect for elevating your weeknight dinners.
- Prep Time: 15 minutes
- Cook Time: 30 minutes
- Total Time: 45 minutes
- Yield: 4 servings 1x
- Category: Main Course
- Method: Baking
- Cuisine: Italian
- Diet: Vegetarian
Ingredients
- 2 cups all-purpose flour
- 1 packet active dry yeast (2 ¼ teaspoons)
- 1 teaspoon sugar
- 1 teaspoon salt
- 3/4 cup warm water
- 2 tablespoons olive oil
- 4 oz prosciutto, sliced
- 8 oz burrata cheese
- 2 cups arugula
- 1 tablespoon honey
- Black pepper to taste
Instructions
- Activate the yeast: In a small bowl, combine the warm water, sugar, and yeast. Let it sit for about 5-10 minutes until it’s foamy and bubbly.
- Make the dough: In a large bowl, whisk together the flour and salt. Make a well in the center and pour in the yeast mixture along with the olive oil.
- Mix until a shaggy dough forms. If it’s too sticky, add a little more flour, one tablespoon at a time.
- Knead the dough: On a floured surface, turn out the dough and knead it for about 5-7 minutes until it’s smooth and elastic.
- Let it rise: Place the kneaded dough into a lightly greased bowl, cover with a towel, and let it rise for about 1 hour, or until doubled in size.
- Preheat the oven: About 20 minutes before the dough is done rising, preheat your oven to 475°F (245°C).
- Roll out the dough: Once risen, punch it down and roll it out to your desired thickness.
- Assemble your pizza: Lay on the prosciutto slices evenly followed by chunks of burrata.
- Bake the pizza: Carefully slide your pizza onto the preheated stone or baking sheet and bake for about 10-12 minutes.
- Finish with arugula and honey: After baking, top with fresh arugula, drizzle with honey, and season with black pepper.
Notes
For a vegan version, substitute burrata with cashew cheese and omit prosciutto. Add roasted veggies for extra flavor.
Nutrition
- Serving Size: 1 slice
- Calories: 250
- Sugar: 2g
- Sodium: 800mg
- Fat: 12g
- Saturated Fat: 5g
- Unsaturated Fat: 7g
- Trans Fat: 0g
- Carbohydrates: 30g
- Fiber: 1g
- Protein: 8g
- Cholesterol: 25mg
Keywords: pizza, prosciutto, burrata, homemade pizza, weeknight dinner

Minute Homemade Pizza Rolls for Busy Weeknights
Homemade Pizza Rolls: A Slice of Comfort
Hello, friends! Today, we’re diving into the delightful world of homemade pizza rolls, a dish that brings the comforting essence of pizza into a crispy, golden package. Whether you’re gearing up for game night, hosting a cozy gathering, or just craving a snack, these pizza rolls are sure to hit the spot. So, grab your apron, and let’s create some magic in the kitchen!
A Bite of Nostalgia
I remember the first time I discovered the beauty of pizza rolls. I was in middle school, and my best friend had invited me over for an after-school snack. We rummaged through her freezer and stumbled upon a bag of frozen pizza rolls. I was skeptical at first—how could something so tiny be so satisfying? But as soon as I popped one in my mouth, I was hooked! That cheesy, pepperoni-filled bite, with its crispy exterior, was a revelation.
Years later, I found myself wanting to recreate that nostalgic delight from scratch. Why? Because there’s something incredibly satisfying about making food at home—it’s like crafting little pieces of love. And the best part? You can control the ingredients, making it a fun activity to do with friends or family. So let’s roll up our sleeves and get ready to make some homemade pizza rolls that are better than any frozen variety!
Ingredients
Here’s what you’ll need to whip up these delightful pizza rolls:
-
5 egg roll wrappers
Perfect for that satisfying crunch! If you can’t find egg roll wrappers, you can substitute with wonton wrappers for a slightly smaller roll. -
1/3 cup chopped mini pepperoni (or regular-sized, sliced)
Mini pepperoni adds a fun bite-sized flair, but regular pepperoni works just as well. Feel free to swap in some cooked sausage or veggies for a different twist! -
1/4 cup pizza sauce
Use your favorite store-bought sauce or whip up a quick homemade version. Feel free to choose a spicy marinara or garlic-infused option to amp up the flavor! -
1 cup shredded mozzarella cheese
This is the classic cheese choice! You can substitute with provolone or a dairy-free cheese for a vegan option.
Now that we have our ingredients lined up, let’s get cooking!
Step-by-Step Instructions
-
Preheat Your Oven
Start by preheating your oven to 400°F (200°C). This is crucial for achieving that perfect golden-brown crust! -
Prepare the Filling
In a mixing bowl, combine the mini pepperoni (or your chosen protein), pizza sauce, and shredded mozzarella cheese. Make sure everything is well-mixed. This ensures each pizza roll is bursting with flavor. -
Assemble the Pizza Rolls
Take one egg roll wrapper and place it on a clean, dry surface in a diamond shape (one point facing you). Add a generous tablespoon of your filling mixture in the center. Here’s a little chef hack: dampen the edges of the wrapper with a bit of water to help seal the rolls. -
Roll It Up
Fold the bottom corner up over the filling, tucking it tightly. Then, fold in the sides and roll it up toward the top corner, sealing it completely. Think of it like wrapping a burrito, but cuter! Repeat this process with the remaining wrappers and filling. -
Bake the Rolls
Line a baking sheet with parchment paper and arrange your pizza rolls seam side down. For that extra golden crunch, brush them lightly with olive oil. Bake in the preheated oven for about 15-20 minutes, flipping halfway through to ensure even browning. -
Serve and Enjoy
Once they’re crispy and golden, remove them from the oven and let them cool for a minute before serving. I like to pair these with a warm dipping sauce, like marinara or ranch, for that extra punch of flavor.
And there you have it—your very own homemade pizza rolls, ready to impress!
Serving Suggestions
When it comes to serving your pizza rolls, presentation can elevate the experience! Arrange them on a vibrant platter, perhaps with some fresh herbs sprinkled around for a pop of color. Serve them alongside a small bowl of pizza sauce or your favorite dipping sauce. This little touch goes a long way in making your homemade treats feel even more special.
Recipe Variations
Feeling adventurous? Here are a few creative twists to try with your pizza rolls:
- Veggie Lovers: Swap out the pepperoni for sautéed mushrooms, bell peppers, and spinach for a flavorful veggie version.
- Spicy Kick: Add some sliced jalapeños to the filling for a spicy punch that’ll wake up your taste buds.
- Cheesy Garlic: Mix in some garlic powder and Parmesan with the mozzarella for a savory, cheesy explosion.
- Buffalo Chicken: Add shredded cooked chicken mixed with buffalo sauce for a spicy take on pizza rolls.
- Breakfast Edition: Consider using scrambled eggs, crumbled sausage, and cheese for a fun breakfast twist!
Chef’s Notes
Over time, I’ve found that these pizza rolls are a hit at every gathering! They not only feed the hunger but also spark conversation. I remember one night with friends—we ended up in a mini pizza roll competition to see who could create the most unique filling. Trust me, after a few rounds, we had everything from sweet BBQ chicken to loaded nacho cheese. It reminded me that cooking isn’t just about making food—it’s an experience to be shared.
FAQs and Troubleshooting
1. My pizza rolls didn’t seal properly. What went wrong?
It sounds like you might need to add a bit more water to the edges when rolling. Make sure to seal them tightly to prevent any leakage while baking.
2. Can I make these ahead of time?
Absolutely! You can assemble these rolls a few hours ahead and place them in the refrigerator until you’re ready to bake them. Just extend the baking time a tad if they’re cold.
3. What should I do if my rolls are too soggy?
This can happen if they’re overfilled or if the filling is too wet. Make sure to measure the filling and consider using less sauce if you find the consistency has become too runny.
4. Can I freeze these?
Yes! These pizza rolls freeze beautifully. Just assemble them, and once they’re frozen solid, transfer them to a zip-top bag. Bake straight from the freezer, adding a few minutes to the baking time.
Nutritional Info
While I believe in enjoying food without counting calories, here’s a quick rundown based on the ingredients we used:
- Calories: Approximately 200 calories per serving (2 rolls)
- Carbohydrates: 25g
- Protein: 10g
- Fat: 8g
This nutritional information can vary based on the specific ingredients you choose, so feel free to adjust as needed.
Let’s roll up those sleeves—it’s time to make some homemade pizza rolls that will leave you smiling and savoring every bite! Cooking is meant to be fun, so enjoy the process, and don’t forget to gather around the table!
PrintHomemade Pizza Rolls

Delightful homemade pizza rolls bringing the comfort of pizza into a crispy, golden package.
- Prep Time: 15 minutes
- Cook Time: 20 minutes
- Total Time: 35 minutes
- Yield: 4 servings 1x
- Category: Snack
- Method: Baking
- Cuisine: Italian
- Diet: Vegetarian
Ingredients
- 5 egg roll wrappers
- 1/3 cup chopped mini pepperoni (or regular-sized, sliced)
- 1/4 cup pizza sauce
- 1 cup shredded mozzarella cheese
Instructions
- Preheat your oven to 400°F (200°C).
- Combine the mini pepperoni, pizza sauce, and shredded mozzarella cheese in a mixing bowl.
- Take one egg roll wrapper and place it on a clean surface in a diamond shape.
- Fold the bottom corner up over the filling tightly, then fold in the sides and roll it up toward the top corner.
- Line a baking sheet with parchment paper and arrange the pizza rolls seam side down, brushing them lightly with olive oil.
- Bake in the preheated oven for about 15-20 minutes, flipping halfway through.
- Serve and enjoy once they’re crispy and golden.
Notes
These pizza rolls are perfect for gatherings and can be made ahead of time. They freeze beautifully and can be baked straight from the freezer.
Nutrition
- Serving Size: 2 rolls
- Calories: 200
- Sugar: 1g
- Sodium: 300mg
- Fat: 8g
- Saturated Fat: 3g
- Unsaturated Fat: 4g
- Trans Fat: 0g
- Carbohydrates: 25g
- Fiber: 1g
- Protein: 10g
- Cholesterol: 15mg
Keywords: pizza rolls, homemade snacks, comfort food, game night snacks, easy recipes
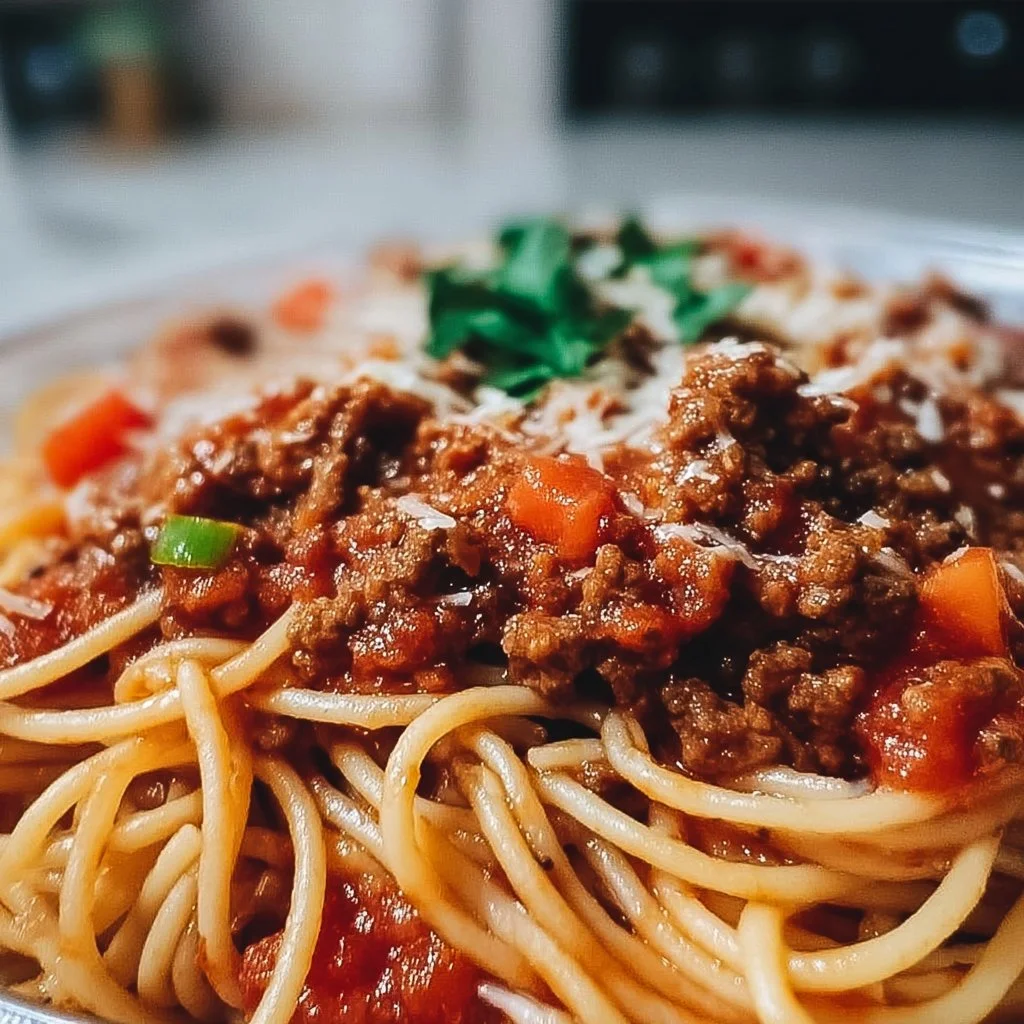
Spaghetti with Meat Sauce
The Perfect Spaghetti with Meat Sauce: A Home Cook’s Delight
Cooking is one of life’s great pleasures, and there’s nothing quite like the comforting embrace of a bowl of spaghetti with meat sauce. It’s simple, satisfying, and a dish I believe everyone should know how to make. Today, I’m excited to share my favorite recipe with you, dripping with nostalgia and flavor—it’s sure to make your kitchen glow with warmth and laughter!
A Personal Memory with Spaghetti
When I think of spaghetti and meat sauce, my mind drifts back to my childhood kitchen, a bustling hub of activity every Sunday evening. My parents, determined to keep our family traditions alive, would host what we called "Sunday Funday." The aroma of simmering sauce would fill the house, mingling with laughter and chatter as my siblings and I set the table, eager for what was about to unfold.
My dad spent the afternoon preparing the sauce, a secret family recipe, which had been passed down through generations. The whole kitchen transformed into an aromatic wonderland of browning meat, caramelizing onions, and garlic that had us all salivating before the first forkful. I remember sneaking bits of the sauce when he wasn’t looking, my taste buds rejoicing with every savory bite. When it finally came time to sit around the table, we served up plates heaped high, ready to enjoy a meal crafted with love. It was more than just food; it was a bond that brought us together.
So, let’s dive into making this classic deliciousness! Follow along, and soon your kitchen will be filled with the same rich scents that have graced my family dinners.
Ingredients: Gather Your Essentials
Before we start, let’s get all your ingredients lined up:
-
Spaghetti: The star of the show! You can opt for traditional wheat pasta or switch it up with whole wheat or gluten-free options. Just cook it according to package instructions for that perfect al dente texture.
-
Ground Beef or Sausage: Either will do! Ground beef gives a classic taste, while sausage adds a delightful zing. Feel free to mix it up for a unique kick!
-
Onion, Chopped: This ingredient adds sweetness and depth. If you’re sensitive to onions, shallots are a lovely substitute or you can even use leeks!
-
Garlic, Minced: Because garlic makes everything better! Fresh garlic is ideal, but if you’re in a pinch, garlic powder works too—just adjust the amount so you don’t overpower the dish.
-
Canned Tomatoes (Crushed or Diced): For that luscious sauce base, choose high-quality canned tomatoes. If fresh tomatoes are in season, feel free to use them; just remember to peel and deseed for a smoother sauce.
-
Tomato Paste: This intensifies the tomato flavor and thickens the sauce. If you’re out, a bit of tomato sauce can work, but the richness might not be as pronounced.
-
Italian Seasoning: Essential for that comforting Italian flavor profile. You can DIY this mix with dried basil, oregano, thyme, and rosemary.
-
Salt: A little goes a long way in enhancing flavors. Keep it handy!
-
Pepper: Freshly ground is always best for that extra kick.
-
Parmesan Cheese (Optional): For a deliciously nutty finish! Other hard cheeses like Pecorino Romano work great too.
Step-by-Step Instructions: Let’s Cook!
Now comes the fun part! Here’s how you bring this dish together:
-
Start by boiling the spaghetti:
- Fill a large pot with salted water and bring it to a rolling boil. When it’s bubbling like mad, toss in your spaghetti. Set a timer based on the package directions—typically 8-10 minutes—for perfectly cooked pasta. Don’t forget to stir occasionally to prevent sticking!
-
Sauté your aromatics:
- While the pasta cooks, grab a large skillet (preferably non-stick) and heat over medium heat. Add a drizzle of olive oil—about a tablespoon should do. Once hot, throw in your chopped onion and sauté until it’s translucent and fragrant, around 3-5 minutes. Then, add the minced garlic and cook for another minute until it gets that lovely golden color and fragrance.
-
Cook the meat:
- Increase the heat to medium-high. Time to add in your ground beef or sausage! Break it apart with a spatula and let it brown evenly, about 5 minutes. Make sure to stir often to avoid clumps and ensure everything caramelizes beautifully.
-
Add the tomatoes and seasonings:
- Once your meat is browned, it’s time to add the canned tomatoes and tomato paste. Stir them in well, then sprinkle in your Italian seasoning, salt, and pepper. Bring the mixture to a gently simmer. This is where the magic happens! Allow the sauce to cook for at least 15 minutes on low heat. If you have the time, let it simmer longer—this is where those flavors deepen and develop!
-
Combine pasta and sauce:
- When your spaghetti is perfectly cooked, reserve about a cup of pasta water, then drain it. Add the drained spaghetti directly into your sauce. Toss to coat the noodles evenly. If the sauce is too thick, add a splash of that reserved pasta water until you reach your desired consistency.
Serving Suggestions: Plating It Up
Presentation does wonders, so let’s make those plates pop! Serve your spaghetti in shallow bowls, twirling the noodles into a nest-like shape for that elegant touch. Top each serving with a generous scoop of meat sauce and finish it off with a sprinkle of freshly grated Parmesan cheese. Add a sprinkle of fresh basil or parsley for a burst of color and flavor—trust me, your guests will be delighted!
Recipe Variations: Get Creative!
This recipe is incredibly versatile! Here are some fun twists to try:
-
Vegetarian Delight: Swap the meat for lentils or a mix of sautéed mushrooms, spinach, and zucchini for a hearty plant-based option.
-
Spicy Kick: Add crushed red pepper flakes to the sauce for heat—just adjust to your spice preference!
-
Creamy Dream: Stir in a splash of heavy cream or a dollop of ricotta just before serving for a rich, creamy sauce.
-
Extra Veggies: Toss in bell peppers, spinach, or other veggies into the sauce—great for sneaking in some extra nutrition!
-
Zoodles: For a low-carb version, use spiralized zucchini instead of spaghetti!
Chef’s Notes: Personal Reflections
Growing up, my dad often insisted that the secret to a great sauce was patience. I’ve learned through the years that allowing the flavors to meld together makes all the difference. As I began experimenting, I incorporated more herbs for freshness and ended up creating a version of the sauce that I can proudly serve to friends and family alike.
And don’t worry about everything being perfect! One time, I mistakenly grabbed chili powder instead of olive oil while cooking. Surprisingly, it made for a deliciously smoky twist that I still replicate today. Cooking is about exploration, so don’t shy away from mistakes—they often lead to remarkable discoveries!
FAQs and Troubleshooting
1. Why did my sauce turn out too watery?
This can happen if there’s excess liquid in the canned tomatoes. To fix it, simmer the sauce uncovered to help it thicken or incorporate a bit of tomato paste.
2. My meat is tough; what did I do wrong?
It’s likely that the meat was cooked at too high a temperature or for too long. Aim for a medium heat and keep stirring to avoid overcooking.
3. How do I store leftovers?
Let the leftovers cool completely, then transfer them to an airtight container. They last in the fridge for 3-4 days or can be frozen for up to 3 months.
4. Can I make this sauce ahead of time?
Absolutely! The sauce actually tastes better the next day as the flavors develop. Just reheat it gently on the stovetop before serving.
Nutritional Info
While I believe the love you put into your food is just as important as the calories, here’s a rough estimate for one serving:
- Calories: 550
- Protein: 25g
- Carbohydrates: 75g
- Fat: 15g
Cooking spaghetti with meat sauce is not just about the ingredients; it’s about the stories, the memories, and the lovely moments shared at the table. I hope this recipe brings you as much joy as it has brought me, so grab that apron, pour yourself a glass of something bubbly, and enjoy every step of the process. Happy cooking!
PrintPerfect Spaghetti with Meat Sauce
A comforting and classic spaghetti with meat sauce recipe that brings warmth and nostalgia to your kitchen.
- Prep Time: 15 minutes
- Cook Time: 30 minutes
- Total Time: 45 minutes
- Yield: 4 servings
- Category: Main Course
- Method: Cooking
- Cuisine: Italian
- Diet: Non-Vegetarian
Ingredients
- Spaghetti
- Ground Beef or Sausage
- Onion, Chopped
- Garlic, Minced
- Canned Tomatoes (Crushed or Diced)
- Tomato Paste
- Italian Seasoning
- Salt
- Pepper
- Parmesan Cheese (Optional)
Instructions
- Start by boiling the spaghetti: Fill a large pot with salted water and bring it to a rolling boil. Toss in your spaghetti and set a timer based on package directions, typically 8-10 minutes. Stir occasionally.
- Sauté your aromatics: Heat a large skillet over medium heat and add olive oil. Once hot, add chopped onion and sauté for 3-5 minutes. Add minced garlic and cook for another minute.
- Cook the meat: Increase heat to medium-high and add ground beef or sausage. Brown evenly for about 5 minutes, stirring often.
- Add the tomatoes and seasonings: Once the meat is browned, add canned tomatoes and tomato paste, then sprinkle in Italian seasoning, salt, and pepper. Simmer for at least 15 minutes on low heat.
- Combine pasta and sauce: Reserve a cup of pasta water, then drain spaghetti. Add drained spaghetti to the sauce and toss to coat.
Notes
For extra flavor, let the sauce simmer longer than 15 minutes. Consider adding vegetables or trying variations like vegetarian options.
Nutrition
- Serving Size: 1 serving
- Calories: 550
- Sugar: 7g
- Sodium: 600mg
- Fat: 15g
- Saturated Fat: 5g
- Unsaturated Fat: 7g
- Trans Fat: 0g
- Carbohydrates: 75g
- Fiber: 5g
- Protein: 25g
- Cholesterol: 70mg
Keywords: spaghetti, meat sauce, Italian recipe, comfort food, family meal
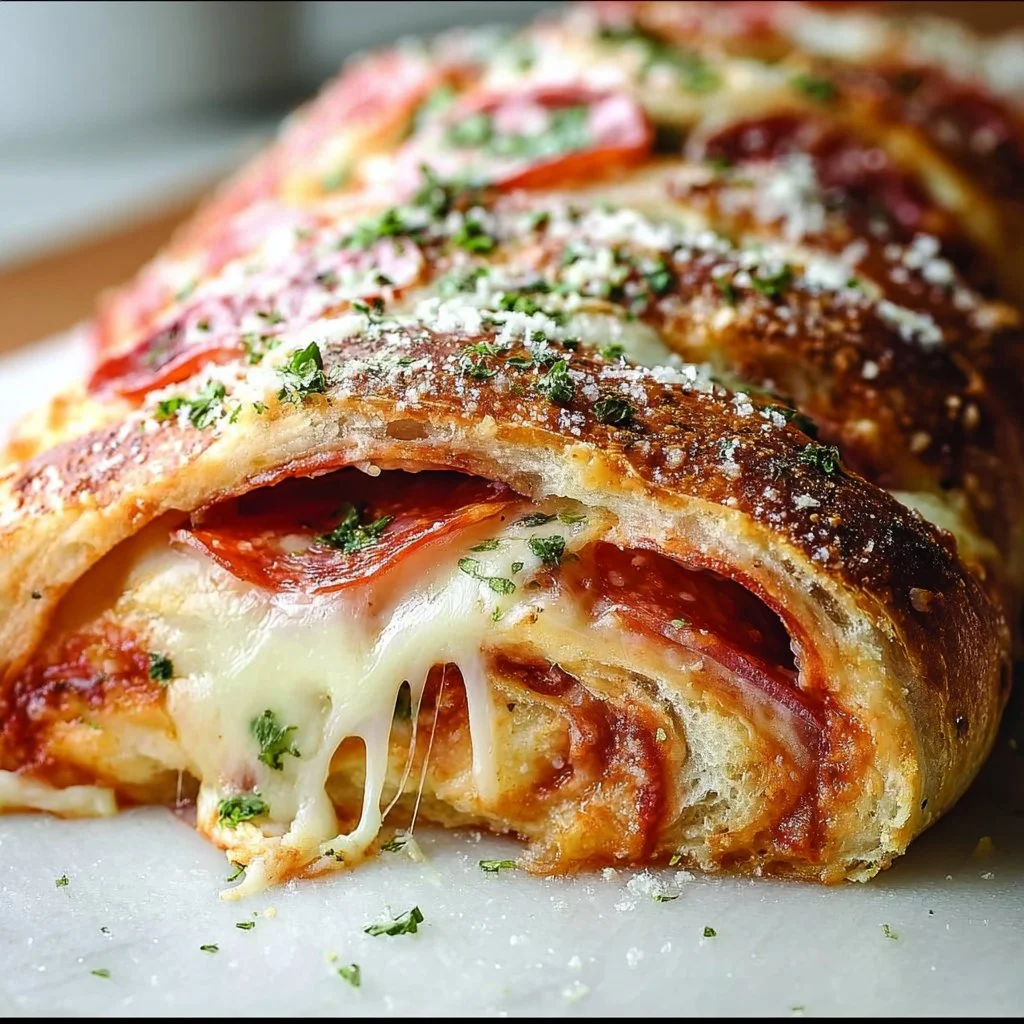
Easy Stromboli Dinner Recipe
Easy Stromboli Dinner Recipe: Your New Favorite Family Meal
Hello, my friends! Are you ready to roll up your sleeves and dive into a delightful dinner that’s not only easy to make but will also impress your family and friends? Today, I’m thrilled to share a scrumptious Easy Stromboli recipe that’s sure to become a staple in your kitchen. A delicious Italian favorite, Stromboli is a stuffed bread roll, perfect for any occasion—from cozy weeknight dinners to festive gatherings.
What I love most about Stromboli is its versatility. You can fill it with just about anything you have on hand, making it the perfect dish for using up leftovers or customizing to your taste. Imagine golden, flaky bread enfolding your favorite meats, cheeses, and veggies all melded together in a gooey, flavorful harmony. Plus, it’s a fun meal to make together with family or friends, turning cooking into a delightful experience rather than just a chore.
I remember the first time I made Stromboli—it was an impromptu dinner party for a few close friends. I had a houseful of giggles and stories, and I wanted to create something that felt festive yet easy. So, I rolled up some pizza dough with pepperoni, mozzarella, and a few hidden veggies, baked it until it was perfectly golden, and then allowed the delicious aromas to envelop us. The best part? Everyone got to enjoy tearing it apart and dipping it into marinara sauce as we shared stories around the table. Before I knew it, I was handed requests for the recipe and promises of Stromboli-themed dinner parties. And that, my friends, is how I knew I had struck gold.
Let’s bring that magic to your kitchen! Grab your apron, and let’s get ready to make your very own Easy Stromboli.
Personal Story
As a child, my family had a tradition of making homemade pizzas every Friday night. My mom would unwittingly become a kitchen magician, conjuring mouthwatering pies while dad handled the grill. I distinctly remember one Friday when we decided to mix things up and try making Stromboli instead. The kitchen was filled with laughter and the wafting smells of garlic and melting cheese. We set our toppings out like a mini buffet—pepperoni, green peppers, mushrooms, and yes, even some leftover meatball bits we couldn’t let go to waste!
As we rolled the dough, I marveled at how a simple mixture of ingredients could transform into something so delightful. Plus, I had the joy of creating my own masterpiece—one half with extra cheese, the other loaded with veggies. What I loved most was pulling it from the oven, the cheese bubbling with anticipation, and the satisfaction of breaking it apart for my siblings and friends. Those moments of warmth and connection around the dinner table stay with me to this day. Stromboli isn’t just food; it’s a way to bring people together—whatever the occasion may be!
Ingredients
Here’s what you’ll need to make your own Easy Stromboli:
-
Pizza Dough (1 pound)
The base of your Stromboli! You can use store-bought dough for convenience or make your own. If using pre-made dough, take it out of the fridge an hour before to come to room temperature. -
Mozzarella Cheese (1 cup, shredded)
The classic choice! Mozzarella melts beautifully, giving you that gooey texture we all crave. For a twist, you can substitute with provolone or a sharp cheddar. -
Pepperoni (1 cup, sliced)
A staple in many Stromboli recipes, but don’t feel limited! Swap it with some cooked Italian sausage, salami, or even turkey pepperoni if you’re aiming for a lighter option. -
Bell Peppers (1/2 cup, diced)
Sweet and colorful! Feel free to use any bell pepper variety—red, green, yellow, or orange. If you’re in the mood for something spicy, throw in some jalapeños! -
Onion (1/4 cup, diced)
For flavor depth, onions are fabulous. You could also caramelize them beforehand for an extra layer of sweetness or use scallions for a milder taste. -
Garlic (2 cloves, minced)
Because garlic makes everything better! If you’re feeling lazy, garlic powder can be a quick alternative. -
Olive Oil (1 tablespoon)
A splash of good-quality olive oil elevates the flavors. You might consider using infused oils like garlic or chili for a kick! -
Parmesan Cheese (1/4 cup, grated)
This isn’t crucial, but a sprinkle of Parmesan adds a lovely salty finish. If you’re out, any hard cheese can do! -
Italian Seasoning (1 teaspoon)
A mix of herbs like oregano, basil, and thyme. If you’re fresh out, feel free to use your favorite spice blend! -
Salt and Pepper (to taste)
Essential for balancing the flavors! Don’t skip adding them; flavor matters immensely.
Chef Insight:
Stromboli is remarkably forgiving! Feel free to experiment with your favorite ingredients or even change up the seasoning according to what you’re in the mood for. It’s all about making it delicious and your own!
Step-by-Step Instructions
Now, let’s dive into the fun part—making your Easy Stromboli! Follow these steps, and you’ll have a delicious dinner in no time:
Step 1: Preheat the Oven
First things first, preheat your oven to 400°F (200°C). This gives us a delightful, crispy crust, ensuring that all that gooey melted cheese is sealed beautifully inside.
Step 2: Prepare Your Dough
Roll out your pizza dough on a well-floured surface into a rectangle. Aim for about 12×15 inches or so, but don’t stress over this. You want it thin enough to hold the filling but thick enough to prevent it from tearing.
Step 3: Add Olive Oil and Seasoning
Brush your rolled-out dough with 1 tablespoon of olive oil. This isn’t just for flavor; it also helps in achieving that lovely golden color. Sprinkle your Italian seasoning, salt, and pepper evenly over the dough.
Step 4: Layer Your Ingredients
Now for the fun part! Start from one of the short ends of your rectangle. Layer on mozzarella cheese, followed by pepperoni, bell peppers, onions, and finally, sprinkle some minced garlic over the top. The key is to keep the fillings about an inch away from the edges to prevent any spillage when rolling!
Step 5: Roll it Up
Starting from the filled end, roll the dough tightly but gently. You want it snug, but don’t rush; being too forceful can cause the dough to tear. Once you reach the end, pinch the seams to seal it up. If you’ve got any edges hanging out, no worries—just fold those in like tucking a burrito.
Step 6: Bake the Stromboli
Place your Stromboli seam side down on a parchment-lined baking sheet. For extra flair (and flavor!), brush a little more olive oil on top and sprinkle with Parmesan cheese. Make a few small diagonal slashes on top with a sharp knife. This helps the steam escape and gives it those lovely golden stripes!
Step 7: Bake to Perfection
Pop your Stromboli into the oven and let it bake for 25-30 minutes, until golden brown and the cheese is gooey. Keep an eye on it in the last few minutes; ovens can vary!
Step 8: Cool and Slice
Once your Stromboli is golden, remove it from the oven and let it cool for about 5-10 minutes. This is crucial—cutting it too soon can unleash a cheesy eruption! Then, slice it into thick pieces and get ready for the feast.
Chef Tip:
To help the cheese stay within the Stromboli, you can add a thin layer of tomato sauce (cooled) before layering the cheese and toppings. Just be careful not to get too wild with the sauce to avoid soggy bread.
Serving Suggestions
When it comes to serving your Easy Stromboli, simplicity is key! Arrange the slices on a large platter, making them visually captivating. Pair it with a delightful marinara or a homemade garlic dipping sauce—both add a great touch. A fresh side salad or a simple arugula salad drizzled in olive oil and lemon juice balances the meal perfectly. Lay out some napkins and let everyone dive in!
Recipe Variations
Now, it’s time to get creative! Here are a few delicious twists you could explore with your Stromboli:
-
Veggie Lovers’ Delight: Load it up with all kinds of vegetables! Spinach, mushrooms, olives, and zucchini make for superb additions.
-
BBQ Chicken Stromboli: Start with shredded rotisserie chicken slathered in your favorite BBQ sauce, along with red onions and cheddar cheese.
-
Buffalo Chicken Style: Mix shredded chicken with buffalo sauce and top with blue cheese crumbles for a flavorful kick.
-
Caprese Style: Fill with fresh mozzarella, tomatoes, and basil, drizzling balsamic glaze before baking for an Italian classic twist.
-
Breakfast Stromboli: Swap traditional fillings with scrambled eggs, crumbled sausage, and cheddar cheese for a fun breakfast variant!
Chef’s Notes
I cherish how adaptable Stromboli is. Over the years, I’ve fueled my creativity here—from classic meats and cheeses to experimenting with global flavors. A notable story comes to mind: one evening, I tried a tropical island-inspired version, incorporating ham, pineapple, and a hint of teriyaki sauce! We laughed over our “Hawaiian Stromboli” and vowed to bring it back for a future dinner party.
Stromboli truly embodies the spirit of home cooking—always flexible, easily shared, and made with love. There’s something therapeutic about rolling dough, stuffing it full of ingredients, and watching it bake to golden perfection!
FAQs and Troubleshooting
Q1: Can I make Stromboli ahead of time?
A1: Absolutely! You can prepare the Stromboli and roll it up, cover it tightly with plastic wrap, and refrigerate for up to 24 hours before baking.
Q2: What should I do if my dough tears?
A2: Don’t panic! Simply patch it with a little extra dough or gently press it together. It won’t affect the flavor!
Q3: How do I freeze leftover Stromboli?
A3: Wrap it tightly in aluminum foil or plastic wrap after it’s cooled and freeze for up to three months. To reheat, unwrap, place in a preheated oven at 350°F (175°C), and heat until warmed through.
Q4: My Stromboli is soggy—what did I do wrong?
A4: This might be caused by too much filling or sauce. Make sure to adjust the amount of wet ingredients and let your fillings cool before assembling.
Nutritional Info
While the nutritional details may vary depending on the ingredients used, a serving of homemade Stromboli is typically around:
- Calories: 350-450 (varies based on fillings)
- Carbohydrates: 40g
- Protein: 15g
- Fat: 15-20g
- Fiber: 2g
Eating good food isn’t just about the calories; it’s about the experience and the joy it brings!
And there you have it! This Easy Stromboli recipe is your gateway to a world of culinary creativity and warm gatherings. Remember, it’s not just about feeding the stomach; it’s about filling hearts with love and laughter. Now, let’s get cooking!
PrintEasy Stromboli Dinner

A delicious Italian stuffed bread roll filled with pepperoni, mozzarella, and veggies, perfect for cozy dinners or festive gatherings.
- Prep Time: 15 minutes
- Cook Time: 30 minutes
- Total Time: 45 minutes
- Yield: 4 servings 1x
- Category: Main Course
- Method: Baking
- Cuisine: Italian
- Diet: Non-Vegetarian
Ingredients
- 1 pound Pizza Dough
- 1 cup Mozzarella Cheese, shredded
- 1 cup Pepperoni, sliced
- 1/2 cup Bell Peppers, diced
- 1/4 cup Onion, diced
- 2 cloves Garlic, minced
- 1 tablespoon Olive Oil
- 1/4 cup Parmesan Cheese, grated
- 1 teaspoon Italian Seasoning
- Salt and Pepper, to taste
Instructions
- Preheat the oven to 400°F (200°C).
- Roll out the pizza dough on a floured surface into a rectangle.
- Brush the dough with olive oil and sprinkle with Italian seasoning, salt, and pepper.
- Layer mozzarella cheese, pepperoni, bell peppers, onions, and garlic on the dough.
- Roll the dough tightly from the filled end and pinch the seams to seal.
- Place it seam side down on a parchment-lined baking sheet.
- Brush with olive oil, sprinkle with Parmesan, and make diagonal slashes on top.
- Bake for 25-30 minutes until golden brown and cheese is gooey.
- Cool for 5-10 minutes before slicing.
Notes
For a twist, mix up the fillings with your favorite ingredients or add a layer of cooled tomato sauce before the cheese.
Nutrition
- Serving Size: 1 serving
- Calories: 400
- Sugar: 2g
- Sodium: 800mg
- Fat: 20g
- Saturated Fat: 8g
- Unsaturated Fat: 10g
- Trans Fat: 0g
- Carbohydrates: 40g
- Fiber: 2g
- Protein: 20g
- Cholesterol: 50mg
Keywords: stromboli, easy dinner, Italian recipe, family meal, stuffed bread
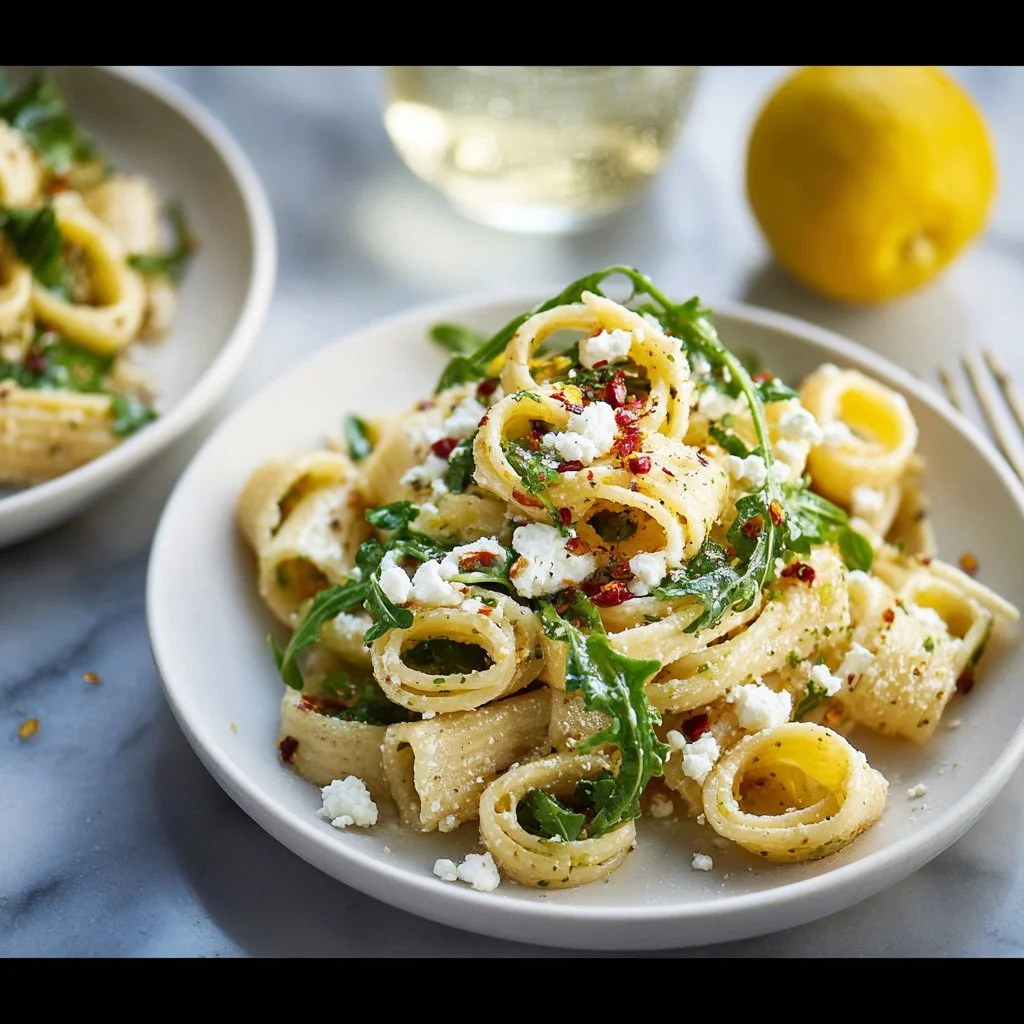
Lemon Ricotta Pasta With Arugula
# Lemon Ricotta Pasta with Arugula: A Bright and Creamy Delight

## Introduction

Ah, pasta! Is there anything more comforting and delightful? It’s a dish that brings people together, whether it’s a cozy family dinner on a weeknight or an elegant dinner party. Today, I am thrilled to share with you my recipe for **Lemon Ricotta Pasta with Arugula** — a dish that perfectly fuses brightness and creaminess while keeping things beautifully simple.

I always love to create recipes that elevate everyday meals, and this one is no exception. Imagine buttery, rich ricotta paired with the zesty brightness of lemon and the peppery flair of arugula — it's like a summer picnic on your plate! Plus, this dish comes together in about 20 minutes, so it's perfect for those busy weeknights when you still want to prepare something special.

One of my favorite things about cooking is that it’s all about sharing stories and experiences. This pasta is rooted in both nostalgia and innovation. The simplicity of the ingredients allows for endless variations, making it an ever-evolving classic in my kitchen.

Let’s dive into the world of Lemon Ricotta Pasta with Arugula, and I promise you’ll be feeling like a kitchen superstar in no time!

## Personal Story

I can still remember the first time I made this pasta dish. I was hosting a small gathering for friends on a sunny Saturday afternoon, and I wanted to create a meal that felt just as light and refreshing as the weather outside. As I grabbed ingredients from my fridge, I spotted a tub of creamy ricotta cheese and a few lemons I had been saving for a special occasion.

That inspired the entire meal! With a pot of boiling water and a few quick strokes, the magic began. As my friends arrived, the aroma of lemon mingling with fresh herbs filled my kitchen. That gathering was unforgettable—not just for the food but for the laughter, stories, and memories we shared. Since that day, Lemon Ricotta Pasta has become a go-to recipe in my household, especially for warm evenings when the sun is setting and good company is nearby.

## Ingredients

To make this vibrant dish, you’ll need the following ingredients:

- **1 lb short pasta (like penne or rigatoni)**: These shapes hold on to the creamy sauce beautifully. If you're gluten-free, feel free to substitute with your favorite gluten-free pasta.

- **1 cup whole milk ricotta cheese**: The star of this dish! Opt for whole milk for that rich, creaminess, but part-skim works if you're watching your calories.

- **1 cup finely grated Parmesan or Pecorino**: Adds a savory depth. If you’re dairy-free, you can use nutritional yeast for a cheesy flavor.

- **1 tablespoon freshly grated lemon zest**: This brightens up the dish and provides a delightful citrus aroma.

- **¼ cup fresh lemon juice from 1-2 lemons, plus extra wedges for serving**: Fresh is key here! Bottled lemon juice can't quite capture that bright flavor.

- **2 cups arugula**: Adding this peppery green brings a fresh, vibrant finish. Spinach can work as a mild substitute if you’re not a fan of the peppery taste.

- **Chili flakes for serving**: This adds a fantastic kick! If you'd rather not have heat, simply skip it or use a sprinkle of black pepper.

- **Salt and black pepper to taste**: Essential for flavoring.

- **Olive oil for serving**: Drizzling a bit of quality olive oil on top enhances the richness of the dish.

- **Thinly sliced or torn basil leaves for serving (optional)**: Fresh basil takes this dish up a notch with its aromatic and sweet flavor.

## Step-by-Step Instructions

Let’s get cooking! Follow these steps to create a delightful bowl of Lemon Ricotta Pasta with Arugula.

1. **Bring a Large Pot of Water to a Boil**
   Fill a big pot with water and add a generous pinch of salt. Bring it to a rolling boil, then add your pasta. Salt is key here; it helps infuse flavor into the pasta.

2. **Cook the Pasta**
   Toss in the short pasta, stirring occasionally. Cook it according to package instructions until it’s al dente—usually about 8-10 minutes. Make sure to taste a piece; you want it firm and slightly chewy!

3. **Reserve Pasta Water**
   Right before you drain the pasta, carefully scoop out about 1 cup of the starchy pasta cooking water using a measuring cup. This water is liquid gold; it'll help create a luscious sauce later!

4. **Drain the Pasta**
   Drain the cooked pasta in a colander, but don't rinse it! You want the starch to help the sauce cling to each noodle.

5. **Mix the Ricotta and Lemon Juice**
   In a large mixing bowl, combine the ricotta cheese and lemon juice. Stir until smooth. The lemon juice will bring brightness, and the creamy ricotta will make the dish luxurious.

6. **Combine Pasta and Sauce**
   Add the hot, drained pasta into the bowl with the ricotta and lemon mixture. Toss everything together, blending the flavors. If it seems too thick, gradually add the reserved pasta water until you reach your desired creaminess.

7. **Stir in Lemon Zest and Arugula**
   Gently fold in the lemon zest and arugula. The arugula will wilt slightly from the heat of the pasta, giving the dish a fresh, vibrant bite. Season generously with salt and pepper, adjusting to your taste.

8. **Plate It Up!**
   Serve immediately! Divide the pasta onto plates or bowls. Drizzle with olive oil and a sprinkle of extra cheese and chili flakes for that perfect finishing touch. If you’ve got fresh basil, toss some torn leaves on top for a fragrant garnish.

## Serving Suggestions

For the perfect presentation, pile the creamy pasta into shallow bowls, allowing the arugula to peek through. Gently drizzle with olive oil and a sprinkle of Parmesan. Serve with fresh lemon wedges on the side for those who want an extra burst of citrus. It looks beautiful and feels inviting, promising that each bite will be delicious!

## Recipe Variations

- **Add Protein**: Toss in cooked shrimp or grilled chicken for a heartier meal.
- **Veggie Boost**: Add sautéed zucchini or roasted cherry tomatoes for a burst of color and flavor.
- **Herb Mix**: Try fresh parsley or dill instead of basil for a different spin, or combine herbs for a fragrant touch.
- **Spice It Up**: Experiment with smoked paprika for a deeper flavor, or add capers for a tangy kick!
- **Nutty Twist**: For a crunchy texture, sprinkle some toasted pine nuts or walnuts on top right before serving.

## Chef’s Notes

This recipe started as a simple weeknight meal for me, but over time, it has evolved into a guest favorite! I remember one time, in a rush to impress my friends, I accidentally added too much lemon zest. While I held my breath waiting for their reaction, they all said it was the best version of the dish yet! So, the moral here is to embrace the happy accidents because they may just lead to new favorites in the kitchen.

## FAQs and Troubleshooting

**1. What if my pasta is too sticky?**
If your pasta clumps together, it might have exceeded its cooking time or didn’t have enough water while cooking. Next time, remember to stir occasionally while boiling and add a bit more pasta water to loosen the sauce before serving.

**2. Can I make this recipe ahead of time?**
Yes, you can! Prepare the pasta and sauce separately and store them in the fridge. When you’re ready to serve, simply reheat and combine.

**3. What if I can't find ricotta cheese?**
No ricotta? No problem! You can substitute with creamy cottage cheese or almond cream cheese for a dairy-free option. Just be mindful that the texture may vary slightly.

**4. Is this dish good for meal prep?**
Absolutely! Take advantage of meal prep by making a batch on the weekend. Just store the pasta securely in the fridge and enjoy it throughout the week—even cold in salads!

## Nutritional Info

This dish is not only satisfying but also packed with nutrients! Each serving provides a good balance of carbohydrates, protein from the cheese, and healthy fats from the olive oil. Plus, the fresh arugula adds beneficial vitamins and minerals.

---

There you have it! My beloved Lemon Ricotta Pasta with Arugula, a dish that's as elegant as it is comforting. So, grab your apron, gather your ingredients, and let’s make some delicious memories in the kitchen!
Lemon Ricotta Pasta with Arugula
A bright and creamy pasta dish that fuses the richness of ricotta with the zestiness of lemon and peppery arugula for a delightful meal.
- Prep Time: 10 minutes
- Cook Time: 10 minutes
- Total Time: 20 minutes
- Yield: 4 servings 1x
- Category: Pasta
- Method: Boiling
- Cuisine: Italian
- Diet: Vegetarian
Ingredients
- 1 lb short pasta (like penne or rigatoni)
- 1 cup whole milk ricotta cheese
- 1 cup finely grated Parmesan or Pecorino
- 1 tablespoon freshly grated lemon zest
- ¼ cup fresh lemon juice from 1-2 lemons, plus extra wedges for serving
- 2 cups arugula
- Chili flakes for serving
- Salt and black pepper to taste
- Olive oil for serving
- Thinly sliced or torn basil leaves for serving (optional)
Instructions
- Bring a large pot of water to a boil.
- Cook the pasta according to package instructions until al dente, about 8-10 minutes.
- Reserve about 1 cup of pasta cooking water.
- Drain the pasta in a colander, without rinsing.
- Mix the ricotta cheese and lemon juice in a large mixing bowl until smooth.
- Combine the hot pasta with the ricotta mixture, adding reserved pasta water to reach desired creaminess.
- Stir in the lemon zest and arugula, seasoning with salt and pepper to taste.
- Plate and serve immediately, drizzling with olive oil and adding cheese and chili flakes as desired.
Notes
For a heartier meal, add cooked shrimp or grilled chicken. For a veggie boost, consider sautéing zucchini or adding roasted cherry tomatoes.
Nutrition
- Serving Size: 1 serving
- Calories: 450
- Sugar: 2g
- Sodium: 350mg
- Fat: 15g
- Saturated Fat: 4g
- Unsaturated Fat: 9g
- Trans Fat: 0g
- Carbohydrates: 60g
- Fiber: 3g
- Protein: 18g
- Cholesterol: 30mg
Keywords: pasta, lemon, ricotta, arugula, vegetarian, quick meal, Italian, comfort food