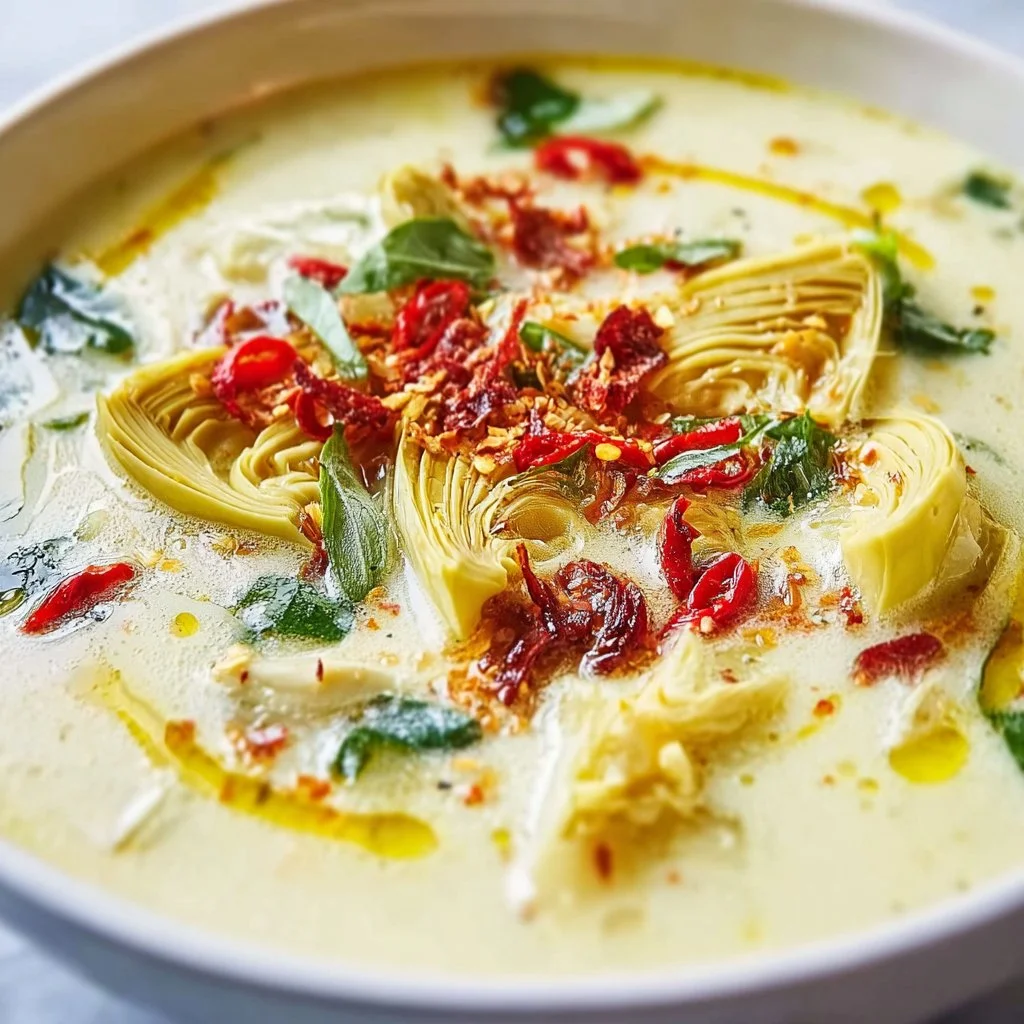
Creamy Lemony Tuscan Artichoke Soup for Ultimate Comfort
Creamy Lemony Tuscan Artichoke Soup for Ultimate Comfort
Hello, fellow food enthusiasts! Today, we’re diving into a bowl of warm and deliciousness that’s perfect for those chilly evenings or whenever you’re in need of a little culinary comfort. Trust me, there’s something utterly magical about a creamy soup that envelops you in warmth and love, and this Creamy Lemony Tuscan Artichoke Soup is no exception.
Imagine walking into a cozy kitchen, the ambiance filled with the rich aroma of sautéed vegetables mingling perfectly with the zestiness of lemon. You close your eyes, take a deep breath, and instantly feel transported to a sun-kissed Italian villa, surrounded by lush greenery and the sweet sound of laughter echoing around the dinner table. Yep, that’s the kind of vibe we’re going for today!
I created this recipe to capture that essence — the elegance of Tuscan flavors balanced with a creamy, comforting finish. The creamy texture is so satisfying, and the tang of lemon brightens everything up, leaving you feeling refreshed and delighted.
Gathering around the table with friends and family over a steaming bowl of this artichoke soup creates a beautiful moment, reminding us how food brings us together. And don’t worry — you don’t need any fancy culinary skills to make this dish shine! With a few simple ingredients and a bit of love, you’ll have a stunning centerpiece worthy of any dinner party or cozy family meal.
So, grab your apron, and let’s embark on this culinary adventure together! Trust me, once you try this soup, it’ll become a beloved staple in your kitchen.
Personal Story
This soup recipe takes me back to my childhood, where my grandmother would whip up her version of creamy soup during the colder months. She was a master at combining flavors, and her kitchen was the heart of the home. I remember sneaking in while she was fussing over the stove, the delightful smell wrapping around me like a warm hug.
One chilly autumn afternoon, I asked her how she made her soup so comforting. She simply smiled and whispered, "It’s all about the love and good ingredients, dear." Those words have stuck with me, and I try to infuse them into everything I create in the kitchen.
Fast forward to today, and I’ve taken inspiration from her comforting techniques and my love for Tuscan cuisine. This Creamy Lemony Tuscan Artichoke Soup is my tribute to her culinary wisdom. Each spoonful feels like a warm embrace, reminiscent of those simple moments spent in her kitchen. I hope it brings you as much joy as it continues to bring me when I serve it to friends and family!
Ingredients
Here’s what you’ll need to create this delightful soup:
-
2 tablespoons Extra-Virgin Olive Oil
A key player for its rich flavor, but feel free to swap it out with avocado oil if you prefer a neutral taste. -
1 large Yellow Onion, diced
Adds a sweet base flavor. If you want a milder profile, you can use shallots instead. -
2 stalks Celery, sliced
Provides a lovely crunch and freshness. If you’re not a fan of celery, feel free to substitute it with bell peppers for a sweet flavor! -
2 medium Carrots, peeled and sliced
They lend a subtle sweetness. Alternatively, feel free to experiment with parsnips for a slightly earthier taste. -
3 cloves Fresh Garlic, chopped
A must-have for that aromatic kick! Garlic powder works in a pinch, but nothing beats fresh garlic’s vibrant flavor. -
1/2 teaspoon Red Pepper Flakes
A little heat to elevate the flavors! Adjust it to your liking, or omit it if you’d prefer a milder soup. -
2 medium Potatoes, peeled and diced into 1/2-inch cubes
Yukon Gold gives a creamy texture, but sweet potatoes can add a unique sweetness if that’s more your style. -
1 can Artichoke Hearts, drained
These beauties add that distinct, tangy flavor. Frozen artichoke hearts are a great substitute if you can’t find canned. -
1/2 cup Sun-Dried Tomatoes, chopped
They bring an intense burst of flavor. In a pinch, you can also use tomato paste for simplicity. -
2 tablespoons Capers, drained
For a briny kick! If you’re looking for a subtler flavor, skip them altogether. -
4 cups Chicken Bone Broth
A rich base that adds depth. If you need a vegetarian option, vegetable broth works beautifully, too. -
1/2 cup Milk of Choice
Regular or plant-based milk works here. Coconut milk adds a delightful creaminess too if you want a tropical twist. -
2 tablespoons Arrowroot Powder
This acts as a thickening agent. Cornstarch is an effective alternative in most cases. -
1 tablespoon Fresh Lemon Juice
Brightens up the flavor! Lime juice can work as a lovely substitute if you’re feeling adventurous. -
1 teaspoon Lemon Zest
For that extra zing! Orange zest can be a nice alternative if you’re in the mood for something a bit different. -
to taste Sea Salt
Salt is essential for enhancing flavors, adjust based on your dietary needs. -
to taste Black Pepper
A little spice! Again, adjust this to your preference. -
1 cup Freshly Chopped Kale or Spinach
Tons of nutrients packed into this leafy goodness! If you aren’t a fan, Swiss chard can serve as a great alternative. -
1/4 cup Freshly grated Parmesan cheese
It’s the perfect finishing touch! For a dairy-free option, vegan cheese alternatives work great. -
1 whole Lemon wedges (for serving)
A zesty accent when it’s time to dig in! -
to taste Red pepper flakes (for added flavor and presentation)
Step-by-Step Instructions
Now that we have our ingredients prepped, it’s time to cook! Here’s how to create this creamy masterpiece step-by-step:
-
Sauté the Base
In a large pot, heat the olive oil over medium heat. Once it’s shimmering, add the onion and cook until it’s translucent, about 5 minutes. This will create a sweet aromatic base for your soup! You want to soften the onions beautifully without browning them. Stir occasionally, and let that aroma fill your kitchen! -
Add Aroma Builders
Toss in the celery, carrots, and garlic. Cook for an additional 5-7 minutes until the vegetables have softened, and your kitchen smells divine! Here’s a pro tip: when you add the garlic, stir continuously for about 1 minute. Garlic can burn quickly; we want that perfect fragrant golden hue. -
Spice It Up
Sprinkle in the red pepper flakes and stir for about 30 seconds — it’s just enough time for the spices to bloom and infuse their flavors into the veggies. Don’t shy away if you love heat; feel free to add a tad more! -
Include the Potatoes
Dump in your diced potatoes and give it a good stir. Let everything combine beautifully for a minute. This will help the potatoes soak up all those delightful flavors. -
Artichokes and Tomatoes, Oh My!
Next up, your artichoke hearts and sun-dried tomatoes! Stir them into the mixture and let them mingle for just a couple of minutes. They will add that essential Tuscan flair to the soup. -
Pour in the Broth
Now it’s time for the main liquid star — the chicken bone broth! Pour it in, turn the heat to high, and bring it to a gentle boil. Once boiling, reduce it to a simmer and cover the pot. Let that soup bubble away for about 15-20 minutes until the potatoes are tender. Here’s a little chef hack: poke a potato cube with a fork; if it slides off easily, it’s ready! -
Blend It Up
Once all the veggies are soft, remove the pot from the heat. If you want a creamy consistency, use an immersion blender directly in the pot to blend everything together until smooth. If you don’t have an immersion blender, carefully transfer the soup (in batches) to a regular blender. Just ensure you don’t fill it to the brim as it can get a little messy! Return it to the pot afterward. -
Finishing Touches
Stir in the milk of your choice, and let the soup heat over low heat for a few minutes while you whisk in the arrowroot powder mixed with a splash of water. This will help thicken the soup and give it that luxurious, creamy texture. Season with the lemon juice, lemon zest, sea salt, and black pepper to taste. Taste test — this is when you can adjust those flavor profiles; maybe you want it zippier with more lemon juice or saltier with a pinch more! -
Greens Galore
Finally, fold in the chopped kale or spinach until it wilts. It adds a lovely brightness to the soup, making it feel fresh and vibrant! -
Serve and Enjoy
Ladle the soup into bowls, sprinkle with Parmesan cheese, and add a squeeze of fresh lemon for that zesty punch. Finish it off with a sprinkle of red pepper flakes for extra flair. Voila! You have a warm bowl of creamy Tuscan artichoke soup that’s ready to impress.
Serving Suggestions
When it comes to plating your soup, simplicity is key! Serve it in colorful bowls that accentuate the beautiful creamy hue of the soup. You can add some crusty bread for dipping alongside it — think garlic bread or a freshly baked sourdough loaf. The contrast of the warm, crusty bread and the smooth soup makes for an unbeatable combo. Don’t forget the lemon wedges on the side for that extra zest when serving!
Recipe Variations
Want to mix things up a bit? Here are some creative twists on this classic recipe:
-
Spicy Spin
Add diced jalapeños or a few dashes of hot sauce in with the garlic for a spicy kick. -
Herbaceous Delight
Fresh herbs like rosemary or thyme can enhance the flavors beautifully. Toss in some chopped herbs towards the end of cooking for a burst of freshness. -
Proteins Galore
Want to make it heartier? Add shredded rotisserie chicken or white beans for added protein to make it even more filling. -
Dairy-Free Dreams
Substitute the milk with coconut milk for a richer flavor, perfect for tropical vibes. -
Cheesy Goodness
Stir in some cream cheese or a splash of heavy cream before blending for an extra creamy soup.
Chef’s Notes
As I’ve worked on perfecting this recipe, I’ve discovered it’s all about layering flavors and keeping it simple yet elegant. The first time I made this soup for a gathering, I was nervous about whether it would impress my guests. But watching them savor each bite and hearing the compliments was priceless! It’s that delightful feeling of knowing you’ve created something truly special from simple ingredients.
And hey, if you ever find yourself with extra soup, no worries! This soup freezes beautifully, so it’s a perfect meal prep option for hectic weeks. Just seal it in an airtight container, and you’ll have a comforting meal waiting for you.
FAQs and Troubleshooting
1. Can I make this soup ahead of time?
Absolutely! This soup tastes even better the next day after the flavors have had time to meld. Store it in an airtight container in the fridge for up to 4 days or freeze for longer storage.
2. What if my soup is too thick?
If you find your soup has thickened too much while storing or cooking, just add a bit of broth or water while reheating to reach your desired consistency!
3. Can I blend the soup if I like some texture?
Of course! If you prefer a chunky soup, blend only half of it and leave the other half intact. This way, you can enjoy both a creamy base and the texture of the veggies.
4. What can I serve alongside the soup?
You can pair this soup with a light salad, a simple cheese platter, or that glorious crusty bread we talked about. It’s versatile, satisfying, and oh-so-delicious!
Nutritional Info (Optional)
While nutritional values may vary based on ingredient choices, here’s a rough breakdown per serving of this delightful soup (based on six servings):
- Calories: 250
- Protein: 6g
- Carbohydrates: 34g
- Fat: 10g
- Fiber: 5g
Enjoying what’s good for you while also indulging in flavor? Now, that’s a win-win!
And there you have it — your ultimate guide to making a delicious Creamy Lemony Tuscan Artichoke Soup full of flavor and warmth. Grab that apron, summon your inner chef, and let’s create some culinary magic in the kitchen! Happy cooking!
PrintCreamy Lemony Tuscan Artichoke Soup

A warm and delicious creamy soup infused with the flavors of Tuscany and a hint of lemon, perfect for chilly evenings.
- Prep Time: 15 minutes
- Cook Time: 30 minutes
- Total Time: 45 minutes
- Yield: 6 servings 1x
- Category: Soup
- Method: Stovetop
- Cuisine: Italian
- Diet: Vegetarian
Ingredients
- 2 tablespoons Extra-Virgin Olive Oil
- 1 large Yellow Onion, diced
- 2 stalks Celery, sliced
- 2 medium Carrots, peeled and sliced
- 3 cloves Fresh Garlic, chopped
- 1/2 teaspoon Red Pepper Flakes
- 2 medium Potatoes, peeled and diced into 1/2-inch cubes
- 1 can Artichoke Hearts, drained
- 1/2 cup Sun-Dried Tomatoes, chopped
- 2 tablespoons Capers, drained
- 4 cups Chicken Bone Broth
- 1/2 cup Milk of Choice
- 2 tablespoons Arrowroot Powder
- 1 tablespoon Fresh Lemon Juice
- 1 teaspoon Lemon Zest
- to taste Sea Salt
- to taste Black Pepper
- 1 cup Freshly Chopped Kale or Spinach
- 1/4 cup Freshly grated Parmesan cheese
- 1 whole Lemon wedges (for serving)
- to taste Red pepper flakes (for added flavor and presentation)
Instructions
- Sauté the Base: In a large pot, heat the olive oil over medium heat. Add the onion and cook until it’s translucent, about 5 minutes.
- Add Aroma Builders: Toss in the celery, carrots, and garlic. Cook for an additional 5-7 minutes.
- Spice It Up: Sprinkle in the red pepper flakes and stir for about 30 seconds to bloom the spices.
- Include the Potatoes: Dump in your diced potatoes and stir well.
- Artichokes and Tomatoes: Stir in the artichoke hearts and sun-dried tomatoes, cooking for a couple of minutes.
- Pour in the Broth: Add the chicken bone broth and bring it to a gentle boil. Reduce to a simmer and cover, cooking for about 15-20 minutes until the potatoes are tender.
- Blend It Up: Remove from heat and blend until smooth using an immersion blender or regular blender.
- Finishing Touches: Stir in the milk and arrowroot powder mixed with water, season with lemon juice, lemon zest, salt, and black pepper.
- Greens Galore: Fold in the chopped kale or spinach until wilted.
- Serve and Enjoy: Ladle into bowls, sprinkle with Parmesan cheese, and add a squeeze of fresh lemon.
Notes
This soup freezes beautifully, making it a great meal prep option.
Nutrition
- Serving Size: 1 serving
- Calories: 250
- Sugar: 4g
- Sodium: 600mg
- Fat: 10g
- Saturated Fat: 2g
- Unsaturated Fat: 5g
- Trans Fat: 0g
- Carbohydrates: 34g
- Fiber: 5g
- Protein: 6g
- Cholesterol: 5mg
Keywords: artichoke soup, creamy soup, Italian soup, vegetarian, comfort food

Creamy Cabbage Carbonara
# Creamy Cabbage Carbonara: A Twist on Tradition

**Introduction**

Hello, my lovely food enthusiasts! Today, I’m super excited to share a recipe that beautifully blends comfort with creativity: Creamy Cabbage Carbonara. If you've ever made a classic carbonara, you know just how luxurious that dish can be. But what if we could give it a little twist that brings a burst of freshness, and makes it even more approachable for weeknight dinners? Enter cabbage! It's often overlooked when crafting pasta dishes, but I promise, this leafy green packs a delicious punch, turning a traditional carbonara into something exciting and new!

Picture this: a creamy, hearty bowl of pasta brought to life with the subtle sweetness of sauteed cabbage and the savory goodness of crispy bacon. You get that rich, silky sauce coating every strand of pasta, while the cabbage adds a bit of crunch and flavor that's simply irresistible. It's one of those meals that will not only fill your belly but also warm your heart. Plus, it's a great way to sneak in some veggies without losing out on the comfort factor we all love in our pasta dishes!

As we delve into this delicious recipe, I've got some fun stories and tips to share that’ll make your cooking experience smooth and enjoyable. Whether you're hosting friends or just cooking for yourself, this dish is a perfect addition to your weeknight repertoire. So grab your apron, perhaps pour yourself a glass of something sparkling, and let’s dive into the world of Creamy Cabbage Carbonara!

---

**Personal Story**

I remember a time, not too long ago, when I had a few friends over for an impromptu dinner. The kind of gathering that happens spontaneously over a glass of wine. As we chatted and caught up, I realized I was missing a main course. Down to the kitchen I dashed, rifling through my cabinets. I had some spaghetti, bacon on hand, and a head of cabbage that had been sitting in the fridge quietly, hoping for its moment in the limelight.

With a sprinkle of this and a dash of that, I created a creamy pasta dish that, believe it or not, left everyone asking for the recipe. It was a hit! That lovely evening sparked the idea for this very dish. It’s amazing how the simplest ingredients can whip up an unforgettable meal and create lasting memories. Ever since, it’s been a staple in my kitchen, a trusty dish that never fails to impress!

---

**Ingredients**

Let’s gather our ingredients! You’ll need a few simple components for this delicious Creamy Cabbage Carbonara. Here’s what you’ll need:

- **1 small head of cabbage, chopped**
  Cabbage is the star of this dish! You can use green or savoy cabbage for a slightly different texture. If you're in a pinch, collard greens or kale can work too.

- **4 slices of bacon, diced**
  Bacon adds that delicious smoky flavor! If you're looking for a lighter option, turkey bacon or even crispy pancetta can be a great option.

- **1 cup grated Parmesan cheese**
  This cheesy goodness is what makes the sauce creamy and rich. Pecorino Romano is a fantastic substitute if you're after a sharper flavor.

- **2 eggs**
  The eggs give the carbonara its luscious creaminess. You can use just the yolks for a richer dish, or heavy cream for a different twist.

- **Salt and pepper to taste**
  Essential for seasoning. I recommend using sea salt and freshly ground black pepper for optimal flavor.

- **Olive oil**
  A good drizzle helps sauté the cabbage and bacon. For a change, you could use avocado oil or even a flavored olive oil for an added twist.

- **Garlic, minced (optional)**
  Garlic adds that beautiful aromatic touch. For a milder taste, consider using roasted garlic instead.

- **Red pepper flakes (optional)**
  If you like a bit of heat, throw in some red pepper flakes! This is entirely up to your spice preference.

---

**Step-by-Step Instructions**

Ready to whip up this delicious Creamy Cabbage Carbonara? Let’s get cooking! Follow these steps, and trust me, you’ll have a meal that’s not just pleasing to the eye but also to the palate.

1. **Cook the Bacon**:
   In a large skillet, heat a drizzle of olive oil over medium heat. Add the diced bacon and cook until crispy, about 5–7 minutes. Keep an eye on it; we want it crispy but not burnt! Once it’s done, use a slotted spoon to transfer the bacon to a plate lined with paper towels. This allows it to drain excess fat while maintaining its crispiness.

2. **Sauté Cabbage**:
   With the bacon fat still in the skillet for flavor, add your chopped cabbage to the pan. Stir it around, allowing the cabbage to cook for about 5–7 minutes until it softens and gets a lovely golden color. If you’re using garlic, toss that in during the last minute! The aroma will be divine!

3. **Cook the Pasta**:
   While the cabbage is cooking, bring a large pot of salted water to a boil. Add your pasta (spaghetti or fettuccine works beautifully here) and cook according to package instructions until al dente. Don’t forget to stir occasionally! Reserve about a cup of pasta water before draining—this liquid is liquid gold for your sauce.

4. **Prepare the Sauce**:
   In a mixing bowl, whisk together the eggs and Parmesan cheese until well combined. Now’s the time to season this mixture with salt and cracked black pepper. Remember, the cheese will add some saltiness, so go easy!

5. **Combine Everything**:
   Drain the pasta and return it to the pot (off the heat!). Quickly toss in the sautéed cabbage and crispy bacon. Pour in the egg and cheese mixture, using a pair of tongs or a fork to toss everything together swiftly. The residual heat from the pasta will cook the eggs, creating that creamy sauce we love! If it looks a bit too thick, gradually add the reserved pasta water until you reach your desired consistency.

6. **Final Touches**:
   Give everything another good mix. Taste for seasoning and adjust as needed, adding more cheese, cracked pepper, or red pepper flakes if you’re feeling adventurous!

---

**Serving Suggestions**

To plate your Creamy Cabbage Carbonara, simply twirl the pasta onto a beautiful plate or into pasta bowls. Top with a generous sprinkle of extra Parmesan and a crack of fresh pepper. For a pop of color, consider adding a sprig of fresh parsley or basil as a garnish. It’s all about making it look inviting and delicious!

---

**Recipe Variations**

1. **Vegetarian Delight**: Skip the bacon altogether and use sautéed mushrooms for an earthy taste. Simply use a splash of soy sauce to help deepen the flavor.

2. **Cheesy Twist**: Swap out some or all of the Parmesan for a mix of Gruyère or aged cheddar for a richer taste and an exquisite cheese pull.

3. **Spicy Kick**: Add in some diced jalapeños or a splash of hot sauce to the sauce while whisking for that added kick.

4. **Herb Infusion**: Toss in some fresh spinach or kale alongside the cabbage for a nutrient boost. Chopped fresh herbs like basil or parsley can enhance flavor too!

5. **Creamier Version**: For an ultra-creamy sauce, add a few tablespoons of heavy cream to the egg mixture before combining with the pasta.

---

**Chef’s Notes**

It’s funny how a dish can evolve over time. When I first made this Creamy Cabbage Carbonara, it was truly a “what-do-I-have-on-hand” secret. I remember being nervous letting my friends try it, thinking it wouldn’t hold up to the traditional version. But after their rave reviews, I realized cooking is all about being creative and using what you have.

Now, I often find myself gravitating toward seasonal ingredients, and cabbage fits the bill perfectly—available year-round and oh-so-versatile. I think we sometimes underestimate how lovely humble ingredients can be; they have a charm and story of their own.

---

**FAQs and Troubleshooting**

**1. Why did my sauce curdle?**
If your sauce curdles, it’s likely that the heat was too high when adding the egg mixture. Make sure to toss the pasta off the heat or very low heat as you integrate the eggs to achieve that creamy texture.

**2. How can I store leftovers?**
Store the leftover pasta in an airtight container in the fridge for up to 3 days. Reheat on the stove with a splash of water to avoid it drying out.

**3. Can I make this dish ahead of time?**
This dish is best enjoyed fresh, but you can prep the cabbage and bacon in advance. Just combine everything right before serving for best results.

**4. What can I substitute for pasta?**
You can use zoodles (zucchini noodles) or spaghetti squash for a low-carb alternative! Just adjust cooking times as needed.

---

**Nutritional Info (Optional)**

While I believe in enjoying every delicious bite, here’s a rough nutritional breakdown per serving (not including additional garnishes or variations):
- Calories: ~550
- Protein: ~20g
- Carbohydrates: ~46g
- Fat: ~30g

---

Thank you for joining me on this culinary adventure! I hope you feel inspired to try making this Creamy Cabbage Carbonara at home. Remember, cooking is about joy, creativity, and gathering around the table with loved ones. Can’t wait to hear how it turns out for you!
Creamy Cabbage Carbonara

A creative twist on traditional carbonara featuring sautéed cabbage, crispy bacon, and a rich creamy sauce.
- Prep Time: 15 minutes
- Cook Time: 30 minutes
- Total Time: 45 minutes
- Yield: 4 servings 1x
- Category: Main Course
- Method: Baking
- Cuisine: Italian
- Diet: Vegetarian option available
Ingredients
- 1 small head of cabbage, chopped
- 4 slices of bacon, diced
- 1 cup grated Parmesan cheese
- 2 eggs
- Salt and pepper to taste
- Olive oil
- Garlic, minced (optional)
- Red pepper flakes (optional)
Instructions
- Cook the bacon: In a large skillet, heat a drizzle of olive oil over medium heat. Add the diced bacon and cook until crispy, about 5–7 minutes. Transfer to a paper towel-lined plate.
- Sauté cabbage: With the bacon fat still in the skillet, add chopped cabbage and cook for about 5–7 minutes until softened and golden.
- Cook the pasta: In a large pot of salted boiling water, add pasta and cook until al dente. Reserve about a cup of pasta water before draining.
- Prepare the sauce: In a bowl, whisk together eggs and Parmesan cheese. Season with salt and pepper.
- Combine everything: Drain pasta, return it to the pot (off the heat), and toss in the sautéed cabbage and bacon. Pour in the egg mixture and toss quickly to create a creamy sauce.
- Final touches: Mix well, adjust seasoning if needed, and serve hot with extra cheese and pepper on top.
Notes
Store leftovers in an airtight container in the fridge for up to 3 days. Reheat with a splash of water to prevent drying.
Nutrition
- Serving Size: 1 serving
- Calories: 550
- Sugar: 3g
- Sodium: 800mg
- Fat: 30g
- Saturated Fat: 10g
- Unsaturated Fat: 15g
- Trans Fat: 0g
- Carbohydrates: 46g
- Fiber: 4g
- Protein: 20g
- Cholesterol: 150mg
Keywords: carbonara, creamy pasta, cabbage, bacon, weeknight dinner
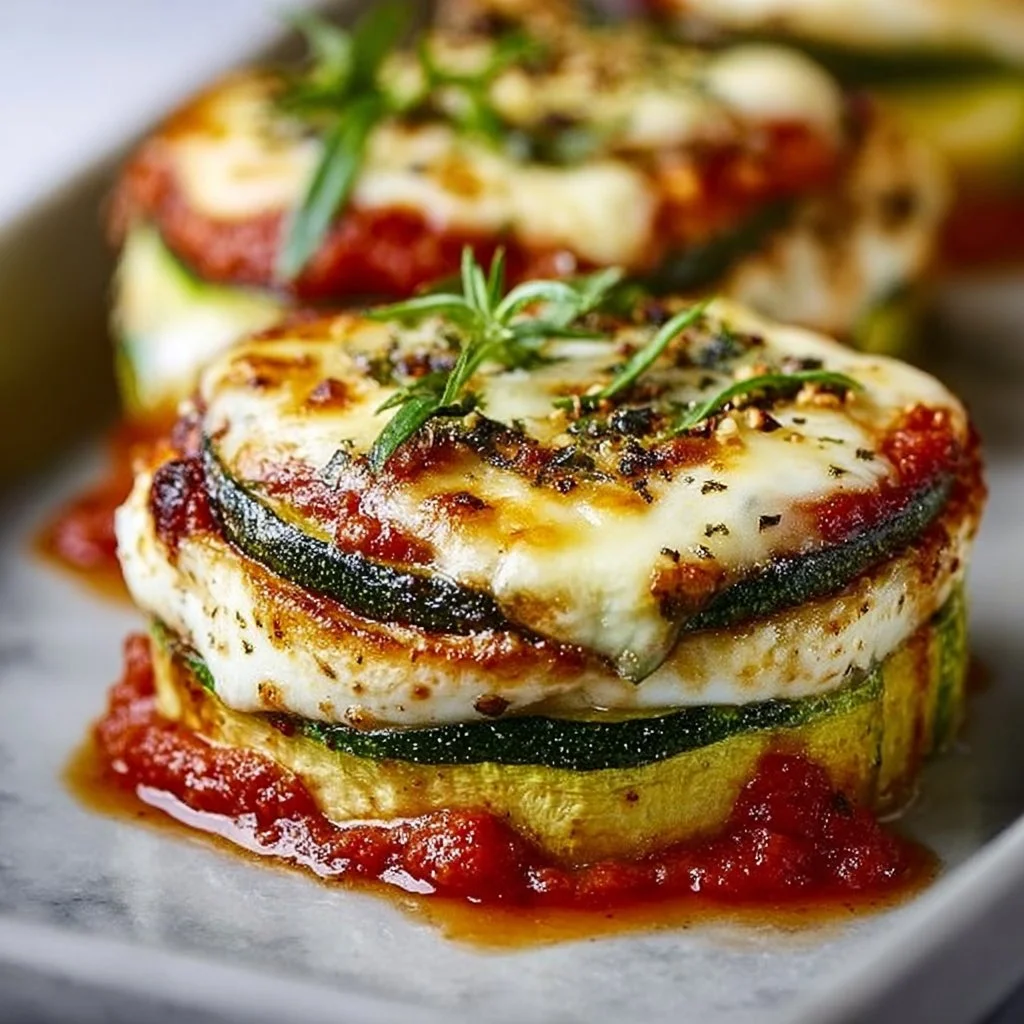
Layered Zucchini Ricotta Melts with Marinara
Layered Zucchini Ricotta Melts with Marinara
Introduction
Hey there, fellow foodies! If there’s one dish that’s as comforting as a warm hug on a chilly evening, it’s my Layered Zucchini Ricotta Melts with Marinara. This dish is an ode to the simplicity and beauty of summer produce, especially when you want something that feels indulgent without leaving you feeling heavy afterward. And trust me, it’s a delightful surprise that tastes just as good as it looks!
Growing up, my mom made a version of this dish almost weekly during the summer months. We would visit the local farmer’s market and come home with bags brimming with fresh vegetables, particularly zucchini. Her recipe was simple yet satisfying: just layers of zucchini swimming in cheesy goodness with a rich marinara sauce slathered all over. The aroma that filled our kitchen was inevitably followed by the sound of our family bellies rumbling, a symphony that meant we were all in for a feast.
Not only is this dish an amazing way to use seasonal ingredients, but it’s also a canvas for creativity. Whether you’re cooking for your family during a busy weeknight or entertaining friends for a casual get-together, these Layered Zucchini Ricotta Melts are sure to impress! You get the creamy goodness of ricotta, the savory depth of marinara, and that perfect cheesy crust on top from the mozzarella and Parmesan. Who could resist? So roll up your sleeves, tie on that apron, and let’s dive into this delicious recipe that’s sure to make you and your guests linger a little longer around the dinner table.
Personal Story
Let me take you back to one sunny Saturday afternoon when my mom and I were elbow-deep in zucchini. We were both so excited; in fact, I think I could even hear the zucchinis whispering, “Pick us, pick us!” As we sorted through the veggies, I stumbled upon the largest zucchini I had ever seen. It was practically a vegetable trophy, and naturally, it became the star of our lunch that day.
Mom’s laughter filled the kitchen as I attempted to slice it evenly—let’s just say my knife skills were as refined as a toddler’s! But after a few giggles and a couple of not-so-great slices, we eventually got it all together. A blanket of ricotta, a thin layer of marinara, and a sprinkle of cheese later, we had a bubbling dish that made our hearts—and stomachs—so very happy. That dish transformed into a family favorite, and I still cherish those moments when we’d gather around the table, laughter filling the air as we savored every bite. I like to think that those wonderful memories infuse my Layered Zucchini Ricotta Melts with a little extra love!
Ingredients
Here’s what you’ll need to whip up this delightful dish. Each ingredient plays an important role in bringing flavor and texture to the table, so let’s dive in:
-
2 large zucchinis, sliced
These sturdy veggies are our base! Look for firm zucchinis without soft spots. You could substitute with eggplant if you’re feeling adventurous, but zucchini truly shines here. -
1 cup ricotta cheese
Rich, creamy, and perfectly spreadable, ricotta holds the dish together. If you’re looking for a lighter option, cottage cheese can work too, though the flavor will change somewhat. -
1 1/2 cups marinara sauce
Store-bought or homemade, marinara packs a punch of flavor. If you’re short on time, grab your favorite brand. Or try a spicy arrabbiata sauce for an extra kick! -
1 cup shredded mozzarella cheese
You’ll want that melty goodness! If you’re into a sharper flavor, feel free to swap in provolone or fontina. -
1/2 cup grated Parmesan cheese
This adds a nutty depth to the dish. Pecorino Romano makes for a kicky substitute if that’s your preference. -
1 teaspoon Italian seasoning
A blend of herbs that infuses your dish with warmth. You can easily swap this for a mix of dried basil and oregano for a personalized touch! -
Salt and pepper to taste
A seasoning essential! Always season as you go for layers of flavor. -
Olive oil for drizzling
Finishing your dish with a drizzle of good-quality olive oil brings everything together. If you’re feeling fancy, try infused olive oil for an extra layer of flavor!
Step-by-Step Instructions
Alright, let’s make some magic happen in the kitchen! Grab your apron, and let’s get started.
-
Preheat Your Oven
Preheat your oven to 375°F (190°C). A hot oven is essential for achieving that bubbly, golden top. Trust me; it makes all the difference! -
Prepare the Zucchini
Slice your zucchinis into thin rounds—about 1/4 inch thick works perfectly. This thickness gives you ample room for layering without making everything too soggy. You can sprinkle a touch of salt over the slices and set them aside; this draws out excess moisture, keeping your dish from getting watery. -
Make the Ricotta Mixture
In a medium mixing bowl, combine your ricotta cheese, Italian seasoning, and a pinch of salt and pepper. Mix it up until all the ingredients are well incorporated. This step adds some flavor to the ricotta, making every layer count! -
Layer It Up
Grab your favorite baking dish. You’ll start with a thin layer of marinara sauce at the bottom to prevent sticking. Then, layer half of the zucchini slices, overlapping them slightly. Spread half of the ricotta mixture over the zucchini, followed by half of the marinara sauce, and sprinkle a third of the mozzarella on top. Repeat the layering process—zucchini, ricotta, marinara, and finish with more mozzarella. Finally, sprinkle the grated Parmesan cheese evenly on top. -
Drizzle with Olive Oil
To ensure that everything gets beautifully golden and crisp, drizzle a little olive oil over the cheesy top. This not only adds flavor but also helps create that crispy layer we all adore. -
Bake to Perfection
Cover the dish with aluminum foil and pop it in the preheated oven. Bake for 25 minutes, then remove the foil and bake for an additional 15-20 minutes until the top is bubbling and nicely golden. Keep an eye on it—every oven is different! -
Cool and Serve
Once you pull it out of the oven, let it cool for about 10 minutes. This step allows everything to set up a bit. Trust me; you don’t want to burn your mouth on gooey cheese right away!
Serving Suggestions
When it’s time to serve, cut your Layered Zucchini Ricotta Melts into hearty squares (or rectangles, if you prefer), and transfer them to plates with a spatula. A sprinkle of fresh basil or parsley on top not only makes it look pristine but also adds a lovely fresh aroma. Pair it with a light green salad dressed in a tangy vinaigrette to balance the richness of the dish. And don’t forget a glass of your favorite wine to elevate the experience!
Recipe Variations
Want to switch it up? Here are some fun variations to consider:
-
Herbed Ricotta: Mix in fresh herbs like basil or spinach into the ricotta for an extra burst of flavor.
-
Protein Boost: Layer in some cooked ground turkey or Italian sausage for an added protein kick.
-
Veggie Medley: Toss in other veggies like bell peppers or mushrooms for added texture and flavor.
-
Spicy Kick: Add crushed red pepper flakes to the marinara sauce for a little heat.
-
Gluten-Free Swap: If you want to skip the marinara, using a homemade tomato basil sauce made with fresh tomatoes can make this dish gluten-free.
Chef’s Notes
Now, I have a little secret—this recipe has evolved over time. When I first started making it, I relied heavily on dairy, and trust me, it was rich! Over the years, I’ve learned how to balance flavors and swap around some of the ingredients for a lighter touch but still keep that comfort food essence. I once had a mishap with too much salt—yikes! Let’s just say it was a memorable family dinner. We laughed, we salvaged what we could, and the lesson learned was to always taste as you go!
FAQs and Troubleshooting
-
Why is my zucchini watery?
Zucchini has a high water content. Salting and letting it sit for a few minutes before assembling helps draw out excess moisture. You can also blot them dry with a paper towel to remove any remaining liquid. -
Can I use frozen zucchini?
While fresh zucchini yields the best texture, you can use frozen zucchini. Just ensure to thaw and drain any excess water before layering. -
What can I serve with this dish?
A light salad, garlic bread, or a simple pasta on the side pairs beautifully and rounds out the meal. -
Can I make this ahead of time?
Absolutely! You can prepare the dish a day in advance, cover it, and refrigerate it. Just take it out to bring to room temperature before baking.
Nutritional Info
While I won’t dive deep into numbers here, I will say that this dish is packed with vitamins from the zucchini, protein from the ricotta, and calcium from the cheese. It’s a wholesome meal that can fit into a balanced diet with the right portion sizes.
There you have it! My Layered Zucchini Ricotta Melts with Marinara not only bring comfort but also a delightful culinary experience that celebrates the joy of cooking. I can’t wait for you to try this recipe and make it your own. Happy cooking, and remember—good food isn’t about showing off. It’s all about showing up! Enjoy every indulgent layer. Let’s set the table! 🍽️
PrintLayered Zucchini Ricotta Melts with Marinara

A comforting layered dish featuring zucchini, ricotta, marinara, and a cheesy topping, perfect for any occasion.
- Prep Time: 15 minutes
- Cook Time: 40 minutes
- Total Time: 55 minutes
- Yield: 4 servings 1x
- Category: Main Course
- Method: Baking
- Cuisine: Italian
- Diet: Vegetarian
Ingredients
- 2 large zucchinis, sliced
- 1 cup ricotta cheese
- 1 1/2 cups marinara sauce
- 1 cup shredded mozzarella cheese
- 1/2 cup grated Parmesan cheese
- 1 teaspoon Italian seasoning
- Salt and pepper to taste
- Olive oil for drizzling
Instructions
- Preheat your oven to 375°F (190°C).
- Slice your zucchinis into thin rounds, about 1/4 inch thick.
- In a medium bowl, combine ricotta, Italian seasoning, salt, and pepper.
- Grab your baking dish and spread a thin layer of marinara sauce at the bottom.
- Layer half of the zucchini slices, overlap slightly, then spread half of the ricotta mixture over the zucchini.
- Follow with half of the marinara sauce and sprinkle a third of the mozzarella on top.
- Repeat the layers: zucchini, ricotta, marinara, and finish with remaining mozzarella.
- Sprinkle grated Parmesan cheese evenly on the top.
- Drizzle olive oil over the top.
- Cover with aluminum foil and bake for 25 minutes.
- Remove the foil and bake for an additional 15-20 minutes until golden and bubbly.
- Let it cool for 10 minutes before serving.
Notes
Try adding fresh herbs to the ricotta or layer in cooked meat for extra protein.
Nutrition
- Serving Size: 1 serving
- Calories: 350
- Sugar: 5g
- Sodium: 400mg
- Fat: 12g
- Saturated Fat: 4g
- Unsaturated Fat: 6g
- Trans Fat: 0g
- Carbohydrates: 45g
- Fiber: 3g
- Protein: 15g
- Cholesterol: 30mg
Keywords: zucchini, ricotta, marinara, vegetarian, comfort food

Lentil Stew
Embrace the Comfort: A Cozy Lentil Stew to Warm Your Heart
Hey there, fellow food enthusiasts! Welcome back to Ivory Apron, where we elevate your everyday cooking experience, one delicious dish at a time. If you’re anything like me, there’s something magical about coming home after a long day and being embraced by the warm and inviting aromas of a simmering stew. Today, I’m excited to share with you one of my all-time favorites: Lentil Stew!
This dish is more than just a recipe; it’s a big, cozy hug in a bowl. It’s hearty, nutritious, and perfect for a busy weeknight dinner or a leisurely weekend gathering. But more than that, it represents those moments when life slows down and we find joy in sharing delicious food with those we love.
When I think of lentil stew, I’m reminded of rainy Sundays spent in my grandmother’s kitchen, where the aroma of simmering lentils greeted us as soon as we walked through the door. She’d pull out her well-worn recipe cards and whisper about the benefits of lentils being not just stellar for our bodies, but also for our taste buds. And frankly, she was right!
As we dive into this recipe, I’m here to assure you that cooking your own lentil stew is not only simple but also provides a wonderful canvas for your culinary creativity! So, roll up those sleeves, tie on your ivory apron, and let’s make some magic in the kitchen together!
Personal Story
As a child, there was one dish that never failed to light up my family’s table: my grandmother’s lentil stew. It was a simple dish, but the comfort it brought was anything but ordinary. Growing up in a bustling household, we often gathered around the table after a long week. Every Sunday, culinary anticipation filled the air as I entered my grandmother’s kitchen.
I vividly remember standing on tiptoes, peering over the stovetop as she stirred that bubbling pot of goodness. For her, cooking was an art form that required few ingredients but an abundance of love. She would gaze at me with a twinkle in her eye, saying, "Cooking is about intention, darling." And how right she was!
Back then, my little hands would help her dice the vegetables while she shared family stories — and a sprinkle of cumin with every ingredient, of course! It wasn’t just about the food; it was about the time we spent together. This lentil stew became our calming ritual, a vessel for connection, laughter, and unforgettable memories. To this day, every ladleful serves as a timely reminder of those soulful Sundays, and it warms my heart to pass along that tradition here with you!
Ingredients
Let’s have some fun gathering our ingredients! Here’s what you’ll need:
-
1 cup lentils, rinsed: Lentils are the star of this show! They’re packed with protein and fiber, making them a nutritious choice. You can use green, brown, or even red lentils for different flavors and textures.
-
1 onion, diced: Onions are the base of flavor. They add depth to the stew. If you’re out of onions, shallots are a great substitute, providing that sweet onion taste!
-
2 carrots, diced: Carrots bring a natural sweetness and vibrant color to the stew. If you’re feeling adventurous, sweet potatoes can offer a similar feel.
-
2 celery stalks, diced: Celery adds a lovely earthiness and slight crunch. For a different flavor profile, try adding leeks!
-
3 cloves garlic, minced: Garlic makes everything better — it’s practically the secret ingredient! If you’re not a fan of strong garlic flavor, add less or roast it first for a milder taste.
-
1 can diced tomatoes: Tomatoes add acidity and balance to the stew. If you have fresh tomatoes, feel free to sub them in — just remember to remove the skins for a smoother texture.
-
4 cups vegetable broth: Broth is the soul of any stew! It adds layers of flavor. Use homemade broth if you have it; otherwise, store-bought works just fine. If you’re low on broth, you can use water too, but enhance the seasoning a bit more.
-
1 teaspoon cumin: Cumin imparts a warm, earthy flavor that enhances the lentils beautifully. If you’d like to try something different, coriander or even curry powder can work well.
-
1 teaspoon paprika: This adds a subtle sweetness and color! You might switch it up with smoked paprika for more depth.
-
Salt and pepper to taste: Always a necessary balance of flavors! Adjust to your liking, but remember to taste as you go!
-
2 tablespoons olive oil: This will help sauté the veggies and add healthy fats! You could swap in coconut oil or butter for variations in flavor.
-
Fresh herbs (optional, for garnish): Fresh herbs like parsley or cilantro can brighten up your dish at the end. If they’re not available, dried herbs can work in a pinch!
Step-by-Step Instructions
Ready to dive into the cooking process? Let’s roll up our sleeves and get started! Here’s how we’ll make our delicious lentil stew:
-
Prep Your Ingredients: Begin by rinsing the lentils in cold water until the water runs clear. This removes any dust or impurities. Set them aside while you chop your veggies.
-
Sauté the Aromatic Veggies: In a large pot, heat the olive oil over medium heat. Once the oil shimmers, add the diced onion. Sauté for about 3-4 minutes until the onion becomes translucent. This is where your kitchen starts to smell fantastic!
-
Add Remaining Vegetables: Toss in the diced carrots and celery, stirring them in. Let them cook for another 5 minutes, allowing the flavors to meld. You can hear the veggies softly whispering to each other!
-
Garlic Time: Once your veggies are tender, add the minced garlic and sauté for another minute. Keep an eye on it; burnt garlic can go from delicious to bitter in a flash!
-
Stir in Spices and Tomatoes: Next, it’s time to add your spices! Stir in the cumin and paprika, letting them roast for about 30 seconds to release their essential oils. Then, add in the can of diced tomatoes (along with the juices) and mix well. Oh, what a glorious color you have now!
-
Pour in the Broth and Lentils: Pour in the vegetable broth and add the rinsed lentils, stirring to combine. Bring the stew to a boil over high heat, then reduce the heat to low. Cover the pot and let it simmer for about 25-30 minutes.
-
Taste Test and Season: After simmering, taste your stew for seasoning. Add salt and pepper as desired. If the lentils are tender and the flavors are well balanced, you’re ready for the next step!
-
Adjust Consistency: If the stew seems too thick, add a splash more broth or water until you reach your desired consistency. Sometimes a little more liquid goes a long way!
-
Garnish and Serve: When you’re ready to serve, take it off the heat and let it rest for a minute. Garnish with fresh herbs (if using), and give it a gentle stir.
Serving Suggestions
Now that your lentil stew is bubbling deliciously, let’s talk about how to plate it beautifully! Serve it in deep, cozy bowls and make sure to scoop up plenty of those lentils and veggies. You can drizzle a touch of extra virgin olive oil for added richness and a sprinkle of fresh herbs for a pop of color. Pair it with some crusty bread or a side salad for a complete meal.
Recipe Variations
Feeling adventurous? Here are some creative twists you can try with this lentil stew:
-
Spicy Kick: Toss in a pinch of red pepper flakes or some chopped jalapeños for heat.
-
Creamy Comfort: Stir in a splash of coconut milk or cream for a rich, creamy texture.
-
Protein Boost: Feel free to add in cooked sausage or shredded chicken for an added protein punch!
-
Veggie Medley: Get creative with your vegetables! Throw in bell peppers, spinach, or kale for added nutrition and color.
-
Herbaceous Lift: Experiment with different herbs. A sprig of thyme or rosemary can change the entire flavor profile and make it seasonal!
Chef’s Notes
Oh, how I love sharing this recipe! It’s evolved over time as I’ve crafted it into my own version of comfort. When I first started making lentil stew, I followed my grandmother’s recipe to the tee. As I became more adventurous in the kitchen, I began to tweak it, adding my own flair and seasonal ingredients. So remember, make it yours! Be fearless in the kitchen, and trust your instincts!
This recipe is one of those dishes that often tastes even better the next day, once the flavors have had even more time to mingle. It’s perfect for meal prep too — you can keep it in the fridge for up to 5 days, so make a big batch!
FAQs and Troubleshooting
-
What if my lentils are mushy?
- If your lentils are mushy, they may have been overcooked. For the best texture, keep an eye on the cooking time and test them a few minutes before the recommended time.
-
Can I freeze leftover stew?
- Yes, you can freeze lentil stew! Just store it in an airtight container. When you’re ready to enjoy it again, thaw it in the refrigerator overnight and reheat on the stove over medium heat.
-
What if I have no vegetable broth?
- If you find yourself without vegetable broth, you can use water instead. Just elevate the seasoning by adding more herbs and spices!
-
Can I use split lentils instead of whole lentils?
- Absolutely! Split lentils cook faster, so decrease the cooking time by about 10-15 minutes for a delicious result.
Nutritional Info
Although specific nutritional values can vary based on ingredients and portions, here’s a rough breakdown for one serving of this delicious lentil stew:
- Calories: 250
- Protein: 13g
- Carbohydrates: 41g
- Dietary Fiber: 15g
- Fat: 5g
This nutrient-packed stew makes for a wholesome and filling meal that you can feel good about!
And there you have it! Your ultimate lentil stew recipe, straight from the ivory apron kitchen to your own. Isn’t it great how food can tell stories and create connections? So tie on that apron, get cooking, and let’s fill our tables with warmth and comfort. If you have any questions or want to share your own variations, I’d love to hear from you. Happy cooking!
PrintCozy Lentil Stew

A warm and inviting lentil stew, perfect for busy weeknights or leisurely gatherings. Hearty, nutritious, and simple to prepare.
- Prep Time: 15 minutes
- Cook Time: 30 minutes
- Total Time: 45 minutes
- Yield: 4 servings 1x
- Category: Main Course
- Method: Stovetop
- Cuisine: Comfort Food
- Diet: Vegan
Ingredients
- 1 cup lentils, rinsed
- 1 onion, diced
- 2 carrots, diced
- 2 celery stalks, diced
- 3 cloves garlic, minced
- 1 can diced tomatoes
- 4 cups vegetable broth
- 1 teaspoon cumin
- 1 teaspoon paprika
- Salt and pepper to taste
- 2 tablespoons olive oil
- Fresh herbs (optional, for garnish)
Instructions
- Prep your ingredients: Rinse the lentils and set aside.
- Sauté the aromatic veggies in olive oil over medium heat until the onion is translucent.
- Add remaining vegetables and cook for another 5 minutes.
- Garlic time! Stir in minced garlic and sauté for another minute.
- Stir in spices and tomatoes, and let cook for 30 seconds.
- Pour in the broth and add lentils, bringing to a boil then reduce to a simmer for 25-30 minutes.
- Taste and season as needed, adjusting consistency if necessary.
- Garnish with fresh herbs if desired, and serve hot.
Notes
This lentil stew is perfect for meal prep and often tastes better the next day! Store in the fridge for up to 5 days.
Nutrition
- Serving Size: 1 serving
- Calories: 250
- Sugar: 5g
- Sodium: 400mg
- Fat: 5g
- Saturated Fat: 0g
- Unsaturated Fat: 5g
- Trans Fat: 0g
- Carbohydrates: 41g
- Fiber: 15g
- Protein: 13g
- Cholesterol: 0mg
Keywords: lentil stew, vegan comfort food, easy dinner, healthy soup