
One-Pot Creamy Broccoli & Potato Soup for Weeknights in 30 Minutes
Creamy Broccoli Potato Soup Recipe: A Warm Hug in a Bowl
Hello, fellow food lover! Today we’re diving into a delightful blend of flavors with my Creamy Broccoli Potato Soup. Picture this: a cozy night, a chilly breeze outside, and a pot bubbling away filled with tender broccoli, velvety potatoes, and zesty cheddar cheese. This dish is more than just a soup; it’s a warm hug in a bowl, perfect for dinner or a comforting lunch. Let’s whip up some magic together!
Personal Story: A Taste of Home
I distinctly remember my early cooking adventures in my grandmother’s kitchen. Every winter, the aroma of her Broccoli Potato Soup wafted through the house, inviting the whole family to gather around the table. As a child, I was always eager to help chop the onions and stir the pot, my hands small but my enthusiasm boundless.
I can still see her gently scooping the vibrant green soup into bowls, topped with a sprinkle of cheese and a dash of pepper. It wasn’t just about the meal; it was the laughter, the stories shared, and the warmth that filled the room. Those moments instilled a profound love for cooking in me, and they echoed the sentiment that good food is all about connection.
Oh, the joy of gathering with loved ones over a steaming bowl of homemade soup! So today, let’s recreate that nostalgia. Grab your apron, and let’s get started!
Ingredients
Here’s what you’ll need for our Creamy Broccoli Potato Soup:
-
Broccoli: Fresh or frozen can work! Broccoli is loaded with vitamins. If you’re in a pinch, substitute with cauliflower for a similar texture and flavor.
-
Potatoes: I love using Yukon Gold for their creamy texture. However, Russets work just as well. Both provide that silky base for our soup.
-
Cheddar Cheese: Sharp cheddar adds a robust taste. You could also use Gruyère for a nutty twist or a dairy-free cheese to make it vegan.
-
Onion: Sweet onions are the best for a gentle sweetness, but yellow onions will do nicely.
-
Garlic: Fresh garlic is a must! If you don’t have any, garlic powder in a pinch can work, but the flavors won’t be quite as vibrant.
-
Vegetable Broth: Homemade is always best, but store-bought works in a pinch. Look for low-sodium options to control the salt.
-
Cream: Heavy cream gives a luscious texture, but half-and-half or coconut milk can also be fabulous substitutes for a lighter version.
-
Salt and Pepper: To taste! Always feel free to adjust based on your preference.
Step-by-Step Instructions
Now, let’s get cooking! Follow these easy steps to achieve your creamy masterpiece:
-
Prep Your Ingredients: Start by rinsing the broccoli thoroughly. You’ll want to chop it into small florets for even cooking. Dice the potatoes into small cubes—this will help them cook faster and blend into a creamy consistency. Mince the garlic and chop half an onion for aromatic goodness!
-
Sauté the Onion and Garlic: In a large pot over medium heat, add a splash of olive oil (or butter, if you prefer). Once it’s shimmering, add the chopped onion. Sauté for about 3-5 minutes until it’s translucent and fragrant. Then toss in the minced garlic, and sauté for about another minute. Fun tip: Ensure your heat isn’t too high; we’re aiming for sweet, not burnt!
-
Add the Broccoli and Potatoes: Time to throw in your chopped broccoli and cubed potatoes! Give everything a good stir to coat the veggies with the onion and garlic combination—hello, flavor!
-
Pour in the Broth: Now, add your vegetable broth until it just covers the veggies. Bring the mixture to a gentle simmer. That’s when magic happens! Cover the pot and let it simmer for about 15-20 minutes until the potatoes are fork-tender. You’ll know it’s ready when the bright green of the broccoli deepens and your kitchen is filled with delicious scents.
-
Blend for Creaminess: Once your vegetables are nice and tender, remove the pot from heat. Using an immersion blender, blend the soup until smooth. If you’re using a traditional blender, carefully transfer the soup in batches. Just remember to leave a little steam escape to prevent a soupy explosion—trust me on this one!
-
Stir in the Cream and Cheese: Return the smooth soup to low heat and add the cream, stirring until well combined. Gradually add in your cheddar cheese, one handful at a time, while mixing. This will help the cheese melt beautifully without clumping. Season with salt and pepper to taste.
-
Final Blend: If you like your soup extra creamy, feel free to blend it again briefly. This is where you can decide how velvety you want your soup to be—smooth and luxurious or with a bit more texture!
Serving Suggestions
Pour the soup into bowls and finish with a sprinkle of fresh chives or parsley on top to add a pop of color. Serve with a side of crusty bread or a light salad. Your table will look inviting, and trust me, the aroma alone will have everyone flocking to the kitchen!
Recipe Variations
Feeling adventurous? Here are a few creative twists you can try:
-
Spicy Kick: Add a pinch of red pepper flakes or a dash of hot sauce to blow the taste buds away.
-
Herb-infused: Toss in fresh herbs like thyme or rosemary while simmering for a complex aroma.
-
Nutty Flavor: Swirl in some toasted pine nuts or sprinkle them on top for a delightful crunch.
-
Creamy Vegan Option: Swap cream for coconut milk and cheddar for a dairy-free alternative for a vegan-friendly soup.
Chef’s Notes
Over the years, this soup has evolved from my grandmother’s classic recipe to my own playful take. I’ve swapped in different cheeses, experimented with fresh herbs, and even tried adding some smoked paprika for a depth of flavor. Every time I make it, I feel like I’m continuing a family tradition, all while putting my spin on it. It’s simple yet sophisticated—the very essence of what cooking is all about!
FAQs and Troubleshooting
1. My soup is too thick; what can I do?
No worries! Just add a bit more vegetable broth or water to thin it out to your desired consistency while reheating.
2. Can I use frozen broccoli?
Absolutely! Frozen broccoli works just as well. Just keep in mind that it might cook quicker, so adjust your simmering time accordingly.
3. How do I store leftovers?
Let the soup cool down before transferring it to an airtight container. It can last in the refrigerator for about 3-4 days or you can freeze it for up to 3 months. Just reheat gently on the stove when you’re ready to dive back into that creamy goodness!
4. Why does my soup taste bland?
If the soup is lacking flavor, try adjusting with a bit more salt, pepper, or even a splash of lemon juice to brighten everything up!
Nutritional Info
While specific nutritional information can vary, on average, a serving of this creamy soup contains roughly 250 calories, with significant amounts of vitamin C, fiber, and calcium. Perfect for a healthy, balanced choice that also feels indulgent!
Cooking is a beautiful journey, and I’m thrilled you’re sharing it with me. This Creamy Broccoli Potato Soup not only nourishes the body but also warms the soul. Remember, whether you’re cooking for yourself or a table full of loved ones, the heart of it all is love. So, tie on that apron and let’s keep creating those beautiful moments together!
PrintCreamy Broccoli Potato Soup

A delightful blend of tender broccoli, velvety potatoes, and zesty cheddar cheese, perfect for a comforting dinner or lunch.
- Prep Time: 10 minutes
- Cook Time: 30 minutes
- Total Time: 40 minutes
- Yield: 4 servings 1x
- Category: Soup
- Method: Cooking
- Cuisine: American
- Diet: Vegetarian
Ingredients
- 2 cups broccoli florets
- 2 cups Yukon Gold potatoes, diced
- 1 cup sharp cheddar cheese, shredded
- 1 onion, chopped
- 2 cloves garlic, minced
- 4 cups vegetable broth
- 1 cup heavy cream
- Salt and pepper, to taste
Instructions
- Prep your ingredients by rinsing the broccoli and chopping it into small florets. Dice the potatoes and mince the garlic.
- Sauté the onion and garlic in a large pot with olive oil over medium heat until fragrant.
- Add the broccoli and potatoes to the pot and stir to combine.
- Pour in the vegetable broth until it covers the veggies. Bring to a simmer and cover.
- Blend the soup with an immersion blender until smooth.
- Stir in the cream and cheddar cheese until melted and combined.
- Final blend if desired for extra creaminess and adjust seasoning.
Notes
Serve topped with fresh chives or parsley and crusty bread.
Nutrition
- Serving Size: 1 serving
- Calories: 250
- Sugar: 3g
- Sodium: 500mg
- Fat: 18g
- Saturated Fat: 10g
- Unsaturated Fat: 8g
- Trans Fat: 0g
- Carbohydrates: 27g
- Fiber: 4g
- Protein: 7g
- Cholesterol: 40mg
Keywords: broccoli soup, creamy soup, vegetarian recipe, comfort food, easy soup
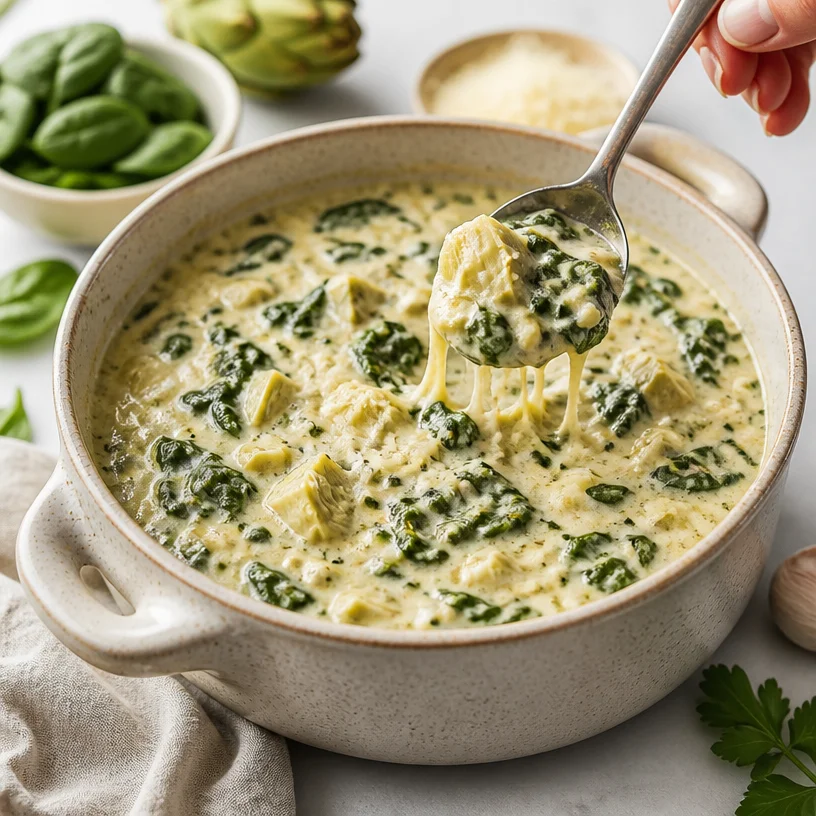
One-Pot Spinach Artichoke Soup (Creamy Weeknight Dinner)
Spinach Artichoke Soup: A Cozy Bowl of Comfort
Hello, my lovely food friends! Today, I’m excited to share with you a recipe that combines warmth, nostalgia, and that wonderful, creamy goodness we all crave – Spinach Artichoke Soup. This dish wraps you in a plush hug of flavor, making it the perfect choice for chilly evenings or whenever you want to impress guests with a cozy starter.
Picture this: It’s a chilly Sunday afternoon, and you’ve gathered your favorite people around your table. Perhaps the smell of garlic is wafting through the air while vegetables simmer gently on the stove. You have bright green spinach, tender artichokes, and just the right amount of creamy richness swirling together in your pot. You can almost hear the laughter that’s about to fill your kitchen, and that’s where the magic starts!
What I love about this spinach artichoke soup is that it’s inspired by the classic dip we all know and love. Remember those gatherings when the spinach artichoke dip would vanish faster than you could say “seconds, please”? Well, think of this soup as that beloved dip’s warm, soul-nourishing sibling. It’s comforting, rich, and has that delightful creaminess that begs for a warm bread roll on the side. Let’s dive into this dreamy recipe that’s easier than you think, featuring some quality ingredients that’ll take your cooking game up a notch!
A Nostalgic Kitchen Memory
As we dive into this recipe, let me take you back a few years. It was a crisp autumn evening, and I was hosting a cozy dinner party at my home. The lights were dim, candles flickered on the table, and a gentle jazz playlist set the mood. I decided to make a big pot of my Spinach Artichoke Soup, which has become a staple whenever I want to impress my guests with something that feels fancy yet deeply comforting.
As I finished stirring that velvety soup, I suddenly realized I had forgotten to buy bread for serving. Panic! But then, I remembered that last-minute kitchen hack: I quickly whipped up some homemade croutons from stale bread lying around and toasted them with garlic and olive oil. What a lifesaver! My guests were thrilled, and after the first taste of that rich soup, the croutons became the talk of the evening. It’s moments like these that inspire me to put my heart into every recipe. Let’s recreate some magic, shall we?
Ingredients
To create this luscious Spinach Artichoke Soup, you’ll need the following ingredients:
-
Fresh Spinach (4 cups)
Spinach brings a vibrant green color and a host of nutrients to the soup! If fresh isn’t accessible, you can substitute it with two cups of frozen spinach. Just make sure to thaw and drain it before adding. -
Canned Artichoke Hearts (1 can, drained)
They add a tangy element to the soup and a delightful texture. If you can’t find canned artichokes, marinated ones work too, but adjust the salt in the recipe since they might be pre-seasoned. -
Cream Cheese (8 oz)
This is where the creaminess comes in! If you want a lighter version, you can use Neufchâtel cheese or even sour cream, though the taste will vary slightly. -
Parmesan Cheese (½ cup, grated)
This adds a rich, nutty flavor to the soup. If you’re in a pinch, Pecorino Romano could be a good substitute. -
Garlic (2 cloves, minced)
Nothing pairs better with spinach and artichokes than garlic! Feel free to use garlic powder (½ teaspoon) if you don’t have fresh. -
Onion (1 medium, diced)
Sweet onions add a lovely base flavor. If you prefer a milder taste, shallots can do wonders here. -
Chicken or Vegetable Broth (4 cups)
This acts as the soup’s base. If you’re looking for a heartier flavor, use low-sodium broth to control the seasoning better. -
Olive Oil (2 tablespoons)
A little fat helps sauté the vegetables and adds depth to the flavor. Butter works beautifully here too if you want that rich, buttery undertone. -
Salt and Pepper to taste
Essential for rounding out the flavors, taste as you go, and remember that cheese adds salt too!
Step-by-Step Instructions
Let’s get cooking! Follow these steps to whip up this comforting Spinach Artichoke Soup:
-
Sauté the Aromatics
In a large pot, heat olive oil over medium heat. Once it’s shimmering, add the diced onion and minced garlic. Sauté them for about 5 minutes, until the onion is translucent – this step builds such a fragrant base for your soup! -
Add the Broth
Pour in the chicken or vegetable broth and bring it to a gentle simmer. This is the magic moment where all those beautiful flavors come together. Give it a stir and let it simmer for about 10 minutes. -
Add Spinach and Artichokes
Toss in the fresh spinach and the drained artichoke hearts. Let it cook for 4–5 minutes until the spinach wilts and the artichokes warm through. Just look at that vivid green color! It’s like spring in a bowl. -
Cream It Up
Now, it’s time for the star players – cream cheese and Parmesan. Add both to the pot, stirring until smooth and creamy. If the soup feels too thick, pour in a bit more broth to reach your desired consistency. Pro tip: If you find it hard to get the cream cheese to mix in, chop it into small cubes first! -
Season and Blend
Taste the soup and season with salt and pepper as needed. If you want a silky texture, use an immersion blender to puree the soup to your ideal smoothness. Just a few quick pulses will do the trick; I love leaving some chunky pieces to create contrast. However, if you prefer a chunky soup, feel free to skip this step! -
Serve!
After blending (or not!), let the soup simmer for another 2-3 minutes to meld the flavors. You absolutely can’t skip this; it elevates the taste even more. Now, take a moment to bask in the smells wafting through your kitchen!
Serving Suggestions
When serving this Spinach Artichoke Soup, I love to garnish it with a sprinkle of extra Parmesan cheese and a drizzle of olive oil for a touch of elegance. Pair it with some crusty bread or homemade crackers for dipping. Or if you’re feeling fancy, serve it in individual ramekins and top them with a little fresh herb for a beautiful presentation!
Recipe Variations
Here are a few twists you can try to keep things exciting:
- Creamy Coconut Twist: Substitute cream cheese with coconut cream for a vegan-friendly option.
- Spicy Kick: Add a pinch of red pepper flakes or a dash of hot sauce for a spicy version.
- Protein Boost: Stir in shredded rotisserie chicken for a heartier meal.
- Herb Infusion: A handful of fresh dill or basil can elevate the soup with a fragrant touch.
- Cheesy Delight: Experiment with different cheeses like Gouda or Gruyere for a new flavor profile!
Chef’s Notes
Over the years, this recipe has become a family favorite, and I’ve made countless tweaks to get it just right. I remember once experimenting with adding a touch of lemon juice at the end, which brightened up the flavors beautifully! Kitchen experiments can sometimes lead to delightful surprises, so don’t hesitate to play around with the ingredients based on what you have.
And, of course, nothing is more fun than gathering friends and sharing a good meal. Don’t stress about perfection in the presentation; just focus on the joy of serving something homemade from your heart!
FAQs and Troubleshooting
1. What if my soup is too thick?
No worries! Just gradually stir in more broth or water until it reaches your desired consistency. Taste as you go to maintain the flavor balance.
2. Can I freeze this soup?
Absolutely! Let it cool completely, then store it in an airtight container. It can keep well in the freezer for up to three months. Just thaw and reheat gently when ready to serve!
3. My soup tastes bland. What should I do?
Flavor is key! Add salt or a splash of lemon juice to brighten it up. You can also throw in a pinch of garlic powder or Italian seasoning for extra depth.
4. Can I make this soup ahead of time?
Definitely! It actually tastes even better the next day once the flavors have had time to meld. Just reheat it gently on the stove and serve, adding extra broth if needed.
Nutritional Info (Optional)
Calories: Approximately 280 per serving (based on 6 servings without toppings)
Carbohydrates: 10g
Protein: 9g
Fat: 22g
Fiber: 2g
(Note: Nutritional information will vary based on serving sizes and specific ingredients used.)
Now, my fabulous friends, it’s time to tie on your apron, gather your ingredients, and let’s create this delightful Spinach Artichoke Soup together! Your taste buds will thank you, and so will the people you serve it to. Happy cooking!
PrintSpinach Artichoke Soup

A warm and creamy Spinach Artichoke Soup that combines vibrant spinach and tender artichokes, perfect for chilly evenings.
- Prep Time: 15 minutes
- Cook Time: 30 minutes
- Total Time: 45 minutes
- Yield: 4 servings
- Category: Appetizer
- Method: Stovetop
- Cuisine: American
- Diet: Vegetarian
Ingredients
- Fresh Spinach (4 cups)
- Canned Artichoke Hearts (1 can, drained)
- Cream Cheese (8 oz)
- Parmesan Cheese (½ cup, grated)
- Garlic (2 cloves, minced)
- Onion (1 medium, diced)
- Chicken or Vegetable Broth (4 cups)
- Olive Oil (2 tablespoons)
- Salt and Pepper to taste
Instructions
- Sauté the Aromatics: In a large pot, heat olive oil over medium heat. Add the diced onion and minced garlic. Sauté for about 5 minutes, until the onion is translucent.
- Add the Broth: Pour in the chicken or vegetable broth and bring it to a gentle simmer for about 10 minutes.
- Add Spinach and Artichokes: Toss in the fresh spinach and the drained artichoke hearts. Cook for 4–5 minutes until the spinach wilts.
- Cream It Up: Stir in cream cheese and Parmesan until smooth. Add more broth if needed to reach desired consistency.
- Season and Blend: Taste soup, season with salt and pepper. Use an immersion blender for a silky texture, if desired.
- Serve! Let it simmer for another 2-3 minutes before serving.
Notes
Garnish with extra Parmesan and a drizzle of olive oil. Serve with crusty bread or homemade crackers.
Nutrition
- Serving Size: 1 serving
- Calories: 280
- Sugar: 4g
- Sodium: 650mg
- Fat: 22g
- Saturated Fat: 13g
- Unsaturated Fat: 7g
- Trans Fat: 0g
- Carbohydrates: 10g
- Fiber: 2g
- Protein: 9g
- Cholesterol: 40mg
Keywords: soup, spinach, artichoke, comfort food, vegetarian

One-Pot Creamy Chicken Corn Chowder in 30 Minutes
The Creamy Comfort of Chicken Corn Chowder: A Kitchen Adventure
Welcome to my kitchen, fellow food enthusiasts! Today, we’re diving into a delightful bowl of warmth: Chicken Corn Chowder. As the weather turns crisp and the leaves begin to fall, there’s nothing quite like a hearty bowl of chowder to wrap you in cozy vibes. This creamy, dreamy dish whispers comfort in every spoonful and is perfect for those cooler evenings when your heart (and belly) craves something a little extra special.
There’s a beautiful simplicity to Chicken Corn Chowder that’s both nostalgic and inviting. Each ingredient harmonizes flawlessly in a comforting melody, creating a warm embrace—it’s like a hug from the inside! Whether you’re whipping it up for a weeknight family dinner or adding a touch of elegance to your next gathering, I promise this chowder will bring smiles all around.
So, grab your apron, light up those stovetop flames, and let’s create something timeless together. Trust me, you won’t just be making dinner; you’ll be crafting a fantastic experience. Let’s get started!
A Sweet Memory: The First Taste of Chowder
Imagine a brisk fall evening filled with the intoxicating scents of garlic, herbs, and sweet corn drifting through the air. I remember the first time I enjoyed chicken corn chowder; I was just a kid, huddled at my grandmother’s kitchen table, eagerly waiting for her to ladle out the fragrant goodness. She was always at her best in the kitchen, an artist of sorts, layering flavors in a way that made every meal feel like a celebration.
One specific evening stands out vividly in my mind. My grandmother had invited friends over, and as the dining room filled with laughter and stories, I sat there mesmerized, watching her move between the stove and the table. The way she stirred the chowder with love, added a sprinkle of herbs, and then smiled as she ladled it into bowls is forever etched in my heart. That warm, creamy chowder, paired with crusty bread, was the highlight of the evening.
Now, as I recreate that cherished dish in my own kitchen, I realize it’s more than just about the flavors; it’s about the love and gathering of friends and family. Chicken Corn Chowder is not just a recipe; it’s a moment—a memory filled with laughter and love. Now, let’s create our own memories as we gather around our tables!
Ingredients for Your Delicious Chicken Corn Chowder
Here’s what you’ll need to create this delightful chowder:
-
Chicken:
- Use boneless, skinless chicken breast or thighs; both work beautifully. If you have leftover rotisserie chicken, that’s a great time-saver too!
-
Corn:
- Fresh corn is ideal, but you can also use canned or frozen corn. If using fresh, just cut the kernels off the cob for that sweet, juicy flavor.
-
Potatoes:
- Yukon gold potatoes are perfect for chowder as they provide a creamy texture when cooked. Feel free to swap in red potatoes if that’s what you have on hand.
-
Cream:
- Heavy cream gives this chowder its signature richness. If you’re looking for a lighter version, you can use half-and-half or whole milk. For a dairy-free alternative, coconut cream works wonderfully.
-
Onion and Garlic:
- These aromatics are essential for building flavor. Fresh onion will add sweetness, while garlic brings a punch!
-
Chicken Broth:
- Opt for low-sodium chicken broth so you have better control over the seasoning. Homemade broth is always a wonderful touch!
-
Thyme:
- Fresh thyme is ideal for its fragrant, earthy notes. Dried thyme works too—just reduce the quantity by half.
-
Salt and Pepper:
- Essential for seasoning. Adjust according to taste. A pinch of cayenne pepper adds an optional kick if you’re feeling adventurous!
With these ingredients, you’ll be ready to create a bowl of warmth that sings comfort with every spoonful!
Step-by-Step Instructions to Your Chowder Masterpiece
Now, let’s take a step into the heart of the kitchen as we transform these ingredients into a steaming bowl of Chicken Corn Chowder. Follow along with me!
-
Prep Your Ingredients:
- Begin by gathering all your ingredients. Chop the onion and garlic, cube the potatoes, and slice up the chicken into bite-sized pieces. This always helps the cooking process flow smoothly—no one enjoys scrambling for ingredients during cooking!
-
Sauté the Aromatics:
- Heat a large pot over medium heat and add a bit of olive oil. Once shimmering, toss in the chopped onions. Sauté them until soft and translucent, about 5 minutes. Add in the minced garlic and sauté for another minute until fragrant. You’ll want your kitchen to smell like heaven at this point!
-
Cook the Chicken:
- Increase the heat to medium-high and add the chicken pieces to your pot. Season with salt, pepper, and thyme. Cook the chicken until it’s browned and cooked through, about 7-10 minutes. Don’t skip this step—browning adds incredible flavor!
-
Add the Potatoes:
- Toss your cubed potatoes into the pot, stirring to combine well. The potatoes will absorb all the good stuff, adding to the chowder’s creaminess later.
-
Pour in the Broth:
- Add the chicken broth to the pot, stirring to combine. Bring the mixture to a gentle simmer. Let your chowder bubble away for about 15-20 minutes, or until the potatoes are tender. This is when the magic begins to happen!
-
Incorporate the Corn:
- Once the potatoes are fork-tender, stir in the corn. Allow it to cook for another 5 minutes. This quick addition lets the corn retain its sweetness without becoming mushy.
-
Add Cream and Adjust Seasoning:
- Finally, pour in the heavy cream, stirring until well combined. Taste and adjust the seasoning with more salt, pepper, or even a pinch of cayenne if you’re feeling bold. Let it warm through for a few more minutes so that all those flavors meld beautifully together.
-
Serve It Up:
- The chowder is ready to be served! Ladle it into bowls and get ready for the compliments that will surely follow—it smells that good!
Serving Suggestions to Elevate Your Chowder
For a delightful presentation, consider garnishing your chowder with a sprinkle of fresh herbs—chopped parsley, chives, or thyme not only add a beautiful splash of color but also enhance the flavor. A drizzle of olive oil or a dollop of sour cream can elevate your dish even further. Serve with warm crusty bread or homemade cornbread for a lovely pairing. Your guests will be coming back for seconds (or thirds)!
Recipe Variations for a Fun Twist
This recipe can be your canvas for creativity! Here are some variations to consider:
- Spicy Chowder: Add diced jalapeños while cooking the onions for a spicy kick.
- Seafood Chowder: Substitute chicken with shrimp or crab for a coastal twist.
- Vegetarian Option: Replace chicken with chickpeas for a hearty meatless dish, using vegetable broth instead.
- Zesty Lemon: Add a squeeze of fresh lemon juice before serving to brighten up the flavors.
- Herb Infusion: Try using fresh basil or dill in place of thyme for a unique spin on the classic flavor profile.
Chef’s Notes: A Journey Through Chowder
As I’ve developed this recipe over the years, I’ve learned that it’s all about balance. You want a creamy texture, but a touch of brightness keeps it from feeling heavy. One evening, I accidentally added too much cream and thought I’d ruined it. But a splash of lemon juice saved the day, creating a deliciously balanced flavor! Cooking is a journey of discovery, and I love embracing the little hiccups that make us better chefs.
Remember, this chowder is versatile! It’s evolved from my grandmother’s traditional recipe into a reflection of my own culinary adventures. So, feel free to make it your own!
FAQs and Troubleshooting Your Chowder Journey
1. What if my chowder is too thick?
- If you find your chowder is thicker than you’d like, simply stir in more chicken broth or water until you reach your desired consistency.
2. Can I make this ahead of time?
- Absolutely! This chowder keeps well in the fridge for about 3-4 days. Reheat gently on the stovetop, adding a splash of broth if necessary.
3. How can I make this dish dairy-free?
- Use full-fat coconut milk instead of cream, and ensure that your broth is free from dairy ingredients.
4. What should I do if it’s too salty?
- If your chowder is too salty, you can balance it out by adding more potatoes or cream to dilute the saltiness. A pinch of sugar can also help counteract saltiness.
Nutritional Info
While this Chicken Corn Chowder is packed with comfort and flavor, here’s an estimated breakdown of its nutritional value per serving:
- Calories: 450
- Protein: 25g
- Carbohydrates: 30g
- Fat: 25g
- Fiber: 3g
Of course, this will vary based on the exact ingredients you use!
And there you have it—Chicken Corn Chowder, straight from my kitchen to yours! I hope you enjoy exploring this dish just as much as I have. Remember, cooking is about joy, creativity, and connection. So tie that apron on and let’s make something incredible together. Happy cooking, friends!
PrintCreamy Chicken Corn Chowder

A delightful bowl of warmth filled with chicken, corn, and creamy goodness, perfect for cozy evenings.
- Prep Time: 15 minutes
- Cook Time: 30 minutes
- Total Time: 45 minutes
- Yield: 4 servings 1x
- Category: Main Course
- Method: Stovetop
- Cuisine: American
- Diet: Non-Vegetarian
Ingredients
- 1 lb boneless, skinless chicken breast or thighs
- 2 cups fresh, canned, or frozen corn
- 2 medium Yukon gold potatoes, cubed
- 1 cup heavy cream (or half-and-half, or coconut cream for dairy-free)
- 1 onion, chopped
- 2 cloves garlic, minced
- 4 cups low-sodium chicken broth
- 1 tsp fresh thyme (or 0.5 tsp dried thyme)
- Salt and pepper to taste
- Pinch of cayenne pepper (optional)
Instructions
- Prep your ingredients: Gather, chop the onion and garlic, cube the potatoes, and slice the chicken.
- Sauté the aromatics: Heat olive oil in a large pot and sauté onions until soft, then add garlic and sauté until fragrant.
- Cook the chicken: Increase heat, add chicken, season with salt, pepper, and thyme, and brown for 7-10 minutes.
- Add the potatoes: Stir in the cubed potatoes and combine well.
- Pour in the broth: Add chicken broth, bring to a gentle simmer, and let bubble for 15-20 minutes until potatoes are tender.
- Incorporate the corn: Stir in the corn and cook for another 5 minutes.
- Add cream and adjust seasoning: Pour in heavy cream, stir, and adjust seasoning as needed.
- Serve it up: Ladle chowder into bowls and enjoy!
Notes
Garnish with fresh herbs and serve with warm crusty bread or cornbread for the best experience.
Nutrition
- Serving Size: 1 bowl
- Calories: 450
- Sugar: 5g
- Sodium: 600mg
- Fat: 25g
- Saturated Fat: 12g
- Unsaturated Fat: 10g
- Trans Fat: 0g
- Carbohydrates: 30g
- Fiber: 3g
- Protein: 25g
- Cholesterol: 90mg
Keywords: chicken, corn, chowder, soup, creamy, fall recipe
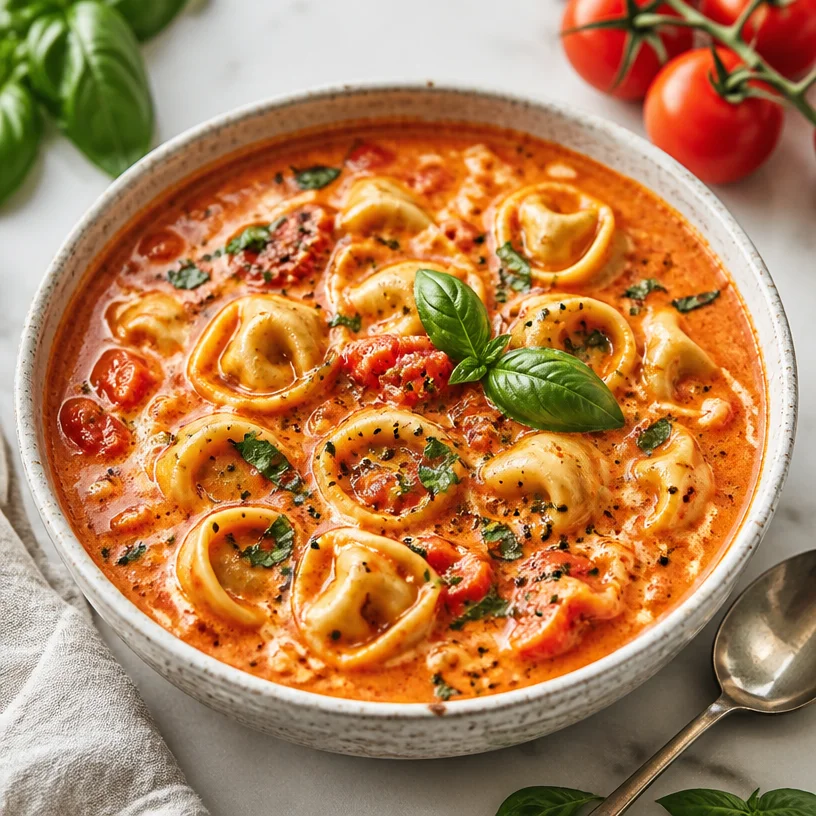
One-Pot Creamy Tomato Tortellini Soup: Ready in 30 Minutes
Creamy Tomato Tortellini Soup: A Hug in a Bowl
Hello, food lovers! Today, let’s dive into a recipe that’s not only heartwarming but also oh-so-delicious—Creamy Tomato Tortellini Soup. This dish is like that old cozy blanket you reach for on brisk autumn nights. It’s a bowl of warmth that wraps around you and reminds you that good food is all about comfort and joy.
Imagine slurping a rich, creamy soup loaded with tender tortellini and bright tomatoes, each spoonful inviting you to take another. Whether you’re catching up with friends, enjoying a quiet evening in, or simply looking for a delightful weeknight dinner, this soup is your ticket to cozy bliss.
A Personal Story: A Delicious Family Tradition
Growing up, my family always gathered around the table, but there was one dish that consistently made an appearance during our chilly evenings—my mom’s tomato soup. It was rich, tangy, and paired perfectly with grilled cheese sandwiches. As children, my siblings and I would fight for the first round of seconds, spooning the soup into our bowls and delighting in every creamy bite.
When I started to explore cooking, I sought to bring my childhood memories into my adult culinary creations. One day, inspired by the classic tomato soup, I thought, “What if I jazz this up a bit?” With a quick trip to the grocery store, I came back with fresh tortellini and cream. That night, Creamy Tomato Tortellini Soup was born, and it quickly became a new family favorite—bringing that nostalgic warmth right back to our table.
Ingredients
Here’s what you’re going to need to whip up this delightful soup:
-
Fresh Tortellini: Go for cheese or spinach tortellini for the best flavor. If you can’t find fresh, frozen works just fine!
-
Canned Tomatoes: I love using whole or crushed San Marzano tomatoes for their rich sweetness. You can substitute them with fresh ripe tomatoes, but you may need to add a bit of sugar for sweetness.
-
Heavy Cream: This is what gives the soup its luxurious creaminess. You can swap it with half-and-half for a lighter version, or coconut cream if you want a dairy-free option.
-
Fresh Basil: This herb adds a burst of fresh flavor. If fresh isn’t in season, grab some dried basil, but remember to use less since dried is more concentrated.
-
Garlic: Freshly minced garlic elevates the flavor profile. You can replace it with garlic powder in a pinch—just use about half the amount.
-
Onion: A medium onion adds sweetness and depth. Red onions can be substituted if you prefer a milder taste.
-
Vegetable or Chicken Broth: Using broth adds another layer of flavor; however, water is an option if you’re in a bind. Just season more generously.
-
Salt & Pepper: Always adjust to your taste! Fresh ground pepper enhances the overall dish, while a pinch of salt accentuates the flavors.
Now you’re prepped and ready to cook!
Step-by-Step Instructions
-
Sauté the Aromatics: In a large pot, heat 1 tablespoon of olive oil over medium heat. Toss in your diced onion and sauté for about 3-4 minutes until they’re soft and translucent. This step is important as it builds the foundation of flavor!
-
Add Garlic: Once the onion is softened, add 2-3 cloves of minced garlic and sauté for an additional minute until fragrant. Keep an eye on it—burnt garlic is not your friend!
-
Crush the Tomatoes: Bring in your canned tomatoes (either whole or crushed) and use a wooden spoon to break them up if using whole. Let this simmer on medium-low heat for about 10 minutes, allowing the flavors to meld beautifully.
-
Pour in the Broth: Add around 4 cups of your veggie or chicken broth, stirring to combine. Bring it back to a gentle boil and season generously with salt and pepper.
-
Add the Tortellini: Once boiling, toss in the fresh tortellini and wait about 5-7 minutes or until they’re al dente. Keep stirring gently—tortellini loves to stick together!
-
Time for Cream: Reduce the heat and slowly pour in the heavy cream, stirring continuously until the soup is beautifully blended and rich. This is where the magic really happens!
-
Finishing Touches: Add a handful of freshly chopped basil and stir to incorporate. Taste and adjust the seasoning if needed—a little more salt or pepper can make a significant difference!
-
Serve Hot and Enjoy: Ladle the soup into bowls and garnish with extra basil, a drizzle of cream, and perhaps a sprinkle of Parmesan cheese for that extra touch of elegance.
Serving Suggestions
To truly elevate your dining experience, consider serving your Creamy Tomato Tortellini Soup with a crusty loaf of bread or a light, crisp salad. Garnish with a fresh basil sprig or a dollop of cream for those Instagram-worthy moments. The warmth of the soup pairs beautifully with the crunch of the bread, creating an inviting dish everyone will love.
Recipe Variations
Feeling adventurous? Here are some fun variations you might want to try:
-
Add Vegetables: Toss in some chopped spinach or kale before serving for a boost of nutrition and color.
-
Spicy Kick: Add a pinch of red pepper flakes for a hint of heat.
-
Meat Lovers: Brown some Italian sausage or bacon before adding the onions for a hearty twist.
-
Cheesy Goodness: Stir in a handful of shredded mozzarella or a sprinkle of grated Parmesan cheese.
-
Herb Infusion: Swap out basil for fresh thyme or oregano for a different herbal note.
Chef’s Notes
I’ll let you in on a little secret: this soup actually improves the next day! The flavors deepen, giving you an even richer bowl. And let’s chat about leftovers—this soup freezes beautifully! Just let it cool completely before transferring it into freezer-safe containers, and you’ll have a quick meal waiting for you on hectic nights.
And on a light-hearted note, the first time I served this at a family gathering, I accidentally spilled the entire pot all over the kitchen floor! We laughed so hard, and I swear it ended up being one of those magical moments—everyone dined on what was salvageable, and it became a running joke at every gathering since. Now I always make a double batch!
FAQs and Troubleshooting
-
Can I use dried tortellini?
Yes! If you’re using dried tortellini, increase the cooking time to about 10-12 minutes, or until they’re cooked according to package instructions. -
How do I make this soup ahead of time?
You can prepare everything up to the addition of the cream and tortellini ahead of time and store it in the refrigerator. Just heat it up and add the cream and tortellini when you’re ready to serve! -
Why is my soup too thick?
If your soup thickens more than you’d like, simply add a bit more broth or water to reach your desired consistency. -
Can I make it dairy-free?
Absolutely! Substitute heavy cream with coconut cream and ensure your tortellini is dairy-free as well.
Nutritional Info (Based on 1 serving)
- Calories: Approximately 350
- Protein: 12g
- Carbohydrates: 45g
- Fat: 15g
- Fiber: 3g
So there you have it! A delightful Creamy Tomato Tortellini Soup that is guaranteed to warm your heart and fill your home with the scents of comfort and joy. Now, roll up those sleeves and let’s get cooking—your new favorite dish is just a bowl away!
PrintCreamy Tomato Tortellini Soup

A heartwarming Creamy Tomato Tortellini Soup that wraps you in warmth and comfort, perfect for chilly evenings.
- Prep Time: 15 minutes
- Cook Time: 30 minutes
- Total Time: 45 minutes
- Yield: 4 servings
- Category: Main Course
- Method: Cooking
- Cuisine: Italian
- Diet: Vegetarian
Ingredients
- Fresh Tortellini (cheese or spinach)
- Canned Tomatoes (whole or crushed San Marzano)
- Heavy Cream
- Fresh Basil
- Garlic (minced)
- Onion (medium)
- Vegetable or Chicken Broth
- Salt & Pepper (to taste)
Instructions
- Sauté the Aromatics: Heat 1 tablespoon of olive oil in a large pot over medium heat, add diced onion, and sauté for 3-4 minutes until soft.
- Add Garlic: Once softened, add minced garlic and sauté for 1 minute until fragrant.
- Crush the Tomatoes: Add canned tomatoes to the pot, breaking them up, and let simmer for 10 minutes.
- Pour in the Broth: Add around 4 cups of broth, stir to combine, and season with salt and pepper.
- Add the Tortellini: Toss in fresh tortellini and cook for 5-7 minutes until al dente.
- Time for Cream: Reduce heat and pour in heavy cream, stirring until blended.
- Finishing Touches: Stir in freshly chopped basil, adjust seasoning if needed.
- Serve Hot and Enjoy: Ladle into bowls, garnish with basil and cream.
Notes
This soup improves in flavor the next day and freezes well for easy meals later.
Nutrition
- Serving Size: 1 serving
- Calories: 350
- Sugar: 6g
- Sodium: 400mg
- Fat: 15g
- Saturated Fat: 7g
- Unsaturated Fat: 5g
- Trans Fat: 0g
- Carbohydrates: 45g
- Fiber: 3g
- Protein: 12g
- Cholesterol: 30mg
Keywords: soup, tortellini, tomato, creamy, comfort food, Italian recipe
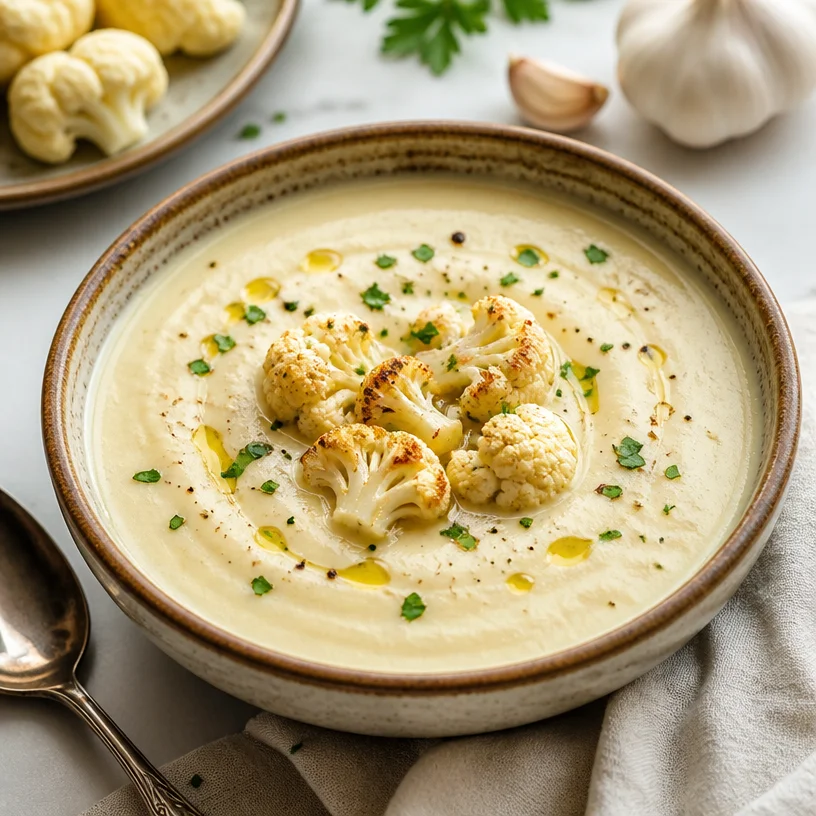
Creamy Cauliflower Soup: Fast, One-Pot Weeknight Comfort
Creamy Cauliflower Soup: A Comforting Bowl of Love
Hello, dear friends! Today, we’re diving headfirst into a bowl of happiness with my Creamy Cauliflower Soup. Whether you’re looking to warm up on a chilly evening or impress your guests with an elegant starter, this soup delivers on every front. It’s creamy, indulgent, and surprisingly easy to make. Plus, it highlights one of my favorite vegetables — cauliflower!
A Cozy Kitchen Memory
Let me take you back to the first time I ever made a creamy cauliflower soup. It was a brisk autumn evening, and I was hosting my very first dinner party at my apartment. I wanted to impress my friends, but my cooking repertoire at the time was limited to pasta and grilled cheese. So, I decided to venture into uncharted culinary territory with this soup.
After a bit of trial and error—where I may or may not have slightly overcooked the garlic and made the kitchen smell like burnt garlic heaven—I finally got it right. The moment my guests took their first spoonful, you could see the delight in their eyes. They kept asking for seconds, and my heart swelled with joy. That night wasn’t just about the soup; it was about connection, laughter, and memories made around the table.
Now, whenever I make this creamy cauliflower soup, I’m reminded of that evening—how a simple dish could bring friends together. Cooking is truly a celebration, and I want to share that spirit with you!
Ingredients:
- 1 large head of cauliflower: Cauliflower is the star of our show! It’s packed with nutrients and has a mild flavor that allows us to create a rich, creamy soup. If you can’t find cauliflower, you can substitute half a head of broccoli for a different but equally delicious flavor.
- 1 medium onion: Onions add a depth of flavor. Use yellow for sweetness or red for a touch of spice! If you’re looking for a milder option, shallots could work beautifully here.
- 3 cloves of garlic: Garlic brings warmth and earthiness to the soup. If you’re not a huge garlic fan, you can halve the amount; however, I promise you, the garlic balances out beautifully with the cream!
- 2 cups of vegetable broth: This forms the base of your soup. Feel free to swap in chicken broth if you’re not vegetarian. Homemade stock is always a winner, but store-bought will work just fine.
- 1 cup of heavy cream: Cream gives our soup that luxurious texture. If you’re looking for a lighter option, you can use half-and-half, or for a dairy-free spin, try coconut milk for a hint of sweetness.
- Salt and pepper to taste: Simple but essential! Adjust according to your palate, and don’t skip tasting along the way. Trust your taste buds!
Step-by-Step Instructions
-
Prep the Cauliflower: Begin by removing the leaves and the core of the cauliflower. Cut it into florets—about 1-inch pieces. This will help them cook more evenly and quickly. Not to mention, it makes for a beautiful presentation!
-
Sauté the Aromatics: In a large pot over medium heat, add a splash of olive oil. Once it’s shimmering, add the chopped onion. Sauté for about 5 minutes until they’re translucent and fragrant—this is where your kitchen will start to smell magical! Next, toss in the minced garlic and sauté for an additional minute, just until fragrant. Keep an eye on it; you want the garlic to be golden, not burnt!
-
Cook the Cauliflower: Add the cauliflower florets to the pot, and stir them around to coat in the wonderful onion and garlic mixture. Now, it’s time to pour in your vegetable broth. Bring everything to a gentle simmer, cover the pot, and let it cook for about 15-20 minutes until the cauliflower is tender.
-
Blend It Up: Once the cauliflower is soft, remove the pot from the heat and let it cool slightly. Carefully transfer the mixture (in batches, if necessary) to a blender. Add the heavy cream, salt, and pepper. Blend until silky smooth. Bonus chef tip: For an extra touch, you can reserve a few cauliflower florets to toss back into the soup afterward for texture.
-
Serve It Right: Pour your creamy concoction back into the pot to warm through one last time. Taste and adjust seasoning, if necessary. I often add a little squeeze of lemon juice at this stage to brighten everything up!
Serving Suggestions
The right presentation can take your soup from homey to haute! Serve the creamy cauliflower soup in delicate bowls, garnished with a drizzle of olive oil or a swirl of cream. Add a sprinkle of fresh herbs like chives or parsley for a pop of color. Crusty bread or garlic croutons on the side will make it feel like a complete meal. Shine brighter, my friends—this soup is good enough to be the star of any dinner table!
Recipe Variations
- Herb Infusion: Add fresh herbs like thyme or rosemary during the cook time for an aromatic twist. Remove the stems before blending!
- Spicy Kick: Toss in some red pepper flakes with your garlic for a gentle heat that complements the creamy texture.
- Cheesy Pleasure: Stir in a handful of grated Parmesan or sharp cheddar just before serving to take your soup to the next level—a creamy soup with savory cheese? Yes, please!
- Nutty Flavor: Add a tablespoon of tahini or almond butter when blending for a nutty profile that deepens the flavor.
- Vegan Version: Substitute the heavy cream with canned coconut milk, and use nutritional yeast instead of cheese for a deliciously dairy-free option.
Chef’s Notes
This soup has been a staple in my kitchen for years! Initially, I followed a strict recipe every time, but as I became more confident, I started making it my own. I once had a friend bring over some roasted garlic, and I decided to throw it in; oh my goodness, that elevated the soup in ways I hadn’t anticipated! Now, experimentation is the name of the game in my kitchen. Each batch is a little different, and I love that it allows me to get creative while maintaining that comforting classic.
FAQs and Troubleshooting
Q1: My soup turned out too thick; what can I do?
A: Fear not! Simply add more broth or water until you reach your desired consistency.
Q2: Can I make this soup in advance?
A: Absolutely! This soup stores beautifully in the fridge for up to three days. Just reheat gently on the stove, adding a splash more cream or broth for extra creaminess.
Q3: How can I make this soup gluten-free?
A: Worry not! All of the ingredients listed are naturally gluten-free. Just double-check your broth for any added ingredients and you’re good to go!
Q4: Can I freeze the soup?
A: Totally! It freezes well for up to two months. When you’re ready to enjoy it again, thaw it in the fridge overnight and reheat on the stove. Some cream and a dash of seasoning may do wonders to revive its lusciousness!
Nutritional Info
*Caloric information can vary based on your specific ingredients and portion sizes, but on average, one serving provides about:
*Calories: 220
*Fat: 15g (with cream)
*Carbohydrates: 12g
Protein: 5g
There you have it, gorgeous souls! Your very own bowl of Creamy Cauliflower Soup awaits. Whether you’re crafting it for dinner guests or treating yourself to a cozy night in, remember that cooking is about the love and the joy of sharing. So tie on your apron and let the aromas fill your kitchen—together, let’s create something delicious. Cheers!
PrintCreamy Cauliflower Soup

A creamy and indulgent cauliflower soup, perfect for warming up on chilly evenings or impressing dinner guests.
- Prep Time: 15 minutes
- Cook Time: 30 minutes
- Total Time: 45 minutes
- Yield: 4 servings 1x
- Category: Soup
- Method: Blending
- Cuisine: American
- Diet: Vegetarian
Ingredients
- 1 large head of cauliflower
- 1 medium onion
- 3 cloves of garlic
- 2 cups of vegetable broth
- 1 cup of heavy cream
- Salt and pepper to taste
Instructions
- Prep the cauliflower: Begin by removing the leaves and the core of the cauliflower. Cut it into florets—about 1-inch pieces.
- Sauté the aromatics: In a large pot over medium heat, add a splash of olive oil. Add the chopped onion and sauté for about 5 minutes until translucent. Then, add the minced garlic and sauté for an additional minute.
- Cook the cauliflower: Add the cauliflower florets to the pot, stir to coat in the onion and garlic mixture, then pour in the vegetable broth. Bring to a gentle simmer, cover, and cook for about 15-20 minutes until the cauliflower is tender.
- Blend it up: Remove the pot from heat and let it cool slightly. Carefully transfer the mixture to a blender, add the heavy cream, salt, and pepper, and blend until silky smooth.
- Serve it right: Pour the creamy soup back into the pot to warm through. Adjust seasoning if necessary.
Notes
Serve with a drizzle of olive oil or a swirl of cream. Garnish with fresh herbs and pair with crusty bread or garlic croutons.
Nutrition
- Serving Size: 1 serving
- Calories: 220
- Sugar: 4g
- Sodium: 400mg
- Fat: 15g
- Saturated Fat: 9g
- Unsaturated Fat: 5g
- Trans Fat: 0g
- Carbohydrates: 12g
- Fiber: 3g
- Protein: 5g
- Cholesterol: 60mg
Keywords: cauliflower soup, creamy soup, vegetarian soup

One-Pot Creamy Loaded Baked Potato Soup in 30 Minutes
Loaded Baked Potato Soup: Comfort in Every Spoonful
Hello, food lovers! Today, I’m thrilled to take you on a culinary adventure that warms not just the tummy but the heart too. We’re diving into the creamy, dreamy world of Loaded Baked Potato Soup — a dish that embodies cozy evenings, family gatherings, and all those lovely memories of snuggling up in a blanket with something delicious in hand.
Imagine it: a bowl of velvety soup infused with the flavors of crispy bacon, cheddar cheese, and a handful of green onions scattered on top. Sounds delightful, right? This recipe is perfect for welcoming in autumn chill or just enjoying a comforting dinner any night of the week. As you gather around the table with family or friends, this soup is sure to be the star of the show. So grab your potatoes, and let’s get cooking!
A Soup Memory to Cherish
Picture this: a rainy Saturday afternoon at my grandma’s house. The sky drizzled grey while the aroma of baked potatoes wafted through the air, expertly blended with the crisp scent of bacon sizzling on the stove. It was one of those magical moments that felt timeless, where the world outside disappeared, and all that mattered was the laughter and love shared around the kitchen.
I remember peeking over the counter, trying to steal glimpses of grandma’s hands working through her secret recipe. She always had a knack for making the simplest ingredients sing. Loaded Baked Potato Soup was one of her go-to recipes; it was thick, creamy, and brimming with flavor—comfort in a bowl.
I couldn’t keep my spoon down as she ladled the soup into those wonderfully mismatched bowls. It was family-style dining at its finest, where every bite felt like a warm hug. Now, every time I make this soup, it takes me back to that cozy kitchen, reminding me that good food truly builds memories.
Ingredients
You’ll need the following ingredients to whip up this hearty Loaded Baked Potato Soup:
-
Potatoes (Russet or Yukon Gold): These starchy superheroes are the base of our soup. They add creaminess and a delightful texture. I recommend Russet potatoes for their high starch content, but Yukon Gold will bring a buttery flavor too.
-
Bacon: Crispy and savory, bacon adds a rich umami flavor that complements the potatoes perfectly. Can’t have bacon? Swap it with turkey bacon or crumbled tempeh for a vegetarian twist!
-
Cheddar Cheese: A must-have for that gooey goodness! I love sharp cheddar for its bold flavor, but feel free to experiment with gouda or even pepper jack for a spicy kick.
-
Sour Cream: This is your soup’s secret weapon! It contributes a tangy creaminess that balances the richness. For a lighter option, you might consider Greek yogurt.
-
Green Onions: Fresh and crisp, green onions not only add a pop of color but also a mild onion flavor that brightens the soup. If you’re out of green onions, chives or shallots can work well too.
These ingredients come together to create not just a recipe but a cozy experience that invites everyone to gather around the table!
Step-by-Step Instructions
Now that we have our ingredients ready, let’s get down to the nitty-gritty of making our Loaded Baked Potato Soup! Follow these steps closely for that perfect bowl of comfort.
-
Prepare Your Ingredients: Start by washing and peeling your potatoes. Chop them into small cubes (about 1-inch pieces) to ensure they cook evenly. You can also chop your bacon, green onions, and cheese before you begin cooking so that everything flows seamlessly.
-
Cook the Bacon: In a large stockpot over medium heat, add the chopped bacon. Cook until crispy and golden, which usually takes about 5-7 minutes. Don’t rush this step—the bacon needs time to render its flavorful fat! Once done, use a slotted spoon to transfer the bacon to a plate lined with paper towels, leaving the drippings in the pot.
-
Sauté the Onions: In the leftover bacon fat, toss in the chopped green onions (reserve some for garnish!). Sauté them for about 2-3 minutes until they become soft and fragrant. This will create a beautiful base flavor for your soup!
-
Add Potatoes and Stock: Now it’s time to add those cubed potatoes into the pot. Stir them around for a minute or two to absorb the flavors. Next, pour in 4 cups of chicken or vegetable stock, covering the potatoes completely. Bring this mixture to a gentle boil.
-
Simmer Away: Reduce the heat to low and cover the pot, allowing it to simmer for around 20 minutes. You want the potatoes to become tender enough to mash easily—a perfect time to gather your family and share some kitchen stories!
-
Blend it Up: Once the potatoes are nice and tender, use an immersion blender to puree the soup until it reaches your desired consistency. If you don’t have an immersion blender, carefully transfer the soup in batches to a regular blender. Just be careful with that hot liquid! I like to leave some chunks for a delightful texture.
-
Stir in Cheddar and Sour Cream: After blending, return the pot to low heat and stir in the shredded cheddar cheese and sour cream. This is where the magic happens; as the cheese melts, your soup becomes indulgently creamy. Always taste and adjust the seasoning—don’t forget a pinch of salt and pepper!
-
Finish with Bacon: Toss back in most of the cooked bacon, reserving some for topping. Let the soup heat through for another 2-3 minutes. Your kitchen should smell heavenly by now!
And there you have it, my friends—a deliciously comforting bowl of Loaded Baked Potato Soup!
Serving Suggestions
Serving this beauty is simple. Ladle the soup into warm bowls and top with a sprinkle of crispy bacon, a dollop of sour cream, and a generous handful of green onions. For an extra comforting touch, you can serve it alongside a crusty loaf of bread or sprinkle some extra shredded cheese on top. Your guests will be digging into this delicious creation in no time!
Recipe Variations
Don’t be afraid to get creative! Here are a few fun twists and variations to consider:
-
Spicy Loaded Baked Potato Soup: Toss in some jalapeños or a dash of hot sauce for some heat.
-
Cheesy Broccoli and Potato Soup: Add in some steamed broccoli florets for a veggie kick—delicious and nutritious!
-
Loaded Potato Soup with Truffle Oil: Drizzle some truffle oil on top for an elevated twist that’s sure to impress at your next dinner party.
-
Vegan Loaded Potato Soup: Substitute the bacon for crispy chickpeas, use almond milk instead of cream, and swap the cheese for a vegan cheddar alternative.
Chef’s Notes
This recipe has evolved over the years, thanks to trial and error (and a few happy accidents!). I recall one time forgetting the bacon and subbing in some finely chopped mushrooms instead. It was a delightful twist that worked well—so never hesitate to play around with the ingredients!
Also, don’t stress about perfection in the kitchen. Remember my grandma’s saying, "If you can smile while cooking, you can never make a mistake!" Trust me; the joy of cooking is all about enjoying the process and the memories made along the way.
FAQs and Troubleshooting
1. My soup is too thick! What should I do?
Don’t worry! If your soup is thicker than you’d like, simply stir in some additional stock or water until you reach your desired consistency.
2. How can I make it gluten-free?
This recipe is naturally gluten-free, as long as you ensure your stock is gluten-free! Always read labels to be safe!
3. My soup is too salty. What can I do?
Try adding a tablespoon of sugar or a splash of vinegar to balance out the saltiness. Alternatively, a chopped potato can absorb excess salt—just remember to remove it after cooking!
4. Can I make this soup ahead of time?
Absolutely! The flavors deepen when it sits, making it even more delicious. Store it in the fridge for up to 3 days; just reheat gently before serving.
Nutritional Info
This Loaded Baked Potato Soup is not just delicious but can also be made healthier with substitutions. One serving typically contains around 400 calories, but this can vary based on the ingredients used. Paired with a side salad, it creates a balanced meal packed with flavor!
So there you have it, my friends—a comforting bowl of Loaded Baked Potato Soup perfect for any occasion! Gather your ingredients, pour yourself a glass of something sparkly, and let’s create some timeless moments together. Happy cooking!
PrintLoaded Baked Potato Soup

A creamy and dreamy Loaded Baked Potato Soup, infused with flavors of crispy bacon, cheddar cheese, and topped with green onions—a perfect cozy dish for chilly evenings.
- Prep Time: 15 minutes
- Cook Time: 30 minutes
- Total Time: 45 minutes
- Yield: 4 servings 1x
- Category: Soup
- Method: Stovetop
- Cuisine: American
- Diet: Non-Vegetarian
Ingredients
- 4 medium Potatoes (Russet or Yukon Gold), peeled and cubed
- 6 slices Bacon, chopped
- 1 cup Cheddar Cheese, shredded
- 1 cup Sour Cream
- 1/2 cup Green Onions, chopped
- 4 cups Chicken or Vegetable Stock
- Salt and Pepper to taste
Instructions
- Prepare Your Ingredients: Wash and peel the potatoes, and chop them into small cubes.
- Cook the Bacon: In a large stockpot over medium heat, add the chopped bacon and cook until crispy.
- Sauté the Onions: In the leftover bacon fat, add chopped green onions and sauté for 2-3 minutes.
- Add Potatoes and Stock: Add cubed potatoes and stock to the pot, covering the potatoes completely.
- Simmer Away: Reduce heat to low, cover, and simmer for around 20 minutes until potatoes are tender.
- Blend it Up: Use an immersion blender to puree the soup until reaching desired consistency.
- Stir in Cheddar and Sour Cream: Return pot to low heat, and stir in shredded cheddar cheese and sour cream.
- Finish with Bacon: Add most of the cooked bacon back into the pot and heat through for another 2-3 minutes.
Notes
Feel free to adjust seasoning; the cheese and bacon add plenty of flavor.
Nutrition
- Serving Size: 1 bowl
- Calories: 400
- Sugar: 4g
- Sodium: 800mg
- Fat: 24g
- Saturated Fat: 11g
- Unsaturated Fat: 7g
- Trans Fat: 0g
- Carbohydrates: 45g
- Fiber: 5g
- Protein: 15g
- Cholesterol: 40mg
Keywords: soup, comfort food, baked potato, creamy soup

One-Pot Creamy Pumpkin-Chicken Soup for Weeknights (30m)
Cozy Up with a Bowl of Pumpkin Chicken Soup
Hello, fellow food lovers! Today, I’m thrilled to guide you through making one of my all-time favorite comfort dishes—Pumpkin Chicken Soup. As the leaves start to turn and the air grows crisp, there’s nothing quite like curling up with a warm bowl of this rich, velvety soup. It’s not just about the flavors; it’s about the memories, the love, and the laughter that comes with every spoonful. So, let’s tie on our aprons and dive into this beautiful creation together!
A Memory Steeped in Comfort
When I think of pumpkin chicken soup, I can’t help but reminisce about the early autumn afternoons spent in my grandmother’s kitchen. She had this magical way of transforming simple ingredients into something extraordinary. I remember walking into her home, greeted by the warm, welcoming aroma of roasting garlic mixed with the earthy scent of pumpkin—an irresistible invitation to gather.
We would stand around the stove, her stirring the pot while I eagerly awaited my turn to help. She’d hand me a spoon and show me how to taste and adjust the seasoning, all while sharing stories of family gatherings and the importance of food in our lives. Those moments taught me that cooking is so much more than just following a recipe; it’s about connection, joy, and creativity.
And that’s exactly what I want to share with you today: a soup that not only nourishes the body but also warms the heart. Let’s create new memories in our kitchens that will last a lifetime!
Ingredients
Here’s what you’ll need to get started on your comforting bowl of Pumpkin Chicken Soup:
-
Chicken: You can use boneless, skinless chicken breasts or thighs. Thighs add a richer flavor; however, breasts are easier for shredding. If you’re in a pinch, rotisserie chicken is a fantastic shortcut!
-
Pumpkin Puree: Make sure to use pure pumpkin puree (not pumpkin pie filling). You can also roast fresh pumpkin if you’re feeling adventurous; it adds a lovely depth of flavor.
-
Onion: A sweet onion or yellow onion works perfectly here. Onions add a wonderful base flavor and sweetness to the soup. If you’re not a fan of onion, you can skip it or use leeks for a subtler taste.
-
Garlic: Fresh garlic cloves are essential! They add a lovely aroma and depth. If you’re short on time, you can use garlic powder—1/4 teaspoon equals about one clove.
-
Cream: This soup gets its dreamy texture from heavy cream. If you’d like a lighter version, whole milk or coconut milk also works beautifully, although the flavor will differ a bit.
-
Sage: Fresh sage adds a wonderful, herby note that pairs beautifully with pumpkin and chicken. Dried sage will also do in a pinch; just use about half the amount.
Step-by-Step Instructions
Now that we have our ingredients lined up, it’s time to get cooking! Follow these steps, and let’s create something scrumptious:
-
Prep the Chicken: Start by seasoning your chicken with salt and pepper. This step is essential; it adds flavor right from the get-go! In a large pot or Dutch oven, heat a splash of olive oil over medium heat. Add the seasoned chicken and cook for about 5-7 minutes per side, until golden brown. Remove it from the pot and set aside. Chef hack: If your chicken has skin, leave it on while cooking for more flavor, but remove it before shredding.
-
Sauté the Aromatics: In the same pot, add a bit more olive oil if needed, then toss in the diced onion and minced garlic. Sauté them for about 3-4 minutes until the onion is soft and translucent. Oh, that smell! It’s the beginning of something beautiful. Tip: Be sure to scrape up any brown bits left from the chicken—they’re packed with flavor!
-
Add the Pumpkin: Time for the star of the show! Stir in the pumpkin puree, mixing it well with the onions and garlic. Cook for a couple of minutes, letting the flavors meld together. It’s okay if the mixture looks a little thick; that just means we’re building flavor!
-
Create the Soup Base: Pour in about 4 cups of chicken stock (or broth!). If you like a thicker soup, use less. Bring the mixture to a gentle simmer. As it bubbles, return the chicken to the pot, along with any juices that have accumulated. Chef tip: If you want a more intense flavor, feel free to add a splash of white wine at this stage!
-
Let It Simmer: Allow the soup to simmer for about 20-25 minutes until the chicken is fully cooked through and tender. This will give the flavors ample time to blend.
-
Shred the Chicken: Once cooked, remove the chicken and shred it with two forks or chop it into bite-sized pieces. Return it to the pot. Chef insight: By shredding the chicken, it absorbs more of the creamy goodness of the soup!
-
Finish with Cream and Sage: Stir in the heavy cream and chopped fresh sage. Let it simmer for another 5-10 minutes, just until everything is heated through. Taste and adjust the seasoning with salt and pepper as needed. Note: If you prefer a smoother texture, you can blend the soup with an immersion blender before adding the cream—just be cautious not to over-blend!
Serving Suggestions
When it comes to serving your pumpkin chicken soup, pretty plating makes a world of difference! Ladle the soup into warm bowls and garnish with a swirl of cream, a sprinkle of fresh sage, and perhaps a few toasted pumpkin seeds for crunch. Serve it with some crusty bread or a simple green salad to round out the meal. Your guests (or family) will be delighted and itching to dig in!
Recipe Variations
Feel free to mix things up with these creative twists:
-
Spicy Kick: Add a pinch of crushed red pepper flakes to the pot for a spicy version that warms you from the inside out.
-
Add Some Greens: Toss in a handful of spinach or kale just before serving for a nutrient boost and vibrant color.
-
Different Proteins: Swap out chicken for turkey or even chickpeas for a plant-based option.
-
Herb Options: Try using thyme or rosemary instead of sage for a different flavor profile that pairs beautifully with the pumpkin.
-
Nutty Garnish: Top with a sprinkle of toasted pine nuts or sunflower seeds for added texture and nutrition.
Chef’s Notes
Throughout the years, this recipe has transformed into a staple at my dinner table. It started as a simple dish to warm my family’s hearts and has now become a canvas for creativity. I love that it’s one of those recipes where you can add whatever is left in the fridge—maybe some carrots or potatoes—and it will still shine!
I remember one time, I accidentally added too much cream, and instead of being upset, I embraced it. The result? An even cozier, velvety soup that left everyone smiling and asking for seconds. So, don’t stress the little things—cooking should always be about joy and experimentation!
FAQs and Troubleshooting
Q: Can I make this soup in advance?
Absolutely! This soup keeps well in the fridge for 3-4 days. Just reheat gently on the stove, adding a splash of broth if it thickens up too much.
Q: How can I thicken the soup?
If you prefer a thicker soup, you can blend a portion of it and return it to the pot. Alternatively, you can stir in a bit of cornstarch mixed with water to thicken it up.
Q: What if I’m not a fan of pumpkin?
No problem! You can substitute butternut squash or sweet potatoes for a similar texture and sweetness.
Q: The soup tastes bland; what can I do?
Ensure you’re seasoning at each step! If it seems bland, boost the flavors with a little more salt, pepper, or even a splash of vinegar for brightness.
Nutritional Info (optional)
If you’re curious about the nutritional breakdown, here’s a general idea per serving (based on a 6-serving batch):
- Calories: 300
- Protein: 20g
- Carbs: 28g
- Fat: 15g
- Fiber: 3g
So there you have it—a warm, delightful bowl of Pumpkin Chicken Soup that’s not just about satisfying hunger but also about sparking joy and connection in your kitchen. So grab your apron, invite a friend or two over, and enjoy the magic of cooking together. Happy cooking!
PrintPumpkin Chicken Soup

A comforting bowl of rich and velvety pumpkin chicken soup, perfect for autumn.
- Prep Time: 15 minutes
- Cook Time: 30 minutes
- Total Time: 45 minutes
- Yield: 4 servings 1x
- Category: Soup
- Method: Simmering
- Cuisine: American
- Diet: Gluten-Free
Ingredients
- 1 lb boneless, skinless chicken breasts or thighs
- 1 cup pumpkin puree
- 1 sweet or yellow onion, diced
- 3 cloves fresh garlic, minced
- 1 cup heavy cream
- 1 tablespoon fresh sage, chopped
- Salt and pepper, to taste
- Olive oil, for cooking
- 4 cups chicken stock
Instructions
- Prep the chicken: Season with salt and pepper, then cook in olive oil until golden brown.
- Sauté the onion and garlic in the same pot until soft.
- Add the pumpkin puree and mix well.
- Create the soup base by adding chicken stock and returning the chicken to the pot.
- Let it simmer for about 20-25 minutes.
- Shred the chicken and return it to the pot.
- Finish by stirring in the heavy cream and sage, and adjust seasoning.
Notes
This soup is versatile; feel free to add greens or switch proteins as desired.
Nutrition
- Serving Size: 1 bowl
- Calories: 300
- Sugar: 5g
- Sodium: 500mg
- Fat: 15g
- Saturated Fat: 8g
- Unsaturated Fat: 5g
- Trans Fat: 0g
- Carbohydrates: 28g
- Fiber: 3g
- Protein: 20g
- Cholesterol: 70mg
Keywords: pumpkin soup, chicken soup, comfort food, autumn recipes

Cheeseburger Soup
Creamy, Dreamy Cheeseburger Soup: A Cozy Bowl of Joy
Welcome back, kitchen companions! Today, I’m excited to share a recipe that takes comfort food to a whole new level—Cheeseburger Soup. Picture this: it’s a chilly evening, the air is crisp with the promise of autumn, and you want nothing more than to wrap your hands around a warm bowl of goodness that tastes just like your favorite cheeseburger. This soup is rich, creamy, and everything we crave when the temperatures drop.
I’ve always believed that food is a form of storytelling. It brings back memories, sparks laughter, and ignites connection—in short, it brings people together. So grab your apron, and let’s dive into this cheeseburger soup adventure that feels like a warm hug in a bowl!
My Cheeseburger Soup Journey
Let me take you back to a delightful autumn afternoon several years ago. I was hosting a casual get-together for friends, and I had the classic hot dogs and hamburgers on my mind. But then, a whimsical idea struck me: why not turn those iconic flavors into a cozy soup? This was a pivotal moment in my cooking journey—the moment I learned that with a little creativity, even the simplest of dishes could be transformed.
As I simmered the beef, loaded it with veggies, and added creamy cheese, the kitchen filled with familiar scents. My friends rolled in, and the laughter and stories started flowing as the soup bubbled on the stove. That first spoonful was an explosion of flavor, and we all were hooked! Every one of us knew we had discovered a new favorite, one that was bound to be brought back to the table time and time again.
Let me guide you through the steps of creating this magical cheeseburger soup so you, too, can create unforgettable memories!
Ingredients
Here’s what you’ll need for this cozy dish:
- Ground Beef: The backbone of our soup, providing that classic cheeseburger flavor. You can substitute with ground turkey or chicken for a leaner option.
- Potatoes: I recommend Yukon Gold or Russet potatoes for their starchy goodness. If you’re looking for a low-carb choice, cauliflower can work in a pinch!
- Carrots: Add a touch of sweetness and color. If you prefer, parsnips or sweet potatoes can give a unique twist.
- Cheddar Cheese: Sharp cheddar offers a bold flavor, but feel free to use any meltable cheese you love—Monterey Jack or Gouda can take this up a notch!
- Milk: This makes the soup creamy and luscious. Substitute with half-and-half for a richer soup, or use plant-based milk for a dairy-free option.
These ingredients come together to create the perfect harmony of flavors, while also offering a chance to customize based on your pantry and dietary preferences.
Step-by-Step Instructions
Now that we’ve gathered our ingredients, let’s get cozy in the kitchen!
Step 1: Brown the Beef
In a large pot or Dutch oven, heat a drizzle of oil over medium heat. Add in 1 pound of ground beef, breaking it up with a wooden spoon. Let it sizzle away until it’s browned and cooked through, about 5-7 minutes. This is where the magic begins! Drain any excess grease—too much fat can make the soup heavy.
Step 2: Add the Vegetables
To the pot, toss in 2 cups of diced potatoes and 1 cup of chopped carrots. Throw in a pinch of salt and pepper to season. Let the veggies sauté for about 3-4 minutes, stirring occasionally. This step helps build layers of flavor and enhances the sweetness of the carrots.
Step 3: Pour in the Liquid
Now, pour in 4 cups of beef broth, bringing everything to a gentle boil. The broth is your canvas, so feel free to use homemade stock if you have it—that’s the secret to a deeply flavored soup! Once it reaches a boil, reduce the heat to a simmer and let it bubble away for about 15-20 minutes, or until the potatoes are tender.
Step 4: Creamy Dreaminess
Once the potatoes are soft, stir in 1 cup of milk and 2 cups of shredded cheddar cheese. As you add the cheese, stir constantly until it melts into that beautiful creamy blend. This is also a great time to taste the soup and adjust the seasoning—don’t shy away from adding a touch more salt or pepper if it needs a little oomph!
Step 5: Final Touches
Keep simmering on low for another 5 minutes, allowing all the flavors to meld beautifully. If the soup seems too thick, simply add a splash of more broth or milk until it reaches your desired consistency. And just like that, you’ve created a pot of deliciousness that your loved ones will rave about!
Serving Suggestions
When it comes to serving your cheeseburger soup, let’s make it extra inviting! Grab some bowls and scoop generous portions. A sprinkle of crispy bacon bits or a dollop of sour cream on top adds an extra layer of indulgence. I also love garnishing with freshly chopped chives or parsley for that pop of color and flavor. Pair it with crusty bread or soft dinner rolls, and you’ve got a meal that sings of warmth and friendship.
Recipe Variations
Now, for those of you who love to put your own spin on things, here are a few creative ideas:
- Spicy Kick: Add some diced jalapeños or a splash of hot sauce to spice things up!
- Veggie-Loaded: Toss in some chopped bell peppers or zucchini for an extra veggie boost.
- Creamy Goodness: Swap the cheddar for cream cheese for a different creamy experience.
- Ground Alternatives: Use ground lamb or sausage as alternatives to beef for a unique flavor profile.
Chef’s Notes
Throughout the years, my cheeseburger soup has evolved. Each time I make it, I think of the laughter, love, and memories it brings. I’ve gone from making it just for friends to creating a big batch for family gatherings. It truly captures the spirit of community, of gathering around the table with shared stories and smiles—a staple recipe in my kitchen. So, don’t be surprised if at some point, you also find your own version of this soup evolving with your family’s tastes!
FAQs and Troubleshooting
1. My soup is too thick! What should I do?
Add a splash of broth or milk and stir until you reach your desired consistency. Gradually add to avoid making it too thin.
2. Can I make this soup in advance?
Absolutely! Just make sure to store it in an airtight container in the fridge. Reheat on the stove, adding a splash of liquid if necessary. The flavors will deepen, making it even more delicious.
3. What can I do with leftover soup?
This soup freezes beautifully! Just let it cool completely, then transfer to freezer-safe containers. It can be kept in the freezer for up to 3 months. When you’re ready, thaw it overnight in the fridge and reheat on the stove.
4. The cheese is clumping! How do I avoid this?
To prevent clumping, make sure the soup is on low heat when adding the cheese. Gradually stir in the cheese and avoid boiling after it’s added.
With every spoonful of cheeseburger soup, I hope you feel the warmth and love that’s been poured into it. It’s about more than just cooking; it’s about connection, kindness, and creating something beautiful together. So, grab that apron, a cozy blanket, and let’s create lovely memories together. Cheers to good food and great company—bon appétit!
PrintCreamy, Dreamy Cheeseburger Soup

A rich and creamy cheeseburger soup that brings comfort and warmth on chilly evenings.
- Prep Time: 10 minutes
- Cook Time: 30 minutes
- Total Time: 40 minutes
- Yield: 4 servings 1x
- Category: Main Course
- Method: Stovetop
- Cuisine: American
- Diet: None
Ingredients
- 1 pound ground beef
- 2 cups diced potatoes (Yukon Gold or Russet)
- 1 cup chopped carrots
- 4 cups beef broth
- 1 cup milk
- 2 cups shredded cheddar cheese
- Oil for cooking
- Salt and pepper to taste
Instructions
- Brown the beef in a large pot over medium heat for 5-7 minutes. Drain excess grease.
- Add the vegetables (potatoes, carrots) and season with salt and pepper. Sauté for 3-4 minutes.
- Pour in the beef broth and bring to a boil. Reduce heat and simmer for 15-20 minutes until potatoes are tender.
- Stir in the milk and cheddar cheese until melted and combined.
- Simmer on low for 5 minutes, adjusting consistency with more broth or milk if needed.
Notes
Garnish with crispy bacon bits, sour cream, chives, or parsley for extra flavor.
Nutrition
- Serving Size: 1 bowl
- Calories: 400
- Sugar: 6g
- Sodium: 900mg
- Fat: 20g
- Saturated Fat: 10g
- Unsaturated Fat: 8g
- Trans Fat: 0g
- Carbohydrates: 30g
- Fiber: 3g
- Protein: 25g
- Cholesterol: 70mg
Keywords: cheeseburger soup, comfort food, cozy recipes, autumn recipes, creamy soup

Creamy Jalapeño Popper Soup: 5-Ingredient Comfort Dinner
Creamy Jalapeño Popper Soup: A Comforting Bowl of Flavor
Welcome to my kitchen, friends! Today, we’re diving into a dish that’s not just a feast for your taste buds but a warm hug in a bowl. Picture this: a rich, luscious Creamy Jalapeño Popper Soup. It’s everything you love about the classic jalapeño popper—creamy, spicy, and a little smoky—transformed into a comforting soup that’s easy to whip up. Whether you’re looking for a cozy weeknight dinner or a stunning dish to impress at your next gathering, this recipe has got you covered!
As the weather cools down, nothing beats curling up with a steaming bowl of soup. And let’s be honest, we could all use a little comfort food love right now! This Creamy Jalapeño Popper Soup is perfect for that. Let me take you on a culinary journey of flavors, textures, and fond memories that will leave you feeling both nostalgic and excited to gather around the table.
A Spoonful of Nostalgia
Whenever I think of jalapeño poppers, I’m instantly transported back to my college days, crammed in a cozy apartment with friends. We would host game nights filled with laughter, snacks, and of course, good food. One of our favorites was a platter of jalapeño poppers, the perfect blend of smoky bacon, spicy jalapeños, and gooey cream cheese. We’d luxuriate in the delight of each crunchy, flavorful bite, savoring both the food and the moments spent together. It was more than just food; it was a way to connect, to celebrate the little things, and to create cherished memories.
Fast forward to today, and while I might have traded card games for cooking experiments, my love for those poppers never faded. That’s exactly where the inspiration for this creamy soup came from. It captures all the flavors we adored in those poppers, but in a deliciously comforting way that’s perfect for sharing…or keeping all to yourself!
Ingredients
Here’s what you’ll need to bring this mouthwatering soup to life:
-
Chicken: I like using boneless, skinless chicken breasts or thighs. You could also substitute with shredded rotisserie chicken for a quicker option. If you’re looking for a vegetarian alternative, try using canned beans for protein!
-
Jalapeños: Fresh is best! They bring both heat and flavor. If you prefer less heat, remove the seeds and membranes, or swap in milder peppers like poblano.
-
Cream Cheese: This is what makes the soup creamy and rich. If you want a lighter version, you can substitute Neufchâtel cheese or even use cashew cream for a dairy-free option.
-
Bacon: Trust me on this—bacon adds a wonderful smoky flavor. For a healthier twist, you can use turkey bacon, or omit it altogether for a vegetarian soup.
-
Chicken Broth: Low-sodium is ideal for controlling saltiness. Homemade broth takes this over the top, but store-bought works just as well.
-
Onion & Garlic: Essential aromatics that lay the flavor foundation. Fresh is always better, but you could use powdered onion or garlic in a pinch.
-
Spices: Paprika, cumin, and a touch of pepper add depth. Feel free to adjust according to your taste.
-
Heavy Cream: For that final luscious touch! If you want something lighter, half-and-half or whole milk are great alternatives.
Step-by-Step Instructions
Ready to create your bowl of deliciousness? Follow these simple steps:
Step 1: Sauté the Aromatics
In a large pot, heat a drizzle of olive oil over medium heat. Add diced onions and sauté until they’re soft and translucent, about 5 minutes. This creates a sweet base for your soup. Add minced garlic and sauté for another minute, just until fragrant. Chef’s tip: Don’t overcrowd the pot; if you’re making a bigger batch, do it in batches to keep that flavor intense.
Step 2: Add the Chicken
Next, toss in your chicken. Brown the pieces for about 5-7 minutes until they’re no longer pink. If using rotisserie chicken, this is where you’ll just add it in later, after simmering to build the flavors.
Step 3: Spice it Up
Sprinkle in your spices: paprika, cumin, and pepper. Stir well to coat the chicken in the aromatic mix. This step is key—it enhances the flavor profile and adds warmth to the soup. A little extra paprika can add a lovely smokiness!
Step 4: Incorporate the Jalapeños
Add the diced jalapeños—this is where the heat comes into play. Stir well and let them cook with the chicken for another 2-3 minutes. Chef’s insight: The longer they cook, the more flavorful they become. If you really like it spicy, toss in some sliced fresh jalapeños towards the end for an extra kick!
Step 5: Pour in the Broth
Now, pour in the chicken broth and bring the pot to a gentle boil. Once bubbling, reduce the heat and let it simmer for 15 minutes. This is when the flavors meld beautifully. If using raw chicken, now’s the time to let it cook through. After simmering, you can easily shred the chicken with two forks.
Step 6: Add the Creaminess
Time to make it creamy! Stir in the cream cheese until it’s fully melted and integrated into the broth. Your soup should turn a beautiful beige, rich in texture. If you want it even creamier, add the heavy cream and stir gently. Pro tip: Always taste before seasoning—adjust with salt or more spices if needed!
Step 7: Garnish and Serve
Finally, ladle the soup into bowls and garnish with crispy bacon and a sprinkle of fresh herbs, like cilantro or parsley, to awaken those flavors. Remember, presentation matters—arranging your toppings artistically makes for a beautiful dish that invites guests to dive in!
Serving Suggestions
This Creamy Jalapeño Popper Soup is perfect with a side of crusty bread or tortilla chips for dipping. You can also serve it in individual bread bowls for a fun twist! A sprinkle of fresh lime juice right before serving can also elevate the flavors.
Recipe Variations
Feel like mixing things up? Try these creative twists:
- Cheesy Variation: Stir in shredded cheddar cheese for an extra cheesy indulgence.
- Mexican Twist: Add a splash of lime juice and garnish with avocado slices for a fresh zing.
- Spicy Southwest: Include corn and black beans for a hearty, southwestern flavor.
- Dairy-Free: Swap out cream cheese and heavy cream for coconut milk to keep it creamy yet dairy-free.
Chef’s Notes
Oh, the joys of experimenting in the kitchen! I once forgot the garlic in a batch of this soup. While it was still delicious, it taught me the importance of all those subtle layers of flavor. I started adding more toppings to keep things exciting—like crispy tortilla strips or even a dollop of salsa for an extra kick! You’ll find that this recipe is very forgiving and open to personal touches that make it uniquely yours.
FAQs and Troubleshooting
1. My soup tastes bland; what can I do?
If your soup is lacking flavor, try adding a splash of hot sauce, more seasoning, or even salt, which enhances all the flavors. Don’t shy away from adjusting your spices based on your own palate!
2. How do I prevent my cream from curdling?
To avoid curdling, always add cream to a simmer, not a boil, and stir gently. If you’re worried, temper your cream by adding a small amount of the hot soup into the cream before stirring it back into the pot.
3. Can I make this ahead of time?
Absolutely! This soup gets even better the next day after the flavors have melded. Just store it in an airtight container, and reheat gently on the stove.
4. Can I freeze this soup?
You can! Freeze in an airtight container, but skip adding the cream before freezing. Stir it in after reheating for the creamiest texture.
Nutritional Info
While I believe in enjoying every bite mindfully, here’s a rough estimate for a serving of this soup:
- Calories: 380
- Protein: 25g
- Carbohydrates: 8g
- Fats: 30g
Remember, these values can vary based on specific ingredients and portion sizes. Cook with love and enjoy every spoonful!
Thank you for joining me today! I hope this Creamy Jalapeño Popper Soup finds a beloved place in your kitchen as it has in mine. As always, happy cooking! Let’s gather around the table and celebrate the warmth we create with our food. Cheers!
PrintCreamy Jalapeño Popper Soup

A comforting and flavorful soup inspired by the classic jalapeño popper, featuring creamy textures and a hint of spice.
- Prep Time: 15 minutes
- Cook Time: 30 minutes
- Total Time: 45 minutes
- Yield: 4 servings 1x
- Category: Soup
- Method: Stovetop
- Cuisine: American
- Diet: Gluten-Free, Dairy Optional
Ingredients
- 2 boneless, skinless chicken breasts or thighs
- 2 fresh jalapeños, diced
- 8 oz cream cheese
- 4 slices of bacon, chopped
- 4 cups low-sodium chicken broth
- 1 onion, diced
- 2 cloves garlic, minced
- 1 tsp paprika
- 1 tsp cumin
- 1/2 tsp black pepper
- 1/2 cup heavy cream
- Olive oil for sautéing
Instructions
- Sauté the aromatics: In a large pot, heat a drizzle of olive oil over medium heat. Add diced onions and sauté until soft and translucent, about 5 minutes. Add minced garlic and sauté for another minute.
- Add the chicken: Toss in your chicken and brown for about 5-7 minutes until no longer pink.
- Sprinkle in your spices: Add paprika, cumin, and pepper to coat the chicken.
- Incorporate the jalapeños: Add diced jalapeños and cook with the chicken for another 2-3 minutes.
- Pour in the broth: Bring to a gentle boil, then reduce heat and simmer for 15 minutes.
- Add the creaminess: Stir in the cream cheese until melted, then add heavy cream.
- Garnish and serve: Ladle into bowls, garnishing with crispy bacon and fresh herbs.
Notes
Feel free to adjust spices to taste. This soup can be made ahead and freezes well; add cream after reheating.
Nutrition
- Serving Size: 1 serving
- Calories: 380
- Sugar: 2g
- Sodium: 800mg
- Fat: 30g
- Saturated Fat: 12g
- Unsaturated Fat: 10g
- Trans Fat: 0g
- Carbohydrates: 8g
- Fiber: 1g
- Protein: 25g
- Cholesterol: 90mg
Keywords: soup, creamy, jalapeño popper, comfort food, spicy soup

Creamy One-Pot Chicken Parmesan Soup (Weeknight Meal)
Comfort in a Bowl: Chicken Parmesan Soup
Hey there, fellow foodies! 🎉 Welcome to the heart of my kitchen, where soups simmer and memories are blended with flavors. Today, we’re diving into a dish that’s like a warm hug on a chilly evening: Chicken Parmesan Soup. Imagine all the comforting notes of classic Chicken Parmesan transformed into an inviting bowl of soup — it’s hearty, it’s delicious, and it’s oh-so-simple to make!
When I first conjured up this recipe, I was craving two things: the comforting familiarity of a beloved Italian dish and the cozy, warming nature of a soup. The moment I took that first spoonful, it brought me back to my childhood, where I would eagerly await my mom’s legendary chicken parmesan on chilly winter nights. We’d gather around the table, laughter echoing through the air, as we savored every melt-in-your-mouth bite. This soup captures that same magic, making it perfect for both weeknights and special occasions, with the added bonus of being a one-pot wonder!
Cooking should always feel elegant yet never intimidating, and that’s exactly what we’ll embrace today. Let’s roll up our sleeves, tie on our aprons, and create a masterpiece that feels both refined and comforting. Ready? Let’s get cooking! 🍲✨
A Kitchen Memory: The Inspiration Behind the Soup
I’ll never forget the first time my mom made chicken parmesan for our family. It had just enough golden-brown crunch on the outside and was layered with gooey, melted cheese — just divine! She served it with spaghetti, and I remember how we all dug in with gusto, each bite savored as though it was the most important mission of our evening.
But here’s the kicker: every time she made it, the aroma would waft through the house, drawing neighbors in, lured by the scent of garlic and tomato. This inviting atmosphere made me realize that food was not just about nourishment; it was about connection. Each meal was a celebration.
That nostalgia is what inspired me to craft this Chicken Parmesan Soup. I wanted to capture that family atmosphere, the simple elegance of Italian cooking, but in a cozy bowl. Picture that same taste you love, now served piping hot in a soup that warms you from the inside out. That, my friends, is what we are making together today!
Ingredients You’ll Need
Let’s gather our ingredients. Here’s what you’ll need for this delectable dish, along with some pro tips to help you out:
-
Chicken Breasts
Use boneless, skinless chicken breasts for a tender and quick-cooking protein. If you’re in a pinch, rotisserie chicken is a fantastic substitute! Just shred it and toss it in toward the end of cooking. -
Marinara Sauce
A rich marinara sauce forms the base of our soup. Store-bought is totally fine (look for organic ones!), but if you’re feeling adventurous, homemade is the way to go. You can even use a roasted tomato sauce for a deeper flavor. -
Parmesan Cheese
Ah, the star of Chicken Parmesan! Freshly grated Parmesan adds creaminess and flavor. Don’t have any? Try Pecorino Romano for a saltier profile or nutritional yeast for a vegan option. -
Pasta
Use small pasta shapes like ditalini, orzo, or even broken spaghetti. If you want to make it gluten-free, feel free to swap in your favorite gluten-free pasta. Just remember to adjust the cooking time! -
Chicken Broth
This will enrich the flavors of your soup. Either store-bought or homemade works great. If you’re low on broth, water will do in a pinch, but it’ll dilute the flavors a bit. -
Italian Seasoning
A blend of herbs like basil, oregano, and thyme brings that Italian flair to our soup. If you’re fresh out, feel free to use individual dried herbs instead! -
Olive Oil
For sautéing your chicken and aromatics. It adds flavor and healthy fats. In a pinch, avocado oil or butter can also do the trick! -
Fresh Basil
This is optional but highly recommended for garnishing! It adds a lovely freshness to your final dish. Dried basil can stand in if fresh is unavailable, just use it more sparingly.
Step-by-Step Instructions
Let’s get our hands busy and start making this delicious Chicken Parmesan Soup! Follow these easy steps for a delightful culinary experience:
-
Prepare Your Chicken
In a large pot, heat about 2 tablespoons of olive oil over medium heat. Season your chicken breasts with salt, pepper, and a sprinkle of Italian seasoning. Once the oil is hot, add the chicken and sauté for about 5-6 minutes on each side until golden brown and cooked through (an internal temperature of 165°F). Remove the chicken and let it rest for a few minutes before shredding or dicing. -
Sauté the Aromatics
In the same pot, add a splash more olive oil if needed. Toss in minced garlic (about 2-3 cloves) and cook for 30 seconds until fragrant — this is where your kitchen will start smelling heavenly! Add a medium diced onion and sauté until translucent, about 3-4 minutes. -
Add Marinara Sauce and Broth
Pour in your marinara sauce and chicken broth (about 4 cups). Bring to a gentle simmer, stirring occasionally to combine the flavors. This thick and rich mixture is the base of your soup! -
Incorporate the Pasta
Once your broth is bubbling, add in the pasta of your choice. Let it cook according to the package instructions (usually around 8-10 minutes). Remember, al dente is the goal here; the pasta will continue to cook even after you turn off the heat. -
Shred the Chicken
While the pasta is cooking, shred or dice your cooked chicken into bite-sized pieces. Add it back into the pot, allowing it to mingle with the flavors of the soup. -
Bring on the Flavor
Stir in freshly grated Parmesan cheese (at least ½ to 1 cup) and taste the soup. Adjust the seasoning with more salt, pepper, or Italian seasoning as needed. Feel free to add a pinch of red pepper flakes for some heat! -
Finishing Touches
Right before serving, chop up fresh basil and stir it into the soup. This not only enhances the flavor but also adds a vibrant splash of color to your dish. -
Serve
Ladle the soup into bowls and garnish with more Parmesan cheese, a drizzle of olive oil, and maybe another sprinkle of fresh basil for a touch of elegance.
Trust me, your kitchen will be filled with happy vibes and fragrant aromas as people gather around!
Serving Suggestions
Presentation can elevate even the simplest dishes. For serving, I recommend using big, rustic bowls that invite people to dig in. You can sprinkle additional grated Parmesan on top and drizzle a little olive oil for that finishing touch. Pair it with a crusty loaf of bread for dipping, and voilà! You’ve got a meal that’s as beautiful as it is delicious.
Recipe Variations
Looking to mix things up? Here are some fun variations you can try:
- Add Veggies: Toss in some chopped spinach or kale for extra nutrition. They’ll wilt perfectly in the warm soup!
- Creamy Twist: Stir in a splash of heavy cream or dairy-free alternative for a richer texture.
- Protein Swap: Use ground turkey or lean ground beef instead of chicken for a different flavor profile.
- Zoodles: For a low-carb option, swap the pasta for zucchini noodles. Just add them in the last few minutes of cooking.
- Spicy: A bit of diced jalapeño or a dash of hot sauce can bring a delightful kick to your soup.
Chef’s Notes
I love seeing how recipes evolve over time. What started as a simple Chicken Parmesan dish has turned into this cozy soup, perfect for feeding a crowd or simply enjoying on a quiet evening alone. It’s inspired countless warm memories at my table, and I hope it does the same for you! I once made this for an impromptu dinner party and ended up sharing the recipe with everyone who came! It’s truly a crowd-pleaser, and the leftovers (if you have any) are even better the next day!
FAQs and Troubleshooting
-
Why is my soup too salty?
If you find the soup too salty, try adding a pinch of sugar to help balance it out. Alternatively, add more low-sodium broth or water to dilute it. -
Can I use frozen chicken?
Yes! Just make sure you cook it through. You may need to increase your cooking time by a few minutes. Ensure it’s fully cooked before shredding. -
What if my pasta gets mushy?
If your pasta turns out mushy, it’s likely overcooked. Keep a close eye on it while it’s simmering, and remember it will continue cooking off-heat. -
How do I store leftovers?
Store any leftovers in an airtight container in the fridge for up to 3–4 days. To reheat, just warm it gently over the stove, adding a splash of broth to loosen it up.
Nutritional Info (Optional)
While not required, it can be helpful to know the nutritional content of your meals. A standard serving of Chicken Parmesan Soup (around 1.5 cups) might provide approximately:
- Calories: 350
- Protein: 30g
- Carbohydrates: 35g
- Fat: 15g
This can vary based on portions and specific ingredients used.
There you have it! Chicken Parmesan Soup that warms your heart and soul, inviting friends and family to gather around the table. Thanks for joining me today! I hope you try this recipe and experience the love and comfort that comes with it. Don’t forget to share your creations, and let’s keep the conversation going. Happy cooking, my friends! 🍽️💛
PrintChicken Parmesan Soup

A delightful Chicken Parmesan Soup that combines the comforting flavors of the classic dish into a warming bowl of goodness, perfect for chilly evenings.
- Prep Time: 15 minutes
- Cook Time: 30 minutes
- Total Time: 45 minutes
- Yield: 4 servings 1x
- Category: Soup
- Method: Stovetop
- Cuisine: Italian
- Diet: N/A
Ingredients
- 1 lb boneless, skinless chicken breasts
- 4 cups marinara sauce
- 1 cup freshly grated Parmesan cheese
- 1 cup small pasta (e.g., ditalini, orzo, or broken spaghetti)
- 4 cups chicken broth
- 1 tablespoon Italian seasoning
- 2 tablespoons olive oil
- Fresh basil for garnish
- 2–3 cloves minced garlic
- 1 medium diced onion
Instructions
- Prepare your chicken by heating olive oil in a large pot over medium heat. Season with salt and pepper. Sauté for 5-6 minutes on each side until cooked through. Remove and shred.
- Sauté the onion and garlic in the same pot until fragrant and translucent.
- Add the marinara sauce and chicken broth, bring to a simmer.
- Incorporate the pasta and cook according to package instructions until al dente.
- Shred the chicken into bite-sized pieces and return to the pot.
- Bring the soup to taste by adding Parmesan cheese and adjusting seasoning.
- Finishing with fresh basil, ladle into bowls and serve with extra Parmesan on top.
Notes
This soup is perfect for leftovers, and its flavor improves the next day. Pair it with crusty bread for a complete meal.
Nutrition
- Serving Size: 1 serving
- Calories: 350
- Sugar: 6g
- Sodium: 700mg
- Fat: 15g
- Saturated Fat: 5g
- Unsaturated Fat: 8g
- Trans Fat: 0g
- Carbohydrates: 35g
- Fiber: 3g
- Protein: 30g
- Cholesterol: 70mg
Keywords: Chicken Parmesan, Soup, Comfort Food, Italian, Hearty, One-Pot Meal