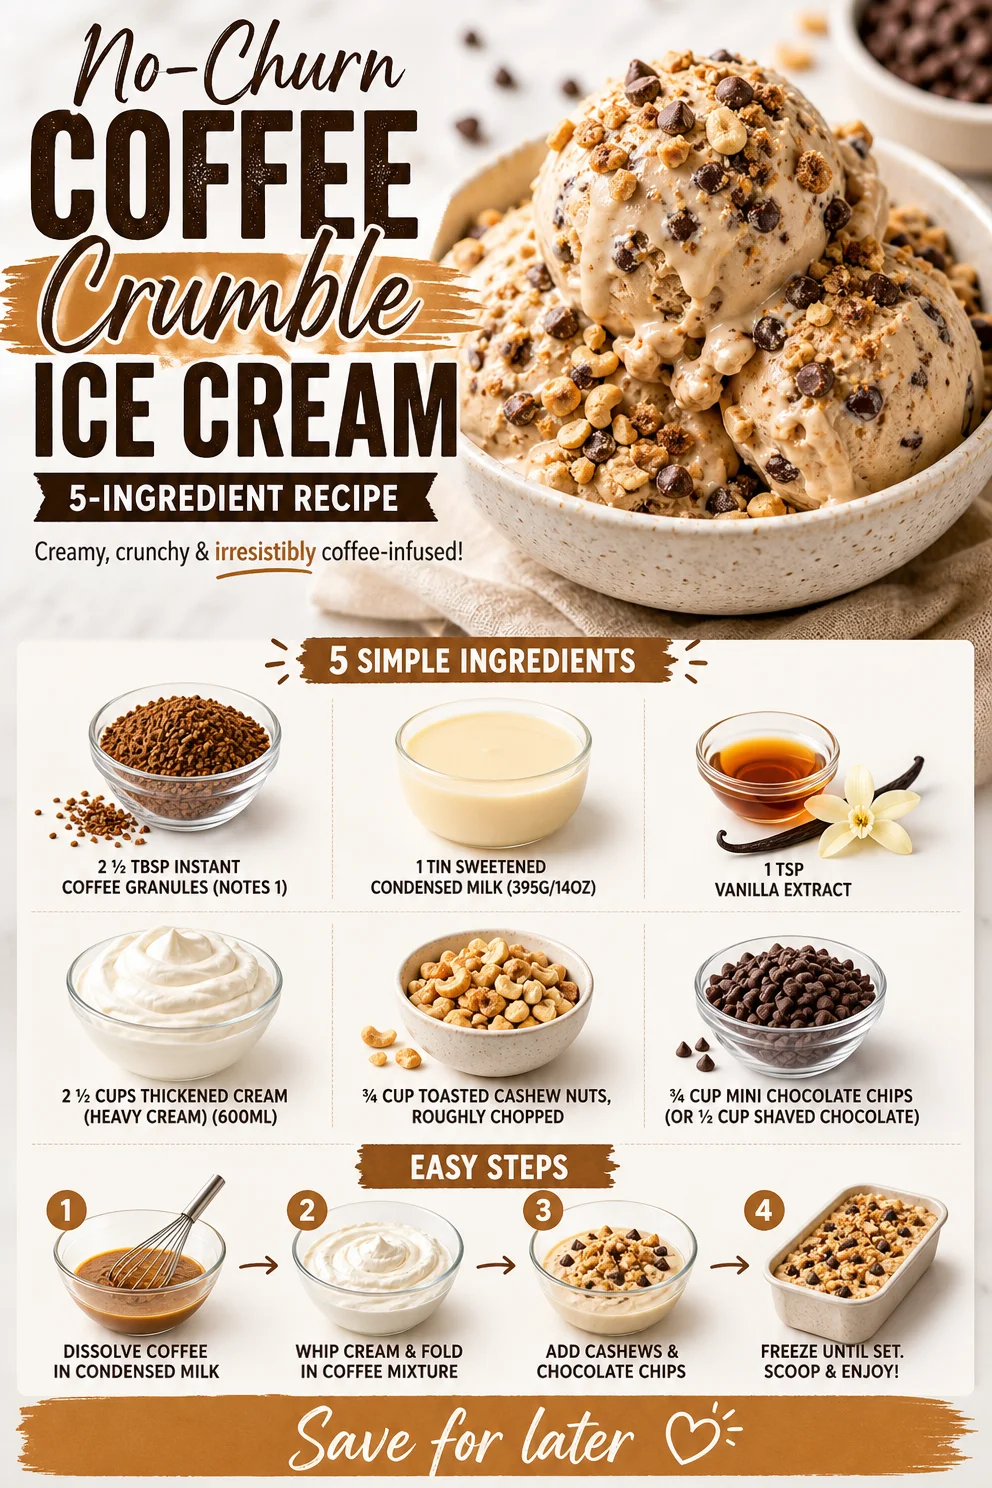
No-Churn Coffee Crumble Ice Cream: 5-Ingredient Recipe
Indulge in the Richness of Coffee Crumble Ice Cream
Hello, fellow food lovers! If you’re anything like me, there’s nothing quite as comforting as a bowl of ice cream on a warm day—unless, of course, it happens to be Coffee Crumble Ice Cream. This delightful treat combines the rich, robust flavors of coffee with the sweet, crunchy goodness of toasted cashews and mini chocolate chips, creating a decadent dessert that’s sure to impress. Whether you’re winding down after a long day or entertaining friends, this ice cream is the perfect homemade indulgence.
A Simple Nostalgic Memory
Let me take you on a little journey down memory lane. Growing up, my grandmother was a magician in the kitchen. Among her many talents, she had a special knack for making ice cream. Every summer, she would surprise us all with her creations, but the highlight was always her coffee-flavored ice cream. I remember sitting on the sun-drenched porch as she churned the mixture, the smell of freshly brewed coffee wafting through the air.
I’d hover around the kitchen, eagerly waiting for that first spoonful, which was always a tiny bit melted—just the way I liked it. Grandmom would tell stories while we savored the sweet, creamy concoction. The combination of rich coffee, the crunch of nuts, and occasional chocolate bites felt like a hug in a bowl. Those moments were precious, and they all revolved around one magic ingredient: ice cream.
Now, I’m thrilled to share this nostalgia with you and hope this Coffee Crumble Ice Cream brings the same joy to your table!
Ingredients
Here’s what you’ll need to whip up this exquisite Coffee Crumble Ice Cream:
-
2 ½ tablespoons instant coffee granules
This is where the rich coffee flavor comes from. You can substitute it with brewed coffee for a more intense flavor—just ensure you reduce the cream slightly to maintain the right texture. -
1 tin sweetened condensed milk (395g/14oz)
This ingredient adds sweetness and creaminess, giving your ice cream that dreamy texture. You can use a dairy-free version if you want to make it vegan! -
1 teaspoon vanilla extract
Vanilla enhances the overall flavor profile. A good quality extract makes a noticeable difference here, but if you don’t have it, feel free to skip it in a pinch! -
2 ½ cups thickened cream (heavy cream) (600ml)
Essential for a rich and creamy texture. For a lighter version, you can use half-and-half or a non-dairy alternative—just check the fat content to ensure it freezes well. -
¾ cup toasted cashew nuts, roughly chopped
These add a delightful crunch and flavor. If you’re allergic to nuts, try crispy rice cereal for that needed texture! -
¾ cup mini chocolate chips (or ½ cup shaved chocolate)
Chocolate is the perfect complement to the coffee flavor. Dark chocolate works wonders if you prefer a deeper flavor, while white chocolate adds a sweeter touch!
Step-by-Step Instructions
Let’s dive into making this delightful treat together!
-
Dissolve Coffee Granules
Start by taking your instant coffee granules and mixing them with a tablespoon of warm water. This helps to dissolve the coffee evenly. If you choose to use brewed coffee, skip this step! -
Combine Cream and Condensed Milk
In a large mixing bowl, blend the thickened cream and sweetened condensed milk. Use a hand mixer or a whisk to combine them thoroughly. Whip until the mixture becomes slightly thickened, but don’t go too far; you want it to be airy yet smooth.Chef Tip: Go easy on the whipping! We’re looking for a soft peak, not stiff peaks.
-
Add Coffee and Vanilla
Once the cream and condensed milk are combined, gently fold in the dissolved coffee mixture and vanilla extract. Be careful to maintain as much air in the mixture as possible for that heavenly creaminess. -
Stir in Nuts and Chocolate
Now it’s time to add in the fun stuff! Gently fold in the toasted cashew nuts and mini chocolate chips. This step is so satisfying; you’ll want to savor how beautiful the mixture looks with those specks of chocolate and chunks of nuts. -
Freeze the Mixture
Pour the ice cream base into a suitable container—something airtight is ideal. Spread the mix evenly, cover, and place it in the freezer for at least 6-8 hours, or until it’s firm. -
Scoop and Serve
When you’re ready to enjoy your creation, pull it out of the freezer and let it sit for about 5-10 minutes for easier scooping. Dive in with a scoop and enjoy the rich flavors and creamy texture!
Serving Suggestions
For serving, I love to dish out the ice cream in stylish bowls, topped with a sprinkle of extra toasted cashews and a drizzle of chocolate sauce. You could even throw in a few coffee beans for that coffee lover’s flair! Serve it alongside a warm slice of cake or some cold brew coffee for a delightful dessert experience.
Recipe Variations
Feeling adventurous? Here are a few fun twists you can try with this base recipe:
- Mocha Crunch: Add a swirl of chocolate syrup throughout for a rich mocha flavor.
- Nutty Delight: Swap cashews for pecans or hazelnuts for a distinct crunch.
- Spiced Coffee: Add a pinch of cinnamon or nutmeg to give the ice cream some warmth and depth.
- Caramel Swirl: Drizzle with caramel sauce for extra sweetness.
- Vegan Version: Use coconut cream and maple syrup instead of condensed milk for a vegan-friendly treat.
Chef’s Notes
Making ice cream at home is truly an art, and I’ve loved playing with flavors and textures over the years. One fun memory I have was when I decided to experiment with different coffee beans during one summer picnic. I ended up using a bold espresso blend, and the results were astonishingly good! That was the magic moment I knew I could go beyond the basic recipe and reach new heights in flavor.
FAQs and Troubleshooting
1. Why is my ice cream too icy?
If your ice cream texture is icy, ensure that you are using fatty creams (like heavy cream) and whip enough air into the mixture. This helps create that velvety texture.
2. Can I use decaf coffee?
Absolutely! Decaf coffee works wonderfully if you love the flavor but want to avoid the caffeine rush.
3. My ice cream is too soft. What did I do wrong?
This can occur if the mixture isn’t cold enough before freezing or if it hasn’t been whipped adequately. Make sure to chill your ingredients and mix properly for the best results.
4. How long will this ice cream last in the freezer?
It will last about 2-3 weeks in the freezer, but trust me, it won’t last that long once everyone tries it!
Nutritional Info
While I won’t go into depths of calorie counts, it’s worth noting that indulging in homemade ice cream means you can control the quality of ingredients. Opting for lower sugar condensed milk and nut substitutes significantly changes these macronutrients, allowing for some guilt-free enjoyment!
So there you have it, my friends! A blend of nostalgia, flavor, and creative freedom that leads to the most delightful Coffee Crumble Ice Cream you can whip up at home. I hope you find joy in preparing this dish, just as I do, and don’t forget to share those lovely memories gathered around your table! Happy cooking!
PrintCoffee Crumble Ice Cream
A rich and creamy homemade ice cream made with coffee, toasted cashews, and mini chocolate chips.
- Prep Time: 15 minutes
- Cook Time: 0 minutes
- Total Time: 480 minutes
- Yield: 4 servings 1x
- Category: Dessert
- Method: Freezing
- Cuisine: American
- Diet: Vegetarian
Ingredients
- 2 ½ tablespoons instant coffee granules
- 1 tin sweetened condensed milk (395g/14oz)
- 1 teaspoon vanilla extract
- 2 ½ cups thickened cream (heavy cream) (600ml)
- ¾ cup toasted cashew nuts, roughly chopped
- ¾ cup mini chocolate chips
Instructions
- Dissolve coffee granules by mixing them with a tablespoon of warm water.
- Combine thickened cream and sweetened condensed milk in a large mixing bowl.
- Add the dissolved coffee mixture and vanilla extract, folding gently.
- Stir in toasted cashew nuts and mini chocolate chips.
- Freeze the mixture for at least 6-8 hours, or until firm.
- Scoop and serve, garnishing as desired.
Notes
For serving, top with extra toasted cashews or drizzle with chocolate sauce.
Nutrition
- Serving Size: 1 serving
- Calories: 350
- Sugar: 30g
- Sodium: 100mg
- Fat: 20g
- Saturated Fat: 10g
- Unsaturated Fat: 8g
- Trans Fat: 0g
- Carbohydrates: 40g
- Fiber: 2g
- Protein: 5g
- Cholesterol: 60mg
Keywords: ice cream, coffee dessert, homemade ice cream, summer treat, easy recipe
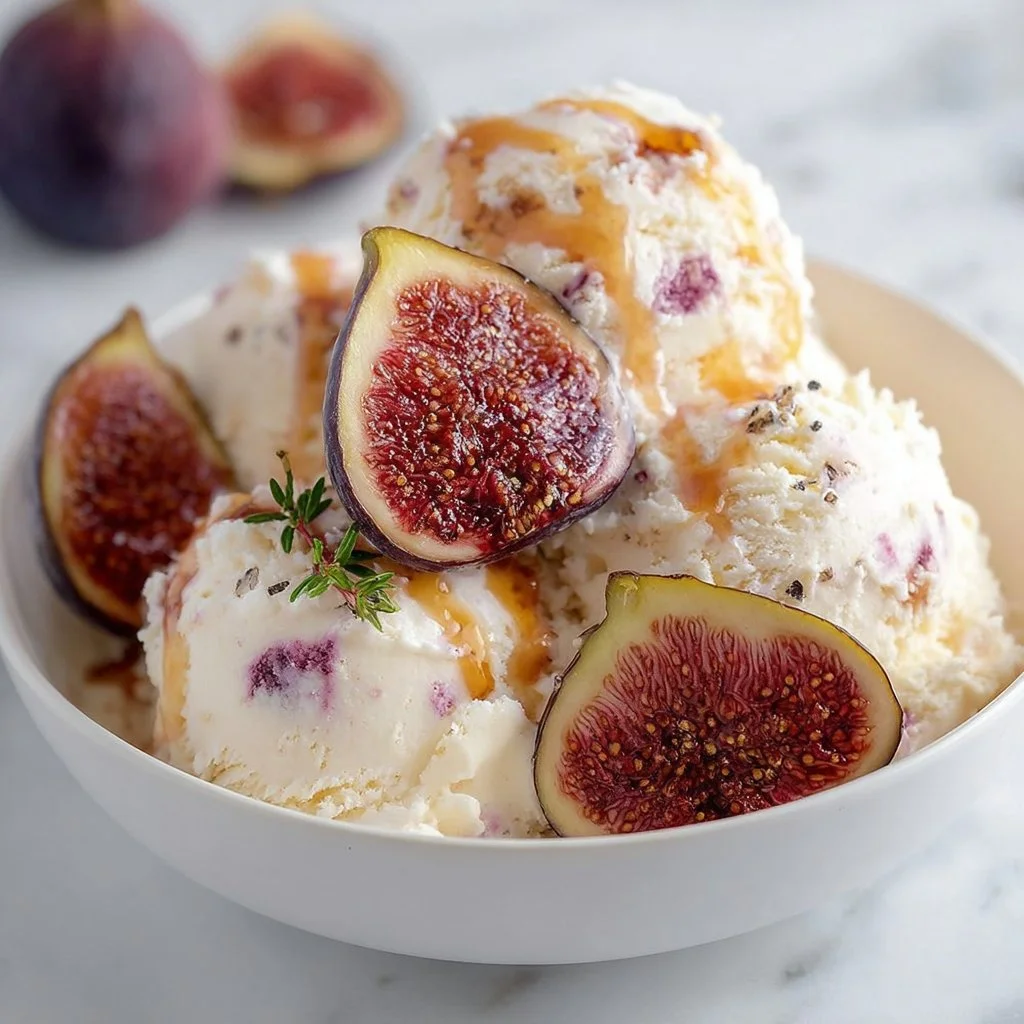
Creamy Fig & Ricotta Ice Cream: 5-Ingredient Quick Fix
Luscious Fig and Ricotta Ice Cream: A Sweet Treat for Any Occasion
Hello food lovers! Today, I’m excited to share something truly special with you: a luscious Fig and Ricotta Ice Cream that will awaken your taste buds and elevate your dessert game to new heights. Whether you’re hosting a fancy dinner party or just want to indulge in a sweet treat after dinner, this recipe is here to impress — without the fuss!
Finding the Inspiration
To understand my deep-rooted love for figs and ricotta ice cream, let me take you back to a sun-drenched summer afternoon spent in my grandmother’s kitchen. The gentle hum of the old fan whirred softly, mixing with the sweet scents emanating from her oven. She would often turn to her vast collection of cookbooks, and that day was no different. “Savannah,” she said, her eyes sparkling with mischief, “let’s make something unforgettable.”
We decided to venture into the world of ice cream. As a child, I was enchanted by the idea of making something so magical from scratch. We combined creamy ricotta cheese — a staple in her Italian repertoire — with fresh figs plucked from the tree in her backyard. The moment that creamy mixture hit the icy churn, I knew we had created something remarkable.
The way the sweet, juicy figs melded with the rich, creamy flavor of ricotta was pure alchemy. That day in the kitchen birthed countless memories – laughter, stories, and of course, that unforgettable fig and ricotta ice cream. Now it’s time to pass this recipe to you, so you can create your own memories in the kitchen.
Gather Your Ingredients
To make this fig and ricotta ice cream, you’ll need the following ingredients:
-
1 cup ricotta cheese: A creamy cheese that adds a luxurious, smooth texture to the ice cream. If you can’t find ricotta, mascarpone makes a great substitute for a richer flavor.
-
1 cup heavy cream: This is essential for giving your ice cream that signature creamy body. If you prefer a lighter version, half-and-half will work too, but your ice cream may be less rich and creamy.
-
1/2 cup sugar: Sweetness is the secret here! You can substitute granulated sugar with coconut sugar or honey, but keep in mind it may alter the flavor slightly.
-
1 teaspoon vanilla extract: This adds warmth and depth of flavor. For a twist, try almond extract or even a few grated lemon zests for a brighter taste.
-
1 cup fresh figs, chopped: Fresh figs bring a natural sweetness and beautiful texture. If fresh figs are out of season, you can use dried figs (but soak them in warm water for an hour to soften).
-
A pinch of salt: Balances the sweetness and heightens all the flavors.
Step-by-Step Instructions
Are you ready to make some ice cream magic? Let’s get started!
-
Prepare the Figs: Chop your fresh figs into small pieces. Here’s a fun tip: If you toss the fig pieces in a tiny bit of sugar, it will help them release their juices, which makes the ice cream even more flavorful. Set them aside.
-
Blend the Base: In a mixing bowl, combine the ricotta cheese, heavy cream, sugar, vanilla extract, and pinch of salt. Use an electric mixer or a whisk to beat the mixture until it’s smooth and creamy. I like to whisk until it reaches a velvety consistency, which just feels luxurious. Remember, we’re aiming for a straight shot of comfort in each bite!
-
Incorporate the Figs: Gently fold the chopped figs into the ricotta mixture. Be careful not to over-mix; we want the figs to remain intact for those delightful bursts of flavor in every spoonful.
-
Chill the Mixture: Cover the bowl and place it in the refrigerator for at least 2 hours, or even better, overnight. This step ensures that all the flavors meld beautifully. You’ll be amazed at how the richness of the ricotta and the sweetness of the figs can develop over time!
-
Churn the Ice Cream: Pour the chilled mixture into your ice cream maker, and churn according to the manufacturer’s instructions. If you don’t have an ice cream maker, no worries! Pour the mixture into a shallow dish, freeze for about 30-40 minutes, then take it out and stir vigorously with a fork to break up any ice crystals. Repeat this every 30 minutes or so until the ice cream is creamy and firm.
-
Freeze and Set: Once the ice cream reaches a soft-serve consistency, transfer it to an airtight container and freeze for at least 4 hours, or until it’s the perfect scoopable texture. Get ready for a thrilling moment when you take a taste for the first time!
Serving Suggestions
When it’s finally time to serve your luscious fig and ricotta ice cream, I suggest plating it in elegant bowls, garnished with a drizzle of honey or a sprinkle of crushed nuts for an added crunch. You could also accompany it with some homemade biscotti or a shortbread cookie for that perfect dessert trio.
Recipe Variations
Want to shake things up? Here are a few ideas:
-
Honey-Roasted Fig Variation: Before mixing figs into your ice cream, roast them with a drizzle of honey in the oven for 10-15 minutes until they caramelize. This brings out another layer of flavor that’s divine!
-
Herbed Infusion: Infuse your cream with rosemary or thyme to add a fragrant herbaceous note. Strain the herbs out before mixing with the ricotta for a sophisticated touch.
-
Chocolate Chip Addition: Fold in semi-sweet chocolate chips to the mixture for a luxurious chocolate-fudge twist.
-
Nutty Twist: Swap out fresh figs for crushed pistachios or walnuts for a delightful nutty ice cream experience.
Chef’s Notes
I have made a few versions of this ice cream over the years, tweaking the recipe as I went. I once added a bit of balsamic reduction to the mix, and wow – it elevated the flavors to a whole different level! It’s fun to experiment with different ingredients and elevate classic tastes into something new. Each spoonful of this fig and ricotta ice cream has a story, a memory, and a bit of love stirred in — that’s what makes cooking so beautiful!
FAQs and Troubleshooting
1. My ice cream is too hard to scoop! What happened?
If your ice cream is too firm, consider letting it sit out for about 5-10 minutes at room temperature before trying to scoop it. Ice crystals may form in solid ice cream; so, be sure to churn it enough if using the no-churn method!
2. What if I can’t find fresh figs?
You can always substitute with dried figs, but keep in mind to soak them beforehand. Frozen figs can also work in a pinch, but be sure to defrost and enjoy the sweetness you want.
3. How long will the ice cream keep?
It’ll last about 1-2 weeks in the freezer if stored properly in an airtight container, but trust me, it won’t last that long!
4. Can I make this dairy-free?
Absolutely! You can use a dairy-free ricotta substitute (like cashew or almond cheese) and use coconut cream in place of heavy cream for a dairy-free treat.
Nutritional Info
Per serving (assuming 8 servings per batch): approximately 225 calories, 15g fat, 20g sugar.
Now that you’re armed with this delightful recipe and plenty of tips, it’s time to don that apron and create your own fig and ricotta ice cream masterpiece. Sharing delicious moments around the table is what it’s all about, so savor every scoop, my friends! Happy cooking, and cheers to beautiful memories around the dinner table!
PrintLuscious Fig and Ricotta Ice Cream

A creamy and luxurious fig and ricotta ice cream, perfect for any occasion.
- Prep Time: 15 minutes
- Cook Time: 4 hours
- Total Time: 4 hours 15 minutes
- Yield: 8 servings 1x
- Category: Dessert
- Method: Churning
- Cuisine: Italian
- Diet: Vegetarian
Ingredients
- 1 cup ricotta cheese
- 1 cup heavy cream
- 1/2 cup sugar
- 1 teaspoon vanilla extract
- 1 cup fresh figs, chopped
- A pinch of salt
Instructions
- Prepare the figs: Chop your fresh figs into small pieces.
- Blend the base: In a mixing bowl, combine the ricotta cheese, heavy cream, sugar, vanilla extract, and pinch of salt.
- Incorporate the figs: Gently fold the chopped figs into the ricotta mixture.
- Chill the mixture: Cover the bowl and place it in the refrigerator for at least 2 hours, or overnight.
- Churn the ice cream: Pour the chilled mixture into your ice cream maker, and churn according to the manufacturer’s instructions.
- Freeze and set: Once the ice cream reaches a soft-serve consistency, transfer it to an airtight container and freeze for at least 4 hours.
Notes
Serve in elegant bowls garnished with honey or nuts for added crunch. Try different variations like honey-roasted figs or chocolate chips.
Nutrition
- Serving Size: 1 serving
- Calories: 225
- Sugar: 20g
- Sodium: 50mg
- Fat: 15g
- Saturated Fat: 10g
- Unsaturated Fat: 5g
- Trans Fat: 0g
- Carbohydrates: 25g
- Fiber: 1g
- Protein: 5g
- Cholesterol: 50mg
Keywords: ice cream, fig, ricotta, dessert, homemade