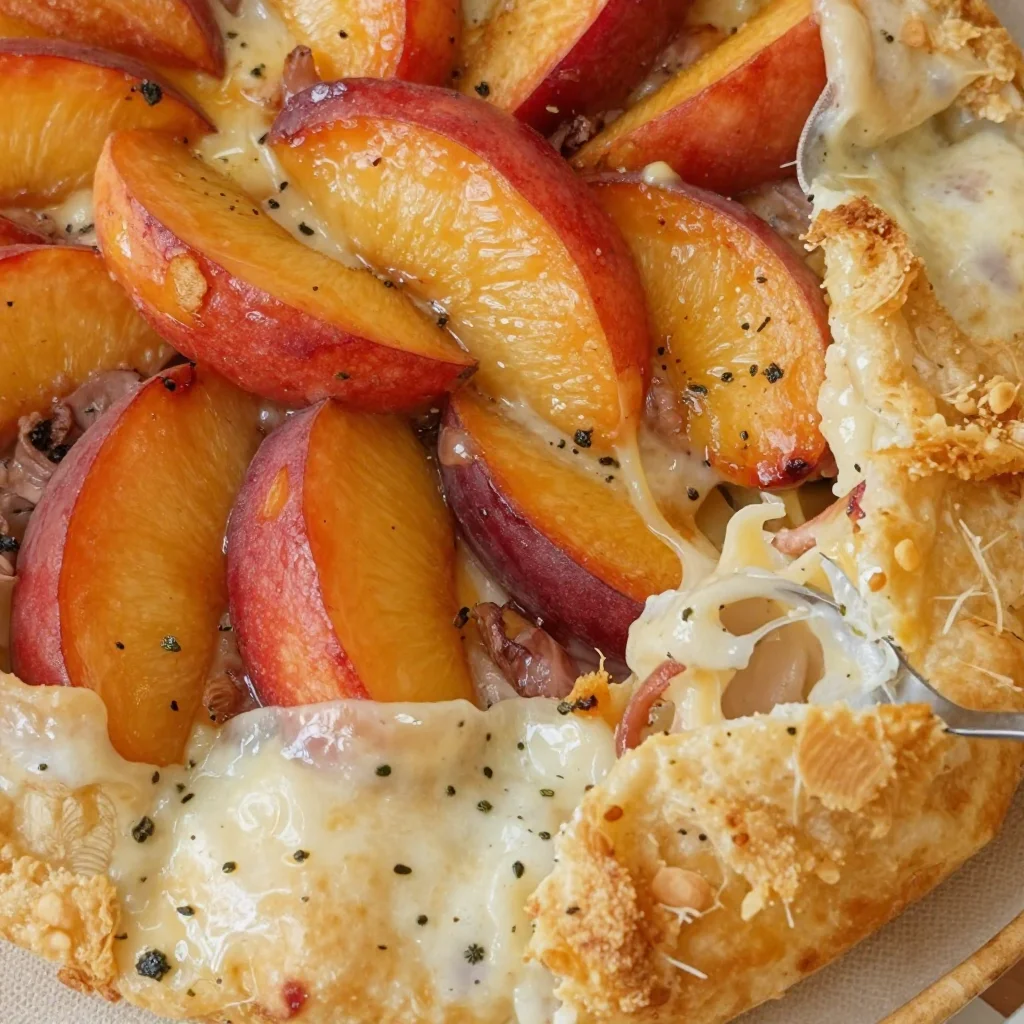
Peach Galette
The Juicy Magic of Peach Galette: A Slice of Summer Love
Hello, fellow food lovers! Today, let’s whip up something that will make your taste buds dance and your kitchen feel like a cozy summer evening—Peach Galette! This rustic dessert is not only a feast for the eyes, but it’s also incredibly delicious and easy to make. Honestly, who can resist the sweet, juicy goodness of fresh peaches enveloped in a golden, flaky crust? Buckle up, because we’re about to embark on a delightful culinary journey that’s rich in flavor and steeped in memories!
The Allure of Peach Galette
There’s something magical about a galette, isn’t there? It’s essentially the laid-back cousin of pie—no need for perfection here! Galettes embrace imperfection, celebrating the goodness of fruit and simple ingredients. For me, peach galette is a beloved summer tradition, conjuring up memories of many sun-drenched afternoons spent baking with my grandmother.
A Nostalgic Kitchen Memory
Picture this: I’m about eight years old, standing on a stool in my grandmother’s sunny kitchen, surrounded by a whirlwind of flour clouds and sweet scents. She’s teaching me the art of making peach galette, her hands moving deftly as she rolls out the dough. I was always in charge of slicing the peaches—just enough so I could sneak a few bites in between steps (a chef’s perk!).
As she explained how to let the dough relax before folding it around the fruits, I felt the warmth of our shared laughter and the flutter of anticipation for the deliciousness to come. That memory is a slice of summer I always carry in my heart, and it’s the inspiration behind this simple, yet elegant dessert. So, are you ready to create your own peach galette memories? Let’s get started!
Ingredients
For the peach galette, you’ll need the following ingredients:
-
2 cups sliced peaches
Fresh, ripe peaches are best in this recipe! They give that juicy, sweet-and-sour flavor that takes the galette to another level. You can also use nectarines for a similar effect. If it’s winter and fresh peaches are scarce, feel free to use frozen peaches—just thaw and drain them beforehand. -
1 tablespoon sugar
A little sweetness enhances the natural flavors of the peaches. You can substitute with brown sugar for a deeper flavor or even coconut sugar for a slightly caramelized essence. -
1 teaspoon cinnamon
This aromatic spice brings warmth and depth. If you’re not a fan, nutmeg or ginger would also work beautifully. -
1 tablespoon lemon juice
This adds a lovely acidity, elevating the sweetness of the peaches. Feel free to use lime juice for a fun twist! -
1 pre-made pie crust
Save time with a pre-made crust, or you can whip up your favorite homemade version if you’re feeling ambitious! A whole wheat crust can add a nutty flavor if you’re looking for a hearty option. -
1 egg (for egg wash)
This is our secret to getting that beautiful golden brown finish on the crust. If you’re vegan, you can substitute it with a mixture of plant-based milk and a splash of vinegar. -
Vanilla ice cream (for serving)
Because what’s better than warm peach galette with creamy vanilla ice cream? You can also use whipped cream or vegan ice cream if you prefer.
Step-by-Step Instructions
Let’s dive into the fun part—making your peach galette! Don’t worry if you’ve never made one before; this step-by-step guide will lead you to a fruit-filled masterpiece.
-
Preheat the Oven
Begin by preheating your oven to 400°F (200°C). This ensures your galette bakes evenly and gets that nice, crispy crust we all crave. -
Prepare the Peaches
Wash, peel (if desired), and slice your peaches. Aim for about 1/4-inch slices for even cooking. Toss them in a mixing bowl with the sugar, cinnamon, and lemon juice. Let them sit for about 10-15 minutes to release some juices and get all scrumptious.Chef Tip: If you like a bit of tartness in your desserts, try adding sliced strawberries or blackberries to the peach mixture!
-
Roll Out the Dough
Lay your pre-made pie crust on a sheet of parchment paper. Using a rolling pin, gently roll it out to about a 12-inch circle—no need for it to be perfect! This rustic vibe is all part of the charm. -
Add the Peach Filling
Spoon the peach mixture onto the center of the dough, leaving about a 2-inch border. Make sure to include some of that delicious juice as you want your galette to be bursting with flavor! -
Fold the Edges
Now, carefully fold the edges of the dough over the peaches. It’s okay if it overlaps a bit—homemade is about love, not perfection! You want to create a little “wall” to contain the filling. -
Brush with Egg Wash
Beat the egg in a small bowl and use a pastry brush to gently brush the edges of the crust. This will give it that mouthwatering golden finish!Chef Hack: If you want extra sparkle, sprinkle a bit of coarse sugar on top after brushing the egg wash for a sweet crunch.
-
Bake
Transfer the parchment paper with the galette to a baking sheet and pop it in the oven. Bake for 30-35 minutes until the crust is golden brown and the peaches are bubbly. Keep an eye on it—the aroma will start wafting through your kitchen, tempting your taste buds! -
Cool Down
Let your galette cool for about 15 minutes before slicing. This helps settle the juices and keeps everything together when you serve. The wait is tough, but worth it!
Serving Suggestions
To serve your beautiful peach galette, place it on a rustic wooden cutting board or a colorful plate. Use a sharp knife to cut into wedges, and don’t be shy—serve it warm with a generous scoop of vanilla ice cream on top! Drizzle with a bit of honey for a touch of sweetness, or sprinkle some fresh mint leaves for a pop of color!
Recipe Variations
If you’re feeling adventurous, here are some fun variations you can try:
- Berry Bliss: Add a handful of blueberries or raspberries to the peach mixture for a mixed berry twist.
- Spiced Up: Incorporate 1/4 teaspoon of allspice or cloves for a deeper flavor profile that reminds you of fall.
- Nutty Flavor: Mix in some chopped nuts, like walnuts or pecans, to the filling for a delightful crunch.
- Coconut Delight: Sprinkle shredded coconut on top of the peaches before folding the dough over for a tropical flair.
- Peach Melba: Add a layer of raspberry jam underneath the peaches for a sweet and tangy surprise!
Chef’s Notes
This peach galette has become one of my all-time favorites over the years because of its versatility and ease. I’ve made it for everything from casual weeknight dinners to elaborate family gatherings, and it always steals the show. One of my most humorous memories was when I tried to impress my friends by making individual galettes. Let’s just say there was a lot of dough flying everywhere, and I ended up with more dough on my face than on the baking sheet! Just remember, cooking is about having fun!
FAQs and Troubleshooting
Q: My crust is too tough! What did I do wrong?
A: This can happen if the dough is overworked or if it gets too warm. Make sure to chill it before rolling out and handle it as lightly as possible.
Q: How do I store leftovers?
A: Cover your galette loosely with foil and store it at room temperature for a day or two. For longer storage, refrigerate it. Reheat in the oven to refresh its crunch.
Q: Can I use canned peaches?
A: Yes, canned peaches work in a pinch! Just make sure to drain them well to avoid excess moisture, or your galette may turn out soggy.
Q: My filling leaked out during baking. Why?
A: This sometimes happens if the peaches were too juicy or if the crust wasn’t folded securely enough. Try to capture those juices in the galette next time!
Nutritional Info (Optional)
While I won’t dive too deep into the nutritional nitty-gritty (because we’re here for joy, not guilt!), keep in mind that a slice of peach galette served warm, especially with ice cream, is all about balance. It’s a delightful treat that celebrates flavors without sacrificing joy.
So there you have it, friends—a beautiful, rustic, and utterly delicious peach galette that’s sure to become a family favorite. Tie on your apron, gather some fresh peaches, and get cooking! Let’s make some memories and have incredible food adventures together. Bon appétit!
PrintPeach Galette

A rustic dessert featuring juicy peaches enveloped in a golden, flaky crust, perfect for summer.
- Prep Time: 15 minutes
- Cook Time: 35 minutes
- Total Time: 50 minutes
- Yield: 8 servings 1x
- Category: Dessert
- Method: Baking
- Cuisine: American
- Diet: Vegetarian
Ingredients
- 2 cups sliced peaches
- 1 tablespoon sugar
- 1 teaspoon cinnamon
- 1 tablespoon lemon juice
- 1 pre-made pie crust
- 1 egg (for egg wash)
- Vanilla ice cream (for serving)
Instructions
- Preheat the oven to 400°F (200°C).
- Prepare the peaches by washing, peeling (if desired), and slicing them into 1/4-inch pieces.
- Toss the peaches in a mixing bowl with the sugar, cinnamon, and lemon juice.
- Roll out the pie crust on a sheet of parchment paper to about a 12-inch circle.
- Add the peach mixture to the center of the dough, leaving a 2-inch border.
- Fold the edges of the dough over the peaches to create a little wall.
- Brush the edges of the crust with beaten egg.
- Bake in the oven for 30-35 minutes until the crust is golden brown and the peaches are bubbly.
- Cool for 15 minutes before slicing and serving.
Notes
Serve warm with a scoop of vanilla ice cream and a drizzle of honey for extra sweetness.
Nutrition
- Serving Size: 1 slice
- Calories: 320
- Sugar: 14g
- Sodium: 180mg
- Fat: 12g
- Saturated Fat: 4g
- Unsaturated Fat: 6g
- Trans Fat: 0g
- Carbohydrates: 45g
- Fiber: 2g
- Protein: 3g
- Cholesterol: 20mg
Keywords: peach dessert, summer galette, rustic pie, easy dessert, homemade pastry
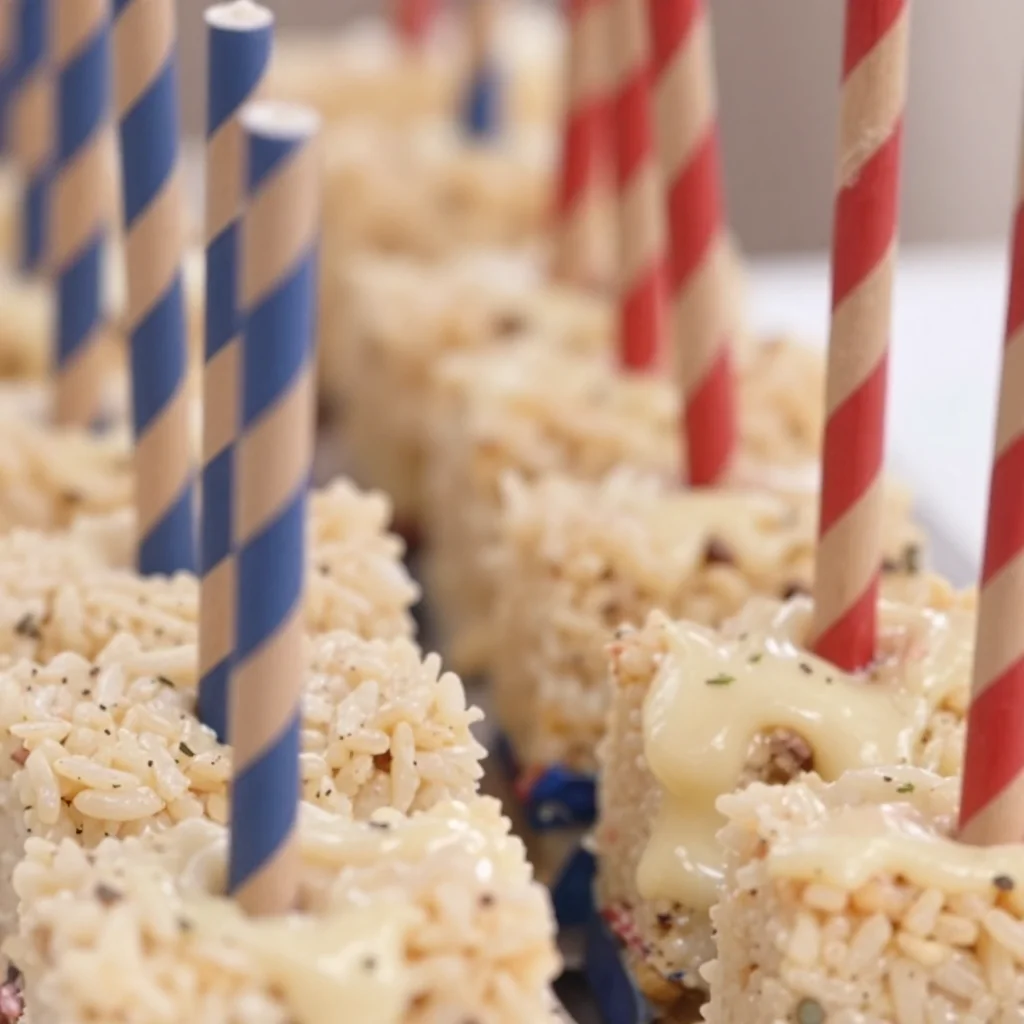
Patriotic No-Bake Rice Krispies Treats: 4th of July Flag
Celebrate the Stars and Stripes with American Flag Rice Krispie Treats
Hello, fellow foodies! Today, we’re diving into a festively sweet treat that’s perfect for your Fourth of July celebration, Memorial Day BBQ, or any backyard gathering where you want to showcase your love for the good ol’ US of A. I’m talking about American Flag Rice Krispie Treats! 🍭 These adorable, gooey delights are not only super easy to whip up, but they also bring a pop of color and fun to your table that will make your guests oooh and ahhh.
Now, if you’re like me, anytime you get together with loved ones, the food is always the heart of the celebration—and that includes fun desserts that bring everyone together. I fondly remember when my family would gather for picnics during the summer, and my mom would come out with a red, white, and blue dessert that made everyone smile. Those moments were filled with laughter, sharing, and lots of sticky fingers from the treats.
What I love about these American Flag Rice Krispie Treats is their versatility; they’re not only tasty but a canvas for creativity and conversation. So, let’s get to it! Grab your apron, and let’s make some memories in the kitchen!
A Nostalgic Kitchen Memory
One of my fondest memories involving Rice Krispie Treats goes way back to elementary school. Our art teacher organized a themed “American Day” celebration, where everyone was encouraged to bring something that represented the USA. My mom and I decided to transform a classic treat into something special—it was a labor of love that taught me how simple ingredients could come together to create something beautiful.
We crafted our very own American flag using a rectangular tray of Rice Krispie Treats, accented with vibrant red and blue candy melts. As my classmates tasted the treats, their faces lit up with delight. We ended the day covered in a sprinkle of powdered sugar and laughter, but the biggest takeaway? Food brings people together in ways that words sometimes can’t.
It’s moments like these that pushed me to create Ivory Apron—to share the joy of cooking and entertaining. So, get ready to roll up your sleeves, because we’re about to make an iconic dessert that’s as much fun to assemble as it is to eat!
Ingredients
Here’s what you’ll need to get started on your colorful adventure:
-
4 paper straws (cut in half)
These will serve as the flagpole! Feel free to use wooden skewers for a sturdier option. -
2 oz white candy melts
Perfect for creating the stars in our flag. Chocolate or white chocolate can work as substitutes if you can’t find candy melts. -
8 pre-packaged Rice Krispie Treats (unwrapped)
The foundation of our dessert. You could also whip up a homemade batch if you’re feeling extra ambitious—just use the classic Rice Krispies recipe! -
5 oz red candy melts
For those eye-popping stripes of our flag! If you want a different hue, red food coloring can be added to white chocolate. -
5 oz blue candy melts
This bright blue will be perfect for the corner of our flag. Again, you can swap in chocolate if necessary. -
Red, white, and blue sprinkles
Because who doesn’t love a little extra crunch and color? Feel free to experiment with any patriotic sprinkle mix!
Step-by-Step Instructions
-
Prepare Your Workspace
Gather all your ingredients and tools. It’s always a good idea to have a clean, organized space—trust me, it makes the process so much smoother! -
Melt the Candy Melts
In separate microwave-safe bowls, melt the red, white, and blue candy melts according to package instructions, heating in 30-second intervals and stirring in between until smooth. This step is my secret for getting perfectly melted chocolate without any clumps. -
Assemble the Base
Line a rectangular baking dish with parchment paper (trust me, it helps with easy removal later). Unwrap the Rice Krispie Treats and layer them tightly in the dish, forming a smooth base for your flag. -
Create the Red Stripes
Now, grab your red candy melts and pour them over the Rice Krispie Treats, spreading it evenly to create alternating stripes. Chef Hack: Use a spatula dipped in warm water for a smooth and clean spread. -
Add the White Stripes
Pour the melted white candy melts over the red layer, smoothing it out as you go. The layers will look beautifully vibrant, just wait until you see the final result! -
Layer in the Blue
Take the remaining Rice Krispie Treats and create a rectangular section on the upper left corner. Pour the melted blue candy melts over it, spreading it evenly once again. -
Sprinkle Some Cheer
Now it’s time for the fun part! While everything is still melted, liberally sprinkle the red, white, and blue sprinkles over the blue layer. Let it all set for about 30 minutes or until the candy melts fully harden. -
Final Touches
Once everything has set, remove the treat from the baking dish using the parchment paper, and carefully cut it into squares or rectangles. Pop your paper straws into the top corner for a fun display!
Serving Suggestions
To showcase your American Flag Rice Krispie Treats, place them on a large white platter to let the colors stand out. You can also add a few festive decorations like mini flags or scatter some extra sprinkles around the base for an elegant touch. Don’t forget to take a moment to snap a photo—this dessert will spark joy on social media!
Recipe Variations
If you want to shake things up a bit, here are some creative twists to consider:
-
Fruit Forward: Layer fresh strawberries and blueberries on top of the Rice Krispie Treat base for a fruity addition!
-
Chocolate Drizzle: Drizzle melted dark chocolate over the final creation for an extra dose of decadence.
-
Texture Play: Toss in crushed graham crackers or mini marshmallows with the sprinkles for a fun texture experience.
-
Different Colors: Don’t be afraid to swap the red and blue for other fun colors—think green for St. Patrick’s Day or pastels for Easter!
-
Peanut Butter Treats: Mix peanut butter into the Rice Krispie Treat base for a nutty twist that adds an extra layer of flavor.
Chef’s Notes
Cooking is all about evolution! This recipe has come a long way from those elementary school days when I first used traditional Rice Krispie Treats. Over the years, I’ve added pops of color and creative flair to enhance the experience and make it even more memorable. And honestly, combining those luscious candy melts with the iconic puffed rice cereal is a match made in heaven.
Plus, don’t be surprised if you find some melted chocolate on your fingers during the process—it’s a sign of good cooking!
FAQs and Troubleshooting
-
Q: What if my candy melts aren’t melting smoothly?
A: Ensure you’re using a microwave-safe bowl and that you’re stirring well between intervals—if they’re burning, reduce the heat! -
Q: Can I make these in advance?
A: Absolutely! Just store them in an airtight container at room temperature to keep them fresh. -
Q: What if I don’t have parchment paper?
No worries! Lightly greasing the baking dish with cooking spray will work fine. -
Q: How do I cut the treats?
Use a sharp knife and a gentle sawing motion for clean cuts. If the edges are sticking, run your knife under warm water for easier cutting.
Nutritional Info (optional)
While I won’t bore you with all the details, it’s good to know these treats are great in moderation! Each square is about 130 calories per serving, depending on how generously you cut them.
So there you have it, folks! A delightfully festive recipe that’s not just about the food but about what it represents—bringing people together, sharing laughter, and creating unforgettable memories around the table. I hope you enjoy making these as much as I do—now let’s get celebrating! Happy cooking!
PrintAmerican Flag Rice Krispie Treats
A festive treat perfect for Fourth of July celebrations, combining Rice Krispie Treats with colorful candy melts to resemble the American flag.
- Prep Time: 15 minutes
- Cook Time: 10 minutes
- Total Time: 25 minutes
- Yield: 8 servings 1x
- Category: Dessert
- Method: No-Bake
- Cuisine: American
- Diet: Vegetarian
Ingredients
- 4 paper straws (cut in half)
- 2 oz white candy melts
- 8 pre-packaged Rice Krispie Treats (unwrapped)
- 5 oz red candy melts
- 5 oz blue candy melts
- Red, white, and blue sprinkles
Instructions
- Prepare your workspace by gathering all your ingredients and tools.
- Melt the candy melts in separate microwave-safe bowls according to package instructions, heating in 30-second intervals and stirring until smooth.
- Assemble the base by lining a rectangular baking dish with parchment paper and layering the Rice Krispie Treats tightly in the dish.
- Create the red stripes by pouring the melted red candy melts over the Rice Krispie Treats.
- Add the white stripes by pouring the melted white candy melts over the red layer.
- Layer in the blue by creating a rectangular section with the remaining Rice Krispie Treats and pouring the melted blue candy melts over it.
- Sprinkle red, white, and blue sprinkles over the blue layer while it’s still melted and let it set for about 30 minutes.
- Final touches involve removing the treat from the baking dish and cutting it into squares or rectangles.
Notes
These treats can be made in advance and stored in an airtight container. Try adding fruit, chocolate drizzle, or mixing in peanut butter for variety.
Nutrition
- Serving Size: 1 serving
- Calories: 130
- Sugar: 15g
- Sodium: 50mg
- Fat: 5g
- Saturated Fat: 2g
- Unsaturated Fat: 3g
- Trans Fat: 0g
- Carbohydrates: 20g
- Fiber: 0g
- Protein: 1g
- Cholesterol: 0mg
Keywords: Rice Krispie Treats, American Flag, Fourth of July, festive dessert, no-bake treat
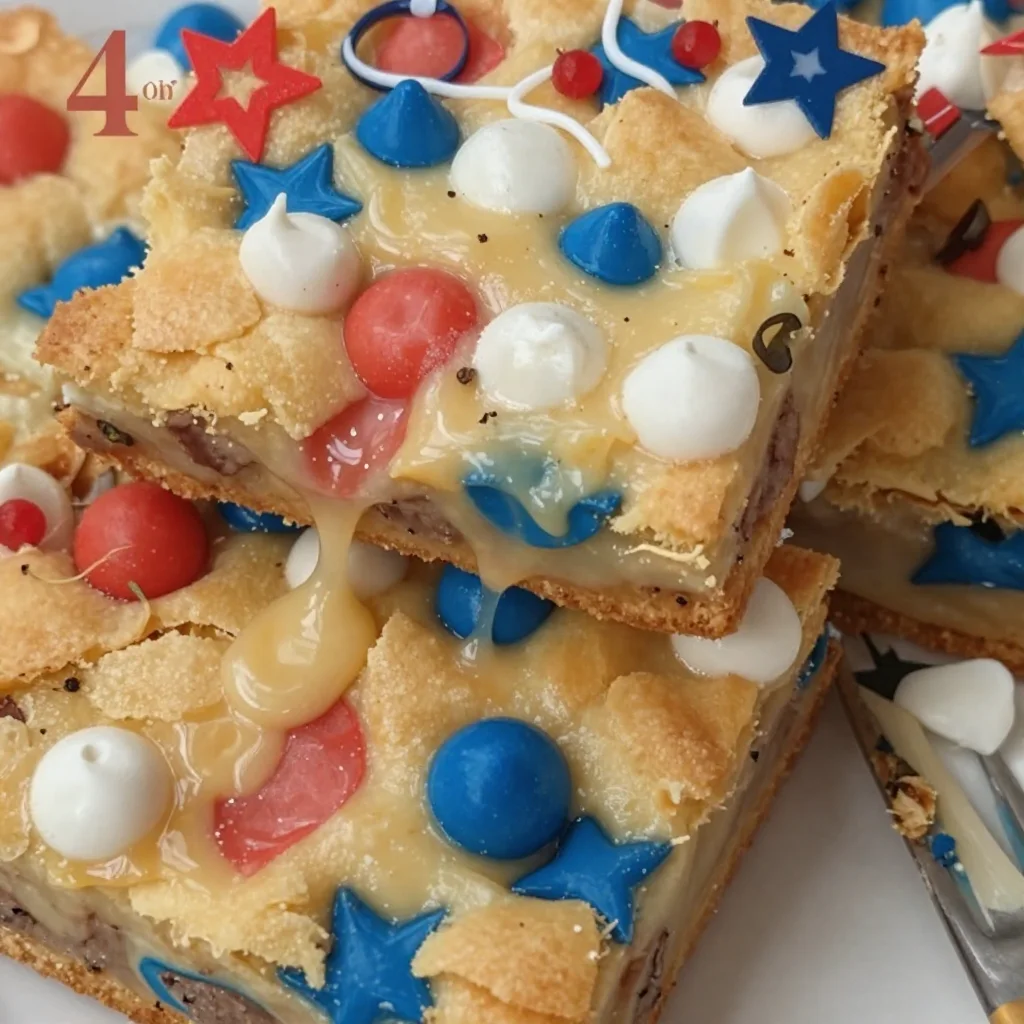
Patriotic 4th of July Cake-Mix Cookie Bars (Quick & Easy)
Celebrate with 4th of July Cake-Mix Cookie Bars: A Sweet Way to Honor Independence Day
Hello, sweet friends! If you’re like me, you’re all about celebrating every little moment with a big, beautiful treat. And as we gear up for a magnificent 4th of July celebration, there’s no better way to honor our independence than with a colorful, festive dessert. Today, I’m thrilled to share my recipe for 4th of July Cake-Mix Cookie Bars — they’re easy to whip up, irresistibly delicious, and bring a burst of red, white, and blue to your table.
Imagine this: warm, gooey cookie bars studded with white chocolate chips, and crunchy M&M’s — they melt in your mouth and are so simple to make. They’ll have your friends and family gathering around the dessert table, and maybe even returning for seconds (or thirds!). So, grab your apron and let’s dive into this delightful, festive treat!
A Sweet Memory: Baking with Mom
I can still remember the thrill of watching my mom whip up a batch of cookies in our cozy kitchen. The air would become sweet and warm, filled with the comforting aroma of baking. One summer, she decided to host a backyard barbecue for our neighborhood, and we made a giant batch of colorful cookies to celebrate the holiday.
Those cookies weren’t just snacks; they were little tokens of joy, sprinkled liberally with love and laughter. With bowls of red and blue sprinkles scattered across the countertops, we talked about our dreams while flour danced through the air. The best part? Watching our neighbors’ faces light up as they took a bite, transforming the simple gathering into a cherished memory.
It’s that spirit of joy and togetherness that inspired me to create these 4th of July Cake-Mix Cookie Bars. They embody the same feelings of love and camaraderie — perfect for sharing with friends and family during summer festivities!
Ingredients
Here’s what you’ll need to create these delightful cookie bars:
-
1 box cake mix (red velvet or vanilla)
A classic cake mix makes this recipe super simple! Either option will work beautifully, but red velvet adds an extra pop of color and flavor. -
1/2 cup vegetable oil
This ingredient keeps our bars moist and delicious. You could substitute it with melted coconut oil for a hint of tropical flavor. -
2 large eggs
These bind our ingredients together, providing structure and richness. If you’re in a pinch, use 1/2 cup of unsweetened applesauce per egg for a great vegan substitute! -
1/2 cup funfetti sprinkles (red, white, and blue)
Rainbow sprinkles bring joy to any dessert and are perfect for our patriotic theme! You can swap these for chocolate sprinkles or omit them if you prefer a more classic look. -
1/2 cup white chocolate chips
They add a creamy sweetness that balances the flavors perfectly. If you’re not a fan of white chocolate, feel free to use semi-sweet chocolate chips or even butterscotch chips for a fun twist. -
1/2 cup blue M&M’s
These festive treats add crunch and color! Swap them out for any colored candy to suit seasonal celebrations or personal favorites. -
1/2 cup red M&M’s
Just like the blue ones, these will provide that lovely crunch. You can easily replace them with peanut M&M’s for an extra layer of flavor.
Step-by-Step Instructions
Let’s get cookin’! Follow these simple steps to create your 4th of July Cake-Mix Cookie Bars:
-
Preheat the Oven: Start by preheating your oven to 350°F (175°C). This ensures that your cookie bars bake evenly and come out perfectly golden brown.
-
Prepare Your Baking Pan: Grease a 9×13-inch baking pan with non-stick spray or line it with parchment paper for easy removal. This is a little chef hack to make sure your cookie bars don’t stick and are easy to cut into neat squares later!
-
Mix the Ingredients: In a large mixing bowl, combine the cake mix, vegetable oil, and eggs. Give it a good stir with a spatula until everything is well mixed. Be careful not to overmix — we want these bars chewy, not tough!
-
Add the Fun Stuff: Gently fold in the funfetti sprinkles, white chocolate chips, and both red and blue M&M’s. Enjoy the beautiful colors as they swirl into the batter — it’s like a little celebration in the bowl!
-
Pour the Batter: Scrape the cookie batter into your prepared baking pan. Use an offset spatula or the back of a spoon to spread it out evenly in the pan. It might be a little thick, but that’s okay!
-
Bake: Place the pan in the preheated oven and bake for about 20-25 minutes. Start checking around the 20-minute mark. You want the edges to be lightly golden and a toothpick inserted in the center should come out mostly clean, meaning a few crumbs are okay — that’s what keeps it chewy!
-
Cool and Cut: Once baked to perfection, take the pan out of the oven and let it cool on a wire rack. Once cooled, carefully lift the bars out using the parchment (if you used it) and cut them into squares.
-
Serve and Enjoy: These bars can be enjoyed warm or at room temperature, but I suggest serving them slightly warm with a scoop of vanilla ice cream for an extra indulgent treat!
Serving Suggestions
When it comes to serving your 4th of July Cake-Mix Cookie Bars, presentation is key! Here’s a simple way to elevate them:
- Plate the bars on a large, colorful platter and sprinkle a few extra funfetti sprinkles around for a festive touch.
- Drizzle a little melted white chocolate on top for a touch of elegance.
- Add fresh berries like strawberries and blueberries around the bars for a pop of natural color and a refreshing balance to the sweetness.
Recipe Variations
Let’s get creative! Here are a few fun variations to customize your cookie bars:
-
Chocolate Chip Cookie Bars: Substitute half of the white chocolate chips for milk chocolate or dark chocolate chips for a classic flavor twist.
-
Nutty Bars: Stir in 1/2 cup of chopped walnuts or pecans for an added crunch and richness.
-
Peppermint Twist: Add ½ teaspoon peppermint extract and replace M&M’s with crushed peppermint candies for a winter holiday twist.
-
Gluten-Free Version: Use a gluten-free cake mix and ensure your other ingredients are gluten-free to make these bars suitable for those with gluten intolerance.
-
Fudge Brownie Bars: Use a brownie mix instead of cake mix for a decadent, fudgy treat your chocolate-loving friends will adore.
Chef’s Notes
This recipe has evolved over my years of baking. I initially started with a basic cookie recipe, but as I learned from friends and family, I incorporated fun flavors and colors to match the lively atmosphere of festive gatherings. Now, these cookie bars are not just a summer favorite but a year-round delight, customizable for any occasion.
One funny memory? I once forgot the eggs! Can you imagine my surprise when the mixture turned out more like a pancake batter? Lesson learned: always double-check your ingredients before mixing!
FAQs and Troubleshooting
-
What should I do if my bars are too chewy?
If your bars turn out too chewy, it might be from overmixing. Next time, mix just until combined and avoid overbaking. A higher ratio of cake mix to liquid can also cause this; always ensure you’re following the measurements closely. -
How do I store leftover cookie bars?
Store your cookie bars in an airtight container at room temperature for up to 4 days. You can also freeze them for later; just wrap them tightly in plastic wrap and then place in a freezer-safe container. -
Can I use another type of cake mix?
Absolutely! Any cake mix flavor can work well. Try chocolate, lemon, or even pumpkin spice for a festive twist depending on the season! -
Why did my cookie bars puff up?
If your bars puffed up while baking, it could be due to overmixing or them being overbaked. Just keep an eye on the baking time and aim for a chewy, slightly underbaked finish!
Nutritional Info
(Optional but helpful: If you wish to include this, it could look something like this):
- Serving Size: 1 bar
- Calories: 210
- Total Fat: 10g
- Saturated Fat: 4g
- Cholesterol: 30mg
- Sodium: 150mg
- Total Carbohydrates: 26g
- Dietary Fiber: 1g
- Sugars: 14g
- Protein: 2g
So there you have it; my delightful 4th of July Cake-Mix Cookie Bars recipe! I hope they add a burst of color and sweetness to your celebrations, just like those cherished memories in my kitchen. It’s all about connection, joy, and a touch of magic in every bite. Happy baking, friends, and let’s make this Independence Day one to remember!
Tie on your apron, pour yourself a sparkling drink, and let’s get baking!
Print4th of July Cake-Mix Cookie Bars
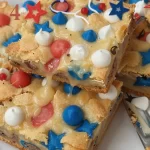
Celebrate Independence Day with these colorful and easy cake-mix cookie bars, perfect for summer festivities!
- Prep Time: 10 minutes
- Cook Time: 25 minutes
- Total Time: 35 minutes
- Yield: 12 servings 1x
- Category: Dessert
- Method: Baking
- Cuisine: American
- Diet: Vegetarian
Ingredients
- 1 box cake mix (red velvet or vanilla)
- 1/2 cup vegetable oil
- 2 large eggs
- 1/2 cup funfetti sprinkles (red, white, and blue)
- 1/2 cup white chocolate chips
- 1/2 cup blue M&M’s
- 1/2 cup red M&M’s
Instructions
- Preheat the oven to 350°F (175°C).
- Prepare a 9×13-inch baking pan with non-stick spray or parchment paper.
- Mix the cake mix, vegetable oil, and eggs in a large mixing bowl until just combined.
- Add the funfetti sprinkles, white chocolate chips, and both red and blue M&M’s.
- Pour the batter into the prepared baking pan, spreading it evenly.
- Bake for 20-25 minutes, until edges are lightly golden and a toothpick comes out mostly clean.
- Cool the bars on a wire rack, then cut into squares.
- Serve warm or at room temperature, optionally with vanilla ice cream.
Notes
For added flavor, substitute half the white chocolate chips with milk or dark chocolate chips. Store in an airtight container for up to 4 days.
Nutrition
- Serving Size: 1 bar
- Calories: 210
- Sugar: 14g
- Sodium: 150mg
- Fat: 10g
- Saturated Fat: 4g
- Unsaturated Fat: 6g
- Trans Fat: 0g
- Carbohydrates: 26g
- Fiber: 1g
- Protein: 2g
- Cholesterol: 30mg
Keywords: 4th of July, dessert, cookie bars, cake mix, festive treats
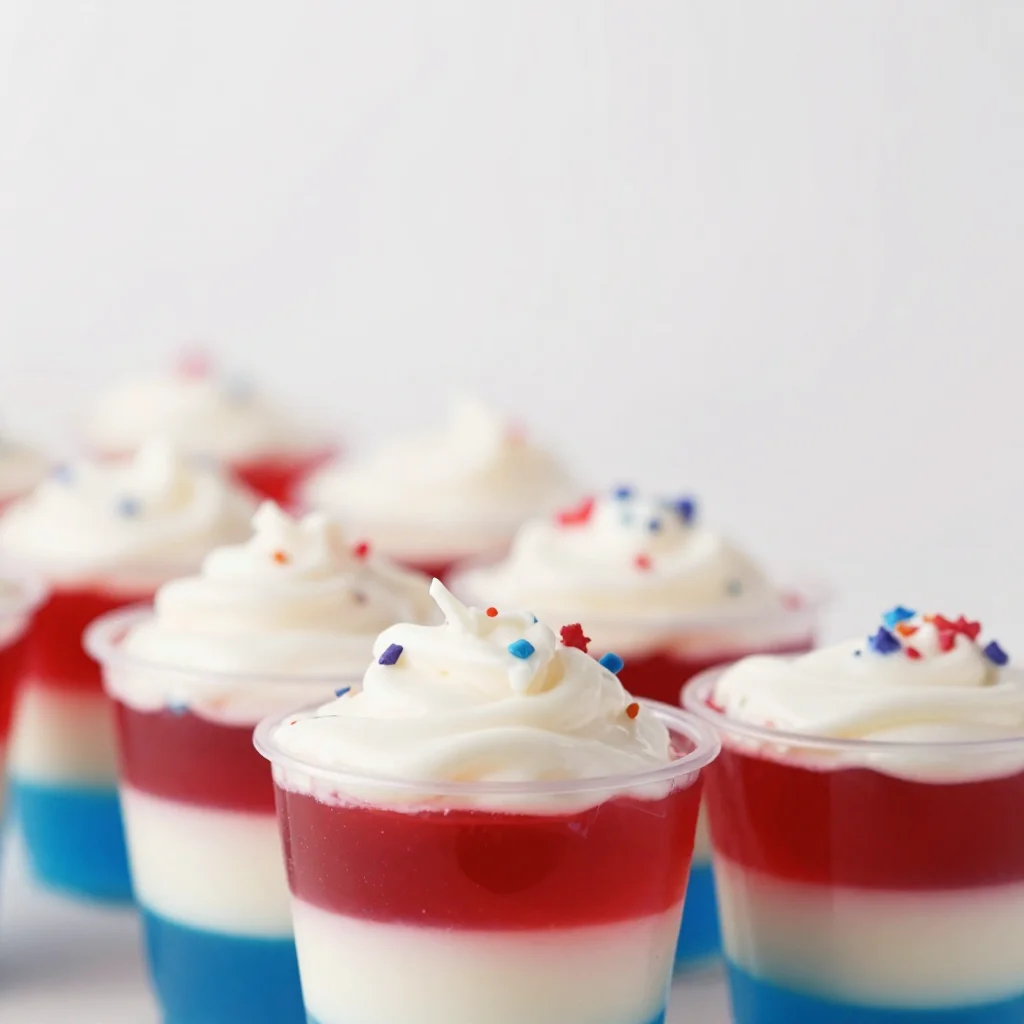
Ingredient No-Bake Patriotic Red, White & Blue Jello Cups
Patriotic Delights: Red, White, and Blue Jello Cups
Hello, fellow food lovers! Today, I’m bubbling with excitement as I share one of my all-time favorite warm-weather treats: Red, White, and Blue Jello Cups! 🎉 These delightful and colorful desserts are not only a feast for the eyes but also bring back the essence of childhood memories—simple, playful, and oh-so-delicious. Perfect for celebratory gatherings like the Fourth of July or Memorial Day, these festive cups are sure to impress your guests and delight the kiddos.
Introduction
Imagine a warm summer day; the sun is shining, friends and family gather in the backyard, and the air is filled with laughter and conversation. What better way to celebrate than with a treat that embodies the spirit of the occasion? Enter the Red, White, and Blue Jello Cups! With their vibrant colors and creamy layers, they provide a sweet sense of nostalgia while making you feel like a master chef. It’s like a culinary time machine that whisks you back to summer cookouts and family picnics, all wrapped up in a charming cup.
The beauty of these cups lies not just in their presentation but also in their versatility. You can customize the flavors, adjust the sweetness, and even swap out ingredients to fit your dietary preferences. So, whether you’re hosting a festive backyard barbecue, a kids’ birthday party, or just want to cool down on a hot day, these Jello Cups have got you covered.
Ready to dive in? Let’s whip up something deliciously festive that will have everyone oohing and aahing over your creation! Gather your ingredients, put on your apron, and let’s get crafting these exquisite Red, White, and Blue Jello Cups.
Personal Story
I first encountered Jello Cups at a family gathering when I was around 8 years old. My grandma, with her charming southern drawl, would whip them up for every holiday and special occasion. I can still picture her in the kitchen, vigorously stirring her concoction while a symphony of laughter erupted from the living room. The anticipation was palpable as we all awaited the reveal—would it be green and yellow, or maybe pink and purple?
But the ultimate showstopper was always the Red, White, and Blue Jello Cups. They became a tradition, each layer a representation of our family history and pride. As a kid, the joy of cutting into that gleaming red layer, followed by the creamy white, and finishing with the vibrant blue, felt almost magical. Little did I know that I would one day be sharing my version of this cherished classic with you all! Each cup is now a reminder of those happy moments, making the act of creating them feel like a warm hug from my grandma.
Ingredients
Let’s gather our colorful cast of ingredients for this fun dessert! Here’s what you’ll need:
-
1 box blue jell-o (3oz box, any flavor)
- Chef’s Insight: The blue raspberry is a favorite, but feel free to experiment with other flavors. Just remember, they should all complement one another!
-
1 cup boiling water
- This hot water will help dissolve the Jell-O granules, making it come to life!
-
1 cup cold water
- This balances out the temperature of the Jell-O, making sure it sets up just right.
-
2 packets Gelatin (unflavored)
- This is the secret ingredient that adds creaminess to your white layer. You can substitute it with agar-agar if you’re looking for a plant-based option.
-
½ cup cold water
- Used to bloom the unflavored gelatin, ensuring it integrates well for a silky texture.
-
1 cup boiling water
- Another round of boiling water helps manage the transition from liquid to gel for our creamy layer.
-
1 can sweetened condensed milk (14oz/395g)
- This decadent ingredient adds a wonderfully rich and creamy taste. If you’re looking for a lighter option, try coconut milk or even almond milk.
-
1 box red jell-o (3oz box, any flavor)
- A classic choice would be strawberry or cherry flavor. Match it with a complementary flavor of blue for the best effect!
-
1 cup boiling water
- Yes, we’re back to boiling hot water—this is necessary for dissolving the red Jell-O.
-
1 cup cold water
- Because we want a nice, balanced texture in our jell-o!
-
Whipped cream
- For that ultra-decadent finish. You can also opt for coconut whipped cream for a dairy-free version.
-
Red, white and blue sprinkles
- These cute little touches will make your dessert even more festive! Go ahead and sprinkle generously.
Step-by-Step Instructions
Now that we have our ingredients ready, let’s dive into the process! Follow along step-by-step, and remember, this is a fun journey—don’t stress about perfection!
-
Prepare Your Blue Jello Layer:
- In a medium bowl, combine the blue Jell-O powder with 1 cup of boiling water. Stir for about 2 minutes until the gelatin is fully dissolved. This part is essential—make sure all those granules are melted away!
-
Add Cold Water:
- Next, stir in 1 cup of cold water. This helps cool the mixture and prepares it for setting. Once combined, pour the blue Jell-O into clear cups or glass containers. Aim for about 1/3 of the way full so you have room for the other layers. Place them in the refrigerator and let them chill for roughly 1 hour.
-
Whip Up the Creamy Layer:
- While the blue Jell-O is setting, we can create that luscious white layer! In a separate bowl, sprinkle the unflavored gelatin over ½ cup of cold water. Let it sit for about 5 minutes to soften.
-
Heat for Blooming:
- After the gelatin has bloomed, add 1 cup of boiling water and whisk until fully dissolved. Now, stir in the sweetened condensed milk until the mixture is smooth. This creamy goodness is what makes the cups truly special!
-
Layer the Cream:
- Carefully take the blue Jell-O from the fridge and gently spoon the white mixture on top, making sure not to disturb the blue layer below. Return your cups to the fridge and let them set for another hour.
-
Create the Red Layer:
- Now, we’re on to the final layer! Just like before, combine the red Jell-O powder with 1 cup of boiling water and stir until dissolved. Add in 1 cup of cold water. Once blended, it’s time to layer! Pour this red mixture carefully on top of the white layer, filling the cups almost to the top.
-
Final Chill:
- Let these beauties set in the fridge for another hour or until fully firm. This will give you time to brew your favorite drink and enjoy some peaceful moments in the kitchen!
-
Time to Serve:
- Once set, top with whipped cream and sprinkle on the red, white, and blue sprinkles for that festive touch. Your stunning Jello Cups are ready to wow your guests!
Serving Suggestions
These delightful Jello Cups are best served chilled right out of the fridge. Arrange them on a vibrant tray or colorful tablecloth to set the mood. If you’re hosting a party, consider placing them at a fun dessert station where your guests can grab and enjoy. They also look lovely garnished with fresh berries or mint leaves for that extra flair.
Recipe Variations
Feeling creative? Here are some fun variations to consider:
-
Fruit Infusion: Add diced strawberries or blueberries to the individual layers for a fruity twist! This not only adds flavor but also elevates the visual appeal.
-
Flavor Fusion: Instead of using traditional flavors, think outside the box! Consider using tropical flavors like passion fruit, mango, or lime for an unexpected twist.
-
Dairy-Free Delight: Swap the sweetened condensed milk with coconut cream or cashew cream for a dairy-free version while still retaining that rich, creamy texture.
-
Make It Boozy: Add a splash of flavored vodka to the layers for an adult version! This could be especially fun for summer parties.
-
Layered Surprise: Instead of keeping the layers simple, try adding different textures like crushed graham crackers or small pieces of cake between layers for a dessert with bite!
Chef’s Notes
As simple as they are, these Jello Cups have evolved over time in my cooking journey. I remember a time when Jell-O was just a party treat, but now, with a bit of effort and creativity, we can make it an elegant masterpiece. Just a few sprinkles and a dollop of whipped cream can elevate it so beautifully!
I once made these Jello Cups for a last-minute gathering, leading to some hilariously fun mishaps as I tried to layer them quickly. Let’s just say it was a colorful explosion! But the laughter they brought when everyone dug in? Absolutely priceless.
FAQs and Troubleshooting
Here are a few common questions and tips to keep in mind when making your Red, White, and Blue Jello Cups:
-
Q: Why isn’t my Jello setting properly?
- A: Ensure you’ve completely dissolved the gelatin and let the mixture cool before layering it. Also, double-check the gelatin-to-water ratios; using too much water can lead to soupy layers!
-
Q: Can I make these in advance?
- A: Absolutely! They can be prepared the day before your gathering. Just keep them covered in the fridge until you’re ready to impress your guests.
-
Q: How can I get cleaner layers?
- A: Let each layer set for at least one hour to allow it to firm up before adding the next layer. Patience here is key for achieving those distinct, vibrant layers!
-
Q: What if I don’t have clear cups?
- A: No worries! Any clear glass or even a fun dessert dish can work. Just be mindful of how the colors will show through.
Nutritional Info
While I usually focus on the joy of cooking and sharing, I know some of you like to keep an eye on nutritional information. Each serving of these Jello Cups typically contains roughly:
- Calories: 120
- Total Fat: 2g
- Carbohydrates: 25g
- Sugar: 20g
- Protein: 2g
Of course, nutritional values can vary based on the ingredients used and portion sizes, especially if you opt for different flavors, alternatives, or toppings.
So there you have it! With just a little time and love, you can create stunning Red, White, and Blue Jello Cups that not only taste amazing but also encapsulate the joy of gathering and celebration. I can’t wait for you to try this recipe and add your personal touch! Happy cooking, everyone—let’s make delicious memories together! 🌟
PrintRed, White, and Blue Jello Cups

A festive dessert composed of vibrant layers of red, white, and blue jello, perfect for celebrations.
- Prep Time: 15 minutes
- Cook Time: 15 minutes
- Total Time: 60 minutes
- Yield: 8 servings 1x
- Category: Dessert
- Method: Chilling
- Cuisine: American
- Diet: Vegetarian
Ingredients
- 1 box blue jell-o (3oz box)
- 1 cup boiling water
- 1 cup cold water
- 2 packets Gelatin (unflavored)
- ½ cup cold water
- 1 cup boiling water
- 1 can sweetened condensed milk (14oz/395g)
- 1 box red jell-o (3oz box)
- 1 cup boiling water
- 1 cup cold water
- Whipped cream
- Red, white and blue sprinkles
Instructions
- Prepare Your Blue Jello Layer: In a medium bowl, combine the blue Jell-O powder with 1 cup of boiling water. Stir for about 2 minutes until the gelatin is fully dissolved.
- Add Cold Water: Stir in 1 cup of cold water and pour the blue Jell-O into clear cups or glass containers, and chill for roughly 1 hour.
- Whip Up the Creamy Layer: In a separate bowl, sprinkle the unflavored gelatin over ½ cup of cold water, let it sit for about 5 minutes, then add 1 cup of boiling water and whisk until fully dissolved. Stir in the sweetened condensed milk.
- Layer the Cream: Spoon the white mixture gently on top of the blue layer and return to the fridge to set for another hour.
- Create the Red Layer: Combine the red Jell-O powder with 1 cup of boiling water, stir until dissolved, add 1 cup of cold water, and layer it on top of the white mixture.
- Final Chill: Let set for another hour or until firm.
- Time to Serve: Top with whipped cream and sprinkles for a festive touch.
Notes
To add a fun twist, consider adding diced fruits or different flavors of jello. These cups can be prepared a day in advance!
Nutrition
- Serving Size: 1 cup
- Calories: 120
- Sugar: 20g
- Sodium: 50mg
- Fat: 2g
- Saturated Fat: 1g
- Unsaturated Fat: 1g
- Trans Fat: 0g
- Carbohydrates: 25g
- Fiber: 0g
- Protein: 2g
- Cholesterol: 5mg
Keywords: jello, dessert, patriotic, festive, summer, kids
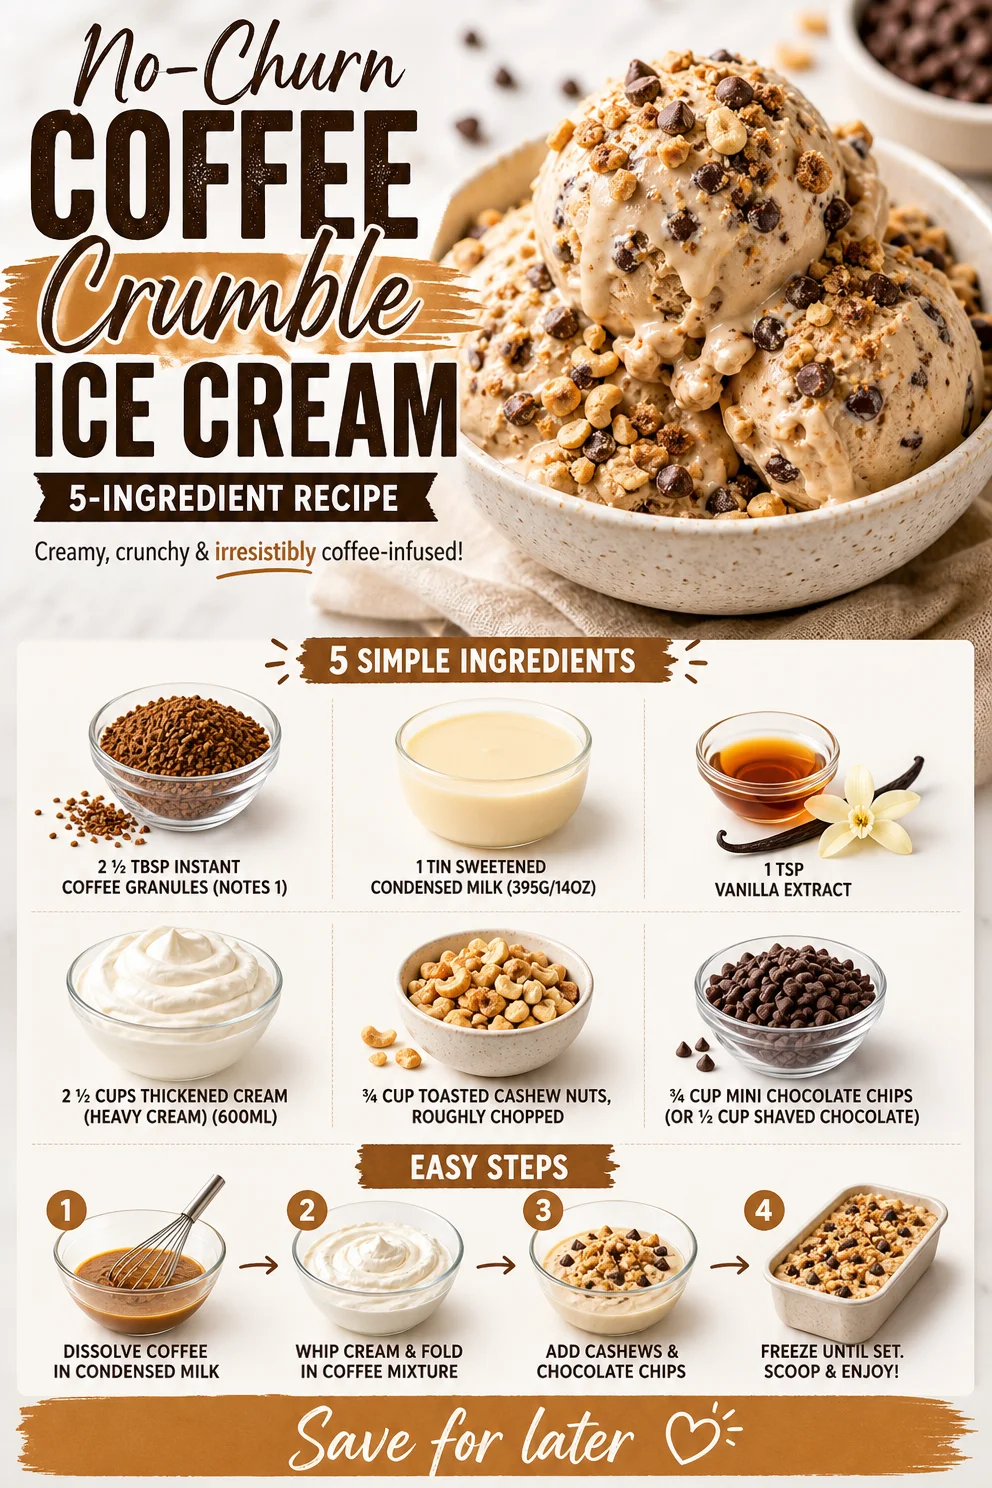
No-Churn Coffee Crumble Ice Cream: 5-Ingredient Recipe
Indulge in the Richness of Coffee Crumble Ice Cream
Hello, fellow food lovers! If you’re anything like me, there’s nothing quite as comforting as a bowl of ice cream on a warm day—unless, of course, it happens to be Coffee Crumble Ice Cream. This delightful treat combines the rich, robust flavors of coffee with the sweet, crunchy goodness of toasted cashews and mini chocolate chips, creating a decadent dessert that’s sure to impress. Whether you’re winding down after a long day or entertaining friends, this ice cream is the perfect homemade indulgence.
A Simple Nostalgic Memory
Let me take you on a little journey down memory lane. Growing up, my grandmother was a magician in the kitchen. Among her many talents, she had a special knack for making ice cream. Every summer, she would surprise us all with her creations, but the highlight was always her coffee-flavored ice cream. I remember sitting on the sun-drenched porch as she churned the mixture, the smell of freshly brewed coffee wafting through the air.
I’d hover around the kitchen, eagerly waiting for that first spoonful, which was always a tiny bit melted—just the way I liked it. Grandmom would tell stories while we savored the sweet, creamy concoction. The combination of rich coffee, the crunch of nuts, and occasional chocolate bites felt like a hug in a bowl. Those moments were precious, and they all revolved around one magic ingredient: ice cream.
Now, I’m thrilled to share this nostalgia with you and hope this Coffee Crumble Ice Cream brings the same joy to your table!
Ingredients
Here’s what you’ll need to whip up this exquisite Coffee Crumble Ice Cream:
-
2 ½ tablespoons instant coffee granules
This is where the rich coffee flavor comes from. You can substitute it with brewed coffee for a more intense flavor—just ensure you reduce the cream slightly to maintain the right texture. -
1 tin sweetened condensed milk (395g/14oz)
This ingredient adds sweetness and creaminess, giving your ice cream that dreamy texture. You can use a dairy-free version if you want to make it vegan! -
1 teaspoon vanilla extract
Vanilla enhances the overall flavor profile. A good quality extract makes a noticeable difference here, but if you don’t have it, feel free to skip it in a pinch! -
2 ½ cups thickened cream (heavy cream) (600ml)
Essential for a rich and creamy texture. For a lighter version, you can use half-and-half or a non-dairy alternative—just check the fat content to ensure it freezes well. -
¾ cup toasted cashew nuts, roughly chopped
These add a delightful crunch and flavor. If you’re allergic to nuts, try crispy rice cereal for that needed texture! -
¾ cup mini chocolate chips (or ½ cup shaved chocolate)
Chocolate is the perfect complement to the coffee flavor. Dark chocolate works wonders if you prefer a deeper flavor, while white chocolate adds a sweeter touch!
Step-by-Step Instructions
Let’s dive into making this delightful treat together!
-
Dissolve Coffee Granules
Start by taking your instant coffee granules and mixing them with a tablespoon of warm water. This helps to dissolve the coffee evenly. If you choose to use brewed coffee, skip this step! -
Combine Cream and Condensed Milk
In a large mixing bowl, blend the thickened cream and sweetened condensed milk. Use a hand mixer or a whisk to combine them thoroughly. Whip until the mixture becomes slightly thickened, but don’t go too far; you want it to be airy yet smooth.Chef Tip: Go easy on the whipping! We’re looking for a soft peak, not stiff peaks.
-
Add Coffee and Vanilla
Once the cream and condensed milk are combined, gently fold in the dissolved coffee mixture and vanilla extract. Be careful to maintain as much air in the mixture as possible for that heavenly creaminess. -
Stir in Nuts and Chocolate
Now it’s time to add in the fun stuff! Gently fold in the toasted cashew nuts and mini chocolate chips. This step is so satisfying; you’ll want to savor how beautiful the mixture looks with those specks of chocolate and chunks of nuts. -
Freeze the Mixture
Pour the ice cream base into a suitable container—something airtight is ideal. Spread the mix evenly, cover, and place it in the freezer for at least 6-8 hours, or until it’s firm. -
Scoop and Serve
When you’re ready to enjoy your creation, pull it out of the freezer and let it sit for about 5-10 minutes for easier scooping. Dive in with a scoop and enjoy the rich flavors and creamy texture!
Serving Suggestions
For serving, I love to dish out the ice cream in stylish bowls, topped with a sprinkle of extra toasted cashews and a drizzle of chocolate sauce. You could even throw in a few coffee beans for that coffee lover’s flair! Serve it alongside a warm slice of cake or some cold brew coffee for a delightful dessert experience.
Recipe Variations
Feeling adventurous? Here are a few fun twists you can try with this base recipe:
- Mocha Crunch: Add a swirl of chocolate syrup throughout for a rich mocha flavor.
- Nutty Delight: Swap cashews for pecans or hazelnuts for a distinct crunch.
- Spiced Coffee: Add a pinch of cinnamon or nutmeg to give the ice cream some warmth and depth.
- Caramel Swirl: Drizzle with caramel sauce for extra sweetness.
- Vegan Version: Use coconut cream and maple syrup instead of condensed milk for a vegan-friendly treat.
Chef’s Notes
Making ice cream at home is truly an art, and I’ve loved playing with flavors and textures over the years. One fun memory I have was when I decided to experiment with different coffee beans during one summer picnic. I ended up using a bold espresso blend, and the results were astonishingly good! That was the magic moment I knew I could go beyond the basic recipe and reach new heights in flavor.
FAQs and Troubleshooting
1. Why is my ice cream too icy?
If your ice cream texture is icy, ensure that you are using fatty creams (like heavy cream) and whip enough air into the mixture. This helps create that velvety texture.
2. Can I use decaf coffee?
Absolutely! Decaf coffee works wonderfully if you love the flavor but want to avoid the caffeine rush.
3. My ice cream is too soft. What did I do wrong?
This can occur if the mixture isn’t cold enough before freezing or if it hasn’t been whipped adequately. Make sure to chill your ingredients and mix properly for the best results.
4. How long will this ice cream last in the freezer?
It will last about 2-3 weeks in the freezer, but trust me, it won’t last that long once everyone tries it!
Nutritional Info
While I won’t go into depths of calorie counts, it’s worth noting that indulging in homemade ice cream means you can control the quality of ingredients. Opting for lower sugar condensed milk and nut substitutes significantly changes these macronutrients, allowing for some guilt-free enjoyment!
So there you have it, my friends! A blend of nostalgia, flavor, and creative freedom that leads to the most delightful Coffee Crumble Ice Cream you can whip up at home. I hope you find joy in preparing this dish, just as I do, and don’t forget to share those lovely memories gathered around your table! Happy cooking!
PrintCoffee Crumble Ice Cream
A rich and creamy homemade ice cream made with coffee, toasted cashews, and mini chocolate chips.
- Prep Time: 15 minutes
- Cook Time: 0 minutes
- Total Time: 480 minutes
- Yield: 4 servings 1x
- Category: Dessert
- Method: Freezing
- Cuisine: American
- Diet: Vegetarian
Ingredients
- 2 ½ tablespoons instant coffee granules
- 1 tin sweetened condensed milk (395g/14oz)
- 1 teaspoon vanilla extract
- 2 ½ cups thickened cream (heavy cream) (600ml)
- ¾ cup toasted cashew nuts, roughly chopped
- ¾ cup mini chocolate chips
Instructions
- Dissolve coffee granules by mixing them with a tablespoon of warm water.
- Combine thickened cream and sweetened condensed milk in a large mixing bowl.
- Add the dissolved coffee mixture and vanilla extract, folding gently.
- Stir in toasted cashew nuts and mini chocolate chips.
- Freeze the mixture for at least 6-8 hours, or until firm.
- Scoop and serve, garnishing as desired.
Notes
For serving, top with extra toasted cashews or drizzle with chocolate sauce.
Nutrition
- Serving Size: 1 serving
- Calories: 350
- Sugar: 30g
- Sodium: 100mg
- Fat: 20g
- Saturated Fat: 10g
- Unsaturated Fat: 8g
- Trans Fat: 0g
- Carbohydrates: 40g
- Fiber: 2g
- Protein: 5g
- Cholesterol: 60mg
Keywords: ice cream, coffee dessert, homemade ice cream, summer treat, easy recipe
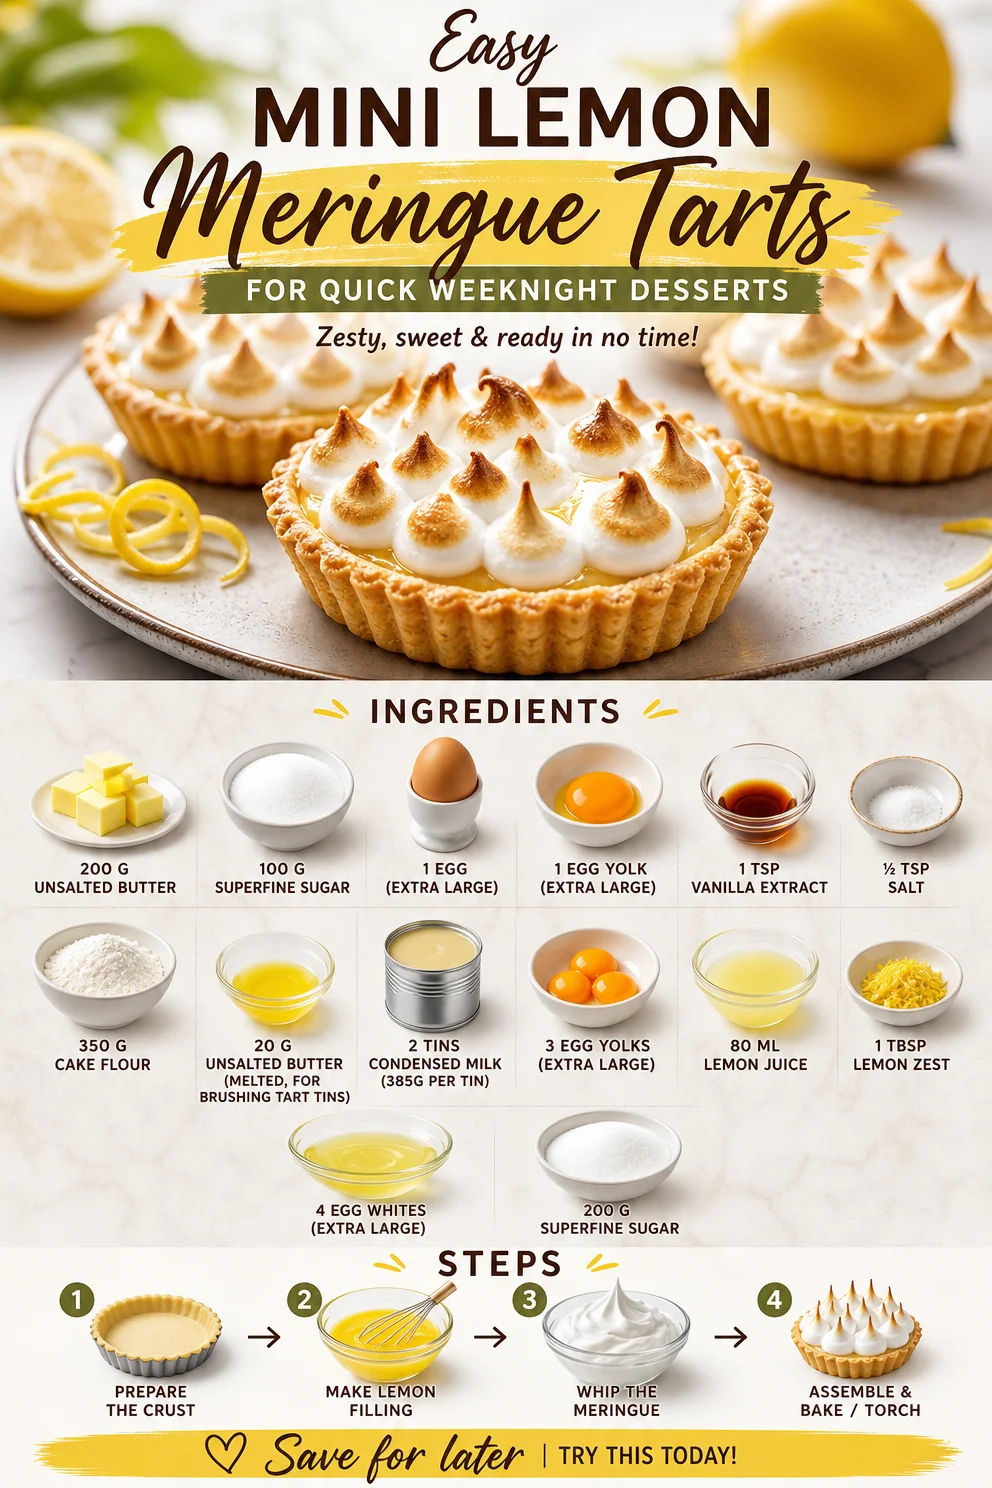
Easy Mini Lemon Meringue Tarts for Quick Weeknight Desserts
Mini Lemon Meringue Tarts: A Sweet Bite of Sunshine
Hello, fellow food lovers! If you’re anything like me, you believe that cooking should be an exciting adventure, blending artistry with flavors that dance on your palate. Today, I’m thrilled to share a recipe that captures the essence of summer in every bite—Mini Lemon Meringue Tarts. These little beauties are perfect for any occasion, whether you’re throwing a dinner party or just indulging in a sweet treat after a long day. Let’s dive into the sunny world of tangy lemon curd and fluffy meringue topped tarts!
A Family Tradition
Growing up in my family, lemon meringue pie was almost a rite of passage. My grandma had a rhythm to her baking—the crackle of her mixing bowl, the sweet and sour aroma wafting through the air, and of course, her infamous meringue that always had to reach that perfect glossy peak. One summer afternoon, I decided to step into the kitchen, determined to replicate her masterpiece. Armed with her handwritten recipe and a heap of enthusiasm, I soon discovered the wonder of whipping egg whites and the magic of balancing sweet and tart flavors.
Though my first attempt ended in a bit of a mess—let’s just say there was more meringue on my face than on the pie—I still remember the joy of creating something special. After a few tries and many giggles later, I finally nailed the recipe. This experience sparked my love for baking and laid the foundation for many delightful kitchen adventures. Fast forward to today, and I’m excited to share a mini version of that classic dessert. Trust me, these Mini Lemon Meringue Tarts will win hearts just like my grandma’s pie!
Ingredients
Here’s what you’ll need to create your own mini lemon meringue tarts:
For the Tart Shells:
- 200 g unsalted butter: Adds a rich flavor and tender texture. If you prefer, you can use a plant-based butter for a dairy-free option.
- 100 g superfine sugar: This helps create a light and tender crust. You can also use powdered sugar if that’s what you have on hand.
- 1 extra-large egg: Acts as a binder in the crust. A flax egg (1 tablespoon flaxseed meal + 2.5 tablespoons water) can be a good substitute for a vegan version.
- 1 extra-large egg yolk: Contributes to the richness. No substitute for this—just embrace the decadence!
- 1 tsp vanilla extract: Enhances the flavor of the crust. Feel free to use almond extract for a twist!
- ½ tsp salt: Just a pinch to balance the sweetness.
- 350 g cake flour: A lighter flour for tender tarts. All-purpose flour will work too, just expect a slightly denser crust.
- 20 g unsalted butter (melted, for brushing tart tins): This is for greasing the tins easily.
For the Lemon Curd Filling:
- 2 tins condensed milk (385g per tin): Provides sweetness and thickness. You can opt for sweetened coconut milk if you’d like to go dairy-free.
- 3 extra-large egg yolks: These will thicken your curd beautifully.
- 80 ml lemon juice: Freshly squeezed is best for a vibrant flavor. Bottle juice works in a pinch, but freshness makes a difference!
- 1 tbsp lemon zest: Always zest before juicing! It adds a lovely aromatic element to your curd.
For the Meringue Topping:
- 4 extra-large egg whites: They’re the star of this meringue—so fluffy and perfect!
- 200 g superfine sugar: Helps stabilize the egg whites to create that dreamy meringue.
Step-by-Step Instructions
Let’s get cooking! Here’s how to create these delightful Mini Lemon Meringue Tarts.
-
Prepare the Tart Shells:
Preheat your oven to 180 °C (350 °F). In a large mixing bowl, cream together the 200 g unsalted butter and 100 g superfine sugar until it’s light and fluffy—this usually takes about 3 minutes at medium speed. Pro tip: A stand mixer can make this process easier, but a handheld mixer works just fine! -
Add the Wet Ingredients:
Mix in the 1 whole egg, 1 egg yolk, and 1 tsp vanilla extract, ensuring everything is well-combined. You want a lovely light yellow mixture that smells divine! -
Incorporate Dry Ingredients:
Gradually sift in the 350 g cake flour and ½ tsp salt. Use a spatula to fold in the flour until just combined. Be careful not to overmix! You want a soft dough that holds together when pressed. If it feels too crumbly, add a teaspoon of cold water. -
Shape and Chill:
Lightly flour your work surface, roll out the dough to about ½ cm thick, and cut out circles that will fit into your tart tins. Press the dough gently into the tins and poke a few holes in the bottom to prevent puffing. Pop these into the fridge for 20-30 minutes to chill—this will help keep them from shrinking during baking. -
Bake the Shells:
Brush the tart shells with melted butter and bake them in the preheated oven for about 15-18 minutes, or until they are golden brown. Keep an eye on them to avoid burning! -
Prepare the Lemon Curd:
While your shells are baking, let’s whip up that luscious lemon curd! In a medium saucepan over low heat, combine the two tins of condensed milk, 3 egg yolks, 80 ml lemon juice, and 1 tbsp lemon zest. Stir constantly until the mixture thickens, about 5-7 minutes. You’ll know it’s ready when it coats the back of a spoon.Tip: Don’t rush this step; patience is key!
-
Fill the Tarts:
Once your shells are cooled and the lemon curd thickened, pour the curd into each tart shell, filling them up to the brim. Set them aside to cool completely while you prepare the meringue. -
Make the Meringue:
In a clean mixing bowl, whip the 4 egg whites on medium speed until soft peaks form. Gradually add in the 200 g superfine sugar, a tablespoon at a time, until the meringue becomes glossy and holds stiff peaks. You want to be able to turn that bowl upside down without losing a drop of meringue! -
Top Your Tarts:
Pipe or spoon the meringue high onto each filled tart. Get creative with the design! A fun swirl or little peaks always looks wonderful. -
Toast the Meringue:
Using a kitchen torch, toast the meringues until they reach a lovely golden hue. If you don’t have a torch, simply pop them under the broiler for 2-3 minutes, keeping a close eye on them to avoid burning. -
Serve and Enjoy:
Let the tarts cool for a few minutes, then serve them chilled or at room temperature. Your guests will be singing your praises!
Serving Suggestions
For an elegant presentation, serve your Mini Lemon Meringue Tarts on a beautiful cake stand, garnished with fresh berries or mint leaves. Consider pairing them with a refreshing drink like iced tea with lemon or a sweet cocktail.
Recipe Variations
Here are a few fun twists you can try:
- Berry Bliss: Add a layer of fresh blueberries or raspberries underneath the lemon curd for a burst of vibrant flavor.
- Coconut Meringue: Incorporate toasted coconut into the meringue for a tropical twist.
- Savory Lemon Tarts: Replace lemon curd with a mixture of savory ingredients like goat cheese and thyme for a unique appetizer.
- Mini Cheesecakes: Swap out lemon curd with cheesecake filling for a delicious twist on classic tarts.
- Vegan Variation: Use aquafaba (chickpea water) in place of egg whites for a delightful vegan meringue.
Chef’s Notes
I can’t help but chuckle when reminiscing about the first time I tried to toast meringue under the broiler. I was so excited to impress my guests that I didn’t pay attention, and voilà! A charred, sad little mound of meringue was all that was left. Lesson learned: sometimes, less is more—especially when it comes to toasting. These tarts are all about bringing joy to the table without stress, so don’t worry about perfection; just enjoy the process!
FAQs and Troubleshooting
1. My meringue didn’t whip up nicely; what went wrong?
Make sure your mixing bowl and beaters are squeaky clean! Any fat or residue can inhibit the egg whites from whipping up properly.
2. How do I prevent my tart shells from getting soggy?
Chill your crusts before baking and make sure to bake until they are golden brown. Pre-baking helps develop a sturdy shell that can handle fillings without getting soggy.
3. Can I make these tarts in advance?
Absolutely! You can prepare the tart shells and lemon curd a day ahead and assemble them right before serving for a fresh meringue.
4. What’s the best way to store leftovers?
Store any leftover tarts in the refrigerator for up to 2 days. They taste amazing cold, but the meringue is best enjoyed fresh!
Nutritional Info
Each mini tart is a delightful treat, bursting with fresh lemon flavor, but be mindful of the sugar content! Indulging in these is best enjoyed in moderation as part of a balanced diet.
I hope you feel inspired to create these Mini Lemon Meringue Tarts in your own kitchen! Remember, it’s not just about the food; it’s the joy, laughter, and memories that gather around the table that makes cooking worthwhile. So grab your apron, and let’s make something delicious together! Happy cooking! 🍋✨
PrintMini Lemon Meringue Tarts

Delightful mini tarts with tangy lemon curd and fluffy meringue, perfect for any occasion.
- Prep Time: 30 minutes
- Cook Time: 30 minutes
- Total Time: 60 minutes
- Yield: 12 servings 1x
- Category: Dessert
- Method: Baking
- Cuisine: American
- Diet: Vegetarian
Ingredients
- 200 g unsalted butter
- 100 g superfine sugar
- 1 extra-large egg
- 1 extra-large egg yolk
- 1 tsp vanilla extract
- ½ tsp salt
- 350 g cake flour
- 20 g unsalted butter (melted, for brushing tart tins)
- 2 tins condensed milk (385 g per tin)
- 3 extra-large egg yolks
- 80 ml lemon juice
- 1 tbsp lemon zest
- 4 extra-large egg whites
- 200 g superfine sugar (for meringue)
Instructions
- Preheat your oven to 180 °C (350 °F). In a large mixing bowl, cream together the butter and sugar until light and fluffy.
- Mix in the egg, egg yolk, and vanilla extract until well-combined.
- Gradually sift in the cake flour and salt, folding until just combined.
- Roll out the dough, cut into circles, and press into tart tins. Chill for 20-30 minutes.
- Brush the tart shells with melted butter and bake for 15-18 minutes until golden brown.
- In a medium saucepan, combine the condensed milk, egg yolks, lemon juice, and zest over low heat. Stir until thickened.
- Pour the lemon curd into each tart shell once cooled.
- Whip the egg whites until soft peaks form, gradually adding sugar until glossy and stiff peaks form.
- Pipe the meringue onto the tarts and toast using a kitchen torch.
- Serve the tarts chilled or at room temperature.
Notes
For a creative twist, try adding fresh berries under the lemon curd or making a vegan version with aquafaba.
Nutrition
- Serving Size: 1 tart
- Calories: 250
- Sugar: 15g
- Sodium: 100mg
- Fat: 10g
- Saturated Fat: 5g
- Unsaturated Fat: 5g
- Trans Fat: 0g
- Carbohydrates: 30g
- Fiber: 1g
- Protein: 4g
- Cholesterol: 70mg
Keywords: lemon tarts, dessert, meringue, baking, summer treats
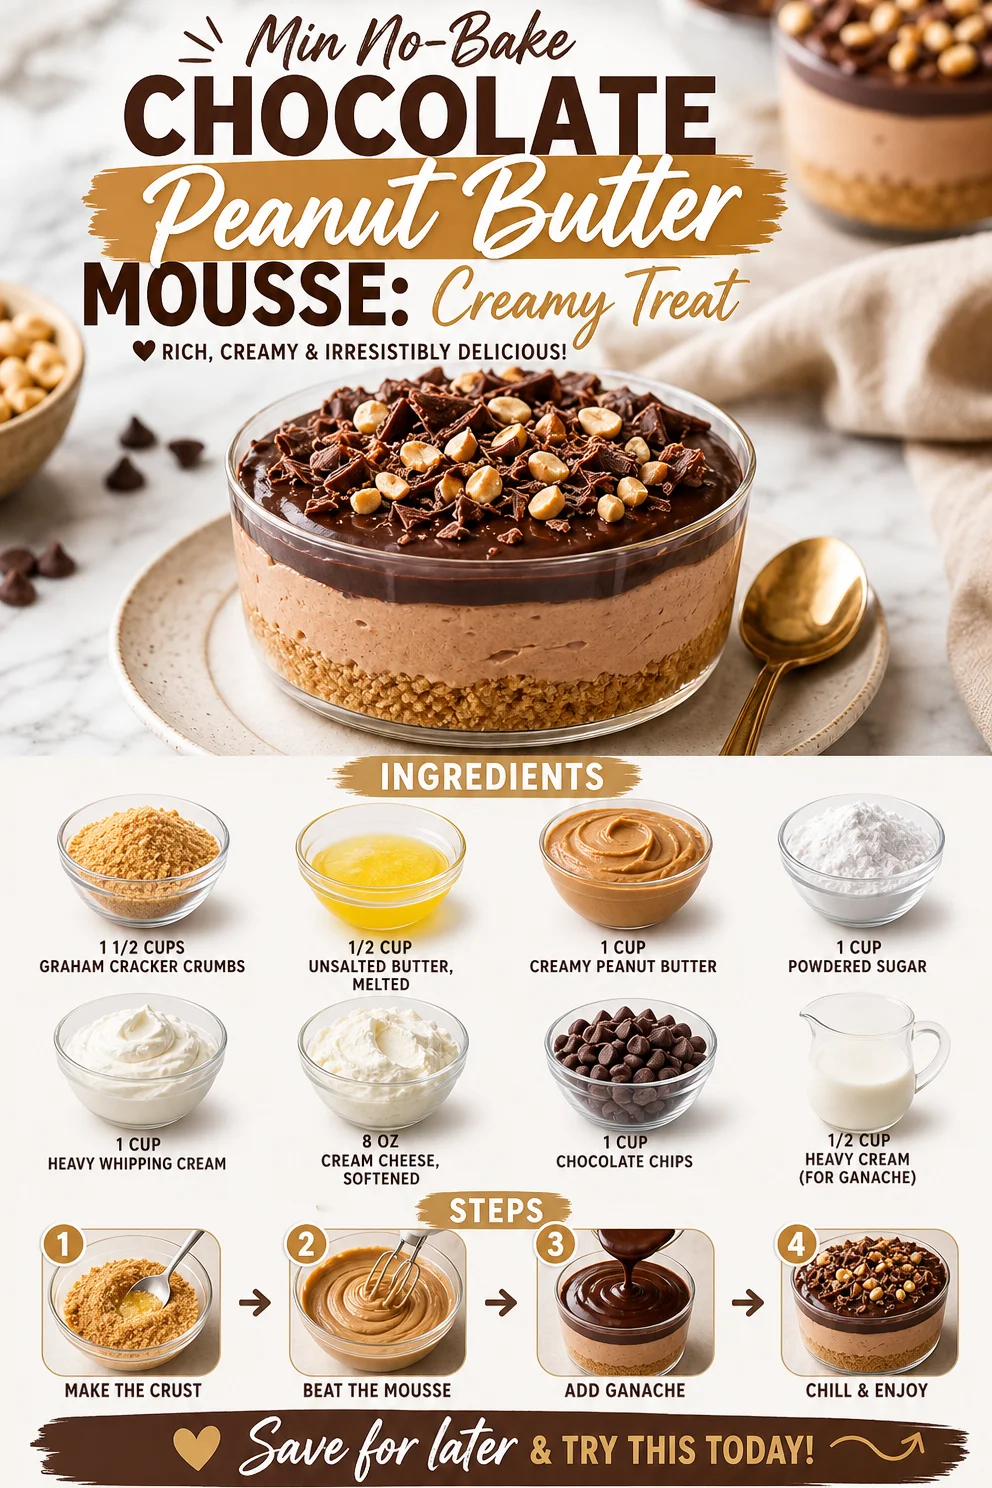
Min No-Bake Chocolate Peanut Butter Mousse: Creamy Treat
Indulge in Decadence: No-Bake Chocolate Peanut Butter Mousse Dessert
Hello, dessert lovers! Have you ever had that delightful moment when a simple combination of ingredients takes you back to your childhood, to warm kitchens filled with giggles and the sweet aroma of treats wafting through the air? That feeling? The one that makes you want to create delicious memories around your table? Well, today we’re diving into a dreamy No-Bake Chocolate Peanut Butter Mousse Dessert that will have you reminiscing and indulging in nostalgia all at once.
I mean, who can resist that velvety layer of chocolate paired with the rich, creamy taste of peanut butter? Seriously, it’s like a flavor celebration right in your mouth. Picture this: a rich chocolate mousse layered atop a buttery graham cracker crust, finished with a luscious peanut butter cream. It’s not just a dessert; it’s an experience! Let’s get those taste buds tingling and prepare our hearts (and stomachs) for something special.
This dessert not only satisfies your sweet cravings, but it also spreads joy and simple joys of life. Each bite is a little reminder to slow down and enjoy the beautiful moments — whether you’re planning a cozy dinner for two, a lively gathering with friends, or just a special treat for yourself. Trust me, you’ll want to keep this recipe close at hand. Ready to get started? Let’s whip up this deliciousness together!
A Taste of Nostalgia
Growing up, my kitchen was a hub of creativity and laughter, especially when it came to dessert time. I can vividly remember those lazy summer days when my mom and I would invent things in the kitchen, armed with nothing but a list of ingredients and a whole lot of enthusiasm. One such day, we decided to experiment with peanut butter, chocolate, and whatever else we could get our hands on from the pantry. As we stirred and tasted, we became engrossed in creating the “perfect” dessert.
Of course, our concoction didn’t always look perfect, but oh, the flavors! We made a mess, dropped chocolate chips, and definitely had some spilled peanut butter along the way, but we were having the best time. Fast forward all these years, and that childhood love for sweet creations hasn’t changed a bit. The No-Bake Chocolate Peanut Butter Mousse Dessert we’re making today captures those joyous moments perfectly. So, roll up your sleeves, and let’s create a sweet memory together!
Ingredients
Here’s what you’ll need to whip up this amazing dessert:
-
1 1/2 cups graham cracker crumbs
These create the perfect buttery base. For a gluten-free version, swap them out for gluten-free graham crackers or even almond flour. -
1/2 cup unsalted butter, melted
The melted butter helps bind the crumbs together. You can use coconut oil for a non-dairy option. -
1 cup creamy peanut butter
The star of our show! Opt for natural peanut butter for a healthier twist. If you prefer almond or cashew butter, they’ll work wonderfully too. -
1 cup powdered sugar
Sweetness brings everything together. If you’re watching your sugar intake, you can use powdered erythritol as a substitute. -
1 cup heavy whipping cream
This will be whipped to create that light, fluffy mousse texture. If you need a dairy-free version, try canned coconut cream. -
8 oz cream cheese, softened
It adds richness and stability to the mousse. For a healthier variation, consider using Greek yogurt. -
1 cup chocolate chips
Semi-sweet or dark, chocolate chips melt beautifully for our mousse. You could also use dairy-free chocolate chips for a vegan option. -
1/2 cup heavy cream (for ganache)
This will make a rich ganache to pour over. Again, feel free to substitute with coconut cream for a non-dairy version.
Step-by-Step Instructions
Now, let’s dive into the magic of cooking! Here’s how to bring it all together:
-
Prepare the crust:
- In a mixing bowl, combine the graham cracker crumbs with the melted butter. Mix until all crumbs are moistened. This is your first crust layer, and don’t skimp on the butter! It’s what gives it that delicious “sticky” texture that holds everything together.
- Press the mixture firmly into the bottom of a 9-inch pie dish (or dessert dish of your choice). Make sure to create an even layer using the back of a measuring cup or your fingers. The more evenly you press it, the better the base will hold its shape!
-
Make the mousse:
- In another bowl, beat the softened cream cheese and peanut butter together until smooth and creamy. You can’t skip this step! Properly mixing these two will ensure a luscious mousse without any lumps.
- Gradually add in the powdered sugar while continuing to beat until combined. Oh, that sweetness is heavenly!
- In a separate bowl, whip the heavy whipping cream until soft peaks form. This is where the magic happens—fluffiness is key for the perfect mousse. Use a hand mixer or a whisk, whichever you fancy. If using a whisk, just make sure to add plenty of love and elbow grease!
-
Fold everything together:
- Gently fold the whipped cream into the peanut butter mixture, using a rubber spatula. Be careful not to deflate that fluffy whipped cream. You want to maintain all that delicious airiness for ultimate indulgence!
- Once fully combined, pour the mousse over the prepared crust. Use a spatula to smooth it out evenly. Utter bliss is happening!
-
Chill:
- Place the pie dish in the refrigerator for at least 2 hours to let the mousse set. Trust me; the wait will be worth it! Nothing beats a cold slice of dessert on a warm day.
-
Prepare the ganache:
- While you wait, let’s make that luscious ganache! In a small saucepan, heat the remaining heavy cream over medium heat until it begins to simmer. Remove from heat and stir in the chocolate chips until melted and glossy. This simple trick will give you the best ganache. If it’s a bit thick, you can always add a splash more cream until it reaches your desired consistency.
-
Top it off:
- Once the mousse is set, pour the chocolate ganache over the top. Spread it gently to make sure every inch is covered in chocolaty goodness. For a little flair, you can sprinkle some extra crushed graham crackers on top for a delightful crunch.
-
Chill again:
- Return the dessert to the fridge for at least another 30 minutes to firm up the ganache. This extra time will allow everything to meld beautifully.
-
Serve and enjoy:
- Slice it up—don’t forget to use a warm knife for cleaner cuts! Serve chilled, and watch everyone’s eyes light up as they take their first bite!
Serving Suggestions
To plate this No-Bake Chocolate Peanut Butter Mousse Dessert, gently slice generous pieces and place them on dessert plates. A dollop of whipped cream and a sprinkle of crushed peanuts on top always makes for a gorgeous finish. Garnish with chocolate shavings for that extra touch of elegance. Let the beauty speak for itself!
Recipe Variations
- Nut-Free Version: Use sunflower seed butter in place of peanut butter and check for nut-free graham crackers.
- Dairy-Free Delight: Substitute cream cheese and heavy cream with vegan options like cashew cream or silken tofu to achieve a creamy texture.
- Extra Chocolate: Add melted chocolate directly to the mousse for a more intensive chocolate flavor.
- Fruit Layer: Incorporate fresh banana or raspberry layers to add a fruity twist between the mousse layers.
- Spicy Kick: A sprinkle of cayenne pepper or chili powder in the chocolate ganache can create a delightful surprise!
Chef’s Notes
You know, this dessert has become one of those go-to recipes for me. Anytime someone asks for a quick and impressive treat, this is my answer! I love how adaptable it is; you can play around with flavors and textures endlessly. Each time I make it, I remember that day in the kitchen with my mom, a reminder that sometimes the best recipes come from spontaneous moments. Plus, there’s always something special about a no-bake dessert—fewer dishes and quicker mess clean-up!
FAQs and Troubleshooting
1. Why is my mousse not setting?
If your mousse hasn’t set, it may need a bit more chilling time. Just be patient; sometimes, it needs a few extra hours!
2. Can I make this ahead of time?
Absolutely! This dessert stores beautifully in the fridge for up to two days. It’s perfect for prepping ahead for gatherings.
3. How can I prevent my cream from deflating?
When folding in whipped cream, use a gentle hand and spatula, making sure not to stir too vigorously. You want to keep that airy texture intact!
4. What’s the best way to slice the dessert?
Run a knife under warm water, dry it off, and slice. This technique gives you crisp, clean edges with each piece!
With this No-Bake Chocolate Peanut Butter Mousse Dessert, you’re not just cooking; you’re creating memories—one delicious bite at a time. So gather your ingredients, bring some friends over, and let’s get to creating something magical. Until next time, happy cooking and sweet indulgences!
PrintNo-Bake Chocolate Peanut Butter Mousse Dessert
A rich and creamy no-bake dessert that combines layers of chocolate mousse and peanut butter cream over a buttery graham cracker crust.
- Prep Time: 15 minutes
- Cook Time: 0 minutes
- Total Time: 150 minutes
- Yield: 8 servings 1x
- Category: Dessert
- Method: No-Bake
- Cuisine: American
- Diet: Nut-Free, Gluten-Free Option
Ingredients
- 1 1/2 cups graham cracker crumbs
- 1/2 cup unsalted butter, melted
- 1 cup creamy peanut butter
- 1 cup powdered sugar
- 1 cup heavy whipping cream
- 8 oz cream cheese, softened
- 1 cup chocolate chips
- 1/2 cup heavy cream (for ganache)
Instructions
- Prepare the crust: In a mixing bowl, combine the graham cracker crumbs with the melted butter. Mix until all crumbs are moistened. Press the mixture firmly into the bottom of a 9-inch pie dish.
- Make the mousse: In another bowl, beat the softened cream cheese and peanut butter together until smooth. Gradually add in the powdered sugar while continuing to beat until combined. In a separate bowl, whip the heavy whipping cream until soft peaks form.
- Fold everything together: Gently fold the whipped cream into the peanut butter mixture. Once fully combined, pour the mousse over the prepared crust.
- Chill: Place the pie dish in the refrigerator for at least 120 minutes to let the mousse set.
- Prepare the ganache: In a saucepan, heat the remaining heavy cream until it begins to simmer. Remove from heat and stir in the chocolate chips until melted.
- Top it off: Once the mousse is set, pour the chocolate ganache over the top and spread it out evenly.
- Chill again: Return the dessert to the fridge for at least another 30 minutes.
- Serve and enjoy: Slice it up and serve chilled with whipped cream and crushed peanuts.
Notes
For a gluten-free version, use gluten-free graham crackers. For a dairy-free version, substitute cream cheese and heavy cream with vegan options.
Nutrition
- Serving Size: 1 slice
- Calories: 400
- Sugar: 20g
- Sodium: 250mg
- Fat: 24g
- Saturated Fat: 10g
- Unsaturated Fat: 12g
- Trans Fat: 0g
- Carbohydrates: 40g
- Fiber: 2g
- Protein: 6g
- Cholesterol: 35mg
Keywords: no-bake dessert, chocolate mousse, peanut butter, easy dessert, gluten-free
Ingredient Cinnamon Roll Bites: Quick Gooey Snack
Quick Cinnamon Roll Bites: A Deliciously Easy Treat
Hello, fellow food lovers! If you’re anything like me, there’s something simply magical about the aroma of cinnamon filling the kitchen. It evokes a sense of warmth and nostalgia that wraps around you like a cozy blanket on a chilly evening. Today, I’m excited to introduce you to one of my favorite cozy treats: Quick Cinnamon Roll Bites.
These delightful little morsels are perfect for breakfast, snacking, or even a sweet treat after dinner. They embody all the flavors of traditional cinnamon rolls but come together in a snap, making them a fantastic choice for busy days when you still want to serve something homemade. With hardly any fuss, these bites will transform your kitchen into a bakery filled with heavenly scents — and trust me, everyone will be asking for seconds!
A Sweet Memory to Share
I vividly remember my grandmother’s kitchen, where the delicious scent of cinnamon wafted through the air every Saturday morning. She’d gather us around the table as she rolled out dough and sprinkled it with your classic cinnamon-sugar mixture. It was less about the recipe and more about the experience — the laughter, the spilled flour, and those tiny little hands helping to knead the dough just a bit too hard.
One particular Saturday, I was tasked with mixing the filling. I added an extra pinch of cinnamon because, why not? I thought it was a genius move until I realized we couldn’t taste anything but spice! We all had a good laugh, and my grandma never let me live it down. She said, “You can’t overpower sweetness with spice, dear!” Since then, I learned how to strike that precious balance, and today, I promise you’ll find just that in these Quick Cinnamon Roll Bites. Let’s dive into making a batch that will create sweet memories of your own!
Ingredients You’ll Need
-
1 can refrigerated crescent dough: This handy ingredient makes everything super quick and easy! You can substitute with any flaky dough or puff pastry if you’re feeling adventurous. Just keep in mind that cooking times may vary slightly.
-
1/4 cup melted butter: This adds richness and helps the sugar stick. You can replace it with coconut oil for a dairy-free option.
-
1/2 cup brown sugar: This sweet ingredient melts beautifully while baking, creating a luscious caramel flavor. If you’re out of brown sugar, you can simply mix white sugar with a spoonful of molasses for a quick substitute.
-
1 tablespoon ground cinnamon: The star of the show! Cinnamon brings that warm, sweet flavor that’s essential for any cinnamon roll. If you’re looking for a twist, try cardamom or pumpkin spice for a unique flavor.
-
1/2 cup powdered sugar: This is for our quick glaze! It creates that sweet finish to our bites. You can use agave syrup or honey instead if you prefer something less processed.
-
1-2 tablespoons milk or cream: Just enough to thin out the glaze to your desired consistency. You can use any plant-based milk as an alternative!
-
1/2 teaspoon vanilla extract: A splash of vanilla adds depth to the glaze. Feel free to get creative here and swap it out with almond extract for a different dimension.
Step-by-Step Instructions
-
Preheat the Oven: Let’s get that oven heated to 375°F (190°C). This step is crucial for that perfectly golden pastry outcome. While the oven preheats, you’ll have time to prep everything!
-
Prep the Dough: Open the can of refrigerated crescent dough and unroll it on a clean surface. It can be a little tricky, but simply press together any perforations to create a single sheet. This will be your canvas for creativity!
-
Make the Filling: In a small bowl, mix together the melted butter, brown sugar, and cinnamon until well combined. This mixture will act as your sweet glue, so make sure everything is thoroughly mixed!
-
Spread the Filling: Use a spatula to spread the cinnamon-sugar mixture evenly over your crescent dough. Go all the way to the edges — you don’t want to miss any delicious bites!
-
Roll It Up: Starting from the widest end of the dough, roll it up tightly into a log. Feel free to channel your inner pastry chef here! Once rolled, cut it into bite-sized pieces — about 1 inch thick. You should get around 12-15 bites from this one roll.
-
Transfer to Baking Sheet: Line a baking sheet with parchment paper or a silicone mat for easy cleanup. Place your little bites on the sheet, giving them some space to spread out while baking.
-
Bake Them Up: Pop those adorable morsels in the preheated oven and bake for about 12-15 minutes, or until they turn golden brown and the kitchen starts smelling heavenly. Keep an eye on them! Since ovens vary, you don’t want to overdo it.
-
Make the Glaze: While they’re baking, whisk together your powdered sugar, milk (or cream), and vanilla extract until smooth. If it’s too thick, add a splash more milk until you achieve that drizzly consistency we love.
-
Glaze and Enjoy: As soon as the bites come out of the oven, give them a generous drizzle with your sweet glaze while they’re still warm. This step is crucial for maximum gooey goodness!
Serving Suggestions
To serve, simply arrange the Cinnamon Roll Bites on a beautiful cake stand or a rustic wooden platter. You could even sprinkle a pinch of cinnamon or extra powdered sugar on top for a touch of elegance! Let guests help themselves, and watch those bites disappear in no time.
Recipe Variations
-
Fruity Twist: Add sliced bananas or apples to the filling for a fruity kick.
-
Nutty Delight: Toss in some chopped pecans or walnuts into the cinnamon mixture for added crunch.
-
Pumpkin Spice: Trade out some of the cinnamon for pumpkin spice for an autumnal flair.
-
Chocolate Drizzle: Drizzle some melted chocolate over your glaze for an indulgent touch.
-
Cream Cheese Icing: Mix cream cheese with powdered sugar and a splash of milk for a richer topping instead of glaze.
Chef’s Notes
These Quick Cinnamon Roll Bites have become a go-to recipe in my kitchen — especially when unexpected guests drop by or when I need a sweet fix. They are forgiving, fun to make, and so versatile! Plus, they remind me of those kitchen adventures with my grandmother, where food was never just about the final dish but the joy in creating something special together.
One time, I hosted a brunch and made these bites with a variety of fillings, from whipped cream cheese with lemon zest to spiced apple butter. It was a hit! Guests loved choosing their own fillings and really made the experience enjoyable.
FAQs and Troubleshooting
1. Why did my cinnamon bites flatten out?
If your bites flatten out during baking, it might be due to using a soft dough or not wrapping them tightly enough. Make sure to roll them firmly and use cold dough for better shape retention.
2. Can I make these ahead?
Absolutely! You can prepare the rolls, cut them, and refrigerate them overnight. Just add a few extra minutes to the baking time.
3. How do I know when they’re done?
Your bites should be golden brown on top and firm to the touch. If they’re still doughy, give them a couple more minutes in the oven.
4. What do I do with leftovers?
They’re best eaten fresh, but if you have leftovers, store them in an airtight container in the refrigerator for up to 2 days. You can reheat them in the microwave or oven until warm.
Nutritional Info
(Optional, but here’s a rough estimate if you want to include it!)
- Serving Size: 1 bite
- Calories: ~150
- Total Fat: 7g
- Saturated Fat: 4g
- Carbohydrates: 22g
- Sugars: 10g
- Protein: 2g
And there you have it — a fabulous recipe for Quick Cinnamon Roll Bites that should take you right back to those cozy kitchen moments! I hope you enjoy making these as much as I do, and I can’t wait to hear your own stories as you gather friends and family around your table. Let’s keep the tradition of love and warmth alive through our kitchen creations! Happy baking!
PrintQuick Cinnamon Roll Bites
Easy and delightful cinnamon roll bites perfect for breakfast or snacking, embodying the flavors of traditional cinnamon rolls.
- Prep Time: 10 minutes
- Cook Time: 15 minutes
- Total Time: 25 minutes
- Yield: 12-15 servings 1x
- Category: Dessert
- Method: Baking
- Cuisine: American
- Diet: Vegetarian
Ingredients
- 1 can refrigerated crescent dough
- 1/4 cup melted butter
- 1/2 cup brown sugar
- 1 tablespoon ground cinnamon
- 1/2 cup powdered sugar
- 1–2 tablespoons milk or cream
- 1/2 teaspoon vanilla extract
Instructions
- Preheat the oven to 375°F (190°C).
- Open the can of refrigerated crescent dough and unroll it on a clean surface.
- Mix together the melted butter, brown sugar, and cinnamon in a small bowl.
- Spread the cinnamon-sugar mixture evenly over your crescent dough.
- Roll it up tightly from the widest end into a log and cut into bite-sized pieces (about 1 inch thick).
- Line a baking sheet with parchment paper and place the bites on it.
- Bake for 12-15 minutes or until golden brown.
- Whisk together powdered sugar, milk, and vanilla extract until smooth to make the glaze.
- Drizzle the glaze over the bites while they’re still warm.
Notes
These bites can be prepared in advance and refrigerated before baking. Customize with various fillings or toppings as desired!
Nutrition
- Serving Size: 1 bite
- Calories: 150
- Sugar: 10g
- Sodium: 200mg
- Fat: 7g
- Saturated Fat: 4g
- Unsaturated Fat: 2g
- Trans Fat: 0g
- Carbohydrates: 22g
- Fiber: 1g
- Protein: 2g
- Cholesterol: 20mg
Keywords: cinnamon rolls, quick dessert, easy recipe, baking, sweet snacks

Ingredient Mini Lemon Impossible Pies for Busy Weeknights
Baby Lemon Impossible Pies: A Slice of Sunshine
Hello, dear foodie friends! Today, we’re diving into a delightful dessert that shines like a slice of sunshine—Baby Lemon Impossible Pies. These little pies are perfect for any occasion, whether you’re celebrating a birthday or just want a sweet treat to lift your spirits. I can’t wait to share not just the recipe, but also a bit of my culinary journey that led me to this delightful creation.
When I think of lemon desserts, I’m instantly transported back to my grandmother’s kitchen, where the air buzzed with laughter and the tantalizing aroma of freshly baked goods. She had this magical ability to turn simple ingredients into something extraordinary. I remember the day she taught me how to make her famous lemon pie. It was one of those hazy summer afternoons, sun streaming through the kitchen window, and lemon meringue pie was on the menu.
With her vibrant yellow apron swaying as she whisked the ingredients together, she told me, “Savannah, life is like a lemon pie. It has its ups and downs, sweet and tangy moments. The key is to embrace it all!” This mantra has stuck with me, and it’s precisely why I’m so passionate about cooking and sharing recipes. Just like my Grandma’s pie, these Baby Lemon Impossible Pies carry warmth, nostalgia, and a touch of elegance without being fussy.
Let’s get our aprons on and embark on this culinary adventure together!
Ingredients
For these divine Baby Lemon Impossible Pies, gather the following ingredients:
-
4 tbsp butter (melted)
A rich, creamy base for our pies. Make sure to use unsalted butter for better control over the flavors. If you’re looking for a dairy-free option, coconut oil works wonderfully! -
1 cup granulated sugar
Sweetness is key! Feel free to use coconut sugar or a sugar substitute if you’re looking for a healthier twist. Just keep in mind that it might alter the texture a bit. -
2 eggs (room temperature)
Eggs help to bind everything together and give the filling its structure. You can replace eggs with flax eggs (1 tbsp ground flaxseed + 2.5 tbsp water) for a vegan option, though the texture may differ. -
1 cup whole milk
Creamy and rich, whole milk gives our pies their luxurious texture. You can use almond milk or oat milk for a dairy-free alternative, but choose unflavored so the lemon shines. -
1/2 cup all-purpose flour
This is what helps your pies rise and gives them that impossible texture. If you’re gluten-free, a mix of almond flour and tapioca flour works nicely. -
1/4 cup fresh lemon juice (not bottled)
Fresh is best! The bright flavor from fresh lemons is unmatched. Bottled juice just doesn’t compare. If you’re out of lemons, you can use lime for a twist! -
1 tbsp lemon zest (from fresh lemons)
The zest adds an aromatic burst that makes these pies truly special. If you’re unable to find fresh lemons, try using orange zest for a different flavor. -
1 tsp vanilla extract
A touch of vanilla rounds out the flavors beautifully. For a fun twist, you could try almond extract instead! -
1/4 tsp salt
Just a pinch adds depth to the sweetness and enhances other flavors. Trust me; it makes a difference!
Step-by-Step Instructions
-
Preheat Your Oven
Preheat your oven to 350°F (175°C). This step is essential—nobody likes a pie that’s underbaked! -
Prepare the Baking Dish
Grease a 9-inch pie dish or individual ramekins with a bit of melted butter. This will help your impossible pies slide right out after baking—yay for easy cleanup! -
Mix the Wet Ingredients
In a mixing bowl, combine the melted butter, granulated sugar, and eggs. Use a whisk to blend them together until they form a cohesive mixture. Admire the swirl; it’s also a chance to show off some arm strength! -
Add the Milk and Flavorings
Gradually pour in the whole milk along with the fresh lemon juice, lemon zest, and vanilla extract. Whisk again until all the ingredients are smooth and well incorporated. -
Incorporate the Dry Ingredients
Next up, sprinkle the all-purpose flour and salt over the wet mixture. Use a spatula to gently fold the dry ingredients into the wet ones. Overmixing can lead to tough pies, and we want them light and fluffy! -
Pour and Bake
Pour the mixture into your prepared dish or ramekins, and place them on the center shelf of your preheated oven. Bake for about 30-35 minutes, or until the tops are golden brown. The tops will form a delicate crust while the filling will remain soft and custardy—trust me, it’s magic! -
Cool, Slice, and Enjoy
Once baked, remove the pies from the oven and allow them to cool for a bit. The pies will puff up and then sink back down slightly—this is totally normal! Slice and serve warm or chilled, and don’t forget to dust with some powdered sugar for that final touch of elegance!
Serving Suggestions
To elevate your Baby Lemon Impossible Pies, consider serving them with a dollop of freshly whipped cream or a scoop of vanilla ice cream. A few fresh berries on the side add color and a burst of flavor, while a sprig of mint can bring a pop of freshness. For added flair, consider drizzling a bit of lemon glaze on top—just mix some powdered sugar with a splash of lemon juice until you reach desired consistency!
Recipe Variations
- Blueberry Lemon Impossible Pies: Add a cup of fresh blueberries to the batter for a delicious twist on flavor and color!
- Coconut Lemon Impossible Pies: Stir in a half cup of shredded coconut for a tropical flair.
- Meringue Topping: After the pies cool, top them with a light meringue and broil until golden for a classic lemon meringue experience, sans the full pie!
- Lemon Lavender: Infuse dried culinary lavender into the milk for a subtle floral note that pairs beautifully with lemon.
- Chai-Spiced Variants: Add a teaspoon of chai spice mix for a warm, spiced finish that offers an intriguing flavor contrast!
Chef’s Notes
This recipe has become a staple in my kitchen over the years. It started as a fun experiment in adapting a classic lemon pie recipe to create a more accessible version. One day, while hurriedly preparing for a dinner party, I realized I had run out of a few ingredients and needed to pivot. The “impossible” aspect was so serendipitous and fitting—it just seemed like the pie made itself! friends and family have come to love their light, custardy texture, and they’re perfect for every occasion, from summer barbecues to cozy winter dinners. Plus, they never fail to impress—those golden tops are a sight to behold!
FAQs and Troubleshooting
1. Why did my pies not set properly?
If your pies didn’t set, it could be due to underbaking. Make sure to follow the baking time and check for that golden crust!
2. Can I use bottled lemon juice?
While it’s best to use fresh lemon juice for optimal flavor, bottled juice can work in a pinch. Just keep in mind that the taste will vary.
3. How can I tell when my pies are done?
Look for a golden brown top. The centers should be just slightly jiggly but not liquid.
4. My pies are too sweet—what can I do?
You can reduce the sugar next time, or balance it by serving with something tangy, like a dollop of yogurt or sour cream, to take off the edge.
Nutritional Info
While specific values can vary based on your chosen ingredients, here’s an estimate per serving (based on 8 servings):
Calories: 220
Carbohydrates: 25g
Protein: 4g
Fat: 10g
Sugar: 15g
And there you have it—the delightful Baby Lemon Impossible Pies ready to take your dessert table by storm! Remember, cooking is all about enjoying the process, making memories, and sometimes embracing a little chaos in the kitchen. So, tie on your apron, gather your loved ones, and start creating your incredible lemon pies. Can’t wait to hear how they turn out—happy baking!
PrintBaby Lemon Impossible Pies

Delightful Baby Lemon Impossible Pies that shine with vibrant lemon flavor, perfect for any occasion.
- Prep Time: 15 minutes
- Cook Time: 35 minutes
- Total Time: 50 minutes
- Yield: 8 servings 1x
- Category: Dessert
- Method: Baking
- Cuisine: American
- Diet: Vegetarian
Ingredients
- 4 tbsp unsalted butter (melted)
- 1 cup granulated sugar
- 2 eggs (room temperature)
- 1 cup whole milk
- 1/2 cup all-purpose flour
- 1/4 cup fresh lemon juice
- 1 tbsp lemon zest
- 1 tsp vanilla extract
- 1/4 tsp salt
Instructions
- Preheat your oven to 350°F (175°C).
- Grease a 9-inch pie dish or individual ramekins with melted butter.
- Combine the melted butter, granulated sugar, and eggs in a mixing bowl.
- Gradually add the whole milk, lemon juice, lemon zest, and vanilla extract, whisking smoothly.
- Sprinkle the flour and salt over the mixture and gently fold it in.
- Pour the mixture into your prepared dish and bake for 30-35 minutes until golden brown.
- Allow the pies to cool slightly before serving warm or chilled, dusted with powdered sugar.
Notes
For added flair, serve with whipped cream or a scoop of vanilla ice cream. Drizzle with lemon glaze for an extra touch.
Nutrition
- Serving Size: 1 serving
- Calories: 220
- Sugar: 15g
- Sodium: 50mg
- Fat: 10g
- Saturated Fat: 6g
- Unsaturated Fat: 4g
- Trans Fat: 0g
- Carbohydrates: 25g
- Fiber: 1g
- Protein: 4g
- Cholesterol: 60mg
Keywords: lemon pie, dessert, baking, easy recipes, summer dessert