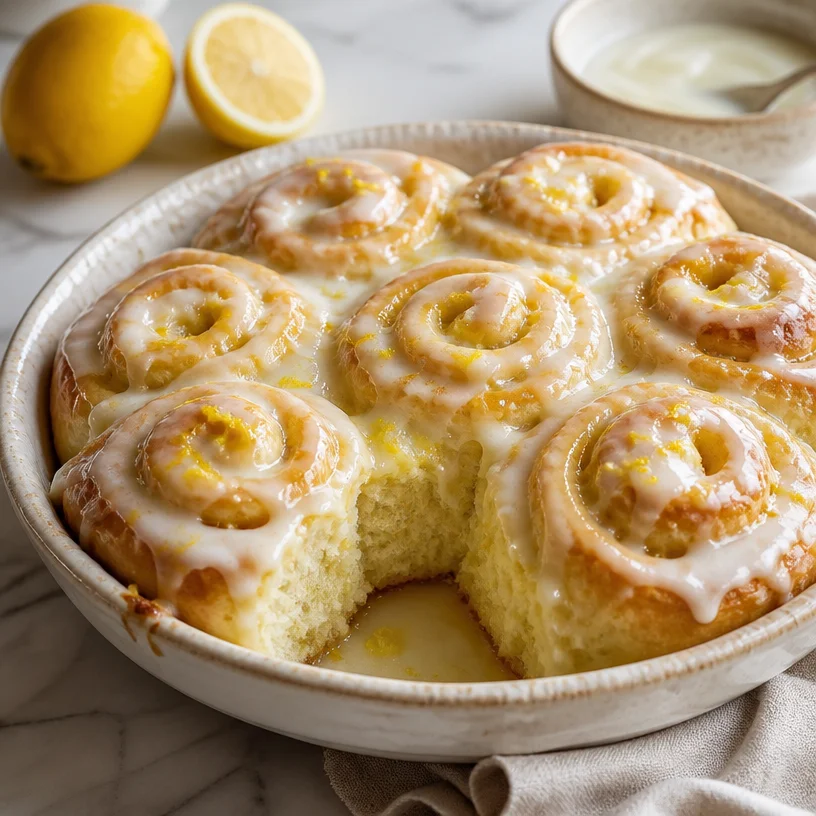
Lemon Rolls
Warm, Zesty Lemon Rolls
Hello there, fellow food enthusiast! Welcome back to the charming world of Ivory Apron, where cooking becomes a delightful journey rather than a daunting task. Today, we’re diving into something irresistibly sweet and zesty: Lemon Rolls. These lovely rolls are soft, fluffy, and packed with a bright lemon flavor that takes your taste buds on a sunlit adventure. Whether it’s for a weekend brunch or a cozy afternoon treat with coffee, lemon rolls are sure to shine.
A Sunny Memory
Ah, lemon rolls! They remind me of a cherished after-school ritual from my childhood. Growing up, my grandma and I shared a secret garden where we cultivated our favorite herbs and, of course, a few lemon trees along the fence. On particularly sunny days, we would pick those juicy lemons together, giggling as the tangy scent filled the air.
One day, after harvesting the lemons, we decided to bake something special. We tackled a recipe that had been passed down through generations but added our twist of lemon zest and juice. As the rolls baked, the sweet and citrusy aroma is forever etched in my memory. We chatted about everything from school to life lessons, and after what felt like hours, we sat down with a plateful of warm lemon rolls, the icing just slightly melted. Every bite reminded us of sunny days spent together, and a beautifully simple truth: good food brings people closer.
Ingredients
Let’s gather the stars of our show! Here’s what you’ll need to whip up these delightful lemon rolls:
-
2 cups all-purpose flour
A versatile staple that provides structure. You can substitute with whole wheat flour if you want a nuttier flavor; however, adjust the liquid slightly as whole wheat flour absorbs more moisture. -
1/2 cup sugar
Sweetness is key! You can also use coconut sugar or a sugar substitute, but keep an eye on the quantity since they can vary in sweetness. -
1/2 teaspoon salt
A crucial component that enhances flavors. Don’t skip this! You can use sea salt or kosher salt too. -
1 packet instant yeast (about 2 1/4 teaspoons)
This helps our rolls to rise beautifully and create that fluffy texture. If you can’t find instant yeast, active dry yeast works perfectly too—just bloom it in warm milk first. -
3/4 cup warm milk
The warmth activates the yeast. You might use non-dairy milk, like almond milk, for a vegan option, but ensure it’s warm, not hot! -
1/4 cup melted butter
Adds richness and flavor. If you’re looking to lighten it up, try using unsweetened applesauce or coconut oil as substitutes. -
1 egg
This gives richness and helps bind the dough. For egg-free versions, a flaxseed meal mixed with water works great! -
1 tablespoon lemon zest
The zest amplifies the lemony goodness. Make sure to avoid the bitter white pith when zesting! -
1/4 cup lemon juice
Brightens up our rolls. Freshly squeezed is always best, but bottled in a pinch works, just watch for added sugars. -
1 cup powdered sugar
This sugar will make our icing heavenly. If you need a low-sugar option, powdered erythritol can work well. -
2 tablespoons lemon juice (for icing)
It gives our icing that lovely tang. If you’re feeling playful, a splash of vanilla extract would be a delightful addition! -
1 tablespoon milk (for icing)
This thins the icing to the perfect drizzly consistency. Use any milk you like, even plant-based!
Step-by-Step Instructions
Let’s jump into the fun part: making our lemon rolls! Follow these steps for a delightful baking experience:
-
Activate the Yeast: In a small bowl, combine the warm milk with the instant yeast and a pinch of sugar. Let it sit for about 5-10 minutes until it’s frothy. This step is crucial; if your yeast doesn’t foam, it might be expired or the milk was too hot or too cold.
-
Mix Dry Ingredients: In a large mixing bowl, whisk together the flour, sugar, and salt. This helps distribute the yeast and ensures a consistent dough.
-
Combine Wet Ingredients: Add the melted butter, egg, lemon zest, and lemon juice to the dry ingredients. Pour in the activated yeast mixture.
-
Knead the Dough: Combine everything until it comes together. Transfer to a floured surface and knead for about 5-7 minutes until you have a smooth, elastic dough. If the dough is too sticky, sprinkle a little more flour as needed.
-
First Rise: Place the dough in a lightly greased bowl, cover with a clean kitchen towel, and let it rise in a warm place for about 1 hour, or until it has doubled in size. A warm spot near your oven works like a charm!
-
Prepare the Filling: While the dough rises, blend your lemon filling. In a small bowl, mix together more sugar, lemon juice, and lemon zest. This mixture will be spread onto the rolled dough for a burst of flavor!
-
Shape the Rolls: Punch down the risen dough gently to release excess air. Roll it out into a rectangle about 1/4 inch thick. Spread the lemon filling evenly over the dough. Roll it tightly from the long side, creating a log.
-
Cutting: Using a sharp knife or dental floss, cut the log into 1-inch thick pieces. Arrange these rolls in a greased baking dish. They should be snug but not crammed together.
-
Second Rise: Cover the rolls again and let them rise for another 30-40 minutes. They’ll puff up nicely during this time.
-
Bake: Preheat your oven to 350°F (175°C). Bake the rolls for 20-25 minutes, or until golden brown. The aroma will be heavenly!
-
Make the Icing: While they bake, whisk together powdered sugar, lemon juice, and milk. The consistency should be thick but spreadable. Adjust as needed!
-
Drizzle the Icing: Once the rolls are cool enough to touch (but still warm!), drizzle the icing on top. Watch it melt into every crevice—heavenly!
Serving Suggestions
To serve these lemon rolls beautifully, plate them in a charming cake stand or a rustic wooden dish. Dust with a sprinkle of powdered sugar for an elegant touch. Pair them with fresh berries, whipped cream, or a dollop of lemon curd for extra indulgence! They also make gorgeous gifts wrapped in parchment paper and tied with twine—who wouldn’t love that kind of surprise?
Recipe Variations
Feeling adventurous? Here are a few twist ideas to elevate your lemon roll game:
- Lavender Lemon Rolls: Add dried culinary lavender to your filling for a delicate floral note.
- Blueberry Lemon Rolls: Toss fresh or frozen blueberries into your filling for a fruity burst.
- Almond Lemon Rolls: Incorporate almond extract into the icing for a deeper flavor profile.
- Vegan Lemon Rolls: Substitute the egg with ground flaxseed and use plant-based milk and butter to make these rolls completely vegan!
- Spicy Lemon Rolls: Add a pinch of cayenne pepper into the filling for a sweet and spicy contrast.
Chef’s Notes
These lemon rolls have become a staple in my home, transforming over the years. Originally, grandma insisted on a lavish cream cheese frosting, but I found that a simple lemon glaze keeps the focus on the delightful citrus flavor. Plus, every baking session brings back those sun-soaked afternoons in the garden, making these rolls extra special.
And oh, if you ever find the dough too sticky—don’t panic! That’s just the flour’s personality showing off. Instead of stressing, sprinkle in a bit more flour as needed and keep kneading until you find that perfect balance.
FAQs and Troubleshooting
Let’s tackle some common questions:
-
Why didn’t my rolls rise?
Ensure your yeast is fresh and not expired. The milk should be warm (not hot) to activate the yeast effectively. A warm rising environment (like an oven with the light on) can help, too! -
The dough is too sticky, what should I do?
Sprinkle a touch more flour as you knead it. Adjust the flour and liquid balance next time if you regularly face this issue. -
Can I make these ahead of time?
Absolutely! You can prepare the dough, let it rise, shape the rolls, and then refrigerate overnight. Bake them fresh in the morning for the best taste. -
What if I want a less sweet glaze?
You can cut back the powdered sugar or substitute it with less sweet alternatives like maple syrup or honey, mixing in more lemon juice to achieve your desired taste.
Nutritional Info
(You might want to calculate the nutritional information based on the ingredients used. Each serving will vary based on portion sizes and any substitutions).
There you have it! A splendid journey into creating fluffy, bright, and utterly delicious lemon rolls. Remember, cooking is about joy, creativity, and gathering loved ones around the table. So, head to the kitchen, tie on your apron, and let’s embrace the magic of cooking. Happy baking!
PrintWarm, Zesty Lemon Rolls

Delightfully soft and fluffy lemon rolls packed with bright lemon flavor, perfect for brunch or an afternoon treat.
- Prep Time: 15 minutes
- Cook Time: 30 minutes
- Total Time: 45 minutes
- Yield: 12 servings 1x
- Category: Dessert
- Method: Baking
- Cuisine: American
- Diet: Vegetarian
Ingredients
- 2 cups all-purpose flour
- 1/2 cup sugar
- 1/2 teaspoon salt
- 1 packet instant yeast (about 2 1/4 teaspoons)
- 3/4 cup warm milk
- 1/4 cup melted butter
- 1 egg
- 1 tablespoon lemon zest
- 1/4 cup lemon juice
- 1 cup powdered sugar
- 2 tablespoons lemon juice (for icing)
- 1 tablespoon milk (for icing)
Instructions
- Activate the yeast: In a small bowl, combine the warm milk with the instant yeast and a pinch of sugar. Let it sit for about 5-10 minutes until it’s frothy.
- Mix dry ingredients: In a large mixing bowl, whisk together the flour, sugar, and salt.
- Combine wet ingredients: Add the melted butter, egg, lemon zest, and lemon juice to the dry ingredients. Pour in the activated yeast mixture.
- Knead the dough: Combine everything until it comes together and knead for about 5-7 minutes until smooth.
- First rise: Place the dough in a greased bowl and let it rise for about 1 hour, or until doubled.
- Prepare the filling: Mix sugar, lemon juice, and lemon zest for the filling.
- Shape the rolls: Roll out the dough, spread the filling, and roll it tightly.
- Cutting: Cut the log into 1-inch thick pieces and arrange in a greased baking dish.
- Second rise: Let rolls rise for another 30-40 minutes.
- Bake: Preheat oven to 350°F (175°C) and bake for 20-25 minutes.
- Make the icing: Whisk powdered sugar, lemon juice, and milk until thick but spreadable.
- Drizzle the icing on top of the rolls once they cool enough to touch.
Notes
These rolls can be made ahead of time and refrigerated overnight before baking. For a less sweet glaze, reduce powdered sugar or substitute with maple syrup.
Nutrition
- Serving Size: 1 roll
- Calories: 220
- Sugar: 15g
- Sodium: 150mg
- Fat: 8g
- Saturated Fat: 4g
- Unsaturated Fat: 3g
- Trans Fat: 0g
- Carbohydrates: 30g
- Fiber: 1g
- Protein: 3g
- Cholesterol: 35mg
Keywords: lemon rolls, dessert, baking, brunch, sweet rolls
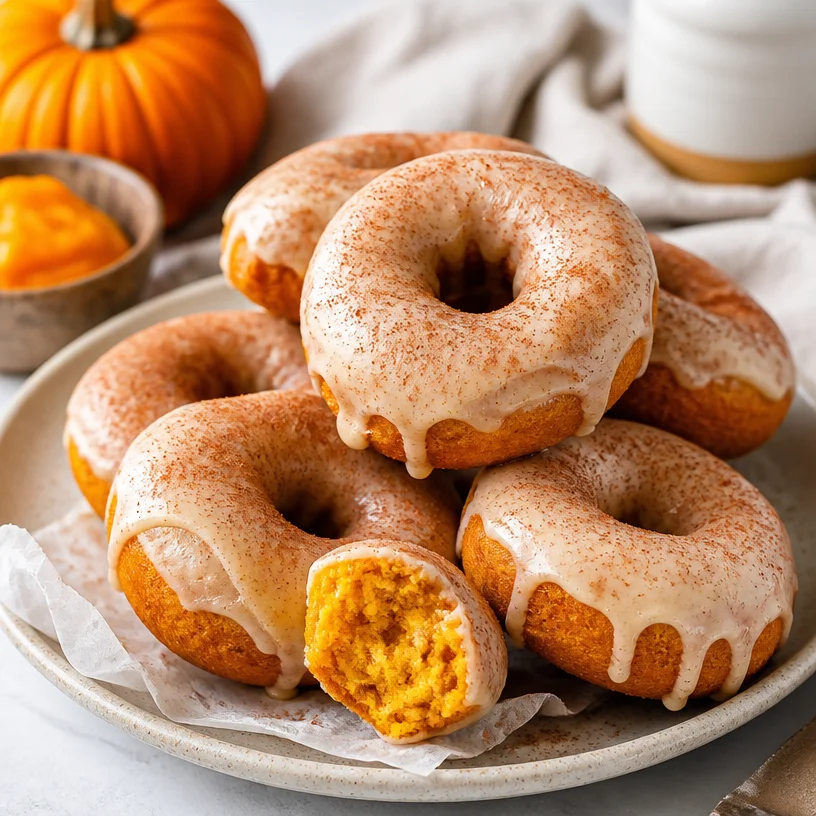
Pumpkin Donuts
How to Make Irresistible Pumpkin Donuts: A Warm and Cozy Fall Treat
Hello, fellow food lovers! As the crisp autumn air rolls in and the leaves start to paint the world in shades of amber and gold, there’s nothing quite like the enchanting aroma of freshly baked donuts wafting through your kitchen. Today, I’m excited to share with you a delightful recipe for pumpkin donuts that embodies the spirit of the season—all while being completely approachable and oh-so-satisfying!
These homemade pumpkin donuts are not just a treat for the taste buds, but they also come with a story. Let’s dive into this cozy kitchen journey together!
A Personal Touch: The First Time I Made Pumpkin Donuts
I can still remember the first time I decided to make pumpkin donuts. It was a chill October Saturday, and I was hosting a little gathering for my friends. As I flipped through a well-loved cookbook, the recipe for pumpkin donuts caught my eye, and I couldn’t resist giving it a shot. The anticipation built as the aroma of warm spices filled the air, drawing everyone into the kitchen like moths to a flame.
The donuts turned out beautifully—golden, fluffy, and just the right amount of sweetness. My friends were impressed, but beyond that, each bite was met with laughter and stories shared over mugs of warm cider. That one baking session turned into a cherished tradition, and pumpkin donuts quickly became a staple at my autumn gatherings. Now, every time I whip up a batch, it brings a wave of nostalgia and warmth that I can’t help but share with you all!
Ingredients You’ll Need
Gathering quality ingredients is key to achieving that perfect donut. Here’s what you’ll need, along with some insider tips to make your baking experience a breeze:
-
½ cup milk (warm, between 95-105°F)
- This is crucial for activating the yeast. Don’t overheat it; you want it warm, not scalding!
-
1½ teaspoons active dry yeast
- Fresh yeast makes all the difference! If you’re using instant yeast, you can skip the warming step with the milk.
-
3¼ cups all-purpose flour (fluffed, spooned, and leveled)
- Fluff your flour before measuring to ensure you don’t end up with dense donuts.
-
⅓ cup granulated sugar
- This adds sweetness and helps the donuts rise nicely.
-
½ teaspoon salt
- A little salt enhances all the lovely flavors!
-
½ teaspoon pumpkin spice (store-bought or homemade)
- You can easily make your own blend with cinnamon, nutmeg, and ginger.
-
⅔ cup pumpkin puree (NOT pumpkin pie mix)
- Make sure it’s pure pumpkin; the added sugar and spices in pie mix can throw off the balance.
-
1 large egg
- This helps bind the ingredients and adds richness.
-
3 tablespoons unsalted butter (softened)
- Softened butter makes it easier to cream with the sugar, giving your donuts that tender texture.
-
½ cup granulated sugar (for coating)
- This is used for rolling the donuts after frying. You could even add more spices to this mix for an extra kick.
-
¾ teaspoon ground cinnamon
- A classic flavor pairing with pumpkin!
-
4 ounces cream cheese (softened)
- This will be part of your glaze, lending a deliciously creamy texture.
-
¼ cup pumpkin puree (for glaze)
- Yes, more pumpkin! It will make the glaze rich and flavorful.
-
½ teaspoon pumpkin spice
- For the glaze, it ties the whole flavor theme together.
-
1 teaspoon vanilla extract (optional)
- If you like a hint of vanilla in your glaze, toss it in!
-
1 cup powdered sugar
- Essential for that sweet, dreamy glaze.
-
1 cup heavy cream (cold)
- You’ll need this for the cream cheese glaze to achieve the perfect texture.
Step-by-Step Instructions
Now that we have everything ready, let’s get cooking! Follow these steps to create your pumpkin donuts, and don’t forget to have a little fun along the way!
Step 1: Activate the Yeast
- In a small bowl, combine the warm milk and active dry yeast. Allow it to sit for about 5-10 minutes until frothy. This means your yeast is alive and ready to work its magic!
Step 2: Mix the Wet Ingredients
- In a large mixing bowl, whisk together the pumpkin puree, sugar, softened butter, egg, and the activated yeast mixture. Use a rubber spatula or wooden spoon to combine everything thoroughly—this is where all that cozy autumn flavor begins to come to life!
Step 3: Combine Dry Ingredients
- In another bowl, whisk together the flour, salt, and pumpkin spice. Adding dry ingredients in a separate bowl helps ensure even distribution—no one wants a rogue clump of salt in their donut!
Step 4: Bring It All Together
- Gradually add the dry ingredients to the wet mixture. Mix until just combined. The dough will be slightly sticky, so resist the urge to add too much extra flour here! If you find it’s too sticky to handle, you can sprinkle a little more flour on your surface.
Step 5: Knead and Rise
- Lightly flour your work surface and turn the dough out onto it. Knead the dough for about 5 minutes until it’s smooth and elastic. Shape it into a ball and place it in a greased bowl. Cover it with a clean kitchen towel and let it rise in a warm place until it doubles in size, about 1 hour.
Step 6: Shape the Donuts
- Once the dough has risen, punch it down to release the air. Roll it out to about ½ inch thickness on a floured surface. Use a donut cutter (or two round cutters of different sizes) to cut out donuts. Place the cut donuts on a parchment-lined tray while you heat your oil.
Step 7: Fry the Donuts
- In a heavy-bottomed pot, heat about 2 inches of vegetable oil to 350°F (monitor with a candy thermometer). Fry the donuts in batches for about 2-3 minutes on each side, or until golden brown. Remove with a slotted spoon and let them drain on paper towels.
Step 8: Prepare the Glaze
- While the donuts cool, make the glaze. In a mixing bowl, whisk together the softened cream cheese, pumpkin puree, powdered sugar, pumpkin spice, and heavy cream until smooth.
Step 9: Glaze ‘Em Up
- Once the donuts are cool enough to handle, dip the tops into the glaze and set them on a cooling rack to let the glaze set. You can sprinkle a bit more cinnamon sugar over the top for a finishing touch.
Serving Suggestions
For an elevated presentation, stack the glazed donuts on a rustic wooden board. Add a few autumn leaves or mini pumpkins around the base for a festive touch. Maybe even serve with a steaming cup of chai or a spiced cider for the ultimate autumn experience!
Recipe Variations
- Baked Pumpkin Donuts: Feel free to bake these instead of frying! Simply pour the batter into a donut pan and bake at 350°F for about 12-15 minutes.
- Gluten-Free Option: Substitute all-purpose flour with a 1:1 gluten-free blend for a gluten-free treat.
- Flavor Twists: Add chocolate chips or chopped nuts into the batter for a delightful crunch.
- Vegan Option: Use a flax egg (1 tablespoon ground flaxseed + 2.5 tablespoons water) instead of the chicken egg, and substitute dairy with plant-based alternatives.
Chef’s Notes
Ah, this pumpkin donut recipe has evolved over the years. I remember the first few times they came out a bit too dense! After much experimenting, I realized it was all about the yeast activation and giving it enough time to rise. You know it’s a good day in the kitchen when the dough is perfectly pillowy!
Also, speaking of stories, I once tried a savory version of these by adding cheese and herbs. They were a disaster! But hey, that’s the beauty of cooking—every mistake is a lesson in creating something even better. So don’t be afraid to let your creativity flow!
FAQs and Troubleshooting
Q1: My donuts are too dense. What went wrong?
A: The dough may not have risen enough, or perhaps the yeast was inactive. Make sure your milk is at the right temperature, and give the dough ample time to rise.
Q2: Can I prep the dough ahead of time?
A: Absolutely! After shaping the donuts, let them rise, then chill them in the fridge overnight. Just let them come to room temperature before frying.
Q3: How do I store the leftover donuts?
A: Place them in an airtight container at room temperature for a day or two, or in the fridge if you want them to last longer. They’re best enjoyed fresh, but a quick zap in the microwave makes them taste warm again!
Q4: What’s the best way to make a thicker glaze?
A: If you prefer a thicker glaze, reduce the amount of heavy cream or add more powdered sugar until you reach the desired consistency.
Nutritional Info
(If you want nutritional information, I recommend calculating it per serving based on your specific ingredients and serving sizes.)
There you have it, my lovely foodies! A delightful recipe for pumpkin donuts that will make your home smell like an autumn wonderland and your loved ones keep coming back for more. Remember, cooking should be fun, so take your time, enjoy the process, and, most importantly, savor the moments shared around the table.
Happy baking! 🎃🍩
PrintIrresistible Pumpkin Donuts

Delicious homemade pumpkin donuts perfect for cozy autumn gatherings.
- Prep Time: 20 minutes
- Cook Time: 30 minutes
- Total Time: 50 minutes
- Yield: 12 servings 1x
- Category: Dessert
- Method: Frying
- Cuisine: American
- Diet: Vegetarian
Ingredients
- ½ cup warm milk (between 95-105°F)
- 1½ teaspoons active dry yeast
- 3¼ cups all-purpose flour (fluffed, spooned, and leveled)
- ⅓ cup granulated sugar
- ½ teaspoon salt
- ½ teaspoon pumpkin spice
- ⅔ cup pumpkin puree (not pumpkin pie mix)
- 1 large egg
- 3 tablespoons unsalted butter (softened)
- ½ cup granulated sugar (for coating)
- ¾ teaspoon ground cinnamon
- 4 ounces cream cheese (softened)
- ¼ cup pumpkin puree (for glaze)
- ½ teaspoon pumpkin spice (for glaze)
- 1 teaspoon vanilla extract (optional)
- 1 cup powdered sugar
- 1 cup heavy cream (cold)
Instructions
- Activate the yeast: In a small bowl, combine the warm milk and active dry yeast. Allow it to sit for about 5-10 minutes until frothy.
- Mix the wet ingredients: In a large mixing bowl, whisk together the pumpkin puree, sugar, softened butter, egg, and the activated yeast mixture.
- Combine the dry ingredients: In another bowl, whisk together the flour, salt, and pumpkin spice.
- Bring it all together: Gradually add the dry ingredients to the wet mixture. Mix until just combined.
- Knead and rise: Knead the dough for about 5 minutes until it’s smooth and elastic. Let it rise until doubled in size, about 1 hour.
- Shape the donuts: Roll the dough out to about ½ inch thickness and cut out donuts.
- Fry the donuts: Heat oil to 350°F and fry the donuts for about 2-3 minutes on each side until golden brown.
- Prepare the glaze: In a mixing bowl, whisk together the softened cream cheese, pumpkin puree, powdered sugar, pumpkin spice, and heavy cream until smooth.
- Glaze ’em up: Dip the tops of the donuts into the glaze and let them set on a cooling rack.
Notes
For a thicker glaze, reduce the amount of heavy cream or add more powdered sugar.
Nutrition
- Serving Size: 1 donut
- Calories: 290
- Sugar: 15g
- Sodium: 200mg
- Fat: 12g
- Saturated Fat: 7g
- Unsaturated Fat: 4g
- Trans Fat: 0g
- Carbohydrates: 36g
- Fiber: 1g
- Protein: 3g
- Cholesterol: 25mg
Keywords: pumpkin donuts, fall treats, dessert, baking, cozy recipes

Coffee Rolls
Indulge in Delightful Coffee Rolls: A Cozy Recipe for Your Kitchen
Hello, my fellow food lovers! Today, we’re diving into the warm and inviting world of Coffee Rolls. Imagine soft, pillowy rolls, tantalizingly infused with the essence of coffee, swirled with cinnamon and a rich cream cheese frosting that leaves your taste buds dancing. If you’re anything like me, coffee is more than just a beverage—it’s an experience, a moment of indulgence. And what could be better than incorporating that experience into a beloved baked good? These Coffee Rolls are sure to become a cherished recipe in your kitchen, perfect for brunch gatherings, lazy Sundays, or that midnight snack craving!
Let’s embark on this journey together, shall we?
A Taste of Nostalgia
Growing up, my mornings were filled with the warm aroma of freshly brewed coffee wafting from the kitchen. My mom had a knack for baking, often treating us to her homemade cinnamon rolls, which were delicious but sometimes a bit of a process! One rainy Saturday, I remember watching her hustle in the kitchen with flour dusting her cheeks. She decided to experiment with a new recipe that she had stumbled upon—a coffee-infused twist on her traditional rolls.
As the rolls baked, I could hardly contain my excitement. The sweet smell of cinnamon met the bold scent of coffee, wrapping us in a cozy embrace. When she pulled them out of the oven, golden and fluffy, we couldn’t wait to dig in. Each bite was a warm hug, with a hint of coffee cutting through the sweetness. That moment ignited my passion for combining flavors, and from then on, coffee became a staple in my baking repertoire. Now, I’m thrilled to share this beloved recipe that holds such a special place in my heart!
Ingredients
Before we roll into the recipe, let’s gather our ingredients. Here’s what you’ll need:
-
¼ cup all-purpose flour: This will act as the base for our Tangzhong, a flour-water paste that keeps our rolls soft and moist. If you’re out of all-purpose, you can use bread flour for a slightly denser roll.
-
¾ cup water: Make sure it’s warm but not hot. It will help activate our yeast, making those rolls nice and fluffy.
-
3 ½ cups all-purpose flour: The star of our rolls! Measure this carefully for the best texture. Remember, spoon the flour into your measuring cup instead of scooping straight from the bag to avoid excess flour.
-
⅓ cup granulated sugar: This adds sweetness and helps activate the yeast, giving our rolls structure.
-
2 teaspoon instant yeast: Make sure it’s fresh! Old yeast may not rise well, and that’s crucial for fluffy rolls.
-
¾ teaspoon fine sea salt: This enhances all the flavors in our rolls and balances the sweetness.
-
½ cup whole milk (slightly warmed): Milk adds richness to our dough. If you’re dairy-free, almond milk or oat milk can do the trick!
-
1 tsp instant coffee granules: This is where the magic begins! You can swap it with espresso powder for a richer coffee flavor.
-
1 large egg (room temperature): This helps bind our dough and adds to the richness.
-
1/2 tsp vanilla extract: A dash of vanilla elevates all the flavors.
-
Tangzhong: Don’t skip this! It’s a flour and water mixture (made with the ¼ cup flour and ¾ cup water) that keeps our rolls super soft.
-
4 tablespoon unsalted butter (room temperature): For a rich flavor and softness. It’s important to let it soften at room temperature for easy incorporation.
-
5 tbsp unsalted butter (room temperature): This will be used in our filling for that melty goodness.
-
2/3 cup dark brown sugar (or light brown sugar): Dark brown sugar adds a nice depth of flavor; however, light brown works just fine too!
-
2 tsp ground cinnamon: The quintessential spice in any cinnamon roll; it pairs perfectly with coffee!
-
1 ½ tsp instant coffee granules: More coffee flavor for the filling—yes, please!
-
2 oz cream cheese (softened): This is for our dreamy frosting.
-
4 tbsp unsalted butter (softened): We’ll mix this with the cream cheese for a delightful frosting.
-
1 cup powdered sugar: To sweeten our frosting to perfection.
-
4 tbsp heavy cream: A drizzle in the frosting makes it luxuriously smooth.
-
¾ tsp instant coffee granules: Just a touch more for extra coffee kick in the frosting!
Step-by-Step Instructions
Now that we have our ingredients ready, let’s get rolling! Follow these steps for delicious results:
-
Prepare the Tangzhong: In a small saucepan, combine the ¼ cup all-purpose flour and ¾ cup water. Cook over medium heat, stirring constantly until the mixture thickens and is paste-like. It should resemble a smooth batter. Set it aside to cool.
-
Mix the Dough: In a large mixing bowl, combine 3 ½ cups of flour, granulated sugar, instant yeast, and sea salt. Whisk together—this is where you harness good vibes and positive energy to infuse into your dough!
-
Combine Wet Ingredients: In another bowl, mix together the slightly warmed milk, instant coffee granules, egg, and vanilla extract. Whisk until well combined. Then, mix in the cooled Tangzhong.
-
Bring It All Together: Gradually add the wet ingredients into the dry ingredients. Use a wooden spoon to combine until a dough starts to form. It may be sticky—don’t fret!
-
Knead: Once you have a cohesive dough, it’s time to knead! Turn the dough onto a floured surface and knead for about 8-10 minutes, or until smooth and elastic. A little shoulder workout never hurt anyone, right? If the dough is too sticky, feel free to sprinkle on a bit of flour as needed.
-
Let It Rise: Form a ball and place it in a lightly greased bowl. Cover it with a clean kitchen towel and let it rise in a warm place for about 1-2 hours or until doubled in size. This is the perfect time to sip on your coffee!
-
Prepare the Filling: In a separate bowl, mix together the softened butter, dark brown sugar, ground cinnamon, and instant coffee granules until combined. It should be a spreadable paste—feel free to use a spatula or your hands!
-
Roll Out the Dough: After your dough has risen, punch it down gently to release the air. On a floured surface, roll it out into a large rectangle, about 1/4 inch thick.
-
Spread the Filling: Evenly spread the filling across the dough rectangle. Make sure to leave a small border around the edges to prevent spillage!
-
Roll It Up: Starting from one of the long sides, roll the dough tightly into a log. Pinch the seam to seal it. Use a sharp knife or a serrated cutter to slice the log into 12 equal rolls.
-
Second Rise: Arrange your rolls in a greased baking dish, spaced out. Cover them again with the towel and let them rise for another 30-45 minutes, aligning with your coffee refill.
-
Bake: Preheat your oven to 350°F (175°C). Once your rolls have risen, bake them in the preheated oven for about 25-30 minutes, or until golden brown.
-
Make the Frosting: While your rolls are baking, whip up the cream cheese frosting. Beat the softened cream cheese and unsalted butter together until smooth. Gradually mix in the powdered sugar, heavy cream, and instant coffee granules until creamy and spreadable.
-
Frost and Enjoy: Once your rolls come out of the oven, let them cool for a few minutes before generously spreading the cream cheese frosting over the top. The frosting will melt into those beautiful, fluffy rolls—heaven in every bite!
Serving Suggestions
For a delightful presentation, serve your Coffee Rolls warm in a beautiful platter. Drizzle with extra frosting, if desired, and garnish with a sprinkle of cinnamon or finely chopped nuts for added texture. Pair these delightful rolls with freshly brewed coffee or chai tea to elevate the experience. Trust me, your brunch guests will be raving about them!
Recipe Variations
-
Nutty Coffee Rolls: Add chopped walnuts or pecans to the filling for a crunchy texture.
-
Choco-Coffee Bliss: Fold some chocolate chips into the filling for a decadent treat.
-
Dairy-Free Option: Swap whole milk for a dairy-free alternative and use vegan butter for the filling and frosting!
-
Spiced Twist: Add cardamom or nutmeg to the cinnamon filling for a warm, spiced flavor.
-
Fruit-Filled Rolls: Mix in apple or pear slices into the filling for a fruity undertone that pairs beautifully with coffee.
Chef’s Notes
You know, the beauty of baking is that it’s an adventure—sometimes things don’t go as planned, and that’s okay! I once forgot to add the sugar to my coffee rolls, and instead of a sweet treat, I ended up with… well, a lesson learned and quite a bitter batch! But that’s what makes the kitchen so special—the discoveries and the memories that are created along the way.
Also, I love to share these rolls with friends—it feels like a warm hug shared amongst laughter. This recipe has evolved over the years, adapting to seasonal flavors and personal touches. I can’t wait to see how you make it your own!
FAQs and Troubleshooting
1. Why aren’t my rolls rising?
Make sure your yeast is fresh! You can test it by mixing it with warm water and sugar; it should bubble up within a few minutes. If the dough is too cold, it may take longer to rise—find a quiet, warm place for optimum rising.
2. Can I make the dough ahead of time?
Absolutely! You can prepare the dough, let it rise, and then shape it into rolls. Place the unbaked rolls in the refrigerator overnight. Allow them to come to room temperature and rise again before baking.
3. How do I store the rolls?
These rolls are best enjoyed fresh but can be stored in an airtight container at room temperature for up to three days. You can also freeze them! Just thaw completely and reheat before serving.
4. My rolls turned out dense. What went wrong?
This could be due to too much flour or not kneading enough! Be sure to measure your flour accurately, and don’t skip the kneading process—it develops the gluten structure that lifts your rolls.
Nutritional Info (Optional)
While I like to indulge in these delightful rolls, I always rebel against the scales! For those tracking, an average coffee roll (without frosting) is roughly 250-300 calories. Remember, these are meant for joyous occasions, so savor each bite!
Conclusion
And there you have it—a warm journey into the world of Coffee Rolls! I hope you feel inspired to tie on your apron and whip up a batch of these delightful treats. They are more than just a dessert; they’re a way to create cherished memories around the table, just like the ones I shared with my family.
Grab your loved ones, pour some coffee, and let’s make some beautiful moments. Happy baking, friends!
PrintDelightful Coffee Rolls

Indulge in soft, pillowy Coffee Rolls infused with coffee, swirled with cinnamon, and topped with rich cream cheese frosting.
- Prep Time: 15 minutes
- Cook Time: 30 minutes
- Total Time: 45 minutes
- Yield: 12 servings 1x
- Category: Dessert
- Method: Baking
- Cuisine: American
- Diet: Vegetarian
Ingredients
- ¼ cup all-purpose flour
- ¾ cup warm water
- 3 ½ cups all-purpose flour
- ⅓ cup granulated sugar
- 2 teaspoons instant yeast
- ¾ teaspoon fine sea salt
- ½ cup whole milk (slightly warmed)
- 1 teaspoon instant coffee granules
- 1 large egg (room temperature)
- ½ teaspoon vanilla extract
- 4 tablespoons unsalted butter (room temperature)
- 5 tablespoons unsalted butter (for filling, room temperature)
- 2/3 cup dark brown sugar
- 2 teaspoons ground cinnamon
- 1 ½ teaspoons instant coffee granules (for filling)
- 2 oz cream cheese (softened)
- 4 tablespoons unsalted butter (for frosting, softened)
- 1 cup powdered sugar
- 4 tablespoons heavy cream
- ¾ teaspoon instant coffee granules (for frosting)
Instructions
- Prepare the Tangzhong: In a small saucepan, combine the ¼ cup all-purpose flour and ¾ cup warm water. Cook over medium heat until the mixture thickens. Set aside to cool.
- Mix the Dough: In a large mixing bowl, combine 3 ½ cups of flour, granulated sugar, instant yeast, and sea salt. Whisk together.
- Combine Wet Ingredients: In another bowl, mix together the warmed milk, instant coffee granules, egg, and vanilla extract. Whisk until well combined, then mix in the cooled Tangzhong.
- Bring It All Together: Gradually add the wet ingredients into the dry ingredients. Use a wooden spoon to combine until a dough starts to form.
- Knead: Turn the dough onto a floured surface and knead for about 8-10 minutes until smooth and elastic.
- Let It Rise: Place dough in a greased bowl, cover, and let rise for 1-2 hours until doubled in size.
- Prepare the Filling: Combine softened butter, dark brown sugar, ground cinnamon, and instant coffee granules in a bowl.
- Roll Out the Dough: Punch down the risen dough, roll it out into a rectangle about ¼ inch thick.
- Spread the Filling: Evenly spread the filling on the dough, leaving a border around the edges.
- Roll It Up: Starting from one long side, roll the dough into a log and slice into 12 equal rolls.
- Second Rise: Arrange rolls in a greased baking dish, cover, and let rise for another 30-45 minutes.
- Bake: Preheat oven to 350°F (175°C) and bake rolls for 25-30 minutes until golden brown.
- Make the Frosting: Beat softened cream cheese and unsalted butter together until smooth, then mix in powdered sugar, heavy cream, and instant coffee until creamy.
- Frost and Enjoy: Let the rolls cool slightly, then generously spread cream cheese frosting on top before serving.
Notes
For a delightful presentation, serve warm and garnish with a sprinkle of cinnamon or nuts. Pairs beautifully with coffee or chai tea.
Nutrition
- Serving Size: 1 roll
- Calories: 300
- Sugar: 12g
- Sodium: 250mg
- Fat: 14g
- Saturated Fat: 8g
- Unsaturated Fat: 4g
- Trans Fat: 0g
- Carbohydrates: 38g
- Fiber: 1g
- Protein: 4g
- Cholesterol: 30mg
Keywords: coffee rolls, cinnamon rolls, breakfast pastries, dessert recipes, baking
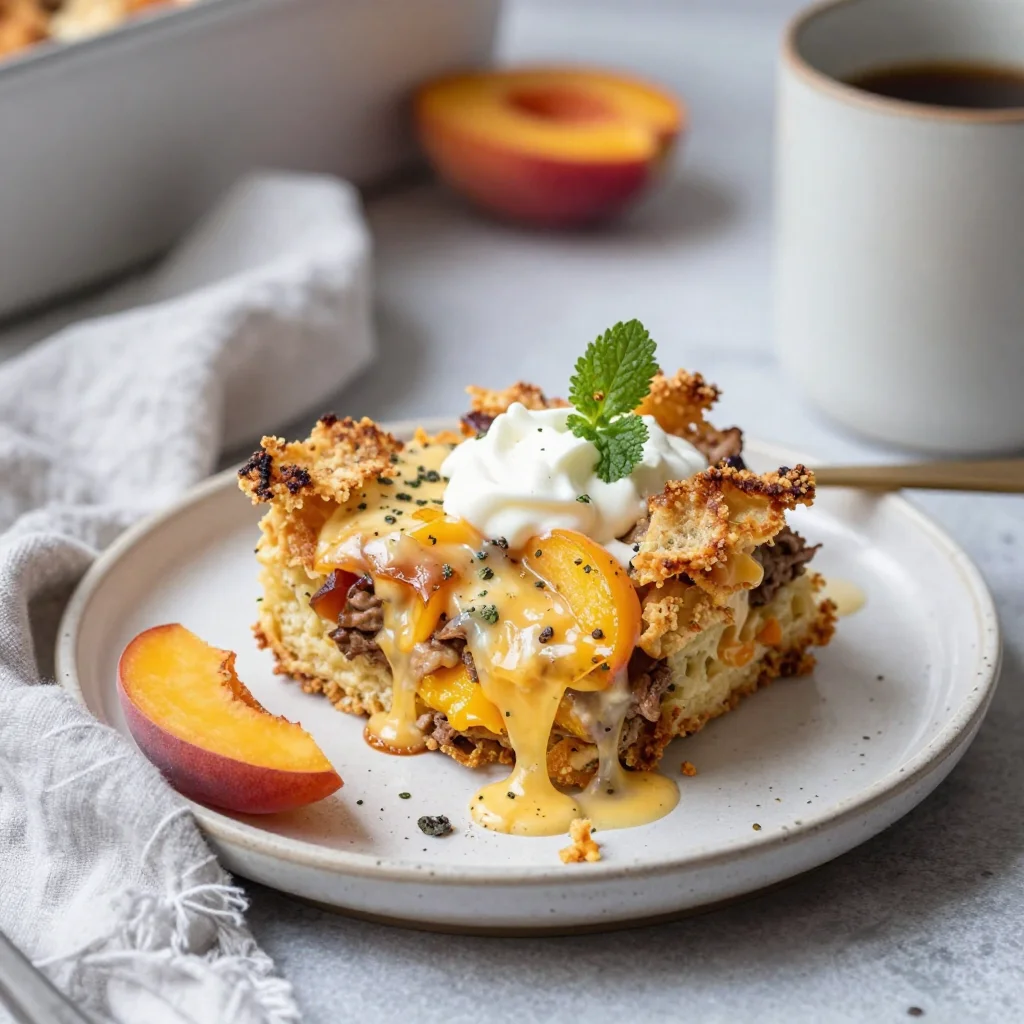
Ingredient Peach Breakfast Bake for Quick Summer Mornings
Peach Breakfast Bake: Easy, Healthy, and Perfect for Summer Mornings
Hello, food lovers! I’m so glad you’re here because today we’re diving into a delightful dish that’s as easy to make as it is delicious. I can’t wait to share my recipe for a Peach Breakfast Bake! Perfect for lazy summer mornings or those hectic weekdays when you want a nourishing meal without putting in too much effort, this breakfast bake is bound to become a staple in your kitchen.
Introduction
Picture this: It’s a sunny Saturday morning. You pour yourself a cup of freshly brewed coffee, and the scent of sweet peaches wafts through the air. You step into the kitchen, the sunlight dancing across the countertops, and you’re ready to whip up something special for breakfast. The excitement of cooking is palpable!
This Peach Breakfast Bake is not only quick and healthy but also incredibly versatile. Made with wholesome ingredients like cottage cheese, fresh peaches, and rolled oats, this dish is packed with protein and flavor, making it the perfect way to fuel your day. And the best part? You can throw it in the oven and enjoy your morning coffee while it bakes to golden perfection.
Summer is all about enjoying fresh, juicy fruits, and what better way to incorporate them into your breakfast than with this peach bake? It’s light, satisfying, and absolutely perfect for serving friends and family or indulging in a quiet morning alone. Trust me, once you take that first bite of warm, gooey peach goodness, you’re going to love it!
So, grab your apron, and let’s bake this delicious breakfast together!
Personal Story
I remember the first time I made this Peach Breakfast Bake. It was during a family gathering at my grandmother’s house. We were surrounded by a bounty of peaches fresh from the farmer’s market, and I was determined to make something that would showcase their sweet flavor.
As I assembled the ingredients, my little cousins dashed in and out of the kitchen, their giggles filling the air. I decided to involve them in the process, letting them sprinkle in the oats and mix the batter. Their eyes sparkled with excitement as they watched the peaches transform into this delightful bake in the oven.
When we finally gathered around the table, the aroma was intoxicating. My grandmother served the dish with a dollop of yogurt and a drizzle of honey, and I could see my family’s faces light up with joy. That moment reminded me of the true essence of cooking: it’s about nurturing relationships and creating beautiful memories. Now, every time I make this dish, those sweet summer mornings come flooding back.
Ingredients
To make this scrumptious Peach Breakfast Bake, you’ll need:
-
2 cups cottage cheese
A great source of protein and calcium! If you prefer a dairy-free option, try using silken tofu blended until smooth for a similar texture. -
3 large eggs
These act as the binding agent and provide richness. For a vegan alternative, you can use flax eggs: 1 tablespoon of ground flaxseed mixed with 2.5 tablespoons of water equals one egg when left to sit for about 5 minutes. -
2 medium ripe peaches, peeled and diced
Fresh, juicy peaches are the star of this dish! If peaches aren’t in season, feel free to substitute with nectarines or even canned peaches (drained) for the same wonderful flavor. -
1/2 cup rolled oats or almond flour
Rolled oats add a nice texture while being heart-healthy. If you want a gluten-free option, almond flour works beautifully, giving the bake a lovely nutty flavor. -
1/4 cup honey or maple syrup
Sweeteners help to enhance the natural sweetness of the peaches. Maple syrup offers a rich flavor, while honey adds a delicate sweetness. For a low-calorie version, try stevia or agave syrup. -
1 tsp vanilla extract
A simple addition that enhances all the other flavors! Use pure vanilla extract for the best taste — imitation vanilla just doesn’t cut it. -
1/2 tsp ground ginger or cinnamon
Both spices provide warmth and depth to your bake. Cinnamon pairs wonderfully with peaches, but if you want a zesty twist, fresh grated ginger is a delightful surprise! -
1 tsp baking powder
This is the leavening agent that gives the bake a lovely rise. If you’re out of baking powder, combining 1/2 tsp baking soda with 1/2 tsp vinegar can be a suitable substitute.
Step-by-Step Instructions
Now that we’ve gathered our ingredients, let’s dive into the step-by-step process of making this mouthwatering Peach Breakfast Bake!
-
Preheat Your Oven
Start by preheating your oven to 350°F (175°C). This step is essential! A hot oven allows your bake to rise beautifully and develop that golden crust on top. -
Prepare Your Baking Dish
Grab an 8×8-inch baking dish (or similar size) and grease it lightly with cooking spray or a little coconut oil. This will help your bake come out easily once it’s done! -
Mix the Wet Ingredients
In a large mixing bowl, combine the cottage cheese, eggs, honey (or maple syrup), and vanilla extract. Whisk these together until smooth and creamy. A tip here: if you want an extra fluffier texture, you can beat the eggs separately before adding them to the mixture. -
Incorporate the Dry Ingredients
Next, gently fold in the rolled oats (or almond flour), ground ginger (or cinnamon), and baking powder into the wet mixture. You want everything to blend smoothly without overmixing it — think of it as a lovely dance in the bowl! -
Add the Peaches
Time to fold in those diced peaches! Gently stir them into the batter, distributing them evenly throughout. The joy of this dish is those bursts of juicy peaches with each bite. -
Pour and Spread
Pour the mixture into the prepared baking dish. Use a spatula to spread it out evenly. It should look delightful already, but wait until it bakes! -
Bake to Perfection
Place your dish in the preheated oven and bake for about 30–35 minutes. Keep an eye on it in the last few minutes. You want a golden top and a toothpick inserted in the center to come out clean. -
Cool and Serve
Once it’s out of the oven, let it cool for about 10 minutes. This allows it to set up nicely and makes it easier to serve. Plus, your kitchen will smell heavenly!
Serving Suggestions
To plate your Peach Breakfast Bake, cut it into squares and serve warm. A sprinkle of cinnamon on top is a lovely finishing touch. I recommend adding a dollop of Greek yogurt or a scoop of vanilla ice cream if you’re feeling indulgent. Drizzle with a bit of honey or maple syrup for an extra touch of sweetness.
Gather around the table with family or friends, and enjoy this dish as a delightful morning treat. Trust me; it’ll brighten anyone’s day!
Recipe Variations
- Berry Blast: Swap out the peaches for mixed berries (strawberries, blueberries, raspberries) for a delicious berry breakfast bake.
- Nutty Delight: Toss in some chopped nuts — pecans or almonds work beautifully for added crunch and healthy fats.
- Coconut Twist: Add some shredded coconut for a tropical flair; it pairs beautifully with the peaches.
- Gluten-Free: Use gluten-free rolled oats or all almond flour for a delicious gluten-free version.
- Savory Spin: Feeling adventurous? Consider adding sautéed spinach and feta cheese for a savory take on breakfast baking!
Chef’s Notes
This Peach Breakfast Bake has evolved over the years in my kitchen. I’ve tested it in so many ways, and I love how forgiving it is! You can really play with the ingredients based on what you have on hand. I once made it with a friend who was excited about using ripe bananas instead of peaches, and it turned out extraordinary!
And here’s a funny kitchen story: I remember trying to multitask while making this dish. I had a pot of coffee brewing, fresh fruit on the counter, and something else cooking in another pan. I turned back to the bowl, only to find that I had mistakenly grabbed a cup of salt instead of sugar! Thankfully, I caught it just in time and added sweetness instead — phew! Always a good reminder to read your measuring cups carefully!
FAQs and Troubleshooting
1. Can I make this ahead of time?
Absolutely! You can prepare the mixture the night before, store it in the fridge, and simply pour it into the baking dish in the morning.
2. Can I freeze leftovers?
Definitely. Cut the bake into squares, place them in an airtight container, and freeze for up to three months. Reheat in the microwave or oven before serving!
3. My bake didn’t rise as expected. What could be wrong?
This can happen if your baking powder is expired or hasn’t been mixed thoroughly into the batter. Make sure to check the freshness of your ingredients!
4. Is it normal for the bake to sink a little as it cools?
Yes, it’s perfectly normal! This dish can deflate slightly as it cools; it’s still delicious and safe to eat!
Nutritional Info
While I typically focus on deliciousness, here’s a little breakdown that might interest you:
- Calories: Approximately 180 calories per serving (based on 8 servings).
- Protein: About 10g protein, thanks to the cottage cheese!
- Carbs: Roughly 22g, mostly from the fruit and oats.
- Fats: About 5g, depending on whether you choose to add nuts.
Conclusion
There you have it, my lovely foodies! This Peach Breakfast Bake recipe is easy to make, full of fresh flavors, and perfect for starting your day with a smile. It’s not just a recipe; it’s an experience — a way to bring people together and create memories around the table. So tie on your apron, get your ingredients ready, and let’s share in the joy of cooking!
I hope you enjoy making this delightful breakfast bake just as much as I do. Happy baking, and may your mornings be joyful and delicious!
PrintPeach Breakfast Bake

A delightful and healthy breakfast bake made with cottage cheese, fresh peaches, and rolled oats, perfect for summer mornings.
- Prep Time: 15 minutes
- Cook Time: 35 minutes
- Total Time: 50 minutes
- Yield: 8 servings 1x
- Category: Breakfast
- Method: Baking
- Cuisine: American
- Diet: Vegetarian
Ingredients
- 2 cups cottage cheese
- 3 large eggs
- 2 medium ripe peaches, peeled and diced
- 1/2 cup rolled oats or almond flour
- 1/4 cup honey or maple syrup
- 1 tsp vanilla extract
- 1/2 tsp ground ginger or cinnamon
- 1 tsp baking powder
Instructions
- Preheat your oven to 350°F (175°C).
- Prepare your baking dish by greasing it lightly with cooking spray or coconut oil.
- Mix the cottage cheese, eggs, honey (or maple syrup), and vanilla extract until smooth and creamy.
- Incorporate the rolled oats (or almond flour), ground ginger (or cinnamon), and baking powder gently into the wet mixture.
- Add the diced peaches, folding them into the batter evenly.
- Pour the mixture into the prepared baking dish and spread it evenly.
- Bake for about 30–35 minutes until golden and a toothpick comes out clean.
- Cool for about 10 minutes before serving.
Notes
Serve warm with a dollop of Greek yogurt or ice cream, and drizzle with honey or maple syrup for extra sweetness.
Nutrition
- Serving Size: 1 square
- Calories: 180
- Sugar: 12g
- Sodium: 350mg
- Fat: 5g
- Saturated Fat: 2g
- Unsaturated Fat: 3g
- Trans Fat: 0g
- Carbohydrates: 22g
- Fiber: 3g
- Protein: 10g
- Cholesterol: 60mg
Keywords: peach breakfast bake, healthy breakfast, summer recipe, easy bake, cottage cheese recipe