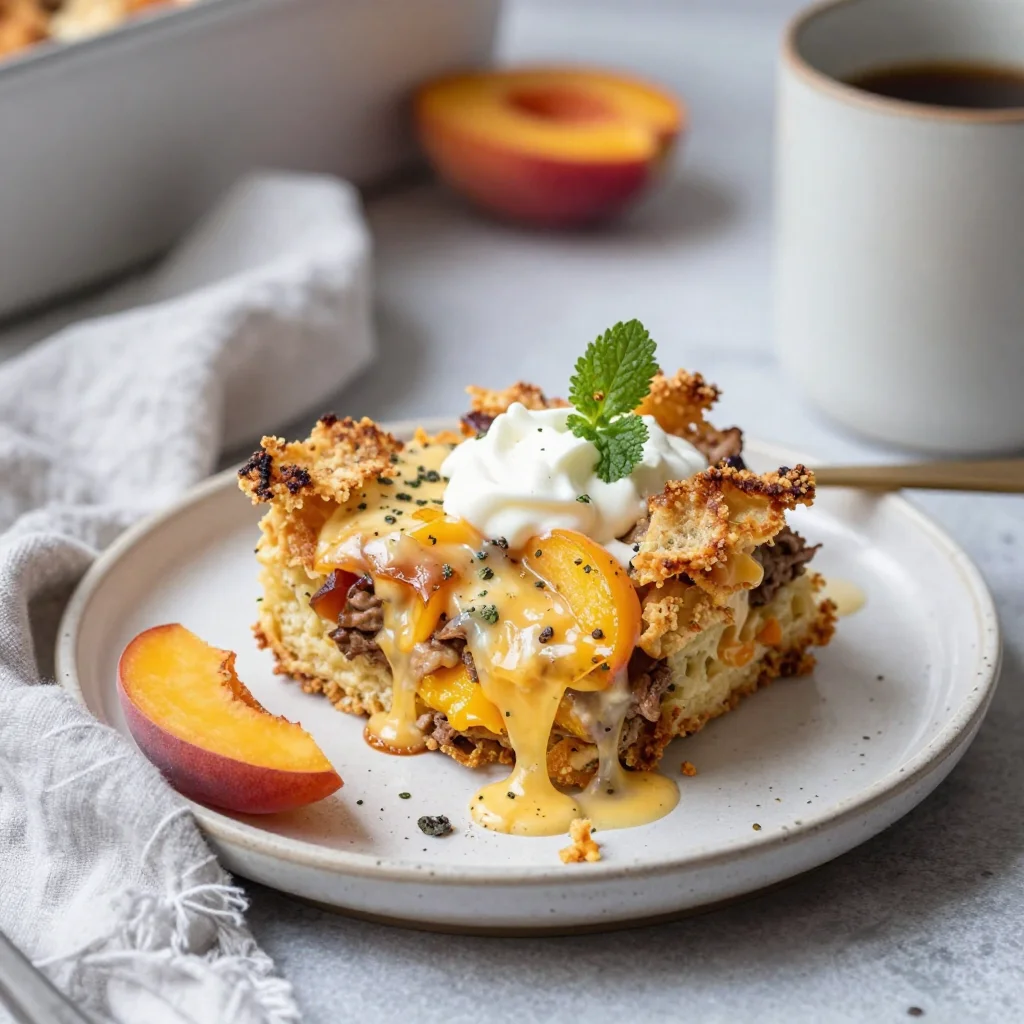
Ingredient Peach Breakfast Bake for Quick Summer Mornings
Peach Breakfast Bake: Easy, Healthy, and Perfect for Summer Mornings
Hello, food lovers! I’m so glad you’re here because today we’re diving into a delightful dish that’s as easy to make as it is delicious. I can’t wait to share my recipe for a Peach Breakfast Bake! Perfect for lazy summer mornings or those hectic weekdays when you want a nourishing meal without putting in too much effort, this breakfast bake is bound to become a staple in your kitchen.
Introduction
Picture this: It’s a sunny Saturday morning. You pour yourself a cup of freshly brewed coffee, and the scent of sweet peaches wafts through the air. You step into the kitchen, the sunlight dancing across the countertops, and you’re ready to whip up something special for breakfast. The excitement of cooking is palpable!
This Peach Breakfast Bake is not only quick and healthy but also incredibly versatile. Made with wholesome ingredients like cottage cheese, fresh peaches, and rolled oats, this dish is packed with protein and flavor, making it the perfect way to fuel your day. And the best part? You can throw it in the oven and enjoy your morning coffee while it bakes to golden perfection.
Summer is all about enjoying fresh, juicy fruits, and what better way to incorporate them into your breakfast than with this peach bake? It’s light, satisfying, and absolutely perfect for serving friends and family or indulging in a quiet morning alone. Trust me, once you take that first bite of warm, gooey peach goodness, you’re going to love it!
So, grab your apron, and let’s bake this delicious breakfast together!
Personal Story
I remember the first time I made this Peach Breakfast Bake. It was during a family gathering at my grandmother’s house. We were surrounded by a bounty of peaches fresh from the farmer’s market, and I was determined to make something that would showcase their sweet flavor.
As I assembled the ingredients, my little cousins dashed in and out of the kitchen, their giggles filling the air. I decided to involve them in the process, letting them sprinkle in the oats and mix the batter. Their eyes sparkled with excitement as they watched the peaches transform into this delightful bake in the oven.
When we finally gathered around the table, the aroma was intoxicating. My grandmother served the dish with a dollop of yogurt and a drizzle of honey, and I could see my family’s faces light up with joy. That moment reminded me of the true essence of cooking: it’s about nurturing relationships and creating beautiful memories. Now, every time I make this dish, those sweet summer mornings come flooding back.
Ingredients
To make this scrumptious Peach Breakfast Bake, you’ll need:
-
2 cups cottage cheese
A great source of protein and calcium! If you prefer a dairy-free option, try using silken tofu blended until smooth for a similar texture. -
3 large eggs
These act as the binding agent and provide richness. For a vegan alternative, you can use flax eggs: 1 tablespoon of ground flaxseed mixed with 2.5 tablespoons of water equals one egg when left to sit for about 5 minutes. -
2 medium ripe peaches, peeled and diced
Fresh, juicy peaches are the star of this dish! If peaches aren’t in season, feel free to substitute with nectarines or even canned peaches (drained) for the same wonderful flavor. -
1/2 cup rolled oats or almond flour
Rolled oats add a nice texture while being heart-healthy. If you want a gluten-free option, almond flour works beautifully, giving the bake a lovely nutty flavor. -
1/4 cup honey or maple syrup
Sweeteners help to enhance the natural sweetness of the peaches. Maple syrup offers a rich flavor, while honey adds a delicate sweetness. For a low-calorie version, try stevia or agave syrup. -
1 tsp vanilla extract
A simple addition that enhances all the other flavors! Use pure vanilla extract for the best taste — imitation vanilla just doesn’t cut it. -
1/2 tsp ground ginger or cinnamon
Both spices provide warmth and depth to your bake. Cinnamon pairs wonderfully with peaches, but if you want a zesty twist, fresh grated ginger is a delightful surprise! -
1 tsp baking powder
This is the leavening agent that gives the bake a lovely rise. If you’re out of baking powder, combining 1/2 tsp baking soda with 1/2 tsp vinegar can be a suitable substitute.
Step-by-Step Instructions
Now that we’ve gathered our ingredients, let’s dive into the step-by-step process of making this mouthwatering Peach Breakfast Bake!
-
Preheat Your Oven
Start by preheating your oven to 350°F (175°C). This step is essential! A hot oven allows your bake to rise beautifully and develop that golden crust on top. -
Prepare Your Baking Dish
Grab an 8×8-inch baking dish (or similar size) and grease it lightly with cooking spray or a little coconut oil. This will help your bake come out easily once it’s done! -
Mix the Wet Ingredients
In a large mixing bowl, combine the cottage cheese, eggs, honey (or maple syrup), and vanilla extract. Whisk these together until smooth and creamy. A tip here: if you want an extra fluffier texture, you can beat the eggs separately before adding them to the mixture. -
Incorporate the Dry Ingredients
Next, gently fold in the rolled oats (or almond flour), ground ginger (or cinnamon), and baking powder into the wet mixture. You want everything to blend smoothly without overmixing it — think of it as a lovely dance in the bowl! -
Add the Peaches
Time to fold in those diced peaches! Gently stir them into the batter, distributing them evenly throughout. The joy of this dish is those bursts of juicy peaches with each bite. -
Pour and Spread
Pour the mixture into the prepared baking dish. Use a spatula to spread it out evenly. It should look delightful already, but wait until it bakes! -
Bake to Perfection
Place your dish in the preheated oven and bake for about 30–35 minutes. Keep an eye on it in the last few minutes. You want a golden top and a toothpick inserted in the center to come out clean. -
Cool and Serve
Once it’s out of the oven, let it cool for about 10 minutes. This allows it to set up nicely and makes it easier to serve. Plus, your kitchen will smell heavenly!
Serving Suggestions
To plate your Peach Breakfast Bake, cut it into squares and serve warm. A sprinkle of cinnamon on top is a lovely finishing touch. I recommend adding a dollop of Greek yogurt or a scoop of vanilla ice cream if you’re feeling indulgent. Drizzle with a bit of honey or maple syrup for an extra touch of sweetness.
Gather around the table with family or friends, and enjoy this dish as a delightful morning treat. Trust me; it’ll brighten anyone’s day!
Recipe Variations
- Berry Blast: Swap out the peaches for mixed berries (strawberries, blueberries, raspberries) for a delicious berry breakfast bake.
- Nutty Delight: Toss in some chopped nuts — pecans or almonds work beautifully for added crunch and healthy fats.
- Coconut Twist: Add some shredded coconut for a tropical flair; it pairs beautifully with the peaches.
- Gluten-Free: Use gluten-free rolled oats or all almond flour for a delicious gluten-free version.
- Savory Spin: Feeling adventurous? Consider adding sautéed spinach and feta cheese for a savory take on breakfast baking!
Chef’s Notes
This Peach Breakfast Bake has evolved over the years in my kitchen. I’ve tested it in so many ways, and I love how forgiving it is! You can really play with the ingredients based on what you have on hand. I once made it with a friend who was excited about using ripe bananas instead of peaches, and it turned out extraordinary!
And here’s a funny kitchen story: I remember trying to multitask while making this dish. I had a pot of coffee brewing, fresh fruit on the counter, and something else cooking in another pan. I turned back to the bowl, only to find that I had mistakenly grabbed a cup of salt instead of sugar! Thankfully, I caught it just in time and added sweetness instead — phew! Always a good reminder to read your measuring cups carefully!
FAQs and Troubleshooting
1. Can I make this ahead of time?
Absolutely! You can prepare the mixture the night before, store it in the fridge, and simply pour it into the baking dish in the morning.
2. Can I freeze leftovers?
Definitely. Cut the bake into squares, place them in an airtight container, and freeze for up to three months. Reheat in the microwave or oven before serving!
3. My bake didn’t rise as expected. What could be wrong?
This can happen if your baking powder is expired or hasn’t been mixed thoroughly into the batter. Make sure to check the freshness of your ingredients!
4. Is it normal for the bake to sink a little as it cools?
Yes, it’s perfectly normal! This dish can deflate slightly as it cools; it’s still delicious and safe to eat!
Nutritional Info
While I typically focus on deliciousness, here’s a little breakdown that might interest you:
- Calories: Approximately 180 calories per serving (based on 8 servings).
- Protein: About 10g protein, thanks to the cottage cheese!
- Carbs: Roughly 22g, mostly from the fruit and oats.
- Fats: About 5g, depending on whether you choose to add nuts.
Conclusion
There you have it, my lovely foodies! This Peach Breakfast Bake recipe is easy to make, full of fresh flavors, and perfect for starting your day with a smile. It’s not just a recipe; it’s an experience — a way to bring people together and create memories around the table. So tie on your apron, get your ingredients ready, and let’s share in the joy of cooking!
I hope you enjoy making this delightful breakfast bake just as much as I do. Happy baking, and may your mornings be joyful and delicious!
PrintPeach Breakfast Bake
A delightful and healthy breakfast bake made with cottage cheese, fresh peaches, and rolled oats, perfect for summer mornings.
- Prep Time: 15 minutes
- Cook Time: 35 minutes
- Total Time: 50 minutes
- Yield: 8 servings 1x
- Category: Breakfast
- Method: Baking
- Cuisine: American
- Diet: Vegetarian
Ingredients
- 2 cups cottage cheese
- 3 large eggs
- 2 medium ripe peaches, peeled and diced
- 1/2 cup rolled oats or almond flour
- 1/4 cup honey or maple syrup
- 1 tsp vanilla extract
- 1/2 tsp ground ginger or cinnamon
- 1 tsp baking powder
Instructions
- Preheat your oven to 350°F (175°C).
- Prepare your baking dish by greasing it lightly with cooking spray or coconut oil.
- Mix the cottage cheese, eggs, honey (or maple syrup), and vanilla extract until smooth and creamy.
- Incorporate the rolled oats (or almond flour), ground ginger (or cinnamon), and baking powder gently into the wet mixture.
- Add the diced peaches, folding them into the batter evenly.
- Pour the mixture into the prepared baking dish and spread it evenly.
- Bake for about 30–35 minutes until golden and a toothpick comes out clean.
- Cool for about 10 minutes before serving.
Notes
Serve warm with a dollop of Greek yogurt or ice cream, and drizzle with honey or maple syrup for extra sweetness.
Nutrition
- Serving Size: 1 square
- Calories: 180
- Sugar: 12g
- Sodium: 350mg
- Fat: 5g
- Saturated Fat: 2g
- Unsaturated Fat: 3g
- Trans Fat: 0g
- Carbohydrates: 22g
- Fiber: 3g
- Protein: 10g
- Cholesterol: 60mg
Keywords: peach breakfast bake, healthy breakfast, summer recipe, easy bake, cottage cheese recipe
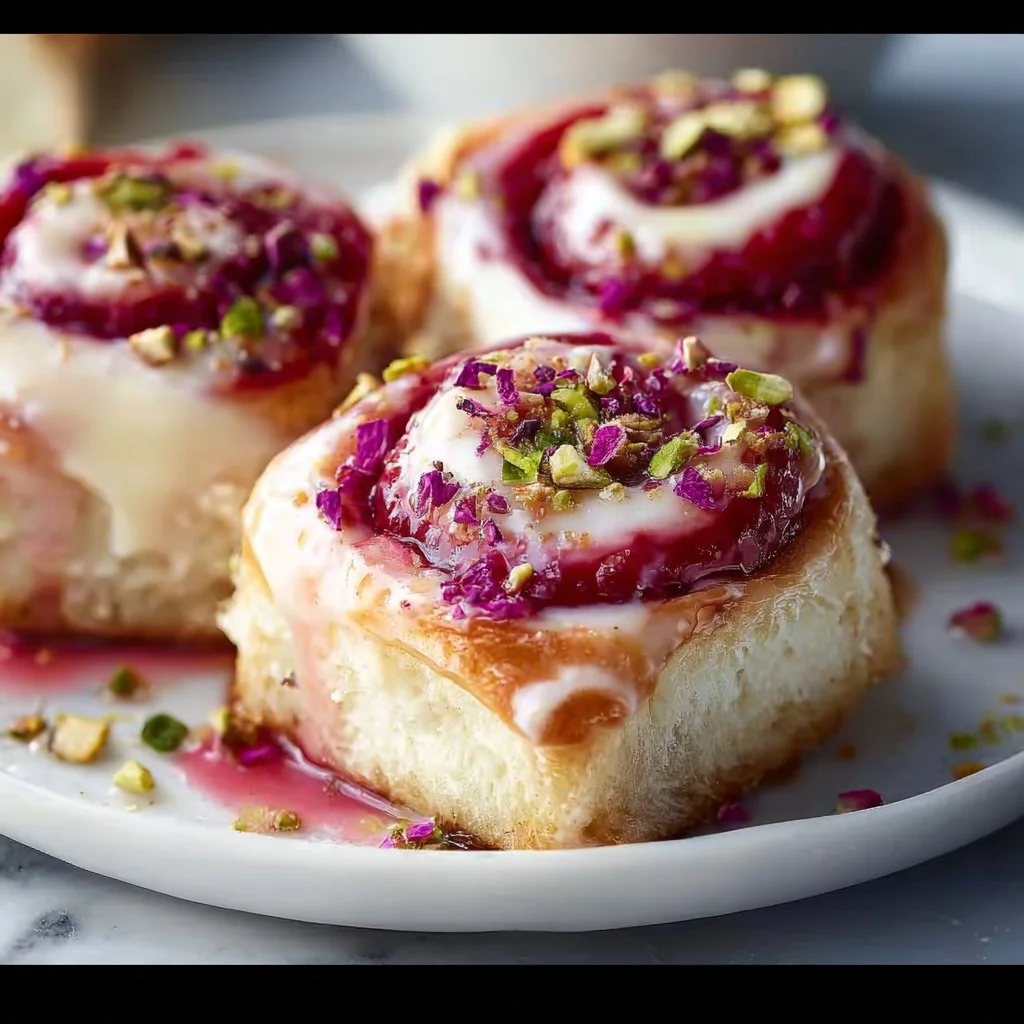
Edd Kimber Raspberry Rose Cheesecake Buns for Quick Mornings
Edd Kimber’s Raspberry and Rose Cheesecake Buns for Blissful Mornings
Ah, the joy of a leisurely weekend morning, the sun streaming in, and the perfect aroma wafting through the kitchen: freshly baked buns. If there’s one thing that can transform an ordinary breakfast into a magical moment, it’s the combination of raspberries and rose—like sunshine in a pastry! Today, I’m excited to share with you a delightful recipe for Edd Kimber’s Raspberry and Rose Cheesecake Buns. These sweet rolls are not just a treat for the taste buds; they’re an invitation to indulge in a little extra love and warmth during breakfast.
When I first stumbled upon this recipe, I was immediately captivated by the idea of combining rich cream cheese with the sweetness of raspberries and the fragrant hint of rose. It felt like a nod to both classic bakery traditions and a modern twist on flavors that resonate with my culinary heart. The best part? You don’t need to be a pastry chef to pull these off. It’s about the love and intention you pour into each bun that makes them special. So, roll up your sleeves, tie on your apron, and let’s dive into this heavenly recipe together!
My Personal Story
Every time I bake, I think back to weekends spent in my grandmother’s kitchen, where the scent of warm sugar and citrus filled the air. She always had a way of making the simplest recipes feel like magic. One weekend, I remember whipping up a batch of rose-flavored cookies with her, completely captivated by the delicate flavor and aroma. Those sweet memories instilled in me a passion for combining unexpected flavors, and that’s likely why Edd Kimber’s Raspberry and Rose Cheesecake Buns struck such a chord with me.
Baking these buns takes me back to those cherished times, where the kitchen was filled with laughter, flour fights, and a generous sprinkle of love. It’s a gentle reminder that food carries stories and emotions, weaving connections through the meals we share. So, as we whip up these buns, remember that each ingredient contributes to a heartfelt narrative—one that can brighten breakfast times and create beautiful moments around your table.
Ingredients
Before you get started, gather these ingredients to make your Raspberry and Rose Cheesecake Buns:
- 500 grams Strong White Bread Flour: For a classic bun texture, strong white bread flour works beautifully. However, if you prefer a softer, cake-like bun, all-purpose flour can substitute perfectly.
- 75 grams Caster Sugar: This sugar gives that quintessential sweetness—granulated sugar will work if that’s what you have on hand.
- 10 grams Fine Sea Salt: This may seem small, but it’s essential. Salt enhances flavor, balancing the sweetness beautifully.
- 7 grams Fast-Action Dried Yeast: The magic behind the buns’ rise! You can use fresh yeast if you have it; just remember to adjust the quantity.
- 300 ml Whole Milk: Creamy and rich, whole milk provides the best flavor. For a dairy-free option, almond or oat milk can easily take its place.
- 2 Large Eggs: They provide structure and moisture, but you can use flax eggs for an egg-free version.
- 75 grams Unsalted Butter: I use unsalted for control over seasoning. Margarine can be used if you’re in a pinch or looking for a dairy-free alternative.
- 250 grams Full-Fat Cream Cheese: This creamy goodness is what makes these buns decadent. If you’d like a lighter version, low-fat cream cheese can do the trick—just know it might alter the texture slightly.
- 200 grams Raspberry Jam: The star filling! While raspberry is delicious, don’t hesitate to try other fruit jams like strawberry or cherry.
- 1 tablespoon Lemon Juice: A touch of acidity that brightens flavors; vinegar can be used as an alternative if you’re in need.
- 1 teaspoon Vanilla Bean Paste: Adds depth and flavor; vanilla extract is fine if that’s what’s on hand.
- 150 grams Icing Sugar: For a sweet glaze on top. If you happen to have granulated sugar, simply powder it to create your own icing sugar.
- 2 tablespoons Rose Water: Just a little bit adds a floral twist. Omit this if you can’t find it; the buns will still be delightful!
- 2 tablespoons Edible Dried Rose Petals: These are for that gorgeous touch. Feel free to swap with more chopped nuts like pistachios for added crunch.
- 50 grams Chopped Shelled Pistachios: For an unexpected but delicious crunch. Swap them out for walnuts or any nuts you fancy!
Step-by-Step Instructions
Ready to rock your kitchen? Let’s dive into the step-by-step of creating these delightful Raspberry and Rose Cheesecake Buns!
-
Activate the Yeast: Begin by mixing the warm (not hot!) milk with the yeast and a sprinkle of sugar. Let this mixture sit for about 5-10 minutes until it’s frothy. This means your yeast is alive and ready to work its magic! Pro tip: Make sure your milk isn’t too hot, or you’ll kill those little yeasties!
-
Make the Dough: In a large mixing bowl, combine the bread flour, sugar, salt, and the frothy yeast mixture. Crack those eggs in too! Stir until it begins to come together into a dough. If you find it too sticky, that’s okay! Just sprinkle a little more flour as needed.
-
Knead: This is where the magic happens! Turn your dough out onto a floured surface and knead for about 10 minutes. Your dough should be smooth and elastic. You can also use a stand mixer with a dough hook for about 6-8 minutes. Just remember, the more you knead, the more love you infuse into the dough!
-
Rest and Rise: Place the dough in a lightly oiled bowl, cover it with a kitchen towel, and let it rise in a warm place until it doubles in size—about 1 hour. Just think of this like a spa day for your dough!
-
Prepare the Filling: While waiting, blend the cream cheese, icing sugar, lemon juice, vanilla paste, and rose water until smooth. Play around with this filling! If you want it cheesier, add more cream cheese. If you want a sweeter note, a touch more icing sugar will do.
-
Shape the Buns: After your dough has risen, roll it out into a rectangle (about 40x30cm). Spread the raspberry jam followed by the cream cheese mixture over the dough. Leave a small border to avoid a giant jam explosion!
-
Roll and Cut: Starting from one edge, roll the dough tightly into a log. Cut the log into equal pieces—about 12-15 pieces. This is where you can turn up the creativity: make them bigger for sharing or smaller for individual bites!
-
Second Rise: Place these beauties in a greased baking dish. Cover again and let them rise for another 30-40 minutes, until puffy and fluffy!
-
Bake and Cool: Preheat your oven to 180°C (350°F). Bake the buns for about 25-30 minutes until they’re golden brown. Keep an eye on them; if they’re getting too dark, cover them lightly with foil.
-
Glaze and Beautify: For the glaze, whisk the icing sugar with a touch of water or lemon juice until smooth and drizzle it over the warm buns. Top with chopped pistachios and dried rose petals for that extra wow factor!
Serving Suggestions
When it comes to serving these Raspberry and Rose Cheesecake Buns, I love to present them on a beautiful platter alongside a small pot of extra raspberry jam and a sprinkle of powdered sugar. Light a few candles, pour some fresh orange juice or coffee, and watch as they disappear!
Recipe Variations
Looking to switch things up with your Raspberry and Rose Cheesecake Buns? Here are a few inspired variations:
- Berry Mix: Swap the raspberry jam for a mix of strawberries and blueberries for a delightful reflect of summer berries.
- Nutty Indulgence: Add chopped almonds or hazelnuts directly into the filling for extra crunch and flavor.
- Lemon Zest: Incorporate some fresh lemon zest into the cream cheese filling for a citrusy zing!
- Dairy-Free Delight: For a completely dairy-free version, use almond cream cheese and a non-dairy butter alternative.
- Savory Option: Feeling adventurous? Try replacing the jam with some savory herb-infused cheese and caramelized onions!
Chef’s Notes
These Raspberry and Rose Cheesecake Buns have become a go-to treat in my household. Over the years, I’ve played around with the fillings and toppings continually—sometimes adding a pinch of cardamom or swapping the rose water for orange blossom water. Each variation feels like a new adventure, turning a classic recipe into something uniquely ours. And just as my grandmother’s spirit lingers in my kitchen, I hope these buns bring as much joy and comfort to your loved ones as they’ve brought to mine.
FAQs and Troubleshooting
1. What if my dough doesn’t rise?
If your dough doesn’t rise, it’s likely that the yeast was expired or the milk was too hot. Ensure your yeast is freshly active. If your kitchen is cold, try placing it in a warm spot—like near a preheated oven!
2. Can I prepare these buns the night before?
Absolutely! Once shaped and in the baking dish, cover with plastic wrap and refrigerate overnight. In the morning, let them come to room temperature and rise for about an hour before baking.
3. How do I store leftovers?
Store any leftover buns in an airtight container at room temperature for up to 2 days, or freeze for up to a month. Just heat them in the oven to restore their fluffy goodness!
4. My cream cheese filling is too runny; what can I do?
If your cream cheese filling isn’t thickening, try adjusting the icing sugar until it reaches your desired consistency. You can also refrigerate it for a while before spreading.
Nutritional Info
While I won’t delve into specifics today, these buns offer a lovely balance of sweetness and decadence; they are best enjoyed in moderation with a side of joy and a loving gathering.
Remember, cooking is an art, and the only ingredient you truly need is love. So, grab your apron, channel your inner chef, and enjoy creating these Raspberry and Rose Cheesecake Buns. Happy baking!
PrintRaspberry and Rose Cheesecake Buns

Delightful raspberry and rose cheesecake buns that make the perfect breakfast treat. Soft, sweet, and filled with rich cream cheese and jam.
- Prep Time: 30 minutes
- Cook Time: 30 minutes
- Total Time: 1 hour
- Yield: 12 servings 1x
- Category: Breakfast
- Method: Baking
- Cuisine: Baked Goods
- Diet: Vegetarian
Ingredients
- 500 grams Strong White Bread Flour
- 75 grams Caster Sugar
- 10 grams Fine Sea Salt
- 7 grams Fast-Action Dried Yeast
- 300 ml Whole Milk
- 2 Large Eggs
- 75 grams Unsalted Butter
- 250 grams Full-Fat Cream Cheese
- 200 grams Raspberry Jam
- 1 tablespoon Lemon Juice
- 1 teaspoon Vanilla Bean Paste
- 150 grams Icing Sugar
- 2 tablespoons Rose Water
- 2 tablespoons Edible Dried Rose Petals
- 50 grams Chopped Shelled Pistachios
Instructions
- Activate the Yeast: Mix warm milk with yeast and sprinkle of sugar. Let sit for 5-10 minutes until frothy.
- Make the Dough: Combine flour, sugar, salt, and frothy yeast mixture in a large bowl. Add eggs and stir until dough begins to form.
- Knead: Turn dough out onto floured surface and knead for about 10 minutes until smooth and elastic.
- Rest and Rise: Place dough in oiled bowl, cover, and let rise in warm place until doubled—about 1 hour.
- Prepare the Filling: Blend cream cheese, icing sugar, lemon juice, vanilla paste, and rose water until smooth.
- Shape the Buns: Roll dough into a rectangle, spread raspberry jam and cream cheese mixture, leaving a border.
- Roll and Cut: Tightly roll dough into a log and cut into equal pieces—about 12-15 pieces.
- Second Rise: Place in greased baking dish, cover, and let rise for 30-40 minutes until puffy.
- Bake and Cool: Preheat oven to 180°C (350°F) and bake buns for 25-30 minutes until golden.
- Glaze and Beautify: Whisk icing sugar with water or lemon juice and drizzle over warm buns. Top with pistachios and rose petals.
Notes
Buns can be prepared overnight in the refrigerator. Store leftovers in an airtight container for up to 2 days or freeze for up to a month.
Nutrition
- Serving Size: 1 bun
- Calories: 300
- Sugar: 18g
- Sodium: 200mg
- Fat: 10g
- Saturated Fat: 5g
- Unsaturated Fat: 4g
- Trans Fat: 0g
- Carbohydrates: 40g
- Fiber: 2g
- Protein: 6g
- Cholesterol: 30mg
Keywords: cheesecake buns, raspberry, rose, breakfast, baking, soft rolls
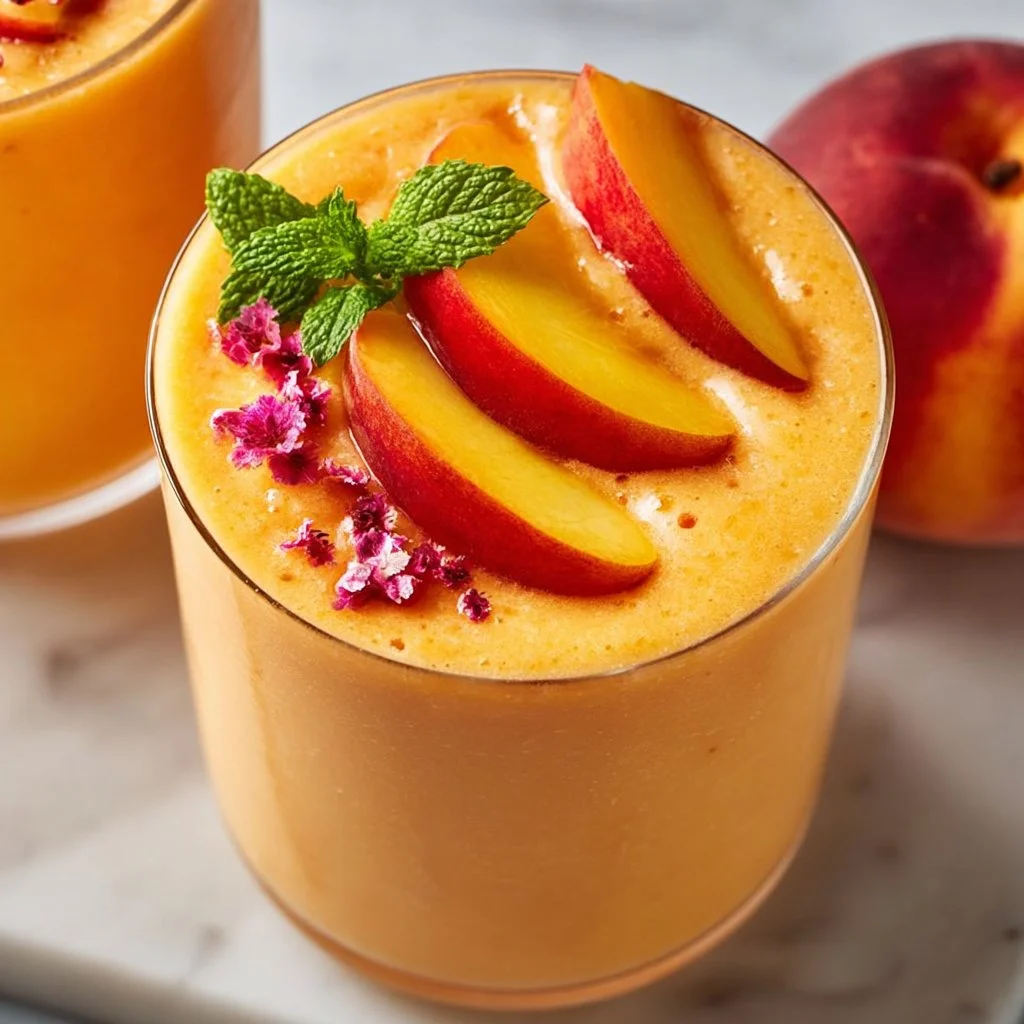
Minute Peach Smoothie with Frozen Peaches for Breakfast
The Perfect Peach Smoothie: A Refreshing Summer Vibe
Hello, dear friends! If you’ve ever sipped a smoothie that makes you feel like you’re lounging on a sun-soaked beach, then you’re in for a treat. Today, we are diving into the world of fruit-filled bliss with a Peach Smoothie featuring frozen peaches. This refreshing drink is not just a thirst-quencher; it’s a little hug in a glass, and I can’t wait to share how to whip it up in your kitchen!
As summer approaches, the desire for something cool and revitalizing becomes hard to resist. Think about it: the sun is shining, summer fruits are bursting with flavor, and there’s no better way to celebrate the season than with a delicious smoothie that gives you all the vibes of beach days and backyard barbecues.
Now, why frozen peaches, you might ask? Well, my friend, frozen fruits are the real unsung heroes of smoothies! They give a wonderfully creamy texture, and you don’t have to worry about them spoiling. Plus, they’re picked at the peak of ripeness and frozen right away, so you get all that deliciousness year-round. Let’s get blending!
My Peachy Personal Story
Ah, peaches. Just saying the word brings me back to my childhood summers spent at my grandparents’ house in the countryside. They had the most magnificent peach tree in their backyard—one that seemed to promise the juiciest, most flavorful peaches you could imagine. I remember spending lazy afternoons picking peaches, their fuzz tickling my fingertips as I filled up my little basket. There was something magical about biting into a sun-warmed peach, the juice running down my chin as my grandma would call us in for her famous peach cobbler.
As I grew older, I started experimenting more with these delightful fruits, realizing their versatility went far beyond pies. That’s when I discovered the joy of smoothies. Combining that nostalgic flavor with vibrant, refreshing frozen peaches not only takes me back but gives me the perfect way to introduce this summer treasure to others. So, let’s capture that spirit of those sun-drenched days with a smoothie that’s just as warm and inviting!
Ingredients
Here’s what you’ll need to create your very own peach smoothie:
-
1 ripe banana
The banana not only adds natural sweetness but also gives the smoothie a creamy texture. If you’re not keen on bananas, you can substitute it with half an avocado for a different flavor and texture. -
1 cup frozen peaches
These are the stars of the show! They provide that summery sweetness and vibrant color. If you don’t have frozen peaches, fresh ones work too; just add some ice to keep it chilled. -
1/2 cup Greek yogurt
Rich in protein and creaminess, Greek yogurt makes our smoothie thick and satisfying. For a dairy-free version, you can opt for coconut yogurt or almond yogurt. -
1/2 cup milk or almond milk (optional)
This is where you can customize your smoothie’s consistency. Need it thinner? Add more liquid! Prefer it thicker? Cut back. Unsweetened almond milk is a good option if you’re watching sugar intake. -
1 tablespoon honey or maple syrup (optional)
If you prefer a sweeter smoothie, this is your go-to. You can adjust it according to your taste buds—just a bit will do. Agave syrup is a great substitute if you’re vegan.
Step-by-Step Instructions
-
Gather Your Ingredients
Before jumping in, make sure you have everything ready to go. It will make your blending process seamless! -
Add the Banana
Peel the ripe banana and slice it in half before tossing it into your blender. Ripe bananas are sweeter and creamier, making them a delightful base.Chef Tip: If your bananas are getting too ripe to eat, don’t toss them! Slice ’em up and freeze them for smoothies.
-
Into the Blender with Frozen Peaches
Next up, grab that cup of frozen peaches! Toss those beauties into the blender. They’ll help chill your smoothie even further and make it seriously refreshing. -
Spoon in Greek Yogurt
Add your Greek yogurt right on top. This is where the creaminess comes into play, and it also packs a protein punch! -
Pour in the Milk
If you’d like a thinner consistency, pour in your choice of milk or almond milk. This step is totally optional. Blend without it for a thicker smoothie! -
Sweeten It Up
Drizzle in your honey or maple syrup if you choose. Keep in mind that the sweetness from the banana and peaches may be enough, so start small and adjust! -
Blend Away!
Put the lid on your blender and blend until smooth. This should take about 30 seconds to a minute, depending on your blender’s power. If you notice lumps, blend a little longer!Chef Hack: Feel free to stop the blender and scrape down the sides if ingredients get stuck. Just remember to turn it off first for safety!
-
Taste Test
Once your smoothie is blended, give it a taste. If you want it sweeter, add more honey or syrup. If it’s too thick, add a splash more milk and blend again. -
Serve It Up!
Pour your peachy goodness into a glass, take a moment to admire that gorgeous color, and enjoy!
Serving Suggestions
To elevate your smoothie presentation, consider garnishing it with a sprig of mint or a few slices of fresh peach on top. Serve it alongside a vibrant breakfast spread or on its own for a refreshing afternoon snack. If you’re feeling especially fancy, pour it into a chilled glass to enjoy with friends on a sunny patio.
Recipe Variations
- Berry Bliss Peach Smoothie: Add a handful of blueberries or strawberries for a berry twist full of antioxidants.
- Peach Green Smoothie: Mix in a handful of spinach or kale for an extra healthy boost without compromising on taste.
- Tropical Peach Vibe: Incorporate a splash of coconut milk and some diced pineapple for a tropical flair.
- Nutty Smoothie: Add a tablespoon of almond butter for a nutty flavor and extra protein.
- Spiced Peach Smoothie: A dash of cinnamon or nutmeg can add warmth and depth to the flavor profile.
Chef’s Notes
It’s fascinating how a simple peach smoothie can carry so many memories! Over the years, I’ve experimented with countless variations—adding a bit of this, a pinch of that. I once made a batch with fresh mint, thinking it would elevate the flavor, and it turned out spectacularly refreshing! Sometimes, it’s the most unexpected combinations that lead to delightful surprises.
Oh, and don’t be surprised if your kids ask for their version with a little scoop of ice cream instead of yogurt—trust me, it’s a fun treat!
FAQs and Troubleshooting
Q: My smoothie is too thick. What do I do?
A: No worries! Just add a little more liquid (milk or water) and blend again until you reach your desired consistency.
Q: Can I use fresh peaches instead of frozen?
A: Absolutely! Just be sure to add some ice to keep it chilled. Remember to peel them first to keep the texture smooth!
Q: How can I make this smoothie vegan?
A: Swap the Greek yogurt for coconut or almond yogurt and use maple syrup as your sweetener. Use almond milk instead of regular milk!
Q: What if my peaches taste bland?
A: If your peaches don’t have a robust flavor, adjust the sweetness with honey or syrup, or enhance it with add-ins like vanilla extract!
Nutritional Info
(If applicable, include basic nutritional facts based on standard servings.)
In this delightful peach smoothie, you’re not just savoring the sweet taste of summer; you’re creating a healthy, nourishing beverage that invigorates your body. It’s packed with vitamins, protein, and wholesome goodness!
So there you have it—your guide to crafting a luscious Peach Smoothie that embodies the spirit of summer and sunshine. I hope you enjoy every sip as much as I do. Remember, cooking should feel like a celebration, so tie on that apron and let’s get blending! Cheers to the best smoothies of summer!
PrintThe Perfect Peach Smoothie
A refreshing peach smoothie that captures the essence of summer with frozen peaches and a creamy texture.
- Prep Time: 10 minutes
- Cook Time: 0 minutes
- Total Time: 10 minutes
- Yield: 2 servings 1x
- Category: Beverage
- Method: Blending
- Cuisine: American
- Diet: Vegetarian
Ingredients
- 1 ripe banana
- 1 cup frozen peaches
- 1/2 cup Greek yogurt
- 1/2 cup milk or almond milk (optional)
- 1 tablespoon honey or maple syrup (optional)
Instructions
- Gather your ingredients
- Add the banana
- Into the blender with frozen peaches
- Spoon in Greek yogurt
- Pour in the milk
- Sweeten it up
- Blend away!
- Taste test
- Serve it up!
Notes
For an additional twist, consider adding berries, spinach, or almond butter for a different flavor. Garnish with mint or peach slices for a beautiful presentation.
Nutrition
- Serving Size: 1 serving
- Calories: 250
- Sugar: 20g
- Sodium: 60mg
- Fat: 3g
- Saturated Fat: 1g
- Unsaturated Fat: 2g
- Trans Fat: 0g
- Carbohydrates: 45g
- Fiber: 5g
- Protein: 7g
- Cholesterol: 10mg
Keywords: peach smoothie, summer drink, healthy smoothie, refreshing beverage, frozen peaches
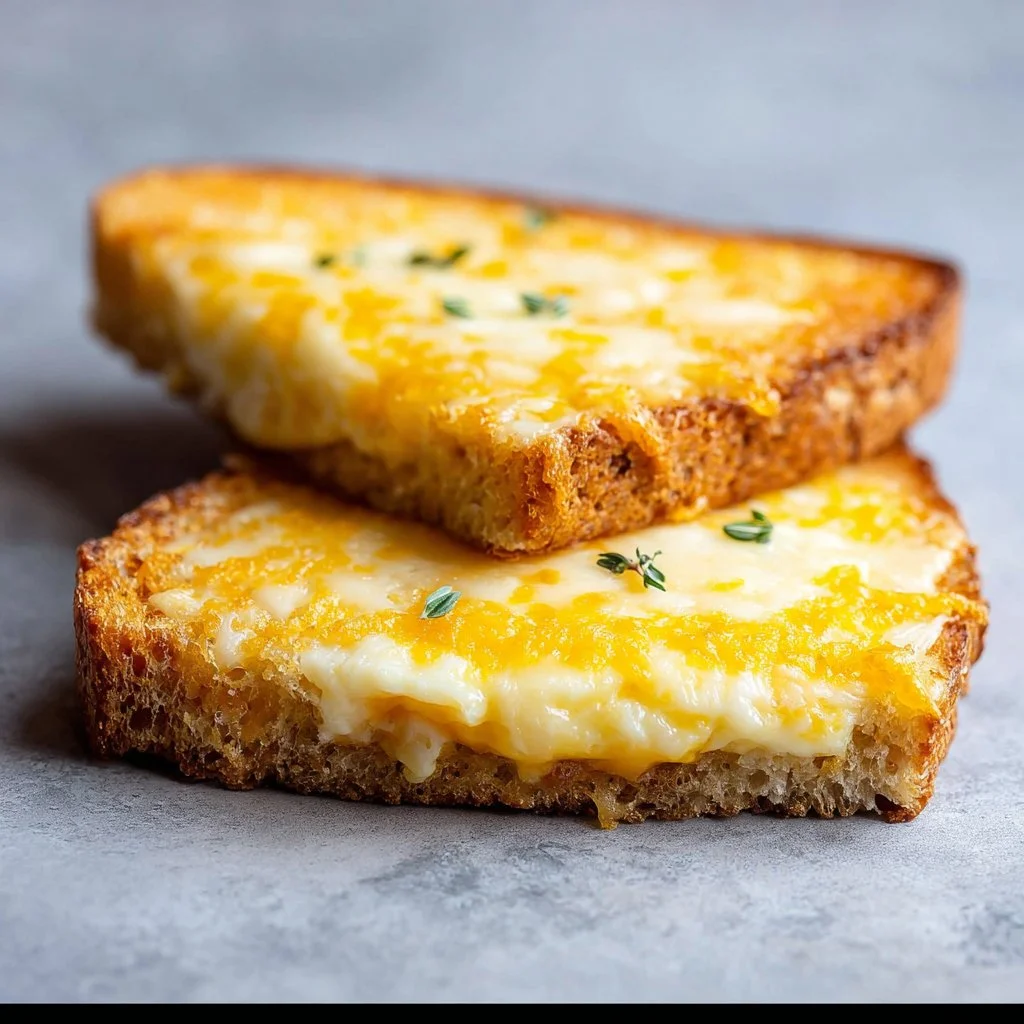
Egg and Cheese Toasts: Crispy, Cheesy, and Amazingly Quick
# Egg and Cheese Toasts: Crispy, Cheesy, and Amazingly Quick

## Introduction

Hey there, fellow food lovers! Today, we’re diving into one of my all-time favorite comfort foods: Egg and Cheese Toasts. Now, before you say, “Savannah, I can whip up a plain old egg and cheese sandwich in my sleep!”—let me tell you why this dish will elevate your brunch game and become a staple on your table.

Egg and Cheese Toasts are not just your average breakfast fare; they’re a delightful symphony of crispy, cheesy goodness perched atop a sturdy piece of bread. Imagine sinking your teeth into a perfectly fried egg, its yolk oozing subtly onto a layer of melted cheese, nestled on a crisp, toasty foundation. It’s quick to prepare, bursting with flavor, and oh-so-satisfying. Whether you’re having a lazy Sunday morning, entertaining guests for brunch, or simply need a quick meal that brings joy to your plate, these toasts will fit the bill!

The beauty of this dish is in its simplicity and versatility. You can customize it with your favorite cheeses, herbs, and seasonings. Plus, it comes together in just minutes, making it perfect for those hectic weekday mornings or spontaneous late-night cravings. Stick around, and I’ll share some delightful variations, tips, and anecdotes that will inspire you to make this dish yours.

So grab your apron, and let’s get cooking! Trust me, once you make these Egg and Cheese Toasts, you’ll keep coming back for more. Let’s whisk up something unforgettable together!

## Personal Story

First, let me take you back to my childhood kitchen. I remember Saturday mornings filled with laughter, the scent of brewing coffee, and the sound of sizzling eggs dancing in the pan. My mom had a knack for turning even the simplest meals into something special. One Saturday, she introduced me to her version of Egg and Cheese Toasts.

We had that hearty bread; you know, the kind that has a thick crust and can stand up to a little butter and some crispy edges? Mom would pan-fry the bread with just the right amount of heat, crack a sunny-side-up egg on top, and sprinkle a glorious mound of cheese—usually cheddar because, let’s be honest, it’s the king of comfort cheese! That first bite was pure bliss. The crispiness of the bread, the creamy cheese, and the rich yolk melting together created a heavenly combination.

I can still hear her encouraging me to experiment with toppings—fresh herbs, a dash of hot sauce, even slices of avocado! Those mornings linger in my heart and have inspired my love for cooking to this very day. With every Egg and Cheese Toast I prepare, I’m reminded of those warm, cozy moments shared at our kitchen table. Now, let's create some delicious memories of your own!

## Ingredients

Here’s what you’ll need to make these glorious Egg and Cheese Toasts, complete with some handy insights and substitution tips:

- **2 slices hearty sandwich bread (no large holes)**
  *Look for bread that’s sturdy enough to hold all the toppings without getting soggy. Sourdough, whole grain, or even brioche works beautifully! If gluten-free is your jam, swap it for a great gluten-free bread.*

- **1 large egg**
  *The star of the show! Feel free to use organic or free-range eggs for added flavor and nutritional value. If you’re vegan or have an egg allergy, consider using a flax egg (1 tablespoon ground flaxseed mixed with 2.5 tablespoons water) as a substitute, though the texture will differ.*

- **1/2 cup (2 ounces) grated cheese (cheddar, pepper jack, or gruyere)**
  *Cheddar is classic, but don’t be afraid to experiment! Pepper jack adds a kick, while Gruyère brings complex nutty flavors. For a dairy-free option, try cashew cheese or nutritional yeast.*

- **1 teaspoon finely chopped fresh herbs (thyme or rosemary)**
  *Herbs elevate the dish and add freshness. If you don’t have fresh herbs, 1/4 teaspoon of dried herbs will work too—just crush them a bit to release their flavor. You can also use parsley, chives, or basil for variety!*

- **Salt and black pepper to taste**
  *Essential for flavor! Always season your egg in the cooking stage for a better-tasting result. Feel free to experiment with flavored salts like smoked salt for an added twist.*

- **Pinch of cayenne (optional)**
  *This is entirely optional but recommended for a hint of spice! If you’re not into spicy, skip it or replace it with paprika for a mild smokiness.*

## Step-by-Step Instructions

Ready to bring your Egg and Cheese Toasts to life? Let’s do this! Here’s how to succeed step by step:

1. **Prep Your Ingredients**
   Start by gathering all your ingredients. It always helps to have everything within reach when you’re cooking. If you haven’t already, grate your cheese and chop your herbs. Prepping ahead saves time and keeps the flow smooth!

2. **Toast the Bread**
   In a non-stick skillet over medium heat, add a small knob of butter or a drizzle of olive oil. Once melted and bubbly, place your bread slices in the pan. Let them toast for about 2-3 minutes until they’re golden brown on one side. A little pro tip: press down gently on the bread with a spatula for even toasting.

3. **Flip the Bread**
   Once your first side is perfectly golden, flip each slice over. If you’d like to add additional oil or butter on this side, now’s the time! This side will be the platform for your lovely toppings.

4. **Add the Egg**
   Carefully crack your egg into the skillet (preferably on top of the toasted side of the bread). Reduce the heat to low to avoid overcooking the egg. If you prefer, you can also fry your egg separately and place it on the toast afterward. Cover the pan with a lid to create steam and heat, which helps cook the egg white evenly while keeping the yolk soft.

5. **Sprinkle on the Cheese**
   Just before your egg is finished cooking (the whites should be set but the yolk still runny), sprinkle the grated cheese generously over the egg. Cover the skillet again to allow the cheese to melt beautifully—this should take about 1-2 minutes. The cheese should be bubbly and soft when you lift the lid, and your egg should be cooked to your liking!

6. **Season to Taste**
   As the cheese melts, sprinkle salt, black pepper, and some cayenne (if using) on top. This is where your Egg and Cheese Toasts really get their flavor boost.

7. **Serve Immediately**
   Once your cheese is melty and delicious, carefully lift the toasts off the skillet with a spatula. Place them on plates, and if you’re feeling fancy, garnish with fresh herbs on top.

That’s it! In under 10 minutes, you’ve created an incredibly satisfying dish that’s sure to impress.

## Serving Suggestions

For serving your Egg and Cheese Toasts, let your creativity shine through! Plate them on a beautiful rustic wooden board or a vibrant plate to catch the eye. You can serve it alongside fresh fruit or a zingy side salad for a well-rounded meal. Drizzling a little sriracha or hot sauce on top elevates the experience, too. Serve with a steaming cup of coffee or a refreshing juice, and you’ve got yourself a feast!

## Recipe Variations

Here are some fun variations to mix things up:

- **Avocado Twist**: Mash half an avocado and spread it on the toast before adding the egg. The creaminess pairs wonderfully with the cheese!

- **Mediterranean Style**: Top with feta cheese, roasted red peppers, and a sprinkle of oregano. Finish with a drizzle of olive oil for an extra flavor punch.

- **Smoked Salmon**: Swap the egg for smoked salmon after cooking the toast, and add cream cheese and capers for a classic bagel-inspired toast.

- **Sunny Salsa**: Top your egg with a fresh salsa made of tomatoes, onions, cilantro, and lime juice for a vibrant, zesty kick!

- **Sweet & Savory**: Spread a bit of fig jam or honey on the toast before adding the cheese. It’s an unexpected yet delightful combination!

## Chef’s Notes

These Egg and Cheese Toasts are one of those recipes that I believe everyone should have in their culinary toolkit. I’ve made them for brunch parties and late-night snacks, and they never disappoint! Sometimes, in my experimental phase, I’ve even added crumbled bacon or leftover roasted vegetables, which gave the dish a delightful boost!

Cooking should feel effortless and fun! Don’t hesitate to adjust the recipe to suit your taste or even the ingredients you have on hand. I remember a friend who once used leftover mashed potatoes to create a base for the eggs—delicious, hearty, and resourceful!

## FAQs and Troubleshooting

**1. Why does my egg stick to the pan?**
Always ensure your skillet is adequately heated and your oil or butter is hot before adding the egg. A non-stick skillet works great for this recipe!

**2. What can I do if my yolk breaks?**
It happens to the best of us! If you break your yolk, simply turn the heat down and allow it to cook through before serving. You can always turn it into a rustic egg scramble on your toast!

**3. Can I prepare these in advance?**
While these are best enjoyed fresh, you can toast the bread ahead of time and store the components separately. When you’re ready to eat, just reheat the bread and cook the egg to order.

**4. How do I know when my egg is perfectly cooked?**
This is all about personal preference! If you like runny yolks, cook until the whites are set and remove from heat. For a firmer yolk, let it cook a bit longer—just keep an eye on it!

## Nutritional Info

For a delicious serving of Egg and Cheese Toasts, here’s a quick nutritional breakdown (estimate varies based on ingredients used):

- Calories: About 350-400
- Protein: 20g
- Carbohydrates: 30g
- Fat: 18g

Note that this can change depending on the type of bread and cheese you choose!

---

There you have it! A delightful and simple recipe for Egg and Cheese Toasts that not only satisfies hunger but also warms the heart. It’s a dish you can play with endlessly, and the best part is sharing it with the ones you love. So, let’s celebrate good food and good company—tie on your apron, and let’s keep cooking together!
Egg and Cheese Toasts

Quick and satisfying Egg and Cheese Toasts topped with a perfectly fried egg and melted cheese, ideal for breakfast or brunch.
- Prep Time: 5 minutes
- Cook Time: 5-7 minutes
- Total Time: 12 minutes
- Yield: 2 servings 1x
- Category: Breakfast
- Method: Frying
- Cuisine: American
- Diet: Vegetarian
Ingredients
- 2 slices hearty sandwich bread (no large holes)
- 1 large egg
- 1/2 cup (2 ounces) grated cheese (cheddar, pepper jack, or gruyere)
- 1 teaspoon finely chopped fresh herbs (thyme or rosemary)
- Salt and black pepper to taste
- Pinch of cayenne (optional)
Instructions
- Prep your ingredients by gathering everything you need.
- Toast the bread in a non-stick skillet over medium heat with a small knob of butter or drizzle of olive oil for 2-3 minutes until golden brown.
- Flip each slice of bread over and add additional oil or butter if desired.
- Add the egg carefully into the skillet, cover the pan to steam, and reduce the heat to low.
- Sprinkle the grated cheese over the egg just before it finishes cooking, covering again to melt the cheese.
- Season with salt, black pepper, and cayenne while the cheese is melting.
- Serve the toasts immediately, garnished with fresh herbs if desired.
Notes
Feel free to customize with toppings like avocado, feta, or salsa for added flavor.
Nutrition
- Serving Size: 1 toast
- Calories: 375
- Sugar: 2g
- Sodium: 450mg
- Fat: 27g
- Saturated Fat: 12g
- Unsaturated Fat: 10g
- Trans Fat: 0g
- Carbohydrates: 30g
- Fiber: 2g
- Protein: 20g
- Cholesterol: 180mg
Keywords: egg, cheese, toast, breakfast, quick meals, brunch
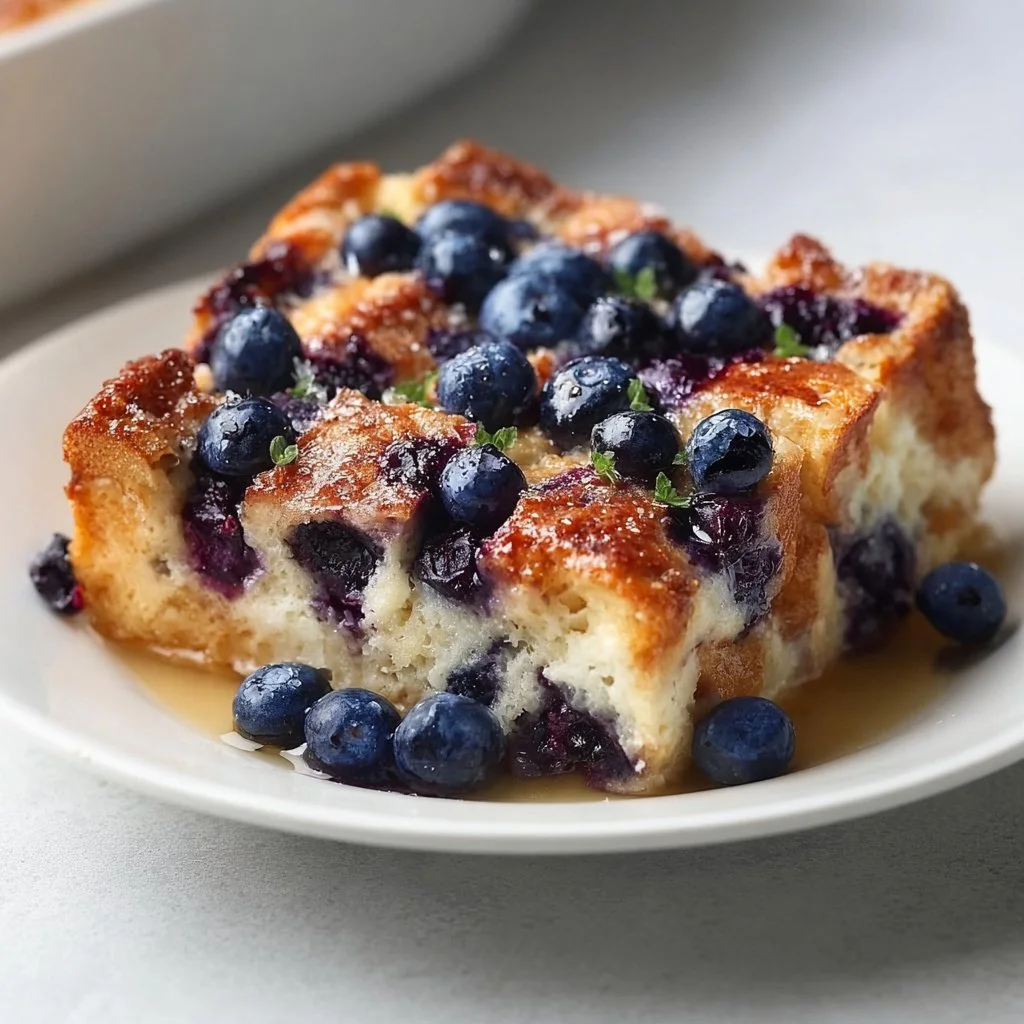
Quick Blueberry French Toast Casserole
Quick Blueberry French Toast Casserole: An Effortless Delight
Hey there, fellow food lovers! Savannah here from Ivory Apron, where we create beautiful dishes that bring joy to your table without any stress. If you’re like me, busy days and spontaneous gatherings call for recipes that are not only delicious but also simple to whip up. Today, I’m excited to share one of my absolute favorites: Quick Blueberry French Toast Casserole.
Imagine waking up on a lazy weekend morning, the sun beams spilling into the kitchen, and the sweet aroma of blueberries wafting through the air. This dish captures that early-morning bliss, combining the flavors of rich bread and juicy berries all in one beautiful bake. Plus, the best part? You can prepare it the night before and pop it in the oven when you’re ready! It’s perfect for brunch with friends, a family gathering, or even breakfast-for-dinner nights.
Now, gather your ingredients and let’s dive into this delightful, stress-free recipe that promises a delicious outcome and leaves plenty of time for lingering conversations around the table. You’re going to love how easy and gratifying this casserole is!
Personal Story
The inspiration for this Quick Blueberry French Toast Casserole comes from my childhood visits to my grandmother’s house. Every summer, we would go to her quaint cottage in the country, where she would whip up mouthwatering breakfasts, filling the air with flavors that hugged your heart. One of my favorite memories revolves around her classic French toast made from stale brioche bread, topped with a cascade of fresh blueberries.
One morning, while she was busy in the kitchen, I decided to play sous chef, clumsily stirring the eggs. Little did I know, all those little mishaps would lead to a life-long love for cooking! That summer, I learned how the simplest ingredients can create the most delightful experiences with family. Fast forward to today, and I’ve transformed that nostalgic recipe into a cozy casserole that captures the essence of those mornings, allowing us to recreate the joy without any fuss.
Ingredients
Here’s what you’ll need for your Quick Blueberry French Toast Casserole:
-
1 loaf of bread (preferably brioche or challah)
These breads are soft, have a subtle sweetness, and soak up the egg mixture beautifully. If you don’t have these on hand, feel free to use any bread you have — just ensure it’s a bit stale for better absorption! -
2 cups fresh blueberries
These little gems add a burst of flavor and antioxidants! Can’t find fresh blueberries? You can substitute them with frozen blueberries; just let them thaw and drain excess liquid before using them. -
6 large eggs
Eggs act as the binding agent and add richness. You can use egg replacers if you’re looking for a vegan version. -
2 cups milk
Whole milk will give you a creamier casserole, but feel free to use any milk or plant-based milk alternatives if you prefer! -
1/2 cup sugar
For sweetness! If you want to cut down on sugar, you can opt for honey or maple syrup—just adjust the liquid accordingly. -
1 teaspoon vanilla extract
This elevates the flavor profile without being overwhelming. Keep the quality high for the best results! -
1 teaspoon ground cinnamon
A warm spice that brings comfort to the dish. Experiment with nutmeg or pumpkin spice for a twist! -
Pinch of salt
Balances out the sweetness! It’s a small but mighty ingredient! -
Butter (for greasing the dish)
This will keep your casserole from sticking and add a hint of flavor. -
Powdered sugar (for serving, optional)
A light dusting of powdered sugar adds a beautiful finish, but feel free to skip it if you’d like.
Step-by-Step Instructions
Now that we’ve gathered our ingredients, let’s get cooking! Get ready for some delicious magic in the kitchen.
-
Prep Your Bread
Start by preheating your oven to 350°F (175°C). This might just be the most important step, so don’t skip it! While it’s heating, slice your loaf of bread into cubes. Aim for about 1-inch pieces — rustic chunks are more than welcome! The bread should feel a bit stale, as it soaks up the egg custard better. If it’s fresh, give it a little toasting in the oven for 10 minutes before proceeding. -
Grease Your Baking Dish
Grab a medium-sized baking dish (about 9×13-inches works perfectly) and coat it with a generous layer of butter. This isn’t just about preventing a sticky disaster; it adds a lovely flavor to the overall dish! -
Nestle In the Blueberries
Scatter half of the bread cubes in the greased dish, then sprinkle one cup of fresh blueberries over the top. This step will allow the blueberries to nestle into the bread as it bakes, creating those delicious flavor pockets we all crave. -
Create the Egg Mixture
In a bowl, whisk together your eggs, milk, sugar, vanilla extract, cinnamon, and that pinch of salt. The mixture should come together smoothly without any lumps. Keep a whisk handy; a fork does the trick, too! -
Pour It All Together
Carefully pour the egg mixture over the bread and blueberries in the baking dish, ensuring that all the bread pieces are well soaked. Give it a gentle push with a spatula to ensure every piece is involved. -
Ah, the Waiting Game
At this point, if you’re preparing this casserole the night before, cover it with plastic wrap and chill it in the fridge overnight. If not, let it sit for at least 15-30 minutes, allowing the bread to absorb all that delicious custard. -
Time to Bake!
Once your oven is preheated and your casserole has soaked, pop it into the oven. Bake for about 30-40 minutes, or until the top is golden brown and slightly puffed. The aroma will be nothing short of heavenly, and you’re going to want to eat it right off the pan! -
Final Touches
Once baked, remove it from the oven and allow it to cool for 5-10 minutes. This brief rest allows everything to settle, making it easier to serve slices without losing structural integrity. -
Serve and Enjoy!
Dust with powdered sugar if desired, then slice and serve warm. I love pairing it with a drizzle of maple syrup or a dollop of yogurt on the side — sumptuous delight, right there!
Serving Suggestions
When plating your Quick Blueberry French Toast Casserole, think about adding a little flair! A sprinkle of powdered sugar can brighten up the presentation. Serve it with a side of whipped cream for those tending towards indulgence. And don’t forget a fresh sprig of mint if you want that extra chef touch — it’s all about those inviting details!
Recipe Variations
Feeling adventurous? Here are a few creative twists you might want to try for your casserole:
- Mix-It-Up with Fruits: Switch out the blueberries for fresh strawberries, raspberries, or even peaches for a seasonal spin.
- Nutty Goodness: Fold in some chopped pecans or walnuts into the dish for added crunch!
- Chocolate Lover’s Delight: Add a sprinkle of dark chocolate or white chocolate chips into the mix for a decadent finish.
- Spice It Up: Try adding some cardamom or apple pie spice in instead of cinnamon for a fragrant twist.
- Go Gluten-Free: Swap the bread for gluten-free bread options to accommodate dietary needs easily.
Chef’s Notes
Funny story — the first time I attempted this recipe, I was so caught up in my excitement that I forgot to add sugar to the egg mixture! Let’s just say, the outcome was a tad bit bland. After a few laughs and adjustments, I realized that experimenting in the kitchen makes for the best memories! So if something goes haywire while you’re cooking, just roll with it.
This recipe has evolved over the years, and I’ve genuinely enjoyed adapting it to include seasonal fruits and flavors, making it ever so versatile!
FAQs and Troubleshooting
-
Why did my casserole come out soggy?
If your casserole turned out soggy, it may have been due to excessive moisture from the bread or blueberries. Aim for dense bread, and be cautious not to overload it with fruit. Also, ensure to let it sit long enough to absorb some of the custard before baking. -
Can I make this casserole ahead of time?
Absolutely! That’s one of the best features of this casserole. You can prepare it the night before, cover it tightly, and refrigerate until you’re ready to bake the next morning. -
I don’t have a 9×13-inch dish; can I use another size?
Sure! Just remember to adjust the baking time if you use a smaller or larger dish. Keep an eye on it while it bakes until it achieves that gorgeous golden color! -
What if I want to make it dairy-free?
You can easily substitute milk with almond milk, coconut milk, or any non-dairy alternative. Just ensure that your bread choice is dairy-free!
Nutritional Info
Note: Nutritional values may vary based on ingredients and portions.
- Calories: Approximately 300 per serving
- Protein: 10g
- Carbohydrates: 45g
- Fat: 12g
- Fiber: 2g
And there you have it! Your Quick Blueberry French Toast Casserole is ready to make headlines at your breakfast table. I hope this recipe sparks joy and delicious memories in your kitchen, just like it does in mine. Let’s keep the spirit of gathering around the table alive, one beautiful dish at a time! Cheers to good food and even better company! 🥂
PrintQuick Blueberry French Toast Casserole
A delightful and effortless casserole combining rich bread and juicy blueberries, perfect for brunch or breakfast-for-dinner.
- Prep Time: 15 minutes
- Cook Time: 30 minutes
- Total Time: 45 minutes
- Yield: 8 servings 1x
- Category: Breakfast
- Method: Baking
- Cuisine: American
- Diet: Vegetarian
Ingredients
- 1 loaf of bread (preferably brioche or challah)
- 2 cups fresh blueberries
- 6 large eggs
- 2 cups milk
- 1/2 cup sugar
- 1 teaspoon vanilla extract
- 1 teaspoon ground cinnamon
- Pinch of salt
- Butter (for greasing the dish)
- Powdered sugar (for serving, optional)
Instructions
- Preheat your oven to 350°F (175°C).
- Slice your loaf of bread into 1-inch cubes.
- Grease a medium-sized baking dish with butter.
- Scatter half of the bread cubes in the greased dish, then sprinkle one cup of blueberries over the top.
- Whisk together eggs, milk, sugar, vanilla extract, cinnamon, and salt in a bowl.
- Pour the egg mixture over the bread and blueberries.
- Chill in the fridge overnight or let it sit for 15-30 minutes.
- Bake for 30-40 minutes until golden brown.
- Remove from the oven and let it cool for 5-10 minutes.
- Serve warm, dusted with powdered sugar if desired.
Notes
Great for making ahead of time. Feel free to mix up the fruits or add nuts for variation.
Nutrition
- Serving Size: 1 serving
- Calories: 300
- Sugar: 5g
- Sodium: 300mg
- Fat: 12g
- Saturated Fat: 6g
- Unsaturated Fat: 4g
- Trans Fat: 0g
- Carbohydrates: 45g
- Fiber: 2g
- Protein: 10g
- Cholesterol: 270mg
Keywords: blueberry casserole, french toast, breakfast recipe