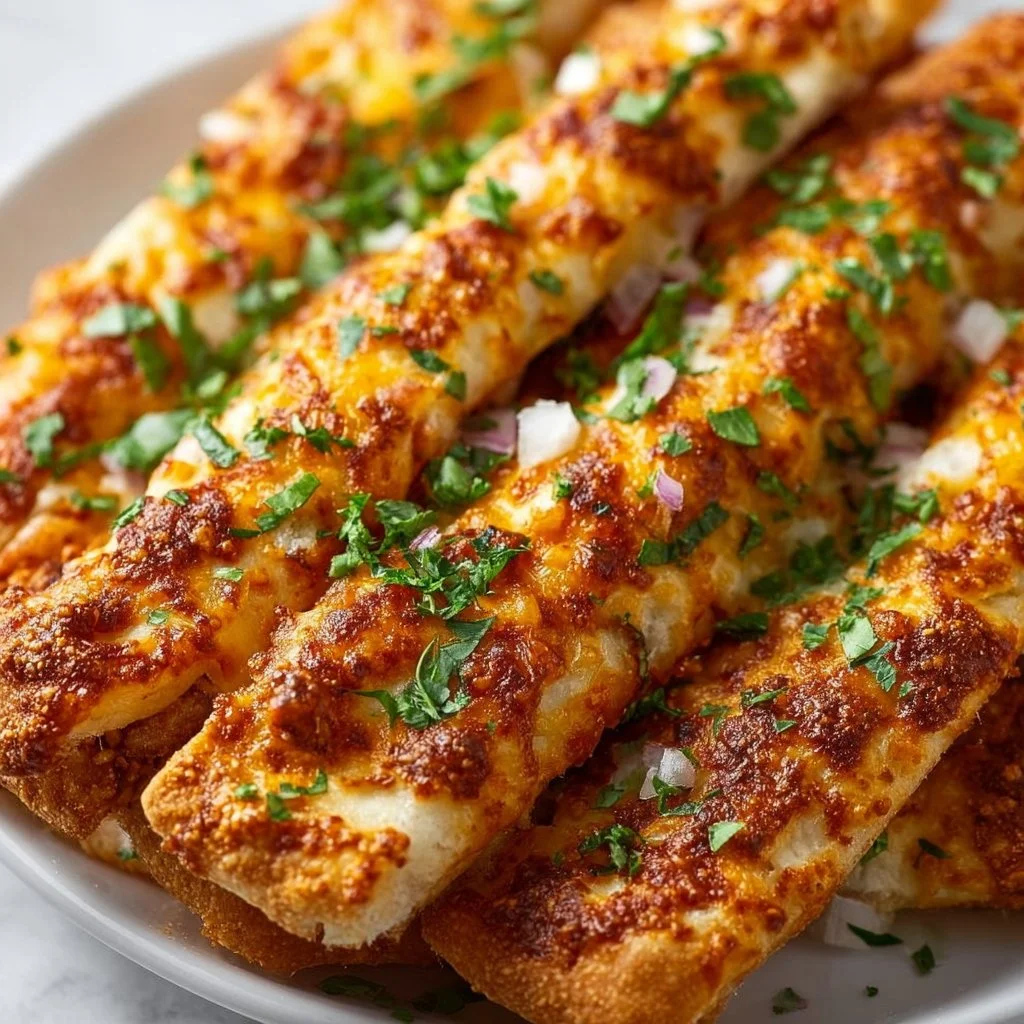
Crispy 15-Minute Cheesy Taco Sticks: Weeknight Snack
Cheesy Taco Sticks: A Flavorful Twist on a Comfort Classic
Welcome to my kitchen, food lovers! Today, I’m super excited to share a dish that will not only bring joy to your taste buds but also remind you of those cozy family gatherings where laughter and delicious aromas filled the air. I’m talking about Cheesy Taco Sticks!
These delectable bites are the perfect blend of savory ground beef, zesty taco seasoning, and gooey cheese, all wrapped in warm, fluffy pizza dough. It’s a recipe that combines the beloved flavors of tacos and pizza to create a fun, handheld treat that’s a hit with both kids and adults alike. Whether you’re hosting a dinner party, having a game night with friends, or just craving something irresistibly tasty on a weeknight, these Cheesy Taco Sticks are sure to be the star of the show!
So grab your apron and let’s dive into this cheesy culinary adventure together!
My Taco Story
Growing up, Taco Tuesdays were a sacred family ritual in my home. My mom would whip up her famous taco filling, which always seemed to have that magical flavor that only moms can create. After dinner, we’d gather at the table, each person crafting their own taco creations with all the relevant toppings — shredded lettuce, diced tomatoes, and oh, the mountains of cheese!
But it wasn’t just about the food; it was about the time spent together. I fondly remember sneaking little bites of the taco filling before it even made it to the table and my sister and I trying to outdo each other with the tallest taco stacks. Fast forward a few years, and I’d often find myself experimenting with leftovers, one evening transforming our beloved tacos into a whimsical party snack. That’s how these Cheesy Taco Sticks came to life—a delightful twist on a nostalgic favorite that instantly transports me back to those laughter-filled evenings.
Ingredients
Here’s what you’ll need to whip up your own batch of Cheesy Taco Sticks:
-
1 lb ground beef (or turkey)
- Ground beef is classic for this recipe, but feel free to substitute it with ground turkey for a leaner option. For a vegetarian twist, try crumbled tempeh or lentils.
-
1 packet taco seasoning
- This seasoning blend is a game-changer! You can use store-bought or make your own with chili powder, garlic powder, onion powder, cumin, and paprika.
-
1 cup shredded cheese (cheddar or Mexican blend)
- Cheddar adds a wonderful sharpness, but a Mexican blend gives that authentic taco flavor. For a dairy-free option, try cashew cheese or nutritional yeast for a cheesy flavor.
-
1 package refrigerated pizza dough
- Store-bought pizza dough saves time, but feel free to make your own! You can even use crescent roll dough for a flaky twist.
-
Salsa (for dipping)
- Salsa adds a fresh zing. Choose your heat level—mild, medium, or hot!
-
Sour cream (for dipping)
- A cooling contrast to the spiced taco filling. For a dairy-free alternative, use coconut cream or a cashew-based sour cream.
-
Chopped green onions (optional, for garnish)
- These add a pop of color and fresh flavor.
Step-by-Step Instructions
Let’s get cooking! Follow these steps closely, and you’ll have those Cheesy Taco Sticks ready for everyone to enjoy in no time.
-
Preheat Your Oven: Set your oven to 375°F (190°C). This allows it to reach the perfect temperature while you prepare your ingredients.
-
Cook the Ground Beef: In a skillet over medium-high heat, add your ground beef (or turkey). Cook until browned, about 7-10 minutes. As it cooks, use a spatula to break it into small pieces. This ensures you’ll have evenly cooked filling in every bite!
-
Season It Up: Once your meat is cooked, drain any excess fat, if necessary. Now sprinkle in the taco seasoning and stir well. Add about 1/3 cup of water and let the mixture simmer for an additional 3-5 minutes. This allows the flavors to meld beautifully!
-
Prepare Your Dough: While your meat simmers, open the package of pizza dough. Lightly flour your countertop and roll out the dough. You want it to be about 1/4 inch thick. If you’re using crescent roll dough, just seal the seams together.
-
Assemble the Taco Sticks: Using a pizza cutter, cut the dough into rectangles—about 3 inches by 4 inches is perfect. On one half of each rectangle, spoon a heaping tablespoon of your taco filling, then sprinkle a generous amount of cheese on top.
-
Seal It Up: Fold the dough over to enclose the filling, pressing the edges with a fork to seal them well. This is crucial! You don’t want that cheesy goodness leaking out while they bake.
-
Bake to Perfection: Line a baking sheet with parchment paper, and place your sealed taco sticks on top. Brush with a little bit of olive oil or melted butter for that gorgeous golden finish. Bake for 15-20 minutes, or until they’re puffed up and beautifully golden brown on top.
-
Serve with Love: Once they’re out of the oven, allow the Cheesy Taco Sticks to cool for a few minutes. Serve them hot with salsa and sour cream for dipping, and don’t forget the chopped green onions for that extra touch!
Serving Suggestions
I love to serve these Cheesy Taco Sticks on a large platter, with colorful bowls of salsa and sour cream for dipping. You can garnish with fresh cilantro or diced avocado for an extra colorful presentation. Your guests will be drawn to this vibrant display, and each bite will taste even better when paired with good company and laughter.
Recipe Variations
Feeling adventurous? Here are a few ways to mix things up:
-
Spicy Twist: Add diced jalapeños to your taco filling for a kick. You can also mix some diced green chilies into your cheese blend for extra flavor.
-
Vegetarian Option: Swap the meat for black beans or sautéed veggies like bell peppers and corn for a hearty vegetarian dish.
-
Different Cheeses: Experiment with Monterey Jack or pepper jack cheese for a creamier or spicier filling. Experimenting is part of the fun!
-
Herb-Infused: Add fresh herbs like cilantro or oregano to the taco mixture for a burst of freshness.
-
Sweet and Savory: Fold in some caramelized onions or even pineapple for a unique twist!
Chef’s Notes
These Cheesy Taco Sticks have evolved over time as I’ve played with different fillings and dough options. I once experimented by using leftover chili as a filling, and let me tell you, it was a hit! It’s one of the great things about cooking: it’s all about creativity and making it your own. They’ve become a staple in my home, serving as a bridge to connect generations through food.
Oh, and don’t be surprised if you find yourself snacking on the filling straight from the skillet! It’s hard to resist that savory goodness!
FAQs and Troubleshooting
1. My taco sticks burst open while baking. What happened?
This usually happens if they were overfilled or not sealed properly. Make sure to press the edges firmly with a fork and avoid overstuffing them.
2. Can I make these ahead of time?
Absolutely! You can assemble the Cheesy Taco Sticks, place them on a baking sheet, cover them tightly with plastic wrap, and refrigerate for a few hours before baking. Add a few extra minutes to the baking time!
3. How do I store leftovers?
If you have any leftovers (highly unlikely, but just in case!), store them in an airtight container in the fridge for up to 3 days. Reheat in the oven or air fryer for best results!
4. What can I serve alongside these?
These pairs wonderfully with a simple side salad, tortilla chips, or even some Mexican rice. It’s a complete meal that’s easy to customize!
Nutritional Info
While I typically focus on taste, I know the nutritional aspect can be important too. Here’s a rough estimate per Cheesy Taco Stick depending on the specific ingredients used:
- Calories: 200-250
- Protein: 12-15g
- Carbohydrates: 20-25g
- Fat: 10-15g
And there you have it, my friend: a delicious adventure into the world of Cheesy Taco Sticks! Cooking should be fun and accessible, and I’m thrilled to be your guide. So tie on that apron, gather your ingredients, and let’s create some memorable moments around your table! Happy cooking!
PrintCheesy Taco Sticks

A flavorful twist on classic tacos and pizza, these Cheesy Taco Sticks combine savory ground beef, zesty seasoning, and gooey cheese wrapped in warm pizza dough.
- Prep Time: 15 minutes
- Cook Time: 20 minutes
- Total Time: 35 minutes
- Yield: 4 servings 1x
- Category: Appetizer
- Method: Baking
- Cuisine: Mexican
- Diet: Omnivore
Ingredients
- 1 lb ground beef (or turkey)
- 1 packet taco seasoning
- 1 cup shredded cheese (cheddar or Mexican blend)
- 1 package refrigerated pizza dough
- Salsa (for dipping)
- Sour cream (for dipping)
- Chopped green onions (optional, for garnish)
Instructions
- Preheat your oven to 375°F (190°C).
- Cook the ground beef in a skillet over medium-high heat until browned, about 7-10 minutes.
- Season the meat with taco seasoning, add 1/3 cup of water, and simmer for 3-5 minutes.
- Prepare your pizza dough by rolling it out on a lightly floured countertop.
- Assemble by cutting the dough into rectangles, adding taco filling and cheese to one half.
- Seal the edges by folding the dough over and pressing it with a fork.
- Bake for 15-20 minutes until golden brown.
- Serve with salsa and sour cream.
Notes
Feel free to customize with different fillings and dips. These can be made ahead of time and stored in the fridge.
Nutrition
- Serving Size: 1 stick
- Calories: 200
- Sugar: 1g
- Sodium: 600mg
- Fat: 12g
- Saturated Fat: 5g
- Unsaturated Fat: 7g
- Trans Fat: 0g
- Carbohydrates: 25g
- Fiber: 2g
- Protein: 15g
- Cholesterol: 40mg
Keywords: taco sticks, cheesy snacks, comfort food, easy appetizers, game day recipes
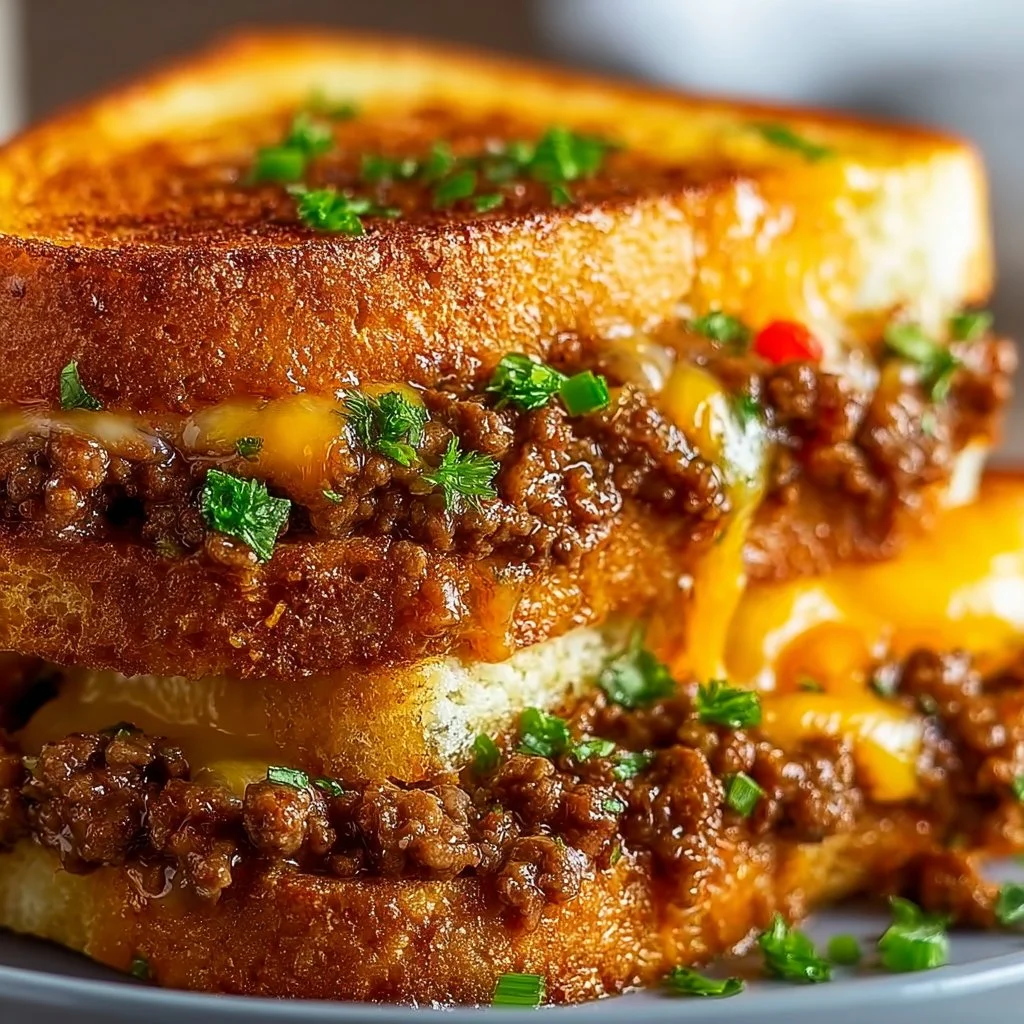
Ultimate Cheesy Ground Beef Melt
The Ultimate Cheesy Ground Beef Melt: A Comfort Food Classic
Introduction
Hello, culinary adventurers! I’m so excited you’re joining me today because we’re diving into one of my absolute favorite comfort food recipes: the Ultimate Cheesy Ground Beef Melt. It’s exactly what it sounds like—juicy, flavorful ground beef meeting a melty, gooey blanket of cheese all encapsulated in toasty bread. Yum, right?
There’s something so nostalgic about biting into a warm, cheesy melt that transports you back to those carefree days when dinner was simply about comfort, love, and the people gathered around the table. Whether you’re whipping this up for a weeknight meal, a cozy lunch, or a fun dinner party, this dish is sure to impress while still keeping things stress-free.
Now, let’s dive right in! I’ll share a personal story that showcases why this dish brings me joy, then take you through every step of the process, share chef tips, and sprinkle in a few fun variations that can personalize your melt. So, tie on your apron and let’s get cooking!
My Personal Story
When I think of the Ultimate Cheesy Ground Beef Melt, I’m transported back to my childhood kitchen, where my mom would host her “cheesy nights.” One evening, after a long day at school, I rushed home, my stomach growling in anticipation of the delightful aroma that filled our little home. My mom had whipped up this incredible ground beef dish, but the best part was watching her melt layers of gooey cheese over the top, transforming an everyday meal into something truly special.
We would sit around the kitchen table, my siblings and I, our plates piled high, laughter echoing against the walls as we shared stories from our day. Each bite was an explosion of flavor with the savory beef, the aromatic garlic and onions, and that melted cheese that stretched so beautifully—food that felt like a warm hug.
This simple yet fantastic recipe became a family staple, a tradition that I carry to this day. Whenever I prepare it now, I often find myself reminiscing, passing on the same warmth and joy to whoever joins me around the table. Trust me, my friends, once you taste this dish, it’ll weave its way into your own heart just like it did mine.
Ingredients
Before we get started, let’s round up our ingredients! Here’s what you’ll need for the Ultimate Cheesy Ground Beef Melt:
-
Ground Beef (1 lb): This is the star of the dish! I love using a higher fat content (80/20) for the juiciest results. For a healthier option, you can substitute it with ground turkey or chicken, but be careful not to dry it out.
-
Cheese (2 cups, shredded): Cheddar is my go-to for that sharpness, but mozzarella, Monterey Jack, or a melting blend can also do the trick. The creamier, the better!
-
Bread (4 slices or burger buns): Choose your favorite! Sandwich bread for a classic melt or burger buns for a heartier version. If you want a gluten-free alternative, look for gluten-free bread options or lettuce wraps.
-
Onion (1, diced, optional): Adds a lovely sweetness and complexity. If you’re not a fan, skip it, or swap in caramelized onions for a richer flavor.
-
Garlic (2 cloves, minced, optional): Fresh garlic brings that beautiful aromatic flavor. Feel free to substitute with garlic powder if you’re in a pinch!
-
Seasonings (Salt, pepper, paprika): Basic but essential! Salt enhances all the flavors, pepper adds a nice kick, and paprika tones it all down with a smokiness.
-
Butter or Oil (2 tbsp): For toasting the bread to perfection. You can choose olive oil for a lighter option or keep it classic with butter.
Step-by-Step Instructions
Now that we have everything ready, let’s get into the cooking! You won’t believe how simple this is to whip up. Follow these steps, and you’ll soon be savoring your cheesy creation.
-
Prep Your Ingredients: Begin by gathering all your ingredients. Chop that onion and mince your garlic, if you’re using them. Keeping everything within reach makes cooking much smoother and more enjoyable!
-
Cook the Ground Beef: In a large skillet, heat a tablespoon of butter or olive oil over medium-high heat. Once hot, add your ground beef, breaking it up with a spatula. Season it with salt, pepper, and paprika. Cook until browned, about 6-8 minutes, stirring occasionally. Don’t rush this step; you want all that flavor to develop! If you see excess fat, consider draining it off to avoid a greasy melt.
-
Add the Aromatics: If you’re using onions and garlic, now’s the time! Toss them in with the beef and let them sauté for about 3-4 minutes until the onions become translucent and the garlic smells heavenly. It’s like an instant flavor boost!
-
Melt the Cheese: Lower the heat to medium and sprinkle your cheese over the beef, covering it generously. Cover the skillet with a lid to let that cheese melt and become oozy, about 2-3 minutes. This is where the magic happens!
-
Toast the Bread: While your beef and cheese conjoin in cheesy harmony, heat another skillet or panini press with a little more butter or oil. If you’re using sandwich bread, take each slice or bun, and lightly brown them on both sides until golden and crispy—heavenly!
-
Assemble Your Melts: Now, take the toasted bread and pile on that flavorful beef and oozy cheese combo. Top it off with another slice of your crispy bread, creating a delicious sandwich that’s begging to be devoured.
-
Final Toasting: For extra melty goodness, consider grilling your assembled sandwiches in the same skillet over medium heat for a couple of minutes on each side until they’re golden brown and crisp. Nothing beats a perfectly toasted melt!
-
Slice and Serve: Once it’s all golden and cheesy, carefully slice those beauties in half. Feel free to get extra creative with your plating—maybe add a side of fresh greens or crispy fries for an indulgent touch!
Serving Suggestions
When serving your Ultimate Cheesy Ground Beef Melt, think of fun, hearty sides! A crisp salad with a tangy vinaigrette perfectly balances the richness of the melt, or consider some sweet potato fries for that added crunch. If you’re feeling adventurous, a touch of salsa or guacamole can elevate your melt to a whole new level!
Recipe Variations
Now for the fun part—personalizing your melt! Here are a few creative twists and flavor options to spice things up:
-
Spicy Kick: Add some diced jalapeños or a few dashes of hot sauce to bring on the heat.
-
Mushroom Delight: Sauté some mushrooms alongside the onions and garlic for an earthy component that pairs beautifully with beef and cheese.
-
Veggie Substitute: Incorporate lentils or black beans instead of beef for a vegetarian twist, maintaining that cheesy goodness.
-
Sourdough Bread: For a tangy, chewy texture, try sourdough bread instead of classic sandwich bread. The flavor combination is simply divine!
-
Herb Infusion: Fresh herbs like thyme or rosemary can give your melt a lovely aromatic flair. Just chop some finely and mix them in when cooking the beef.
Chef’s Notes
Oh, the stories I could tell about my cheesy nights gone awry! I once invited friends over for a “cheesy melt night,” only to realize I had burnt the first batch so badly it resembled charcoal. The laughter that erupted made it all worth it, but I learned the hard way to keep an eye on those toasting sandwiches! Since then, I’ve become a pro at keeping my kitchen timer handy.
I’ve also evolved the recipe over time, playing with the kind of cheese and seasonings until I landed on this dreamy combination. I genuinely believe that cooking should be fun and that experimenting in the kitchen can lead to delightful surprises!
FAQs and Troubleshooting
-
Why is my cheese not melting?
It can happen! Make sure you’re using a cheese known for melting, like cheddar or mozzarella. Covering the pan can also help trap in the heat for that gooey texture. -
Can I use a different type of meat?
Absolutely! Ground turkey or chicken work well too. Just remember to adjust seasoning and moisture, as lean meats can sometimes become dry. -
What if my bread is getting too brown before the cheese melts?
If you notice the bread browning too quickly, simply lower the heat. Alternatively, you can cover the skillet briefly to help the cheese melt while preventing the bread from getting overly crispy. -
Can I make this dish in advance?
Sure! You can prepare the ground beef mixture ahead and store it in the fridge. When you’re ready to eat, just reheat it, add cheese, and assemble the melts.
Nutritional Info
You might be curious about the nutritional breakdown. While this recipe is rich and indulgent, each melt can provide around 400-500 calories, depending on the ingredients used. If you’re counting calories, you can go light on bread and cheese or add more veggies to keep it balanced.
Now that you’re equipped with this Ultimate Cheesy Ground Beef Melt recipe, I hope you feel inspired to gather your loved ones, share some laughs, and create memorable meals. Remember, cooking should be joyful—just as much about the experience as the outcome. Happy cooking, friends!
PrintUltimate Cheesy Ground Beef Melt

A comforting and indulgent ground beef melt topped with gooey cheese and toasted bread, perfect for any meal.
- Prep Time: 15 minutes
- Cook Time: 20 minutes
- Total Time: 35 minutes
- Yield: 4 servings 1x
- Category: Main Course
- Method: Grilling
- Cuisine: American
- Diet: None
Ingredients
- 1 lb Ground Beef
- 2 cups Cheese (shredded)
- 4 slices Bread or burger buns
- 1 Onion (diced, optional)
- 2 cloves Garlic (minced, optional)
- Salt (to taste)
- Pepper (to taste)
- Paprika (to taste)
- 2 tbsp Butter or Oil
Instructions
- Prep your ingredients by gathering everything and chopping onion and mincing garlic if using.
- Cook the ground beef in a skillet over medium-high heat for 6-8 minutes until browned, seasoning with salt, pepper, and paprika.
- Add the onions and garlic to the beef and sauté for about 3-4 minutes until onions become translucent.
- Melt the cheese over the beef, covering the skillet with a lid for 2-3 minutes until oozy.
- Toast the bread in another skillet or panini press until golden and crispy.
- Assemble the melts by piling the beef and cheese on the toasted bread and topping with another slice.
- Final toasting of the sandwiches for an additional few minutes on each side until golden brown.
- Slice and serve your melts with preferred sides.
Notes
For a healthier option, substitute ground beef with turkey or chicken. Consider adding mushrooms, jalapeños, or herbs for a twist!
Nutrition
- Serving Size: 1 sandwich
- Calories: 450
- Sugar: 2g
- Sodium: 600mg
- Fat: 25g
- Saturated Fat: 12g
- Unsaturated Fat: 10g
- Trans Fat: 0g
- Carbohydrates: 30g
- Fiber: 2g
- Protein: 25g
- Cholesterol: 80mg
Keywords: ground beef, cheesy melt, comfort food, sandwiches, easy recipes
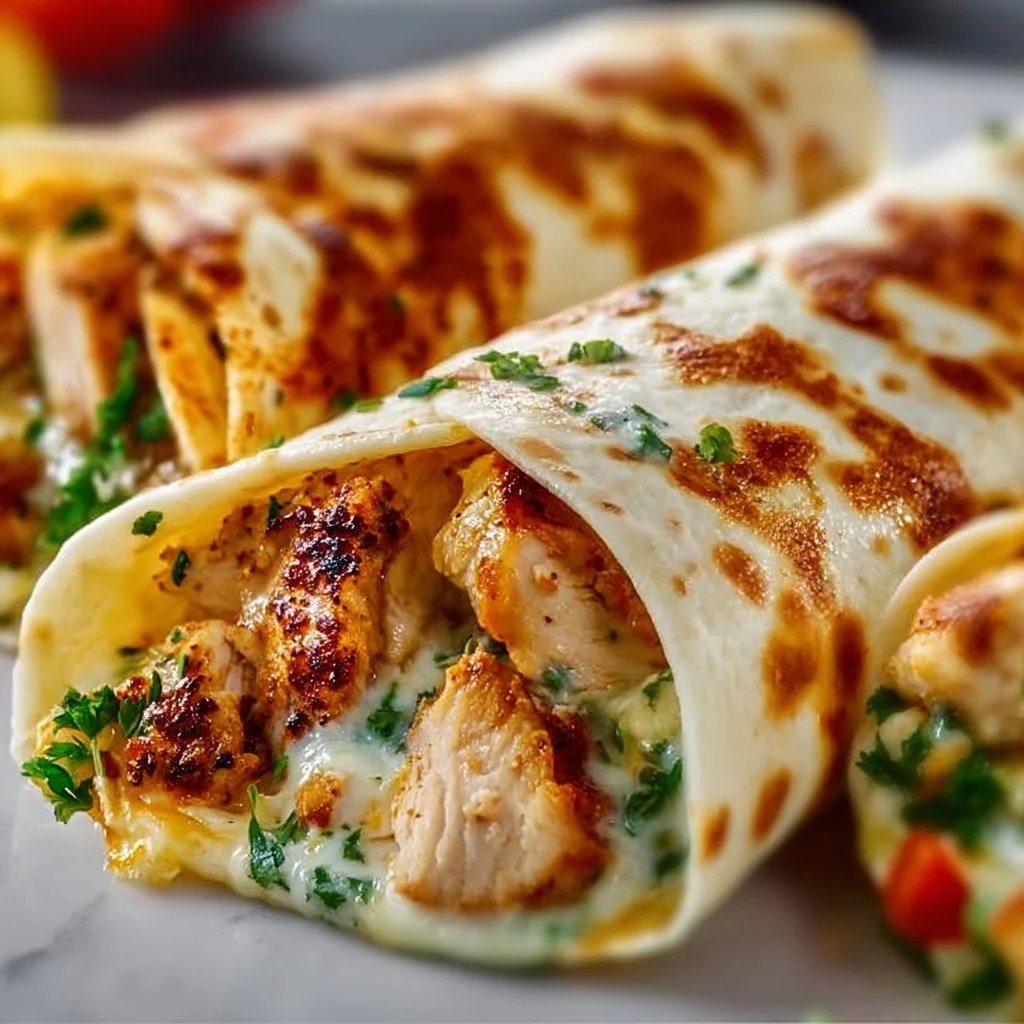
Cheesy Garlic Chicken Wraps
Cheesy Garlic Chicken Wraps: Elevate Your Snack Game!
Hey there, fellow food enthusiast! 🌟 Today, we’re diving into the delicious world of Cheesy Garlic Chicken Wraps — a dish that’s both simple and scrumptious! Imagine crispy, garlicky goodness wrapped up in a warm embrace of melted cheese, tender chicken, and fresh veggies. Sounds dreamy, right? Whether you’re preparing a quick lunch, a satisfying snack, or a showstopper for your next gathering, these wraps will not only please your palate but also fill your home with mouthwatering aromas.
Now, I know what you might be thinking: “Isn’t cooking something elaborate or fancy?” But trust me, cooking can be elegant without the intimidation factor. I started my cooking journey with simple ingredients, and these wraps are a prime representation of that ethos. They’re a perfect fusion of flavors with a kick of garlic, and they come together faster than you can say “Cheesy Garlic Chicken”!
So, grab your apron, pull on some tunes, and let’s start whipping up these fabulous wraps. With just a few ingredients, you’ll create a meal that feels like a restaurant experience right at your kitchen table. Ready? Let’s get cooking!
Personal Story
One of my fondest culinary memories goes back to my early days of hosting friends for movie nights. I was always looking for that perfect finger food, something that would impress while still being comfortable and cozy. That’s when these Cheesy Garlic Chicken Wraps entered the scene!
I remember one particular rainy Friday evening, the kind that screams for comfort food and a good flick. I had just finished up a long week and wanted to unwind with a warm dish that felt like a giant hug. I slathered garlic and shredded chicken into wraps and baked them until crispy. The aroma alone was enough to get my friends excited! As we gathered around the living room, munching on those ooey-gooey wraps, I realized that food isn’t just about sustenance — it’s about creating moments and memories. Laughing, sharing stories, and enjoying each bite, we quickly knew that these wraps would be a recurring favorite for all future get-togethers.
That experience taught me a valuable lesson: It’s the simplest recipes that often hold the most significance. So, let’s bring that magic to your kitchen!
Ingredients
To create these delightful wraps, you’ll need the following ingredients:
-
2 cups cooked chicken, shredded
Whether it’s rotisserie chicken for convenience or leftover grilled chicken from last night, this ingredient is your protein base. Got leftover turkey? Perfect switch! -
1 cup shredded cheese (cheddar or mozzarella)
Cheddar offers a sharpness that blends wonderfully with garlic, while mozzarella brings that gooey stretchiness we all crave. Want to spice it up? Try pepper jack for a kick! -
4 large lettuce leaves or low carb wraps
If you’re aiming for a low-carb option, go for lettuce for a fresh touch. Prefer something heartier? Whole wheat or spinach wraps work beautifully! -
3 cloves garlic, minced
Garlic adds an unbeatable flavor punch! If you’re garlic-shy, feel free to scale back, but remember — good garlic makes everything better! -
1 tablespoon olive oil
This helps to sauté the garlic and chicken, enhancing the flavor. Don’t have olive oil? Use melted butter or avocado oil — both will lend a rich taste! -
Salt and pepper, to taste
Seasoning is key! Play with your palate — add more salt, or toss in some Italian seasoning for an aromatic twist.
Step-by-Step Instructions
Get ready to bring those flavors to life! Follow these steps, and you’ll be devouring Cheesy Garlic Chicken Wraps in no time!
-
Preheat your oven: Set it to 375°F (190°C). This is where the magic begins!
-
Sauté the garlic: In a large skillet, heat the olive oil over medium heat. Add the minced garlic and sauté for about 1-2 minutes until fragrant. Be careful not to burn it; burnt garlic can taste bitter!
-
Add the chicken: Toss the shredded chicken into the skillet. Stir to combine and coat the chicken in the garlicky goodness. Let it heat through for about 3-5 minutes. Be sure to season it with salt and pepper; this is the moment to layer in those flavors!
-
Make the cheese meld: When the chicken is heated thoroughly, sprinkle the shredded cheese on top. Cover the skillet with a lid to allow the cheese to melt — this should take about 2-3 minutes. If you don’t have a lid, simply lower the heat and keep an eye on it!
-
Build your wraps: Take your lettuce leaves or low-carb wraps and lay them flat on a clean surface. Spoon the cheesy chicken mixture onto the center of each leaf or wrap.
-
Wrap it up: Fold the sides of the wrap over the filling and then roll it up from the bottom. If using lettuce leaves, you can use toothpicks to hold them together, making them easier to grab!
-
Bake for a crispy finish: Arrange the wraps on a baking sheet and pop them in the oven for about 5-10 minutes, just until the edges are lightly crispy and golden. If you want extra crispy, turn on the broiler for the last minute — but keep a close eye!
-
Serve and enjoy: Remove from the oven, let cool for a minute, and enjoy them as they are or with your favorite dipping sauce — ranch, salsa, or garlic aioli, perhaps?
Serving Suggestions
Plating is the final touch to elevate your wraps! Arrange your Cheesy Garlic Chicken Wraps on a platter with a sprinkle of fresh parsley or a drizzle of balsamic glaze for a little flair. Serve with a side of fresh veggies or a simple salad for a delightful balance.
For an extra pop, serve them with small bowls of dipping sauces — think garlic aioli, zesty sour cream, or spicy salsa. This interactive element not only excites your guests but allows them to customize their bites!
Recipe Variations
Feel like shaking things up? Here are some creative twists you can try:
-
Buffalo Chicken Wraps: Add a few tablespoons of your favorite hot sauce to the chicken mixture for a spicy kick.
-
Veggie-Packed Wraps: Add sautéed peppers and onions for added color and crunch, or toss in some spinach for an extra boost of nutrients.
-
Herbed Chicken: Infuse fresh herbs like thyme, basil, or cilantro into the chicken while sautéing for a refreshing twist.
-
Cheesy Spinach & Artichoke Wraps: Stir in some chopped artichoke hearts and fresh spinach before wrapping for a creamy, decadent alternative.
Chef’s Notes
Each time I make these wraps, I’m reminded of that cozy movie night with friends. It’s funny how food can transport us back in time! Over the years, I’ve tweaked this recipe many times, experimenting with different cheeses and proteins. Sometimes I even sneak in some roasted veggies — why not? It’s all about creativity and adapting to what you have available in your kitchen.
Pro tip? These wraps are excellent for meal prep! Make a double batch, store them in the fridge, and you’ve got a quick meal ready to reheat at a moment’s notice. You can even enjoy them cold — they’re that delicious!
FAQs and Troubleshooting
1. What’s the best way to store leftovers?
Place any leftover wraps in an airtight container in the fridge. They are best enjoyed within 2-3 days. Reheat them in the oven for best results.
2. Can I freeze these wraps?
Absolutely! Assemble them, but don’t bake before freezing. Once they’re frozen, you can bake them straight from the freezer — just add a few extra minutes to the cooking time.
3. How can I avoid soggy wraps?
Ensure your wraps are squeezed dry after washing and avoid over-saturating them with sauces before baking. If using lettuce, keep them cold until you’re ready to serve.
4. Can I substitute the chicken with another protein?
For sure! This recipe works wonders with turkey, shrimp, or even tofu for a vegetarian option. Just remember to adjust your cooking times as needed.
Nutritional Info (Optional)
While I don’t have the exact nutritional breakdown for these wraps, they are packed with protein from the chicken and healthy fats from the olive oil. Think of it this way: with a balance of protein, veggies, and healthy fats, you’re nourishing both your body and soul.
And there you have it! A delightful, approachable recipe for Cheesy Garlic Chicken Wraps that’s sure to become a regular feature in your culinary adventures. Cooking is not just about the food on your plate; it’s about the love and memories we create along the way. So, gather those around you, celebrate the art of sharing a meal, and enjoy every bite!
Happy cooking, and welcome to the wonderful world of Ivory Apron! 🍽️
PrintCheesy Garlic Chicken Wraps

Delicious wraps filled with cheesy garlic chicken, fresh veggies, and baked to crispy perfection.
- Prep Time: 10 minutes
- Cook Time: 15 minutes
- Total Time: 25 minutes
- Yield: 4 servings 1x
- Category: Snack
- Method: Baking
- Cuisine: American
- Diet: High Protein
Ingredients
- 2 cups cooked chicken, shredded
- 1 cup shredded cheese (cheddar or mozzarella)
- 4 large lettuce leaves or low carb wraps
- 3 cloves garlic, minced
- 1 tablespoon olive oil
- Salt and pepper, to taste
Instructions
- Preheat your oven to 375°F (190°C).
- Sauté the garlic in olive oil over medium heat for 1-2 minutes until fragrant.
- Add the shredded chicken to the skillet and season with salt and pepper. Heat through for 3-5 minutes.
- Make the cheese meld by sprinkling it on top and covering the skillet for 2-3 minutes.
- Build your wraps by placing the cheesy chicken mixture on the lettuce leaves or wraps.
- Wrap them up and secure with toothpicks if using lettuce.
- Bake in the oven for 5-10 minutes until crispy and golden.
- Serve and enjoy with your favorite dipping sauces!
Notes
For a spicier version, add hot sauce to the chicken mixture. These wraps are great for meal prep and can be frozen before baking.
Nutrition
- Serving Size: 1 serving
- Calories: 450
- Sugar: 1g
- Sodium: 350mg
- Fat: 20g
- Saturated Fat: 8g
- Unsaturated Fat: 9g
- Trans Fat: 0g
- Carbohydrates: 20g
- Fiber: 2g
- Protein: 30g
- Cholesterol: 70mg
Keywords: cheesy wraps, garlic chicken, easy snacks, meal prep, baked wraps