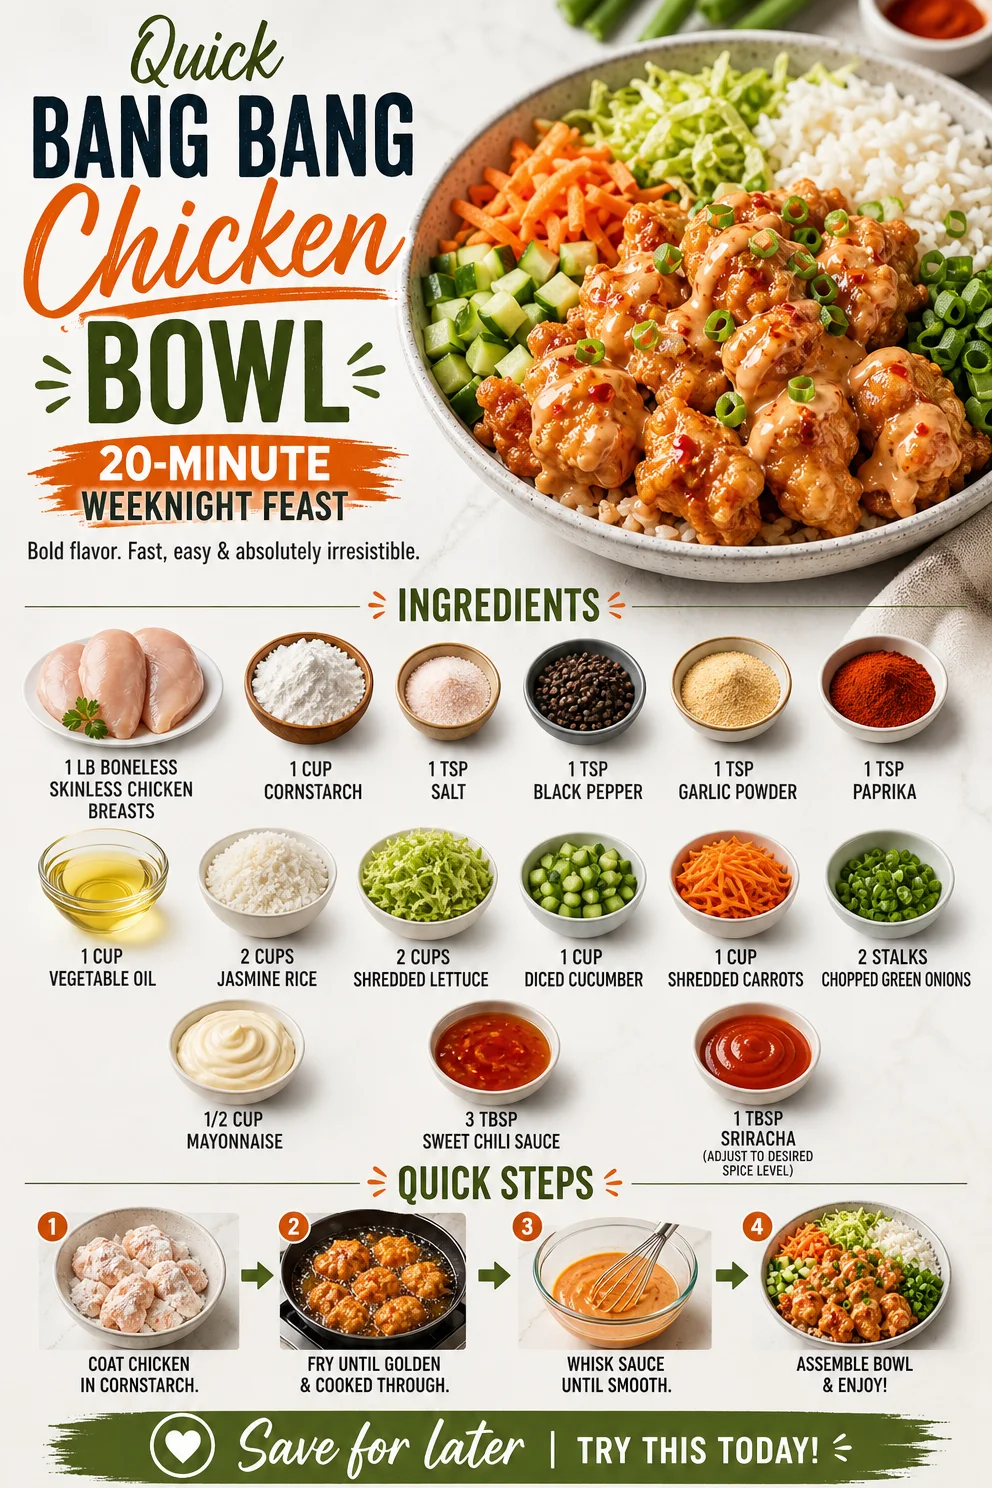
Quick Bang Bang Chicken Bowl: 20-Minute Weeknight Feast
Savor Every Bite of This Bang Bang Chicken Bowl Delight
Hello, my culinary friends! If you’re looking to infuse your dinner routine with a delightful twist, you’ve landed in the right space! Today we’re whipping up a dish that’s not only bursting with flavor but also beautifully satisfying—it’s my Bang Bang Chicken Bowl! This dish brings a touch of fun and excitement to your table while keeping the process approachable and enjoyable.
Now, let me tell you, every time I make this dish, I’m transported back to those vibrant summer evenings spent with my family, gathered around the grill, the air thick with different aromas, laughter, and stories. This dish not only reminds me of those joyful times but also embodies the core of what cooking means to me: connection, love, and a little bit of adventure.
Bang Bang Chicken is a dish that’s both spicy and sweet, the perfect combination to tantalize your taste buds and leave you reaching for more. Think crispy, succulent chicken tossed in a sauce that packs a flavorful punch, all layered atop a bed of fluffy jasmine rice and fresh veggies. Each ingredient plays its distinct role, working together to create something wonderful.
Are you ready to embark on this culinary journey with me? Let’s dive into the deliciousness of this Bang Bang Chicken Bowl and savor every single bite!
Personal Story
One of my fondest memories tied to this dish takes me back to a summer trip with friends—a mini getaway that turned into an unforgettable culinary adventure. We rented a lakeside cabin and spent our days swimming, hiking, and of course, cooking! One evening, I decided to whip up a version of Bang Bang Chicken to share around our picnic table.
I remember marinating the chicken while my friends munched on snacks and debated whether pineapple belongs on pizza (it definitely does, by the way!). The sun dipped low in the sky, glowing orange—just like the crispy chicken I envisioned. The atmosphere swelled with anticipation and laughter, and as we feasted on the bowl of goodness, we shared stories about everything from high school crushes to dreams for the future. That meal reflected our bond, and each bite was laced with joy and friendship.
Today, every time I prepare a Bang Bang Chicken Bowl, I think of that beautiful evening filled with laughter and connection. I hope to inspire the same warmth and togetherness in your kitchen!
Ingredients
To create your own Bang Bang Chicken Bowl, gather these ingredients:
-
1 pound Boneless Skinless Chicken Breasts
This is the star of the show! For a different texture, feel free to swap it out for shrimp or tofu for a plant-based option. -
1 cup Cornstarch
Coating the chicken generously ensures a wonderfully crispy exterior. Don’t skip this; it’s key to that crunch! -
1 teaspoon Salt
Salt enhances flavor—it’s a must! Feel free to adjust to your taste preference. -
1 teaspoon Black Pepper
For a bit of kick! Use fresh cracked pepper for an extra aromatic boost. -
1 teaspoon Garlic Powder
It adds depth and warmth to the dish. Fresh minced garlic could be more potent if you’re feeling adventurous! -
1 teaspoon Paprika
This spice brings a mild smokiness and vibrant color. Swap in smoked paprika for a deeper flavor! -
1 cup Vegetable Oil
For frying! Heat thoroughly before adding the chicken for optimal crispiness. Peanut oil is a delightful alternative. -
2 cups Jasmine Rice
This fluffy rice is fragrant and comforting. Brown rice or quinoa can be healthier substitutes that still deliver on taste! -
2 cups Shredded Lettuce
For crunch! Other greens like arugula or spinach could add a different flair—go green! -
1 cup Diced Cucumber
A refreshing contrast to the warm chicken. Feel free to play with other crunchy veggies like bell peppers! -
1 cup Shredded Carrots
These not only add sweetness but also color and nutrition. Mix in colorful veggies for a vibrant dish! -
2 stalks Chopped Green Onions
For a fresh pop of flavor! It adds a lovely garnish, too. Shallots or chives would also work well. -
1/2 cup Mayonnaise
Creaminess all around! Swap with non-fat mayonnaise or Greek yogurt for a lighter option mantaining the flavor. -
3 tablespoons Sweet Chili Sauce
It lends that iconic sweetness with a touch of spice. You could even jazz it up with homemade versions! -
1 tablespoon Sriracha
Adjust it to your spice level! Use chili garlic sauce for tangy flavor or omit it for a milder experience.
Step-by-Step Instructions
Now that we have our ingredients ready, let’s dive into the delightful process of making this Bang Bang Chicken Bowl!
-
Prepare the Chicken:
Start by trimming any excess fat from your boneless skinless chicken breasts. Cut them into bite-size pieces, making sure they’re roughly equal for even cooking. This is a great time to add a pinch of salt and pepper for an initial flavor kick! -
Coat in Cornstarch:
In a shallow bowl, pour the cornstarch. Dredge each piece of chicken in the cornstarch until they are fully coated. This step is essential for achieving that glorious crunch! Let them rest for a few minutes while you heat the oil. -
Heat the Oil:
In a deep skillet or frying pan, pour in the vegetable oil. Heat it over medium-high heat until shimmering. If you’re unsure, you can test a small piece of chicken—if it sizzles when added, you’re good to go! Remember, hot oil is your friend for crispy chicken. -
Fry the Chicken:
Once the oil is hot, carefully add the chicken pieces in a single layer (don’t overcrowd the pan!). Fry until golden brown on one side, then flip to cook the other side, usually about 5-7 minutes total. You want that gorgeous golden crust! Use a slotted spoon to remove the chicken and place it on a plate lined with paper towels to absorb excess oil. -
Make the Sauce:
In a mixing bowl, combine the mayonnaise, sweet chili sauce, and sriracha. Whisk until smooth and creamy—this is where the magic happens! Adjust the sriracha based on how spicy you want it; a little goes a long way! -
Toss the Chicken:
In a large bowl, gently toss your crispy chicken with the sauce until well-coated. The beautiful thing about this dish is the balance of flavors; you want each piece to have a nice glaze without drowning in sauce! -
Prepare the Rice:
While the chicken is frying, cook your jasmine rice according to the package instructions. For added flavor, consider simmering the rice in chicken broth instead of water! -
Assemble the Bowls:
Once your rice is fluffy and the chicken is coated, it’s time to assemble. Start with a base of jasmine rice, top it with the saucy chicken, and add a handful of shredded lettuce, diced cucumber, and carrots. Garnish with chopped green onions for that fresh lift!
Serving Suggestions
To plate your Bang Bang Chicken Bowl, start with a generous scoop of jasmine rice in a deep bowl. Top it with a good portion of that luscious chicken, then layer on the fresh veggies, ensuring a pop of color and crunch. Serve immediately while everything is still warm, and don’t forget a drizzle of extra sauce on top if you’re feeling adventurous!
Recipe Variations
Here are a few fun twists to keep things interesting:
- Sweet and Spicy Twist: Add a pinch of crushed red pepper flakes to the sauce for an extra kick!
- Crispy Tofu Version: Swap chicken for cubes of crispy tofu for a satisfying vegetarian option.
- Grilled Chicken Bowls: Try grilling your marinated chicken for a smoky flavor—a game changer!
- Zoodle Alternative: Swap out rice for zucchini noodles if you’re feeling fancy and want a low-carb twist!
Chef’s Notes
This Bang Bang Chicken Bowl truly reflects my culinary philosophy: elevate comfort food while making it approachable. I remember the first time I shared this dish at a dinner party—it disappeared in minutes! Over the years, I’ve played with textures and flavor profiles, and each tweak has only made this dish feel more like home.
Another fun fact? My friends keep suggesting I go into business with this dish; the demand is real! Every time I make it, I’m reminded of the joy it brings to everyone at my table, and I love sharing those moments with you all.
FAQs and Troubleshooting
1. Why is my chicken not crispy?
Ensure your oil is hot enough before frying. If the oil isn’t sufficiently warmed, it can cause the chicken to steam instead of fry. Always heat the oil to the point of shimmering before adding your chicken.
2. Can I make the sauce ahead of time?
Absolutely! The sauce can be made in advance and stored in the refrigerator for up to a week. Just give it a good stir before using it!
3. How do I fix overly salty chicken?
If you find your chicken is too salty, try pairing it with additional rice or veggies to balance the flavors. A dollop of creamy sauce can also help mellow things out.
4. What can I serve alongside this dish?
Consider pairing your Bang Bang Chicken Bowl with a light, refreshing salad or some spring rolls for that extra crunch and freshness.
Nutritional Info
(If you’re curious about the nutritional content, just remember that this recipe will vary depending on portion sizes and any modifications you make. However, you can generally expect a good balance of protein from the chicken, carbohydrates from the rice, and essential vitamins from the veggies!)
And there you have it—a delightful Bang Bang Chicken Bowl that brings a flavor explosion to your kitchen! I hope you enjoy this recipe as much as I do. Remember, cooking is about creating beautiful experiences, so gather your loved ones, share your table, and savor every bite! Happy cooking!
PrintBang Bang Chicken Bowl
A delightful twist on dinner with crispy chicken in a flavorful sauce over jasmine rice and fresh veggies.
- Prep Time: 15 minutes
- Cook Time: 30 minutes
- Total Time: 45 minutes
- Yield: 4 servings 1x
- Category: Main Course
- Method: Frying
- Cuisine: Asian
- Diet: Non-Vegetarian
Ingredients
- 1 pound Boneless Skinless Chicken Breasts
- 1 cup Cornstarch
- 1 teaspoon Salt
- 1 teaspoon Black Pepper
- 1 teaspoon Garlic Powder
- 1 teaspoon Paprika
- 1 cup Vegetable Oil
- 2 cups Jasmine Rice
- 2 cups Shredded Lettuce
- 1 cup Diced Cucumber
- 1 cup Shredded Carrots
- 2 stalks Chopped Green Onions
- 1/2 cup Mayonnaise
- 3 tablespoons Sweet Chili Sauce
- 1 tablespoon Sriracha
Instructions
- Prepare the Chicken: Trim any excess fat from the chicken breasts and cut into bite-size pieces. Season with salt and pepper.
- Coat in Cornstarch: Dredge each piece of chicken in cornstarch until fully coated. Let rest while you heat the oil.
- Heat the Oil: Pour vegetable oil into a skillet and heat over medium-high heat until shimmering.
- Fry the Chicken: Carefully add the chicken in a single layer and fry until golden brown, about 5-7 minutes. Use a slotted spoon to remove and drain on paper towels.
- Make the Sauce: In a bowl, mix mayonnaise, sweet chili sauce, and sriracha until smooth.
- Toss the Chicken: Gently combine the fried chicken with the sauce until well-coated.
- Prepare the Rice: Cook jasmine rice according to package instructions, optionally using chicken broth for flavor.
- Assemble the Bowls: Start with a scoop of rice, top with chicken, and add lettuce, cucumber, and carrots. Garnish with green onions.
Notes
Add crushed red pepper flakes for extra heat or substitute chicken with tofu for a vegetarian option.
Nutrition
- Serving Size: 1 serving
- Calories: 450
- Sugar: 6g
- Sodium: 500mg
- Fat: 15g
- Saturated Fat: 2g
- Unsaturated Fat: 10g
- Trans Fat: 0g
- Carbohydrates: 60g
- Fiber: 4g
- Protein: 20g
- Cholesterol: 60mg
Keywords: Bang Bang Chicken, Chicken Bowl, Asian Cuisine, Fried Chicken, Comfort Food
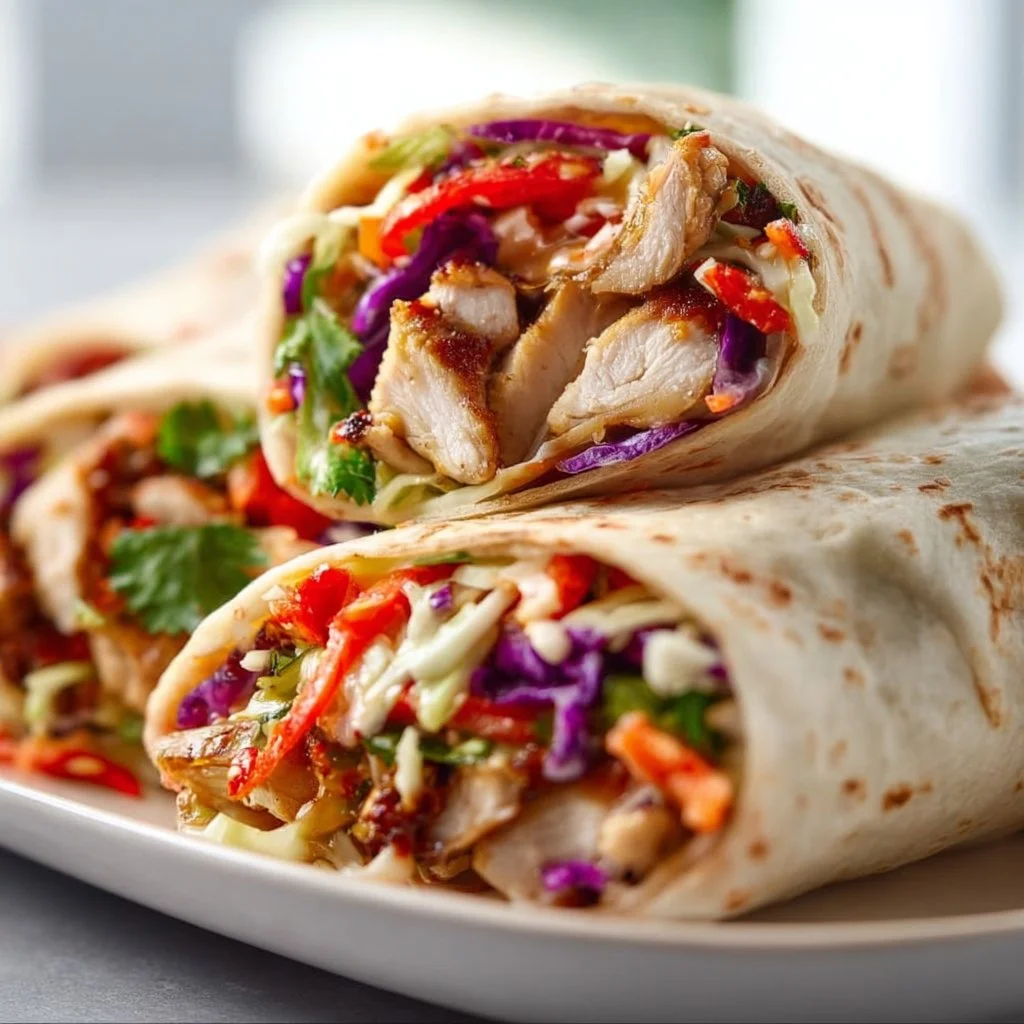
Weeknight Thai Chicken Wraps with Crunchy Asian Slaw
Thai Chicken Wraps with Crunchy Asian Slaw: A Flavor-Packed Adventure
Hello, dear foodies! It’s Savannah from Ivory Apron, and today we’re diving into a deliciously fresh and fun recipe that’s sure to be a hit around your dinner table: Thai Chicken Wraps with Crunchy Asian Slaw! If you’re looking for a dish that’s both vibrant and easy to make, you’ve come to the right place. Let’s get those aprons on because this recipe is sure to impress!
Ah, the joy of wrapping up scrumptious fillings in crisp lettuce or soft tortillas! It’s like a little present waiting to be unwrapped. There’s something so satisfying about creating a meal that’s not just a feast for the stomach but also a visual delight. These Thai Chicken Wraps are not only loaded with flavor, but they also pack a nutrient punch and provide a wonderful crunch thanks to the fresh, colorful slaw.
This dish is perfect for those cozy weeknight dinners or casual get-togethers with friends. Picture this: a warm evening, friends gathered around the table, laughter filling the air, and everyone crafting their own wraps. It’s about connection—and what better way to connect than over a shared meal?
What makes these wraps so special is the contrast of textures and flavors. The tenderness of the shredded chicken mixed with the creamy peanut sauce, combined with the crispness of the slaw, creates a delightful bite that dances on your taste buds. Grab those ingredients, and let’s make it happen!
Personal Story
Whenever I think of wraps, I’m transported back to a sunny summer day spent with my best friends at our favorite picnic spot. We each brought our favorite homemade dishes to share, and I chose to prepare a similar version of these wraps. I remember spreading out the colorful blanket, setting out bowls of fresh veggies, and, of course, my creamy peanut sauce.
As we crafted our own wraps, we swapped stories, laughter, and of course, extra helpings of that delicious sauce! That day was a beautiful reminder of how food brings us all together. The combination of fresh ingredients and vibrant flavors made the meal not just filling but a celebration of friendship and creativity. Ever since then, I’ve been perfecting this recipe, making it a go-to not only for summer picnics but year-round gatherings.
Ingredients
Here’s what you need to whip up these delightful wraps:
-
1 pound cooked chicken, shredded
Use rotisserie chicken for a quick and easy shortcut, or poach chicken breasts for a healthier option. If you’re vegetarian, feel free to swap in some roasted tofu! -
1/2 cup creamy peanut sauce
You can make your own for extra flair; combine peanut butter, soy sauce, honey, and a splash of lime juice. Alternatively, store-bought works just as well! -
4 large lettuce leaves or tortillas
Butter lettuce offers a gentle crunch and wraps beautifully, but any sturdy lettuce or even whole wheat tortillas will do the trick nicely. -
1 cup shredded carrots
They add a lovely sweetness and color. If you’re short on fresh carrots, buy pre-shredded ones in the veggie aisle. -
1 cup red cabbage, shredded
This gives a pop of color and crunch. You can replace it with green cabbage if you prefer a milder flavor or use coleslaw mix for convenience. -
1/2 cup cucumber, sliced
For that refreshing crunch! If cucumbers aren’t your thing, try sliced bell peppers or radishes instead for a peppery kick. -
1/4 cup green onions, chopped
These add a mild onion flavor. You can easily substitute with finely chopped shallots if that’s what you have on hand. -
1 tablespoon soy sauce
Look for low-sodium options if you’re watching your salt intake, or use tamari for a gluten-free option. -
1 tablespoon rice vinegar
This adds a tangy brightness; lemon or lime juice works in a pinch for a similar zing. -
Salt and pepper to taste
Always taste as you go! A little seasoning can elevate the entire dish.
Step-by-Step Instructions
Alright, let’s get cooking! Follow these simple steps to create your Thai Chicken Wraps.
Step 1: Prepare the Chicken
Start with your shredded chicken. If you’re using rotisserie chicken, just shred it directly from the bones into a large mixing bowl. If you’re cooking your chicken, poach it in simmering water or chicken broth until fully cooked (about 15-20 minutes). Then, let it cool slightly before shredding.
Chef Tip: If you season the poaching water with garlic, ginger, and a dash of soy sauce, your chicken will have a lovely depth of flavor straight from the start!
Step 2: Make the Peanut Sauce
In a separate bowl, mix together the creamy peanut sauce and soy sauce. You can adjust the consistency by adding a little water if it feels too thick. Taste and add a splash of rice vinegar for extra tang!
Chef Hack: Need a little kick? Squeeze in a bit of sriracha or chili paste for some heat!
Step 3: Prepare the Veggies
Chop and shred the carrots, cabbage, and cucumbers. Toss them in a bowl, along with the green onions. Add a dash of salt and rice vinegar, and give them a gentle toss to combine.
Tip: Make your slaw ahead of time! This can rest for a short while, allowing the flavors to meld beautifully.
Step 4: Assemble the Wraps
On a clean surface, lay out your large lettuce leaves (or tortillas). Fill each leaf with shredded chicken, then drizzle with peanut sauce. Don’t be shy; the more, the merrier!
Chef Insight: It’s all about the balance! Layer your ingredients so that each bite has a little bit of everything for a flavor explosion.
Step 5: Add the Crunchy Slaw
Pile on the crunchy Asian slaw on top of your chicken and peanut sauce. You want to add enough to give a satisfying crunch without overstuffing.
Step 6: Roll it Up!
Fold the sides in on your lettuce leaves, then roll from the bottom up to encase all those delicious fillings. If using tortillas, it’s similar—fold in the sides, wrap it tightly, and you’re golden!
Fun Fact: If you’re worried about the wrap falling apart, secure it with a toothpick.
Serving Suggestions
For plating, line your wraps beautifully on a large serving platter, surrounded by small bowls of extra peanut sauce for dipping. Garnish with fresh herbs like cilantro or mint for that final touch—trust me, it elevates both the flavor and the presentation!
Recipe Variations
Feeling adventurous? Here are some delightful variations:
- Spicy Thai Chicken: Add sliced jalapeños or a drizzle of hot chili oil for some heat.
- Crunchy Taco Twist: Swap out the traditional ingredients for spiced ground turkey or beef and use tortillas to create a fusion taco wrap.
- Vegan Option: Replace the chicken with chickpeas and make a quick tahini sauce for an exciting new flavor profile.
- Fruit Infusion: Toss in some diced mango or pineapple into your slaw for a refreshing tropical sweetness.
Chef’s Notes
Throughout my culinary journey, I’ve learned that wraps are a canvas for creativity! What started as simple chicken and slaw has evolved into a dish that you can personalize in countless ways. The laughter shared over a thoughtfully constructed wrap is what makes cooking so special. Plus, there’s something so satisfying about watching friends dig into a dish you’ve prepared with love.
And here’s a fun kitchen story for you: My first attempt at these wraps turned into a hilarious mess! I was so excited and wrapped the first lettuce leaf too tightly, resulting in a beautifully exploded filling all over the table. Instead of being frustrated, we renamed that version “open-faced wraps” and laughed about it while we savored every bite. Sometimes, the kitchen adventures that don’t go as planned are the most memorable!
FAQs and Troubleshooting
Q1: My wraps keep falling apart; what can I do?
A: Be sure to choose sturdy lettuce leaves like butter or romaine, which are better for wrapping. If using tortillas, make sure they’re warmed; it makes them more pliable!
Q2: Can I prepare these in advance?
A: Absolutely! You can prep all the ingredients ahead of time—just keep them separately stored to maintain their freshness. Assemble right before serving.
Q3: What if I don’t have peanut sauce?
A: You can substitute with almond butter mixed with a bit of soy sauce and honey for a different twist. Alternatively, a zesty vinaigrette works well too!
Q4: Is this recipe gluten-free?
A: If you use gluten-free soy sauce and lettuce wraps instead of tortillas, you’ll have a gluten-free meal that’s still full of flavor!
Nutritional Info
While I always encourage indulging every now and then, I can assure you these wraps are packed with veggies and lean protein, making them a wholesome choice too. Each wrap can be around 250-300 calories, depending on portion sizes and ingredients used, plus tons of vitamins and minerals from the fresh veggies!
So there you have it—your go-to recipe for Thai Chicken Wraps with Crunchy Asian Slaw! Let’s keep the culinary adventure alive and spread the love around the table. Happy cooking, friends!
Tie your apron, pour yourself something refreshing, and let’s make beautiful memories, one wrap at a time. Thank you for cooking alongside me—can’t wait to hear your stories and see your wraps!
Let’s set the table, shall we?
PrintThai Chicken Wraps with Crunchy Asian Slaw
Enjoy fresh and flavorful Thai Chicken Wraps filled with shredded chicken, creamy peanut sauce, and crunchy Asian slaw, perfect for weeknight dinners or casual get-togethers.
- Prep Time: 15 minutes
- Cook Time: 20 minutes
- Total Time: 35 minutes
- Yield: 4 servings 1x
- Category: Main Course
- Method: Wrap
- Cuisine: Thai
- Diet: Gluten-Free, Dairy-Free
Ingredients
- 1 pound cooked chicken, shredded
- 1/2 cup creamy peanut sauce
- 4 large lettuce leaves or tortillas
- 1 cup shredded carrots
- 1 cup red cabbage, shredded
- 1/2 cup cucumber, sliced
- 1/4 cup green onions, chopped
- 1 tablespoon soy sauce
- 1 tablespoon rice vinegar
- Salt and pepper to taste
Instructions
- Prepare the Chicken: Start with your shredded chicken. If you’re using rotisserie chicken, just shred it directly from the bones into a large mixing bowl. If you’re cooking your chicken, poach it in simmering water or chicken broth until fully cooked (about 15-20 minutes). Then, let it cool slightly before shredding.
- Make the Peanut Sauce: In a separate bowl, mix together the creamy peanut sauce and soy sauce. You can adjust the consistency by adding a little water if it feels too thick. Taste and add a splash of rice vinegar for extra tang!
- Prepare the Veggies: Chop and shred the carrots, cabbage, and cucumbers. Toss them in a bowl, along with the green onions. Add a dash of salt and rice vinegar, and give them a gentle toss to combine.
- Assemble the Wraps: On a clean surface, lay out your large lettuce leaves (or tortillas). Fill each leaf with shredded chicken, then drizzle with peanut sauce.
- Add the Crunchy Slaw: Pile on the crunchy Asian slaw on top of your chicken and peanut sauce.
- Roll it Up! Fold the sides in on your lettuce leaves, then roll from the bottom up to encase all those delicious fillings.
Notes
Feel free to customize with additional veggies or sauces. Enjoy with extra peanut sauce for dipping!
Nutrition
- Serving Size: 1 wrap
- Calories: 300
- Sugar: 5g
- Sodium: 400mg
- Fat: 15g
- Saturated Fat: 2g
- Unsaturated Fat: 10g
- Trans Fat: 0g
- Carbohydrates: 25g
- Fiber: 3g
- Protein: 20g
- Cholesterol: 50mg
Keywords: Thai, Chicken, Wraps, Slaw, Easy Recipe, Healthy Dinner, Gluten-Free
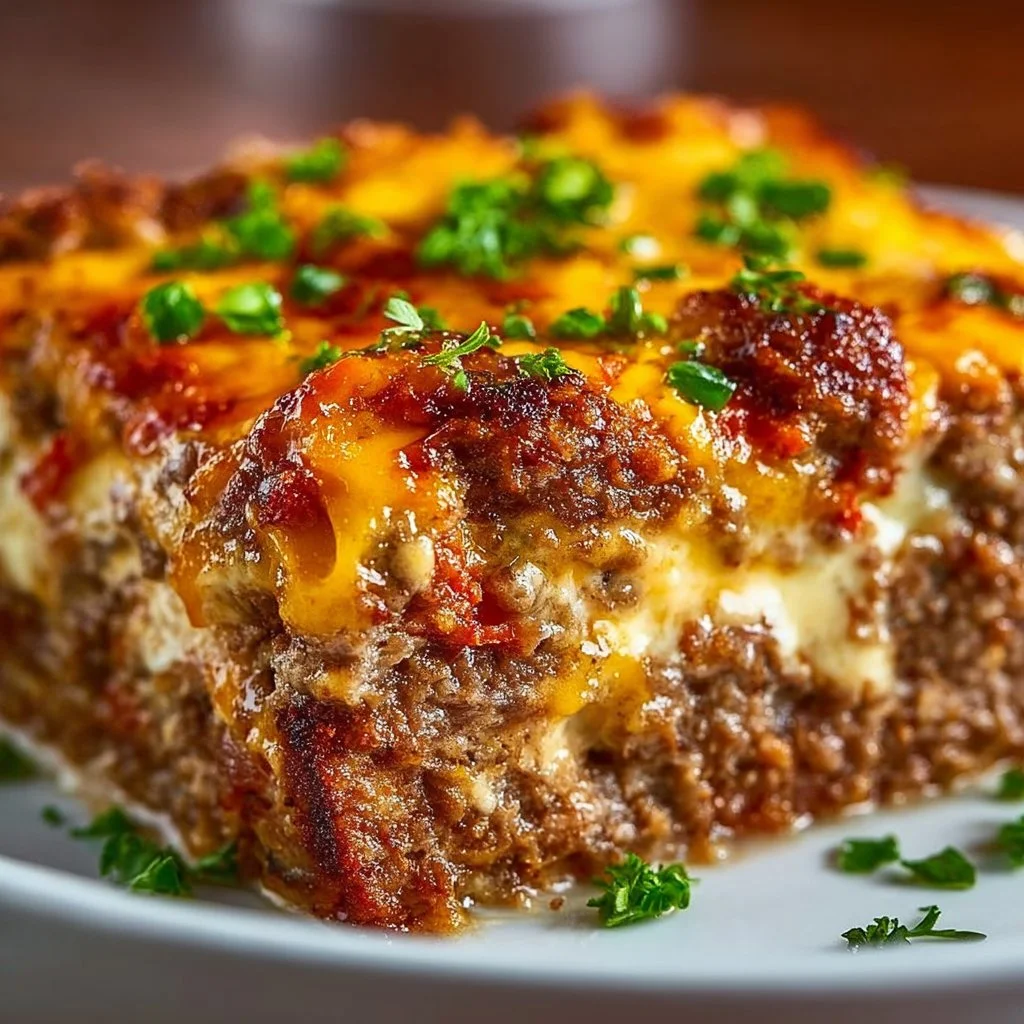
Cheesy Meatloaf Casserole
Cheesy Meatloaf Casserole: A Heartwarming Twist on a Classic Dish
Hello, fellow food lovers! Today, we’re diving into the deliciously comforting world of Cheesy Meatloaf Casserole. This dish is not just a meal; it’s a memory wrapped in layers of cheesy goodness and savory meat. Join me as we explore my cherished connection to this dish, break down the ingredients, and create a concoction that will make your taste buds dance.
Personal Story
Let me take you back to my childhood, where food was more than just sustenance; it was a celebration. I remember bustling around the kitchen with my mom, who had a knack for transforming humble ingredients into heartwarming, family-style meals. One of our favorite comfort foods was her meatloaf, but my favorite memory goes beyond just the loaf itself; it’s about the casserole she would make the next day using the leftovers.
After a hearty Sunday dinner, my mom would turn the uneaten meatloaf into a cheesy casserole during the week. She’d layer it with gooey cheese and sometimes even toss in some extra veggies she had on hand. The best part? The smell wafting through our home as it baked reminded me of the warmth and love that only home-cooked meals can provide. Today, I’m bringing that nostalgia to your kitchen with my Cheesy Meatloaf Casserole — a dish that radiates comfort and love.
Ingredients
Here’s what you’ll need to create this delicious Cheesy Meatloaf Casserole:
-
1 lb ground beef
The star of the show! Look for lean ground beef for a healthier option. You can substitute with ground turkey or plant-based meat for a lighter or vegetarian alternative. -
1 cup shredded cheese (cheddar or mozzarella)
Cheddar gives a rich flavor, while mozzarella adds creaminess. Feel free to mix both or swap them out for your favorite cheese — gouda or pepper jack work wonders, too! -
1 cup bread crumbs
These help bind the meatloaf while adding texture. Panko or gluten-free bread crumbs can be used for a twist! -
1/2 cup milk
This adds moisture to the meat, making it tender. Consider unsweetened almond milk or oat milk for a dairy-free option. -
1/4 cup ketchup
A classic flavor booster! You can swap it for barbecue sauce or even homemade tomato sauce for a richer note. -
1 onion, chopped
Adds aromatic depth. If you’re not a fan, shallots or leeks can give a milder onion flavor. -
2 cloves garlic, minced
Because garlic makes everything better! If you’re short on fresh, 1/2 teaspoon of garlic powder will do. -
Salt and pepper to taste
Essential seasonings! Fresh herbs like thyme or parsley can also elevate the flavors. -
1 teaspoon Italian seasoning
This is my secret weapon! A mix of dried herbs brings warmth and an earthy note. Omit or replace with fresh herbs based on your preference.
Step-by-Step Instructions
Now that we have our ingredients lined up, let’s get started on creating this culinary masterpiece!
-
Preheat Your Oven
Set your oven to preheat at 350°F (175°C). This ensures your casserole will bake evenly. -
Sauté the Aromatics
In a medium skillet, heat a splash of olive oil over medium heat. Add the chopped onion and cook until translucent, about 5 minutes. Then, add the minced garlic and sauté for another minute until fragrant. This step packs your casserole with flavor and creates a delicious aroma.Tip: Don’t rush this step! The golden-brown bits from the onions and garlic add depth to your dish.
-
Mix the Meatloaf Ingredients
In a large bowl, combine the ground beef, bread crumbs, milk, ketchup, sautéed onion and garlic, Italian seasoning, salt, and pepper. Using your hands or a spatula, mix until just combined. Be careful not to overwork the meat, as this can lead to a tough texture.Chef Insight: If you’re feeling adventurous, add a squirt of Worcestershire sauce for extra umami goodness!
-
Shape the Meatloaf
Transfer the mixture to a greased baking dish. Shape it into a loaf, about 8×4 inches. This doesn’t have to be perfect — it’s about the flavor, not the looks! -
Bake the Meatloaf
Place the baking dish in the preheated oven and bake for 45 minutes, or until it reaches an internal temperature of 160°F (71°C).Commentary: While it’s baking, your kitchen will start smelling divine! I recommend using this time to get your favorite side dishes ready or to set the table for dinner!
-
Cheese it Up
Once the meatloaf is done, carefully remove it from the oven. Here comes the best part: sprinkle your shredded cheese generously on top of the meatloaf. Return it to the oven for an additional 10 minutes until the cheese has melted and bubbly. -
Rest and Serve
After removing it from the oven, let the casserole rest for about 10 minutes. This allows the juices to redistribute, making every slice perfect. Slice it up (just like cake!), and serve while warm.
Serving Suggestions
A beautiful plated dish can elevate any meal. For this Cheesy Meatloaf Casserole, I recommend serving slices on a bed of buttery mashed potatoes or alongside a fresh green salad for some contrast. Drizzle a little extra ketchup on top or a homemade gravy if you’re feeling extra indulgent. Remember, presentation adds to the experience!
Recipe Variations
- Make it Spicy: Add diced jalapeños or crushed red pepper flakes for a kick.
- Veggie Boost: Incorporate finely chopped bell peppers or grated carrots into the meat mixture for added nutrition and flavor.
- Herbed Delight: Change the seasoning to a Southwest blend with cumin and chili powder for a unique twist.
- Stuffed Meatloaf: Stuff the center with a combination of spinach and cream cheese before baking for a surprise filling!
Chef’s Notes
This Cheesy Meatloaf Casserole holds a special place in my heart, and it has evolved over the years. It started as a simple way to utilize leftovers, but with a few tweaks, it became a family favorite. I once had a friend over who proclaimed it the "gourmet comfort food." Funny enough, I think they enjoyed it more than the fancy five-course meal I had planned later that week! The beauty of cooking lies in the unexpected moments—embracing the joy of comfort and creativity.
FAQs and Troubleshooting
1. My casserole is too dry! What happened?
This might be due to overbaking. Make sure to check for doneness with a meat thermometer and try adding an extra splash of milk or broth next time.
2. Why didn’t my meatloaf hold together?
Not mixing the ingredients enough or overmixing can lead to a crumbly texture. Aim for a gentle blend and be sure to add enough binder (bread crumbs and milk).
3. Can I make this ahead of time?
Absolutely! You can prep the meatloaf ahead of time, cover it, and store it in the fridge for up to 24 hours before baking.
4. How can I make this gluten-free?
Substitute the bread crumbs with gluten-free alternatives, like crushed gluten-free crackers or gluten-free oats.
Nutritional Info
While Cheesy Meatloaf Casserole is meant primarily for enjoyment, it’s always helpful to know the basics. Each serving roughly contains:
- Calories: 350
- Protein: 25g
- Carbohydrates: 20g
- Fat: 20g
Feel free to adjust ingredients to fit your dietary needs!
Conclusion
Cooking is a journey filled with stories, flavors, and shared moments. My Cheesy Meatloaf Casserole is a testament to the beauty of creating comforting, delicious meals that bring people together. Whether you’re sharing it with friends, family, or simply treating yourself, I hope you find joy in every bite. So tie on your apron, gather your ingredients, and let’s create something special in your kitchen today. Happy cooking!
PrintCheesy Meatloaf Casserole

A heartwarming twist on a classic dish, combining the comforting flavors of meatloaf with gooey cheese in a delicious casserole.
- Prep Time: 15 minutes
- Cook Time: 55 minutes
- Total Time: 70 minutes
- Yield: 4 servings 1x
- Category: Main Course
- Method: Baking
- Cuisine: American
- Diet: Paleo
Ingredients
- 1 lb ground beef
- 1 cup shredded cheese (cheddar or mozzarella)
- 1 cup bread crumbs
- 1/2 cup milk
- 1/4 cup ketchup
- 1 onion, chopped
- 2 cloves garlic, minced
- Salt and pepper to taste
- 1 teaspoon Italian seasoning
Instructions
- Preheat your oven to 350°F (175°C).
- Sauté the onion in olive oil until translucent, then add garlic and cook until fragrant.
- Mix the ground beef, bread crumbs, milk, ketchup, sautéed onion and garlic, Italian seasoning, salt, and pepper in a large bowl.
- Shape the mixture into a loaf in a greased baking dish.
- Bake for 45 minutes, or until the internal temperature reaches 160°F (71°C).
- Cheese it up by sprinkling shredded cheese on top, then bake for an additional 10 minutes until melted.
- Rest the casserole for about 10 minutes before serving.
Notes
Serve with mashed potatoes or a fresh salad. Add extra ketchup or homemade gravy for indulgence.
Nutrition
- Serving Size: 1 serving
- Calories: 350
- Sugar: 4g
- Sodium: 500mg
- Fat: 20g
- Saturated Fat: 8g
- Unsaturated Fat: 10g
- Trans Fat: 0g
- Carbohydrates: 20g
- Fiber: 2g
- Protein: 25g
- Cholesterol: 70mg
Keywords: meatloaf casserole, comfort food, cheesy casserole
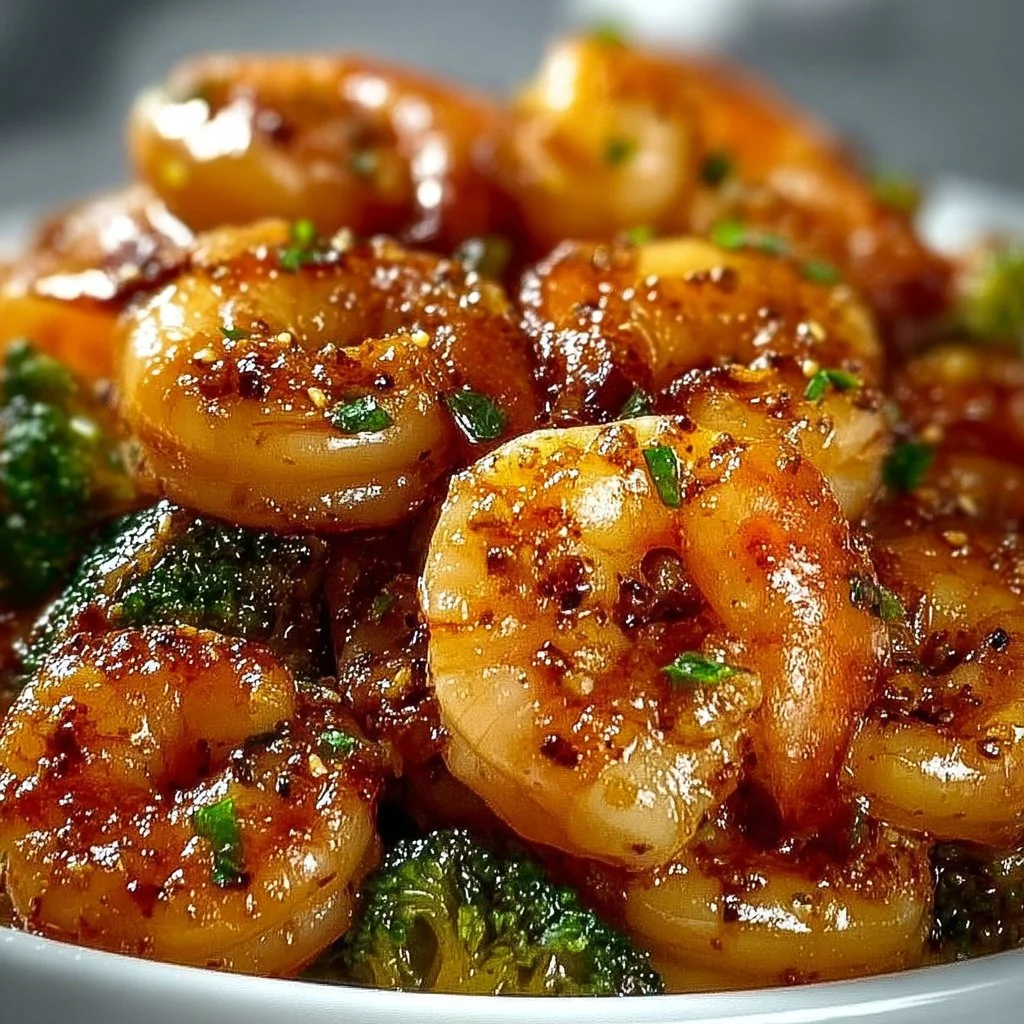
High-Protein Honey Garlic Shrimp
High-Protein Honey Garlic Shrimp: A Flavorful Delight
Hello, lovely foodies! Today, I’m thrilled to share with you a dish that’s close to my heart and packed with flavor: High-Protein Honey Garlic Shrimp. This recipe is not just a feast for the taste buds; it’s also a celebration of the joy of cooking and the beauty of gathering around the table with loved ones. Perfectly sweet, garlicky, and delightfully tender, this dish is sure to become a new favorite in your kitchen.
Let’s dive into the magic of these succulent shrimp. They’re not only high in protein—making them an excellent option for a healthy meal—but they’re also incredibly easy to whip up. Whether you’re looking to impress guests at a dinner party or simply trying to make weeknight dinners feel a bit more special, this recipe is a surefire hit. Ready to create something delicious? Let’s go!
A Taste of My Kitchen
Whenever I think of honey garlic shrimp, I’m instantly transported back to my childhood. I remember being in the kitchen with my grandma, who was such an inspiration in my early cooking adventures. One summer evening, we decided to whip up her famous garlic shrimp, a family staple that had everyone drooling. The aroma of sizzling garlic mingling with the sweet scent of honey was like a warm hug for the senses.
As we gathered around the table, my family eagerly awaited the moment where plates were filled with beautifully glazed shrimp, served atop a fluffy bed of jasmine rice. My grandpa would always say, "If you can make shrimp dance in a honey glaze, you can impress anyone!" It was this fun, whimsical spirit that fueled my passion for cooking and sharing food with others. Fast forward to today, and I’m excited to share this easy yet elegant dish that not only honors my grandma’s culinary flair but also showcases how simple it can be to create magic in the kitchen.
Ingredients You’ll Need
To make these lovely honey garlic shrimp, you’ll need the following ingredients:
-
1 pound shrimp, peeled and deveined: Look for large, fresh shrimp for the best texture and flavor. If you can’t find fresh, frozen shrimp will work beautifully—just make sure to thaw them properly before cooking.
-
1/4 cup honey: This sweet nectar is essential for our glaze! If you’re looking for a healthier alternative, you can use agave syrup or maple syrup for a unique flavor twist.
-
3 cloves garlic, minced: Fresh garlic is a must here; it adds depth and richness. If you’re in a pinch, pre-minced garlic can work, but be sure to adjust the amount, as it can be stronger in flavor.
-
2 tablespoons soy sauce: This adds a savory umami kick. For a gluten-free option, feel free to swap this with tamari or coconut aminos.
-
1 tablespoon olive oil: Use extra-virgin olive oil for the best flavor and health benefits. Canola or avocado oil are good substitutes if you’re looking for something lighter.
-
Salt and pepper to taste: Simple seasonings that elevate the flavors. Always taste your dish as you go to ensure it’s seasoned to your liking!
-
Steamed rice or vegetables for serving: Jasmine rice is fantastic with this dish, but feel free to serve it alongside broccoli, asparagus, or any of your favorite seasonal vegetables.
Step-by-Step Instructions
Let’s get cooking! Follow these simple steps to create your high-protein honey garlic shrimp masterpiece:
-
Prep your shrimp: If using frozen shrimp, make sure they’ve been thawed. Rinse them under cold water, pat dry with a paper towel, and set aside. This ensures that the shrimp will sear nicely and not steam in the pan.
-
Make the honey garlic sauce: In a medium bowl, whisk together the honey, minced garlic, and soy sauce until well combined. This will be the glaze that gives our shrimp their delightful flavor. Take a moment to inhale that sweet garlic goodness—it’s divine!
-
Heat your pan: In a large skillet, heat the olive oil over medium-high heat. Make sure it’s hot enough to sizzle when the shrimp hit the pan—that’s how we achieve a nice golden crust on our shrimp!
-
Cook the shrimp: Once the pan is hot, add the shrimp in a single layer. Let them cook undisturbed for about 2 minutes. You want them to develop a lovely golden color on one side before flipping. Flip the shrimp and cook for another 1-2 minutes until they’re opaque and cooked through.
-
Add the sauce: Reduce the heat to medium and pour the honey garlic sauce over the shrimp. Toss everything together to coat each shrimp evenly in that luscious glaze. Allow it to bubble for about a minute until slightly thickened. The smell will be irresistible!
-
Season to perfection: Taste the shrimp and add salt and pepper as needed. This is the moment where you can tailor the flavors to your liking—don’t be afraid to experiment!
-
Final touch: Once the sauce is shiny and the shrimp are well-coated, remove the pan from heat. You’re just a few moments from diving into this delightful dish!
Serving Suggestions
To plate this dish, spoon a generous serving of steamed rice onto a beautiful plate, then artfully arrange your honey garlic shrimp on top. Drizzle any extra sauce over the shrimp and garnish with freshly chopped herbs like green onions or parsley for a pop of color. Serve it with a side of vibrant, steamed vegetables for a complete, beautiful meal that’s sure to impress.
Recipe Variations
Looking to shake things up? Here are a few fun twists you can try with this high-protein shrimp dish:
-
Spicy kick: Add a pinch of red pepper flakes or a splash of Sriracha to the honey garlic sauce for a fiery twist.
-
Citrus burst: Squeeze in some fresh lime or lemon juice to the sauce for a zesty, bright flavor that complements the shrimp beautifully.
-
Tropical vibe: Stir in some diced pineapple or mango in the last minute of cooking for a sweet, fruity addition.
-
Herb-inspired: Swap out the garlic for fresh ginger and finish with a sprinkle of cilantro or basil for a fresh herby flair.
-
Cooking method: Grill the shrimp on skewers instead of pan-searing for a smoky charred flavor. Just adjust the cooking time for skewers on the grill!
Chef’s Notes
As a chef, I value the stories that recipes can tell. This honey garlic shrimp has evolved in my kitchen over the years. Initially, I would make it without much thought, but then I discovered the joy of adding layers of flavor—different herbs and spices, and even the knack for presentation! Every time I revisit this dish, it brings back not only the pleasure of cooking but also memories of loved ones gathered around the table, sharing stories and laughter.
A funny kitchen mishap I can’t forget is when I accidentally grabbed salt instead of sugar while preparing this recipe for a dinner party. Instead of panicking, I added a bit more honey and a splash of lemon juice to balance the flavors, and it turned out unexpectedly delicious! Cooking is all about improvisation and enjoying the process, so embrace those moments!
FAQs and Troubleshooting
Q: My shrimp turned out rubbery. What happened?
A: Overcooking shrimp is the main culprit for rubbery texture. Make sure to cook them just until they’re opaque and firm; they usually need only 2-3 minutes per side.
Q: Can I make this dish ahead of time?
A: While honey garlic shrimp taste best fresh, you can prepare the sauce ahead and store it in the fridge. Cook the shrimp just before serving for the best texture.
Q: What can I substitute for shrimp?
A: If you’re not fond of shrimp, this recipe works beautifully with chicken or tofu. Just adjust the cooking time until they are fully cooked.
Q: How do I store leftovers?
A: Store any leftovers in an airtight container in the refrigerator for up to 3 days. Reheat gently in a pan or microwave, but be careful not to overcook!
Nutritional Information
This honey garlic shrimp recipe serves approximately four people, making it an ideal meal for both family dinners and intimate gatherings. Each serving is not only delicious but a protein-packed option, making it great for a post-workout meal or a healthy dinner.
Approximate nutritional values per serving:
- Calories: 320
- Protein: 25g
- Carbohydrates: 30g
- Fat: 10g
Now that you have all the tools and knowledge to create this delightful high-protein honey garlic shrimp dish, it’s time to tie on your apron and gather your loved ones around the table. Cooking is about connection and joy, so I can’t wait for you to share this experience with friends and family. Happy cooking, and may your kitchen be filled with sweet aromas and laughter!
PrintHigh-Protein Honey Garlic Shrimp
A flavorful and easy dish featuring succulent shrimp coated in a sweet and garlicky honey glaze.
- Prep Time: 10 minutes
- Cook Time: 10 minutes
- Total Time: 20 minutes
- Yield: 4 servings 1x
- Category: Main Course
- Method: Sautéing
- Cuisine: Asian
- Diet: Gluten Free
Ingredients
- 1 pound shrimp, peeled and deveined
- 1/4 cup honey
- 3 cloves garlic, minced
- 2 tablespoons soy sauce
- 1 tablespoon olive oil
- Salt and pepper to taste
- Steamed rice or vegetables for serving
Instructions
- Prep your shrimp: If using frozen shrimp, make sure they’ve been thawed. Rinse them under cold water, pat dry with a paper towel, and set aside.
- Make the honey garlic sauce: In a medium bowl, whisk together the honey, minced garlic, and soy sauce until well combined.
- Heat your pan: In a large skillet, heat the olive oil over medium-high heat.
- Cook the shrimp: Add the shrimp in a single layer. Let them cook undisturbed for about 2 minutes. Flip the shrimp and cook for another 1-2 minutes until opaque.
- Add the sauce: Reduce the heat to medium and pour the honey garlic sauce over the shrimp. Toss to coat.
- Season to perfection: Taste the shrimp and add salt and pepper as needed.
- Final touch: Once the sauce is shiny and shrimp are well-coated, remove from heat.
Notes
Serve with steamed rice and garnish with fresh herbs. Experiment with flavors by adding spices or citrus.
Nutrition
- Serving Size: 1 serving
- Calories: 320
- Sugar: 28g
- Sodium: 500mg
- Fat: 10g
- Saturated Fat: 1g
- Unsaturated Fat: 9g
- Trans Fat: 0g
- Carbohydrates: 30g
- Fiber: 0g
- Protein: 25g
- Cholesterol: 200mg
Keywords: honey garlic shrimp, high protein shrimp, easy shrimp recipe
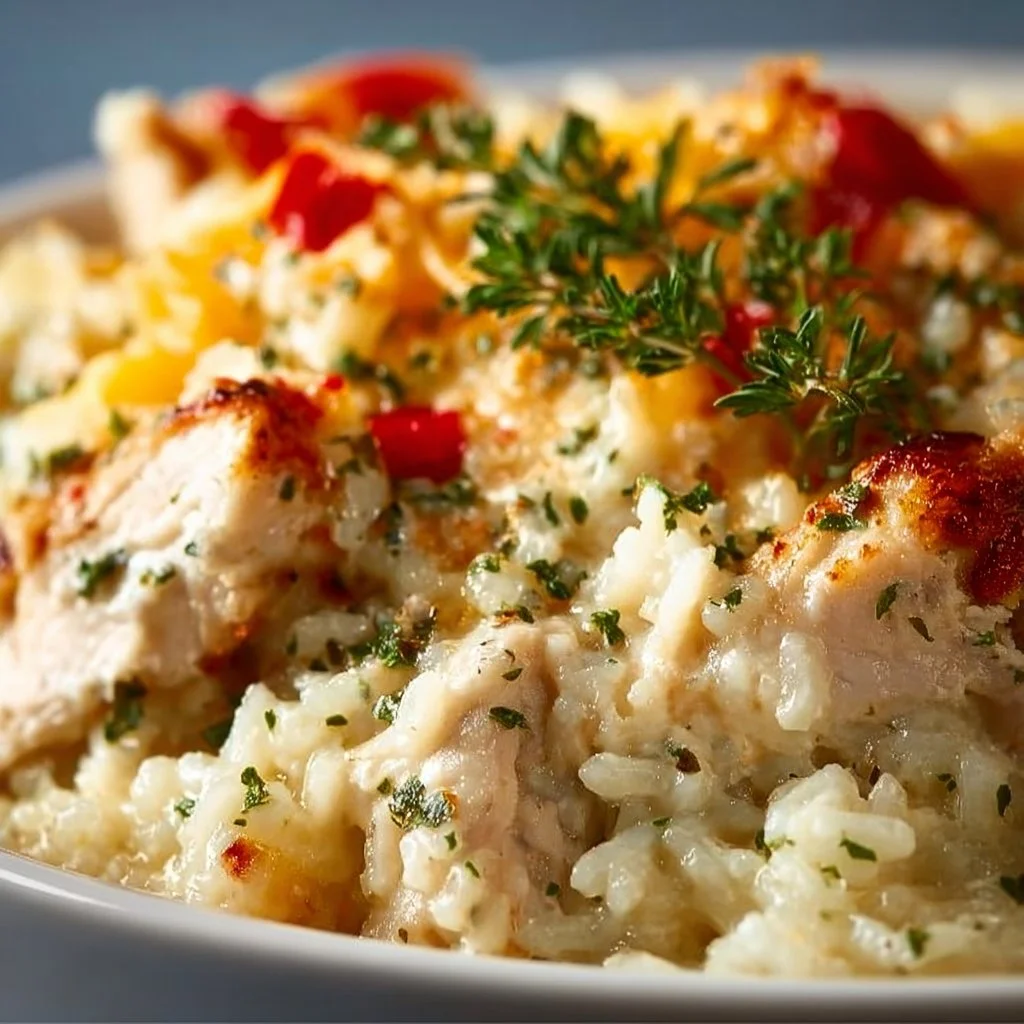
Angel Chicken and Rice Casserole
Angel Chicken and Rice Casserole: A Comforting Hug on a Plate
Hello, dear friends! Today, I am beyond excited to share a recipe that holds a special place in my heart and belly — Angel Chicken and Rice Casserole. This dish encapsulates everything I adore about cooking: it’s warm, comforting, and extremely easy to whip up. Whether you’re hosting a cozy dinner, preparing a meal for a busy weeknight, or simply looking to treat yourself, this casserole has got you covered.
Imagine this: it’s a chilly evening, and the aroma of something delicious wafts through the air as you pull this casserole from the oven, bubbling with flavor and love. It’s truly the culinary equivalent of a soft hug, enveloping you in its warmth and familiarity. So, let’s dive deeper into this magical dish and chat about my journey with it.
A Trip Down Memory Lane
One of my fondest memories of cooking this dish goes back to a rainy Saturday afternoon. I was in college, juggling a part-time job and schoolwork. My friends often dropped by, looking for comfort food after a long week. I wanted to make something quick but impressive, and that’s when I stumbled upon this Angel Chicken and Rice Casserole recipe in an old family cookbook.
I remember dashing to the grocery store, making sure to grab all the ingredients, and racing home. As I mixed everything together, my kitchen filled with laughter and chatter from my friends who, despite their busy lives, gathered around my small kitchen. By the time the casserole came out of the oven, our little apartment was filled with warmth, comfort, and gooey deliciousness. We dug in together, delighting in every cheesy bite while stories flowed and laughter echoed. This dish became our go-to comfort meal, and to this day, it’s one of my favorites.
Ingredients
Gathering the right ingredients is key to any fantastic dish. Let’s break down what you’ll need for this delightful casserole:
-
2 cups cooked chicken, shredded
- Feel free to use rotisserie chicken for convenience, or pull from your stash of leftovers!
-
1 cup uncooked rice
- While I love using long-grain white rice, brown rice or even jasmine rice can add an interesting twist. Just adjust the cooking time as needed!
-
1 can cream of chicken soup
- Creamy and comforting! If you’re feeling adventurous, homemade versions are fantastic too, or try swapping for cream of celery soup for a unique flair.
-
1 can cream of mushroom soup
- Another layer of creaminess! If you’re not a fan of mushrooms, opt for another cream soup like cream of onion or omit it altogether.
-
1 1/2 cups chicken broth
- Homemade broth is the best, but store-bought works perfectly in a pinch. Low-sodium options are a good choice for those watching their salt intake.
-
1 cup sour cream
- This ingredient adds richness! You can substitute with Greek yogurt for a healthier version, or even a dairy-free alternative if desired.
-
1/2 cup butter, melted
- Ah, butter — the key to flavor! If you’re watching your calories, try using olive oil for a healthier spin.
-
1 packet onion soup mix
- This is a flavor bomb! You can create a homemade mix by combining onion powder, garlic powder, and dried onion flakes if you’d like to avoid MSG.
-
Salt and pepper to taste
- Always essential, these simple seasonings can elevate your dish!
-
1 cup shredded cheese (optional)
- You can use any cheese you love — cheddar, mozzarella, or even a sprinkle of parmesan can take it to the next level.
Step-by-Step Instructions
Now that we’ve gathered our ingredients, it’s time to bring this dish to life! Follow along with these steps, sprinkled with a few chef tips to help you along.
-
Preheat the Oven:
- Preheat your oven to 350°F (175°C). This will set the stage for baking perfection, allowing the casserole to cook evenly.
-
Mix the Saucy Base:
- In a large mixing bowl, combine the cream of chicken soup, cream of mushroom soup, sour cream, melted butter, and onion soup mix.
- Chef Tip: Use a whisk for an even blend. It’ll help break up any lumps, creating a smooth, luscious sauce that hugs the chicken and rice beautifully.
-
Add the Chicken and Rice:
- Stir in the shredded chicken and uncooked rice until well coated. It’s all about layers of flavor!
- Chef Insight: The rice cooks while the casserole bakes, soaking up all those creamy, savory flavors.
-
Pour in the Broth:
- Gently mix in the chicken broth, ensuring everything is well incorporated.
- Pro Tip: If you’d like more flavor, try using broth instead of water when cooking your side dishes later — it’s a little chef secret!
-
Season to Taste:
- Don’t forget to add salt and pepper! This step is crucial, as seasoning can transform a good dish into a great one. Taste a small spoonful to see where you’re at.
-
Transfer to Baking Dish:
- Pour the mixture into a greased 9×13-inch baking dish. If you love a crispy top, get messy and sprinkle shredded cheese on top before it goes into the oven!
- Fun Fact: Using a glass baking dish can help you monitor the browning process without opening the oven.
-
Bake:
- Bake uncovered for about 45 to 50 minutes, or until bubbly and the rice has absorbed most of the broth. You want to see a nice golden crust on top!
- Chef’s Hint: If it’s browning too quickly, cover it loosely with foil to prevent burning while it finishes cooking.
-
Let it Rest:
- Once baked, let it sit for about 10-15 minutes before digging in. This helps the casserole set, making it easier to serve.
- Essential Tip: Use this wait time to whip up a simple salad or toast some crusty bread for a complete meal.
Serving Suggestions
To serve this delicious Angel Chicken and Rice Casserole, scoop hearty portions onto plates, allowing the creamy, cheesy goodness to cascade over the edges. A sprinkle of fresh parsley or chives on top adds a pop of color and freshness. Pair it with a zesty green salad or roasted vegetables to balance the richness of the dish. Don’t forget some crusty bread to soak up every last creamy bite!
Recipe Variations
Feeling adventurous? Here are a few ways to jazz up this classic casserole:
- Veggie Delight: Add in steamed broccoli or spinach for an extra layer of nutrition and flavor.
- Spicy Kick: A dash of red pepper flakes or diced jalapeños can bring some heat to the table.
- Herb Infusion: Fresh herbs such as thyme, rosemary, or basil can elevate the flavors. Add them during the mixing stage for a fragrant dish!
- Different Cheeses: Swap out the cheese for your favorite — pepper jack for a spicy touch, or feta for a Mediterranean vibe.
Chef’s Notes
This recipe is one I treasure, and it has evolved over the years. Initially, I made it exactly as written, but over time I’ve played with different herbs and spices, turning it into a versatile dish suitable for any palate. It’s a fantastic way to use leftover chicken, and I’ve even made it vegetarian by substituting beans or extra veggies. Whenever I whip it up, it always evokes memories of laughter and togetherness. It’s the kind of dish that fills the stomach and warms the heart!
FAQs and Troubleshooting
1. Can I use raw chicken in this recipe?
While the original recipe calls for cooked chicken, you can use raw chicken. Just ensure it’s chopped into small pieces and increase the baking time to about an hour to ensure it cooks thoroughly.
2. My rice is crunchy after baking. What went wrong?
This can happen if there isn’t enough liquid or if it doesn’t bake long enough. Make sure to measure your ingredients accurately, and if you need more time, cover it with foil and let it bake a bit longer.
3. Can I make this ahead of time?
Absolutely! You can prepare the casserole the night before and keep it in the fridge. Just be sure to add a few extra minutes to the baking time since it will be starting cold.
4. How do I store the leftovers?
Store any leftovers in an airtight container in the fridge for up to 3-4 days. You can reheat in the oven or microwave, but I recommend the oven for that crispy top!
Nutritional Info
While I won’t delve too deeply into nutritional info, it’s worth noting that this casserole is a hearty dish packed with protein from the chicken and sour cream, making it satisfying. For those keeping an eye on calories, consider using lower-fat substitutes for some of the creamy ingredients or adding in more vegetables to balance it out.
And there you have it — Angel Chicken and Rice Casserole in all its glory! I hope this dish brings you joy and warmth when you gather around your own table. Remember, my friends, cooking is about sharing love and creating memories. Grab your apron and let’s get cooking! 🍽️
PrintAngel Chicken and Rice Casserole

A warm and comforting casserole that combines shredded chicken, creamy soups, and rice for a delicious family meal.
- Prep Time: 15 minutes
- Cook Time: 50 minutes
- Total Time: 65 minutes
- Yield: 8 servings 1x
- Category: Main Course
- Method: Baking
- Cuisine: American
- Diet: Gluten-Free
Ingredients
- 2 cups cooked chicken, shredded
- 1 cup uncooked rice
- 1 can cream of chicken soup
- 1 can cream of mushroom soup
- 1 1/2 cups chicken broth
- 1 cup sour cream
- 1/2 cup butter, melted
- 1 packet onion soup mix
- Salt and pepper to taste
- 1 cup shredded cheese (optional)
Instructions
- Preheat the oven to 350°F (175°C).
- Mix together the cream of chicken soup, cream of mushroom soup, sour cream, melted butter, and onion soup mix in a large mixing bowl.
- Add the shredded chicken and uncooked rice, stirring until well coated.
- Pour in the chicken broth and mix until incorporated.
- Season with salt and pepper to taste.
- Transfer the mixture to a greased 9×13-inch baking dish and optionally sprinkle cheese on top.
- Bake uncovered for 45 to 50 minutes, or until bubbly and golden brown.
- Let the casserole rest for 10-15 minutes before serving.
Notes
Feel free to customize with your favorite veggies or spices for a unique twist!
Nutrition
- Serving Size: 1 serving
- Calories: 400
- Sugar: 4g
- Sodium: 600mg
- Fat: 22g
- Saturated Fat: 10g
- Unsaturated Fat: 8g
- Trans Fat: 0g
- Carbohydrates: 35g
- Fiber: 2g
- Protein: 19g
- Cholesterol: 70mg
Keywords: chicken casserole, comfort food, easy dinner, family meal
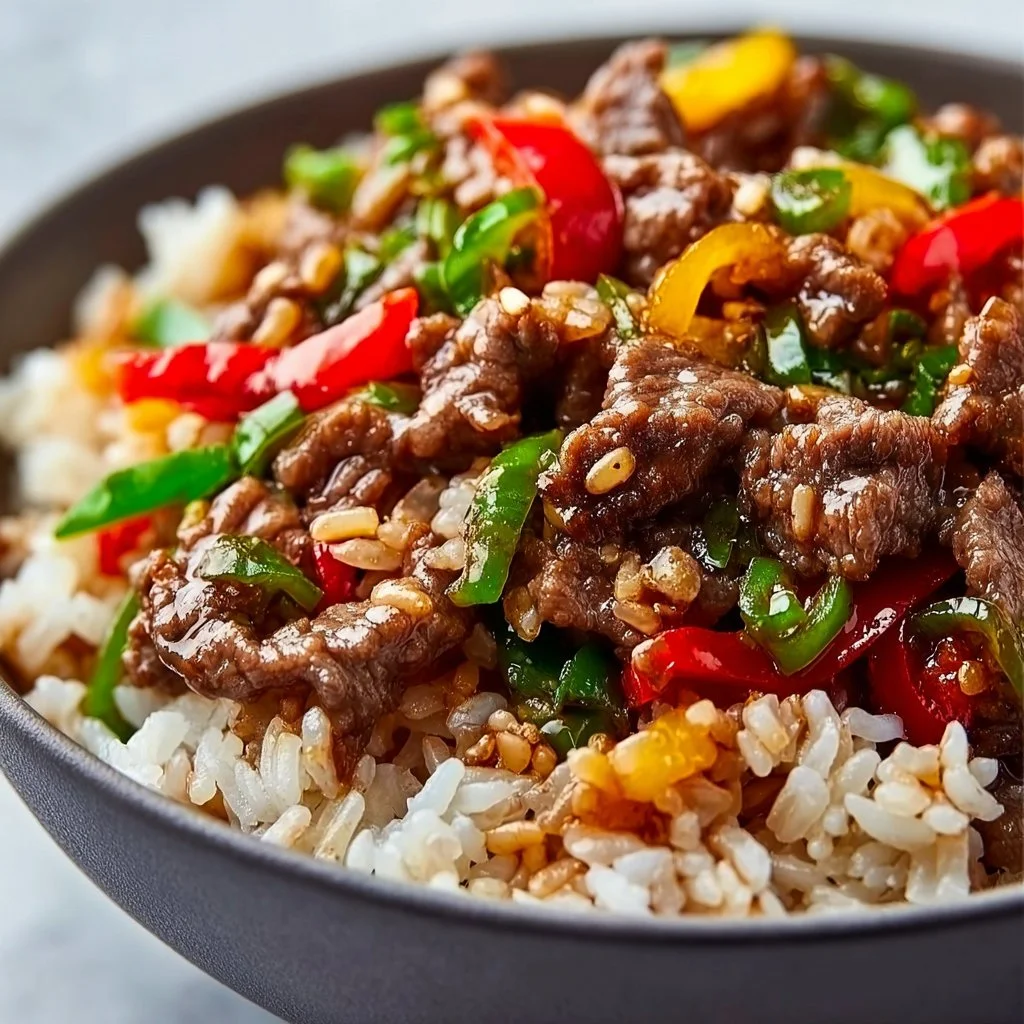
Beef and Pepper Rice Bowl
# Savory Beef and Pepper Rice Bowl: A Heartwarming Family Classic

## Introduction

Welcome back, culinary friends! Today, we’re diving into one of my all-time favorite comfort dishes: the Beef and Pepper Rice Bowl. This recipe is all about bringing together flavors that make your taste buds dance while keeping things simple. Trust me, this colorful, hearty dish is perfect for any night of the week, especially when you’re craving something that feels like a warm hug.

What I love most about this dish is how it effortlessly combines textures and tastes. The ground beef adds a rich, satisfying heartiness, while the bell peppers and jalapeño bring a burst of freshness and a hint of spicy zing. And don’t get me started on the fluffy rice—it serves as the ideal canvas for all those vibrant flavors.

This recipe is not just about feeding the belly; it’s about feeding the soul. I distinctly remember the first time I made this dish for a gathering at my home. Everyone was raving about how delicious it was, and I felt an overwhelming sense of joy knowing I created something everyone loved. So let’s get cooking and bring that same joy to your table!

## Personal Story

As I sit here reminiscing, I can clearly picture the vibrant kitchen of my childhood home. My mom would whip up a wonderful Beef and Pepper dish that would fill the entire house with a mouthwatering aroma. Growing up, it was a staple on our dinner table. The sounds of sizzling beef and chopping veggies would spark our family gatherings—the essence of togetherness that I still cherish.

After school, I often found myself lingering in the kitchen, helping her chop bell peppers while she shared the stories of her day. Those moments made me appreciate not just the meal but also the love that went into it. Years later, when I moved into my first apartment, I knew I had to recreate this dish. With every bite, it felt like I was wrapped in the comfort of home. Fast forward to now, and I’m thrilled to be sharing this hearty Beef and Pepper Rice Bowl with you, so you can create similar memories with your loved ones!

## Ingredients

Before we jump into the cooking, let’s gather our ingredients. Here’s what you’ll need for the Beef and Pepper Rice Bowl:

- **1 lb ground beef**
  - *Chef Insight:* Feel free to substitute with ground turkey or chicken for a leaner option or go vegetarian with lentils!

- **1 onion, diced**
  - *Substitution Tip:* Any onion will do, but yellow onions offer a balanced sweetness that complements the dish beautifully.

- **1 bell pepper, diced**
  - *Quick Tip:* Use any color you like—red, yellow, or green—to add a pop of color and different sweetness levels.

- **1 jalapeño, diced**
  - *Substitution Tips:* If you prefer a milder flavor, remove the seeds and membranes, or swap it out for a chopped poblano pepper.

- **3 cups cooked rice**
  - *Chef Insight:* Leftover rice works like a charm! You can also use quinoa or cauliflower rice for a gluten-free or lower-carb option.

- **2 tablespoons soy sauce**
  - *Quick Tip:* Low-sodium soy sauce is a great option if you’re watching your salt intake. For a gluten-free version, use tamari.

- **1 teaspoon garlic powder**
  - *Chef Insight:* Fresh garlic lends a brighter taste if you have it; just use 2-3 minced cloves instead!

- **1 teaspoon ground black pepper**
  - *Quick Tip:* Freshly cracked pepper elevates the flavor, but powdered works just fine if that’s all you have on hand.

- **1 tablespoon olive oil**
  - *Chef Insight:* Feel free to use avocado, canola, or even sesame oil for a different flavor twist.

## Step-by-Step Instructions

Now that we’ve got everything prepped, let’s get cooking! Follow these detailed steps to create your delectable Beef and Pepper Rice Bowl.

1. **Heat the Oil:**
   - In a large skillet over medium heat, drizzle in the olive oil. Let it warm for about 1 minute. This helps to create a nice sear on your beef and brings out its flavor.

2. **Cook the Onion:**
   - Add the diced onion to the skillet. Sauté for about 3-4 minutes until it becomes translucent and fragrant. Pro tip: For extra flavor, throw in a pinch of salt while cooking the onion.

3. **Brown the Beef:**
   - Next, add in the ground beef. Use a spatula to break it apart as it cooks. Continue cooking for about 5-7 minutes until it’s fully browned. Make sure to drain off excess fat, but don’t worry about getting every drop! That little bit of grease adds flavor.

4. **Add the Peppers:**
   - Once the beef is browned, stir in the diced bell pepper and jalapeño. Cook for about 3-4 minutes until they soften up. The colors will start blending, and your kitchen will smell absolutely divine!

5. **Seasoning Time:**
   - Sprinkle garlic powder and ground black pepper over the mixture. Pour in the soy sauce—this is where the magic happens! Stir everything thoroughly to ensure even flavor distribution. Let it cook together for another 2-3 minutes so the rice can soak up those delicious juices.

6. **Mix in the Rice:**
   - Gently fold in your cooked rice. I like to use a spatula to carefully mix it—this keeps the rice from breaking apart too much. Cook for an additional 2-3 minutes until everything is heated through.

7. **Final Taste Test:**
   - Before serving, take a little taste! If it needs a little more oomph, go ahead and sprinkle in more soy sauce or a dash of salt.

## Serving Suggestions

Now that your Beef and Pepper Rice Bowl is ready, let’s talk presentation! To serve, scoop generous portions into bowls. For an extra touch, I love to garnish with fresh cilantro, sliced green onions, or a drizzle of tangy lime juice on top. A squeeze of fresh lime brightens the dish and elevates those flavors even more!

## Recipe Variations

Get creative with this Beef and Pepper Rice Bowl! Here are some fun twists you can try:

- **Spicy Sriracha Kick:** Drizzle a little Sriracha on top for an extra punch.
- **Tex-Mex Version:** Swap out the bell peppers for corn and black beans, and serve with avocado slices.
- **Curry Flavor:** Stir in a tablespoon of curry powder for a warm, exotic twist.
- **Low-carb Option:** Substitute rice with cauliflower rice, and load it up with extra veggies.
- **More Veggies:** Add in zucchini or carrots for added nutrition and color.

## Chef’s Notes

What I love about this recipe is how it’s evolved over time. Growing up, my mom often added her own twists, and I’ve carried that tradition forward. Sometimes, if I have it on hand, I toss in a handful of spinach or kale for that pop of green!

Funny enough, one time, I completely forgot to buy bell peppers, so I had to use up some leftover frozen mixed veggies. It was a hit! So don’t be afraid to switch things up or use what you already have. Let your creativity flow!

## FAQs and Troubleshooting

**1. My dish came out too salty. What can I do?**
Don’t worry! Add a little more cooked rice or a splash of water to dilute the saltiness. It helps balance the flavors.

**2. Can I make this dish ahead of time?**
Absolutely! It stores well in the fridge for up to 3 days. Reheat on the stovetop or in the microwave before serving.

**3. What can I substitute for ground beef?**
Aside from ground turkey or chicken, consider using plant-based meat alternatives or lentils for a vegetarian option.

**4. My rice turned mushy. What happened?**
Mushy rice can result from overcooking. For next time, ensure your rice is cooked al dente before mixing it into the dish. If you have leftover rice, make sure it’s cooled properly before using it.

## Nutritional Info

While I encourage you to enjoy this comforting dish, I understand many of you can appreciate nutritional details too! Typically, this hearty bowl offers:

- **Calories:** Approximately 450 per serving
- **Protein:** About 25g
- **Carbohydrates:** Around 45g
- **Fat:** Roughly 15g

Feel free to adjust the ingredients and portion sizes according to your dietary needs!

---

So there you have it, my friends! A Beef and Pepper Rice Bowl that’s not only delicious but also filled with love and memories. I hope you enjoy making this recipe as much as I do. So, tie on your apron, gather your loved ones, and let’s make magic happen in our kitchens. Happy cooking!
Savory Beef and Pepper Rice Bowl
A heartwarming Beef and Pepper Rice Bowl that combines ground beef, vibrant vegetables, and fluffy rice for a comforting family meal.
- Prep Time: 10 minutes
- Cook Time: 20 minutes
- Total Time: 30 minutes
- Yield: 4 servings 1x
- Category: Main Course
- Method: Sautéing
- Cuisine: American
- Diet: None
Ingredients
- 1 lb ground beef
- 1 onion, diced
- 1 bell pepper, diced
- 1 jalapeño, diced
- 3 cups cooked rice
- 2 tablespoons soy sauce
- 1 teaspoon garlic powder
- 1 teaspoon ground black pepper
- 1 tablespoon olive oil
Instructions
- Heat the oil in a large skillet over medium heat, drizzling in the olive oil and letting it warm for about 1 minute.
- Cook the onion by adding it to the skillet and sauté for about 3-4 minutes until translucent and fragrant.
- Brown the beef by adding in the ground beef, breaking it apart as it cooks, and continue cooking for about 5-7 minutes until fully browned.
- Add the diced bell pepper and jalapeño, cooking for about 3-4 minutes until softened.
- Season by sprinkling garlic powder and black pepper over the mixture, pouring in the soy sauce, and letting it cook together for another 2-3 minutes.
- Mix in the cooked rice gently, cooking for an additional 2-3 minutes until everything is heated through.
- Taste before serving and add more soy sauce or salt if needed.
Notes
Garnish with fresh cilantro, sliced green onions, or a drizzle of lime juice for extra flavor.
Nutrition
- Serving Size: 1 serving
- Calories: 450
- Sugar: 5g
- Sodium: 800mg
- Fat: 15g
- Saturated Fat: 5g
- Unsaturated Fat: 7g
- Trans Fat: 0g
- Carbohydrates: 45g
- Fiber: 3g
- Protein: 25g
- Cholesterol: 70mg
Keywords: beef, rice bowl, comfort food, dinner recipe, family meal
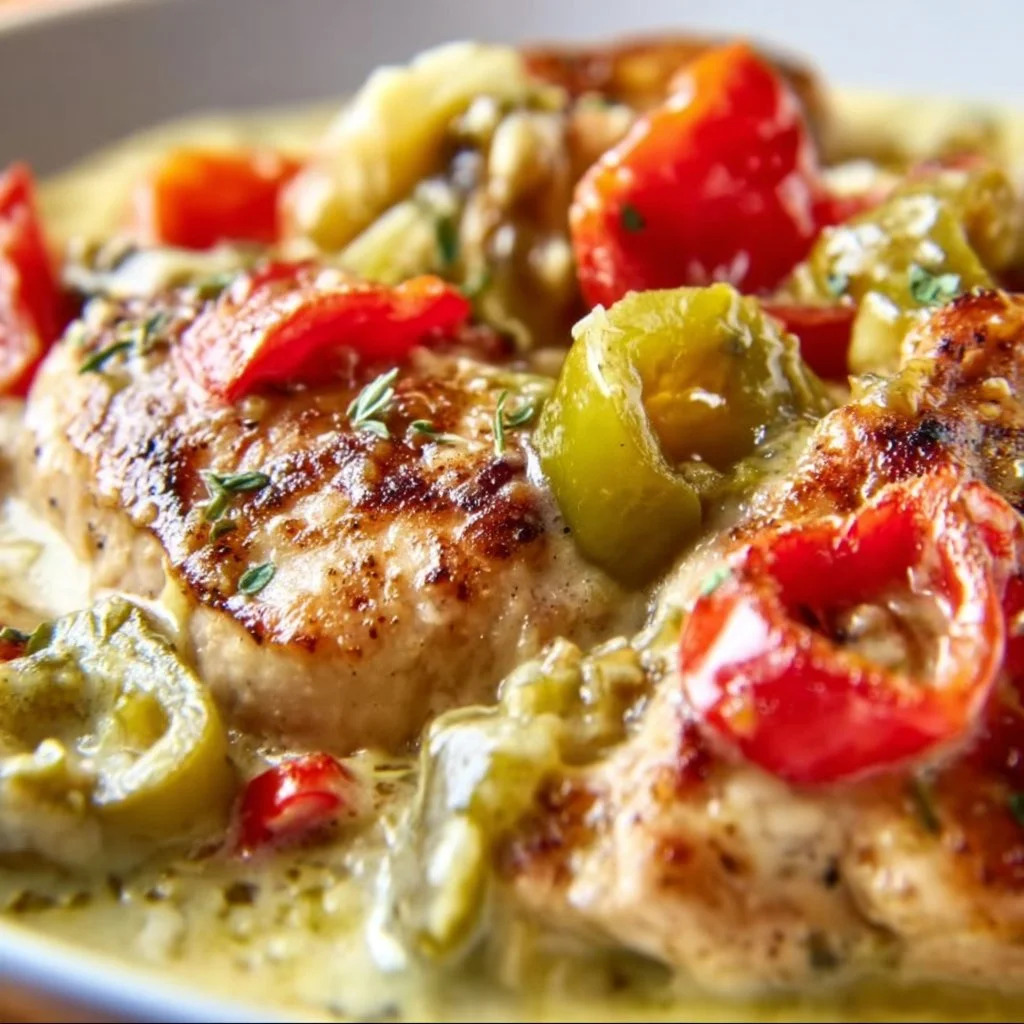
Creamy Banana Pepper Chicken Skillet
Creamy Banana Pepper Chicken Skillet: A Comforting Delight
Introduction
Hello, food lovers! Today, I’m thrilled to share with you one of my kitchen’s crown jewels: Creamy Banana Pepper Chicken Skillet. This dish has a special place in my heart—and my table—thanks to its mouthwatering combination of creamy goodness and zesty peppers. Every time I whip up this savory delight, I’m reminded of the times spent in my grandmother’s kitchen, where laughter and rich aromas filled the air.
You see, cooking is more than just a necessary chore; it’s an experience that evokes emotion, nostalgia, and connection. There’s something magical about gathering loved ones around the table for a meal made with love. Whether it’s a casual weeknight dinner or a celebratory feast, my goal is to create food that not only satisfies but also sparks joy and conversation.
This Creamy Banana Pepper Chicken Skillet does just that. With tender pieces of chicken enveloped in a luscious cream sauce punctuated by the tangy bite of banana peppers, it’s a symphony of flavors that will transport you straight to culinary bliss. Simple ingredients unite in this one-pan wonder, ensuring an effortless clean-up and more time for you to enjoy the company of your family and friends. So, let’s roll up our sleeves, grab our aprons, and dive right into this creamy goodness!
Personal Story
I still vividly recall the first time I made this dish. It was a chilly autumn evening, and I was hosting a small gathering for my close friends. As I prepped in the kitchen, the chatter and laughter flowed in from the living room, seamlessly blending with the sizzle of chicken cooking on the stove. I had discovered banana peppers not long before, and I was intrigued by the idea of incorporating them into a creamy skillet meal.
As the aroma filled my home, I felt a sense of anticipation and excitement. I served the dish to my friends, and the response was electric! Exclamations of delight resonated with each forkful they took. The zesty flavor of the banana peppers elevated the creaminess of the dish in a way that made it unforgettable. That night transformed not only my recipe repertoire but also deepened my appreciation for the power of food and the memories we create around it. Since then, this creamy delight has graced many more tables, and each time it brings a new wave of smiles and satisfaction.
Ingredients
Here’s what you’ll need to create your own Creamy Banana Pepper Chicken Skillet:
-
1 lb chicken breast, cubed
Chicken breast is lean and quick to cook, making it perfect for weeknight meals. You could substitute it with thighs for a juicier option. -
1 cup creamy pepperoncini peppers, sliced
These spicy-sour peppers pack a punch! If you prefer a milder flavor, feel free to substitute with banana peppers or omit some for a less zesty kick. -
1 tablespoon olive oil
Extra virgin olive oil works wonderfully here. You could also use avocado oil for a higher smoke point or any neutral oil you prefer. -
1/2 cup heavy cream
The heavy cream gives this dish its luxurious texture. For a lighter option, you could try half-and-half, but keep in mind it may not be as creamy. -
1 teaspoon garlic powder
This enhances the dish’s flavor profile with a comforting garlic aroma. If you have fresh garlic, you could substitute 1-2 cloves, minced. -
Salt and pepper to taste
Always season your dishes! Kosher salt and freshly cracked pepper will elevate the flavors beautifully. -
Fresh parsley for garnish
A pop of color and freshness. You could use chives or basil if you prefer a different herbal touch.
Step-by-Step Instructions
-
Prep Your Ingredients: Start by cubing the chicken breast into bite-sized pieces. This will help it cook evenly and quickly. Slice the pepperoncini peppers and set everything aside.
-
Heat the Pan: Grab a large skillet and warm up the olive oil over medium-high heat. You want that oil shimmering to ensure a nice sear on your chicken.
-
Cook the Chicken: Add the cubed chicken to the pan, seasoning it generously with salt and pepper. Sear the chicken for about 5-7 minutes, stirring occasionally until it’s golden brown and cooked through. Use a meat thermometer if you have one; the internal temperature should reach 165°F for safety. Don’t overcrowd the pan—if necessary, cook the chicken in batches!
-
Add the Peppers: Once the chicken is cooked, stir in the sliced pepperoncini. Let them cook with the chicken for about 2-3 minutes to soften, releasing their juices. This step is key to infusing your dish with zesty flavor.
-
Make It Creamy: Lower the heat to medium and stir in the heavy cream. Keep stirring to combine everything smoothly. The cream will simmer and bubble slightly, thickening up beautifully. If you like, add garlic powder at this stage; it will meld perfectly with the cream and peppers.
-
Season Smartly: Taste your creamy mixture and adjust the seasoning with more salt and pepper if necessary. Don’t forget that the pepperoncini has its own zing, so be mindful not to overdo it with salt!
-
Garnish and Serve: Once the mixture is creamy and heated through, take it off the heat. Spoon your delectable Creamy Banana Pepper Chicken onto plates and garnish with fresh parsley. It’s the finishing touch that adds vibrancy!
Serving Suggestions
To elevate the presentation of your dish, consider serving it over a bed of fluffy rice or creamy polenta. A sprinkle of extra parsley and perhaps some freshly grated parmesan can add a lovely touch. Pair it with a crisp green salad for a balanced meal that looks as good as it tastes. Your guests will be impressed!
Recipe Variations
If you’re feeling adventurous, know that there are plenty of ways you can twist this recipe to suit your taste:
- Spicy Twist: Add crushed red pepper flakes or diced jalapeños for an extra kick!
- Veggie Boost: Toss in some vibrant bell peppers, spinach, or zucchini for a healthy veggie addition.
- Cheesy Delight: Stir in some shredded cheddar cheese or cream cheese for an even richer sauce.
- Herbaceous Flavor: Experiment with fresh herbs like basil or thyme to deepen the dish’s flavor profile.
- Dietary Swap: For a lighter version, use boneless, skinless chicken thighs or even tofu for a vegetarian option.
Chef’s Notes
One of the things I adore about this recipe is its simplicity. It’s perfect for busy weeknights yet elegant enough for company. I’ve shared this dish several times with friends and family, and each time, I try to put my spin on it, whether adding a new herb or experimenting with different sides. Just the other day, I swapped in fresh mint as a garnish, and it brought such a fresh vibe!
Cooking is a journey, so don’t be afraid to experiment and make it your own. You might just stumble upon a twist that becomes your signature touch!
FAQs and Troubleshooting
-
What if my chicken is dry?
If your chicken turns out dry, it could be due to overcooking. Always ensure your chicken reaches the safe internal temperature without overcooking it. If you find yourself in a pinch, adding a splash more cream or chicken broth can help moisten it up! -
Can I make this in advance?
Absolutely! You can prepare the chicken and sauce ahead of time. Just reheat gently on the stove with a splash of cream before serving. -
How can I store leftovers?
Store any leftovers in an airtight container in the fridge for up to 3-4 days. Reheat in a skillet for the best texture! -
What sides go well with this dish?
Pair it with rice, pasta, or a fresh salad for a balanced meal. I personally love serving it with garlic bread to soak up all that creamy goodness!
Nutritional Info (per serving, approx.)
- Calories: 450
- Protein: 32g
- Fat: 30g
- Carbohydrates: 6g
- Fiber: 1g
So there you have it! With this creamy banana pepper chicken skillet, you’ll have a comforting dish that not only fills bellies but also warms hearts. Gather your loved ones, enjoy the process, and let the flavors pave the way for delightful memories. Happy cooking, my friends!
PrintCreamy Banana Pepper Chicken Skillet

A comforting dish featuring tender chicken in a creamy sauce with zesty banana peppers.
- Prep Time: 15 minutes
- Cook Time: 20 minutes
- Total Time: 35 minutes
- Yield: 4 servings 1x
- Category: Main Course
- Method: Stovetop
- Cuisine: American
- Diet: Gluten-Free
Ingredients
- 1 lb chicken breast, cubed
- 1 cup creamy pepperoncini peppers, sliced
- 1 tablespoon olive oil
- 1/2 cup heavy cream
- 1 teaspoon garlic powder
- Salt and pepper to taste
- Fresh parsley for garnish
Instructions
- Prep your ingredients: Start by cubing the chicken breast into bite-sized pieces and slice the pepperoncini peppers.
- Heat the pan: Warm up the olive oil over medium-high heat in a large skillet.
- Cook the chicken: Add the cubed chicken, seasoning it with salt and pepper, and cook for 5-7 minutes until golden brown.
- Add the peppers: Stir in the sliced pepperoncini and cook for 2-3 minutes.
- Make it creamy: Lower heat, stir in the heavy cream and garlic powder, simmering until thickened.
- Season smartly: Taste and adjust the seasoning as needed.
- Garnish and serve: Finish with fresh parsley and serve over rice or polenta.
Notes
Feel free to experiment with additional spices or substitute chicken with vegetables for a lighter option.
Nutrition
- Serving Size: 1 serving
- Calories: 450
- Sugar: 3g
- Sodium: 600mg
- Fat: 30g
- Saturated Fat: 15g
- Unsaturated Fat: 10g
- Trans Fat: 0g
- Carbohydrates: 6g
- Fiber: 1g
- Protein: 32g
- Cholesterol: 90mg
Keywords: creamy chicken, skillet meal, comfort food, banana pepper, one-pan recipe
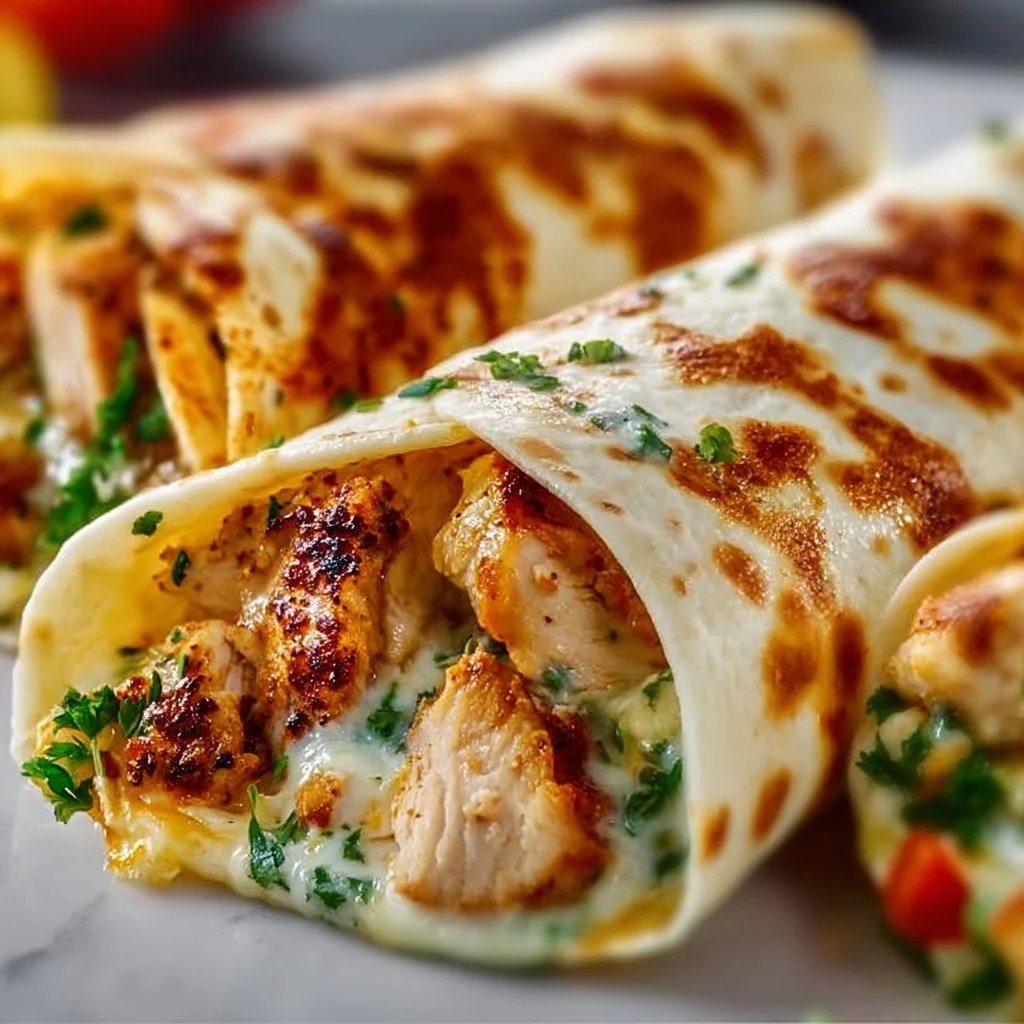
Cheesy Garlic Chicken Wraps
Cheesy Garlic Chicken Wraps: Elevate Your Snack Game!
Hey there, fellow food enthusiast! 🌟 Today, we’re diving into the delicious world of Cheesy Garlic Chicken Wraps — a dish that’s both simple and scrumptious! Imagine crispy, garlicky goodness wrapped up in a warm embrace of melted cheese, tender chicken, and fresh veggies. Sounds dreamy, right? Whether you’re preparing a quick lunch, a satisfying snack, or a showstopper for your next gathering, these wraps will not only please your palate but also fill your home with mouthwatering aromas.
Now, I know what you might be thinking: “Isn’t cooking something elaborate or fancy?” But trust me, cooking can be elegant without the intimidation factor. I started my cooking journey with simple ingredients, and these wraps are a prime representation of that ethos. They’re a perfect fusion of flavors with a kick of garlic, and they come together faster than you can say “Cheesy Garlic Chicken”!
So, grab your apron, pull on some tunes, and let’s start whipping up these fabulous wraps. With just a few ingredients, you’ll create a meal that feels like a restaurant experience right at your kitchen table. Ready? Let’s get cooking!
Personal Story
One of my fondest culinary memories goes back to my early days of hosting friends for movie nights. I was always looking for that perfect finger food, something that would impress while still being comfortable and cozy. That’s when these Cheesy Garlic Chicken Wraps entered the scene!
I remember one particular rainy Friday evening, the kind that screams for comfort food and a good flick. I had just finished up a long week and wanted to unwind with a warm dish that felt like a giant hug. I slathered garlic and shredded chicken into wraps and baked them until crispy. The aroma alone was enough to get my friends excited! As we gathered around the living room, munching on those ooey-gooey wraps, I realized that food isn’t just about sustenance — it’s about creating moments and memories. Laughing, sharing stories, and enjoying each bite, we quickly knew that these wraps would be a recurring favorite for all future get-togethers.
That experience taught me a valuable lesson: It’s the simplest recipes that often hold the most significance. So, let’s bring that magic to your kitchen!
Ingredients
To create these delightful wraps, you’ll need the following ingredients:
-
2 cups cooked chicken, shredded
Whether it’s rotisserie chicken for convenience or leftover grilled chicken from last night, this ingredient is your protein base. Got leftover turkey? Perfect switch! -
1 cup shredded cheese (cheddar or mozzarella)
Cheddar offers a sharpness that blends wonderfully with garlic, while mozzarella brings that gooey stretchiness we all crave. Want to spice it up? Try pepper jack for a kick! -
4 large lettuce leaves or low carb wraps
If you’re aiming for a low-carb option, go for lettuce for a fresh touch. Prefer something heartier? Whole wheat or spinach wraps work beautifully! -
3 cloves garlic, minced
Garlic adds an unbeatable flavor punch! If you’re garlic-shy, feel free to scale back, but remember — good garlic makes everything better! -
1 tablespoon olive oil
This helps to sauté the garlic and chicken, enhancing the flavor. Don’t have olive oil? Use melted butter or avocado oil — both will lend a rich taste! -
Salt and pepper, to taste
Seasoning is key! Play with your palate — add more salt, or toss in some Italian seasoning for an aromatic twist.
Step-by-Step Instructions
Get ready to bring those flavors to life! Follow these steps, and you’ll be devouring Cheesy Garlic Chicken Wraps in no time!
-
Preheat your oven: Set it to 375°F (190°C). This is where the magic begins!
-
Sauté the garlic: In a large skillet, heat the olive oil over medium heat. Add the minced garlic and sauté for about 1-2 minutes until fragrant. Be careful not to burn it; burnt garlic can taste bitter!
-
Add the chicken: Toss the shredded chicken into the skillet. Stir to combine and coat the chicken in the garlicky goodness. Let it heat through for about 3-5 minutes. Be sure to season it with salt and pepper; this is the moment to layer in those flavors!
-
Make the cheese meld: When the chicken is heated thoroughly, sprinkle the shredded cheese on top. Cover the skillet with a lid to allow the cheese to melt — this should take about 2-3 minutes. If you don’t have a lid, simply lower the heat and keep an eye on it!
-
Build your wraps: Take your lettuce leaves or low-carb wraps and lay them flat on a clean surface. Spoon the cheesy chicken mixture onto the center of each leaf or wrap.
-
Wrap it up: Fold the sides of the wrap over the filling and then roll it up from the bottom. If using lettuce leaves, you can use toothpicks to hold them together, making them easier to grab!
-
Bake for a crispy finish: Arrange the wraps on a baking sheet and pop them in the oven for about 5-10 minutes, just until the edges are lightly crispy and golden. If you want extra crispy, turn on the broiler for the last minute — but keep a close eye!
-
Serve and enjoy: Remove from the oven, let cool for a minute, and enjoy them as they are or with your favorite dipping sauce — ranch, salsa, or garlic aioli, perhaps?
Serving Suggestions
Plating is the final touch to elevate your wraps! Arrange your Cheesy Garlic Chicken Wraps on a platter with a sprinkle of fresh parsley or a drizzle of balsamic glaze for a little flair. Serve with a side of fresh veggies or a simple salad for a delightful balance.
For an extra pop, serve them with small bowls of dipping sauces — think garlic aioli, zesty sour cream, or spicy salsa. This interactive element not only excites your guests but allows them to customize their bites!
Recipe Variations
Feel like shaking things up? Here are some creative twists you can try:
-
Buffalo Chicken Wraps: Add a few tablespoons of your favorite hot sauce to the chicken mixture for a spicy kick.
-
Veggie-Packed Wraps: Add sautéed peppers and onions for added color and crunch, or toss in some spinach for an extra boost of nutrients.
-
Herbed Chicken: Infuse fresh herbs like thyme, basil, or cilantro into the chicken while sautéing for a refreshing twist.
-
Cheesy Spinach & Artichoke Wraps: Stir in some chopped artichoke hearts and fresh spinach before wrapping for a creamy, decadent alternative.
Chef’s Notes
Each time I make these wraps, I’m reminded of that cozy movie night with friends. It’s funny how food can transport us back in time! Over the years, I’ve tweaked this recipe many times, experimenting with different cheeses and proteins. Sometimes I even sneak in some roasted veggies — why not? It’s all about creativity and adapting to what you have available in your kitchen.
Pro tip? These wraps are excellent for meal prep! Make a double batch, store them in the fridge, and you’ve got a quick meal ready to reheat at a moment’s notice. You can even enjoy them cold — they’re that delicious!
FAQs and Troubleshooting
1. What’s the best way to store leftovers?
Place any leftover wraps in an airtight container in the fridge. They are best enjoyed within 2-3 days. Reheat them in the oven for best results.
2. Can I freeze these wraps?
Absolutely! Assemble them, but don’t bake before freezing. Once they’re frozen, you can bake them straight from the freezer — just add a few extra minutes to the cooking time.
3. How can I avoid soggy wraps?
Ensure your wraps are squeezed dry after washing and avoid over-saturating them with sauces before baking. If using lettuce, keep them cold until you’re ready to serve.
4. Can I substitute the chicken with another protein?
For sure! This recipe works wonders with turkey, shrimp, or even tofu for a vegetarian option. Just remember to adjust your cooking times as needed.
Nutritional Info (Optional)
While I don’t have the exact nutritional breakdown for these wraps, they are packed with protein from the chicken and healthy fats from the olive oil. Think of it this way: with a balance of protein, veggies, and healthy fats, you’re nourishing both your body and soul.
And there you have it! A delightful, approachable recipe for Cheesy Garlic Chicken Wraps that’s sure to become a regular feature in your culinary adventures. Cooking is not just about the food on your plate; it’s about the love and memories we create along the way. So, gather those around you, celebrate the art of sharing a meal, and enjoy every bite!
Happy cooking, and welcome to the wonderful world of Ivory Apron! 🍽️
PrintCheesy Garlic Chicken Wraps

Delicious wraps filled with cheesy garlic chicken, fresh veggies, and baked to crispy perfection.
- Prep Time: 10 minutes
- Cook Time: 15 minutes
- Total Time: 25 minutes
- Yield: 4 servings 1x
- Category: Snack
- Method: Baking
- Cuisine: American
- Diet: High Protein
Ingredients
- 2 cups cooked chicken, shredded
- 1 cup shredded cheese (cheddar or mozzarella)
- 4 large lettuce leaves or low carb wraps
- 3 cloves garlic, minced
- 1 tablespoon olive oil
- Salt and pepper, to taste
Instructions
- Preheat your oven to 375°F (190°C).
- Sauté the garlic in olive oil over medium heat for 1-2 minutes until fragrant.
- Add the shredded chicken to the skillet and season with salt and pepper. Heat through for 3-5 minutes.
- Make the cheese meld by sprinkling it on top and covering the skillet for 2-3 minutes.
- Build your wraps by placing the cheesy chicken mixture on the lettuce leaves or wraps.
- Wrap them up and secure with toothpicks if using lettuce.
- Bake in the oven for 5-10 minutes until crispy and golden.
- Serve and enjoy with your favorite dipping sauces!
Notes
For a spicier version, add hot sauce to the chicken mixture. These wraps are great for meal prep and can be frozen before baking.
Nutrition
- Serving Size: 1 serving
- Calories: 450
- Sugar: 1g
- Sodium: 350mg
- Fat: 20g
- Saturated Fat: 8g
- Unsaturated Fat: 9g
- Trans Fat: 0g
- Carbohydrates: 20g
- Fiber: 2g
- Protein: 30g
- Cholesterol: 70mg
Keywords: cheesy wraps, garlic chicken, easy snacks, meal prep, baked wraps
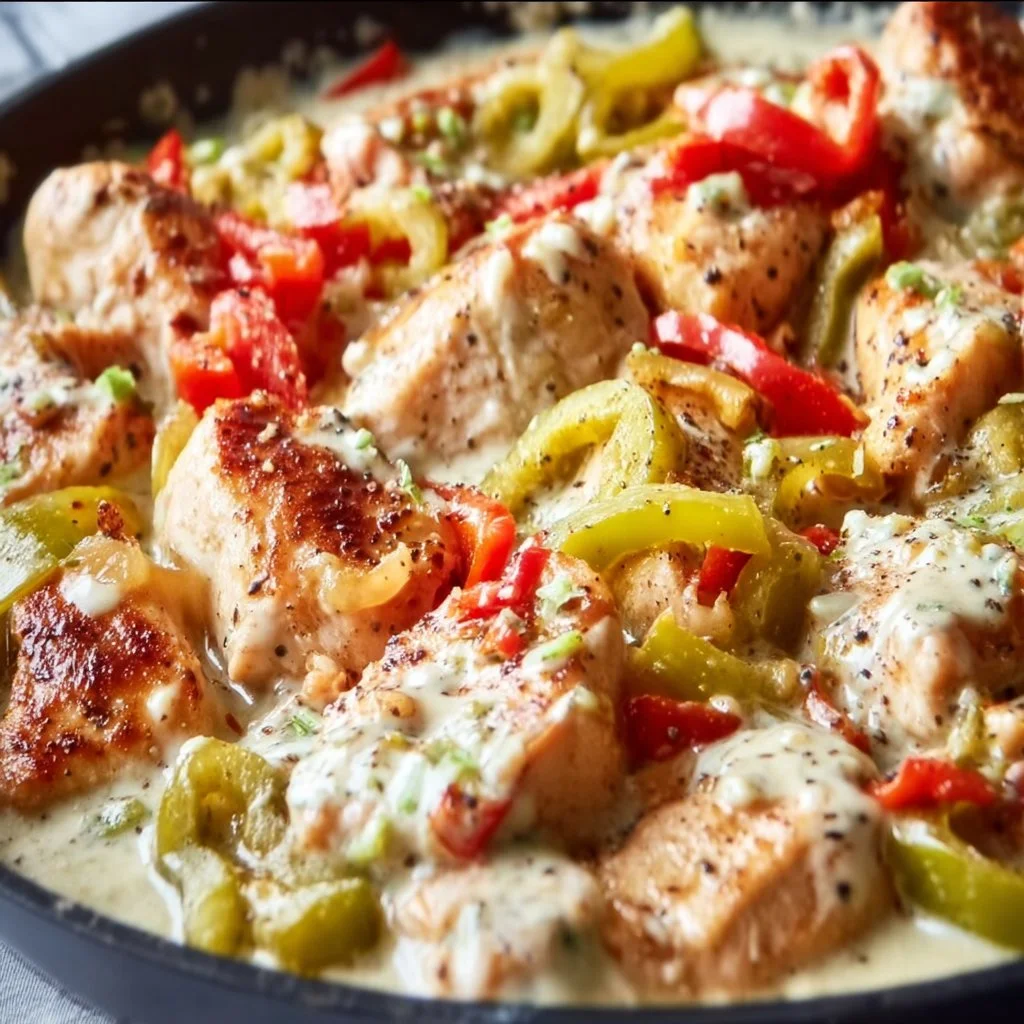
Creamy Banana Pepper Chicken Skillet
Creamy Banana Pepper Chicken Skillet: A Flavorful Journey
Welcome, food lovers! Today, I’m excited to take you on a culinary adventure with my creamy banana pepper chicken skillet. Picture this: succulent pieces of chicken, the zing of banana peppers, and a velvety sauce that dances on your taste buds. This dish is the epitome of comfort food, all cooked in one handy skillet. So, roll up your sleeves, tie on that ivory apron, and let’s elevate your weeknight dinner game!
A Taste of Nostalgia
Ah, banana peppers! Just the mention of them brings back fond memories of summer barbecues at my grandmother’s house. She was the queen of backyard gatherings, always blending flavors and colors in her dishes while effortlessly charming her guests. One particular dish that stands out is her creamy chicken sauté, infused with bright banana peppers. I remember sneaking bites when she wasn’t looking, the rich sauce coating my fingers as I’d lick them clean.
Fast forward to today, and I’ve recreated that gorgeous dish with my own twist! This creamy banana pepper chicken skillet is not just a meal; it’s a thread woven from cherished moments with family and friends, reminding us that good food is about connection, laughter, and, of course, flavor.
Ingredients
Here’s what you’ll need to bring this delectable dish to life:
-
1 pound chicken breast, cut into bite-sized pieces
Tender and juicy, chicken breast forms the hearty protein base for your dish. If you want to go for a lighter option, turkey breast works beautifully too. -
1 cup banana peppers, sliced
These vibrant peppers add a pop of heat and tang that elevates the creaminess of the sauce. Mild or hot, depending on your preference! If banana peppers aren’t available, try using sliced jalapeños or even bell peppers for a sweeter note. -
1 cup heavy cream
The magic ingredient! Heavy cream provides that luscious texture and rich flavor. If you’re looking for a lighter option, half-and-half works, but be mindful that it may not thicken quite as much. -
2 tablespoons olive oil
This will help cook the chicken, adding a hint of flavor. Feel free to substitute with butter for a richer taste or avocado oil if you prefer a higher smoke point. -
2 cloves garlic, minced
Garlic is a flavor powerhouse, bringing warmth and depth to the dish. Love garlic? Go ahead and add another clove! -
Salt and pepper to taste
Seasoning is crucial! Always taste as you go to find that perfect balance of flavors. -
Fresh parsley for garnish
A sprinkle of fresh parsley not only brightens up the dish visually but adds a subtle earthiness. You can also use basil or cilantro for a different twist!
Step-by-Step Instructions
Now, let’s get cooking! Follow these steps for a flawless creamy banana pepper chicken skillet experience.
Step 1: Sear the Chicken
-
Heat the olive oil in a large skillet over medium-high heat. Once shimmering, it’s time to add the chicken.
-
Season the chicken pieces with salt and pepper before tossing them into the hot skillet. This step is key to ensuring your chicken has flavor right from the start. Sear for about 6-8 minutes, or until the chicken is golden brown on all sides. Don’t overcrowd the pan; if you need to, work in batches.
Tip: If you want an extra crispiness, let the chicken sear without moving it for a few minutes before flipping!
Step 2: Add the Garlic and Peppers
-
When the chicken is cooked through (an internal temperature of 165°F), remove it from the skillet and set aside on a plate.
-
In the same skillet, add a little more olive oil if needed, then toss in the minced garlic and banana peppers—just a couple of minutes until fragrant. This is where your kitchen will start smelling incredible!
Chef Hack: For more intense flavor, let the garlic cook until it’s just golden—be careful not to burn it!
Step 3: Create the Cream Sauce
-
Pour in the heavy cream and stir gently to combine. Use a wooden spoon to scrape any tasty bits stuck at the bottom of the pan; these bits are packed with flavor!
-
Let the cream simmer for about 5 minutes, allowing it to thicken slightly. This is the perfect moment to taste and adjust your seasoning. Need a pinch more salt? Go for it!
Step 4: Combine Everything
- Add the cooked chicken back into the skillet, stirring well to coat it in that luscious cream sauce. Allow everything to simmer together for another 3-5 minutes. This is where the magic happens, as all those flavors meld together.
Pro Tip: If you like a little heat, try adding a pinch of red pepper flakes at this stage for an extra kick!
Step 5: Serve It Up
- Once everything is beautifully combined and warmed through, take your skillet off the heat. Garnish with fresh parsley before serving.
Presentation Tip: For a touch of elegance, spoon the dish into a shallow bowl and drizzle a little extra cream around the edge before placing the chicken in the center.
Serving Suggestions
I love serving this creamy banana pepper chicken skillet over a fluffy bed of rice, creamy polenta, or even with crusty bread for dipping. Pair it with a fresh green salad or some sautéed seasonal vegetables to round out the meal. And don’t forget a glass of something bubbly to toast your accomplishment!
Recipe Variations
Here are a few fun twists to make this dish your own:
- Spicy Creole Twist: Add in some diced Andouille sausage along with the chicken for a smoky, spicy version.
- Veggie Boost: Toss in some spinach or kale when adding the chicken back to the pan for a punch of color and nutrients.
- Swaps for Cream: For a lighter version, substitute half of the heavy cream with a creamy, low-fat yogurt stirred in at the end for brightness.
- Cheesy Goodness: Stir in a handful of grated Parmesan right at the end for a cheesy, umami-rich finish.
- Citrus Zing: A squeeze of lemon or lime juice at the end brightens the entire dish and cuts through the richness!
Chef’s Notes
Every time I whip up this creamy banana pepper chicken skillet, I think back to those days in Grandma’s kitchen. I’ve tweaked her original recipe over the years—using less cream, emphasizing fresh peppers, and adding my little kitchen hacks. It’s amazing how one dish can bring together generations of flavor and smiles.
I remember one time I invited friends over for dinner, and I was still fiddling with the prep when they arrived. Instead of panicking, I welcomed them in and made it a group effort. Everyone pitched in, and we laughed while cooking together, transforming an ordinary dinner into a memory we still talk about! Food truly has a way of connecting us.
FAQs and Troubleshooting
1. My sauce is too thin; how can I thicken it?
If your sauce isn’t thickening as desired, allow it to simmer a bit longer over low heat. Alternatively, mix a teaspoon of cornstarch with a tablespoon of cold water to form a slurry, adding it to the sauce and stirring well.
2. Can I use frozen chicken?
Absolutely! Just be sure to thaw it fully before cooking. If you’re short on time, you can also throw frozen chicken directly into the skillet, just extend cooking time to ensure it cooks through completely.
3. What can I do if my dish is too salty?
A pinch of sugar or a splash of vinegar can help cut the saltiness. You can also serve the chicken over more rice or noodles to balance the flavors.
4. How do I store leftovers?
Keep any leftovers in an airtight container in the fridge for up to 3 days. Reheat gently on the stove, adding a splash of water or cream to loosen up the sauce.
Nutritional Info (Optional)
While specific nutritional values can vary, here’s a rough estimate per serving (1/4 of the recipe):
- Calories: 450
- Protein: 35g
- Total Fat: 30g
- Carbohydrates: 10g
And that’s how you create a cozy, flavorful Creamy Banana Pepper Chicken Skillet! I hope it fills your kitchen with warmth and sparks joyful memories. Happy cooking, and don’t forget to share your creations with me—let’s keep the kitchen magic alive together!
PrintCreamy Banana Pepper Chicken Skillet

A delicious one-pan meal featuring chicken cooked in a creamy sauce with banana peppers, perfect for weeknight dinners.
- Prep Time: 15 minutes
- Cook Time: 30 minutes
- Total Time: 45 minutes
- Yield: 4 servings 1x
- Category: Main Course
- Method: Skillet Cooking
- Cuisine: American
- Diet: Gluten-Free
Ingredients
- 1 pound chicken breast, cut into bite-sized pieces
- 1 cup banana peppers, sliced
- 1 cup heavy cream
- 2 tablespoons olive oil
- 2 cloves garlic, minced
- Salt and pepper to taste
- Fresh parsley for garnish
Instructions
- Heat the olive oil in a large skillet over medium-high heat. Season the chicken pieces with salt and pepper before tossing them into the hot skillet. Sear for about 6-8 minutes, or until the chicken is golden brown on all sides.
- Add the minced garlic and banana peppers to the skillet and cook until fragrant.
- Pour in the heavy cream and stir to combine. Let the cream simmer for about 5 minutes to thicken.
- Combine the cooked chicken back into the skillet and allow it to simmer together for another 3-5 minutes.
- Serve the dish garnished with fresh parsley.
Notes
For a spicy twist, consider adding red pepper flakes or other peppers.
Nutrition
- Serving Size: 1 serving
- Calories: 450
- Sugar: 5g
- Sodium: 600mg
- Fat: 30g
- Saturated Fat: 15g
- Unsaturated Fat: 10g
- Trans Fat: 0g
- Carbohydrates: 10g
- Fiber: 2g
- Protein: 35g
- Cholesterol: 90mg
Keywords: chicken, creamy, banana peppers, skillet, easy dinner
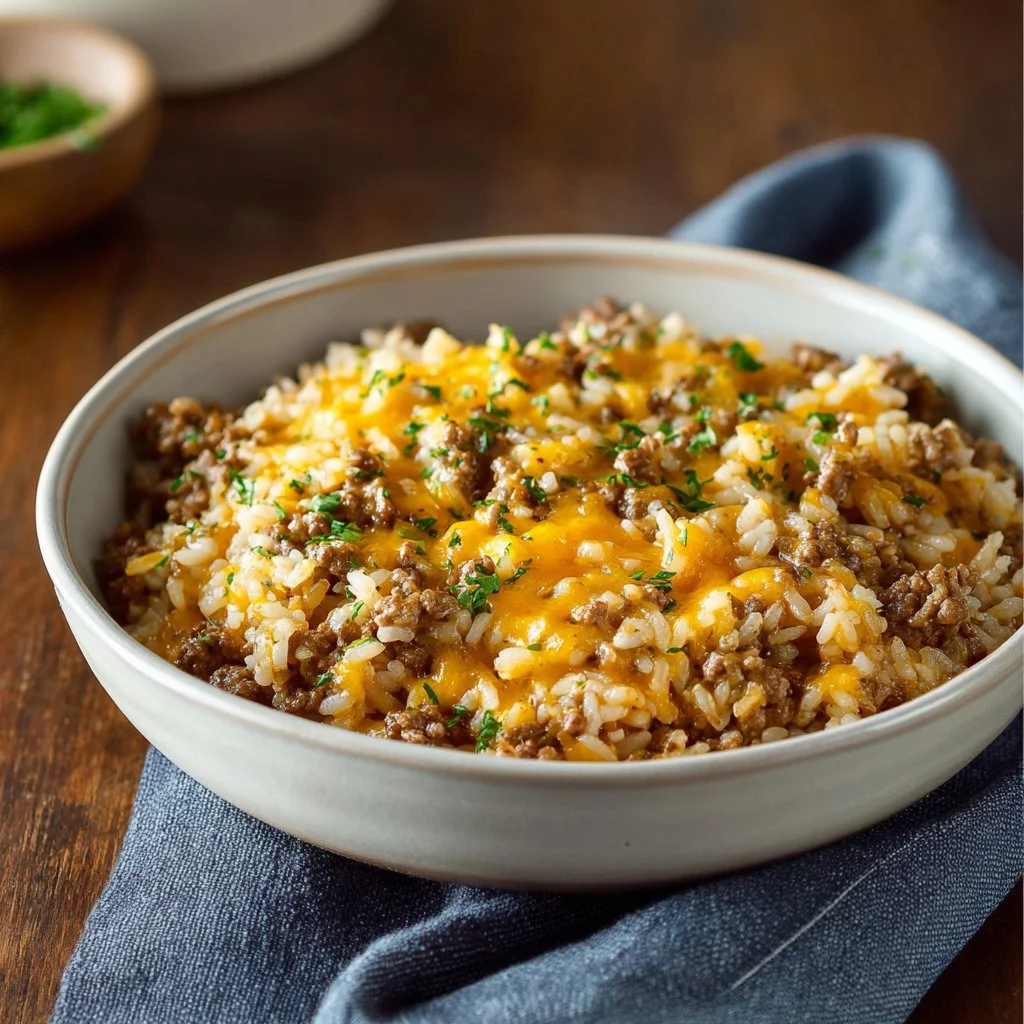
Cheesy Ground Beef and Rice Casserole
Comfort in a Casserole: Cheesy Ground Beef and Rice Casserole Recipe
Hello, fellow food lovers! Today, I’m inviting you on a delicious journey to one of those cozy dishes that brings pure comfort to your table — Cheesy Ground Beef and Rice Casserole. If you’ve ever walked into a friend’s house on a chilly evening and been greeted by the rich, warming aroma of something bubbling away in the oven, then you know the pure joy that a casserole can bring. It’s like a warm hug after a long day!
This dish is a nostalgic favorite of mine, hailing from those busy weeknights when dinner needed to be not just quick but also satisfying. Cheesy Ground Beef and Rice Casserole is one of those recipes that effortlessly combines heartiness with cheesiness in a balanced blend that is as delicious as it is uncomplicated. Plus, it’s all made in one dish, which means fewer dishes to wash—a win-win at any time!
Imagine your kitchen filled with enticing aromas as you create this dish. The satisfaction doesn’t just come from the meal but from the memories being made around your table. Whether you’re feeding a hungry family, hosting a friend, or simply wanting to treat yourself, this casserole hits the spot every time.
So, grab your apron, preheat that oven, and let’s dive into creating this comforting treasure together.
Personal Story
There is something so deeply nostalgic about casseroles for me. Growing up, my family had a tradition of “casserole night” every Thursday. My mom would whip up different variations, but one night, she made a cheesy ground beef and rice casserole that forever etched itself into my memory. My younger self was mesmerized as she stirred the mixture of beef, fluffy rice, and melted cheese together, and each bite transported me into a delicious dream world.
I remember setting the table with mismatched dinner plates and the warmth of our kitchen filled with laughter. My siblings and I would compete for the last scoop, and it didn’t take long for us to dub it "the famous cheesy pile." Those moments were more than just about the food; they were about gathering, sharing, and love.
Now, as an adult, whenever I make this dish, it brings back waves of those cherished memories. It reminds me to slow down, savor the flavors, and prioritize the beautiful connections that food fosters. So let’s recreate that sense of warmth and togetherness right in your own home!
Ingredients
Here’s what you’ll need to make this delicious Cheesy Ground Beef and Rice Casserole:
-
1 lb lean ground beef
The star of our dish! Lean beef keeps it hearty but doesn’t add unnecessary grease. Looking for a substitute? Ground turkey or chicken works well if you prefer lighter meat. -
1 small onion, diced
This adds a sweet depth to our dish. If you’re not a fan of onions, leeks or shallots can offer similar flavor. You can also skip this entirely if you’d like a milder taste! -
2 cloves garlic, minced
Garlic is a must for flavor! If you’re in a pinch, garlic powder can be used instead; just 1/2 teaspoon will do. -
2 cups cooked white rice
Feel free to use leftover rice or even try brown rice for a nuttier flavor! Just make sure it’s fully cooked before adding. -
1 can (10.5 oz) cream of mushroom soup (or cream of chicken)
This creamy goodness acts as the binding agent that brings everything together. If you’re looking for a healthier alternative, try making your own cream of mushroom soup from scratch. -
1/2 cup milk or beef broth
This adds additional moisture to the casserole. Vegetable broth is a great option for vegetarians, while heavy cream can lend an even richer texture. -
2 cups shredded cheddar cheese (divided)
Because, let’s be honest, the more cheese, the better! Try swapping with Monterey Jack or a mix of your favorites. -
1 tsp paprika
Paprika adds a subtle smokiness to the dish. You can substitute with smoked paprika for more depth or even cayenne for a kick! -
Salt and pepper to taste
Don’t forget these essentials! Freshly cracked black pepper delivers the best flavor. -
Optional: chopped parsley for garnish
A sprinkle of fresh parsley adds color and a touch of brightness to your dish before serving.
Step-by-Step Instructions
Step 1: Preheat the Oven
Preheat your oven to 350°F (175°C). This step is crucial for ensuring your casserole bakes evenly, allowing all those delicious flavors to meld together perfectly.
Step 2: Cook the Beef
In a large skillet over medium heat, add the ground beef and diced onion. Season with salt and pepper. Cook until the beef is browned and the onions are translucent, around 5-7 minutes. Use a spatula to break the beef into small crumbles. Here’s a handy chef tip: if you’re using lean beef, cooking it in a non-stick pan can help it brown beautifully without sticking!
Step 3: Add Garlic and Rice
Stir in the minced garlic and cook for another minute until fragrant. This makes the whole kitchen smell divine! Next, add in your cooked rice. Mix gently to combine. Pro tip: using leftover rice makes this step quicker — just ensure it’s cold and fluffy to avoid mushiness.
Step 4: Create the Sauce
In a separate bowl, combine the cream of mushroom soup and milk (or beef broth). Whisk until smooth, then pour this mixture over the beef and rice in the skillet. Stir well to blend everything together. This creates a creamy, flavorful base for our casserole.
Step 5: Add Cheese and Seasonings
Add in 1½ cups of shredded cheddar cheese and the paprika, mixing well until everything is coated in cheesy goodness. Don’t be shy about tasting at this point—just a little bit to ensure the seasoning is right!
Step 6: Transfer to Casserole Dish
Grease a 9×13-inch casserole dish with a bit of cooking spray or butter. Pour the mixture into the prepared dish and spread it out evenly. Don’t worry about it looking perfect; it will all blend and bubble together beautifully in the oven!
Step 7: Top It Off
Sprinkle the remaining ½ cup of cheddar cheese on top. This will create a golden, bubbly crust that you’ll look forward to digging into!
Step 8: Bake
Pop the casserole into your preheated oven and bake for about 30-35 minutes, or until the cheese is bubbly and golden. Enjoy the aromas wafting through your home during this time! It’s like an olfactory hug that brings everyone together.
Step 9: Chill and Serve
Once ready, remove the casserole from the oven, and let it sit for about 5-10 minutes before serving. This gives it a chance to set and makes serving a whole lot easier. Trust me, your friends and family will want to dive in right away, but it’s worth the wait!
Serving Suggestions
When it comes to serving, remember that presentation can elevate any dish. Scoop generous portions onto plates, letting the gooey cheese stretch tantalizingly. Add a sprinkle of chopped parsley for a pop of color. Serve with a side salad or some crusty bread for a complete meal. Trust me, the sight of cheesy goodness is enough to keep your guests coming back for seconds!
Recipe Variations
Feeling adventurous? Here are a few fun twists and variations you can try with this casserole:
-
Vegetable-Packed Casserole: Throw in cooked vegetables like spinach, bell peppers, or peas for added nutrition and color.
-
Mexican-Inspired: Add taco seasoning, black beans, and corn for a Mexican flair. Top with jalapeños or avocado before serving.
-
Sautéed Mushrooms: For those mushroom lovers, sauté some fresh mushrooms along with the beef for an extra layer of flavor.
-
Different Cheeses: Experiment with different cheese combinations like gouda or pepper jack for a flavor twist.
-
Gluten-Free Alternative: Use gluten-free cream of mushroom soup or create a homemade version from scratch without flour.
Chef’s Notes
Ah, the evolution of this recipe! It has been a staple in my house and has transformed over the years, from using whatever I had in the fridge to being a full-on crowd-pleaser at gatherings. I once accidentally added too much garlic (is there such a thing?) and discovered it resulted in a surprisingly delightful flavor!
I often reminisce about my "Casserole Night" and how this dish fits perfectly as comfort food. It’s one of those meals that not only satisfies the stomach but also warms the heart.
FAQs and Troubleshooting
Q: Can I make this casserole ahead of time?
A: Absolutely! You can assemble the casserole and keep it covered in the refrigerator for up to 24 hours. Just pop it in the oven when you’re ready to bake!
Q: How do I store leftovers?
A: Store any leftovers in an airtight container in the fridge for up to 3 days. You can reheat portions in the microwave or pop it back in the oven.
Q: My casserole seems dry; what did I do wrong?
A: Casseroles can dry out if they’re baked too long or if there’s insufficient moisture. Ensure you’re not overcooking it and double-check the liquid ratio before baking.
Q: Can I freeze this casserole?
A: Definitely! This casserole freezes well. Just cool it completely before cutting leftovers into portions and storing in an airtight container. Thaw overnight in the fridge before reheating!
Nutritional Info
While the exact nutritional content will vary based on specific ingredient choices and serving sizes, a serving of Cheesy Ground Beef and Rice Casserole generally contains:
- Calories: ~400-450
- Protein: ~25g
- Carbohydrates: ~45g
- Fat: ~20g
(Nutritional info calculated based on standard ingredients; always check labels for accuracy!)
Now that you have all the tips and tricks for crafting this delectable Cheesy Ground Beef and Rice Casserole, I’m excited to hear how it turns out! Remember, this dish is not just about food; it’s about community, joy, and those moments that linger long after the last bite. Happy cooking, my friends! 🍽️
PrintCheesy Ground Beef and Rice Casserole

A comforting and hearty casserole combining ground beef, rice, and cheese, perfect for cozy dinners.
- Prep Time: 15 minutes
- Cook Time: 35 minutes
- Total Time: 50 minutes
- Yield: 4 servings 1x
- Category: Main Course
- Method: Baking
- Cuisine: American
- Diet: Carnivore
Ingredients
- 1 lb lean ground beef
- 1 small onion, diced
- 2 cloves garlic, minced
- 2 cups cooked white rice
- 1 can (10.5 oz) cream of mushroom soup
- 1/2 cup milk or beef broth
- 2 cups shredded cheddar cheese (divided)
- 1 tsp paprika
- Salt and pepper to taste
- Optional: chopped parsley for garnish
Instructions
- Preheat your oven to 350°F (175°C).
- Cook the ground beef and diced onion in a skillet until the beef is browned.
- Add the minced garlic and cook for another minute.
- Combine the cream of mushroom soup and milk (or beef broth) in a separate bowl.
- Add 1½ cups of shredded cheddar cheese and paprika to the beef mixture.
- Transfer the mixture to a greased casserole dish.
- Top it off with the remaining ½ cup of cheddar cheese.
- Bake for about 30-35 minutes until bubbly and golden.
- Chill for 5-10 minutes before serving.
Notes
Feel free to modify the ingredients or add in your favorite veggies for a twist.
Nutrition
- Serving Size: 1 serving
- Calories: 400
- Sugar: 3g
- Sodium: 750mg
- Fat: 20g
- Saturated Fat: 10g
- Unsaturated Fat: 8g
- Trans Fat: 0g
- Carbohydrates: 45g
- Fiber: 2g
- Protein: 25g
- Cholesterol: 70mg
Keywords: casserole, beef, cheese, comfort food, easy dinner