
Viral Carrot Ribbon Salad
The Viral Carrot Ribbon Salad: A Fresh Take on a Classic!
Hey there, fellow food lovers! 🌟 I’m so excited to dive into a vibrant dish that’s not just easy to prepare but also bursting with flavor and color—the Viral Carrot Ribbon Salad! This recipe has been making waves online, and I can see why! It’s the kind of dish that makes you want to whip up a big batch and delight your family or guests with its stunning presentation and crisp texture.
Picture this: you’ve had a long day, and rather than reaching for the usual takeout menu, you decide to create something fresh and exciting in your kitchen. Enter: the carrot ribbon salad. Not only is it a feast for the eyes, but it’s also the epitome of healthy eating without sacrificing taste or elegance. And the best part? It’s as easy as 1-2-3! This salad is the perfect balance of sweet, tangy, and crunchy, often making its way onto my dinner table as a side for roasted meats or even as a stand-alone dish on warm days.
This post is about more than just another salad recipe. It’s about connecting with food—about creating moments where we gather around the dining table, share stories, and build memories. So, grab your peeler and let’s get ready to whip up something sensational. Trust me, your taste buds will thank you!
Personal Story
Growing up, my kitchen was always the heart of our home. My mom had this way of transforming the simplest vegetables into colorful masterpieces. I remember one summer afternoon when she and I decided to visit the local farmer’s market. Ah, the sights and smells! Fresh herbs, sun-ripened tomatoes, and the brightest carrots I had ever seen.
After a stroll through the market and a few bags filled to the brim with fresh produce, we returned home and jumped into the kitchen. Instead of our usual carrot sticks, my mom suggested we try making a ribbon salad. I was a bit apprehensive at first; I thought it might be too fancy for our laid-back family meals. But as soon as those vibrant carrot ribbons hit the bowl, soaked in a simple dressing, I was in love! It was dazzling, delicious, and such a fun way to eat my veggies. Fast forward to today, and I’ve added my own twist to that nostalgic recipe, making it even easier and, dare I say, viral-worthy.
Ingredients
Here’s what you’ll need to assemble your lovely carrot ribbon salad:
-
4 large carrots
Fresh and crunchy carrots are the stars of this dish. Try to opt for medium to large carrots for the best ribbons. If you’re in a pinch, colorful carrots (purple, yellow, or white) can add an even more stunning presentation! -
1 tablespoon olive oil
A high-quality olive oil brings richness and helps emulsify the dressing. Substitute with avocado oil for a milder flavor or walnut oil for a nutty twist. -
1 tablespoon apple cider vinegar
The acidity from the vinegar gives the salad a delightful tang. You can also swap this for white wine vinegar or lemon juice for a brighter kick! -
1 teaspoon honey or maple syrup
This adds a touch of sweetness to balance the vinegar’s acidity. For vegan options, stick with maple syrup. You can also reduce the amount or substitute with agave nectar if you prefer! -
Salt and pepper to taste
Essential for enhancing flavor. I always suggest using flaky sea salt to elevate the dish, as it contributes a lovely texture, but regular table salt works just fine. -
Red pepper flakes (optional)
For a little heat! These flavorful flakes add a popping contrast to the sweet carrots. Feel free to adjust the amount based on your spice preference. -
Fresh herbs (such as cilantro or parsley) for garnish
A sprinkle of fresh herbs makes the salad sing! If you’re not a fan, feel free to swap with fresh mint for an unexpected twist or skip altogether.
Step-by-Step Instructions
Step 1: Prepare Your Carrots
First things first, you want to give your carrots a good scrub. Make sure they’re nice and clean! Then, cut off the tops and tails. Now, it’s time to create those fabulous ribbons. Using a vegetable peeler, take each carrot and peel long strips from top to bottom. Try to keep the pressure consistent for even ribbons! You can also use a mandoline for perfectly uniform strips if you have one in your kitchen.
Step 2: Make the Dressing
In a small bowl or jar, combine the olive oil, apple cider vinegar, and honey (or maple syrup). Whisk or shake until well combined. Here’s a tip: You can make this dressing up to a week in advance and store it in the fridge for easy access. Each time you use it, give it a good shake before pouring!
Step 3: Assemble the Salad
In a large mixing bowl, toss those beautiful carrot ribbons and pour the dressing over them. Mix gently but thoroughly! You want the ribbons to soak in that delicious dressing without tearing apart. If you have the patience, let the salad sit for about 10 minutes before serving; this allows the flavors to meld and the carrots to soften slightly while still maintaining a delightful crunch!
Step 4: Season to Taste
Once your ribbons are all dressed up, season generously with salt, pepper, and red pepper flakes if using. Give it one last toss and taste – adjust if needed! This is your chance to make it perfect for your palate.
Step 5: Garnish and Serve
Transfer your beautiful salad onto a serving dish and finish with a sprinkle of fresh herbs. Voilà! You’ve just created something that all of your friends will want the recipe for.
Serving Suggestions
To serve this carrot ribbon salad, I love to create beautiful layers on a platter or in a rustic bowl. A sprinkle of toasted nuts or seeds—think sunflower or pumpkin—adds an extra crunch. Pair this salad with grilled chicken, fish, or even a hearty grain dish for a complete feast. You can also serve it as a refreshing side for barbecues or picnics. Just imagine the summer sunshine and friends laughing around the table!
Recipe Variations
- Add Protein: Toss in some chickpeas for added protein, or sprinkle with feta or goat cheese for creaminess.
- Nutty Delight: Include toasted walnuts or almonds for an extra crunch and flavor boost.
- Add Fruits: Diced apples or pears can bring a lovely sweetness and freshness to the mix.
- Switch Up the Veggies: Try zucchini ribbons alongside your carrot ribbons for a full rainbow effect!
- Spice it Up: Experiment with different spices in your dressing—some fresh ginger or a spoonful of Dijon mustard can take it to a whole new level!
Chef’s Notes
You know, when I first started making this salad, I used to stress about getting those ribbons just right. But after a few batches, I learned that the beauty of cooking lies in the imperfections! The curves and twists of the ribbons add character. Plus, cooking should be fun and enjoyable, so don’t be afraid to play with your food! The more you experiment, the more delicious surprises you’ll uncover.
And let’s not forget that this recipe has evolved over time—what started as a simple side is now a staple at dinner parties and potlucks, consistently receiving rave reviews. It’s amazing how something so simple can bring so much joy.
FAQs and Troubleshooting
-
Why are my carrot ribbons not coming out properly?
This usually means that the carrots might be too thick or not fresh enough. Ensure you’re using large, firm carrots and apply consistent pressure while peeling. -
How long does the salad last?
This salad is best enjoyed fresh, but you can store leftovers in an airtight container in the fridge for up to 2 days. The carrots may soften a bit, but they’ll still be tasty! -
Can I make this salad ahead of time?
Absolutely! You can prepare the dressing and carrot ribbons separately several hours in advance. Just combine them when you’re ready to serve. -
I don’t like vinegar. Can I skip it?
Feel free to substitute with a squeeze of lemon juice or a little bit of yogurt mixed into the dressing for a creamy alternative!
Nutritional Info (Optional)
For those counting calories, this carrot ribbon salad is a light, nutrient-dense option. Each serving typically contains around 70 calories, packed with vitamins A and C, along with healthy fats from olive oil. Perfect for those who want to indulge while staying mindful of their health!
Remember, my friends, cooking should be an adventure. So, as you whip up this vibrant carrot ribbon salad, let it inspire you to explore new flavors and have fun in the kitchen. Happy cooking! 🥕✨
PrintViral Carrot Ribbon Salad

A vibrant, healthy carrot ribbon salad that’s easy to prepare and bursting with flavor and color.
- Prep Time: 15 minutes
- Cook Time: 0 minutes
- Total Time: 15 minutes
- Yield: 4 servings 1x
- Category: Salad
- Method: No cooking required
- Cuisine: Healthy
- Diet: Vegan
Ingredients
- 4 large carrots
- 1 tablespoon olive oil
- 1 tablespoon apple cider vinegar
- 1 teaspoon honey or maple syrup
- Salt and pepper to taste
- Red pepper flakes (optional)
- Fresh herbs (such as cilantro or parsley) for garnish
Instructions
- Prepare your carrots by scrubbing them clean, cutting off the tops and tails, and using a vegetable peeler to create long ribbons.
- Make the dressing by combining olive oil, apple cider vinegar, and honey (or maple syrup) in a small bowl and whisking until well mixed.
- Assemble the salad by tossing the carrot ribbons in a large bowl with the dressing until well coated.
- Season the salad with salt, pepper, and red pepper flakes to taste, then give it a final toss.
- Garnish with fresh herbs and serve immediately.
Notes
This salad is best enjoyed fresh, and can be made ahead by preparing the dressing and carrot ribbons separately.
Nutrition
- Serving Size: 1 serving
- Calories: 70
- Sugar: 3g
- Sodium: 150mg
- Fat: 5g
- Saturated Fat: 0.5g
- Unsaturated Fat: 4.5g
- Trans Fat: 0g
- Carbohydrates: 10g
- Fiber: 3g
- Protein: 1g
- Cholesterol: 0mg
Keywords: carrot salad, healthy salad, vegan salad, refreshing salad, summer salad

Baked Marinated Chicken Salad with Mozzarella and Balsamic Vinaigrette
Baked Marinated Chicken Salad with Mozzarella and Balsamic Vinaigrette
Hello food lovers! Today, I’m excited to whip up a delightful dish that will make your taste buds dance with joy: Baked Marinated Chicken Salad with Mozzarella and Balsamic Vinaigrette. Picture this: tender, marinated chicken that’s baked to perfection, nestled amongst vibrant greens, creamy mozzarella, and juicy cherry tomatoes, all drizzled with a luscious homemade balsamic vinaigrette. Can you say yum?
Now, I know what you might be thinking — salads can sometimes feel like a chore, right? But trust me, this salad is anything but boring! It’s a celebration of flavors and textures all in one bowl. This dish is ideal for a light lunch, a chic dinner party starter, or even a fantastic meal prep option that brightens up your week.
What makes this salad so special? It’s not just about the freshness of the ingredients; it’s also about the finesse of the marinade that transforms simple chicken into a flavorful centerpiece. Plus, it gives you the perfect opportunity to gather around the table with friends or family and share in the joy of good food.
So grab your apron (you know I love that!), put on your favorite playlist, and let’s dive into this delicious journey together. Cooking should feel approachable and rewarding, and I’m here to guide you every step of the way. Let’s get started!
Personal Story
This recipe holds a special place in my heart, and here’s why. I remember one lovely summer evening when I had a few friends over for dinner. The sun was setting, the air was warm, and the garden was in full bloom — the perfect backdrop for some great conversation. I wanted to create a meal that felt festive but didn’t require me to be stuck in the kitchen all night.
I decided on this vibrant Baked Marinated Chicken Salad, and the reactions were priceless. As I brought out the beautifully arranged salad, my friends’ eyes lit up. There’s just something magical about seeing a dish you’ve poured your heart into being enjoyed by those you care about. We sat around the table, laughing, reminiscing, and savoring every bite together.
That night, I realized that food brings people together in such a beautiful way. It became clear to me that cooking is not just about sustenance; it’s about creating memories. This salad became a staple in my hosting repertoire, reminding me of that perfect summer night — full of joy, laughter, and delicious flavors. I can’t wait for you to create your own cherished memories with this recipe!
Ingredients
Let’s dive into the ingredient list! Here’s what you’ll need to create this colorful salad:
-
Chicken Breasts: The star of the dish! Use boneless, skinless chicken breasts for tenderness. If you’re short on time, you can substitute them with thinly sliced chicken thighs for a more flavorful option.
-
Mozzarella Balls: Look for fresh mozzarella (bocconcini) as they provide a creaminess that elevates the dish. If you’re dairy-free, try using marinated tofu or skip the cheese entirely.
-
Avocado: Adds creaminess and healthy fats. Opt for ripe avocados — if they’re not ripe, place them in a brown bag for a day or two. You can swap for sliced almonds for a crunchy texture.
-
Cherry Tomatoes: These sweet little gems add a pop of color and flavor. If you can’t find cherry tomatoes, feel free to use grape tomatoes or even diced regular tomatoes.
-
Baby Spinach: Soft and nutrient-dense, it serves as the perfect base. As a substitute, you can use arugula for a peppery twist or kale, but make sure to massage it well for tenderness.
-
Balsamic Vinaigrette: This is where the magic happens! A good store-bought vinaigrette works, but homemade is always best. You can use a lemon vinaigrette for a zippier approach as well.
-
Olive Oil: Extra virgin olive oil adds richness to the vinaigrette. If you prefer a stronger flavor, try a flavored oil like garlic-infused olive oil.
-
Salt and Pepper: Essential for seasoning, these two will enhance the flavors of your dish. Freshly cracked black pepper is a must for that extra kick!
Step-by-Step Instructions
Now that we have our ingredients ready, let’s get cooking! Follow these simple steps, and don’t forget to have fun along the way:
Step 1: Marinate the Chicken
- Prep the Marinade: In a bowl, combine olive oil, salt, pepper, and balsamic vinaigrette. Whisk until blended.
- Add the Chicken: Place your chicken breasts in a zip-lock bag or a shallow dish, and pour the marinade over the top. Ensure each piece is well-coated.
- Let it Sit: Allow the chicken to marinate in the fridge for at least 30 minutes to an hour. If you have time, marinate overnight for deeper flavor!
Step 2: Bake the Chicken
- Preheat the Oven: Set your oven to 400°F (200°C). Preheating is key for even cooking!
- Prep the Baking Dish: Lightly grease a baking dish or line it with parchment paper for easy cleanup. Spread the marinated chicken in an even layer.
- Bake: Cook the chicken for 20-25 minutes, or until it reaches an internal temperature of 165°F (75°C). Keep an eye on it, as ovens can vary. The chicken should be golden brown and juicy!
Step 3: Assemble the Salad
- Chop the Veggies: While the chicken is baking, chop the avocado and halve the cherry tomatoes. Throw the spinach into a large mixing bowl.
- Slice the Chicken: Once the chicken is done, let it rest for five minutes before slicing it into bite-sized pieces. This helps keep the juices locked in!
- Combine: Add the sliced chicken, avocado, mozzarella balls, and cherry tomatoes to the bowl of spinach. Toss gently to combine, ensuring you don’t mash the avocado!
Step 4: Dress the Salad
- Add Vinaigrette: Drizzle more balsamic vinaigrette over the salad, tossing lightly so everything gets a lovely coating. Taste and adjust seasoning if needed — don’t be shy with that seasoning!
Step 5: Serve and Enjoy
- Plating: Serve the salad family-style on a large platter or individual bowls for a chic presentation. Add an extra sprinkle of salt and pepper on top for a finishing touch.
And voila! You’ve made a scrumptious Baked Marinated Chicken Salad that’s bursting with flavors and textures.
Serving Suggestions
To serve this salad beautifully, consider arranging it on a large wooden board or platter for a rustic feel. You can garnish with some fresh basil leaves for added aroma and color, or sprinkle some toasted pine nuts for an extra crunch. Serve alongside a rustic baguette or some whole-grain crackers for a complete meal that everyone will love.
Recipe Variations
Want to switch things up? Here are a few fun variations to consider:
- Mediterranean Twist: Add olives, sun-dried tomatoes, and feta cheese instead of mozzarella for a Mediterranean flair.
- Zesty Citrus: Incorporate segments of orange or grapefruit for a refreshing citrus burst.
- Grilled Chicken: Fire up the grill instead of baking. Grilled chicken adds great smoky flavors.
- Substitute Greens: Swap the baby spinach for mixed greens, or throw in some arugula for a peppery kick.
- Protein Swap: Try using shrimp or firm tofu for a different protein option — both work wonderfully!
Chef’s Notes
I can’t tell you how many times I’ve made this salad for gatherings, and it never fails to impress. It’s one of those go-to recipes that I can adapt based on what I have on hand. In fact, I once experimented with using leftover grilled vegetables — it transformed the dish into a whole new experience! Just goes to show how versatile this salad can be.
And trust me, if you let the marinated chicken sit longer, the flavors deepen, creating a brilliantly tasty meal. It’s perfect for weeknight dinners, meal-prepping for the week, or impressing guests at a dinner party. Whatever the occasion, this salad is bound to become a favorite in your kitchen, just like it has in mine!
FAQs and Troubleshooting
-
What if my chicken isn’t cooking evenly?
- Ensure that your chicken breasts are of similar thickness. If you have uneven pieces, consider pounding them down to an even thickness before marinating for consistent cooking.
-
Can I make this salad ahead of time?
- Yes! You can marinate the chicken and bake it ahead of time. Just store the assembled salad in the fridge for no longer than a day to avoid sogginess — dress just before serving!
-
What can I do if my salad dressing is too tangy?
- If you find your balsamic vinaigrette too tangy, try adding a teaspoon of honey or maple syrup to balance the acidity.
-
How do I store leftovers?
- Keep any leftovers in an airtight container in the fridge for up to three days. I recommend re-mixing before serving, as the dressing can settle.
Nutritional Info (Per Serving)
(Note: Nutritional information may vary based on specific ingredient brands and quantities.)
- Calories: 420
- Protein: 35g
- Fat: 25g
- Carbohydrates: 10g
- Fiber: 5g
- Sugar: 2g
I hope you enjoyed this cooking journey as much as I did! Remember, great food is about connection, creativity, and joy. I can’t wait to hear how this Baked Marinated Chicken Salad turned out for you! Until then, happy cooking!
PrintBaked Marinated Chicken Salad with Mozzarella and Balsamic Vinaigrette

A vibrant salad featuring tender baked marinated chicken, fresh mozzarella, and a homemade balsamic vinaigrette, perfect for any occasion.
- Prep Time: 15 minutes
- Cook Time: 30 minutes
- Total Time: 45 minutes
- Yield: 4 servings 1x
- Category: Salad
- Method: Baking
- Cuisine: American
- Diet: Gluten-Free
Ingredients
- 2 boneless, skinless Chicken Breasts
- 1 cup fresh Mozzarella Balls (bocconcini)
- 1 ripe Avocado, diced
- 1 cup Cherry Tomatoes, halved
- 4 cups Baby Spinach
- 1/4 cup Balsamic Vinaigrette
- 2 tablespoons Extra Virgin Olive Oil
- Salt and Pepper to taste
Instructions
- Marinate the Chicken: In a bowl, combine olive oil, salt, pepper, and balsamic vinaigrette. Whisk until blended. Place chicken in a zip-lock bag or dish, pour the marinade over, and refrigerate for 30 minutes to 1 hour.
- Preheat the Oven: Set oven to 400°F (200°C).
- Prep the Baking Dish: Grease a baking dish and spread marinated chicken in an even layer. Bake for 20-25 minutes until cooked through.
- Chop the Veggies: Dice avocado and halve cherry tomatoes while the chicken bakes, and add spinach to a large mixing bowl.
- Slice the Chicken: Once baked, let it rest, then slice it into bite-sized pieces and add to the salad bowl, along with avocado, mozzarella, and tomatoes.
- Add Vinaigrette: Drizzle additional balsamic vinaigrette over the salad and toss gently.
- Serve and Enjoy: Present the salad on a platter or in individual bowls with a sprinkle of seasoning.
Notes
Allow the chicken to marinate longer for deeper flavor. Adjust seasoning and dressing to taste.
Nutrition
- Serving Size: 1 serving
- Calories: 420
- Sugar: 2g
- Sodium: 500mg
- Fat: 25g
- Saturated Fat: 6g
- Unsaturated Fat: 18g
- Trans Fat: 0g
- Carbohydrates: 10g
- Fiber: 5g
- Protein: 35g
- Cholesterol: 75mg
Keywords: Chicken Salad, Marinated Chicken, Balsamic Vinaigrette, Summer Salad, Healthy Lunch
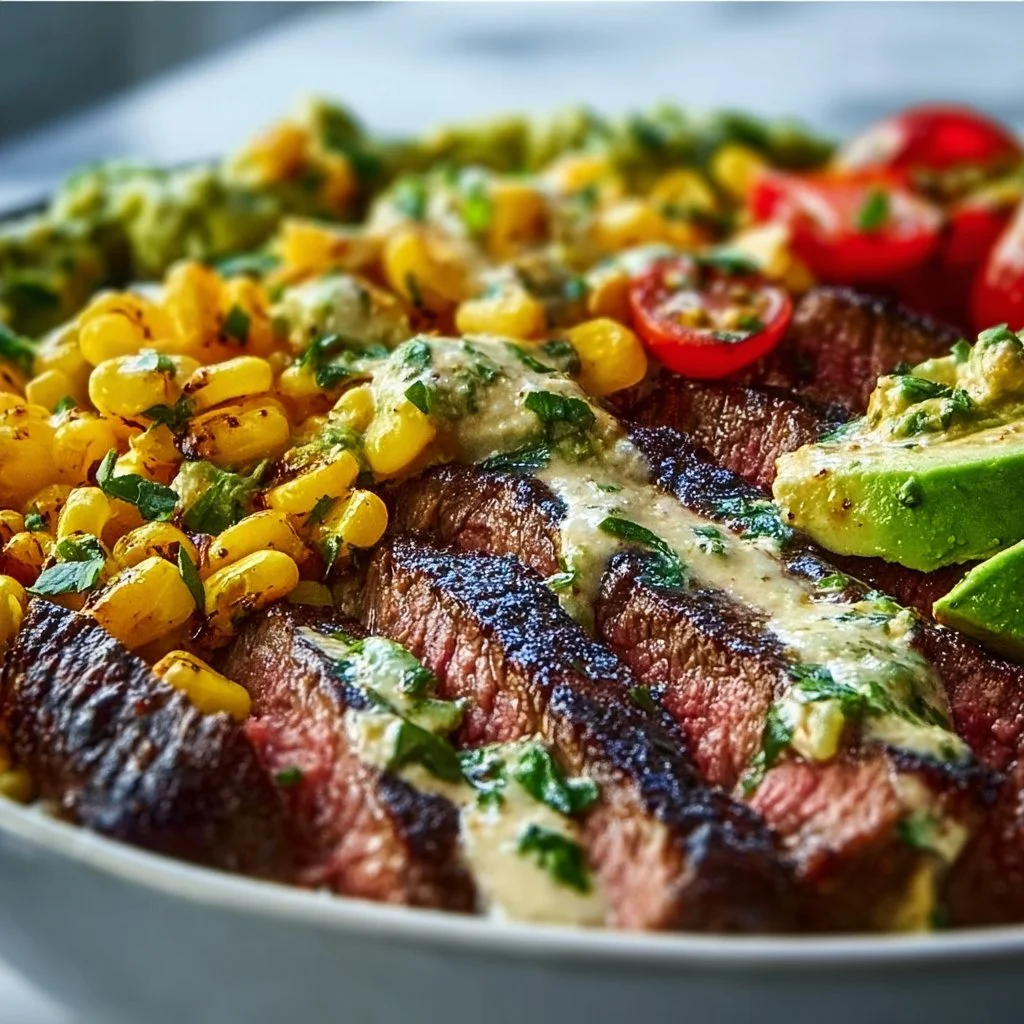
Grilled Steak Bowl with Avocado and Corn
Savory Grilled Steak Bowl with Avocado and Corn
Hello, food lovers! Are you ready to elevate your mealtime game? Today, we’re diving into a dish that’s not just delicious but also brimming with vibrant flavors and textures: the Grilled Steak Bowl with Avocado and Corn. Believe me, this bowl is everything you could ever want—a delightful combination of juicy grilled steak, creamy avocado, and sweet roasted corn, all topped with zesty lime juice and cilantro.
If you’re a fan of quick, satisfying meals that impress without overwhelming, you’ve come to the right place. Perfect for family dinners, casual get-togethers, or that cozy night in, this dish is all about providing the comfort we crave while still looking stunning on the plate.
Imagine the satisfying crunch of sweet corn mingling with the rich flavors of grilled steak, complemented beautifully by creamy avocado—it’s not just food; it’s an experience! And the best part? You don’t need a five-star kitchen or lengthy prep time to create this masterpiece. Just a little intention, quality ingredients, and a sprinkle of love.
Ready to transform your weeknight meals? Grab your apron, and let’s get cooking!
Personal Story
Every time I whip up a Grilled Steak Bowl, I’m taken back to a summer barbecue in my backyard, surrounded by the laughter of friends and the sizzling sound of the grill. It was one of those golden evenings where the setting sun painted the sky with pink and orange hues. The air was filled with the mouth-watering aroma of seasoned steak grilling to perfection.
As I stood by the grill, flipping the steak and listening to everyone’s chatter, I couldn’t help but smile. I remember a dear friend holding up a bowl filled with grilled corn, and saying, “This corn is like candy!” Laughter erupted as we piled our bowls high with grilled goodies, avocado, and whatever fresh veggies we could find in the garden. Those moments of connection, laughter, and delicious food are what it’s all about. And now, I want to share that love, that nostalgia, with you through this recipe!
Ingredients
Here’s what you’ll need to create this savory delight:
-
Juicy Grilled Steak
Whether you choose ribeye, flank, or sirloin, make sure it’s well-marbled for incredible flavor. Look for cuts that have a good balance of fat for that perfect juicy bite. And don’t worry—if steak isn’t your thing, grilled chicken or tofu can be just as fabulous! -
Creamy Avocado
Avocados add a luxurious creaminess that elevates any dish. Look for avocados that yield slightly to gentle pressure; they should be ripe but not overly soft. If avocados are out of season, you can switch to hummus for a creamy alternative! -
Sweet Roasted Corn
Fresh corn is best, but you can easily use canned or frozen corn. Just sauté it in a little bit of oil to achieve that roasted flavor. Pro tip: grill corn on the cob directly on the grill for an extra layer of smokiness! -
Cilantro
This bright herb brings freshness to the dish. If you’re not a fan of cilantro, feel free to swap it for parsley or green onions—both impart a lovely fresh note. -
Sour Cream
It’s a classic topping that adds a tangy creaminess. Greek yogurt is a fantastic substitute if you prefer something lighter. -
Lime Juice
Freshly squeezed lime juice brightens up the flavors, giving it that zesty kick. Bottled lime juice works in a pinch, but fresh is always best! -
Salt and Pepper
Season to taste! Salt enhances the flavors, while freshly cracked black pepper adds a little spice.
Step-by-Step Instructions
Alright, let’s dive into the cooking process! Follow along, and let me share a few chef secrets as we go.
-
Prep the Steak:
First things first—let’s get your steak ready! Take your steak out of the fridge and let it come to room temperature for about 30 minutes. This ensures even cooking. While it’s resting, season it liberally with salt and freshly cracked pepper. This step isn’t just for flavor; it helps form a beautiful crust when you grill. -
Grill the Corn:
While that steak is relaxing, let’s prepare the corn. If you’re using fresh corn, shuck it, then drizzle it with a bit of olive oil and a pinch of salt. Grill it on medium-high heat until it’s slightly charred, about 10 minutes. If you’re using frozen corn, toss it into a skillet with a bit of oil and sauté until golden! -
Fire Up the Grill:
Preheat your grill to high heat. If you don’t have a grill, a cast-iron skillet on the stovetop works wonder, too! Just make sure it’s super hot before you add the steak—you want that sear! -
Grill the Steak:
Place the steak on the grill and resist the urge to move it around too much—let it sear! Depending on the thickness of your steak, grill for about 4-6 minutes per side for medium-rare. Here’s my tip: use an instant-read thermometer; it should read about 135°F for perfect medium-rare. -
Rest the Steak:
Once it’s grilled to your liking, remove it from the heat and let it rest for at least 5-10 minutes. This allows the juices to redistribute throughout the meat, ensuring each bite is tender and juicy. -
Slice and Dine:
After resting, slice the steak against the grain—this is crucial for tenderness! As you slice, imagine the beautiful layers of flavor you’re creating. -
Assemble Your Bowl:
Now, let’s put it all together! In a bowl, layer your sliced steak, grilled corn, and diced avocado. Drizzle with sour cream, a splash of lime juice, and a handful of fresh cilantro.
And voilà! You’ve created a stunning Grilled Steak Bowl that’s a feast for the eyes and the belly!
Serving Suggestions
Presentation is key to making your meal feel special, so let’s plate it up! Start with a generous base of the grilled corn and steak at the bottom. Neatly arrange slices of avocado on top, and finish with a lovely dollop of sour cream. Sprinkle some fresh cilantro over everything for that pop of green. You can even serve it in a rustic bowl or on a wooden board for an extra chic touch!
Recipe Variations
Here are a few creative twists on the classic Grilled Steak Bowl:
- Spicy Kick: Add some diced jalapeños or a drizzle of hot sauce for those who love a little heat.
- Mexican Flair: Swap the sour cream for cotija cheese and add black beans for a heartier meal.
- Vegetarian Delight: Replace steak with grilled portobello mushrooms or marinated tempeh for a satisfying plant-based option.
- Mediterranean Vibe: Use grilled chicken and swap the avocado for tzatziki sauce—a refreshing complement!
- Tropical Twist: Add pineapple chunks in place of some corn for a fruity explosion of flavor.
Chef’s Notes
Over the years, this Grilled Steak Bowl has become a staple in my home. It started as a way to use up leftover grilled steak but evolved into a must-have dish for every gathering. Sometimes I throw in whatever veggies I have left in the fridge, and it always surprises me how versatile it can be.
Funny story: A friend of mine once challenged me to create a bowl entirely without any of the usual ingredients. By the end of the cook-off, I ended up grilling peaches and topping them with balsamic reduction, and it turned out to be a hit! Who knew bowls could be so creatively liberating?
FAQs and Troubleshooting
-
What if my steak is tough?
Make sure to slice the steak against the grain, and let it rest before cutting. If it’s still tough, you might have cooked it too long. A meat thermometer is a great tool to avoid that! -
Can I make this bowl ahead of time?
Absolutely! You can grill the steak and corn in advance. Just store them separately in the fridge and assemble when you’re ready to eat. -
My avocado isn’t ripe; what should I do?
If you find yourself with a hard avocado, place it in a brown paper bag with an apple or banana for a day or two to help it ripen faster. -
How can I make this dish gluten-free?
Great news—this recipe is naturally gluten-free! Just ensure any sides or additional toppings are also gluten-free.
Nutritional Info
While I always emphasize the joy of cooking and sharing, I know that nutritional information can be valuable. Here’s a quick overview:
- Calories: Approximately 550 per bowl (without any additional toppings)
- Protein: 35g
- Fats: 35g (depending on avocado and sour cream)
- Carbohydrates: 30g (mostly from corn)
And there you have it—a delicious journey through the art of creating a Grilled Steak Bowl with Avocado and Corn! I hope you find joy in making and sharing this dish as much as I have. Keep creating those beautiful moments around your table, and remember that the secret ingredient is always love! Happy cooking!
PrintSavory Grilled Steak Bowl with Avocado and Corn
A delightful combination of juicy grilled steak, creamy avocado, and sweet roasted corn, all topped with zesty lime juice and cilantro.
- Prep Time: 15 minutes
- Cook Time: 30 minutes
- Total Time: 45 minutes
- Yield: 4 servings
- Category: Main Course
- Method: Grilling
- Cuisine: American
- Diet: Gluten-Free
Ingredients
- Juicy Grilled Steak
- Creamy Avocado
- Sweet Roasted Corn
- Cilantro
- Sour Cream
- Lime Juice
- Salt and Pepper
Instructions
- Prep the steak: Take your steak out of the fridge and let it come to room temperature for about 30 minutes. Season it with salt and pepper.
- Grill the corn: Prepare the corn and grill it until slightly charred, about 10 minutes.
- Fire up the grill: Preheat your grill to high heat.
- Grill the steak: Place the steak on the grill and grill for about 4-6 minutes per side for medium-rare.
- Rest the steak: Remove it from the heat and let it rest for at least 5-10 minutes.
- Slice and dine: Slice the steak against the grain.
- Assemble your bowl: Layer your sliced steak, grilled corn, and diced avocado, then drizzle with sour cream and lime juice.
Notes
Feel free to add diced jalapeños for a spicy kick or replace steak with portobello mushrooms for a vegetarian option.
Nutrition
- Serving Size: 1 bowl
- Calories: 550
- Sugar: 4g
- Sodium: 500mg
- Fat: 35g
- Saturated Fat: 10g
- Unsaturated Fat: 20g
- Trans Fat: 0g
- Carbohydrates: 30g
- Fiber: 6g
- Protein: 35g
- Cholesterol: 90mg
Keywords: steak bowl, grilled steak, avocado, corn, healthy meal
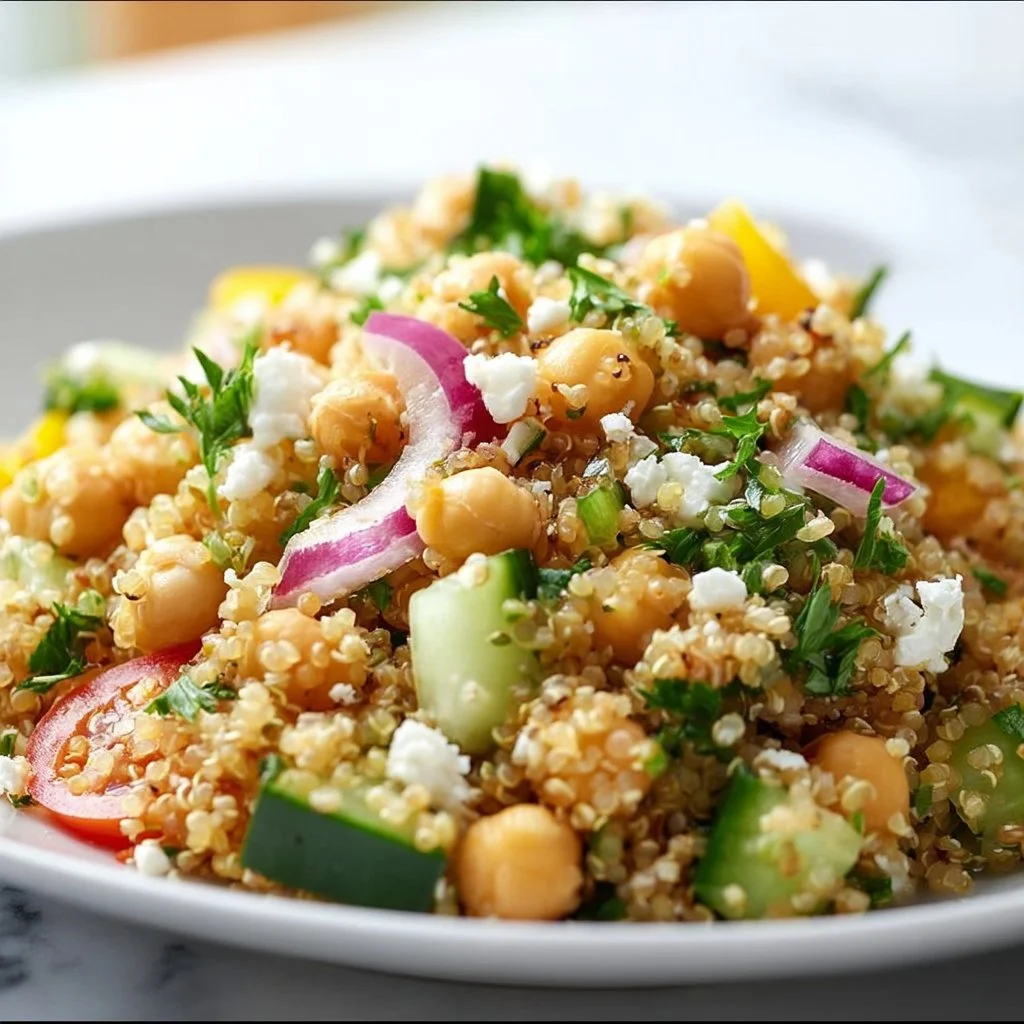
Lemon Quinoa and Chickpea Salad
# Lemon Quinoa and Chickpea Salad: A Refreshing Taste of Summer

## Introduction

Hello, food lovers! Today, we're diving into a vibrant, refreshing dish that captures the essence of summer right on your plate—Lemon Quinoa and Chickpea Salad! This isn’t just any salad; it’s a delightful mélange of wholesome ingredients, zesty flavors, and a sprinkling of sunshine that brightens even the cloudiest of days.

Imagine sitting under a blue sky, the fragrant breeze rustling the leaves around you, as you savor each bite of this colorful salad. Packed with protein-rich quinoa and fiber-filled chickpeas, this dish makes a perfect light lunch or a fabulous side at any gathering. The lemon dressing dances on your taste buds, while fresh vegetables offer a crisp crunch that feels like a hug for your palate. Plus, it’s a quick and simple recipe that even novice cooks can master—but shh, I won’t tell if you take all the credit for it!

What I love most about this salad is how versatile it is—it's the perfect canvas for experimenting with flavors. Whether you’re adding some colorful cherry tomatoes, feta cheese, or even avocado, there's a way to make this dish uniquely yours. Plus, it’s great for meal prep; just whip up a batch at the start of your week, and you'll have a wholesome dish ready to go whenever hunger strikes!

So, grab your freshest ingredients and let’s roll up our sleeves together. By the end of this post, you’ll not only have a delicious recipe in your back pocket, but a story to share around your table—because, as I always say, good food is all about good company!

## Personal Story

Let me take you back to one of my favorite summer memories. I was hosting a sunny backyard picnic for friends, the kind of gathering where laughter filled the air, and every bite was savored. As I set up picnic blankets, I decided to serve a fresh quinoa salad as the centerpiece of the table. I remember buzzing around my kitchen, the aroma of herbs wafting through the open windows, while I told my friend Jenna all about quinoa's amazing benefits.

That day, everyone was raving about the salad—its bright flavors were a hit. I watched my friends go back for seconds (and even thirds), and it warmed my heart to see how something so simple could bring so much joy. This Lemon Quinoa and Chickpea Salad became a staple in my recipe repertoire because it reminded me of that day—when food wasn’t just about sustenance but about connection, laughter, and love shared around a table.

## Ingredients

Here’s what you’ll need to whip up this scrumptious salad:

### Salad Components

- **1 cup quinoa**
  *This small seed is a complete protein, making it a powerhouse! You can use any color—white, red, or black—depending on your preference.*

- **1 can chickpeas, drained and rinsed**
  *Wonderfully versatile and packed with protein comes these little gems. If you’re feeling adventurous, you can toss in cooked lentils instead!*

- **1 cucumber, diced**
  *Crisp and refreshing! If you prefer a different crunch, try swapping in chopped bell pepper or carrots.*

- **1 bell pepper, diced**
  *Sweet and colorful, bell peppers offer vibrant flavor. You can use different colors like red, yellow, or even orange to make the dish pop!*

- **1/4 red onion, finely chopped**
  *They add a punch of flavor! If you’re sensitive to raw onion, substitute with green onions or chives for a milder taste.*

- **1/4 cup fresh parsley, chopped**
  *Herbal freshness at its best! You can replace it with cilantro for a brighter twist.*

### Dressing Ingredients

- **1/4 cup olive oil**
  *A drizzle of this liquid gold is a must for richness! Use avocado oil if you're looking for a neutral flavor.*

- **Juice of 1 lemon**
  *The star of the show! Freshly squeezed lemon juice will brighten the entire salad.*

- **1 teaspoon Dijon mustard**
  *Adds tang and depth! You can swap this with whole grain mustard or skip it entirely for a simpler dressing.*

- **Salt and pepper to taste**
  *Essential for balancing flavors! Don’t forget to taste as you go—this is key in cooking.*

With these vibrant and healthful ingredients, you're ready to create a salad that celebrates all the fresh, delicious flavors of summer!

## Step-by-Step Instructions

Alright, let’s get cooking! Here’s how to whip up your Lemon Quinoa and Chickpea Salad:

### Step 1: Rinse Your Quinoa

Before we start cooking, it's important to rinse the quinoa under cold running water for about 1-2 minutes. This step helps remove the natural coating called saponin, which can give it a bitter taste. It makes such a difference!

### Step 2: Cook the Quinoa

In a medium saucepan, combine 1 cup of rinsed quinoa with 2 cups of water (or broth for extra flavor). Bring it to a gentle boil, then lower the heat to a simmer and cover. Let it cook for about 15 minutes or until all the water is absorbed. A pro tip? Once it’s cooked, remove it from heat and fluff it with a fork—this will keep your quinoa light and airy, perfect for mixing into salads.

### Step 3: Chop Your Veggies

While the quinoa is cooking, grab your cutting board and chop up your veggies—cucumber, bell pepper, and red onion—into bite-sized pieces. The more colorful, the better! As you chop, let your mind wander to the flavors; imagine the fresh crunch mingling with zesty lemon in each bite.

### Step 4: Mix the Dressing

In a small bowl, whisk together the olive oil, juice of the lemon, Dijon mustard, salt, and pepper. Taste it! Adjust the seasoning if needed. I often add an extra squeeze of lemon to make it a bit zestier—totally up to you!

### Step 5: Combine It All

Once your quinoa is fluffy and slightly cooled, it’s time to mix everything! In a large bowl, combine the quinoa, chickpeas, chopped veggies, and parsley. Drizzle the dressing over the top and toss gently to combine. You want every piece coated in that zesty goodness.

### Step 6: Taste and Adjust

This is the fun part! Grab a spoon and take a taste. Does it need more salt? A splash more lemon? Adjust to your liking—it’s your salad, after all!

### Step 7: Refrigerate or Serve

You can serve it right away, but I love letting it chill in the fridge for at least 30 minutes. This allows all those flavors to meld beautifully. Plus, it’s an incredibly refreshing dish straight from the fridge on hot days!

## Serving Suggestions

When it comes to plating your Lemon Quinoa and Chickpea Salad, simplicity is key. Serve it in a large bowl or plate it individually for your guests. A sprinkle of extra parsley on top can add a pop of color. If you want to add a touch of elegance, a lemon wedge and a drizzle of olive oil finish it off beautifully. And for those extra hungry guests, serve it alongside some grilled chicken or fish for a more hearty meal.

## Recipe Variations

Feel like getting creative? Here are a few fun twists to make this salad your own:

1. **Mediterranean Twist:** Add crumbled feta cheese and some kalamata olives for a Mediterranean flair.
2. **Tex-Mex Style:** Mix in black beans, corn, diced avocado, and a pinch of chili powder for a hearty version.
3. **Herb-Infused:** Experiment with different herbs like mint or basil to give it a refreshing herbal kick.
4. **Crunch Factor:** Toss in some toasted sunflower seeds or slivered almonds for an additional crunch.
5. **Spicy Kick:** Add a dash of red pepper flakes or diced jalapeños for a spicy blast of flavor.

## Chef’s Notes

Every recipe tells a story, and over the years, this Lemon Quinoa and Chickpea Salad has evolved into a versatile dish. I remember the first time I made it; I was so focused on the presentation that I almost forgot to taste it! Don’t be like me! Having a taste along the way is crucial—it’s how you'll ensure it's perfect.

Also, I must confess, I've made this salad with countless variations, including adding roast vegetables and even some chopped apples for sweetness! It’s like a blank canvas that welcomes your creativity in the kitchen, keeping things fun and fresh!

## FAQs and Troubleshooting

**1. My quinoa is mushy. What did I do wrong?**
  Overcooking quinoa or adding too much water can lead to a mushy texture. Make sure to follow the 2:1 water to quinoa ratio and keep an eye on cooking times. Quinoa should be fluffy, not sticky!

**2. Can I make this salad ahead of time?**
  Absolutely! It tastes even better the next day as the flavors meld together. Just keep it stored in an airtight container in the fridge.

**3. How long will leftovers last?**
  This salad can last up to 3-4 days in the refrigerator. Just give it a stir before serving again!

**4. Can I use frozen chickpeas?**
  Yes! If you're using frozen chickpeas, just ensure they are fully thawed, drained, and rinsed well.

## Nutritional Info

Nutritionally speaking, this Lemon Quinoa and Chickpea Salad is not just delicious but also incredibly nutritious! It’s high in protein, fiber, and tons of vitamins from the fresh vegetables. A single serving typically contains:

- Calories: 320
- Protein: 12g
- Carbohydrates: 45g
- Fiber: 10g
- Fat: 12g (mostly from healthy olive oil)

***

And there you have it, folks—a vibrant, zesty Lemon Quinoa and Chickpea Salad recipe that’s bound to become your new favorite! Whether it's a picnic, meal prep, or a gathering with loved ones, this salad shines in every setting. So tie on that apron, gather around the table, and let’s celebrate the joy of good food together!
Lemon Quinoa and Chickpea Salad
A refreshing summer salad made with protein-rich quinoa, fiber-filled chickpeas, and a zesty lemon dressing.
- Prep Time: 15 minutes
- Cook Time: 15 minutes
- Total Time: 30 minutes
- Yield: 4 servings 1x
- Category: Salad
- Method: No Cooking
- Cuisine: Mediterranean
- Diet: Vegetarian
Ingredients
- 1 cup quinoa
- 1 can chickpeas, drained and rinsed
- 1 cucumber, diced
- 1 bell pepper, diced
- 1/4 red onion, finely chopped
- 1/4 cup fresh parsley, chopped
- 1/4 cup olive oil
- Juice of 1 lemon
- 1 teaspoon Dijon mustard
- Salt and pepper to taste
Instructions
- Rinse your quinoa under cold running water for about 1-2 minutes.
- Cook the quinoa by combining it with 2 cups of water, bring to a boil, then lower to a simmer and cover for about 15 minutes.
- Chop your veggies into bite-sized pieces.
- Mix the dressing ingredients in a small bowl: olive oil, lemon juice, Dijon mustard, salt, and pepper.
- Combine quinoa, chickpeas, veggies, and parsley in a large bowl; drizzle the dressing and toss gently.
- Taste and adjust the seasoning as needed.
- Refrigerate for at least 30 minutes before serving, if desired.
Notes
This salad is perfect for meal prep and tastes even better the next day as flavors meld together.
Nutrition
- Serving Size: 1 serving
- Calories: 320
- Sugar: 3g
- Sodium: 150mg
- Fat: 12g
- Saturated Fat: 1g
- Unsaturated Fat: 10g
- Trans Fat: 0g
- Carbohydrates: 45g
- Fiber: 10g
- Protein: 12g
- Cholesterol: 0mg
Keywords: quinoa salad, chickpea salad, summer salad, vegetarian recipe, healthy salad
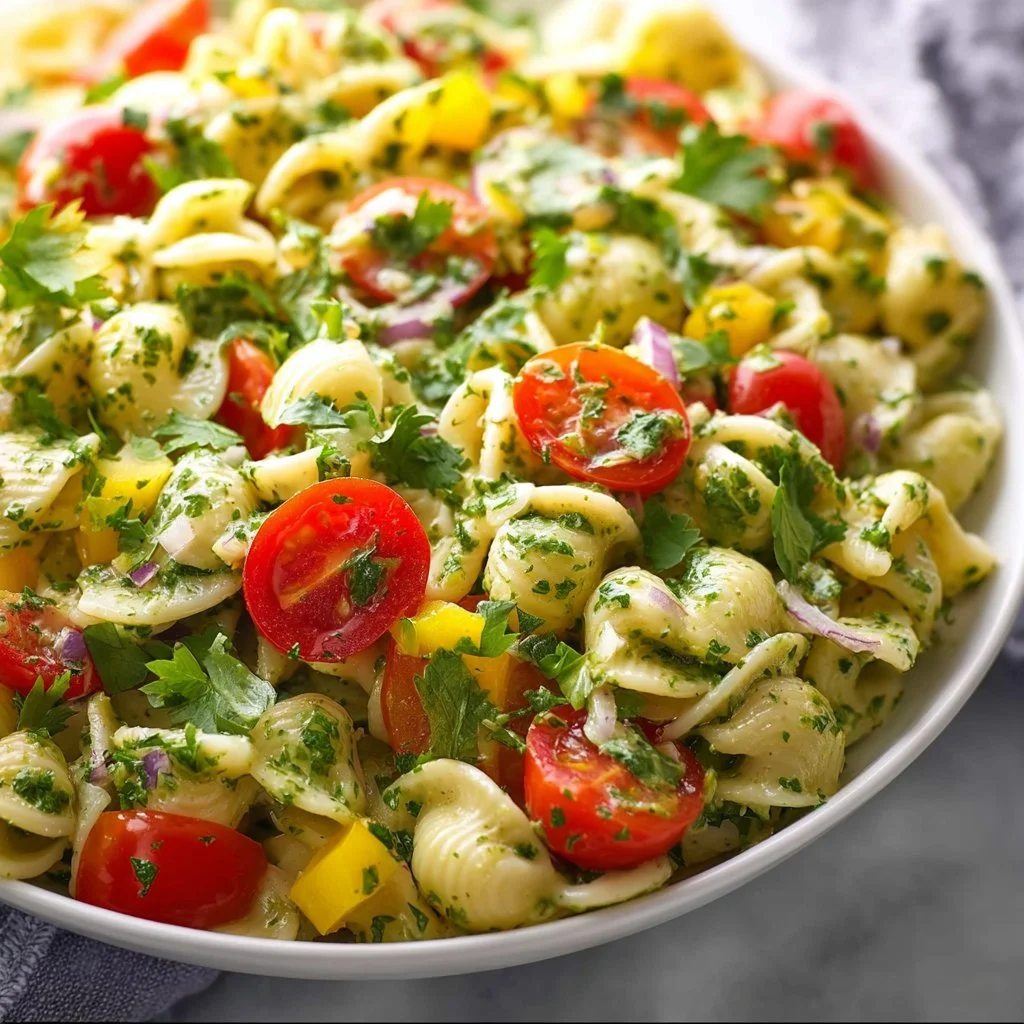
Cilantro Lime Pasta Salad
Cilantro Lime Pasta Salad: A Refreshing Twist for Your Next Gathering!
Hello, my lovely foodies! Today, we’re diving into one of my favorite summer dishes that’s just bursting with flavor and sunshine: Cilantro Lime Pasta Salad. If you’re looking for a refreshing, easy-to-make dish that’s perfect for summer barbecues, potlucks, or a light weeknight dinner, you’ve hit the jackpot.
Picture this: a warm, sunny afternoon, the grill sizzling just outside, and your favorite people gathered around a beautifully set table. You serve up plates of this vibrant pasta salad, and instantly, smiles spread across faces. The combination of zesty lime, fresh cilantro, and creamy avocado dances on the palate, making everyone feel right at home. That’s the magic of this dish—it’s approachable elegance at its best!
When it comes to cooking, I always believe in sourcing the best quality ingredients you can find, and simply letting them shine through your dishes. This Cilantro Lime Pasta Salad embraces that philosophy beautifully. Imagine twirling your fork around perfectly cooked pasta, highlighted by the crunch of sweet corn, juicy cherry tomatoes, and the creamy richness of avocado—all drizzled with a bright and zesty lime dressing. Heaven, right?
So, let’s roll up our sleeves and get to work. I promise you’ll not only wow your guests (or even your family), but you’ll enjoy every minute of preparing this delightful dish. Let’s make magic happen in the kitchen together!
Personal Story
I have a special place in my heart for this Cilantro Lime Pasta Salad, reminding me of summer dinners at my childhood home. My mother had this way of turning every meal into a celebration, often inspired by whatever was freshest at the market. One year, we decided to host a big family reunion in our backyard, and I was tasked with bringing a dish everyone could enjoy.
That’s when my mom and I concocted the first version of this pasta salad. We stood together in the kitchen, laughing and talking, as the aroma of garlic wafted in from a nearby dish. We tossed together vibrant greens and fresh veggies, drizzling them with lime as if it were sunshine itself. As family filtered into our backyard, the tables filled with dishes from everyone’s homes, but it was our pasta salad that stole the show!
Everyone was raving about the flavors, the colors, the textures, and I knew we’d created something special. Through the years, this recipe has evolved, but every bite still transports me back to those sunlit afternoons, surrounded by love and laughter. I’m thrilled to share it with you today—let’s make some delicious memories in your kitchen!
Ingredients
Here’s what you’ll need to whip up this Cilantro Lime Pasta Salad:
-
8 oz pasta (your choice)
Choose your favorite pasta shape! I often go for fusilli or penne for the fun texture, but spaghetti or rotini work beautifully as well. Gluten-free pasta can be used if you prefer. -
1 cup fresh corn (cut from the cob or frozen)
Fresh sweet corn adds a delicious crunch. If it’s not corn season, frozen corn works perfectly. Just make sure to thaw it before use! -
1 cup cherry tomatoes (halved)
These little gems bring a juicy pop to each bite! Any variety works; try using heirloom tomatoes for a rustic touch. -
1/2 red onion (diced)
Red onion offers a nice crunch and a hint of sweetness. For a milder flavor, soak the diced onion in cold water for 10-15 minutes to tone down the bite. -
1 avocado (diced)
Creamy avocado elevates this salad to a whole new level. Make sure it’s ripe but still firm; if you’re making this salad for later, toss the avocado in lime juice to keep it from browning. -
1/4 cup fresh cilantro (chopped)
This herb adds a bright, fresh flavor that just can’t be beaten! If you’re not a cilantro fan, fresh parsley can be a nice substitute. -
Juice of 2 limes
Fresh lime juice provides that zesty punch! If limes are hard to find, lemon juice can be a good alternative, though the flavor will shift slightly. -
1/4 cup olive oil
A quality extra virgin olive oil adds richness; use a nice one for the best flavor. You can mix things up with avocado oil or a nut oil to change the flavor profile. -
Salt and pepper to taste
Always season with care! You can always add more later, but start light and build gradually.
Step-by-Step Instructions
Ready to dive into the cooking process? Let’s make this delicious Cilantro Lime Pasta Salad together!
-
Cook the Pasta:
Begin by bringing a large pot of salted water to a rolling boil. Add your pasta and cook according to package instructions until al dente. This usually takes about 8-10 minutes, but check it! Ensure you taste a piece—it should have just a slight firmness in the center. Once done, drain and rinse under cold water to stop the cooking process. This step is super important; we want our pasta to be cool and ready to soak in all the dressing! -
Prepare the Veggies:
While the pasta cooks, let’s chop! Dice the red onion, halve the cherry tomatoes, and chop the cilantro. If you’re using fresh corn, carefully cut the kernels off the cob. Make it a family affair—get your loved ones in on the chopping fun! Remember, the prettier the presentation, the more inviting the dish! -
Make the Dressing:
In a small bowl or mason jar, combine the lime juice, olive oil, salt, and pepper. Shake or whisk until combined. Tasting is key here! If you feel it needs more acidity, add another splash of lime juice or a pinch more salt. This dressing is the heart of the salad—don’t be shy to get it just right! -
Combine Everything:
In a large mixing bowl, combine your cooled pasta, corn, tomatoes, onion, avocado, and cilantro. Drizzle the dressing on top and gently toss everything together until well coated. Be gentle when mixing, particularly with the avocado, so we don’t end up with guacamole! -
Taste and Adjust:
Now, this is where you should be tasting again! Every ingredient needs to shine through, and if it feels a little flat, add more lime juice or salt. This is your creation, and it should sing in harmony! -
Chill and Serve:
Cover the salad and let it chill in the fridge for at least 30 minutes. This allows all the flavors to meld beautifully. Right before serving, give it a final gentle toss to reintroduce all those delightful flavors.
Serving Suggestions
When it comes to presentation, think simple yet elegant! Use a large, bright bowl to showcase the vibrant colors of the salad. For a fun twist, serve in individual cups or small bowls for outdoor gatherings. Sprinkle extra cilantro on top for that fresh, vibrant finish. This salad pairs beautifully with grilled chicken, shrimp, or even as a standalone dish on a warm day—it’s all about that effortless elegance!
Recipe Variations
Now let’s get creative! Here are a few fun variations to tailor this salad to your taste:
-
Spicy Kick: Add diced jalapeños or chili flakes for a zesty heat that balances wonderfully with the creaminess of the avocado.
-
Protein Boost: Toss in some grilled chicken, shrimp, or even black beans for a heartier meal.
-
Cheesy Delight: Crumble some feta or cotija cheese for a salty kick that complements the lime beautifully.
-
Nutty Flavor: Include toasted sunflower seeds or chopped walnuts for an added crunch and nutty flavor.
-
Seasonal Twist: In place of corn, use diced bell peppers or zucchini when they’re in season for a fresh key flavor.
Chef’s Notes
Cilantro Lime Pasta Salad has become a staple recipe in my kitchen. Over the years, I’ve taken it to countless gatherings and watched it evolve from a simple dish to a showstopper. I recall one time, I added diced mango, and it was an instant hit—who knew that sweet and savory could complement each other so well?
Embrace the evolution of your recipes! Don’t be afraid to mix in ingredients based on what you have on hand or what’s currently in season. Cooking, after all, is about expressing your creativity while making delicious memories.
FAQs and Troubleshooting
1. Can I prepare this salad in advance?
Absolutely! You can prepare the salad a day ahead of time, just hold off on adding the avocado until you’re about to serve. This keeps it fresh and prevents browning.
2. What if the dressing is too tangy?
Start with less lime juice! You can always add more, but it’s hard to take out. Balance it out with a little more olive oil or a pinch of sugar if needed.
3. Can I switch out the pasta type?
Of course! Use any pasta you love—gluten-free or whole wheat variations work perfectly. Just keep an eye on cooking times.
4. How do I store leftovers?
Keep any leftover salad in an airtight container in the fridge for about 2-3 days. You may want to add fresh avocado when serving leftovers to keep things vibrant.
Nutritional Info (if applicable)
While I typically don’t stress the numbers, it’s good to know that this salad is packed with nutrients! It includes healthy fats from the avocado and olive oil, fiber from the veggies and pasta, and a wealth of vitamins—especially if you pile on the produce.
There you have it, my wonderful friends—a fresh and tantalizing Cilantro Lime Pasta Salad that’s sure to impress and inspire! As you tie on your apron and get to creating, remember that every dish tells a story. I can’t wait to hear about your own kitchen adventures. Happy cooking!
PrintCilantro Lime Pasta Salad
A refreshing and zesty pasta salad bursting with flavors of lime, cilantro, and creamy avocado, perfect for summer gatherings.
- Prep Time: 15 minutes
- Cook Time: 10 minutes
- Total Time: 45 minutes
- Yield: 4 servings 1x
- Category: Salad
- Method: Mixing
- Cuisine: Mexican
- Diet: Vegetarian
Ingredients
- 8 oz pasta (your choice)
- 1 cup fresh corn (cut from the cob or frozen)
- 1 cup cherry tomatoes (halved)
- 1/2 red onion (diced)
- 1 avocado (diced)
- 1/4 cup fresh cilantro (chopped)
- Juice of 2 limes
- 1/4 cup olive oil
- Salt and pepper to taste
Instructions
- Cook the Pasta: Begin by bringing a large pot of salted water to a rolling boil. Add your pasta and cook according to package instructions until al dente. Drain and rinse under cold water.
- Prepare the Veggies: While the pasta cooks, chop the red onion, halve the cherry tomatoes, and chop the cilantro. Cut kernels off the corn if using fresh.
- Make the Dressing: In a bowl or jar, combine lime juice, olive oil, salt, and pepper. Shake or whisk until combined.
- Combine Everything: In a large bowl, combine cooled pasta, corn, tomatoes, onion, avocado, and cilantro. Drizzle dressing on top and gently toss.
- Taste and Adjust: Taste the salad and add more lime juice or salt as needed.
- Chill and Serve: Cover and chill in the fridge for at least 30 minutes before serving.
Notes
For a creamy avocado, ensure it’s ripe. Toss with lime juice if preparing in advance to prevent browning.
Nutrition
- Serving Size: 1 serving
- Calories: 350
- Sugar: 5g
- Sodium: 400mg
- Fat: 18g
- Saturated Fat: 2g
- Unsaturated Fat: 14g
- Trans Fat: 0g
- Carbohydrates: 45g
- Fiber: 6g
- Protein: 10g
- Cholesterol: 0mg
Keywords: pasta salad, summer recipes, healthy salad

Deconstructed Healthy Hamburger Bowl
# Deconstructed Healthy Hamburger Bowl: A Flavorful Twist on a Classic

## Introduction

Hello, fellow food lovers! I’m so thrilled you’ve dropped by to explore one of my favorite go-to meals: the Deconstructed Healthy Hamburger Bowl. If you’re like me, you love the comforting taste of a juicy burger but are always in search of lighter, healthier options that don’t skimp on flavor. This vibrant bowl puts a delightful spin on the classic burger, transforming all your favorite ingredients into a fresh, colorful dish that’s not only satisfying but also packed with nutrients.

Picture this: it’s a sunny Saturday afternoon, and the smell of grilled burgers wafts through the air. You invite a few friends over for a casual cookout, where laughter and stories blend seamlessly with the sizzling from the grill. But the heavy feeling after devouring those burgers? Not so pleasant, right? That’s where the beauty of this Deconstructed Healthy Hamburger Bowl comes in — it captures all the flavors you love about a classic burger while making it a little more wholesome and colorful.

With simple ingredients like ground turkey or beef, fresh veggies, and creamy avocado, you’ll find that this bowl is not only a feast for the eyes but also a delightful experience for your taste buds. It’s a dish that embraces both elegance and approachability, just like the essence of Ivory Apron! So, whether you’re meal-prepping for the week or hosting friends for a laid-back dinner, this bowl is bound to impress.

Let’s dive into this delicious adventure as we cook together and create a memorable experience around your table.

## Personal Story

I’ll never forget my very first summer cookout. I was around ten years old, and my family gathered in the backyard, where my dad manned the grill. There was something magical about the way the burgers sizzled and the tantalizing aroma that filled the air. My father handed me a spatula and said, “You’re in charge of flipping!” The pride I felt at that moment, coupled with the joy of serving my family those perfectly charred patties, ignited a passion for cooking that’s only grown over the years.

Years later, I transformed those nostalgic flavors into a healthier rendition with this Deconstructed Hamburger Bowl. It’s a dish that reminds me of those carefree summer days spent outdoors, simplifying the process and maximizing the flavors. Each bite takes me back to that backyard where laughter reigned and delicious food was the star. I hope as you create your own version of this dish, you too will stir up fond memories while crafting something fresh and exciting.

## Ingredients

Let’s gather our ingredients! Here’s what you’ll need to create this mouthwatering Deconstructed Healthy Hamburger Bowl:

- **Ground Turkey or Beef**: The star protein! Ground turkey is leaner and lighter, making it an excellent alternative to beef. If you prefer beef, go for lean cuts to keep it healthier.

- **Cauliflower Rice**: A fantastic low-carb substitute for traditional rice. It adds volume and texture without the extra carbs. Frozen cauliflower rice is also convenient—just pop it in the microwave!

- **Cherry Tomatoes**: Sweet and juicy, cherry tomatoes pack a flavorful punch. You can use any color, including yellow or purple, for a vibrant look!

- **Lettuce**: Crisp and refreshing, lettuce adds crunch. Romaine or butter lettuce works wonderfully here. Feel free to use spinach for a twist!

- **Avocado**: Creamy and nutritious, avocado elevates the bowl with healthy fats. If you prefer a different flavor, you could use a dollop of Greek yogurt in its place.

- **Pickles**: Give that classic burger taste with zesty dill or bread-and-butter pickles. They lend a delicious crunch and brightness.

- **Onion**: Red onions are great for a sharp bite, while green onions provide a milder flavor. Use what you enjoy most!

- **Cheddar Cheese (optional)**: Add a little shredded cheese for that rich, melty goodness. Choose low-fat cheese for a healthier option.

- **Olive Oil**: A drizzle of this healthy fat adds moisture and flavor while sautéing the protein.

- **Salt and Pepper**: Essential seasonings that enhance all the flavors in the bowl.

- **Your Choice of Condiments**: Ketchup, mustard, and mayonnaise—add them according to your taste!

## Step-by-Step Instructions

Now that we have our ingredients ready, let’s roll up our sleeves and get cooking! Follow these steps for a delectable Deconstructed Healthy Hamburger Bowl:

1. **Prep the Cauliflower Rice:**
   - If you’re using frozen cauliflower rice, prepare it according to the package instructions. If you’re using fresh cauliflower, pulse florets in a food processor until rice-sized.
   - In a non-stick skillet, heat a drizzle of olive oil over medium heat. Add the cauliflower rice, season with a pinch of salt and pepper, and sauté for about 5-7 minutes until tender. Chef tip: If you want a nuttier flavor, try toasting the cauliflower rice until golden before sautéing!

2. **Cook the Ground Turkey or Beef:**
   - In the same skillet, push the cauliflower rice to one side and add more olive oil. If using beef, let it cook until browned, breaking it up with a spatula. If you're using turkey, it takes a bit longer to cook through.
   - Season the meat with salt and pepper. For a fun kick, toss in garlic powder or smoked paprika. Cook until everything is fully cooked (about 7-10 minutes).

3. **Prepare the Toppings:**
   - While the meat is cooking, chop your cherry tomatoes in half, slice the onions thinly, and wash your lettuce. Cut your avocado into wedges or cubes. Quick tip: To prevent browning, sprinkle a little lemon juice on any cut avocado!

4. **Assemble the Bowl:**
   - Once everything is cooked, it’s time to assemble! Start with a generous scoop of cauliflower rice at the base of your bowl. Add a big helping of your cooked protein (turkey or beef), followed by a colorful array of cherry tomatoes, sliced onions, lettuce, and avocado. Don’t forget the pickles!

5. **Add Finishing Touches:**
   - If you're feeling adventurous, sprinkle some shredded cheddar cheese on top (optional), and drizzle with your favorite condiments. I love a good swipe of ketchup and a dash of mustard—classic!

## Serving Suggestions

Time to enjoy! Serve your Deconstructed Hamburger Bowl in a beautiful, wide bowl to showcase the colorful layers. For an extra touch, add a sprig of fresh parsley or cilantro on top. Presenting your dish in a visually appealing manner elevates the dining experience, and trust me, it’ll impress your guests!

## Recipe Variations

Want to add your own flair? Here are some delicious twists to consider:

1. **Spicy Kick**: Add jalapeños or a drizzle of sriracha for some heat.

2. **Southwest Flair**: Incorporate black beans, corn, and a sprinkle of chili powder for a Tex-Mex vibe!

3. **Mediterranean Touch**: Include feta cheese, olives, and diced cucumbers, swapping out the ketchup for tzatziki sauce.

4. **Vegan/Vegetarian Option**: Swap the ground meat with lentils or a plant-based crumbles, and use vegan cheese!

5. **Grilled Flavor**: Fire up the grill and cook the turkey or beef patties separately. Serve them sliced over the other ingredients for that authentic burger taste.

## Chef’s Notes

One of the joys of cooking is how recipes can evolve over time. I started with a straightforward burger bowl; however, as I experimented, I discovered how vibrant and fresh ingredients could transform the dish into something beautiful and tasty. And let me tell you, the laughter and joy that fill my kitchen as I assemble these bowls with friends is an absolute treasure.

Whenever I make this, I remember my little backyard cookout, and it never fails to inspire me to gather loved ones around the table. Cooking is a love language, isn’t it? Each bowl in front of us is a celebration of flavors, memories, and connections.

## FAQs and Troubleshooting

**1. What if my cauliflower rice is too mushy?**
   - It often means it was cooked too long or at too high a heat. Try sautéing it on medium heat for less time, and ensure it’s not thawed too long beforehand to keep some of that crunch.

**2. How can I store leftovers?**
   - Store the components separately in airtight containers in the fridge for up to three days. This keeps everything fresh and helps maintain textures.

**3. Can I freeze this bowl?**
   - While cooked meat freezes well, I recommend avoiding freezing the salads or fresh toppings. They tend to lose their crunch once thawed. You can freeze just the cooked protein.

**4. What if I don’t have ground turkey or beef?**
   - Ground chicken, pork, or even canned beans or lentils are fantastic substitutes. Get creative with what you have on hand!

## Nutritional Info

*Nutritional info will vary based on your specific ingredients and serving size. This bowl is typically around 400 calories, packed with protein, healthy fats, and a bounty of vitamins from the fresh veggies!*

So, there you have it—your guide to creating a Deconstructed Healthy Hamburger Bowl that’s as incredible as it is nutritious! I hope you enjoy every moment spent in the kitchen, and remember: good food is about showing up, being present, and making memories. Happy cooking!
Deconstructed Healthy Hamburger Bowl

A vibrant and nutritious bowl that combines all the flavors of a classic hamburger in a lighter, healthier version.
- Prep Time: 15 minutes
- Cook Time: 20 minutes
- Total Time: 35 minutes
- Yield: 4 servings 1x
- Category: Main Course
- Method: Stovetop
- Cuisine: American
- Diet: Healthy
Ingredients
- 1 lb ground turkey or beef
- 2 cups cauliflower rice
- 1 cup cherry tomatoes, halved
- 2 cups lettuce, chopped
- 1 avocado, diced
- 1/2 cup pickles, sliced
- 1/2 onion, thinly sliced
- 1/2 cup cheddar cheese, shredded (optional)
- 2 tbsp olive oil
- Salt and pepper to taste
- Your choice of condiments (ketchup, mustard, mayonnaise)
Instructions
- Prep the cauliflower rice: If using frozen, prepare according to package instructions. If fresh, pulse florets until rice-sized. Heat olive oil in a skillet, add cauliflower rice, season with salt and pepper, and sauté for 5-7 minutes.
- Cook the ground turkey or beef: Push cauliflower rice to the side, add more oil, and cook the meat until browned, seasoning with salt and pepper; should take about 7-10 minutes.
- Prepare the toppings: Halve cherry tomatoes, slice onions, wash lettuce, and dice avocado, adding lemon juice to prevent browning.
- Assemble the bowl: Start with cauliflower rice, add cooked protein, then layer with tomatoes, onions, lettuce, avocado, and pickles.
- Add finishing touches: Top with cheddar cheese if desired and drizzle with condiments.
Notes
For a spicy kick, add jalapeños. To keep it vegan, substitute ground meat with lentils and use vegan cheese.
Nutrition
- Serving Size: 1 bowl
- Calories: 400
- Sugar: 6g
- Sodium: 500mg
- Fat: 18g
- Saturated Fat: 4g
- Unsaturated Fat: 8g
- Trans Fat: 0g
- Carbohydrates: 30g
- Fiber: 5g
- Protein: 30g
- Cholesterol: 80mg
Keywords: healthy burger bowl, deconstructed hamburger, low-carb meal, meal prep, nutritious dinner

Low-Carb Fish Taco Bowls
Dive Into Deliciousness: Low-Carb Fish Taco Bowls
Welcome back to the kitchen, foodie friends! Today, I’m excited to take you on an unforgettable culinary journey with one of my favorite dishes: Low-Carb Fish Taco Bowls. This recipe not only showcases the beautiful flavors of fresh ingredients but also embraces a low-carb lifestyle. Trust me; dinner will never feel boring again!
Fish tacos are a beloved classic, and for good reason. The blend of fresh fish, zesty toppings, and creamy sauces creates a delightful explosion of flavors in every bite. When you combine that with gorgeous cauliflower rice and the crunch of sweet and spicy coleslaw, you’ve got yourself a taco bowl that feels indulgent yet utterly wholesome.
Picture this: you’re perched at your table with family or friends, surrounded by laughter and stories, as you dig into your vibrant bowls that look as stunning as they taste. That’s what I want for you! So, buckle up your apron, and let’s get cooking!
A Whiff of Nostalgia: My Fish Taco Adventure
While I adore every inch of food, fish tacos hold a special place in my heart. I remember the very first time I tried them—warm summer evenings spent near the coast, the sound of waves crashing, and the sweet scent of salt in the air. There was a tiny shack that served the most magnificent fish tacos; their creations were loaded with freshly battered fish, a smooth chipotle sauce, and a sprinkle of lime.
Every bite was like a mini-vacation on my plate! I began experimenting with my own versions, steering toward healthier options while not compromising that beachy spirit. The result? A low-carb fish taco bowl that captures the essence of those summer nights but fits seamlessly into everyday life.
What You’ll Need: Ingredients
Let’s break down the ingredients you’ll need to nail these Low-Carb Fish Taco Bowls:
-
4 Frozen Cod Fillets
Cod is mild and flaky, making it a great choice for tacos! You can substitute with tilapia or salmon if you prefer a different fish. Just keep an eye on cooking times, as they may vary! -
2 cups Pineapple Lime Cauliflower Rice
This is a delightful low-carb swap for traditional rice. If you haven’t got the pineapple lime flavor, you can use plain cauliflower rice and add a splash of lime juice and bits of fresh pineapple to boost those tropical vibes! -
2 cups Sweet and Spicy Coleslaw
Coleslaw adds a fantastic crunch! If you’re short on time, grab a pre-made one from the store, or make your own with cabbage, carrots, and your favorite dressing. It’s the perfect complement to the fish! -
2 tbsp Melted Unsalted Butter
This will keep the fish juicy. You could use olive oil for a healthier fat option if you’d like! -
2 tbsp Taco Seasoning
Homemade or store-bought, this is what brings the flavor pop! If you need a spice-free option, try a mix of cumin and smoked paprika instead. -
¼ cup Sour Cream (or Greek Yogurt)
Totally switching up the creaminess! Greek yogurt is a lighter option, and you could even use dairy-free yogurt if necessary. -
1½ tsp Lime Juice
Fresh is always best! It brightens up the dish and gives that zesty kick! -
1 tsp Honey
This adds a hint of sweetness to balance out the tang. Feel free to substitute with agave or maple syrup if you prefer. -
1 tbsp Milk
You can use any milk you love—dairy or non-dairy works! -
Pinch of Salt
Never underestimate the power of salt; it enhances all the flavors coming together! -
1 Sliced Avocado
Creamy goodness! An absolute must; avocado elevates these bowls. You could also try using guacamole for a fun twist! -
¼ cup Chopped Cilantro
For freshness and a pop of color; cilantro elevates the dish. If you’re not a fan, some chopped green onions could work as a fun substitute!
Let’s Get Cooking: Step-by-Step Instructions
Step 1: Prepare the Fish
Start by preheating your oven to 375°F (190°C). While it warms up, take the frozen cod fillets and pat them dry with some paper towels. This will help them crisp up beautifully in the oven. Next, brush the fillets with the melted unsalted butter, then sprinkle on the taco seasoning, making sure to coat them well. If you love heat, feel free to add a pinch of cayenne pepper for a zesty kick!
Step 2: Bake the Fillets
Arrange the seasoned fish fillets on a baking sheet lined with parchment paper or a silicone mat (hello, easy clean-up!). Bake them in the oven for about 15-20 minutes or until the fish flakes easily with a fork. The cooking time may vary based on the thickness of your fillets, so keep an eye on them—no one wants overcooked, rubbery fish.
Step 3: Cook the Cauliflower Rice
While the fish is baking, let’s get that cauliflower rice going. In a skillet over medium heat, toss in the pineapple lime cauliflower rice. Cook for about 5-7 minutes, stirring occasionally until it’s heated through. Don’t overcook it; we want it to remain light and fluffy! Adding a pinch of salt during this step helps amp up the flavors!
Step 4: Assemble the Creamy Sauce
In a small bowl, mix together the sour cream (or Greek yogurt), lime juice, honey, milk, and a pinch of salt. If your sauce is too thick, you can always add a splash more milk until you reach a creamy but pourable consistency. This is the magic sauce that will tie everything together.
Step 5: Enjoy the Crunch
Now let’s whip up that sweet and spicy coleslaw! If you’re using pre-made coleslaw, you might want to add a little bump of flavor with extra lime juice or a touch more honey. For homemade, simply toss your shredded cabbage and carrots with your favorite dressing—easy peasy!
Step 6: Prepare the Avocado and Cilantro
Slice the avocado while everything is cooking, and chop up that fresh cilantro! The avocado adds creaminess, while cilantro adds freshness. You’ll only need a sprinkle for garnish before digging in!
Step 7: Bowl Building!
Now, it’s time to create your beautiful taco bowls! Start by spooning a generous amount of cauliflower rice as your base, then place a piece of your perfectly baked fish on top. Next, pile on that sweet and spicy coleslaw, drizzle with the creamy sauce, and finish off with sliced avocado and chopped cilantro.
Serving Suggestions
When it comes to plating, think vibrant and rustic! You can serve everything right in bowls for a casual vibe, or you can arrange each component on a large platter, allowing guests to build their own taco bowls. The key is to keep it colorful and inviting! A sprinkle of extra cilantro or even some lime wedges on the side can add a delightful pop of freshness.
Recipe Variations
-
Zesty Shrimp Swap: Try swapping out the cod with shrimp! Just adjust the cooking time; shrimp cooks much quicker and offers that fantastic seafood flavor.
-
Spicy Fish Twist: Toss your fish in a spicy chipotle sauce before baking for an extra kick!
-
Grain-Free Options: Use shredded lettuce instead of cauliflower rice for those looking to ditch carbs altogether.
-
Different Proteins: Chicken or turkey seasoned with taco spices works exceptionally well for those who aren’t in the mood for fish!
-
Dairy-Free Delight: Substitute the sour cream with avocado yogurt or cashew cream for a smooth, dairy-free sauce.
Chef’s Notes
I’ll let you in on a little secret—this recipe evolves constantly! Some nights, I swap the coleslaw for mango salsa for a fruity twist. Other times, we garnish with pickled onions for an extra zing. Kitchen creations are always a reflection of personal taste and the ingredients you have on hand, so feel free to get creative! And if your kitchen gets a little messy, remember, it’s all part of the fun!
FAQs and Troubleshooting
Q1: What if my fish sticks to the baking sheet?
Use parchment paper or a silicone baking mat to prevent sticking. Plus, ensure the fillets are dry before seasoning!
Q2: Can I use fresh fish instead of frozen?
Absolutely! Fresh fish will work beautifully. Just adjust the cooking time, as fresh fillets may cook faster than frozen.
Q3: How do I store leftovers?
Store your leftover fish taco bowls in airtight containers in the fridge for up to two days. Reheat gently in the oven or microwave!
Q4: My sauce is too thick—what should I do?
No worries! Just add a splash more milk to thin it out. The goal is a smooth, creamy consistency.
So, what are you waiting for? Grab your apron, assemble those fresh ingredients, and indulge in these Low-Carb Fish Taco Bowls. This recipe combines flavor, freshness, and flexibility, making it perfect for any occasion! Maybe invite over a friend, sip some sparkling water, and share those home-cooked moments.
I can’t wait to hear how your dish turns out! Happy cooking!
PrintLow-Carb Fish Taco Bowls

Indulge in these vibrant Low-Carb Fish Taco Bowls featuring fresh fish, cauliflower rice, and a crunchy coleslaw, perfect for a wholesome dinner.
- Prep Time: 15 minutes
- Cook Time: 30 minutes
- Total Time: 45 minutes
- Yield: 4 servings 1x
- Category: Main Course
- Method: Baking
- Cuisine: Mexican
- Diet: Low-Carb
Ingredients
- 4 Frozen Cod Fillets
- 2 cups Pineapple Lime Cauliflower Rice
- 2 cups Sweet and Spicy Coleslaw
- 2 tbsp Melted Unsalted Butter
- 2 tbsp Taco Seasoning
- ¼ cup Sour Cream (or Greek Yogurt)
- 1½ tsp Lime Juice
- 1 tsp Honey
- 1 tbsp Milk
- Pinch of Salt
- 1 Sliced Avocado
- ¼ cup Chopped Cilantro
Instructions
- Preheat your oven to 375°F (190°C). Pat the frozen cod fillets dry with paper towels. Brush with melted unsalted butter and sprinkle with taco seasoning.
- Arrange the seasoned fish fillets on a lined baking sheet. Bake for 15-20 minutes or until the fish flakes easily.
- While the fish is baking, heat the pineapple lime cauliflower rice in a skillet over medium heat for 5-7 minutes.
- Mix sour cream (or Greek yogurt), lime juice, honey, milk, and a pinch of salt in a small bowl to make the creamy sauce.
- Whip up the sweet and spicy coleslaw, or enhance store-bought coleslaw with extra lime juice.
- Slice the avocado and chop fresh cilantro for garnish.
- Build your taco bowls by spooning cauliflower rice, topping with baked fish, coleslaw, creamy sauce, sliced avocado, and cilantro.
Notes
Feel free to substitute ingredients based on personal preference, such as using shrimp instead of cod or incorporating mango salsa for a fruity twist.
Nutrition
- Serving Size: 1 bowl
- Calories: 350
- Sugar: 5g
- Sodium: 400mg
- Fat: 12g
- Saturated Fat: 4g
- Unsaturated Fat: 6g
- Trans Fat: 0g
- Carbohydrates: 45g
- Fiber: 3g
- Protein: 15g
- Cholesterol: 30mg
Keywords: Fish Taco, Low-Carb, Healthy Dinner, Mexican Cuisine, Taco Bowls

Healthy Zucchini Noodles with Grilled Chicken and Basil Pesto
Savoring Summer: Healthy Zucchini Noodles with Grilled Chicken and Basil Pesto
Hello there, fellow food lover! Today, we’re diving into one of my favorite summer dishes — Healthy Zucchini Noodles with Grilled Chicken and Basil Pesto. Picture a plate bursting with fresh flavors, vibrant colors, and wholesome goodness. It’s comfort food made light, perfect for those warm evenings when you want something delicious without feeling weighed down.
Zucchini noodles, or “zoodles” as they charmingly call them, are not just a trendy substitute for pasta; they bring a delightful crunch and subtle sweetness that pairs perfectly with well-seasoned grilled chicken and the fragrant, nutty essence of basil pesto. And here’s the best part: this dish is incredibly easy to whip up! So why not put on that apron of yours, grab your favorite kitchen tools, and join me in creating a dish that sings summer?
This dish transports me right back to my childhood summers spent in my grandmother’s garden, where the zucchini grew in abundance. She would pick them fresh, and we’d often make amazing meals together, creating memories alongside our food. Now, I share those flavors with you but with a bit of my own twist. Grab a glass of something refreshing, and let’s sauté our way into a culinary adventure that celebrates both the simplicity and elegance of home cooking.
Personal Story
I vividly remember summers on my grandmother’s farm, where the sun kissed the earth, and the air was sweet with the scent of fresh basil and ripe tomatoes. As a kid, I loved the excitement of harvesting vegetables from her garden. One summer day, she asked me to help her prepare dinner for the family. We grabbed a basket and headed out to gather a bunch of crunchy, green zucchinis and a handful of fragrant basil.
Returning to the cozy kitchen, I watched in awe as she turned our simple harvest into a beautiful meal. With just a handful of ingredients, she created magic: sautéed zucchini with grilled chicken, drizzled with a homemade pesto that made every bite irresistible. Her joy in cooking filled the kitchen, creating a warm and inviting atmosphere that made every meal special — a tradition I carry on today.
Now, as I step into my kitchen, I strive to replicate that feeling: the joy of cooking with fresh ingredients and the warmth that comes from sharing with friends and family. Every time I make zucchini noodles, it feels like I’m taking a trip back to my roots, honoring my grandmother while bringing a fresh perspective to the dish.
Ingredients
Here’s what you’ll need to create this delightful summer dish:
-
Zucchini (4 medium)
- The star of our show! Zucchini is low in calories and high in nutrients. If you want a twist, yellow squash works beautifully too.
-
Grilled Chicken (2 boneless, skinless breasts)
- Seasoned to perfection, grilled chicken adds protein and heartiness. Feel free to swap in tofu or chickpeas for a vegetarian option!
-
Basil Pesto (1 cup)
- A luscious blend of fresh basil, garlic, and pine nuts — homemade is best, but store-bought works in a pinch. For nut-free pesto, try sunflower seeds instead!
-
Olive Oil (2 tablespoons)
- Extra virgin is best for dressing and sautéing. It’s full of healthy fats! Avocado oil can be a good substitute with a milder flavor.
-
Salt (to taste)
- Enhances flavor — always start small and adjust! Sea salt or kosher salt are great choices.
-
Black Pepper (to taste)
- Freshly cracked pepper adds an aromatic touch. If you like a little heat, try a pinch of red pepper flakes.
-
Parmesan Cheese (optional, for topping)
- Adds a savory depth to the dish. You can use nutritional yeast as a dairy-free option.
-
Cherry Tomatoes (1 cup, halved)
- A pop of sweetness and color. Feel free to substitute with diced bell peppers for a different flavor profile.
Step-by-Step Instructions
Let’s get cooking! Follow these steps and allow yourself to enjoy the process:
-
Spiralize the Zucchini:
- Using a spiralizer, create long strands of zucchini. If you don’t have a spiralizer, a vegetable peeler can also produce delightful ribbons! I love how this method transforms ordinary zucchini into something visually exciting. Tip: Salt the zucchini noodles lightly and allow them to sit for about 10 minutes. This will draw out excess moisture, preventing your dish from becoming too watery.
-
Prepare the Chicken:
- Preheat your grill or a grill pan over medium-high heat. While it’s heating up, season both sides of the chicken breasts with olive oil, salt, and black pepper. This simple seasoning lets the grilled flavor shine through. When the grill is hot, add the chicken and cook for about 6-7 minutes on each side until fully cooked. You can tell it’s done when the juices run clear! Once cooked, let the chicken rest for a few minutes before slicing it into thin strips — this keeps it juicy.
-
Make the Pesto:
- If you’re preparing homemade pesto, blend the fresh basil, garlic, pine nuts, and olive oil in a food processor until smooth. Season with salt and additional olive oil as desired. Tasting along the way is key — adjust to your preference! No worries if you’re using store-bought — just give it a quick stir and set it aside.
-
Sauté the Zucchini Noodles:
- In a large skillet, heat a tablespoon of olive oil over medium heat. Add the zucchini noodles to the skillet, sautéing them for just 2-3 minutes. You want them to remain tender yet retain a little crunch; overcooking will turn them mushy. As they sauté, toss in the halved cherry tomatoes, mixing everything together until warmed through.
-
Combine and Serve:
- Now, it’s time to bring it all together! Add the sliced grilled chicken to the skillet and gently mix in the bright green basil pesto until everything is coated with that delicious, aromatic sauce. It’s visually stunning — you’ll want to dive right in!
Serving Suggestions
For plating, I suggest a simple yet elegant approach. Use a large bowl or plate to create a nest of zucchini noodles, topped with a generous portion of grilled chicken and then a drizzle of extra pesto to finish. Garnish with freshly grated Parmesan cheese, a few basil leaves, and a sprinkle of black pepper for that restaurant-worthy touch. Pair with a chilled glass of white wine or sparkling water, and you’re all set for a delightful meal!
Recipe Variations
Here are a few fun twists you can play with to keep things exciting:
-
Zoodles with Shrimp: Swap out the chicken for shrimp for a quick, seafood option. Just sauté them until they turn pink, and you’re golden!
-
Spicy Pesto: Add a few red pepper flakes to your basil pesto for a spicy kick that adds an extra layer of flavor.
-
Roasted Vegetable Medley: Toss in some roasted bell peppers, asparagus, or cherry tomatoes for added nutrition and depth.
-
Creamy Avocado Sauce: Blend ripe avocados with garlic and lime juice instead of pesto for a creamy, dairy-free sauce.
-
Savory Vegan Option: Substitute grilled chicken with chickpeas and use nutritional yeast in place of cheese for a full vegan transformation.
Chef’s Notes
As I reflect on the evolution of this recipe, I think back to the first time I glimpsed zucchini noodles on a gourmet menu. I remember being skeptical but intrigued. Once I tried them, I was hooked! This dish has evolved over time, becoming a staple in my own kitchen, and I have played around with flavors, from adding spicy elements to experimenting with different sauces. The heart of the recipe remains grounded in that simple joy of cooking with fresh ingredients and sharing it with loved ones.
Cooking is as much about creativity as it is about technique — don’t hesitate to play around with flavors! Each iteration tells a story, just like my grandmother’s zucchini-inspired meals.
FAQs and Troubleshooting
-
How do I prevent my zucchini noodles from turning mushy?
- Great question! Salt your zoodles lightly before cooking to draw out moisture and sauté them just until tender (2-3 minutes) for a nice bite!
-
Can I make the basil pesto in advance?
- Absolutely! You can prepare your pesto up to a week in advance. Store it in an airtight container and drizzle a little olive oil on top to prevent browning.
-
What if I don’t have a spiralizer?
- No problem! You can simply use a vegetable peeler to create wide ribbons of zucchini or even slice them into thin strips with a knife.
-
Is this dish suitable for meal prep?
- Yes! This dish stores well in the refrigerator for up to 3 days. Just remember to keep the sauce separate until you’re ready to eat to maintain the zoodles’ texture.
Nutritional Info
Per Serving (Based on 4 servings):
- Calories: 320
- Protein: 32g
- Carbohydrates: 12g
- Dietary Fiber: 3g
- Sugars: 4g
- Total Fat: 18g
- Saturated Fat: 3g
I hope you enjoy creating these delightful Healthy Zucchini Noodles with Grilled Chicken and Basil Pesto as much as I do! Remember, cooking is all about sharing love and joy through food, so invite a friend over, and let’s fill the table with laughter and beautiful moments. Happy cooking! 🍽️
PrintHealthy Zucchini Noodles with Grilled Chicken and Basil Pesto

A light and flavorful summer dish featuring zucchini noodles, grilled chicken, and homemade basil pesto.
- Prep Time: 15 minutes
- Cook Time: 20 minutes
- Total Time: 35 minutes
- Yield: 4 servings 1x
- Category: Main Course
- Method: Sautéing, Grilling
- Cuisine: Italian
- Diet: Gluten-Free, Low-Carb
Ingredients
- 4 medium Zucchini
- 2 boneless, skinless Grilled Chicken breasts
- 1 cup Basil Pesto
- 2 tablespoons Olive Oil
- Salt (to taste)
- Black Pepper (to taste)
- Parmesan Cheese (optional, for topping)
- 1 cup Cherry Tomatoes, halved
Instructions
- Spiralize the Zucchini: Using a spiralizer, create long strands of zucchini. Lightly salt and let sit for about 10 minutes.
- Prepare the Chicken: Preheat the grill. Season the chicken with olive oil, salt, and pepper. Grill for 6-7 minutes per side until fully cooked. Let it rest before slicing.
- Make the Pesto: Blend fresh basil, garlic, pine nuts, and olive oil in a food processor until smooth, seasoning to taste.
- Sauté the Zucchini Noodles: Heat olive oil in a skillet, sauté zucchini noodles for 2-3 minutes, then mix in the halved cherry tomatoes.
- Combine and Serve: Add sliced chicken and pesto to the skillet, mixing until well-coated. Serve garnished with Parmesan cheese and basil.
Notes
For a vegetarian option, substitute chicken with tofu or chickpeas. Experiment with different vegetables for added flavor.
Nutrition
- Serving Size: 1 serving
- Calories: 320
- Sugar: 4g
- Sodium: 300mg
- Fat: 18g
- Saturated Fat: 3g
- Unsaturated Fat: 10g
- Trans Fat: 0g
- Carbohydrates: 12g
- Fiber: 3g
- Protein: 32g
- Cholesterol: 70mg
Keywords: zucchini noodles, grilled chicken, basil pesto, healthy recipe, summer dish, low-carb
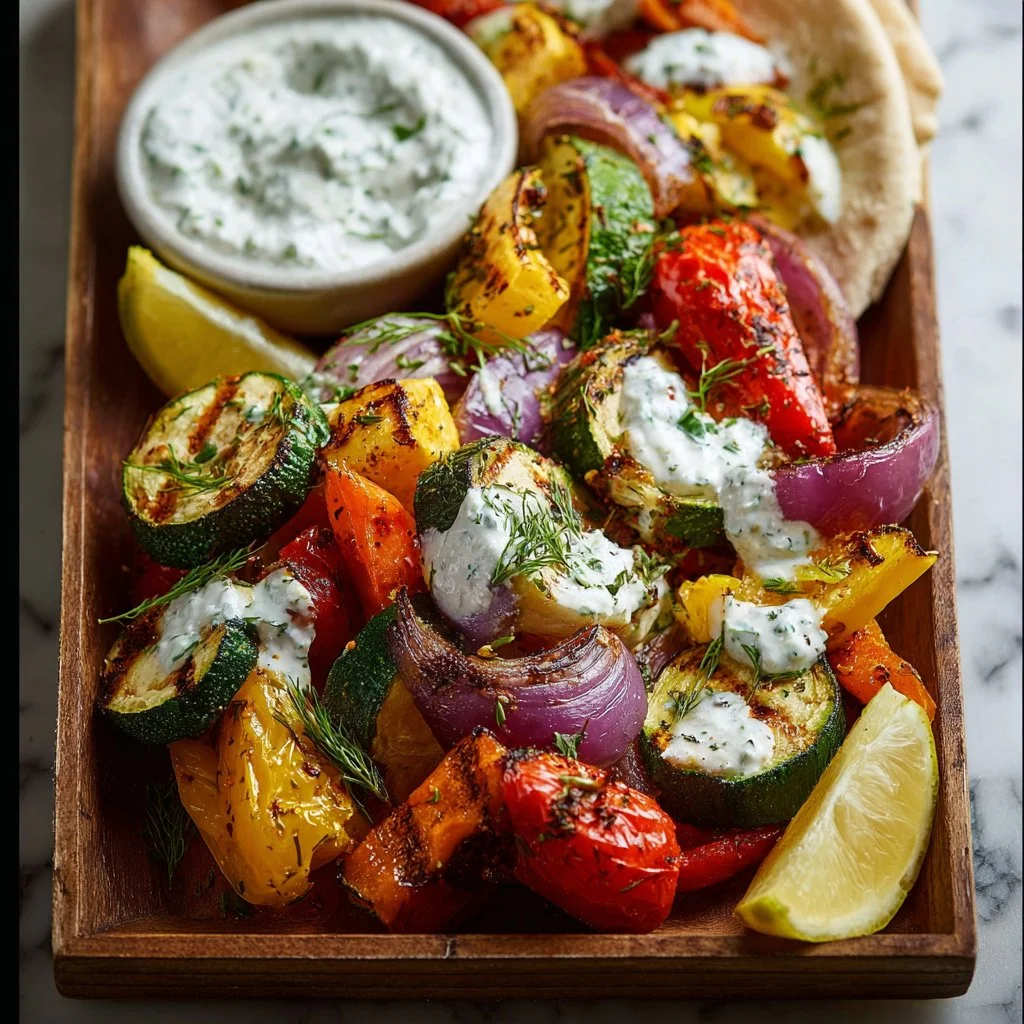
Sheet-Pan Roasted Veggies with Tzatziki & Pita
# Sheet-Pan Roasted Veggies with Tzatziki & Pita: A Flavorful Adventure

**Introduction**

Hello, my culinary friends! Today, we’re diving into a vibrant, wholesome dish that's sure to make your taste buds dance: Sheet-Pan Roasted Veggies with Tzatziki & Pita. Oh, the joy of gathering around a colorful plate filled with perfectly roasted vegetables! There's something both satisfying and comforting about the aroma that wafts through your kitchen as those veggies caramelize and crisp up in the oven.

This recipe is a piece of cake to whip up on any busy weeknight, but it has the elegance to impress even the most discerning Dinner Party Dave. What's the secret? It’s all about harnessing the natural sweetness of fresh veggies, a drizzle of olive oil, and the delightful coolness of homemade or store-bought tzatziki sauce. Top it all off with some warm pita bread, and you have a stunning dish that feels graceful yet effortless.

As a lovable host-at-heart, I promise you that my focus with this blog is to create recipes that make people feel at home, whether you’re sharing stories around the dinner table or prepping for a cozy movie night. So, tie on your apron, pour yourself something bubbly, and let’s get cooking!

---

**Personal Story**

Let me take you back to a sun-drenched afternoon spent at my Aunt Clara's house. She was a master of finding the most delicious veggies at the farmer's market, and every summer, she would invite the entire family over for her iconic roasted veggie platter. I can still visualize those radiant peppers, vibrant zucchinis, and luscious red onions—each piece perfectly caramelized to perfection!

One of my fondest memories is the way she taught me to roast. I can still hear her saying, "Savannah, love, it’s all about letting the veggies dance in the oven!" Those moments stood out to me, not just for the food but the laughter and love shared around the table. As we enjoyed her dish, the tzatziki was the star of the show—cool, refreshing, and full of flavor. That experience motivated me to create my own spin on her recipes, leading to this delightful Sheet-Pan Roasted Veggies with Tzatziki & Pita!

---

**Ingredients**

Here's what you’ll need to create this beautiful dish. For each ingredient, I'll share a quick tip that will make you feel like a pro in your own kitchen!

- **Assorted Vegetables** (bell peppers, zucchini, red onion, etc.)
  - *Chef Insight*: Choosing a variety of colors adds visual appeal and different flavors. Feel free to mix in seasonal veggies like carrots, asparagus, or even eggplant. Just remember to cut them into even-sized pieces to ensure uniform cooking!

- **Olive Oil**
  - *Substitution Tip*: If you’re not a fan of olive oil, avocado oil or grapeseed oil work splendidly too! The oil helps in caramelizing the veggies and enhances their natural flavors.

- **Salt**
  - *Quick Insight*: Salt enhances flavor by drawing out moisture and intensifying taste. Use kosher salt for its coarse texture or sea salt for a bit of added mineral complexity.

- **Pepper**
  - *Quick Insight*: Freshly ground black pepper adds a burst of flavor and a slight heat. If you want a kick, consider crushed red pepper flakes!

- **Garlic Powder**
  - *Chef Insight*: Garlic powder is a great shortcut! If you can't find any, feel free to swap in freshly minced garlic. Just be cautious with the amount—as fresh garlic can be stronger!

- **Tzatziki Sauce**
  - *Chef Insight*: While you can absolutely make your own, store-bought varieties are perfectly acceptable here. Just look for one with fresh ingredients (and no preservatives, if you can!) to keep it light and authentic.

- **Pita Bread**
  - *Substitution Tip*: If you’re feeling adventurous, try using naan or even whole-grain wraps for a twist on the classic. They’ll soak up that tzatziki goodness just beautifully!

---

**Step-by-Step Instructions**

1. **Preheat the Oven:**
   - Start by preheating your oven to 425°F (220°C). This high heat ensures beautifully caramelized veggies that are tender on the inside and crispy on the outside. Trust me; your kitchen will start smelling divine!

2. **Prepare the Vegetables:**
   - Wash your veggies thoroughly and pat them dry. Cutting them into even pieces (about 1-inch cubes for this dish) helps everything cook evenly. I recommend a colorful mix: vibrant bell peppers for sweetness, zucchini for a soft bite, and red onion for a zing of flavor.

3. **Toss with Oil and Seasoning:**
   - In a large mixing bowl, add your chopped veggies and drizzle them with a generous amount of olive oil (about 3-4 tablespoons). Then sprinkle salt, pepper, and garlic powder over the top. Take those kitchen tools and get your hands in there! Toss everything around until all the veggies are evenly coated. Your hands are the best tools for mixing!

4. **Spread on a Baking Sheet:**
   - Line a baking sheet with parchment paper for easy cleanup—because who wants to scrub pans after a delicious meal? Spread the seasoned veggies out in a single layer on the sheet. Overcrowding can lead to steaming instead of roasting, so give them some space!

5. **Roast in the Oven:**
   - Pop that baking sheet into your preheated oven and let those beauties roast for about 20-25 minutes. Give them a good stir halfway through the cooking time. Watch them transform into golden perfection!

6. **Warm the Pita:**
   - About five minutes before the veggies are done, toss the pita bread into the oven (next to the veggies works great) to warm them up. This step is essential—you want those pockets warm and toasty for scooping!

7. **Plate and Serve:**
   - Once your veggies are beautifully roasted, remove them from the oven and let them cool slightly before serving. They’ll be steaming hot! Arrange the warm pita on a serving platter alongside the vibrant veggies and drizzle with tzatziki sauce, either in a bowl or over the top. Voilà!

---

**Serving Suggestions**

Plating this dish is all about showcasing the colors and inviting the eyes to the table. Arrange your roasted veggies in a charming pile on a large platter, then nestle the warmed pita around the edge. Serve the tzatziki in a small bowl with a sprig of fresh mint or parsley for a pop of color. Drizzle a little olive oil over it all for that restaurant-style flair.

---

**Recipe Variations**

Feeling adventurous? Here are some creative spins you can incorporate into your Sheet-Pan Roasted Veggies:

- **Mediterranean Delight**: Add kalamata olives and cherry tomatoes for extra color and tang.
- **Herby Twist**: Sprinkle some fresh herbs like dill or basil over the veggies before serving for a fresh burst of flavor.
- **Spicy Kick**: Toss in some sliced jalapeños or a touch of smoked paprika for a subtle heat.
- **Zesty Citrus**: Squeeze some fresh lemon juice over the dish just before serving to elevate the flavors!
- **Make it a Meal**: Add chickpeas or cooked quinoa to the veggie mix for a heartier, protein-rich dish.

---

**Chef’s Notes**

One of my fondest memories while evolving this recipe was the time I tried adding an unexpected splash of balsamic vinegar before roasting. Boy, that did the trick! It added a whole new level of flavor that was just divine. These roasted goodies can really be a reflection of your personal taste—mix and match until you find what makes your heart (and tummy!) sing.

And trust me, this dish has come a long way from Aunt Clara’s kitchen. It has adapted, evolved, and made my heart swell every time I cook it. I hope when you pack this into your weekly meal prep or bring it out on special occasions, it brings joy to your table!

---

**FAQs and Troubleshooting**

- **What if my veggies aren’t cooked evenly?**
  - Make sure to cut your vegetables into similar sizes, and don't crowd the pan. If some are still crisp while others are soft, just give them a few more minutes in the oven.

- **Can I make this dish ahead of time?**
  - Absolutely! You can roast the veggies and store them in the fridge for 3-4 days. Just reheat in the oven for a few minutes before serving!

- **How do I store leftovers?**
  - Store any leftovers in an airtight container in the fridge. They make a delicious lunch the next day cold or warmed up again!

- **What if I don’t have tzatziki?**
  - Not to fret! You can easily whip up a quick yogurt sauce using Greek yogurt, minced garlic, diced cucumber, and a squeeze of lemon. It’ll give you a similar refreshing flavor!

---

**Nutritional Info** *(Optional)*

**Calories per serving**: Approximately 220 (with tzatziki and pita)
- *Protein*: 6g
- *Fat*: 10g
- *Carbohydrates*: 30g
- *Fiber*: 5g

---

Are you drooling yet, fellow foodies? With this Sheet-Pan Roasted Veggies with Tzatziki & Pita recipe, you’ll not only create a stunning meal but also bring that touch of elegance to your everyday dining. Remember, cooking is as much about the experience as it is about the food. So, gather your loved ones, share some stories, and make beautiful memories around your table. Happy cooking, my friends!
Sheet-Pan Roasted Veggies with Tzatziki & Pita
A vibrant and wholesome dish featuring roasted vegetables served with tzatziki sauce and warm pita bread, perfect for any weeknight dinner or special occasion.
- Prep Time: 15 minutes
- Cook Time: 25 minutes
- Total Time: 40 minutes
- Yield: 4 servings
- Category: Main Course
- Method: Baking
- Cuisine: Mediterranean
- Diet: Vegetarian
Ingredients
- Assorted Vegetables (bell peppers, zucchini, red onion, etc.)
- Olive Oil
- Salt
- Pepper
- Garlic Powder
- Tzatziki Sauce
- Pita Bread
Instructions
- Preheat the oven to 425°F (220°C).
- Prepare the vegetables by washing, drying, and cutting them into even 1-inch cubes.
- Toss the veggies with olive oil, salt, pepper, and garlic powder until evenly coated.
- Spread the seasoned veggies on a lined baking sheet in a single layer.
- Roast in the oven for 20-25 minutes, stirring halfway through.
- Warm the pita bread in the oven about 5 minutes before the veggies are done.
- Plate the roasted veggies with the warm pita and drizzle with tzatziki sauce before serving.
Notes
Feel free to add a variety of seasonal vegetables for more color and flavor. Experiment with different herbs and spice adjustments based on your taste preference.
Nutrition
- Serving Size: 1 serving
- Calories: 220
- Sugar: 5g
- Sodium: 250mg
- Fat: 10g
- Saturated Fat: 1g
- Unsaturated Fat: 7g
- Trans Fat: 0g
- Carbohydrates: 30g
- Fiber: 5g
- Protein: 6g
- Cholesterol: 0mg
Keywords: roasted veggies, tzatziki, pita, Mediterranean, healthy dinner, vegetarian recipes
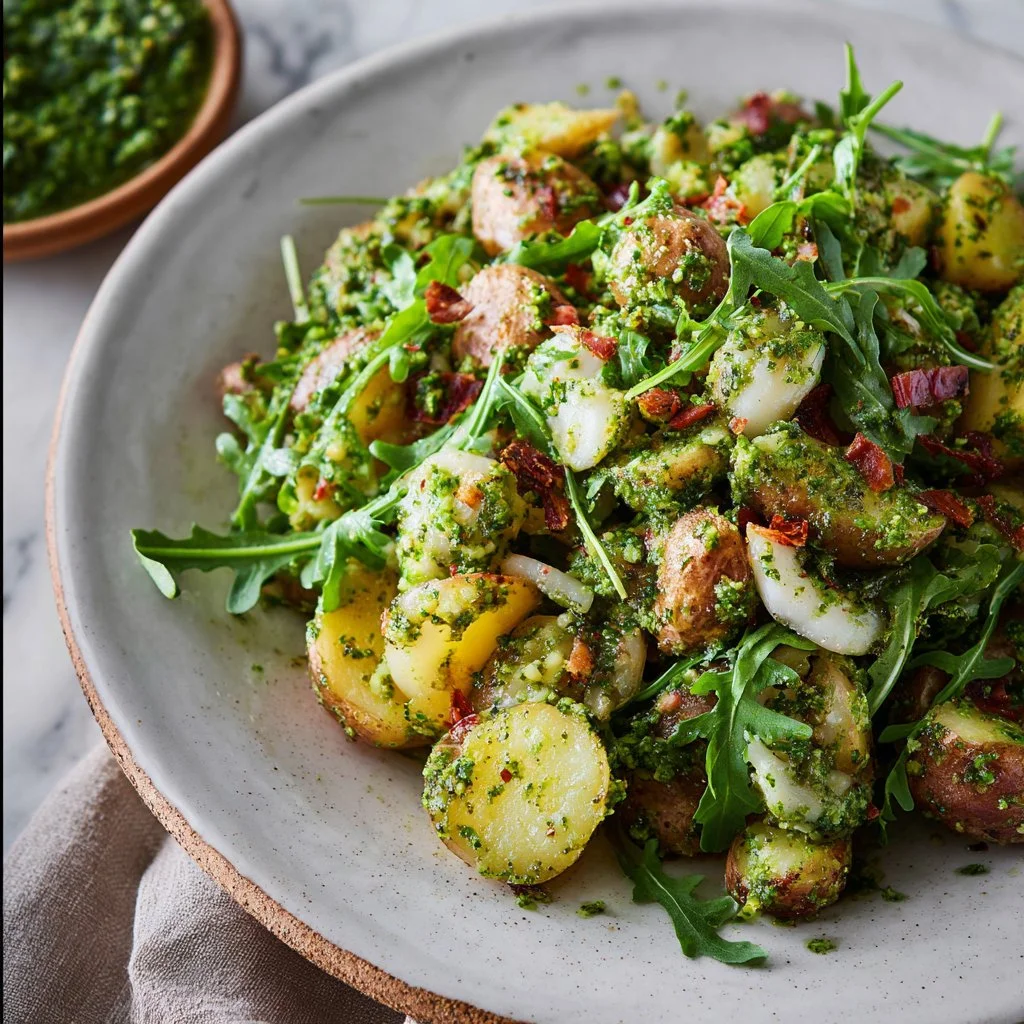
Arugula Pesto Potato Salad
Arugula Pesto Potato Salad: A Fresh Take on a Classic Dish
Hey there, kitchen enthusiasts! Today, we’re diving into a vibrant twist on an old favorite: Arugula Pesto Potato Salad. If you’re anything like me, potato salad has a special place in your heart. It’s versatile, comforting, and practically a staple at gatherings, barbecues, and family reunions. But let’s be honest: nobody wants the same ol’ mayo-laden version every time!
That’s where this fabulous arugula pesto comes in. With its peppery, fresh flavor, this bright green sauce will elevate your potato salad game to a whole new level. The best part? It’s uncomplicated enough to whip up on a weeknight yet elegant enough to wow your dinner guests. So, grab your apron and let’s get cooking!
In this blog post, I’ll share a delightful personal memory tied to this dish, guide you through the ingredients, and offer step-by-step instructions to ensure you nail this recipe. Plus, I’ll sprinkle in some serving suggestions and variations to help you tailor it to your taste. Let’s gather around the table and make some delicious food together!
Personal Story
I remember the first time I tried arugula pesto. It was a summer BBQ at my best friend’s house, and the sky was a perfect blue, the kind that makes everything feel brighter. She had spent the whole afternoon preparing dishes, turning her backyard into a haven of deliciousness. The moment I tasted this unique pesto, I was hooked. It was a little spicy, a little nutty, and paired perfectly with her grilled veggies and, of course, the potato salad she had made on a whim.
That day, we laughed until our sides hurt, shared stories under the warm sun, and of course, tasted everything on the table. The memory of that meal was sparked by a simple yet transformative ingredient – arugula. It reminded me of how food could create connections, evoke nostalgia, and even foster creativity in the kitchen. Fast forward to today, and I find joy in recreating that experience by sharing my version with all of you!
Ingredients
Key Ingredients for Arugula Pesto Potato Salad
-
2 lbs "pee wee" potatoes, halved
These small, tender potatoes cook quickly and have a creamy texture. You can substitute with fingerling or baby Yukon gold potatoes if you can’t find pee wees. -
Olive oil
A rich source of healthy fats, olive oil adds depth and flavor. Extra virgin olive oil is preferred for its robust taste, but a light olive oil works too. -
Kosher salt
Essential for enhancing the flavor in cooking. If you only have table salt, use about half the amount since it’s finer. -
Freshly cracked black pepper
A sprinkle of this adds a hint of warmth and complexity. Use freshly cracked for the best flavor! -
3 red spring onions, thinly sliced
These onions bring a mild sweetness and vibrant color. Chives or green onions are excellent substitutes if you can’t find red spring onions. -
2 cups packed arugula
This leafy green is peppery and full of nutrients. If you’re not a fan, spinach or kale can be blended in for a milder taste. -
6 radishes, thinly shaved on a mandolin
Radishes contribute crunch and earthiness. If you don’t have radishes, sliced cucumbers can add a different but refreshing crunch. -
1 cup packed basil leaves
Fresh basil adds a lovely aroma and flavor to the pesto. Feel free to mix in some parsley for a twist! -
1 small handful chives
They add a delicate onion flavor. If you’re out of chives, feel free to increase the amount of spring onions. -
2 garlic cloves, chopped
Garlic is essential for depth; it elevates the pesto. If you prefer a milder taste, you can roast the garlic in olive oil before adding it to the mix. -
⅓ cup toasted pine nuts
Pine nuts provide rich nuttiness and healthy fats. If you have a nut allergy, sunflower seeds or pumpkin seeds can work in a pinch. -
⅓ cup grated pecorino romano cheese
This cheese brings a sharp, salty kick. Parmesan can be used for a similar flavor. -
½ tsp lemon zest
Adding zest brightens the flavor of the pesto. Make sure to zest the lemon before juicing! -
2 tbsp lemon juice
Freshly squeezed lemon juice balances creamy and savory flavors beautifully. -
1 tbsp honey
A hint of sweetness smooths out the pesto’s flavors. Feel free to substitute with maple syrup for a vegan option! -
¾ cup extra virgin olive oil
This is the base for your pesto, providing richness and body.
Step-by-Step Instructions
Cooking the Potatoes
-
Boil the Potatoes
Fill a large pot with salted water and bring it to a boil. Add the halved pee wee potatoes and cook until fork-tender, about 15-20 minutes. Make sure to keep an eye on them! You want them soft but not mushy.Tip: To ensure even cooking, start with potatoes that are all similar in size.
-
Drain and Cool
Once tender, drain the potatoes in a colander and let them cool for about 10 minutes. Drizzling them with a little olive oil while they cool will prevent them from sticking together.
Making the Arugula Pesto
-
Blend the Pesto
In a food processor, combine 2 cups of arugula, basil leaves, chives, garlic, toasted pine nuts, and grated pecorino Romano cheese. Drizzle in the lemon juice and honey, and start adding olive oil. Blend until smooth but still slightly chunky for texture.Chef Hack: If your pesto is too thick, you can add more olive oil or a splash of water to achieve your desired consistency.
-
Season
Once blended, add the lemon zest, kosher salt, and freshly cracked black pepper to taste. Blend again briefly to combine. Give it a taste test—you want that perfect harmony of flavors!
Assembling the Salad
-
Combine Ingredients
In a large mixing bowl, gently toss the cooled potatoes with the arugula pesto until they’re nicely coated. Add in the thinly sliced red spring onions and shaved radishes.Tip: Don’t toss too vigorously; you want to keep the potatoes intact!
-
Final Adjustments
Take a moment to taste the salad once more. Add additional salt, pepper, or lemon juice to brighten things up if needed.
Serving the Salad
-
Plate
Transfer the potato salad to a serving dish. Make it visually appealing by artfully layering or arranging the salad, allowing the rainbow of colors to shine through.Presentation Tip: Garnish with additional arugula, basil leaves, or a sprinkle of pecorino cheese for that "wow" factor!
Recipe Variations
- Caprese Twist: Add cherry tomatoes and mozzarella balls for a Caprese-inspired salad!
- Vegan Twist: Substitute the cheese with nutritional yeast and the honey with agave syrup.
- Spicy Kick: Include red pepper flakes in the pesto for a spicy surprise!
- Mediterranean Flair: Toss in some marinated olives and roasted red peppers for a robust flavor.
- Herby Variation: Experiment with different herbs like dill or mint for a unique twist on flavor.
Chef’s Notes
This Arugula Pesto Potato Salad has become a staple in my kitchen, and I love how it evolves with the seasons. Sometimes, I swap in seasonal veggies to keep it fresh—just recently, I tossed in some blanched asparagus and snap peas! Also, remember that the pesto can be made ahead of time and stored in the fridge, so it’s perfect for meal prep.
Every time I serve this dish, I get stories from friends about their potato salad memories. I think it’s fascinating how food can stir nostalgia and even create new memories around the table!
FAQs and Troubleshooting
-
What if my potatoes are mushy?
If you accidentally over-boil the potatoes, try using them in a creamy mashed potato recipe instead! -
Can I make the pesto ahead of time?
Absolutely! Pesto can be stored in the fridge for up to a week. Just make sure to cover it with a thin layer of olive oil to avoid discoloration. -
Can I freeze the pesto?
Yes, you can freeze arugula pesto! Ice cube trays are great for portioning it out—just thaw in the fridge when you want to use it! -
Why is my pesto turning brown?
This often happens when it’s exposed to air. Be sure to store it airtight, and if some browning occurs, it’s still edible, but you can add a splash of lemon juice to brighten it up again.
Nutritional Info
This Arugula Pesto Potato Salad is packed with fresh greens, healthy fats, and earthy flavors—all while offering a delicious balance of carbs and nutrients. You can expect approximately:
- Calories: 350 per serving (1 cup)
- Protein: 8g
- Carbohydrates: 30g
- Fat: 24g
Whether you’re in need of an easy weeknight meal or an impressive dish for entertaining, this Arugula Pesto Potato Salad will not disappoint. Tie on your apron, enjoy your time in the kitchen, and let’s make beautiful memories—one delicious plate at a time!
PrintArugula Pesto Potato Salad
A vibrant twist on a classic potato salad featuring a peppery arugula pesto that elevates traditional flavors.
- Prep Time: 15 minutes
- Cook Time: 20 minutes
- Total Time: 35 minutes
- Yield: 4 servings 1x
- Category: Side Dish
- Method: Boiling and Blending
- Cuisine: Mediterranean
- Diet: Vegetarian
Ingredients
- 2 lbs “pee wee” potatoes, halved
- ⅓ cup olive oil
- 1 tsp kosher salt
- ½ tsp freshly cracked black pepper
- 3 red spring onions, thinly sliced
- 2 cups packed arugula
- 6 radishes, thinly shaved
- 1 cup packed basil leaves
- 1 small handful chives
- 2 garlic cloves, chopped
- ⅓ cup toasted pine nuts
- ⅓ cup grated pecorino romano cheese
- ½ tsp lemon zest
- 2 tbsp lemon juice
- 1 tbsp honey
- ¾ cup extra virgin olive oil
Instructions
- Boil the potatoes in salted water until fork-tender, about 15-20 minutes.
- Drain the potatoes and let them cool for about 10 minutes.
- Blend the pesto ingredients: arugula, basil, chives, garlic, pine nuts, and cheese with lemon juice and honey. Gradually add olive oil until smooth.
- Season the pesto with lemon zest, salt, and pepper. Blend briefly to combine.
- Combine the cooled potatoes with the arugula pesto, spring onions, and radishes in a large bowl.
- Final adjustments with salt, pepper, or lemon juice to taste.
- Plate the salad in a serving dish, garnishing as desired.
Notes
Pesto can be made ahead of time. Keep it in the fridge covered with olive oil to prevent discoloration. Customize with seasonal veggies and herbs!
Nutrition
- Serving Size: 1 serving
- Calories: 350
- Sugar: 5g
- Sodium: 400mg
- Fat: 24g
- Saturated Fat: 4g
- Unsaturated Fat: 16g
- Trans Fat: 0g
- Carbohydrates: 30g
- Fiber: 4g
- Protein: 8g
- Cholesterol: 10mg
Keywords: potato salad, pesto, arugula, summer recipes, vegetarian side dish