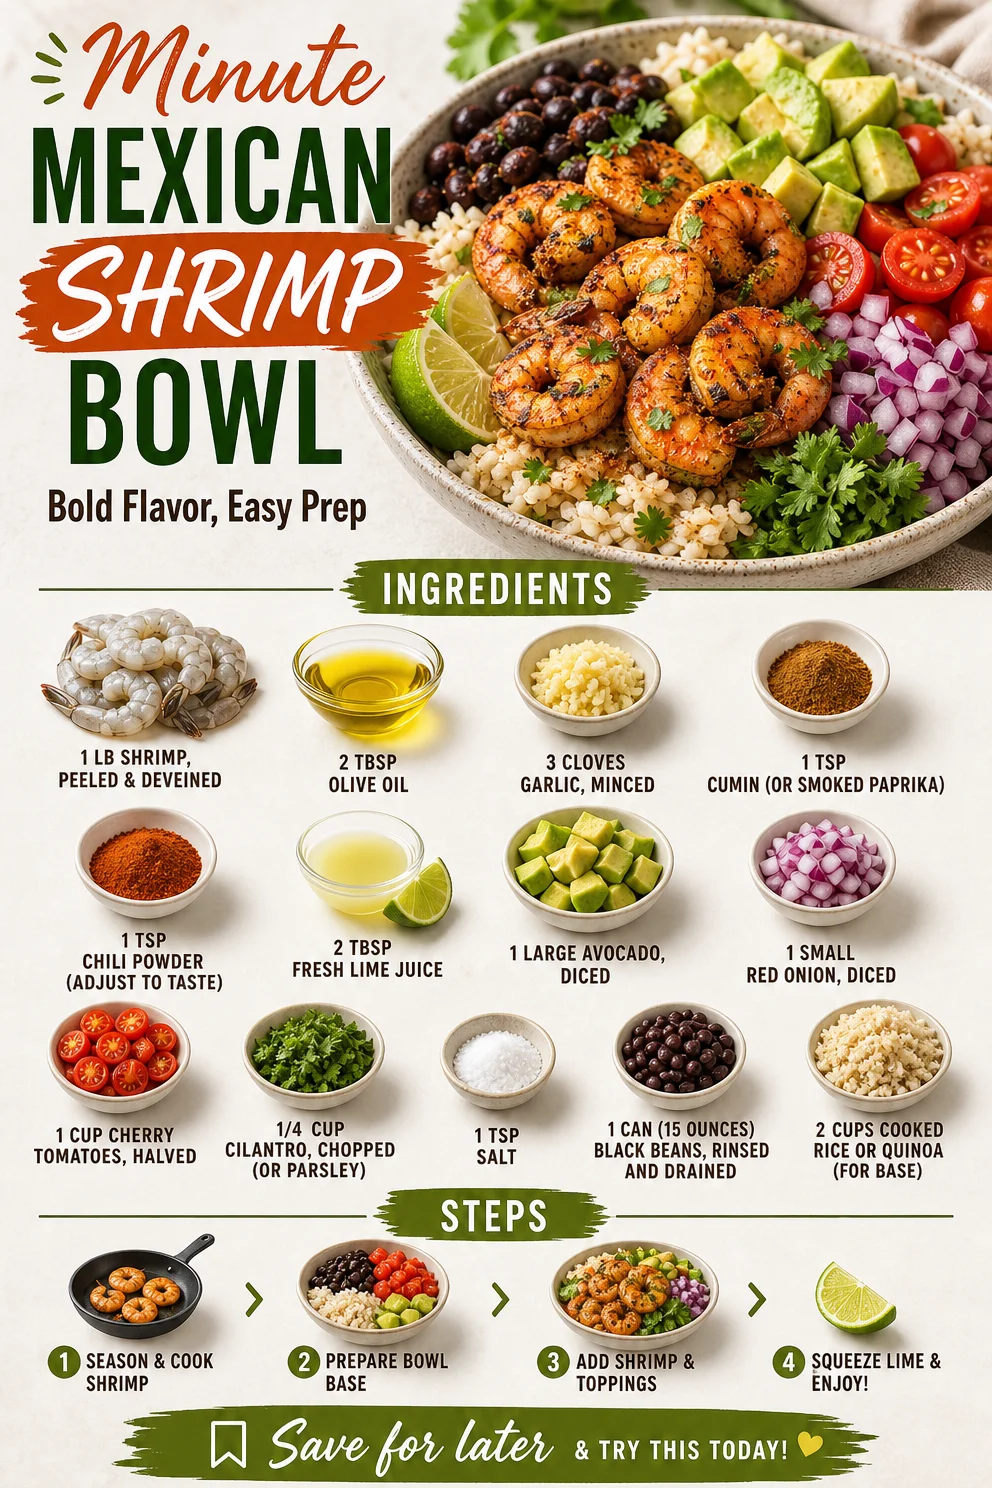
Minute Mexican Shrimp Bowl: Bold Flavor, Easy Prep
Daringly Delicious Mexican Shrimp Bowl Bursting with Flavor
Hello, fabulous foodies! Today, we’re diving into one of my absolute favorite dishes — the Daringly Delicious Mexican Shrimp Bowl. This bowl is not just a meal; it’s an explosion of colors, flavors, and textures that will whisk you straight to a sun-kissed beach in Mexico with each delightful bite. With juicy shrimp expertly seasoned and tossed with fresh ingredients, this dish is perfect for any weeknight dinner or an impressive gathering. Are you ready to take your taste buds on an adventure? Let’s get cooking!
A Personal Story: Savoring the Moments
Let me take you back a few years to a sunny spring afternoon. I was hosting a small get-together for my closest friends, and the air was filled with laughter and the sound of clinking glasses. As I flipped a few shrimp in the sizzling sauté pan, a waft of garlic and spices danced around the kitchen, drawing my friends in like a fragrant magnet. The vibrant colors of diced avocado, bright cherry tomatoes, and the fresh green cilantro coming together in that bowl were nothing short of a culinary masterpiece.
I remember serving this dish and watching everyone’s eyes light up with delight as they dug in. The combination of flavors was both sophisticated and comforting, a reminder that good food is about connection and joy. That day solidified my love for crafting meals that not only taste incredible but also bring people together. And let me tell you, these Mexican Shrimp Bowls did just that!
Ingredients
Here’s what you’ll need to recreate this culinary delight. Each ingredient plays a vital role in building layers of flavor and texture — just like life, right?
-
1 lb shrimp, peeled and deveined: Fresh shrimp are a must for the best flavor; however, frozen shrimp work perfectly too! Just make sure to thaw them overnight in the fridge for optimal texture.
-
2 tbsp olive oil: This not only helps with cooking but adds a hint of flavor. If you’re looking for a twist, consider avocado oil for a different profile.
-
3 cloves garlic, minced: Ah, garlic! The flavor-building superstar. If you’re in a pinch, you can use 1 tsp of garlic powder, but I highly recommend fresh for depth.
-
1 tsp cumin (or smoked paprika): Cumin adds that warm, earthy flavor. If you want a smokier tone, swap it out for smoked paprika, bringing a delightful depth to your dish.
-
1 tsp chili powder (adjust to taste): Spice is subjective! Start with this base, and feel free to increase it to suit your heat preference.
-
2 tbsp fresh lime juice: This brightens the dish up wonderfully! For a fun twist, you can use lemon juice or even a splash of orange juice for sweetness.
-
1 large avocado, diced: Who doesn’t love avocado? Choose one that’s ripe for optimal creaminess (hint: gently squeeze to check for ripeness!).
-
1 small red onion, diced: Red onion adds a beautiful crunch and a hint of sweetness. If you’re not a fan, feel free to swap it out for green onions.
-
1 cup cherry tomatoes, halved: These sweet gems add brightness. If tomatoes aren’t in season, canned diced tomatoes will do in a pinch — just drain them!
-
1/4 cup cilantro, chopped (or parsley): Cilantro brings a burst of freshness. If you’re not a cilantro fan, parsley has a milder taste and will still work beautifully.
-
1 tsp salt: Essential for enhancing flavors. Start with this amount, and adjust to taste; even a pinch more can elevate your bowl.
-
1 can (15 ounces) black beans, rinsed and drained: A fantastic source of protein and texture. Feel free to substitute with pinto beans or chickpeas for another fabulous option.
-
2 cups cooked rice or quinoa: Both grains will serve as a lovely base. Use brown rice for a nutty flavor, or quinoa to add a protein-packed twist!
Step-by-Step Instructions
Alright, time to roll up your sleeves and dive into the cooking process!
-
Prep the Ingredients: Start by preparing all your veggies and shrimp. Chop, dice, and rinse those ingredients. This makes the cooking process smooth as butter! Trust me; it’s worth taking a moment to set everything out.
-
Heat the Olive Oil: In a large skillet, heat the olive oil over medium-high heat. You want it glistening but not smoking. If it starts to smoke, take it off the heat for a moment. We’re sautéing, not frying!
-
Sauté the Garlic: Add the minced garlic to the hot oil. Stir for about 30 seconds or until fragrant. You don’t want to burn the garlic — it should just become aromatic. The aroma should draw everybody toward the kitchen like a siren song.
-
Cook the Shrimp: Toss in the shrimp, cumin, chili powder, and salt. Stir and cook until the shrimp turns pink and opaque, about 3-4 minutes. Keep the heat high enough, but be sure to flip them gently, as overcooking can lead to rubbery shrimp.
-
Add Lime Juice: Once the shrimp is perfectly cooked, drizzle the fresh lime juice over them and give a final stir. That zesty kick will add so much brightness to your dish.
-
Combine with Black Beans: In a large mixing bowl, combine the cooked rice or quinoa, black beans, cherry tomatoes, diced avocado, red onion, and cilantro. Gently fold everything in to ensure even distribution without mashing the avocado. This is where we build harmony in our bowl!
-
Plate the Bowl: Now, it’s time to bring everything together! Place a generous scoop of the rice and beans mixture at the bottom of your serving bowl, and top it with the heavenly shrimp. Drizzle any remaining garlic oil from the pan on top for extra flair!
-
Garnish and Serve: Finish off with a sprig of cilantro for color and a hint of freshness. You can also squeeze a little more lime on top for extra brightness. Serve with tortilla chips on the side for that extra crunch, and watch your guests’ eyes light up as they dig in!
Serving Suggestions
When it comes to plating, remember that presentation matters! Use wide, shallow bowls to create a beautiful base. Layer the rice or quinoa first, followed by the shrimp, then artfully arrange the avocado, cherry tomatoes, and cilantro on top. A sprinkle of lime zest could also add a touch of elegance.
For extra pizzazz, serve with lime wedges and a small bowl of spicy salsa or guacamole on the side. Eating should be a celebration — let’s make it look as pretty as it is tasty!
Recipe Variations
Feeling adventurous? Here are some creative twists to make this dish your own:
-
Spicy Kick: Add sliced jalapeños for an added kick of spice to incorporate more heat!
-
Tropical Vibes: Include diced mango or pineapple for a sweet and tangy twist that complements the shrimp beautifully.
-
Protein Switch-Up: Switch the shrimp out for grilled chicken or diced tofu for a vegetarian option that’s equally delightful.
-
Grain Swap: Try using cauliflower rice for a low-carb alternative! Just sauté it briefly until it’s tender, as it packs an impressive flavor punch.
-
Herb Fiesta: Experiment with dill or basil instead of cilantro for a fresh twist on flavors!
Chef’s Notes
As with any recipe, this Mexican Shrimp Bowl has evolved over time. Originally, it was more about using whatever I had in the fridge, but now I like to highlight vibrant ingredients that create harmony. One of my favorite kitchen moments was experimenting with different spice blends until I stumbled upon the perfect combo for this dish.
Never underestimate the magic of a good pinch of salt or the zest of a fresh lime! And remember, cooking is not just about following a recipe—it’s about trusting your instincts and allowing the flavors to inspire you. Don’t hesitate to tweak recipes based on your taste — embrace the creative process!
FAQs and Troubleshooting
Q: What if my shrimp turns out rubbery?
A: This usually happens from overcooking. Cook the shrimp just until they turn pink and opaque (about 3-4 minutes).
Q: Can I make this in advance?
A: Absolutely! You can prep the rice, beans, and shrimp ahead of time but combine everything right before serving for optimal flavor and texture.
Q: How can I reduce the spice level?
A: If you’re sensitive to heat, simply reduce the chili powder to half a teaspoon or omit it entirely. The dish will still be fragrant and delicious!
Q: What’s a good side dish to serve with this bowl?
A: A light citrus salad or a refreshing corn salad would pair wonderfully, balancing the flavors in your shrimp bowl beautifully.
Nutritional Info
This scrumptious bowl is packed with protein, healthy fats, and an abundance of vitamins from the veggies. Each serving offers a wonderful balance of nutrients, making it as nourishing as it is delicious!
So there you have it, my lovely food enthusiasts — a Daringly Delicious Mexican Shrimp Bowl that not only satisfies the palate but also brings joy to your dining table. Whether it’s a cozy weeknight or a vibrant gathering, this recipe serves to create connections and treasured memories. Now, tie on your apron, pour yourself a refreshing drink, and get ready to whip up a dish that’s bursting with flavor! Happy cooking!
PrintDaringly Delicious Mexican Shrimp Bowl
An explosion of colors, flavors, and textures, this Mexican Shrimp Bowl features juicy shrimp expertly seasoned and tossed with fresh ingredients.
- Prep Time: 15 minutes
- Cook Time: 15 minutes
- Total Time: 30 minutes
- Yield: 4 servings 1x
- Category: Main Course
- Method: Sautéing
- Cuisine: Mexican
- Diet: Gluten-Free
Ingredients
- 1 lb shrimp, peeled and deveined
- 2 tbsp olive oil
- 3 cloves garlic, minced
- 1 tsp cumin (or smoked paprika)
- 1 tsp chili powder (adjust to taste)
- 2 tbsp fresh lime juice
- 1 large avocado, diced
- 1 small red onion, diced
- 1 cup cherry tomatoes, halved
- 1/4 cup cilantro, chopped (or parsley)
- 1 tsp salt
- 1 can (15 ounces) black beans, rinsed and drained
- 2 cups cooked rice or quinoa
Instructions
- Prep the ingredients: Start by preparing all your veggies and shrimp. Chop, dice, and rinse those ingredients.
- Heat the olive oil: In a large skillet, heat the olive oil over medium-high heat.
- Sauté the garlic: Add the minced garlic to the hot oil and stir for about 30 seconds or until fragrant.
- Cook the shrimp: Toss in the shrimp, cumin, chili powder, and salt, cooking until the shrimp turns pink and opaque, about 3-4 minutes.
- Add lime juice: Once cooked, drizzle the fresh lime juice over the shrimp and give a final stir.
- Combine with black beans: In a large mixing bowl, combine cooked rice or quinoa, black beans, cherry tomatoes, diced avocado, red onion, and cilantro.
- Plate the bowl: Place a generous scoop of the rice and beans mixture at the bottom of your serving bowl, and top it with the shrimp.
- Garnish and serve: Finish with a sprig of cilantro and serve with tortilla chips on the side.
Notes
For extra flavor, consider using avocado oil instead of olive oil and serve with lime wedges and spicy salsa.
Nutrition
- Serving Size: 1 serving
- Calories: 450
- Sugar: 5g
- Sodium: 600mg
- Fat: 20g
- Saturated Fat: 3g
- Unsaturated Fat: 14g
- Trans Fat: 0g
- Carbohydrates: 45g
- Fiber: 10g
- Protein: 25g
- Cholesterol: 160mg
Keywords: shrimp bowl, Mexican, healthy dinner, easy recipe, quick meal
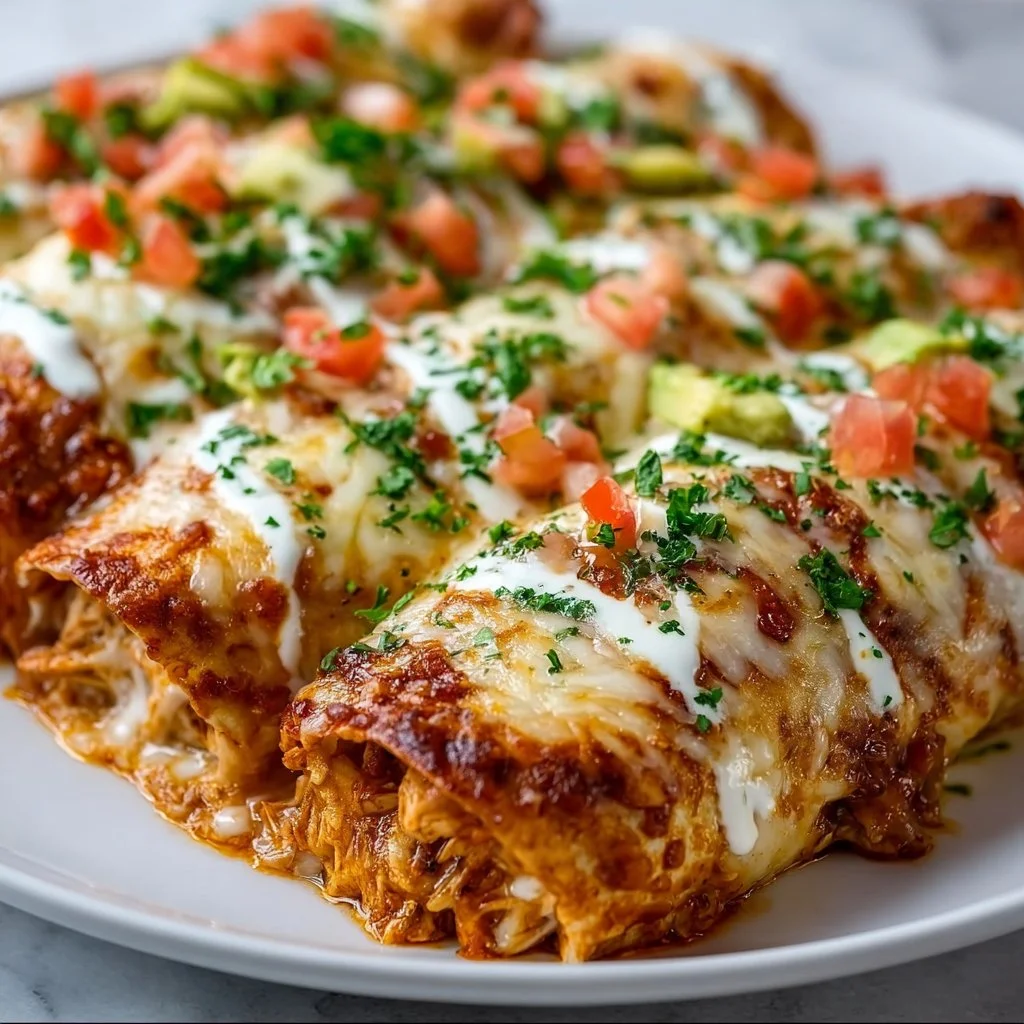
Minute Healthy Chicken Enchiladas: Easy Weeknight Dinner
Quick & Healthy Chicken Enchiladas: A Delicious Journey Awaits
Hello, fellow food lovers! Are you ready to embark on a flavorful trip that’s both quick and healthy? Today, we’re diving into a dish that’s sure to become a cherished staple in your kitchen: Chicken Enchiladas! Imagine tender, shredded chicken wrapped in warm tortillas, blanketed in a tangy enchilada sauce, and topped with ooey-gooey cheese. Sounds dreamy, right? Let’s make that dream a reality while keeping it light and wholesome!
Cooking has always been my way of expressing love, and this recipe represents the blend of tradition and everyday simplicity. Enchiladas hold a special place in my heart, not just for their incredible flavor, but for the beautiful memories they evoke. Picture this: it was a chilly evening, and my friends were gathered in my cozy kitchen, laughter filling the air as I dished out my batch of homemade enchiladas. Their smiles and warm compliments were everything.
So, roll up your sleeves, tie on that apron, and prepare for some culinary magic. I promise you’ll feel like a rockstar in the kitchen!
My Chicken Enchilada Story
Growing up, weekends were often filled with vibrant gatherings of family and friends around a table brimming with delicious food. Enchiladas were a crowd favorite, and I can still recall the excitement of helping my grandmother roll each tortilla, her laughter ringing out as we spilled a bit of filling. I learned that cooking is more than just about the food; it’s about the memories we create around it. One night, we decided to host an impromptu dinner party, and enchiladas were the star of the show. The kitchen was filled with the intoxicating aromas of spices and salsa, as we plated the colorful enchiladas for our guests. With each bite, their smiles grew wider, and that warmth spread through our hearts like a cozy blanket.
Now, let’s bring that same joy into our homes — without needing hours in the kitchen!
Ingredients
Here’s what you’ll need to whip up these scrumptious chicken enchiladas:
-
2 cups cooked shredded chicken: Use rotisserie chicken for a quick option, or cook your own for a fresher flavor. It’s a perfect way to use leftovers too!
-
1 cup black beans, drained and rinsed: These add protein and fiber. If you’re not a fan, feel free to swap them out with pinto beans or even quinoa for a twist.
-
1 cup corn: Fresh, frozen, or canned — corn brings a delightful sweetness that balances the spices beautifully.
-
1 cup diced tomatoes: You can use fresh tomatoes or canned diced tomatoes for convenience. The juicy texture helps keep the enchiladas moist!
-
1 teaspoon chili powder: This spice gives our dish a warm kick. Adjust the amount according to your spice tolerance; a little goes a long way!
-
1 teaspoon cumin: This earthy spice adds depth to the flavors. If you’re out, smoked paprika can offer a unique twist!
-
8 small whole wheat tortillas: Whole wheat tortillas add fiber. If you prefer corn tortillas, go for it! Just be gentle when rolling them as they can be more fragile.
-
1 cup shredded cheese (e.g., cheddar or Mexican blend): Cheese is the magical glue of this dish! Feel free to use dairy-free alternatives if you want a healthier option.
-
1/2 cup enchilada sauce: Store-bought or homemade, just make sure it’s full of flavor to elevate our dish. You can also use salsa if you’re in a pinch!
-
Fresh cilantro for garnish: This bright herb adds a pop of color and flavor. If cilantro isn’t your thing, try fresh parsley or even green onions.
Step-by-Step Instructions
Ready to get cooking? Let’s break it down into simple steps along with some tips and tricks that’ll make this process a breeze!
-
Preheat the Oven: Preheat your oven to 375°F (190°C). This ensures your enchiladas will cook evenly, resulting in that perfect gooey cheese on top!
-
Prepare the Filling: In a large bowl, combine the cooked shredded chicken, black beans, corn, diced tomatoes, chili powder, and cumin. Give it a gentle stir to mix all those delicious flavors together.
-
Soften the Tortillas: If using corn tortillas, lightly heat them in a skillet or microwave for about 20 seconds until they’re pliable. This prevents them from cracking as you fill them!
-
Assemble the Enchiladas: Take a tortilla, place some of the filling in the center (about 1/4 cup should do), and roll it tightly. Place seam-side down in a lightly greased baking dish. Repeat until all tortillas are filled.
-
Pour on the Enchilada Sauce: Once all the enchiladas are in the dish, pour the enchilada sauce evenly over the top. Use the back of a spoon to spread it out, covering every delicious inch!
-
Cheese It Up: Sprinkle the shredded cheese all over the enchiladas. Cheese lovers rejoice; you can always add more if you want that melty magic!
-
Bake to Perfection: Place the baking dish in the preheated oven and bake for 20-25 minutes, or until the cheese is bubbling and golden. Your kitchen is about to smell heavenly!
-
Garnish and Serve: Once they’re done, take them out of the oven, let them cool for a few minutes, then garnish with fresh cilantro.
Serving Suggestions
For the ultimate presentation, serve your chicken enchiladas on a large platter, drizzled with extra enchilada sauce and sprinkled with fresh cilantro. Pair with a simple side salad of mixed greens tossed in a zesty vinaigrette, and perhaps some homemade guacamole or a dollop of Greek yogurt for creaminess.
Recipe Variations
Looking to switch things up? Here are a few creative ideas:
-
Vegetarian Enchiladas: Replace the chicken with sautéed vegetables like zucchini, bell peppers, and mushrooms for a wholesome veggie alternative.
-
Spicy Kick: Add diced jalapeños or a pinch of cayenne pepper to the filling for an extra punch of heat.
-
Cheesy Veggie Delight: Toss in some sautéed spinach or kale into the filling for a nutrient boost.
-
Taco Style: Use taco seasoning instead of chili powder and cumin for a twist that will bring a fun, familiar flavor.
-
Gluten-Free Option: Substitute the whole wheat tortillas with corn tortillas or gluten-free tortillas to accommodate dietary preferences.
Chef’s Notes
I’ve played around with this recipe over the years, and the beauty lies in its flexibility. There was a time when I experimented with different types of cheese — a smoked gouda added a layer of flavor that was to die for! Cooking enchiladas can still lead to accidental spills or misadventures (I once dropped an entire tray face-first on the floor — oops!). But it’s those little mishaps that make the kitchen feel alive and full of laughter.
FAQs and Troubleshooting
Here are some common questions and a few troubleshooting tips to ensure your enchiladas turn out amazing:
1. What if my tortillas break while rolling?
No worries! Simply heat them a bit more to soften them. Alternatively, you can layer them like a lasagna instead of rolling. It’s just as tasty!
2. How can I make my enchiladas extra saucy?
Use more enchilada sauce and even consider drizzling some on top before serving! You can adjust the amount based on your preference.
3. How do I store leftovers?
Store covered in the refrigerator for up to 3 days. To reheat, pop them in the oven or microwave until heated through.
4. Can I freeze these enchiladas?
Absolutely! Just assemble them without baking, wrap them tightly, and freeze. When ready to eat, bake them straight from the freezer, allowing for extra cooking time.
Nutritional Info (Optional)
For a rough estimate, each enchilada contains approximately:
- Calories: 300
- Protein: 24g
- Carbohydrates: 35g
- Fat: 10g
(Note: nutritional information may vary based on specific ingredients.)
So there you have it — an inviting, easy-to-follow recipe that’s bound to impress! I’m thrilled to have shared this journey with you. May every bite elevate your dining experience and create memories around your table. Now, grab your apron, and let’s recreate that special kitchen magic! Welcome to the realm of quick, healthy chicken enchiladas — your taste buds will thank you!
PrintQuick & Healthy Chicken Enchiladas

Delicious and wholesome chicken enchiladas wrapped in warm tortillas with a tangy sauce and melted cheese.
- Prep Time: 15 minutes
- Cook Time: 25 minutes
- Total Time: 40 minutes
- Yield: 4 servings 1x
- Category: Main Course
- Method: Baking
- Cuisine: Mexican
- Diet: Healthy
Ingredients
- 2 cups cooked shredded chicken
- 1 cup black beans, drained and rinsed
- 1 cup corn
- 1 cup diced tomatoes
- 1 teaspoon chili powder
- 1 teaspoon cumin
- 8 small whole wheat tortillas
- 1 cup shredded cheese (e.g., cheddar or Mexican blend)
- 1/2 cup enchilada sauce
- Fresh cilantro for garnish
Instructions
- Preheat the oven to 375°F (190°C).
- Combine the cooked shredded chicken, black beans, corn, diced tomatoes, chili powder, and cumin in a large bowl.
- Heat corn tortillas in a skillet or microwave for about 20 seconds until pliable.
- Take a tortilla, place about 1/4 cup of the filling in the center, and roll it tightly. Place seam-side down in a greased baking dish.
- Pour the enchilada sauce evenly over the top of the enchiladas.
- Sprinkle shredded cheese all over the enchiladas.
- Bake in the preheated oven for 20-25 minutes, until the cheese is bubbling and golden.
- Garnish with fresh cilantro before serving.
Notes
Feel free to customize the filling and toppings to your taste. This recipe is flexible and works well with various ingredients.
Nutrition
- Serving Size: 1 enchilada
- Calories: 300
- Sugar: 5g
- Sodium: 400mg
- Fat: 10g
- Saturated Fat: 4g
- Unsaturated Fat: 6g
- Trans Fat: 0g
- Carbohydrates: 35g
- Fiber: 8g
- Protein: 24g
- Cholesterol: 60mg
Keywords: chicken enchiladas, healthy recipe, easy dinner, Mexican food

Cheesy Taco Sticks
Cheesy Taco Sticks: An Easy, Fun, and Flavorful Snack
Hello, fellow food lovers! If you’re in the mood for a snack that’s equal parts cheesy, cozy, and downright delicious, then you’ve come to the right place. Today, we’re diving into a recipe for Cheesy Taco Sticks—a treat that will have everyone hovering around the kitchen like it’s a taco truck on wheels. Think of this as your invite to a gourmet fiesta, right in the comfort of your own home!
A Quick Taco Time Tale
Let me take you back to one of my favorite childhood memories. I was still in school, and my mom would surprise us with taco night every Friday. The aroma of seasoned beef sizzling on the stove, the crispness of fresh veggies, and the sight of gooey cheese melting over everything was enough to send my heart soaring. All week long, I dreamed about that glorious taco spread and the delicious chaos that followed—sour cream-covered faces, salsa splatters on the table, and laughter about who could stack the tallest taco tower.
One special night, while we were preparing our tacos, my mom had a fun twist up her sleeve. She rolled out some dough and stuffed it with all the taco goodness, transforming our weekly tradition into something new, exciting, and utterly delightful. There we were, biting into cheesy taco sticks, and I was hooked! From that moment on, I knew that anything smothered in cheese and seasoned beef deserved a spot in my kitchen. Now, I’m thrilled to pass this tradition on to you with my version of Cheesy Taco Sticks!
Ingredients
Here’s what you’ll need to bring this cheesy dream to life:
-
1 lb ground beef
A staple in any taco-inspired dish. If you prefer a lighter option, feel free to swap it with ground turkey or even black beans for a vegetarian twist. -
1 packet taco seasoning
This is your secret weapon for flavor! Taco seasoning blends spices like cumin, chili powder, and garlic for those authentic taco vibes. You can easily make your own with common spices at home! -
1 cup shredded cheese (cheddar or Mexican blend)
Cheese is essential for that melty goodness! Cheddar brings sharpness, while a Mexican blend adds complexity. If you’re feeling adventurous, try pepper jack for a kick! -
1 can refrigerated crescent dough
This crescent dough is a magic ingredient! It’s flaky, buttery, and extremely forgiving—ideal for creating the perfect cheesy stick. For a healthier route, look for whole wheat dough. -
Sour cream and salsa for dipping
Because what’s cheese without some zesty dipping? These pair perfectly, balancing the richness of the taco sticks. Feel free to swap salsa for guacamole if you’re team green!
Step-by-Step Instructions
Now, let’s roll up our sleeves and get cooking—these cheesy taco sticks are oh-so-easy to prepare!
-
Preheat Your Oven
Begin by preheating your oven to 375°F (190°C). This will ensure that our taco sticks get golden brown and crisp. -
Cook the Beef
In a skillet over medium heat, add your ground beef. Use a wooden spoon to break it up as it cooks. Cook until browned (approximately 6-8 minutes). Drain any excess fat if needed. Pro tip: Adding a splash of water while cooking helps keep the meat tender and juicy! -
Season the Beef
Sprinkle the taco seasoning over the beef. Add a splash of water (about ¼ cup) and stir to combine. Allow it to cook for a couple more minutes until the mixture is thick and fragrant. Don’t be afraid to taste it! Adjust seasoning if you like it zippier. -
Prepare the Dough
Roll out the refrigerated crescent dough on a clean surface. You can press the seams together to create a single sheet, which will make it easier to wrap the beef mixture. Chef’s tidbit: You can also slice the dough into squares for a more rustic look! -
Assembly Time!
Spoon a generous amount of the seasoned beef mixture onto one end of the dough. Top it with a sprinkle of shredded cheese. Roll the dough over the filling into a log shape and pinch the seams to seal. Place seam side down on a baking sheet lined with parchment paper. Tip: Brush a little melted butter on top for added golden richness! -
Bake to Perfection
Pop the baking sheet into your preheated oven and let those sticks bake for about 12-15 minutes, or until they are golden brown. The aroma wafting through your kitchen will be irresistible! -
Serve Warm
Once baked, remove the sticks from the oven and let them cool slightly. They are best served warm, right out of the oven! Remember to dive in with those dipping sauces—the creaminess of sour cream against the warmth of the sticks is heavenly!
Serving Suggestions
For presentation, slice the cheesy taco sticks into bite-sized pieces and arrange them on a platter. You can garnish with a sprinkle of chopped cilantro for color and freshness. Serve alongside a small bowl of salsa and sour cream for dipping goodness! It’s all about making your taco feast feel festive and inviting.
Recipe Variations
Here are a few creative flips you can try with this recipe:
- Chicken Taco Sticks: Substitute ground beef with shredded rotisserie chicken.
- Bean & Cheese Twist: For a vegetarian option, use refried beans and top with cheese.
- Spicy Taco Sticks: Add some diced jalapeños to the beef mixture for an extra kick.
- Loaded Taco Sticks: Mix in black olives, corn, or chopped bell peppers for added texture.
Chef’s Notes
Over the years, I’ve made Cheesy Taco Sticks countless times, tweaking and experimenting along the way. One of my funniest memories was when I decided to add too much cheese—let’s just say they were oozing and ended up looking more like a taco explosion! What a mess, but oh my, they tasted divine! This is one recipe that has truly evolved as I’ve shared it with friends and family, each one adding their secret ingredients or techniques. I love that cooking is not just about following directions but about sharing those funny moments and culinary adventures.
FAQs and Troubleshooting
1. My dough didn’t seal properly—what happened?
Sometimes, it can be tricky to seal the dough well, especially if it’s cold. Make sure to pinch the seams tightly and, if needed, use a bit of water to help stick them together.
2. Can I freeze the uncooked sticks?
Absolutely! You can assemble them ahead of time, wrap them well in plastic, and freeze. Bake straight from the freezer, but add a few extra minutes to the baking time.
3. How do I prevent sogginess?
To prevent sogginess, make sure to drain the beef mixture well after cooking. Also, avoid overloading the filling—keep it balanced for the best texture.
4. What can I do with leftover filling?
Fear not! You can use any leftover filling in salads, tacos, or nachos. It’s versatile and could make a fantastic lunch option!
Nutritional Info
For those interested in the numbers, each cheesy taco stick (if you cut them into six pieces) contains approximately:
- Calories: 210
- Protein: 10g
- Carbohydrates: 15g
- Fat: 12g
(Note: Nutritional values can vary based on specific brands and adjustments to the recipe.)
Cooking should be a celebration—a way to create beautiful, flavorful moments. I hope you enjoy making these Cheesy Taco Sticks as much as I have over the years. Gather your loved ones, unleash your inner foodie, and let’s keep this culinary tradition going! Whether for a cozy movie night, a party, or just a fun Friday treat, you can’t go wrong with these cheesy delights. So, tie on that apron, crank the oven, and let’s get cooking!
PrintCheesy Taco Sticks

An easy, fun, and flavorful snack that combines cheesy goodness with seasoned beef, all wrapped in flaky crescent dough.
- Prep Time: 15 minutes
- Cook Time: 15 minutes
- Total Time: 30 minutes
- Yield: 4 servings 1x
- Category: Snack
- Method: Baking
- Cuisine: Mexican
- Diet: Beef
Ingredients
- 1 lb ground beef
- 1 packet taco seasoning
- 1 cup shredded cheese (cheddar or Mexican blend)
- 1 can refrigerated crescent dough
- Sour cream and salsa for dipping
Instructions
- Preheat your oven to 375°F (190°C).
- Cook the ground beef in a skillet over medium heat, breaking it up until browned (about 6-8 minutes), and drain excess fat.
- Season the beef with taco seasoning and a splash of water, stirring to combine.
- Prepare the refrigerated crescent dough on a clean surface, pressing seams together.
- Spoon the beef mixture onto one end of the dough and top with cheese. Roll and seal.
- Place on a baking sheet lined with parchment paper and brush with melted butter.
- Bake for 12-15 minutes or until golden brown.
- Serve warm with sour cream and salsa.
Notes
Make sure to drain the beef well and avoid overloading the filling for the best texture.
Nutrition
- Serving Size: 1 serving
- Calories: 210
- Sugar: 1g
- Sodium: 500mg
- Fat: 12g
- Saturated Fat: 6g
- Unsaturated Fat: 4g
- Trans Fat: 0g
- Carbohydrates: 15g
- Fiber: 0g
- Protein: 10g
- Cholesterol: 50mg
Keywords: cheesy snacks, taco sticks, party food
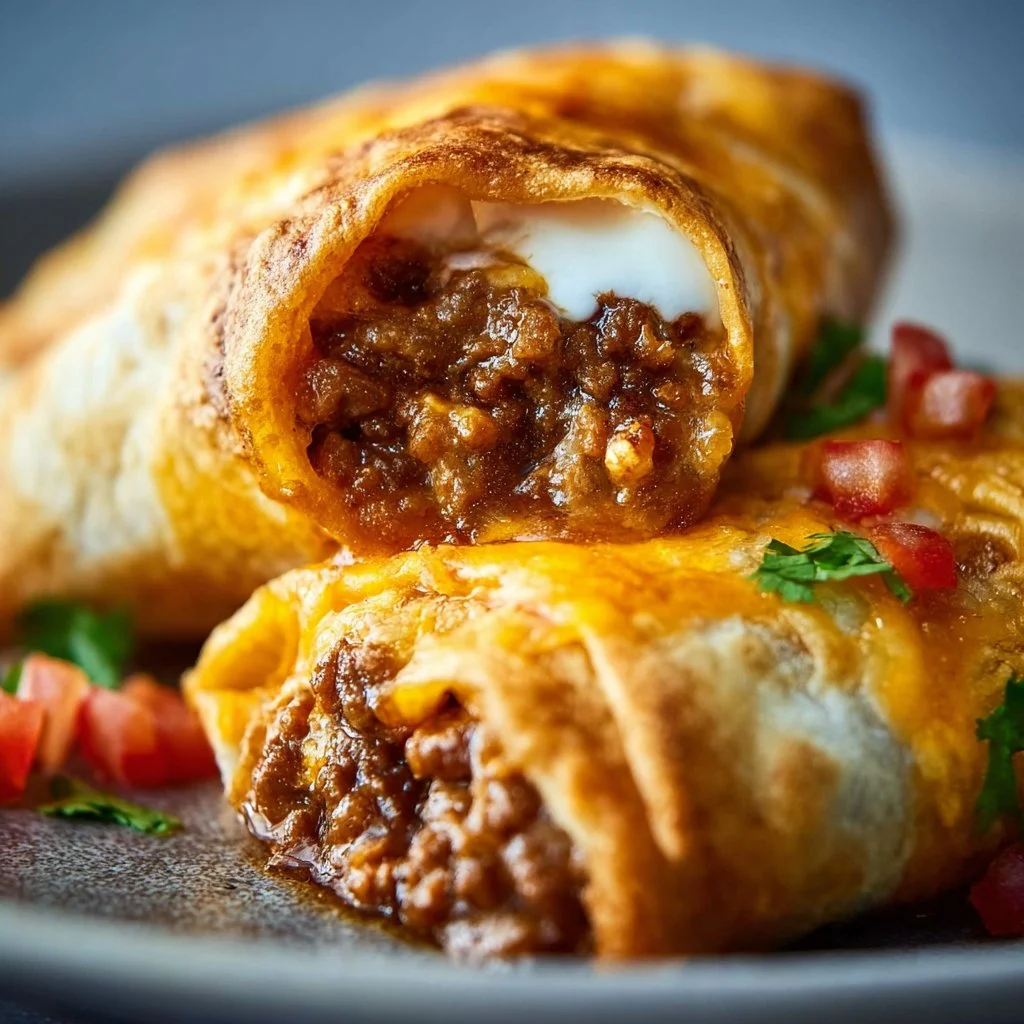
Beef and Cheese Chimichangas
Dive into Deliciousness: Beef and Cheese Chimichangas
Welcome back to Ivory Apron, everyone! If there’s one thing I want to share with you today, it’s that cooking can be both elegant and approachable, especially when it comes to comfort food classics like Beef and Cheese Chimichangas. These delightful, crispy rolls are filled with seasoned ground beef, luscious cheese, and a chorus of flavors that sing throughout each bite. Whether you’re hosting a lively dinner party or just craving something hearty for weeknight dinner, chimichangas bring a burst of joy to the table.
Now, let’s talk about what makes chimichangas so special. These delicious pockets of goodness are the ultimate comfort food. Picture this: a warm tortilla filled to the brim with savory meat, gooey cheese, and a hint of spice, fried to golden perfection. Sounds tempting, right? But there’s more to this dish than just their mouthwatering taste. Chimichangas are best enjoyed with friends and family, making them a fantastic centerpiece for gatherings. So, grab your apron, and let’s get cooking!
A Bite of Nostalgia
Let me take you back to a cozy fall evening a few years ago. It was one of those rare occasions when all my friends from college managed to gather at my place. The air was crisp, and we were all bundled up, ready for a fun night filled with laughter and stories. I decided to whip up my version of chimichangas—a recipe I had been perfecting over the years.
With laughter echoing in my kitchen, we chatted about old times as I sautéed ground beef and added the spices that filled the room with a mouthwatering aroma. I can still picture my friends’ faces lighting up when they took that first bite. The crispy shell gave way to the savory, cheesy filling, and it was pure bliss. We paired them with homemade guacamole, fresh salsa, and a zingy lime crema that made everything taste even better. It was one of those unforgettable evenings! Now, every time I make chimichangas, I’m reminded of that warm gathering, filled with food, friends, and fantastic memories.
Ingredients
Here’s what you’ll need to make these scrumptious Beef and Cheese Chimichangas:
-
1 lb ground beef
(Use lean ground beef for a healthier option! You can also swap it out for ground chicken or turkey for a lighter twist.) -
1 small onion (finely diced)
(Onions add sweet and savory depth. If you’re not a fan, sauté some bell peppers or shallots instead for a different flavor.) -
2 cloves garlic (minced)
(Garlic packs a flavor punch! You can use garlic powder as a quick alternative—1/4 teaspoon per clove.) -
1 packet (1 oz) taco seasoning (or homemade)
(Feel free to use store-bought seasoning, but nothing beats a homemade blend of chili powder, cumin, and paprika!) -
½ cup salsa
(Choose your favorite salsa; the level of spice is up to you! For a fresh kick, try pico de gallo or even some zesty green salsa.) -
1 cup refried beans
(These add creaminess and an extra layer of flavor. For a vegetarian twist, use black beans or even lentils.) -
1 ½ cups shredded cheddar cheese (or Mexican blend)
(Cheddar is classic, but Monterey Jack or pepper jack cheese can add a delightful twist!) -
6 large flour tortillas (burrito-size)
(Larger tortillas wrap better, but corn tortillas work if you’re going gluten-free. Just soften them beforehand.) -
2 tbsp vegetable oil (for brushing/frying)
(I love avocado oil for a richer flavor; it’s also great for frying!)
Step-by-Step Instructions
Ready to create these golden wonders? Let’s break it down step by step!
-
Brown the Beef
In a large skillet over medium heat, add the ground beef. Cook until browned, breaking it up with a wooden spoon (about 6-8 minutes). A little kitchen hack: using a potato masher speeds up the crumbling process, ensuring an even texture. -
Add Onions and Garlic
Once the beef is browned, stir in the finely diced onion. Cook until it’s soft and translucent (about 3-4 minutes). Add the minced garlic and taco seasoning, mixing well for another minute to allow the flavors to bloom. -
Stir in Salsa and Beans
Pour in the salsa and refried beans, stirring to combine everything. Cook for about 2-3 minutes until heated through. Note: Taste your filling here! This is the moment to adjust seasonings if you’d like — a touch more cumin or even a sprinkle of cayenne for heat! -
Assemble the Chimichangas
Lay one tortilla on a flat surface. Spoon a generous amount of the beef mixture in the center (about 1/4 cup should do). Sprinkle some shredded cheese on top. To fold: bring the sides of the tortilla toward the center, then roll it up tightly like a burrito. Repeat with the remaining tortillas. -
Prep for Frying
Preheat your oven to 400°F (200°C). If you’re opting to bake instead of fry, a quick brush with oil will give you all the goodness—so don’t skip this step! For frying, heat vegetable oil in a deep skillet or Dutch oven over medium-high heat. -
Fry or Bake
If frying, carefully place the chimichangas in the hot oil, seam-side down. Fry for about 3-4 minutes per side or until golden brown. If baking, place them seam-side down on a baking sheet, brush with oil, and bake for 20 minutes, turning halfway through until crispy. -
Drain and Serve
If you fried them, transfer the chimichangas to a paper towel-lined plate to drain excess oil. Either way, let them cool for a minute, then get ready to serve!
Serving Suggestions
Now, for the fun part—serving! Arrange your chimichangas on a large platter, maybe sprinkle some chopped cilantro or green onions on top for a fresh pop of color. Pair them with side dishes like guacamole, sour cream, or a vibrant salad for a delightful contrast. Don’t forget a squeeze of lime; it cuts through the richness beautifully!
Recipe Variations
-
Spicy Vegetarian Option
Swap the beef for a mix of sautéed bell peppers, zucchini, and black beans. Use pepper jack cheese for an extra kick! -
Buffalo Chicken Style
Replace the beef with shredded cooked chicken and toss it in buffalo sauce. Add creamy blue cheese crumbles instead of cheddar! -
Breakfast Chimichangas
Fill with scrambled eggs, crumbled breakfast sausage, and cheese. Perfect for brunch or a cozy weekend meal! -
Sweet and Savory
For a fusion twist, incorporate caramelized apples or pears with brie cheese for a unique dessert chimichanga. -
BBQ Beef Delight
Substitute taco seasoning with BBQ sauce and pulled beef for a smoky flavor profile.
Chef’s Notes
I love how chimichangas can adapt to whatever I have lying around! This recipe has evolved for me over the years—from traditional beef fillings to experimenting with all sorts of flavors. A fun memory I have is of a friends’ potluck where I brought a batch of sweet and savory chimichangas, filled with smoky barbecue and topped with a chipotle crema. They were an instant hit!
One thing to remember—your chimichangas don’t need to be perfect. Embrace those little imperfections; they make your cooking unique. Just enjoy the process!
FAQs and Troubleshooting
-
What if I can’t find large tortillas?
No worries! You can use medium tortillas; just reduce the filling amount and adjust your cooking time since they’ll fry up faster. -
How do I prevent the filling from leaking?
Make sure to fold the tortillas tightly and seal the edges with a little water or a mix of flour and water if you’re feeling fancy! -
Can I make these ahead of time?
Absolutely! You can prepare the filling and assemble the chimichangas in advance. Store them covered in the fridge and fry/bake them just before serving. -
Why are my chimichangas not crispy?
Ensure the oil is hot enough (around 350°F). If it’s not hot, they will absorb too much oil and become soggy. Use a thermometer for accuracy!
Dive In!
Ready to create and share these delectable Beef and Cheese Chimichangas? I promise they’re as fun to make as they are to eat. Tie on that apron, gather your favorite people, and whip up something delicious that’ll have everyone asking for seconds. Bon appétit!
PrintBeef and Cheese Chimichangas

Crispy rolls filled with seasoned ground beef, cheese, and a hint of spice, perfect for gatherings or a hearty weeknight dinner.
- Prep Time: 20 minutes
- Cook Time: 30 minutes
- Total Time: 50 minutes
- Yield: 6 servings 1x
- Category: Main Course
- Method: Frying or Baking
- Cuisine: Mexican
- Diet: None
Ingredients
- 1 lb ground beef
- 1 small onion (finely diced)
- 2 cloves garlic (minced)
- 1 packet (1 oz) taco seasoning
- ½ cup salsa
- 1 cup refried beans
- 1 ½ cups shredded cheddar cheese
- 6 large flour tortillas (burrito-size)
- 2 tbsp vegetable oil (for brushing/frying)
Instructions
- Brown the beef in a skillet over medium heat until browned, about 6-8 minutes.
- Add the onions and cook until soft, about 3-4 minutes, then stir in garlic and taco seasoning.
- Stir in salsa and refried beans, and cook for about 2-3 minutes until heated through.
- Assemble each tortilla with beef mixture and cheese, folding and rolling tightly.
- Preheat the oven to 400°F (200°C) if baking, or heat oil if frying.
- Fry in hot oil for 3-4 minutes per side or Bake for 20 minutes, turning halfway through.
- Drain excess oil on paper towels (if frying) and let cool slightly before serving.
Notes
Serve with guacamole, sour cream, or a vibrant salad. Feel free to adapt fillings for different variations.
Nutrition
- Serving Size: 1 chimichanga
- Calories: 400
- Sugar: 3g
- Sodium: 600mg
- Fat: 18g
- Saturated Fat: 7g
- Unsaturated Fat: 8g
- Trans Fat: 0g
- Carbohydrates: 40g
- Fiber: 4g
- Protein: 25g
- Cholesterol: 60mg
Keywords: chimichangas, beef, cheese, Mexican, comfort food, party food
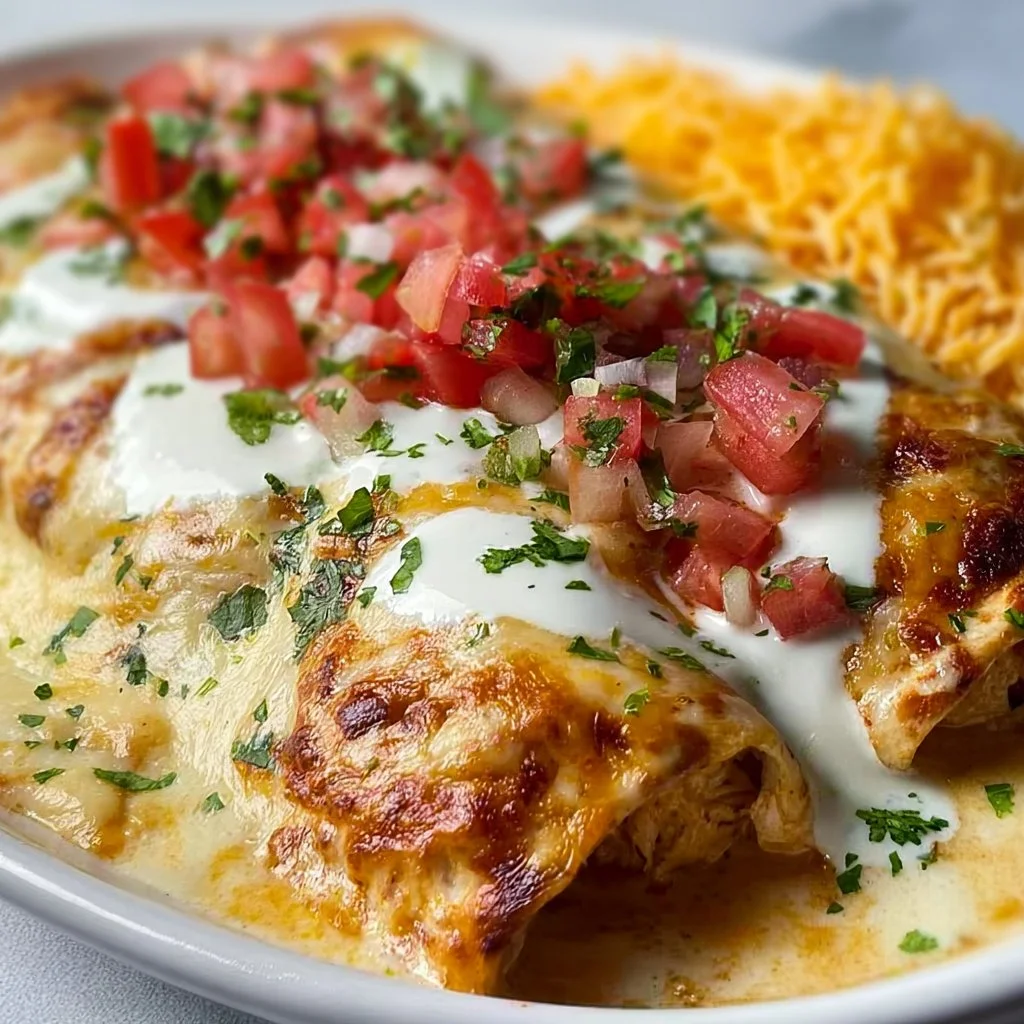
Queso Chicken Enchiladas for a Quick and Cheesy Dinner Delight
Queso Chicken Enchiladas for a Quick and Cheesy Dinner Delight
Hello, fellow food lovers! If there’s one dish in my recipe arsenal that never fails to bring a smile to my face — and to the faces of my loved ones — it’s my Queso Chicken Enchiladas. With their creamy queso sauce, tender chicken, and cheesy goodness, these enchiladas are not just a meal; they’re a cozy hug in a tortilla. Whether you’re looking to whip up a weeknight dinner for the family or impress your friends at the next gathering, this recipe has you covered.
Cooking for me has always been about more than just feeding people; it’s about connecting, sharing stories, and creating memories around the table. I fondly remember the first time I made these enchiladas. It was a chilly autumn evening, and I wanted to make something comforting after what felt like a long week. I rifled through my pantry, found a few staple ingredients, and voila! My Queso Chicken Enchiladas were born. The aroma that filled my kitchen was intoxicating, and the laughter that followed at the dinner table was priceless.
Are you ready to dive into this cheesy delight? Let’s gather our ingredients and start cooking! You’ll be so glad you did.
Personal Story
Looking back, one of my fondest memories of making these enchiladas was the first time I prepared them for my close-knit group of friends during a cooking night. The atmosphere was relaxed; we sipped on sparkling water and reminisced about our college days, laughter and stories filling the air. As the enchiladas baked in the oven, the scent wafted through the house, coaxing everyone into the kitchen. When I finally pulled out that bubbling pan of cheesy goodness, the cheers were exhilarating!
The platter was nearly wiped clean in minutes, and every bite was accompanied by compliments and joyful exclamations. It was the perfect blend of nostalgia and new memories. This dish has since become a staple when I’m hosting, always reminding me that great food brings people together. And let me tell you, there’s nothing better than watching someone take a bite and smile with delight!
Ingredients
To make these tasty Queso Chicken Enchiladas, gather these simple yet delicious ingredients:
-
4 Burrito Size Flour Tortillas
Flour tortillas lend a pillowy texture to the enchiladas, but corn tortillas are a fabulous gluten-free alternative. Just remember to warm them up slightly on a skillet to keep them from cracking! -
2 Cups Shredded Chicken
Feel free to use rotisserie chicken for a quicker prep, or if you’re in the mood, poach or bake some chicken breasts. Leftover turkey also works brilliantly here! -
1 Packet Taco Seasoning
You can batch-make your own seasoning mix with spices like cumin, chili powder, and garlic for a personalized touch! Store-bought is convenient, but homemade can really amp up the flavor! -
1 Cup Sour Cream
Creamy, tangy, and rich, this plays well with the queso. Substitute with Greek yogurt for a healthier twist if desired! -
1 Cup Shredded Cheddar Cheese
Sharp Cheddar adds a delightful bite. For extra creaminess, mix in some Monterey Jack cheese — it melts like a dream! -
1 Can Chopped Green Chilies
These add a nice mild heat. Feel free to adjust the quantity based on your heat preference or even substitute with jalapeños for a kick! -
1 Can Diced Tomatoes with Green Chilies (Undrained)
The liquid helps keep the enchiladas moist. You can use regular diced tomatoes if you prefer! -
16 oz Queso Blanco Velveeta
This is the star of the dish! It melts beautifully, creating that indulgent creamy sauce. If you’re feeling adventurous, try using a block of cheese from the deli — just ensure it has good melting properties.
Step-by-Step Instructions
-
Preheat Your Oven
Preheat your oven to 350°F (175°C). This step is vital to ensure your enchiladas get that lovely golden finish while baking. -
Prepare the Filling
In a mixing bowl, combine the shredded chicken, taco seasoning, sour cream, chopped green chilies, and half of the shredded cheese. Mix well until everything is beautifully coated. This filling is so flavorful, you might find yourself sneaking bites before even wrapping it up! -
Assemble the Enchiladas
On a warm tortilla, spoon about ¼ cup of the chicken mixture into the center. Roll tightly from one end to the other and place seam-side down in a greased baking dish. Repeat with the remaining tortillas. There’s something therapeutic about rolling these babies up — just imagine the joy they’re going to bring! -
Make the Queso Sauce
In a saucepan over medium heat, melt the Velveeta queso. Add the diced tomatoes (with their juice) and stir until completely melted and combined. I like to add a touch of milk or chicken broth if I want a thinner sauce. Keep stirring to prevent it from sticking! -
Pour the Queso Sauce
Once your queso is smooth, pour it over the rolled enchiladas in the baking dish, making sure to cover them generously. You want every bite to be infused with that gooey goodness! -
Top with Cheese
Sprinkle the remaining shredded cheese on top of the enchiladas, allowing for that glorious cheesy crust we all crave. -
Bake
Place the baking dish in your preheated oven and bake for 20-25 minutes or until the cheese is bubbly and slightly golden on the edges. Your kitchen is going to smell divine — trust me! -
Serve
Once they’re done, let them sit for a few minutes before serving. This allows everything to set just a touch, making for easier cutting. Pair with a fresh salad or some tortilla chips for crunch!
Serving Suggestions
For plating these enchiladas, grab a large serving spoon and scoop them out onto a beautiful platter. Garnish with a sprinkle of fresh cilantro or a dollop of sour cream for a pop of color and flavor. Serve alongside a crisp green salad or some homemade salsa for added freshness. And don’t forget the margaritas — they pair oh-so-well!
Recipe Variations
- Spicy Kick: Add sliced jalapeños to the filling or substitute spicy taco seasoning to elevate the heat.
- Veggie Lovers: Replace the chicken with black beans, corn, or sautéed vegetables for a delicious vegetarian option.
- Creamy Avocado Sauce: Instead of queso, make a creamy avocado sauce to drizzle over the enchiladas before serving for a fresh twist.
- Herb Infusion: Add chopped fresh herbs like cilantro or chives to the filling for an aromatic upgrade.
- Different Cheeses: Swap out the cheddar and use pepper jack for a hint of spice or feta for a Mediterranean flair.
Chef’s Notes
These Queso Chicken Enchiladas are one of those recipes that have truly evolved in my kitchen. I started with a basic version many years ago, but over time, I’ve added little twists and turned it into something that feels uniquely mine. I also have to admit, there have been times where I tried using every cheese in my fridge, resulting in an accidental but delicious fusion of flavors!
One of my funniest kitchen stories related to this dish happened when I made them for a big family gathering. I mistakenly used a spicy bean dip instead of queso, and let’s just say they definitely left an impression! Lesson learned: always double-check your ingredients.
FAQs and Troubleshooting
Q: What if my enchiladas break when rolling?
A: Make sure to warm up your tortillas before filling them. This helps prevent breakage. If they do break, just layer the ingredients like a lasagna — it’ll still taste fantastic!
Q: Can I make these ahead of time?
A: Absolutely! You can assemble them and store them in the fridge covered for up to a day before baking. Just add a few extra minutes to the baking time since they’ll be cold from the fridge.
Q: What can I substitute for Velveeta?
A: If you want a more natural cheese option, try a block of cream cheese paired with a melting cheese like Monterey Jack or mozzarella. Just blend the cream cheese smooth before adding!
Q: How do I make them less greasy?
A: Opt for lower-fat cheese options or use Greek yogurt instead of sour cream to lighten them up a bit. You can also drain the diced tomatoes well to reduce moisture if necessary.
Nutritional Info
While everyone’s dietary needs can vary, here’s a rough estimate per serving (based on 4 servings):
- Calories: 450
- Protein: 28g
- Carbohydrates: 45g
- Fat: 20g
Remember to adjust based on your ingredient choices and serving sizes!
So there you have it, my beloved Queso Chicken Enchiladas — not just a meal, but a delightful experience in the kitchen and around the table! Whether you’re making these for a casual night or a special occasion, they’re sure to bring joy and warmth. Now, tie on your apron, turn up the music, and let’s make something delicious! Happy cooking!
PrintQueso Chicken Enchiladas

Creamy and cheesy Queso Chicken Enchiladas perfect for a cozy dinner, filled with tender chicken and topped with a luscious queso sauce.
- Prep Time: 15 minutes
- Cook Time: 25 minutes
- Total Time: 40 minutes
- Yield: 4 servings 1x
- Category: Main Course
- Method: Baking
- Cuisine: Mexican
- Diet: Gluten-Free Option Available
Ingredients
- 4 Burrito Size Flour Tortillas
- 2 Cups Shredded Chicken
- 1 Packet Taco Seasoning
- 1 Cup Sour Cream
- 1 Cup Shredded Cheddar Cheese
- 1 Can Chopped Green Chilies
- 1 Can Diced Tomatoes with Green Chilies (Undrained)
- 16 oz Queso Blanco Velveeta
Instructions
- Preheat your oven to 350°F (175°C).
- Combine the shredded chicken, taco seasoning, sour cream, chopped green chilies, and half of the shredded cheese in a mixing bowl.
- On a warm tortilla, spoon about ¼ cup of the chicken mixture into the center, roll tightly, and place seam-side down in a greased baking dish.
- Melt the Velveeta queso in a saucepan over medium heat, adding diced tomatoes and stirring until combined.
- Pour the queso sauce over the rolled enchiladas, covering them generously.
- Sprinkle the remaining shredded cheese on top of the enchiladas.
- Bake for 20-25 minutes until cheese is bubbly and golden.
- Let sit for a few minutes before serving.
Notes
Serve with fresh cilantro, sour cream, or a crisp salad. Feel free to modify the recipe to suit your taste, such as adding spicy elements or veggie substitutes.
Nutrition
- Serving Size: 1 serving
- Calories: 450
- Sugar: 4g
- Sodium: 800mg
- Fat: 20g
- Saturated Fat: 10g
- Unsaturated Fat: 6g
- Trans Fat: 0g
- Carbohydrates: 45g
- Fiber: 2g
- Protein: 28g
- Cholesterol: 80mg
Keywords: enchiladas, chicken, queso, cheesy, dinner, comfort food
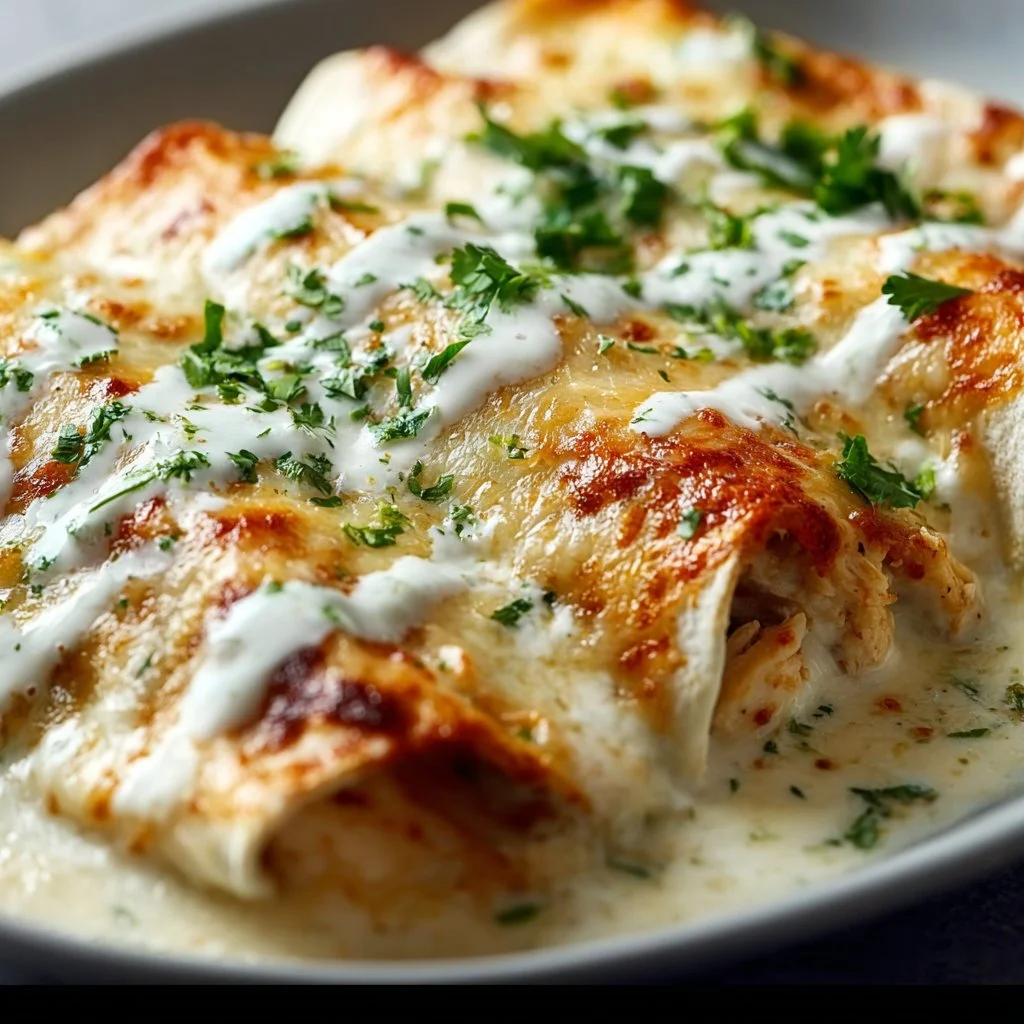
Creamy White Chicken Enchiladas
Creamy White Chicken Enchiladas: A Delicious Journey
Hello there, fellow food lovers! Today, I’m excited to share with you a dish that embodies comfort, warmth, and a whole lot of flavor: Creamy White Chicken Enchiladas. These delightful rolls are not only a feast for the eyes but also a warm hug for the taste buds. Picture melty cheese, tender chicken, and a luscious white sauce all wrapped in soft tortillas—what’s not to love?
When I think of my time in the kitchen crafting this recipe, it brings back fond memories of family gatherings, where laughter and delicious aromas filled the air. There’s something magical about sharing a cozy meal with the people you love, and I firmly believe these enchiladas deliver just that!
Whether you’re looking to impress friends at a dinner party or simply want to treat yourself to a comforting weeknight meal, this dish has got you covered. Let’s dive into this culinary adventure together!
My Culinary Memory
One of my favorite kitchen memories revolves around these delightful creamy white chicken enchiladas. I remember the first time I made them for my closest friends during a cozy winter gathering. The flurry of the season had everyone seeking warmth and comfort, and there I was, armed with my trusty apron, ready to create something special.
The moment those enchiladas came out of the oven—golden, bubbling, and simply irresistible—the entire room filled with the heavenly aroma of melted cheese and spices. As we gathered around the table, plates piled high with enchiladas, I couldn’t help but feel a deep sense of joy. We laughed, shared stories, and indulged in seconds (and maybe even thirds!). It was then that I realized how food has this incredible ability to bring people together and create cherished memories. So, grab your apron, and let’s recreate that magic in your kitchen!
Ingredients
Here’s what you’ll need to whip up these delectable Creamy White Chicken Enchiladas:
-
8-10 flour tortillas (medium size): Flour tortillas are soft and pliable—perfect for rolling. If you prefer a gluten-free option, corn tortillas work wonderfully too!
-
3 cups cooked shredded chicken: You can use rotisserie chicken for convenience or poach your own for freshness. Bonus points for flavor if you season the chicken while cooking!
-
2 cups shredded Monterey Jack cheese (divided): This cheese melts beautifully, adding a creamy texture to your dish. Feel free to substitute with white cheddar for a sharper taste.
-
1 cup shredded cheddar cheese (divided): Classic cheddar brings a delicious tanginess. Go for a sharp variety for more robust flavor!
-
1/2 cup diced green chiles (canned or fresh): These little guys add a delightful kick. If you prefer a milder flavor, opt for canned mild chiles or skip this ingredient altogether.
-
1/4 cup chopped fresh cilantro: Fresh cilantro brightens the dish! If you’re not a fan of cilantro, parsley can be used instead, although it offers a different flavor profile.
-
1 small onion (diced): Onions provide depth and sweetness. You can substitute with shallots for a more subtle flavor.
-
3 tablespoons butter: Butter adds that rich, velvety texture to our sauce. If you need a dairy-free option, use olive oil or vegan butter.
-
3 tablespoons all-purpose flour: This is essential for making the roux that thickens our white sauce. You can use gluten-free flour if necessary.
-
2 cups chicken broth: Homemade is best! But store-bought works perfectly in a pinch. Just be sure it’s low-sodium for better control over your seasonings.
-
1 cup sour cream (room temperature): Adds creaminess and tang! You can substitute with Greek yogurt for a healthier alternative.
-
1/2 teaspoon cumin (ground): Cumin brings warmth and earthiness to the dish. Feel free to adjust this based on your personal taste!
-
Salt and pepper (to taste): Essential seasonings that enhance the flavors!
Step-by-Step Instructions
Now that we’ve got our ingredients lined up, let’s get cooking! I promise it’ll be easier than you think!
-
Prepare Your Cooking Area: Start by preheating your oven to 350°F (175°C). Grab a 9×13-inch baking dish and lightly grease it with cooking spray or a drizzle of olive oil. This will help prevent sticking and make for easier cleanup.
-
Make the White Sauce: In a medium saucepan over medium heat, melt the butter. Once it’s bubbling, add the diced onions and cook for about 3-4 minutes until they’re translucent and fragrant. Here’s a little chef hack: stir occasionally to prevent burning and let them get that lovely caramelized color!
-
Create the Roux: Stir in the flour to create a roux. Combine it with the butter and onions, whirling it until it looks like a paste. Cook for another minute to cook out the raw flour flavor. You want it to be a light golden color.
-
Add Chicken Broth and Season: Gradually whisk in the chicken broth, ensuring there are no lumps. Increase the heat slightly and keep whisking until the mixture thickens, about 2-3 minutes. Once it’s nice and creamy, fold in the sour cream, cumin, salt, and pepper. Voila! Your white sauce is ready!
-
Combine Chicken and Sauce: In a large mixing bowl, combine your shredded chicken, half of the Monterey Jack cheese, green chiles, and half of the cilantro. Pour in a cup of the creamy white sauce and mix until everything is evenly coated.
-
Assemble the Enchiladas: Take one tortilla and spoon about 1/3 cup of the chicken mixture into the center. Roll it up tightly and place it seam-side down in your prepared baking dish. Repeat until all tortillas are filled. This might get a little messy, but isn’t that part of the fun?
-
Top it Off: Once all your enchiladas are snug in their dish, pour the remaining white sauce over them. Sprinkle the rest of your cheeses on top (the more cheese, the better!). Finish with a sprinkle of salt and pepper.
-
Bake to Perfection: Pop the baking dish in the preheated oven and bake for about 25-30 minutes, or until the top is golden and bubbly. You might want to crank the broiler for an extra minute or two at the end to get that perfect golden crust—just keep a close eye on it!
-
Garnish and Serve: Once removed from the oven, sprinkle the remaining cilantro over the top. Allow it to cool for a few minutes before serving.
Serving Suggestions
When it comes to plating, I like to keep it simple yet inviting. Serve your enchiladas directly from the baking dish for a homey vibe, letting your guests dive right in! Add a fresh side salad with a zesty vinaigrette to cut through the creaminess and maybe some avocado slices to add a hint of richness. Don’t forget to put out a bowl of sour cream and salsa for toppings—it’s all about personalization!
Recipe Variations
Feel like switching things up a bit? Here are a few creative spins on this classic:
- Spicy Salsa Verde Variety: Swap the white sauce for a zesty salsa verde for an unexpected twist that adds both flavor and spice!
- Vegetarian Option: Replace the chicken with black beans or roasted vegetables. This offers a hearty meatless meal while keeping all the creamy goodness.
- Extra Cheesy: For the cheese lovers, add another layer of cheese between the enchiladas and top with crushed tortilla chips before baking for a delightful crunch.
- Herb Infusion: Experiment with different herbs like oregano or thyme mixed into the filling for additional aromatic flavors!
- Breakfast Enchiladas: Substitute shredded chicken with scrambled eggs, black beans, and pepper jack cheese for a delicious breakfast twist!
Chef’s Notes
These Creamy White Chicken Enchiladas have a special place in my heart because of their versatility. They’ve evolved over time based on what I have on hand or what my friends are craving. I’ve thrown in everything from leftover grilled chicken to a variety of cheeses, and every time they’ve turned out divine. I once made a version with a little chipotle sauce for a smoky kick, and let me tell you, it was a hit!
In the kitchen, things don’t always go perfectly—once, I accidentally grabbed flour instead of cornstarch while trying to thicken a sauce. Long story short, we ended up with a delightful gravy that paired beautifully with some leftover steak! So remember, every cooking experience is an opportunity to learn and grow—embrace it!
FAQs and Troubleshooting
1. What if my sauce is too thick when I make it?
If your sauce gets too thick, don’t fret! Simply whisk in a bit more chicken broth until it reaches your desired consistency.
2. Can I freeze leftover enchiladas?
Yes! These enchiladas freeze beautifully. Just make sure to cover them well with plastic wrap and aluminum foil. They can be stored for up to 3 months. Thaw in the refrigerator and then bake as directed.
3. What’s the best way to reheat them?
Reheat your enchiladas in a preheated oven at 350°F (175°C) for about 15-20 minutes, until heated through. You can cover them with foil to prevent the cheese from browning too quickly.
4. Why are my enchiladas falling apart?
If your enchiladas are falling apart, it may be due to overfilling or undercooking the tortillas. Ensure they’re warmed slightly before filling to make them pliable, and don’t overload them with filling!
Nutritional Info (Optional)
Each serving of these Creamy White Chicken Enchiladas (based on a recipe serving 8) is approximately:
- Calories: 320
- Protein: 22g
- Carbohydrates: 28g
- Fat: 15g
Remember, nutrition can vary based on specific ingredients used, so adjust accordingly!
And there you have it! Beautiful, creamy white chicken enchiladas that are as enjoyable to make as they are to eat. I hope this recipe brings you as much joy as it has brought me over the years. Now, tie on that ivory apron of yours, tap into your culinary spirit, and let’s make some delicious memories together. Happy cooking!
PrintCreamy White Chicken Enchiladas

Comforting enchiladas filled with shredded chicken and smothered in a creamy white sauce.
- Prep Time: 15 minutes
- Cook Time: 30 minutes
- Total Time: 45 minutes
- Yield: 8 servings 1x
- Category: Main Course
- Method: Baking
- Cuisine: Mexican
- Diet: Gluten-Free Option
Ingredients
- 8–10 flour tortillas
- 3 cups cooked shredded chicken
- 2 cups shredded Monterey Jack cheese (divided)
- 1 cup shredded cheddar cheese (divided)
- 1/2 cup diced green chiles
- 1/4 cup chopped fresh cilantro
- 1 small onion (diced)
- 3 tablespoons butter
- 3 tablespoons all-purpose flour
- 2 cups chicken broth
- 1 cup sour cream
- 1/2 teaspoon cumin (ground)
- Salt and pepper (to taste)
Instructions
- Preheat your oven to 350°F (175°C) and grease a 9×13-inch baking dish.
- Melt the butter in a medium saucepan over medium heat. Add the diced onions and cook for 3-4 minutes until translucent.
- Stir in the flour to create a roux and cook for another minute.
- Whisk in the chicken broth gradually until thickened, about 2-3 minutes. Fold in the sour cream, cumin, salt, and pepper.
- Combine shredded chicken, half of the Monterey Jack cheese, green chiles, and half of the cilantro in a mixing bowl. Add a cup of the white sauce and mix well.
- Fill each tortilla with the chicken mixture, roll tightly, and place seam-side down in the dish.
- Pour the remaining white sauce over the top and sprinkle with the remaining cheese.
- Bake for 25-30 minutes until golden and bubbly.
- Garnish with remaining cilantro before serving.
Notes
These enchiladas can be frozen for up to 3 months. Reheat in a preheated oven at 350°F (175°C) for 15-20 minutes.
Nutrition
- Serving Size: 1 serving
- Calories: 320
- Sugar: 4g
- Sodium: 600mg
- Fat: 15g
- Saturated Fat: 8g
- Unsaturated Fat: 6g
- Trans Fat: 0g
- Carbohydrates: 28g
- Fiber: 2g
- Protein: 22g
- Cholesterol: 50mg
Keywords: enchiladas, creamy chicken, comfort food, Mexican cuisine
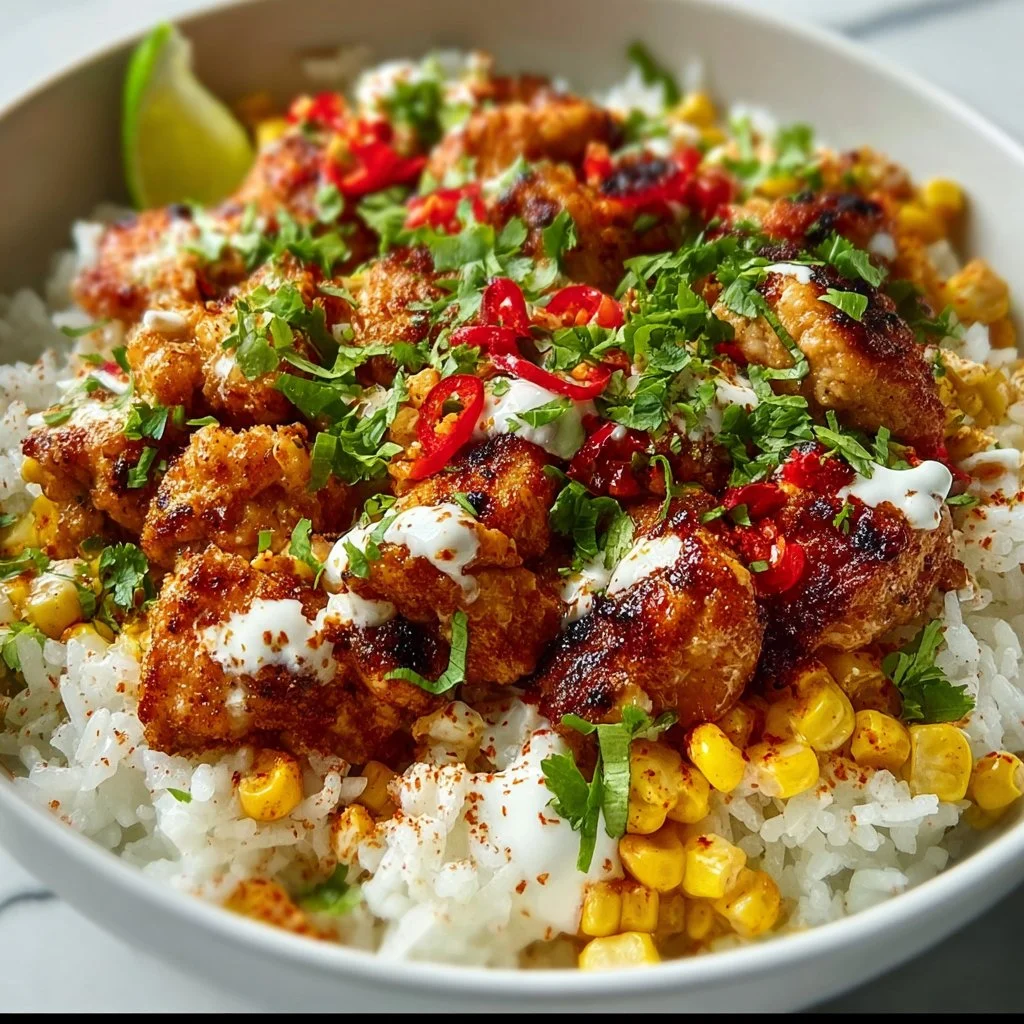
Street Corn Chicken Rice Bowl
Street Corn Chicken Rice Bowl: A Flavorful Journey in a Bowl
Hello there, fellow food lover! Are you ready to embark on an unforgettable culinary adventure? Today, we’re diving into the vibrant, zesty, and absolutely mouthwatering world of the Street Corn Chicken Rice Bowl. This dish is not only a feast for the taste buds; it’s also a celebration of fresh ingredients and easy cooking techniques. So, grab your apron, and let’s dive in!
Picture this: It’s a sultry summer evening, and the air is thick with the aroma of spices and the delightful sizzle of food cooking on the street. Street vendors are bustling, and the sound of laughter mingles with the tantalizing scents wafting through the air. This is the heart of street food culture, and it’s where our dish finds its inspiration.
The Street Corn Chicken Rice Bowl captures the colorful, lively essence of street corn—a beloved Mexican street food. With a base of fluffy rice, grilled chicken, and an array of fresh toppings, this dish brings all the joys of street food right to your dinner table. Think: creamy, cheesy goodness mingling with smoky spices and pops of sweetness from corn. It’s summer vibes in a bowl, and truly, who wouldn’t want that?
I love this recipe because it’s endlessly customizable, making it perfect for a casual weeknight dinner or an impressive gathering with friends. And believe me when I say, once you set this dish on the table, it will steal the spotlight! As we say here at Ivory Apron, cooking should be elegant yet approachable—so let’s create something together that you’ll be proud to serve!
Personal Story
I remember the first time I tasted street corn. It was during a summer festival in my hometown, where food trucks lined the streets, boldly showcasing mouthwatering treats. One warm evening, I spotted a vendor with corn on the cob, generously slathered in mayonnaise and then dusted with cotija cheese, chili powder, and a squeeze of lime. As it touched my lips, I swear I could feel the sun set with every bite. That unforgettable burst of flavors became a source of inspiration for me as I began crafting this recipe.
The idea of bringing that glorious street food experience home was thrilling! What could be better than recreating those vibrant flavors in a dish that feels both comforting and elevated? So, after experimenting and tweaking, I finally landed on this Street Corn Chicken Rice Bowl—a recipe that captures all those street-side vibes while being beautifully simple to prepare.
Ingredients
Let’s gather our ingredients! Here’s what you’ll need to create your Street Corn Chicken Rice Bowl:
-
2 cups cooked rice
- You can use white rice, brown rice, or even cilantro-lime rice for an extra zing! If you’re short on time, store-bought cooked rice works, too.
-
2 chicken breasts (grilled and sliced)
- Boneless, skinless chicken is a favorite here, but feel free to switch it up with grilled shrimp or cooked chickpeas for a meat-free option.
-
1 cup corn kernels
- Fresh corn off the cob is the gold standard, but frozen or canned corn works beautifully in a pinch. Make sure to drain and rinse the canned variety!
-
1/2 cup black beans
- Black beans are a protein-packed powerhouse. If you’re not a fan, kidney beans or pinto beans can make a great alternative.
-
1/4 cup diced red onion
- Red onion adds a sweet crunch. For a milder flavor, consider using green onions or shallots instead.
-
1/4 cup diced tomatoes
- Fresh tomatoes brighten up the dish, but you can use tomatillos for a more vibrant kick.
-
1/4 cup crumbled cotija cheese
- This crumbly cheese brings a creamy, salty punch! Feta or ricotta salata can be used as excellent stand-ins.
-
2 tablespoons chopped fresh cilantro
- Cilantro adds a fresh note and is key to that authentic flavor. If cilantro isn’t your thing, fresh parsley is a great substitute.
-
1 tablespoon olive oil
- A drizzle of olive oil enhances the dish’s richness; avocado oil is another wonderful option!
-
1 teaspoon chili powder
- This spice brings warmth and robust flavors. If you prefer heat, cayenne pepper is a fantastic alternative.
-
1/2 teaspoon smoked paprika
- Smoky paprika transports you right back to that street-side grill! For something milder, regular paprika works beautifully.
-
1/2 teaspoon cumin
- Earthy and warm, cumin balances out the flavors. Caraway seeds in a pinch can lend a different twist.
-
1/4 teaspoon salt
- Always adjust to taste, and remember that the cheese will add saltiness too!
-
1/4 teaspoon black pepper
- Freshly ground black pepper is ideal, but pre-ground will work in a pinch.
-
1/2 cup sour cream or Greek yogurt
- Both options provide creaminess. Greek yogurt gives you a protein boost; feel free to use a dairy-free substitute if needed.
-
Juice of 1 lime
- Fresh lime juice adds brightness and acidity, brightening all the flavors. Bottled lime juice works if you’re in a hurry, but fresh is always best!
-
1/2 teaspoon garlic powder
- Garlic powder provides a mellow garlic flavor. Fresh chopped garlic can elevate this if that’s your style.
-
1/4 teaspoon salt (for the sour cream/yogurt mix)
- Perfect for enhancing the creamy topping!
Step-by-Step Instructions
Ready to get cooking? Let’s bring all those vibrant flavors together!
-
Cook Your Rice:
- Begin by cooking your rice according to package instructions. If you want to amp up the flavor, substitute half of the water with chicken broth. This small step will take your rice from ordinary to extraordinary!
-
Prepare the Chicken:
- While your rice is cooking, season the chicken breasts with olive oil, chili powder, smoked paprika, cumin, salt, and pepper. Let these flavors meld by marinating for at least 15 minutes (or even overnight if you have the time).
- Preheat your grill or a grill pan over medium-high heat. Cook the chicken for about 6–7 minutes on each side or until fully cooked through (internal temperature should reach 165°F or 75°C). Let the chicken rest for a few minutes before slicing it into thin strips.
-
Sauté the Corn:
- In a separate skillet, add a drizzle of olive oil over medium heat. Throw in your corn and cook for about 5 minutes, stirring occasionally, until it begins to char slightly. This step adds an authentic depth of flavor, reminiscent of those street vendors!
-
Prepare the Black Beans and Toppings:
- In a small saucepan, warm the black beans over low heat, seasoning them with a pinch of cumin and a sprinkle of salt. Meanwhile, chop your red onion, tomatoes, and cilantro.
-
Create the Sour Cream Sauce:
- In a small bowl, combine sour cream or Greek yogurt with lime juice, garlic powder, and salt. This creamy topping is the perfect finishing touch to your bowl, providing a cool contrast to the savory elements.
-
Assemble the Bowls:
- Once everything is ready, it’s time to assemble! Take your cooked rice and place a generous scoop in the base of a serving bowl. Layer the sliced chicken, sautéed corn, black beans, diced red onion, diced tomatoes, and crumbled cotija on top.
-
Finish it Off with Flavor:
- Drizzle your sour cream sauce over the entire bowl. Sprinkle fresh cilantro on top and maybe an extra squeeze of lime juice for that signature brightness.
-
Presentation Matters:
- Don’t forget to step back and admire your beautiful creation! A well-presented dish always makes the meal feel more special.
Serving Suggestions
For an inviting presentation, use shallow bowls and add all the components in a colorful, layered fashion. Start with a base of rice, then artfully arrange the chicken and assorted toppings. For that final touch, garnish with cilantro and a sprinkle of cotija. Trust me, your guests will be snapping pictures before they even take a bite!
Pair this bowl with a refreshing drink—perhaps a sparkling limeade or a nice chilled glass of rosé—to elevate your dining experience even further.
Recipe Variations
Love to get creative? Here are some fun twists you can try on this dish:
- Taco Twist: Add taco seasoning to your chicken for a flavor-packed twist reminiscent of your favorite taco shop.
- Veggie Delight: Replace chicken with grilled zucchinis for a wonderful vegetarian alternative; you can also add bell peppers for crunch!
- Spicy Kick: Mix in a fresh diced jalapeño for an added kick that’s sure to satisfy spice lovers!
- Cheesy Goodness: Incorporate a sprinkle of shredded Monterey Jack or pepper jack cheese for an added cheesy layer.
- Chili Beans: Swap out the black beans for spicy chili beans for a heartier, more robust dish!
Chef’s Notes
This Street Corn Chicken Rice Bowl has become a staple in my kitchen, evolving with every new creation I try. The base flavors stay true, while toppings or proteins change depending on what I have on hand. A fond memory attached to this dish was a fun dinner party with friends where we made a ‘create your own bowl’ station, and everyone had a blast customizing their meals! So, get creative and make it your own. That’s what cooking is all about—joy, laughter, and connection around the table.
FAQs and Troubleshooting
1. Can I make this dish in advance?
Absolutely! You can prep the components ahead of time. Just store each component separately in airtight containers, and assemble just before serving to keep everything fresh.
2. How do I store leftovers?
Keep any leftovers in the fridge for up to 3 days. Heat them up gently on the stove to maintain that delicious flavor for another meal!
3. My corn isn’t charring; how can I improve that?
If your corn isn’t getting that lovely char, make sure your skillet is hot enough before adding it. You can also roast the corn in the oven on high heat if you’re looking for a caramelized flavor.
4. Can I use a different protein?
Absolutely! Feel free to experiment with grilled shrimp, tofu, or even seasoned ground beef. Each alternative will bring a unique spin to this dish!
Nutritional Info
For those interested in nutritional values, here’s a rough breakdown per serving (this can vary based on exact ingredients used):
- Calories: ~550
- Protein: ~40g
- Carbohydrates: ~60g
- Fat: ~15g
- Fiber: ~10g
(Always adjust based on your specific ingredients and serving sizes!)
Conclusion
As we wrap up this delicious journey, I hope you’re inspired to create your own Street Corn Chicken Rice Bowl. Remember, it’s all about enjoying the process and savoring those beautiful moments around your table. Cooking doesn’t have to be intimidating—it can be joyous, sharing, and filled with laughter. So, tie on that ivory apron and let’s celebrate the magic of home-cooked meals together, one delightful bowl at a time!
Thank you for cooking alongside me today, and happy eating!
PrintStreet Corn Chicken Rice Bowl

A vibrant and customizable bowl featuring grilled chicken, fluffy rice, and a medley of fresh toppings inspired by the beloved Mexican street corn.
- Prep Time: 20 minutes
- Cook Time: 20 minutes
- Total Time: 40 minutes
- Yield: 4 servings 1x
- Category: Main Course
- Method: Grilling
- Cuisine: Mexican
- Diet: Gluten-Free
Ingredients
- 2 cups cooked rice
- 2 chicken breasts (grilled and sliced)
- 1 cup corn kernels
- 1/2 cup black beans
- 1/4 cup diced red onion
- 1/4 cup diced tomatoes
- 1/4 cup crumbled cotija cheese
- 2 tablespoons chopped fresh cilantro
- 1 tablespoon olive oil
- 1 teaspoon chili powder
- 1/2 teaspoon smoked paprika
- 1/2 teaspoon cumin
- 1/4 teaspoon salt
- 1/4 teaspoon black pepper
- 1/2 cup sour cream or Greek yogurt
- Juice of 1 lime
- 1/2 teaspoon garlic powder
- 1/4 teaspoon salt (for the sour cream/yogurt mix)
Instructions
- Cook your rice according to package instructions, using chicken broth for extra flavor if desired.
- Prepare the chicken by marinating it in olive oil, chili powder, smoked paprika, cumin, salt, and pepper for at least 15 minutes. Grill until cooked through.
- Sauté the corn in olive oil over medium heat for about 5 minutes until charred.
- Warm the black beans in a small saucepan with a pinch of cumin and salt.
- Create the sour cream sauce by combining sour cream or Greek yogurt with lime juice, garlic powder, and salt.
- Assemble the bowls by placing a scoop of rice at the base, followed by chicken, corn, black beans, red onion, tomatoes, and cotija cheese.
- Drizzle with sour cream sauce and garnish with cilantro and extra lime juice.
- Serve and enjoy your beautifully crafted bowls!
Notes
Customize this dish with different proteins or toppings based on preference. Store leftovers in the fridge for up to 3 days.
Nutrition
- Serving Size: 1 bowl
- Calories: 550
- Sugar: 6g
- Sodium: 500mg
- Fat: 15g
- Saturated Fat: 4g
- Unsaturated Fat: 8g
- Trans Fat: 0g
- Carbohydrates: 60g
- Fiber: 10g
- Protein: 40g
- Cholesterol: 75mg
Keywords: street corn, chicken bowl, Mexican food, summer recipes, customizable meals

Low-Carb Fish Taco Bowls
Dive Into Deliciousness: Low-Carb Fish Taco Bowls
Welcome back to the kitchen, foodie friends! Today, I’m excited to take you on an unforgettable culinary journey with one of my favorite dishes: Low-Carb Fish Taco Bowls. This recipe not only showcases the beautiful flavors of fresh ingredients but also embraces a low-carb lifestyle. Trust me; dinner will never feel boring again!
Fish tacos are a beloved classic, and for good reason. The blend of fresh fish, zesty toppings, and creamy sauces creates a delightful explosion of flavors in every bite. When you combine that with gorgeous cauliflower rice and the crunch of sweet and spicy coleslaw, you’ve got yourself a taco bowl that feels indulgent yet utterly wholesome.
Picture this: you’re perched at your table with family or friends, surrounded by laughter and stories, as you dig into your vibrant bowls that look as stunning as they taste. That’s what I want for you! So, buckle up your apron, and let’s get cooking!
A Whiff of Nostalgia: My Fish Taco Adventure
While I adore every inch of food, fish tacos hold a special place in my heart. I remember the very first time I tried them—warm summer evenings spent near the coast, the sound of waves crashing, and the sweet scent of salt in the air. There was a tiny shack that served the most magnificent fish tacos; their creations were loaded with freshly battered fish, a smooth chipotle sauce, and a sprinkle of lime.
Every bite was like a mini-vacation on my plate! I began experimenting with my own versions, steering toward healthier options while not compromising that beachy spirit. The result? A low-carb fish taco bowl that captures the essence of those summer nights but fits seamlessly into everyday life.
What You’ll Need: Ingredients
Let’s break down the ingredients you’ll need to nail these Low-Carb Fish Taco Bowls:
-
4 Frozen Cod Fillets
Cod is mild and flaky, making it a great choice for tacos! You can substitute with tilapia or salmon if you prefer a different fish. Just keep an eye on cooking times, as they may vary! -
2 cups Pineapple Lime Cauliflower Rice
This is a delightful low-carb swap for traditional rice. If you haven’t got the pineapple lime flavor, you can use plain cauliflower rice and add a splash of lime juice and bits of fresh pineapple to boost those tropical vibes! -
2 cups Sweet and Spicy Coleslaw
Coleslaw adds a fantastic crunch! If you’re short on time, grab a pre-made one from the store, or make your own with cabbage, carrots, and your favorite dressing. It’s the perfect complement to the fish! -
2 tbsp Melted Unsalted Butter
This will keep the fish juicy. You could use olive oil for a healthier fat option if you’d like! -
2 tbsp Taco Seasoning
Homemade or store-bought, this is what brings the flavor pop! If you need a spice-free option, try a mix of cumin and smoked paprika instead. -
¼ cup Sour Cream (or Greek Yogurt)
Totally switching up the creaminess! Greek yogurt is a lighter option, and you could even use dairy-free yogurt if necessary. -
1½ tsp Lime Juice
Fresh is always best! It brightens up the dish and gives that zesty kick! -
1 tsp Honey
This adds a hint of sweetness to balance out the tang. Feel free to substitute with agave or maple syrup if you prefer. -
1 tbsp Milk
You can use any milk you love—dairy or non-dairy works! -
Pinch of Salt
Never underestimate the power of salt; it enhances all the flavors coming together! -
1 Sliced Avocado
Creamy goodness! An absolute must; avocado elevates these bowls. You could also try using guacamole for a fun twist! -
¼ cup Chopped Cilantro
For freshness and a pop of color; cilantro elevates the dish. If you’re not a fan, some chopped green onions could work as a fun substitute!
Let’s Get Cooking: Step-by-Step Instructions
Step 1: Prepare the Fish
Start by preheating your oven to 375°F (190°C). While it warms up, take the frozen cod fillets and pat them dry with some paper towels. This will help them crisp up beautifully in the oven. Next, brush the fillets with the melted unsalted butter, then sprinkle on the taco seasoning, making sure to coat them well. If you love heat, feel free to add a pinch of cayenne pepper for a zesty kick!
Step 2: Bake the Fillets
Arrange the seasoned fish fillets on a baking sheet lined with parchment paper or a silicone mat (hello, easy clean-up!). Bake them in the oven for about 15-20 minutes or until the fish flakes easily with a fork. The cooking time may vary based on the thickness of your fillets, so keep an eye on them—no one wants overcooked, rubbery fish.
Step 3: Cook the Cauliflower Rice
While the fish is baking, let’s get that cauliflower rice going. In a skillet over medium heat, toss in the pineapple lime cauliflower rice. Cook for about 5-7 minutes, stirring occasionally until it’s heated through. Don’t overcook it; we want it to remain light and fluffy! Adding a pinch of salt during this step helps amp up the flavors!
Step 4: Assemble the Creamy Sauce
In a small bowl, mix together the sour cream (or Greek yogurt), lime juice, honey, milk, and a pinch of salt. If your sauce is too thick, you can always add a splash more milk until you reach a creamy but pourable consistency. This is the magic sauce that will tie everything together.
Step 5: Enjoy the Crunch
Now let’s whip up that sweet and spicy coleslaw! If you’re using pre-made coleslaw, you might want to add a little bump of flavor with extra lime juice or a touch more honey. For homemade, simply toss your shredded cabbage and carrots with your favorite dressing—easy peasy!
Step 6: Prepare the Avocado and Cilantro
Slice the avocado while everything is cooking, and chop up that fresh cilantro! The avocado adds creaminess, while cilantro adds freshness. You’ll only need a sprinkle for garnish before digging in!
Step 7: Bowl Building!
Now, it’s time to create your beautiful taco bowls! Start by spooning a generous amount of cauliflower rice as your base, then place a piece of your perfectly baked fish on top. Next, pile on that sweet and spicy coleslaw, drizzle with the creamy sauce, and finish off with sliced avocado and chopped cilantro.
Serving Suggestions
When it comes to plating, think vibrant and rustic! You can serve everything right in bowls for a casual vibe, or you can arrange each component on a large platter, allowing guests to build their own taco bowls. The key is to keep it colorful and inviting! A sprinkle of extra cilantro or even some lime wedges on the side can add a delightful pop of freshness.
Recipe Variations
-
Zesty Shrimp Swap: Try swapping out the cod with shrimp! Just adjust the cooking time; shrimp cooks much quicker and offers that fantastic seafood flavor.
-
Spicy Fish Twist: Toss your fish in a spicy chipotle sauce before baking for an extra kick!
-
Grain-Free Options: Use shredded lettuce instead of cauliflower rice for those looking to ditch carbs altogether.
-
Different Proteins: Chicken or turkey seasoned with taco spices works exceptionally well for those who aren’t in the mood for fish!
-
Dairy-Free Delight: Substitute the sour cream with avocado yogurt or cashew cream for a smooth, dairy-free sauce.
Chef’s Notes
I’ll let you in on a little secret—this recipe evolves constantly! Some nights, I swap the coleslaw for mango salsa for a fruity twist. Other times, we garnish with pickled onions for an extra zing. Kitchen creations are always a reflection of personal taste and the ingredients you have on hand, so feel free to get creative! And if your kitchen gets a little messy, remember, it’s all part of the fun!
FAQs and Troubleshooting
Q1: What if my fish sticks to the baking sheet?
Use parchment paper or a silicone baking mat to prevent sticking. Plus, ensure the fillets are dry before seasoning!
Q2: Can I use fresh fish instead of frozen?
Absolutely! Fresh fish will work beautifully. Just adjust the cooking time, as fresh fillets may cook faster than frozen.
Q3: How do I store leftovers?
Store your leftover fish taco bowls in airtight containers in the fridge for up to two days. Reheat gently in the oven or microwave!
Q4: My sauce is too thick—what should I do?
No worries! Just add a splash more milk to thin it out. The goal is a smooth, creamy consistency.
So, what are you waiting for? Grab your apron, assemble those fresh ingredients, and indulge in these Low-Carb Fish Taco Bowls. This recipe combines flavor, freshness, and flexibility, making it perfect for any occasion! Maybe invite over a friend, sip some sparkling water, and share those home-cooked moments.
I can’t wait to hear how your dish turns out! Happy cooking!
PrintLow-Carb Fish Taco Bowls

Indulge in these vibrant Low-Carb Fish Taco Bowls featuring fresh fish, cauliflower rice, and a crunchy coleslaw, perfect for a wholesome dinner.
- Prep Time: 15 minutes
- Cook Time: 30 minutes
- Total Time: 45 minutes
- Yield: 4 servings 1x
- Category: Main Course
- Method: Baking
- Cuisine: Mexican
- Diet: Low-Carb
Ingredients
- 4 Frozen Cod Fillets
- 2 cups Pineapple Lime Cauliflower Rice
- 2 cups Sweet and Spicy Coleslaw
- 2 tbsp Melted Unsalted Butter
- 2 tbsp Taco Seasoning
- ¼ cup Sour Cream (or Greek Yogurt)
- 1½ tsp Lime Juice
- 1 tsp Honey
- 1 tbsp Milk
- Pinch of Salt
- 1 Sliced Avocado
- ¼ cup Chopped Cilantro
Instructions
- Preheat your oven to 375°F (190°C). Pat the frozen cod fillets dry with paper towels. Brush with melted unsalted butter and sprinkle with taco seasoning.
- Arrange the seasoned fish fillets on a lined baking sheet. Bake for 15-20 minutes or until the fish flakes easily.
- While the fish is baking, heat the pineapple lime cauliflower rice in a skillet over medium heat for 5-7 minutes.
- Mix sour cream (or Greek yogurt), lime juice, honey, milk, and a pinch of salt in a small bowl to make the creamy sauce.
- Whip up the sweet and spicy coleslaw, or enhance store-bought coleslaw with extra lime juice.
- Slice the avocado and chop fresh cilantro for garnish.
- Build your taco bowls by spooning cauliflower rice, topping with baked fish, coleslaw, creamy sauce, sliced avocado, and cilantro.
Notes
Feel free to substitute ingredients based on personal preference, such as using shrimp instead of cod or incorporating mango salsa for a fruity twist.
Nutrition
- Serving Size: 1 bowl
- Calories: 350
- Sugar: 5g
- Sodium: 400mg
- Fat: 12g
- Saturated Fat: 4g
- Unsaturated Fat: 6g
- Trans Fat: 0g
- Carbohydrates: 45g
- Fiber: 3g
- Protein: 15g
- Cholesterol: 30mg
Keywords: Fish Taco, Low-Carb, Healthy Dinner, Mexican Cuisine, Taco Bowls

Sweet Potato Taco Bowl
Sweet Potato Taco Bowl: A Cozy Culinary Journey
Hello, my fellow foodies! Today, I’m inviting you into my kitchen to whip up a delightful Sweet Potato Taco Bowl that’s not just delicious but also packed with vibrancy and texture. Whether you’re looking to impress guests or treat yourself to a satisfying weeknight dinner, this recipe is the perfect go-to. Imagine a warm, inviting bowl filled with roasted sweet potatoes, fluffy rice, creamy avocado, and a sprinkle of your favorite toppings—all coming together for a truly unforgettable meal.
This dish embodies the spirit of cozy gatherings around the dinner table; it’s bright, colorful, and just the right amount of comforting. I remember when I first served a version of this bowl to a group of friends during a chilly evening gathering. As the fragrant sweet potatoes roasted in the oven, the lively chatter around my dining table filled the air with warmth. Could it be the delicious aroma or the clinking of glasses? Perhaps a bit of both! I can’t help but smile remembering how we savored our creations; the sweet potatoes were the star of the show, and the camaraderie was the icing on the cake.
Not only is this taco bowl easy to prepare, but it’s also versatile. You can adjust the seasonings, mix in your favorite veggies, or dress it up with toppings galore. It’s all about what you love and what inspires you! Join me as I take you through the journey of creating this Sweet Potato Taco Bowl, sprinkled with personal stories, tips, and a few chef hacks along the way. Ready? Let’s get cooking!
Personal Story
When it comes to sweet potatoes, I have a vivid memory that warms my heart. It was during a family gathering a few years back when my Aunt Lucy first introduced the idea of a sweet potato taco bowl. She was known for her zesty personality and her vibrant cooking style, often throwing impromptu dinner parties that felt like mini festivals. One cozy autumn evening, she set out various bowls filled with toppings and let each of us build our own taco bowls. The delicious aroma of paprika, cumin, and roasted sweet potatoes wafted through the house as we assembled our dishes.
As I piled on black beans, corn, and a drizzle of salsa, I felt a rush of creativity. Grabbing a generous avocado slice, I garnished my bowl and proudly presented it to my family. The laughter, the sharing—I realized that cooking isn’t just about making food; it’s about creating memories. Aunt Lucy’s simple yet gorgeous sweet potato taco bowls have since become a staple in my kitchen, and every time I make them, I feel connected to that moment. Just like the vibrant colors of the dish, life is all about those vibrant moments shared at the table.
Ingredients
To create your Sweet Potato Taco Bowl, you’ll need the following ingredients:
-
2 medium sweet potatoes (cubed)
Sweet potatoes bring natural sweetness and a rich, earthy flavor to the bowl. If you don’t have sweet potatoes, you can use regular potatoes or even butternut squash for a different texture and flavor. -
2 tablespoons olive oil
Olive oil helps to achieve that crispy-roasted texture for the sweet potatoes. Alternatively, you can use avocado oil or melted coconut oil. -
1 teaspoon paprika
Paprika adds a beautiful smokiness to the sweet potatoes. If you’re looking for a little kick, you could substitute smoked paprika or cayenne pepper. -
1 teaspoon ground cumin
Cumin brings warmth and depth of flavor. If you’re not a fan, coriander or taco seasoning can work instead. -
½ teaspoon chili powder
A sprinkle of chili powder adds a gentle heat that complements the sweetness of the potatoes. Adjust to your preference or skip it for a milder dish. -
Salt & pepper to taste
Seasoning enhances every component of the bowl; don’t skimp on it! You can also use garlic powder or onion powder for additional depth. -
Cooked rice or quinoa
This forms the hearty base of your taco bowl. Choose your favorite grain—brown rice, wild rice, or even cauliflower rice for a lighter option! -
Black beans (rinsed)
These provide protein and a creamy texture. You can substitute with pinto beans or chickpeas if you prefer. -
Corn kernels
Sweet corn adds a crunch and pops of sweetness. Canned, frozen, or fresh corn works perfectly here. -
Avocado slices
Creamy avocado balances the flavors beautifully. If you’re out of avocado, Greek yogurt or sour cream could provide a similar creaminess. -
Salsa or sour cream (optional)
Dress your taco bowl with salsa for zest or sour cream for richness. Fresh pico de gallo or guacamole can elevate your bowl even more.
Step-by-Step Instructions
Now, let’s dive into the cooking process! Follow these steps, and your Sweet Potato Taco Bowl will be ready to impress:
-
Preheat Your Oven
Preheat your oven to 425°F (220°C). A hot oven means crispy sweet potatoes! -
Prepare Your Sweet Potatoes
Start by peeling and cubing your sweet potatoes. Aim for about 1-inch cubes; they’ll roast evenly and get beautifully caramelized. -
Season the Sweet Potatoes
In a large bowl, toss the cubed sweet potatoes with olive oil, paprika, cumin, chili powder, and a generous sprinkle of salt and pepper. Make sure every cube is coated; this is where the flavor magic happens!Chef Tip: Instead of tossing them in a bowl, you can spread everything on a baking sheet lined with parchment for easy cleanup.
-
Roast the Sweet Potatoes
Spread the seasoned sweet potatoes in a single layer on a baking sheet. Roast for about 25–30 minutes, turning them halfway through. You want them golden and tender!Little Chef Hack: For super crispiness, turn on the broiler for the last 2–3 minutes of cooking! Just keep an eye on them to prevent burning.
-
Prepare Your Bases
While the sweet potatoes are roasting, cook your rice or quinoa according to package instructions. This will ensure you have a fluffy base for your taco bowl. -
Warm the Black Beans and Corn
In a small saucepan over medium heat, warm the black beans and corn together. Just a few minutes should do the trick, allowing the flavors to mingle. Season lightly with a pinch of salt. -
Slice the Avocado
While the beans and corn warm up, slice your ripe avocado. Aim for thin, beautiful slices that will add a lovely creamy texture. Sprinkle a dash of lemon or lime juice on the slices to keep them from browning. -
Assemble Your Taco Bowl
Once everything is cooked and ready, it’s time to assemble! In a bowl, start with a generous scoop of rice or quinoa. Layer on the roasted sweet potatoes, followed by the warm black beans and corn. Finish with avocado slices, a dollop of salsa or sour cream, and maybe some fresh herbs if you’re feeling fancy.Presentation Hack: Place each ingredient in sections to create a colorful visual appeal, making it as much a feast for the eyes as it is for the palate!
-
Enjoy!
Grab your fork, dig in, and savor every bite of your Sweet Potato Taco Bowl! I recommend sharing it with friends or family—there’s something truly special about a meal enjoyed together.
Serving Suggestions
When it comes to plating, remember that appealing to the eye is half the fun! Use a wide, shallow bowl to showcase the vibrant colors of the sweet potatoes, black beans, corn, and fresh avocado. Drizzle hot sauce or a squeeze of lime over the top for an extra zesty finish.
Fun Fact:
Adding a sprinkle of crumbled feta or fresh cilantro can turn your taco bowls into a picnic-worthy feast! Pair it with a light salad or tortilla chips for a complete meal.
Recipe Variations
To keep things exciting, here are some fun variations to try with your Sweet Potato Taco Bowl:
-
Spicy Kick: Add some diced jalapeños for an extra layer of heat.
-
Southwestern Twist: Mix in roasted bell peppers and serve with chipotle crema for a smoky flavor.
-
Vegetable Medley: Add sautéed onions, zucchini, or other seasonal veggies to enrich the bowl.
-
Protein Boost: Top your bowl with shredded chicken, grilled shrimp, or even a poached egg for added protein.
-
Gluten-Free: Swap rice for quinoa or cauliflower rice to make it gluten-free while keeping it packed with flavor.
Chef’s Notes
This Sweet Potato Taco Bowl has evolved over time in my kitchen. I started with basic flavors, but as I experimented more, I discovered the joy of layering different components. Initially, I was daunted by the thought of roasting sweet potatoes, fearing they wouldn’t be fluffy or flavorful. But after many trials (and a few burnt batches!), I learned how to get the perfect roast.
Funny Kitchen Memory: One time, I forgot to turn on the oven while preparing for a dinner party! As my friends waited, I panicked and threw together a makeshift raw veggie platter that turned out to be a hit. Now we joke that I could host a party with only sweet potatoes and still have a good time!
FAQs and Troubleshooting
1. My sweet potatoes are mushy instead of crispy. What went wrong?
This could be due to overcrowding the baking sheet. Ensure your sweet potatoes are placed in a single layer with some space in between, allowing them to roast evenly.
2. Can I prep this dish in advance?
Absolutely! You can roast the sweet potatoes a day ahead and store them in the fridge. Just warm them up before serving.
3. How do I keep my avocado from browning?
Squeeze some lemon or lime juice on your avocado slices just before serving. This natural acid helps slow down the oxidation process.
4. Can I make this vegan?
Yes! This recipe is already vegan-friendly. Just ensure your rice or quinoa is also vegan, and enjoy away!
Nutritional Info (Optional)
A single serving of this Sweet Potato Taco Bowl contains approximately:
- Calories: 400
- Protein: 12g
- Carbohydrates: 60g
- Fat: 15g
- Fiber: 12g
Please note that these values can vary based on ingredient choices and portion sizes!
And there you have it! A delicious, colorful, and wholesome Sweet Potato Taco Bowl that celebrates the art of easy cooking with elegance. I hope this recipe finds a cherished place in your kitchen, just as it has in mine. Happy cooking, and may your table always be filled with laughter and good food!
PrintSweet Potato Taco Bowl

A delightful bowl filled with roasted sweet potatoes, fluffy rice, creamy avocado, and your favorite toppings; perfect for a cozy dinner.
- Prep Time: 15 minutes
- Cook Time: 30 minutes
- Total Time: 45 minutes
- Yield: 4 servings 1x
- Category: Main Course
- Method: Baking
- Cuisine: Mexican
- Diet: Vegan
Ingredients
- 2 medium sweet potatoes, cubed
- 2 tablespoons olive oil
- 1 teaspoon paprika
- 1 teaspoon ground cumin
- ½ teaspoon chili powder
- Salt & pepper to taste
- Cooked rice or quinoa
- Black beans, rinsed
- Corn kernels
- Avocado slices
- Salsa or sour cream (optional)
Instructions
- Preheat your oven to 425°F (220°C).
- Prepare your sweet potatoes by peeling and cubing them into 1-inch pieces.
- Season the sweet potatoes with olive oil, paprika, cumin, chili powder, salt, and pepper.
- Roast the sweet potatoes in a single layer on a baking sheet for 25–30 minutes, turning halfway.
- Prepare your rice or quinoa according to package instructions.
- Warm the black beans and corn together in a small saucepan over medium heat.
- Slice your avocado and sprinkle with lemon or lime juice.
- Assemble the taco bowl starting with a scoop of rice, then layer roasted sweet potatoes, warm black beans and corn, and avocado slices.
- Finish with salsa, sour cream, or additional toppings of your choice.
- Enjoy your delicious Sweet Potato Taco Bowl!
Notes
You can easily customize this bowl with additional toppings or veggie variations.
Nutrition
- Serving Size: 1 serving
- Calories: 400
- Sugar: 6g
- Sodium: 300mg
- Fat: 15g
- Saturated Fat: 2g
- Unsaturated Fat: 10g
- Trans Fat: 0g
- Carbohydrates: 60g
- Fiber: 12g
- Protein: 12g
- Cholesterol: 0mg
Keywords: sweet potato, taco bowl, vegan recipe, healthy dinner, gluten-free, vegetarian
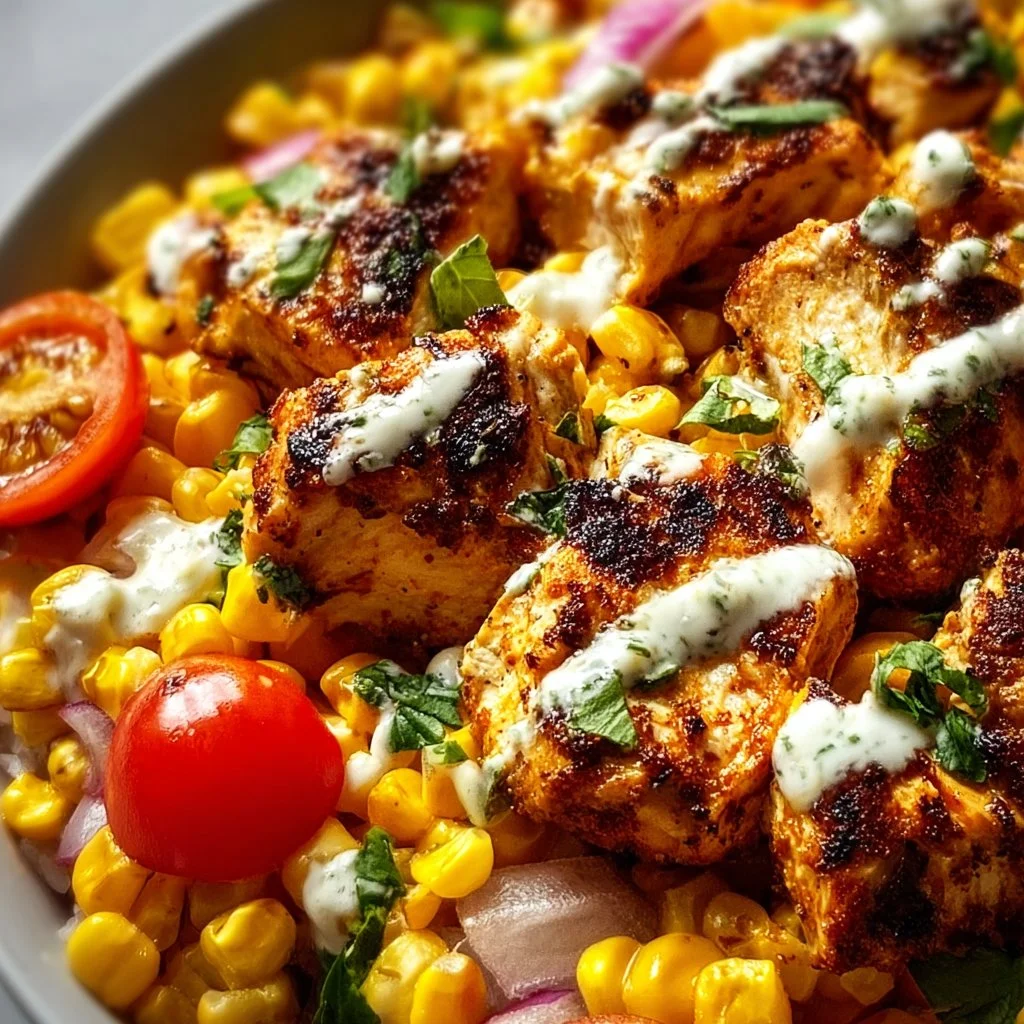
Easy Street Corn Chicken Bowl
Easy Street Corn Chicken Bowl: A Recipe That’s Sure to Impress!
Hello, my lovely food enthusiasts! Today, I’m thrilled to share with you one of my all-time favorite weekday meals that is as satisfying as it is simple — the Easy Street Corn Chicken Bowl. This dish embodies everything I adore about home cooking: comfort, color, and a sprinkle of love served right on your plate. Not only is it packed with flavor, but it also celebrates fresh, wholesome ingredients that come together to create a meal that feels festive, whether it’s a Tuesday night dinner or a weekend gathering.
Picture yourself on a sun-drenched patio, a light breeze in the air while the chatter of friends fills the space. The inviting aroma of seasoned chicken wafts through as you serve this vibrant bowl filled with color and textures. The creamy avocado, zesty lime, and sweet corn are the kind of flavor explosions that can make any day feel special.
But what makes this bowl even more appealing? It’s ridiculously easy to prepare! In just about 30 minutes, you can have a delicious, nourishing meal on the table that looks like it belongs in a gourmet magazine. Whether you’re a kitchen novice or a seasoned chef, this dish will impress your guests and satisfy even the pickiest eaters.
So, roll up those sleeves, grab your apron, and let’s dive into my Easy Street Corn Chicken Bowl recipe — a dish that will not just fill your belly but also warm your heart!
Personal Story
I still vividly remember the first time I served a chicken bowl similar to this recipe at a dinner party. It was a sunny Sunday afternoon, and I had invited a group of my closest friends over for a casual gathering. The idea was to celebrate the end of summer with a laid-back vibe and some delicious food. I wanted to create a dish that felt fun and festive without keeping me shackled to the kitchen for hours.
After a little brainstorming and some inspiration from a local food truck that served mouthwatering chicken bowls, I landed on a colorful creation featuring seasoned chicken, freshly grilled corn, and a burst of toppings. As soon as I set the bowls on the table, I saw my friends’ eyes light up with excitement, and soon they were digging in. We laughed, shared memories, and enjoyed each other’s company while savoring every bite of that flavorful dish. It turned out to be the highlight of their day, and it solidified my love for sharing food with friends and family.
That joyous gathering taught me that cooking is not just about the food itself; it’s about the connections we create around the table. Here’s my version of that unforgettable chicken bowl, ready to bring laughter and joy to your dining experience!
Ingredients
Here’s what you’ll need to create this vibrant Easy Street Corn Chicken Bowl:
-
2 cups cooked chicken, shredded
Feel free to use rotisserie chicken for convenience, or season and grill your own for a fresh touch! You can substitute with turkey or even tofu for a vegetarian option. -
1 cup corn (canned or frozen)
Canned corn is convenient; just rinse it before adding. Frozen corn works beautifully too—simply thaw it or sauté for a few minutes for that sweet flavor. -
1 cup black beans, rinsed and drained
Black beans add protein and fiber. You can swap with kidney beans or chickpeas if you prefer. -
1 cup cooked rice or quinoa
Both options work great! Quinoa gives a nutty flavor, while rice (white or brown) is classic comfort. If you’re looking for a low-carb alternative, try cauliflower rice. -
1 cup diced tomatoes
Fresh, vibrant tomatoes are best, but you can use canned diced tomatoes for convenience. Add some green chilies for a kick! -
1 avocado, diced
Creamy and rich, avocados are a must. If you’re avocado-cautious, try substituting with some Greek yogurt or sour cream. -
1/2 cup shredded cheese (cheddar or your choice)
Cheddar is traditional, but feel free to get creative! Pepper jack brings a spicy zing, while queso fresco adds a lovely creaminess. -
1/4 cup cilantro, chopped
You can’t go wrong with a fragrant garnish! If you’re not a cilantro fan, fresh parsley works just as well. -
1 lime, juiced
A squeeze of lime brightens up the dish. For a twist, try lemon or even orange juice! -
Salt and pepper to taste
Don’t forget to season! A pinch of cumin or smoked paprika could elevate your bowl even further!
Step-by-Step Instructions
Now that we have our delicious ingredients ready, let’s get cooking! Follow along with these step-by-step instructions for a flawless Easy Street Corn Chicken Bowl.
-
Cook the Rice/Quinoa
If you are starting with uncooked rice or quinoa, prepare it according to package instructions. Typically, for quinoa, you’ll use a 2:1 water-to-quinoa ratio, simmering for about 15 minutes. For rice, the cooking time may vary, so keep an eye on it! This step is crucial as it serves as the base for your bowl. -
Prepare the Chicken
If you’ve got pre-cooked chicken, shred it into bite-sized pieces using forks or your hands — however you prefer! If you’re cooking it fresh, season chicken breasts with salt, pepper, and a touch of cumin or chili powder for that extra flavor. Grill, bake, or sauté it until it reaches an internal temperature of 165°F (about 20-25 minutes). Once done, let it rest for a few minutes before shredding it to keep the juiciness intact. -
Sauté the Corn
If you’re using frozen corn, sauté it in a non-stick skillet over medium heat with a drizzle of olive oil for about 5 minutes until it’s slightly caramelized and golden. If using canned corn, simply heat it through for 2-3 minutes in the pan. This adds a great depth of flavor! -
Combine Black Beans and Tomatoes
In a medium bowl, combine the rinsed black beans and diced tomatoes. Add a squeeze of lime juice, season with salt, pepper, and toss lightly. This will enhance the flavors while giving you that fresh, zesty profile! -
Assemble Your Bowl
Now the fun part! Grab your favorite bowls and start layering: add a generous scoop of rice or quinoa at the bottom. Top with shredded chicken, followed by a heap of the black bean and tomato mixture, and then add the sautéed corn. -
Add Creamy Avocado and Cheese
Place the diced avocado on top and sprinkle the shredded cheese generously. This adds a creamy, rich dimension that perfectly balances the other ingredients. -
Garnish with Fresh Cilantro and Lime
Finish your creation by adding freshly chopped cilantro and drizzling with lime juice. This adds a pop of color and flavor that takes your bowl from ordinary to extraordinary! -
Serve and Enjoy
Dig in! Serve immediately while everything is warm, and be prepared for compliments from your fellow diners.
Serving Suggestions
When it comes to serving this Easy Street Corn Chicken Bowl, presentation is key! Opt for shallow, wide bowls to allow each component to shine. You can even garnish with extra lime wedges and a sprinkle of chili flakes for those who enjoy an extra kick. For a festive touch, pair it with tortilla chips for some crunch or consider setting up a create-your-own bowl station where guests can customize their own with toppings like sour cream, pickled jalapeños, or your favorite hot sauce!
Recipe Variations
Now, let’s get creative! Here are a few twist ideas to keep things exciting:
-
Spicy Street Corn: Mix in some chipotle or jalapeño into the sautéed corn for a spicy kick.
-
Southwest Style: Add diced bell peppers and red onion for that extra crunch and flavor.
-
Asian Fusion: Swap out the rice for sushi rice and drizzle with soy sauce and sesame seeds. Add water chestnuts for crunch!
-
Vegan Delight: Replace chicken with tofu, and use cashew cheese or skip the cheese for a complete plant-based bowl.
-
Breakfast Twist: Top with a fried egg for a delightful twist that’s perfect for brunch!
Chef’s Notes
As a chef who loves to play in the kitchen, I always find every recipe evolves over time. This Easy Street Corn Chicken Bowl has seen many variations in my home, from spontaneous additions of seasonal veggies to experimenting with different international spices. My playful attitude toward cooking is what keeps it fresh and exciting!
Plus, I’ve learned over the years that the best cooking comes with a side of laughter and the willingness to try something new, even if it means a little mess! (Trust me, I’m a pro at cleaning up flour disasters!)
FAQs and Troubleshooting
1. What if my rice is mushy?
A little overcooked rice can happen, but don’t fret! Use a spoon to fluff it up gently, which can help separate the grains. If it’s too far gone, consider adding some crispy toppings to offer more texture!
2. How can I make this meal prep-friendly?
Absolutely! Cook your chicken, rice, and chop your veggies in advance. Store separately in airtight containers, and when you’re ready to eat, simply reheat and assemble!
3. My black beans are mushy; what did I do wrong?
Overcooked beans can lose their texture, so always check the package instructions for cooking times. If using canned black beans, simply rinse them and add them to the dish at the last minute to avoid softening further.
4. Can I freeze this bowl?
Yes! Store the assembled bowl without toppings in an airtight container. It should stay fresh for about 3-4 months. Just remember to freeze the guacamole and cheese separately. Thaw and reheat before serving, then top off fresh!
Nutritional Info
This Easy Street Corn Chicken Bowl is not only delicious but also packed with nutrients! Here’s a quick overview per serving:
- Calories: Approximately 450
- Protein: 35g
- Carbohydrates: 45g
- Fat: 15g
- Fiber: 10g
(Note: Nutritional values may vary based on ingredient brands and specific measurements.)
And there you have it — a delightful, colorful, and easy recipe perfect for any occasion. I hope you allow this Easy Street Corn Chicken Bowl to brighten your meal times as it has brightened mine. Tie on that apron, gather your ingredients, and let’s make some delicious memories together around the table! Happy cooking!
PrintEasy Street Corn Chicken Bowl

A vibrant and satisfying bowl packed with flavor, featuring seasoned chicken, fresh corn, and colorful toppings, perfect for any occasion.
- Prep Time: 15 minutes
- Cook Time: 30 minutes
- Total Time: 45 minutes
- Yield: 4 servings 1x
- Category: Main Course
- Method: Sautéing & Assemble
- Cuisine: Mexican
- Diet: Gluten-Free
Ingredients
- 2 cups cooked chicken, shredded
- 1 cup corn (canned or frozen)
- 1 cup black beans, rinsed and drained
- 1 cup cooked rice or quinoa
- 1 cup diced tomatoes
- 1 avocado, diced
- 1/2 cup shredded cheese (cheddar or your choice)
- 1/4 cup cilantro, chopped
- 1 lime, juiced
- Salt and pepper to taste
Instructions
- Cook the Rice/Quinoa according to package instructions.
- Prepare the Chicken by shredding or cooking fresh chicken until done.
- Sauté the Corn in a skillet until golden.
- Combine Black Beans and Tomatoes in a bowl with lime juice.
- Assemble your Bowl by layering rice, chicken, black bean mixture, and sautéed corn.
- Add Creamy Avocado and Cheese on top.
- Garnish with Fresh Cilantro and Lime juice.
- Serve and Enjoy immediately!
Notes
This meal can easily be customized with toppings like sour cream, jalapeños, or serve with tortilla chips.
Nutrition
- Serving Size: 1 bowl
- Calories: 450
- Sugar: 4g
- Sodium: 600mg
- Fat: 15g
- Saturated Fat: 7g
- Unsaturated Fat: 6g
- Trans Fat: 0g
- Carbohydrates: 45g
- Fiber: 10g
- Protein: 35g
- Cholesterol: 75mg
Keywords: chicken bowl, corn bowl, easy dinner, healthy meal, colorful bowl