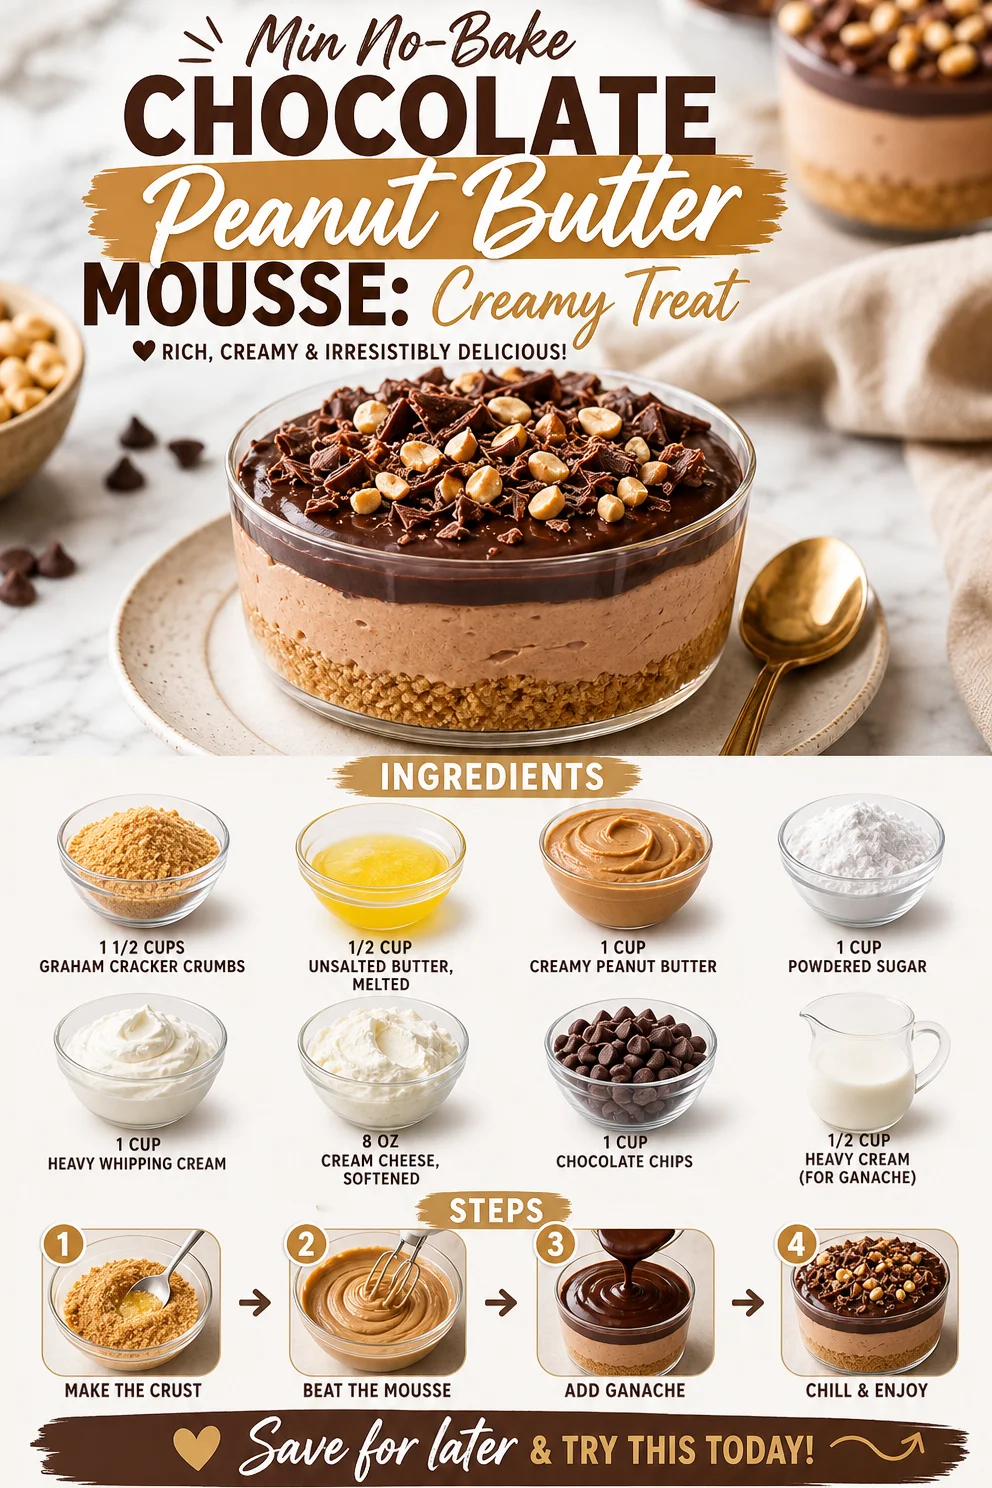
Min No-Bake Chocolate Peanut Butter Mousse: Creamy Treat
Indulge in Decadence: No-Bake Chocolate Peanut Butter Mousse Dessert
Hello, dessert lovers! Have you ever had that delightful moment when a simple combination of ingredients takes you back to your childhood, to warm kitchens filled with giggles and the sweet aroma of treats wafting through the air? That feeling? The one that makes you want to create delicious memories around your table? Well, today we’re diving into a dreamy No-Bake Chocolate Peanut Butter Mousse Dessert that will have you reminiscing and indulging in nostalgia all at once.
I mean, who can resist that velvety layer of chocolate paired with the rich, creamy taste of peanut butter? Seriously, it’s like a flavor celebration right in your mouth. Picture this: a rich chocolate mousse layered atop a buttery graham cracker crust, finished with a luscious peanut butter cream. It’s not just a dessert; it’s an experience! Let’s get those taste buds tingling and prepare our hearts (and stomachs) for something special.
This dessert not only satisfies your sweet cravings, but it also spreads joy and simple joys of life. Each bite is a little reminder to slow down and enjoy the beautiful moments — whether you’re planning a cozy dinner for two, a lively gathering with friends, or just a special treat for yourself. Trust me, you’ll want to keep this recipe close at hand. Ready to get started? Let’s whip up this deliciousness together!
A Taste of Nostalgia
Growing up, my kitchen was a hub of creativity and laughter, especially when it came to dessert time. I can vividly remember those lazy summer days when my mom and I would invent things in the kitchen, armed with nothing but a list of ingredients and a whole lot of enthusiasm. One such day, we decided to experiment with peanut butter, chocolate, and whatever else we could get our hands on from the pantry. As we stirred and tasted, we became engrossed in creating the “perfect” dessert.
Of course, our concoction didn’t always look perfect, but oh, the flavors! We made a mess, dropped chocolate chips, and definitely had some spilled peanut butter along the way, but we were having the best time. Fast forward all these years, and that childhood love for sweet creations hasn’t changed a bit. The No-Bake Chocolate Peanut Butter Mousse Dessert we’re making today captures those joyous moments perfectly. So, roll up your sleeves, and let’s create a sweet memory together!
Ingredients
Here’s what you’ll need to whip up this amazing dessert:
-
1 1/2 cups graham cracker crumbs
These create the perfect buttery base. For a gluten-free version, swap them out for gluten-free graham crackers or even almond flour. -
1/2 cup unsalted butter, melted
The melted butter helps bind the crumbs together. You can use coconut oil for a non-dairy option. -
1 cup creamy peanut butter
The star of our show! Opt for natural peanut butter for a healthier twist. If you prefer almond or cashew butter, they’ll work wonderfully too. -
1 cup powdered sugar
Sweetness brings everything together. If you’re watching your sugar intake, you can use powdered erythritol as a substitute. -
1 cup heavy whipping cream
This will be whipped to create that light, fluffy mousse texture. If you need a dairy-free version, try canned coconut cream. -
8 oz cream cheese, softened
It adds richness and stability to the mousse. For a healthier variation, consider using Greek yogurt. -
1 cup chocolate chips
Semi-sweet or dark, chocolate chips melt beautifully for our mousse. You could also use dairy-free chocolate chips for a vegan option. -
1/2 cup heavy cream (for ganache)
This will make a rich ganache to pour over. Again, feel free to substitute with coconut cream for a non-dairy version.
Step-by-Step Instructions
Now, let’s dive into the magic of cooking! Here’s how to bring it all together:
-
Prepare the crust:
- In a mixing bowl, combine the graham cracker crumbs with the melted butter. Mix until all crumbs are moistened. This is your first crust layer, and don’t skimp on the butter! It’s what gives it that delicious “sticky” texture that holds everything together.
- Press the mixture firmly into the bottom of a 9-inch pie dish (or dessert dish of your choice). Make sure to create an even layer using the back of a measuring cup or your fingers. The more evenly you press it, the better the base will hold its shape!
-
Make the mousse:
- In another bowl, beat the softened cream cheese and peanut butter together until smooth and creamy. You can’t skip this step! Properly mixing these two will ensure a luscious mousse without any lumps.
- Gradually add in the powdered sugar while continuing to beat until combined. Oh, that sweetness is heavenly!
- In a separate bowl, whip the heavy whipping cream until soft peaks form. This is where the magic happens—fluffiness is key for the perfect mousse. Use a hand mixer or a whisk, whichever you fancy. If using a whisk, just make sure to add plenty of love and elbow grease!
-
Fold everything together:
- Gently fold the whipped cream into the peanut butter mixture, using a rubber spatula. Be careful not to deflate that fluffy whipped cream. You want to maintain all that delicious airiness for ultimate indulgence!
- Once fully combined, pour the mousse over the prepared crust. Use a spatula to smooth it out evenly. Utter bliss is happening!
-
Chill:
- Place the pie dish in the refrigerator for at least 2 hours to let the mousse set. Trust me; the wait will be worth it! Nothing beats a cold slice of dessert on a warm day.
-
Prepare the ganache:
- While you wait, let’s make that luscious ganache! In a small saucepan, heat the remaining heavy cream over medium heat until it begins to simmer. Remove from heat and stir in the chocolate chips until melted and glossy. This simple trick will give you the best ganache. If it’s a bit thick, you can always add a splash more cream until it reaches your desired consistency.
-
Top it off:
- Once the mousse is set, pour the chocolate ganache over the top. Spread it gently to make sure every inch is covered in chocolaty goodness. For a little flair, you can sprinkle some extra crushed graham crackers on top for a delightful crunch.
-
Chill again:
- Return the dessert to the fridge for at least another 30 minutes to firm up the ganache. This extra time will allow everything to meld beautifully.
-
Serve and enjoy:
- Slice it up—don’t forget to use a warm knife for cleaner cuts! Serve chilled, and watch everyone’s eyes light up as they take their first bite!
Serving Suggestions
To plate this No-Bake Chocolate Peanut Butter Mousse Dessert, gently slice generous pieces and place them on dessert plates. A dollop of whipped cream and a sprinkle of crushed peanuts on top always makes for a gorgeous finish. Garnish with chocolate shavings for that extra touch of elegance. Let the beauty speak for itself!
Recipe Variations
- Nut-Free Version: Use sunflower seed butter in place of peanut butter and check for nut-free graham crackers.
- Dairy-Free Delight: Substitute cream cheese and heavy cream with vegan options like cashew cream or silken tofu to achieve a creamy texture.
- Extra Chocolate: Add melted chocolate directly to the mousse for a more intensive chocolate flavor.
- Fruit Layer: Incorporate fresh banana or raspberry layers to add a fruity twist between the mousse layers.
- Spicy Kick: A sprinkle of cayenne pepper or chili powder in the chocolate ganache can create a delightful surprise!
Chef’s Notes
You know, this dessert has become one of those go-to recipes for me. Anytime someone asks for a quick and impressive treat, this is my answer! I love how adaptable it is; you can play around with flavors and textures endlessly. Each time I make it, I remember that day in the kitchen with my mom, a reminder that sometimes the best recipes come from spontaneous moments. Plus, there’s always something special about a no-bake dessert—fewer dishes and quicker mess clean-up!
FAQs and Troubleshooting
1. Why is my mousse not setting?
If your mousse hasn’t set, it may need a bit more chilling time. Just be patient; sometimes, it needs a few extra hours!
2. Can I make this ahead of time?
Absolutely! This dessert stores beautifully in the fridge for up to two days. It’s perfect for prepping ahead for gatherings.
3. How can I prevent my cream from deflating?
When folding in whipped cream, use a gentle hand and spatula, making sure not to stir too vigorously. You want to keep that airy texture intact!
4. What’s the best way to slice the dessert?
Run a knife under warm water, dry it off, and slice. This technique gives you crisp, clean edges with each piece!
With this No-Bake Chocolate Peanut Butter Mousse Dessert, you’re not just cooking; you’re creating memories—one delicious bite at a time. So gather your ingredients, bring some friends over, and let’s get to creating something magical. Until next time, happy cooking and sweet indulgences!
PrintNo-Bake Chocolate Peanut Butter Mousse Dessert
A rich and creamy no-bake dessert that combines layers of chocolate mousse and peanut butter cream over a buttery graham cracker crust.
- Prep Time: 15 minutes
- Cook Time: 0 minutes
- Total Time: 150 minutes
- Yield: 8 servings 1x
- Category: Dessert
- Method: No-Bake
- Cuisine: American
- Diet: Nut-Free, Gluten-Free Option
Ingredients
- 1 1/2 cups graham cracker crumbs
- 1/2 cup unsalted butter, melted
- 1 cup creamy peanut butter
- 1 cup powdered sugar
- 1 cup heavy whipping cream
- 8 oz cream cheese, softened
- 1 cup chocolate chips
- 1/2 cup heavy cream (for ganache)
Instructions
- Prepare the crust: In a mixing bowl, combine the graham cracker crumbs with the melted butter. Mix until all crumbs are moistened. Press the mixture firmly into the bottom of a 9-inch pie dish.
- Make the mousse: In another bowl, beat the softened cream cheese and peanut butter together until smooth. Gradually add in the powdered sugar while continuing to beat until combined. In a separate bowl, whip the heavy whipping cream until soft peaks form.
- Fold everything together: Gently fold the whipped cream into the peanut butter mixture. Once fully combined, pour the mousse over the prepared crust.
- Chill: Place the pie dish in the refrigerator for at least 120 minutes to let the mousse set.
- Prepare the ganache: In a saucepan, heat the remaining heavy cream until it begins to simmer. Remove from heat and stir in the chocolate chips until melted.
- Top it off: Once the mousse is set, pour the chocolate ganache over the top and spread it out evenly.
- Chill again: Return the dessert to the fridge for at least another 30 minutes.
- Serve and enjoy: Slice it up and serve chilled with whipped cream and crushed peanuts.
Notes
For a gluten-free version, use gluten-free graham crackers. For a dairy-free version, substitute cream cheese and heavy cream with vegan options.
Nutrition
- Serving Size: 1 slice
- Calories: 400
- Sugar: 20g
- Sodium: 250mg
- Fat: 24g
- Saturated Fat: 10g
- Unsaturated Fat: 12g
- Trans Fat: 0g
- Carbohydrates: 40g
- Fiber: 2g
- Protein: 6g
- Cholesterol: 35mg
Keywords: no-bake dessert, chocolate mousse, peanut butter, easy dessert, gluten-free
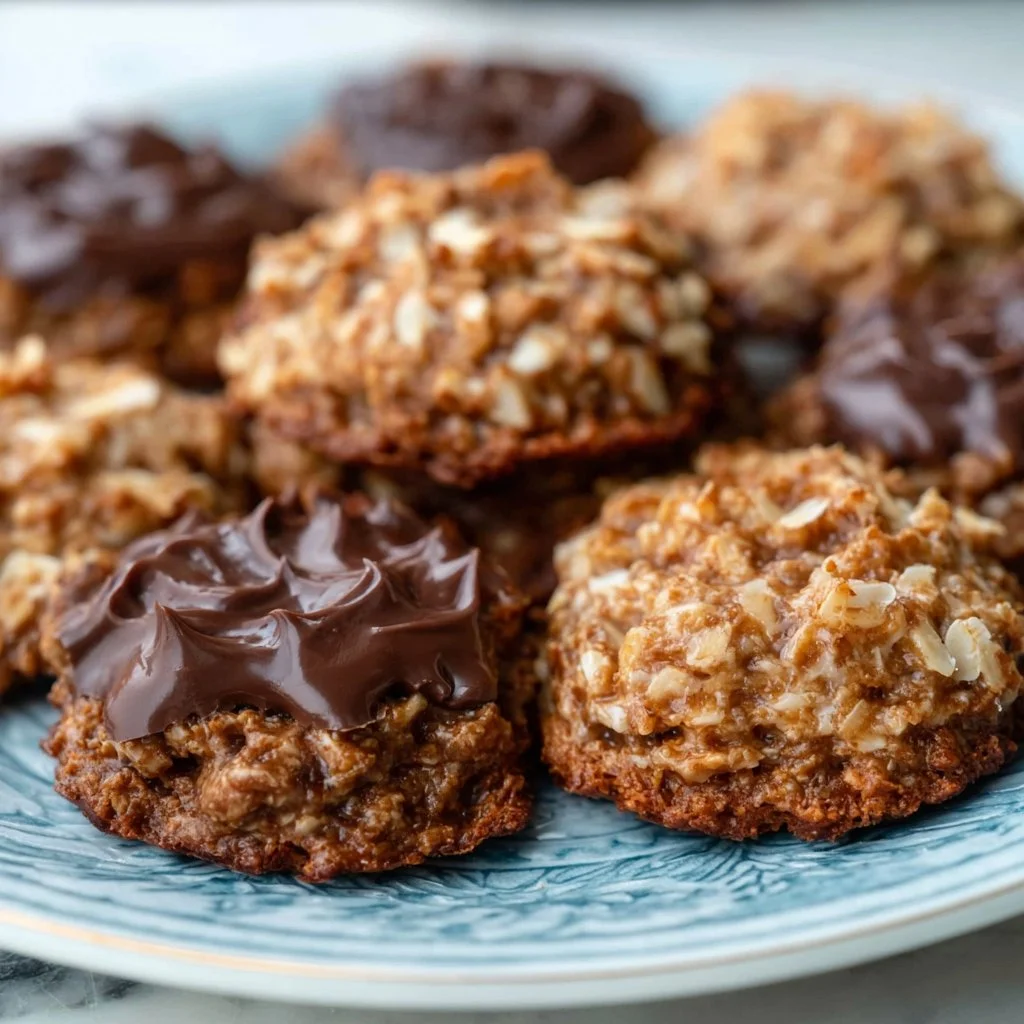
Easy No-Bake Keto Cookies (Low Carb & Delicious!)
Easy No-Bake Keto Cookies (Low Carb & Delicious!)
Hello, fellow foodies! Welcome back to my little corner of the culinary world, Ivory Apron. Today, we’re diving into a deliciously simple treat that’s all about flavor without the fuss—No-Bake Keto Cookies! If you’re following a low-carb lifestyle or just want a sweet pick-me-up without all the guilt, these cookies are both a game changer and a lifesaver.
Picture this: It’s a cozy afternoon, you’ve got your favorite playlist humming in the background, and you suddenly crave something sweet. But here’s the kicker—you don’t want to spend hours slaving away in the kitchen, and you certainly don’t want to turn on the oven in the heat of summer! That’s where these no-bake wonders come in. They’re super easy to whip up and boast ingredients that keep you on track while satisfying that sweet tooth.
These delightful cookies combine rich flavors and healthy fats, making them the perfect snack or dessert option. Plus, you can customize them to suit your taste buds, and they are totally kid-approved! So grab your apron (or just a mixing bowl if you prefer), and let’s create something scrumptious together!
Personal Story
You know, my love for no-bake desserts goes way back to my childhood. I vividly remember those long summer days spent in my grandmother’s kitchen. She had a knack for showing me just how enjoyable cooking can be, and one of her favorite treats was her famous no-bake chocolate oat cookies. The chocolate would melt in your mouth, sweetened just right with a hint of peanut butter.
We would often make a batch to share with family and friends, and honestly, it seemed like they were gone in an instant. It became our little summer tradition; the laughter, the mess, and the sweet smell of chocolate were all part of the experience. Fast forward to today, and while I’ve certainly refined the recipe a bit to fit my keto lifestyle, those warm, nostalgic feelings of joy and togetherness still inspire me to share these delightful No-Bake Keto Cookies with you.
Ingredients
Here’s what you’ll need to make these easy-peasy No-Bake Keto Cookies:
-
1 cup unsweetened almond butter
A creamy, rich base that complements our flavors. If you’re allergic to nuts, you can substitute it with sunflower seed butter or even tahini for a different twist! -
1/3 cup unsweetened cocoa powder
This adds that deep chocolate flavor we all love. Look for a good quality cocoa powder to really elevate your cookies. If you want a hint of sweetness, you can use carob powder instead! -
1/4 cup keto-friendly sweetener (like erythritol or stevia)
This will sweeten your cookies without the carbs! Experiment with different blends to find your perfect level of sweetness. You can use monk fruit sweetener here too! -
1/4 cup coconut oil, melted
Melted coconut oil helps bind everything together while adding a subtle flavor. You can easily replace this with unsalted butter if that’s more your style! -
1/2 teaspoon vanilla extract
A classic addition that brings warmth and depth. Don’t skip it—it makes all the difference! You can experiment with almond extract for a fun variation too. -
1/4 cup unsweetened shredded coconut
This adds a lovely texture and flavor! If you’re not a fan, you can leave this out or substitute it with chopped nuts for an extra crunch. -
1/4 cup sugar-free dark chocolate chips
Totally optional but recommended if you’re a chocolate lover! You could swap these for dried fruit like cranberries or chopped dates—just keep an eye on the carbs!
Step-by-Step Instructions
Ready to get started? Here’s how to whip up your No-Bake Keto Cookies in no time!
-
Gather Your Ingredients
Take a moment to measure out all your ingredients. This not only speeds up the process, but it also ensures you don’t forget anything. You’ll need a medium mixing bowl and a rubber spatula for folding everything together. -
Mix Wet Ingredients First
In your medium bowl, combine the almond butter, melted coconut oil, and vanilla extract. Stir them together until well incorporated. The almond butter should be creamy and smooth. This is where the magic starts! -
Add Dry Ingredients
Now, sprinkle in the unsweetened cocoa powder, keto-friendly sweetener, and shredded coconut. Use your spatula to fold the dry ingredients into the wet mixture gently. You should see a rich, chocolate-y batter starting to form.Chef Tip: If you’re finding the mixture too thick, feel free to add a splash of coconut milk to loosen it up.
-
Incorporate Chocolate Chips
Finally, fold in your sugar-free dark chocolate chips (if using). Make sure they are evenly distributed across your cookie mixture. You want that delicious burst of chocolate in every bite! -
Form the Cookies
Using a tablespoon, scoop out portions of the batter and place them onto a parchment-lined baking sheet. Flatten them slightly with the back of the spoon or your fingers to create a cookie shape.Chef Hack: Wet your hands with a little coconut oil for easier handling!
-
Chill in the Fridge
Pop your baking sheet in the fridge for at least 30 minutes to allow the cookies to set. This is the hardest part! Try not to eat all the batter (although I won’t tell if you sneak a bite!). -
Enjoy!
Once they’re firm, take them out and enjoy these delightful no-bake treats! Store any leftovers in an airtight container in the fridge for a quick go-to snack.
Serving Suggestions
To plate these cookies perfectly, simply arrange them on a rustic wooden board or a pretty plate. You can garnish with a sprinkle of shredded coconut or a drizzle of melted dark chocolate if you’re feeling fancy. They also pair wonderfully with a tall glass of almond milk or your favorite herbal tea—perfect for an afternoon treat.
Recipe Variations
-
Nut-Free Version: Substitute almond butter with sunflower seed butter for a nut-free alternative. This adds a new flavor profile while keeping it low-carb!
-
Chewy Texture: Add 1/4 cup of ground flaxseed or chia seeds for extra fiber and a bit of chewiness.
-
Spicy Twist: A pinch of cinnamon or cayenne pepper can make the flavor profile pop! This is a fun way to give them a bit of a kick.
-
Caramel Lovers: Drizzle in some sugar-free caramel sauce before chilling for that silky sweetness.
-
Nutty Crunch: Fold in some chopped pecans or walnuts for added crunch and healthy fats!
Chef’s Notes
Creating no-bake desserts became a sort of personal mission for me—not only do they save time, but they evoke a sense of nostalgia. Each time I whip up these cookies, I think back to those sweltering summer afternoons spent with my grandmother. It’s incredible how something so simple can carry such vibrant memories.
Over the years, I’ve played with the recipe to make it more versatile and appealing to a wider range of dietary preferences. It keeps evolving, just like my cooking journey, and every batch comes out a little different depending on what I’m feeling that day.
FAQs and Troubleshooting
1. Can I use a different nut butter?
Absolutely! Any nut butter will work, but make sure it’s creamy rather than chunky for the right texture.
2. What if my cookies are too crumbly?
If your cookies are crumbling apart, try adding a bit more melted coconut oil or almond butter. This will help them bind better.
3. How can I store these cookies?
Keep these cookies in an airtight container in the fridge for up to a week. They also freeze well if you want to keep a stash for later!
4. Can I omit the cocoa powder?
Yes, if you prefer a more classic cookie flavor, you can leave out the cocoa powder entirely and maybe add a bit more vaniller or coconut for flavor!
Nutritional Info (Optional)
Each No-Bake Keto Cookie contains approximately:
- Calories: 120
- Total Fat: 10g
- Net Carbs: 2g
- Protein: 4g
So there you have it! These easy No-Bake Keto Cookies are not just a delightful treat but a chance to create memories in the kitchen. Whether you’re indulging solo or sharing with friends, they’re bound to shine. Now, put on your apron, gather your ingredients, and let’s make something delicious together. Happy baking (or no-baking!), everyone!
PrintEasy No-Bake Keto Cookies
Deliciously simple no-bake cookies that are low-carb and perfect for satisfying your sweet tooth without guilt.
- Prep Time: 10 minutes
- Cook Time: 30 minutes
- Total Time: 40 minutes
- Yield: 12 cookies 1x
- Category: Dessert
- Method: No-Bake
- Cuisine: Keto
- Diet: Low Carb
Ingredients
- 1 cup unsweetened almond butter
- 1/3 cup unsweetened cocoa powder
- 1/4 cup keto-friendly sweetener (like erythritol or stevia)
- 1/4 cup coconut oil, melted
- 1/2 teaspoon vanilla extract
- 1/4 cup unsweetened shredded coconut
- 1/4 cup sugar-free dark chocolate chips (optional)
Instructions
- Gather your ingredients.
- Mix wet ingredients first: combine almond butter, melted coconut oil, and vanilla extract.
- Add dry ingredients: sprinkle in cocoa powder, keto sweetener, and shredded coconut.
- Incorporate chocolate chips (if using).
- Form the cookies: scoop portions onto a parchment-lined baking sheet.
- Chill in the fridge for at least 30 minutes to set.
- Enjoy! Store leftovers in an airtight container.
Notes
Feel free to customize with nut substitutes or additional flavors like cinnamon or chopped nuts.
Nutrition
- Serving Size: 1 cookie
- Calories: 120
- Sugar: 1g
- Sodium: 50mg
- Fat: 10g
- Saturated Fat: 8g
- Unsaturated Fat: 2g
- Trans Fat: 0g
- Carbohydrates: 2g
- Fiber: 1g
- Protein: 4g
- Cholesterol: 0mg
Keywords: no-bake, keto, cookies, low carb, dessert
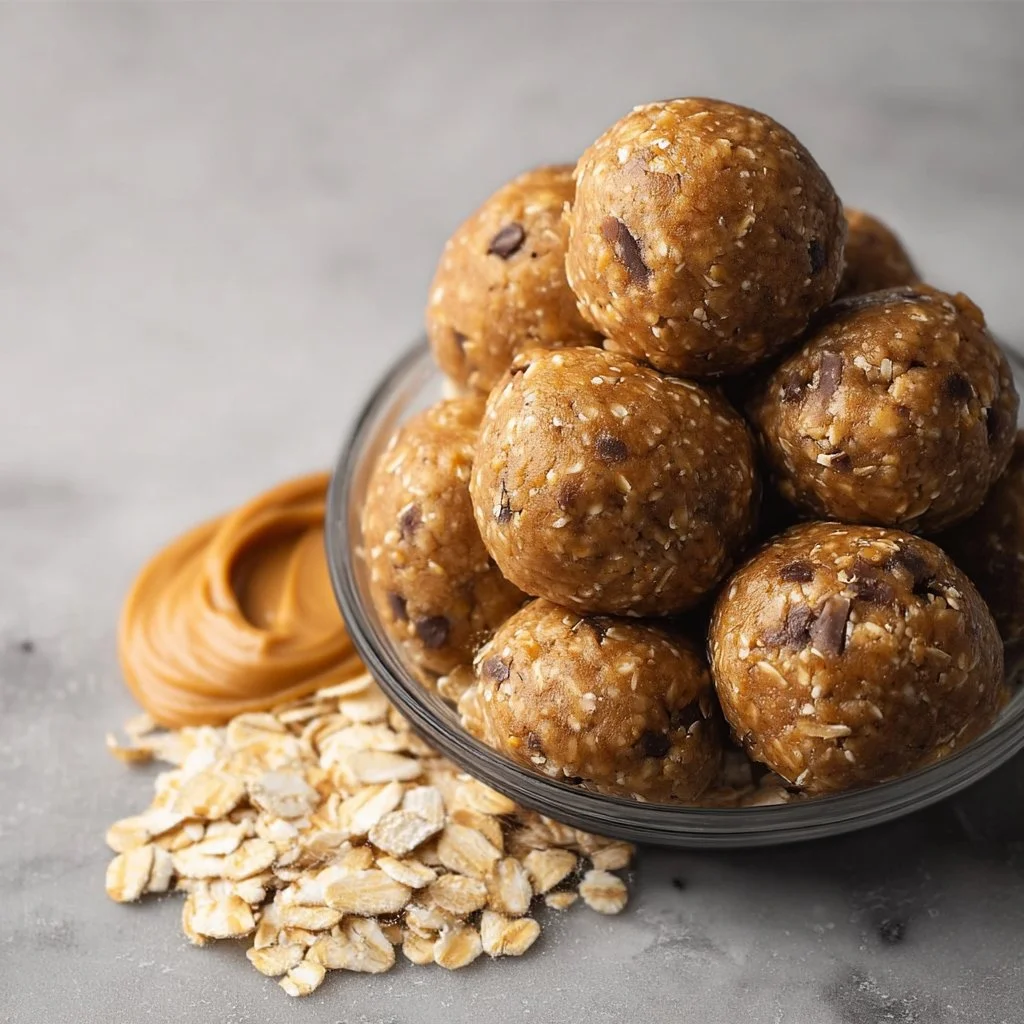
No-Bake Peanut Butter Energy Bites
# No-Bake Peanut Butter Energy Bites: A Delicious and Simple Treat

## Introduction

Hello, lovely foodies! Today, I'm thrilled to share a recipe that has honestly become one of my go-to snacks: No-Bake Peanut Butter Energy Bites. If you're like me and always looking for quick, nutritious, and downright delicious ways to satisfy your sweet tooth, then these babies are for you!

Picture this: a blissful afternoon spent in the kitchen, the sun streaming through the window, and the sound of a spoon gently scraping the sides of a mixing bowl. In just a few minutes, you've whisked together some pantry staples and crafted an energizing treat that’s perfect for those busy days when you need a little pick-me-up. Plus, these energy bites are entirely fuss-free—you don’t even need to turn on the oven!

Whether you're gearing up for a busy work week, packing snacks for the kids, or just craving a little indulgence, these No-Bake Peanut Butter Energy Bites score high on versatility. You can mix them up using different ingredients or just stick to the classic, like we will today. The best part? They’re incredibly forgiving! So grab your apron, and let’s dive into this delightful recipe that marries simplicity and flavor beautifully.

## Personal Story

I’ll never forget the first time I made these energy bites. It was one of those rainy afternoons where I just couldn’t muster the energy to bake anything fancy, but I craved something sweet. I rummaged through my pantry and found a few key ingredients: quick oats, peanut butter, and honey. The idea for No-Bake Peanut Butter Energy Bites popped up like a light bulb moment. As I combined everything, I felt a wave of nostalgia—the same warmth and love I felt when I watched my grandmother whip up her infamous no-bake cookies, which were always a hit among family and friends.

With a hint of excitement, I rolled the mixture into little balls, and as I did, I remembered all those cozy evenings spent with loved ones, sharing stories around the table, and sneaking bites of dessert before dinner was served. It's moments like those that remind me why I share recipes; they create connections and spark joy. So, let’s get back to this modern twist on my childhood delight: No-Bake Peanut Butter Energy Bites!

## Ingredients

To whip up these irresistible bites, you only need a handful of ingredients. Let’s take a look:

- **½ cup Quick Oats**
  Quick oats are a wonderful base for these energy bites, adding texture and heartiness. If you don’t have quick oats, rolled oats will work as well—just pulse them a bit in a blender or food processor to create a finer texture.

- **¼ cup Peanut Butter**
  The star ingredient! Creamy or crunchy, choose your favorite nut butter. For a nut-free version, sun butter or soy nut butter are excellent substitutes.

- **2 tablespoons Honey**
  This natural sweetener gives the bites a lovely stickiness and helps hold everything together. If you’re looking for a vegan option, feel free to swap it with maple syrup or agave nectar.

- **¼ cup Mini Chocolate Chips**
  Who says you can’t indulge a little? Mini chocolate chips add a delightful sweetness and fun texture. You can use dark chocolate for a richer flavor or leave them out altogether if you're feeling extra healthy!

## Step-by-Step Instructions

Alright, let’s get to the fun part! Here’s how to make these No-Bake Peanut Butter Energy Bites, step by step:

1. **Gather Your Ingredients**:
   Before you start, make sure to have all your ingredients on the counter. This way, you'll stay organized, and you'll streamline the whole process—no one wants to be rummaging around mid-recipe.

2. **Mixing Bowl Time**:
   In a mixing bowl, combine the **½ cup quick oats** and **¼ cup peanut butter**. Use a spatula or a wooden spoon to mix them together. You’ll want to get them nice and well combined. Don’t be afraid to use a bit of muscle—this is where the fun begins!

3. **Add the Honey**:
   Pour in the **2 tablespoons of honey** and mix everything until it’s nicely incorporated. The mixture will become sticky, but that’s exactly what we want! This sticky goodness will help in forming those perfect little bites.

4. **Chocolate Chips, Please**:
   Now, throw in the **¼ cup mini chocolate chips** and gently fold them into the mixture. Be generous! These little bites of chocolate bliss are what make these energy balls so special.

5. **Roll Into Bites**:
   Using your hands (don't forget to wash them first!), scoop out about a tablespoon of the mixture and roll it into a ball. Place it on a plate or parchment paper. Repeat until all the mixture is used up! Feel free to adjust the size based on your preferences—some days you just need a bigger bite, right?

6. **Chill Time**:
   Once you have all your energy bites rolled, pop them in the refrigerator for at least 30 minutes. This helps them firm up beautifully. If you’re running short on time, you can enjoy them right away, but they’re definitely better chilled!

7. **Enjoy**:
   After they’ve chilled, grab a few and enjoy them as a delightful snack, workout fuel, or even a sweet treat after dinner. They’re perfect for keeping your energy levels up throughout the day.

## Serving Suggestions

When it comes to serving these delicious bites, the simplest approach works best. Arrange them in a cute bowl or on a rustic wooden platter for a charming display. You can sprinkle a few extra mini chocolate chips on top to catch the eye, or you can even drizzle a bit of peanut butter over the top for that extra “wow” factor. They make for a fantastic snack option at parties or a surprise treat in a lunchbox!

## Recipe Variations

Want to mix it up a bit? Here are some fun variations to keep your energy bites exciting:

1. **Coconut Bliss**: Add shredded coconut to the mix for a tropical twist or roll the bites in coconut for an added fun texture!

2. **Nutty Buddy**: Incorporate some finely chopped nuts, like almonds or walnuts, for extra crunch.

3. **Swap the Nut Butter**: Try almond butter, cashew butter, or even tahini for a different flavor profile.

4. **Dried Fruit Delight**: Toss in some dried cranberries, raisins, or even chopped apricots for a sweet and chewy surprise.

5. **Spice It Up**: A pinch of cinnamon or a dash of vanilla extract can take the flavor to a whole new level!

## Chef’s Notes

These No-Bake Peanut Butter Energy Bites have evolved over the years in my kitchen. Originally, they started as a simple after-school snack for my kids. But I soon realized they were so delightful that I needed to share them with everyone! I’ve experimented with so many ingredients—from protein powders to flaxseeds, and let me tell you, you really can’t go wrong!

Sometimes, I find myself sneaking a few right after a workout or even mid-afternoon when the sweet cravings kick in. They’ve become my secret weapon in keeping energy levels up and maintaining a positive mood. Who knew that a little creation could bring so much joy?

## FAQs and Troubleshooting

**Q1: My energy bites are too sticky; how can I fix this?**
If your mixture is too sticky to roll, try adding a bit more oats or a sprinkle of powdered sugar to help firm things up.

**Q2: Can I freeze these energy bites?**
Absolutely! You can store them in an airtight container in the freezer for up to three months. Just thaw them for a bit before enjoying!

**Q3: How can I make these energy bites gluten-free?**
Make sure to use certified gluten-free oats to keep this recipe safe for everyone!

**Q4: What if I don’t like peanut butter?**
No worries! Any nut or seed butter will work perfectly in this recipe, so feel free to experiment with what you have on hand.

## Nutritional Info

While I won’t provide specific numbers (since they can vary based on brands and exact quantities), these No-Bake Peanut Butter Energy Bites pack a punch of healthy fats, fiber, and protein, making them an excellent choice for energy and satiation.

---

And there you have it, my fabulous foodies! Your very own No-Bake Peanut Butter Energy Bites, crafted with love and joy. Remember, cooking is all about having fun, sharing stories, and creating connections. I can’t wait to hear how they turn out for you—so gather your friends, roll up your sleeves, and create some culinary magic in your kitchen. Happy snacking!
No-Bake Peanut Butter Energy Bites
Easy and nutritious No-Bake Peanut Butter Energy Bites perfect for snacks or a quick energy boost.
- Prep Time: 15 minutes
- Cook Time: 0 minutes
- Total Time: 30 minutes
- Yield: 12 servings 1x
- Category: Snack
- Method: No-Bake
- Cuisine: American
- Diet: Vegetarian
Ingredients
- ½ cup Quick Oats
- ¼ cup Peanut Butter
- 2 tablespoons Honey
- ¼ cup Mini Chocolate Chips
Instructions
- Gather your ingredients.
- Mixing bowl time: Combine the oats and peanut butter.
- Add the honey and mix until incorporated.
- Throw in the mini chocolate chips and fold into the mixture.
- Roll into balls and place on a plate.
- Chill for at least 30 minutes in the refrigerator.
- Enjoy as a snack or energy boost!
Notes
Feel free to adjust the size of the energy bites. They can be frozen for up to three months.
Nutrition
- Serving Size: 1 bite
- Calories: 100
- Sugar: 6g
- Sodium: 50mg
- Fat: 5g
- Saturated Fat: 1g
- Unsaturated Fat: 4g
- Trans Fat: 0g
- Carbohydrates: 14g
- Fiber: 2g
- Protein: 3g
- Cholesterol: 0mg
Keywords: snacks, energy bites, no-bake, peanut butter, healthy treats