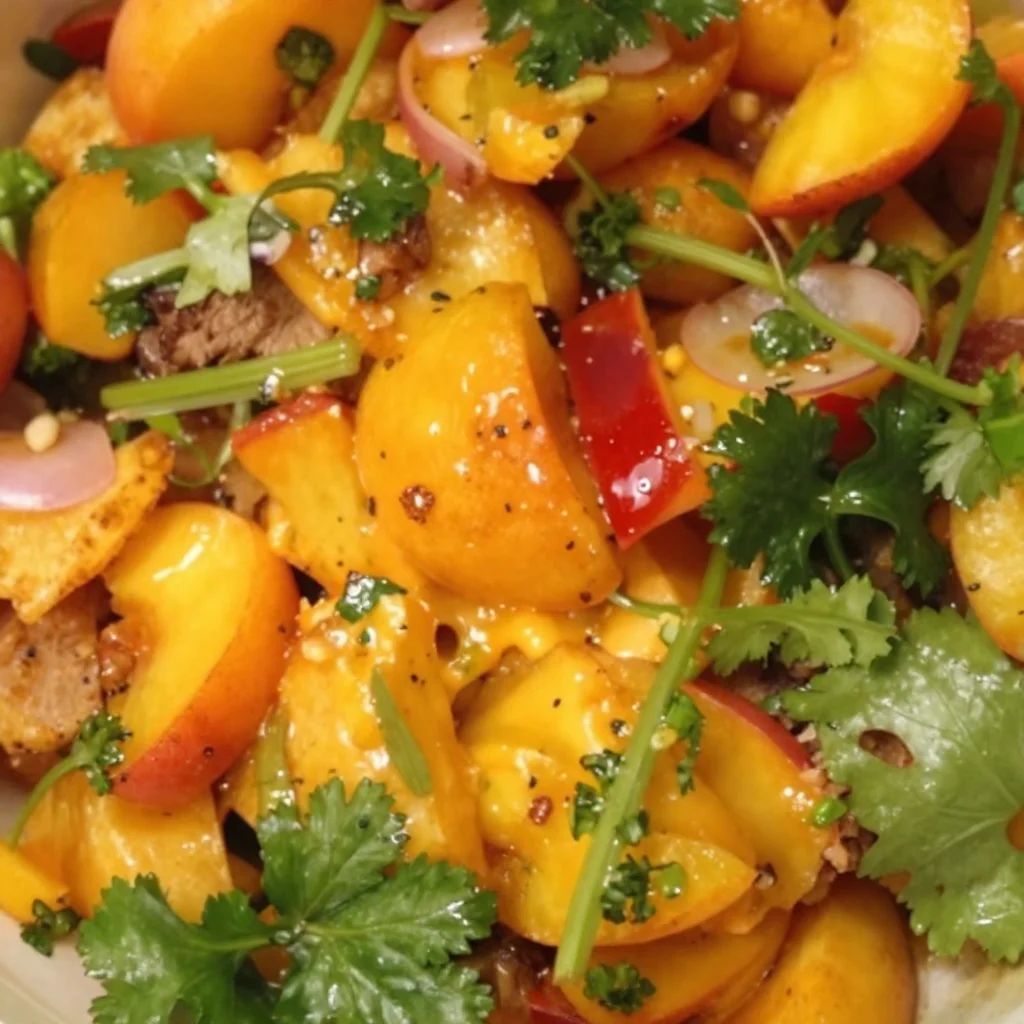
Nectarine Salsa
Nectarine Salsa: A Sweet & Spicy Adventure for Your Palate
Hello, fellow food lovers! Welcome back to my culinary corner, where we celebrate the joy of cooking together. Today, I’m excited to share a delightful recipe that bursts with flavor and color—Nectarine Salsa! This refreshing and zesty salsa is perfect for summer barbecues, taco nights, or just enjoying with tortilla chips on a sunny afternoon.
What I love about this dish is not just its vibrant taste but also the memories it brings back. I remember the first time I made this salsa at a family gathering. It was one of those steamy summer evenings, filled with laughter, delicious food, and a warm breeze. I had a couple of friends over, and we decided to fire up the grill. As we prepped the meal, I wanted something that could stand out as more than just a usual side. So, after a quick rummage through my fridge, I spotted some juicy nectarines and bursting tomatoes. Voilà! Nectarine Salsa was born.
So, let’s dive into this easy-to-make recipe that captures the essence of summer on your plate. Get your aprons on, and let’s have some fun in the kitchen!
My Nectarine Salsa Memory: A Family Gathering
It was a sun-drenched afternoon at my aunt’s house, and the backyard was a flurry of activity. Children were running about, laughter echoed, and the smell of grilled chicken wafted through the air. As we gathered around the dining table, I proudly presented my first attempt at making Nectarine Salsa.
I remember stepping outside, feeling the warmth on my back, and nervously setting the bowl down next to the grilled goodies. I was unsure how the flavors would be received, but once the first scoop was taken, the faces around the table lit up with delight! My uncle declared it “the perfect summer accompaniment”, and I felt a rush of joy—who knew? The sweet nectarines mixed with the heat of the chili and the crunch of fresh veggies could create such a buzz!
That day marked a special occasion for me, as it was one of the first times I felt truly proud of a dish I had created. Since then, it has become a staple at every family gathering, enjoyed by everyone and always devoured within minutes. Now, it’s time for you to create some memories of your own with this delicious Nectarine Salsa!
Ingredients You’ll Need
To whip up this vibrant salsa, gather the following ingredients:
-
2-3 nectarines, diced (about 2 cups)
Sweet, juicy nectarines are the star here. Look for ones that yield slightly to gentle pressure for optimal ripeness. If you can’t find nectarines, peaches are a fantastic substitution! -
1 tomato, diced (about 1 cup)
A ripe tomato adds freshness. You can use Roma or vine-ripened tomatoes for best flavor. For a low-carb twist, consider swapping with diced cucumber. -
1 cup cilantro, minced
This herb brings a burst of freshness. If cilantro isn’t your friend, try swapping it with finely chopped mint for a unique flavor. -
1/4 cup shallot, diced (or substitute red onion)
Shallots provide a milder taste than onions. If you relish a bolder flavor, use red onion. Sweet onion also works well if you prefer something less sharp. -
1 bird’s eye chili, seeds removed, finely diced
Also known as Thai red chilies, they offer a spicy kick! For those who prefer milder salsa, jalapeños are a great substitute, or simply leave them out altogether. -
1 tablespoon lime juice (plus more to taste)
Lime juice adds brightness. Freshly squeezed is always best. If you’re in a bind, bottled lime juice will suffice. -
1 teaspoon honey or sugar
Just a touch of sweetness balances the acidity. For a vegan version, stick with agave syrup.
Step-By-Step Instructions
Now that you have your ingredients ready, let’s dive into making your Nectarine Salsa! Follow along with these step-by-step instructions, and don’t forget to taste as you go!
-
Prep Your Ingredients
Start by washing your fruits and vegetables under cold water. This ensures any dirt or pesticides are washed away. Slice the nectarines in half, remove the pits, and dice them into small, even pieces. Don’t stress about perfection—the rustic feel adds charm! -
Dice the Tomato
Next, grab your tomato and cut out the stem. Dice it just like you did with the nectarines! If you’re feeling fancy, you can even remove the seeds for a tidier salsa, but it’s not necessary if you don’t mind a bit of extra juiciness. -
Finely Chop the Cilantro
Cilantro can be a polarizing herb, but it’s essential in this recipe. Rinse it well, and then chop it roughly before mincing it finely. The smaller the pieces, the more flavor it releases! -
Chop the Shallot
Peel and mince the shallot. If you find shallots too mild, slicing a red onion into small pieces will work just as well. Take care to avoid any tears—try chilling the onion for a while or cutting it under running water! -
Prepare the Chili
For some heat, take your bird’s eye chili, slice it in half, and carefully remove the seeds. Mince it finely. More heat means more spice, so adjust according to your taste! If you’re unsure, start with half the chili to test. -
Mix It Up!
In a mixing bowl, combine the diced nectarines, tomato, minced cilantro, chopped shallot, and minced chili. Use a spatula or spoon to gently fold the ingredients together while being careful not to mash the nectarines. -
Dress It Up
Add in the lime juice and honey (or sugar). Stir to combine everything, allowing the flavors to meld beautifully. Give it a taste and adjust with more lime juice or honey as needed. You want a balance of sweet, tangy, and spicy flavors! -
Let It Chill
For the best flavor, let your salsa sit in the fridge for about 30 minutes before serving. This resting period allows all the flavors to blend. Just like a good glass of wine, time makes it better! -
Final Taste Test
Right before serving, give it one last taste to see if it needs any additional lime juice or salt. Adjust as necessary, and then it’s ready to rock on your table!
Serving Suggestions
Your Nectarine Salsa is ready to shine! Serve it in a vibrant bowl with colorful tortilla chips on the side for some crunch. If you’re feeling festive, you can pair it with grilled chicken or fish, or even spoon it over tacos or burrito bowls for a punch of fresh flavor. Presentation is everything, so don’t forget to sprinkle some extra cilantro on top for that “wow” factor!
Recipe Variations
Let’s shake things up! Here are a few creative twists to keep your Nectarine Salsa exciting:
- Spicy Pineapple Delight: Swap out nectarines for diced fresh pineapple for a tropical twist.
- Chunky Avocado Salsa: Add in diced avocado for a creamy texture and extra health benefits. Just be sure to eat it right away to prevent browning!
- Sweet and Savory: Toss in some crumbled feta cheese for a contrasting flavor.
- Herby Infusion: Experiment with other herbs such as basil or parsley to change up the flavor profile.
- Fruit Fiesta: Combine nectarines with additional fruits like mango or kiwi for a colorful mix!
Chef’s Notes
This Nectarine Salsa is one of those magical recipes that evolves every time I make it. Depending on what’s in season or available, it turns into a new creation each time. I once added some diced bell peppers, and it gave the salsa a fun crunch! It’s incredible how something so simple can be dressed up in so many ways.
Oh, and I have to share this—a friend of mine once tried to impress a date by making this salsa but accidentally added too much heat! Let’s just say, laughter filled the air, alongside their search for milk to cool things down. We still chuckle about that fiery evening every time he brings it up!
FAQs and Troubleshooting
1. My salsa is too spicy! What can I do?
If your salsa turns out too spicy, add more diced tomatoes and nectarines to dilute the heat. A dash of sugar can also help counteract the spice.
2. Can I make this salsa ahead of time?
Absolutely! This salsa can be made a day in advance. Just store it in an airtight container in the fridge. Just remember that the flavors meld and develop over time, but the fresh texture is always best eaten within 2-3 days!
3. What if I can’t find nectarines?
No problem! Peaches or even a combination of ripe mango and pineapple can work wonders for a delightful twist.
4. How can I store leftover salsa?
Store any leftovers in a sealed container in the refrigerator for up to three days. The salsa may soften as it sits, but the flavor will still be delicious! Just give it a gentle stir before serving.
Nutritional Info
While I don’t dive too deep into nutritional info typically, I know many of you care about that! This Nectarine Salsa is not only refreshing but also packed with vitamins and antioxidants, thanks to the fresh fruits and veggies. It’s naturally low in calories and a great addition to any healthy meal!
And there you have it—a delightful Nectarine Salsa that brings sunshine and flavor to your table! I hope it inspires you to gather your friends or family and create lasting memories just like I did. So tie on your apron, get cooking, and let’s keep spreading the love through good food. Happy cooking!
PrintNectarine Salsa

A delightful and refreshing salsa bursting with flavor, perfect for summer barbecues or as a side with tortilla chips.
- Prep Time: 15 minutes
- Cook Time: 0 minutes
- Total Time: 15 minutes
- Yield: 4 servings 1x
- Category: Appetizer
- Method: Mixing
- Cuisine: Mexican
- Diet: Vegan
Ingredients
- 2–3 nectarines, diced (about 2 cups)
- 1 tomato, diced (about 1 cup)
- 1 cup cilantro, minced
- 1/4 cup shallot, diced (or substitute red onion)
- 1 bird’s eye chili, seeds removed, finely diced
- 1 tablespoon lime juice (plus more to taste)
- 1 teaspoon honey or sugar
Instructions
- Prep your ingredients by washing the fruits and vegetables under cold water.
- Dice the tomato by cutting out the stem and dicing it like the nectarines.
- Finely chop the cilantro, rinsing it well before mincing.
- Chop the shallot by peeling and mincing it, or use red onion if preferred.
- Prepare the chili by slicing it in half, removing seeds, and mincing it finely.
- Mix the diced nectarines, tomato, cilantro, shallot, and chili in a mixing bowl.
- Dress it up by adding lime juice and honey (or sugar) and mixing well.
- Let it chill in the fridge for about 30 minutes for flavors to meld.
- Final taste test before serving, adjusting lime juice or salt as needed.
Notes
Serve with tortilla chips or as a topping for grilled chicken or fish. Adjust ingredients to personal taste.
Nutrition
- Serving Size: 1 serving
- Calories: 180
- Sugar: 10g
- Sodium: 5mg
- Fat: 1g
- Saturated Fat: 0g
- Unsaturated Fat: 1g
- Trans Fat: 0g
- Carbohydrates: 40g
- Fiber: 4g
- Protein: 3g
- Cholesterol: 0mg
Keywords: nectarine salsa, summer recipe, fresh salsa, vegan appetizer, colorful salsa
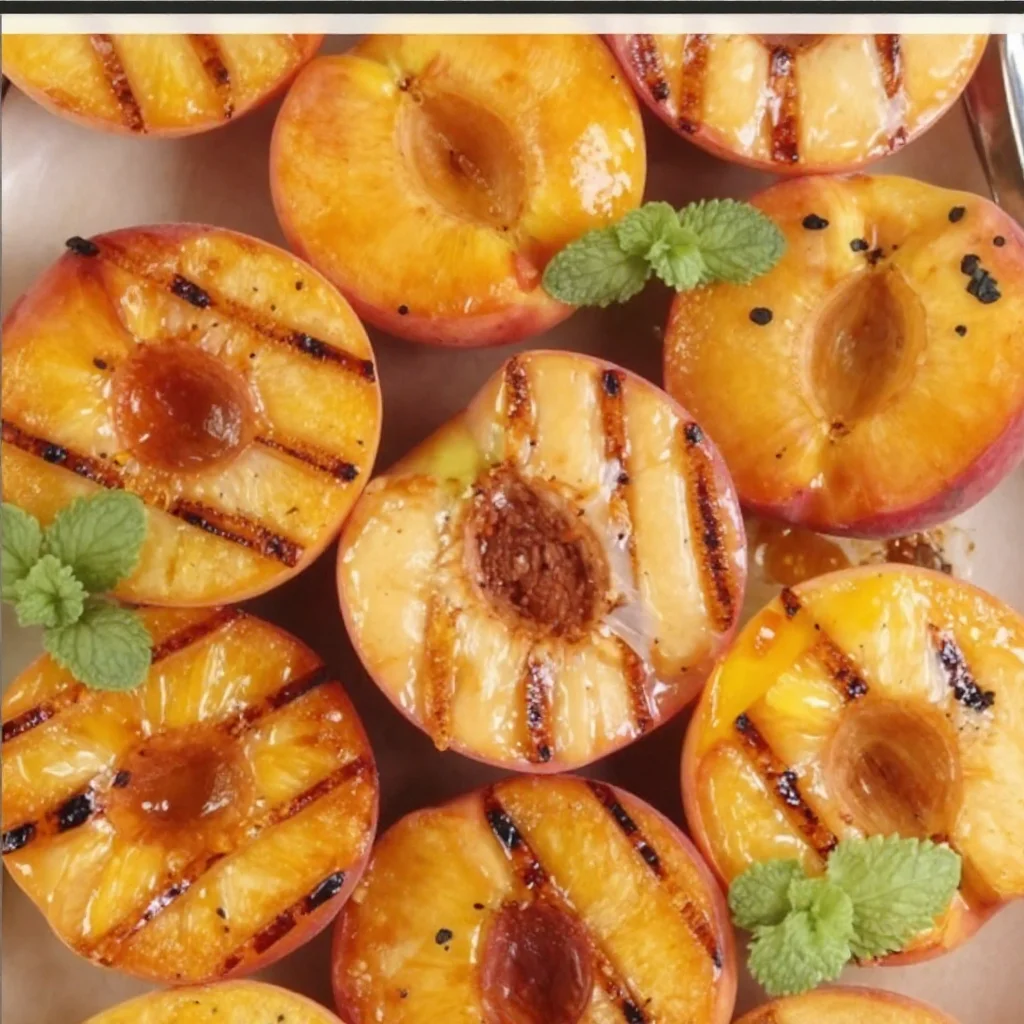
Minute Grilled Cinnamon Peaches: Quick Summer Treat
Grilled Peaches with Cinnamon: A Sweet Summer Delight
Hello and welcome back, foodie friends! Today, we’re stepping into a world of sweet indulgence with a delightful recipe that embodies the essence of summer: Grilled Peaches with Cinnamon. If you’re a fan of simple, delicious desserts that look like you’ve embraced your inner gourmet chef, you’re in for a treat!
Imagine this: the sun is shining, you’re outside enjoying a leisurely afternoon, and the smell of peaches caramelizing on the grill fills the air. This isn’t just a recipe; it’s a celebration of summer flavors that will transform how you enjoy one of nature’s sweetest offerings. Grilling brings out the natural sugars in the fruit, creating little bites of heaven that are juicy and tender, with a touch of warmth and spice from the cinnamon. A scoop of vanilla ice cream on top, or a drizzle of caramel sauce, takes this dish over the top!
Not only is this recipe incredibly easy to whip up, but it also allows you to share a beautiful dish that looks like you put in hours of effort — and trust me, nobody needs to know just how simple it really is! So grab your apron, and let’s get cooking!
A Memory of Peaches
Let me take you back to a summer evening spent at my grandparents’ house in the countryside. The air was fragrant with blooming jasmine, and the sun was dipping below the horizon, painting the sky in shades of pink and orange. My grandmother would gather all of us kids around her little charcoal grill in the backyard, and we’d line up as she skewered fresh fruits. That’s when I first tasted grilled peaches.
She would coat them lightly with olive oil and sprinkle on cinnamon, placing them directly on the hot grill. As the peaches cooked, we could hardly contain our anticipation, the sweet aroma wafting through the air, mingling with the sounds of laughter and summer insects. When those peaches came off the grill, they were soft and slightly charred, and we’d scoop them up with vanilla ice cream. Every bite was pure bliss, a moment of pure summer joy.
That memory has always stayed with me, a reminder that the simplest ingredients can create the most meaningful experiences. So, let’s recreate that magic and make our own grilled peach memories!
Ingredients
Here’s what you’ll need to bring this sweet summer creation to life:
-
4 ripe peaches
Choose peaches that give slightly when pressed; they should be ripe but not overly soft. If you can’t find peaches, nectarines make a great substitute too! -
2 tablespoons olive oil
A high-quality extra virgin olive oil adds richness and enhances the fruit’s natural sweetness. You can also use melted coconut oil for a unique flavor twist. -
1 teaspoon ground cinnamon
This spice adds warmth and a cozy aroma to your peaches. If you want to get adventurous, consider trying cardamom or nutmeg for a different flavor profile. -
2 tablespoons brown sugar
The brown sugar caramelizes beautifully on the grill, enhancing the sweetness of the peaches. If you’re looking for a lighter option, you can replace it with honey or maple syrup. -
Optional: ice cream or caramel sauce for serving
A scoop of creamy vanilla ice cream or a drizzle of rich caramel sauce elevates this dish to pure indulgence. Go for dairy-free ice cream if you want to keep it vegan!
Step-by-Step Instructions
Now, let’s dive into the cooking! Follow these steps for perfectly grilled peaches:
-
Prepare the Peaches
Start by washing the peaches under cold water. Dry them gently, then cut each peach in half, removing the pit. If you’re using particularly ripe peaches, be careful with your knife; they should yield easily but still hold their shape. -
Preheat the Grill
Heat your grill to medium-high heat. If you’re using a charcoal grill, let the coals settle until they’re glowing red-hot. A well-prepped grill is crucial for achieving those perfect grill marks and caramelized flavors. -
Create the Mixture
In a small bowl, whisk together the olive oil, cinnamon, and brown sugar. This mixture should form a paste that lightly coats the peach halves. It’s a flavor bomb and will enhance the caramelization process. -
Brush the Peaches
Take a pastry brush and generously brush the olive oil mixture onto the cut sides of each peach half. Make sure to coat them well, as this step is key to flavor and caramelization. -
Grill Time
Place the peaches cut side down on the grill. Grill for about 3-4 minutes until you see those lovely grill marks start to form. Keep an eye on them; you want them to soften without falling apart! -
Flip and Grill Again
Carefully flip the peaches over using tongs or a spatula. Grill for another 2-3 minutes. This allows the olive oil and sugar mixture to caramelize beautifully. You’ll know they’re ready when they’re fragrant and slightly soft to the touch. -
Remove and Let Cool
Once done, remove the peaches from the grill and place them on a plate. Give them a few moments to cool slightly; they’ll be steaming hot! -
Serve
If you’ve chosen to use ice cream or caramel sauce, go ahead and serve the grilled peaches warm alongside a scoop of ice cream or drizzle caramel over the top. You can also sprinkle some extra cinnamon if you feel like it.
Tip: Make sure to gather your friends or family around. This dish is all about sharing joy and creating memories!
Serving Suggestions
When it comes to plating, simplicity is key. You want to showcase the gorgeous golden-brown grill marks and the lusciousness of the peaches. Place the warm grilled halves on a vibrant plate, allowing the juices to pool slightly. Add a generous scoop of ice cream right in the center, and a drizzle of caramel sauce over it all. A sprig of mint or a dusting of additional cinnamon elevates the presentation, making it feel extra special — all without too much fuss.
Recipe Variations
Want to mix things up a bit? Here are some fun variations to try:
-
Balsamic Grilled Peaches: Drizzle some balsamic glaze over the peaches before grilling for a tangy contrast.
-
Spiced Pecans or Walnuts: Add chopped and toasted nuts on top for a delicious crunch. It adds texture and complements the sweetness beautifully.
-
Honey Drizzle: Replace sugar with a drizzle of honey if you want a more natural sweetener.
-
Minty Twist: Add finely chopped mint leaves as a topping for a refreshing flavor boost that brightens the dish.
-
Flavored Ice Cream: Experiment with different ice cream flavors like cinnamon, caramel, or coconut for a unique taste experience!
Chef’s Notes
This recipe is truly a reflection of the beauty of seasonal cooking. My own grilling adventure with peaches has evolved over the years, from just dessert to becoming a centerpiece at summer cookouts. I often find myself experimenting with spices and toppings, and it never ceases to amaze me how versatile grilled peaches can be.
I once made this dish for a backyard barbecue, and unexpectedly, a close friend ended up at the hospital that day! It was a wild adventure, and I ended up serving grilled peaches as a dessert to all our other friends while regularly checking my phone for updates about our friend. It brought laughter and lightness to the situation, reminding me that good food can create joy even in challenging moments.
FAQs and Troubleshooting
1. What’s the best way to tell if peaches are ripe?
Look for peaches that give slightly to pressure. They should be fragrant and have a nice golden hue. If they’re hard, let them sit at room temperature until they soften.
2. My peaches fell apart while grilling! Tips?
Overripe peaches can be tricky! Next time, choose slightly firmer peaches, and handle them gently when flipping to keep the halves intact.
3. Can I make this recipe ahead of time?
While grilled peaches are best served fresh, you can prep them ahead of time by cutting and coating them, then grilling just before serving.
4. How do I store leftovers?
If you have leftovers, store them in the refrigerator in an airtight container for up to 2 days. Gently reheat them in a microwave or on the grill to enjoy again!
Nutritional Info
While I don’t usually add nutritional info, here’s a little insight: Peaches are rich in vitamins A and C, and fiber, making them a healthy dessert option. Paired with ice cream, you get an indulgent treat, so enjoy every bite mindfully!
With every grilled peach you make, you’re not just serving dessert — you’re sharing a piece of summer and creating warm memories. Let’s gather around the table and make moments that matter, one delicious bite at a time. Happy grilling, friends! 🍑✨
PrintGrilled Peaches with Cinnamon

A simple and delicious dessert featuring grilled peaches caramelized with cinnamon and served warm, perfect for summer indulgence.
- Prep Time: 10 minutes
- Cook Time: 10 minutes
- Total Time: 20 minutes
- Yield: 4 servings 1x
- Category: Dessert
- Method: Grilling
- Cuisine: American
- Diet: Vegetarian
Ingredients
- 4 ripe peaches
- 2 tablespoons olive oil
- 1 teaspoon ground cinnamon
- 2 tablespoons brown sugar
- Optional: ice cream or caramel sauce for serving
Instructions
- Prepare the peaches by washing them and cutting in half, removing the pit.
- Preheat the grill to medium-high heat, ensuring coals are glowing if using charcoal.
- Create the mixture by whisking together olive oil, cinnamon, and brown sugar in a small bowl.
- Brush the mixture onto the cut sides of the peach halves with a pastry brush.
- Grill the peaches cut side down for about 3-4 minutes until grill marks form.
- Flip the peaches and grill for another 2-3 minutes until fragrant and soft.
- Remove the peaches from the grill and let cool slightly on a plate.
- Serve warm with ice cream or caramel sauce and enjoy!
Notes
Make sure to gather friends and family around to share this delightful dessert!
Nutrition
- Serving Size: 1 peach half
- Calories: 180
- Sugar: 15g
- Sodium: 0mg
- Fat: 8g
- Saturated Fat: 1g
- Unsaturated Fat: 7g
- Trans Fat: 0g
- Carbohydrates: 24g
- Fiber: 2g
- Protein: 2g
- Cholesterol: 0mg
Keywords: grilled peaches, summer dessert, cinnamon peaches, easy dessert
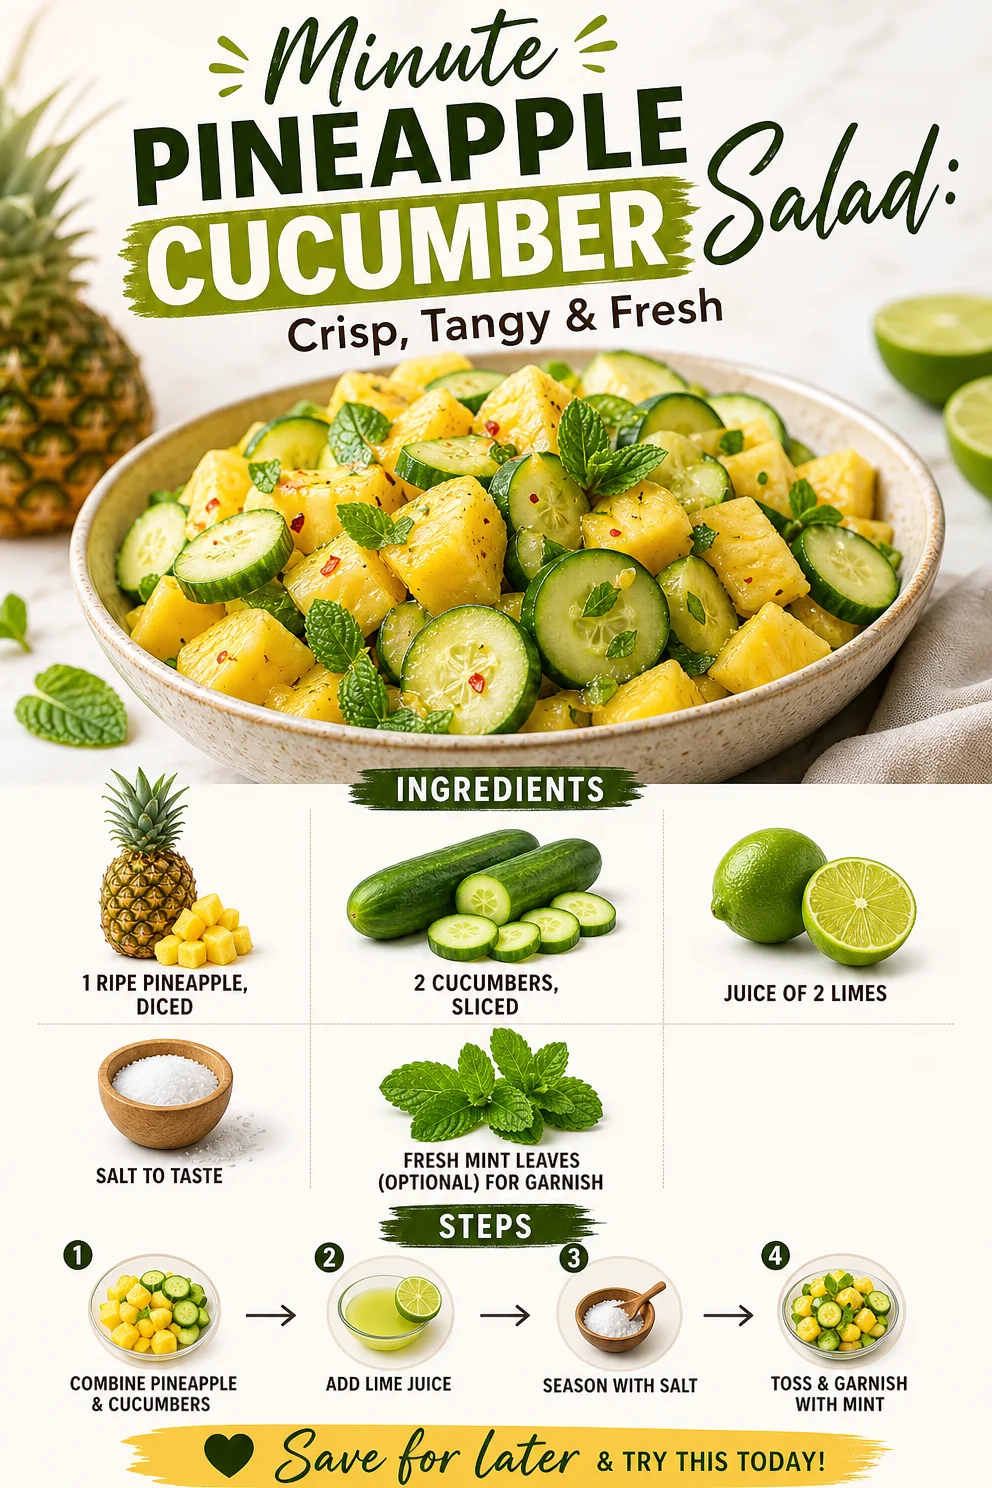
Minute Pineapple Cucumber Salad: Crisp, Tangy & Fresh
Refreshing Pineapple Cucumber Salad
Hello, fellow food lovers! Today, I’m thrilled to share one of my go-to summer staples that’s as refreshing as a cool breeze on a hot day: Pineapple Cucumber Salad. This vibrant dish combines the sweetness of ripe pineapple with the crisp, cool crunch of cucumbers, all brightened up with a zesty lime dressing. Perfect for summer barbecues, family picnics, or simply to enjoy on a lazy afternoon, this salad brings a burst of flavor to any table. So grab your apron, and let’s chop, mix, and have some fun in the kitchen together!
Personal Story
Growing up, my summers were filled with vivid colors, laughter, and, of course, food. One particular memory that always comes to mind is the annual family picnic at the local park. My aunts would bring their famous dishes, turning the picnic blanket into a feast fit for royalty. But my favorite was always the fresh pineapple cucumber salad made by my grandmother. She had a knack for combining simple ingredients into something magical. As we sat under the shade of the old oak tree, the sweet and tangy salad was the shining star amidst tempting burgers and sizzling sausages. With each bite, I felt transported back to those sun-soaked days—and I cherished the laughter and stories shared over a perfectly tossed bowl of this vibrant salad. Now, every time I make this dish, I’m reminded of those beautiful moments, and I love sharing it with friends and family!
Ingredients
Before we dive into the cooking, let’s gather our ingredients. You’ll only need a few fresh staples for this salad, so let’s get started:
-
1 ripe pineapple, diced
A perfect choice when fully ripe—a bright yellow color and a fragrant smell! If fresh pineapple isn’t available, feel free to use canned pineapple in juice, just drain it well for the best flavor. -
2 cucumbers, sliced
These add a lovely crunch and hydration to our salad. You can use any type of cucumber you prefer—English cucumbers are great for their thin skin, while Persian cucumbers are known for sweetness! -
Juice of 2 limes
The zesty kick that elevates the entire dish. If you’re out of limes, lemon juice can be a great substitute in a pinch. -
Salt to taste
A little salt enhances the natural flavors and sweetness of the fruits. Don’t skip this; it makes all the difference! I usually opt for kosher salt for its texture. -
Fresh mint leaves (optional) for garnish
If you have mint on hand, it’s a wonderful addition that adds a refreshing note. If you want to switch it up, try basil or even cilantro for a different vibe!
Step-by-Step Instructions
Now that we have our ingredients ready, let’s get cooking! This salad is so simple that you’ll feel like a kitchen wizard in no time.
-
Prep the Pineapple
Start by cutting the top and bottom off the pineapple to create a stable base. Stand it upright and carefully slice away the outer peel, following the contours of the fruit. Cut it into quarters, remove the core, and chop into bite-sized pieces. Pro tip: Use a serrated knife for smoother cuts, and always ensure your pineapple is fresh for the sweetest flavor! -
Slice the Cucumbers
Next, take your cucumbers and wash them thoroughly. You can leave the skin on for that gorgeous green pop and added nutrients, or peel them if desired. Slice them into thin rounds or even half-moons for added texture. I love using a mandoline for uniform slices, but a sharp knife works perfectly too! -
Juice the Limes
Squeeze the juice from your limes into a small bowl. Make sure to catch any seeds—nobody wants a surprise crunch! You can also use a citrus juicer for maximum juice extraction. The fresh juice adds brightness that complements the sweetness of the fruit beautifully. -
Mix It All Together
In a large bowl, combine your diced pineapple and sliced cucumbers. Pour the lime juice over the mixture, sprinkle with salt, and gently toss until everything is well combined. Remember, go easy on the mixing; we want to keep those lovely cucumber slices intact! -
Garnish and Serve
If you’re using mint leaves, chop them finely and sprinkle them over the top of your salad. You can also reserve a few whole leaves for an elegant touch. Voila! Your refreshing pineapple cucumber salad is ready to be served.
Serving Suggestions
Presentation is key! For a beautiful display, serve this salad in a large, shallow bowl, allowing the vibrant colors to shine. You can also use individual servings with small glass bowls to create an elegant touch for a dinner party. Don’t forget a sprig of fresh mint on top for a finishing touch that gives off a fragrant appeal!
Recipe Variations
Now let’s get creative! Here are a few delightful variations to switch things up:
- Spicy Riff: Add some diced jalapeños or a sprinkle of chili flakes for a spicy twist that pairs well with lime!
- Add Protein: Toss in some grilled chicken or shrimp for a hearty, refreshing summer meal.
- Tropical Blend: Replace half of the pineapple with mango for a different tropical flair!
- Nutty Crunch: Sprinkle with toasted walnuts or almonds for a crunchy contrast that complements the soft textures of the salad.
- Mediterranean Vibe: Try adding crumbled feta cheese, kalamata olives, and a drizzle of olive oil for a savory twist.
Chef’s Notes
This salad is one of those recipes that feels like an old friend—easy, comfortable, and endlessly adaptable! Over the years, I’ve experimented with different fruits, and let me tell you, peaches and watermelon take this salad to a whole new level. Also, I have a funny story: the first time I made this for a gathering, I got overly excited with the lime juice and ended up with a whole lot of tang. Let’s just say, my friends affectionately dubbed it “Savannah’s Zesty Surprise” that day! Now, I always remind myself that balance is key when it comes to flavors!
FAQs and Troubleshooting
-
How can I prevent my cucumbers from getting soggy?
To avoid a watery salad, salt the cucumbers lightly and let them sit for about 10 minutes before adding them to the salad. It helps draw out excess moisture. -
Can I make this salad in advance?
While you can prep the pineapple and cucumbers ahead of time, I recommend mixing the dressing and combining everything just before serving to keep the salad crisp. -
What can I do with leftovers?
Leftovers can be stored in an airtight container in the fridge for up to 2 days, but the cucumbers might lose their crunch. I recommend adding them to smoothies for a fruity boost! -
Can I substitute the pineapple with another fruit?
Absolutely! Other juicy fruits like diced peach, nectarines, or even apples (as long as they’re crisp) can work wonderfully in place of pineapple!
Nutritional Info
While I won’t dive too deep into numbers, this salad is packed with Vitamin C, hydration, fiber, and antioxidants—making it not only delicious but nutritious as well!
So there you have it—your complete guide to crafting a refreshing Pineapple Cucumber Salad! It’s light, bright, and bursting with flavor, perfect for any occasion. I can’t wait for you to try it out, and I hope it brings a smile to your table just like it does for mine! Now, go ahead, tie on that apron, whip up this salad, and bask in the culinary joy of creating something beautiful. Happy cooking!
PrintRefreshing Pineapple Cucumber Salad
A vibrant summer salad combining sweet pineapple and crisp cucumbers, enhanced with a zesty lime dressing.
- Prep Time: 15 minutes
- Cook Time: 0 minutes
- Total Time: 15 minutes
- Yield: 4 servings 1x
- Category: Salad
- Method: Mixing
- Cuisine: American
- Diet: Vegan
Ingredients
- 1 ripe pineapple, diced
- 2 cucumbers, sliced
- Juice of 2 limes
- Salt to taste
- Fresh mint leaves (optional) for garnish
Instructions
- Prep the pineapple by cutting off the top and bottom, then slice away the outer peel. Remove the core and chop into bite-sized pieces.
- Slice the cucumbers after washing them thoroughly. Choose to leave the skin on or peel, then cut into thin rounds or half-moons.
- Juice the limes in a small bowl, making sure to catch any seeds.
- Mix diced pineapple and sliced cucumbers in a large bowl. Pour lime juice over and sprinkle with salt, gently tossing to combine.
- Garnish the salad with chopped mint leaves or whole leaves for an elegant touch, then serve.
Notes
For added flavor, consider adding diced jalapeños for a spicy twist or crumbled feta cheese for a Mediterranean vibe.
Nutrition
- Serving Size: 1 serving
- Calories: 150
- Sugar: 12g
- Sodium: 100mg
- Fat: 1g
- Saturated Fat: 0g
- Unsaturated Fat: 1g
- Trans Fat: 0g
- Carbohydrates: 36g
- Fiber: 4g
- Protein: 2g
- Cholesterol: 0mg
Keywords: summer salad, pineapple, cucumber, refreshing, light meal, vegan salad
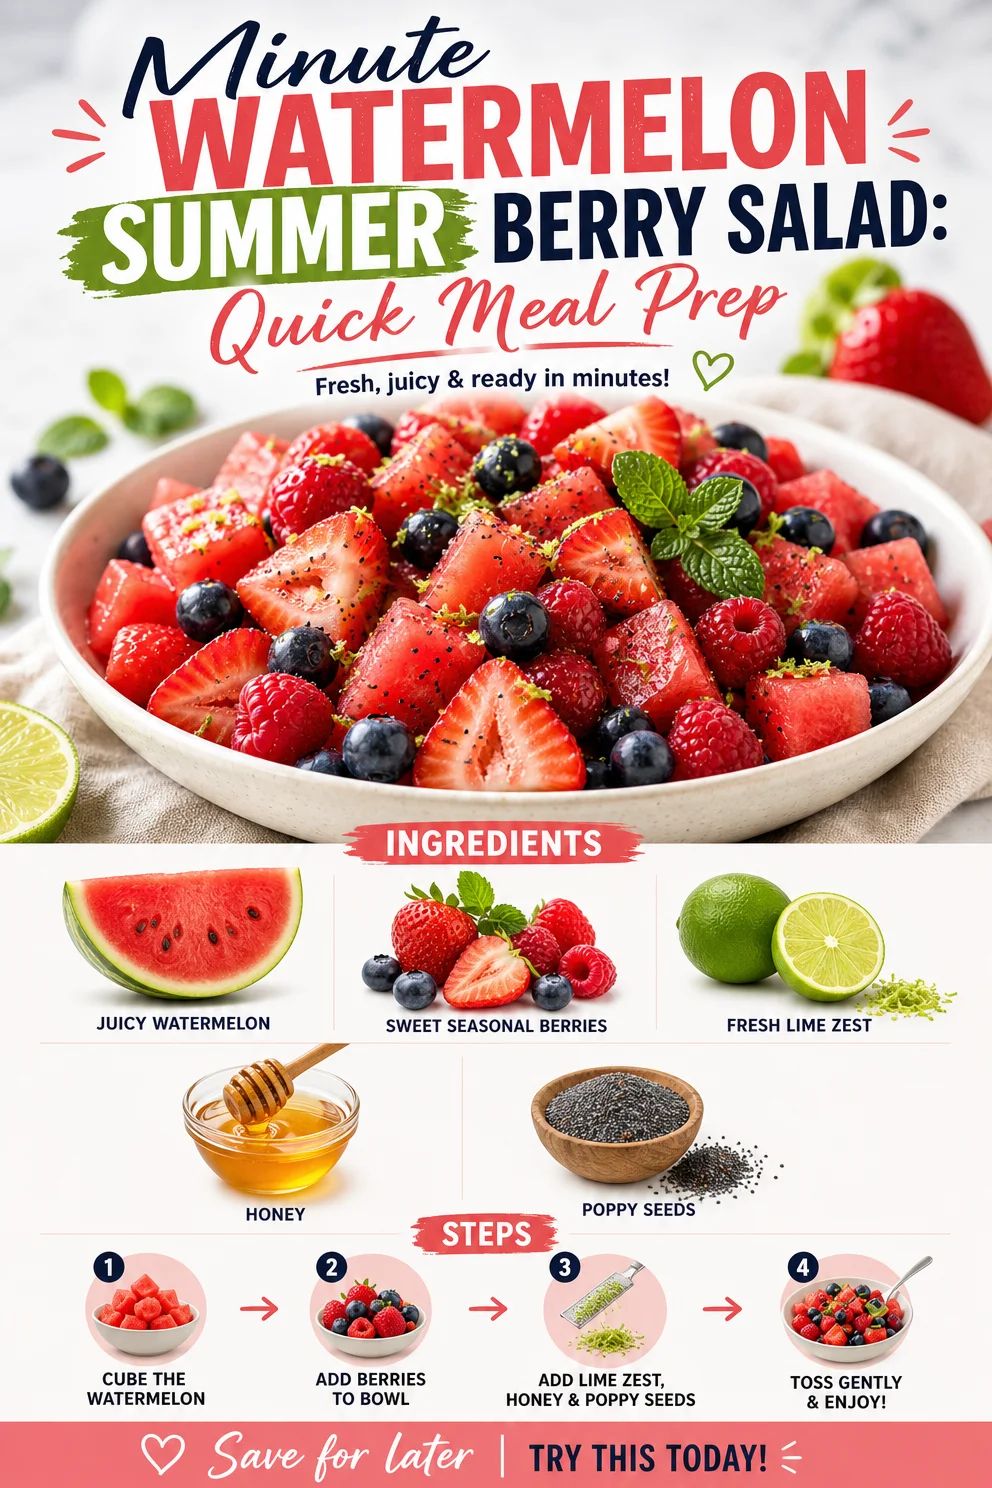
Minute Watermelon Summer Berry Salad: Quick Meal Prep
Watermelon Summer Berry Salad: A Delightful, Refreshing Treat
Hello there, fellow food lovers! Today, we’re diving into a dish that perfectly captures the spirit of summer — Watermelon Summer Berry Salad. Bursting with juicy watermelon and vibrant seasonal berries, this salad is as refreshing as a cool breeze on a hot day. Not only is it a visual feast, but it’s also a delicious way to celebrate fresh flavors and the joys of seasonal eating.
The inspiration for this salad comes from my summer picnics as a child. I can vividly recall family gatherings in our backyard, the sun shining bright, and the smell of fresh-cut grass hanging in the air. My grandmother would always bring a giant bowl of watermelon slices, drizzled with honey, and topped with sweet berries from her garden. The sight of those colorful fruits on the picnic table instantly made everyone smile!
The laughter, the joy of being surrounded by family, and of course, the simple pleasure of eating, imprinted a deep love for fresh, light salads in me. This Watermelon Summer Berry Salad not only pays tribute to those joyful memories but also brings a sense of carefree summer nostalgia that we all cherish.
So grab your apron, head to the kitchen, and let’s create a dish that embodies the joy of summer!
Ingredients
Here’s what you’ll need to create this delightful salad:
-
Juicy Watermelon
- Why: Watermelon is hydrating, sweet, and the star of the show. Its bright red color adds a joyful pop to our dish.
- Tip: Choose a watermelon that feels heavy for its size and has a uniform shape. You can substitute it with cantaloupe or honeydew for a twist.
-
Sweet Seasonal Berries (Strawberries, Blueberries, Raspberries)
- Why: These berries are rich in antioxidants and add a sweet-tart taste that complements the watermelon beautifully.
- Tip: Feel free to mix and match based on what’s fresh or in season. Blackberries or cherries would also make delightful additions.
-
Fresh Lime Zest
- Why: Lime zest adds a bright, zesty kick that elevates the sweetness of the fruits.
- Tip: If you don’t have limes, lemon zest can work just as well!
-
Honey
- Why: A drizzle of honey enhances the sweetness of the watermelon and adds a touch of elegance.
- Tip: If you’re looking for a vegan option, agave syrup or maple syrup can easily substitute honey.
-
Poppy Seeds
- Why: These tiny seeds add a lovely crunch and visual appeal.
- Tip: You can replace poppy seeds with sesame seeds if you prefer a different texture.
Step-by-Step Instructions
Now that we have our ingredients ready, let’s get cooking! Follow these steps to create your Watermelon Summer Berry Salad:
-
Prepare the Watermelon
Start by cutting your watermelon. Cut it in half and then into thick wedges before removing the rind. You can use a melon baller or just cube the flesh into bite-sized pieces.- Chef Tip: Use a sharp knife for clean cuts and keep your watermelon cold for a refreshing crunch.
-
Wash and Slice the Berries
Rinse your strawberries, blueberries, and raspberries under cool water. For strawberries, remove the green tops and slice them into halves or quarters, depending on their size.- Chef Insight: Always dry your berries gently with a paper towel to avoid excess moisture, which can water down your salad.
-
Combine the Fruits
In a large mixing bowl, combine the watermelon cubes and the berries. Gently toss them together to avoid smashing the delicate berries while ensuring an even distribution of flavors.- Insider Tip: A wooden spoon or your hands are great tools for this task!
-
Add Lime Zest and Honey
Zest your lime over the fruit mix — this is where the magic happens! Follow by drizzling the honey over the salad.- Hint: Start with a small amount of honey and taste as you go. You can always add more if you wish for a sweeter outcome!
-
Sprinkle with Poppy Seeds
Finish off your salad by sprinkling poppy seeds on top for crunch. Gently toss everything once more to mix the flavors without breaking the berries.- Chef Hack: Let the salad sit for about 10 minutes before serving; this allows the flavors to meld beautifully.
Serving Suggestions
Plating is a fun part of making meals inviting! Serve your Watermelon Summer Berry Salad in a large, shallow bowl to showcase the vibrant colors. You can garnish with a few mint leaves or even some additional citrus zest for a pop of color. For a more elegant touch, serve individual portions in glass cups to allow the colors to shine through.
Recipe Variations
Here are a few fun twists you can try with this salad, depending on your taste preferences:
-
Add cheese: Crumbled feta or goat cheese can add a salty contrast to the sweetness of the fruits.
-
Spice it up: Add a sprinkle of chili powder or Tajín for a spicy kick that balances the sweetness.
-
Herbal notes: Incorporate fresh mint or basil to impart a refreshing herbal essence.
-
Citrus burst: Try adding a splash of orange juice for an even more refreshing flavor profile.
-
Nutty crunch: Toss in some chopped nuts like almonds or walnuts for added texture and healthy fats.
Chef’s Notes
Over the years, this Watermelon Summer Berry Salad has undergone delightful transformations in my kitchen. I’ve played with flavors and textures, discovering new ways to elevate it with every season. One of the funniest moments was when I confused the honey jar with a bottle of mustard during a cooking demo. While it was a disaster, it sparked my creativity to explore savory elements in sweet salads. Today, I still love experimenting and seeing how far I can push traditional salads!
FAQs and Troubleshooting
1. Can I make this salad ahead of time?
While this salad is best enjoyed fresh, you can prepare the watermelon and berries a few hours in advance. Just keep them refrigerated separately until you’re ready to mix and serve.
2. What if I can’t find fresh berries?
Don’t worry! You can substitute with frozen berries. Just be sure to thaw and dry them, as they tend to release extra moisture.
3. How can I ensure my watermelon is sweet?
Look for a watermelon with a creamy yellow spot (where it sat on the ground) and a heavy-feeling fruit. Sweetness can vary, so don’t hesitate to taste as you go!
4. My salad turned out too watery. What happened?
If you notice excess liquid pooling at the bottom, it could be because the watermelon was too ripe. To avoid this, you can salt the watermelon lightly before mixing; it’ll draw out some moisture, making the flavors more concentrated without being too watery.
Nutritional Info (Optional)
This salad is not only delicious but also packed with nutrients!
- Calories: Approximately 120 kcal per serving
- Carbohydrates: 30g
- Fiber: 3g
- Proteins: 2g
- Fats: 1g
So there you have it! A Watermelon Summer Berry Salad that’s not only easy to prepare but also rich in flavor and memories. I hope you enjoy creating this dish as much as I do. Remember, it’s all about gathering around the table, enjoying good food, and making delicious memories. Until next time, happy cooking!
PrintWatermelon Summer Berry Salad
A refreshing summer salad bursting with juicy watermelon and vibrant seasonal berries, perfect for warm days.
- Prep Time: 15 minutes
- Cook Time: 0 minutes
- Total Time: 15 minutes
- Yield: 4 servings
- Category: Salad
- Method: No-Cook
- Cuisine: American
- Diet: Vegan
Ingredients
- Juicy Watermelon
- Sweet Seasonal Berries (Strawberries, Blueberries, Raspberries)
- Fresh Lime Zest
- Honey
- Poppy Seeds
Instructions
- Prepare the Watermelon: Cut the watermelon in half and then into thick wedges before removing the rind. Cube the flesh into bite-sized pieces.
- Wash and Slice the Berries: Rinse strawberries, blueberries, and raspberries. Remove green tops from strawberries and slice them into halves or quarters.
- Combine the Fruits: In a large mixing bowl, combine watermelon cubes and the berries. Gently toss to distribute flavors.
- Add Lime Zest and Honey: Zest your lime over the fruit mix and drizzle honey over the salad.
- Sprinkle with Poppy Seeds: Finish the salad by sprinkling poppy seeds on top and gently toss again.
Notes
Let the salad sit for about 10 minutes before serving to allow flavors to meld. Serve in a shallow bowl or individual glass cups for an elegant touch.
Nutrition
- Serving Size: 1 serving
- Calories: 120
- Sugar: 12g
- Sodium: 5mg
- Fat: 1g
- Saturated Fat: 0g
- Unsaturated Fat: 1g
- Trans Fat: 0g
- Carbohydrates: 30g
- Fiber: 3g
- Protein: 2g
- Cholesterol: 0mg
Keywords: watermelon salad, summer salad, berry salad, refreshing salad
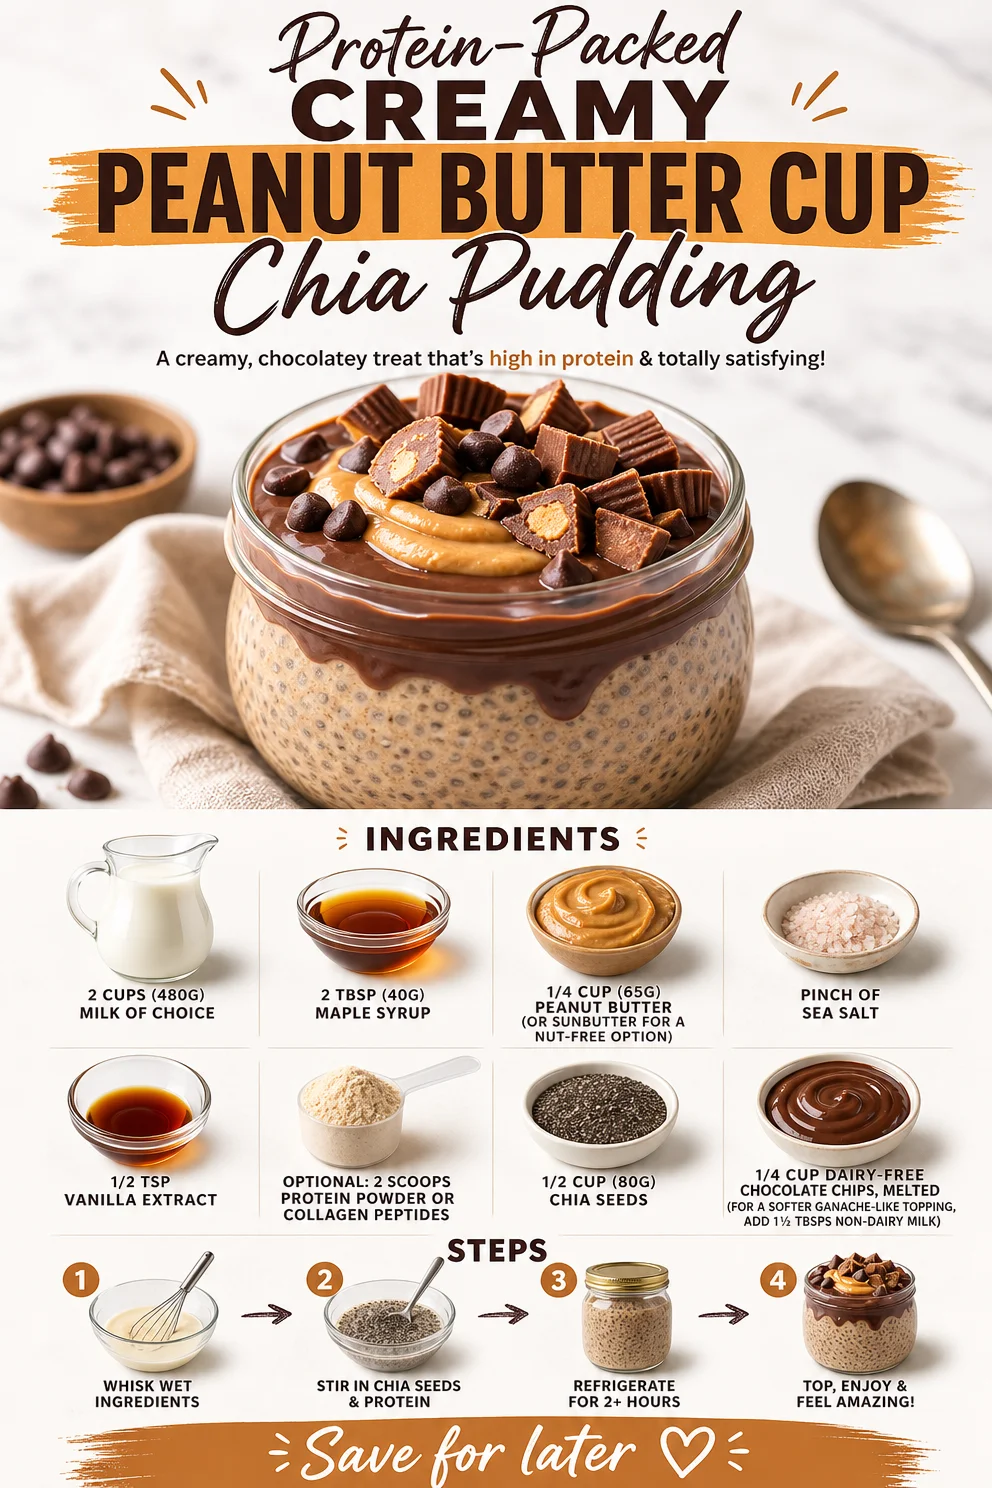
Protein-Packed Creamy Peanut Butter Cup Chia Pudding
Creamy Peanut Butter Cup Chia Pudding: A Decadent Delight
Imagine this: It’s a late afternoon, the sunlight is filtering through your kitchen window, and you can smell the rich aroma of peanut butter wafting through the air. You’re craving something sweet but want to keep it healthy, too. Enter Creamy Peanut Butter Cup Chia Pudding! It’s the perfect blend of indulgence and nourishment, with a nutty twist that satisfies your sweet tooth without the guilt.
This pudding is a fantastic option for breakfast, a snack, or even dessert. Packed with omega-3 fatty acids, protein, and healthy fats, it’s as delightful for your body as it is for your taste buds. Plus, it’ll impress anyone you serve it to with its creamy texture and rich flavor, making it a fantastic addition to your hosting repertoire.
Now, let’s dive into why this dish holds such a special place in my heart and my kitchen!
A Nostalgic Taste of Home
Growing up, peanut butter was a staple in our household. My siblings and I would slather it on everything from fresh bananas to those classic white bread sandwiches, eagerly anticipating our next sweet fix. One of my fondest memories is from a summer afternoon when we concocted our first peanut butter dessert with mom—a no-bake pie that included layers of rich chocolate and creamy peanut butter.
That day sparked a love affair with the pairing, and since then, I’ve dedicated myself to finding ways to incorporate the flavors I adored into healthier options. When I stumbled upon chia seeds, I knew I had to create a pudding that could capture the essence of that nostalgic dessert while packing in plenty of nourishment. And voilà! The Creamy Peanut Butter Cup Chia Pudding was born.
Ingredients
Let’s talk about what you’ll need for this delicious treat! Here’s your shopping list:
- 2 cups (480g) milk of choice: Use almond, coconut, soy, or dairy milk depending on your preference. Each will give a slightly different flavor and texture.
- 2 tbsp (40g) maple syrup: This adds a beautiful sweetness. If you’re looking for a lower-glycemic option, try using agave syrup or even stevia!
- 1/4 cup (65g) peanut butter: For the classic taste! If there are nut allergies or you prefer a different twist, feel free to use SunButter or almond butter.
- Pinch of sea salt: Enhances the flavor and balances the sweetness. Trust me; it makes a difference!
- 1/2 tsp vanilla extract: This adds warmth and depth to the pudding. For a different flavor profile, consider using almond extract.
- Optional: 2 scoops protein powder or collagen peptides: Perfect for adding an extra boost if you’re enjoying this as a post-workout treat.
- 1/2 cup (80g) chia seeds: Packed with fiber and omega-3s, these little guys are what give our pudding that delightful, creamy texture.
- 1/4 cup dairy-free chocolate chips, melted: For a chocolatey topping reminiscent of a peanut butter cup! For a softer consistency, add 1 ½ tbsp of non-dairy milk when melting.
Step-by-Step Instructions
Ready to make this decadent treat? Follow these easy steps to whip up your Creamy Peanut Butter Cup Chia Pudding.
-
Combine the Base Ingredients
In a medium bowl, combine your milk of choice, maple syrup, and peanut butter. Using a whisk, mix until the peanut butter is fully incorporated and there are no lumps. Pro tip: For easier mixing, you can warm the peanut butter slightly—this helps it blend smoothly! -
Add Flavor Enhancers
Sprinkle in the pinch of sea salt, vanilla extract, and protein powder (if using). Stir until everything is well combined. Taste! Adjust sweetness if needed by adding more maple syrup. -
Mix in the Chia Seeds
Add in those chia seeds! Stir well to ensure they’re evenly distributed throughout the mixture. Chia seeds are magical—they’ll swell and create that creamy pudding texture as they absorb the liquid. -
Let it Set
Cover the bowl with plastic wrap or a lid and place it in the fridge for at least 2 hours or overnight if you can wait. This is the patience-testing part, but trust me, it’s worth it! -
Melt the Chocolate
Once your pudding has set, it’s time to melt those chocolate chips. You can do this in a microwave-safe bowl in 30-second intervals, stirring in between, or use a double boiler. If you’re adding the option of non-dairy milk for a softer consistency, mix that in while you melt. -
Assemble and Serve
To serve, spoon the chia pudding into individual cups or small bowls. Drizzle the melted chocolate over the top like a beautiful finishing touch. You can even sprinkle a few extra chocolate chips for added indulgence!
Serving Suggestions
For an extra layer of delight, consider garnishing your pudding with a dollop of coconut whipped cream or a few slices of banana. Set it alongside a warm cup of coffee or tea, and you’ve created a lovely little indulgence that’s perfect for breakfast or dessert!
Recipe Variations
- Nut-Free Option: Swap peanut butter for sunflower seed butter (SunButter) to keep it nut-free.
- Chocolate Overload: Add cocoa powder to the base mix for a richer chocolate flavor.
- Fruity Twist: Mix in some mashed bananas or pureed berries to the base recipe for added sweetness and flavor.
- Spiced Up Pudding: Add a pinch of cinnamon or nutmeg to warm up the flavors.
- Vegan Delight: Ensure all ingredients are plant-based, like opting for coconut yogurt instead of milk.
Chef’s Notes
This recipe has evolved over time through experimentation! I’ve played around with different nut butters, variations of sweeteners, and even added mashed bananas for a fruitier take! The beauty of this pudding lies in its flexibility—it’s truly a canvas for your creativity. And if you’re anything like me, you may end up devouring a bowl (or two) before it even makes it to the fridge!
FAQs and Troubleshooting
-
Why did my chia pudding not thicken?
If your pudding didn’t thicken up, it could be that it didn’t have enough time to set. Chia seeds need enough time to absorb liquid (at least a couple of hours). If it’s too thin after setting, try mixing in a few more chia seeds and letting it sit longer. -
Can I use regular yogurt instead of milk?
Absolutely! You can replace milk with your favorite yogurt to create a thicker texture, but be aware that this may alter the pudding’s flavor slightly. -
What if the pudding is too sweet for me?
Each sweetener has a different level of intensity, so if you find it too sweet, cut back on the maple syrup, or add more milk and chia seeds to balance it out. -
How long will this pudding last?
Store the pudding in an airtight container in the refrigerator for up to 5 days. The flavors will continue to deepen and meld together as it sits!
Nutritional Info
This is an approximate estimate, varies by ingredient choices:
- Calories: 270
- Protein: 10g
- Carbs: 30g
- Fats: 15g
- Fiber: 10g
And there you have it! Your journey to making Creamy Peanut Butter Cup Chia Pudding is complete. This delectable dessert not only pleases the palate but allows you to reminisce about those simple joys of childhood. So, tie on that apron, gather your ingredients, and let’s create this timeless treat together! Enjoy every creamy, dreamy bite—because good food is all about the moments we share at the table. Happy cooking!
PrintCreamy Peanut Butter Cup Chia Pudding
A decadent yet healthy pudding combining peanut butter, chia seeds, and a touch of sweetness for a delightful treat.
- Prep Time: 10 minutes
- Cook Time: 0 minutes
- Total Time: 120 minutes
- Yield: 4 servings 1x
- Category: Dessert
- Method: Refrigeration
- Cuisine: American
- Diet: Vegetarian
Ingredients
- 2 cups (480g) milk of choice
- 2 tbsp (40g) maple syrup
- 1/4 cup (65g) peanut butter
- Pinch of sea salt
- 1/2 tsp vanilla extract
- Optional: 2 scoops protein powder or collagen peptides
- 1/2 cup (80g) chia seeds
- 1/4 cup dairy-free chocolate chips, melted
Instructions
- Combine the milk of choice, maple syrup, and peanut butter in a medium bowl. Whisk until smooth.
- Add the pinch of sea salt, vanilla extract, and protein powder (if using), and stir well.
- Mix in the chia seeds, ensuring they are evenly distributed throughout.
- Cover with plastic wrap and refrigerate for at least 2 hours or overnight.
- Melt the chocolate chips in a microwave or double boiler.
- Assemble by spooning the chia pudding into servings and drizzling melted chocolate over the top.
Notes
For a nut-free option, use sunflower seed butter instead of peanut butter. You can also add cocoa powder or fruits for variations.
Nutrition
- Serving Size: 1 serving
- Calories: 270
- Sugar: 8g
- Sodium: 170mg
- Fat: 15g
- Saturated Fat: 3g
- Unsaturated Fat: 10g
- Trans Fat: 0g
- Carbohydrates: 30g
- Fiber: 10g
- Protein: 10g
- Cholesterol: 0mg
Keywords: chia pudding, healthy dessert, peanut butter, vegan pudding
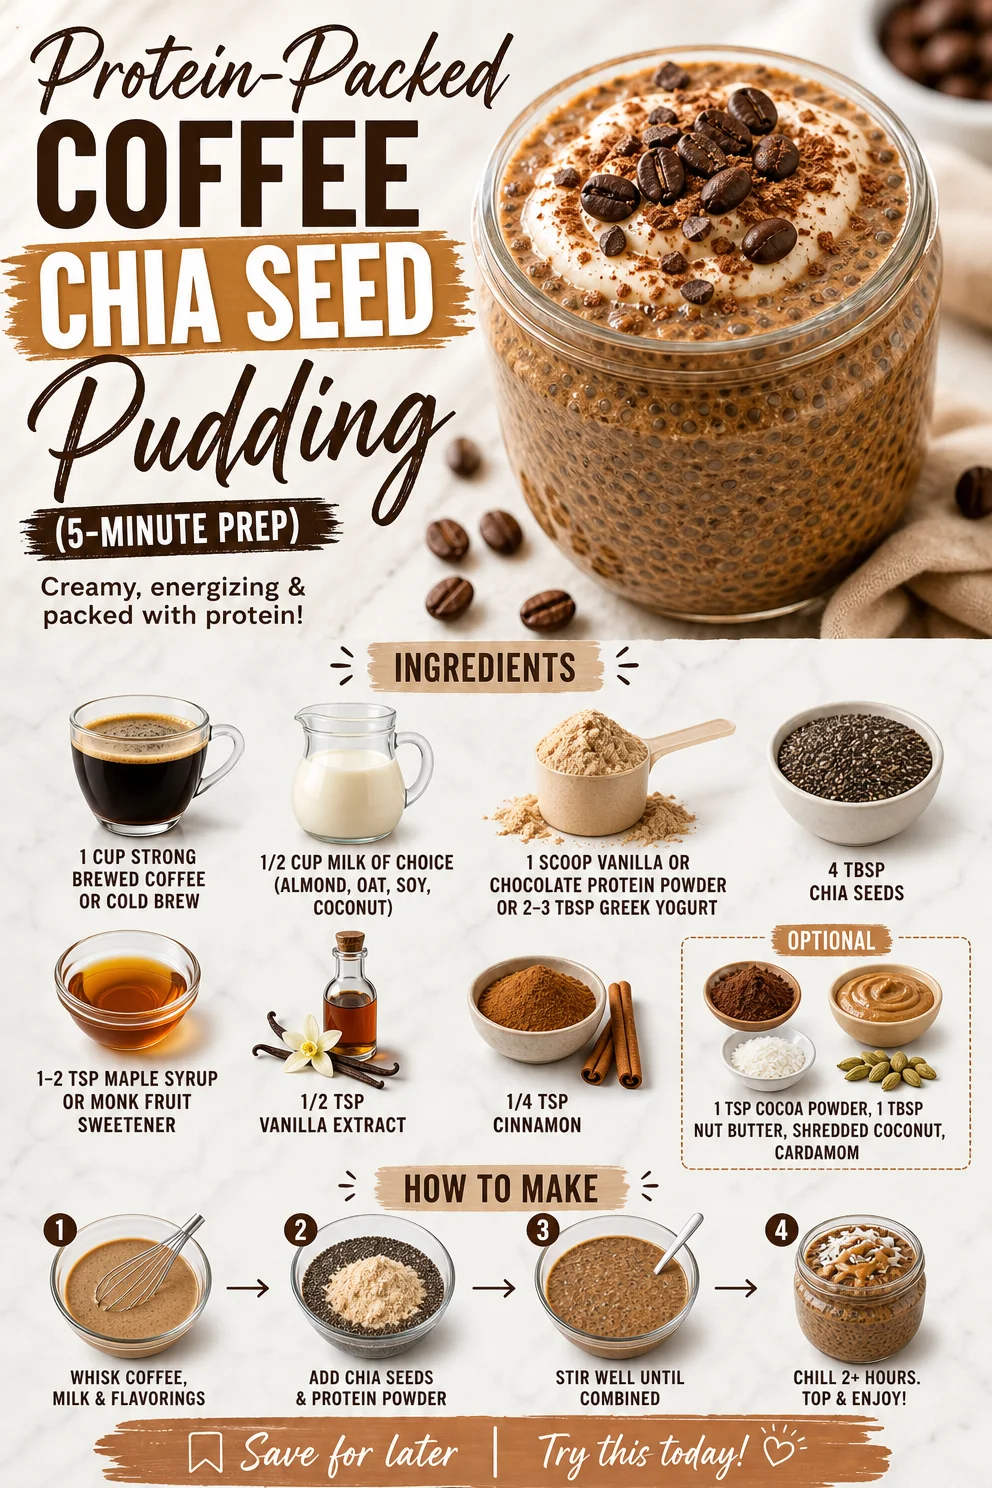
Protein-Packed Coffee Chia Seed Pudding (5-Minute Prep)
Coffee Chia Seed Pudding With Protein: A Deliciously Energizing Dessert
Hey there, fellow foodies! If you’re anything like me, mornings are a sacred time—a ritual filled with the warmth of coffee and the promise of a delicious day ahead. There’s something about the aroma of freshly brewed coffee that just sets the mood, right? Now, imagine taking that glorious cup of joe and transforming it into a decadent dessert that’s as nutritious as it is indulgent. Enter: Coffee Chia Seed Pudding with Protein!
This delightfully creamy, coffee-infused pudding is a game-changer when it comes to breakfast or dessert. Yes, you read that right—both! Not only does it give you that caffeine boost thanks to our good friend, coffee, but it also packs an extra punch with protein, fiber, and healthy fats from chia seeds. It’s like a cozy hug in a bowl that you can enjoy at any time of day!
I love making this chia pudding for those busy mornings when I want something quick, flavorful, and oh-so-satisfying. Just mix, let it set, and voila—you’ve got breakfast or a snack ready to go! My friends are always astonished when they try this recipe, asking me for the secret. Spoiler alert: it’s simple, and I can’t wait to share it with you.
So grab your apron and let’s dive into this easy, heartwarming recipe that brings together the best of coffee and chia. Trust me, you’re going to want to keep this in your back pocket for those moments when you just need a little pick-me-up!
Personal Story
Let’s rewind a bit to when I first discovered my love for chia seeds. It was a sunny Saturday morning, and I had decided to throw a little breakfast gathering for my closest friends. At the time, I had just become obsessed with trying out new recipes from my favorite food blog. One of the recipes that caught my eye was a simple chia seed pudding. But it was missing something—something rich and familiar. That’s when it hit me: coffee!
I brewed a strong pot of coffee, mixed it with chia seeds, and the rest was history. As my friends arrived, they were greeted by the rich aroma of coffee and the excitement of a brand-new recipe that I was presenting. One bite, and they were hooked! It became a staple at our gatherings, a sort of culinary bonding moment over cups of coffee and bowls of chia pudding. It’s that warm memory of joy and connection that inspires me to keep sharing this recipe. I’m so grateful that I get to recreate that experience in my kitchen and now yours!
Ingredients
Let’s get to the heart of this recipe! Here’s everything you’ll need to whip up this delectable Coffee Chia Seed Pudding with Protein:
-
1 cup strong brewed coffee or cold brew
The base of our pudding! Brew it strong for robust flavor. If you’re sensitive to caffeine, you can opt for decaf or a caffeine-free coffee alternative. -
1/2 cup milk of choice (almond, oat, soy, coconut)
This adds creaminess. Almond milk gives a nutty flavor, while coconut milk lends a tropical touch. Feel free to swap for water or a milk blend. -
1 scoop vanilla or chocolate protein powder or 2–3 tbsp Greek yogurt
For an extra protein boost! Choose a flavor that complements the coffee. Greek yogurt adds creaminess, while protein powder keeps it light. -
4 tbsp chia seeds
These tiny seeds are nutrient powerhouses! They thicken the pudding. If you don’t have chia seeds, you could try flax seeds, but the texture may differ. -
1–2 tsp maple syrup or monk fruit sweetener
A touch of sweetness! Maple syrup offers a comforting caramel note. For less sugar, use monk fruit sweetener as a sugar-free option. -
1/2 tsp vanilla extract
Enhances the overall flavor. A high-quality extract is preferred; it makes a noticeable difference in taste! -
1/4 tsp cinnamon
Adds warmth and spice. You can also try cardamom for an exotic twist if you’re feeling adventurous! -
Optional:
- 1 tsp cocoa powder: For a mocha-like flavor – just mix in with the chia seeds.
- 1 tbsp nut butter: Stir in almond or peanut butter for creaminess.
- Shredded coconut: For a sweet finish or as a garnish.
Step-by-Step Instructions
Alright, now that we have our ingredients lined up, let’s get cooking! This part is quick and easy, so you can whip this up in no time.
Step 1: Brew the Coffee
Start by brewing your coffee. Use a method you love—French press, pour-over, or drip. Aim for a strong brew, as it will be the backbone of your pudding. If you want a chilled version, prepare cold brew instead. Let it cool a bit before moving on!
Step 2: Mix Ingredients
In a medium mixing bowl, whisk together the brewed coffee, milk of your choice, protein powder or Greek yogurt, chia seeds, maple syrup, vanilla extract, and cinnamon. Grab your favorite whisk and mix until all the ingredients are well combined. It’s essential to ensure the chia seeds are evenly distributed to avoid clumps later.
Step 3: Let it Set
Once you’ve mixed everything, cover your bowl with plastic wrap or transfer the mixture into individual jars for those Instagram-worthy portions! Place it in your refrigerator for at least 4 hours or overnight if you want to wake up to this delightful treat. As it sits, the chia seeds will absorb the liquid and expand, giving it that pudding-like texture.
Step 4: Stir Up the Pudding
After it’s set, give the pudding a good stir. You might notice a few chia seeds floating at the top—don’t worry! Just mix it back in, and you’ll end up with a beautiful, thick consistency. If it feels a bit too thick, stir in a bit more milk to reach your desired creaminess.
Step 5: Serve and Enjoy!
Scoop the pudding into your favorite bowls or jars. Top each portion with a sprinkle of shredded coconut, a dollop of nut butter, or a dusting of cocoa powder. The presentation is key here—your little dish of goodness is about to wow anyone who sees it!
Serving Suggestions
Serving this Coffee Chia Seed Pudding is all about making it feel special! Layer in mason jars for a beautiful breakfast display, or serve in cute dessert glasses topped with fresh berries, nuts, or chocolate shavings. Drizzle a little extra maple syrup or a swirl of nut butter on top for that extra tantalizing touch. You could even pair it with a side of fresh fruit or a slice of banana bread for a delightful brunch ensemble!
Recipe Variations
Now, let’s mix things up a bit! Here are some creative variations you can try:
- Mocha Delight: Add 1 tsp cocoa powder into the mix for a chocolatey twist! Top with chocolate shavings for extra indulgence.
- Nutty Buddy: Swirl in your favorite nut butter—peanut, almond, or even cashew—for a protein-packed treat.
- Tropical Escape: Swap the coffee for coconut milk and add some fresh pineapple chunks and toasted coconut flakes for a tropical vibe.
- Spiced Delight: Experiment with spices! Try adding a pinch of nutmeg or cardamom for warmth.
- Vanilla Berry Bliss: Stir in a handful of blueberries or strawberries for a fresh, fruity addition!
Chef’s Notes
Oh, let me tell you, this recipe has certainly evolved over time! Initially, I started with just coffee and chia seeds, but as I explored flavors and textures, it grew into this customizable delight. One of the funniest moments came when I tried making it with a leftover cold brew from my brunch party. I wasn’t sure how it would turn out, but it ended up being the best pudding of all time! Now, I always encourage experimenting with flavors and ingredients!
Regardless of how you make it, the most important part is enjoying the process and sharing those lovely moments with friends and family. Cooking is all about connection, and this pudding is a perfect way to bond—trust me!
FAQs and Troubleshooting
Can I prepare this pudding ahead of time?
Absolutely! Chia pudding stores well in the refrigerator for up to 5 days. Just make sure to keep it covered so it stays fresh.
What if my pudding isn’t thickening?
If your pudding hasn’t thickened enough, it likely needs more time in the fridge. If you’re in a pinch, you can add an extra tablespoon of chia seeds and let it sit for another hour.
Can I omit the protein powder?
Yes! If you prefer or don’t have protein powder on hand, you can substitute with Greek yogurt, or simply enjoy it without for a lighter treat.
How can I add more sweetness?
Simply adjust the sweetness to your liking! Start with the suggested amount of maple syrup or sweetener, and then taste before adding more. You can also use a drizzle of honey or agave syrup if you like.
Nutritional Info
- Calories: Approximately 190 per serving (excluding toppings)
- Protein: 15g (depending on protein powder)
- Carbs: 20g
- Fats: 6g
- Fiber: 8g
Conclusion
And there you have it—your new go-to recipe for Coffee Chia Seed Pudding with Protein! It’s simple, elegant, and oh-so-good. I hope you absolutely love it as much as I do. The best part? You can personalize it while creating beautiful moments in the kitchen and around your table!
So tie on that apron, pour another cup of coffee, and enjoy this deliciously energizing treat that’s perfect for any occasion. Can’t wait to hear how you make it your own—happy cooking, everyone!
PrintCoffee Chia Seed Pudding With Protein
A deliciously energizing dessert that combines the richness of coffee with the nutritious benefits of chia seeds.
- Prep Time: 10 minutes
- Cook Time: 0 minutes
- Total Time: 240 minutes
- Yield: 4 servings 1x
- Category: Dessert
- Method: Refrigeration
- Cuisine: American
- Diet: Vegetarian
Ingredients
- 1 cup strong brewed coffee or cold brew
- 1/2 cup milk of choice (almond, oat, soy, coconut)
- 1 scoop vanilla or chocolate protein powder or 2–3 tbsp Greek yogurt
- 4 tbsp chia seeds
- 1–2 tsp maple syrup or monk fruit sweetener
- 1/2 tsp vanilla extract
- 1/4 tsp cinnamon
- Optional: 1 tsp cocoa powder, 1 tbsp nut butter, shredded coconut
Instructions
- Brew the Coffee: Start by brewing your coffee using your preferred method for a strong brew. Let it cool slightly.
- Mix Ingredients: In a medium bowl, whisk together the brewed coffee, milk, protein powder or Greek yogurt, chia seeds, maple syrup, vanilla extract, and cinnamon until well combined.
- Let it Set: Transfer the mixture to a bowl or jars, cover, and refrigerate for at least 4 hours or overnight.
- Stir Up the Pudding: After it’s set, stir to redistribute the chia seeds. Add more milk if needed to adjust the consistency.
- Serve and Enjoy!: Scoop into bowls and top with toppings like shredded coconut, nut butter, or cocoa powder.
Notes
Store this pudding in the refrigerator for up to 5 days in a covered container.
Nutrition
- Serving Size: 1 serving
- Calories: 190
- Sugar: 6g
- Sodium: 100mg
- Fat: 6g
- Saturated Fat: 1g
- Unsaturated Fat: 5g
- Trans Fat: 0g
- Carbohydrates: 20g
- Fiber: 8g
- Protein: 15g
- Cholesterol: 0mg
Keywords: coffee chia pudding, healthy dessert, protein pudding, vegan dessert, chia seeds
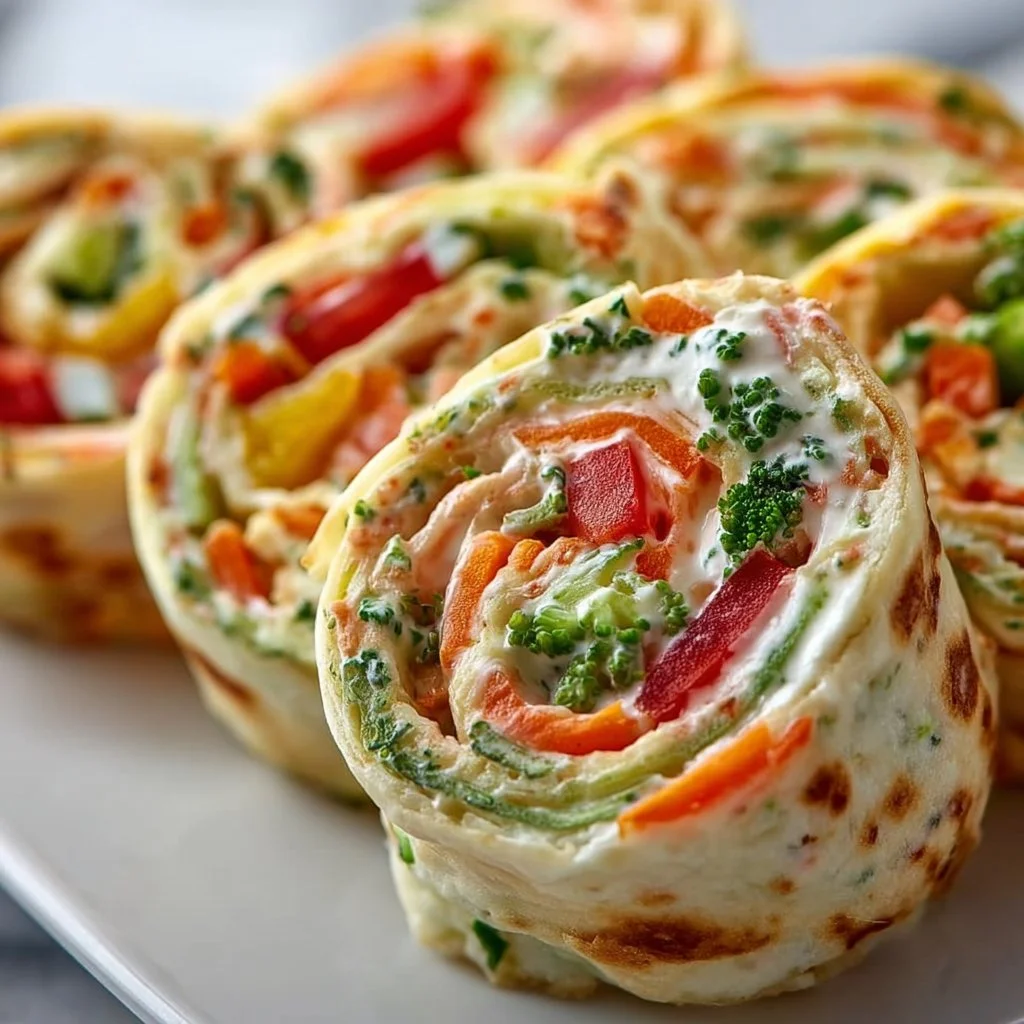
Fresh Vegetable Tortilla Roll Ups
Fresh Vegetable Tortilla Roll Ups: A Delightful Bite of Flavor
Hello, fellow foodies! Today, I’m thrilled to share a vibrant, fresh dish that’s not only a favorite for gatherings but also a wonderful addition to your weeknight meals: Fresh Vegetable Tortilla Roll Ups. These colorful bites are all about bringing together fresh ingredients, delightful flavors, and the joy of sharing with loved ones. Whether you’re hosting a party, preparing a healthy lunch, or simply looking to snack in style, these tortilla roll ups are here to impress!
A Bit of Nostalgia
Ah, the memories! I remember the first time I rolled up veggies in a tortilla. It was a sunny afternoon, and my best friend invited me over for a little gathering. She was always the creative one, and that day she presented us with these beautiful tortilla roll ups filled to the brim with crisp vegetables and creamy spread. I was amazed at how something so simple could be such a crowd-pleaser! We sat in her backyard, laughing and enjoying the burst of flavors, with our plates stacked high with these adorable roll ups. It was a carefree day filled with good food, laughter, and the undeniable magic of fresh ingredients coming together. That inspired me to bring my own twist to these fun bites, and I’m excited to pass them down to you!
So, let’s roll up our sleeves and get cooking, shall we?
Ingredients
Here’s a friendly little rundown of what you’ll need for these delightful Fresh Vegetable Tortilla Roll Ups:
-
Large Flour Tortillas (3-4 pieces)
- A blank canvas for all those fresh fillings. Feel free to substitute with whole wheat tortillas for a healthier option or spinach tortillas for an extra pop of color.
-
Cream Cheese (8 oz)
- This adds a creamy richness that binds everything together. Go for herb-flavored cream cheese for an extra kick or use Greek yogurt as a lighter alternative!
-
Bell Peppers (1 red, 1 yellow)
- Sweet and crunchy, bell peppers provide a vibrant color contrast. You can swap them for cucumbers if you prefer a more refreshing crunch.
-
Carrots (1-2 medium)
- Adding sweetness and crunch, carrots are a staple in these roll ups. You can also grate them instead of slicing for a different texture.
-
Cucumber (1 medium)
- Cool and refreshing, cucumbers balance out the creaminess. If you want a more robust flavor, try using zucchini!
-
Fresh Spinach (1 cup)
- For that green goodness! You could also use arugula for a peppery twist.
-
Avocado (1 ripe)
- Creamy and dreamy; you can’t go wrong here. If you’re out of avocados, a thin layer of guacamole would work well too.
-
Fresh Herbs (1/4 cup; dill, chives, or parsley)
- These add a burst of freshness and zest. Use whatever herbs you love or have on hand!
-
Salt and Pepper (to taste)
- Always essential! A pinch of garlic powder or cumin can amp up flavors if you’re feeling adventurous.
Step-by-Step Instructions
-
Prep Your Ingredients:
Start by washing all your vegetables thoroughly. Slice the bell peppers into thin strips, julienne the carrots, and slice the cucumber into thin sheets. If you want to make life easier, use a mandoline slicer for those veggies! -
Mix the Cream Cheese:
In a small bowl, whip the cream cheese until it’s soft and spreadable. You can add a pinch of salt and pepper and even a dash of lemon juice for a little extra zing! -
Assemble the Tortillas:
Lay a tortilla flat on a clean surface. Using a spatula or a butter knife, spread a generous layer of cream cheese evenly across the tortilla, leaving about an inch at the edges to avoid overflow. -
Layer Your Veggies:
Start layering your sliced veggies! Lay down the fresh spinach first, followed by the bell peppers, carrots, cucumbers, and avocado. Remember, you want balance and color here, so feel free to mix it up! -
Roll It Up:
Time to roll! Starting from one end, gently lift the edge of the tortilla over the filling and begin to roll tightly. Be sure not to overstuff, or it might burst out. Keep rolling until you reach the end, then give it a gentle press to seal. -
Slice and Serve:
With a sharp knife, slice the roll into bite-sized pieces—around 1-2 inches works nicely. Make sure to slice straight down to maintain that beautiful filling show-off! -
Plating:
Arrange the roll ups on a platter, and consider drizzling a little balsamic glaze or serving with a tangy dipping sauce on the side. A sprinkle of fresh herbs or edible flowers can elevate the presentation even more!
Serving Suggestions
These Fresh Vegetable Tortilla Roll Ups make a fantastic centerpiece for any platter. Serve them alongside some hummus or tzatziki for dipping, or pair with a refreshing salad to create a light meal. You could even stack them up like a tower for some added flair!
Recipe Variations
- Mediterranean Twist: Add some feta cheese and olives for a Greek-inspired version.
- Spicy Kick: Mix in a bit of chopped jalapeño or use a spicy herb cream cheese to add some heat.
- Sweet and Savory: Throw in some roasted red peppers and a hint of balsamic vinegar for unexpected sweetness.
- Vegan Option: Replace cream cheese with crushed avocado and use a vegan tortilla for a plant-based delight.
Chef’s Notes
When I first started making these roll ups, I made the mistake of overloading them—I can’t tell you how many times I had a filling explosion! So, when you’re rolling, remember that less is more. It’s all about balance! And don’t fret over other potential mishaps; cooking is all about learning and having fun. Over time, these roll ups have morphed from just a party snack into my go-to for light lunches, quick dinners, and even school lunches for my kids!
FAQs and Troubleshooting
Q: Can I prepare these roll ups in advance?
A: Absolutely! Just wrap them tightly in plastic wrap or foil to keep them fresh. I’d suggest not slicing them until you’re ready to serve; it helps maintain their shape.
Q: What if my tortillas are too dry?
A: If your tortillas are not pliable, try microwaving them for 10-15 seconds. This softens them up and makes rolling much easier!
Q: Can I freeze these roll ups?
A: Yes, but keep in mind that the texture might change once thawed. If you want to freeze them, I recommend freezing them uncut and without the avocado.
Q: I can’t find fresh herbs; can I use dried?
A: Sure! Dried herbs work, but you’ll want to use them sparingly as they’re more potent than fresh.
Nutritional Info
Though I don’t have specific numbers for you today, these roll ups are loaded with veggies, healthy fats from the avocado, and can easily fit into a healthy lifestyle depending on your ingredients. If you’re counting calories or macros, simply calculate based on your specific substitutions.
And there you have it, my dear friends! Fresh Vegetable Tortilla Roll Ups are not just a recipe; they’re a doorway into gathering, sharing, and enjoying the beauty of cooking. So let’s tie on our aprons, gather those lovely ingredients, and whip up something delicious together! Happy cooking!
PrintFresh Vegetable Tortilla Roll Ups

A vibrant and fresh dish featuring rolled tortillas filled with assorted vegetables and cream cheese. Perfect for gatherings or a nutritious snack.
- Prep Time: 15 minutes
- Cook Time: 0 minutes
- Total Time: 15 minutes
- Yield: 4 servings
- Category: Appetizer
- Method: No-Cook
- Cuisine: Mediterranean
- Diet: Vegetarian
Ingredients
- Large Flour Tortillas (3-4 pieces)
- Cream Cheese (8 oz)
- Bell Peppers (1 red, 1 yellow)
- Carrots (1-2 medium)
- Cucumber (1 medium)
- Fresh Spinach (1 cup)
- Avocado (1 ripe)
- Fresh Herbs (1/4 cup; dill, chives, or parsley)
- Salt and Pepper (to taste)
Instructions
- Prep Your Ingredients: Start by washing all your vegetables thoroughly. Slice the bell peppers into thin strips, julienne the carrots, and slice the cucumber into thin sheets. If you want to make life easier, use a mandoline slicer for those veggies!
- Mix the Cream Cheese: In a small bowl, whip the cream cheese until it’s soft and spreadable. You can add a pinch of salt and pepper and even a dash of lemon juice for a little extra zing!
- Assemble the Tortillas: Lay a tortilla flat on a clean surface. Using a spatula or a butter knife, spread a generous layer of cream cheese evenly across the tortilla, leaving about an inch at the edges to avoid overflow.
- Layer Your Veggies: Start layering your sliced veggies! Lay down the fresh spinach first, followed by the bell peppers, carrots, cucumbers, and avocado. Remember, you want balance and color here, so feel free to mix it up!
- Roll It Up: Time to roll! Starting from one end, gently lift the edge of the tortilla over the filling and begin to roll tightly. Be sure not to overstuff, or it might burst out. Keep rolling until you reach the end, then give it a gentle press to seal.
- Slice and Serve: With a sharp knife, slice the roll into bite-sized pieces—around 1-2 inches works nicely. Make sure to slice straight down to maintain that beautiful filling show-off!
- Plating: Arrange the roll ups on a platter, and consider drizzling a little balsamic glaze or serving with a tangy dipping sauce on the side. A sprinkle of fresh herbs or edible flowers can elevate the presentation even more!
Notes
Serve with hummus or tzatziki for dipping, or pair with a refreshing salad.
Nutrition
- Serving Size: 1 roll up (approximately 2 inches)
- Calories: 250
- Sugar: 3g
- Sodium: 300mg
- Fat: 15g
- Saturated Fat: 5g
- Unsaturated Fat: 8g
- Trans Fat: 0g
- Carbohydrates: 30g
- Fiber: 5g
- Protein: 6g
- Cholesterol: 20mg
Keywords: vegetable roll ups, tortilla roll ups, healthy snacks, appetizers, party food
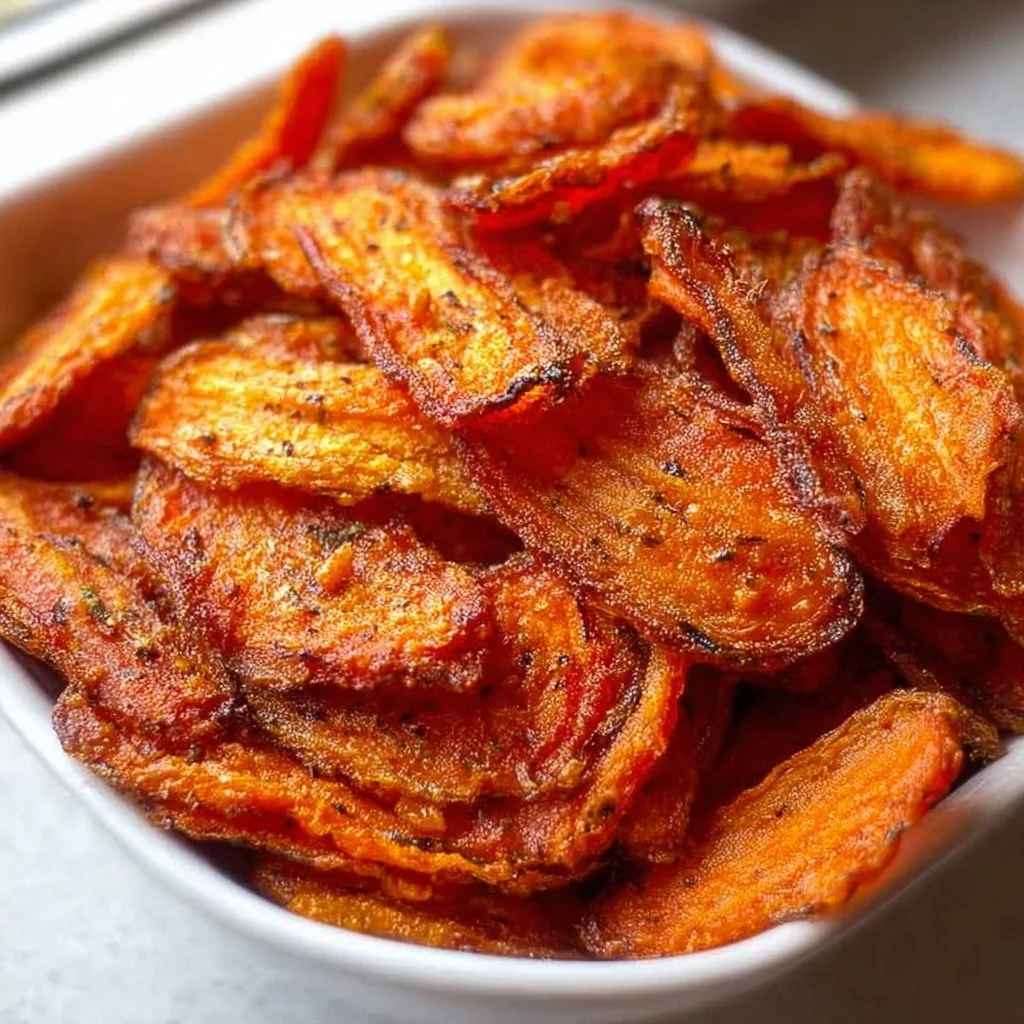
Homemade Carrot Chips, Oven-Baked
Homemade Carrot Chips: A Crunchy Delight Straight from Your Oven
Hey there, fellow food lovers! Today, we’re diving into a recipe that’s not just a hit at dinner parties but also a fantastic guilt-free snack for your everyday munching. I’m talking about Homemade Oven-Baked Carrot Chips! If you’ve ever craved a crunch that doesn’t come with the heaviness of traditional chips, you’re in for a treat.
These carrot chips are not only easy to whip up, but they can also be customized to your taste. Plus, they’re a brilliant way to sneak in those essential veggies while satisfying your craving for something crisp and delicious. And did I mention how fun it is to bring a little color onto your plate? The bright orange hue of the carrots reflects a sunny, cheerful vibe that can uplift any mealtime.
Think of this recipe as a love letter to all the crunch enthusiasts out there. I remember the first time I tried making these—my kitchen was alive with anticipation as the sweet aroma of roasted carrots filled the air. With a sprinkle of salt and a dash of seasoning, those humble root vegetables transformed into a show-stopping snack. So, grab your apron and let’s get cooking—this might just become your new favorite way to enjoy carrots!
Personal Story
Growing up, my family had a tradition of Saturday movie nights. We’d gather in the living room, blankets piled high, and a spread of snacks that would make any movie studio envious. But there was one tricky challenge: my brother, the snack connoisseur, was always looking for something new and exciting to munch on. One weekend, craving a break from the usual popcorn and chips, I decided to experiment.
Channeling my inner chef, I grabbed some carrots from the fridge and set to work. I sliced them thin, drizzled some olive oil, and seasoned them with a little salt and pepper before sending them off to the oven. The result? Crunchy, flavorful chips that my brother devoured in minutes, and suddenly, carrot chips were all the rage in our household. My mom couldn’t believe I had concocted a healthy snack that actually beat the store-bought versions. Those delightful little chips became a staple for our movie nights, adding a colorful twist to our munching routine. Now, every time I whip up a batch, I’m transported back to those cozy evenings, sharing laughs and bites with my family.
Ingredients
Here’s what you’ll need to create your batch of delectable carrot chips:
-
Carrots: The star of the show! Choose firm, fresh carrots for the best flavor and crunch. Alternatively, you could use colorful varieties, like purple or rainbow carrots, for a vibrant twist.
-
Olive Oil: This will help the chips crisp up and adds a lovely richness. If you want a different flavor profile, avocado oil or coconut oil work wonderfully as substitutes.
-
Salt: A sprinkle of salt enhances the flavor of the carrots. You can use sea salt, Himalayan pink salt, or kosher salt depending on your preference.
-
Seasonings: This is where you can let your creativity flow! I recommend garlic powder, smoked paprika, or even a dash of chili powder. Feel free to experiment with herbs like dried thyme or rosemary for an extra flavor kick.
-
Parmesan Cheese (optional): For an extra layer of flavor, you can sprinkle some finely grated Parmesan on top before baking. It mellows out as the chips cook, lending richness that’s simply scrumptious.
Step-by-Step Instructions
-
Preheat Your Oven: Start by preheating your oven to 400°F (200°C). An adequately heated oven is essential for achieving that perfect crunch!
-
Prepare Your Carrots: Wash and peel the carrots. Then, using a sharp knife or a mandoline, slice the carrots as thinly as possible, about 1/8 inch thick. The thinner the slices, the crispier the final product will be!
-
Toss with Olive Oil: In a large mixing bowl, add the carrot slices. Drizzle them with about 1 to 2 tablespoons of olive oil. Use your hands to gently toss the carrots, ensuring they are well-coated. This step is crucial—too little oil, and they may turn out soggy.
-
Season the Carrots: Now, sprinkle salt and your choice of seasonings over the oil-coated carrots. Mix again to distribute the spices evenly. Here’s a little chef hack: use your hands (why not get a bit messy?) to really massage the flavors into the carrots.
-
Arrange on a Baking Sheet: Line a baking sheet with parchment paper for easy cleanup. Spread the seasoned carrot slices in a single layer on the sheet. Make sure they aren’t overlapping—this allows for even cooking.
-
Bake: Pop the baking sheet into the preheated oven. Bake for about 15-20 minutes. Keep an eye on them, as every oven is different! You want them to be golden brown with crispy edges. If they seem to be softening, you might need a few extra minutes; just don’t let them burn.
-
Cool and Crisp: After baking, let the carrot chips sit on the baking sheet for a few minutes to cool—this helps them crisp up even more. Trust me; patience pays off here!
-
Serve and Enjoy: Once cool enough to handle, transfer your lovely carrot chips to a serving dish. If using, sprinkle with freshly grated Parmesan cheese while they’re still warm for it to melt slightly.
And voila! You have a delightful, healthy snack that serves beautifully and tastes even better.
Serving Suggestions
Carrot chips can be served in various fun ways! Create a vibrant platter by pairing them with a dip like hummus or tzatziki for a delightful crunch and creaminess combo. You can also add a touch of flair by garnishing with fresh herbs or serving them in mini cones for a playful presentation. Either way, they’re sure to impress your guests.
Recipe Variations
Looking to mix things up? Here are a few creative twists on the classic carrot chips:
-
Spicy Sriracha Carrot Chips: Drizzle some Sriracha sauce along with the olive oil for an extra kick. Just be cautious with the amount—start with a teaspoon!
-
Honey Glazed Carrot Chips: For a sweet twist, drizzle some honey before baking, resulting in a caramelized, slightly sticky treat!
-
Cinnamon Sugar Carrot Chips: If you have a sweet tooth, toss the baked chips in a mixture of cinnamon and sugar for a dessert-like snack.
-
Herbed Garlic Carrot Chips: Mix in your favorite dried herbs with garlic powder for a fragrant and flavorful twist.
-
Crispy Parmesan Carrot Chips: Add a generous sprinkle of grated Parmesan before baking for cheesy goodness that pairs beautifully with the sweet carrots.
Chef’s Notes
These oven-baked carrot chips have become a staple in my kitchen, especially when I’m feeling snacky but want to avoid the usual potato chip temptation. Over the years, I’ve played around with different seasonings and toppings. One particularly memorable baking session involved an accidental flour cloud in my kitchen when I was trying to add a pinch of cayenne for spice. The kitchen turned into a mini flour explosion! While that batch didn’t turn out exactly as planned, we had a hearty laugh, and those chips still found their way onto our movie night platter.
What I love most about these carrot chips is how versatile and forgiving they are. Don’t sweat it if you burn a batch or two—each experience sharpens your skills!
FAQs and Troubleshooting
-
Why are my carrot chips soggy?
- This usually happens due to excess moisture. Make sure the carrot slices are as thin as possible and pat them dry with a paper towel before tossing them in oil.
-
Can I store leftovers?
- Although best enjoyed fresh, you can keep leftover chips in an airtight container for up to a day. Reheat them briefly in the oven to restore some crispiness.
-
Can I use baby carrots?
- Absolutely! Just slice them thinly, as they tend to be a bit thicker. You may need to adjust the baking time accordingly.
-
What’s the best way to cut the carrots?
- A mandoline slicer is ideal for uniform thickness. If you don’t have one, just use a sharp knife, and try your best to keep the slices even.
Nutritional Info (Optional)
Carrot chips are not only delicious but semi-nutritious too! Here’s a quick overview per serving (based on about one medium carrot):
- Calories: ~50 (with olive oil)
- Carbohydrates: ~10g
- Fat: ~3g (mostly heart-healthy fats from olive oil)
- Fiber: ~2g
- Vitamin A: High (great for vision and skin health!)
There you have it—your ultimate guide to making homemade carrot chips! Now put on that ivory apron, get creative, and let those crunchy delights inspire joy in your kitchen. Happy cooking!
PrintHomemade Carrot Chips

Deliciously crunchy oven-baked carrot chips that are a guilt-free snack option.
- Prep Time: 10 minutes
- Cook Time: 20 minutes
- Total Time: 30 minutes
- Yield: 2 servings 1x
- Category: Snack
- Method: Baking
- Cuisine: American
- Diet: Vegan
Ingredients
- 2–3 medium Carrots
- 1–2 tablespoons Olive Oil
- Salt to taste
- Seasonings of choice (e.g., garlic powder, smoked paprika, chili powder)
- Parmesan Cheese (optional)
Instructions
- Preheat your oven to 400°F (200°C).
- Prepare the carrots by washing and peeling them, then slice thinly, about 1/8 inch thick.
- Toss the carrot slices with olive oil in a mixing bowl, ensuring they’re well-coated.
- Season the carrots with salt and your choice of seasonings, mixing well.
- Arrange the slices in a single layer on a lined baking sheet, avoiding overlap.
- Bake for about 15-20 minutes, checking occasionally for doneness.
- Cool for a few minutes on the baking sheet to enhance crispiness.
- Serve the chips on a dish, sprinkling with Parmesan if desired.
Notes
These carrot chips make a versatile snack and can be paired with dips like hummus or tzatziki.
Nutrition
- Serving Size: 1 serving
- Calories: 50
- Sugar: 3g
- Sodium: 150mg
- Fat: 3g
- Saturated Fat: 0g
- Unsaturated Fat: 3g
- Trans Fat: 0g
- Carbohydrates: 10g
- Fiber: 2g
- Protein: 1g
- Cholesterol: 0mg
Keywords: carrot chips, healthy snacks, oven-baked snacks, vegetable chips
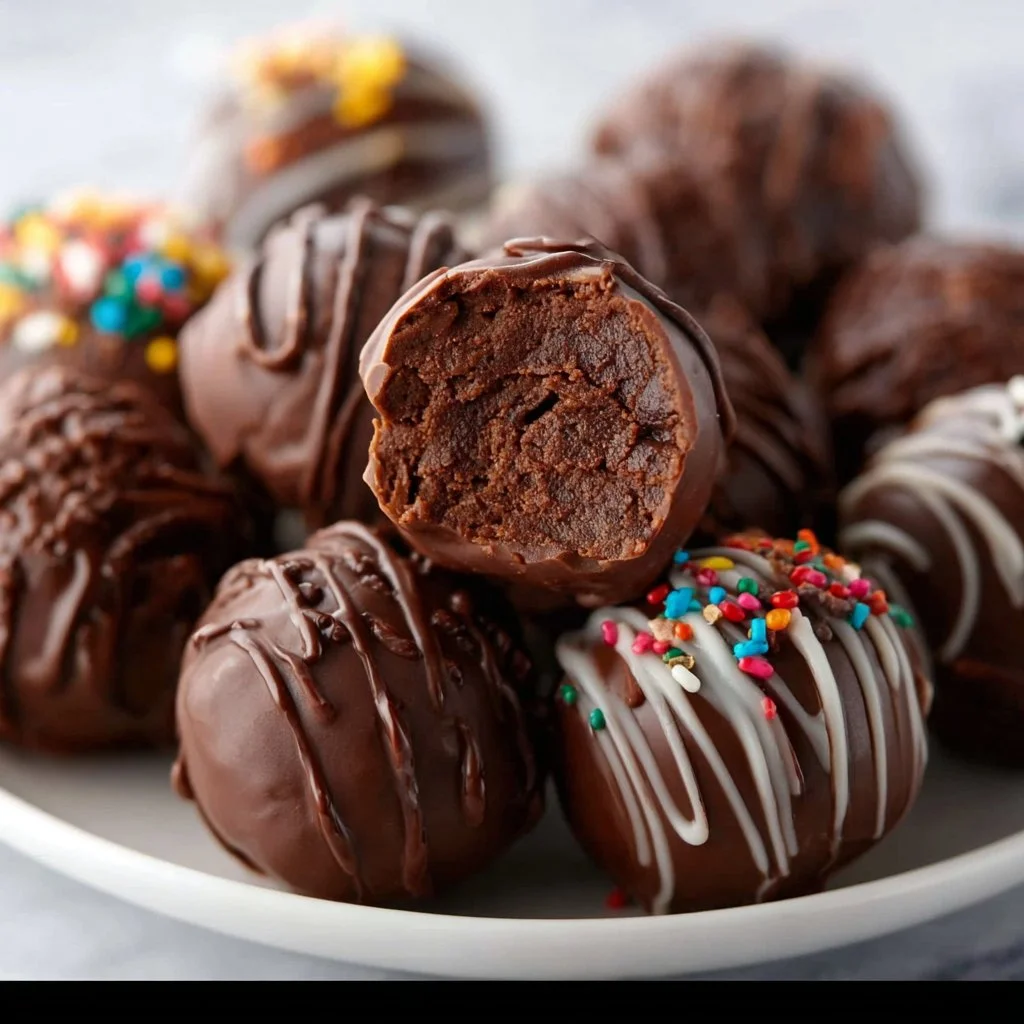
Keto Brownie Truffles Recipe
Decadent Keto Brownie Truffles: A Guilt-Free Indulgence
Hello, fellow food lovers! If you’ve ever found yourself dreaming of that rich, chocolatey goodness without the guilt, I’ve got a treat for you today. Say hello to Keto Brownie Truffles! They are a low-carb delight that brings all the joys of brownies in a convenient truffle form—perfect for noshing after dinner or sharing at your next gathering (if you can bear to part with them).
When I started my journey into the world of low-carb baking, I was nervous. I mean, how can you replicate that fudgy texture and decadent flavor we all know and love? But once I discovered the magic of almond flour and Swerve sweetener, I was hooked! The first time I brought these truffles to a potluck, the compliments just kept rolling in. Friends were raving about them and asking for the recipe. And that’s how I knew I needed to share this simple yet delightful creation with all of you!
What I love most about these brownie truffles is not just their delectable taste but their versatility. You can easily customize them, add spices, and roll them in different coatings. Light, rich, and totally satisfying, making keto living enjoyable and deliciously sweet. Ready to roll up your sleeves and dive into the kitchen with me? Let’s get started!
Personal Story
Let me take you back to my childhood, where my grandmother’s kitchen was the heart of our home. The air was always filled with warm aromas of freshly baked brownies, and those moments spent with her were priceless. She taught me the value of simple ingredients and how a little creativity could turn them into something spectacular. We’d bake together on rainy afternoons, the sound of laughter filling the room as we fought over who got to lick the mixing bowl.
Now, while my grandma’s traditional brownies were divine, I often craved a healthier alternative. Fast forward to today, and I’m grateful that I can honor her recipes and bring my modern twist to the table with these Keto Brownie Truffles. They capture that nostalgic brownie flavor while allowing us to indulge without guilt. It’s my way of keeping our sweet memories alive while embracing a healthier lifestyle.
Ingredients
Let’s gather our magic potion! Here’s what you’ll need to whip up these keto brownie truffles:
-
1 1/4 cup almond flour
A low-carb hero with a slightly nutty flavor. If you don’t have almond flour, you can try coconut flour, but note that you’ll need less (about 1/3 cup) since it absorbs more moisture. -
1/2 cup powdered Swerve Sweetener
This erythritol-based sweetener mimics sugar’s sweetness without the carbs. If you prefer another powdered sweetener, make sure it’s keto-friendly and doesn’t have a funky aftertaste! -
1/4 cup cocoa powder
This is where we get that chocolate goodness! Choose unsweetened for a more concentrated chocolate flavor; you can substitute with carob powder if you’re avoiding chocolate. -
Pinch salt
Balancing the sweetness, a little salt enhances the chocolate flavor beautifully. If you like a bit more depth, feel free to use sea salt. -
1/2 cup butter (melted)
Rich and creamy, butter helps create that fudgy texture. If you want to use coconut oil for a dairy-free option, just make sure it’s melted. -
1 tsp vanilla extract
Vanilla is a classic that brightens up all the other flavors. Feel free to experiment with almond extract for a twist! -
Water if needed
Sometimes the mixture needs a splash of water to achieve the right consistency—don’t hesitate to add it slowly! -
3 ounces sugar-free dark chocolate (chopped)
This adds extra decadence. You can use any kind of sugar-free dark chocolate you enjoy. -
1/2 ounce cocoa butter (or 1 tbsp coconut oil)
Cocoa butter intensifies the chocolate flavor and adds a silky texture, but coconut oil works perfectly as a substitute if that’s what you have on hand!
Step-by-Step Instructions
Now that we have all our ingredients lined up, let’s get cooking!
-
Preheat Your Oven: Set your oven to 350°F (175°C). Preheating helps ensure even cooking. While that’s warming up, grab a mixing bowl!
-
Mix Dry Ingredients: In a medium bowl, combine the almond flour, powdered Swerve sweetener, cocoa powder, and a pinch of salt. Whisk them together until they’re evenly mixed. Here’s a little chef hack: sifting the cocoa powder before mixing can help break up clumps and enhance the texture of your truffles.
-
Incorporate Wet Ingredients: In a separate bowl, combine the melted butter, vanilla extract, and any water you might need. Gently stir until fully blended. You want smoothness here — the smoother, the creamier your truffles will be!
-
Combine the Mixtures: Pour the wet ingredients into the dry ingredients and stir until just combined. If the batter feels too crumbly, add a teaspoon of water at a time until you achieve a thick dough-like consistency.
-
Fold in Chocolate: Gently fold in the chopped sugar-free dark chocolate. This is the moment the decadence really comes together! Use a spatula to ensure the chocolate is evenly distributed.
-
Shape the Truffles: Using your hands, scoop out tablespoon-sized portions of the dough and roll them into balls. Don’t stress about being perfect; the slight imperfections add charm!
-
Chill: Place the truffle balls on a parchment-lined baking sheet and pop them in the fridge for about 30 minutes. Chilling helps them firm up nicely.
-
Melt Coating: While the truffles chill, melt the cocoa butter (or coconut oil) in a microwave-safe dish until completely liquid. Then, remove your truffles from the fridge.
-
Coat Your Truffles: Dip each truffle into the melted cocoa butter or coconut oil, then roll in additional cocoa powder (or crushed nuts if you prefer a crunchy coating). Place them back on the parchment to set.
-
Serve & Enjoy: Once set, they’re ready to enjoy or store in an airtight container in the fridge for up to a week. Trust me, they won’t last long—each bite is pure bliss!
Serving Suggestions
When it comes to plating these Keto Brownie Truffles, keep it simple and elegant. Arrange them on a beautiful platter, dust with cocoa powder, and maybe garnish with a few fresh mint leaves for a pop of color. You could even serve them alongside a dollop of whipped cream or a scoop of sugar-free vanilla ice cream for a scrumptious dessert.
Recipe Variations
Feel like mixing it up? Here are a few ideas to make these brownie truffles your own:
-
Nutty Delight: Roll your truffles in finely chopped nuts like pecans or walnuts for an added crunch.
-
Peppermint Twists: Add a few drops of peppermint extract to the batter for a refreshing holiday twist!
-
Spicy Kick: A pinch of cayenne or chili powder can elevate the chocolate flavor and give it an unexpected kick.
-
Mocha Magic: Mix in a tablespoon of instant coffee granules for a delightful mocha flavor.
-
Chewy Coconut: Incorporate unsweetened shredded coconut into the dough for a tropical twist!
Chef’s Notes
These Keto Brownie Truffles have quickly become a staple in my kitchen, a staple I love to whip up on weekends when friends come over for game night. They’re a great conversation starter, and watching faces light up after the first bite is the best reward!
One of the funny things about this recipe is how the smallest adjustments lead to deliciously different flavors. Once, I accidentally used baking soda instead of salt and ended up with a very interesting truffle. That’s the beauty of cooking—sometimes, “mistakes” lead to delightful surprises that elevate your culinary exploration!
FAQs and Troubleshooting
1. My mixture is too dry. What should I do?
No worries! Just add water or a little melted butter, one teaspoon at a time, until it reaches a thick but manageable consistency.
2. Can I use whole wheat flour instead of almond flour?
Whole wheat flour is not low-carb. Stick with almond flour or coconut flour for an optimal keto option.
3. How do I store these truffles?
Keep them in an airtight container in the fridge for up to a week. They also freeze well, so you can save some for a later treat!
4. What if I don’t have sugar-free dark chocolate?
You can substitute it with any other unsweetened chocolate, but remember to account for the sweetness in your truffle mixture!
Nutritional Info
(This is optional and could include details like calories, fat, protein, and carb counts based on serving sizes).
Per Truffle (Approx. 1 truffle):
- Calories: 90
- Fat: 8g
- Protein: 2g
- Carbs: 3g (Net Carbs: 1g)
- Fiber: 2g
So, there you have it, my wonderful foodies! These Keto Brownie Truffles are an easy and delicious way to satisfy your chocolate cravings while sticking to your healthy eating plans. I hope you enjoy making them as much as I do. Let’s tie on those aprons, and we’ll create some kitchen magic together! Happy cooking, everyone!
PrintDecadent Keto Brownie Truffles

Keto Brownie Truffles are a low-carb delight that offers the rich chocolate flavor of brownies in a convenient truffle form, perfect for guilt-free indulgence.
- Prep Time: 15 minutes
- Cook Time: 0 minutes
- Total Time: 45 minutes
- Yield: 12 servings 1x
- Category: Dessert
- Method: Chilling
- Cuisine: Keto
- Diet: Keto
Ingredients
- 1 1/4 cup almond flour
- 1/2 cup powdered Swerve Sweetener
- 1/4 cup cocoa powder
- Pinch salt
- 1/2 cup butter (melted)
- 1 tsp vanilla extract
- Water if needed
- 3 ounces sugar-free dark chocolate (chopped)
- 1/2 ounce cocoa butter (or 1 tbsp coconut oil)
Instructions
- Preheat your oven to 350°F (175°C).
- Mix the almond flour, powdered Swerve sweetener, cocoa powder, and a pinch of salt in a medium bowl.
- Incorporate the melted butter, vanilla extract, and any water in a separate bowl.
- Combine the wet ingredients with the dry ingredients until just mixed.
- Fold in the chopped sugar-free dark chocolate.
- Shape the dough into tablespoon-sized balls.
- Chill on a parchment-lined baking sheet for about 30 minutes.
- Melt the cocoa butter or coconut oil in a microwave-safe dish.
- Coat each truffle in the melted cocoa butter or coconut oil, then roll in cocoa powder.
- Serve and enjoy or store in an airtight container in the fridge.
Notes
These truffles can be customized with various coatings and flavors. They store well in the fridge for up to a week.
Nutrition
- Serving Size: 1 truffle
- Calories: 90
- Sugar: 1g
- Sodium: 50mg
- Fat: 8g
- Saturated Fat: 5g
- Unsaturated Fat: 3g
- Trans Fat: 0g
- Carbohydrates: 3g
- Fiber: 2g
- Protein: 2g
- Cholesterol: 30mg
Keywords: Keto, Brownies, Truffles, Low-Carb, Desserts
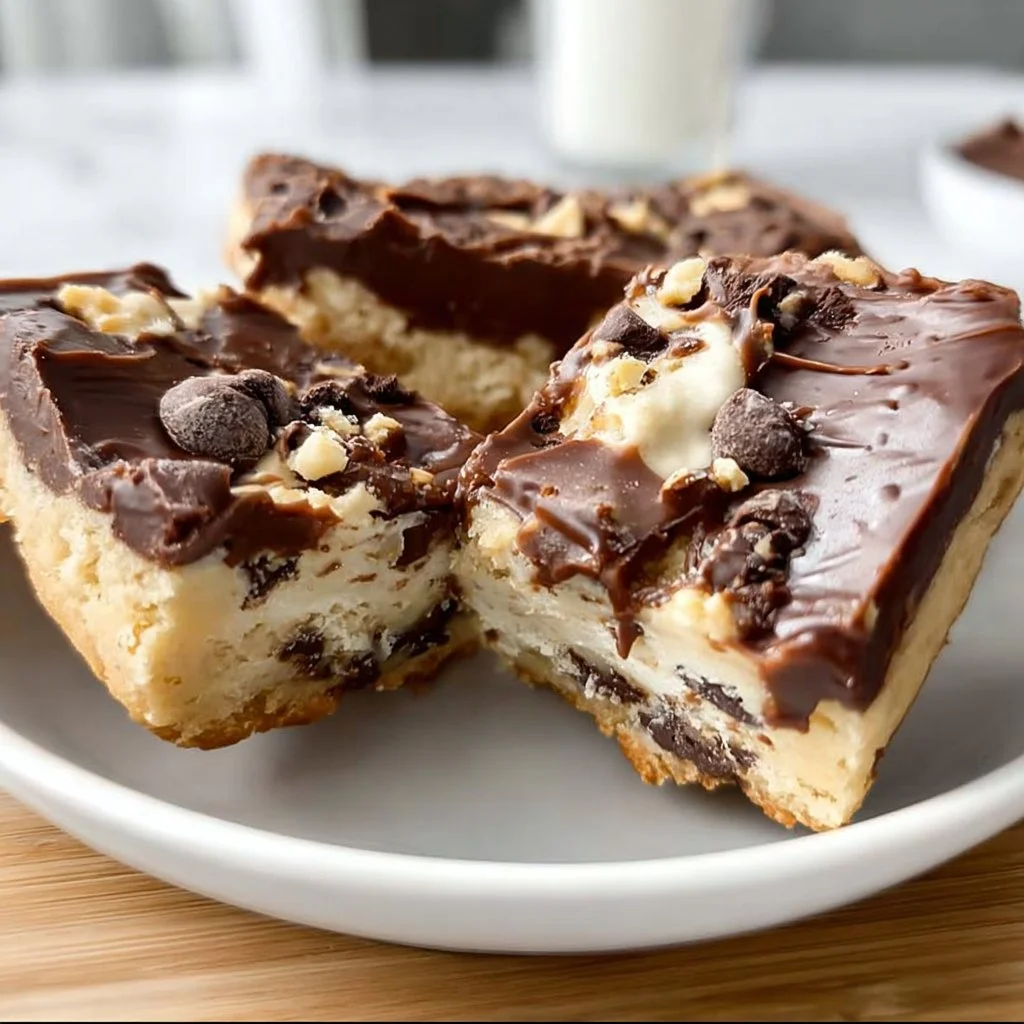
Sugar Free Low Carb Cookie Bars
# Delightful Sugar-Free Low Carb Cookie Bars

## Introduction

Hey, friend! Have you ever experienced that moment when you’re just craving something deliciously sweet, but you want it to be a little kinder to your waistline? Today, I’m thrilled to share my go-to recipe for Sugar-Free Low Carb Cookie Bars that will satisfy those sweet cravings without the guilt.

These little gems are not only simple to make but also pack all the flavor you would expect from a traditional cookie. As a recipe creator, I firmly believe that you shouldn’t have to sacrifice taste for health—or vice versa! With just a few quality ingredients, you’ll whip up a batch of these bars that may very well become your new favorite treat.

And trust me, whether you’re watching your sugar intake or simply looking for a deliciously healthy snack option, these cookie bars are bound to impress—even your non-dieting friends will be clamoring for a second bite!

So, tie on your apron, grab your mixing bowl, and let’s dive into this delightful, low-carb adventure together!

## Personal Story

I have to take you back to my college days—a time filled with late-night study sessions, laughter, and of course, super questionable snack choices. As finals rolled around, my best friends and I would gather in the kitchen, trying to fuel our brains with whatever we could find. It was during those frantic nights of studying that I first started to experiment with healthier desserts.

One evening, with a few ingredients left in the pantry, I decided to whip up a batch of cookie bars using almond flour and peanut butter. It was an instant hit among my friends! The energy boost from these cookie bars kept us fueled through the most stressful study sessions. Every bite reminded us that healthy doesn’t have to mean boring, and these bars became our go-to snack during finals week.

Fast forward to today, and I’ve refined that original recipe into these Sugar-Free Low Carb Cookie Bars. They’re just as delicious as those late-night creations but packed with all the good stuff. Now, whenever I make these bars, I’m taken back to those cherished memories of friendship and study sessions that went into the wee hours of the night.

## Ingredients

Let’s break down the ingredients you’ll need to make these delectable cookie bars. Each ingredient plays an important role in flavor and texture:

- **1 cup almond flour**
  Perfect for those low-carb diets, almond flour adds a subtly sweet flavor along with fiber and healthy fats. Looking for a substitute? You might try sunflower seed flour for a nut-free option, though it may alter the flavor slightly.

- **1/2 cup peanut butter or almond butter**
  This ingredient is your creamy base. Peanut butter lends a rich flavor; however, almond butter is a great alternative for those watching their cholesterol or who prefer a gentler taste.

- **1/4 cup sugar-free sweetener**
  Whether you use erythritol, monk fruit, or stevia, this sweetener will give your bars that delightful sweetness without the sugar crash! If you prefer natural sweeteners, consider using mashed ripe banana, but keep in mind that it will increase the carb count.

- **1/4 cup coconut oil, melted**
  Coconut oil not only helps bind the ingredients but also adds a subtle flavor and healthy fats. Unsalted butter or any mild-flavored oil can serve as a substitute.

- **1 tsp vanilla extract**
  This brings depth and warmth to your bars. Always use pure vanilla extract if you can for the best taste. In a pinch, vanilla essence will do, but the flavor might be less robust.

- **1/4 tsp salt**
  A touch of salt heightens flavors and balances the sweetness. You can use sea salt or Himalayan salt, both work well.

- **1/2 cup dark chocolate chips (sugar-free, optional)**
  For those who love a chocolaty kick, sugar-free dark chocolate chips can add that indulgent feeling without the sugar. If you’d rather skip the chocolate, feel free to leave it out for classic cookie bars.

## Step-by-Step Instructions

Now, let’s get into the fun part: making these cookie bars! Just follow these simple steps, and you’ll be on your way to cookie heaven.

1. **Preheat Your Oven**
   Preheat your oven to 350°F (175°C). This ensures your bars cook evenly and gives you that warm, inviting aroma wafting through the kitchen.

2. **Prepare Your Baking Dish**
   Line an 8x8 inch baking dish with parchment paper, leaving some overhang on the sides. This will make it super easy to lift the bars out later and slice them into pretty squares. No one wants sticky bars stuck to the pan!

3. **Mix the Wet Ingredients**
   In a mixing bowl, combine your peanut butter (or almond butter) and melted coconut oil. Use a rubber spatula or spoon to blend until smooth. Then, stir in the sweetener and vanilla extract until thoroughly mixed. It should look creamy and inviting—just like a good hug!

4. **Into the Dry Ingredients**
   Next, add your almond flour and salt to the wet mixture. Stir until just combined. You don’t want to overmix; a few lumps are perfectly fine! If you're incorporating dark chocolate chips, fold them in now to distribute the chocolate goodness throughout the dough.

5. **Spread Into the Dish**
   Transfer the dough into your prepared baking dish. Use the back of a spatula or your fingers to gently press the mixture into an even layer. Remember, it doesn’t have to look perfect; we're going for rustic charm here!

6. **Bake**
   Place your dish in the oven and let those cookie bars bake for about 15-20 minutes, or until they're golden brown around the edges. Keep an eye on them, though—we want them chewy in the middle, not crunchy!

7. **Cool**
   Once baked, remove the dish from the oven and let it cool in the pan for about 10 minutes. Then, lift the bars out using the parchment paper and allow them to cool completely on a wire rack. This step is crucial because it helps the bars set properly.

8. **Slice and Serve**
   Once they’re cool, slice them into squares or bars—and finally, dig in! The moment you taste that first bite, you’ll appreciate the harmonious blend of flavors and textures.

## Serving Suggestions

What’s the perfect way to serve these delightful cookie bars? Simple! Arrange them on a beautiful platter, maybe dust them with a sprinkle of powdered erythritol for that café-style finish. Pairing them with a hot cup of coffee or a glass of almond milk makes for a fabulous afternoon treat. Feeling fancy? Add a dollop of whipped coconut cream on top for an extra touch of sweetness!

## Recipe Variations

There’s so much versatility in this recipe! Here are a few delicious variations to try:

1. **Nutty Bliss**: Swap half the almond flour for chopped nuts like walnuts or pecans for added crunch.

2. **Fruity Twist**: Mix in 1/4 cup of unsweetened coconut flakes or dried unsweetened cranberries for a chewy texture and natural sweetness.

3. **Spiced Up**: Add a teaspoon of cinnamon or pumpkin spice to give these bars a delightful warmth—perfect for cozy evenings!

4. **Cocoa Delight**: Replace 1/4 cup of almond flour with unsweetened cocoa powder for a chocolatey version that will satisfy any chocolate lover.

5. **Protein Boost**: Stir in a scoop of low-carb protein powder for a nutritional punch.

## Chef’s Notes

These Sugar-Free Low Carb Cookie Bars started as an experimental late-night snack, and it warms my heart to see them evolve into a beloved recipe. I can’t tell you how many times I’ve come back to this treat when craving something sweet without the sugar.

One time while prepping for a dinner party, I let my best friend take the lead on the baking while I prepped other dishes. Let’s just say we forgot the salt—oops! But you know what? They still turned out amazing. It just shows that when using quality ingredients, even little mistakes can lead to delightful surprises in the kitchen!

## FAQs and Troubleshooting

**Q: My cookie bars turned out too crumbly. What happened?**
A: This can happen if there’s too much dry ingredient or if they didn’t bake long enough. Make sure to measure accurately and give them enough time to set.

**Q: Can I make these bars vegan?**
A: Absolutely! Substitute the egg with a chia egg (1 tablespoon chia seeds + 2.5 tablespoons water, let sit for 5 mins), and try using a plant-based butter instead of coconut oil.

**Q: How long do these cookie bars last?**
A: In an airtight container at room temperature, they should last about a week. If you want to keep them longer, pop them in the fridge, where they can last about 2 weeks.

**Q: Can I freeze these cookie bars?**
A: Yes! Slice and wrap them individually in plastic wrap, then place them in a freezer-safe bag. They can last up to 3 months in the freezer. Just thaw a slice when those sweet cravings hit!

## Nutritional Info

While I can't provide exact nutritional values, each serving (based on a total of 16 bars) is packed with protein and healthy fats while remaining low in carbs. This makes them a delightful option in your snacking rotation.

---

There you have it—delicious and simple Sugar-Free Low Carb Cookie Bars that anyone can whip up! I hope you enjoyed this little kitchen adventure with me and found inspiration to create your own magical memories, just like I did. Let’s keep the conversation going—let me know how your cookie bars turn out!
Sugar-Free Low Carb Cookie Bars

Delicious and guilt-free cookie bars that satisfy sweet cravings without the carbs.
- Prep Time: 10 minutes
- Cook Time: 20 minutes
- Total Time: 30 minutes
- Yield: 16 bars 1x
- Category: Dessert
- Method: Baking
- Cuisine: American
- Diet: Gluten-Free, Low Carb
Ingredients
- 1 cup almond flour
- 1/2 cup peanut butter or almond butter
- 1/4 cup sugar-free sweetener
- 1/4 cup coconut oil, melted
- 1 tsp vanilla extract
- 1/4 tsp salt
- 1/2 cup dark chocolate chips (sugar-free, optional)
Instructions
- Preheat your oven to 350°F (175°C).
- Prepare an 8×8 inch baking dish by lining it with parchment paper.
- Mix the peanut butter (or almond butter) and melted coconut oil until smooth; stir in the sweetener and vanilla extract.
- Add almond flour and salt to the wet mixture and stir until just combined; fold in chocolate chips if using.
- Transfer the dough into the prepared baking dish, pressing it into an even layer.
- Bake for 15-20 minutes, or until golden brown around the edges.
- Cool for about 10 minutes in the pan, then lift out using parchment and cool completely on a wire rack.
- Slice into squares and enjoy!
Notes
These cookie bars can be customized with various mix-ins and are great paired with coffee or almond milk.
Nutrition
- Serving Size: 1 bar
- Calories: 180
- Sugar: 1g
- Sodium: 200mg
- Fat: 14g
- Saturated Fat: 5g
- Unsaturated Fat: 7g
- Trans Fat: 0g
- Carbohydrates: 6g
- Fiber: 2g
- Protein: 6g
- Cholesterol: 0mg
Keywords: sugar-free, low carb, cookies, dessert, healthy snacks