
Crockpot BBQ Chicken
Slow Cooker BBQ Chicken: A Savory Sensation for Any Gathering
Hey there, fellow food lovers! Welcome back to Ivory Apron, where the kitchen feels like home and cooking feels like an art. Today, I’m beyond excited to share one of my go-to recipes for those busy weeknights or laid-back weekends—Crockpot BBQ Chicken! This dish is perfect for cozy family dinners, entertaining guests, or even as meal prep for the week.
Picture this: It’s a warm evening; the sun is setting, casting a beautiful golden glow in your kitchen. You’ve tied on your favorite apron, and the tantalizing aroma of BBQ chicken wafts through the air, promising deliciousness. Not only does this dish deliver that mouthwatering flavor, but it’s also incredibly easy to make—just toss everything into the crockpot and let it work its magic!
I’ll take you through every step from preparation to serving, ensuring that you feel like a pro—even if it’s your first time in the kitchen. Whether you’re hosting a backyard BBQ or simply craving some comforting chicken sandwiches, this recipe is your ticket to culinary bliss. So grab your apron, and let’s get cooking!
Personal Story
Ah, BBQ chicken! It takes me back to those long summer evenings at my grandparents’ backyard; the grill was always fired up, and the laughter of family sprinkled the air. My grandmother would marinate the chicken in her secret BBQ sauce, letting it soak in that smoky-sweet flavor. I can still see my younger self stealing bites as it grilled, trying to sneak a taste of that delicious sauce.
When we moved our gatherings inside for some reason—perhaps a sudden summer storm or an unexpected drop in temperature—the crockpot came to the rescue. My mom would whip up her version of BBQ chicken, letting it simmer away while we played board games. It became a family favorite—something that was equally perfect for game night as it was for Sunday dinners. Now I get to share the joys of this dish with you, blending nostalgia with practicality in the modern kitchen.
Ingredients
Here’s what you’ll need to prepare this delectable dish:
-
4 Boneless, Skinless Chicken Breasts
These beauties are the heart of the dish! They’re tender, juicy, and soak up every ounce of flavor from the BBQ sauce. You can easily substitute with thighs if you prefer dark meat; they’re a bit richer in flavor and won’t dry out as easily. -
1 Cup BBQ Sauce
Choose your favorite brand or homemade variety! I love a classic sauce that balances sweetness and tanginess. If you’re feeling adventurous, try a spicy or smoky BBQ sauce for a flavor twist. -
1/4 Cup Chicken Broth
This adds moisture and richness without overwhelming the BBQ flavor. If you don’t have broth on hand, water or even apple cider can work—though that may change the flavor profile a bit. -
1 Tablespoon Worcestershire Sauce
This umami-packed sauce enhances the overall flavor and gives a depth that’s simply divine. If you’re avoiding it, soy sauce is an excellent substitute, though it may alter the flavor slightly. -
1 Teaspoon Garlic Powder
Garlic lovers rejoice! This ingredient adds a savory kick. If you have fresh garlic, feel free to substitute 2-3 minced cloves for an even fresher taste. -
1 Teaspoon Onion Powder
A must-have for that deep, aromatic taste. In a pinch, finely chopped onions or shallots can do the trick! -
Salt and Pepper to Taste
Essential for bringing all the flavors together. I recommend starting with a bit and adding more as needed during cooking. -
Buns for Serving (Optional)
These are a great way to turn your BBQ chicken into delicious sandwiches! Opt for soft brioche buns for a little luxury, or use whole grain for a healthier twist.
Step-by-Step Instructions
Here’s how to get your Crockpot BBQ Chicken ready for a glorious feast!
1. Prep Your Chicken
Begin by rinsing your chicken breasts under cold water, then pat them dry with paper towels. Drying them ensures better seasoning absorption and browning. Trim off any excess fat for a leaner dish.
2. Season and Layer
Sprinkle the chicken breasts with salt, pepper, garlic powder, and onion powder. Don’t be shy—seasoning is where flavor starts! Lay them in the bottom of the crockpot, making sure they’re arranged neatly in a single layer.
3. Mix Your Sauces
In a separate bowl, whisk together the BBQ sauce, Worcestershire sauce, and chicken broth until it’s well combined. This is where you can taste-test and adjust—add a pinch of chili powder or honey if you like!
4. Pour and Cover
Pour the mixture over the seasoned chicken, making sure they’re well coated. Pop the lid on your crockpot, set it to low heat, and let it do its magic for 6-8 hours. Pro tip: avoid lifting the lid during cooking! Every time you check, you lose precious heat and extend the cooking time.
5. Shred and Serve
When you’re ready to eat, carefully insert a fork or two into the chicken and shred it right in the pot! It should fall apart easily if cooked correctly. If you want a thicker sauce, keep the lid off for the last half hour and let it reduce.
6. Toast Your Buns
For that extra touch, pop some buns under the broiler for a minute or two until they’re delightfully toasted. A little butter before toasting goes a long way for flavor!
Serving Suggestions
Now that your BBQ chicken is ready, it’s time to serve! Pile the juicy, shredded chicken onto toasted buns, adding coleslaw or pickle slices for crunch if you like. Arrange them on a wooden cutting board surrounded by napkins for a rustic touch. It’s perfect for feeding a crowd.
Recipe Variations
Want to shake things up? Here are a few creative twists you can make with this recipe:
-
Spicy BBQ Chicken: Mix in some cayenne pepper or hot sauce into the BBQ sauce for a kick!
-
Honey Mustard Flavor: Swap out the BBQ sauce for honey mustard for a sweet-savory experience!
-
Greek Inspired: Add some oregano, lemon juice, and serve it in pita bread with tzatziki.
-
Veggie Lovers Delight: Toss in some halved bell peppers or onions while cooking for added veggies and flavor.
-
Low-Carb Option: Serve over lettuce instead of buns for a refreshing, low-carb alternative.
Chef’s Notes
Every time I make this recipe, I’m reminded of family gatherings and the love that food brings us together. There was one summer where I overestimated how hungry we all were—I had made way too much chicken! But instead of leftovers, my friends and family made unforgettable memories, serving the BBQ chicken in tacos, nachos, and even pizzas! Creativity flourishes in the kitchen, and that’s what makes cooking so special. Trust me; this dish will cater to any occasion!
FAQs and Troubleshooting
1. What if my chicken is dry?
If your chicken turns out dry, make sure to season it adequately and check that your crockpot temperature is set correctly. Adding more liquid during cooking can help keep it moist.
2. How can I make this recipe ahead of time?
Prep everything the night before! Season the chicken and mix your sauces, storing it in the fridge. In the morning, toss it into the crockpot for effortless evening dinner!
3. Can I use frozen chicken?
Yes, you can use frozen chicken, but increase the cooking time to 8-10 hours. Always check to ensure the chicken is thoroughly cooked before serving.
4. How can I store leftovers?
Store any leftover BBQ chicken in an airtight container in the refrigerator for up to three days. You can also freeze portions for up to three months—perfect for a quick weeknight meal!
Nutritional Info (Optional)
While specific nutritional information can vary, here’s a general overview for this BBQ chicken recipe:
- Calories: Approximately 300 per serving (including a bun)
- Protein: 30g
- Carbohydrates: 30g
- Fat: 6g
Feel free to adapt the recipe’s elements to suit any dietary requirements!
I hope you’ll give this Crockpot BBQ Chicken recipe a try—it’s simplicity and delicious flavor are sure to impress any diners at your table. Remember, the best memories are made around the table, and I can’t wait to hear about your culinary adventures! Happy cooking, and let’s keep spreading the love of good food. 🌟
PrintSlow Cooker BBQ Chicken

A savory and easy slow cooker BBQ chicken dish perfect for any gathering.
- Prep Time: 15 minutes
- Cook Time: 480 minutes
- Total Time: 495 minutes
- Yield: 4 servings 1x
- Category: Main Course
- Method: Slow Cooking
- Cuisine: American
- Diet: None
Ingredients
- 4 Boneless, Skinless Chicken Breasts
- 1 Cup BBQ Sauce
- 1/4 Cup Chicken Broth
- 1 Tablespoon Worcestershire Sauce
- 1 Teaspoon Garlic Powder
- 1 Teaspoon Onion Powder
- Salt and Pepper to Taste
- Buns for Serving (Optional)
Instructions
- Prep Your Chicken: Rinse the chicken breasts under cold water, then pat them dry with paper towels.
- Season and Layer: Sprinkle the chicken with salt, pepper, garlic powder, and onion powder, then lay them in the crockpot.
- Mix Your Sauces: Whisk together the BBQ sauce, Worcestershire sauce, and chicken broth in a separate bowl.
- Pour and Cover: Pour the sauce mixture over the seasoned chicken, cover, and set to low for 6-8 hours.
- Shred and Serve: Shred the chicken in the pot with forks when ready to eat.
- Toast Your Buns: Toast the buns under the broiler if desired.
Notes
For extra flavor, consider adding some cayenne pepper or hot sauce to the BBQ sauce.
Nutrition
- Serving Size: 1 serving
- Calories: 300
- Sugar: 8g
- Sodium: 600mg
- Fat: 6g
- Saturated Fat: 1g
- Unsaturated Fat: 5g
- Trans Fat: 0g
- Carbohydrates: 30g
- Fiber: 1g
- Protein: 30g
- Cholesterol: 80mg
Keywords: BBQ chicken, slow cooker, easy chicken recipes, family dinner
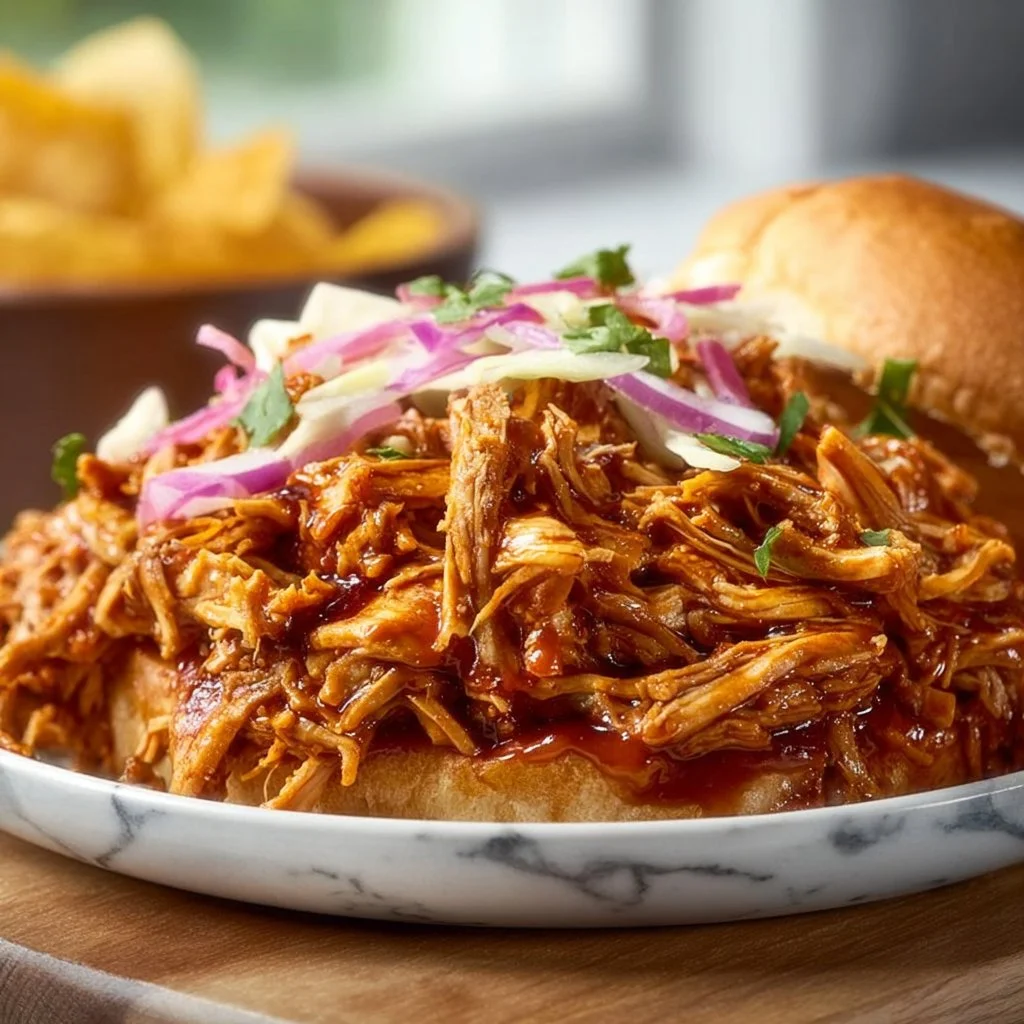
Crock Pot BBQ Pulled Chicken
The Best Crock Pot BBQ Pulled Chicken Recipe
Hey there, fellow foodies! 👋 Welcome back to Ivory Apron, where cooking feels elegant yet comforting, and dishes come together without the fuss. Today, I’m super excited to share one of my absolute favorite recipes: Crock Pot BBQ Pulled Chicken! This dish embodies everything I love about cooking—it’s uncomplicated, flavorful, and perfect for everything from a casual weeknight dinner to a lively gathering with friends.
Picture this: You’ve had a long day, and the last thing you want to do is spend hours in the kitchen. Enter the humble crock pot—your trusty sidekick that does all the heavy lifting while you sit back and binge your favorite show. With just a few ingredients, you’ll create tender, juicy pulled chicken that’s dripping with rich BBQ flavor. Not to mention, your house will smell positively irresistible!
Imagine lifting the lid of your crock pot to reveal perfectly cooked chicken that pulls apart effortlessly. You can serve it on a bun or over a bed of rice, maybe with some coleslaw on the side. If someone asks what the secret is, just smile and say, “Oh, it’s just my little crock pot magic.” But really, it’s this recipe that’s going to win you a standing ovation (well, at least a sincerely satisfied smile from your dinner guests).
So, buckle up for a culinary adventure as I walk you through my go-to recipe for Crock Pot BBQ Pulled Chicken. Before you know it, you’ll be mastering the art of slow cooking like a pro—and you might even want to host a BBQ just to show off your skills!
Personal Story
Every time I make BBQ pulled chicken, I’m transported back to summer evenings at my grandparents’ house. My grandpa, a true culinary artist at heart, would fire up the backyard grill while the family gathered around, sharing stories and laughter. I remember sneaking into the kitchen to snag a taste of the chicken he’d slow-cooked all day, with those smoky BBQ flavors infusing every juicy bite.
Watching him transform simple ingredients into extraordinary dishes inspired my own love for cooking. His BBQ pulled chicken was legendary—a dish so comforting that it felt less like a meal and more like a warm hug. Fast forward to today, and I’ve created my own version in the crock pot, making it easier than ever to achieve that nostalgic flavor without spending all day in the kitchen. Every bite takes me back to those summer evenings, surrounded by family, with hearts as full as our plates.
Ingredients
Here’s what you’ll need to pull off this delicious Crock Pot BBQ Pulled Chicken:
-
4 boneless, skinless chicken breasts
- These are the star of the show! Boneless and skinless keep things tender and easy to shred. If you’re feeling adventurous, you can use thighs for a richer flavor.
-
1 cup BBQ sauce
- Use your favorite store-bought sauce or make your own! For a spicy kick, opt for a chipotle BBQ sauce.
-
1/2 cup chicken broth
- This will keep the chicken moist as it cooks away. If you’re out, vegetable broth or even water will do in a pinch, but aim for the best flavor.
-
1 tablespoon Worcestershire sauce
- Adds a deep, savory element to the dish. If you’re vegan or vegetarian, use a vegan Worcestershire sauce or skip it completely!
-
1 tablespoon apple cider vinegar
- This brightens up the flavors and balances the sweetness of the BBQ sauce. If you don’t have it, feel free to substitute white vinegar or lemon juice.
-
1 tablespoon brown sugar
- Enhances the flavors and gives sweetness. For a healthier option, use honey or maple syrup for that delightful caramelization.
-
1 teaspoon garlic powder
- Garlic is a must for depth and taste. If you prefer fresh, you can crush a garlic clove or two instead.
-
1 teaspoon onion powder
- Adds that sweet onion flavor without the texture. If you’re using fresh onions, sauté them before adding for a deeper taste.
-
Salt and pepper to taste
- Classic seasoning that brings the whole dish together! Remember, you can always add more later, but it’s hard to take it out once it’s in.
With these ingredients, you’re all set to create a dish that’s as fun to make as it is to eat. Trust me, your taste buds will be thanking you!
Step-by-Step Instructions
Now that you have everything prepped, let’s get cooking! Here’s how you create this mouthwatering BBQ pulled chicken:
-
Prepare the Chicken:
- First, grab those lovely chicken breasts and give them a quick rinse under cold water. Pat them dry with paper towels—this helps to make sure they sear beautifully if you choose to brown them first. If you want that extra flavor kick, feel free to brown the chicken in a skillet over medium-high heat for about 2-3 minutes on each side before adding to the crock pot. This step is optional but can enhance the overall flavor.
-
Make Your Sauce:
- In a mixing bowl, combine the BBQ sauce, chicken broth, Worcestershire sauce, apple cider vinegar, brown sugar, garlic powder, and onion powder. Whisk it all together until it’s well mixed. Let me tell you, this fragrant mixture already has me drooling! This is where all your flavors are going to come from, so taste as you go—adjust with a little more vinegar for tang or brown sugar for sweetness if needed.
-
Layer Your Ingredients:
- Place your chicken breasts at the bottom of your crock pot, and then pour the sauce mixture over the chicken, ensuring that everything is nicely coated. I like to get in there with my hands and give it a little loving massage to make sure each piece of chicken gets that delicious BBQ bath.
-
Set It and Forget It:
- Cover your crock pot and set it on low for 6-8 hours, or on high for 3-4 hours. If you’ve chosen to brown your chicken first, the cook time on high might lean towards the shorter end. This is when the magic happens—your kitchen will fill with the tantalizing aroma of BBQ goodness, making it impossible to resist!
-
Shred It:
- Once your cooking time is up, take the lid off and grab two forks. Shred the chicken right in the crock pot, mixing it into the sauce. You’ll know it’s done when the chicken pulls apart easily. If it looks a little too soupy for your liking, you can let it cook for an extra 15-30 minutes with the lid off for the sauce to reduce.
-
Taste Test:
- This is the moment of truth! Give your pulled chicken a taste and adjust the seasoning with salt and pepper. Don’t be shy—this is your creation!
And there you have it—a stunningly tasty Crock Pot BBQ Pulled Chicken that took minimal effort but will deliver maximum flavor and joy!
Serving Suggestions
For the best experience, lay out a spread that invites everyone to dig in. Serve your pulled chicken on fresh brioche buns for classic BBQ sandwiches, or over a fluffy bed of rice for a hearty meal. Pair it with some crunchy coleslaw on the side for that refreshing contrast, and maybe a pickle or two for that delightful bite. Don’t forget a drizzle of extra BBQ sauce on top, because let’s be real—there’s no such thing as too much!
Recipe Variations
Feeling a little adventurous? Here are some fun twists on the classic BBQ pulled chicken:
- Tropical Twist: Add pineapple juice and some diced pineapple to the sauce for a sweet, tropical flair.
- Spicy Kick: Stir in some diced jalapeños or a teaspoon of cayenne pepper to the sauce for a fiery upgrade.
- Mesquite Flavor: Use a smoky BBQ sauce, and toss in a teaspoon of smoked paprika for extra depth.
- Herbed Delight: Add chopped fresh herbs (like cilantro or basil) to the finished chicken for a burst of freshness.
- Make it Pulled Chicken Salad: Mix your pulled chicken with Greek yogurt or mayo and some diced celery for a yummy salad that fits perfectly in a wrap or on a bed of greens.
Let your creativity shine and make this dish your own!
Chef’s Notes
I’ve been making this BBQ pulled chicken recipe for years now, and it has evolved over time. In the beginning, I followed a traditional recipe step-by-step, but I quickly started adding my personal touches until it truly felt like my own. I remember one time when I accidentally poured in a bit too much apple cider vinegar—and you know what? It turned out spectacular! That delightful tang added a new dimension to the chicken, and now I recommend folks to be bold and experiment.
And that’s what I love most about cooking—each dish tells a story, and each time you prepare it, you have the chance to create your own unique version. Let your kitchen be a playground of flavors!
FAQs and Troubleshooting
1. What if my chicken is tough?
This usually means the chicken was overcooked. Chicken breasts can dry out if cooked too long, even in the crock pot. Stick to the recommended cook time, and check the chicken with a fork for tenderness.
2. Can I use frozen chicken breasts?
Yes! If you’re using frozen chicken breasts, it’s best to cook them on low for 8-10 hours to ensure they cook through. Avoid the high setting, as it won’t defrost the chicken evenly.
3. What if the sauce is too thin?
If the sauce seems too watery, remove the lid for the last 30 minutes of cooking to help it thicken up. You can also mix a tablespoon of cornstarch with a splash of water and stir it in to achieve a thicker sauce.
4. How can I store leftovers?
Store any leftover pulled chicken in an airtight container in the fridge for up to 4 days or freeze it for up to 3 months. Just make sure to let it cool down completely before sealing it in for freezing!
Nutritional Info (Optional)
(Per serving based on 4 servings, without buns)
- Calories: 265
- Protein: 36g
- Carbohydrates: 18g
- Fat: 6g
- Sodium: 540mg
Final Thoughts
Crock Pot BBQ Pulled Chicken is not just a meal; it’s a highlight of any gathering, a perfect centerpiece for casual evenings, and a delight to taste. I hope this recipe inspires you to step into the kitchen with confidence and joy. Cooking doesn’t have to be complicated—it can be a delicious expression of love and creativity.
So tie on your apron, gather your ingredients, and let’s create some mouthwatering memories together! Remember, good food is all about showing up. Can’t wait to hear what you think of the recipe—happy cooking! 🍽️
PrintCrock Pot BBQ Pulled Chicken

Uncomplicated, flavorful BBQ pulled chicken made in a crock pot—perfect for weeknight dinners or gatherings.
- Prep Time: 10 minutes
- Cook Time: 240 minutes
- Total Time: 250 minutes
- Yield: 4 servings 1x
- Category: Main Course
- Method: Slow Cooking
- Cuisine: American
- Diet: Gluten-Free
Ingredients
- 4 boneless, skinless chicken breasts
- 1 cup BBQ sauce
- 1/2 cup chicken broth
- 1 tablespoon Worcestershire sauce
- 1 tablespoon apple cider vinegar
- 1 tablespoon brown sugar
- 1 teaspoon garlic powder
- 1 teaspoon onion powder
- Salt and pepper to taste
Instructions
- Prepare the chicken by rinsing and patting dry.
- Make your sauce by combining BBQ sauce, chicken broth, Worcestershire sauce, apple cider vinegar, brown sugar, garlic powder, and onion powder in a bowl.
- Layer the chicken in the crock pot and pour the sauce over it, coating the chicken well.
- Set the crock pot on low for 6-8 hours or high for 3-4 hours.
- Shred the chicken in the crock pot after cooking, mixing with the sauce.
- Taste test and adjust seasoning as needed.
Notes
Great served on brioche buns or over rice with coleslaw.
Nutrition
- Serving Size: 1 serving
- Calories: 265
- Sugar: 6g
- Sodium: 540mg
- Fat: 6g
- Saturated Fat: 1g
- Unsaturated Fat: 3g
- Trans Fat: 0g
- Carbohydrates: 18g
- Fiber: 0g
- Protein: 36g
- Cholesterol: 90mg
Keywords: pulled chicken, crock pot, BBQ, slow cooker
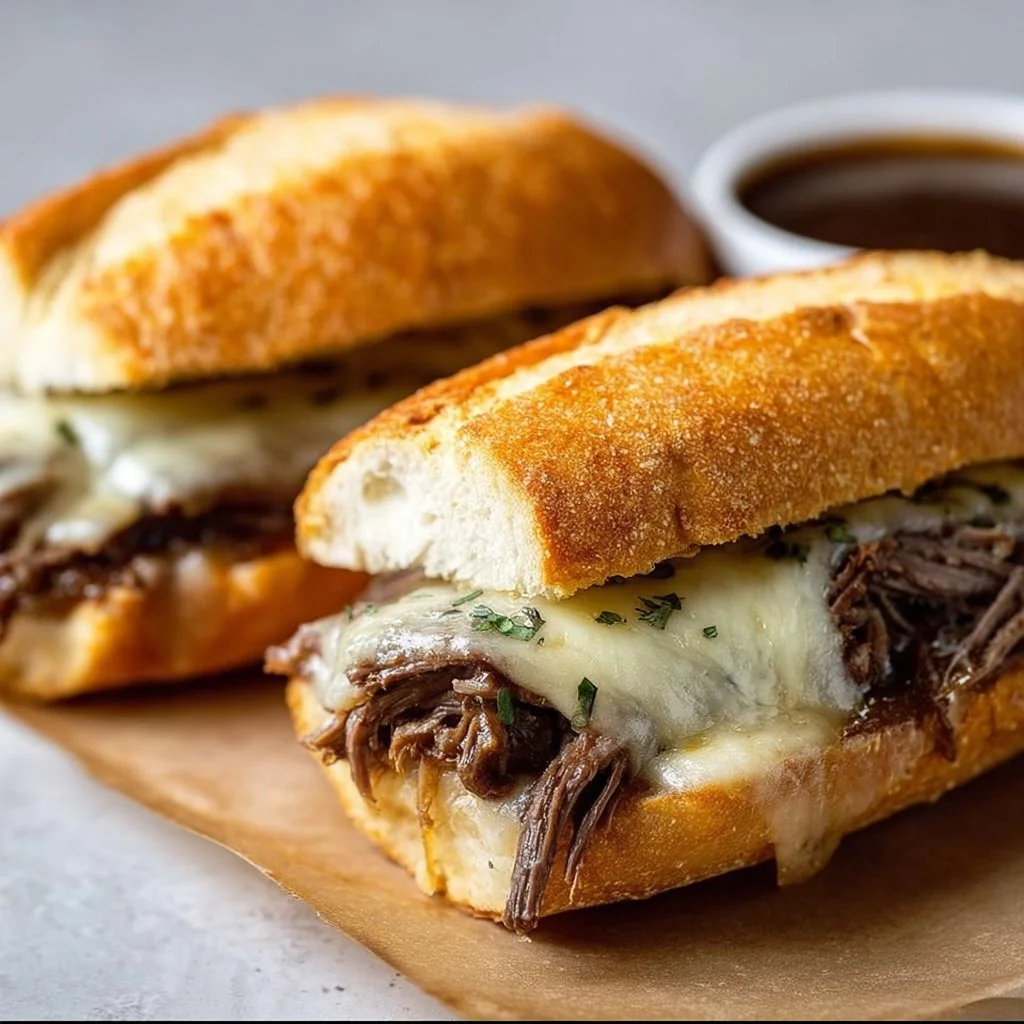
Crockpot French Dip Sandwiches
Savory Slow-Cooked Delight: Crockpot French Dip Sandwiches
Hello, fellow home chefs and food enthusiasts! I’m so excited to share one of my absolute favorite comfort food recipes with you today—Crockpot French Dip Sandwiches. Imagine coming home after a busy day to the irresistible aroma of tender beef, aromatic onions, and savory broth wafting through your house. It’s like being wrapped in a warm culinary hug!
Not only are French Dip Sandwiches one of the most satisfying meals, but they’re also surprisingly simple to make, thanks to our trusty Crockpot. You can let it do the heavy lifting while you tackle your to-do list—or just kick your feet up and catch up on some Netflix binge-watching!
These sandwiches are the quintessential comfort food—perfect for game day gatherings, casual family dinners, or even a cozy date night at home. With every bite, you’ll experience the joy of slow-cooked beef, perfectly soaked bread, and all the flavor that simmers in the pot. And the best part? You don’t have to be a culinary wizard to pull it off!
So, grab your apron and let’s dive into the delightful world of Crockpot French Dip Sandwiches. Trust me, your taste buds will thank you!
Personal Story
Growing up, Sundays were sacred in our household. No matter what was happening during the week, Sunday was the day my family gathered around the table, ready to share stories over a delicious meal. My dad loved trying new recipes, and one year, he decided we’d dive into a classic French Dip Sandwich.
He marinated the beef overnight, and I was in charge of slicing the onions—let me tell you, those tear-filled moments are now some of my fondest kitchen memories! The slow cooker chugged away in the corner, and by midday, the house smelled so good that even the neighbors must have been curious.
That first bite was pure magic—flavorful beef, soft bread, and a dipping sauce that packed a punch. Ever since that day, I’ve made it my mission to perfect the French Dip. Now, every time I make this dish, I’m reminded of those wonderful Sundays shared with family, laughter, and love around the table.
Ingredients
Here’s what you’ll need for this deliciously comforting recipe:
-
3 pounds beef chuck roast
- Perfect for slow cooking, it breaks down beautifully, becoming tender and juicy after hours of simmering.
-
1 onion, sliced
- Adds sweetness and aroma. If you prefer, you can substitute it with shallots for a milder flavor.
-
4 cloves garlic, minced
- Garlic is a game-changer! If you’re feeling adventurous, use roasted garlic for a sweeter, richer flavor.
-
2 cups beef broth
- The base of your dipping sauce. You can use low-sodium broth or homemade, if you have it. Chicken broth can be a good alternative, too, though it will slightly alter the taste.
-
1 tablespoon Worcestershire sauce
- This adds depth and savory umami flavor. If you’re out, soy sauce or balsamic vinegar can make a decent substitute.
-
1 teaspoon dried thyme
- Fresh thyme is a fantastic substitute! I love the hint of earthiness it brings to the dish.
-
Salt and pepper to taste
- Essential for seasoning! Don’t forget to taste as you go to achieve your desired flavor.
-
Hero rolls or French baguette
- A sturdy roll will hold up to the juicy beef. Opt for crusty baguettes if you want an extra crunch.
-
Sliced cheese (optional)
- Provolone or Swiss work wonderfully for those cheesy cravings! You can always skip it or use a dairy-free alternative for dietary needs.
Step-by-Step Instructions
Now let’s get cooking! Follow these steps, and you’ll have a mouthwatering meal in no time.
Step 1: Prepare the Meat
Start by giving your beef chuck roast a little love! Generously season it with salt and pepper on all sides. This step is key for building flavor as it cooks. Heat a skillet over medium-high heat and sear the beef for about 3-4 minutes on each side, just until it gets that lovely brown crust. This creates depth in flavor and elevates the entire dish!
Step 2: Load Your Crockpot
Once seared, place the beef in the Crockpot. It should fit nicely, like a cozy little blanket. Next, dump those beautifully sliced onions and minced garlic over the top. Don’t skimp on the garlic—it’s what will make the flavors sing!
Step 3: Add the Liquid Gold
Pour in the beef broth followed by the Worcestershire sauce. Sprinkle the dried thyme over everything and give it a gentle stir to combine. The liquid will create a luscious broth that becomes your dipping sauce later. Yum!
Step 4: Set It and Forget It
Now comes the easy part! Cover the Crockpot and set it on low for 8-10 hours. Let the magic happen while you enjoy your day. This is the perfect time for a long walk or a catch-up with that book you’ve been meaning to read. Pro tip: if you’re in a rush, cook on high for 4-6 hours, but trust me, slow cooking brings out the best flavors!
Step 5: Shred and Serve
When the time is up and your kitchen smells divine, it’s time to shred that beef! Using two forks, pull the meat apart gently. It should fall apart easily. As it’s shredding, stir it into the juices to soak in all that flavor. You want every bite to be delicious!
Step 6: Toast the Rolls
Preheat your oven to 350°F (175°C). Slice your hero rolls or baguette and place them in a baking dish. Toast them for about 5 minutes, just until they’re warm and slightly crispy. This step helps prevent sogginess when you dip!
Step 7: Assemble the Sandwiches
Now, it’s time for the grand assembly! Scoop that tender beef onto the toasted rolls, top with cheese if desired, and serve with a small bowl of the flavorful broth on the side for dipping. Trust me, the dripping broth makes for the tastiest bite!
Serving Suggestions
When it comes to plating, simplicity is key. Arrange your sandwiches on a large platter, accompanied by small bowls of the savory broth for dipping. A sprinkle of fresh herbs like parsley can add a pop of color! And for an extra flair, consider serving alongside crispy potato chips or a fresh garden salad to round out the meal. Voilà!
Recipe Variations
Here are a few creative twists to make this recipe your own:
-
Spicy French Dip: Add sliced jalapeños or a splash of hot sauce to the broth for a kick.
-
Mushroom and Swiss Variation: Sauté mushrooms and add them to the sandwich for a delightful earthy flavor.
-
Herb-Infused: Use fresh herbs like rosemary and thyme for a more aromatic experience. Just tie them together for easy removal later!
-
BBQ Twist: Mix barbecue sauce with the beef broth for a sweet and tangy barbecue French dip.
-
Vegetarian Option: Swap the beef roast with a hearty portobello mushroom or jackfruit and adjust the broth for a satisfyingly meaty alternative.
Chef’s Notes
There’s something magical about the simplicity of this recipe. It has evolved over the years, from those exciting Sunday afternoons with my family to cozy weeknight dinners with friends. Each time I make it, I find new ways to tweak and personalize the recipe.
One of my favorite funny kitchen moments happened when I forgot to buy beef broth and instead used an experimental mushroom stock. As the family dug into the sandwiches, they were baffled by the delightful umami bomb in every bite! Sometimes kitchen mistakes lead to delicious surprises, and that’s what makes cooking so fun!
FAQs and Troubleshooting
Q1: Why is my beef tough?
If your beef isn’t tender, it probably needs more time in the slow cooker. The beauty of slow cooking is that some cuts of meat need that extra time to break down fully.
Q2: How do I prevent soggy bread?
To avoid sogginess, toast your rolls before assembling the sandwiches. Also, serve the dipping broth on the side instead of soaking the bread in it.
Q3: Can I freeze leftovers?
Absolutely! Gather any leftover beef and broth in a freezer-safe container. When you’re ready to enjoy it again, thaw it out in the fridge and reheat on the stove or microwave.
Q4: What if I don’t have a Crockpot?
No problem! You can make French Dip Sandwiches in a heavy-duty pot on the stovetop. Just cover it, simmer on low for about 3-4 hours, and stir occasionally.
Nutritional Info (Optional)
If you’re curious about the nutritional side of this recipe, here’s a rough overview (per sandwich, without cheese):
- Calories: 450
- Protein: 35g
- Carbohydrates: 45g
- Fat: 15g
(Note: Nutritional values may vary based on specific ingredients used.)
I hope you enjoy making these Crockpot French Dip Sandwiches as much as I do. Remember, cooking is all about joy, creativity, and making delicious memories around the table. So, tie on that apron, pour yourself a glass of something sparkling, and let’s create something beautiful together! Happy cooking!
PrintCrockpot French Dip Sandwiches

A comforting and delicious Crockpot French Dip Sandwich recipe featuring tender beef, aromatic onions, and savory broth, perfect for any occasion.
- Prep Time: 15 minutes
- Cook Time: 600 minutes
- Total Time: 615 minutes
- Yield: 4 servings 1x
- Category: Main Course
- Method: Slow Cooking
- Cuisine: American
- Diet: None
Ingredients
- 3 pounds beef chuck roast
- 1 onion, sliced
- 4 cloves garlic, minced
- 2 cups beef broth
- 1 tablespoon Worcestershire sauce
- 1 teaspoon dried thyme
- Salt and pepper to taste
- Hero rolls or French baguette
- Sliced cheese (optional)
Instructions
- Prepare the Meat: Generously season the beef chuck roast with salt and pepper on all sides. Heat a skillet over medium-high heat and sear the beef for about 3-4 minutes on each side, until browned.
- Load Your Crockpot: Place the seared beef in the Crockpot. Add sliced onions and minced garlic over the top.
- Add the Liquid Gold: Pour in the beef broth and Worcestershire sauce, sprinkle with dried thyme, and stir to combine.
- Set It and Forget It: Cover the Crockpot and set it on low for 8-10 hours.
- Shred and Serve: Once done, shred the beef using two forks and mix it into the broth.
- Toast the Rolls: Preheat oven to 350°F, slice rolls, toast for about 5 minutes.
- Assemble the Sandwiches: Place beef on toasted rolls, top with cheese if desired, and serve with broth on the side.
Notes
To prevent sogginess, toast your rolls before assembling the sandwiches and serve the broth on the side.
Nutrition
- Serving Size: 1 sandwich
- Calories: 450
- Sugar: 2g
- Sodium: 800mg
- Fat: 15g
- Saturated Fat: 5g
- Unsaturated Fat: 7g
- Trans Fat: 0g
- Carbohydrates: 45g
- Fiber: 2g
- Protein: 35g
- Cholesterol: 100mg
Keywords: French Dip, Sandwich, Comfort Food, Crockpot, Slow Cooker