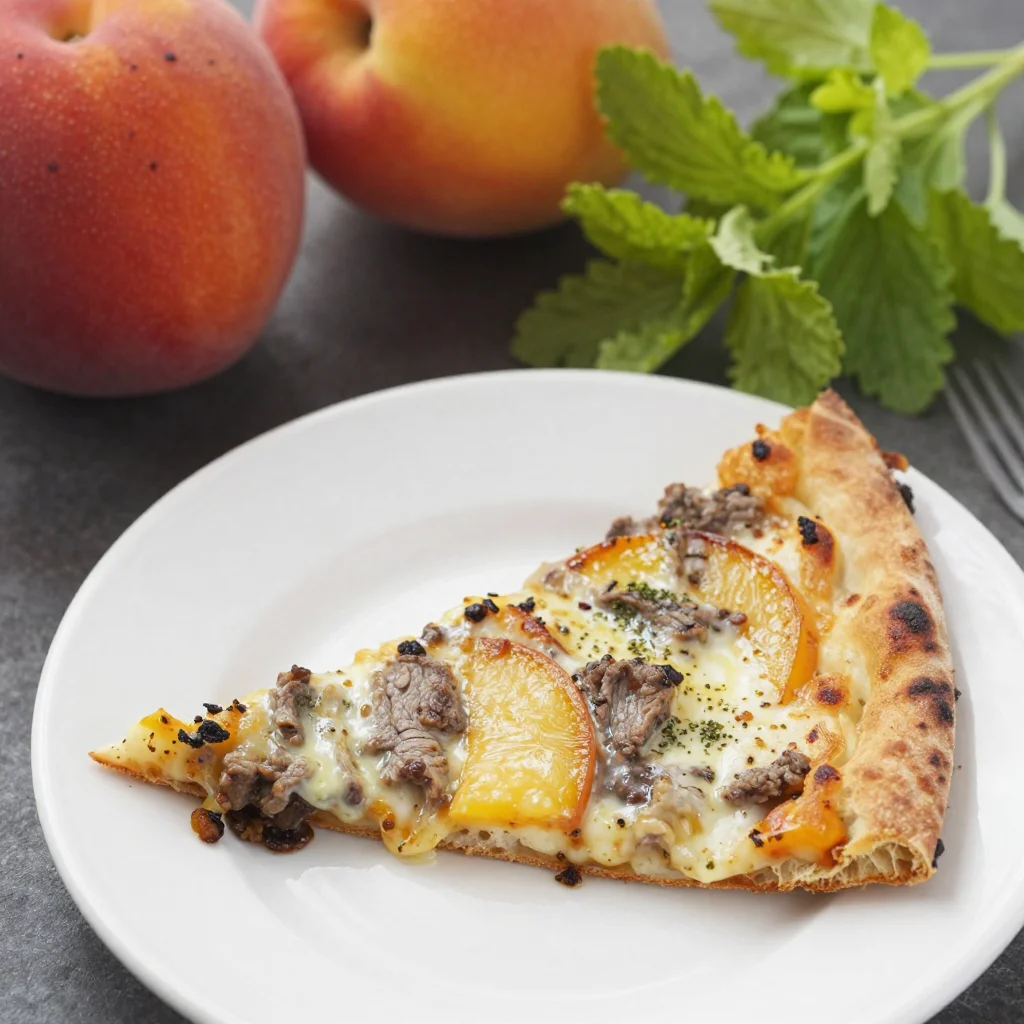
Minute Peach & Basil Naan Bread Pizza: Summer Flavor
Easy Peach & Basil Naan Bread Pizza: A Culinary Love Story
Hello, my friends! Today, we’re embarking on a delicious culinary adventure that combines the sweetness of summer peaches with the aromatic flavors of fresh basil, all atop the wonderfully versatile canvas of naan bread. Seriously, who doesn’t adore a good naan bread pizza? It’s like the ultimate love letter from the Indian subcontinent to Italian cuisine, and I’m here for it!
As the days get warmer and the sun shines a little brighter, often my mind wanders to all the delightful seasonal ingredients that grace our markets. Peaches—golden, juicy, and oh-so-sweet—are one of my favorite things to cook with during the summer months. The best part? They pair extraordinarily well with savory flavors, particularly when you introduce herby basil and rich mozzarella into the mix.
This Easy Peach & Basil Naan Bread Pizza not only embraces the essence of summer but is also perfect for entertaining friends or enjoying a cozy night in. It’s elegant enough to impress your guests yet so simple you won’t break a sweat (trust me, I’ve got your back!). You can whip this up in under 30 minutes—yes, you read that right! So grab your apron, and let’s dive into a dish that will make your taste buds sing!
Personal Story
This recipe brings back fond memories of summers spent at my grandmother’s house. Every summer, she’d stock up on ripe peaches from the local farmers’ market. I remember her bustling around the kitchen, the warmth from the oven mingling with the sweet aroma of fresh peaches. On lazy afternoons, we would make peach cobbler or just slice them up and enjoy them with a sprinkle of sugar and a squeeze of lemon.
One day, during a particularly hot heatwave, we decided to create something new. With thin slices of freshly baked bread, we layered peaches, mozzarella, and fresh basil from her garden. My grandma and I laughed as we watched the cheese melt and the peaches caramelize under the broiler. That day was filled with laughter, delicious foods, and a few messy kitchen moments (don’t even get me started on the cheese pull!). This naan bread pizza is inspired by that very essence of summer—simple, joyful, and brimming with flavor. And now, I’m thrilled to pass the baton and share this recipe with you!
Ingredients
-
2 large naan breads
The base of our pizza! Naan bread is wonderfully soft and chewy, perfect for holding our toppings. You can substitute with pita bread or tortilla if needed. -
1 tablespoon olive oil
A splash of olive oil brings richness and helps achieve that lovely crispy texture on the naan. If you don’t have olive oil, feel free to use avocado or vegetable oil. -
1 clove garlic, minced
Garlic adds a beautiful aroma and depth of flavor. If you want a milder garlic taste, you can roast it beforehand or substitute with garlic powder. -
1/2 fresh peach, thinly sliced
Peaches are the star here! Choose peaches that are ripe but firm. If peaches aren’t in season, apricots or pears would work nicely, too. -
4 oz fresh mozzarella, sliced
The creamy, gooey goodness of mozzarella complements the sweetness of the peaches beautifully. For a twist, try burrata for a creamier consistency or feta for a tangy touch. -
15 basil leaves, chopped
Fresh basil brings a fragrant burst of flavor that enhances the whole dish! If fresh basil isn’t available, you can use a teaspoon of dried basil—though I promise, fresh makes a world of difference! -
1/2 cup balsamic vinegar (optional)
Drizzling balsamic vinegar adds a sweet-tart finish that ties all elements together. If you’re looking for alternatives, try a splash of lemon juice or a fruity balsamic glaze.
Step-by-Step Instructions
-
Preheat Your Oven
Start by preheating your oven to 450°F (232°C). This high temperature will help achieve that perfect crispy naan base! -
Prepare the Naan
Brush each naan bread lightly with olive oil. This not only gives it flavor but also helps it crisp up beautifully in the oven. Place the naan on a baking sheet lined with parchment paper. -
Add the Garlic
Sprinkle the minced garlic evenly over the naan breads. The garlic will infuse the bread with a lovely aroma and flavor as it cooks! -
Layer the Ingredients
Start layering your toppings! First, add the sliced peaches. Remember to spread them evenly for balanced flavor. Next, place the mozzarella slices atop the peaches, ensuring each slice gets its fair share of gooey goodness. Finally, sprinkle the chopped basil over the top, which will give a fragrant lift to the pizza. -
Bake
Pop the naan into the preheated oven for about 10–12 minutes. You’ll want to keep an eye on it—once the cheese is melted and bubbly, and the edges of the naan start to turn golden, it’s done! If you like a little extra color, you can broil for an additional 1–2 minutes. -
Prepare the Balsamic Drizzle
While your pizza is baking, it’s time for the balsamic drizzle! Pour the balsamic vinegar into a small saucepan over medium heat and bring it to a gentle simmer. Let it reduce for about 5-7 minutes until it thickens slightly. Keep stirring to prevent it from burning. -
Serve
Once your naan bread pizza is out of the oven and smelling divine, let it cool for a minute. Drizzle the balsamic reduction over the top, and voilà! You have a stunning dish that just begs to be shared.
Serving Suggestions
Slice your naan bread pizza into wedges and serve it warm. It pairs wonderfully with a light salad or a refreshing cocktail for a delightful summer meal. For an elegant touch, you can garnish with a few whole basil leaves and some extra mozzarella pearls. It’s all about making that presentation pop without any fuss!
Recipe Variations
- Grilled Peach & Chicken: Add some grilled chicken pieces for a protein boost.
- Spicy Kick: Sprinkle some chili flakes over the top before baking if you’re looking for a little heat.
- Cheese Swap: Experiment with different cheeses like goat cheese or sliced brie for a rich flavor profile.
- Vegan Version: Use vegan mozzarella and a drizzle of olive oil for a delicious plant-based option.
- Herb Infusion: Try adding rosemary or thyme along with the basil for a unique twist on flavors.
Chef’s Notes
Cooking is a journey filled with experimentation, and this recipe is no exception! The concept of naan bread pizzas is adaptable to so many flavors and ingredients—just let your creativity flow! Whenever I make this dish, I think back to the times spent in my grandmother’s kitchen, crafting new recipes together. Each bite is a delightful reminder of those moments, inspiring me to find joy in both cooking and sharing good food. Plus, there are fewer things more gratifying than seeing people savor your dishes!
FAQs and Troubleshooting
What if my naan bread gets soggy?
If your naan feels soggy, try pre-baking it for a couple of minutes without toppings before adding them. This creates a barrier and helps keep it crispy.
Can I make this pizza ahead of time?
You can assemble the pizza and place it in the oven when you’re ready to serve. Just be aware it may require a couple of additional minutes to heat through.
How do I store leftovers?
Leftovers can be stored in an airtight container in the fridge for up to two days. Reheat in the oven for a crispy finish.
What can I use if I don’t have peaches?
If peaches aren’t on hand, feel free to use plums, nectarines, or even apples for a lovely twist on this recipe!
Nutritional Info
As this is a fun and flexible recipe, you can tailor it to fit various dietary needs! But generally speaking, each serving will be an excellent source of vitamins from the fruit and healthy fats from the olive oil.
So there you have it! A delightful, summery Easy Peach & Basil Naan Bread Pizza that’s easy to whip up and full of flavor. Join me in the kitchen, and let’s share our love for food one recipe at a time! Happy cooking, friends!
PrintEasy Peach & Basil Naan Bread Pizza

A delightful and simple naan bread pizza topped with juicy peaches, fresh basil, and mozzarella, perfect for summer gatherings.
- Prep Time: 10 minutes
- Cook Time: 12 minutes
- Total Time: 22 minutes
- Yield: 2 servings 1x
- Category: Main Course
- Method: Baking
- Cuisine: Fusion
- Diet: Vegetarian
Ingredients
- 2 large naan breads
- 1 tablespoon olive oil
- 1 clove garlic, minced
- 1/2 fresh peach, thinly sliced
- 4 oz fresh mozzarella, sliced
- 15 basil leaves, chopped
- 1/2 cup balsamic vinegar (optional)
Instructions
- Preheat your oven to 450°F (232°C).
- Brush each naan bread lightly with olive oil and place on a baking sheet lined with parchment paper.
- Sprinkle the minced garlic evenly over the naan breads.
- Layer the sliced peaches, then mozzarella slices, and top with the chopped basil.
- Bake for about 10–12 minutes until the cheese is melted and bubbly.
- Prepare the balsamic drizzle by simmering balsamic vinegar in a saucepan until thickened.
- Serve the naan pizza warm with a drizzle of balsamic reduction.
Notes
Serve with a light salad or refreshing cocktail. Experiment with different cheese options for varied flavors.
Nutrition
- Serving Size: 1 serving
- Calories: 320
- Sugar: 8g
- Sodium: 300mg
- Fat: 10g
- Saturated Fat: 4g
- Unsaturated Fat: 6g
- Trans Fat: 0g
- Carbohydrates: 42g
- Fiber: 4g
- Protein: 12g
- Cholesterol: 20mg
Keywords: naan pizza, peach pizza, summer recipes, quick meals, vegetarian pizza

Lime Chicken Party
Lime Chicken Party: A Zesty Delight for Any Gathering!
Hello, fellow foodies! Welcome back to my cozy corner of culinary creativity here at Ivory Apron! If you’re looking to elevate your next gathering with something vibrant and delicious, then you’ve landed in the right place. Today, I’m excited to share with you a recipe that not only celebrates the zestiness of lime but also embodies all the warmth of a friendly gathering. Say hello to my Lime Chicken Party—a dish that’s as effortless as it is impressive!
Cooking is all about creating experiences, and there’s something special about gathering around the table to share a meal infused with flavors and fresh ingredients. The bright acidity of lime combined with the tender juiciness of chicken brings sunshine to any plate, and I can’t wait for you to experience it with your loved ones!
Let’s Get Personal: A Memory with Lime Chicken
This Lime Chicken recipe holds a special place in my heart because it reminds me of a long summer evening spent with family and friends in my backyard. One year, during a balmy summer evening, I decided to host a casual barbecue to celebrate my cousin’s birthday. As we set up the string lights overhead and arranged picnic blankets on the grass, I wanted a showstopper of a dish that wouldn’t keep me stuck in the kitchen.
I marinated chicken breasts in a luscious lime mixture, using fresh herbs and spices to brighten the flavor. As the chicken grilled to perfection, the sizzle mixed with our laughter and the smell of charred goodness wafted through the air. I recall the joy on everyone’s faces as they took the first bite—the zesty chicken paired deliciously with ripe avocado and colorful salads. That night was filled with great conversations, hearty laughter, and a lot of love, and I’ve been sharing this fabulous dish ever since!
Ingredients
Here’s what you’ll need to create this vibrant Lime Chicken Party dish. Each ingredient is not only essential but also brings something special to the table:
-
4 Chicken Breasts
Tender and versatile, chicken breasts serve as the perfect canvas for our zesty marinade. You can swap these for chicken thighs for a juicier bite or even use tofu for a vegetarian-friendly option. -
2 Limes (juiced)
Fresh lime juice adds a bright acidity that elevates the dish. Bottled lime juice is convenient in a pinch, but I highly recommend fresh for that vibrant flavor. -
1 Avocado (sliced)
Creamy avocados balance out the zesty lime and add richness to your plate. If you’re feeling adventurous, you can swap it for mango for a fruity twist! -
1/4 Cup Fresh Cilantro (chopped)
Fresh cilantro introduces a lovely herbaceous note. If cilantro isn’t your thing, parsley works beautifully as a substitute or skip it altogether for a milder flavor. -
1 Teaspoon Chili Powder
A hint of chili powder adds depth and a touch of warmth. You can adjust the heat level by using smoked paprika for a smoky flavor or cayenne pepper for an extra kick. -
1 Tablespoon Olive Oil
This helps to keep the chicken moist and adds a touch of richness. You can use avocado oil or grapeseed oil for a neutral flavor. -
Salt and Pepper to taste
Essential for enhancing flavors. Don’t forget to taste as you go—seasoning is key!
Step-by-Step Instructions
Alright, let’s dive into the fun part: cooking this fabulous Lime Chicken! Follow these steps and remember, cooking should feel joyful, so dance around the kitchen if inspiration strikes!
Step 1: Prepare the Marinade
- Mix it Up! In a bowl, combine the juice of two limes, olive oil, chili powder, and a pinch of salt and pepper. Whisk until well blended.
Chef Note: The acid from the lime juice helps to tenderize the chicken, making it juicy and delicious.
Step 2: Marinate the Chicken
- Let It Soak Up Flavor! Place your chicken breasts in a zip-top bag or shallow dish and pour the marinade over. Seal the bag or cover the dish, then refrigerate for at least 30 minutes. If you have more time, let it marinate for up to 2 hours for maximum flavor.
Pro Tip: Always refrigerate while marinating to keep the chicken safe!
Step 3: Preheat the Grill (or Pan)
- Let’s Get Cooking! Preheat your grill to medium-high heat, or if you prefer using a skillet, heat a drizzle of olive oil in a large pan over medium heat.
Chef Tip: A well-heated grill ensures that your chicken gets those beautiful grill marks!
Step 4: Grill the Chicken
- On the Heat! Remove the chicken from the marinade (discard the marinade), and grill each breast for about 6-7 minutes per side or until they’re cooked through (165°F internal temperature).
Commentary: For that extra charred flavor, don’t move the chicken too much! Let it sear before flipping.
Step 5: Rest and Slice
- The Waiting Game! Once cooked, transfer the chicken to a plate and let it rest for about 5 minutes. This helps the juices redistribute, ensuring your chicken remains juicy.
Chef Insight: Always rest your meat—this is where the magic happens!
Step 6: Assemble Your Dish
- Time to Plate Up! Slice the grilled chicken, serve it with sliced avocado, a sprinkle of fresh cilantro, and some lime wedges on the side for an extra burst of flavor.
Serving Suggestion: Arrange it beautifully on a platter for that wow factor!
Serving Suggestions
Presentation makes all the difference! For serving, arrange the sliced chicken on a large platter with the avocado nestled beside it. Scatter some chopped cilantro over the top and garnish with lime wedges. Not only does it look gorgeous, but it’s also a feast for the eyes, inviting everyone to dig in!
Recipe Variations
Getting creative is half the fun! Try out some of these ideas for a unique twist on this Lime Chicken:
- Tropical Twist: Add diced pineapple or mango to the marinade for a sweet tropical flavor.
- Spice It Up: Incorporate fresh jalapeños into the marinade for a fiery kick!
- Herbed Delight: Swap lime juice with lemon or orange juice for a different citrus spin, accompanied by fresh basil instead of cilantro.
- Colombian Ajiaco Style: Create a hearty bowl with potatoes and corn, served alongside the chicken for a comforting dish.
Chef’s Notes
This Lime Chicken recipe has evolved over time in my kitchen, swapping in and out of various ingredients based on what I have on hand or the season. I remember one evening when I had some leftover coconut milk— I added it to the marinade. The result? It was absolutely tropical bliss! Experimenting like this is what keeps cooking fun and exciting, so don’t be afraid to trust your instincts!
FAQs and Troubleshooting
Q1: What if my chicken is dry?
A: Dry chicken often results from overcooking. Use a meat thermometer to check doneness and aim for 165°F.
Q2: Can I make this dish ahead of time?
A: Absolutely! You can marinate the chicken a day in advance, and when ready to serve, just grill it!
Q3: How can I adjust the lime flavor?
A: If you find lime too tart, balance it by adding a teaspoon of honey or agave to the marinade for a touch of sweetness.
Q4: Is it okay to freeze the marinated chicken?
A: Yes! Just make sure to thaw in the refrigerator before cooking it to maintain its juiciness.
Nutritional Info
Optional, but helpful!
While specifics excite some, generally, a serving of this Lime Chicken (without sides) is about 200 calories, packed with protein and fresh flavors. Perfect for a healthy meal that doesn’t compromise on taste!
And there you have it! My Lime Chicken Party recipe is not just food; it’s an experience waiting to unfold in your kitchen. I hope you find joy in making this dish as much as I do. Remember, it’s all about sharing flavors, laughter, and beautiful moments around your table! So tie on your apron, gather your loved ones, and let’s create something magical together. Happy cooking! 🍗💛
PrintLime Chicken Party

A zesty Lime Chicken dish perfect for gatherings, combining fresh flavors and tender grilled chicken with vibrant lime.
- Prep Time: 15 minutes
- Cook Time: 30 minutes
- Total Time: 45 minutes
- Yield: 4 servings 1x
- Category: Main Course
- Method: Grilling
- Cuisine: Mexican
- Diet: Paleo
Ingredients
- 4 Chicken Breasts
- 2 Limes (juiced)
- 1 Avocado (sliced)
- 1/4 Cup Fresh Cilantro (chopped)
- 1 Teaspoon Chili Powder
- 1 Tablespoon Olive Oil
- Salt and Pepper to taste
Instructions
- Mix it Up! In a bowl, combine the juice of two limes, olive oil, chili powder, and a pinch of salt and pepper. Whisk until well blended.
- Let It Soak Up Flavor! Place your chicken breasts in a zip-top bag or shallow dish and pour the marinade over. Seal the bag or cover the dish, then refrigerate for at least 30 minutes. If you have more time, let it marinate for up to 2 hours for maximum flavor.
- Preheat your grill to medium-high heat, or if you prefer using a skillet, heat a drizzle of olive oil in a large pan over medium heat.
- Remove the chicken from the marinade (discard the marinade), and grill each breast for about 6-7 minutes per side or until they’re cooked through (165°F internal temperature).
- Transfer the chicken to a plate and let it rest for about 5 minutes to ensure juiciness.
- Slice the grilled chicken, serve it with sliced avocado, a sprinkle of fresh cilantro, and some lime wedges on the side for an extra burst of flavor.
Notes
For added taste, you can incorporate fresh jalapeños into the marinade or swap lime juice with lemon for a different citrus spin.
Nutrition
- Serving Size: 1 serving
- Calories: 200
- Sugar: 1g
- Sodium: 300mg
- Fat: 10g
- Saturated Fat: 1.5g
- Unsaturated Fat: 7g
- Trans Fat: 0g
- Carbohydrates: 6g
- Fiber: 3g
- Protein: 28g
- Cholesterol: 70mg
Keywords: lime chicken, grilled chicken, party recipe, summer recipe, healthy chicken
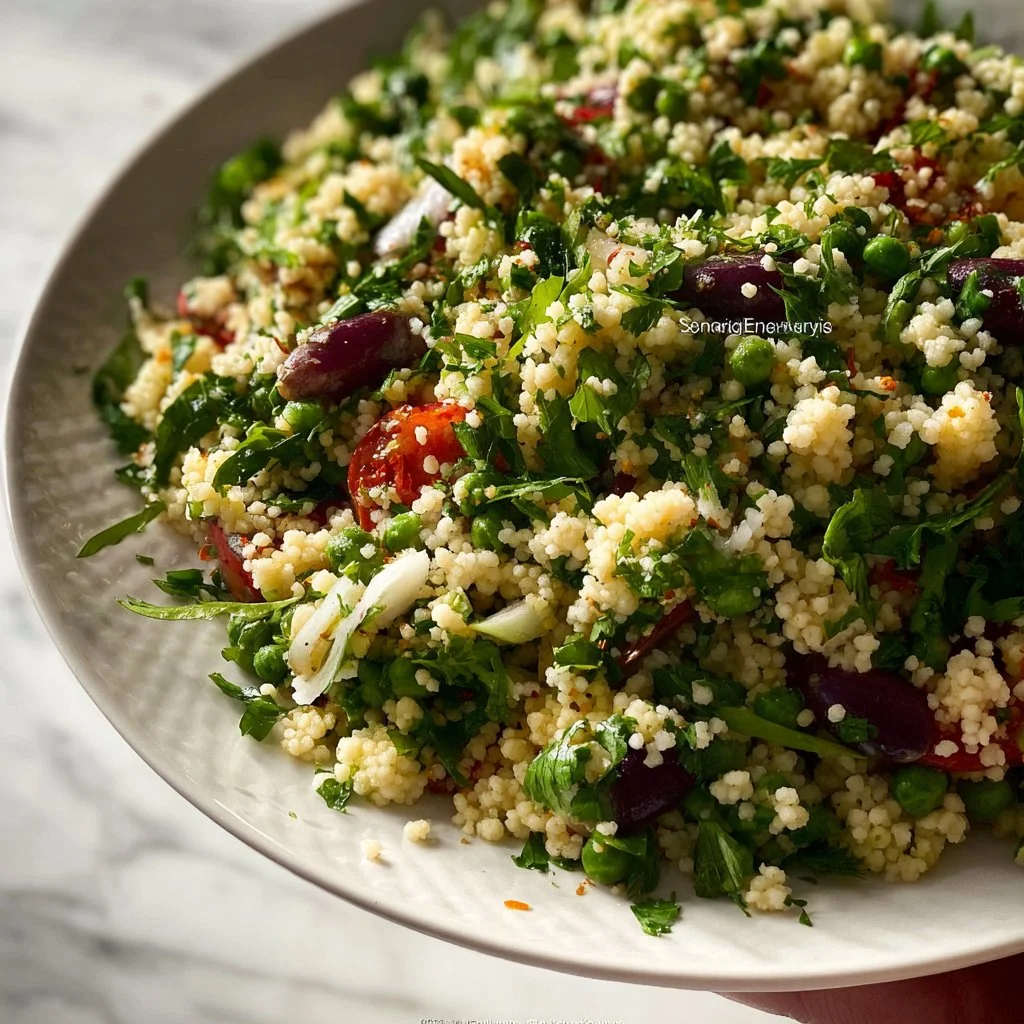
Couscous Salad
Refreshing Couscous Salad: A Celebration of Fresh Flavors
Welcome to the bright and vibrant world of couscous salad! This dish is the epitome of what I love about cooking — it’s effortless yet elegant, packed with flavors, and showcases the beauty of fresh, seasonal ingredients. One bite of this delightful salad, and you’ll find yourself transported to sunny picnics, outdoor barbeques, and joyful gatherings around the table.
Couscous is like a blank canvas in the culinary world. It has a subtle nutty flavor and a delightfully fluffy texture, making it the perfect base for all sorts of ingredients. Think of it as your trusty sidekick that allows roasted veggies, fresh herbs, and zesty dressings to shine. And trust me, this salad is versatile enough to complement any meal or stand proudly on its own.
What truly endears me to this dish is its simplicity. It comes together quickly, making it a fantastic option whether you’re meal prepping for the week, hosting friends for dinner, or simply wanting something delicious after a long day. Plus, it’s a vibrant dish that appeals to the eyes as much as it satisfies the palate — talk about a win-win!
So grab your apron, and let’s dive into this couscous salad recipe. I promise that cooking it will be as joyful as devouring it!
Personal Story
I still remember the first time I discovered the magic of couscous. It was during a summer trip with friends to a gorgeous Mediterranean beach town. We were wandering through a colorful food market, surrounded by lively vendors shouting about their fresh produce, spices, and local delicacies. A friendly vendor caught my attention and handed me a small plate of couscous salad that had been tossed with cherry tomatoes, crisp cucumbers, and a splash of zesty lemon.
As I took that first bite, I was struck by the burst of flavors — refreshing, bright, and downright addictive! We spent the afternoon nibbling on that perfect salad, laughing, and soaking up the sun. That experience forever changed my relationship with food. I realized that cooking is not just about following a recipe but about creating memories, sharing stories, and bringing people together.
Now, every time I whip up a couscous salad, I’m reminded of that sunny afternoon — with friends gathered, laughter in the air, and the delightful mingling of flavors in my mouth. Let’s recreate that feeling at home with your own couscous salad!
Ingredients
Here’s what you’ll need for a fantastic couscous salad:
-
Couscous (1 cup): This tiny pasta is the star of the show! It’s quick to prepare and absorbs flavors beautifully. For a whole grain option, try using whole wheat couscous or quinoa for a gluten-free alternative.
-
Cherry Tomatoes (1 cup, halved): These sweet little jewels add a burst of color and freshness. Any juicy tomato will work, but cherry or grape tomatoes are my favorites. If they’re out of season, feel free to use sun-dried tomatoes for a different twist!
-
Cucumber (1 medium, diced): Crisp and cool, cucumbers bring a refreshing crunch to the salad. If you prefer, swap with bell peppers or even radishes for some extra color and flavor.
-
Red Onion (½ medium, finely chopped): A little bite goes a long way! Red onions add depth and a lovely color. Soak them in cold water for about 10 minutes to tame their sharpness if you prefer a milder flavor.
-
Parsley (¼ cup, chopped): Fresh herbs elevate any dish! Parsley adds a lovely green note and a bit of brightness. For a twist, try swapping with cilantro or mint.
-
Lemon Juice (from 1 lemon): The zingy citrus flavor brings it all together. Freshly squeezed lemon juice is the way to go! If you’re in a pinch, a splash of vinegar could work, but don’t skip the acidity.
-
Olive Oil (3 tablespoons): A good-quality extra virgin olive oil brings richness and depth. If you want to play around, try a flavored oil like garlic or herb-infused for a unique touch.
-
Salt and Pepper (to taste): Simple but essential, these seasonings will ensure your salad tastes just right. Season gradually and adjust according to your preference.
By understanding each ingredient and how to substitute them, you’ll find freedom in the kitchen. This recipe is about making it your own!
Step-by-Step Instructions
Step 1: Prepare the Couscous
- Boil Water: In a medium saucepan, bring 1 cup of water to a vigorous boil.
- Add Couscous: Once boiling, stir in 1 cup of couscous along with a pinch of salt.
- Cover: Remove from heat, cover, and let it sit for about 5 minutes. This allows the couscous to absorb all the water, making it fluffy and delightful.
- Fluff it Up: After 5 minutes, use a fork to fluff the couscous — this prevents clumping and results in a light texture. You can also drizzle a bit of olive oil here for extra flavor.
Step 2: Chop the Veggies
- Cherry Tomatoes: Slice your cherry tomatoes in half. This allows their sweetness to mingle with the other ingredients beautifully.
- Cucumber: Dice the cucumber into bite-sized pieces. Take care to remove the seeds if they’re particularly watery — nobody wants a soggy salad!
- Red Onion: Finely chop the red onion. If you’re sensitive to their strong flavor, remember the soaking tip mentioned earlier!
Step 3: Make the Dressing
- Mix it Together: In a small bowl, whisk together the juice of one lemon, 3 tablespoons of olive oil, and a pinch of salt and pepper. Adjust to taste.
- Incorporate Fresh Herbs: Add chopped parsley to your dressing if you like — it infuses flavor right from the start!
Step 4: Combine it All
- Mix Salad Ingredients: In a large bowl, gently combine the fluffed couscous, cherry tomatoes, cucumber, red onion, and parsley.
- Dress the Salad: Pour the dressing over it and gently fold everything together. The key is to be gentle here so as not to mush up the ingredients.
- Taste and Adjust: This is your moment to shine! Taste the salad and add more salt, pepper, or lemon juice as desired. The balance should feel bright and fresh.
Step 5: Chill and Serve
- Chill: If time allows, let the salad sit in the fridge for about 30 minutes. This helps the flavors meld beautifully.
- Serve: When ready, give it a gentle stir, taste one last time for seasoning, and then you’re ready to serve. Voilà, you’ve just created a beautiful couscous salad!
Serving Suggestions
To make your couscous salad shine, serve it in a rustic bowl or a vibrant platter. Garnish with extra parsley or lemon wedges for an added touch of freshness. You can also pair it with grilled chicken, shrimp, or veggies for a complete meal that’s bursting with summer vibes.
Recipe Variations
Feel free to get creative! Here are a few easy variations to jazz up your couscous salad:
- Mediterranean Twist: Add crumbled feta, Kalamata olives, and roasted red peppers for a Mediterranean feast.
- Asian Fusion: Toss in some edamame, shredded carrots, and a drizzle of sesame oil for an Asian-inspired salad.
- Nutty Delight: Sprinkle in toasted almonds or pine nuts for a delicious crunch.
- Spicy Kick: For those who love a bit of heat, add chopped jalapeños or a pinch of red pepper flakes.
- Protein-Packed: Mix in chickpeas or grilled chicken for a heartier meal.
Chef’s Notes
This recipe has been a staple in my kitchen for years, evolving with each season and gathering. I often find myself experimenting with whatever ingredients are in season, like adding roasted squash in the fall or fresh peaches in summer. Couscous salad has a special ability to adapt and shine, reminding us that food can be a reflection of where we are and who we are with.
I can’t help but chuckle when I think of my friend trying to impress her in-laws with this dish. She accidentally used cinnamon instead of cumin in the dressing – let’s just say it didn’t quite blend! But we laughed it off, and the story is now part of our cooking lore.
FAQs and Troubleshooting
-
What should I do if my couscous is clumping together?
Ensure you’re fluffing the couscous with a fork right after it absorbs the water. Adding a little olive oil while fluffing can also prevent clumping. -
Can I prepare this salad in advance?
Absolutely! Couscous salad actually tastes better as it sits, allowing the flavors to meld together. Just hold off on adding delicate ingredients like fresh parsley until you’re ready to serve. -
What if my salad is too tangy?
If you feel it’s too acidic, just balance it out with a bit more olive oil and a pinch of sugar or honey to combat the acidity. -
Can I use other grains instead of couscous?
Sure! Quinoa, bulgur wheat, or even farro can work interchangeably, just make sure to follow the cooking instructions for those grains.
Nutritional Info
This couscous salad is not only delicious but also nutritious! It’s rich in fiber from the veggies and couscous, and it’s packed with vitamins from the fresh ingredients. You can enjoy it guilt-free!
So, there you have it, my friends! A beautiful, refreshing couscous salad that’s sure to be a hit at your table. I can’t wait for you to try it and make it your own. Remember, cooking is all about joy and sharing. So let’s keep gathering, creating, and enjoying food together. Happy cooking!
PrintRefreshing Couscous Salad
A vibrant and refreshing couscous salad loaded with fresh vegetables and zesty flavors, perfect for any occasion.
- Prep Time: 15 minutes
- Cook Time: 5 minutes
- Total Time: 20 minutes
- Yield: 4 servings 1x
- Category: Side Dish
- Method: Mixing
- Cuisine: Mediterranean
- Diet: Vegetarian
Ingredients
- 1 cup couscous
- 1 cup cherry tomatoes, halved
- 1 medium cucumber, diced
- ½ medium red onion, finely chopped
- ¼ cup parsley, chopped
- Juice of 1 lemon
- 3 tablespoons olive oil
- Salt and pepper, to taste
Instructions
- Prepare the Couscous: Boil 1 cup of water in a medium saucepan. Once boiling, stir in 1 cup of couscous and a pinch of salt. Cover and let sit for about 5 minutes. Fluff with a fork.
- Chop the Veggies: Slice cherry tomatoes in half, dice the cucumber, and finely chop the red onion.
- Make the Dressing: Whisk together the juice of one lemon, 3 tablespoons of olive oil, and a pinch of salt and pepper.
- Combine it All: In a large bowl, combine the fluffed couscous, tomatoes, cucumber, onion, and parsley. Pour dressing over and gently mix.
- Chill and Serve: Let the salad chill in the fridge for about 30 minutes, then serve with a final stir.
Notes
Feel free to customize with additions like feta, nuts, or other seasonal veggies.
Nutrition
- Serving Size: 1 serving
- Calories: 250
- Sugar: 4g
- Sodium: 200mg
- Fat: 9g
- Saturated Fat: 1g
- Unsaturated Fat: 8g
- Trans Fat: 0g
- Carbohydrates: 36g
- Fiber: 3g
- Protein: 6g
- Cholesterol: 0mg
Keywords: couscous, salad, refreshing, Mediterranean, vegetarian, healthy