
Coconut Lime Chicken
Coconut Lime Chicken: A Tropical Escape Right in Your Kitchen
Introduction
Hello, dear foodie friends! Savannah here from Ivory Apron, and today we’re diving into something truly special — Coconut Lime Chicken! This dish is not just a recipe; it’s an experience, a little piece of tropical paradise that you can create in your very own kitchen.
Picture this: It’s a balmy evening, the sun is setting, and you can almost hear the distant sound of waves crashing on a beach. While we may not all have access to a tropical paradise, we can certainly bring that flavor to our dinner tables. Coconut Lime Chicken combines the richness of coconut milk with the zesty brightness of lime, perfect for those who crave something light yet satisfying. It’s a dish that’s as comforting as it is refreshing, making it perfect for any occasion, whether it’s a weeknight dinner or a fabulous dinner party!
As a recipe creator, nothing makes me happier than sharing culinary adventures with you all. I believe cooking should feel elegant but not intimidating, and that’s what this Coconut Lime Chicken embodies. So, tie on your apron, grab some tropical music, and let’s get cooking!
Personal Story
I can’t help but smile whenever I think about the first time I made Coconut Lime Chicken. It was a sunny Saturday, and my close friends and I had gathered for our monthly potluck. The theme was “Tropical Escape,” and the minute I heard it, my mind raced with all the possible dishes. But one stood out like a beacon of warmth and comfort — Coconut Lime Chicken.
I still remember mingling in the kitchen, buzzing with excitement, as the chicken marinated in a fragrant coconut-lime bath. The scent of fresh cilantro and garlic filled the air, welcoming my friends as they arrived. We laughed, sipped on fruity cocktails, and reminisced about our last vacation together. When the chicken hit the grill, the chorus of sizzling sound transported us to a little beach hut, surrounded by palm trees and laughter.
That day wasn’t just about the food; it was about creating memories around the table, something I cherish deeply. I can’t wait for you to create your own beautiful moments with this recipe!
Ingredients
Let’s get into the delicious details! Here’s what we’ll need for this mouthwatering Coconut Lime Chicken:
-
4 Chicken Breasts
Thick, boneless chicken breasts work best for this recipe. If you’re feeling adventurous, you can substitute chicken thighs for a juicier option! -
1 Cup Coconut Milk
This creamy goodness is the star of the dish, lending a rich texture and tropical flavor. You can use light coconut milk if you’re looking to cut down on calories — but don’t forget that the creaminess contributes to the dish’s overall feel! -
1 Lime (Juiced)
Fresh lime juice adds a vibrant brightness to the dish. If you don’t have lime, lemon juice can be a great substitute, though it will offer a slightly different acidity. -
1/4 Cup Fresh Cilantro (Chopped)
This fresh herb brings a burst of flavor and a lively green color. If cilantro isn’t your thing (you’re not alone!), parsley can be used instead — it’s milder but still adds a lovely touch! -
2 Cloves Garlic (Minced)
Garlic is a must for flavor! If you’re feeling lazy, garlic powder will do in a pinch — just remember, fresh garlic has that unbeatable aromatic kick. -
1 Teaspoon Ginger (Grated)
A little ginger introduces warmth and depth. If you don’t have fresh ginger, ground ginger will work, just use half the amount as it’s more concentrated. -
Salt and Pepper to Taste
Don’t underestimate these staples! Adjust according to your preference, but definitely taste as you go. -
Olive Oil for Cooking
A drizzle of olive oil is all you need to get things sizzling. For grilling, you can use a neutral oil like canola or avocado oil to step up the heat tolerance.
Step-by-Step Instructions
Ready to create some magic? Let’s get down to business with these simple yet effective steps. Grab your apron and let’s cook!
-
Marinate the Chicken
In a bowl, combine the coconut milk, lime juice, chopped cilantro, minced garlic, grated ginger, salt, and pepper. For an extra flavor boost, feel free to add a pinch of red pepper flakes if you like a touch of heat! Place the chicken breasts in a resealable plastic bag or a shallow dish, pouring the marinade over them to coat thoroughly. Seal or cover and let it marinate in the fridge for at least 30 minutes — or up to 2 hours for more intense flavor.Chef Hack: If you’re in a hurry, you can marinate the chicken for just 15 minutes, but the longer it sits, the more the flavors penetrate the chicken.
-
Preheat Your Grill or Skillet
If grilling, preheat your grill to medium-high heat (about 375°F). If you’re using a skillet, place it over medium heat and drizzle with olive oil. -
Cook the Chicken
Once your grill or skillet is hot, remove the chicken from the marinade (letting the excess drip off) and place it on the grill or skillet. Cook for about 6-7 minutes on each side or until the chicken reaches an internal temperature of 165°F.Chef Tip: Resist the temptation to flip it too often! Let that lovely char develop for a few minutes on each side before flipping.
-
Rest the Chicken
Once cooked, transfer the chicken to a plate and cover it loosely with foil. Allow it to rest for about 5-10 minutes. This step is crucial! It helps the juices redistribute, ensuring your chicken is juicy and flavorful. -
Serve and Enjoy
Slice the chicken against the grain for beautiful presentation and serve it up with extra lime wedges and cilantro if desired. You can drizzle any leftover marinade over it for extra flavor!
Serving Suggestions
To plate your Coconut Lime Chicken, consider serving it on a bed of fluffy jasmine rice or alongside grilled vegetables for a beautiful contrast of colors. A light salad with mango and avocado can also complement the dish perfectly, creating a beautiful, refreshing meal that invites everyone to dive in. And don’t forget to garnish with a sprinkle of fresh cilantro on top — it adds that final pop of color and vibrancy that we all love!
Recipe Variations
Feeling inspired? Here are a few creative twists on this recipe:
-
Spicy Mango Salsa: Top your chicken with a fresh mango salsa made with diced mango, red onion, jalapeño, lime juice, and cilantro for a sweet and spicy kick.
-
Coconut Lime Shrimp: Swap chicken for shrimp! Adjust cooking time accordingly (about 2-3 minutes per side). It’s a quick and fabulous variation.
-
Grilled Pineapple: Add grilled pineapple slices on the side for a delightful sweetness and a taste of the tropics.
-
Vegan Delight: Replace chicken with tofu or tempeh for a plant-based version. Make sure to press out excess moisture before marinating to ensure flavor absorption.
-
Coconut Lime Quinoa Bowl: Serve the chicken over quinoa instead of rice, topped with diced cucumbers, avocado, and a drizzle of coconut sauce.
Chef’s Notes
This Coconut Lime Chicken has become a staple in my kitchen, evolving over the years as I’ve played with flavors and techniques. A fun memory I have is when I decided to grill it one summer evening, and I realized that even a simple family meal could turn into an event with just a little creativity and care. The rhapsody of flavors transported us to sunny shores without needing to leave home!
I often find that this recipe is a conversation starter, allowing everyone to share their own travel stories or culinary adventures. I hope, as you serve this dish, it opens up those beautiful moments for you and your loved ones, too.
FAQs and Troubleshooting
-
What if my chicken is dry?
Make sure you don’t overcook it. Use a meat thermometer to check for doneness. Remember, it should be at 165°F for juicy perfection! -
Can I marinate it overnight?
Absolutely! Marinating overnight enhances the flavors. Just be careful not to exceed that time too much to avoid texture issues. -
What if I don’t have coconut milk?
You can use low-sodium chicken broth or plain yogurt for a different creamy base. Just keep in mind it will change the flavor profile slightly. -
Can I grill this indoors?
Yes! If you have a grill pan, it works beautifully on the stovetop. Just monitor the heat to avoid smoking too much.
Nutritional Info (per serving) (optional)
- Calories: 350
- Protein: 37g
- Carbohydrates: 8g
- Fat: 18g
There you have it, friends! A delightful Coconut Lime Chicken recipe that’s sure to bring a touch of the tropics right to your table. I can’t wait to hear your stories and see your creations. Remember, good food isn’t just about the taste; it’s about the moments we create around it. Happy cooking and see you next time on Ivory Apron! 🍽️✨
PrintCoconut Lime Chicken

A light yet satisfying dish that combines the richness of coconut milk with the zesty brightness of lime, perfect for any occasion.
- Prep Time: 30 minutes
- Cook Time: 15 minutes
- Total Time: 45 minutes
- Yield: 4 servings 1x
- Category: Main Course
- Method: Grilling
- Cuisine: Tropical
- Diet: Gluten-Free
Ingredients
- 4 Chicken Breasts
- 1 Cup Coconut Milk
- 1 Lime (Juiced)
- 1/4 Cup Fresh Cilantro (Chopped)
- 2 Cloves Garlic (Minced)
- 1 Teaspoon Ginger (Grated)
- Salt and Pepper to Taste
- Olive Oil for Cooking
Instructions
- Marinate the Chicken: In a bowl, combine the coconut milk, lime juice, chopped cilantro, minced garlic, grated ginger, salt, and pepper. Place the chicken in a resealable bag or shallow dish, pour the marinade over, seal or cover, and let it marinate in the fridge for at least 30 minutes.
- Preheat Your Grill or Skillet: Preheat your grill to medium-high heat (about 375°F) or place a skillet over medium heat and drizzle with olive oil.
- Cook the Chicken: Remove the chicken from the marinade, letting excess drip off, and place it on the grill or skillet. Cook for about 6-7 minutes on each side until the chicken reaches an internal temperature of 165°F.
- Rest the Chicken: Transfer the chicken to a plate and cover loosely with foil. Allow it to rest for about 5-10 minutes.
- Serve and Enjoy: Slice the chicken against the grain, serve with extra lime wedges and cilantro, and drizzle any leftover marinade over it if desired.
Notes
For spicy flavor, add a pinch of red pepper flakes to the marinade. Serving suggestions include jasmine rice or grilled vegetables.
Nutrition
- Serving Size: 1 serving
- Calories: 350
- Sugar: 4g
- Sodium: 450mg
- Fat: 18g
- Saturated Fat: 15g
- Unsaturated Fat: 3g
- Trans Fat: 0g
- Carbohydrates: 8g
- Fiber: 1g
- Protein: 37g
- Cholesterol: 80mg
Keywords: Coconut Chicken, Lime Chicken, Tropical Recipe, Summer Grilling, Easy Chicken Dinner

Creamy Coconut Key Lime Pie Smoothie
Creamy Coconut Key Lime Pie Smoothie: A Tropical Retreat in a Glass
Hello, sunshine! Are you ready to whisk your taste buds away to a tropical paradise? If you’ve been daydreaming about biting into a velvety slice of key lime pie on a sun-soaked beach, then today’s recipe is just for you. Join me as we whip up a Creamy Coconut Key Lime Pie Smoothie that combines all the flavors you love in that classic dessert, but with a nutritious twist!
Smoothies are one of my favorite breakfast options or afternoon pick-me-ups. They are so versatile and can be customized to fit any craving or dietary need. Plus, they’re an excellent way to sneak in a few extra servings of fruits and veggies, which is always a win in my book! And when it’s as dreamy as this creamy coconut key lime pie smoothie, you won’t want to miss it.
This recipe is a reflection of my love for all things tropical. Whenever I think of key lime pie, I’m transported back to family vacations in Florida, where we’d indulge in slice after slice while overlooking the sparkling ocean. I wanted to capture that same blissful feeling in a smoothie — light yet satisfying, tangy yet sweet, and oh-so-refreshing.
So grab your blender, summon the sunshine, and let’s create a deliciously inviting smoothie that will have you sipping your way to happiness.
Personal Story
One summer, my family embarked on a road trip down to the Florida Keys. The ocean was a brilliant turquoise, the sun was shining bright, and the air was filled with the scent of salty sea breeze. We stumbled upon a small seaside café and decided to stop for lunch. As soon as we sat down, I saw it — a slice of key lime pie larger than my face!
Naturally, I had to order it. As I took that first bite, the zesty creaminess exploded in my mouth, balancing perfectly between sweet and sour. It was pure bliss. Wrapped up in a buttery graham cracker crust, I was hooked. Not only did that pie become the highlight of my lunch, but it also inspired me to recreate its delicious flavors and make it a staple in my kitchen. Now, with this smoothie, I can enjoy that delightful taste anytime I want without the guilt of a heavy dessert.
Ingredients
Here’s what you’ll need to whip up this delicious smoothie:
- 1 cup coconut milk: Creamy and tropical, coconut milk makes this smoothie rich and smooth. You can also use almond milk or regular milk for a lighter option.
- 1/2 cup Greek yogurt: Adding Greek yogurt gives your smoothie a lovely thickness plus a boost of protein. If you’re dairy-free, try using a plant-based yogurt; coconut yogurt would enhance the flavor!
- 1 banana: Bananas add natural sweetness and help create a creamy texture. Don’t have a banana? Avocado is a fantastic substitute that will give you creaminess without overpowering the flavor.
- 1/4 cup key lime juice: This is where the magic happens! Key lime juice provides that soft tartness that sings in your smoothie. If you can’t find key limes, regular limes work just as well — just adjust to taste!
- 1 tablespoon honey or maple syrup (optional): A touch of sweetness helps balance the tanginess of the key lime. If you want to keep it sugar-free, you can skip this altogether or use a touch of agave syrup.
- 1/2 cup spinach or kale: Sneaky veggies are where it’s at! Adding greens boosts the nutrition profile without altering the taste much. If you want to skip this, feel free to leave out the greens for a truly dessert-like experience!
- Ice cubes (as desired): Ice helps thicken the smoothie and chills it down for a refreshing treat. You can blend in frozen fruit instead if you prefer a thicker texture.
Step-by-Step Instructions
Let’s get this tropical party started! Follow these simple steps for a perfect creamy coconut key lime pie smoothie:
-
Prepare your ingredients: Start by gathering all your ingredients on the countertop. Slice the banana into smaller pieces for easier blending. If you’re using fresh key limes, juice them now and zest them for an extra flavor boost.
-
Add the coconut milk: Pour 1 cup of coconut milk into your blender. Not only does this bring that delightful tropical flavor, but it also provides a creamy base. Be sure to use full-fat coconut milk for the creamiest result, but light coconut milk works too if you’re watching calories!
-
In goes the Greek yogurt: Add in 1/2 cup of Greek yogurt for that rich texture along with the protein punch. If it’s a bit thick, don’t worry! That’s what we want. A creamy smoothie means a satisfying one.
-
Next up, the banana: Toss in your banana. If you like a colder smoothie, use a frozen banana; it’ll make your drink extra refreshing. You can also throw in a few tablespoons of shredded coconut here for some chewy texture and additional flavor.
-
The key lime juice: Squeeze in 1/4 cup of that fresh key lime juice. This is where the magic happens! The tartness of the lime will rev up the flavors. If you find it too tangy after blending, you can always add more honey for sweetness.
-
Sweeten to taste: If you want, drizzle in your tablespoon of honey or maple syrup for that touch of sweetness. Remember, this step is optional — only add it if you like your smoothies on the sweeter side.
-
Add your greens: Toss in the 1/2 cup of spinach or kale, if using. This is a great way to sneak in some extra nutrients without sacrificing flavor.
-
Ice it up: Lastly, add some ice cubes. About a cup should do it, but adjust depending on how thick you want your smoothie. Blend everything on high until super smooth and creamy.
-
Taste and adjust: After blending, pause and taste your smoothie. This is your chance to customize it! If it’s too thick, add a bit more coconut milk. If it’s not sweet enough or too tangy, adjust the honey/maple syrup or lime juice as needed.
-
Serve and enjoy!: Pour your creamy coconut key lime pie smoothie into a chilled glass, and get ready to sip on your tropical paradise!
Serving Suggestions
Presentation is key! To serve this delightful smoothie, I recommend pouring it into a tall glass and topping it off with a dollop of whipped cream and a sprinkle of crushed graham crackers for that classic pie vibe. You could even add a citrus wedge or a slice of lime on the rim for that added splash of flair!
Recipe Variations
Feeling adventurous? Here are some fun variations to try in your creamy coconut key lime pie smoothie:
- Mango twist: Add in some frozen mango chunks for a tropical twist that complements the lime beautifully.
- Choco-lime: A tablespoon of cacao powder can transform this into a chocolate key lime pie smoothie! It’s a rich and indulgent treat.
- Minty fresh: Toss in a few fresh mint leaves for a refreshing spin on the classic flavors. Mint and lime are a match made in heaven!
- Nutty addition: Sprinkling in some almond or peanut butter can offer healthy fats and protein while giving a unique nutty twist.
Chef’s Notes
This recipe has evolved into one of my go-to smoothies because it perfectly captures the essence of summer, no matter the season. I love that it’s not just a drink; it’s a moment in a glass. The tangy key lime paired with creamy coconut makes my heart sing every time I sip it. And, honestly, it’s so versatile. You can use the same base but change the fruit or greens as your cravings evolve. One time, I accidentally added a handful of blueberries — and you know what? It worked beautifully!
Keep in mind, the taste may vary based on the ripeness of your banana and freshness of your key limes. Don’t hesitate to make adjustments as you go along; that’s part of the fun!
FAQs and Troubleshooting
Q1: My smoothie turned out too runny. What did I do wrong?
A: No worries! If your smoothie is too thin, you might have added too much liquid. Try adding more yogurt or ice to thicken it back up.
Q2: Can I prepare this smoothie ahead of time?
A: Absolutely! You can prep the ingredients and store them in the fridge. For best results, blend fresh to enjoy, but if you must make it ahead, drink it within 24 hours for optimal flavor and texture.
Q3: Is this smoothie kid-friendly?
A: Definitely! Kids love the creamy texture and sweet flavors. Plus, the spinach is a fun sneaky veggie that they won’t even notice!
Q4: How can I make this smoothie vegan?
A: Simply use a plant-based yogurt and swap honey for maple syrup to keep it fully vegan. Enjoy your delicious dairy-free treat!
And there you have it! A Creamy Coconut Key Lime Pie Smoothie that is as delightful to enjoy as it is to make. So gather your ingredients, summon a splash of tropical sunshine into your kitchen, and enjoy each and every sip. Here’s to creating delicious memories around your table! Keep cooking with love and intention — happy blending!
PrintCreamy Coconut Key Lime Pie Smoothie

A refreshing smoothie that captures the delightful flavors of key lime pie with a nutritious twist.
- Prep Time: 10 minutes
- Cook Time: 0 minutes
- Total Time: 10 minutes
- Yield: 2 servings 1x
- Category: Breakfast
- Method: Blending
- Cuisine: Tropical
- Diet: Vegetarian
Ingredients
- 1 cup coconut milk
- 1/2 cup Greek yogurt
- 1 banana
- 1/4 cup key lime juice
- 1 tablespoon honey or maple syrup (optional)
- 1/2 cup spinach or kale
- Ice cubes (as desired)
Instructions
- Prepare your ingredients: Start by gathering all your ingredients on the countertop.
- Add the coconut milk: Pour 1 cup of coconut milk into your blender.
- In goes the Greek yogurt: Add in 1/2 cup of Greek yogurt.
- Next up, the banana: Toss in your banana.
- The key lime juice: Squeeze in 1/4 cup of that fresh key lime juice.
- Sweeten to taste: If you want, drizzle in your tablespoon of honey or maple syrup.
- Add your greens: Toss in the 1/2 cup of spinach or kale, if using.
- Ice it up: Lastly, add some ice cubes.
- Blend everything on high until super smooth and creamy.
- Taste and adjust: Pause and taste your smoothie.
- Serve and enjoy!: Pour your smoothie into a chilled glass.
Notes
For best results, use full-fat coconut milk for creaminess. Customize sweetness and thickness to your liking.
Nutrition
- Serving Size: 1 serving
- Calories: 300
- Sugar: 20g
- Sodium: 50mg
- Fat: 10g
- Saturated Fat: 8g
- Unsaturated Fat: 2g
- Trans Fat: 0g
- Carbohydrates: 40g
- Fiber: 4g
- Protein: 8g
- Cholesterol: 5mg
Keywords: smoothie, coconut, key lime pie, tropical, breakfast

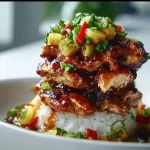
Hawaiian Turned Chicken Stack
Hawaiian Turned Chicken Stack: A Flavorful Journey to the Islands
Aloha, fellow food lovers! If you’re ready to take your taste buds on a tropical getaway, you’ve landed in the right place. I’m joyful to guide you through making a dish that’s not only bursting with flavors but also doubles as a warm hug on a plate—Hawaiian Turned Chicken Stack. Inspired by the sun-soaked islands, this recipe perfectly marries the tender juiciness of chicken thighs with the sweetness of pineapple and the vibrant crunch of fresh veggies.
Imagine yourself lounging on a Hawaiian beach, the gentle waves dancing at your feet while the scent of barbecue wafts through the air. Sounds dreamy, right? Well, you don’t need to strap on your flip-flops to enjoy this culinary escape. With just a few quality ingredients and a sprinkle of love, you can create an elegant dish that transports you right to those sandy shores without ever leaving your kitchen.
Whether you’re hosting a dinner party, prepping a family meal, or simply treating yourself to something special, this Hawaiian Turned Chicken Stack is sure to impress. With vibrant colors and punchy flavors that reflect the spirit of the islands, it’s perfect for any occasion. Are you excited? Let’s dive into this flavorful journey together!
Personal Story
One of my most cherished memories revolves around my aunt, who was a culinary wizard in our family. Every summer, she would host a luau in her backyard, transforming it into a slice of Hawaii with tiki torches, floral leis, and hula music. The highlight of those gatherings was always her Hawaiian chicken dish, grilled to perfection and drizzled with a sweet and tangy glaze. As a kid, I remember standing by the grill, my nose twitching with excitement as the savory aroma wrapped around me like a warm embrace.
One year, she decided to let me take the lead in the kitchen—an opportunity I grabbed with both hands! Armed with her recipes, I’m pretty sure I created a delightful disaster of flavors (let’s just say, there was more “ting” than “zing”). Still, she was incredibly supportive and showed me how to elevate my cooking without fear.
That summer ignited my passion for cooking, and I realized that food brings us not just sustenance but also stories—the laughter, the joy, the love. Presenting this Hawaiian Turned Chicken Stack is my way of keeping that magic alive and passing on the warmth I felt as a child.
Ingredients
Here’s what you’ll need to create this beautiful dish, along with some tips to make your cooking journey even smoother:
-
4 boneless, skinless chicken thighs
Tender and tasty, chicken thighs provide a juicy bite. If you’re looking for a lighter option, feel free to swap them out for boneless chicken breasts, but be mindful to avoid overcooking them. -
1/2 cup soy sauce
This becomes the base of your marinade, introducing a savory umami flavor. For a gluten-free alternative, use tamari instead! -
1/4 cup brown sugar
The sweetness balances the saltiness of the soy sauce. If you prefer, coconut sugar or agave syrup can offer a more complex flavor. -
1/4 cup pineapple juice
Adds that tropical zing! Fresh juice is ideal, but store-bought works just as well. -
2 tablespoons ketchup
Yep, it may seem unconventional, but it adds a delightful depth of flavor. Feel free to use a homemade version if you’re feeling adventurous! -
1 tablespoon rice vinegar
This rounds out the flavors, giving a pleasant acidity that brightens everything. Apple cider vinegar is a good substitute if you don’t have it on hand. -
2 cloves garlic, minced
Garlic adds complexity and aroma. Don’t feel shy to add an extra clove if you’re a garlic lover, like I am! -
1 teaspoon fresh ginger, grated
Ginger introduces a warm spice and freshness. If fresh isn’t available, a dash of ground ginger can work in a pinch! -
1 tablespoon vegetable oil
This is for cooking; it helps prevent sticking. You can use any neutral oil, like canola or avocado oil. -
2 cups cooked jasmine rice
This fluffy rice soaks up the delicious sauce wonderfully. Brown rice or quinoa can be fantastic substitutes for a healthy twist. -
1 cup fresh pineapple, diced
Fresh pineapple pieces add a burst of sweetness. If fresh isn’t available, use canned pineapple (drained) for ease. -
1 red bell pepper, diced
This adds a nice crunch and beautiful color. For a different sweetness, you can substitute it with orange or yellow bell peppers. -
1/2 cup green onions, sliced
These vibrant garnishes add a lovely bite. Chives can serve as an excellent alternative if green onions aren’t available. -
1 avocado, sliced
Creamy avocado complements the dish beautifully. If you’re feeling fancy, try a drizzle of chili oil for a spicy kick. -
Fresh cilantro, for garnish
Adds freshness and a pop of color. If cilantro’s not your thing, fresh parsley can be a beautiful alternative. -
Lime wedges, for serving
The squeeze of lime brightens and lifts every flavor—don’t skip it! Lemon can work as a substitute if that’s what you have.
Step-by-Step Instructions
Let’s roll up those sleeves, tie on that apron, and get cooking! Here’s how to create your Hawaiian Turned Chicken Stack:
Step 1: Marinating the Chicken
- In a mixing bowl, whisk together the soy sauce, brown sugar, pineapple juice, ketchup, rice vinegar, minced garlic, and grated ginger. This will be your marinade—sweet, tangy, and oh-so-delicious.
- Place the chicken thighs snugly in the bowl, ensuring they are thoroughly coated in the marinade. Cover, and let them soak in the flavors for at least 30 minutes (longer if you have the time—up to 2 hours in the fridge is best!). This step is crucial for infusing the chicken with that island magic.
Chef’s Tip: Don’t Have Time to Marinate?
No worries! If time’s short, simply brush the marinade over the chicken while cooking, ensuring it bakes in all those flavors.
Step 2: Cooking the Chicken
- Heat the vegetable oil in a large skillet over medium-high heat. When hot, add the marinated chicken thighs, saving that luscious marinade for later. Cook for about 5 minutes on each side until cooked through and golden brown. This step will create a beautiful crust!
Step 3: Making the Sauce
- Once the chicken is cooked, remove it from the skillet and set aside. In the same skillet, pour in the reserved marinade, bringing it to a simmer. Let it bubble away for 3–4 minutes until it thickens slightly. This will give you a glossy, flavorful glaze to drizzle over your chicken!
Step 4: Building Your Stack
- Time to layer it all together! Start with a base of fluffy jasmine rice on your plate. Next, place a beautifully cooked chicken thigh right on top. Then, it’s time to stack on the toppings: a handful of diced fresh pineapple, vibrant bell pepper, and the green onions.
- To finish, add a few slices of creamy avocado on top and drizzle a generous amount of that luscious glaze over everything. A sprinkle of fresh cilantro and a wedge of lime complete your masterpiece!
Chef’s Tip: Plate with Love
Presentation matters! Don’t just slap it on the plate. Take a moment to artfully arrange your ingredients, reflecting the dish’s tropical spirit. Remember, even humble meals shine with a little thoughtfulness!
Serving Suggestions
To serve this delightful dish, arrange the components on a large platter for family-style dining or plate individual servings. Drizzle extra glaze over the top for a mouthwatering finish, and don’t forget those lime wedges—after all, it’s all about that zesty pop! Add a refreshing side salad or some crispy slaw, and you’re set for a meal that feels both elegant and relaxed.
Recipe Variations
Let’s shake things up a bit! Here are a few creative twists to consider:
-
Teriyaki Chicken Stack: Swap out the soy sauce for a teriyaki sauce to shift the flavor profile while maintaining the Hawaiian vibes.
-
Grilled Chicken Skewers: Cut the chicken into bite-sized pieces and skewer them with bell pepper and pineapple before grilling. Perfect for a summer cookout!
-
Coconut Rice: Steam your jasmine rice with coconut milk instead of water for a creamier, more tropical flavor.
-
Spicy Heat: Add some diced jalapeños to the pineapple topping for a kick that contrasts nicely with the sweetness.
-
Vegan Delight: Swap chicken for firm tofu or tempeh, marinating and preparing it similarly for a delicious vegan option.
Chef’s Notes
This dish has evolved quite a bit over the years. The first time I made it, I remember being completely overwhelmed, trying to balance all the flavors. Now, I savor the process, knowing that cooking is about experimenting and learning. One funny kitchen disaster was when I accidentally grabbed brown sugar thinking it was flour—let me tell you, pineapple and sugar-coated chicken is not a flavor alignment made in heaven! But that’s what makes cooking fun—sometimes, the best recipes arise from our "oops" moments.
FAQs and Troubleshooting
Q1: My chicken turned out dry. What happened?
Ah, dry chicken is a common kitchen hiccup! Make sure you’re not overcooking them; chicken thighs are forgiving, but 6-7 minutes per side usually does the trick. Also, using a meat thermometer (aim for 165°F/74°C) can help ensure perfectly juicy results.
Q2: Can I prepare this dish ahead of time?
Absolutely! You can marinate the chicken earlier in the day and store it in the fridge. When you’re ready to cook, just follow the steps, and you’re good to go!
Q3: What if I don’t like pineapple?
No worries! While pineapple is a star here, feel free to replace it with your favorite fruit—mango or peaches could work wonders, too! The idea is to keep that fresh, fruity note.
Q4: Is this dish good for meal prepping?
Yes! The Hawaiian Turned Chicken Stack stores beautifully in the refrigerator. Just pack the components separately and combine them when you’re ready to dig in!
Nutritional Info
(Your nutritional values will vary based on serving size, so be sure to adjust based on your specific needs!)
Per Serving (estimated):
Calories: 450 | Protein: 28g | Carbs: 45g | Fat: 20g
Packed with flavor and nutrition, this dish provides a balanced meal without skimping on taste!
And there you have it—your ultimate guide to creating a delicious Hawaiian Turned Chicken Stack! Cooking is all about joy, creativity, and sharing; I hope this recipe encourages you to gather your loved ones around the table. Bon appétit, and until next time, keep those aprons tied and the laughter rolling! 🌺🍍🌿
PrintHawaiian Turned Chicken Stack
A vibrant dish marrying juicy chicken thighs, sweet pineapple, and fresh veggies for a tropical escape.
- Prep Time: 30 minutes
- Cook Time: 15 minutes
- Total Time: 45 minutes
- Yield: 4 servings 1x
- Category: Main Course
- Method: Stovetop
- Cuisine: Hawaiian
- Diet: Gluten-Free
Ingredients
- 4 boneless, skinless chicken thighs
- 1/2 cup soy sauce
- 1/4 cup brown sugar
- 1/4 cup pineapple juice
- 2 tablespoons ketchup
- 1 tablespoon rice vinegar
- 2 cloves garlic, minced
- 1 teaspoon fresh ginger, grated
- 1 tablespoon vegetable oil
- 2 cups cooked jasmine rice
- 1 cup fresh pineapple, diced
- 1 red bell pepper, diced
- 1/2 cup green onions, sliced
- 1 avocado, sliced
- Fresh cilantro, for garnish
- Lime wedges, for serving
Instructions
- Marinate the chicken by whisking together soy sauce, brown sugar, pineapple juice, ketchup, rice vinegar, minced garlic, and grated ginger. Coat the chicken thoroughly and let it soak for at least 30 minutes.
- Heat the vegetable oil in a skillet over medium-high heat. Add the marinated chicken thighs and cook for about 5 minutes on each side until cooked through and golden brown.
- Remove the chicken from the skillet, then pour in the reserved marinade. Bring to a simmer and cook for 3-4 minutes until it thickens slightly.
- Layer the dish by placing jasmine rice on a plate, topping it with a cooked chicken thigh, diced pineapple, bell pepper, green onions, avocado, and drizzling the sauce over everything.
Notes
For a lighter option, swap chicken thighs for boneless chicken breasts. Feel free to adjust the spice level and use any fruit you prefer.
Nutrition
- Serving Size: 1 serving
- Calories: 450
- Sugar: 14g
- Sodium: 800mg
- Fat: 20g
- Saturated Fat: 3g
- Unsaturated Fat: 15g
- Trans Fat: 0g
- Carbohydrates: 45g
- Fiber: 3g
- Protein: 28g
- Cholesterol: 75mg
Keywords: Hawaiian chicken, tropical recipe, chicken stack, rice bowl
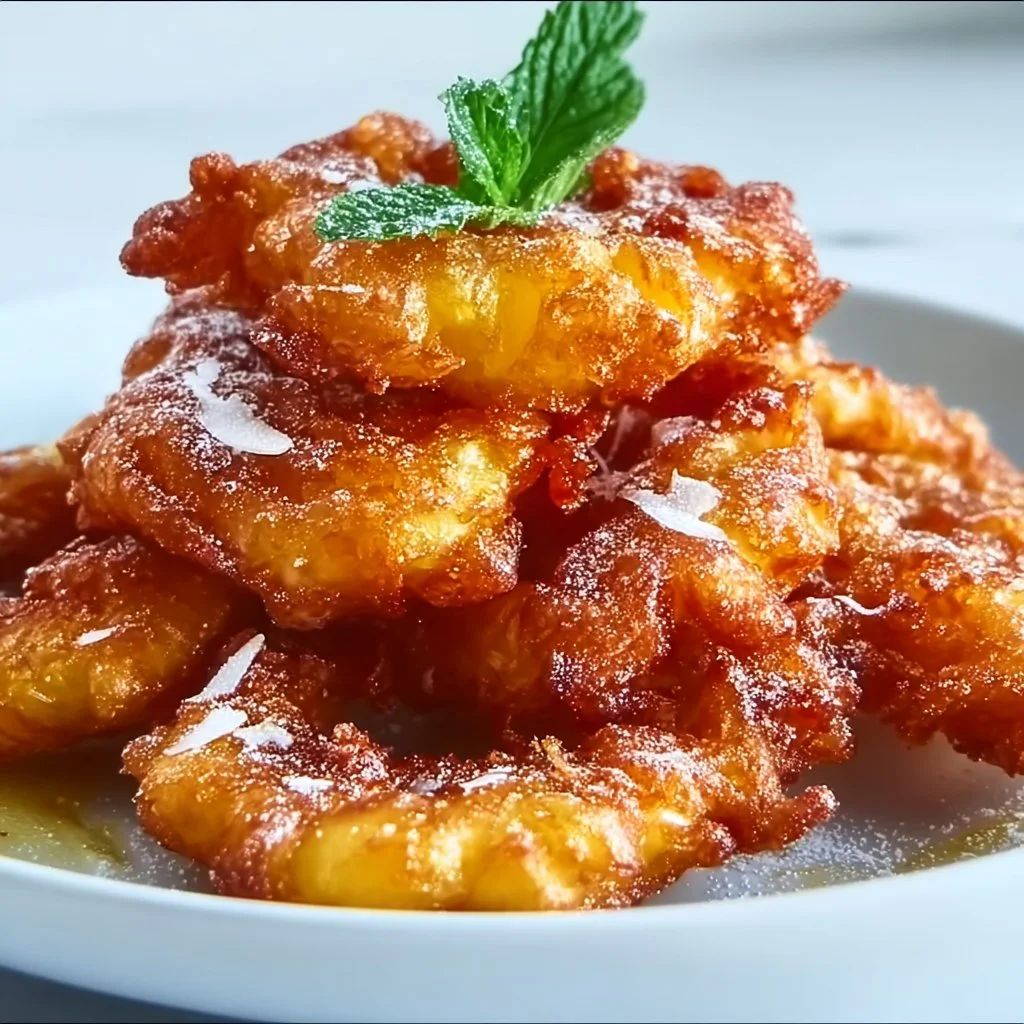
Heavenly Pineapple Fritters That Bring Tropical Joy
# Heavenly Pineapple Fritters That Bring Tropical Joy

## Introduction

Hello, my fellow food enthusiasts! Gather around because today we’re whisking you away to a sun-soaked paradise with one of my absolute favorite recipes — **Heavenly Pineapple Fritters**! These little bites of sweetness are not only a nod to tropical vibes but also remind us of carefree childhood days spent lounging by the pool, savoring each mouthful, and perhaps even a bit of sunshine on our skin.

Imagine it: the first bite of a warm, crispy fritter, giving way to the juicy sweetness of pineapple, all wrapped in a light, fluffy batter that's just the right amount of crispy. Does it get any better? I think not! Whether you're planning a tropical-themed brunch, looking for a delicious weekend treat, or just seeking a flavor explosion to brighten your day, these fritters are sure to bring a smile to your face.

They're incredibly easy to whip up and will fill your kitchen with a delightful aroma that mimics dining in a beachside café. Plus, you’ll love how versatile this recipe is — it welcomes both unique twists and dietary swaps effortlessly, making it a hit for everyone around the table. So, tie on your apron and get ready to dive into this tropical adventure!

## Personal Story

Let me take you back to a balmy summer afternoon when I was a child. My family and I hosted our annual summer gather where laughter floated effortlessly in the warm breeze and delicious aromas filled the air. We were in our backyard, surrounded by luscious greenery and colorful flowers, and, of course, a massive table laden with food.

That year, my aunt decided to showcase her newly discovered recipe for pineapple fritters. Much like a magician revealing a trick, she showed us how to perfectly batter and fry fresh pineapple rings until they were golden and crisp. That memory has since etched itself into my heart, from the way my cousins and I eagerly dipped the warm fritters into creamy coconut yogurt to the sheer delight everyone felt with each bite. **Those fritters were a highlight** of our gathering, and the joy they brought us reminded me of the magic food can create. Fast forward to today, and here I am, ready to share my twist on that beloved family recipe with you!

## Ingredients

To embark on this culinary adventure, you’ll need the following ingredients:

- **1 cup All-purpose flour**
  This serves as the base for the batter. If you’re looking for a gluten-free option, you can easily substitute it with a 1:1 gluten-free flour blend!

- **1/4 cup Granulated sugar**
  This adds just the right amount of sweetness. If you're feeling adventurous, try using coconut sugar instead for a touch of caramel flavor and a less refined option.

- **1 tablespoon Baking powder**
  This gives our fritters that airy fluffiness. Avoid substituting it with baking soda directly as it may lead to overly dense fritters.

- **1/4 teaspoon Salt**
  A pinch of salt enhances the flavors. Don’t skip it; even sweet recipes need that little kick!

- **1 teaspoon Ground cinnamon**
  For that warm, cozy flavor that feels like a hug in each bite. If you have it on hand, a dash of nutmeg can elevate the warm spices even more.

- **1 large Egg**
  This helps bind the mixture together. If you’re going for a vegan option, a flax egg will work perfectly!

- **1/2 cup Milk**
  It creates the desired consistency in the batter. Feel free to swap this out for dairy-free milk like almond or coconut milk if that suits your dietary needs.

- **1 whole Fresh pineapple**
  The star of the recipe! Sliced into rings, these juicy gems will offer bursts of flavor in every bite. If fresh pineapple isn’t available, canned pineapple (in juice, not syrup) may work as a last resort.

- **2 cups Vegetable oil**
  For frying; you can use canola or coconut oil, depending on your preference and what you have on hand. Coconut oil will give a slight tropical essence!

- **1 tablespoon Additional cinnamon and sugar**
  This is for dusting the finished fritters. Adjust to your liking, adding more or less according to your sweet tooth!

## Step-by-Step Instructions

Now, let’s get to the fun part — cooking these luscious fritters!

1. **Prep the Pineapple:**
   First, slice your fresh pineapple into rings, about 1/2 inch thick. If you have a core remover, this makes it breeze! If not, a knife will do just fine. And hey, no pressure! If some slices are not perfect circles, that's what makes home cooking homely!

2. **Make the Batter:**
   In a large mixing bowl, whisk together the all-purpose flour, granulated sugar, baking powder, salt, and ground cinnamon. Give it a little whirl until everything is nicely combined. This is where the magic begins!

3. **Incorporate Wet Ingredients:**
   In a separate bowl, beat the egg and then combine it with the milk. Pour this mixture into the dry ingredients, and stir until just incorporated. Do not overmix! It's okay if it’s a little lumpy — those lumps will dissolve while cooking, resulting in fluffy fritters.

4. **Heat the Oil:**
   In a deep skillet or heavy-bottomed pot, heat the vegetable oil over medium-high heat. You want enough oil to submerge at least half of the fritters. To test if the oil is ready, drop a small spoonful of batter into it. If it bubbles all around and rises to the surface, you’re good to go!

5. **Fry the Fritters:**
   Carefully dip each pineapple ring into the batter, allowing any excess to drip off, and gently place it into the hot oil. Don’t overcrowd the pan — work in batches if you need to! Fry each side for about 2-3 minutes until they turn golden brown.

6. **Drain and Dust:**
   Once fried, remove the fritters from the oil and place them on a paper towel-lined plate to absorb any excess oil. While they’re still warm, sprinkle them generously with your cinnamon and sugar mix. Watch how that sugar sparkles in the light — isn’t it beautiful?

And just like that, your heavenly pineapple fritters are ready to shine!

## Serving Suggestions

These fritters are best served warm, and the toppings are endless! I love plating them with a scoop of creamy coconut yogurt on the side for dipping or drizzling a little honey over them. If you’re feeling fancy, a dust of powdered sugar or even a sprinkle of toasted coconut can take the presentation up a notch. Serve them on a rustic wooden board or a beautiful platter, and let everyone dive in together!

## Recipe Variations

Feel free to have fun with these fritters! Here are some creative variations to keep things fresh:

1. **Coconut Fritters:** Mix shredded coconut into your batter for a tropical twist that'll send your tastebuds straight to a beach vacation!

2. **Chocolate-Dipped:** After frying, dip the fritters in melted dark chocolate and roll them in chopped nuts for an irresistible treat.

3. **Spiced Version:** Add a pinch of cayenne or chili powder to the batter for a sweet-savory experience that'll tickle your fancy. A little heat lifts the sweetness beautifully!

4. **Vegan Option:** Swap the egg for a flax egg and use unsweetened almond milk or coconut milk for a completely plant-based treat.

5. **Fruit Medley:** Mix in other fruits like banana or blueberries to the batter. The possibilities are endless — it’s all about what you love!

## Chef’s Notes

Oh, the stories these fritters have brought to my kitchen! I remember the very first time I made them for a brunch gathering. The moment I pulled the first batch out of the oil, a sense of anticipation filled the air, and you could hear the ooohs and aaahs as everyone bit into them. I even added a playful coconut sauce to the mix, which became an instant fan favorite!

Through experimentation, I learned that the key to perfect fritters is precision in the oil temperature; too cool, and they’ll be greasy, while too hot will burn them. It’s all about that magic sweet spot.

## FAQs and Troubleshooting

1. **Why are my fritters soggy?**
   This usually means your oil wasn’t hot enough. Make sure to keep the oil at a consistent temperature — a good thermometer can help here!

2. **Can I prepare the batter ahead of time?**
   It’s best served fresh, but you can prep the dry ingredients in advance. Just mix them with wet ingredients right before frying to maintain that fluffy texture.

3. **What if I don't have fresh pineapple?**
   Canned pineapple can work in a pinch! Just make sure to pat it dry to reduce excess moisture, which can make your batter soggy.

4. **How do I store leftover fritters?**
   Store them in an airtight container in the fridge for up to 2 days. Reheat them in the oven or an air fryer for that crispy finish!

## Nutritional Info

*Note: Nutritional values may vary based on specific ingredient brands and types used.*

- Calories per fritter (without additional toppings): approximately 150-200
- Total fat: 9g
- Saturated fat: 2g
- Carbohydrates: 18g
- Protein: 2g
- Fiber: 1g
- Sugar: 6g

There you have it, dear friends! **Heavenly Pineapple Fritters** that not only tantalize the tongue but also tug at the heartstrings, serving up nostalgia and flavor in every bite. Whether you're hosting friends or enjoying a little indulgence on your own, these fritters are sure to bring a slice of tropical joy to your kitchen. Happy cooking!
Heavenly Pineapple Fritters

Delicious, crispy fritters made with fresh pineapple, perfect for any tropical-themed brunch or treat.
- Prep Time: 15 minutes
- Cook Time: 15 minutes
- Total Time: 30 minutes
- Yield: 4 servings 1x
- Category: Dessert
- Method: Frying
- Cuisine: Tropical
- Diet: Vegetarian
Ingredients
- 1 cup All-purpose flour
- 1/4 cup Granulated sugar
- 1 tablespoon Baking powder
- 1/4 teaspoon Salt
- 1 teaspoon Ground cinnamon
- 1 large Egg
- 1/2 cup Milk
- 1 whole Fresh pineapple, sliced into rings
- 2 cups Vegetable oil, for frying
- 1 tablespoon Additional cinnamon and sugar for dusting
Instructions
- Prep the Pineapple: Slice your fresh pineapple into rings, about 1/2 inch thick.
- Make the Batter: In a large mixing bowl, whisk together the all-purpose flour, granulated sugar, baking powder, salt, and ground cinnamon.
- Incorporate Wet Ingredients: In a separate bowl, beat the egg and then combine it with the milk. Pour this mixture into the dry ingredients.
- Heat the Oil: In a deep skillet or heavy-bottomed pot, heat the vegetable oil over medium-high heat.
- Fry the Fritters: Carefully dip each pineapple ring into the batter and gently place it into the hot oil.
- Drain and Dust: Remove the fritters from the oil and place them on a paper towel-lined plate to absorb any excess oil, then sprinkle with cinnamon and sugar.
Notes
Serve warm with coconut yogurt or honey. Experiment with toppings like powdered sugar or toasted coconut for extra flair.
Nutrition
- Serving Size: 1 fritter
- Calories: 180
- Sugar: 6g
- Sodium: 150mg
- Fat: 9g
- Saturated Fat: 2g
- Unsaturated Fat: 5g
- Trans Fat: 0g
- Carbohydrates: 22g
- Fiber: 1g
- Protein: 2g
- Cholesterol: 30mg
Keywords: fritters, pineapple, dessert, tropical, brunch