
One-Pan Breakfast Pizza with Biscuits and Sausage Gravy
Biscuits and Sausage Gravy Breakfast Pizza: A Delicious Morning Treat
Hello, my fellow food lovers! Today, I’m super excited to share with you a dish that’s come to mean a lot to me over the years: Biscuits and Sausage Gravy Breakfast Pizza. Picture this: a delicious, warm pizza crust topped with creamy sausage gravy, fluffy scrambled eggs, and gooey cheese—a true morning masterpiece! This breakfast pizza combines two beloved classics in a way that’s not only indulgent but also surprisingly approachable. So, grab your apron, and let’s dive into this delightful recipe that will make your breakfast feel like a special occasion!
Personal Story
I still remember the first time I had the idea for breakfast pizza. It was a lazy Sunday morning, the kind where you linger in your pajamas, caffeinated bliss pulsing through your veins, and a little craving for something hearty starts to set in. It was my friends’ brunch gathering, and someone had brought over the most luscious homemade sausage gravy. As I savored each bite, I pondered how it would be on a crispy pizza crust. That’s the magic of cooking—every dish tells a story and reminds us of the people we cherish. This pizza not only carries those memories; it invites you to create new ones. So, whether it’s a cozy brunch with friends or a cheerful family breakfast, this pizza is your delicious passport to flavor-town!
Ingredients
Here’s what you’ll need for this delightful dish along with some helpful insights:
-
1 package (16 oz) breakfast sausage
A flavorful base! Go for your favorite brand. For a healthier option, you can use turkey or chicken sausage without sacrificing flavor. -
1/4 cup all-purpose flour
This will help thicken your gravy. Feel free to use gluten-free flour if that suits your needs—it works well in this recipe! -
2 cups milk, divided
I recommend whole milk for richness, but 2% works too. Alternatively, you can use almond milk for a dairy-free version, though I would recommend adjusting the seasoning slightly. -
Ground black pepper, to taste
A staple in the kitchen! Freshly ground gives a better punch. Add more or less depending on your spice tolerance! -
1 tbsp olive oil (optional)
This can help cook your sausage slightly faster and prevent sticking. If your sausage is high in fat, you might not need it at all. -
1 pre-baked pizza crust (12-inch)
Choose a thin, crispy crust for an enjoyable texture, or go for a thicker, fluffier style based on your preference! -
Cooking spray
A quick spritz on the pizza crust can prevent sticking and ensure golden-brown edges. -
6 large eggs
The star of the show! These will add fluffiness when scrambled. You can also replace these with egg-substitute for a lighter meal. -
1/4 cup milk (for eggs)
This makes your scrambled eggs extra creamy. You can use the same milk you use for the gravy! -
1 cup shredded Cheddar cheese (or more, as desired)
Cheddar brings a sharpness that complements the gravy beautifully. You can mix it up with Monterey Jack or Pepper Jack for added flavor! -
Crispy fried onions for topping
These add that perfect finishing crunch! You can find them at the grocery store, or you could make your own if you have time!
Step-by-Step Instructions
Now, let’s get cooking! Here’s how you whip up this Biscuits and Sausage Gravy Breakfast Pizza step by step.
-
Prepare the Gravy
Start by cranking your stovetop to medium heat. In a large skillet, add your breakfast sausage. If you’re using the olive oil, drizzle it in alongside your sausage. Cook until browned, breaking it apart with a spatula. This step not only adds flavor but creates a lovely base for your gravy!Chef Tip: If you prefer your sausage a little spicy, consider using a spicy blend or adding red pepper flakes into the skillet while the sausage cooks.
-
Create the Roux
Once the sausage is nicely browned (think golden goodness), sprinkle the flour directly over the sausage. Stir constantly for about 2 minutes. This roux will thicken your gravy. Don’t skip this step—it’s vital for flavor and texture!Fun Fact: The roux should turn a nice golden color without burning; that’s when you know it’s ready for the next step!
-
Whisk in the Milk
Gradually pour in 1.5 cups of the milk, stirring continuously to avoid lumps. Let the gravy simmer for about 5-7 minutes, stirring until it thickens to a creamy consistency. This is the moment your kitchen will start smelling heavenly!Chef Hack: If your gravy is too thick, don’t fret! Just add a splash more milk until you reach your desired consistency.
-
Season the Gravy
Season generously with ground black pepper (and salt, if you like it). Taste and adjust according to your preference. Remember, this is a flexible sauce, and you’re the chef! -
Prep the Eggs
In a separate bowl, whisk together your eggs and the remaining 1/4 cup of milk until fully combined. Season with a pinch of salt and pepper.Chef Insight: Whisking air into your eggs will make them incredibly fluffy while cooking. It’s all about that texture!
-
Scramble the Eggs
In another skillet over medium-low heat, scramble your egg mixture. Stir often, and focus on soft curds. Once they’re nearly done, remove from heat—they will continue to cook in the residual heat!Trick to Remember: You want them soft and creamy, not rubbery. Don’t overcook them!
-
Assemble the Pizza
Preheat your oven according to your pizza crust instructions (usually around 425°F). On a baking sheet, spray your pre-baked pizza crust with cooking spray. Pour the creamy sausage gravy evenly across the top, followed by the scrambled eggs.Chef Tip: Make sure to leave a little edge without gravy for an effortless slice later!
-
Cheese It Up
Generously sprinkle the shredded Cheddar cheese over the top. If you’re feeling extra cheesy, why not add more? -
Bake It
Pop the loaded pizza in the oven! Bake for about 10-15 minutes, or until the cheese is bubbly and lightly golden. You’ll know it’s perfect when those edges start to get crispy!Final Touch: If you like an extra crispy top, you can broil it on high for the last minute—just watch it closely!
-
Add a Crunch
Once out of the oven, garnish the pizza with crispy fried onions for that added layer of texture and flavor. Give it a couple of minutes to cool down, and then it’s time to slice and serve!
Serving Suggestions
When it comes to serving your Biscuits and Sausage Gravy Breakfast Pizza, presentation is key! I love to cut it into triangular slices and place them on a beautiful platter. You can add a sprinkle of fresh herbs like chives or parsley for a pop of color. Pair it with fresh fruit on the side for a refreshing contrast and to balance out all those rich flavors. If you want to go the extra mile, serve it alongside some mimosas or a rich coffee blend!
Recipe Variations
-
Veggie Delight: Add some sautéed peppers and onions to the sausage for a heartier flavor and extra nutrition.
-
Spicy Option: Spice it up by using hot breakfast sausage or adding jalapeños for a kick!
-
Herbed Twist: Stir in some fresh herbs, like thyme or rosemary, into the egg mixture for a fragrant twist.
-
Savory Swap: Try swapping the sausage for crumbled bacon or chorizo for a unique flavor profile.
-
Dairy-Free Delight: Use plant-based sausage and dairy-free cheese for a lighter, allergen-friendly option.
Chef’s Notes
This recipe has evolved over the years in my kitchen! The first time I made it, I was super cautious about the gravy and ended up with a lumpy mess—but that mistake led to so many delicious tweaks! I’ve experimented with various toppings and spices, all of which added their own special touch. Whenever I bring this dish to gatherings, it never fails to bring smiles and compliments. And if there are leftovers (which is rare), I love reheating a slice and having it for lunch!
FAQs and Troubleshooting
-
My gravy turned out lumpy. What happened?
No worries! It’s all about whisking it thoroughly! Make sure to add the milk slowly while stirring constantly. If it’s already lumpy, you can blend it with an immersion blender before serving. -
Can I make this pizza ahead of time?
Absolutely! You can prepare the components (the gravy and scrambled eggs) ahead of time. Simply assemble and bake when you’re ready to serve! -
What’s the best way to reheat leftovers?
You can warm it up in the oven at a low temperature or in the microwave. If using the oven, cover it with foil to keep it from drying out. -
How can I make this vegetarian?
Just swap the sausage for a hearty veggie crumble or mushrooms sautéed until golden! The gravy will still be just as creamy and delicious!
Nutritional Info
This recipe is rich in flavors and nutrients, delivering hearty satisfaction. Each serving provides protein from the sausage and eggs while giving you a balanced start to the day. As always, adjust according to your dietary needs!
There you have it, my friends! A delightful dish that brings comfort to the breakfast table while keeping your gatherings elegant and inviting. Biscuits and Sausage Gravy Breakfast Pizza is sure to nourish both body and soul, and it makes for fantastic memories around the table. Remember, cooking is all about sharing moments and flavors with those you love. So, tie on that apron and let’s make some breakfast magic! Bon appétit!
PrintBiscuits and Sausage Gravy Breakfast Pizza

A delicious breakfast pizza topped with creamy sausage gravy, fluffy scrambled eggs, and gooey cheese, perfect for a special morning treat.
- Prep Time: 15 minutes
- Cook Time: 30 minutes
- Total Time: 45 minutes
- Yield: 4 servings 1x
- Category: Breakfast
- Method: Baking
- Cuisine: American
- Diet: None
Ingredients
- 1 package (16 oz) breakfast sausage
- 1/4 cup all-purpose flour
- 2 cups milk, divided
- Ground black pepper, to taste
- 1 tbsp olive oil (optional)
- 1 pre-baked pizza crust (12-inch)
- Cooking spray
- 6 large eggs
- 1/4 cup milk (for eggs)
- 1 cup shredded Cheddar cheese (or more, as desired)
- Crispy fried onions for topping
Instructions
- Prepare the gravy: Heat your stovetop to medium heat and cook the breakfast sausage in a large skillet. If using, drizzle in olive oil. Cook until browned, breaking apart with a spatula.
- Create the roux: Once browned, sprinkle flour over the sausage and stir constantly for about 2 minutes.
- Whisk in the milk: Gradually pour in 1.5 cups of milk, stirring continuously. Let simmer for 5-7 minutes until thickened.
- Season the gravy: Add ground black pepper and adjust seasoning to taste.
- Prep the eggs: Whisk together the eggs and remaining 1/4 cup of milk in a separate bowl, seasoning with salt and pepper.
- Scramble the eggs: In another skillet, scramble the egg mixture over medium-low heat until soft and creamy.
- Assemble the pizza: Preheat oven and spray pre-baked pizza crust with cooking spray. Pour sausage gravy evenly across the top, followed by scrambled eggs.
- Cheese it up: Generously sprinkle shredded Cheddar cheese over the top.
- Bake it: Bake for 10-15 minutes until cheese is bubbly and golden.
- Add a crunch: Garnish with crispy fried onions before slicing and serving.
Notes
Serve with fresh fruit and a sprinkle of herbs for color. Pairs well with mimosas or coffee.
Nutrition
- Serving Size: 1 slice
- Calories: 450
- Sugar: 6g
- Sodium: 750mg
- Fat: 22g
- Saturated Fat: 9g
- Unsaturated Fat: 10g
- Trans Fat: 0g
- Carbohydrates: 40g
- Fiber: 2g
- Protein: 18g
- Cholesterol: 300mg
Keywords: breakfast pizza, sausage gravy, brunch recipe, breakfast ideas
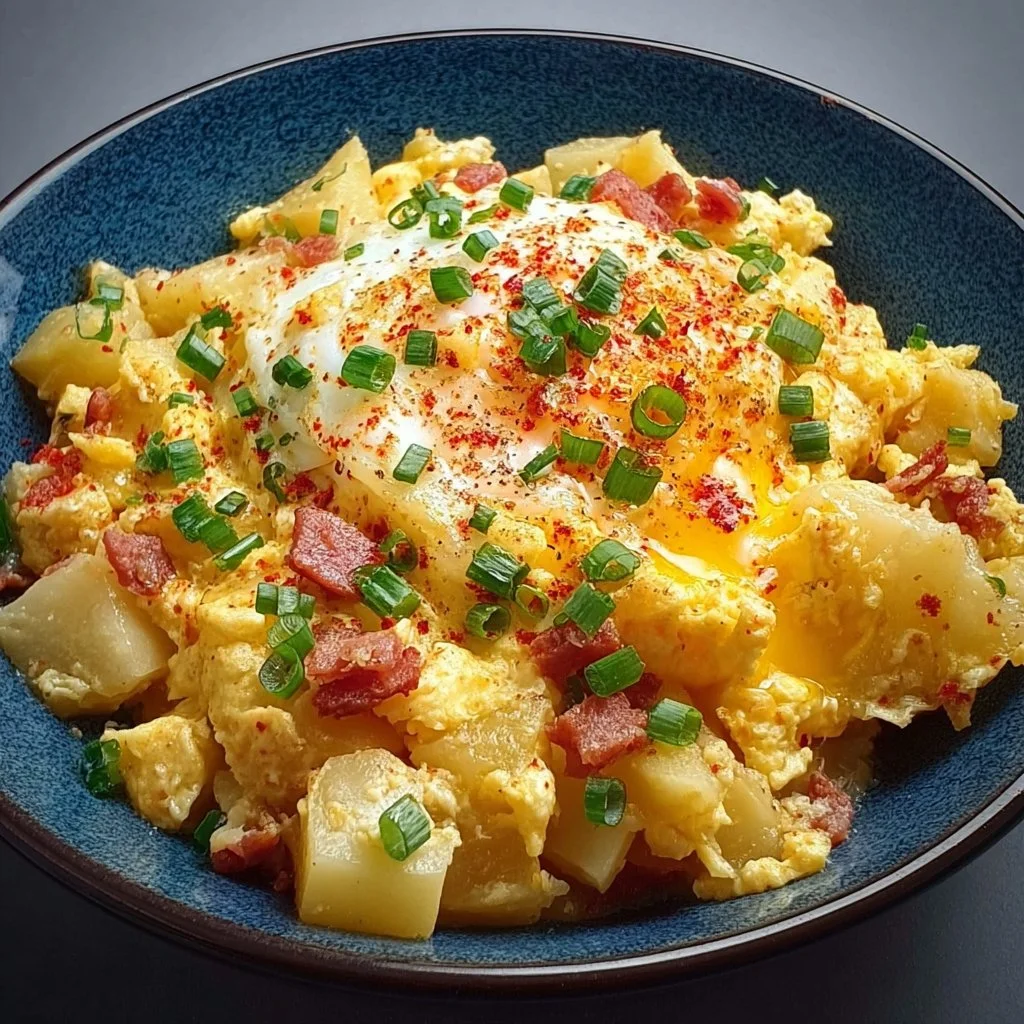
Cheesy Potato Egg Scramble
# Cheesy Potato Egg Scramble: A Breakfast Delight

## Introduction

Hello, fellow food lovers! Today, we're diving into the warm, cozy world of breakfast with a dish that’s sure to make your mornings a little brighter: the Cheesy Potato Egg Scramble! This simple yet satisfying meal is one that evokes memories of lazy Sunday mornings spent in the kitchen, the tempting aroma of crispy potatoes sizzling away, and a backdrop of laughter and clinking dishes.

The beauty of a cheesy potato egg scramble lies in its essence—the perfect combination of textures and flavors, crowned with that irresistible melting cheese. This recipe is not just for breakfast; it’s perfect for brunch, a midnight snack, or even a fulfilling dinner when you need comfort food at its finest. Plus, it’s super versatile, which means you can use whatever ingredients you have on hand.

Whether you enjoy it alongside toast slathered in butter, with a fresh fruit salad, or simply on its own, I promise this scramble will nurture your soul and satisfy your hunger. So let’s roll up our sleeves and get cooking!

## Personal Story

I remember the first time I made a potato egg scramble. It was a chilly Saturday morning, right after I had moved into my first apartment. I was still figuring out how to navigate my tiny kitchen, armed with a collection of mismatched pots and pans. I had some leftover roasted potatoes in the fridge and a couple of eggs that were about to expire. Not wanting to waste anything (my motto: “waste not, want not”), I decided to throw them together, adding a generous handful of cheddar cheese.

As the potatoes browned and the eggs puffed up, the aroma wafted through my apartment and drew my friends in like a magnet. We gathered around the table with mugs of coffee, our voices mixing with bursts of laughter and stories. That morning, the humble potato egg scramble transformed into a feast, filled with love, warmth, and community. It wasn’t just about the food; it was about sharing moments and creating memories. Every time I make this dish now, I’m reminded of that sunrise and the joy of cooking for those you love.

## Ingredients

Here’s what you’ll need for this cheesy, comforting meal:

- **2 cups diced potatoes**
  These can be fresh or leftover, and I love using a variety like Yukon Gold for their creamy texture. If you don’t have potatoes, you could sub in sweet potatoes for a slightly sweeter twist!

- **4 large eggs**
  Fresh eggs are key to a fluffy scramble. If you're vegan, consider using tofu or chickpea flour mixed with water as an alternative.

- **1 cup shredded cheddar cheese**
  Cheddar is classic, but feel free to experiment! A sharp white cheddar or even Monterey Jack can add a lovely flavor.

- **1/2 cup diced ham or bacon (optional)**
  I love the addition of savory ham or crispy bacon here, but you can skip it for a vegetarian version, or swap in cooked sausage if you prefer!

- **Salt and pepper to taste**
  This is your seasoning base; don’t hesitate to adjust according to your preference.

- **2 tablespoons olive oil**
  I prefer olive oil for its healthy fats and rich flavor, but feel free to use butter or any oil you like best.

- **Chopped green onions for garnish (optional)**
  These add a lovely fresh crunch and color to the dish. If you don’t have green onions, you could opt for chopped parsley or cilantro.

## Step-by-Step Instructions

**Step 1: Prep Your Potatoes**
Start by dicing your potatoes into bite-sized pieces. I recommend having them around ½-inch cubes for even cooking. If you’re using fresh potatoes, rinse them under cold water to remove the starch and then pat them dry. This will help them crisp up beautifully in the pan!

**Step 2: Cook the Potatoes**
Heat the olive oil in a large skillet over medium heat. Once hot, toss in the diced potatoes and season with a pinch of salt. Let them cook without stirring for about 5–7 minutes until they’re golden and crispy on one side. Remember, patience is key here! Flip them occasionally to get an even browning.

**Step 3: Add the Ham or Bacon**
If you’re going for the optional meat addition, toss in the diced ham or cooked bacon now. Allow everything to cook together for another 3–4 minutes. You’ll want that delicious, meaty flavor to infuse into the potatoes.

**Step 4: Beat the Eggs**
In a separate bowl, crack the eggs and whisk them vigorously until the yolks and whites are fully combined. Season with salt and pepper. You can add a splash of milk or cream here for extra creaminess.

**Step 5: Pour and Scramble**
Once your potatoes (and ham, if using) are beautifully golden, reduce the heat to medium-low and pour the beaten eggs directly over the potatoes in the skillet. Using a spatula, gently stir to distribute the eggs evenly, scraping up any tempting bits from the bottom of the pan. Keep stirring occasionally for about 2-3 minutes, just until the eggs are fluffy and mostly set but still slightly runny.

**Step 6: Add the Cheese**
Here’s the best part—add in that shredded cheddar cheese! Give it a gentle fold through the eggs and potatoes, allowing it to melt into that creamy goodness.

**Step 7: Plate and Serve**
Once everything is cooked to your liking, remove the skillet from the heat. Serve hot, garnished with a sprinkle of chopped green onions for that beautiful finish.

## Serving Suggestions

Plating doesn’t have to be complicated! Spoon generous servings of the cheesy potato egg scramble onto plates, letting it spill slightly over the edges for a rustic feel. Serve with slices of crusty bread or buttery toast on the side, and perhaps a fresh garden salad or some sliced avocado for a nutritious balance. You could also offer a dollop of sour cream on top for extra deliciousness!

## Recipe Variations

1. **Veggie Delight**: Add in diced bell peppers, spinach, or tomatoes for a burst of color and added nutrients.

2. **Southwestern Twist**: Mix in diced jalapeño or corn, and top with avocado slices and salsa for a Tex-Mex flair.

3. **Asian Fusion**: Stir in chopped bok choy or shredded cabbage and drizzle with soy sauce. Top with sesame seeds for that crunchy finish.

4. **Egg White Scramble**: For a healthier option, use egg whites instead of whole eggs, and add more veggies!

5. **Herbed Infusion**: Try mixing in fresh herbs like chives, dill, or parsley for a fragrant touch.

## Chef's Notes

This recipe has come a long way since that first fateful day in my apartment! It started merely as a necessity to use what I had, but over time, it has evolved into a go-to dish that I love to serve during weekend brunches or quick dinners when life gets busy. I’ve experimented with various toppings and ingredients, and it’s always delightful to see how it can change and still feel like home. One funny memory involves a batch that featured way too much cheese—it ended with me laughing while digging into a gooey, cheeseburger-like scramble that we all still rave about to this day!

## FAQs and Troubleshooting

**Q: My potatoes aren't cooking through!**
A: Make sure your diced potatoes are small enough and give them adequate time to cook—if they’re browning too quickly, lower the heat.

**Q: Why are my eggs rubbery?**
A: Overcooking can lead to rubbery eggs. Take them off the heat while they're still slightly runny; they’ll continue to cook in the pan’s residual heat.

**Q: Can I prepare this ahead of time?**
A: While it's best enjoyed fresh, you can prep the diced potatoes and other ingredients beforehand. Simply scramble and cook right before serving!

**Q: How can I make this dish more filling?**
A: Add some cooked quinoa or black beans to the scramble to bulk it up and make it more hearty!

## Nutritional Info (optional)

- **Calories**: Approximately 350 per serving
- **Protein**: 22g
- **Carbohydrates**: 30g
- **Fat**: 18g

---

And there you have it—your guide to crafting a delicious Cheesy Potato Egg Scramble! Thank you for joining me in the kitchen today. Cooking should be a joyful experience where you feel free to experiment and express yourself. So tie on that apron, gather your loved ones, and let’s create beautiful moments around the table—one delicious meal at a time! Happy cooking!
Cheesy Potato Egg Scramble

A comforting and satisfying cheesy potato egg scramble, perfect for breakfast, brunch, or a late-night snack.
- Prep Time: 10 minutes
- Cook Time: 15 minutes
- Total Time: 25 minutes
- Yield: 4 servings 1x
- Category: Breakfast
- Method: Stovetop
- Cuisine: American
- Diet: Vegetarian
Ingredients
- 2 cups diced potatoes
- 4 large eggs
- 1 cup shredded cheddar cheese
- 1/2 cup diced ham or bacon (optional)
- Salt and pepper to taste
- 2 tablespoons olive oil
- Chopped green onions for garnish (optional)
Instructions
- Prep your potatoes by dicing them into bite-sized pieces.
- Cook the potatoes in olive oil over medium heat for about 5–7 minutes until golden and crispy.
- Add the ham or bacon if using, and cook for another 3–4 minutes.
- Beat the eggs in a bowl, seasoning with salt and pepper.
- Pour the beaten eggs over the potatoes, stirring gently until the eggs are fluffy.
- Add the shredded cheddar cheese and fold it through until melted.
- Plate and serve hot, garnished with green onions.
Notes
Feel free to customize with additional veggies or spices to suit your taste!
Nutrition
- Serving Size: 1 serving
- Calories: 350
- Sugar: 2g
- Sodium: 600mg
- Fat: 18g
- Saturated Fat: 7g
- Unsaturated Fat: 10g
- Trans Fat: 0g
- Carbohydrates: 30g
- Fiber: 3g
- Protein: 22g
- Cholesterol: 350mg
Keywords: scramble, breakfast, potatoes, cheesy, egg, brunch, easy recipe
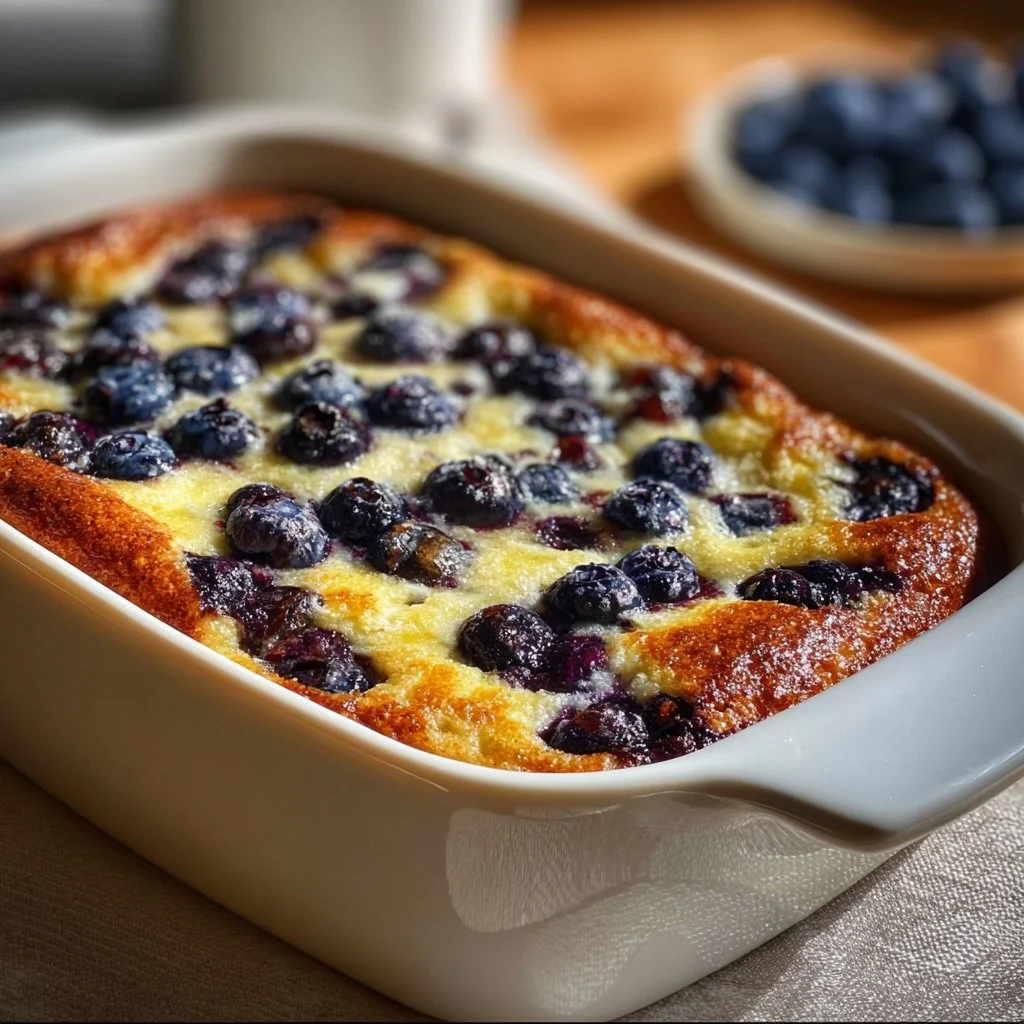
Blueberry Buttermilk Pancake Casserole
# Blueberry Buttermilk Pancake Casserole: A Delightful Brunch Treat

## Introduction

Hey there, fellow cooking enthusiasts! Today I’m super excited to share a dish that’s as comforting as it is crowd-pleasing: the **Blueberry Buttermilk Pancake Casserole**. This fantastic recipe is the epitome of lazy Sunday mornings—think fluffy pancakes piled high with juicy blueberries, all baked into a dreamy casserole that’s perfect for sharing (or devouring all by yourself, no judgment here!).

If you're anything like me, you cherish those moments that bring family and friends together. Whether it’s the lingering aroma of pancakes wafting through the house or the joy of gathering around the table, this recipe is an ode to all the good times. Imagine soft buttermilk pancakes, bursting with sweet, tart blueberries, served warm from the oven, drizzled with maple syrup, and perhaps a dollop of whipped cream. Ah, pure bliss!

But what’s even better? This casserole lets you prep it all in advance, so you can relax and enjoy the company of your loved ones without flipping individual pancakes. That’s right; it’s a make-ahead miracle. Perfect for brunch gatherings, holiday breakfasts, or a cozy family treat whenever you crave a little bit of indulgence!

So, grab your apron and let’s dive into this delicious journey of creating the ultimate Blueberry Buttermilk Pancake Casserole. You won’t want to miss what’s coming up next!

## Personal Story

Ahh, blueberry pancakes... they remind me of my childhood summers spent at Grandma’s house. Every weekend, we’d wake up to the sound of her sizzling skillet, and the kitchen would fill with the sweet scent of butter and berries. Grandma had a magical touch when it came to pancakes. We’d help her, pouring batter and plopping blueberries onto the pancakes, and before we knew it, the stack would grow higher than our heads!

But one day, during one of those blissful mornings, she decided to make something a bit different—a pancake casserole! At first, I was skeptical, but my goodness, it was life-changing! We dug into a warm, fluffy, and saucy creation that combined all the pancake goodness into one glorious dish. That moment is forever etched in my memory, and I knew right then that this method was worth preserving.

Now, I’m excited to bring that tradition to you with my Blueberry Buttermilk Pancake Casserole. Whether you’re creating memories with family or hosting a fun brunch, I hope this recipe carries on that same spirit of joy and connection.

## Ingredients

Let’s gather up our ingredients for this delicious pancake casserole! Here’s what you need to make this dreamy dish:

- **2 cups buttermilk**
  *Chef Insight*: Buttermilk adds a wonderful tanginess and makes the pancakes exceptionally tender! If you don’t have buttermilk, you can make a quick substitute using regular milk and a tablespoon of vinegar or lemon juice. Just let it sit for about 5 minutes!

- **2 large eggs**
  *Substitution Tip*: Eggs help the casserole rise and provide moisture. If you're looking for an egg-free option, you could use flax eggs (1 tablespoon of flaxseed meal mixed with 2.5 tablespoons of water, let sit for 5 minutes).

- **1/4 cup melted butter**
  *Quick Insight*: The melted butter lends richness and flavor. For a healthier twist, consider substituting melted coconut oil.

- **2 cups all-purpose flour**
  *Substitution Tip*: Whole wheat flour can work here if you’re after a nuttier flavor—just keep in mind it might slightly alter the texture!

- **1/4 cup sugar**
  *Note*: This adds just the right amount of sweetness. Feel free to reduce the sugar if you prefer less sweetness or try coconut sugar for a different flavor.

- **1 tablespoon baking powder**
  *Why It Matters*: Baking powder helps the casserole rise! Make sure it’s fresh for the best results.

- **1/2 teaspoon baking soda**
  *Insider Tip*: This helps with browning and is great in conjunction with buttermilk.

- **1/2 teaspoon salt**
  *Why It’s Essential*: It balances the sweetness and enhances flavors overall.

- **2 cups fresh blueberries**
  *Substitution Insight*: Feel free to swap for frozen blueberries if fresh aren’t available—just make sure to add them frozen to prevent the batter from getting too watery!

- **1 teaspoon vanilla extract**
  *Chef Hack*: This little splash takes the flavor to the next level and adds a lovely aroma.

With our ingredients gathered, we’re ready to create magic in the kitchen!

## Step-by-Step Instructions

Now, let’s get cooking! Follow these simple steps to whip up your Blueberry Buttermilk Pancake Casserole.

1. **Preheat the Oven**: First things first, let’s get that oven preheating to 350°F (175°C). This allows for an even bake over the entire dish.

2. **Mix Wet Ingredients**: In a large mixing bowl, whisk together the buttermilk, melted butter, eggs, and vanilla extract until everything is well combined. This creates the base flavor for your pancakes.

3. **Combine Dry Ingredients**: In a separate bowl, mix together the flour, sugar, baking powder, baking soda, and salt. Whisking them together helps combine the leavening agents evenly, which will ensure fluffiness!

4. **Combine Wet and Dry**: Gradually add the dry mixture into the wet ingredients, gently folding until just combined. Be careful not to overmix—lumps are okay! This keeps the pancakes light and airy.

5. **Fold in the Berries**: Now for the fun part! Gently fold the fresh blueberries into the batter. You want them evenly distributed throughout the pancake mix, so every bite is packed with that juicy explosion.

6. **Prepare Your Baking Dish**: Grease a 9x13-inch baking dish with some extra butter or non-stick spray. This will help the casserole release easily once baked.

7. **Pour and Spread**: Pour the batter into your prepared baking dish, using a spatula to spread it out evenly. Don’t be alarmed if it looks a bit thick; it will puff up beautifully as it bakes!

8. **Bake**: Place the casserole in the preheated oven and let it bake for about 30-35 minutes, or until the top is golden brown and a toothpick inserted into the center comes out clean. The smell that fills your kitchen during this time is pure heaven!

9. **Cool and Serve**: Once baked, let your pancake casserole cool for about 10 minutes before cutting into it. This makes it easier to serve.

## Serving Suggestions

When it comes to serving, keep it simple yet elegant! Cut the casserole into squares and serve hot, drizzling a generous pour of maple syrup over the top. Add a dollop of whipped cream for extra indulgence, and maybe throw on some extra fresh blueberries if you’re feeling fancy! Pair this delicious casserole with a side of crispy bacon or fresh fruit for a delightful brunch spread.

## Recipe Variations

I love how versatile this Blueberry Buttermilk Pancake Casserole can be! Here are a few fun twists you can try:

1. **Mixed Berries**: Swap out blueberries for a mix of strawberries, raspberries, and blackberries for a colorful berry medley.

2. **Lemon Zest**: Add a teaspoon of lemon zest to the batter for a bright, zesty kick that pairs perfectly with the sweetness of the blueberries.

3. **Chocolate Chip Delight**: Mix in some semi-sweet chocolate chips for a decadent take. Who says pancakes can’t be dessert?

4. **Nutty Crust**: Add a layer of chopped pecans or almonds on top before baking. They’ll toast wonderfully and add an amazing crunch.

5. **Dairy-Free Option**: Substitute with dairy-free milk and vegan butter to make this recipe suitable for lactose intolerance.

## Chef's Notes

This recipe holds a special place in my heart. I remember the first time I made it for my friends. I was all nervous, thinking, “What if it doesn’t turn out?” But as soon as I pulled the casserole out of the oven, the golden crust and bursting berries had everyone swooning. The laughter, the chatter, and that first delicious bite—truly unforgettable!

Over time, I’ve tweaked and perfected this recipe, experimenting with add-ins while keeping that classic pancake flavor. It’s become a go-to for celebrations and casual family breakfasts alike. I guess you could say it’s a staple in my kitchen, and I hope it becomes one in yours too.

## FAQs and Troubleshooting

Here are some common questions I often receive regarding this recipe, along with solutions to avoid any kitchen mishaps:

1. **Why is my pancake casserole dense?**
   If you overmixed the batter, it could lead to denser pancakes. Mix until just combined, and you should achieve a lovely fluffy texture.

2. **Can I make this ahead of time?**
   Absolutely! You can prepare it the night before, cover it, and keep it in the fridge. Just bake it in the morning; it might take a few extra minutes if it's chilled.

3. **What if I don't have fresh blueberries?**
   Frozen blueberries work perfectly—just add them straight into the batter without thawing to avoid excess moisture.

4. **How do I store leftovers?**
   Store any leftovers in an airtight container in the refrigerator for up to three days. Reheat in the microwave or oven until warmed through.

So there you have it—your complete guide to my Blueberry Buttermilk Pancake Casserole. It’s not just a recipe; it’s an experience waiting to happen. I can’t wait to hear how your baking adventure goes! Let’s gather around the table and celebrate with flavors that are both comforting and delightful. Enjoy this sweet treat, and remember to share the love!

---
Feel free to adapt any part of this recipe and make it your very own. Happy cooking!
Blueberry Buttermilk Pancake Casserole
A delightful brunch treat featuring fluffy buttermilk pancakes baked with juicy blueberries.
- Prep Time: 15 minutes
- Cook Time: 35 minutes
- Total Time: 50 minutes
- Yield: 8 servings 1x
- Category: Brunch
- Method: Baking
- Cuisine: American
- Diet: Vegetarian
Ingredients
- 2 cups buttermilk
- 2 large eggs
- 1/4 cup melted butter
- 2 cups all-purpose flour
- 1/4 cup sugar
- 1 tablespoon baking powder
- 1/2 teaspoon baking soda
- 1/2 teaspoon salt
- 2 cups fresh blueberries
- 1 teaspoon vanilla extract
Instructions
- Preheat the Oven to 350°F (175°C).
- Mix Wet Ingredients in a large mixing bowl—whisk together buttermilk, melted butter, eggs, and vanilla extract.
- Combine Dry Ingredients in a separate bowl—mix together flour, sugar, baking powder, baking soda, and salt.
- Combine Wet and Dry by gradually adding the dry mixture into the wet ingredients and gently folding until just combined.
- Fold in the Berries, gently incorporating the blueberries into the batter.
- Prepare Your Baking Dish by greasing a 9×13-inch baking dish.
- Pour and Spread the batter into the prepared baking dish.
- Bake the casserole in the preheated oven for about 30-35 minutes, until the top is golden brown.
- Cool and Serve after letting it cool for about 10 minutes.
Notes
For make-ahead convenience, prepare the casserole the night before and bake it in the morning. Add additional toppings such as maple syrup or whipped cream when serving.
Nutrition
- Serving Size: 1 square
- Calories: 320
- Sugar: 10g
- Sodium: 350mg
- Fat: 12g
- Saturated Fat: 6g
- Unsaturated Fat: 4g
- Trans Fat: 0g
- Carbohydrates: 42g
- Fiber: 2g
- Protein: 8g
- Cholesterol: 80mg
Keywords: pancakes, brunch, blueberry, casserole, breakfast