
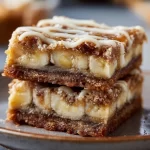
Ooey Gooey Banana Bars
Ooey Gooey Banana Bars: A Sweet and Comforting Treat
Hey there, fellow foodies! If you’re anything like me, bananas seem to mysteriously multiply in your fruit bowl. One day, you have just a few perfectly ripe bananas, and the next day, they look at you with their sad, spotty faces, practically begging to be used in some delicious way! Well, don’t you worry—I’m here to help you turn those bananas into something ooey, gooey, and utterly irresistible.
Today, we’re diving into the world of Ooey Gooey Banana Bars! These delightful treats are like a hug in dessert form—sweet, comforting, and the perfect balance of chewy and soft. Not only are they easy to prepare, but they also fill your kitchen with an aroma that could lure anyone into the room. This recipe is the embodiment of cozy indulgence, and today, I’m excited to share it with you. Whether you’re looking for a snack for your afternoon coffee, a sweet treat to impress your friends, or a mouth-watering dessert for the family, you’re in the right place.
So, grab your apron and let’s get baking!
Personal Story
Ah, the banana bar! My first experience with these scrumptious little squares takes me back to my childhood kitchen. I must’ve been no older than ten when my grandmother decided to whip up a batch of her famous banana bars. I still remember the way her kitchen felt—a warm, familiar space filled with laughter and the rich essence of vanilla and sugar. She had a magic touch; no one could ever replicate her recipes quite like she did!
One rainy afternoon, we dove into the world of banana baking together. All I remember was the fun we had mashing those bananas, sneaking spoonfuls of batter, and her radiant smile as we pulled the bars from the oven. The gooey centers and the smell of warm caramelized sugar were simply divine. As we shared those bars with the family, I felt a profound connection—not only to food but to the joy of gathering together, sharing stories, and, of course, indulging in life’s sweet moments.
Now, let’s carry that spirit into your kitchen as we create your very own batch of Ooey Gooey Banana Bars!
Ingredients
Before we get started, let’s gather our ingredients. Here’s what you’ll need:
Ingredients List:
-
3 ripe bananas, mashed
- Ripe bananas are sweeter and break down more easily, making them perfect for this recipe. If you don’t have people who eat bananas when they’re ripe, just stick them in a paper bag for a day or two, or bake them for a few minutes until they’re soft!
-
1/2 cup unsalted butter, melted
- I prefer unsalted butter for its versatility, but if you only have salted, just skip adding any salt later! This butter will provide richness and moisture.
-
1 cup brown sugar
- Brown sugar gives the bars that lovely caramel flavor. You can use white sugar, but I highly recommend sticking with brown for that melt-in-your-mouth experience.
-
1 large egg
- The egg is your binder—helping everything come together into a cohesive, gooey treat! For a vegan option, try using a "flax egg" (1 tablespoon ground flaxseed mixed with 2.5 tablespoons water) as a substitute.
-
1 teaspoon vanilla extract
- Vanilla enhances all the other flavors—don’t skip it! If you want to get fancy, try using homemade vanilla extract or a splash of almond extract for a different twist.
-
1 cup all-purpose flour
- This is the base of our bars! If you’re looking for gluten-free alternatives, a 1:1 gluten-free flour blend can do the trick.
-
1 teaspoon baking soda
- This is our leavening agent. It helps the bars rise and become fluffy while granting a lovely texture.
-
1/2 teaspoon salt
- Just a pinch enhances all the sweetness!
-
1/2 cup peanut butter (for drizzling on top)
- This adds an incredible element of indulgence! If you’re not a fan of peanut butter, try drizzling melted chocolate or a caramel sauce instead.
Now that we have our ingredients, let’s get our hands a little messy!
Step-by-Step Instructions
-
Preheat the Oven:
Start by preheating your oven to 350°F (175°C). This step is essential because we want our banana bars to bake evenly and perfectly. And trust me, your anticipation will build as the kitchen fills with that sweet banana aroma! -
Prepare the Baking Dish:
Grab an 8×8 inch baking dish (or any similarly sized dish). Grease it lightly with some butter or line it with parchment paper for easy removal. Honestly, who wants to wrestle with stuck bars? -
Mash the Bananas:
In a large mixing bowl, mash those ripe bananas with a fork or potato masher. Aim for a consistency that’s mostly smooth, with a few chunks to enhance the texture. Fun fact: the more you mash them, the sweeter your bars will be! -
Mix in the Wet Ingredients:
Stir in the melted butter until combined. Next, mix in the brown sugar, followed by the egg and vanilla extract. Ensure everything is well combined—you want that delightful flavor to spread throughout the batter. -
Combine the Dry Ingredients:
In a separate bowl, whisk together the flour, baking soda, and salt. Then, gently fold the dry mixture into the wet mixture. Be careful not to overmix—you want the bars to remain soft and gooey, not tough! -
Pour and Spread:
Pour the batter into the prepared baking dish, spreading it out evenly with a spatula. Now, this is the moment where you can be a little extra! Drizzle the peanut butter over the top in a zigzag pattern. If the peanut butter is too thick to drizzle, warm it slightly in the microwave for easier pouring. -
Bake:
Place the dish in the preheated oven and bake for about 25-30 minutes. Keep an eye on them! The bars are done when the edges are golden and a toothpick inserted into the center comes out with a few moist crumbs. -
Cool and Cut:
Once baked, remove the bars from the oven and allow them to cool in the pan for about 10 minutes. Once they’re slightly cooled, use a sharp knife to cut them into squares. Trust me; the cool-down period is torture, but the excitement is worth it!
Each step brings us closer to banana heaven! Feel free to sing or dance a little while you wait—your kitchen deserves a soulful serenade!
Serving Suggestions
Ah, the moment of truth has arrived! When serving your Ooey Gooey Banana Bars, consider a simple yet effective presentation. You can either serve them warm with a scoop of vanilla ice cream on the side or dust them with powdered sugar for a touch of elegance. For another layer of flavor, drizzle a bit more warm peanut butter or chocolate sauce on top just before serving.
And don’t forget to plate them on your favorite serving platter to add a personal touch to your gathering. They’ll look beautiful and inviting!
Recipe Variations
Want to mix things up? Here are a few delightful variations to suit your taste:
- Nutty Appeal: Add 1/2 cup of chopped walnuts or pecans to the batter for an additional crunch.
- Chocolate Lovers: Fold in 1/2 cup of chocolate chips for a deliciously chocolatey twist!
- Tropical Banana Bars: Add shredded coconut and chopped pineapple for a tropical vibe!
- Oatmeal Swirl: Incorporate a 1/2 cup of rolled oats into the batter for wholesome goodness.
- Spicy Banana Bars: Enhance the flavor profile by adding a teaspoon of cinnamon or nutmeg to the dry ingredients for a warm spiciness.
Feel free to experiment and see what delightful combinations you can come up with!
Chef’s Notes
These Ooey Gooey Banana Bars have been a staple in my kitchen for years, and like all good recipes, they’ve evolved over time. I’ve swapped in different nut butters, played around with spices, and even topped them with fresh fruit. Each adaptation has led to some beautiful kitchen memories with friends and family.
And speaking of memories, I once made these for a potluck dinner, completely forgetting to add the egg! I was mortified, but thankfully, everyone loved them just the same, and the "oops!" turned into a great conversation starter! Embrace your imperfections; in the kitchen and in life, it’s those little moments that create the best stories.
FAQs and Troubleshooting
-
Why are my banana bars too dense?
- Overmixing the batter is often the culprit! Mix until just combined to keep them soft and gooey.
-
Can I use frozen bananas?
- Absolutely! Thaw the bananas and drain excess liquid before mashing them, and you’re good to go.
-
What’s the best way to store these bars?
- Store in an airtight container at room temperature for up to three days. For longer storage, you can refrigerate them for up to a week or freeze them individually wrapped for up to 3 months!
-
Can I make this recipe vegan?
- Yes! Substitute the egg for a flax egg or any egg replacement you prefer, and use a vegan butter alternative.
Nutritional Info (if applicable)
While I love indulging in these banana bars, it’s always helpful to know what you’re eating. The estimates below give you an idea of what each bar contains, but keep in mind the figures can vary based on your substitutes:
- Calories: Approximately 180
- Fat: 8g
- Carbohydrates: 26g
- Protein: 3g
- Fiber: 1g
There you have it! Your Ooey Gooey Banana Bars are ready to be enjoyed. Thank you for letting me share this delicious recipe with you. May your cooking adventures be filled with joy, laughter, and sweet memories! Happy baking, friend! 🍌✨
PrintOoey Gooey Banana Bars
These delightful banana bars are sweet, comforting, and the perfect balance of chewy and soft. Easy to make and irresistibly delicious!
- Prep Time: 10 minutes
- Cook Time: 30 minutes
- Total Time: 40 minutes
- Yield: 12 servings 1x
- Category: Dessert
- Method: Baking
- Cuisine: American
- Diet: Vegetarian
Ingredients
- 3 ripe bananas, mashed
- 1/2 cup unsalted butter, melted
- 1 cup brown sugar
- 1 large egg
- 1 teaspoon vanilla extract
- 1 cup all-purpose flour
- 1 teaspoon baking soda
- 1/2 teaspoon salt
- 1/2 cup peanut butter (for drizzling on top)
Instructions
- Preheat the oven to 350°F (175°C).
- Prepare an 8×8 inch baking dish by greasing it or lining it with parchment paper.
- Mash the bananas in a large mixing bowl until mostly smooth.
- Mix in the melted butter, followed by the brown sugar, egg, and vanilla extract.
- Combine the flour, baking soda, and salt in a separate bowl and then fold into the wet ingredients.
- Pour the batter into the prepared baking dish and drizzle with peanut butter.
- Bake for 25-30 minutes until the edges are golden.
- Cool for 10 minutes before cutting into squares.
Notes
For a vegan option, substitute the egg with a flax egg and use plant-based butter. Enjoy warm with ice cream or powdered sugar!
Nutrition
- Serving Size: 1 bar
- Calories: 180
- Sugar: 15g
- Sodium: 200mg
- Fat: 8g
- Saturated Fat: 3g
- Unsaturated Fat: 5g
- Trans Fat: 0g
- Carbohydrates: 26g
- Fiber: 1g
- Protein: 3g
- Cholesterol: 20mg
Keywords: banana bars, dessert, sweet treats, baking, comfort food
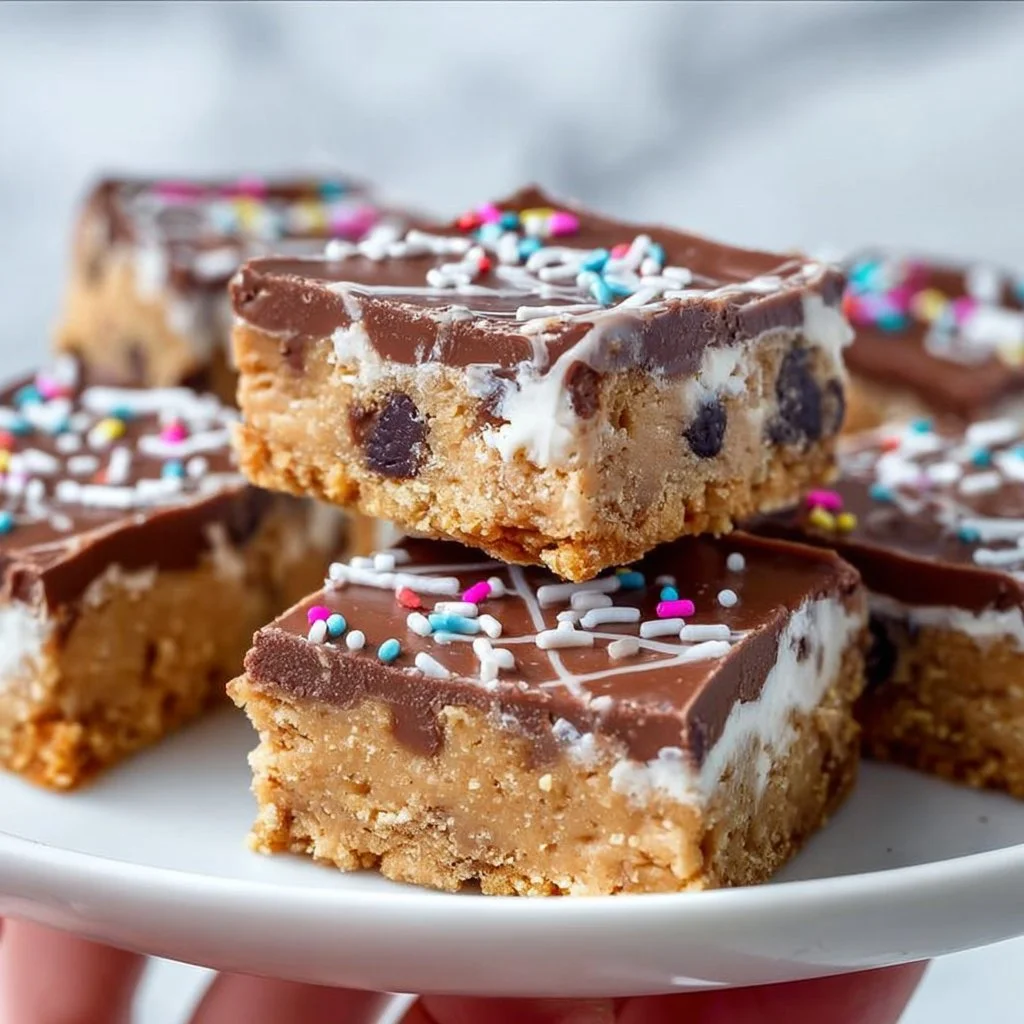
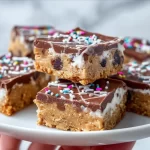
No Bake Cookie Dough Bars
Indulge in No-Bake Cookie Dough Bars: A Delicious Adventure in Your Kitchen
Hey there, fellow food lovers! If you’re anything like me, you’ve had that moment where you find yourself scrolling through endless recipes, craving something sweet, yet wanting it to be easy and fuss-free. Well, today is your lucky day! I’m excited to share with you my all-time favorite recipe for No-Bake Cookie Dough Bars. Picture this: bite-sized morsels of cookie dough goodness that you can whip up in minutes—no oven required. Perfect for a late-night snack, an impromptu gathering, or simply to satisfy those chocolate cravings (which we all know can be quite insatiable).
These bars embody what I love about cooking: they’re simple yet indulgent, and they’re a fun way to create a treat that feels homemade without putting yourself through the wringer in the kitchen. With just a handful of wholesome ingredients, you’ll be able to dig into a dessert that’s creamy, sweet, and oh-so-satisfying. So, tie on your apron and let’s get started on this sweet adventure!
Personal Story
The inspiration behind these No-Bake Cookie Dough Bars comes from my childhood. I remember spending weekends in the kitchen with my grandmother, who had an undeniable talent for whipping up desserts that felt like a warm hug. One afternoon, she introduced me to the joys of cookie dough—sneaking spoonfuls from the mixing bowl while she baked classic chocolate chip cookies. It was pure magic! I can still hear her laughter and the clattering of pots and pans as we made joyful messes together.
Fast forward to now, and I’ve taken that nostalgic memory and put a modern twist on it. These bars remind me of those carefree days, but they also align with my passion for creating approachable, elegant dishes. Whether you’re hosting a casual get-together or enjoying a cozy night in, these No-Bake Cookie Dough Bars bring a delightful taste of nostalgia into the present.
Ingredients
Here’s what you need to create these scrumptious bars:
-
1 cup almond flour
A versatile and gluten-free option that provides a lovely nutty flavor. If you need a substitute, you can use oat flour or all-purpose flour, but keep in mind that the texture may slightly change. -
1/2 cup maple syrup
This natural sweetener offers a rich flavor that balances perfectly with the other ingredients. You can swap it with agave nectar or honey if you prefer, but ensure you’re okay with the flavor variations. -
1/2 cup peanut butter or almond butter
This is where the creaminess comes from! I love the taste of peanut butter, but almond butter will give you a lighter flavor. For a nut-free option, sunflower seed butter works beautifully too. -
1/2 cup dark chocolate chips
Adds that heavenly burst of sweetness and richness! If you’re looking for a dairy-free version, make sure to use vegan chocolate chips. -
1 teaspoon vanilla extract
This ingredient elevates the overall flavor and adds a warm, aromatic essence. You can skip it if you’re in a pinch or substitute with almond extract for a different twist. -
Pinch of salt
A little salt helps balance the sweetness of the bars. Trust me; it makes a world of difference! If you’re avoiding sodium, you can omit it, but I wouldn’t recommend it.
Step-by-Step Instructions
Step 1: Gather Your Ingredients
First things first—before diving in, let’s make sure we have all these beautiful ingredients at hand! Set your workspace with everything ready so you can whip these bars up like a pro.
Step 2: Mix the Base
In a mixing bowl, combine the almond flour and salt. Make sure there are no clumps! The smoother the mixture, the better your bars will be. Add in the peanut butter and mix until you have a thick, paste-like consistency. This is where your fork or spatula becomes your best friend—don’t be shy!
Step 3: Sweeten the Mixture
Now it’s time to incorporate the maple syrup and vanilla extract. Pour them in and mix everything together until you achieve a well-combined dough. Remember, don’t rush this part; letting your ingredients really blend together makes all the difference!
Step 4: Fold in the Chocolate Chips
Once mixed, gently fold in the dark chocolate chips. Use your spatula to ensure an even distribution throughout your dough. This is where the indulgent magic happens—feel free to steal a few chocolate chips for yourself, I promise I won’t tell!
Step 5: Press the Dough into a Pan
Now, choose a square baking dish (about 8×8 inches works great) and line it with parchment paper for easy removal later. Pour your dough mixture into the dish and press it down firmly using your palms or a spatula. This step is essential, as it ensures your bars have a nice structure once they set.
Step 6: Chill
Pop your pan into the refrigerator and let it chill for at least an hour. This waiting can feel like the toughest part, but it’s essential for the bars to firm up and become sliceable.
Step 7: Slice and Serve
Once chilled, remove the bars from the fridge and lift them out using the parchment paper. Cut them into squares or bars, depending on your preference.
Step 8: Enjoy!
Now, it’s time to indulge! Serve these bars at room temperature, or even chilled for a refreshing twist.
Serving Suggestions
Place the bars on a lovely platter and sprinkle with a touch of sea salt to enhance their beauty and flavors. Pair with a dollop of whipped cream or a scoop of vanilla ice cream if you’re feeling extra indulgent. They also make for a fabulous addition to a charcuterie board!
Recipe Variations
- Nut-Free Delight: Replace peanut or almond butter with sunflower seed butter for a nut-free version.
- Protein Punch: Add a scoop of your favorite protein powder for an added health boost.
- Coconut Cream: Incorporate shredded coconut into the dough for a tropical twist.
- Spicy Kick: Add a tiny pinch of cayenne pepper for a surprising, spicy kick.
- Fruit Fusion: Mix in chopped dried fruits like cranberries or apricots for a chewy texture.
Chef’s Notes
I can’t tell you how many times I’ve made these bars with different flavors, simply because I love experimenting! One time, in the middle of summer, I added a handful of crushed graham crackers for a s’mores-inspired treat—let’s just say it was a hit! Remember, this recipe is your playground. Don’t hesitate to make it your own!
FAQs and Troubleshooting
Q: Why are my bars too crumbly?
A: If your bars are falling apart, they might need just a bit more moisture. Try adding a little more maple syrup or nut butter until the mixture sticks together better.
Q: Can I use a different sweetener?
A: Absolutely! You can use honey, agave, or even a sugar alternative like stevia or erythritol, keeping in mind that they may alter the final taste slightly.
Q: How should I store the bars?
A: Store these in an airtight container in the fridge for about a week or freeze them for longer-lasting treats. Just make sure to separate layers with parchment paper to keep them from sticking!
Q: Can I bake these bars instead of chilling them?
A: Though the magic of these bars lies in their no-bake nature, you could experiment with baking in a low oven (around 350°F for 10-15 minutes) for a slightly different texture. Keep an eye on them to prevent overcooking!
Nutritional Info
(Optional and can vary based on specific brands and ingredients used. A rough estimate per bar if cut into 12 servings)
- Calories: 130
- Protein: 4g
- Fat: 8g
- Carbohydrates: 12g
- Fiber: 2g
So, there you have it! Your ultimate guide to making No-Bake Cookie Dough Bars! With a dash of nostalgia and a sprinkle of creativity, I hope this recipe finds a special place in your kitchen. Remember, cooking should be a joyful experience—embrace the process, share the love, and most importantly, enjoy every sweet bite! Happy baking!
PrintNo-Bake Cookie Dough Bars
Indulge in these delicious No-Bake Cookie Dough Bars, a perfect treat that embodies simplicity and nostalgia.
- Prep Time: 15 minutes
- Cook Time: 0 minutes
- Total Time: 75 minutes
- Yield: 12 servings 1x
- Category: Dessert
- Method: No-Bake
- Cuisine: American
- Diet: Vegetarian
Ingredients
- 1 cup almond flour
- 1/2 cup maple syrup
- 1/2 cup peanut butter or almond butter
- 1/2 cup dark chocolate chips
- 1 teaspoon vanilla extract
- Pinch of salt
Instructions
- Gather Your Ingredients
- Mix the Base
- Sweeten the Mixture
- Fold in the Chocolate Chips
- Press the Dough into a Pan
- Chill
- Slice and Serve
- Enjoy!
Notes
For a nut-free version, use sunflower seed butter instead. Experiment with different flavors like coconut, protein powder, or dried fruits.
Nutrition
- Serving Size: 1 bar
- Calories: 130
- Sugar: 7g
- Sodium: 50mg
- Fat: 8g
- Saturated Fat: 1.5g
- Unsaturated Fat: 6g
- Trans Fat: 0g
- Carbohydrates: 12g
- Fiber: 2g
- Protein: 4g
- Cholesterol: 0mg
Keywords: no-bake, dessert, cookie dough, easy recipe, quick treat