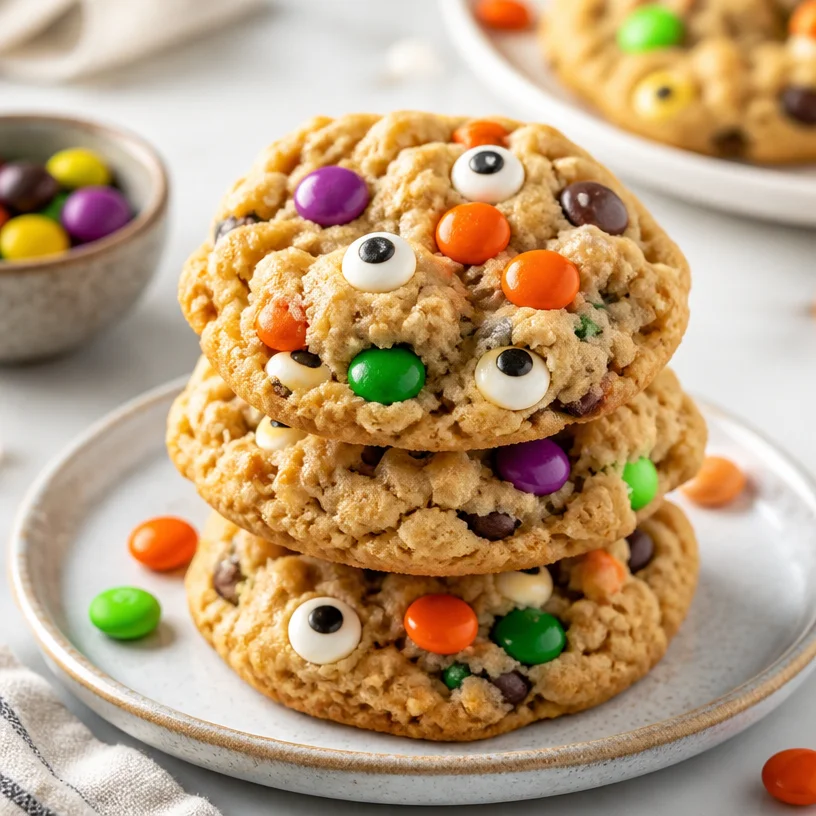
Monster Cookies
Monster Cookies: A Whimsical Treat for Every Occasion!
Hello, dear food lovers! Today, we’re diving into the delightful world of Monster Cookies — a whimsical treat that’s not just for Halloween, but perfect for any occasion where smiles and sweet cravings collide. Imagine cookies loaded with oats, chocolate, and, of course, candy eyes peering at you from the platter. Isn’t that just irresistible? Whether you’re baking with kids, celebrating a birthday, or just wanting to push the gray days away, these colorful delights have your back. Grab your apron, and let’s dive into the art of cookie-making!
My Monster Cookie Memory
Let’s take a little stroll down memory lane, shall we? I can still remember the first time I baked Monster Cookies. It was a rainy Saturday, and my younger cousin was over for a sleepover. Armed with a family-sized box of oats and a few bags of colorful candies, we decided to create something magnificent. The best part? We got carried away with the candy eyes! A kitchen disaster turned into a full-fledged monster celebration as we emerged with monstrous creations adorned with googly eyes staring back from every plate. These cookies were not only delicious; they were an expression of our childlike energy, creativity, and, of course, giggles. Since that day, Monster Cookies have held a special spot in my heart, and now, I want to share that joy with you!
Ingredients
Before we get to the fun part of mixing and baking, let’s gather our ingredients. Here’s what you’ll need to whip up a batch of these delightful Monster Cookies:
-
1 cup of unsalted butter, softened: This gives the cookies a rich flavor. If you’re vegan, you can substitute it with coconut oil or a vegan butter.
-
1 cup of brown sugar: For that deep, caramel-like sweetness. If you don’t have brown sugar, you can replace it with white sugar and a splash of molasses.
-
1/2 cup of granulated sugar: To balance the richness. This sugar can be replaced with coconut sugar for a more natural option.
-
2 large eggs: They bind the ingredients together and add moisture. You can substitute each egg with a tablespoon of ground flaxseed mixed with three tablespoons of water for a vegan version.
-
1 teaspoon of vanilla extract: This adds depth to the flavor. Pure vanilla extract is ideal, but imitation vanilla works too in a pinch.
-
2 cups of all-purpose flour: The backbone of our cookies. You could swap it out for a gluten-free flour blend if you’re catering to gluten sensitivities.
-
1 teaspoon of baking soda: This helps the cookies rise and ensures a chewy texture. No substitutes needed for this one!
-
1/2 teaspoon of salt: Enhances the overall flavor. If you’re watching your sodium intake, consider using sea salt sparingly.
-
2 cups of old-fashioned oats: Chewy and hearty, oats are the star! Instant oats can work, but they won’t give the same texture.
-
1 cup of chocolate chips: Feel free to use dark, milk, or white chocolate! For a fun twist, try adding butterscotch or peanut butter chips.
-
1 cup of candy eyes: These are essential for the monster effect! If you can’t find candy eyes, just chop up some colorful candies.
Step-by-Step Instructions
Now that we’ve got all our ingredients prepped and ready to go, it’s time to turn these ingredients into mouthwatering Monster Cookies! Ready? Let’s bake!
-
Preheat the Oven: Preheat your oven to 350°F (175°C). This ensures that your cookies bake evenly. While waiting, enjoy the anticipation of that warm, sweet aroma soon to waft through your kitchen!
-
Cream the Butter and Sugars: In a large mixing bowl, add your softened butter, brown sugar, and granulated sugar. Using a hand mixer or stand mixer, cream them together until the mixture is light and fluffy. This step introduces air into the batter, making your cookies soft and chewy. Don’t skimp on this!
-
Add Eggs and Vanilla: Next, crack the eggs into the bowl and pour in the vanilla extract. Mix until combined. The mixture should look smooth and silky. If you’re using flax eggs, blend them separately before adding to the mixture to ensure even mixing.
-
Combine Dry Ingredients: In another bowl, whisk together the flour, baking soda, and salt. This ensures even distribution of the baking soda and salt throughout the dough. Gradually add this dry mixture to your wet ingredients, mixing until just combined. Be careful not to overmix, as that can lead to tough cookies!
-
Fold in the Oats and Chocolate Chips: Add the oats and chocolate chips (or your chosen mix-ins) into the dough. Using a spatula or wooden spoon, fold them in gently. Here’s a chef hack: reserve a handful of chocolate chips to sprinkle on top before baking for extra visual pop!
-
Add the Candy Eyes: Now, for the fun part! Gently fold in your candy eyes, ensuring they’re evenly distributed in the dough. Be careful not to crush them!
-
Scoop the Dough: Using a cookie scoop or a spoon, drop generous portions of dough onto a baking sheet lined with parchment paper. Leave enough space between each mound for spreading—about two inches should do.
-
Bake: Place the baking sheet in your preheated oven and bake for 10-12 minutes, or until the cookies are slightly golden around the edges but still soft in the center. The delicious smell will drive you wild!
-
Cool: Let the cookies sit on the baking sheet for 5 minutes before transferring them to a wire rack to cool completely. This resting period helps them set beautifully.
Serving Suggestions
When it comes to serving your Monster Cookies, presentation is key. Arrange them on a colorful platter, perhaps alongside some milk or a fun dip like chocolate ganache. Get creative! You might even stack them for a towering display. A sprinkle of sea salt on top can elevate the flavor, balancing out the sweetness beautifully. For an extra festive touch, consider garnishing with sprigs of mint or edible flowers. Trust me; your guests will be smitten!
Recipe Variations
Monster Cookies are incredibly versatile! Here are some fun variations to consider:
-
Nutty Monster Cookies: Add 1 cup of chopped nuts like walnuts or pecans for crunch.
-
Peanut Butter Twist: Substitute half the butter with peanut butter to give your cookies a nutty flavor.
-
Add Dried Fruit: For a chewy texture and tartness, throw in 1 cup of dried cranberries or cherries.
-
Spice it Up: Add 1 teaspoon of cinnamon or a pinch of cayenne for a fun flavor kick.
-
Mini Monster Cookies: Scoop smaller portions for bite-sized cookies, perfect for parties!
Chef’s Notes
Throughout my baking journey, these Monster Cookies have evolved. Initially, they were just a fun way to get my cousin involved in the kitchen, but over the years, we’ve experimented! I once had a baking mishap where I mixed up the sugar measurements. Little did I know, the extra sweetness created a different kind of monster! Sometimes the kitchen can surprise you in the best ways. Don’t be afraid to play and explore different flavors; you never know what delightful concoction you might whip up!
FAQs and Troubleshooting
1. Why are my cookies flat?
Flat cookies can be a result of overly softened butter or too much liquid. Make sure your butter is just softened, not melted. Also, double-check your flour measurements, making sure to sift it if necessary.
2. Can I freeze Monster Cookie dough?
Absolutely! Feel free to scoop the dough onto baking sheets, freeze until firm, then transfer to a Ziplock bag. They can be stored for up to 3 months. Bake directly from the freezer, adding a minute or two to the baking time.
3. How do I store leftover cookies?
Keep your cookies in an airtight container at room temperature for up to a week. For longer storage, consider freezing them as mentioned above!
4. Can I make these gluten-free?
Definitely! Substitute the all-purpose flour with a gluten-free blend. Be cautious with your baking soda, as it might react differently depending on the mix!
Nutritional Info
While I believe in enjoying every bite without guilt, here’s a quick glance at the nutritional info (per cookie, based on 24 cookies):
- Calories: 150
- Total Fat: 7g
- Saturated Fat: 4g
- Carbohydrates: 20g
- Fiber: 1g
- Sugars: 9g
- Protein: 2g
Remember, indulge and enjoy!
And there you have it, my lovely friends – Monster Cookies that will make your heart sing and your taste buds dance! These cookies embody a spirit of playfulness and creativity that I absolutely adore. Now, tie on your apron, gather your loved ones, and bring a little whimsy to your kitchen. Happy baking! 🍪✨
PrintMonster Cookies
A whimsical treat perfect for any occasion, these Monster Cookies are loaded with oats, chocolate, and colorful candy eyes!
- Prep Time: 15 minutes
- Cook Time: 12 minutes
- Total Time: 27 minutes
- Yield: 24 cookies 1x
- Category: Dessert
- Method: Baking
- Cuisine: American
- Diet: Vegetarian
Ingredients
- 1 cup of unsalted butter, softened
- 1 cup of brown sugar
- 1/2 cup of granulated sugar
- 2 large eggs
- 1 teaspoon of vanilla extract
- 2 cups of all-purpose flour
- 1 teaspoon of baking soda
- 1/2 teaspoon of salt
- 2 cups of old-fashioned oats
- 1 cup of chocolate chips
- 1 cup of candy eyes
Instructions
- Preheat the oven: Preheat your oven to 350°F (175°C).
- Cream the butter and sugars: In a large mixing bowl, add the softened butter, brown sugar, and granulated sugar. Cream them together until light and fluffy.
- Add eggs and vanilla: Crack the eggs into the bowl and pour in the vanilla extract. Mix until combined.
- Combine dry ingredients: In another bowl, whisk together the flour, baking soda, and salt. Gradually add this dry mixture to your wet ingredients.
- Fold in the oats and chocolate chips: Add the oats and chocolate chips into the dough and fold them in gently.
- Add the candy eyes: Gently fold in the candy eyes, ensuring they’re evenly distributed.
- Scoop the dough: Drop generous portions of dough onto a baking sheet lined with parchment paper.
- Bake: Place the baking sheet in the oven and bake for 10-12 minutes.
- Cool: Let the cookies sit on the baking sheet for 5 minutes before transferring them to a wire rack.
Notes
For a nutty flavor, consider adding chopped nuts. These cookies are versatile and can be made gluten-free by using a gluten-free flour blend.
Nutrition
- Serving Size: 1 cookie
- Calories: 150
- Sugar: 9g
- Sodium: 100mg
- Fat: 7g
- Saturated Fat: 4g
- Unsaturated Fat: 2g
- Trans Fat: 0g
- Carbohydrates: 20g
- Fiber: 1g
- Protein: 2g
- Cholesterol: 30mg
Keywords: cookies, monster cookies, baking, fun treats, snacks
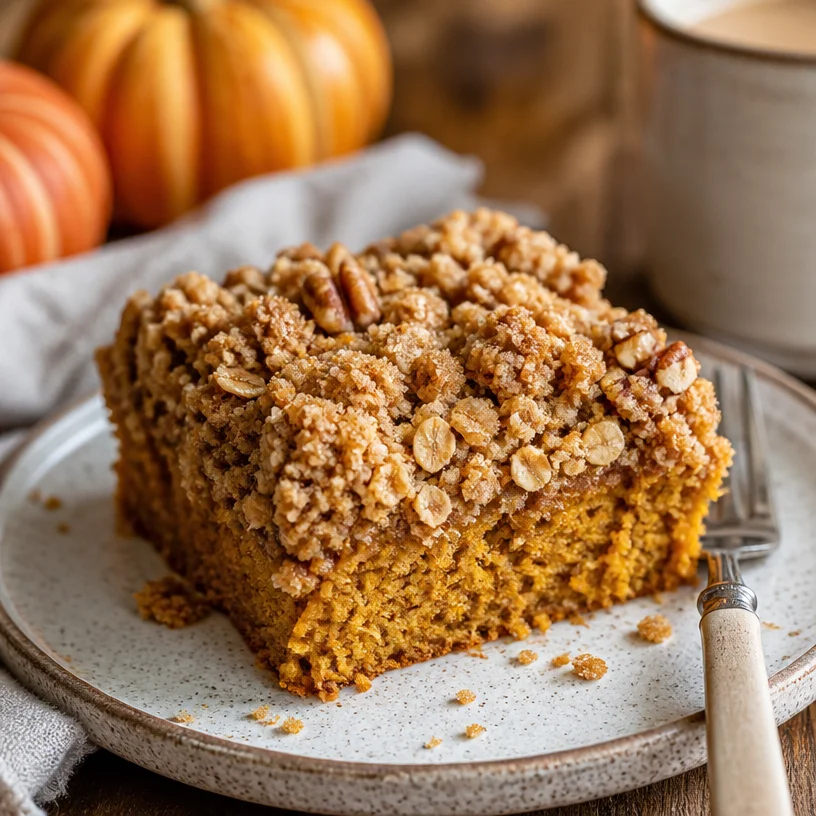
Pumpkin Crumb Cake
Pumpkin Crumb Cake: A Cozy Delight for Every Occasion
Hello, fellow food enthusiasts! Gather ‘round because today, we’re diving into a recipe that captures the essence of autumn and all its cozy vibes — Pumpkin Crumb Cake. Imagine a warm slice of cake, topped with a crunchy, buttery crumb, and infused with warm spices that remind you of crisp leaves and a hint of nostalgia; that’s precisely what this cake serves up!
Why Pumpkin Crumb Cake?
I don’t know about you, but for me, pumpkin-flavored treats conjure up memories of cooler days and family gatherings. The aroma of spices wafting through the kitchen while the cake bakes is enough to make anyone feel at home. This delightful crumb cake is the perfect combination of moist cake and sweet, crunchy topping — a true crowd-pleaser for any gathering, from casual weeknight dinners to festive fall celebrations.
When I first experimented with this recipe, I remember hosting a small get-together for a few friends. The kitchen was filled with laughter as I whipped up the batter, and when I pulled the cake from the oven, I couldn’t help but feel a burst of pride. I served everyone warm slices alongside mugs of spiced cider. The smiles and satisfied sighs said it all — there’s something magical about good food shared with great company.
Let’s roll up our sleeves and get into this scrumptious recipe!
Ingredients You’ll Need
So, here’s what you’ll need to whip up this delightfully moist pumpkin crumb cake:
-
1 ½ cups all-purpose flour: This forms the base of our cake. Can’t find all-purpose? Substitute with a 1:1 gluten-free flour blend for a gluten-free option!
-
1 cup sugar: It sweetens the cake beautifully. If you want a healthier alternative, try using coconut sugar or a sugar substitute that measures 1:1.
-
1 teaspoon baking powder: Helps the cake rise perfectly, giving it that lovely fluffy texture.
-
½ teaspoon baking soda: Works in tandem with the baking powder to create a light and airy cake.
-
½ teaspoon salt: Balances the sweetness and enhances the flavors. Don’t skip it!
-
1 teaspoon ground cinnamon: A warm spice that truly shines in this recipe. If you’re feeling adventurous, try adding a touch of cardamom or mixed spice blend!
-
½ teaspoon ground nutmeg: This adds a lovely depth of flavor. A little nutmeg goes a long way, so remember to keep it mild!
-
½ cup unsalted butter, melted: This adds richness to the cake. You can use coconut oil for a dairy-free version, giving a slight coconut essence.
-
1 cup pumpkin puree: Pure pumpkin brings moisture and richness to the cake. Canned works perfectly fine; just ensure it’s pure pumpkin, not pumpkin pie filling.
-
2 large eggs: They help bind everything together. If you need an egg-free option, try using flax eggs (1 tablespoon ground flaxseed mixed with 2.5 tablespoons water per egg).
-
1 teaspoon vanilla extract: This adds a lovely aroma and flavor to the cake. Substitute with almond extract for a different twist!
-
½ cup brown sugar: This gives the crumb topping a nice depth and chewiness.
-
½ cup rolled oats: These provide texture and a hint of chewiness to the crumb — a delicious surprise!
-
¼ cup chopped pecans or walnuts: Adds a delightful crunch on top. You can also leave them out if you’re nut-free or swap for pumpkin seeds!
Step-by-Step Instructions
-
Preheat Your Oven: Set your oven to preheat at 350°F (175°C). This helps the cake bake evenly.
-
Prepare Your Pan: Grease a 9×9 inch baking pan (or line it with parchment paper). This ensures easy removal once it’s baked — trust me, nobody wants to lose their precious cake to the pan!
-
Mix the Dry Ingredients: In a large mixing bowl, whisk together the all-purpose flour, sugar, baking powder, baking soda, salt, cinnamon, and nutmeg until well combined. This simple step helps evenly distribute the leavening agents and spices.
-
Combine Wet Ingredients: In another bowl, combine the melted butter, pumpkin puree, eggs, and vanilla extract. Whisk until smooth. Pro tip: Let the butter cool slightly before mixing to avoid scrambling the eggs!
-
Mix Wet and Dry Together: Pour the wet ingredients into the dry ingredients, and gently mix until just combined. Be careful not to overmix; a few lumps are perfectly fine!
-
Prepare the Crumb Topping: In a smaller bowl, mix together the brown sugar, rolled oats, and chopped nuts. Then, drizzle in a little melted butter (about 2 tablespoons). This mixture should be crumbly but stick together when pressed.
-
Layer and Bake: Pour the cake batter into your prepared pan, and evenly spread the crumb topping over it. Bake for 30-35 minutes or until a toothpick inserted into the center comes out clean (with just a few crumbs). Keep an eye on it during the last few minutes to avoid overbaking!
-
Cool and Serve: Once baked, allow the cake to cool in the pan for about 15 minutes before transferring it to a wire rack. This cooling period ensures the cake doesn’t fall apart while you’re trying to plate it. Slice it warm, and serve it with a dusting of powdered sugar for a lovely finish!
Serving Suggestions
Serving this Pumpkin Crumb Cake is all about making it special! Dust each slice with a sprinkle of powdered sugar for a touch of elegance. Pair it with a dollop of whipped cream or a scoop of vanilla ice cream, basking in the harmonious flavors of pumpkin and spice. If you want to elevate the experience, serve it alongside a warm spiced latte or a glass of apple cider. Your guests will be singing your praises!
Recipe Variations
-
Chocolate Chip Pumpkin Crumb Cake: Toss in ½ cup of semi-sweet or dark chocolate chips for an indulgent twist!
-
Spiked with Bourbon: Add a splash of bourbon to the batter for a warm, flavorful kick; just a tablespoon will do!
-
Gluten-Free Twist: Swap the all-purpose flour for a gluten-free blend and check that your oats are certified gluten-free for a celiac-safe treat.
-
Vegan Version: Substitute the eggs with flax eggs and use non-dairy butter. Your friends won’t even know it’s dairy-free!
-
Add Zest: For a lighter tone, try adding a teaspoon of orange or lemon zest to the batter for a fresh, vibrant flavor.
Chef’s Notes
This pumpkin crumb cake is one of those recipes that has transformed over time. When I first made it, the crumb topping was a last-minute addition. I had some leftover oats, and they ended up stealing the show! I encourage you to experiment. The cake itself is like a blank canvas, inviting you to color it with your own creative touches! One warning — be prepared for the cake to disappear quickly; it’s a guaranteed hit!
FAQs and Troubleshooting
Q: Can I use fresh pumpkin puree instead of canned?
A: Absolutely! Just make sure it’s well-drained and not too watery. Roast or steam your pumpkin, scoop out the flesh, and mash until smooth.
Q: My cake turned out too dense. What went wrong?
A: Overmixing can cause a dense cake. Aim to mix until just combined, and ensure your leavening agents are fresh and active.
Q: How do I know when the cake is done?
A: Insert a toothpick into the center. If it comes out clean or with just a few moist crumbs, it’s ready!
Q: Can I store leftovers?
A: Yes! Store cut pieces in an airtight container at room temperature for up to three days. You can also freeze slices for up to two months. Wrap them well and thaw as needed!
Nutritional Info
While I usually focus on the joy of sharing food, I understand the importance of nutrition. Each slice of this cake (based on 12 servings) contains approximately:
- Calories: 220
- Protein: 3g
- Carbohydrates: 30g
- Dietary Fiber: 1g
- Total Fat: 10g
Remember to enjoy in moderation, savoring each delightful bite!
Thank you for joining me today in creating this warm, comforting Pumpkin Crumb Cake! It’s more than a recipe; it’s an invitation to gather around the table with loved ones. Let’s keep the kitchen alive with stories and laughter because food truly brings us together. Happy baking, friends!
PrintPumpkin Crumb Cake
A cozy pumpkin crumb cake topped with a crunchy, buttery crumb and infused with warm spices, perfect for autumn gatherings.
- Prep Time: 15 minutes
- Cook Time: 35 minutes
- Total Time: 50 minutes
- Yield: 12 servings 1x
- Category: Dessert
- Method: Baking
- Cuisine: American
- Diet: Vegetarian
Ingredients
- 1 ½ cups all-purpose flour
- 1 cup sugar
- 1 teaspoon baking powder
- ½ teaspoon baking soda
- ½ teaspoon salt
- 1 teaspoon ground cinnamon
- ½ teaspoon ground nutmeg
- ½ cup unsalted butter, melted
- 1 cup pumpkin puree
- 2 large eggs
- 1 teaspoon vanilla extract
- ½ cup brown sugar
- ½ cup rolled oats
- ¼ cup chopped pecans or walnuts
Instructions
- Preheat your oven to 350°F (175°C).
- Prepare a 9×9 inch baking pan by greasing it or lining it with parchment paper.
- Mix the dry ingredients: whisk together the flour, sugar, baking powder, baking soda, salt, cinnamon, and nutmeg.
- Combine the wet ingredients in another bowl: mix together melted butter, pumpkin puree, eggs, and vanilla extract.
- Mix the wet ingredients into the dry ingredients until just combined, being careful not to overmix.
- Prepare the crumb topping by mixing brown sugar, rolled oats, and chopped nuts in a smaller bowl, then drizzle in some melted butter.
- Layer the cake batter into the prepared pan, spreading the crumb topping evenly over the batter.
- Bake for 30-35 minutes or until a toothpick comes out clean with just a few crumbs.
- Cool in the pan for about 15 minutes before transferring to a wire rack, then slice and serve.
Notes
Dust slices with powdered sugar, and serve with whipped cream or ice cream for extra indulgence.
Nutrition
- Serving Size: 1 slice
- Calories: 220
- Sugar: 15g
- Sodium: 220mg
- Fat: 10g
- Saturated Fat: 6g
- Unsaturated Fat: 4g
- Trans Fat: 0g
- Carbohydrates: 30g
- Fiber: 1g
- Protein: 3g
- Cholesterol: 40mg
Keywords: pumpkin, cake, crumb cake, fall dessert, autumn recipes
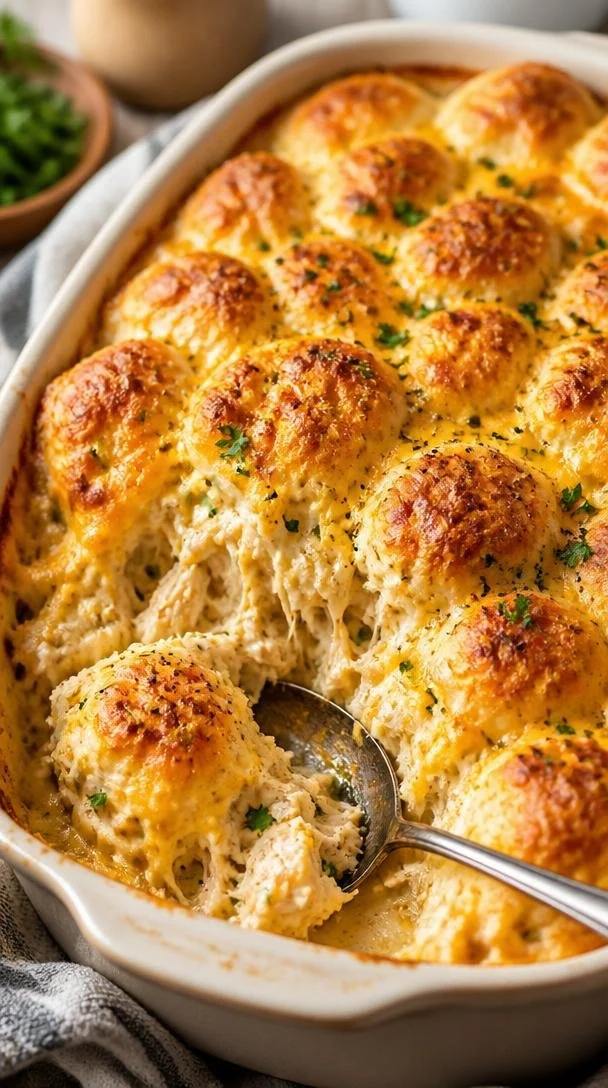
Chicken Bubble Biscuit Bake Casserole
Chicken Bubble Biscuit Bake Casserole: A Cozy Classic
Hello, food lovers! Today, we’re diving into a dish that brings a wave of nostalgia and comfort straight to the dinner table—my Chicken Bubble Biscuit Bake Casserole! Trust me, if you haven’t tried this whimsical yet heartwarming bake, you’re in for a treat.
Picture this: a fluffy biscuit topping giving way to a creamy, savory filling packed with tender chicken and ooey-gooey cheese. It’s the kind of meal that sends you back to family gatherings, cozy nights on the couch, and childhood memories of rolling dough—okay, maybe that last part was just a bit ambitious as a kid! Whether you’re looking to impress guests or just want to make some delicious memories with your family, this casserole is your solution. Plus, it’s ridiculously easy to whip up!
With the savory flavors mingling and bubbles rising joyfully from the oven, this bake will make your heart (and stomach) sing. Stay tuned as I share my story behind this comforting dish, how to make it step-by-step, and a few fun twists to keep things exciting. Grab your apron, and let’s get cooking!
My Chicken Casserole Journey
Let me take you back to one of my fondest memories of cooking with my grandma. Growing up, Sunday dinners at her house were an absolute highlight. The kitchen was always the nucleus of activity, filled with laughter, delicious aromas, and the occasional playful bickering about the "best" family recipes. It was in that cozy little kitchen I first encountered a similar casserole—a basic chicken noodle casserole that stirred my imagination and love for cooking.
Fast forward a few years, and I found myself embracing my own culinary creativity. I began experimenting, adding my touch to that rustic, comforting dish with fluffy biscuits straight from the oven. The fusion of flavors and textures ignited my passion: creamy chicken filling paired with warm, flaky biscuits was a culinary match made in heaven. Combine that with my now-signature twist—cheddar cheese—and voila! Chicken Bubble Biscuit Bake Casserole was born.
Now, every time I make this dish, I can’t help but smile, remembering those cherished Sundays filled with love, family, and the best part—delicious food. This casserole isn’t just a meal; it’s a connection to my past and a way to create new memories today.
Ingredients
Here’s what you’ll need to create this delightful bake:
-
2 cups cooked chicken, shredded
Shredded chicken is the star here! You can use rotisserie chicken for convenience or cook your own. Using dark meat can add extra flavor and moisture. -
1 can (8 oz) refrigerated biscuit dough
Fluffy biscuits form a golden, pillowy topping. If you prefer, you can make your own buttermilk biscuits for a homemade touch. -
1 cup cream of chicken soup
This is the base that ties everything together. If you want to lighten it up, feel free to use a low-fat or homemade version. -
1 cup shredded cheddar cheese
Cheddar cheese adds that melty, rich flavor. Feel free to swap it out for mozzarella for a milder taste or a sharper cheese for an extra kick! -
1/2 cup milk
Milk helps to create a creamy texture. Skim or almond milk can be good substitutes if you’re looking for a healthier option. -
1 teaspoon garlic powder
A classic flavor-enhancer that has a warm, aromatic essence. Fresh minced garlic works too for that pungent kick! -
1 teaspoon onion powder
It adds sweetness and depth. Sub in fresh onions if you enjoy a chunkier texture, just sauté them first for a burst of sweetness. -
Salt and pepper to taste
Essential for balancing flavors. Always season your dishes to your preference!
Step-by-Step Instructions
Let’s get cooking! Here’s how you can whip up your Chicken Bubble Biscuit Bake Casserole.
Step 1: Preheat the Oven
First, preheat your oven to 375°F (190°C). This ensures the casserole will bake evenly and the biscuits will puff up perfectly.
Step 2: Prepare Your Chicken
If you haven’t cooked your chicken yet, now is the right time to shred it. You can poach chicken breasts in a pot of boiling water or sauté them in a skillet. Once cooked, let them cool, then shred it into bite-sized pieces. Make sure to season with a pinch of salt and pepper while shredding for added flavor.
Step 3: Mix the Filling
In a large mixing bowl, combine your shredded chicken, cream of chicken soup, milk, garlic powder, onion powder, and some salt and pepper. Give it a good stir until mixed well. This creamy concoction is what makes this dish so comforting. It should be smooth and luscious—don’t be shy! Taste and adjust seasoning as needed.
Step 4: Add the Cheese
Next, fold in your shredded cheddar cheese. This is where the magic happens! The cheese will melt and create a gooey, delicious layer in between those biscuits. You can also reserve a bit to sprinkle on top for that extra cheesy goodness.
Step 5: Assemble the Casserole
Pour the chicken mixture into a greased 9"x13" casserole dish, spreading it evenly. Now, grab the biscuit dough and break it into pieces. You can do small pieces for a more scattered look or larger pieces for a rustic feel. Just make sure the dough pieces are not crowded—this allows them to rise beautifully.
Step 6: Bake to Perfection
Place the casserole in the preheated oven and bake for about 25-30 minutes. You want the biscuits to rise and turn a lovely golden-brown color. The bubbling edges will signal that your creation is ready to be served! A word of advice—place a baking sheet on the rack below the casserole to catch any bubbling overflow.
Step 7: Let It Rest
Once baked, take it out of the oven and let it rest for about 10 minutes. This helps the filling set and makes it easier to serve. Plus, it gives the delicious aroma a moment to permeate your kitchen!
Serving Suggestions
When it comes time to serve your Chicken Bubble Biscuit Bake Casserole, a rustic presentation works wonders. You can use a large spoon to scoop out generous portions and serve them on individual plates. Garnish with freshly chopped parsley or a sprinkle of green onions for a pop of color. You can serve it alongside a simple mixed green salad to incorporate a refreshing crunch and balance the richness of the casserole.
Recipe Variations
Want to mix things up a bit? Here are some fun variations to play around with:
- Spicy Twist: Add diced jalapeños or hot sauce to the chicken mixture for a fiery kick.
- Veggie-Loaded: Toss in steamed broccoli or peas for an extra layer of nutrition and color.
- Herbaceous Boost: Mix in fresh herbs like thyme, rosemary, or even dill to elevate the flavors.
- Creamy Mushroom: Substitute the cream of chicken soup with cream of mushroom for an earthy, umami flavor.
- Cheesy Delight: Try mixing different kinds of cheese, like mozzarella and pepper jack, for an exciting twist.
Chef’s Notes
This casserole has been a go-to in my kitchen for years. I like to think of it as the cozy blanket of comfort food—perfect for a rainy day or unexpected guests. I remember the first time I brought this to a friend’s potluck, and it disappeared faster than I could say “biscuit bake.”
Over the years, I’ve played with several ingredients, including using leftover turkey during the holidays. The casserole has evolved with flavors and textures, but the essence remains the same: comfort and joy. I always encourage you to make this your own—there’s a wonderful freedom in adapting recipes to your liking!
FAQs and Troubleshooting
1. Can I use frozen chicken?
Absolutely! Just make sure it’s fully cooked before shredding. It’s best to thaw it in the refrigerator overnight for even cooking.
2. What if my biscuits don’t rise?
Double-check the expiration date on your biscuit dough; old dough may not rise well. You can also make your own biscuits for a guaranteed rise!
3. Can I make it ahead of time?
Definitely! You can prepare it a day in advance, cover it, and refrigerate. Just add a few extra minutes to your baking time if it goes in cold.
4. What side dishes pair well with this casserole?
Roasted veggies, a crisp garden salad, or even a light soup can complement the heartiness of this dish beautifully.
Nutritional Info
While this recipe isn’t designed to be a health-focused dish, it can be a satisfying part of your meal plan when enjoyed mindfully as part of a balanced diet.
So there you have it—my Chicken Bubble Biscuit Bake Casserole. A dish that holds both heart and flavor, it’s one you’ll return to time and again. Remember, cooking is about joy, creativity, and gathering, so I can’t wait to hear how yours turns out! Happy cooking from my kitchen to yours!
PrintChicken Bubble Biscuit Bake Casserole

A comforting casserole featuring a creamy chicken filling topped with fluffy biscuits and melted cheddar cheese.
- Prep Time: 15 minutes
- Cook Time: 30 minutes
- Total Time: 45 minutes
- Yield: 4 servings 1x
- Category: Main Course
- Method: Baking
- Cuisine: American
- Diet: None
Ingredients
- 2 cups cooked chicken, shredded
- 1 can (8 oz) refrigerated biscuit dough
- 1 cup cream of chicken soup
- 1 cup shredded cheddar cheese
- 1/2 cup milk
- 1 teaspoon garlic powder
- 1 teaspoon onion powder
- Salt and pepper to taste
Instructions
- Preheat your oven to 375°F (190°C).
- Prepare your chicken by shredding it into bite-sized pieces.
- Mix the shredded chicken, cream of chicken soup, milk, garlic powder, onion powder, and some salt and pepper in a large bowl.
- Add in the shredded cheddar cheese and fold until well combined.
- Assemble the chicken mixture into a greased 9’x13′ casserole dish and top with pieces of biscuit dough.
- Bake for about 25-30 minutes until the biscuits are golden-brown and bubbly.
- Let it rest for 10 minutes before serving.
Notes
Serve with fresh herbs or a garden salad. You can customize the recipe with different cheeses or add veggies for a twist.
Nutrition
- Serving Size: 1 serving
- Calories: 400
- Sugar: 2g
- Sodium: 600mg
- Fat: 20g
- Saturated Fat: 10g
- Unsaturated Fat: 8g
- Trans Fat: 0g
- Carbohydrates: 35g
- Fiber: 1g
- Protein: 25g
- Cholesterol: 75mg
Keywords: chicken casserole, comfort food, easy recipes, family dinner
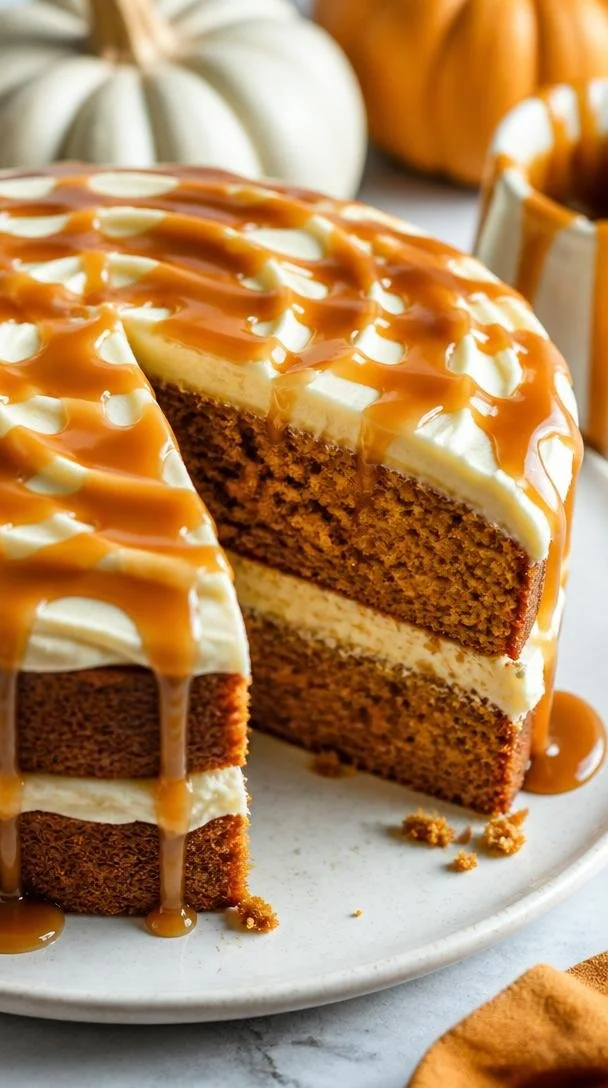
Pumpkin Cake with Caramel Cream Cheese Frosting
Fall in Love with Pumpkin Cake: A Sweet Slice of Heaven
Hello fellow food enthusiasts! There’s something undeniably magical about the fall season, especially when it comes to cozy baking. And what better way to embrace those autumn vibes than with a slice of warm, spiced pumpkin cake topped with luscious caramel cream cheese frosting? Whether you’re gathering around the table with friends or simply indulging in a sweet moment with a good book, this cake brings a delightful warmth to your home.
Pumpkin desserts hold a special place in my heart. They remind me of golden afternoons spent in the kitchen with my grandmother, who had a way of turning simple ingredients into beloved treats. I can still hear her laughter echoing as she would mix the dough, teaching me the art of patience while waiting for the cakes to bake. That intoxicating aroma of spices wafting through the house is something I never want to forget—a memory beautifully encapsulated in this pumpkin cake recipe.
I love sharing this treat during family gatherings, where the cake often takes center stage, adorned with its creamy frosting that glimmers with sweet caramel drizzle. It’s a crowd-pleaser, and I promise it will become a staple in your home too. So, grab that apron and let’s create something incredibly delicious together!
A Sweet Memory
As a child, I would often help my grandmother prepare for the holiday dinners. She had an entire ritual: selecting the freshest ingredients at the market, setting them out on her kitchen counter, and inviting me to join her. One year, she decided to experiment with pumpkin, inspired by a recent trip to a local pumpkin patch. I still remember how we giggled as we scooped out the pumpkin puree, our hands messily covered in orange goodness.
That year, her pumpkin cake stole the show. Family members would rave about it for weeks, and I found joy not just in eating the cake but in the smiles it created. Those exhilarating moments in the kitchen ignited my passion for cooking—a passion that has only grown over time. Now, I want to inspire you to create your own joyful memories with this scrumptious pumpkin cake recipe!
Ingredients
Gather these fabulous ingredients to make your pumpkin cake truly delicious:
- 2 cups all-purpose flour: The backbone of your cake. For a gluten-free option, substitute with a 1:1 gluten-free flour blend.
- 2 cups sugar: Sweetness personified! You can use brown sugar for deeper flavor or coconut sugar for a healthier alternative.
- 1 cup vegetable oil: Makes your cake moist and fluffy. If you prefer, you can substitute with melted coconut oil or applesauce for a lighter option.
- 4 large eggs: Provide structure and richness. For an egg-free version, try using flax eggs (1 tbsp flaxseed meal + 2.5 tbsp water per egg).
- 1 can (15 oz) pumpkin puree: The star of the show! Make sure it’s pure pumpkin and not pumpkin pie filling, which has added sugar and spices.
- 1 tsp baking powder: Helps the cake rise. You can use baking soda (1/4 tsp more) if that’s all you have.
- 1 tsp baking soda: A leavening agent that works wonders in achieving that light texture.
- 1 tsp cinnamon: Such a warm spice that gives this cake its lovely aroma! Feel free to toss in some pumpkin pie spice if you have it on hand.
- 1/2 tsp nutmeg: Adds a warm, nutty flavor; fresh nutmeg is always a fantastic choice if you have it.
- 1/2 tsp salt: Balances the sweetness and enhances all the flavors.
- 1/2 cup cream cheese, softened: The creamy base for our frosting. Neufchâtel cheese is a lighter alternative.
- 1/2 cup salted caramel sauce: This adds richness and sweetness to the frosting. You can make your own or purchase it from the store.
- 2 cups powdered sugar: Sweetness overload! You can reduce this if you’d like a less sweet frosting.
- 1 tsp vanilla extract: Brings everything together harmoniously. Use pure vanilla for a richer flavor.
Step-by-Step Instructions
Now, let’s dive into the glorious world of baking this pumpkin cake!
-
Preheat Your Oven: Begin by throwing your oven into action and preheating it to 350°F (175°C). This ensures that your cake starts to bake evenly right from the moment you pour in the batter.
-
Prepare Your Pans: Lightly grease and flour two 9-inch round cake pans. You can also line the bottoms with parchment paper if you want an extra smooth release. Trust me, you don’t want to lose any of this scrumptious cake!
-
Mix the Dry Ingredients: In a medium bowl, whisk together your flour, baking powder, baking soda, cinnamon, nutmeg, and salt. This step is essential for ensuring that your leavening agents are evenly distributed— a little chef hack to avoid any surprises later on!
-
Whisk the Wet Ingredients: In a large mixing bowl, combine the sugar and vegetable oil, and whisk until they become cohesive and slightly lightened in color. Next, add in the eggs, one at a time, beating well after each addition for that extra fluff!
-
Pumpkin Time: Stir in the pumpkin puree and vanilla extract, combining them gently until you have a smooth mixture. It’s like a warm hug in a bowl!
-
Combine the Mixtures: Gradually fold the dry ingredients into the wet mixture, being careful not to overmix. You want to be gentle here! Overmixing can lead to a dense cake, and nobody wants that.
-
Pour and Bake: Pour your batter evenly into your prepared pans, spreading it out to ensure that it bakes uniformly. Pop them in the oven and let them bake for about 25 to 30 minutes, or until a toothpick inserted in the center comes out clean. That aroma will start dancing around your kitchen in no time!
-
Cool the Cakes: Once baked, remove them from the oven and let them cool in the pans for about 10 minutes. Then, take them out and let them cool completely on a wire rack. Patience is key!
-
Whip Up the Frosting: In a mixing bowl, beat together the softened cream cheese, salted caramel sauce, and vanilla extract until it’s smooth and creamy. Gradually add the powdered sugar, mixing well until fluffy and dreamy.
-
Frost the Cake: Once your cakes are completely cool, place one layer on a serving platter. Spread a generous amount of frosting on top before adding the second layer. Finish with more frosting on top and let it drizzle down the sides. Trust me; it’s a sight to behold!
Serving Suggestions
For a beautiful presentation, serve the cake with a drizzle of leftover caramel sauce and a sprinkle of cinnamon on top. You can place a few pecans or walnuts around the base of the cake for added flavor and style. And don’t forget to brew a pot of warm spiced tea or coffee to accompany this delightful treat. Your guests will feel like royalty!
Recipe Variations
Feeling adventurous? Here are a few fun twists you can try:
- Spiced Nut Pumpkin Cake: Add chopped pecans or walnuts into the batter for an extra crunch.
- Chocolate Chip Version: Fold in a cup of semi-sweet chocolate chips for that luscious chocolate-pumpkin combo!
- Gluten-Free: Use a gluten-free flour blend to make this cake suitable for gluten-sensitive friends.
- Vegan Alteration: Substituting flax eggs and non-dairy cream cheese can easily make this a vegan dessert.
- Ginger Snap Kick: Pre-add minced crystallized ginger into the batter for a zesty kick!
Chef’s Notes
This pumpkin cake recipe has gone through some lovely transformations over the years. Originally, I used a boxed cake mix when I first started baking, but as my cooking journey flourished, I felt compelled to create something from scratch that connected with the warmth from my childhood.
One day, I decided to add caramel to the frosting—a kiss of sweetness that completed the cake perfectly! Funny enough, I once got a bit too generous with the frosting and ended up with a “caramel waterfall.” It’s one of my favorite kitchen mishaps and a reminder that perfection isn’t the goal—deliciousness is!
FAQs and Troubleshooting
1. My cake is too dense. What did I do wrong?
- This usually happens from overmixing the batter. Be gentle when folding the dry ingredients into the wet ingredients!
2. Can I use fresh pumpkin instead of canned?
- Absolutely! Just make sure to cook and puree it until smooth. It may require slightly more attention to achieve the right consistency compared to canned.
3. Why did my frosting turn out runny?
- If your frosting is too thin, try adding more powdered sugar to reach your desired consistency. You want it spreadable but not dripping off the cake.
4. How can I make this cake ahead of time?
- You can bake the cake layers ahead and freeze them. Just wrap them tightly in plastic wrap and store them in the freezer. Thaw them out and frost on the day you plan to serve.
Nutritional Info
While I don’t often focus heavily on nutritional content, this cake does yield about 12 servings with around 350 calories each, depending on generous frosting application. It’s all about balance, right? Enjoy a slice as a treat and savor the flavors!
So there you have it! A delectable pumpkin cake with caramel cream cheese frosting that promises not only to taste divine but to create lasting memories around your table. Remember, cooking is all about joy and connection—so let’s get baking and share those delicious moments! Happy baking, my friends!
PrintPumpkin Cake with Caramel Cream Cheese Frosting
Delightful pumpkin cake with spiced flavors, topped with rich caramel cream cheese frosting.
- Prep Time: 20 minutes
- Cook Time: 30 minutes
- Total Time: 50 minutes
- Yield: 12 servings 1x
- Category: Dessert
- Method: Baking
- Cuisine: American
- Diet: Vegetarian
Ingredients
- 2 cups all-purpose flour
- 2 cups sugar
- 1 cup vegetable oil
- 4 large eggs
- 1 can (15 oz) pumpkin puree
- 1 tsp baking powder
- 1 tsp baking soda
- 1 tsp cinnamon
- 1/2 tsp nutmeg
- 1/2 tsp salt
- 1/2 cup cream cheese, softened
- 1/2 cup salted caramel sauce
- 2 cups powdered sugar
- 1 tsp vanilla extract
Instructions
- Preheat your oven to 350°F (175°C).
- Prepare your pans by greasing and flouring two 9-inch round cake pans.
- Mix the dry ingredients: whisk together flour, baking powder, baking soda, cinnamon, nutmeg, and salt.
- Whisk the wet ingredients: combine sugar and vegetable oil, then add in the eggs, beating well.
- Stir in the pumpkin puree and vanilla extract until smooth.
- Combine the dry ingredients into the wet mixture, folding gently.
- Pour the batter into prepared pans and bake for 25 to 30 minutes.
- Cool the cakes in the pans for 10 minutes, then transfer to a wire rack.
- Whip up the frosting: beat cream cheese, salted caramel, and vanilla until smooth, then gradually add powdered sugar.
- Frost the cooled cakes, layering generously with frosting between and on top.
Notes
For best results, be gentle when mixing to avoid a dense cake. Feel free to add nuts or chocolate chips for variations.
Nutrition
- Serving Size: 1 slice
- Calories: 350
- Sugar: 35g
- Sodium: 450mg
- Fat: 15g
- Saturated Fat: 5g
- Unsaturated Fat: 8g
- Trans Fat: 0g
- Carbohydrates: 52g
- Fiber: 2g
- Protein: 5g
- Cholesterol: 30mg
Keywords: pumpkin cake, autumn dessert, caramel frosting
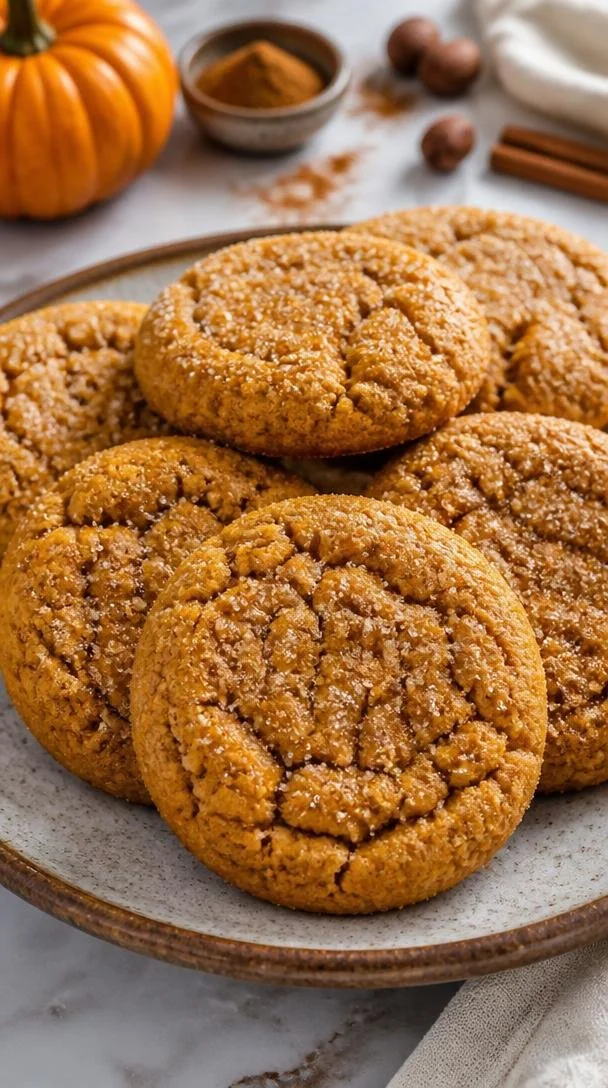
Easy One-Bowl Chewy Pumpkin Cookies in 25 Minutes Flat
Chewy Pumpkin Cookies: A Delicious Fall Treat
Welcome, food lovers! Today, we’re diving into the cozy world of baking with a recipe that brings a taste of autumn right into your kitchen: chewy pumpkin cookies. These delightful treats are perfect for crisp evenings when you want to enjoy something sweet that’s also a bit wholesome. Plus, they’re incredibly easy to whip up, making them a favorite around my table.
I remember the first time I tried a pumpkin cookie. It was at a friend’s autumn gathering, where the air was filled with the rich aroma of spices and baked goods. As soon as I took a bite, I was transported to a haven of fall flavors—the warm spices, the soft texture, and that subtly sweet pumpkin flavor all wrapped up in one cookie. It was love at first taste! Since then, I’ve perfected my chewy pumpkin cookie recipe, and I can’t wait to share it with you.
So, whether you’re cozying up at home, hosting a gathering, or just looking to satisfy a sweet tooth, let’s get started on these scrumptious chewy pumpkin cookies that will make your heart—and tummy—happy!
My Pumpkin Cookie Memory
One of my fondest memories is from a few years ago when I decided to host an impromptu pumpkin-themed gathering to celebrate the season. It was one of those crisp October days; the leaves were changing, and the sun was shining brightly. My friends and I gathered around the kitchen island, sipping spiced apple cider and sharing stories. The star of the show? My chewy pumpkin cookies, of course!
With laughter filling the room, we rolled out dough, sprinkled flour everywhere, and turned what could have been a stressful baking session into a joyful experience. When those cookies came out of the oven, we could hardly wait for them to cool! The sweet scent filled the house, and as we finally took our first bites, you could hear the “Mmm”s echoing through the room. Those cookies not only filled our stomachs but also created a warm atmosphere filled with connection and joy—reminding me that food truly brings people together.
Ingredients
Let’s gather our ingredients! Here’s what you’ll need for these gooey, chewy pumpkin cookies, along with some handy tips for each component:
-
1 cup pumpkin puree
(Canned or homemade, pumpkin puree is the star of the show. If you’re feeling adventurous, you can use butternut squash puree as a fantastic substitute!) -
1 cup brown sugar
(This adds moisture and rich flavor! For a lighter touch, you can swap half of this with coconut sugar or white sugar.) -
1/2 cup granulated sugar
(Gives just the right amount of sweetness without overpowering the pumpkin. Feel free to reduce this slightly for a less sweet cookie.) -
1/2 cup butter (softened)
(Butter contributes to that fabulous chewy texture. If you want to make it dairy-free, coconut oil or vegan butter works well!) -
1 egg
(This binds everything together. You can replace it with a flax egg for a vegan option: mix 1 tablespoon ground flaxseed with 2.5 tablespoons water and let it sit for a few minutes to thicken.) -
2 cups all-purpose flour
(Essential for structure! For a gluten-free version, feel free to use a 1:1 gluten-free flour blend.) -
1 teaspoon baking soda
(This helps the cookies rise and gives them a nice texture. Make sure it’s fresh for the best results!) -
1 teaspoon baking powder
(Works in conjunction with baking soda for extra fluffiness!) -
1 teaspoon pumpkin spice
(A blend of cinnamon, nutmeg, and clove that gives our cookies that wonderful autumn flavor. You can make your own mix too!) -
1/2 teaspoon salt
(Enhances all the flavors! Don’t skimp on this step.) -
1/4 cup granulated sugar (for topping)
(This gives the cookies a lovely sugary crust! You can opt for sparkling sugar for a little extra sparkle.)
Step-by-Step Instructions
Now that we have our ingredients ready, let’s get baking! Follow these steps carefully, and I promise you’ll have a batch of scrumptious pumpkin cookies in no time.
Step 1: Preheat Your Oven
First things first—let’s get the oven preheating! Set it to 350°F (175°C). This ensures our cookies bake evenly and come out perfectly chewy.
Step 2: Cream the Butter and Sugars
In a large mixing bowl, beat together the softened butter, brown sugar, and granulated sugar until the mixture is light and fluffy—about 2-3 minutes. Tip: Using a hand mixer or stand mixer can save you some elbow grease, but a good old wooden spoon works too!
Step 3: Add the Egg and Pumpkin
Next, crack in your egg and add the pumpkin puree, mixing until well combined. This is where the magic starts to happen. The pumpkin will add moisture and flavor, and your mix will have a beautiful orange hue. Chef’s Hack: For a hint of flavor, try adding a touch of vanilla extract to this mix!
Step 4: Dry Ingredients Unite
In another bowl, whisk together the all-purpose flour, baking soda, baking powder, pumpkin spice, and salt. This step ensures that all the leaveners and spices are evenly distributed throughout the flour. Tip: Sifting the flour can provide an even lighter cookie, but it’s not absolutely necessary.
Step 5: Combine Wet and Dry Ingredients
Slowly add the dry mixture to the pumpkin mixture in increments, gently folding until just combined. Pro Tip: Don’t overmix! We want those cookies to stay tender and chewy, and overworking the dough can lead to extra gluten formation.
Step 6: Scoop and Shape
Using a cookie scoop or a tablespoon, drop rounded mounds of dough onto a parchment-lined baking sheet, spacing them about 2 inches apart. This allows room for them to spread! If you want, you can slightly flatten the tops with your fingers for an even bake.
Step 7: Sugar Crust
Before popping them in the oven, sprinkle a little granulated sugar on top of each cookie. This not only gives them a lovely sweet crust but adds a festive touch. Remember to resist eating the dough—though it may be tempting!
Step 8: Bake
Bake your cookies in the preheated oven for 10-12 minutes or until they’re light golden around the edges but still soft in the center. Tip: They will continue to firm up as they cool, so don’t overbake!
Step 9: Cool and Enjoy!
Let the cookies cool on the baking sheet for about 5 minutes before transferring them to a wire rack to cool completely. This waiting period allows them to set while remaining soft and chewy. And now, patience is key, my friends!
Serving Suggestions
When you’re ready to serve, consider plating these cookies on a beautiful platter sprinkled with extra pumpkin spice or a drizzle of white chocolate for added flair. Pair them with a warm cup of spiced chai tea or a latte, and you’ll have an irresistible snack that’s perfect for sharing (if you’re feeling generous!).
Recipe Variations
Want to switch it up a bit? Here are a few ideas:
- Chocolate Chip Twist: Fold in a cup of chocolate chips for a classic combo!
- Nutty Delight: Add 1/2 cup of chopped walnuts or pecans for a crunchy texture.
- Gluten-Free: Use a gluten-free flour blend instead of all-purpose flour.
- Spiced Up: Increase the pumpkin spice to 1.5 teaspoons for an extra kick of flavor.
- Frosted Version: Top with a cream cheese frosting for a decadent dessert!
Chef’s Notes
Ah, these cookies have a special place in my heart! This recipe has evolved over time, adapted from my classic sugar cookie base to incorporate the deliciousness of pumpkin. I vividly remember my first attempt—I accidentally spilled too much pumpkin puree, and that batch turned out a bit too chewy for my liking. But guess what? They were still gobbled up by my friends! The lesson? Often, the best moments in the kitchen come from those happy accidents.
FAQs and Troubleshooting
1. Why are my cookies flat?
If your cookies spread too much, it could be due to too much butter or not enough flour. Always carefully measure your ingredients, and if your butter was too soft, try chilling the dough for 30 minutes before baking.
2. How do I store my pumpkin cookies?
These cookies can be stored in an airtight container at room temperature for up to a week. If you’d like them to last longer, freeze the baked cookies. Just be sure to let them cool completely before freezing and place parchment paper between layers.
3. Can I make these ahead of time?
Absolutely! You can whip up the dough ahead of time and refrigerate it for up to 3 days before baking. Alternatively, freeze the shaped cookie dough balls and bake them directly from the freezer—just add an extra minute or two to the baking time.
4. How do I know when they’re done?
Look for edges that are set and lightly golden; the centers will appear soft. Trust your instinct—it’s the best guide!
Nutritional Info
(For reference, here’s a high-level breakdown of the nutritional info per cookie if you make about 24 cookies—calories may vary.)
- Calories: 108
- Protein: 1.5g
- Fat: 4.5g
- Carbohydrates: 16g
- Fiber: 0.5g
- Sugar: 6g
And there you have it! Your guide to creating these delightful chewy pumpkin cookies. With a warm, inviting texture and a sprinkle of fall flavors, they’re bound to become a favorite in your baking repertoire. I can’t wait to hear about your own kitchen adventures and the wonderful moments these cookies help create. So, tie on your apron, grab that mixer, and let’s bake a batch together! Happy baking, friends!
PrintChewy Pumpkin Cookies

Delicious chewy pumpkin cookies that capture the essence of fall with warm spices and a soft texture.
- Prep Time: 15 minutes
- Cook Time: 12 minutes
- Total Time: 27 minutes
- Yield: 24 cookies 1x
- Category: Dessert
- Method: Baking
- Cuisine: American
- Diet: Vegetarian
Ingredients
- 1 cup pumpkin puree
- 1 cup brown sugar
- 1/2 cup granulated sugar
- 1/2 cup butter (softened)
- 1 egg
- 2 cups all-purpose flour
- 1 teaspoon baking soda
- 1 teaspoon baking powder
- 1 teaspoon pumpkin spice
- 1/2 teaspoon salt
- 1/4 cup granulated sugar (for topping)
Instructions
- Preheat your oven to 350°F (175°C).
- Cream the softened butter, brown sugar, and granulated sugar until light and fluffy.
- Add the egg and pumpkin puree, mixing until combined.
- Whisk together flour, baking soda, baking powder, pumpkin spice, and salt in another bowl.
- Combine the dry mixture with the pumpkin mixture until just mixed.
- Scoop rounded mounds of dough onto a parchment-lined baking sheet.
- Sprinkle granulated sugar on top of each cookie.
- Bake for 10-12 minutes until golden around the edges.
- Cool for 5 minutes on the baking sheet before transferring to a wire rack.
Notes
These cookies can be stored in an airtight container for up to a week. Dough can be refrigerated for up to 3 days or frozen for later use.
Nutrition
- Serving Size: 1 cookie
- Calories: 108
- Sugar: 6g
- Sodium: 200mg
- Fat: 4.5g
- Saturated Fat: 2.5g
- Unsaturated Fat: 2g
- Trans Fat: 0g
- Carbohydrates: 16g
- Fiber: 0.5g
- Protein: 1.5g
- Cholesterol: 30mg
Keywords: pumpkin cookies, fall cookies, chewy cookies, dessert, autumn treats
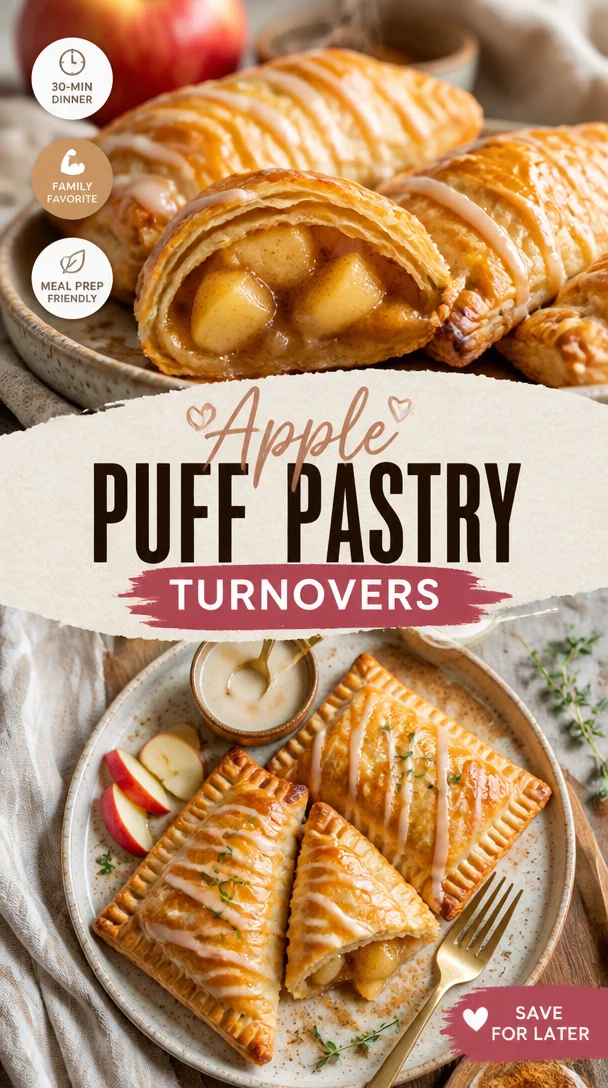
Apple Puff Pastry Turnovers
Apple Puff Pastry Turnovers: A Delightful Journey in Every Bite
Hello, dear friends! Today, we’re diving into the world of flaky, buttery goodness with a recipe that will have your kitchen smelling divine: Apple Puff Pastry Turnovers. These luscious little pockets of joy are not just a treat for the taste buds; they’re a celebration of warm, comforting flavors wrapped in crispy pastry. Think of them as tiny masterpieces, ready to impress your friends and family—or even just yourself—after a long day.
When I think back to my childhood, there’s a vivid memory that springs to mind: my grandmother’s kitchen, where warmth radiated from the oven as she prepared her famous apple turnovers. The smell of cinnamon and baked apples got me every time, making it impossible to resist sneaking one before they were even cool! Those delicious moments spent watching her craft these treats are woven into my earliest culinary experiences.
And that, my friends, is why I’m here to share this delightful recipe with you. Because cooking is not just about the food; it’s about the stories, memories, and love you put into every dish. Join me as we recreate a nostalgic favorite that’s easy enough for a weeknight treat yet impressive enough for any gathering.
A Taste of Nostalgia
It was a chilly autumn afternoon, one of those perfect days when the leaves turned a brilliant amber and the air was crisp. I remember standing on a stool in my grandmother’s cozy kitchen, peering over the counter as she peeled and diced the Granny Smith apples. With every slice, she would share a story about her own childhood and how her mother taught her to bake. Those apples, mixed with butter, sugar, and a sprinkle of cinnamon, were transformed into a filling that was so magical I could hardly contain my excitement.
As we rolled out the puff pastry, I marveled at how something so simple could become an extraordinary treat with just a little love and creativity. By the time those turnovers came out of the oven, golden and flaky, the entire house was fragrant with the smell of baked apples and cinnamon. Each bite was a warm hug—sweet, tart, and comforting. That experience shaped my love for cooking and my belief that everyone deserves to savor the beauty of homemade treats, no matter their skill level. So, let’s channel that nostalgia and recreate this delightful dish together!
Ingredients
Gather your ingredients, and let’s jump into the apple turnover magic! Here’s what you’ll need:
-
1 pound (2 sheets) puff pastry (thawed if frozen)
- Tip: Puff pastry is a game changer! Keep some on hand for quick desserts and savory delights. If you’re in a pinch, you can use phyllo dough, but keep in mind the texture will be different!
-
2 large (or 4 small) Granny Smith apples (peeled, cored, and diced into small uniform pieces)
- Substitution: If Granny Smith apples aren’t available, feel free to use Honeycrisp or Fuji for a sweeter flavor. Just be sure they are tart enough to balance the sugar!
-
1 tablespoon unsalted butter
- Chef Insight: Using unsalted butter lets you control the saltiness in your dish. If you only have salted butter on hand, just reduce the added salt from the recipe.
-
1/8 cup brown sugar
- Tip: Not only does brown sugar add sweetness, but it also brings a lovely moisture and depth of flavor. Dark brown sugar can give an even richer taste.
-
1/8 cup granulated sugar
- Substitution: You can adjust the sugar amounts according to your sweetness preference, or even swap in coconut sugar for a more wholesome twist.
-
1 teaspoon cornstarch
- Chef Insight: This helps thicken the apple mixture and prevents it from becoming too runny. If you don’t have cornstarch, you can use flour, but it might not absorb as well as cornstarch does.
-
1/2 teaspoon cinnamon
- Tip: For an extra kick, you can also add a dash of nutmeg or allspice to enhance the flavor profile.
-
1 pinch salt
- Chef Insight: Balancing flavors is key in cooking. A pinch of salt elevates the sweetness and brings out the apples’ natural flavor.
-
1 large egg
- Tip: This will be used to create an egg wash that gives your pastries that beautiful golden color when baked. You can substitute it with a teaspoon of yogurt or a plant-based egg if you’re vegan.
-
1 tablespoon milk
- Substitution: Any type of milk works here—dairy or non-dairy! Almond milk or oat milk can add a slight flavor twist too.
-
2/3 cup powdered sugar
- Chef Insight: Whisked together with milk, this creates a simple glaze to elevate our turnovers to pastry perfection!
-
1 tablespoon milk (for glaze)
- Tip: You can add a splash of vanilla extract for an aromatic twist to the glaze.
Step-by-Step Instructions
Ready to make some kitchen magic? Follow these steps carefully, and you’ll have a batch of gorgeous apple turnovers in no time!
-
Preparing the Apples: Begin by peeling, coring, and dicing your Granny Smith apples into small, even pieces (about half an inch). This ensures they cook evenly. In a medium saucepan over medium heat, melt the unsalted butter. Once melted, add the diced apples, brown sugar, granulated sugar, cornstarch, cinnamon, and a pinch of salt. Stir gently to combine, and let it cook for about 5–7 minutes until the apples are tender but not mushy. Remove from heat and set aside to cool.
-
Rolling Out the Puff Pastry: Preheat your oven to 400°F (200°C). Roll out the thawed puff pastry sheets on a lightly floured surface until they are about 1/8 inch thick. Cut each sheet into 4 squares—this will yield 8 turnovers. Don’t stress if they don’t look perfect; rustic is the name of the game!
-
Filling the Pastry: Spoon about 2 tablespoons of the apple filling onto the center of each pastry square. Be careful not to overfill, or your delicious filling might escape during baking!
-
Assembling the Turnovers: Fold the pastry over the filling to create a triangle. Press down the edges firmly with your fingers to seal, then use a fork to crimp the edges for an extra secure seal. This also gives a lovely decorative touch.
-
Egg Wash and Baking: Whisk together the egg and milk in a small bowl. Brush this egg wash over the tops of the turnovers—this will give them that golden, inviting look. Place the turnovers on a parchment-lined baking sheet, leaving space for them to puff up. Bake in your preheated oven for 20-25 minutes or until they are golden brown and flaky. You might want to rotate the baking sheet halfway through for even cooking.
-
Making the Glaze: While the turnovers bake, whisk together the powdered sugar and the remaining tablespoon of milk in a small bowl. You want a syrupy consistency—you can add more powdered sugar or milk as needed to achieve this.
-
Gilding the Lily: Once the turnovers are out of the oven (be sure to let them cool for a few minutes), drizzle the glaze over the top. This adds the finishing touch and makes them look truly tantalizing!
Serving Suggestions
These apple puff pastry turnovers are best served warm, right out of the oven. To plate them, arrange them on a charming platter and dust lightly with a sprinkle of powdered sugar. You can serve them alongside a scoop of vanilla ice cream or a dollop of whipped cream for an extra indulgent treat. An aromatic cup of spiced chai or hot cider pairs beautifully as well, creating a complete cozy experience.
Recipe Variations
- Berry Bliss: Substitute some of the apples with mixed berries (e.g., blueberries, raspberries) for a delightful fruity twist.
- Nutty Addition: Add 1/4 cup of chopped walnuts or pecans to the apple filling for a crunchy texture.
- Caramel Drizzle: Drizzle salted caramel sauce over the baked turnovers for an indulgent dessert.
- Savory Twist: For a savory version, fill the pastries with spiced sautéed mushrooms and cheese instead of apples.
- Gluten-Free Option: Use gluten-free puff pastry so everyone can enjoy these treats regardless of dietary restrictions.
Chef’s Notes
As I’ve made these turnovers over the years, they’ve evolved into a cherished family favorite. Sometimes I experiment with different fruits depending on what’s in season—pears, peaches, and even berries have made their way into these pockets of love!
The best part about this recipe is that it’s incredibly forgiving. If your apples are a bit too sweet, a squeeze of lemon juice can add a bright touch and balance the flavors. And if you happen to overdo it with the filling, just know that a little overflow never hurt anyone—it’s a sign of love, right?
FAQs and Troubleshooting
-
Why did my puff pastry not puff?
Unfortunately, if the pastry wasn’t thawed properly (make sure it’s fully thawed!), or if the oven wasn’t hot enough, it might not puff up as expected. Always preheat your oven! -
My turnovers leaked during baking. What went wrong?
This usually happens if the filling was too wet. Ensure you’re not overloading the pastry with filling, and give the filling time to cool and thicken before using it. -
Can I freeze the turnovers before baking?
Absolutely! Just assemble them, place them on a baking sheet lined with parchment, and freeze them until solid. Then transfer them to a freezer bag. You can bake them straight from the freezer; just add a few extra minutes to the baking time. -
What should I do if the glaze is too thick?
If your glaze is too thick, gradually add more milk until you reach your desired consistency. It should be thick enough to drizzle but thin enough to spread a bit!
Nutritional Info
While I won’t dive too deep into the numbers, it’s worth noting that each delightful turnover is best enjoyed in moderation as a sweet treat. Made with fresh apples and a few simple ingredients, these beauties are perfect for sharing and savoring. Remember, it’s the joy of cooking and gathering together that truly nourishes us!
So there you have it—Apple Puff Pastry Turnovers that are sure to warm your heart and delight your guests (or yourself!). Cooking is a journey, and I’m so glad you’re on this one with me. Let’s keep creating those lovely kitchen memories, one recipe at a time! Happy cooking, my friends! 🍏❤️
PrintApple Puff Pastry Turnovers

Delightful apple turnovers wrapped in flaky puff pastry, perfect for any occasion.
- Prep Time: 15 minutes
- Cook Time: 25 minutes
- Total Time: 40 minutes
- Yield: 8 servings 1x
- Category: Dessert
- Method: Baking
- Cuisine: American
- Diet: Vegetarian
Ingredients
- 1 pound (2 sheets) puff pastry (thawed if frozen)
- 2 large (or 4 small) Granny Smith apples (peeled, cored, and diced)
- 1 tablespoon unsalted butter
- 1/8 cup brown sugar
- 1/8 cup granulated sugar
- 1 teaspoon cornstarch
- 1/2 teaspoon cinnamon
- 1 pinch salt
- 1 large egg
- 1 tablespoon milk
- 2/3 cup powdered sugar
- 1 tablespoon milk (for glaze)
Instructions
- Prepare the Apples: Begin by peeling, coring, and dicing your Granny Smith apples into small, even pieces. In a medium saucepan over medium heat, melt the unsalted butter. Add the diced apples, brown sugar, granulated sugar, cornstarch, cinnamon, and a pinch of salt. Stir gently and let it cook for about 5–7 minutes until the apples are tender. Remove from heat and set aside to cool.
- Preheat your oven to 400°F (200°C). Roll out the thawed puff pastry sheets on a lightly floured surface until about 1/8 inch thick. Cut each sheet into 4 squares—yielding 8 turnovers.
- Spoon about 2 tablespoons of the apple filling onto the center of each pastry square. Be careful not to overfill.
- Fold the pastry over the filling to create a triangle. Press down the edges firmly and use a fork to crimp the edges.
- Whisk together the egg and milk in a small bowl. Brush this egg wash over the tops of the turnovers. Place on a parchment-lined baking sheet, leaving space for puffing up. Bake for 20-25 minutes until golden brown.
- Whisk together the powdered sugar and remaining milk in a small bowl for the glaze, achieving a syrupy consistency.
- Drizzle the glaze over cooled turnovers before serving.
Notes
Serve warm with whipped cream or vanilla ice cream for an extra treat.
Nutrition
- Serving Size: 1 turnover
- Calories: 250
- Sugar: 10g
- Sodium: 150mg
- Fat: 10g
- Saturated Fat: 4g
- Unsaturated Fat: 6g
- Trans Fat: 0g
- Carbohydrates: 36g
- Fiber: 1g
- Protein: 3g
- Cholesterol: 30mg
Keywords: apple, pastry, dessert, turnovers, baked goods

One-Bowl Double-Chocolate Muffins in 15 Minutes (No-Mixer)
Double Chocolate Muffins: A Luxurious Treat for Any Occasion
Introduction
Hello, lovely food lovers! Today, we’re diving into a decadent delight that’s sure to satisfy even the most serious chocolate cravings — double chocolate muffins. Picture this: a warm, gooey muffin oozing with melted chocolate chips, paired perfectly with a cup of coffee or tea. Whether for breakfast, an afternoon snack, or dessert, these irresistible muffins truly shine.
But what makes these muffins extra special? It’s not just about the rich, chocolatey flavor; it’s the memories and love baked into every bite! I still remember the first time I made these muffins. I was hosting a casual breakfast for a group of friends, and feels were running high as we all gathered around the table with steaming hot mugs in hand. The aroma of chocolate wafted through the kitchen, drawing everyone closer. They barely had time to cool before we dove in, gooey centers and all! Trust me; you’ll want to recreate that experience in your home too.
So, tie on your apron and let’s get started on making these luscious double chocolate muffins. I promise they’ll be a crowd-pleaser and add an elegant twist to your everyday baking! Plus, you’ll learn some handy tips along the way that will leave you feeling like a pro in the kitchen!
Personal Story
Back in my college days, Sundays were sacred. It was the one day of the week that was all about cozy get-togethers, brunches, and a bit of relaxation before the chaos of the week resumed. One particular Sunday stands out in my mind when I decided to whip up my double chocolate muffins for a small gathering. I remember standing in my tiny kitchen, chocolate speckles everywhere, and feeling a little nervous about whether my friends would love them.
As the timer buzzed, I pulled out the muffins from the oven, and the aroma filled my home with warmth. My friends couldn’t wait to dig in, and as soon as they took their first bites, the room filled with smiles and satisfied sighs. One of my pals even declared, “These are better than any café muffin I’ve ever had!” That moment solidified my belief that nurturing people through food is truly a gift. Ever since then, these double chocolate muffins have held a special place in my heart and my recipe collection.
Ingredients
Let’s gather our ingredients! Here’s what you’ll need to create these scrumptious double chocolate muffins:
-
1 3/4 cups all-purpose flour
The backbone of our muffins, flour helps to create structure. You can substitute whole wheat flour for a healthier twist, but keep in mind it may change the texture slightly. -
1/2 cup unsweetened cocoa powder
This is where the chocolate magic begins! Choose a high-quality cocoa powder for a richer flavor. You can use Dutch-processed cocoa if you prefer a smoother taste. -
1 cup granulated sugar
Sweetness is essential! You can swap it for brown sugar for a hint of caramel flavor, or use coconut sugar for a more earthy sweetness. -
1 teaspoon baking soda
A key leavening agent that helps our muffins rise beautifully. Make sure it’s fresh! Replace with baking powder if needed, but the texture might change a bit. -
1/2 teaspoon salt
Salt enhances the chocolate flavor — don’t skip it! You can use sea salt for a gourmet touch. -
2 large eggs
Eggs provide moisture and bind the ingredients together. For a vegan option, you can substitute them with flax eggs (1 tablespoon ground flaxseed mixed with 2.5 tablespoons water per egg). -
1 cup buttermilk
Buttermilk adds richness and tenderness. No buttermilk? Don’t worry! You can make a quick substitute by adding a tablespoon of vinegar or lemon juice to regular milk. Let it sit for about 5 minutes! -
1/2 cup vegetable oil
This keeps the muffins moist. You can use melted coconut oil or even applesauce for a lighter option. -
1 teaspoon vanilla extract
A splash of vanilla brightens the whole muffin experience. Feel free to experiment with almond extract or even coffee for a twist! -
1 cup chocolate chips
Because we want double the chocolate, right? Use semi-sweet, dark, or even white chocolate chips. You can also use chopped chocolate bars for a gourmet touch!
Step-by-Step Instructions
Now that we have all our delightful ingredients ready, it’s time to get cooking! Follow these detailed steps for making your double chocolate muffins:
-
Preheat the Oven
Preheat your oven to 350°F (175°C). This ensures that your muffins bake evenly from the moment they hit the oven. -
Prepare the Muffin Tin
Grab a muffin tin and line it with paper liners or grease it lightly. This helps with easy removal later. If you have a non-stick muffin pan, you may not need liners — just make sure to grease it well to prevent sticking! -
Mix Dry Ingredients
In a large mixing bowl, whisk together the flour, cocoa powder, baking soda, and salt until well combined. This step is crucial as it helps to evenly distribute the leavening agent. Make sure there are no cocoa clumps! -
Combine Wet Ingredients
In another bowl, whisk the eggs and sugar together until fluffy. Next, add the buttermilk, vegetable oil, and vanilla extract, mixing until everything is well blended. Tip: If you’re prone to lumps, beat the wet ingredients with a whisk for a bit longer to ensure a smooth mixture. -
Combine Both Mixtures
Pour the wet mixture into the dry ingredients. Gently fold the two mixtures together using a spatula — be careful not to overmix! It’s okay if there are a few flour streaks; we want to keep our muffins light and tender. -
Add Chocolate Chips
Carefully fold in the chocolate chips, making sure they’re evenly distributed throughout the batter. Oh, and save a few for sprinkling on top for that “wow” factor! -
Fill the Muffin Tin
Evenly portion the batter into the prepared muffin tin, filling each cup about two-thirds full. This allows space for the muffins to rise without overflowing. If desired, sprinkle the remaining chocolate chips on top. -
Bake
Place the muffin tin in the preheated oven and bake for 18-20 minutes. Check for doneness using a toothpick; it should come out with a few moist crumbs — not completely clean! -
Cool
Once baked, let the muffins cool in the tin for about 5 minutes, then transfer them to a wire rack to cool completely. This helps maintain their moist texture.
And voilà! You’ve just created a batch of perfectly fluffy double chocolate muffins!
Serving Suggestions
Now, let’s talk about serving these beauties. They’re delightful on their own, but why not elevate the experience a little? I love serving them warm, dusted with powdered sugar for elegant flair. Pair them with a scoop of vanilla ice cream or a dollop of whipped cream for an indulgent dessert. Or simply enjoy one with your morning coffee — it’s the perfect pairing!
Recipe Variations
Ready to get creative? Here are some fun variations you can try with your double chocolate muffins:
- Mint Chocolate Muffins: Add a few drops of peppermint extract for a refreshing twist.
- Nutty Delight: Fold in a half-cup of chopped nuts like walnuts or pecans for added crunch and flavor.
- Spicy Chocolate: Mix in a pinch of cayenne or cinnamon for a subtly spicy kick.
- Fruit-Infused: Add chopped raspberries or strawberries for a fruity surprise!
- Gluten-Free: Swap the all-purpose flour for a gluten-free blend, making sure your baking powder is certified gluten-free as well.
Chef’s Notes
As with all recipes, practice makes perfect! The beauty of these muffins is how flexible they can be — you can use this base recipe and change it up to suit your taste buds or what you have on hand. I’ve made these muffins countless times and often add a little more cocoa or chocolate depending on my cravings. Sometimes, I even experiment with flavor extracts, and guess what? They’ve always turned out deliciously! Remember, it’s all about having fun in the kitchen!
FAQs and Troubleshooting
Here are some common questions you may have while making your double chocolate muffins:
-
Why are my muffins dense?
Overmixing the batter can lead to dense muffins. Fold the wet and dry ingredients just until combined! -
How do I store leftover muffins?
Keep them in an airtight container at room temperature for up to three days. You can also freeze them for up to three months; just thaw at room temperature when ready to eat. -
Can I make these muffins ahead of time?
Absolutely! You can prepare the batter the night before and refrigerate it, then bake fresh muffins in the morning. Just allow them to sit at room temperature for about 10 minutes before baking. -
How do I fix dry muffins?
If you find your muffins turned out dry, try reducing the baking time slightly next time or make sure the measuring of your flour is accurate and not over-packed.
Nutritional Info
While indulging in these double chocolate muffins is an absolute delight, it’s always great to be mindful of the ingredients you’re consuming. Each muffin (based on 12 servings) typically contains approximately:
- Calories: 240
- Total Fat: 12g
- Saturated Fat: 3g
- Carbohydrates: 31g
- Sugars: 15g
- Protein: 4g
Of course, these values can vary based on your ingredients and any substitutions you may choose to make.
And there you have it! Your guide to crafting the most delightful double chocolate muffins that bring joy to every gathering. I hope you enjoy making them as much as I do. Happy baking, and don’t forget to share your muffin moments around the table! 🍫✨
PrintDouble Chocolate Muffins

Decadent double chocolate muffins with melted chocolate chips, perfect for any occasion.
- Prep Time: 15 minutes
- Cook Time: 20 minutes
- Total Time: 35 minutes
- Yield: 12 servings 1x
- Category: Dessert
- Method: Baking
- Cuisine: American
- Diet: Vegetarian
Ingredients
- 1 3/4 cups all-purpose flour
- 1/2 cup unsweetened cocoa powder
- 1 cup granulated sugar
- 1 teaspoon baking soda
- 1/2 teaspoon salt
- 2 large eggs
- 1 cup buttermilk
- 1/2 cup vegetable oil
- 1 teaspoon vanilla extract
- 1 cup chocolate chips
Instructions
- Preheat your oven to 350°F (175°C).
- Prepare a muffin tin by lining it with paper liners or greasing it lightly.
- Mix dry ingredients: in a large mixing bowl, whisk together flour, cocoa powder, baking soda, and salt.
- Combine wet ingredients in another bowl: whisk eggs and sugar until fluffy, then add buttermilk, vegetable oil, and vanilla extract.
- Combine both mixtures by pouring the wet mixture into the dry ingredients and gently folding.
- Add chocolate chips and fold them in with care.
- Fill the muffin tins about two-thirds full with batter.
- Bake in the preheated oven for 18-20 minutes or until a toothpick comes out with a few moist crumbs.
- Cool the muffins in the tin for 5 minutes then transfer to a wire rack.
Notes
For variations, consider adding mint extract, nuts, or fruits to customize your muffins!
Nutrition
- Serving Size: 1 muffin
- Calories: 240
- Sugar: 15g
- Sodium: 200mg
- Fat: 12g
- Saturated Fat: 3g
- Unsaturated Fat: 7g
- Trans Fat: 0g
- Carbohydrates: 31g
- Fiber: 2g
- Protein: 4g
- Cholesterol: 70mg
Keywords: muffins, double chocolate, dessert, baking, chocolate
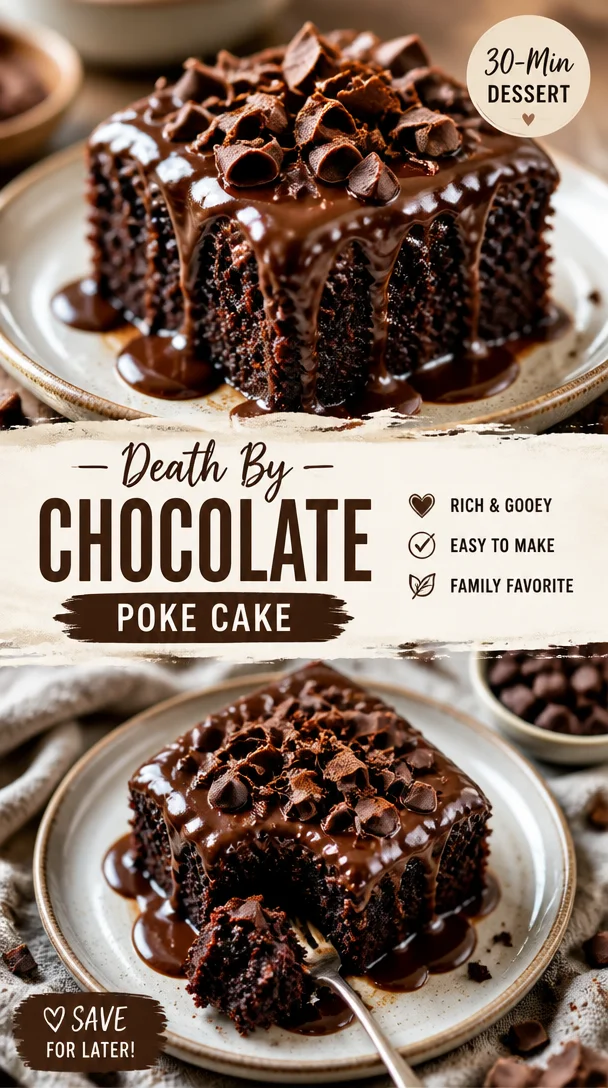
Death By Chocolate Poke Cake
Death By Chocolate Poke Cake: A Decadent Delight
Hello, my fellow food lovers! Today, we’re diving into a dessert that will make your heart sing and your taste buds dance – the Death By Chocolate Poke Cake. Imagine sinking your fork into a rich, moist chocolate cake that’s generously soaked in chocolate pudding, layered with whipped topping, and studded with chocolate chips. Sounds heavenly, right? Well, it is!
A Chocolate Lover’s Dream
Growing up, one of my fondest memories is of my family gatherings around the holidays. The chatter, the laughter, and of course, the dessert table! There was always one dish that stole the spotlight every time – my mom’s Chocolate Poke Cake. It was the ultimate indulgence, a cake that beckoned you in with its chocolatey allure.
I remember the first time I helped my mom make it. I was probably around 10 years old, standing on a chair to reach the mixing bowl, my tiny hands covered in flour and cocoa powder. As we poured the warm pudding over the baked cake, the excitement was palpable. I couldn’t wait to dig in! That cake always brought our family together, and it remains a cherished memory close to my heart. Now, I carry that tradition forward, and I can’t wait for you to experience the joy of creating your own Death By Chocolate Poke Cake.
Ingredients
For this delicious cake, you will need:
-
1 box chocolate cake mix: This is the backbone of our poke cake. If you’re feeling adventurous, you could use homemade chocolate cake for a richer flavor, but the box mix makes it super easy!
-
Ingredients required to prepare the cake (usually eggs, water, and oil): Always check the back of your cake mix box for specifics. If you’re out of eggs, you can substitute each egg with 1/4 cup of unsweetened applesauce for a rich, moist cake!
-
1 cup chocolate pudding mix: Instant pudding works best for this recipe. It provides a creamy consistency. If you fancy a different flavor, vanilla pudding works, but then you’d lose that rich chocolate kick.
-
2 cups milk: Whole milk adds richness, but you can swap it with almond milk or oat milk for a dairy-free option. Just ensure you’re using an unsweetened version for the right flavor profile.
-
1 cup whipped topping: This is what keeps the cake light and fluffy. If you’re feeling extra, homemade whipped cream is a fantastic, indulgent substitute!
-
1 cup chocolate chips: Mini chocolate chips are great for even distribution, or use dark chocolate chips for an intense hit of chocolate.
-
Chocolate syrup for drizzling: This delightful drizzle elevates the cake visually and adds extra sweetness. If you’re looking for a healthier alternative, try a homemade chocolate sauce with less sugar.
Step-by-Step Instructions
Ready to get baking? Let’s dive into the steps of making this chocolate masterpiece!
-
Preheat your Oven: Start by preheating your oven to 350°F (175°C). This ensures an even bake — nobody wants a gooey cake where it shouldn’t be!
-
Prepare the Cake Mix: In a large mixing bowl, combine the chocolate cake mix with the water, eggs, and oil as directed on the box. Mix on medium speed for about 2 minutes until the batter is smooth. Here’s where you can let loose and really whip up some air into that batter!
-
Bake the Cake: Pour the batter into a greased 9×13 inch baking dish. Bake it in the preheated oven for 30-35 minutes, or until a toothpick inserted into the center comes out clean. (Pro Tip: Don’t open the oven door too soon; this can cause your cake to sink!)
-
Cool the Cake: Once baked, remove the cake from the oven and let it cool in the pan for about 15 minutes. This allows it to set properly and makes it easier to poke!
-
Poke the Cake: Now for the fun part! Use the handle of a wooden spoon or a large fork to poke holes all over the surface of the cake. Aim for a pattern, but random works too! The more holes, the more pudding can seep in!
-
Mix the Pudding: While the cake cools, whisk together the chocolate pudding mix and milk in a separate bowl. Make sure there are no lumps! Once combined, let it rest for a few minutes until it thickens up slightly.
-
Pour the Pudding: Gently pour the chocolate pudding over the poked cake, making sure it seeps into all the holes. This is what makes the cake ultra moist and decadently chocolatey!
-
Chill the Cake: Cover the cake with plastic wrap and let it chill in the refrigerator for at least 2 hours (or overnight if you can resist!). This allows the pudding to set fully and brings all the flavors together.
-
Add the Topping: Before serving, spread the whipped topping evenly over the pudding layer. Add your chocolate chips on top for that delightful crunch!
-
Drizzle with Chocolate Syrup: Last but not least, drizzle chocolate syrup artfully over the top. Don’t be shy – the more, the merrier!
Serving Suggestions
Slice your Death By Chocolate Poke Cake into generous squares and serve with an extra dollop of whipped topping on the side. It’s perfect for potlucks, birthdays, or a casual weeknight dessert. Consider serving with a scoop of vanilla ice cream for that wonderful contrast of flavors!
Recipe Variations
Ready to get creative? Here are some variations to try:
-
Nutty Surprise: Fold in chopped nuts like walnuts or hazelnuts into the chocolate pudding before pouring it over the cake for an added crunch.
-
Mint Chocolate: Add a few drops of mint extract to the pudding mixture for a refreshing twist that pairs beautifully with chocolate.
-
Peanut Butter Delight: Swirl in some creamy peanut butter into the whipped topping or sprinkle crushed peanut butter cups on top for a Reese’s-inspired version!
-
Coffee Infusion: Replace a portion of the milk with brewed coffee for a mocha-style cake that’s simply irresistible.
-
Sprinkles Galore: For a fun celebratory touch, add colorful sprinkles to the topping for festive flair.
Chef’s Notes
This recipe has been a staple in my home for years and has undergone some delightful transformations. When I first tried making it vegan, I swapped the eggs for applesauce and used coconut whipped cream instead of regular whipped topping. It was a hit with both my vegan friends and non-vegan guests alike!
Another funny memory I have is the time I attempted to make a "healthier" version (I know, what was I thinking?) by reducing the sugar and using whole wheat cake mix. Let’s just say, while it was still edible, lush and moist it was not! Lesson learned: sometimes you just need to indulge – and this cake is the perfect excuse!
FAQs and Troubleshooting
Q: My cake sank in the middle. What went wrong?
A: This could be due to underbaking or opening the oven door too early. Make sure to bake it fully until a toothpick comes out clean!
Q: Can I use homemade pudding instead of instant?
A: Absolutely! Just pour the warm pudding over the poked cake and let it soak in. Be mindful to chill the cake longer since homemade pudding may have a different consistency.
Q: How long will this cake stay fresh?
A: In the refrigerator, it should last for about 3-4 days, though trust me, it won’t last long once you share it!
Q: Can I freeze this cake?
A: Yes! Just cover it well with plastic wrap and foil. To serve, thaw it in the refrigerator overnight and enjoy. However, note that the whipped topping may not be as fresh as when originally made.
Nutritional Info
(Optional)
For those conscious of their nutritional intake, a slice of Death By Chocolate Poke Cake typically contains:
- Calories: Approximately 400
- Total Fat: 20g
- Saturated Fat: 10g
- Sugar: 30g
- Protein: 5g
(Note: Nutritional values will vary depending on ingredients used.)
And there you have it! The perfect dessert to welcome chocolate lovers into your home. I hope you enjoy making and sharing this Death By Chocolate Poke Cake as much as I have. Tie on your apron, get ready to indulge, and may your kitchen be filled with laughter and delicious aromas! Happy baking!
PrintDeath By Chocolate Poke Cake

A rich, moist chocolate cake soaked in chocolate pudding, layered with whipped topping, and topped with chocolate chips.
- Prep Time: 15 minutes
- Cook Time: 35 minutes
- Total Time: 50 minutes
- Yield: 12 servings 1x
- Category: Dessert
- Method: Baking
- Cuisine: American
- Diet: Vegetarian
Ingredients
- 1 box chocolate cake mix
- Ingredients required to prepare the cake (usually eggs, water, and oil)
- 1 cup chocolate pudding mix
- 2 cups milk
- 1 cup whipped topping
- 1 cup chocolate chips
- Chocolate syrup for drizzling
Instructions
- Preheat your Oven to 350°F (175°C).
- Prepare the Cake Mix by combining the chocolate cake mix with the required ingredients.
- Bake the Cake in a greased 9×13 inch baking dish for 30-35 minutes.
- Cool the Cake in the pan for about 15 minutes.
- Poke the Cake using the handle of a wooden spoon.
- Mix the Pudding by whisking together the chocolate pudding mix and milk.
- Pour the Pudding over the poked Cake.
- Chill the Cake in the refrigerator for at least 2 hours.
- Add the Topping by spreading the whipped topping over the pudding layer.
- Drizzle with Chocolate Syrup before serving.
Notes
Consider serving with a scoop of vanilla ice cream for contrast.
Nutrition
- Serving Size: 1 serving
- Calories: 400
- Sugar: 30g
- Sodium: 300mg
- Fat: 20g
- Saturated Fat: 10g
- Unsaturated Fat: 6g
- Trans Fat: 0g
- Carbohydrates: 52g
- Fiber: 2g
- Protein: 5g
- Cholesterol: 50mg
Keywords: chocolate cake, poke cake, dessert, chocolate dessert

Easy Baklava Recipe
Easy Baklava Recipe: A Sweet Journey to Your Table
Hello, fellow foodies! Savannah here, and I am absolutely thrilled to dive into the world of baklava with you today! If you’re new to this iconic Middle Eastern pastry, prepare to be enchanted. Baklava is a delicious layered dessert made with flaky phyllo dough, chopped nuts, and a sticky honey syrup that comes together like magic. It’s the kind of treat that feels both elegant and comforting, perfect for special occasions or a sweet addition to your afternoon tea. So, gather your ingredients and let’s make some baklava together!
A Sweet Memory: The First Time I Made Baklava
I remember the first time I tried to make baklava in my tiny apartment kitchen. I was excited but also a bit intimidated—after all, phyllo dough has a reputation for being finicky, right? I still recall the smell of melted butter wafting through my space as I carefully layered each sheet, envisioning my creation transforming into a golden delight. I had a friend visiting, and as we snacked on the crispy edges while it baked, we giggled at our culinary misadventures, grateful we’d opted for pre-chopped nuts to save time. Fast forward to the final product—perfectly golden, sweet, and so sumptuous. Each bite was like a warm hug from the inside out! Since that day, baklava has become a staple in my home, both for entertaining friends and for those cozy days when I want something special to enjoy with a cup of tea.
Ingredients for Baklava
Here’s what you’ll need to create this delightful dessert:
-
Phyllo Dough (1 package, 16 ounces): This is the heart of your baklava! Thaw according to package instructions before you start. If you’re feeling adventurous and won’t mind some extra time, you can make your own, but pre-made is perfectly fine!
-
Butter (1 1/4 cups, melted): This luscious ingredient is critical for layering your phyllo sheets with flavor and richness. If you’re looking for a lighter option, consider using olive oil instead, though the flavor will vary.
-
Walnuts (8 ounces, finely chopped): They add a lovely crunch and nutty flavor to the baklava. You could substitute with pecans if you prefer a sweeter taste.
-
Pistachios (8 ounces, shelled and finely chopped): They contribute both texture and a pop of color to contrast with the walnuts. Feel free to get creative with your nut choices; almonds or cashews are delicious alternatives!
-
Ground Cinnamon (1 teaspoon): This adds warmth and spice to the mixture. For a more unique flavor, consider using nutmeg or even cardamom!
-
Granulated Sugar (1 cup): This sweetens the filling and helps create that syrupy goodness. For a healthier option, you could use coconut sugar or a sugar substitute—but be mindful of the flavor change.
-
Water (3/4 cup): This is essential for making your syrup.
-
Honey (1/2 cup): Nothing compares to the rich sweetness it provides. If you’re looking for vegan alternatives, you might try maple syrup, but again, keep in mind the taste.
-
Lemon Juice (2 tablespoons): This adds a touch of brightness to balance out the sweetness of the syrup.
-
Fresh Orange Peel (1 2-inch piece): This subtle citrus note infuses the syrup with a refreshing flavor. If you don’t have orange, lemon zest works just as beautifully.
Step-by-Step Instructions for Making Baklava
Now that we’ve gathered our ingredients, it’s time to get cooking! Follow these steps to create your baklava masterpiece.
-
Preheat Your Oven: Start by preheating your oven to 350°F (175°C). This ensures that your baklava bakes evenly and turns out golden and delicious.
-
Prep the Phyllo: Unroll your phyllo dough carefully, keeping it covered with a damp towel to prevent it from drying out. Working with phyllo can be delicate, but don’t stress! If a sheet tears, just patch it with another—your baklava will still taste fabulous.
-
Butter Your Baking Dish: Grab a 9×13-inch baking dish (or a similar size) and brush it generously with melted butter. This is crucial for preventing sticking and creating those flaky layers.
-
Layer the Phyllo: Place one sheet of phyllo dough in the dish and brush it with more melted butter. Repeat this process, layering about 8-10 sheets, brushing each one with butter. This creates a lovely flaky base.
-
Prepare the Nut Mixture: In a bowl, combine the finely chopped walnuts, pistachios, ground cinnamon, and a couple of tablespoons of sugar. Mix well and then evenly spread half of the nut mixture over the phyllo layers.
-
Continue Layering: Add another 5-7 sheets of buttered phyllo on top of the nut mixture—remember to butter each sheet well. Follow with the remaining nut mixture and another layer of phyllo, keeping the same buttering routine.
-
Finish with Phyllo: Once you’ve added all your filling, top everything off with 6-8 more buttered sheets of phyllo. The top layer is your protective layer, so make sure it’s well-buttered for that beautiful golden finish.
-
Slice Before Baking: Using a sharp knife, cut through the layers into diamond or square shapes. This allows the syrup to soak in later, and it gives your baklava that classic appearance.
-
Bake the Baklava: Place your dish into the preheated oven and bake for about 45-50 minutes or until the top is golden brown and crispy. Your kitchen will smell heavenly during this time!
-
Prepare the Syrup: While the baklava bakes, it’s time to make the syrup. In a saucepan, combine water, granulated sugar, honey, lemon juice, and the fresh orange peel. Bring it to a boil and then reduce the heat, letting it simmer for about 10-15 minutes until slightly thickened.
-
Soak the Baklava: Once the baklava is done baking, remove it from the oven and pour the hot syrup over the hot baklava. Allow it to sit and soak for at least 4-5 hours, or better yet, overnight! The longer it sits, the more syrup it will absorb, making it even more delicious.
Serving Suggestions
When it comes to serving your baklava, presentation is key! Arrange the pieces on a beautiful serving platter, maybe with some fresh mint leaves sprigged around for that lovely touch of green. Drizzle a little extra honey over the top, or sprinkle with some additional chopped nuts for that gourmet look. Have some tea or Turkish coffee on hand to complement the sweetness of the baklava. It’s the perfect pairing!
Recipe Variations
Feeling adventurous? Here are a few ways you can customize your baklava:
-
Chocolate Drizzle: For all the chocolate lovers out there—melt some chocolate and drizzle it over the completed baklava for a rich twist.
-
Spiced Nut Blend: Experiment with different spices in your nut mixture, such as nutmeg or cardamom, for a warm flavor profile.
-
Fruits and Nuts: Add dried fruits like raisins or cranberries to the nut mix for extra sweetness and texture.
-
Nut-Free Option: If you’re dealing with nut allergies, try finely chopped sunflower seeds or pumpkin seeds instead. The texture will be different, but still tasty!
-
Pastry with a Twist: Layer some freshly sliced apples or pears between the phyllo and nut mixture. It’s a fun way to add a fruity layer that complements the spices beautifully.
Chef’s Notes
Ah, baklava has certainly evolved in my kitchen—from an ambitious baking project to a beloved family recipe. I’ve swapped ingredients based on what’s on hand and played with flavors, and each time, it’s a delicious success. The joy of making baklava is not just in the end result, but in the stories shared while layering those delicate sheets of phyllo. While making it once felt like a daunting task, I can confidently say it’s one of the most rewarding desserts you could ever whip up! I promise you, once you get the hang of it, you’ll find joy in sharing this treat with loved ones, as I do.
FAQs and Troubleshooting
1. My baklava is soggy! What did I do wrong?
A: This might happen if you didn’t allow the syrup to cool before pouring it over the hot baklava, or if you didn’t let the baklava absorb the syrup sufficiently. Allow it some time to sit overnight, and it will soak in beautifully.
2. How do I know when my baklava is done baking?
A: Look for a rich golden brown color on the top layers. If it’s still pale after 45-50 minutes, give it a few extra minutes. Just keep an eye on it so it doesn’t burn!
3. Can I freeze baklava?
A: Yes, absolutely! Freeze it before adding syrup, then wrap it tightly in plastic wrap and store in an airtight container. When you’re ready to enjoy, thaw, bake until warm, and then add the syrup!
4. What can I substitute if I don’t have phyllo dough?
A: While phyllo dough is traditional for baklava, you can try using puff pastry as a different texture alternative. However, the result will be somewhat different in taste and texture.
Nutritional Info
While I won’t provide exact nutritional info here, keep in mind that baklava, while delicious, is indulgent. A piece of this lovely dessert is best savored slowly. Be mindful of portion sizes since it’s rich and sweet!
Now that you’ve got the full scoop on making baklava, I can’t wait for you to give it a try! Remember, cooking and baking can be as much about the process—and the laughter shared in the kitchen—as it is about the final dish. So roll up those sleeves, tie on your apron, and let’s create something beautiful together. Happy baking!
PrintEasy Baklava Recipe

A delicious layered dessert made with phyllo dough, chopped nuts, and honey syrup, perfect for special occasions or afternoon tea.
- Prep Time: 30 minutes
- Cook Time: 50 minutes
- Total Time: 80 minutes
- Yield: 24 servings
- Category: Dessert
- Method: Baking
- Cuisine: Middle Eastern
- Diet: Vegetarian
Ingredients
- Phyllo Dough (1 package, 16 ounces, thawed)
- Butter (1 1/4 cups, melted)
- Walnuts (8 ounces, finely chopped)
- Pistachios (8 ounces, shelled and finely chopped)
- Ground Cinnamon (1 teaspoon)
- Granulated Sugar (1 cup)
- Water (3/4 cup)
- Honey (1/2 cup)
- Lemon Juice (2 tablespoons)
- Fresh Orange Peel (1 piece, 2-inch)
Instructions
- Preheat your oven to 350°F (175°C).
- Prep the phyllo by unrolling it and covering it with a damp towel.
- Butter your baking dish generously with melted butter.
- Layer one sheet of phyllo in the dish and brush with butter, repeating with 8-10 sheets.
- Prepare the nut mixture by combining walnuts, pistachios, cinnamon, and sugar.
- Spread half of the nut mixture over the phyllo layers.
- Continue layering with 5-7 more sheets of buttered phyllo and the remaining nut mixture.
- Finish with 6-8 more buttered sheets of phyllo on top.
- Slice the baklava into diamond or square shapes.
- Bake for 45-50 minutes until golden brown and crispy.
- Prepare the syrup by simmering water, sugar, honey, lemon juice, and orange peel.
- Soak the baked baklava with hot syrup and let it sit for at least 4-5 hours or overnight.
Notes
Allow baklava to soak longer for better flavor absorption. Serve with fresh mint and a drizzle of honey for a gourmet touch.
Nutrition
- Serving Size: 1 piece
- Calories: 250
- Sugar: 18g
- Sodium: 60mg
- Fat: 16g
- Saturated Fat: 6g
- Unsaturated Fat: 10g
- Trans Fat: 0g
- Carbohydrates: 30g
- Fiber: 2g
- Protein: 3g
- Cholesterol: 30mg
Keywords: baklava, dessert, phyllo dough, Middle Eastern, sweet treat, layered dessert, nuts, honey
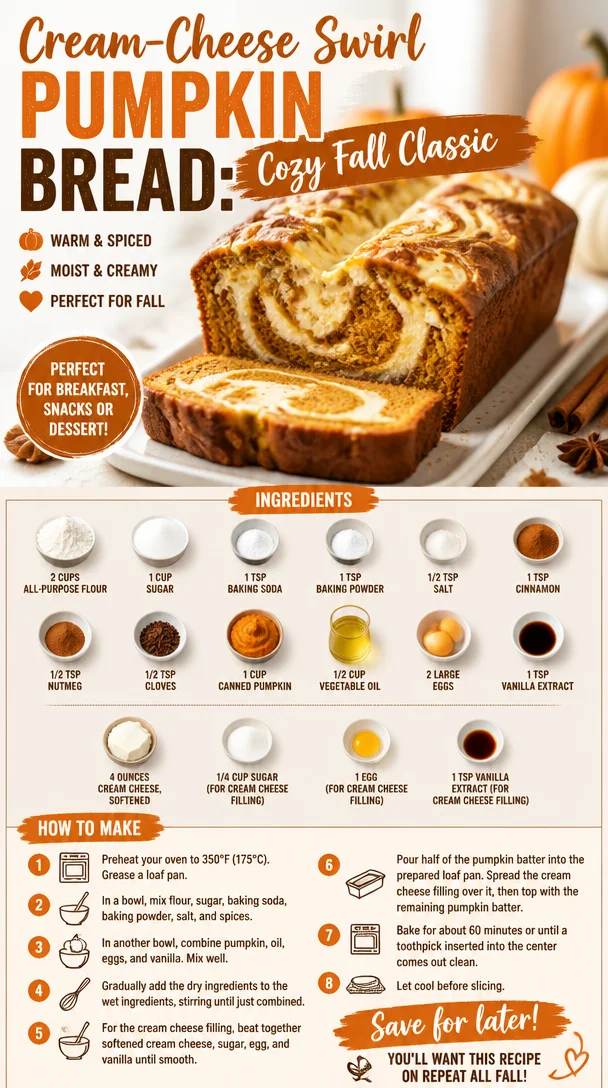
Cream-Cheese Swirl Pumpkin Bread: Cozy Fall Classic
The Ultimate Pumpkin Bread with Cream Cheese Recipe: A Slice of Fall Heaven
Hello, friends! With crisp autumn air, vibrant leaves painting the landscape, and the scent of warm spices filling the kitchen, it’s officially the season for pumpkin bread. There’s something truly magical about this loaf — a blend of cozy flavors that instantly creates the warmest feelings of nostalgia. Whether you’re whipping it up for a Sunday brunch, a cozy gathering, or simply to enjoy with your morning coffee, this pumpkin bread with cream cheese is a must-try!
With every slice, you’re not just satisfying your sweet tooth; you’re embracing the essence of fall. Join me as we dive into this recipe, filled with warmth and a dash of nostalgia that’ll make your kitchen feel like home.
A Slice of My Pumpkin Bread Memory
Let me take you back to my childhood kitchen, where autumn meant two things: the vibrant colors of fallen leaves outside, and the mouth-watering aroma of pumpkin bread wafting through the house. My grandmother, adorned in her worn-out apron, would gather us kids around the counter. Each year, she insisted we get our hands sticky, mixing the batter as we laughed and exchanged stories.
I vividly remember the first time I cracked an egg for the cream cheese filling. It felt like a rite of passage! That simple act of folding in the cream cheese mixture always added a layer of excitement. When that loaf came out of the oven — golden-brown, with a glossy, sugar-dusted top — you could almost hear our collective gasps of delight. It was a family ritual, a moment of pure joy! Today, I pass that same magic on to you with this easy yet indulgent pumpkin bread recipe that captures the essence of those cherished moments.
Ingredients: The Essentials for Your Perfect Pumpkin Bread
Here’s what you’ll need for this incredible pumpkin bread with cream cheese filling, along with a few tips to ensure you’ve got the best results:
-
2 cups all-purpose flour: This forms the structure of your bread. You can substitute with whole wheat flour for a nuttier flavor or gluten-free flour if needed.
-
1 cup sugar: Sweetness is key! You can reduce this by using coconut sugar or maple syrup for a more natural option.
-
1 teaspoon baking soda: It provides that lovely rise you’re after.
-
1 teaspoon baking powder: This helps ensure your loaf is fluffy and not dense.
-
1/2 teaspoon salt: Just enough to balance the sweetness.
-
1 teaspoon cinnamon: The classic fall spice.
-
1/2 teaspoon nutmeg: Adds that distinctive warmth.
-
1/2 teaspoon cloves: A little goes a long way in enhancing flavors.
-
1 cup canned pumpkin: This is where the magic happens! Fresh pumpkin can also work, just make sure it’s properly pureed.
-
1/2 cup vegetable oil: For moisture; you can also use melted coconut oil for a tropical twist.
-
2 large eggs: Acts as a binder for your ingredients.
-
1 teaspoon vanilla extract: Because it’s just better with a splash of vanilla.
-
4 ounces cream cheese, softened: The star of our filling. Make sure it’s at room temperature for smooth mixing!
-
1/4 cup sugar (for cream cheese filling): Enhances the sweetness of the cream cheese.
-
1 egg (for cream cheese filling): Helps bind the cream cheese mixture.
-
1 teaspoon vanilla extract (for cream cheese filling): Adds extra flavor to the filling.
Step-by-Step Instructions: Let’s Get Baking!
Now, let’s roll up our sleeves and bake this lovely bread together! Follow these steps, and you’ll not only have a delicious loaf but will also create memories along the way.
-
Preheat Your Oven: Set your oven to 350°F (175°C) and grease a 9×5-inch loaf pan. A lined pan helps with easy removal later.
-
Mix the Dry Ingredients: In a large bowl, whisk together the flour, sugar, baking soda, baking powder, salt, cinnamon, nutmeg, and cloves. Making sure they’re well combined helps ensure an even flavor.
-
Combine the Wet Ingredients: In another bowl, mix the canned pumpkin, vegetable oil, 2 eggs, and 1 teaspoon of vanilla extract. Make sure everything is blended smoothly. If you love a hint of nuttiness, feel free to add some chopped walnuts or pecans here!
-
Fold them Together: Pour the wet ingredients into the dry ingredients. Gently mix until just combined! A few lumps are perfectly okay. Over-mixing could lead to a dense loaf, and we want it fluffy!
-
Prepare the Cream Cheese Filling: In a separate bowl, beat together the softened cream cheese, 1/4 cup sugar, 1 egg, and 1 teaspoon vanilla extract until smooth. It should be creamy and spreadable.
-
Layer the Mixtures: Transfer half the pumpkin batter to the prepared loaf pan, smoothing it out. Next, dollop the cream cheese mixture over the batter, spreading it gently to create an even layer. Finish off by pouring the remaining pumpkin batter on top. Don’t worry about perfection — it’s the little imperfections that make it homemade!
-
Bake Away: Place the loaf in your preheated oven and bake for about 60-70 minutes. The top should be golden brown, and a toothpick inserted into the center should come out clean.
-
Cool: Once baked, allow the bread to cool in the pan for about 20 minutes before transferring it to a wire rack. This step ensures that the bread holds its shape.
-
Slice and Enjoy: After a bit of patience while it cools, slice the bread and watch the beautiful cream cheese swirl emerge. Heaven!
Serving Suggestions: How to Present Your Pumpkin Bread
For that Instagram-worthy shot (if you’re into that kind of thing!), slice your pumpkin bread and arrange it on a beautiful platter. A drizzle of honey or maple syrup can add a lovely touch. Garnish with a sprinkle of cinnamon or a dollop of whipped cream cheese. Pair it with a hot cup of your favorite spiced latte for an extra cozy vibe.
Recipe Variations: Get Creative!
-
Chocolate Chip Pumpkin Bread: Fold in a cup of chocolate chips to the batter for a decadent touch.
-
Nutty Banana-Pumpkin Fusion: Add a mashed ripe banana for moisture and flavor depth while incorporating some walnuts for crunch.
-
Gluten-Free Version: Swap in gluten-free baking flour and ensure your baking powder is certified gluten-free.
-
Maple Sugar Sweetness: Replace regular sugar with maple sugar for a unique twist that’s perfect for fall.
-
Vegan Option: Use flax eggs (1 tablespoon of ground flaxseed mixed with 2.5 tablespoons of water for each egg) and non-dairy cream cheese to make it vegan-friendly.
Chef’s Notes: A Little Extra Love
Fall has a special place in my heart, and this pumpkin bread takes me back to those cherished moments in my grandmother’s kitchen. Each time I bake it, I’m greeted with the same warmth, just like having her by my side. And since then, I’ve played with this recipe, adapting flavors and filling options — it never fails to inspire creativity in my kitchen. You might find layers of apple or even a hint of bourbon-infused spices when I’m feeling adventurous!
FAQs and Troubleshooting: Let’s Clear Up Your Questions!
-
Why did my pumpkin bread turn out dense?
- This can happen if the batter was overmixed or if you packed the flour too tightly. Ensure you use the spoon-and-level method for measuring flour and mix just until combined.
-
Can I freeze the pumpkin bread?
- Absolutely! Wrap it tightly in plastic wrap and aluminum foil before storing it in the freezer. It should last up to three months. Just defrost at room temperature when you’re ready to enjoy.
-
How do I know when my bread is done baking?
- Aside from the toothpick test, your bread should slightly spring back when you gently press the top and look for a golden-brown color.
-
Is it necessary to add eggs?
- Eggs act as binders and contribute to the moisture content. If you’re looking for an eggless option, flax eggs are a great substitute, or you could use unsweetened applesauce.
Nutritional Info (Optional)
This delicious pumpkin bread offers a little taste of nostalgia while packing a flavorful punch. Although it’s a treat, here’s a rough estimate for one slice (about 1/12th of the recipe):
- Calories: 200
- Total Fat: 9g
- Saturated Fat: 2g
- Cholesterol: 30mg
- Sodium: 160mg
- Total Carbohydrates: 30g
- Dietary Fiber: 1g
- Sugars: 10g
- Protein: 3g
So there you have it, friends! An incredible pumpkin bread with cream cheese recipe that’s not only a treat for the taste buds but a journey back to those moments spent in the kitchen. I hope you’ll create your own beautiful memories as you bake this loaf. Let’s gather around the table, savor each slice, and celebrate the joys of food together. Happy baking!
PrintThe Ultimate Pumpkin Bread with Cream Cheese
This pumpkin bread with cream cheese filling captures the essence of fall with cozy flavors and nostalgia.
- Prep Time: 15 minutes
- Cook Time: 70 minutes
- Total Time: 85 minutes
- Yield: 12 servings 1x
- Category: Dessert
- Method: Baking
- Cuisine: American
- Diet: Vegetarian
Ingredients
- 2 cups all-purpose flour
- 1 cup sugar
- 1 teaspoon baking soda
- 1 teaspoon baking powder
- 1/2 teaspoon salt
- 1 teaspoon cinnamon
- 1/2 teaspoon nutmeg
- 1/2 teaspoon cloves
- 1 cup canned pumpkin
- 1/2 cup vegetable oil
- 2 large eggs
- 1 teaspoon vanilla extract
- 4 ounces cream cheese, softened
- 1/4 cup sugar (for cream cheese filling)
- 1 egg (for cream cheese filling)
- 1 teaspoon vanilla extract (for cream cheese filling)
Instructions
- Preheat your oven to 350°F (175°C) and grease a 9×5-inch loaf pan.
- Mix the dry ingredients: In a large bowl, whisk together the flour, sugar, baking soda, baking powder, salt, cinnamon, nutmeg, and cloves.
- Combine the wet ingredients: In another bowl, mix the canned pumpkin, vegetable oil, 2 eggs, and 1 teaspoon of vanilla extract.
- Fold them together: Pour the wet ingredients into the dry ingredients and gently mix until just combined.
- Prepare the cream cheese filling: In a separate bowl, beat together the softened cream cheese, 1/4 cup sugar, 1 egg, and 1 teaspoon vanilla extract until smooth.
- Layer the mixtures: Transfer half the pumpkin batter to the prepared loaf pan, dollop the cream cheese mixture over it, and pour the remaining pumpkin batter on top.
- Bake for about 60-70 minutes until the top is golden brown and a toothpick inserted into the center comes out clean.
- Cool in the pan for about 20 minutes before transferring to a wire rack.
- Slice and enjoy your homemade pumpkin bread!
Notes
For an Instagram-worthy shot, slice and arrange on a platter. Drizzle with honey or maple syrup and garnish with cinnamon.
Nutrition
- Serving Size: 1 slice
- Calories: 200
- Sugar: 10g
- Sodium: 160mg
- Fat: 9g
- Saturated Fat: 2g
- Unsaturated Fat: 7g
- Trans Fat: 0g
- Carbohydrates: 30g
- Fiber: 1g
- Protein: 3g
- Cholesterol: 30mg
Keywords: pumpkin bread, fall recipes, cream cheese, cozy baking, sweet treats