Elderflower Tart
A Taste of Elegance: Creating Your Own Delightful Elderflower Tart
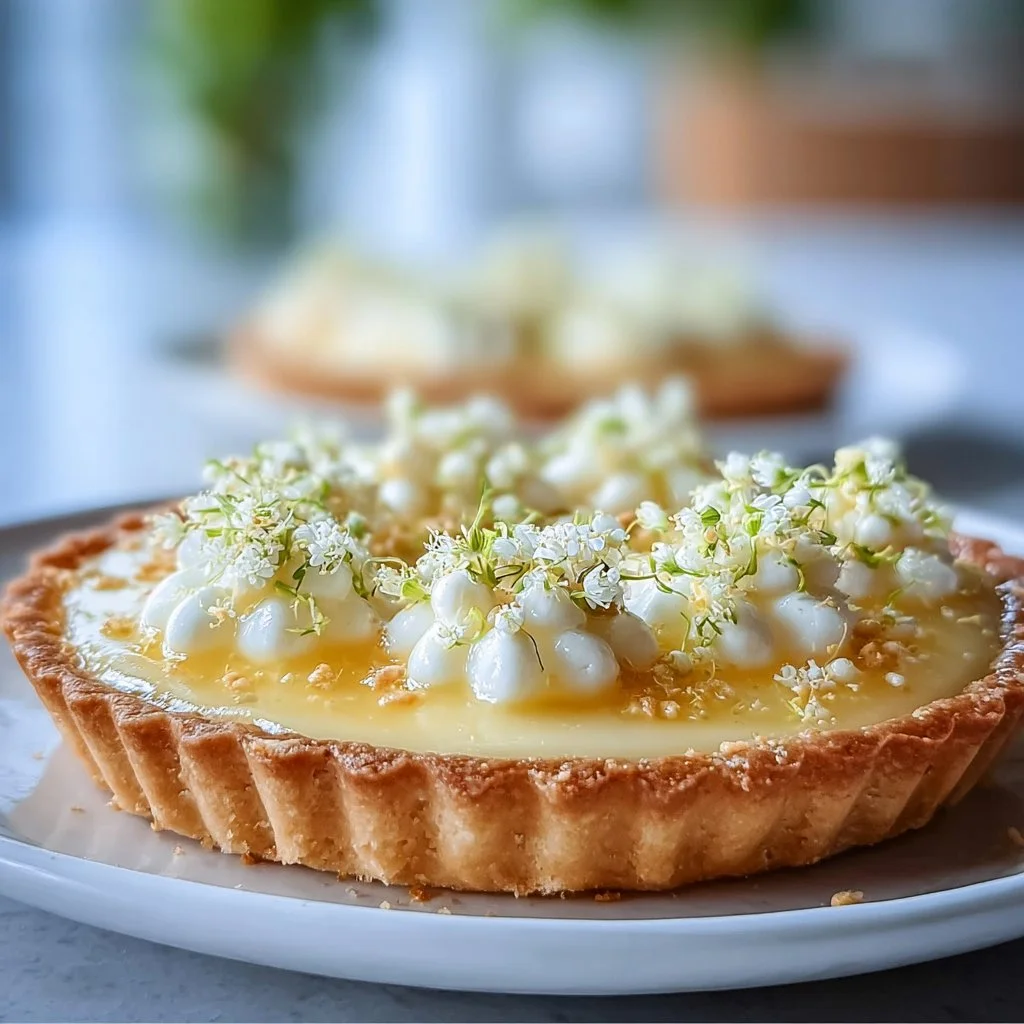
Hello, friends! Today, I’m excited to share a recipe that embodies elegance and simplicity: the Elderflower Tart. This delightful dessert is a perfect showcase of fresh flavors, with a refreshing twist brought by the delicate notes of elderflower. Whether you’re planning a stylish dinner party or just looking to impress your family on a regular Tuesday night, this tart will undoubtedly steal the spotlight at your table.
A Slice of Nostalgia
I’ll never forget the first time I tasted an elderflower-infused dessert. I was at a quaint little café tucked away in the English countryside during college. It was one of those serene afternoons where the sun danced through the leaves, and everything felt just right. I ordered a slice of elderflower tart—not quite knowing what to expect—and with the first bite, I was transported. The creamy lemon curd blended effortlessly with the sweet floral essence of elderflower, creating a taste sensation that was both comforting and refreshing.
I remember savoring that tart while chatting with friends about dreams, life decisions, and where we’d go after graduation. It was an inspiring moment—one that ignited my passion for creating desserts that not only taste incredible but also evoke fond memories. Now, that same excitement fills my kitchen every time I make this elderflower tart.
Ingredients
Let’s gather our ingredients! Here’s what you’ll need to create this stunning tart:
-
1 cup all-purpose flour: The foundation of your tart crust. You can substitute with a gluten-free flour blend if needed, just remember to add a pinch of xanthan gum to help with structure.
-
1/2 cup unsalted butter, cold and cubed: Chilled butter makes for a flaky crust. If you’re lactose intolerant, feel free to use a dairy-free butter substitute.
-
1/4 cup powdered sugar: This sweetener helps create a tender, melt-in-your-mouth crust. If you’re out of powdered sugar, you can blend granulated sugar in a food processor until fine.
-
1/4 teaspoon salt: Enhances the flavors in your crust. A pinch of sea salt works wonders too if you prefer!
-
2-3 tablespoons cold water: This is key for bringing your dough together. If your kitchen is especially warm, add more water as needed to achieve a workable dough.
-
1 cup lemon curd: The zingy, creamy filling that pairs beautifully with elderflower. Store-bought works just fine, but nothing beats homemade if you have the time!
-
1/2 cup elderflower syrup: This sweet elixir embodies the flowery notes that make this tart stand out. If you can’t find elderflower syrup, a splash of lavender syrup is a fantastic alternative.
-
Fresh berries for garnish (optional): They add color and a burst of freshness. Choose your favorites—blueberries, raspberries, or strawberries all complement the tart beautifully.
Step-by-Step Instructions
Now that we’ve rounded up our ingredients, it’s time to get cooking! Follow these step-by-step instructions for creating your own beautiful elderflower tart:
-
Make the Tart Crust: In a mixing bowl, combine the all-purpose flour, powdered sugar, and salt. Whisk them together to combine. Next, add in the cold, cubed butter. Using a pastry cutter or your fingertips, work the butter into the flour mixture until it resembles coarse crumbs (think peas!).
Chef’s Tip: Keep the butter as cold as possible. If your kitchen is warm, pop the bowl in the refrigerator for a few minutes to chill.
-
Bring it Together: Gradually add the cold water, one tablespoon at a time, mixing with a fork until the dough just comes together. Avoid overworking it! Once formed, shape the dough into a disc, wrap it in plastic wrap, and chill in the fridge for at least 30 minutes.
-
Roll out the Dough: After chilling, remove the dough and place it on a lightly floured surface. Roll it out to about 1/8-inch thickness. Don’t worry if it cracks a little; just patch it up as you fit it into your tart pan.
Chef’s Hack: To get it into your tart pan easily, roll the dough around your rolling pin and then unroll it over the pan!
-
Form the Crust: Gently press the dough into the corners of the tart pan, trimming any excess hanging over the edges. Prick the bottom of the crust with a fork to prevent it from puffing up during baking.
-
Blind Bake: Place a layer of parchment paper on top of the crust, fill it with pie weights or dried beans, and bake in a preheated oven at 375°F (190°C) for about 15-20 minutes. Remove the parchment and weights, and bake for an additional 5-10 minutes, until the crust is golden brown.
Chef’s Insight: Letting the crust cool completely will ensure that the filling doesn’t make it soggy.
-
Prepare the Filling: While the crust is cooling, mix the lemon curd and elderflower syrup in a bowl until well combined. If you’re using homemade lemon curd, this is where you’ll taste it and adjust the sweetness if needed!
-
Fill the Tart: Pour the elderflower-lemon mixture into the cooled crust, spreading it out evenly.
-
Chill and Set: Refrigerate the tart for at least 2 hours, allowing it to set properly.
-
Garnish Thoughtfully: When ready to serve, top with fresh berries for that pop of color and freshness.
Serving Suggestions
When it comes to plating your elderflower tart, remember that presentation is key. For a simple yet stunning display, slice your tart into wedges and arrange them on a beautiful cake stand. Garnish each slice with a few fresh berries and a sprig of mint for an added touch of elegance. If you want to elevate the experience, a dusting of powdered sugar or a dollop of whipped cream on the side is a lovely addition!
Recipe Variations
Feeling adventurous? Here are some creative twists you can try with your elderflower tart:
-
Berry Blast: Add a layer of mixed berry compote on top of the lemon curd before chilling for a fruity surprise.
-
Almond Shortbread Crust: Substitute half of the all-purpose flour with finely ground almonds for a nutty flavor.
-
Lemon-Lavender Fusion: Infuse a hint of lavender into the lemon curd for a floral pop alongside the elderflower.
-
Tartlets: Instead of a whole tart, adapt the recipe into mini tartlets for cute individual servings.
-
Vegan Twist: Use a plant-based butter and aquafaba (chickpea brine) for the lemon curd to create a vegan version.
Chef’s Notes
Every recipe holds a little bit of personal magic! The first time I made this elderflower tart for a gathering, I was nervous. Would everyone like it? I watched as my friends took their first bites, and the room filled with delighted smiles and “Mmm”s. It made me realize how food opens the door to connection and joy!
Since then, I’ve experimented with different flavor pairings. You could say this tart is a reflection of my culinary journey—always evolving, always warm, inviting, and ready to make people smile around the table.
FAQs and Troubleshooting
1. Why did my tart crust shrink during baking?
- This happens if the dough was overworked or not chilled enough. Make sure to chill the dough well before baking and avoid handling it too much.
2. Can I make this tart ahead of time?
- Absolutely! This tart keeps beautifully in the fridge for up to three days, making it perfect for parties!
3. What should I do if my lemon curd is too runny?
- If your lemon curd is too liquid, you can cook it a bit longer over low heat to thicken it up. Just be careful not to scorch it!
4. How do I store leftovers?
- Store any leftover tart in an airtight container in the refrigerator for up to three days. Avoid stacking anything on top to keep it intact!
Nutritional Info
Per serving (1 slice, based on 10 slices total):
- Calories: Approx. 210
- Total Fat: 10g
- Saturated Fat: 6g
- Carbohydrates: 30g
- Fiber: 1g
- Sugar: 8g
- Protein: 2g
Ready to tie on your apron and create something beautiful? I can’t wait for you to try this elderflower tart. It’s not just dessert; it’s an invitation to slow down, savor, and create joyful memories around your table. Happy baking!
PrintElderflower Tart

A delightful elderflower tart featuring a creamy lemon curd filling and a flaky crust, perfect for impressing guests or enjoying on a quiet evening.
- Prep Time: 30 minutes
- Cook Time: 30 minutes
- Total Time: 2 hours
- Yield: 10 servings 1x
- Category: Dessert
- Method: Baking
- Cuisine: British
- Diet: Vegetarian
Ingredients
- 1 cup all-purpose flour
- 1/2 cup unsalted butter, cold and cubed
- 1/4 cup powdered sugar
- 1/4 teaspoon salt
- 2–3 tablespoons cold water
- 1 cup lemon curd
- 1/2 cup elderflower syrup
- Fresh berries for garnish (optional)
Instructions
- Make the Tart Crust: In a mixing bowl, combine the all-purpose flour, powdered sugar, and salt. Whisk them together to combine. Add in the cold, cubed butter and work it into the flour mixture until it resembles coarse crumbs.
- Bring it Together: Gradually add the cold water, one tablespoon at a time, mixing with a fork until the dough just comes together. Shape into a disc, wrap in plastic wrap, and chill in the fridge for at least 30 minutes.
- Roll out the Dough: On a lightly floured surface, roll the dough out to about 1/8-inch thickness and fit it into your tart pan.
- Form the Crust: Press the dough into the corners of the tart pan, and prick the bottom with a fork.
- Blind Bake: Place parchment paper over the crust, fill with pie weights, and bake at 375°F (190°C) for 15-20 minutes. Remove weights and bake for another 5-10 minutes until golden brown.
- Prepare the Filling: Mix the lemon curd and elderflower syrup in a bowl until well combined.
- Fill the Tart: Pour the mixture into the cooled crust.
- Chill and Set: Refrigerate the tart for at least 2 hours.
- Garnish Thoughtfully: Top with fresh berries before serving.
Notes
For variations, consider adding mixed berry compote, using almond flour for the crust, or creating mini tartlets.
Nutrition
- Serving Size: 1 slice
- Calories: 210
- Sugar: 8g
- Sodium: 100mg
- Fat: 10g
- Saturated Fat: 6g
- Unsaturated Fat: 4g
- Trans Fat: 0g
- Carbohydrates: 30g
- Fiber: 1g
- Protein: 2g
- Cholesterol: 30mg
Keywords: elderflower, tart, dessert, lemon curd, baking, elegant dessert
Mango Curd Tart
Mango Curd Tart: A Sun-Kissed Delight
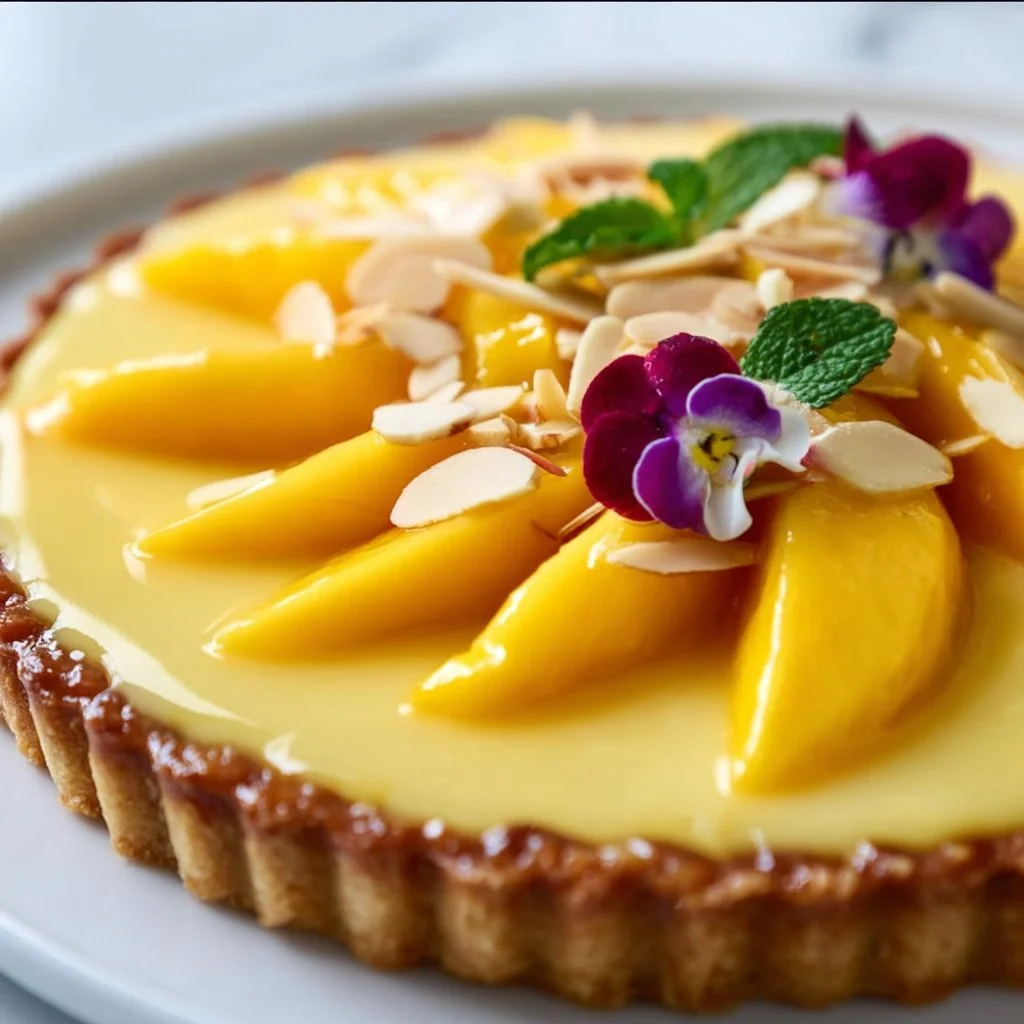
Hello, fellow food lovers! Have you ever taken a bite of something so delicious that it instantly transports you to a sun-drenched beach or a vibrant summer picnic? That’s exactly the kind of experience you’ll get with my Mango Curd Tart. With its creamy, luscious mango filling nestled in a buttery, melt-in-your-mouth crust, this dessert is a celebration of everything we love about summer — and it’s so easy to make!
Imagine hosting a dinner party, friends gathered around the table with laughter ringing in the air, and you proudly presenting this stunning tart as the grand finale. Trust me, the moment your guests take their first bite, you’ll see their eyes light up with delight, and you’ll be the star of the evening!
This tart holds a special place in my heart. Once, during a sunny afternoon at my friend Chloe’s garden, we decided to whip up something refreshing. With ripe mangoes just begging to be used and a little playful competition to see who could create the best dessert, the Mango Curd Tart was born! We stirred, whisked, and poured our way to a sweet victory as the tart baked, filling the kitchen with an irresistible aroma. In that lively atmosphere, friendships deepened, and belly laughs echoed. It became more than just a dessert — it was a token of memories made, laughter shared, and the sheer joy of cooking together.
Whether you’re looking to impress your guests or simply want to indulge in a slice of sunshine, this Mango Curd Tart is your answer. So, grab your apron, and let’s embark on this fruity journey together!
Personal Story
I don’t think there’s ever been a summer where mangoes didn’t play a starring role in our family gatherings. I remember one particularly hot weekend when my parents decided to host an impromptu BBQ. As the grill sizzled and the sweet scent of barbecued meats wafted through the air, my mom dashed into the kitchen, determined to create the ultimate summer dessert.
She pulled out her secret stash of ripe mangoes and a few essential baking ingredients. As I watched her transform simple ingredients into something magical, I realized that cooking was about the joy it brings — both in the process and in the delicious results. That day, we devoured palm-sized slices of mango tart, sticky with sweet juice and topped with whipped cream. Each bite was a reminder of summer warmth and family love.
Now, every time I whip up a Mango Curd Tart, it’s a little homage to those sunny days spent in the kitchen with my mom. It’s my way of reconnecting with that carefree spirit and celebrating the sweet, juicy goodness of mangoes. You’re going to love bringing this tart to life in your own kitchen!
Ingredients
Here’s what you’ll need to whip up this tropical delight:
- 1 1/2 cups all-purpose flour
- The foundation of your pastry crust. If you’re gluten-free, feel free to use a gluten-free all-purpose blend!
- 1/2 cup unsalted butter, softened
- Butter provides richness and flavor to the crust. Be sure it’s softened for easy mixing — you can also use coconut oil for a dairy-free option!
- 1/4 cup powdered sugar
- This sweetener results in a tender, melt-in-your-mouth crust. If you’re out, granulated sugar works in a pinch, though the texture will be slightly different.
- 1/4 teaspoon salt
- Just a pinch enhances the sweetness of the crust.
- 1 large egg yolk
- This helps bind your crust together and adds richness. If you need an egg-free option, consider using flaxseed meal mixed with water as a substitute.
- 1/4 cup cold water
- This helps bring your dough together; cold water solidifies the butter, ensuring a flaky crust.
- 1 cup mango puree
- Aim for fresh or frozen mangoes — just blend them until smooth! You can also use store-bought puree for convenience.
- 3/4 cup sugar
- This sweetens your curd. Feel free to reduce the sugar depending on your sweetness preference.
- 3 large eggs
- The eggs provide structure and creaminess. If you want an egg-free version, silken tofu blended until smooth can work too!
- 1/2 cup lemon juice
- Adds brightness and balances the sweetness — fresh is always best! If you’re in a pinch, bottled lemon juice works too.
- 1 tablespoon lemon zest
- A little zest gives that extra zing to your curd. If you don’t have lemons, limes or oranges could be alternate zest options!
- 1/2 cup heavy cream
- This transforms your curd into a luxurious experience. For a lighter option, you can use whipped coconut cream or dairy-free heavy cream.
Step-by-Step Instructions
Step 1: Prepare the Crust
-
Combine Dry Ingredients:
- In a mixing bowl, whisk together the all-purpose flour, powdered sugar, and salt. This helps evenly distribute the ingredients.
-
Cut in the Butter:
- Add the softened butter and, using your fingers or a pastry cutter, work it into the flour mixture until it resembles coarse crumbs. This is a fun step! Just think of it as a mini workout for your hands.
-
Add Egg Yolk:
- Mix in the egg yolk until combined. This adds a beautiful richness to your crust.
-
Incorporate Cold Water:
- Gradually add the cold water one tablespoon at a time, mixing gently until the dough comes together. Don’t overwork it; we want it tender!
-
Chill the Dough:
- Wrap the dough in plastic wrap and refrigerate for at least 30 minutes. This will make it easier to roll out later and help prevent shrinkage.
Step 2: Bake the Crust
-
Preheat Oven:
- Preheat your oven to 350°F (175°C). A warm oven is key for a perfectly baked tart!
-
Roll Out the Dough:
- On a lightly floured surface, roll out the chilled dough to about 1/8 inch thick. Carefully transfer it to a tart pan (a removable-bottom tart pan is great for easy serving).
-
Blind Bake:
- Prick the bottom with a fork and line it with parchment paper. Fill with pie weights or dried beans. Bake for 15 minutes or until lightly golden. Blind baking ensures a crisp crust.
-
Cool:
- Remove from the oven, take out the weights, and let the crust cool completely. Keep an eye on it as it cools; the slightly warm crust helps the curd set nicely!
Step 3: Prepare the Mango Curd
-
Combine Mango Puree and Sugar:
- In a saucepan over medium heat, whisk together the mango puree and sugar until the sugar fully dissolves. This fragrant step sets the stage for your curd.
-
Add Eggs and Lemon Juice:
- Gradually whisk in the eggs and the lemon juice. Make sure to whisk constantly to avoid scrambling the eggs! The mixture should be smooth and bright.
-
Cook the Mixture:
- Keep cooking and whisking constantly until the mixture thickens (this happens around 170°F; you can use a thermometer for precision). This process takes patience, but it’s worth it!
-
Strain (Optional):
- If you want the smoothest curd, strain the mixture through a fine-mesh sieve into a clean bowl. This removes any potential egg bits, giving you that silky texture.
-
Finish with Cream:
- Stir in the lemon zest and heavy cream until fully combined. Your mango curd will be magical, creamy, and oh-so-tropical!
Step 4: Assemble the Tart
-
Pour the Curd:
- Gently pour the mango curd into the cooled tart crust, spreading it evenly. Watching it fill the crust is like pouring sunshine!
-
Chill:
- Refrigerate the tart for at least 2-3 hours, allowing the curd to set perfectly. You can even leave it overnight for an easier day tomorrow!
Serving Suggestions
To serve your stunning Mango Curd Tart, slice it into wedges and garnish with a dollop of whipped cream, fresh mango slices, or mint leaves for a pop of color. A sprinkle of toasted coconut or crushed pistachios can add a delightful crunch!
The vibrant yellow of the mango curd contrasts beautifully with the buttery crust, making it a visually stunning centerpiece at any gathering.
Recipe Variations
- Berry Bliss: Replace mango puree with mixed berry puree for a tart berry version.
- Coconut Twist: Add shredded coconut to the curd for a tropical flair or use coconut cream instead of heavy cream for a dairy-free option.
- Spicy Kick: Incorporate a pinch of cayenne pepper or sliced jalapeños for a spicy kick to balance the sweetness.
- Citrus Medley: Mix in different citrus juices like orange or lime for a zesty twist!
- Nut Crust: Switch out the all-purpose flour for almond flour or hazelnut flour to add a nutty flavor and gluten-free option.
Chef’s Notes
Creating this Mango Curd Tart has been a delightful journey through the years. I still remember the first time I attempted to make curd from scratch. Let’s just say it was a year of trials and laughter! My earlier attempts often resulted in scrambled eggs — one time, I even managed to churn out a mango-flavored omelet!
But with each time I made it, I learned more about the delicate dance between heat and whisking, leading to the smooth, creamy curd we know and love today. This tart has become a staple in my kitchen, symbolizing the importance of persistent experimentation and savoring the process of cooking.
FAQs and Troubleshooting
1. Why did my curd turn out runny?
- Ensure you cooked the mixture until it thickened fully — the generous heat helps the eggs set properly.
2. Can I make the crust ahead of time?
- Absolutely! You can prepare the crust a day in advance, wrap it well, and store it in the fridge.
3. What if I don’t have a tart pan?
- No worries! Use a pie dish or even muffin tins for individual servings — just adjust the baking time.
4. How can I prevent my crust from shrinking?
- Cooling the dough and blind-baking are key. Try not to stretch it when placing it in the pan; instead, gently press it in.
Nutritional Info (Optional)
| Nutrient | Per Slice (1/8 of Tart) |
|———————|————————-|
| Calories | 300 |
| Total Fat | 18g |
| Saturated Fat | 10g |
| Cholesterol | 85mg |
| Sodium | 150mg |
| Total Carbohydrates | 35g |
| Dietary Fiber | 2g |
| Sugars | 20g |
| Protein | 3g |
There you have it — a delightful Mango Curd Tart recipe that’s more than just a dessert; it’s a celebration of flavors and memories! I hope it finds a special place in your kitchen, just as it has in mine. Enjoy every sunny bite — happy cooking!
PrintMango Curd Tart

A creamy and luscious mango filling nestled in a buttery, melt-in-your-mouth crust, perfect for summer gatherings.
- Prep Time: 30 minutes
- Cook Time: 30 minutes
- Total Time: 120 minutes
- Yield: 8 servings 1x
- Category: Dessert
- Method: Baking
- Cuisine: Tropical
- Diet: Vegetarian
Ingredients
- 1 1/2 cups all-purpose flour
- 1/2 cup unsalted butter, softened
- 1/4 cup powdered sugar
- 1/4 teaspoon salt
- 1 large egg yolk
- 1/4 cup cold water
- 1 cup mango puree
- 3/4 cup sugar
- 3 large eggs
- 1/2 cup lemon juice
- 1 tablespoon lemon zest
- 1/2 cup heavy cream
Instructions
- Combine Dry Ingredients: In a mixing bowl, whisk together the all-purpose flour, powdered sugar, and salt.
- Cut in the Butter: Add the softened butter and work it into the flour mixture until it resembles coarse crumbs.
- Add Egg Yolk: Mix in the egg yolk until combined.
- Incorporate Cold Water: Gradually add the cold water one tablespoon at a time, mixing gently until the dough comes together.
- Chill the Dough: Wrap the dough in plastic wrap and refrigerate for at least 30 minutes.
- Preheat Oven: Preheat your oven to 350°F (175°C).
- Roll Out the Dough: On a lightly floured surface, roll out the chilled dough to about 1/8 inch thick and transfer it to a tart pan.
- Blind Bake: Prick the bottom with a fork and line it with parchment paper. Bake for 15 minutes.
- Cool: Remove from the oven and let the crust cool completely.
- Combine Mango Puree and Sugar: In a saucepan, whisk together the mango puree and sugar over medium heat.
- Add Eggs and Lemon Juice: Gradually whisk in the eggs and lemon juice.
- Cook the Mixture: Keep cooking and whisking until the mixture thickens.
- Strain (Optional): Strain the mixture through a fine-mesh sieve into a clean bowl.
- Finish with Cream: Stir in the lemon zest and heavy cream until fully combined.
- Pour the Curd: Gently pour the mango curd into the cooled tart crust.
- Chill: Refrigerate the tart for at least 2-3 hours to set.
Notes
Garnish with whipped cream, fresh mango slices, or mint leaves before serving.
Nutrition
- Serving Size: 1 slice
- Calories: 300
- Sugar: 20g
- Sodium: 150mg
- Fat: 18g
- Saturated Fat: 10g
- Unsaturated Fat: 6g
- Trans Fat: 0g
- Carbohydrates: 35g
- Fiber: 2g
- Protein: 3g
- Cholesterol: 85mg
Keywords: Mango, Curd, Tart, Summer Dessert, Tropical Dessert