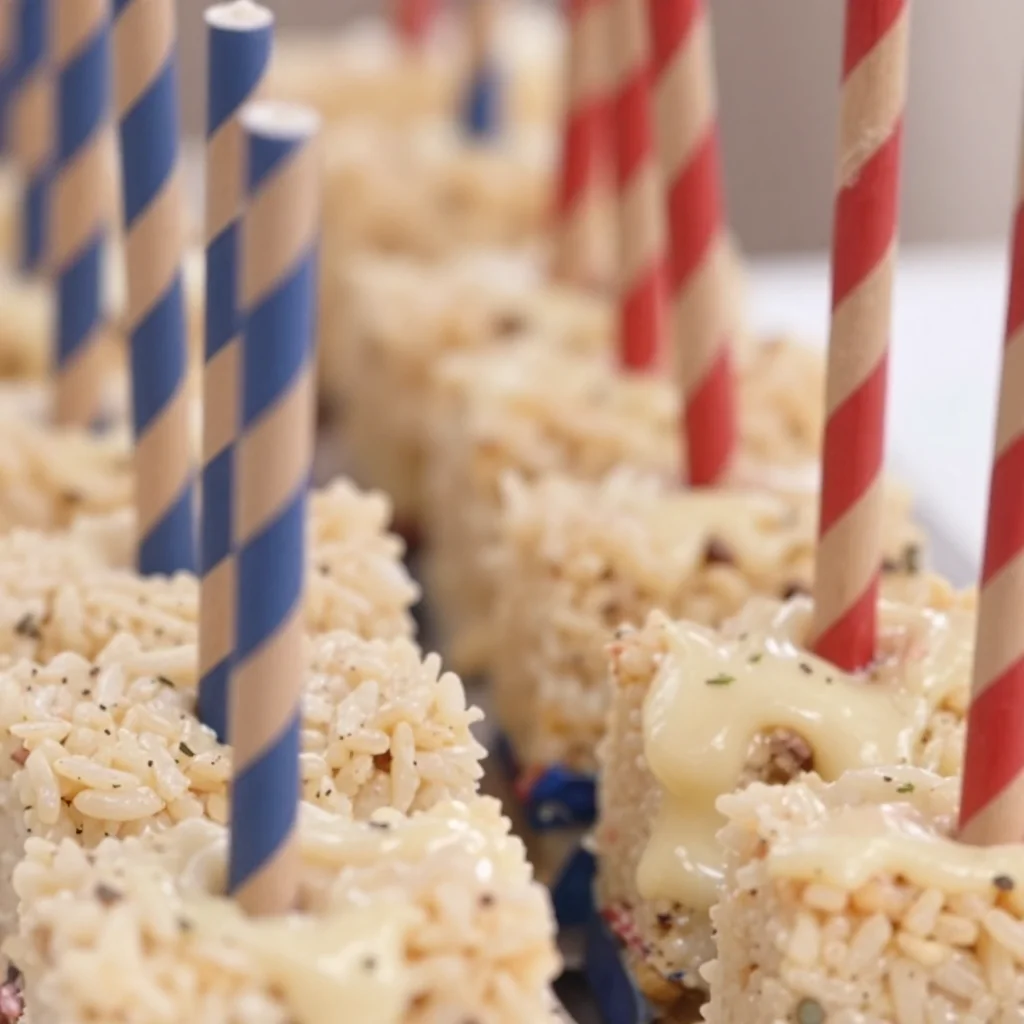
Celebrate the Stars and Stripes with American Flag Rice Krispie Treats
Hello, fellow foodies! Today, we’re diving into a festively sweet treat that’s perfect for your Fourth of July celebration, Memorial Day BBQ, or any backyard gathering where you want to showcase your love for the good ol’ US of A. I’m talking about American Flag Rice Krispie Treats! 🍭 These adorable, gooey delights are not only super easy to whip up, but they also bring a pop of color and fun to your table that will make your guests oooh and ahhh.
Now, if you’re like me, anytime you get together with loved ones, the food is always the heart of the celebration—and that includes fun desserts that bring everyone together. I fondly remember when my family would gather for picnics during the summer, and my mom would come out with a red, white, and blue dessert that made everyone smile. Those moments were filled with laughter, sharing, and lots of sticky fingers from the treats.
What I love about these American Flag Rice Krispie Treats is their versatility; they’re not only tasty but a canvas for creativity and conversation. So, let’s get to it! Grab your apron, and let’s make some memories in the kitchen!
A Nostalgic Kitchen Memory
One of my fondest memories involving Rice Krispie Treats goes way back to elementary school. Our art teacher organized a themed “American Day” celebration, where everyone was encouraged to bring something that represented the USA. My mom and I decided to transform a classic treat into something special—it was a labor of love that taught me how simple ingredients could come together to create something beautiful.
We crafted our very own American flag using a rectangular tray of Rice Krispie Treats, accented with vibrant red and blue candy melts. As my classmates tasted the treats, their faces lit up with delight. We ended the day covered in a sprinkle of powdered sugar and laughter, but the biggest takeaway? Food brings people together in ways that words sometimes can’t.
It’s moments like these that pushed me to create Ivory Apron—to share the joy of cooking and entertaining. So, get ready to roll up your sleeves, because we’re about to make an iconic dessert that’s as much fun to assemble as it is to eat!
Ingredients
Here’s what you’ll need to get started on your colorful adventure:
-
4 paper straws (cut in half)
These will serve as the flagpole! Feel free to use wooden skewers for a sturdier option. -
2 oz white candy melts
Perfect for creating the stars in our flag. Chocolate or white chocolate can work as substitutes if you can’t find candy melts. -
8 pre-packaged Rice Krispie Treats (unwrapped)
The foundation of our dessert. You could also whip up a homemade batch if you’re feeling extra ambitious—just use the classic Rice Krispies recipe! -
5 oz red candy melts
For those eye-popping stripes of our flag! If you want a different hue, red food coloring can be added to white chocolate. -
5 oz blue candy melts
This bright blue will be perfect for the corner of our flag. Again, you can swap in chocolate if necessary. -
Red, white, and blue sprinkles
Because who doesn’t love a little extra crunch and color? Feel free to experiment with any patriotic sprinkle mix!
Step-by-Step Instructions
-
Prepare Your Workspace
Gather all your ingredients and tools. It’s always a good idea to have a clean, organized space—trust me, it makes the process so much smoother! -
Melt the Candy Melts
In separate microwave-safe bowls, melt the red, white, and blue candy melts according to package instructions, heating in 30-second intervals and stirring in between until smooth. This step is my secret for getting perfectly melted chocolate without any clumps. -
Assemble the Base
Line a rectangular baking dish with parchment paper (trust me, it helps with easy removal later). Unwrap the Rice Krispie Treats and layer them tightly in the dish, forming a smooth base for your flag. -
Create the Red Stripes
Now, grab your red candy melts and pour them over the Rice Krispie Treats, spreading it evenly to create alternating stripes. Chef Hack: Use a spatula dipped in warm water for a smooth and clean spread. -
Add the White Stripes
Pour the melted white candy melts over the red layer, smoothing it out as you go. The layers will look beautifully vibrant, just wait until you see the final result! -
Layer in the Blue
Take the remaining Rice Krispie Treats and create a rectangular section on the upper left corner. Pour the melted blue candy melts over it, spreading it evenly once again. -
Sprinkle Some Cheer
Now it’s time for the fun part! While everything is still melted, liberally sprinkle the red, white, and blue sprinkles over the blue layer. Let it all set for about 30 minutes or until the candy melts fully harden. -
Final Touches
Once everything has set, remove the treat from the baking dish using the parchment paper, and carefully cut it into squares or rectangles. Pop your paper straws into the top corner for a fun display!
Serving Suggestions
To showcase your American Flag Rice Krispie Treats, place them on a large white platter to let the colors stand out. You can also add a few festive decorations like mini flags or scatter some extra sprinkles around the base for an elegant touch. Don’t forget to take a moment to snap a photo—this dessert will spark joy on social media!
Recipe Variations
If you want to shake things up a bit, here are some creative twists to consider:
-
Fruit Forward: Layer fresh strawberries and blueberries on top of the Rice Krispie Treat base for a fruity addition!
-
Chocolate Drizzle: Drizzle melted dark chocolate over the final creation for an extra dose of decadence.
-
Texture Play: Toss in crushed graham crackers or mini marshmallows with the sprinkles for a fun texture experience.
-
Different Colors: Don’t be afraid to swap the red and blue for other fun colors—think green for St. Patrick’s Day or pastels for Easter!
-
Peanut Butter Treats: Mix peanut butter into the Rice Krispie Treat base for a nutty twist that adds an extra layer of flavor.
Chef’s Notes
Cooking is all about evolution! This recipe has come a long way from those elementary school days when I first used traditional Rice Krispie Treats. Over the years, I’ve added pops of color and creative flair to enhance the experience and make it even more memorable. And honestly, combining those luscious candy melts with the iconic puffed rice cereal is a match made in heaven.
Plus, don’t be surprised if you find some melted chocolate on your fingers during the process—it’s a sign of good cooking!
FAQs and Troubleshooting
-
Q: What if my candy melts aren’t melting smoothly?
A: Ensure you’re using a microwave-safe bowl and that you’re stirring well between intervals—if they’re burning, reduce the heat! -
Q: Can I make these in advance?
A: Absolutely! Just store them in an airtight container at room temperature to keep them fresh. -
Q: What if I don’t have parchment paper?
No worries! Lightly greasing the baking dish with cooking spray will work fine. -
Q: How do I cut the treats?
Use a sharp knife and a gentle sawing motion for clean cuts. If the edges are sticking, run your knife under warm water for easier cutting.
Nutritional Info (optional)
While I won’t bore you with all the details, it’s good to know these treats are great in moderation! Each square is about 130 calories per serving, depending on how generously you cut them.
So there you have it, folks! A delightfully festive recipe that’s not just about the food but about what it represents—bringing people together, sharing laughter, and creating unforgettable memories around the table. I hope you enjoy making these as much as I do—now let’s get celebrating! Happy cooking!
PrintAmerican Flag Rice Krispie Treats
A festive treat perfect for Fourth of July celebrations, combining Rice Krispie Treats with colorful candy melts to resemble the American flag.
- Prep Time: 15 minutes
- Cook Time: 10 minutes
- Total Time: 25 minutes
- Yield: 8 servings 1x
- Category: Dessert
- Method: No-Bake
- Cuisine: American
- Diet: Vegetarian
Ingredients
- 4 paper straws (cut in half)
- 2 oz white candy melts
- 8 pre-packaged Rice Krispie Treats (unwrapped)
- 5 oz red candy melts
- 5 oz blue candy melts
- Red, white, and blue sprinkles
Instructions
- Prepare your workspace by gathering all your ingredients and tools.
- Melt the candy melts in separate microwave-safe bowls according to package instructions, heating in 30-second intervals and stirring until smooth.
- Assemble the base by lining a rectangular baking dish with parchment paper and layering the Rice Krispie Treats tightly in the dish.
- Create the red stripes by pouring the melted red candy melts over the Rice Krispie Treats.
- Add the white stripes by pouring the melted white candy melts over the red layer.
- Layer in the blue by creating a rectangular section with the remaining Rice Krispie Treats and pouring the melted blue candy melts over it.
- Sprinkle red, white, and blue sprinkles over the blue layer while it’s still melted and let it set for about 30 minutes.
- Final touches involve removing the treat from the baking dish and cutting it into squares or rectangles.
Notes
These treats can be made in advance and stored in an airtight container. Try adding fruit, chocolate drizzle, or mixing in peanut butter for variety.
Nutrition
- Serving Size: 1 serving
- Calories: 130
- Sugar: 15g
- Sodium: 50mg
- Fat: 5g
- Saturated Fat: 2g
- Unsaturated Fat: 3g
- Trans Fat: 0g
- Carbohydrates: 20g
- Fiber: 0g
- Protein: 1g
- Cholesterol: 0mg
Keywords: Rice Krispie Treats, American Flag, Fourth of July, festive dessert, no-bake treat