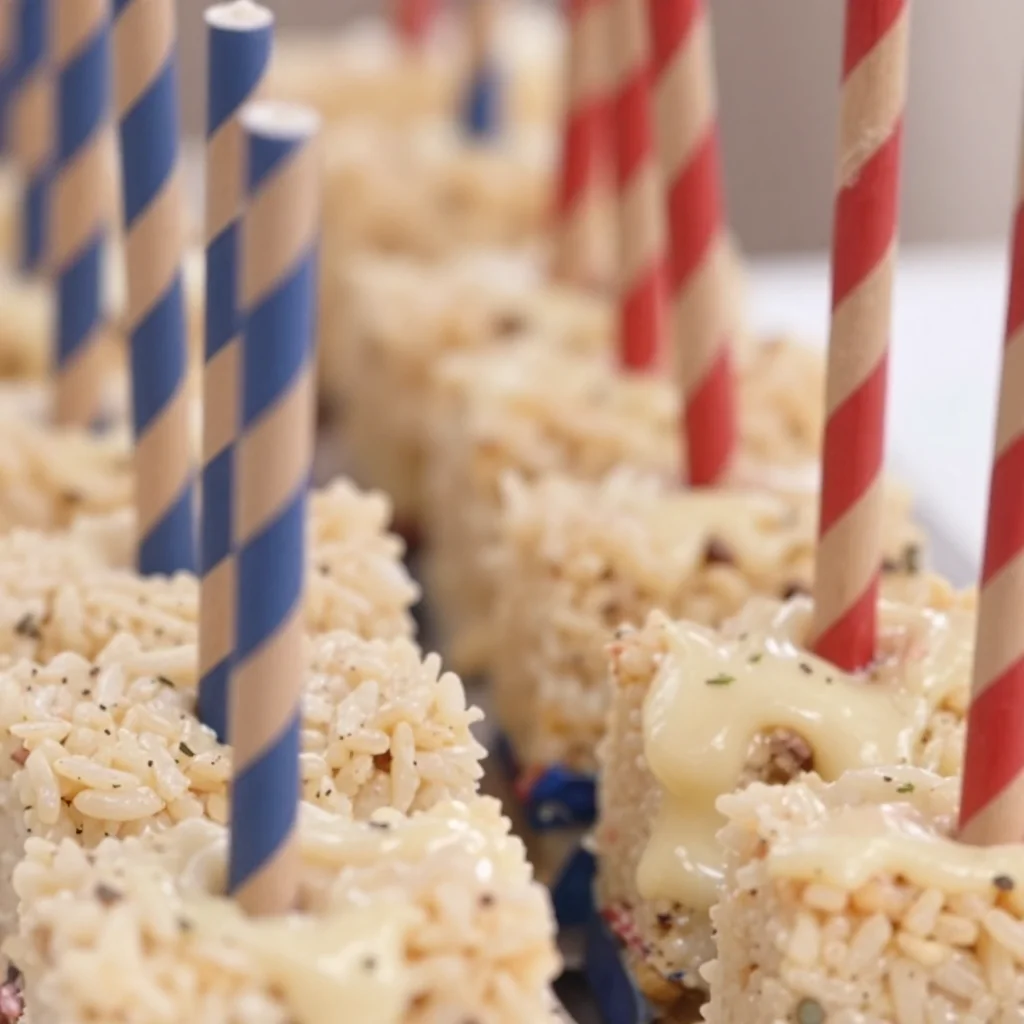
Patriotic No-Bake Rice Krispies Treats: 4th of July Flag
Celebrate the Stars and Stripes with American Flag Rice Krispie Treats
Hello, fellow foodies! Today, we’re diving into a festively sweet treat that’s perfect for your Fourth of July celebration, Memorial Day BBQ, or any backyard gathering where you want to showcase your love for the good ol’ US of A. I’m talking about American Flag Rice Krispie Treats! 🍭 These adorable, gooey delights are not only super easy to whip up, but they also bring a pop of color and fun to your table that will make your guests oooh and ahhh.
Now, if you’re like me, anytime you get together with loved ones, the food is always the heart of the celebration—and that includes fun desserts that bring everyone together. I fondly remember when my family would gather for picnics during the summer, and my mom would come out with a red, white, and blue dessert that made everyone smile. Those moments were filled with laughter, sharing, and lots of sticky fingers from the treats.
What I love about these American Flag Rice Krispie Treats is their versatility; they’re not only tasty but a canvas for creativity and conversation. So, let’s get to it! Grab your apron, and let’s make some memories in the kitchen!
A Nostalgic Kitchen Memory
One of my fondest memories involving Rice Krispie Treats goes way back to elementary school. Our art teacher organized a themed “American Day” celebration, where everyone was encouraged to bring something that represented the USA. My mom and I decided to transform a classic treat into something special—it was a labor of love that taught me how simple ingredients could come together to create something beautiful.
We crafted our very own American flag using a rectangular tray of Rice Krispie Treats, accented with vibrant red and blue candy melts. As my classmates tasted the treats, their faces lit up with delight. We ended the day covered in a sprinkle of powdered sugar and laughter, but the biggest takeaway? Food brings people together in ways that words sometimes can’t.
It’s moments like these that pushed me to create Ivory Apron—to share the joy of cooking and entertaining. So, get ready to roll up your sleeves, because we’re about to make an iconic dessert that’s as much fun to assemble as it is to eat!
Ingredients
Here’s what you’ll need to get started on your colorful adventure:
-
4 paper straws (cut in half)
These will serve as the flagpole! Feel free to use wooden skewers for a sturdier option. -
2 oz white candy melts
Perfect for creating the stars in our flag. Chocolate or white chocolate can work as substitutes if you can’t find candy melts. -
8 pre-packaged Rice Krispie Treats (unwrapped)
The foundation of our dessert. You could also whip up a homemade batch if you’re feeling extra ambitious—just use the classic Rice Krispies recipe! -
5 oz red candy melts
For those eye-popping stripes of our flag! If you want a different hue, red food coloring can be added to white chocolate. -
5 oz blue candy melts
This bright blue will be perfect for the corner of our flag. Again, you can swap in chocolate if necessary. -
Red, white, and blue sprinkles
Because who doesn’t love a little extra crunch and color? Feel free to experiment with any patriotic sprinkle mix!
Step-by-Step Instructions
-
Prepare Your Workspace
Gather all your ingredients and tools. It’s always a good idea to have a clean, organized space—trust me, it makes the process so much smoother! -
Melt the Candy Melts
In separate microwave-safe bowls, melt the red, white, and blue candy melts according to package instructions, heating in 30-second intervals and stirring in between until smooth. This step is my secret for getting perfectly melted chocolate without any clumps. -
Assemble the Base
Line a rectangular baking dish with parchment paper (trust me, it helps with easy removal later). Unwrap the Rice Krispie Treats and layer them tightly in the dish, forming a smooth base for your flag. -
Create the Red Stripes
Now, grab your red candy melts and pour them over the Rice Krispie Treats, spreading it evenly to create alternating stripes. Chef Hack: Use a spatula dipped in warm water for a smooth and clean spread. -
Add the White Stripes
Pour the melted white candy melts over the red layer, smoothing it out as you go. The layers will look beautifully vibrant, just wait until you see the final result! -
Layer in the Blue
Take the remaining Rice Krispie Treats and create a rectangular section on the upper left corner. Pour the melted blue candy melts over it, spreading it evenly once again. -
Sprinkle Some Cheer
Now it’s time for the fun part! While everything is still melted, liberally sprinkle the red, white, and blue sprinkles over the blue layer. Let it all set for about 30 minutes or until the candy melts fully harden. -
Final Touches
Once everything has set, remove the treat from the baking dish using the parchment paper, and carefully cut it into squares or rectangles. Pop your paper straws into the top corner for a fun display!
Serving Suggestions
To showcase your American Flag Rice Krispie Treats, place them on a large white platter to let the colors stand out. You can also add a few festive decorations like mini flags or scatter some extra sprinkles around the base for an elegant touch. Don’t forget to take a moment to snap a photo—this dessert will spark joy on social media!
Recipe Variations
If you want to shake things up a bit, here are some creative twists to consider:
-
Fruit Forward: Layer fresh strawberries and blueberries on top of the Rice Krispie Treat base for a fruity addition!
-
Chocolate Drizzle: Drizzle melted dark chocolate over the final creation for an extra dose of decadence.
-
Texture Play: Toss in crushed graham crackers or mini marshmallows with the sprinkles for a fun texture experience.
-
Different Colors: Don’t be afraid to swap the red and blue for other fun colors—think green for St. Patrick’s Day or pastels for Easter!
-
Peanut Butter Treats: Mix peanut butter into the Rice Krispie Treat base for a nutty twist that adds an extra layer of flavor.
Chef’s Notes
Cooking is all about evolution! This recipe has come a long way from those elementary school days when I first used traditional Rice Krispie Treats. Over the years, I’ve added pops of color and creative flair to enhance the experience and make it even more memorable. And honestly, combining those luscious candy melts with the iconic puffed rice cereal is a match made in heaven.
Plus, don’t be surprised if you find some melted chocolate on your fingers during the process—it’s a sign of good cooking!
FAQs and Troubleshooting
-
Q: What if my candy melts aren’t melting smoothly?
A: Ensure you’re using a microwave-safe bowl and that you’re stirring well between intervals—if they’re burning, reduce the heat! -
Q: Can I make these in advance?
A: Absolutely! Just store them in an airtight container at room temperature to keep them fresh. -
Q: What if I don’t have parchment paper?
No worries! Lightly greasing the baking dish with cooking spray will work fine. -
Q: How do I cut the treats?
Use a sharp knife and a gentle sawing motion for clean cuts. If the edges are sticking, run your knife under warm water for easier cutting.
Nutritional Info (optional)
While I won’t bore you with all the details, it’s good to know these treats are great in moderation! Each square is about 130 calories per serving, depending on how generously you cut them.
So there you have it, folks! A delightfully festive recipe that’s not just about the food but about what it represents—bringing people together, sharing laughter, and creating unforgettable memories around the table. I hope you enjoy making these as much as I do—now let’s get celebrating! Happy cooking!
PrintAmerican Flag Rice Krispie Treats
A festive treat perfect for Fourth of July celebrations, combining Rice Krispie Treats with colorful candy melts to resemble the American flag.
- Prep Time: 15 minutes
- Cook Time: 10 minutes
- Total Time: 25 minutes
- Yield: 8 servings 1x
- Category: Dessert
- Method: No-Bake
- Cuisine: American
- Diet: Vegetarian
Ingredients
- 4 paper straws (cut in half)
- 2 oz white candy melts
- 8 pre-packaged Rice Krispie Treats (unwrapped)
- 5 oz red candy melts
- 5 oz blue candy melts
- Red, white, and blue sprinkles
Instructions
- Prepare your workspace by gathering all your ingredients and tools.
- Melt the candy melts in separate microwave-safe bowls according to package instructions, heating in 30-second intervals and stirring until smooth.
- Assemble the base by lining a rectangular baking dish with parchment paper and layering the Rice Krispie Treats tightly in the dish.
- Create the red stripes by pouring the melted red candy melts over the Rice Krispie Treats.
- Add the white stripes by pouring the melted white candy melts over the red layer.
- Layer in the blue by creating a rectangular section with the remaining Rice Krispie Treats and pouring the melted blue candy melts over it.
- Sprinkle red, white, and blue sprinkles over the blue layer while it’s still melted and let it set for about 30 minutes.
- Final touches involve removing the treat from the baking dish and cutting it into squares or rectangles.
Notes
These treats can be made in advance and stored in an airtight container. Try adding fruit, chocolate drizzle, or mixing in peanut butter for variety.
Nutrition
- Serving Size: 1 serving
- Calories: 130
- Sugar: 15g
- Sodium: 50mg
- Fat: 5g
- Saturated Fat: 2g
- Unsaturated Fat: 3g
- Trans Fat: 0g
- Carbohydrates: 20g
- Fiber: 0g
- Protein: 1g
- Cholesterol: 0mg
Keywords: Rice Krispie Treats, American Flag, Fourth of July, festive dessert, no-bake treat
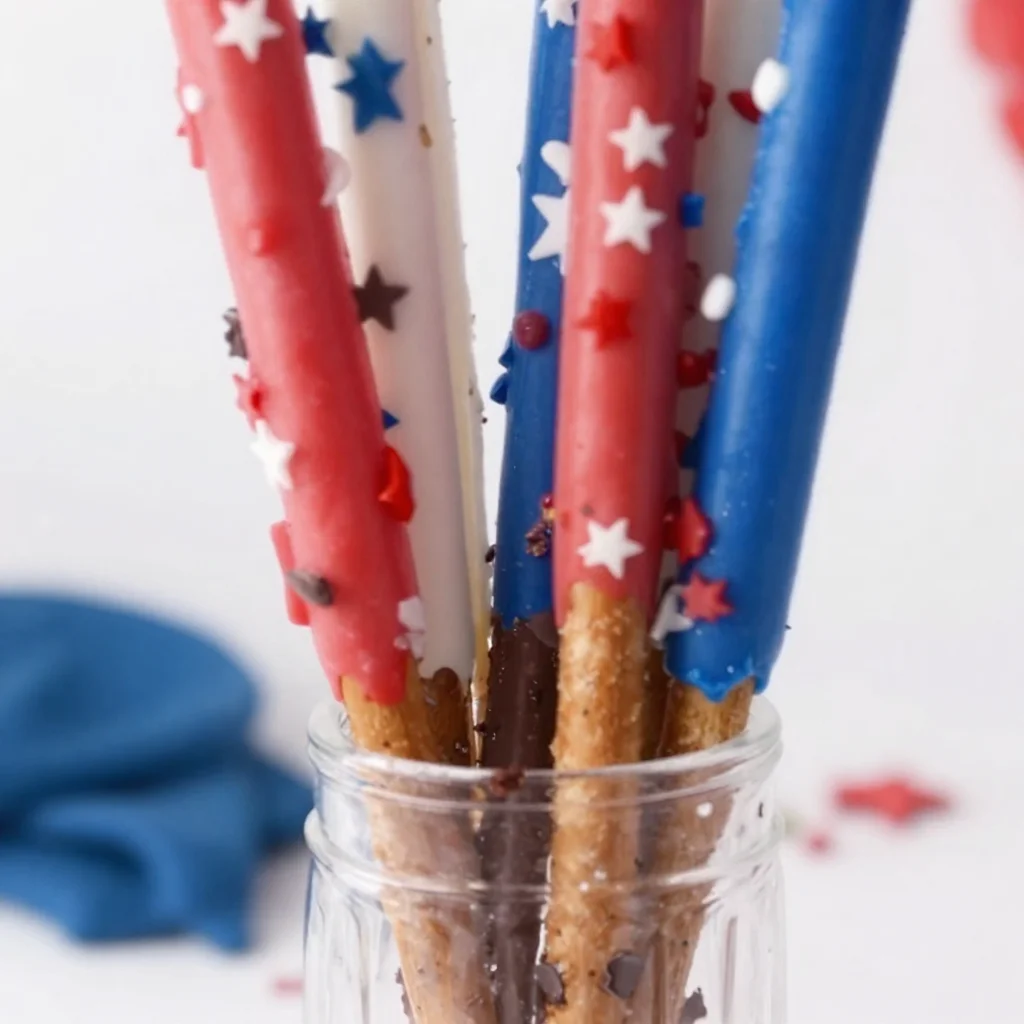
4th of July: No-Bake Patriotic Chocolate-Dipped Pretzel Rods
Patriotic Chocolate Dipped Pretzel Rods: A Festive and Fun Treat!
Ah, summer! The warm breeze, the sound of laughter echoing through backyards, and the joyful anticipation of holiday celebrations. One of my favorite summer holidays is the Fourth of July, filled with backyard barbecues, spectacular firework displays, and, of course, delicious food. This year, let’s add a touch of fun and flair to our festivities with a delightful and easy-to-make treat: Patriotic Chocolate Dipped Pretzel Rods!
These pretzel rods are the perfect blending of salty and sweet, providing the ideal crunch while being beautifully decorated in red, white, and blue. Not only are they festive and gorgeous to look at, but they’re also incredibly simple to whip up, making them an ideal project for little hands that want to help in the kitchen. Picture this: a mini kitchen assembly line filled with eager little chefs dipping pretzels, drizzling chocolate, and sprinkling star sprinkles. It’s a memory in the making!
As we dive into this recipe, I’ll share some personal stories, valuable tips, and everything you need to know to make these delightful treats. So gather around the kitchen, let’s create something beautiful and delicious to celebrate our great nation together!
A Nostalgic Bite
When I think of holiday treats that take me back in time, chocolate-covered pretzels instantly transport me to my childhood. Growing up, my mom would always involve us kids in the kitchen during holiday preparations. I remember a particular Fourth of July BBQ when we decided to create our own red, white, and blue snacks. Armed with pretzels, candy melts, and a little creativity, we made the messiest, most colorful chocolate-dipped pretzels.
The kitchen was filled with giggles as my siblings and I fought over who got to sprinkle the star decorations. In those moments, we didn’t just create delicious snacks; we built lasting memories. Today, I recreate that joyful chaos with my loved ones every year, and I hope these Patriotic Chocolate Dipped Pretzel Rods inspire you to do the same!
Ingredients
Here’s what you’ll need to create these festive snacks:
-
12 Pretzel Rods: You can find these in most grocery stores. They add a delightful crunch and salty balance to the sweetness of the chocolate. Plus, they’re the perfect size for little hands!
-
½ Cup Red Candy Melts: These are easy to find around holidays. If you can’t locate red, white, or blue melts, regular chocolate chips will work, but the vibrant colors of candy melts really make the presentation pop.
-
½ Cup Blue Candy Melts: Just like the red melts, feel free to substitute with other colors depending on the occasion. For instance, for a fall event, caramel or orange melts would be fantastic.
-
½ Cup White Candy Melts: White melts provide a beautiful contrast and a creamy sweetness. You could also use white chocolate chips if you prefer a real chocolate flavor, just melt them down carefully to avoid burning.
-
2 Tablespoons Patriotic Star Sprinkles: These charming little sprinkles add just the right touch of festivity. If you can’t find star sprinkles, go for any confetti or colored sprinkles! They’ll still add a playful flair.
Each ingredient carries a hint of tradition, a sprinkle of creativity, and a dash of nostalgia. Feel free to get creative as you prepare your pretzel rods!
Step-by-Step Instructions
Let’s dive into the fun part—preparing your Patriotic Chocolate Dipped Pretzel Rods!
-
Prepare Your Workspace: Grab a baking sheet and line it with parchment paper. This makes the cleanup easier and is crucial for letting your pretzel rods set without sticking.
-
Melt the Candy Melts: In microwave-safe bowls, place your red, white, and blue candy melts. Heat them in 30-second intervals, stirring in between, until they’re smooth and melted. Be cautious not to overheat—this can lead to a grainy texture. If you do, a splash of vegetable oil can help bring them back to a silky consistency!
-
Dip the Pretzel Rods: Once your melts are ready, it’s time for the fun part! Holding a pretzel rod, dip it into the colored candy melts about two-thirds of the way down. Allow any excess to drip off, and if you need a thicker coating, dip it again.
-
Sprinkle Away: Immediately after dipping, sprinkle the star sprinkles generously onto the wet chocolate. You’ll want to do this step quickly before the chocolate hardens, so enlist your little helpers here! Gently shake off any excess sprinkles if needed.
-
Set the Pretzel Rods: Place the decorated pretzel rod onto the lined baking sheet. Repeat this process with all your pretzel rods, mixing if you’d like to alternate colors.
-
Let Them Set: Once all your pretzel rods are dipped and decorated, let them sit at room temperature or pop them in the refrigerator for about 10-15 minutes to harden completely.
-
Pack Up and Enjoy: Once the chocolate has set, you can serve them immediately or package them nicely in cellophane bags tied with a ribbon for a delightful treat to share!
Cooking is all about taking your time and enjoying the process. Feel free to dance around your kitchen, sing a song, and soak in those memories while you create something delicious!
Serving Suggestions
To serve your Patriotic Chocolate Dipped Pretzel Rods, simply arrange them on a festive platter or into individual treat bags tied with red, white, and blue ribbons. You can even create a fun display by placing them in a decorative jar or a tall glass. Don’t forget to make some space for ice-cold lemonade or refreshing iced tea to complete the festive atmosphere.
Recipe Variations
Feel free to add your own twist with these variations:
-
Drizzle of Dark Chocolate: After dipping the pretzels in candy melts, drizzle some melted dark chocolate over the top for an extra chocolatey flavor.
-
Peanut Butter Twist: Dip your pretzels in melted peanut butter before covering them in candy melts for a deliciously nutty twist.
-
Texture Variety: Mix in crushed nuts or toffee bits with your sprinkles for added crunch and flavor dimension.
-
Seasonal Colors: Change the colors of the candy melts to fit different holidays. Green and red for Christmas, pastels for Easter—the possibilities are endless!
-
Dairy-Free Option: Use dairy-free chocolate chips or melts to make this recipe suitable for dairy allergies or preferences.
Chef’s Notes
Over the years, this recipe has evolved from simple, messy kitchen fun to a festive activity for friends and family. The smiles that come from dipping pretzels and the laughter that fills the room are priceless. I’ll never forget that one time we almost had a mini chocolate fight—let’s just say, chocolate makes everything more fun!
Each time I make these pretzel rods, I’m reminded of that nostalgia and how food binds us together. Whether you’re celebrating the Fourth of July, a birthday, or simply a sunny day, making these treats is about creating moments in the kitchen that you’ll cherish forever.
FAQs and Troubleshooting
Q1: My chocolate got hard before I dipped all the pretzels. What can I do?
A: No worries! You can reheat the chocolate in short intervals, stirring well between bursts. If it’s still too thick, add a teaspoon of vegetable oil to smooth it out!
Q2: Can I use regular chocolate chips instead of candy melts?
A: Absolutely! Just remember that chocolate chips won’t give you the vibrant colors you want. Make sure to melt them gently to avoid burning.
Q3: My pretzel rods broke during dipping! How can I prevent this?
A: Pretzel rods can be fragile. Make sure to dip them gently and not apply too much pressure. Dipping in small batches can also help.
Q4: How long can I store these pretzel rods?
A: These treats can last for about 1-2 weeks, stored in an airtight container at room temperature. If it’s really hot, consider refrigerating them to keep the chocolate firm!
Nutritional Info (optional)
For those counting calories or tracking nutrition, here’s a rough estimate per serving (1 pretzel rod):
- Calories: 120
- Total Fat: 7g
- Saturated Fat: 4g
- Carbohydrates: 14g
- Sugars: 9g
- Protein: 1g
These values can vary depending on the type of chocolate or substitutes you choose, so always check your specific ingredients for accurate info!
There you have it! Celebrate your next gathering with these fun and festive Patriotic Chocolate Dipped Pretzel Rods. They’re sure to be a hit, spark joy, and remind everyone to indulge in the simple pleasures of life and good food. Happy cooking!
PrintPatriotic Chocolate Dipped Pretzel Rods

These festive and easy-to-make pretzel rods are dipped in red, white, and blue chocolate, perfect for celebrating the Fourth of July.
- Prep Time: 15 minutes
- Cook Time: 10 minutes
- Total Time: 25 minutes
- Yield: 12 servings 1x
- Category: Dessert
- Method: Dipping
- Cuisine: American
- Diet: Vegetarian
Ingredients
- 12 Pretzel Rods
- ½ Cup Red Candy Melts
- ½ Cup Blue Candy Melts
- ½ Cup White Candy Melts
- 2 Tablespoons Patriotic Star Sprinkles
Instructions
- Prepare your workspace by lining a baking sheet with parchment paper.
- Melt the candy melts in microwave-safe bowls, heating in 30-second intervals until smooth.
- Dip each pretzel rod into the melted candy melts about two-thirds of the way down.
- Sprinkle star sprinkles onto the wet chocolate immediately after dipping.
- Set the decorated pretzel rods on the lined baking sheet.
- Let them sit at room temperature or refrigerate for about 10-15 minutes to harden completely.
- Pack up and enjoy your festive treats!
Notes
Feel free to get creative with colors and toppings to fit different holidays.
Nutrition
- Serving Size: 1 Pretzel Rod
- Calories: 120
- Sugar: 9g
- Sodium: 230mg
- Fat: 7g
- Saturated Fat: 4g
- Unsaturated Fat: 2g
- Trans Fat: 0g
- Carbohydrates: 14g
- Fiber: 1g
- Protein: 1g
- Cholesterol: 0mg
Keywords: patriotic treats, chocolate dipped pretzels, Fourth of July snacks, festive desserts
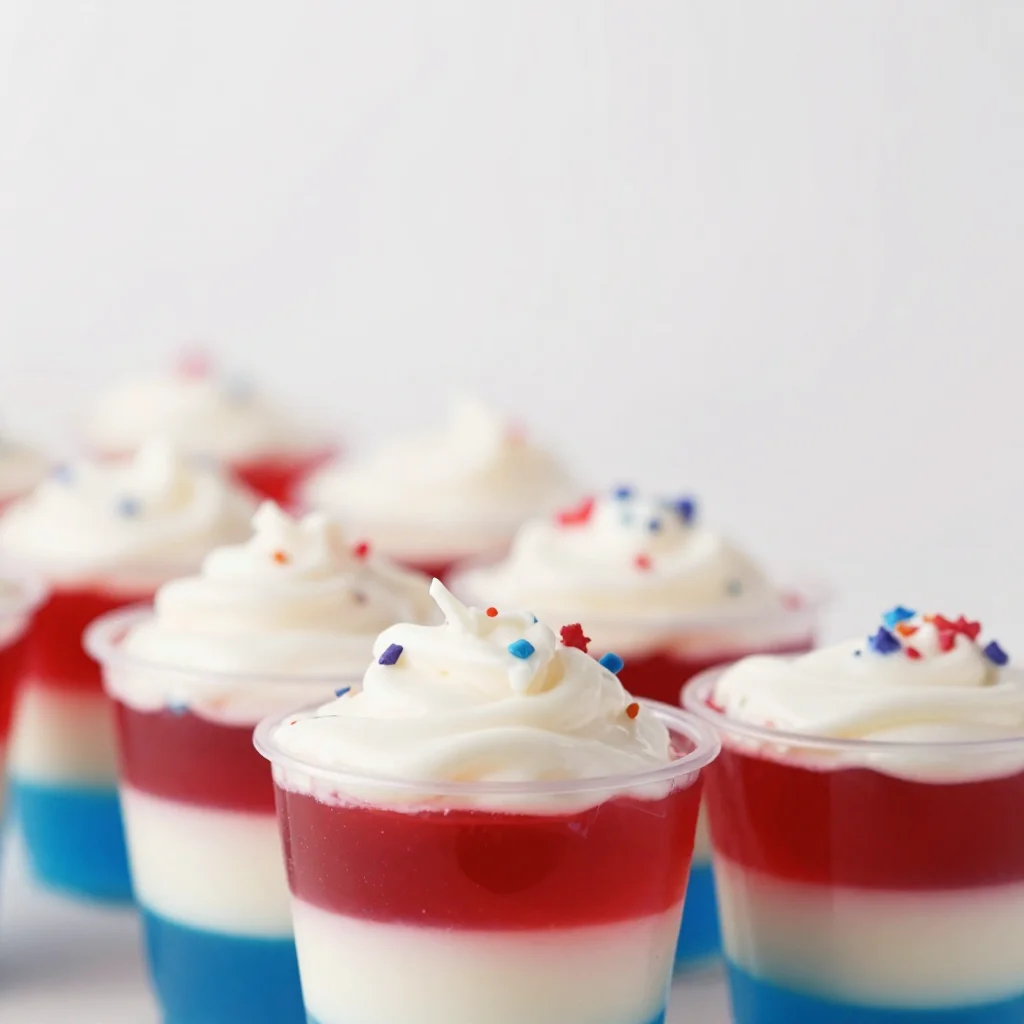
Ingredient No-Bake Patriotic Red, White & Blue Jello Cups
Patriotic Delights: Red, White, and Blue Jello Cups
Hello, fellow food lovers! Today, I’m bubbling with excitement as I share one of my all-time favorite warm-weather treats: Red, White, and Blue Jello Cups! 🎉 These delightful and colorful desserts are not only a feast for the eyes but also bring back the essence of childhood memories—simple, playful, and oh-so-delicious. Perfect for celebratory gatherings like the Fourth of July or Memorial Day, these festive cups are sure to impress your guests and delight the kiddos.
Introduction
Imagine a warm summer day; the sun is shining, friends and family gather in the backyard, and the air is filled with laughter and conversation. What better way to celebrate than with a treat that embodies the spirit of the occasion? Enter the Red, White, and Blue Jello Cups! With their vibrant colors and creamy layers, they provide a sweet sense of nostalgia while making you feel like a master chef. It’s like a culinary time machine that whisks you back to summer cookouts and family picnics, all wrapped up in a charming cup.
The beauty of these cups lies not just in their presentation but also in their versatility. You can customize the flavors, adjust the sweetness, and even swap out ingredients to fit your dietary preferences. So, whether you’re hosting a festive backyard barbecue, a kids’ birthday party, or just want to cool down on a hot day, these Jello Cups have got you covered.
Ready to dive in? Let’s whip up something deliciously festive that will have everyone oohing and aahing over your creation! Gather your ingredients, put on your apron, and let’s get crafting these exquisite Red, White, and Blue Jello Cups.
Personal Story
I first encountered Jello Cups at a family gathering when I was around 8 years old. My grandma, with her charming southern drawl, would whip them up for every holiday and special occasion. I can still picture her in the kitchen, vigorously stirring her concoction while a symphony of laughter erupted from the living room. The anticipation was palpable as we all awaited the reveal—would it be green and yellow, or maybe pink and purple?
But the ultimate showstopper was always the Red, White, and Blue Jello Cups. They became a tradition, each layer a representation of our family history and pride. As a kid, the joy of cutting into that gleaming red layer, followed by the creamy white, and finishing with the vibrant blue, felt almost magical. Little did I know that I would one day be sharing my version of this cherished classic with you all! Each cup is now a reminder of those happy moments, making the act of creating them feel like a warm hug from my grandma.
Ingredients
Let’s gather our colorful cast of ingredients for this fun dessert! Here’s what you’ll need:
-
1 box blue jell-o (3oz box, any flavor)
- Chef’s Insight: The blue raspberry is a favorite, but feel free to experiment with other flavors. Just remember, they should all complement one another!
-
1 cup boiling water
- This hot water will help dissolve the Jell-O granules, making it come to life!
-
1 cup cold water
- This balances out the temperature of the Jell-O, making sure it sets up just right.
-
2 packets Gelatin (unflavored)
- This is the secret ingredient that adds creaminess to your white layer. You can substitute it with agar-agar if you’re looking for a plant-based option.
-
½ cup cold water
- Used to bloom the unflavored gelatin, ensuring it integrates well for a silky texture.
-
1 cup boiling water
- Another round of boiling water helps manage the transition from liquid to gel for our creamy layer.
-
1 can sweetened condensed milk (14oz/395g)
- This decadent ingredient adds a wonderfully rich and creamy taste. If you’re looking for a lighter option, try coconut milk or even almond milk.
-
1 box red jell-o (3oz box, any flavor)
- A classic choice would be strawberry or cherry flavor. Match it with a complementary flavor of blue for the best effect!
-
1 cup boiling water
- Yes, we’re back to boiling hot water—this is necessary for dissolving the red Jell-O.
-
1 cup cold water
- Because we want a nice, balanced texture in our jell-o!
-
Whipped cream
- For that ultra-decadent finish. You can also opt for coconut whipped cream for a dairy-free version.
-
Red, white and blue sprinkles
- These cute little touches will make your dessert even more festive! Go ahead and sprinkle generously.
Step-by-Step Instructions
Now that we have our ingredients ready, let’s dive into the process! Follow along step-by-step, and remember, this is a fun journey—don’t stress about perfection!
-
Prepare Your Blue Jello Layer:
- In a medium bowl, combine the blue Jell-O powder with 1 cup of boiling water. Stir for about 2 minutes until the gelatin is fully dissolved. This part is essential—make sure all those granules are melted away!
-
Add Cold Water:
- Next, stir in 1 cup of cold water. This helps cool the mixture and prepares it for setting. Once combined, pour the blue Jell-O into clear cups or glass containers. Aim for about 1/3 of the way full so you have room for the other layers. Place them in the refrigerator and let them chill for roughly 1 hour.
-
Whip Up the Creamy Layer:
- While the blue Jell-O is setting, we can create that luscious white layer! In a separate bowl, sprinkle the unflavored gelatin over ½ cup of cold water. Let it sit for about 5 minutes to soften.
-
Heat for Blooming:
- After the gelatin has bloomed, add 1 cup of boiling water and whisk until fully dissolved. Now, stir in the sweetened condensed milk until the mixture is smooth. This creamy goodness is what makes the cups truly special!
-
Layer the Cream:
- Carefully take the blue Jell-O from the fridge and gently spoon the white mixture on top, making sure not to disturb the blue layer below. Return your cups to the fridge and let them set for another hour.
-
Create the Red Layer:
- Now, we’re on to the final layer! Just like before, combine the red Jell-O powder with 1 cup of boiling water and stir until dissolved. Add in 1 cup of cold water. Once blended, it’s time to layer! Pour this red mixture carefully on top of the white layer, filling the cups almost to the top.
-
Final Chill:
- Let these beauties set in the fridge for another hour or until fully firm. This will give you time to brew your favorite drink and enjoy some peaceful moments in the kitchen!
-
Time to Serve:
- Once set, top with whipped cream and sprinkle on the red, white, and blue sprinkles for that festive touch. Your stunning Jello Cups are ready to wow your guests!
Serving Suggestions
These delightful Jello Cups are best served chilled right out of the fridge. Arrange them on a vibrant tray or colorful tablecloth to set the mood. If you’re hosting a party, consider placing them at a fun dessert station where your guests can grab and enjoy. They also look lovely garnished with fresh berries or mint leaves for that extra flair.
Recipe Variations
Feeling creative? Here are some fun variations to consider:
-
Fruit Infusion: Add diced strawberries or blueberries to the individual layers for a fruity twist! This not only adds flavor but also elevates the visual appeal.
-
Flavor Fusion: Instead of using traditional flavors, think outside the box! Consider using tropical flavors like passion fruit, mango, or lime for an unexpected twist.
-
Dairy-Free Delight: Swap the sweetened condensed milk with coconut cream or cashew cream for a dairy-free version while still retaining that rich, creamy texture.
-
Make It Boozy: Add a splash of flavored vodka to the layers for an adult version! This could be especially fun for summer parties.
-
Layered Surprise: Instead of keeping the layers simple, try adding different textures like crushed graham crackers or small pieces of cake between layers for a dessert with bite!
Chef’s Notes
As simple as they are, these Jello Cups have evolved over time in my cooking journey. I remember a time when Jell-O was just a party treat, but now, with a bit of effort and creativity, we can make it an elegant masterpiece. Just a few sprinkles and a dollop of whipped cream can elevate it so beautifully!
I once made these Jello Cups for a last-minute gathering, leading to some hilariously fun mishaps as I tried to layer them quickly. Let’s just say it was a colorful explosion! But the laughter they brought when everyone dug in? Absolutely priceless.
FAQs and Troubleshooting
Here are a few common questions and tips to keep in mind when making your Red, White, and Blue Jello Cups:
-
Q: Why isn’t my Jello setting properly?
- A: Ensure you’ve completely dissolved the gelatin and let the mixture cool before layering it. Also, double-check the gelatin-to-water ratios; using too much water can lead to soupy layers!
-
Q: Can I make these in advance?
- A: Absolutely! They can be prepared the day before your gathering. Just keep them covered in the fridge until you’re ready to impress your guests.
-
Q: How can I get cleaner layers?
- A: Let each layer set for at least one hour to allow it to firm up before adding the next layer. Patience here is key for achieving those distinct, vibrant layers!
-
Q: What if I don’t have clear cups?
- A: No worries! Any clear glass or even a fun dessert dish can work. Just be mindful of how the colors will show through.
Nutritional Info
While I usually focus on the joy of cooking and sharing, I know some of you like to keep an eye on nutritional information. Each serving of these Jello Cups typically contains roughly:
- Calories: 120
- Total Fat: 2g
- Carbohydrates: 25g
- Sugar: 20g
- Protein: 2g
Of course, nutritional values can vary based on the ingredients used and portion sizes, especially if you opt for different flavors, alternatives, or toppings.
So there you have it! With just a little time and love, you can create stunning Red, White, and Blue Jello Cups that not only taste amazing but also encapsulate the joy of gathering and celebration. I can’t wait for you to try this recipe and add your personal touch! Happy cooking, everyone—let’s make delicious memories together! 🌟
PrintRed, White, and Blue Jello Cups
A festive dessert composed of vibrant layers of red, white, and blue jello, perfect for celebrations.
- Prep Time: 15 minutes
- Cook Time: 15 minutes
- Total Time: 60 minutes
- Yield: 8 servings 1x
- Category: Dessert
- Method: Chilling
- Cuisine: American
- Diet: Vegetarian
Ingredients
- 1 box blue jell-o (3oz box)
- 1 cup boiling water
- 1 cup cold water
- 2 packets Gelatin (unflavored)
- ½ cup cold water
- 1 cup boiling water
- 1 can sweetened condensed milk (14oz/395g)
- 1 box red jell-o (3oz box)
- 1 cup boiling water
- 1 cup cold water
- Whipped cream
- Red, white and blue sprinkles
Instructions
- Prepare Your Blue Jello Layer: In a medium bowl, combine the blue Jell-O powder with 1 cup of boiling water. Stir for about 2 minutes until the gelatin is fully dissolved.
- Add Cold Water: Stir in 1 cup of cold water and pour the blue Jell-O into clear cups or glass containers, and chill for roughly 1 hour.
- Whip Up the Creamy Layer: In a separate bowl, sprinkle the unflavored gelatin over ½ cup of cold water, let it sit for about 5 minutes, then add 1 cup of boiling water and whisk until fully dissolved. Stir in the sweetened condensed milk.
- Layer the Cream: Spoon the white mixture gently on top of the blue layer and return to the fridge to set for another hour.
- Create the Red Layer: Combine the red Jell-O powder with 1 cup of boiling water, stir until dissolved, add 1 cup of cold water, and layer it on top of the white mixture.
- Final Chill: Let set for another hour or until firm.
- Time to Serve: Top with whipped cream and sprinkles for a festive touch.
Notes
To add a fun twist, consider adding diced fruits or different flavors of jello. These cups can be prepared a day in advance!
Nutrition
- Serving Size: 1 cup
- Calories: 120
- Sugar: 20g
- Sodium: 50mg
- Fat: 2g
- Saturated Fat: 1g
- Unsaturated Fat: 1g
- Trans Fat: 0g
- Carbohydrates: 25g
- Fiber: 0g
- Protein: 2g
- Cholesterol: 5mg
Keywords: jello, dessert, patriotic, festive, summer, kids
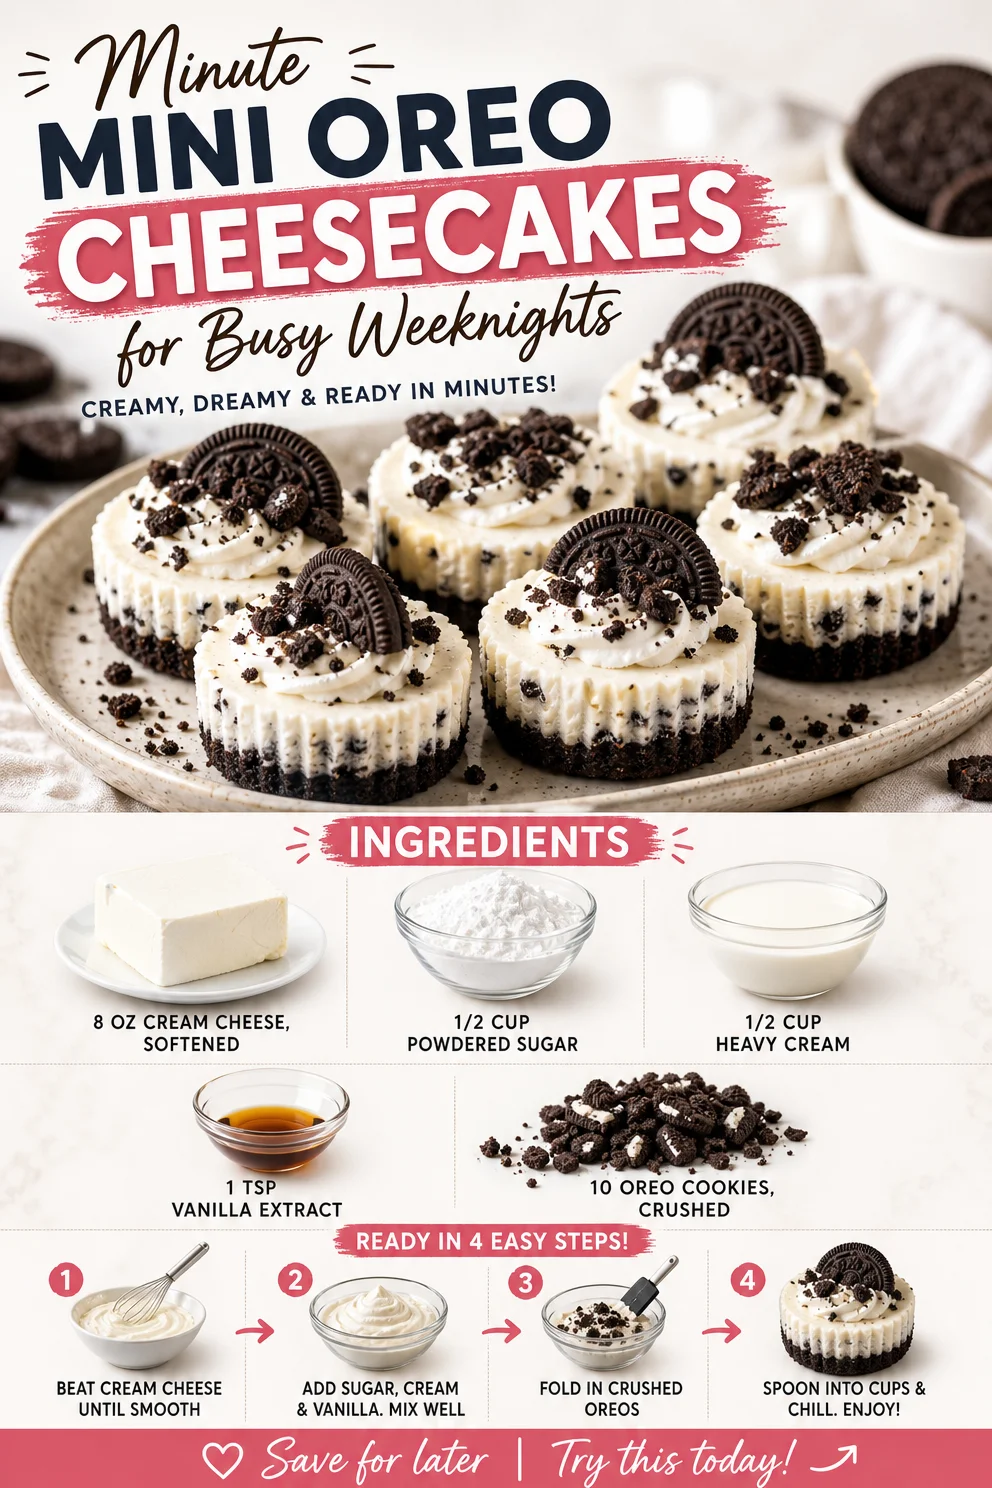
Minute Mini Oreo Cheesecakes for Busy Weeknights
Mini Oreo Cheesecakes: A Sweet Indulgence for Every Occasion
Hello, fellow food lovers! Savannah here, and today I’ve got something truly delightful to share: Mini Oreo Cheesecakes. These bite-sized treasures are the perfect blend of creamy, dreamy cheesecake and that irresistible chocolatey crunch we all love from Oreos. Whether it’s a dinner party, a casual get-together, or simply a sweet treat after a long day, these mini cheesecakes will steal the show and keep your guests coming back for seconds—and maybe even thirds!
You might be wondering, “Savannah, what makes these mini cheesecakes so special?” Well, let me tell you, it’s all about the balance of flavors and textures. They are rich but not overwhelming, sweet but not cloyingly so. Plus, they are so easy to whip up! No need for any baking skills or fancy kitchen gadgets—just your trusty mixing bowl and a little bit of love. So, let’s dive into this scrumptious recipe that’s sure to bring joy to any table.
My Mini Oreo Cheesecake Story
I remember the first time I made mini cheesecakes. It was for a friend’s birthday celebration. I wanted to create something special that would stand out among the usual cake options. While browsing through my pantry for inspiration, the sight of those familiar black-and-white cookies caught my eye. “What if I could incorporate Oreos?” I thought. The idea of a mini cheesecake infused with that classic Oreo flavor sparked my creativity, and before I knew it, I was mixing and tasting, feeling like a true kitchen alchemist.
The party was a hit! Guests raved about these little morsels, and their faces lit up with joy after each bite. It was that night I discovered the magic of individual desserts. There’s something so personal about having a treat made just for you, and I knew I had to share this recipe with all my culinary companions. Fast forward to today, and I’m thrilled to guide you through making your very own Mini Oreo Cheesecakes!
Ingredients
Here’s what you’ll need to create these luscious little cheesecakes:
-
8 oz cream cheese, softened
This is the star of the show! Softening the cream cheese is essential for a smooth and creamy texture. If you’re in a pinch, you can use Neufchâtel for a lighter option. -
1/2 cup powdered sugar
This sweetener dissolves beautifully into the cream cheese, giving the filling that silky-smooth finish. Need a swap? Coconut sugar will work, but it’s dark and may affect the final color slightly. -
1/2 cup heavy cream
Whipping cream adds lightness and richness. If you prefer a lower-fat version, you can use half-and-half, but it won’t whip up quite as fluffy. -
1 tsp vanilla extract
A splash of vanilla enhances the flavors and adds a lovely aroma. Always opt for pure vanilla extract when you can—it’s worth it! -
10 Oreo cookies, crushed
These delicious cookies will give our cheesecakes that classic flavor and a nice crunch. If you’re feeling adventurous, try different flavored Oreos for a unique twist!
Step-by-Step Instructions
Now, let’s make these adorable cheesecakes! Follow these steps closely, and I promise they will be a breeze to whip up:
-
Prepare the Cupcake Liners
Start by placing cupcake liners in a muffin tin. This will help with the removal later and ensure a beautiful presentation. Pro tip: choose festive liners if you’re feeling celebratory! -
Crush the Oreos
Place your 10 Oreo cookies in a zip-top bag and crush them using a rolling pin or your hands until they resemble fine crumbs. Alternatively, you can pulse them in a food processor for finer crumbs. This will be your crust! Leave a handful of crumbs to sprinkle on top later — it’s all about that final touch! -
Make the Cheesecake Filling
In a mixing bowl, combine the 8 oz of softened cream cheese and 1/2 cup of powdered sugar. Using an electric mixer, beat until smooth and creamy. This step is crucial—you want to make sure there are no lumps! Keep scraping down the sides of your bowl to ensure an even consistency. -
Add the Heavy Cream and Vanilla
Pour in the 1/2 cup heavy cream and 1 tsp of vanilla extract into your cream cheese mixture. Beat again until the mixture is thick and fluffy. This step usually takes about 2-3 minutes. If you’re feeling fancy, whip the cream separately until it forms stiff peaks before folding it in—this adds extra lightness! -
Fold in the Oreo Crumbs
Gently fold in the crushed Oreos, ensuring they’re evenly distributed. This gives you that lovely contrast between the creamy cheesecake and the crunchy bits of cookie. -
Fill the Cups
Spoon the cheesecake filling into your prepared cupcake liners, filling them about three-quarters of the way full. Smooth the tops with a spatula for a neat finish. Don’t worry about being too precise—that little rustic charm adds to the inviting nature of the dessert! -
Chill and Set
Place the muffin tin in the fridge for at least 4 hours, or ideally overnight. This chilling time is essential to help your cheesecakes set properly. While you’re waiting, treat yourself to a cup of tea or coffee; you’ve earned it! -
Serve and Enjoy
Once the cheesecakes are set, remove them from the muffin tin and remove the cupcake liners carefully. Top with the reserved Oreo crumbs and a dollop of whipped cream for that extra touch of decadence!
Serving Suggestions
To serve your Mini Oreo Cheesecakes, you can plate them on a beautiful dessert stand or arrange them on a rustic wooden board for that charming, homey vibe. Consider adding fresh mint leaves or a drizzle of chocolate sauce for a pop of color and contrast. And remember—presentation matters, but it’s the taste that truly counts, so don’t stress too much about it!
Recipe Variations
Here are a few fun variations to spice up your Mini Oreo Cheesecakes:
-
Peanut Butter Twist
Add 1/4 cup of creamy peanut butter to your cheesecake mixture for a rich, nutty flavor. -
Minty Fresh
Substitute mint Oreos for a refreshing spin and add a drop or two of mint extract. -
Fruit-Filled Delight
Top your cheesecakes with fresh berries or a quick berry compote for a fruity contrast. -
Chocolate Drizzle
Melt some chocolate and drizzle it over the cheesecakes just before serving for a luxurious touch. -
Gluten-Free Version
Use gluten-free Oreos and ensure your powdered sugar is gluten-free for a luscious treat everyone can enjoy!
Chef’s Notes
I can’t help but laugh when I think back to the first time I made these cheesecakes. I was so eager to whip them up that I accidentally confusingly added double the amount of powdered sugar! What resulted was an unbelievably sweet filling—almost too much for my taste! But instead of a disaster, it turned into a fun learning experience. I learned to take my time and follow my intuition in the kitchen. Remember, every mishap is a chance to learn!
FAQs and Troubleshooting
-
Q: My cheesecakes are too liquidy. What went wrong?
A: Make sure the cream cheese is fully softened before mixing. Also, ensure you whip the heavy cream until it reaches stiff peaks before folding it into the mixture for perfect texture. -
Q: Can I freeze these cheesecakes?
Absolutely! Just wrap them tightly in plastic wrap and foil, then store them in an airtight container. They can be frozen for up to 2 months. Thaw them in the fridge before serving. -
Q: How long do these last in the fridge?
They should be good for about 5 days in the refrigerator. Just keep them covered to maintain freshness! -
Q: Are these kid-friendly?
Definitely! Little ones love the mini size. Just keep an eye on portion sizes if they’re in a sugar rush!
Nutritional Info (Optional)
While indulging in delicious desserts can mean giving up a bit on the nutritional side, here’s a rough estimate for each mini cheesecake:
- Calories: 150
- Fat: 10g
- Carbohydrates: 15g
- Protein: 2g
Ultimately, indulging in sweets occasionally is all about balance, so enjoy these cheesecakes guilt-free!
Mini Oreo Cheesecakes are a delightful way to spread joy and sweeten any occasion. With easy preparation, customizable flavors, and irresistible taste, they’ll become a favorite no matter where you serve them. So, roll up those sleeves, gather your ingredients, and let’s create something timeless at your table! Tie on your apron, and let the fun begin!
PrintMini Oreo Cheesecakes
Bite-sized mini cheesecakes that combine creamy cheesecake and crunchy Oreos for a delightful treat.
- Prep Time: 15 minutes
- Cook Time: 240 minutes
- Total Time: 255 minutes
- Yield: 12 servings 1x
- Category: Dessert
- Method: No-Bake
- Cuisine: American
- Diet: Vegetarian
Ingredients
- 8 oz cream cheese, softened
- 1/2 cup powdered sugar
- 1/2 cup heavy cream
- 1 tsp vanilla extract
- 10 Oreo cookies, crushed
Instructions
- Prepare the cupcake liners by placing them in a muffin tin.
- Crush the Oreo cookies in a zip-top bag until they resemble fine crumbs.
- Make the cheesecake filling by beating the cream cheese and powdered sugar until smooth.
- Add the heavy cream and vanilla extract to the mixture and beat until thick and fluffy.
- Fold in the crushed Oreos carefully.
- Fill the cupcake liners with the cheesecake mixture.
- Chill in the fridge for at least 4 hours, or overnight.
- Serve with reserved Oreo crumbs and whipped cream on top.
Notes
Can be customized with various Oreo flavors or toppings. Best served chilled for a delightful experience.
Nutrition
- Serving Size: 1 serving
- Calories: 150
- Sugar: 10g
- Sodium: 200mg
- Fat: 10g
- Saturated Fat: 6g
- Unsaturated Fat: 4g
- Trans Fat: 0g
- Carbohydrates: 15g
- Fiber: 1g
- Protein: 2g
- Cholesterol: 30mg
Keywords: cheesecake, mini desserts, Oreo, no-bake, easy recipes
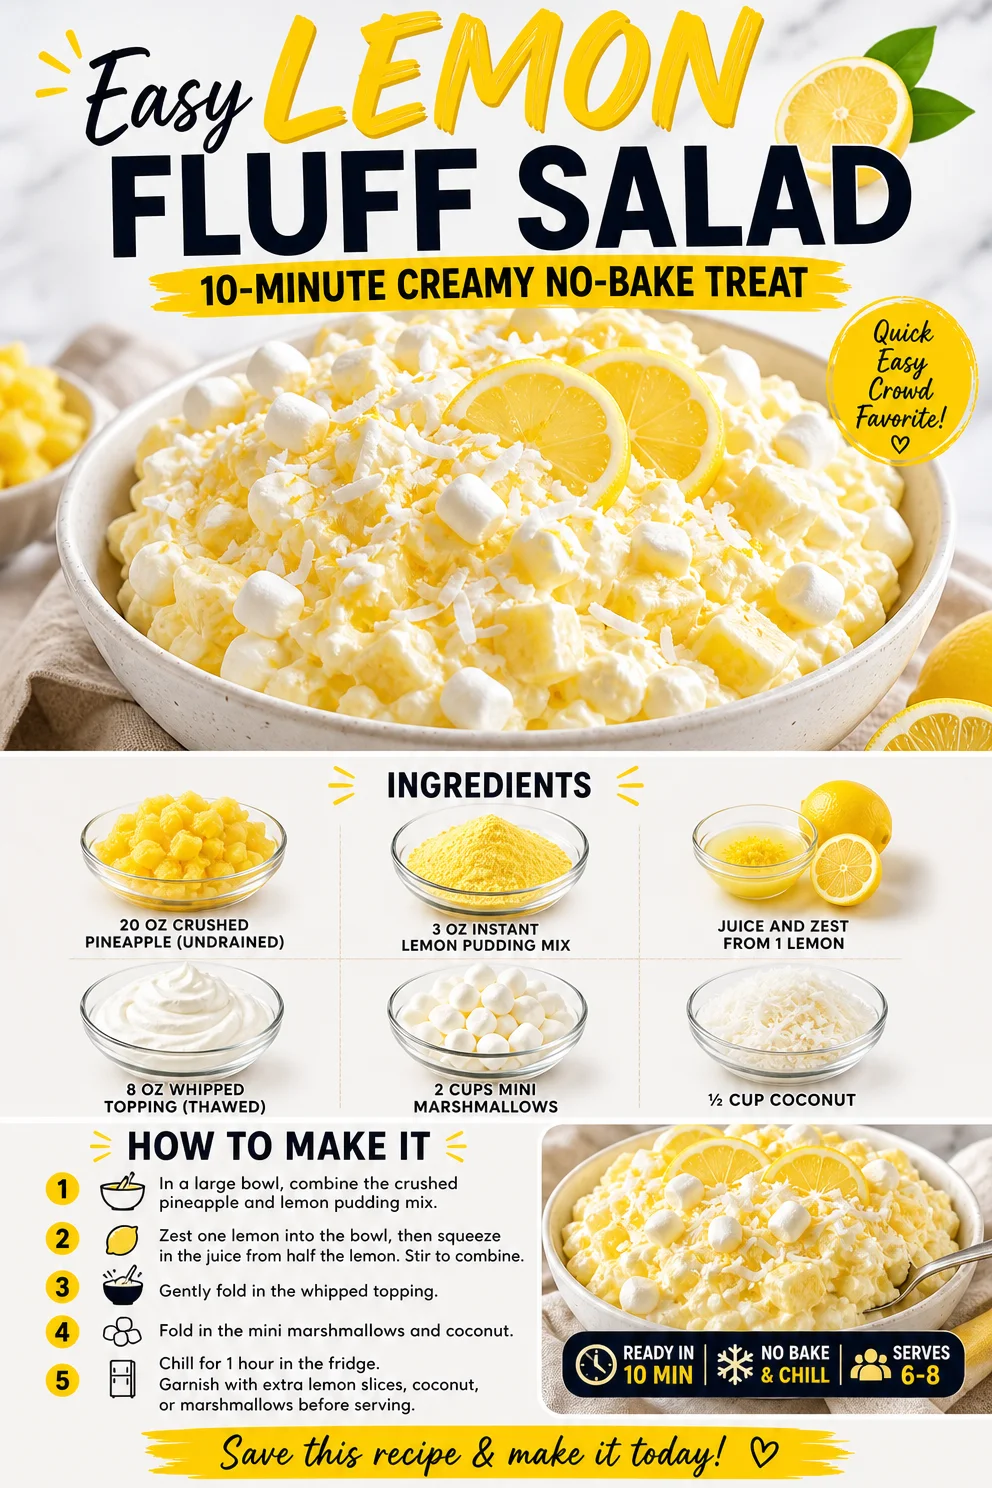
Easy Lemon Fluff Salad: 10-Minute Creamy No-Bake Treat
A Taste of Nostalgia: Classic Lemon Fluff Salad
Hello, dear foodies! Today, we’re diving into a dessert that’s as light as a cloud and as refreshing as a spring day: Classic Lemon Fluff Salad. This delightful dish is the perfect balance of bright citrus and creamy sweetness, bringing a smile to your face with each fluffy spoonful. It’s not just a salad; it’s a nostalgic journey through family gatherings, summer picnics, and delightful potluck dinners. So, roll up your sleeves, and let’s whip up a bowl of sunshine!
A Little Slice of My Kitchen History
Let me take you back to a sunny afternoon at my grandmother’s house—what a place of warmth and joy! This was where I first took a bite of Lemon Fluff Salad. Picture this: lush green grass, a big wooden picnic table adorned with a checkered tablecloth, and my family gathered round, sharing laughter and stories. Grandma would always make this salad for special occasions and summer get-togethers, and it was as iconic as her homemade lemonade.
I remember the excitement as Grandma stirred together the bright yellow mix, her laughter echoing in the background. Watching her zest that lemon was a revelation! Who knew such a simple step could elevate a dish so much? When served chilled, that light and airy fluff would melt away any worries. Each taste brought back memories of long summer days and the feeling of togetherness. Now, every time I make it, I’m whisked back to those precious moments, and I hope to share that joy with you too!
Ingredients
Here’s what you’ll need to create this delightful Classic Lemon Fluff Salad:
-
20 oz crushed pineapple (undrained)
- This ingredient is the foundation of the fluffiness. The sweetness from the pineapple perfectly complements the tartness of the lemon. If you can’t find crushed pineapple, you can use chopped fresh pineapple—just make sure to drain some juice to maintain the right consistency.
-
3 oz instant lemon pudding mix
- This is the secret weapon! The instant pudding mix gives the salad its creamy texture and enhances that bright lemon flavor. If you want a twist, you could substitute it with vanilla pudding for a milder taste.
-
Juice and zest from 1 lemon
- This adds a fresh, zesty kick! A zester is your best friend here; it gives you that vibrant lemon zest that’s packed with oils—perfect for enhancing flavor. If you’re out of lemons, bottled lemon juice can work in a pinch, but it won’t have the aromatic benefits of the zest.
-
8 oz whipped topping (thawed)
- The whipped topping adds a luscious creaminess that lightens everything up. If you prefer, you can use homemade whipped cream for a fresher taste—just whip heavy cream with a bit of sugar until soft peaks form.
-
2 cups mini marshmallows
- Sweet little bites of joy! These marshmallows add a lovely texture and extra sweetness. If you’re not a fan of marshmallows, you can leave them out or swap for diced fruits like strawberries or bananas for a fresher alternative.
-
½ cup coconut
- This ingredient gives the salad a wonderful chewy texture and a hint of tropical flair. You can use sweetened or unsweetened coconut, depending on your preference. Don’t have coconut? No problem! You can replace it with slivered almonds for added crunch.
Step-by-Step Instructions
Now let’s get into the nitty-gritty of creating this delicious Lemon Fluff Salad!
-
Prepare the base
Start by grabbing a large mixing bowl. Open your can of crushed pineapple—no need to drain it—and pour it into the bowl. It’s okay if some juice comes along; this will help keep everything nice and moist. Just imagine that golden goodness glistening in the sun! -
Mix the pudding
Next, sprinkle the 3 oz of instant lemon pudding mix over the pineapple. Use a spatula to gently fold them together. You want to ensure that the pudding is well incorporated without creating clumps. The pudding will start to thicken up as it combines with the pineapple juices; it’s like magic in action! -
Add the zest and juice
Now, zest your lemon using a zester or fine grater to get about 1 tablespoon of zest. Set it aside, then cut the lemon in half to squeeze out the juice. Add both the zest and juice to the mixture, and fold gently. This is where the salad starts to come alive! The fragrance of lemon will fill your kitchen—how delightful! -
Incorporate the whipped topping
Now, let’s lighten things up! Take your 8 oz of thawed whipped topping and gently fold it into the pineapple mixture. Remember, the goal here is to keep it fluffy, so be gentle! This step adds that marvelous creaminess that makes every bite heavenly. -
Add the marshmallows and coconut
Time for the fun part! Gently fold in the 2 cups of mini marshmallows and ½ cup coconut. These little additions create bursts of sweetness and texture that’ll make your taste buds dance! -
Chill the salad
Transferring the mixture to a serving bowl, cover it and let it chill in the refrigerator for at least 2 hours. This allows the flavors to meld together beautifully and for the salad to firm up nicely. Trust me; the wait will be worth it!
Serving Suggestions
Presentation is key to making this dish truly shine! Spoon the chilled Lemon Fluff Salad into decorative bowls or a large glass trifle dish for a beautiful effect. Top it with a sprinkle of extra lemon zest or a few extra mini marshmallows for flair. Serve it alongside other goodies at your next gathering, or enjoy it solo as a sweet treat. Either way, it’s sure to impress!
Recipe Variations
Feeling adventurous? Here are some creative twists to try:
- Berry Delight: Mix in 1 cup of fresh berries—strawberries, blueberries, or raspberries—for a fruity explosion.
- Nutty Coconut Crunch: Swap coconut with toasted pecans or almonds for added crunch.
- Zesty Lime Fluff: Substitute lemon with lime for a tangy twist that’s just as refreshing!
- Tropical Pineapple: Add diced mango or kiwi for an exotic flair.
- Dairy-Free Option: Use coconut whipped cream and dairy-free pudding to make this salad suitable for lactose-intolerant friends.
Chef’s Notes
Ah, the memories this recipe stirs up! I’ve made this salad countless times, and each time, it brings a wave of nostalgia. It’s evolved into a family classic at my gatherings. Just last year, during a summer reunion, I decided to add that extra zest of lemon zest and wow, did it take the dish to another level! My cousin said it reminded them of Grandma’s recipe, and honestly, that’s the highest compliment I could ask for!
In the spirit of sharing, I encourage you to experiment with this recipe. Add your personal touch, and watch it become part of your family’s stories too!
FAQs and Troubleshooting
1. What can I use instead of whipped topping?
You can use homemade whipped cream! Just whip heavy cream with some sugar until soft peaks form for a fresher taste.
2. Can I make this salad ahead of time?
Absolutely! This salad actually benefits from being chilled overnight; the flavors get even better.
3. What if my salad seems too runny?
It might need a little more time to chill. If it’s still too runny after chilling, add a little more instant pudding mix to help thicken it.
4. How long can I store leftover salad?
Keep leftovers in an airtight container in the refrigerator. It’ll stay fresh for about 3-4 days, but honestly, it’s so good, I doubt there’ll be any left!
Nutritional Info
For those who like to keep track, here are approximate nutritional values per serving (makes about 8 servings):
- Calories: 180
- Total Fat: 5g
- Saturated Fat: 2g
- Cholesterol: 5mg
- Sodium: 50mg
- Total Carbohydrates: 34g
- Dietary Fiber: 1g
- Sugars: 24g
- Protein: 1g
Now that you have all the tools and stories to make this Classic Lemon Fluff Salad, it’s time to gather around your table, share a delicious dessert, and make those beautiful memories that linger long after the last spoonful is gone. Happy cooking, friends! 🍋✨
PrintClassic Lemon Fluff Salad
A delightful dessert salad that balances bright citrus and creamy sweetness, perfect for gatherings.
- Prep Time: 20 minutes
- Cook Time: 0 minutes
- Total Time: 120 minutes
- Yield: 8 servings 1x
- Category: Dessert
- Method: Chilling
- Cuisine: American
- Diet: Vegetarian
Ingredients
- 20 oz crushed pineapple (undrained)
- 3 oz instant lemon pudding mix
- Juice and zest from 1 lemon
- 8 oz whipped topping (thawed)
- 2 cups mini marshmallows
- ½ cup coconut
Instructions
- Start by grabbing a large mixing bowl. Open your can of crushed pineapple and pour it into the bowl.
- Sprinkle the instant lemon pudding mix over the pineapple. Use a spatula to gently fold them together.
- Zest your lemon to get about 1 tablespoon of zest. Squeeze out the juice and add both to the mixture, folding gently.
- Take your thawed whipped topping and gently fold it into the pineapple mixture.
- Fold in the mini marshmallows and coconut until evenly distributed.
- Transfer the mixture to a serving bowl, cover it, and let it chill in the refrigerator for at least 2 hours.
Notes
Add extra lemon zest or marshmallows on top for presentation. This salad also benefits from being made ahead of time.
Nutrition
- Serving Size: 1 serving
- Calories: 180
- Sugar: 24g
- Sodium: 50mg
- Fat: 5g
- Saturated Fat: 2g
- Unsaturated Fat: 3g
- Trans Fat: 0g
- Carbohydrates: 34g
- Fiber: 1g
- Protein: 1g
- Cholesterol: 5mg
Keywords: lemon, salad, dessert, fluff salad, summer dessert, pineapple, nostalgic
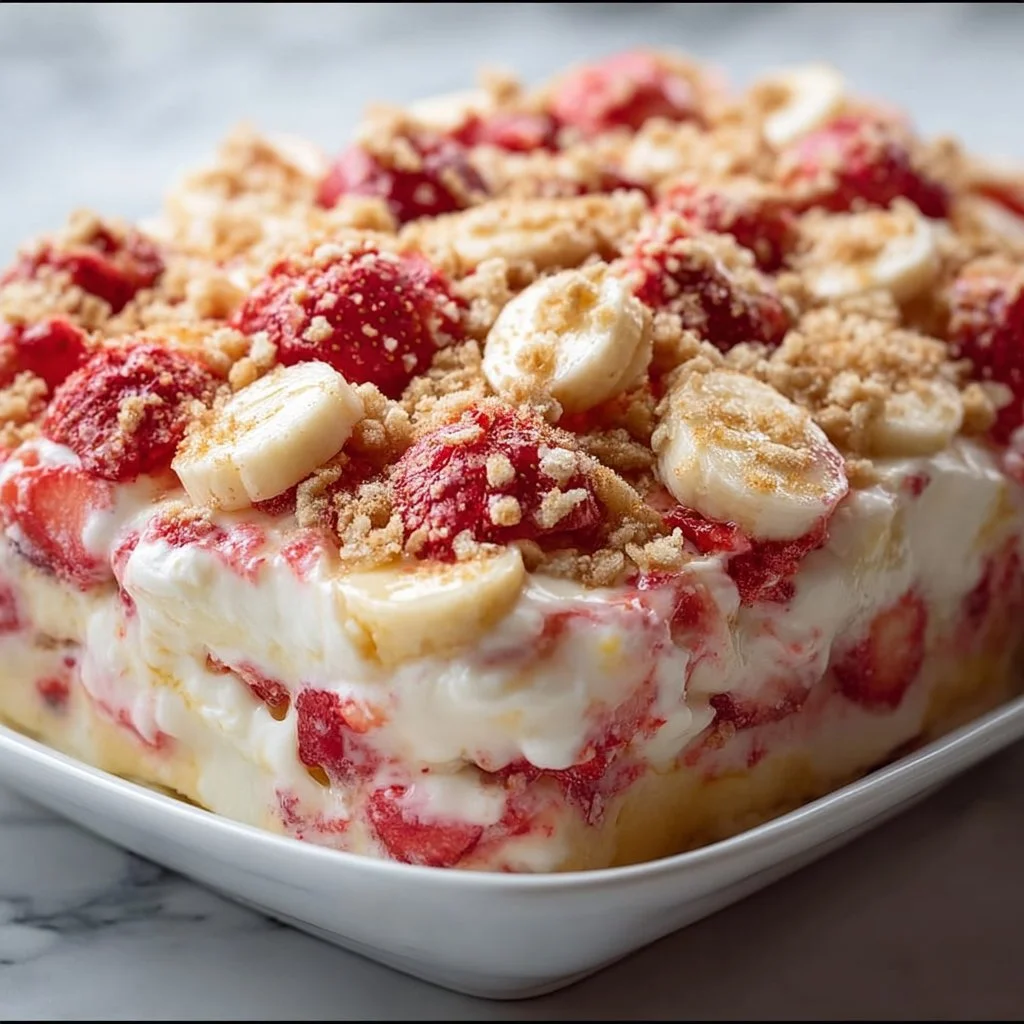
Strawberry Crunch Banana Pudding
The Delightful Harmony of Strawberry Crunch Banana Pudding
Hello, fellow food lovers! Today, let’s dive into a dish that’s near and dear to my sweet tooth—Strawberry Crunch Banana Pudding. This dessert isn’t just another pudding; it’s a delightful medley that combines the creaminess of vanilla pudding, the brightness of fresh bananas, and the unexpected crunch from strawberry cookie crumble. Whether you’re looking for a treat to impress your friends at a dinner party or simply want to indulge in something sweet after a long day, this recipe is here to save the day!
Growing up, I spent a lot of time in my grandmother’s kitchen while she worked her culinary magic. One of my fondest memories is when she would whip up her famous banana pudding during family gatherings. We’d all gather around the table, and the air would fill with laughter and that inviting aroma of pudding cooling in the refrigerator. She had a way of making the ordinary feel special—like a masterpiece crafted from everyday ingredients. Fast forward to today, and I’ve added my own twist: a strawberry crunch topping to elevate her classic recipe into something new and exciting.
This Strawberry Crunch Banana Pudding brings back all those warm memories while letting me share my passion for creating sophisticated yet simple desserts. Pairing the smooth vanilla pudding with the freshness of bananas and that buttery strawberry crunch is a joyous experience that will have your taste buds dancing. Let’s explore how to craft this delicious treat together!
Ingredients
To create this beautiful dessert, you’ll need the following ingredients:
-
1 package of vanilla pudding mix
The base of this dessert, vanilla pudding, provides a creamy and smooth texture. If you want an alternative, consider using a sugar-free version or a flavored pudding mix like banana or cheesecake. -
2 cups of milk
Whole milk creates a richer texture, but you can experiment with skim milk or plant-based alternatives like almond milk or oat milk for a different flavor. -
3 bananas, sliced
Ripe bananas are a must for this recipe; their natural sweetness adds to the dessert’s charm. If you’re not a banana fan, you could swap them out for thinly sliced peaches or berries for a fresh twist. -
1 container of whipped topping
This adds a light and airy texture to the pudding. You can use homemade whipped cream if you prefer a more natural option, or an alternative like coconut whipped cream for a dairy-free version. -
1 cup of strawberry cookie crumble
This is where the magic happens! You can make your crumble with buttery strawberry cookies, or if they’re not available, any buttery shortbread cookies mixed with some strawberry powder can work beautifully. -
Fresh strawberries for garnish (optional)
A pop of color and freshness, fresh strawberries make the dessert look inviting and add a burst of flavor. If you’re short on strawberries, blueberries or raspberries could work too!
Step-by-Step Instructions
Step 1: Prepare Your Pudding
- In a large mixing bowl, combine the vanilla pudding mix with 2 cups of milk.
Tip: Whisk vigorously for about 2 minutes until the mixture thickens—this is where the magic starts! Use a handheld mixer on low if you want to make it even fluffier.
Step 2: Fold in the Whipped Topping
- Once the pudding has set, gently fold in the container of whipped topping.
Chef Hack: Use a spatula and a gentle folding motion to keep the mixture light and airy. Remember, we want that creamy texture without losing all the fluffiness!
Step 3: Layer Your Ingredients
-
In a large glass serving dish or individual cups, start layering: begin with a layer of pudding, followed by a layer of sliced bananas.
Bonus Tip: Arrange the banana slices in a circle for a beautiful presentation—trust me, your guests will be impressed! -
Repeat the layering process until you’ve reached the top of your dish, finishing with a layer of pudding.
Step 4: Top with Crunch
- Sprinkle the strawberry cookie crumble generously over the top layer.
Chef Insight: Don’t hold back on the crumble—this is the highlight of the dish! If you’d like extra crunch, consider toasting the crumble slightly in a pan for 5-7 minutes.
Step 5: Chill and Garnish
- Place the finished pudding in the refrigerator for at least 2 hours (or ideally overnight) to allow the flavors to meld and the pudding to set perfectly.
Final Touch: When ready to serve, garnish with fresh strawberries for that extra charm.
Serving Suggestions
When it comes to serving your Strawberry Crunch Banana Pudding, the beauty is in the details! For a stunning presentation, consider using individual glass cups or jars. This not only showcases the delightful layers but also makes for an appealing dessert buffet. Drizzle a bit of homemade chocolate sauce or caramel on top just before serving for an extra special treat!
Recipe Variations
Let’s get playful! Here are some fun twists on this classic recipe:
- Chocolate-Chip Banana Pudding: Add mini chocolate chips to the pudding for that chocolate lover’s touch.
- Nutty Banana Crunch: Sprinkle in some chopped nuts like pecans or almonds for added texture.
- Berry Medley: Swap out the strawberries for a mix of your favorite berries—blueberries, raspberries, and blackberries for a fruity explosion!
- Savory Banana Pudding: A hint of cream cheese in the pudding could offer a delightful tang if you’re feeling adventurous.
- Lemon Zest: A little lemon zest in the pudding adds a refreshing punch—perfect for warm weather gatherings!
Chef’s Notes
As many recipes do, this Strawberry Crunch Banana Pudding has evolved over time. I even remember the first time I served it at a family gathering—a few skeptical looks turned to delight as forks dove in. The crunch was indeed a game-changer! My journey with this dish ignited my love for creating layers of flavor and texture. Plus, it’s an easy go-to when unexpected guests stop by; it takes less than 30 minutes to prep!
One thing I always keep in mind is to bring my personality into my cooking. There’s something magical about sharing food with loved ones that creates connection and warmth. This dish has become a staple—it’s a reminder of my grandmother’s kitchen where so much love began.
FAQs and Troubleshooting
1. Can I make this pudding ahead of time?
Absolutely! This pudding actually tastes better the next day, once it has chilled and all the flavors have melded together.
2. What if I can’t find strawberry cookies?
No worries! You can make your crumble with any buttery cookies. Just blend them with a touch of strawberry jam or freeze-dried strawberries for that strawberry flavor!
3. Why is my pudding not thickening?
Make sure you’re whisking the pudding mix and milk well for the recommended time. If it still doesn’t thicken, you may need to check the expiration date on your pudding mix.
4. How should I store leftovers?
Keep any leftovers covered in the refrigerator. It should stay fresh for about 3-4 days, though the crumble might lose some crunch.
Nutritional Info
If you’d like to know the nutritional breakdown, a serving of Strawberry Crunch Banana Pudding contains approximately:
- Calories: 250
- Total Fat: 10g
- Saturated Fat: 5g
- Carbohydrates: 38g
- Sugars: 20g
- Protein: 3g
Remember, these figures may vary depending on the specific brands of ingredients used.
So there you have it! Your very own guide to creating Strawberry Crunch Banana Pudding that marries nostalgia with elegance. I hope you find joy in making this dish as much as I do. Let’s gather around the table, dive into some layers of deliciousness, and create memories that last! I can’t wait to hear how yours turns out—happy cooking!
PrintStrawberry Crunch Banana Pudding
A delightful medley of creamy vanilla pudding, fresh bananas, and crunchy strawberry cookie crumble.
- Prep Time: 30 minutes
- Cook Time: 0 minutes
- Total Time: 120 minutes
- Yield: 4 servings 1x
- Category: Dessert
- Method: Chilling
- Cuisine: American
- Diet: Vegetarian
Ingredients
- 1 package of vanilla pudding mix
- 2 cups of milk
- 3 bananas, sliced
- 1 container of whipped topping
- 1 cup of strawberry cookie crumble
- Fresh strawberries for garnish (optional)
Instructions
- In a large mixing bowl, combine the vanilla pudding mix with 2 cups of milk. Whisk vigorously for about 2 minutes until the mixture thickens.
- Once the pudding has set, gently fold in the container of whipped topping.
- In a large glass serving dish or individual cups, start layering: begin with a layer of pudding, followed by a layer of sliced bananas.
- Repeat the layering process until you’ve reached the top, finishing with a layer of pudding.
- Sprinkle the strawberry cookie crumble generously over the top layer.
- Place the finished pudding in the refrigerator for at least 120 minutes (or ideally overnight) to allow the flavors to meld.
Notes
Consider using individual glass cups for serving. Drizzle homemade chocolate sauce or caramel on top before serving.
Nutrition
- Serving Size: 1 serving
- Calories: 250
- Sugar: 20g
- Sodium: 105mg
- Fat: 10g
- Saturated Fat: 5g
- Unsaturated Fat: 5g
- Trans Fat: 0g
- Carbohydrates: 38g
- Fiber: 1g
- Protein: 3g
- Cholesterol: 15mg
Keywords: banana pudding, strawberry dessert, summer dessert
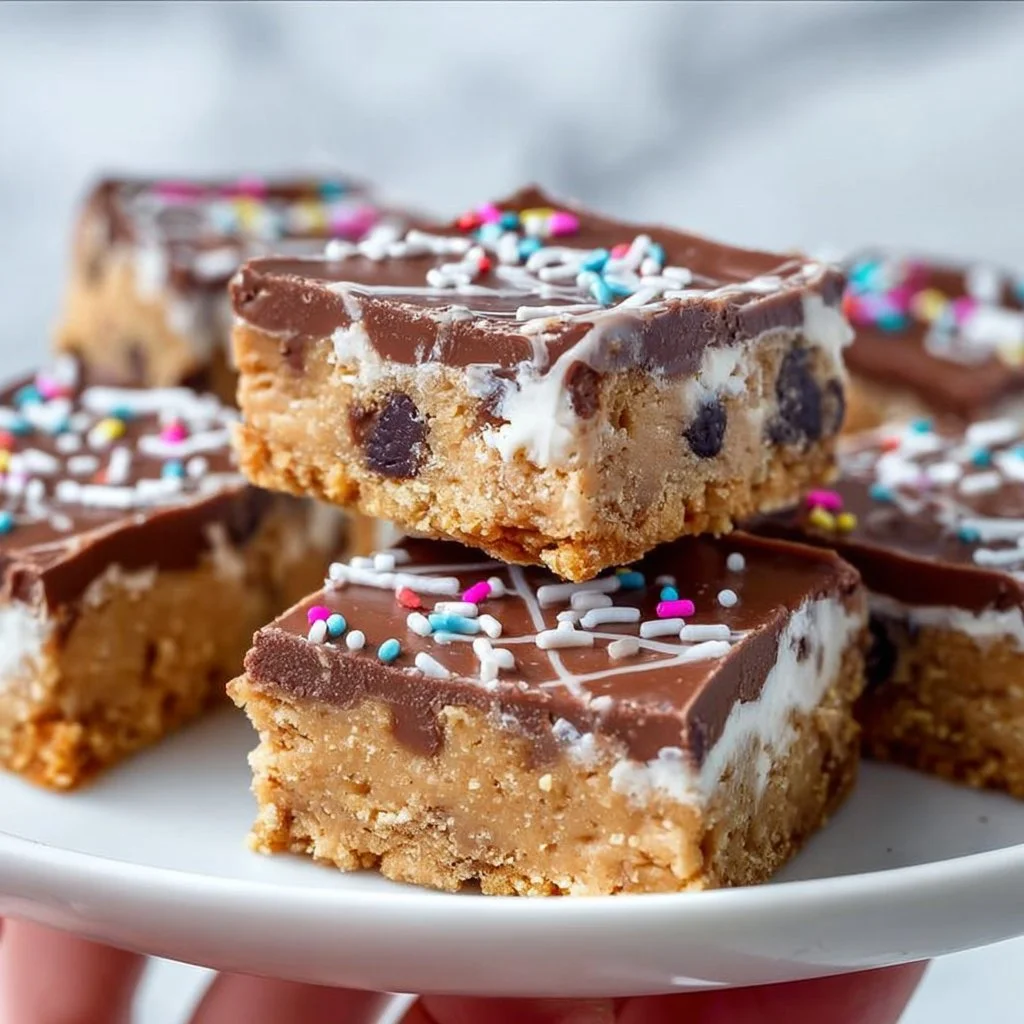
No Bake Cookie Dough Bars
Indulge in No-Bake Cookie Dough Bars: A Delicious Adventure in Your Kitchen
Hey there, fellow food lovers! If you’re anything like me, you’ve had that moment where you find yourself scrolling through endless recipes, craving something sweet, yet wanting it to be easy and fuss-free. Well, today is your lucky day! I’m excited to share with you my all-time favorite recipe for No-Bake Cookie Dough Bars. Picture this: bite-sized morsels of cookie dough goodness that you can whip up in minutes—no oven required. Perfect for a late-night snack, an impromptu gathering, or simply to satisfy those chocolate cravings (which we all know can be quite insatiable).
These bars embody what I love about cooking: they’re simple yet indulgent, and they’re a fun way to create a treat that feels homemade without putting yourself through the wringer in the kitchen. With just a handful of wholesome ingredients, you’ll be able to dig into a dessert that’s creamy, sweet, and oh-so-satisfying. So, tie on your apron and let’s get started on this sweet adventure!
Personal Story
The inspiration behind these No-Bake Cookie Dough Bars comes from my childhood. I remember spending weekends in the kitchen with my grandmother, who had an undeniable talent for whipping up desserts that felt like a warm hug. One afternoon, she introduced me to the joys of cookie dough—sneaking spoonfuls from the mixing bowl while she baked classic chocolate chip cookies. It was pure magic! I can still hear her laughter and the clattering of pots and pans as we made joyful messes together.
Fast forward to now, and I’ve taken that nostalgic memory and put a modern twist on it. These bars remind me of those carefree days, but they also align with my passion for creating approachable, elegant dishes. Whether you’re hosting a casual get-together or enjoying a cozy night in, these No-Bake Cookie Dough Bars bring a delightful taste of nostalgia into the present.
Ingredients
Here’s what you need to create these scrumptious bars:
-
1 cup almond flour
A versatile and gluten-free option that provides a lovely nutty flavor. If you need a substitute, you can use oat flour or all-purpose flour, but keep in mind that the texture may slightly change. -
1/2 cup maple syrup
This natural sweetener offers a rich flavor that balances perfectly with the other ingredients. You can swap it with agave nectar or honey if you prefer, but ensure you’re okay with the flavor variations. -
1/2 cup peanut butter or almond butter
This is where the creaminess comes from! I love the taste of peanut butter, but almond butter will give you a lighter flavor. For a nut-free option, sunflower seed butter works beautifully too. -
1/2 cup dark chocolate chips
Adds that heavenly burst of sweetness and richness! If you’re looking for a dairy-free version, make sure to use vegan chocolate chips. -
1 teaspoon vanilla extract
This ingredient elevates the overall flavor and adds a warm, aromatic essence. You can skip it if you’re in a pinch or substitute with almond extract for a different twist. -
Pinch of salt
A little salt helps balance the sweetness of the bars. Trust me; it makes a world of difference! If you’re avoiding sodium, you can omit it, but I wouldn’t recommend it.
Step-by-Step Instructions
Step 1: Gather Your Ingredients
First things first—before diving in, let’s make sure we have all these beautiful ingredients at hand! Set your workspace with everything ready so you can whip these bars up like a pro.
Step 2: Mix the Base
In a mixing bowl, combine the almond flour and salt. Make sure there are no clumps! The smoother the mixture, the better your bars will be. Add in the peanut butter and mix until you have a thick, paste-like consistency. This is where your fork or spatula becomes your best friend—don’t be shy!
Step 3: Sweeten the Mixture
Now it’s time to incorporate the maple syrup and vanilla extract. Pour them in and mix everything together until you achieve a well-combined dough. Remember, don’t rush this part; letting your ingredients really blend together makes all the difference!
Step 4: Fold in the Chocolate Chips
Once mixed, gently fold in the dark chocolate chips. Use your spatula to ensure an even distribution throughout your dough. This is where the indulgent magic happens—feel free to steal a few chocolate chips for yourself, I promise I won’t tell!
Step 5: Press the Dough into a Pan
Now, choose a square baking dish (about 8×8 inches works great) and line it with parchment paper for easy removal later. Pour your dough mixture into the dish and press it down firmly using your palms or a spatula. This step is essential, as it ensures your bars have a nice structure once they set.
Step 6: Chill
Pop your pan into the refrigerator and let it chill for at least an hour. This waiting can feel like the toughest part, but it’s essential for the bars to firm up and become sliceable.
Step 7: Slice and Serve
Once chilled, remove the bars from the fridge and lift them out using the parchment paper. Cut them into squares or bars, depending on your preference.
Step 8: Enjoy!
Now, it’s time to indulge! Serve these bars at room temperature, or even chilled for a refreshing twist.
Serving Suggestions
Place the bars on a lovely platter and sprinkle with a touch of sea salt to enhance their beauty and flavors. Pair with a dollop of whipped cream or a scoop of vanilla ice cream if you’re feeling extra indulgent. They also make for a fabulous addition to a charcuterie board!
Recipe Variations
- Nut-Free Delight: Replace peanut or almond butter with sunflower seed butter for a nut-free version.
- Protein Punch: Add a scoop of your favorite protein powder for an added health boost.
- Coconut Cream: Incorporate shredded coconut into the dough for a tropical twist.
- Spicy Kick: Add a tiny pinch of cayenne pepper for a surprising, spicy kick.
- Fruit Fusion: Mix in chopped dried fruits like cranberries or apricots for a chewy texture.
Chef’s Notes
I can’t tell you how many times I’ve made these bars with different flavors, simply because I love experimenting! One time, in the middle of summer, I added a handful of crushed graham crackers for a s’mores-inspired treat—let’s just say it was a hit! Remember, this recipe is your playground. Don’t hesitate to make it your own!
FAQs and Troubleshooting
Q: Why are my bars too crumbly?
A: If your bars are falling apart, they might need just a bit more moisture. Try adding a little more maple syrup or nut butter until the mixture sticks together better.
Q: Can I use a different sweetener?
A: Absolutely! You can use honey, agave, or even a sugar alternative like stevia or erythritol, keeping in mind that they may alter the final taste slightly.
Q: How should I store the bars?
A: Store these in an airtight container in the fridge for about a week or freeze them for longer-lasting treats. Just make sure to separate layers with parchment paper to keep them from sticking!
Q: Can I bake these bars instead of chilling them?
A: Though the magic of these bars lies in their no-bake nature, you could experiment with baking in a low oven (around 350°F for 10-15 minutes) for a slightly different texture. Keep an eye on them to prevent overcooking!
Nutritional Info
(Optional and can vary based on specific brands and ingredients used. A rough estimate per bar if cut into 12 servings)
- Calories: 130
- Protein: 4g
- Fat: 8g
- Carbohydrates: 12g
- Fiber: 2g
So, there you have it! Your ultimate guide to making No-Bake Cookie Dough Bars! With a dash of nostalgia and a sprinkle of creativity, I hope this recipe finds a special place in your kitchen. Remember, cooking should be a joyful experience—embrace the process, share the love, and most importantly, enjoy every sweet bite! Happy baking!
PrintNo-Bake Cookie Dough Bars
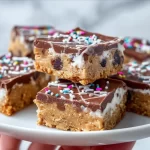
Indulge in these delicious No-Bake Cookie Dough Bars, a perfect treat that embodies simplicity and nostalgia.
- Prep Time: 15 minutes
- Cook Time: 0 minutes
- Total Time: 75 minutes
- Yield: 12 servings 1x
- Category: Dessert
- Method: No-Bake
- Cuisine: American
- Diet: Vegetarian
Ingredients
- 1 cup almond flour
- 1/2 cup maple syrup
- 1/2 cup peanut butter or almond butter
- 1/2 cup dark chocolate chips
- 1 teaspoon vanilla extract
- Pinch of salt
Instructions
- Gather Your Ingredients
- Mix the Base
- Sweeten the Mixture
- Fold in the Chocolate Chips
- Press the Dough into a Pan
- Chill
- Slice and Serve
- Enjoy!
Notes
For a nut-free version, use sunflower seed butter instead. Experiment with different flavors like coconut, protein powder, or dried fruits.
Nutrition
- Serving Size: 1 bar
- Calories: 130
- Sugar: 7g
- Sodium: 50mg
- Fat: 8g
- Saturated Fat: 1.5g
- Unsaturated Fat: 6g
- Trans Fat: 0g
- Carbohydrates: 12g
- Fiber: 2g
- Protein: 4g
- Cholesterol: 0mg
Keywords: no-bake, dessert, cookie dough, easy recipe, quick treat
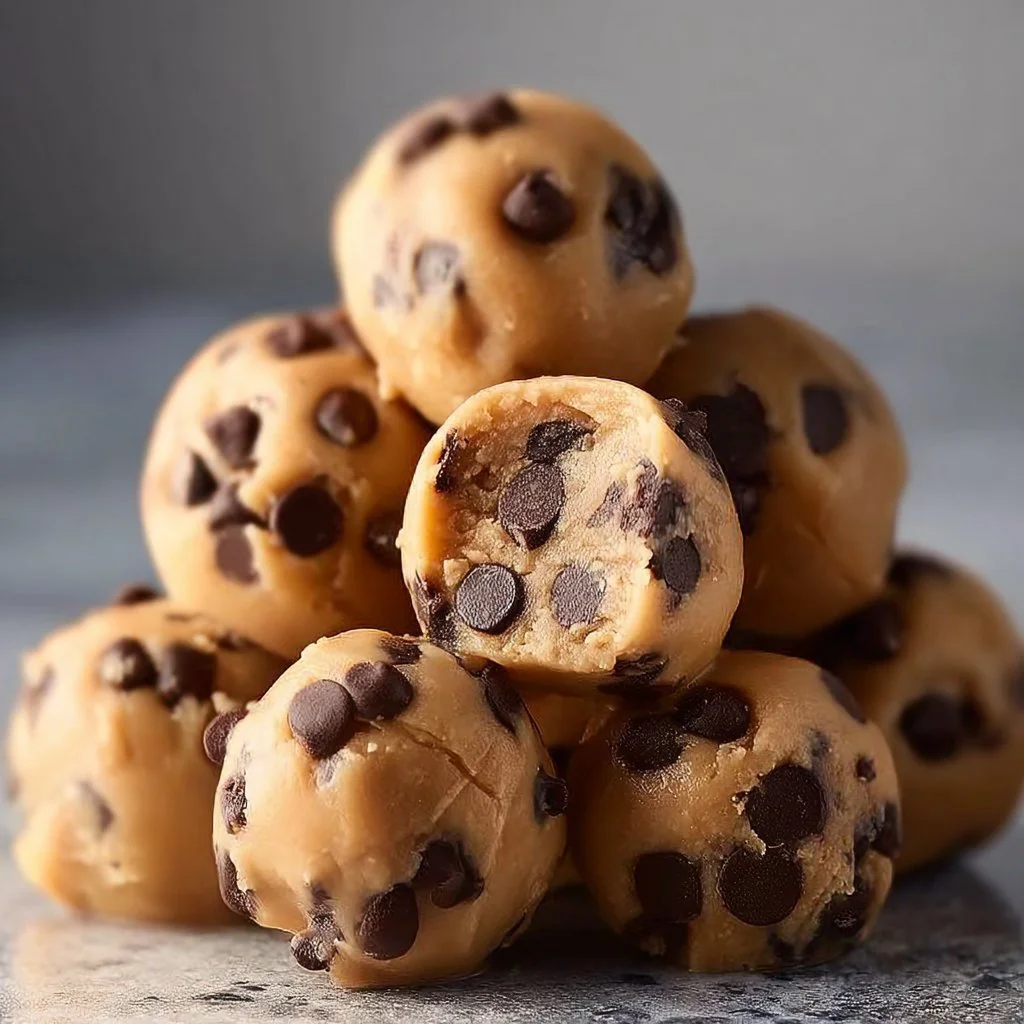
Indulgent No-Bake Cookie Dough Bites Recipe: Easy Dessert Bliss
# Indulgent No-Bake Cookie Dough Bites Recipe: Easy Dessert Bliss

## Introduction

Hello, fellow food lovers! Today, we’re diving into the world of indulgence with a recipe that’s not just easy but downright blissful: No-Bake Cookie Dough Bites! If you’ve ever found yourself craving that nostalgic taste of cookie dough straight from the bowl (you know what I’m talking about!), then hold onto your aprons because this recipe is a game-changer.

Picture this: it’s a Saturday afternoon. The sun is shining through your kitchen window, and there’s nothing on your agenda except indulging in something sweet. These no-bake cookie dough bites come together in a snap! They’re uncomplicated, fun to make, and perfect for satisfying those sweet cravings without turning on the oven.

As I share my tips, tricks, and insights, I want you to feel at home in your kitchen. Let’s whisk together our love for good food and create something delightful that we can share with friends or enjoy all by ourselves (no judgment here!). Ready to roll up those sleeves and create some culinary magic? Let’s do this!

## Personal Story

Whenever I make cookie dough bites, I’m taken back to my childhood—the sweet time when cookie dough was the ultimate treat, and everyone's fingers had a little dough residue. I remember my mom whipping up batch after batch of cookies for family gatherings, and I’d inevitably sneak spoonfuls of that creamy, buttery goodness when her back was turned. We’d laugh at the absurdity of it all, pretending it was our little secret.

One rainy afternoon, with a mix of boredom and hunger, I decided to take matters into my own hands. Armed with my mom’s coveted recipe, I ventured to make cookie dough all by myself. Of course, my first attempt was met with a sprinkle of chaos—flour on the floor, sugar exploding from the bag, and a clear indication that I didn’t quite grasp the concept of “gentle mixing.” Yet, with every failed attempt, to me, the journey was sweeter than the end result. Fast forward years later, and instead of slaving away over a hot oven, I’m bringing you these revamped no-bake bites that capture that same joy and nostalgia.

## Ingredients

Gather your ingredients and let the fun begin! Here’s what you’ll need for these delightful no-bake cookie dough bites:

- **1 stick Unsalted Butter (Softened)**
  This is your foundation for rich, buttery flavor. For a vegan option, simply substitute with dairy-free butter.

- **1/2 cup Light Brown Sugar**
  This adds a hint of caramel flavor, creating that irresistible warmth in the cookie dough. If you're out of brown sugar, you can substitute with granulated sugar mixed with a touch of molasses.

- **2 tablespoons Milk**
  Regular milk or a non-dairy option works great here. The milk helps bring the dough together nicely, so if you're dairy-free, go for almond, soy, or coconut milk; they work perfectly!

- **1 teaspoon Vanilla Extract**
  A must-have for any cookie recipe, this gives depth to the flavor. You can use imitation vanilla in a pinch, but the real stuff elevates the experience.

- **1 cup All-Purpose Flour (Must be heat-treated)**
  Treating your flour is essential for safety since we’re not baking it. To heat-treat, just spread it onto a baking sheet and bake at 350°F (175°C) for about 5-10 minutes, or microwave it in 30-second intervals.

- **1/4 teaspoon Salt**
  This is key for balancing out the sweetness; a touch makes a world of difference!

- **1/2 cup Mini Chocolate Chips**
  Because who doesn’t love chocolate? Mini chips blend in beautifully, offering bites of chocolatey goodness throughout.

- **1 cup Semisweet or Milk Chocolate**
  This will be the outer coating for your bites. Get your favorites here—dark, semisweet, or milk chocolate are all great choices!

- **1 tablespoon Coconut Oil or Vegetable Oil (Optional)**
  Adding this to the chocolate when melting will give it a smoother texture for coating. Plus, it’s an easy way to make the chocolate a little more indulgent.

## Step-by-Step Instructions

Let’s whip up these cookie dough bites and elevate our dessert game!

1. **Prepare Your Flour**: As mentioned, we need heat-treated flour. Spread it on a baking sheet, and pop it in the oven for about 5-10 minutes. This step is crucial to eliminate any potential bacteria since we’re not baking these bites. **Chef Tip**: You can do this ahead of time and store it in an airtight container.

2. **Blend the Butter and Sugar**: In a mixing bowl, cream together your softened unsalted butter and light brown sugar. Using an electric mixer makes this easy-peasy, but don’t worry; a wooden spoon and some elbow grease will do just fine. You want it to be light and fluffy—about 2-3 minutes. **Insider Tip**: Room temperature butter blends better, so don’t forget to take it out of the fridge ahead of time.

3. **Add the Liquid Ingredients**: Mix in the milk and vanilla extract until well combined. This creates a creamy base that will take your cookie bites to the next level.

4. **Incorporate Dry Ingredients**: Once the wet ingredients are mixed together, gradually add in your heat-treated flour and salt. Mix until just combined; this will start looking like the cookie dough you’ve always loved.

5. **Chocolate Chips, Please!**: Stir in the mini chocolate chips. I always find it fun to add just a few extra for good measure—more chocolate, more happiness! **Chef Hack**: If you prefer a chunkier cookie dough, try chopping up a chocolate bar instead.

6. **Chill the Dough**: Now, grab a spatula, and scoop your cookie dough mixture onto a piece of plastic wrap. Form it into a log or a disc shape, wrap it tightly, and pop it in the fridge for 20-30 minutes. This helps the dough firm up a bit, making rolling easier.

7. **Melt the Chocolate**: In a microwave-safe bowl, combine semisweet or milk chocolate with coconut oil (if using). Microwave in 30-second intervals, stirring in between until fully melted and glossy. A double boiler works perfectly if you prefer to melt chocolate the old-school way.

8. **Shape the Bites**: Once the dough is firm, remove it from the fridge. Using a melon baller or your hands, scoop out bite-sized portions and roll them into balls.

9. **Dip Them in Chocolate**: Dip each dough ball into the melted chocolate, using a fork to gently lift it out and let the excess drip off. **Chef Tip**: If you want an even coating, you can double dip after the first coat has set slightly!

10. **Chill Again**: Place the chocolate-coated bites on a baking sheet lined with parchment paper. Refrigerate until the chocolate has set—about 20 minutes more.

11. **Enjoy**: Once set, pop those bites into a cute jar or onto a pretty plate, and watch them disappear in a flash!

## Serving Suggestions

These No-Bake Cookie Dough Bites are perfect for sharing, but they also make a glorious afternoon snack! To serve, arrange them in a stylish bowl or tiered dessert stand, sprinkle with sea salt for a gourmet touch, and garnish with fresh mint or berries for that pop of color. They’re delightful paired with coffee or a glass of milk for a classic treat!

## Recipe Variations

Get creative with these cookie dough bites! Here are some simple twists you can try:

- **Nutty Cookie Dough Bites**: Mix in crushed nuts, like pecans or walnuts, for added crunch.
- **Peanut Butter Heaven**: Swirl in some creamy peanut butter for a rich and delightful flavor.
- **Coconut Bliss**: Add shredded coconut to the dough for a tropical twist.
- **S’Mores Style**: Toss in mini marshmallows and graham cracker crumbs for a fun take on the campfire classic.
- **Gluten-Free Option**: Substitute all-purpose flour with oat flour or a gluten-free all-purpose blend.

## Chef’s Notes

Creating these bites has been such a rewarding experience, blending nostalgia with modern convenience. From my sticky childhood attempts at crafting cookie dough to these no-bake wonders, it’s all about enjoyment in the kitchen. Far too often, we build barriers around cooking, thinking it must be complicated or time-consuming. This recipe serves as a reminder that joy can come from simplicity! Plus, who wouldn't love a treat that's ready in no time?

## FAQs and Troubleshooting

1. **Can I skip the heat-treating step for the flour?**
   - Technically, yes, but it's not recommended! Heating flour kills any potential bacteria, making it safe to consume raw.

2. **How long do these cookie dough bites last?**
   - Store them in an airtight container in the fridge for up to a week. I doubt they’ll last that long, though!

3. **What if my chocolate is too thick for dipping?**
   - If your melted chocolate is too thick, simply add a little bit more coconut oil or vegetable oil until you reach the desired consistency.

4. **Can I freeze these no-bake bites?**
   - Absolutely! They freeze beautifully. Just make sure to allow them to thaw in the fridge before serving for the best texture.

## Nutritional Info

(Per Cookie Dough Bite - Approximately, varies based on size)

- Calories: 120
- Total Fat: 7g
- Saturated Fat: 4g
- Cholesterol: 15mg
- Sodium: 33mg
- Total Carbohydrates: 13g
- Dietary Fiber: 0g
- Sugars: 9g
- Protein: 1g

---

So there you have it — a delightful recipe for No-Bake Cookie Dough Bites that’s guaranteed to make your sweet tooth sing! Whether you’re sharing with friends or keeping them all to yourself (no judgment here!), I hope you find joy in every bite. Let’s make cooking fun, approachable, and absolutely delicious! Happy baking (or should we say, no baking!), and don’t forget to share your creations with me!
Indulgent No-Bake Cookie Dough Bites

Delicious and easy no-bake cookie dough bites that capture the nostalgic taste of cookie dough.
- Prep Time: 10 minutes
- Cook Time: 30 minutes
- Total Time: 40 minutes
- Yield: 12 servings 1x
- Category: Dessert
- Method: No-Bake
- Cuisine: American
- Diet: Vegetarian
Ingredients
- 1 stick Unsalted Butter (Softened)
- 1/2 cup Light Brown Sugar
- 2 tablespoons Milk
- 1 teaspoon Vanilla Extract
- 1 cup All-Purpose Flour (Must be heat-treated)
- 1/4 teaspoon Salt
- 1/2 cup Mini Chocolate Chips
- 1 cup Semisweet or Milk Chocolate
- 1 tablespoon Coconut Oil or Vegetable Oil (Optional)
Instructions
- Prepare Your Flour: Spread it on a baking sheet and pop it in the oven for about 5-10 minutes.
- Blend the Butter and Sugar: Cream together your softened unsalted butter and light brown sugar until light and fluffy.
- Add the Liquid Ingredients: Mix in the milk and vanilla extract until well combined.
- Incorporate Dry Ingredients: Gradually add in your heat-treated flour and salt, mixing until just combined.
- Chocolate Chips, Please!: Stir in the mini chocolate chips.
- Chill the Dough: Scoop your cookie dough mixture onto plastic wrap and form it into a log or disc shape. Refrigerate for 20-30 minutes.
- Melt the Chocolate: Combine semisweet or milk chocolate with coconut oil and microwave in 30-second intervals until fully melted.
- Shape the Bites: Scoop out bite-sized portions of dough and roll them into balls.
- Dip Them in Chocolate: Dip each dough ball into the melted chocolate and let the excess drip off.
- Chill Again: Place the chocolate-coated bites on a parchment-lined baking sheet and refrigerate until the chocolate has set.
- Enjoy: Serve the bites in a cute jar or on a plate and delight in their goodness!
Notes
These cookie dough bites are perfect for sharing or as an afternoon snack. For a gourmet touch, sprinkle with sea salt or garnish with fresh mint.
Nutrition
- Serving Size: 1 bite
- Calories: 120
- Sugar: 9g
- Sodium: 33mg
- Fat: 7g
- Saturated Fat: 4g
- Unsaturated Fat: 2g
- Trans Fat: 0g
- Carbohydrates: 13g
- Fiber: 0g
- Protein: 1g
- Cholesterol: 15mg
Keywords: cookie dough, no-bake dessert, easy sweets, indulgent treats