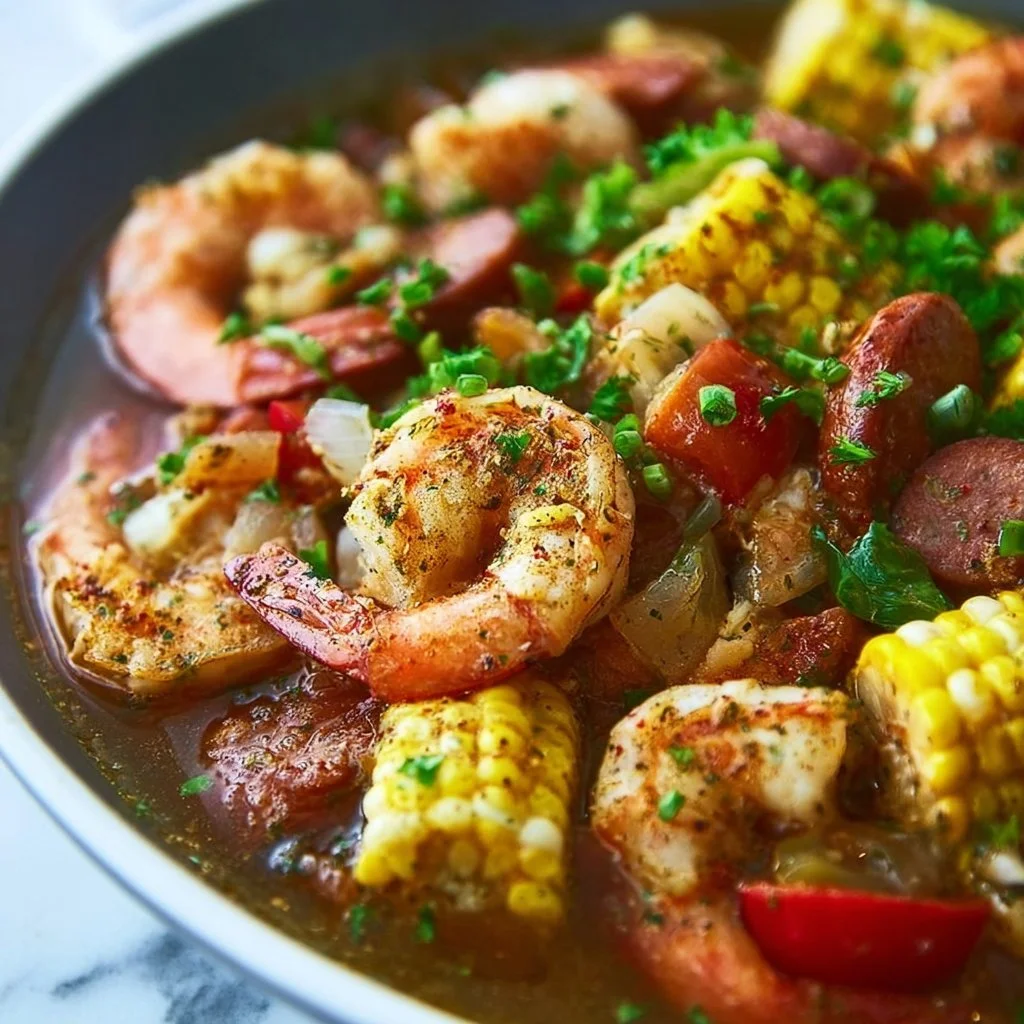
Slow Cooker Shrimp Boil
# Slow Cooker Shrimp Boil: An Effortless Feast

## Introduction

Hey, fellow food lovers! If you’re looking for a laid-back, crowd-pleasing dinner that has all your favorite flavors, you’ve landed in the right place. Today, we're diving into the world of a classic Southern tradition with a twist: a Slow Cooker Shrimp Boil! Picture this — succulent shrimp, tender potatoes, zesty sausage, and sweet corn all melting together in a symphony of flavors. Yep, it’s about to get delicious!

Now, I know what you might be thinking. "A shrimp boil? Isn’t that complicated?" Well, let me assure you, my friend, it doesn't have to be! With the trusty slow cooker, you can kick back and enjoy the aroma of the sea as it fills your kitchen while you prepare for a cozy dinner with friends or family. Plus, the most beautiful part of cooking is sharing a meal that bonds us together, so let’s make sure it’s a celebration worth remembering!

In this blog post, I'll guide you through my personal touch on the shrimp boil, along with stories that will make you smile, tips that’ll keep you cooking like a pro, and of course, that easy-breezy shine of effortless elegance that I strive for here at Ivory Apron. So, grab your apron, prepare to be whisked away to seaside vibes, and let’s get cooking!

## Personal Story

This shrimp boil holds a special place in my heart, just like the sun-drenched summer days spent at my grandparents' beach house. Every Fourth of July, the tradition was simple yet magical: a huge pot simmering outside, the sound of laughter floating through the salty air, and friends and family gathered around with makeshift tables made of picnic blankets.

I can still picture my uncle Mike proudly wearing his oversized bib, ready to tackle the feast. The dogs would trot around, hoping for a stray corn kernel, and my grandmother would squeeze lemon over the spicy, juicy shrimp, urging us all to dig in. There was something undeniably satisfying about the communal spirit of a shrimp boil — hands messy, laughter loud, and everyone instantly transformed into a family.

When I moved away and began hosting my own gatherings, I wanted to capture that same spontaneous joy. Thus, the slow cooker version was born! It allows me to recreate those cherished memories without the fuss of standing over a boiling pot in the heat. Plus, it gives me time to relax and mingle with my guests, just like those sunny days at the beach.

## Ingredients

Let’s make sure you have everything you need to whip up this delectable dish. Here’s your shopping list, along with some tips for each ingredient:

- **1 pound shrimp, deveined**
  - Fresh or frozen works great! If using frozen shrimp, just be sure to thaw them in the fridge overnight. Can't find shrimp? Try substituting with chicken or even lobster for a twist.

- **2 pounds potatoes, quartered**
  - I love using small baby potatoes — they cook evenly and are so tender! If you’re short on time, you can use pre-cut potatoes. Sweet potatoes can also add a lovely sweetness to the dish.

- **1 pound smoked sausage, sliced**
  - Andouille is classic, but don’t hesitate to explore! Turkey sausage is a lighter option, or you could even try chorizo for a spicy kick.

- **4 ears corn, halved**
  - Fresh corn brings a sweetness that’s hard to beat. Canned corn can substitute in a pinch, but it will lack that crunch. If you can’t find corn on the cob, frozen corn works beautifully too.

- **2 tablespoons Old Bay seasoning**
  - This iconic blend is a must! If you can’t find Old Bay, try a mix of paprika, garlic powder, and a hint of cayenne for heat.

- **4 cups water**
  - For the best flavor, consider using seafood stock or vegetable broth instead!

- **Salt and pepper to taste**
  - A little seasoning goes a long way. Start with a pinch and adjust as you go; you can always add more, but you can’t take it out!

- **Lemon wedges (for serving)**
  - Fresh lemon brightens up the dish, so don’t skip it! A twist of lime also offers a delightful twist.

## Step-by-Step Instructions

Alright, let’s roll up those sleeves and get to cooking. This slow cooker shrimp boil is as simple as it gets, and I’ll guide you through each step.

1. **Prepare Your Ingredients**: Start by washing your potatoes and corn. Quarter those potatoes and cut the corn in half. Give your shrimp a good rinse if they’re fresh. You want them sparkling clean!

2. **Layer the Ingredients**: In your slow cooker, begin by adding the quartered potatoes. They’ll need a little more time to cook than the other ingredients, so we’re giving them a head start. Next, layer on the sausage slices — this is where the flavor starts to build!

3. **Add Corn and Water**: Toss the corn halves into the pot, followed by the Old Bay seasoning and the water (or stock if you opted for that). Make sure to stir a little to evenly distribute the spices — we want every bite packed with flavor!

4. **Set the Slow Cooker**: Cover the slow cooker and set it on low for about 4 hours. This is the beauty of slow cooking — you can go about your day and let those flavors meld beautifully without any fuss.

5. **Check the Potatoes**: After 4 hours, take a quick peek and poke the potatoes with a fork. If they’re tender, it’s time to add in your shrimp. If they need more time, let them go for another half hour or so.

6. **Shrimp Power!**: When the potatoes are just right, stir in the shrimp. They cook quickly, so just let them simmer for about 15-20 minutes on low until they turn pink and opaque. This is where the magic happens — they soak up all those fantastic flavors from the broth!

7. **Season to Taste**: Before serving, taste a bite! Add salt or pepper if needed to elevate those flavors. You can always add more Old Bay if you’re feeling adventurous!

8. **Plate It Up**: Once everything is cooked just right, you’re ready to serve. Carefully scoop out the shrimp, potatoes, corn, and sausage into a large bowl or platter, letting that juicy broth pool around the bottom.

## Serving Suggestions

Here’s where the fun really begins! Serve your slow cooker shrimp boil family-style on a big, beautiful platter. Don’t forget to garnish with the lemon wedges — they’re an essential part of the whole experience. Encourage everyone to dig in with their hands, just like our beach gatherings. If you want to bring a touch of elegance, consider laying down some parchment paper on the table to catch those flavorful drips.

Pair it with a crisp green salad or some crusty bread to soak up the tasty broth. And don’t skimp on the drinks — sparkling lemonade or a chilled white wine would complement this dish beautifully!

## Recipe Variations

Feeling creative? Here are a few fun variations you can try:

1. **Spicy Kick**: Add sliced jalapeños or sprinkle with red pepper flakes for some extra heat.
2. **Herbed Delight**: Toss in freshly chopped parsley or dill right before serving for a fresh finish.
3. **Cajun Twist**: Swap Old Bay for a Cajun seasoning blend to give it that southern flair.
4. **Veggie Boost**: Add bell peppers, zucchini, or even artichokes for a pop of color and nutrition!
5. **Gluten-Free Twist**: Make sure to choose gluten-free sausage and paired ingredients, if required!

## Chef's Notes

I remember my first attempts at hosting a shrimp boil; I was so eager to impress! I barely sat down, running back and forth to the kitchen. One time, I accidentally sent a guest in search of napkins, but they came back with a family-sized pack of paper towels instead! We had a good laugh, and from that moment on, I learned to embrace the chaos of hosting. This shrink boil has evolved through the years — adding personal touches from each gathering and transforming into a staple on my dining table.

Oh, and a little tip: don’t forget to enjoy the process! If you find yourself feeling stressed, slow down and savor the moments. That’s what cooking is all about — creating spaces for connection, laughter, and joy.

## FAQs and Troubleshooting

1. **Why did my shrimp turn out rubbery?**
   - Overcooking is the culprit! Be sure to add the shrimp toward the end of the cooking time. They're quick to cook, so keep an eye on them.

2. **Can I make this ahead of time?**
   - Absolutely! Prep your potatoes and sausage, and layer everything in the slow cooker. Cook it when you’re ready, or put it in the fridge and reheat it on low when it’s party time!

3. **What can I do with leftovers?**
   - You’re in luck! Use leftover shrimp and sausage in a pasta dish, stir them into a rice bowl, or throw them in an omelet for a tasty breakfast!

4. **How can I make it spicier?**
   - If you like the heat, be bold! Add some cayenne pepper to the Old Bay, or toss in those jalapeños mentioned earlier to elevate the flavor profile.

## Nutritional Info

Although I refrain from being overly focused on numbers, here's an approximate breakdown per serving:

- **Calories**: 350
- **Protein**: 25g
- **Carbohydrates**: 45g
- **Fat**: 12g

Remember, this recipe is about enjoying good food and good company, so take the nutritional info lightly and delight in the flavors!

---

Now that you’ve got everything you need to recreate this Slow Cooker Shrimp Boil, I can’t wait for you to gather your loved ones and serve it up! Cooking is such a beautiful experience, and I hope this dish brings you as much joy as it brings me. Here’s to heartfelt gatherings, flavorful adventures, and making memories around the table. Happy cooking!
Slow Cooker Shrimp Boil
A classic Southern shrimp boil made easy in a slow cooker, featuring shrimp, potatoes, sausage, and corn with zesty flavors.
- Prep Time: 15 minutes
- Cook Time: 240 minutes
- Total Time: 255 minutes
- Yield: 4 servings 1x
- Category: Main Course
- Method: Slow Cooking
- Cuisine: Southern
- Diet: Seafood
Ingredients
- 1 pound shrimp, deveined
- 2 pounds potatoes, quartered
- 1 pound smoked sausage, sliced
- 4 ears corn, halved
- 2 tablespoons Old Bay seasoning
- 4 cups water
- Salt and pepper to taste
- Lemon wedges (for serving)
Instructions
- Prepare your ingredients by washing the potatoes and corn, quartering the potatoes, and cutting the corn in half.
- Layer the quartered potatoes in the slow cooker, followed by the sausage slices.
- Add the corn halves, Old Bay seasoning, and water, stirring to distribute the spices.
- Set the slow cooker on low for about 4 hours.
- Check the potatoes for tenderness after 4 hours, and adjust cooking time if necessary.
- Add the shrimp when potatoes are tender, and let them simmer for 15-20 minutes until cooked through.
- Season to taste with salt and pepper before serving.
- Plate the shrimp, potatoes, corn, and sausage into a serving dish, enjoying the broth.
Notes
Serve family-style with lemon wedges and encourage guests to eat with their hands for a communal experience.
Nutrition
- Serving Size: 1 serving
- Calories: 350
- Sugar: 5g
- Sodium: 400mg
- Fat: 12g
- Saturated Fat: 4g
- Unsaturated Fat: 6g
- Trans Fat: 0g
- Carbohydrates: 45g
- Fiber: 3g
- Protein: 25g
- Cholesterol: 130mg
Keywords: shrimp boil, slow cooker, Southern cuisine, seafood recipe, easy dinner
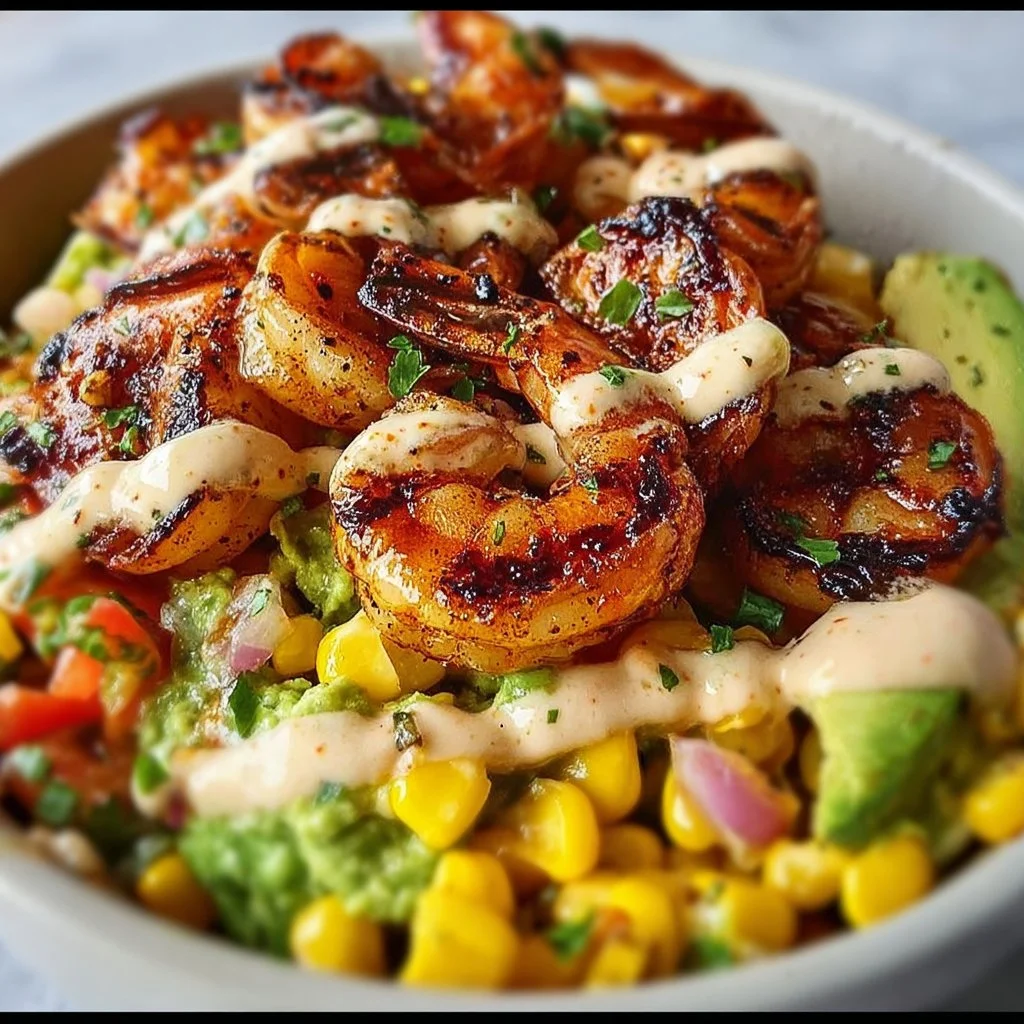
Grilled Shrimp Bowl with Avocado, Corn Salsa & Creamy Garlic Sauce
# Grilled Shrimp Bowl with Avocado, Corn Salsa & Creamy Garlic Sauce: A Delicious Journey

### Introduction

Welcome to my kitchen, food lovers! Today, we’re embarking on a culinary adventure full of vibrant flavors and colorful ingredients. Allow me to introduce you to a dish that has become one of my absolute favorites—**Grilled Shrimp Bowl with Avocado, Corn Salsa, and Creamy Garlic Sauce**. Picture a beautiful bowl brimming with perfectly grilled shrimp, fresh corn salsa, and a dollop of creamy garlic goodness, all topped off with luscious avocado. It’s the kind of meal that’s not only nourishing but a total showstopper, perfect for any occasion!

What I love most about this dish is its versatility. Whether you’re hosting a fancy dinner party or just enjoying an ordinary weeknight dinner, this grilled shrimp bowl fits the bill. The fresh ingredients combine to create a delightful harmony of textures and flavors—each bite is an explosion of summer freshness! Plus, grilled shrimp are a cinch to make and can be ready in less than 30 minutes, allowing for those precious moments to relax and enjoy with loved ones.

So grab your apron, tie it on, and let’s dive into this succulent dish that’s sure to impress. Are you ready to create something that looks beautiful and tastes even better? Let's go!

### Personal Story

Let me take you back to a sun-drenched summer day a few years ago when I had some friends over for a weekend barbecue. The sun was shining, the music was playing, and the scent of grilled food wafted through the air. I had decided to prepare grilled shrimp skewers—light, succulent, and packed with flavor. As I marinated the shrimp, I couldn’t help but remember those lazy summer days spent by the sea, where fresh shrimp were abundant and cooking was always a shared joy.

As the shrimp sizzled on the grill and the corn salsa mixed with ripe avocados, laughter filled the patio. We chatted and reminisced about vacations and adventures while waiting for the food to cook—such simple yet magical moments! That evening, the grilled shrimp was the highlight, paired beautifully with that creamy garlic sauce everybody went crazy over. Everyone left with full bellies and big smiles, and I knew then that this dish would become a staple in my recipe repertoire!

### Ingredients

Let’s gather our ingredients to make this delightful grilled shrimp bowl:

- **1 lb large shrimp, peeled and deveined**
    Perfect for grilling—look for shrimp that are firm and slightly sweet. If you can’t find large shrimp, medium works too, just adjust the cooking time accordingly. Frozen shrimp is also an option; just ensure they’re completely thawed.

- **1 tbsp olive oil**
    This will help to add flavor and keep the shrimp from sticking to the grill. You can swap it out for avocado oil or even melted butter for a richer taste.

- **1 tsp paprika**
    Adds a subtle smokiness and depth. Feel free to use smoked paprika for a more intense flavor or omit it if you're not a fan!

- **½ tsp garlic powder**
    Enhances that lovely garlic flavor without the fuss of prepping fresh garlic. If you prefer fresh, use a whole clove instead!

- **¼ tsp salt**
    Essential for seasoning. Adjust according to your taste preferences!

- **¼ tsp black pepper**
    A necessity for balancing out flavors! You can switch this for freshly cracked pepper for a spicier kick.

- **¼ tsp cayenne pepper (optional)**
    For those who like a bit of heat! Remove if you’re serving kids or anyone who prefers milder flavors.

- **1 cup frozen corn, thawed**
    Sweet and crunchy, it adds a lovely texture to the salsa. Fresh corn off the cob is perfect if it’s in season!

- **½ cup red onion, diced**
    For a sharp sweetness that complements the shrimp beautifully! You can substitute with green onions or white onions if you prefer.

- **¼ cup cilantro, chopped**
    Adds a bright, herby flavor. If cilantro isn’t your thing, parsley can work too.

- **1 jalapeño, seeded and minced (optional)**
    A nice touch if you enjoy some heat; skip it for a milder flavor.

- **1 lime, juiced**
    The acid will brighten the dish up! If you don’t have lime, lemon is a suitable substitute.

- **Salt to taste**
    Always taste as you go and season as needed!

- **½ cup mayonnaise**
    It serves as the base for our creamy garlic sauce. For a healthier twist, use Greek yogurt!

- **¼ cup sour cream**
    Adds tanginess and creaminess. If you’re dairy-free, opt for plant-based yogurt.

- **1 tbsp cilantro, chopped**
    For flavor and garnish in the sauce—optional but recommended!

- **1 tbsp lemon juice**
    Brightens the sauce while adding refreshing depth. Fresh lemon juice is always best!

- **1 clove garlic, minced**
    Fresh garlic provides that unmistakable punch—use two cloves if you're feeling bold.

- **¼ tsp salt**
    Essential for seasoning the sauce.

- **¼ tsp black pepper**
    For a little hint of warmth.

- **1 avocado, sliced or mashed**
    Creamy, delicious, and oh-so-decadent! If you're in a hurry, guacamole makes a lovely substitute.

- **Sesame seeds, for garnish**
    These add a lovely crunch and visual appeal. Toast them lightly for added flavor!

- **Green onions, chopped, for garnish**
    A bright green sprinkle over the bowl for that final touch!

### Step-by-Step Instructions

#### Step 1: Prepare the Shrimp Marinade

In a bowl, combine the shrimp with olive oil, paprika, garlic powder, salt, black pepper, and cayenne pepper (if using). Toss everything together until the shrimp are evenly coated. Allow the shrimp to marinate for about 15-20 minutes while you prepare the corn salsa—this lets the flavors enhance beautifully!

#### Step 2: Make the Corn Salsa

While waiting, in another bowl, combine the thawed corn, diced red onion, chopped cilantro, minced jalapeño (if using), and the juice of one lime. Season the salsa with salt to taste and set it aside. The freshness of this salsa is truly the star—make sure to mix it well so every bite is bursting with flavor!

#### Step 3: Preheat the Grill

Preheat your grill to medium-high heat (`about 400°F`). If you’re using a grill pan, heat it on the stove over medium-high heat. You want that perfect char on each shrimp, so let’s get that grill sizzling!

#### Step 4: Grill the Shrimp

Once the grill is ready, add your marinated shrimp. Grill them for about 2-3 minutes on each side, or until they turn pink and opaque. Avoid overcooking them; shrimp can go from perfect to rubbery in a flash! Keep a close eye, and don’t forget to flip them halfway through cooking!

#### Step 5: Prepare the Creamy Garlic Sauce

As the shrimp is grilling, prepare the creamy garlic sauce. In a small bowl, combine mayonnaise, sour cream, chopped cilantro, minced garlic, lemon juice, and a pinch of salt and pepper. Mix everything until smooth and creamy. Taste and adjust seasoning as needed!

#### Step 6: Assemble the Bowl

Now, it’s time to assemble your grilled shrimp bowl! Start with a base of your favorite grains like rice or quinoa. Layer on the grilled shrimp, then scoop generous amounts of corn salsa over the top. Add your creamy garlic sauce, and for the final touch, sprinkle with sliced avocado, sesame seeds, and chopped green onions—it’s all about that gorgeous presentation!

### Serving Suggestions

Serve this grilled shrimp bowl immediately. A vibrant, fresh garnish like lime wedges can be added for people who enjoy a hit of acidic goodness. You can also offer extra cilantro or hot sauce on the side for those who want a flavor kick!

### Recipe Variations

- **Taco Style:** Build a shrimp taco with warm corn tortillas and pile on the corn salsa and avocado for a fresh twist!
- **Zoodles:** Swap the grain for zucchini noodles for a healthy, low-carb option.
- **Spicy Shrimp:** Add chipotle peppers in adobo sauce to the marinade for a smoky, spicy flavor kick.
- **Fruit Salsa:** Mix in some diced mango or pineapple for a sweet fruit salsa instead of a corn salsa.
- **Dairy-Free:** Use vegan mayo and coconut cream to make the sauce while keeping it creamy and flavorful.

### Chef’s Notes

This grilled shrimp bowl is truly a versatile dish that can endlessly evolve based on the ingredients you have on hand or seasonal produce. I once made a version using pineapple in the salsa, and it was an instant hit! It’s so rewarding to see how a simple dish can create beautiful memories and be customized to fit any palate. And let’s be honest, who doesn’t love a meal that looks beautiful and comes together so quickly?

### FAQs and Troubleshooting

**1. What if my shrimp is tough after grilling?**
   - Overcooked shrimp can become rubbery. Keep a close watch on the shrimp while they’re on the grill; they usually take just a few minutes per side until they turn pink.

**2. Can I make the creamy garlic sauce in advance?**
   - Absolutely! The sauce can be made a day ahead. Just store it in an airtight container in the refrigerator, and give it a stir before serving.

**3. How can I tell if the shrimp is cooked through?**
   - Cooked shrimp should be opaque and pink, and they will form a nice “C” shape. Avoid the “O” shape; that’s a sign of overcooking!

**4. What should I serve with this shrimp bowl?**
   - This dish pairs beautifully with a fresh green salad, grilled vegetables, or even a tangy coleslaw for some extra crunch!

### Nutritional Info
Each serving of this Grilled Shrimp Bowl is packed with protein, healthy fats, and vibrant vegetables, making it a well-rounded meal. While nutritional values can vary based on specific ingredients and portion sizes, a rough estimate per serving might look like this:

- Calories: 450
- Protein: 30g
- Fats: 25g
- Carbohydrates: 30g

Tuning into your taste buds and making this Grilled Shrimp Bowl with Avocado, Corn Salsa & Creamy Garlic Sauce is a delightful way to create a nourishing and beautiful dish. Enjoy every bite and relish the memories you create around your table!
Grilled Shrimp Bowl with Avocado, Corn Salsa & Creamy Garlic Sauce
A vibrant and flavorful grilled shrimp bowl with fresh corn salsa and creamy garlic sauce, topped with avocado.
- Prep Time: 20 minutes
- Cook Time: 10 minutes
- Total Time: 30 minutes
- Yield: 4 servings 1x
- Category: Main Course
- Method: Grilling
- Cuisine: Mexican
- Diet: Gluten-Free
Ingredients
- 1 lb large shrimp, peeled and deveined
- 1 tbsp olive oil
- 1 tsp paprika
- ½ tsp garlic powder
- ¼ tsp salt
- ¼ tsp black pepper
- ¼ tsp cayenne pepper (optional)
- 1 cup frozen corn, thawed
- ½ cup red onion, diced
- ¼ cup cilantro, chopped
- 1 jalapeño, seeded and minced (optional)
- 1 lime, juiced
- Salt to taste
- ½ cup mayonnaise
- ¼ cup sour cream
- 1 tbsp cilantro, chopped
- 1 tbsp lemon juice
- 1 clove garlic, minced
- ¼ tsp salt
- ¼ tsp black pepper
- 1 avocado, sliced or mashed
- Sesame seeds, for garnish
- Green onions, chopped, for garnish
Instructions
- Prepare the shrimp marinade by combining shrimp with olive oil, paprika, garlic powder, salt, black pepper, and cayenne pepper in a bowl.
- Make the corn salsa by mixing corn, red onion, cilantro, jalapeño, and lime juice in another bowl; season with salt.
- Preheat your grill to medium-high heat (about 400°F).
- Grill the marinated shrimp for 2-3 minutes on each side until pink and opaque.
- Prepare the creamy garlic sauce by mixing mayonnaise, sour cream, cilantro, garlic, lemon juice, and seasoning until smooth.
- Assemble the bowl with a base of grains, grilled shrimp, corn salsa, creamy garlic sauce, and garnish with avocado, sesame seeds, and green onions.
Notes
This dish is versatile and can be adjusted based on available ingredients. Enjoy it fresh with lime wedges for added flavor!
Nutrition
- Serving Size: 1 serving
- Calories: 450
- Sugar: 3g
- Sodium: 600mg
- Fat: 25g
- Saturated Fat: 4g
- Unsaturated Fat: 20g
- Trans Fat: 0g
- Carbohydrates: 30g
- Fiber: 4g
- Protein: 30g
- Cholesterol: 200mg
Keywords: grilled shrimp, corn salsa, avocado bowl, healthy recipe, summer dish
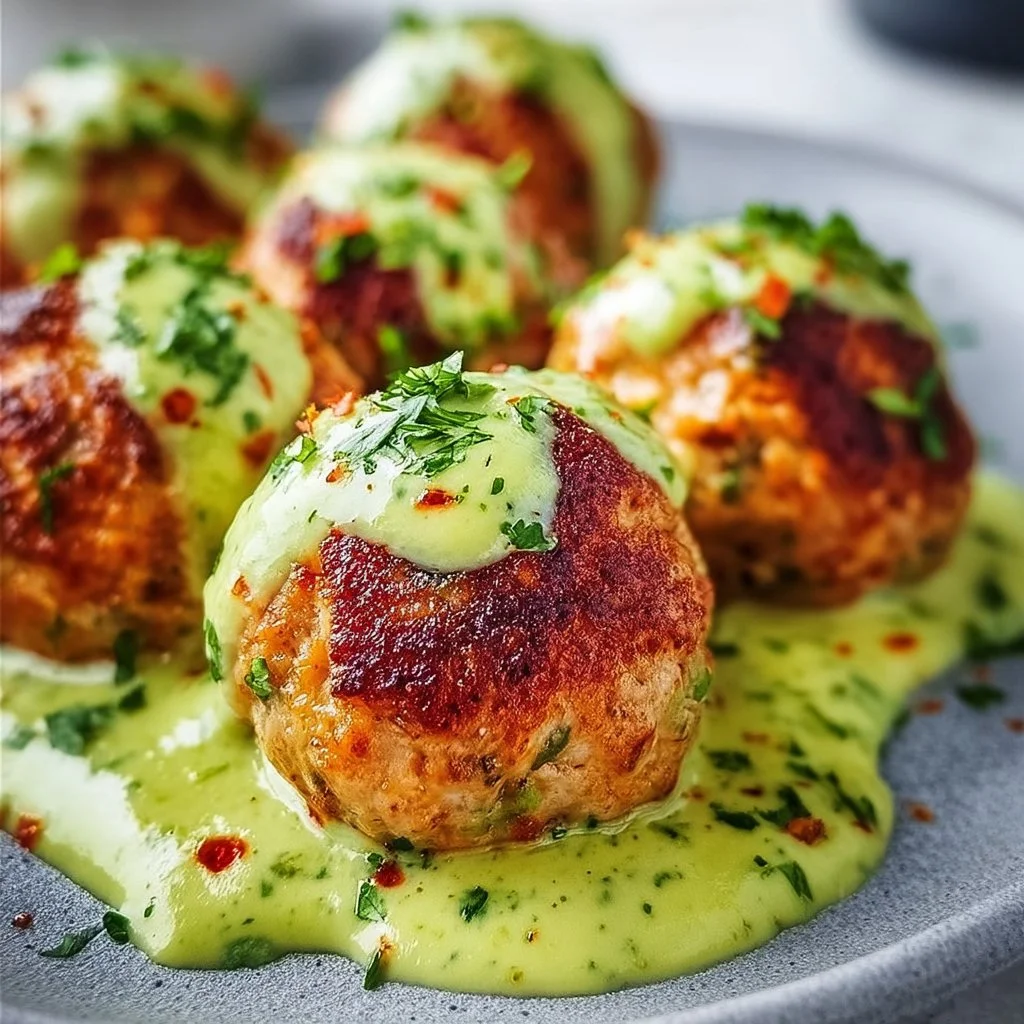
Salmon Balls with Creamy Avocado Sauce
# Salmon Balls with Creamy Avocado Sauce: A Delightful Treat for Any Occasion

Hello, my fabulous foodies! Today, we’re diving into a dish that is not only delightful but also packed with nutrients – Salmon Balls with Creamy Avocado Sauce. Whether you're planning a cozy dinner party or looking for a scrumptious snack to enjoy while binge-watching your favorite series, these little bites of joy are bound to impress. Let’s roll up our sleeves and get ready to create something truly special together!

## Introduction

There's something magical about salmon that just screams elegance, don’t you think? It’s rich, tender, and versatile, fitting perfectly into a variety of culinary creations. Today’s dish transforms this glorious fish into bite-sized balls that are crispy on the outside and luscious on the inside. And who can resist that creamy avocado sauce? I know I can’t!

Imagine sinking your teeth into a warm, golden salmon ball, bursting with flavors of fresh herbs and garlic, then taking a refreshing dip into that zesty avocado sauce. It’s a match made in culinary heaven! These little salmon treasures are perfect for parties, as appetizers, or even as a main dish paired with a beautiful salad. Plus, they come together in no time. Spoiler alert: your guests will be begging you for the recipe!

Let me take you on a journey into my kitchen memories where we’ll mix, roll, and create these delightful salmon balls, sure to leave everyone wanting more. Grab your apron, and let’s get to it!

## Personal Story

I still remember the first time I experimented with salmon in the kitchen. It was a rainy afternoon, the kind that’s perfect for cozy cooking. I had just returned from a vibrant farmers’ market, where I stumbled upon the freshest salmon, glistening like a jewel. As I set the scene with a few candles and soft music playing in the background, I felt inspired.

With no particular recipe in mind, I decided to play matchmaker with the ingredients I had on hand. As the aroma of garlic wafted through my kitchen, it hit me: salmon balls! What could be more fun than creating bite-sized pieces of happiness? I whipped up the mixture, rolled them into little balls, and fried them until golden. That evening, I gathered my friends and served crispy salmon balls with a creamy dip. The laughter and joy around the table were contagious. That moment ignited my passion for creating approachable yet elegant dishes, and I knew I had to share it with all of you!

## Ingredients

To craft these savory salmon balls, you’ll need the following ingredients:

- **1 lb fresh salmon, skin removed**
  *The star of the show! Fresh salmon has great flavor and texture. If you’re in a pinch, canned salmon can also work, just ensure it's well-drained.*

- **1/2 cup breadcrumbs**
  *These help bind your balls and give them that wonderful crunch. For a gluten-free option, you can use almond flour or crushed gluten-free crackers!*

- **1/4 cup green onions, chopped**
  *These add a mild onion flavor and a pop of color. If you don’t have green onions, diced shallots will do the trick!*

- **1/4 cup fresh parsley, chopped**
  *This herb brings freshness to the dish! You can substitute it with dill for a more traditional seafood flavor or basil for a different twist.*

- **1 egg**
  *The egg acts as a binder to hold everything together. For a vegan option, try a flaxseed egg (1 tbsp ground flaxseed mixed with 2.5 tbsp water) instead!*

- **1 clove garlic, minced**
  *Garlic is essential for flavor! If you’re a garlic lover, feel free to add an extra clove or two!*

- **1 tsp lemon juice**
  *Lemon juice brightens all the flavors. If you love lime, feel free to swap that in for a zesty twist!*

- **Salt and pepper to taste**
  *Seasoning is key! Add salt and pepper according to your preference, and don’t forget to taste as you go!*

For the **Creamy Avocado Sauce**:

- **1 ripe avocado**
  *The creaminess of the avocado is unmatched! Ensure your avocado is perfectly ripe for the best flavor and texture.*

- **1/4 cup Greek yogurt**
  *This adds a cool creaminess and a bit of tang. For a dairy-free version, you can substitute with coconut yogurt.*

- **1 tbsp lime juice**
  *Lime juice brightens the sauce and complements the creaminess! If you don’t have lime, lemon works just as well.*

- **Salt to taste**
  *Just a pinch makes all the difference!*

## Step-by-Step Instructions

Now let’s get cooking, shall we? Follow these steps for a delightful experience:

1. **Prep the Salmon:**
   Start by cutting your fresh salmon into chunks. This will make it easier for us to blend it into a delicious mixture.

2. **Cook the Salmon (Optional):**
   If you prefer a slightly cooked flavor in your balls, you can lightly poach the salmon. Just bring a pot of water to a gentle simmer, add the salmon, and let it cook for about 5-7 minutes until it's just opaque. If you want a more raw, fresh flavor, go straight to chopping raw salmon!

3. **Mix Ingredients:**
   In a large mixing bowl, combine the chopped salmon, breadcrumbs, green onions, parsley, minced garlic, and egg. Don’t forget that delightful lemon juice! Gently mix everything together until well combined. It’s okay if there are still some chunks of salmon for texture!

4. **Season To Taste:**
   Add in salt and pepper to your liking. Be sure to taste the mixture as you go — it should be savory, zesty, and packed with flavor!

5. **Shape the Balls:**
   Using your hands, scoop out spoonfuls of the mixture and roll them into golf ball-sized shapes. This is where we get our hands dirty, and I love it! To prevent sticking, you can lightly dampen your hands with water.

6. **Coat with Additional Breadcrumbs (Optional):**
   For an extra crispy crust, roll each salmon ball in a little more breadcrumbs before frying. Not necessary but definitely adds to the texture!

7. **Cook the Salmon Balls:**
   Heat a frying pan over medium heat and add enough oil to cover the bottom (about 1/4 inch). Once shimmering, carefully add the salmon balls. Cook for 4-5 minutes on each side until golden brown and crispy. Remember to keep an eye on the heat to prevent burning!

8. **Drain & Cool:**
   Once cooked, transfer the salmon balls to a plate lined with paper towels to absorb any excess oil.

9. **Make the Creamy Avocado Sauce:**
   While the salmon balls cool slightly, it’s time for the delicious sauce! In a small bowl, mash the ripe avocado and stir in the Greek yogurt, lime juice, and salt. Mix until smooth and creamy – feel free to taste and adjust seasoning!

## Serving Suggestions

Now that our salmon balls are ready and paired with that heavenly avocado sauce, it’s time to serve! Plate the salmon balls on a beautiful serving platter, dollop that creamy sauce in the center, and sprinkle some extra chopped parsley over the top for a pop of color. This dish looks stunning served with toothpicks for easy sharing, or alongside a fresh garden salad for a complete meal.

## Recipe Variations

Feel free to get creative with these salmon balls! Here are a few fun variations to consider:

1. **Spicy Salmon Balls:** Add a teaspoon of red pepper flakes or a dash of hot sauce to the mixture for a spicy kick.

2. **Mediterranean Twist:** Incorporate sun-dried tomatoes, olives, and feta into the salmon mixture for a Mediterranean flavor explosion.

3. **Crispy Baked Version:** Instead of pan-frying, bake your salmon balls at 375°F (190°C) for about 15-20 minutes until golden and cooked through.

4. **Herbed Cream Cheese Sauce:** For a different dip, instead of Greek yogurt, blend some cream cheese with fresh herbs and a hint of lemon juice!

## Chef’s Notes

Cooking is not just about the final dish; it’s about the experience, the memories, and the love you pour into it! The first time I made these salmon balls, they became an instant favorite in my household. Over time, I’ve played around with flavor profiles and textures, making them feel even more special every time. One time while preparing them for a gathering, I accidentally added twice the garlic — and let me tell you, they were a massive hit with my friends who adore garlic. I learned then that perfection is subjective and embracing imperfection can create unforgettable magic in the kitchen!

## FAQs and Troubleshooting

1. **What can I substitute for salmon?**
   If you’d like a lighter option, try using canned tuna. Remember to drain it well! You can also experiment with shredded chicken or plant-based alternatives.

2. **Why are my salmon balls falling apart?**
   If they’re crumbling, it might be due to the lack of a binder. Ensure you use the egg, and consider adding a bit more breadcrumbs if needed.

3. **Can I prepare these ahead of time?**
   Absolutely! You can prep the salmon mixture in advance and store it covered in the fridge for up to 24 hours. Shape and cook the balls right before serving for the best texture.

4. **How can I make these gluten-free?**
   Simply swap out regular breadcrumbs for gluten-free alternatives like almond flour, or use crushed gluten-free crackers instead!

## Nutritional Info (if applicable)

Each serving (2 salmon balls with sauce) contains approximately:
- **Calories:** 220
- **Protein:** 14g
- **Fat:** 15g
- **Carbohydrates:** 10g
- **Fiber:** 3g

So what are you waiting for? Gather your ingredients, put on your favorite playlist, and let the aromatic journey begin! I can’t wait for you to try these salmon balls with creamy avocado sauce. Here’s to elegant cooking that’s easy to achieve and deeply enjoyable. Happy cooking, friends!
Salmon Balls with Creamy Avocado Sauce
Delightful salmon balls paired with a creamy avocado sauce, perfect as appetizers or a main dish.
- Prep Time: 15 minutes
- Cook Time: 20 minutes
- Total Time: 35 minutes
- Yield: 4 servings 1x
- Category: Appetizer
- Method: Frying
- Cuisine: American
- Diet: Gluten-Free
Ingredients
- 1 lb fresh salmon, skin removed
- 1/2 cup breadcrumbs
- 1/4 cup green onions, chopped
- 1/4 cup fresh parsley, chopped
- 1 egg
- 1 clove garlic, minced
- 1 tsp lemon juice
- Salt and pepper to taste
- 1 ripe avocado
- 1/4 cup Greek yogurt
- 1 tbsp lime juice
- Salt to taste
Instructions
- Prep the Salmon: Start by cutting your fresh salmon into chunks.
- Cook the Salmon (Optional): Lightly poach the salmon if you prefer a slightly cooked flavor.
- Mix Ingredients: In a large bowl, combine the salmon, breadcrumbs, green onions, parsley, garlic, and egg. Add lemon juice!
- Season To Taste: Add salt and pepper according to your liking.
- Shape the Balls: Roll the mixture into golf ball-sized shapes.
- Coat with Additional Breadcrumbs (Optional): Roll in more breadcrumbs for extra crispiness.
- Cook the Salmon Balls: Fry in a pan with oil over medium heat for 4-5 minutes on each side.
- Drain & Cool: Transfer to a plate lined with paper towels to absorb excess oil.
- Make the Creamy Avocado Sauce: Mash the avocado and mix with Greek yogurt, lime juice, and salt.
Notes
Feel free to get creative with the ingredients and spices to suit your taste preferences!
Nutrition
- Serving Size: 2 salmon balls with sauce
- Calories: 220
- Sugar: 1g
- Sodium: 350mg
- Fat: 15g
- Saturated Fat: 2g
- Unsaturated Fat: 10g
- Trans Fat: 0g
- Carbohydrates: 10g
- Fiber: 3g
- Protein: 14g
- Cholesterol: 30mg
Keywords: salmon, avocado, appetizer, healthy bites, gluten-free