Grilled Seafood Skewers
Flavorful Grilled Seafood Skewers: A Taste of the Seas and Savory Delight
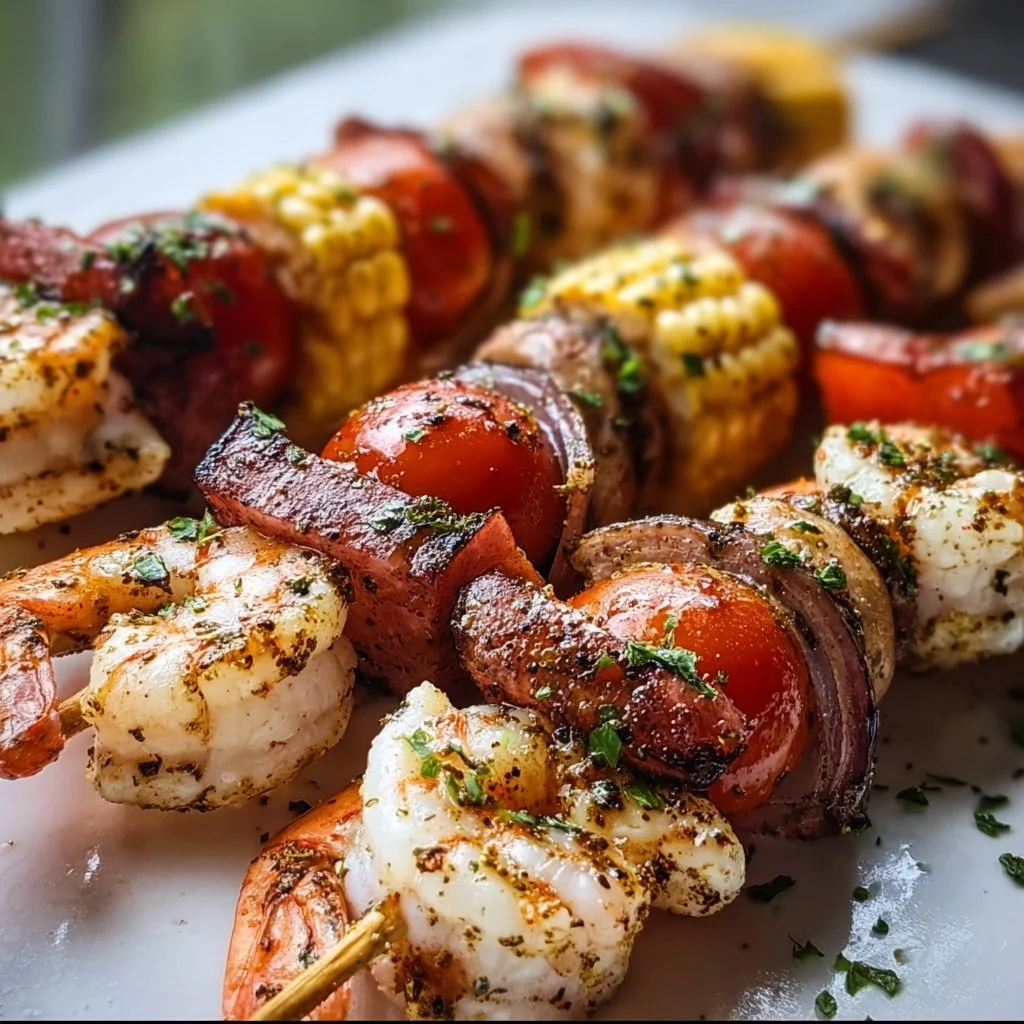
Hello, fellow culinary adventurers! Are you ready to embark on a delicious journey with me today? Let’s fire up the grill and whip up something incredibly enticing: Grilled Seafood Skewers! Imagine a platter filled with colorful, juicy shrimp and spicy sausage perfectly intertwined with crisp, fresh vegetables that promise to add a burst of flavor to your summer gatherings or cozy weeknight dinners.
Grilled seafood skewers bring a certain joy to any meal, don’t they? The sizzle of the grill, the inviting aroma wafting through the air, and the sight of those beautifully charred pieces coming together are enough to make any foodie excited. They’re not just food; they’re an experience! These skewers are an epitome of effortless elegance — they look impressive, but they’re surprisingly straightforward to prepare. Plus, eating skewers is inherently fun; there’s something about picking them off the stick that brings out the playful side of dining.
And, let’s be real: grilling gives our food a delightful smoky flavor that simply can’t be replicated in the oven. Whether you’re hosting friends for a summer barbecue or looking to spice up your dinner routine, these skewers will delight your palate and might even turn your kitchen into a gathering spot. So, tie on that apron, grab a refreshing beverage, and let’s create something delightful together!
Personal Story
Ah, grilled seafood skewers! They remind me of summer evenings spent at my grandparents’ house. Every year, as soon as the weather warmed up, my family would gather for what we affectionately dubbed “Grill Nights.” My grandfather was the king of the grill, a culinary wizard with an eye for balancing flavors. He’d set up a table under the twinkling fairy lights in the backyard, the grill glowing with anticipation.
One of my fondest memories was when I was tasked with assembling the skewers. My grandma would hand me the skewers and a basket of vibrant vegetables – the bell peppers jiggled with color while the zucchini came fresh from her garden. I vividly recall the thrill of pairing the juicy shrimp with spicy sausage and the crackling sound of the grill as I dropped them on.
Each skewer was a little masterpiece of its own, and with every bite, we savored not just the amazing flavors but the warmth of family, laughter, and satisfaction of a meal well-earned. Today, I carry this tradition with pride and love sharing these delectable skewers with friends and family, continuing the legacy of summers spent enjoying good food and togetherness.
Ingredients
Here’s what you’ll need to craft your own grilled seafood skewers:
-
1 pound shrimp, peeled and deveined: Shrimp are quick to cook, flavorful, and irresistibly tender when grilled. You can substitute with scallops or chicken breast if you’re craving variety.
-
1 pound sausage, sliced: I love using spicy Italian sausage for that extra kick! You could easily switch to a different type of sausage for varying flavor profiles — think chorizo or even turkey sausage for a lighter option.
-
2 bell peppers, cut into chunks: Color adds life to your dish! Use a mix of red, yellow, and green for a visual feast. If you’re out of fresh peppers, you can try zucchini or cherry tomatoes as substitutes.
-
1 zucchini, sliced: This veggie is not only nutritious but also grills beautifully. If you’re not a zucchini fan, squash or mushrooms can work wonders in their place.
-
1 red onion, cut into chunks: Grilling mellows the sharpness of onions and adds a hint of sweetness. If red onions aren’t available, yellow onions or even shallots could do the trick!
-
2 tablespoons olive oil: This helps keep everything moist and contributes to a slight richness. You can replace it with avocado oil or melted butter for a different flavor twist.
-
1 teaspoon garlic powder: A pantry staple that brings a delectable aroma to your skewers. Fresh minced garlic could substitute if you prefer a more potent garlicky flavor!
-
1 teaspoon paprika: Paprika lends a beautiful color and warmth. You can opt for smoked paprika for an added smoky note or skip it altogether for a more neutral flavor.
-
Salt and pepper to taste: Essential for elevating the flavors of your dish. Don’t hesitate to add more or less based on your preference.
-
Skewers (wooden or metal): Remember, if you opt for wooden skewers, soak them in water for a bit beforehand to prevent burning on the grill.
Step-by-Step Instructions
-
Prep Your Ingredients: Start by peeling and deveining the shrimp if you haven’t done so already. Rinse them under cold water and pat them dry with a paper towel. This step is important because excess moisture can result in a less-than-ideal grilling experience.
-
Chop the Vegetables: Next, take a chopping board and cut your bell peppers, zucchini, and red onion into chunks. Think bite-sized pieces to ensure even cooking. Visualize how beautiful the colors will be once they’re caramelized on the grill — it’s pure magic!
-
Create the Marinade: In a large bowl, add the olive oil, garlic powder, paprika, salt, and pepper. Mix it well to create your marinade. Let’s be honest: this mix is going to make everything so delicious!
-
Combine Ingredients: Toss in your shrimp, sausage, and the chopped veggies. Make sure all the ingredients are well coated in your marinade. Feeling adventurous? You can even let this marinate for 30 minutes if you have time.
-
Skewering Time!: Start threading your ingredients onto the skewers. I like to alternate between the shrimp, sausage, and vegetables for a colorful presentation. This not only looks appetizing but also ensures even cooking.
-
Preheat Your Grill: While you’re assembling the skewers, fire up your grill (or grill pan) on medium-high heat. The grill needs to be hot to get those lovely grill marks and achieve that fantastic flavor.
-
Grill the Skewers: Place the skewers on your preheated grill. Grill each side for about 2-3 minutes; the shrimp should turn opaque, and the sausage will get those lovely char marks. Keep an eye on them; nobody likes a burnt skewer!
-
Finishing Touches: Once they’re cooked, remove the skewers from the grill (carefully, they’ll be hot!) and allow them to rest for a few minutes. This helps retain their juices.
Serving Suggestions
Now, it’s time to plate up your culinary masterpiece! I recommend serving the skewers on a large, rustic wooden board or a vibrant platter. You could sprinkle some freshly chopped herbs like parsley or cilantro on top for that final touch. A side of lemon wedges can brighten the dish’s flavors too! Drizzling a bit of balsamic glaze or a yogurt sauce on the side can take your presentation (and flavor) to the next level.
Recipe Variations
Want to mix things up? Here are a few creative twists on these grilled seafood skewers:
-
Citrus Infusion: Add slices of lemon or lime onto your skewers for a zesty twist that complements seafood beautifully.
-
Spicy Kick: Spice things up by marinating your shrimp in a mixture of chili flakes or hot sauce for a fiery flavor.
-
Herb Bliss: Brighten up this dish by adding fresh herbs like basil or cilantro to the marinade or garnishing your skewers afterward.
-
Sweet Treat: Consider adding pineapple chunks for a tropical twist. The sweetness caramelizes on the grill, pairing wonderfully with the savory elements!
-
Vegetarian Option: Swap the shrimp and sausage for hearty cubed tofu and hearty veggies like eggplant or Portobello mushrooms for a satisfying vegetarian option.
Chef’s Notes
Over the years, my grilled seafood skewers have evolved significantly. Initially, I would just throw everything together with minimal thought, but as I experimented more, I realized how truly magical marinades could be. The simple act of letting the shrimp soak in a flavorful mix does wonders! I’ve also embraced the idea that presentation counts. A little effort in the plating can elevate a dish from good to show-stopping!
And let’s not forget the ingredients! Using seasonal veggies truly enhances the dish, so don’t hesitate to adapt based on what you find in your farmer’s market. Get creative and make this recipe your own!
FAQs and Troubleshooting
1. My shrimp ended up rubbery. What did I do wrong?
- Overcooking can lead to rubbery shrimp. Make sure to grill them just until they turn opaque, which usually takes just 2-3 minutes on each side.
2. Can I prep the skewers in advance?
- Absolutely! You can assemble the skewers and store them in the fridge for a couple of hours before grilling. Just ensure they are covered to avoid drying out.
3. What if I don’t have a grill?
- No problem! You can use a grill pan on your stove or even bake them in the oven at 400°F for about 15-20 minutes, flipping halfway.
4. How can I make these skewers gluten-free?
- This recipe is already gluten-free! Just be sure to choose gluten-free sausage if you’re using store-bought.
Nutritional Info
While the nutritional specifics can vary based on your sausage choice and quantities, a typical skewer serving is packed with protein, fiber, and plenty of vitamins from the veggies. With shrimp being a fantastic source of lean protein and the array of colorful vegetables providing fiber and antioxidants, you’re definitely nourishing your body while enjoying these delightful skewers!
Whether you’re savoring them solo or sharing them with loved ones, these Grilled Seafood Skewers are sure to bring joy to your table. Embrace the warmth of cooking, the thrill of grilling, and the love of sharing food. Until next time, happy cooking!
PrintFlavorful Grilled Seafood Skewers

Delicious grilled skewers featuring juicy shrimp, spicy sausage, and fresh vegetables, perfect for summer gatherings or cozy dinners.
- Prep Time: 15 minutes
- Cook Time: 15 minutes
- Total Time: 30 minutes
- Yield: 4 servings 1x
- Category: Main Course
- Method: Grilling
- Cuisine: Seafood
- Diet: Gluten-Free
Ingredients
- 1 pound shrimp, peeled and deveined
- 1 pound sausage, sliced
- 2 bell peppers, cut into chunks
- 1 zucchini, sliced
- 1 red onion, cut into chunks
- 2 tablespoons olive oil
- 1 teaspoon garlic powder
- 1 teaspoon paprika
- Salt and pepper to taste
- Skewers (wooden or metal)
Instructions
- Prep your ingredients: Start by peeling and deveining the shrimp if you haven’t done so already. Rinse them under cold water and pat them dry with a paper towel.
- Chop the vegetables: Cut your bell peppers, zucchini, and red onion into chunks.
- Create the marinade: In a large bowl, mix the olive oil, garlic powder, paprika, salt, and pepper.
- Combine ingredients: Toss in your shrimp, sausage, and the chopped veggies.
- Start skewering: Thread your shrimp, sausage, and vegetables onto the skewers, alternating for a colorful presentation.
- Preheat your grill: Fire up your grill on medium-high heat.
- Grill the skewers: Place them on the grill and cook for about 2-3 minutes per side.
- Remove the skewers from the grill and allow them to rest for a few minutes before serving.
Notes
Feel free to swap out the ingredients for your preferred flavors or seasonal veggies! Wooden skewers should be soaked in water beforehand to prevent burning.
Nutrition
- Serving Size: 1 skewer
- Calories: 250
- Sugar: 3g
- Sodium: 600mg
- Fat: 15g
- Saturated Fat: 4g
- Unsaturated Fat: 9g
- Trans Fat: 0g
- Carbohydrates: 10g
- Fiber: 2g
- Protein: 20g
- Cholesterol: 150mg
Keywords: grilled skewers, seafood, shrimp, summer recipes, BBQ, healthy dinner

Crock Pot BBQ Pulled Chicken
The Best Crock Pot BBQ Pulled Chicken Recipe
Hey there, fellow foodies! 👋 Welcome back to Ivory Apron, where cooking feels elegant yet comforting, and dishes come together without the fuss. Today, I’m super excited to share one of my absolute favorite recipes: Crock Pot BBQ Pulled Chicken! This dish embodies everything I love about cooking—it’s uncomplicated, flavorful, and perfect for everything from a casual weeknight dinner to a lively gathering with friends.
Picture this: You’ve had a long day, and the last thing you want to do is spend hours in the kitchen. Enter the humble crock pot—your trusty sidekick that does all the heavy lifting while you sit back and binge your favorite show. With just a few ingredients, you’ll create tender, juicy pulled chicken that’s dripping with rich BBQ flavor. Not to mention, your house will smell positively irresistible!
Imagine lifting the lid of your crock pot to reveal perfectly cooked chicken that pulls apart effortlessly. You can serve it on a bun or over a bed of rice, maybe with some coleslaw on the side. If someone asks what the secret is, just smile and say, “Oh, it’s just my little crock pot magic.” But really, it’s this recipe that’s going to win you a standing ovation (well, at least a sincerely satisfied smile from your dinner guests).
So, buckle up for a culinary adventure as I walk you through my go-to recipe for Crock Pot BBQ Pulled Chicken. Before you know it, you’ll be mastering the art of slow cooking like a pro—and you might even want to host a BBQ just to show off your skills!
Personal Story
Every time I make BBQ pulled chicken, I’m transported back to summer evenings at my grandparents’ house. My grandpa, a true culinary artist at heart, would fire up the backyard grill while the family gathered around, sharing stories and laughter. I remember sneaking into the kitchen to snag a taste of the chicken he’d slow-cooked all day, with those smoky BBQ flavors infusing every juicy bite.
Watching him transform simple ingredients into extraordinary dishes inspired my own love for cooking. His BBQ pulled chicken was legendary—a dish so comforting that it felt less like a meal and more like a warm hug. Fast forward to today, and I’ve created my own version in the crock pot, making it easier than ever to achieve that nostalgic flavor without spending all day in the kitchen. Every bite takes me back to those summer evenings, surrounded by family, with hearts as full as our plates.
Ingredients
Here’s what you’ll need to pull off this delicious Crock Pot BBQ Pulled Chicken:
-
4 boneless, skinless chicken breasts
- These are the star of the show! Boneless and skinless keep things tender and easy to shred. If you’re feeling adventurous, you can use thighs for a richer flavor.
-
1 cup BBQ sauce
- Use your favorite store-bought sauce or make your own! For a spicy kick, opt for a chipotle BBQ sauce.
-
1/2 cup chicken broth
- This will keep the chicken moist as it cooks away. If you’re out, vegetable broth or even water will do in a pinch, but aim for the best flavor.
-
1 tablespoon Worcestershire sauce
- Adds a deep, savory element to the dish. If you’re vegan or vegetarian, use a vegan Worcestershire sauce or skip it completely!
-
1 tablespoon apple cider vinegar
- This brightens up the flavors and balances the sweetness of the BBQ sauce. If you don’t have it, feel free to substitute white vinegar or lemon juice.
-
1 tablespoon brown sugar
- Enhances the flavors and gives sweetness. For a healthier option, use honey or maple syrup for that delightful caramelization.
-
1 teaspoon garlic powder
- Garlic is a must for depth and taste. If you prefer fresh, you can crush a garlic clove or two instead.
-
1 teaspoon onion powder
- Adds that sweet onion flavor without the texture. If you’re using fresh onions, sauté them before adding for a deeper taste.
-
Salt and pepper to taste
- Classic seasoning that brings the whole dish together! Remember, you can always add more later, but it’s hard to take it out once it’s in.
With these ingredients, you’re all set to create a dish that’s as fun to make as it is to eat. Trust me, your taste buds will be thanking you!
Step-by-Step Instructions
Now that you have everything prepped, let’s get cooking! Here’s how you create this mouthwatering BBQ pulled chicken:
-
Prepare the Chicken:
- First, grab those lovely chicken breasts and give them a quick rinse under cold water. Pat them dry with paper towels—this helps to make sure they sear beautifully if you choose to brown them first. If you want that extra flavor kick, feel free to brown the chicken in a skillet over medium-high heat for about 2-3 minutes on each side before adding to the crock pot. This step is optional but can enhance the overall flavor.
-
Make Your Sauce:
- In a mixing bowl, combine the BBQ sauce, chicken broth, Worcestershire sauce, apple cider vinegar, brown sugar, garlic powder, and onion powder. Whisk it all together until it’s well mixed. Let me tell you, this fragrant mixture already has me drooling! This is where all your flavors are going to come from, so taste as you go—adjust with a little more vinegar for tang or brown sugar for sweetness if needed.
-
Layer Your Ingredients:
- Place your chicken breasts at the bottom of your crock pot, and then pour the sauce mixture over the chicken, ensuring that everything is nicely coated. I like to get in there with my hands and give it a little loving massage to make sure each piece of chicken gets that delicious BBQ bath.
-
Set It and Forget It:
- Cover your crock pot and set it on low for 6-8 hours, or on high for 3-4 hours. If you’ve chosen to brown your chicken first, the cook time on high might lean towards the shorter end. This is when the magic happens—your kitchen will fill with the tantalizing aroma of BBQ goodness, making it impossible to resist!
-
Shred It:
- Once your cooking time is up, take the lid off and grab two forks. Shred the chicken right in the crock pot, mixing it into the sauce. You’ll know it’s done when the chicken pulls apart easily. If it looks a little too soupy for your liking, you can let it cook for an extra 15-30 minutes with the lid off for the sauce to reduce.
-
Taste Test:
- This is the moment of truth! Give your pulled chicken a taste and adjust the seasoning with salt and pepper. Don’t be shy—this is your creation!
And there you have it—a stunningly tasty Crock Pot BBQ Pulled Chicken that took minimal effort but will deliver maximum flavor and joy!
Serving Suggestions
For the best experience, lay out a spread that invites everyone to dig in. Serve your pulled chicken on fresh brioche buns for classic BBQ sandwiches, or over a fluffy bed of rice for a hearty meal. Pair it with some crunchy coleslaw on the side for that refreshing contrast, and maybe a pickle or two for that delightful bite. Don’t forget a drizzle of extra BBQ sauce on top, because let’s be real—there’s no such thing as too much!
Recipe Variations
Feeling a little adventurous? Here are some fun twists on the classic BBQ pulled chicken:
- Tropical Twist: Add pineapple juice and some diced pineapple to the sauce for a sweet, tropical flair.
- Spicy Kick: Stir in some diced jalapeños or a teaspoon of cayenne pepper to the sauce for a fiery upgrade.
- Mesquite Flavor: Use a smoky BBQ sauce, and toss in a teaspoon of smoked paprika for extra depth.
- Herbed Delight: Add chopped fresh herbs (like cilantro or basil) to the finished chicken for a burst of freshness.
- Make it Pulled Chicken Salad: Mix your pulled chicken with Greek yogurt or mayo and some diced celery for a yummy salad that fits perfectly in a wrap or on a bed of greens.
Let your creativity shine and make this dish your own!
Chef’s Notes
I’ve been making this BBQ pulled chicken recipe for years now, and it has evolved over time. In the beginning, I followed a traditional recipe step-by-step, but I quickly started adding my personal touches until it truly felt like my own. I remember one time when I accidentally poured in a bit too much apple cider vinegar—and you know what? It turned out spectacular! That delightful tang added a new dimension to the chicken, and now I recommend folks to be bold and experiment.
And that’s what I love most about cooking—each dish tells a story, and each time you prepare it, you have the chance to create your own unique version. Let your kitchen be a playground of flavors!
FAQs and Troubleshooting
1. What if my chicken is tough?
This usually means the chicken was overcooked. Chicken breasts can dry out if cooked too long, even in the crock pot. Stick to the recommended cook time, and check the chicken with a fork for tenderness.
2. Can I use frozen chicken breasts?
Yes! If you’re using frozen chicken breasts, it’s best to cook them on low for 8-10 hours to ensure they cook through. Avoid the high setting, as it won’t defrost the chicken evenly.
3. What if the sauce is too thin?
If the sauce seems too watery, remove the lid for the last 30 minutes of cooking to help it thicken up. You can also mix a tablespoon of cornstarch with a splash of water and stir it in to achieve a thicker sauce.
4. How can I store leftovers?
Store any leftover pulled chicken in an airtight container in the fridge for up to 4 days or freeze it for up to 3 months. Just make sure to let it cool down completely before sealing it in for freezing!
Nutritional Info (Optional)
(Per serving based on 4 servings, without buns)
- Calories: 265
- Protein: 36g
- Carbohydrates: 18g
- Fat: 6g
- Sodium: 540mg
Final Thoughts
Crock Pot BBQ Pulled Chicken is not just a meal; it’s a highlight of any gathering, a perfect centerpiece for casual evenings, and a delight to taste. I hope this recipe inspires you to step into the kitchen with confidence and joy. Cooking doesn’t have to be complicated—it can be a delicious expression of love and creativity.
So tie on your apron, gather your ingredients, and let’s create some mouthwatering memories together! Remember, good food is all about showing up. Can’t wait to hear what you think of the recipe—happy cooking! 🍽️
PrintCrock Pot BBQ Pulled Chicken

Uncomplicated, flavorful BBQ pulled chicken made in a crock pot—perfect for weeknight dinners or gatherings.
- Prep Time: 10 minutes
- Cook Time: 240 minutes
- Total Time: 250 minutes
- Yield: 4 servings 1x
- Category: Main Course
- Method: Slow Cooking
- Cuisine: American
- Diet: Gluten-Free
Ingredients
- 4 boneless, skinless chicken breasts
- 1 cup BBQ sauce
- 1/2 cup chicken broth
- 1 tablespoon Worcestershire sauce
- 1 tablespoon apple cider vinegar
- 1 tablespoon brown sugar
- 1 teaspoon garlic powder
- 1 teaspoon onion powder
- Salt and pepper to taste
Instructions
- Prepare the chicken by rinsing and patting dry.
- Make your sauce by combining BBQ sauce, chicken broth, Worcestershire sauce, apple cider vinegar, brown sugar, garlic powder, and onion powder in a bowl.
- Layer the chicken in the crock pot and pour the sauce over it, coating the chicken well.
- Set the crock pot on low for 6-8 hours or high for 3-4 hours.
- Shred the chicken in the crock pot after cooking, mixing with the sauce.
- Taste test and adjust seasoning as needed.
Notes
Great served on brioche buns or over rice with coleslaw.
Nutrition
- Serving Size: 1 serving
- Calories: 265
- Sugar: 6g
- Sodium: 540mg
- Fat: 6g
- Saturated Fat: 1g
- Unsaturated Fat: 3g
- Trans Fat: 0g
- Carbohydrates: 18g
- Fiber: 0g
- Protein: 36g
- Cholesterol: 90mg
Keywords: pulled chicken, crock pot, BBQ, slow cooker