
Chewy Pumpkin Snickerdoodle Cookies
Chewy Pumpkin Snickerdoodle Cookies: The Ultimate Fall Treat
Hello, fellow foodies! If there’s one thing that gets me excited as the leaves start to turn and the air becomes crisp, it’s baking season. And nothing quite captures the essence of fall like a batch of warm, chewy pumpkin snickerdoodle cookies. Imagine biting into a cookie that’s soft, chewy, and bursting with cozy spices—it’s like a warm hug in every bite!
There’s something incredible about combining the classic flavors of snickerdoodles with the lusciousness of pumpkin. These cookies are not only a delicious treat, but they also bring a touch of joy to every gathering. Whether you’re hosting a fall dinner party, bringing a sweet dish to a potluck, or just indulging on a quiet evening at home, these cookies are sure to please.
My Sweet Connection to Snickerdoodles
Let me take you back to my childhood for a moment. I have vivid memories of autumn weekends when my family would gather in the kitchen, the scent of cinnamon swirling in the air, filling every nook of our home. My mom was a wizard with cookies, and her snickerdoodle recipe was legendary—every friend who visited would rave about them. We’d roll the dough in a cinnamon-sugar mixture and press them out, eagerly waiting for them to come out of the oven.
Fast forward a few years, and I’ve taken those beloved cookies and given them a little twist with pumpkin puree. Not only does the pumpkin add a delightful richness and moisture, but it also brings a fun seasonal flair that everyone loves! These cookies remind me of those cherished family moments, mingling around the kitchen, sharing stories, and waiting for the sweet sound of the oven timer.
So, grab your apron and let’s dive into this delicious recipe!
Ingredients
Gather your ingredients because they play a starring role in this cookie masterpiece!
-
1 cup unsalted butter: Bring it to room temperature for the best creaming results. If you’re in a pinch, you can substitute with margarine, but butter always wins for flavor!
-
2/3 cup Libby’s Pumpkin Puree (room temperature): Essential for that perfect pumpkin flavor! You can swap it with homemade pumpkin puree, just ensure it’s not too watery.
-
1/2 cup granulated sugar: Sweet and simple; consider using coconut sugar for a deeper flavor.
-
1/2 cup + 2 tablespoons dark brown sugar (packed): The molasses in dark brown sugar gives these cookies depth. You can use light brown sugar if that’s what you have.
-
2 large egg yolks (room temperature): Yolks add richness and moisture. Don’t even think about leaving them out!
-
2 teaspoons vanilla extract: A must for that aromatic base flavor! Try using freshly scraped vanilla beans for a luxurious touch.
-
1 2/3 cup + 1 tablespoon all-purpose flour: Flour gives structure. Spoon it into your measuring cup and level it off for accuracy (don’t scoop directly from the bag to avoid compacting).
-
1 1/2 teaspoons pumpkin spice: This magical blend of cinnamon, nutmeg, and ginger brings that quintessential fall flavor. Feel free to create your own mix for a personal touch!
-
1 teaspoon baking soda: For that delightful rise! You can swap it with baking powder if needed, but it won’t give quite the same lift.
-
1 teaspoon cream of tartar: This ingredient enhances chewiness and helps stabilize the dough. If you don’t have it, you can replace it with additional baking powder (add 1 teaspoon).
-
1/2 teaspoon kosher salt: Salt enhances flavors! If using table salt, reduce the amount slightly.
-
1/3 cup granulated sugar (for rolling): This crunchy outside is what makes a snickerdoodle truly special!
-
1 teaspoon ground cinnamon (for rolling): Cinnamon is the star of the show here! You can add a pinch of nutmeg if you’re feeling adventurous.
Step-by-Step Instructions
Ready to make your kitchen smell like fall? Let’s get baking!
-
Preheat your oven: Preheat your oven to 350°F (175°C). It’s always best to start with a hot oven to get those cookies perfectly chewy.
-
Cream the butter and sugars: In a large mixing bowl, beat together the room temperature unsalted butter, granulated sugar, and dark brown sugar until light and fluffy (about 3-5 minutes). This is where the magic begins; it creates that airy texture perfect for chewy cookies.
-
Add pumpkin and yolks: Next, beat in the Libby’s pumpkin puree and the egg yolks one at a time, followed by the vanilla extract. Mix until everything is well-combined—this batter should have a beautiful orange hue!
-
Combine the dry ingredients: In another bowl, whisk together the flour, pumpkin spice, baking soda, cream of tartar, and kosher salt. Slowly add this dry mix to your wet ingredients, stirring until just blended. Don’t overmix—this can lead to tough cookies, and nobody wants that!
-
Chill the dough: This step is optional but highly recommended! Once mixed, cover the dough with plastic wrap and refrigerate for 30 minutes. Chilling helps the flavors meld beautifully and makes the dough easier to handle.
-
Prepare for rolling: While the dough chills, mix the granulated sugar and ground cinnamon in a small bowl. This will be your delicious rolling mix!
-
Form the cookies: Remove the dough from the fridge. Using a cookie scoop or your hands, form 1-inch balls of dough. Roll each ball in the cinnamon-sugar mixture until fully coated.
-
Place on baking sheets: Line a baking sheet with parchment paper. Space the dough balls about 2 inches apart, as they will spread during baking.
-
Bake: Slide the baking sheet into the preheated oven and bake for 10-12 minutes or until the edges are set but the center is still soft. They’ll firm up while cooling.
-
Cool down: Remove the cookies from the oven and let them cool on the baking sheet for 5 minutes before transferring them to a wire rack. This allows them to finish baking and become perfectly chewy!
Serving Suggestions
To serve these delightful cookies, place them on a rustic platter or stack them high with a light dusting of extra cinnamon sugar on top for that extra touch of flair. Pair them with a tall glass of milk or a steaming cup of chai tea for a cozy experience.
Recipe Variations
-
Chocolate Chip Pumpkin Snickerdoodles: Add a 1/2 cup of chocolate chips to the dough for a rich twist.
-
Gluten-Free Option: Substitute the all-purpose flour with a gluten-free 1:1 baking flour for a gluten-free bake.
-
Nutty Delight: Stir in 1/2 cup of nuts—walnuts or pecans add a delightful crunch.
-
Cream Cheese Filling: Make them even more decadent by adding a dollop of cream cheese filling in the center.
-
Switch Up the Spices: Experiment with adding cardamom or allspice for a unique flavor profile.
Chef’s Notes
Baking is often about experimentation. The first time I made these pumpkin snickerdoodles, I accidentally added too much pumpkin puree, thinking more was better. You know what? It ended up being a delicious accident! The cookies came out incredibly chewy and everyone raved about them. So don’t be afraid to try your own variations!
FAQs and Troubleshooting
-
Why are my cookies spreading too much?
- This could be due to your butter being too warm or not chilling the dough long enough. Make sure your butter is softened but not melted, and try refrigerating the dough if necessary.
-
How can I store leftovers?
- Once cooled, store your cookies in an airtight container at room temperature for up to 5 days. You can also freeze them for up to 3 months—perfect for those sweet cravings!
-
My cookies came out too hard. What happened?
- Overbaking is usually the culprit! Keep an eye on them in the oven. They should look slightly underbaked when you take them out, as they’ll continue to firm up while cooling.
-
Can I use pumpkin spice mix?
- Absolutely, pumpkin spice mix is a fantastic shortcut. Just replace the pumpkin spice, but ensure you’re using a good quality blend for the best flavor.
Nutritional Info
These cookies are rich and indulgent, making them a special treat. Each cookie (from the batch of about 24) has approximately 160 calories, with 8g of fat and 22g of carbohydrates. Perfectly balanced for an occasional sweet tooth!
So there you have it, friends! Chewy pumpkin snickerdoodle cookies that are sure to impress and bring warmth to your kitchen. I can’t wait for you to try this recipe and create your own sweet memories. Let’s get baking, and remember—good food isn’t about showing off. It’s about showing up. Happy Cooking!
PrintChewy Pumpkin Snickerdoodle Cookies

Warm and chewy pumpkin snickerdoodle cookies, bursting with cozy spices—perfect for fall gatherings.
- Prep Time: 15 minutes
- Cook Time: 12 minutes
- Total Time: 45 minutes
- Yield: 24 cookies 1x
- Category: Dessert
- Method: Baking
- Cuisine: American
- Diet: Vegetarian
Ingredients
- 1 cup unsalted butter (room temperature)
- 2/3 cup Libby’s Pumpkin Puree (room temperature)
- 1/2 cup granulated sugar
- 1/2 cup + 2 tablespoons dark brown sugar (packed)
- 2 large egg yolks (room temperature)
- 2 teaspoons vanilla extract
- 1 2/3 cup + 1 tablespoon all-purpose flour
- 1 1/2 teaspoons pumpkin spice
- 1 teaspoon baking soda
- 1 teaspoon cream of tartar
- 1/2 teaspoon kosher salt
- 1/3 cup granulated sugar (for rolling)
- 1 teaspoon ground cinnamon (for rolling)
Instructions
- Preheat your oven to 350°F (175°C).
- Cream together the butter, granulated sugar, and dark brown sugar until light and fluffy (about 3-5 minutes).
- Add in the pumpkin puree and egg yolks one at a time, followed by the vanilla extract.
- Combine the dry ingredients in another bowl and whisk together.
- Slowly add the dry mix to the wet ingredients, stirring until just blended.
- Chill the dough for 30 minutes in the refrigerator.
- Mix the granulated sugar and ground cinnamon in a small bowl for rolling.
- Form 1-inch balls of dough and roll in the cinnamon-sugar mixture.
- Place the balls on a lined baking sheet, 2 inches apart.
- Bake for 10-12 minutes or until edges are set and centers are soft.
- Cool on the baking sheet for 5 minutes before transferring to a wire rack.
Notes
For richer flavor, try adding nuts or chocolate chips. Store cookies in an airtight container at room temperature or freeze for longer storage.
Nutrition
- Serving Size: 1 cookie
- Calories: 160
- Sugar: 10g
- Sodium: 140mg
- Fat: 8g
- Saturated Fat: 5g
- Unsaturated Fat: 3g
- Trans Fat: 0g
- Carbohydrates: 22g
- Fiber: 1g
- Protein: 2g
- Cholesterol: 30mg
Keywords: pumpkin, snickerdoodle, cookies, fall, dessert

Minute Soft & Chewy Lemon Cookies Recipe for Weeknights
Soft & Chewy Lemon Cookies: A Taste of Sunshine
Hello, fellow food lovers! Today, let’s take a delightful journey into the world of baking with soft and chewy lemon cookies that will brighten up any day. There’s something so uplifting about the freshness of lemon, don’t you think? Whether it’s the first bite of a warm cookie or the way the scent wafts through your kitchen, these lemon cookies are sure to bring a bit of sunshine into your life. Ready to whip up something scrumptious? Let’s dive right in!
A Little Nostalgia in Every Bite
Growing up, my grandmother had this magical way of making every holiday special. I remember bustling around the kitchen with her, the air scented with citrus and sugar, as she would bake her famous lemon cookies. While I had my little hands busy mixing and measuring, she’d often share stories about her childhood, where every cookie was made with love and laughter. The laughter often turned into playful contests over who could make the best cookies—her firm belief was that the secret ingredient was always a heaping spoonful of joy.
I still use her recipes, adding my own spin along the way, but that warm memory stays with me every time I mix up these zesty delights. These cookies remind me that baking is about creating memories as much as it is about the final product. So, gather your love and let’s get baking these soft, chewy lemon cookies!
Ingredients You’ll Need
Here’s what you need for your lemon cookies. Each ingredient plays an important role, so let’s break it down a bit:
-
1 cup unsalted butter, softened
Using unsalted butter gives you complete control over the salt levels in your cookies. Make sure it’s softened for easier blending. Margarine can be used in a pinch, but nothing beats the rich flavor of butter! -
1 cup granulated sugar
This is your main sweetener, giving cookies the delightful structure we all love. If you want a hint of caramel flavor, try brown sugar instead! -
1/2 cup powdered sugar
Powdered sugar adds a touch of sweetness and helps create that soft, melt-in-your-mouth texture. You can make your own by blending granulated sugar until fine! -
2 large eggs
Eggs act as a binding agent in your cookie dough. If you’re vegan, try using flax eggs (1 tablespoon ground flaxseed mixed with 2.5 tablespoons water for each egg). -
1 tablespoon lemon zest
Zest brings a wonderful aromatic citrus flavor. Use a microplane for finely grating it. Don’t skip this—it’s super important for enhancing the lemon taste! -
1/4 cup fresh lemon juice
Freshly squeezed lemon juice is a must! It brightens up the cookies and gives them that refreshing tang. If you’re in a hurry, bottled lemon juice will work, but fresh is always best. -
3 cups all-purpose flour
This is the main structure of your cookies. Alternatively, you can substitute half of the flour with almond flour for a lovely nutty flavor. -
1 teaspoon baking soda
Baking soda is your leavening agent that helps in achieving the perfect rise—so don’t skip it! Baking powder can be a substitute, but you’ll need a bit more. -
1/2 teaspoon salt
Just a dash of salt enhances the sweetness and balances flavors. -
1/2 teaspoon cream of tartar
This ingredient adds stability to your cookies and helps them maintain a soft, chewy texture. If you don’t have it, a bit of extra baking soda can help too. -
1/2 teaspoon vanilla extract
A hint of vanilla rounds out flavors beautifully and adds a lovely aroma. Feel free to use organic or homemade for an extra boost!
Step-by-Step Instructions for Soft & Chewy Lemon Cookies
Now that we have our delightful ensemble of ingredients, let’s get to the fun part—baking! Follow these simple steps to create your batch of lemon goodness:
-
Preheat Your Oven
Preheat your oven to 350°F (175°C). This is crucial for achieving the perfectly baked cookie. While it heats up, you can prepare your cookie dough! -
Cream the Butter and Sugars
In a large mixing bowl, beat the softened butter with the granulated and powdered sugars until the mixture is light and fluffy—about 2-3 minutes. This process incorporates air, which helps your cookies rise beautifully. -
Add Eggs and Flavorings
One at a time, add the eggs, mixing well after each addition. Then, stir in the lemon zest, lemon juice, and vanilla extract. The mixture will look slightly curdled, but don’t worry; it’s perfectly normal! -
Combine Dry Ingredients
In a separate bowl, whisk together the flour, baking soda, salt, and cream of tartar. Gradually add this dry mix to the wet mixture, stirring just until combined. Overmixing can create tough cookies—no one wants that! -
Chill Your Dough (Optional)
For a thicker cookie with a lovely chewy center, chill your dough for at least 30 minutes. This step isn’t mandatory, but it helps prevent spreading while baking. -
Scoop and Bake
Using a cookie scoop or tablespoon, drop your dough onto a lined baking sheet, spacing them about 2 inches apart. Bake in the preheated oven for 10-12 minutes, or until the edges are lightly golden. -
Cool Your Cookies
Allow the cookies to cool on the baking sheet for about 5 minutes before transferring them to a wire rack. This helps them set up while still warm, keeping that delicious chewy texture. -
Enjoy!
There’s nothing quite like a warm cookie. Pair with a glass of milk, or enjoy them on their own for a cozy treat. Trust me; you’ll be coming back for more!
Serving Suggestions
Presentation matters, right? For an elevated feel, arrange your cookies on a beautiful platter. Maybe garnish them with a sprinkle of lemon zest or even edible flowers for a stunning touch. Don’t forget to pour a tall glass of cold milk or a refreshing lemonade to complete the experience!
Recipe Variations
Get creative with these fun twists on your lemon cookies:
- Lemon Poppy Seed Cookies: Add a tablespoon of poppy seeds for a delightful crunch.
- Chocolate-Dipped Lemon Cookies: Dip half of each cookie in melted dark chocolate for a delicious flavor contrast.
- Lemon Blueberry Cookies: Fold in a cup of fresh or frozen blueberries into the dough for extra fruity goodness.
- Lavender Lemon Cookies: Incorporate a teaspoon of culinary lavender for a soothing floral aroma.
- Gluten-Free Version: Substitute all-purpose flour with a gluten-free flour blend. Ensure that your other ingredients are gluten-free as well.
Chef’s Notes
These cookies have evolved quite a bit in my kitchen! I remember when I first started experimenting with lemon cookies, they would often come out too dry or too flat. It took a few trials (and a bit of patience) to discover the perfect balance of ingredients and chilling times. The soft, chewy texture has become a family favorite—my kids often request them on special occasions. And you should see their faces when they come out of the oven, oh yes, it’s a beautiful sight!
FAQs and Troubleshooting
Q: My cookies spread too much in the oven. What went wrong?
A: This could be due to overmixing or not chilling the dough long enough. Try chilling for at least 30 minutes to an hour next time.
Q: Why are my cookies too hard?
A: Overbaking can lead to a tough cookie. Keep an eye on them and pull them out once the edges are golden but the centers still look slightly soft.
Q: Can I freeze the cookie dough?
A: Yes! You can freeze the dough for up to three months. Scoop it into balls, freeze on a tray, and then transfer to a freezer bag. Bake from frozen, adding a couple of extra minutes to the baking time.
Q: How do I store leftover cookies?
A: Keep them in an airtight container at room temperature for up to a week. For longer storage, pop them in the freezer; they’ll be just as delicious once thawed.
Nutritional Info (Optional)
For those interested in a general idea, one lemon cookie has approximately 150 calories, 7g of fat, 21g of carbohydrates, and 1g of protein (depending on exact size and variations).
So there you have it! An easy, delightful recipe for soft and chewy lemon cookies that not only tastes amazing but also carries with it a sense of nostalgia and warmth. I can’t wait to hear how yours turn out. Remember, each cookie carries a piece of your story—the laughter, love, and good times shared around the table. Happy baking!
PrintSoft & Chewy Lemon Cookies
Delightful soft and chewy lemon cookies that bring a taste of sunshine to your day.
- Prep Time: 15 minutes
- Cook Time: 12 minutes
- Total Time: 27 minutes
- Yield: 24 cookies 1x
- Category: Dessert
- Method: Baking
- Cuisine: American
- Diet: Vegetarian
Ingredients
- 1 cup unsalted butter, softened
- 1 cup granulated sugar
- 1/2 cup powdered sugar
- 2 large eggs
- 1 tablespoon lemon zest
- 1/4 cup fresh lemon juice
- 3 cups all-purpose flour
- 1 teaspoon baking soda
- 1/2 teaspoon salt
- 1/2 teaspoon cream of tartar
- 1/2 teaspoon vanilla extract
Instructions
- Preheat your oven to 350°F (175°C).
- Cream the butter and sugars until light and fluffy, about 2-3 minutes.
- Add the eggs one at a time, mixing well after each. Then stir in lemon zest, lemon juice, and vanilla.
- Combine dry ingredients in a separate bowl, then gradually add to wet mixture, stirring until just combined.
- Chill your dough for at least 30 minutes for a thicker cookie (optional).
- Scoop dough onto a lined baking sheet, spacing them 2 inches apart.
- Bake for 10-12 minutes until the edges are lightly golden.
- Cool on the baking sheet for 5 minutes before transferring to a wire rack.
Notes
Chilling the dough helps prevent spreading while baking. For variation, consider adding poppy seeds or dipping in chocolate.
Nutrition
- Serving Size: 1 cookie
- Calories: 150
- Sugar: 12g
- Sodium: 150mg
- Fat: 7g
- Saturated Fat: 4g
- Unsaturated Fat: 3g
- Trans Fat: 0g
- Carbohydrates: 21g
- Fiber: 0g
- Protein: 1g
- Cholesterol: 30mg
Keywords: lemon cookies, chewy cookies, baking, dessert, cookies
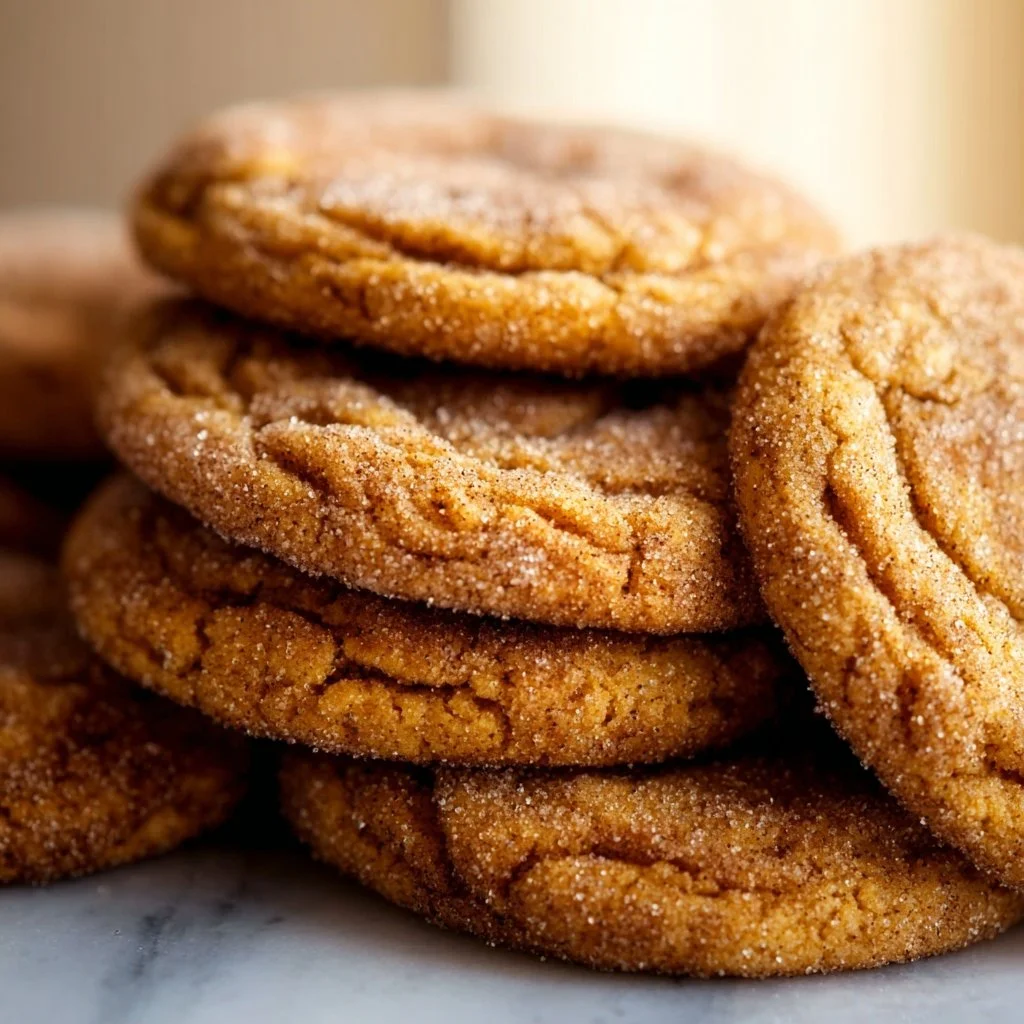
Chewy Pumpkin Snickerdoodle Cookies
Chewy Pumpkin Snickerdoodle Cookies: A Fall Classic with a Twist
Hello, my fellow culinary adventurers! Savannah here, and I am so excited to share one of my all-time favorite fall treats with you: Chewy Pumpkin Snickerdoodle Cookies. As the leaves begin to turn and the crisp autumn air sets in, there’s nothing quite like the aroma of warm cookies wafting through your kitchen. These cookies perfectly capture the essence of fall, blending the classic cinnamon-sugar coating of a snickerdoodle with the cozy, comforting flavor of pumpkin.
Why pumpkin snickerdoodles, you ask? Well, let me tell you—the magic of this combination lies in its chewiness, spice, and nostalgia. Growing up, I adored baking cookies alongside my grandma during the change of seasons. While traditional snickerdoodles were a staple, the addition of pumpkin just felt like the warm embrace of fall, wrapping around you like a cozy blanket.
In this blog post, we’ll delve into the recipe step-by-step, sharing tips and tricks as we go. By the end, you’ll be ready to tie on your apron and whip up a batch of chewy pumpkin snickerdoodle cookies that will have everyone asking for seconds! So grab your measuring cups and let’s dive in!
Personal Story
Ah, fall—what a magical time! One of my fondest memories revolves around this season and the delicious cookies we’d bake every year. I remember waking up to the smell of cinnamon drifting through the house, and the golden autumn sunlight streaming through the windows.
One particular year, my grandma decided to take our classic snickerdoodle recipe and add a twist with a can of pumpkin. At first, I was skeptical—“Pumpkin in cookies?” I thought. But oh, was I wrong! The moment I took a bite, a symphony of flavors danced on my palate. The chewiness of the cookie mixed with the warmth of cinnamon and the subtle sweetness of pumpkin was pure magic!
To this day, every time I bake these cookies, I’m transported back to that tiny kitchen filled with laughter, flour flying everywhere, and my grandma’s warm smile as we created memories that would last a lifetime. I hope these chewy pumpkin snickerdoodle cookies become a cherished recipe in your home, too!
Ingredients
Before we dive into the baking, let’s gather our ingredients. Here’s what you’ll need for these delectable cookies:
-
1 cup unsalted butter: This adds richness to the cookies. Feel free to substitute with vegan butter for a dairy-free version!
-
2/3 cup Libby’s Pumpkin Puree (room temperature): This is the star of our show, giving the cookies that lovely orange hue and a moist texture. Any brand of pumpkin puree will do, just be sure it’s not pumpkin pie filling!
-
1/2 cup granulated sugar: Standard sugar for sweetness. You can swap out with coconut sugar for a more caramel-like flavor.
-
1/2 cup + 2 tablespoons dark brown sugar (packed): The molasses in brown sugar gives depth and a chewy texture. Light brown sugar works too, but may result in a slightly less rich flavor.
-
2 large egg yolks (room temperature): Egg yolks add moisture and richness. If you’re vegan, try using flax eggs as an alternative.
-
2 teaspoons vanilla extract: Pure vanilla extract enhances the flavor. Feel free to explore with other extracts like almond for a unique touch!
-
1 2/3 cup + 1 tablespoon all-purpose flour: Make sure you fluff the flour before measuring to prevent packing it down. A 1:1 gluten-free flour blend can substitute here.
-
1 1/2 teaspoons pumpkin spice: This blend usually includes cinnamon, nutmeg, and ginger, perfectly encapsulating the season. If you don’t have pumpkin spice, a combination of ground cinnamon and nutmeg works beautifully.
-
1 teaspoon baking soda: This helps our cookies rise and achieve that perfect chewy texture.
-
1 teaspoon cream of tartar: Alongside the baking soda, it adds a delightful tang and helps the cookies stay tender.
-
1/2 teaspoon kosher salt: Balances the sweetness and enhances flavor.
-
1/3 cup granulated sugar (for rolling): This will give the cookies that classic snickerdoodle sweetness on the outside.
-
1 teaspoon ground cinnamon (for rolling): Adding this to the sugar gives the cookies an aromatic, delicious crust.
With everything gathered, you’re well on your way to making some heavenly cookies!
Step-by-Step Instructions
Now that we have our ingredients prepped, let’s get baking! Follow these simple steps for chewy pumpkin snickerdoodle cookie perfection:
-
Preheat the Oven: Start by preheating your oven to 350°F (180°C). This step is crucial to ensure your cookies bake evenly and come out perfectly chewy.
-
Cream the Butter and Sugars: In a large mixing bowl, add 1 cup of unsalted butter, 1/2 cup of granulated sugar, and 1/2 cup + 2 tablespoons of packed dark brown sugar. Beat them together until the mixture is smooth and creamy—about 2-3 minutes. This process incorporates air into the batter, creating a lighter cookie!
-
Incorporate the Pumpkin: Next, add your room temperature 2/3 cup of pumpkin puree, 2 large egg yolks, and 2 teaspoons of vanilla extract into the mix. Beat until everything is well-combined. The batter may look slightly curdled due to the pumpkin, but don’t fret—it’s perfect.
-
Mix the Dry Ingredients: In another bowl, whisk together 1 2/3 cup + 1 tablespoon of all-purpose flour, 1 1/2 teaspoons of pumpkin spice, 1 teaspoon of baking soda, 1 teaspoon of cream of tartar, and 1/2 teaspoon of kosher salt. Gradually add this dry mixture to the wet ingredients, mixing until just combined. Be careful not to overmix—this keeps the cookies tender!
-
Chill the Dough: For optimal flavor and texture, cover the dough with plastic wrap and chill in the fridge for at least 30 minutes. This step helps the cookies keep their shape while baking and enhances the flavors.
-
Prepare the Cinnamon Sugar: In a small bowl, combine 1/3 cup of granulated sugar with 1 teaspoon of ground cinnamon. This will be our delicious rolling mixture!
-
Form and Roll the Cookies: Once your dough is chilled, use a cookie scoop (or a tablespoon) to portion out the dough. Roll each ball into the cinnamon-sugar mixture until well coated.
-
Bake: Place the coated dough balls on a parchment-lined baking sheet, spaced about 2 inches apart (they’ll spread). Bake in your preheated oven for about 10-12 minutes, until the edges are set but the centers look slightly underbaked. They will continue to set on the sheet as they cool.
-
Cool and Enjoy: Let your cookies cool on the baking sheet for 5 minutes, then transfer them to a wire rack to cool completely. Trust me, the smell as they cool will make it hard to resist!
And there you have it—chewy pumpkin snickerdoodle cookies that are sure to warm your heart and delight your taste buds.
Serving Suggestions
There’s nothing quite like the joy of serving fresh-baked cookies to friends and family. For a beautiful presentation, stack a few cookies on a simple white plate, dust with powdered sugar for an extra touch, and place them next to a warm cup of spiced chai or pumpkin spice latte. You can also place them in a cute cookie jar for an inviting centerpiece on your kitchen table.
Recipe Variations
Feeling adventurous? Here are a few variations you can try:
-
Chocolate Chip Pumpkin Snickerdoodles: Add 1/2 cup of semi-sweet or dark chocolate chips to the dough for a delightful surprise!
-
Nutty Crunch: Fold in 1/4 cup of crushed pecans or walnuts for a nutty twist and extra texture.
-
Cranberry Snap: Toss in 1/2 cup of dried cranberries for a seasonal burst of flavor and a pop of color!
-
Maple Drizzle: Drizzle a little maple glaze on top of cooled cookies for an extra touch of sweetness.
-
Gluten-Free Option: Use a 1:1 gluten-free flour blend to adapt this recipe and accommodate gluten sensitivities!
Chef’s Notes
As I reflect on these chewy pumpkin snickerdoodles, I can’t help but smile. This recipe has evolved just like my cooking journey. Initially, I started with traditional snickerdoodles, but once I embraced the pumpkin, everything changed! The cookies became a symbol of the season and a way to share love with those around me.
And let’s not forget—the dough is irresistible! Make sure to save a bit to taste before baking! (Don’t tell anyone I said that!) Over the years, I’ve learned to enjoy cooking as not only a way to feed the body but also to nourish the soul. Each batch reminds me of the importance of connection, joy, and creativity in the kitchen.
FAQs and Troubleshooting
-
Why are my cookies flat?
- There might not have been enough flour, or the dough may not have been chilled long enough. Make sure to measure accurately and chill for at least 30 minutes to help maintain shape!
-
Can I freeze the dough?
- Absolutely! You can freeze the dough balls before baking. Just roll them in the cinnamon-sugar mixture, freeze on a baking sheet, then transfer to a freezer bag. You can bake them straight from the freezer—just add a couple of extra minutes to the baking time.
-
What if I don’t have cream of tartar?
- If you don’t have it, you can substitute with an equal amount of baking powder (omit the baking soda if you do this). The cookies will still be delicious!
-
How do I store leftover cookies?
- To keep them chewy, store the cookies in an airtight container at room temperature for up to a week (if they last that long!). You can place a slice of bread in the container to help retain moisture.
Nutritional Info (Optional)
While I encourage you to savor each cookie mindfully, here’s a rough estimate of the nutritional info for each cookie, assuming a batch yields 24 cookies:
- Calories: 140
- Total Fat: 7g
- Saturated Fat: 4g
- Carbohydrates: 19g
- Fiber: 0.5g
- Sugar: 8g
- Protein: 1g
Of course, these numbers will vary based on your specific ingredients and portion sizes.
I hope you enjoy creating these delightful chewy pumpkin snickerdoodle cookies as much as I do! They’re perfect for crisp autumn days, cozy gatherings, or just because. Happy baking, and remember—good food is all about showing up and creating moments together. Let’s bring a little extra joy to our tables with these delicious treats! 🍂🍪
PrintChewy Pumpkin Snickerdoodle Cookies

A delightful twist on traditional snickerdoodles, these chewy pumpkin cookies are perfect for fall, blending the warmth of cinnamon with a cozy pumpkin flavor.
- Prep Time: 15 minutes
- Cook Time: 12 minutes
- Total Time: 57 minutes
- Yield: 24 servings 1x
- Category: Dessert
- Method: Baking
- Cuisine: American
- Diet: Vegetarian
Ingredients
- 1 cup unsalted butter
- 2/3 cup Libby’s Pumpkin Puree (room temperature)
- 1/2 cup granulated sugar
- 1/2 cup + 2 tablespoons dark brown sugar (packed)
- 2 large egg yolks (room temperature)
- 2 teaspoons vanilla extract
- 1 2/3 cup + 1 tablespoon all-purpose flour
- 1 1/2 teaspoons pumpkin spice
- 1 teaspoon baking soda
- 1 teaspoon cream of tartar
- 1/2 teaspoon kosher salt
- 1/3 cup granulated sugar (for rolling)
- 1 teaspoon ground cinnamon (for rolling)
Instructions
- Preheat the Oven: Start by preheating your oven to 350°F (180°C).
- Cream the Butter and Sugars: In a large mixing bowl, add the butter, granulated sugar, and brown sugar. Beat until smooth and creamy.
- Incorporate the Pumpkin: Add the pumpkin puree, egg yolks, and vanilla extract, beating until well-combined.
- Mix the Dry Ingredients: In another bowl, whisk together the flour, pumpkin spice, baking soda, cream of tartar, and salt. Gradually add to the wet ingredients.
- Chill the Dough: Cover the dough and chill in the fridge for at least 30 minutes.
- Prepare the Cinnamon Sugar: Combine the granulated sugar and ground cinnamon in a small bowl.
- Form and Roll the Cookies: Use a scoop to portion the dough and roll in the cinnamon-sugar mixture.
- Bake: Place the cookies on a parchment-lined sheet and bake for 10-12 minutes.
- Cool and Enjoy: Let cool for 5 minutes on the baking sheet before transferring to a wire rack.
Notes
These cookies can be stored in an airtight container for up to a week. Consider trying variations like adding chocolate chips or nuts for an added twist!
Nutrition
- Serving Size: 1 cookie
- Calories: 140
- Sugar: 8g
- Sodium: 100mg
- Fat: 7g
- Saturated Fat: 4g
- Unsaturated Fat: 2g
- Trans Fat: 0g
- Carbohydrates: 19g
- Fiber: 0.5g
- Protein: 1g
- Cholesterol: 30mg
Keywords: pumpkin cookies, snickerdoodle, fall desserts, chewy cookies
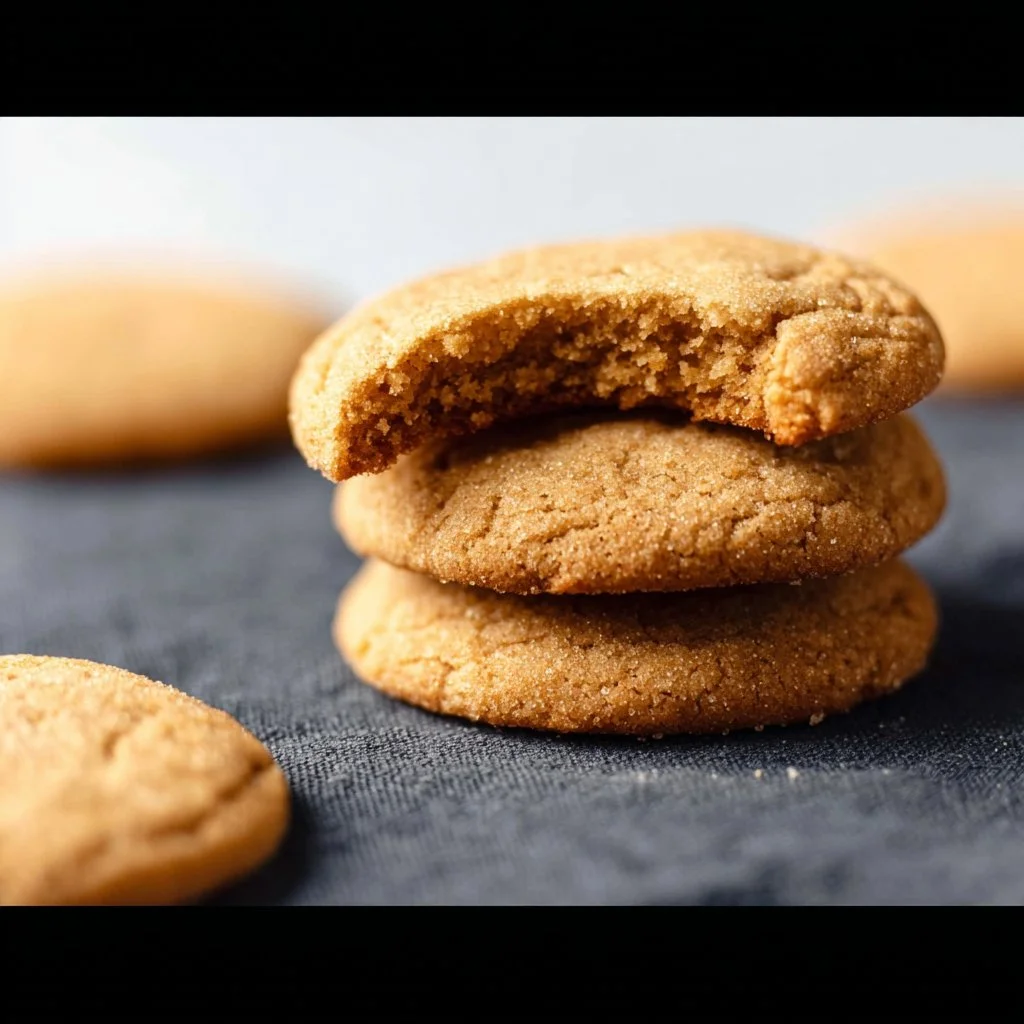
Easy 3 Ingredient Brown Sugar Cookies
Easy 3-Ingredient Brown Sugar Cookies: A Nostalgic Delight
Welcome, fellow food enthusiasts! Today, I’m thrilled to share one of my all-time favorite baked treats with you: 3-Ingredient Brown Sugar Cookies! These cookies are not just a sweet indulgence; they represent the simplicity and joy of baking that can transform an ordinary day into something a little more special.
Picture this: You arrive home after a long day, a little weary but ready to unwind. The comforting scent of baked goods wafts through the air, instantly wrapping you in warmth. That’s the magic of these brown sugar cookies! They’re soft, chewy, and utterly delightful, making them perfect for an afternoon treat or a cozy dessert after dinner.
What’s the best part? You don’t need a pantry full of ingredients to whip up these sweet delights! With just three simple ingredients, you’ll have a batch of cookies that will transport you back to the cozy afternoons of your childhood. They remind me of baking sessions with my grandmother, who often claimed that the best recipes are the simplest ones. We would giggle and create a delightful mess in the kitchen, the two of us crafting cookie dough that felt like magic between our hands.
Whether you’re an experienced baker or a newbie looking to delve into the world of cookies, these brown sugar cookies are foolproof and oh-so-satisfying. So, roll up those sleeves, tie on that ivory apron, and let’s get baking!
Personal Story
One of the sweetest memories I have involves my first solo cooking adventure. I was about eight years old, and my mom had left me with a small collection of ingredients and a dream to bake cookies. With the entire house to myself, I decided to try my hand at brown sugar cookies, inspired by the smell of freshly baked goodies from the kitchen.
I remember reaching for the brown sugar and thinking how magical it looked—golden and glistening in the light, just like a little treasure. I combined it with softened butter, mixed in the flour, and what emerged was a fantastic creation that instantly filled our home with an aroma I could barely describe. It felt as though my little hands had conjured something special from the pantry.
When my family came home, they were greeted with the warm scent of baking cookies. The smiles on their faces made all my efforts worthwhile. Those moments taught me that cooking isn’t just about the food; it’s about creating memories and sharing them with the people you love.
Ingredients
Here’s what you’ll need to create your scrumptious 3-Ingredient Brown Sugar Cookies:
-
½ cup salted butter (softened to room temperature – 1 stick)
Chef Insight: Using salted butter enhances the flavor and balances the sweetness of the cookies. If you only have unsalted butter on hand, just add a pinch of salt to your dough for a similar effect! -
½ cup brown sugar
Substitution Tips: Both light and dark brown sugar will work beautifully! Light brown sugar will give you a milder flavor, while dark brown sugar adds a richer, more caramelized taste. -
1 cup all-purpose flour
Quick Insight: Make sure to spoon and level the flour when measuring, which prevents your cookies from becoming dense. If you want to swap it out for a gluten-free option, a 1:1 gluten-free blend works like a charm!
Step-by-Step Instructions
Ready to bake? Let’s dive into the process! Here’s how to whip up these delightful cookies, step by step:
-
Preheat the Oven: Start by preheating your oven to 350°F (175°C). This is a crucial step, so don’t skip it! A properly preheated oven ensures that your cookies bake evenly and develop that lovely golden hue.
-
Cream the Butter and Brown Sugar: In a mixing bowl, add the softened salted butter and the brown sugar. Using a hand mixer or a wooden spoon, cream them together until the mixture is light and fluffy. This usually takes about 2-3 minutes. Chef Hack: Scrape down the sides of the bowl occasionally to make sure everything is well combined.
-
Add the Flour: Gradually fold in the all-purpose flour. Mix until the dough comes together—it should be soft and slightly sticky. Tip: Don’t overmix! Once you can see no more flour, you’re good to go!
-
Scoop the Dough: Using a tablespoon or a cookie scoop, portion out the dough onto a baking sheet lined with parchment paper, leaving some space in between each cookie for spreading. Chef’s Note: If you want your cookies to have a little extra pizzazz, roll the dough into balls and then roll them in a bit of extra brown sugar before placing them on the baking sheet.
-
Bake: Slide the baking sheet into your preheated oven and bake for about 10-12 minutes. The cookies are done when they are slightly golden on the edges but still soft in the center. Reminder: They will harden a bit as they cool, so don’t overbake!
-
Cool and Enjoy: Allow the cookies to cool on the baking sheet for about 5 minutes before transferring them to a wire rack to cool completely. They’re delicious warm, but they also taste delightful at room temperature!
Serving Suggestions
When it comes to plating your brown sugar cookies, the goal is to keep it simple yet inviting. Place a stack of warm cookies on a charming plate, perhaps alongside a small dish of milk or a scoop of your favorite ice cream for a delightful dessert experience. For a touch of elegance, garnish with a sprinkle of sea salt or a dusting of powdered sugar. Your friends and family will be saying, “Wow!” before they even take a bite!
Recipe Variations
Now that you’ve mastered the classic recipe, here are a few creative twists you might want to explore:
-
Chocolate Chip Delight: Add half a cup of chocolate chips to the dough for a delightful chocolatey twist.
-
Nutty Brown Sugars: Mix in half a cup of chopped nuts—walnuts, pecans, or even almonds—for a crunchy contrast to the soft cookie.
-
Cinnamon Spice: Add a teaspoon of cinnamon or pumpkin spice to the flour for a warm, cozy flavor.
-
Citrus Zest: Incorporate a teaspoon of lemon or orange zest to brighten the cookies and add a fresh aroma!
-
Dairy-Free Option: Swap the salted butter for ½ cup of coconut oil for a dairy-free alternative that still yields delicious results!
Chef’s Notes
Over the years, this recipe has become a staple in my kitchen. I love how versatile and forgiving it is—perfect for those last-minute cravings or when you need a sweet treat for unexpected guests. One of my funniest kitchen stories happened when I attempted to make these cookies while also juggling a phone call. Let’s just say I added brown sugar, thinking it was my measuring cup of flour! The resulting cookies were oddly sweet but still deliciously edible!
It’s these little mishaps that remind me of the joy in cooking and how it doesn’t always have to be perfect; it just has to be made with love.
FAQs and Troubleshooting
Here are a few common questions you might have about these cookies:
-
Why are my cookies spreading too much?
This could be due to the butter being too soft. Make sure to chill your dough for about 30 minutes before baking to help keep them from spreading. -
Can I store the dough?
Absolutely! You can refrigerate the dough wrapped in plastic wrap for up to a week or freeze it for up to three months. Just thaw in the fridge before using. -
How do I make the cookies chewier?
For chewier cookies, try slightly reducing the flour and increasing the butter. This adjustment helps them retain moisture. -
What if my cookies are too dry?
If the cookies turn out dry, you may have accidentally added too much flour. The next batch, be sure to spoon the flour into the measuring cup rather than scooping directly from the bag.
Nutritional Info
Optional but Helpful: While it’s hard to resist tracking down the numbers, a basic serving of one of these cookies contains approximately 120 calories, 6g of fat, 15g of carbs, and 1g of protein. Enjoy these cookies in moderation as part of a balanced diet!
So there you have it—the ultimate guide to crafting your delicious 3-Ingredient Brown Sugar Cookies! I hope this recipe brings you as much joy as it brings me. Now, tie on your apron, grab some brown sugar, and let’s whip up some sweet memories together! Happy baking!
PrintEasy 3-Ingredient Brown Sugar Cookies

Simple and delightful brown sugar cookies that require just three ingredients and bring back memories of cozy baking sessions.
- Prep Time: 15 minutes
- Cook Time: 12 minutes
- Total Time: 27 minutes
- Yield: 12 cookies 1x
- Category: Dessert
- Method: Baking
- Cuisine: American
- Diet: Vegetarian
Ingredients
- ½ cup salted butter (softened to room temperature – 1 stick)
- ½ cup brown sugar
- 1 cup all-purpose flour
Instructions
- Preheat the oven to 350°F (175°C).
- Cream the softened salted butter and brown sugar together until light and fluffy.
- Add the all-purpose flour and mix until the dough is soft and slightly sticky.
- Scoop the dough onto a baking sheet lined with parchment paper, leaving space between each cookie.
- Bake for 10-12 minutes until golden on the edges but soft in the center.
- Cool on the baking sheet for 5 minutes before transferring to a wire rack.
Notes
To enhance flavor, use salted butter. For variations, consider adding chocolate chips, nuts, or spices.
Nutrition
- Serving Size: 1 cookie
- Calories: 120
- Sugar: 9g
- Sodium: 80mg
- Fat: 6g
- Saturated Fat: 4g
- Unsaturated Fat: 2g
- Trans Fat: 0g
- Carbohydrates: 15g
- Fiber: 0g
- Protein: 1g
- Cholesterol: 30mg
Keywords: brown sugar cookies, easy cookies, 3-ingredient cookies, baking, dessert