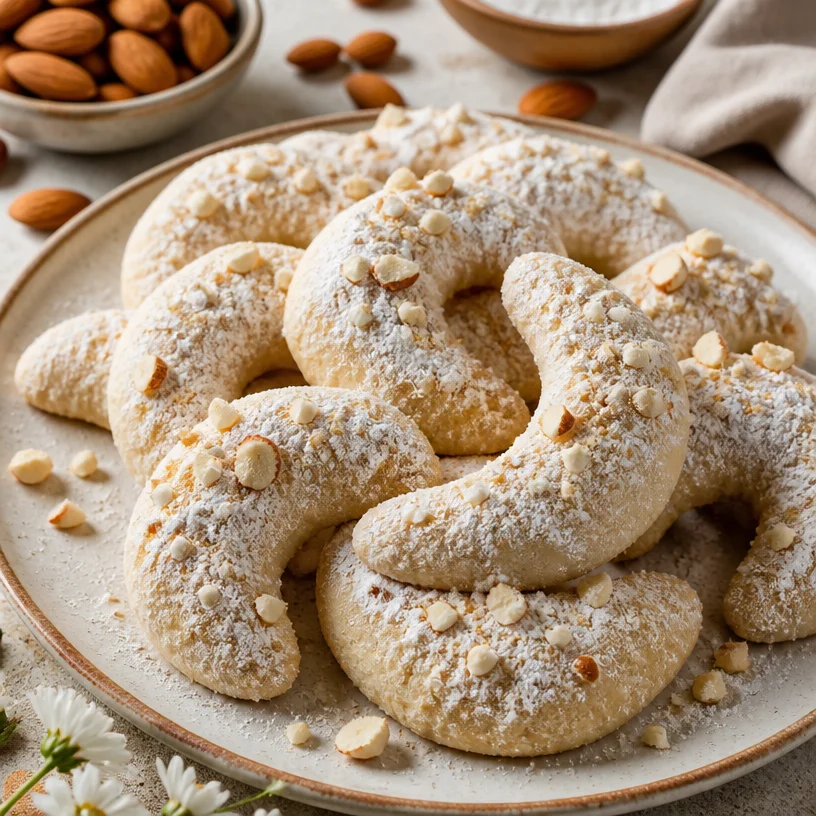
Almond Crescent Cookies: Easy, Crisp Tea-Time Treat
The Sweet Aroma of Nostalgia: Almond Crescent Cookies
Hello friends! Today, we’re diving into a delightful little corner of my kitchen to whip up a batch of Almond Crescent Cookies. These charming little treats have a special place in my heart, and I can’t wait to share the joy of creating them with you. Perfectly buttery, with a lovely hint of almond and a gentle sweetness, these cookies are not just a dessert – they’re a memory, a hug in cookie form.
A Walk Down Memory Lane
Let me take you back to a sunny afternoon in my childhood kitchen. The warm scent of freshly baked cookies dances through the air, blending with the laughter of friends and family. My grandmother, the heart of our home, would invite us into her kitchen, her bright blue apron swaying as she twirled around, mixing, rolling, and baking. It was a time when the world outside slowed down, and our only concern was the tantalizing cookies cooling on the counter.
Among her treasured recipes, the Almond Crescent Cookies stood out. She taught me the delicate process of shaping the dough into crescent moons, rolling them in a cloud of powdered sugar, and the way to savor the crisp edges with each bite. Now, every time I bake these cookies, I feel that same warmth, reliving those lovely moments. So, let’s create some delicious nostalgia together!
Ingredients You’ll Need
Here’s what you’ll need to gather for these wonderful cookies:
-
1 cup unsalted butter, softened
- This adds rich creaminess to the cookies. Make sure it’s at room temperature for easy mixing. If you’re in a pinch, you can substitute it with an equal amount of coconut oil for a dairy-free option.
-
1/2 cup powdered sugar
- This gives the cookies a light, sweet taste and a melt-in-your-mouth texture. For a healthier alternative, try using powdered erythritol or another sweetener of your choice.
-
1 teaspoon vanilla extract
- Adds a warm, aromatic flavor to balance the sweetness. If you want to experiment, a touch of bourbon or rum extract could add an interesting twist.
-
1 teaspoon almond extract
- The star of the show! It lends that classic, nostalgic flavor. You could use hazelnut extract for a different nutty flavor altogether if desired.
-
2 1/4 cups all-purpose flour
- This provides structure to our cookies. For a gluten-free version, you can use a gluten-free 1:1 baking blend with xanthan gum.
-
1/4 teaspoon salt
- A little pinch enhances the flavors and balances the sweetness. Using sea salt can give an extra dash of flavor!
-
1/2 cup chopped almonds
- These add a delightful crunch and flavor. Feel free to substitute with other nuts like walnuts or pistachios for a unique variation.
-
Additional powdered sugar for dusting
- This is what makes these cookies so visually appealing! You could infuse the sugar with a bit of cinnamon for an interesting flavor twist.
Step-by-Step Instructions
Now that we have our ingredients all prepped and ready, let’s get those elbows greased up and dive into the baking process!
-
Preheat Your Oven
- Start by preheating your oven to 350°F (175°C). This ensures that when we pop our cookies in, they’ll bake evenly right from the get-go!
-
Cream the Butter and Sugar
- In a large mixing bowl, combine the softened butter and powdered sugar. Using an electric mixer, beat them together on medium speed until the mixture is light and fluffy—this usually takes about 2-3 minutes. It’s crucial to incorporate air for those lovely, tender cookies!
-
Add the Flavorings
- Now, pour in the vanilla and almond extracts. Mix just until combined. Take a moment here to breathe in that intoxicating aroma; it’s the heart of our cookies!
-
Incorporate the Dry Ingredients
- In a separate bowl, whisk together the flour and salt. Gradually add the flour mixture to the butter mixture in about three additions, mixing on low speed until just combined. Be careful not to overmix; we want to keep those cookies light and flaky!
-
Fold in the Almonds
- Sprinkle in the chopped almonds and gently fold them into the dough with a spatula. This is where those delightful crunches come from! If you want to get a bit adventurous, you can lightly toast the almonds before adding them for an enhanced nutty flavor.
-
Shape the Cookies
- Using your hands, scoop about a tablespoon of dough and roll it into a crescent shape, or, if you’re feeling fun, you could create little balls and then shape them into crescents! Place them on a lined baking sheet, leaving some space in between for spreading.
-
Bake the Cookies
- Pop the sheets into your preheated oven and bake for 12-15 minutes, or until the edges are golden. Keep an eye on them, as they can turn from perfect to too crispy in the blink of an eye!
-
Dust with Powdered Sugar
- Allow the cookies to cool for about 5 minutes on the baking sheet before transferring them to a wire rack. While they’re still warm, gently sift powdered sugar over the top. This makes them look absolutely gorgeous and transforms them into a sprinkle of happiness!
Serving Suggestions
To serve these lovely Almond Crescent Cookies, I recommend placing them on a beautiful platter or in a delightful basket lined with a colorful cloth. Pair them with a steaming cup of tea or coffee, or for an extra treat, bring out some homemade hot cocoa. These cookies are perfect for gatherings, holiday celebrations, or simply enjoying with loved ones on a cozy afternoon.
Recipe Variations
-
Chocolate Dipped Almond Crescents: Melt some dark or white chocolate and dip half of each cooled cookie before they set on a wire rack for a decadent twist.
-
Cinnamon Almond Crescents: Add a teaspoon of ground cinnamon to the dough for a spice-infused treat that’s perfect for fall baking.
-
Orange Zest Addition: Incorporate a teaspoon of fresh orange zest to the mix for a lively citrus note.
-
Nut-Free Version: Simply omit the chopped almonds and replace them with miniature chocolate chips for a delightful sweetness.
-
Matcha Almond Cookies: Add a tablespoon of matcha powder for a unique and vibrant twist; think green and gorgeous!
Chef’s Notes
These Almond Crescent Cookies have quite the history in my kitchen. They started as a special holiday treat but have since become a staple of my baking repertoire. I often find new friends and family loving these cookies during festive gatherings or casual weekend afternoons. They’re enjoyed straight from the oven but even better when shared!
And here’s a little kitchen story—I once tried to multitask and ended up rolling my cookie dough too thin. Unfortunately, they flattened out instead of holding their crescent shape. Instead of tossing them, I embraced the mistake and dusted them with powdered sugar, presenting them as ‘Almond Dust Clouds’. Life’s too short not to laugh at your baking blunders, right?
FAQs and Troubleshooting
-
Why are my cookies flat?
- If your dough is too soft, it could be over-creamed or have too much butter. Make sure to chill the dough for 30 minutes before baking if this happens!
-
Can I freeze the dough?
- Absolutely! You can shape the cookies, freeze them on a baking sheet, and then transfer them to a freezer-safe bag. When you’re ready to bake, just pop them into the oven without thawing!
-
What’s the best way to store these cookies?
- Store them in an airtight container at room temperature for up to a week. If they last that long!
-
How can I tell if they’re done baking?
- Look for the edges to turn a light golden brown. The centers might seem soft, but they’ll firm up as they cool!
Nutritional Info (Optional)
- Serving Size: 1 cookie
- Calories: Approximately 95
- Total Fat: 6g (Saturated Fat: 4g)
- Carbohydrates: 10g (Sugars: 3g)
- Protein: 1g
These Almond Crescent Cookies are so much more than just a dessert; they’re a sprinkle of love that brings us together – a sweet reminder of cherished moments spent sharing food and laughter. I can’t wait for you to try this recipe, and I’d love to hear how they turn out! Let’s keep that kitchen bustling, tie on those aprons, and bake up some memories! Happy baking!
PrintAlmond Crescent Cookies
Deliciously buttery cookies with a hint of almond, perfect for cherishing memories and sharing with loved ones.
- Prep Time: 15 minutes
- Cook Time: 15 minutes
- Total Time: 30 minutes
- Yield: 24 cookies 1x
- Category: Dessert
- Method: Baking
- Cuisine: American
- Diet: Vegetarian
Ingredients
- 1 cup unsalted butter, softened
- 1/2 cup powdered sugar
- 1 teaspoon vanilla extract
- 1 teaspoon almond extract
- 2 1/4 cups all-purpose flour
- 1/4 teaspoon salt
- 1/2 cup chopped almonds
- Additional powdered sugar for dusting
Instructions
- Preheat your oven to 350°F (175°C).
- Cream the butter and powdered sugar until light and fluffy.
- Add the vanilla and almond extracts and mix until combined.
- Incorporate the flour and salt gradually into the butter mixture.
- Fold in the chopped almonds.
- Shape the dough into crescent shapes and place on a lined baking sheet.
- Bake for 12-15 minutes until golden on the edges.
- Dust with powdered sugar while warm.
Notes
For a different flavor twist, try adding chocolate, cinnamon, or orange zest.
Nutrition
- Serving Size: 1 cookie
- Calories: 95
- Sugar: 3g
- Sodium: 50mg
- Fat: 6g
- Saturated Fat: 4g
- Unsaturated Fat: 2g
- Trans Fat: 0g
- Carbohydrates: 10g
- Fiber: 0g
- Protein: 1g
- Cholesterol: 30mg
Keywords: cookies, almond, crescents, dessert, baking, nostalgic
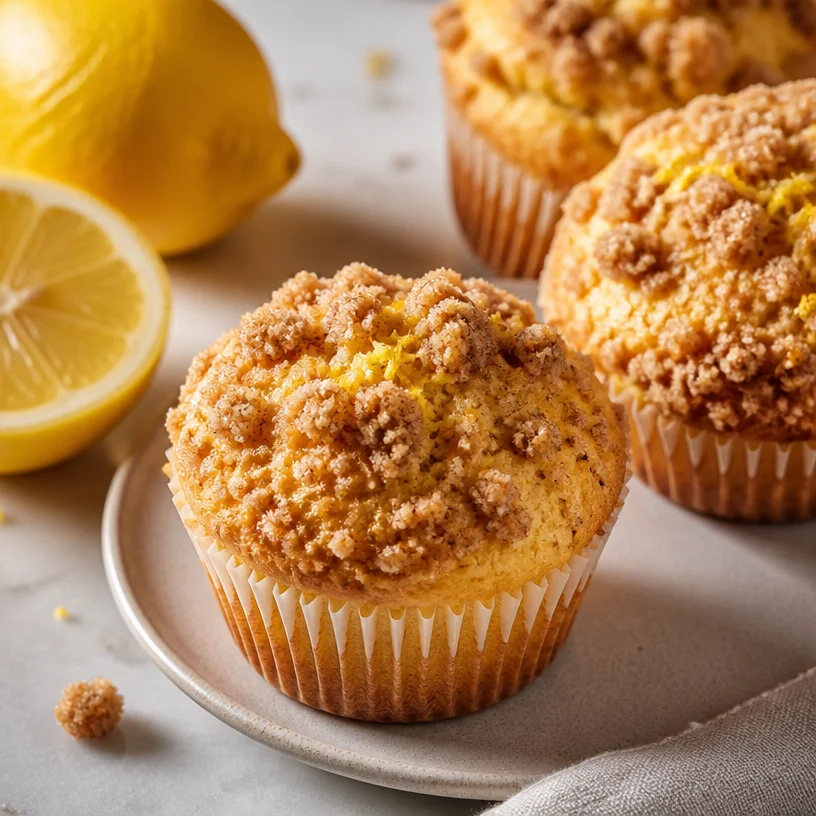
Lemon Muffins with Streusel
The Joy of Baking: Lemon Muffins with Streusel
Hello there, my fellow food enthusiasts! Today, we’re diving into the delightful world of baking with a recipe that’s bright, zesty, and utterly comforting: Lemon Muffins with Streusel. These little gems are not just a morning treat; they’re perfect for any time of day. So grab your apron, and let’s transform our kitchens into a lemony haven!
A Memory to Cherish
I’ll never forget the first time I baked lemon muffins. It was a sunny Saturday morning, and the scent of lemon wafted through my kitchen like a gentle breeze—exciting and invigorating! My dear friend, Mia, had come over, and we decided to whip something up together. Mia has this infectious laugh that can light up any room, and as we mixed the ingredients, we shared silly stories of our culinary mishaps.
As the muffins baked, we were practically bouncing with anticipation. When they finally came out of the oven, golden brown and topped with that crunchy streusel, we couldn’t wait to dig in. One bite, and it was pure magic—tart yet sweet, with a buttery crunch. We ended up devouring the whole batch and laughing about how we’d need to make another one soon, right there and then! Those lemon muffins not only filled our bellies with joy; they filled our hearts with wonderful memories—something every dish should do.
The Ingredients You’ll Need
Let’s gather our ingredients together! Here’s what you’ll need:
-
1 and 1/2 cups all-purpose flour: This forms the base of your muffins. If you’re looking for a gluten-free option, try using a 1:1 gluten-free flour blend.
-
1/2 cup granulated sugar: This adds sweetness and moisture. You can swap it for coconut sugar for a more earthy flavor.
-
2 teaspoons baking powder: Essential for that lovely rise! Ensure it’s fresh for the best results.
-
1/2 teaspoon baking soda: This will enhance the rise and help create a light texture.
-
1/4 teaspoon salt: A little pinch to balance the sweetness. Sea salt can add an extra touch of flavor!
-
1/2 cup buttermilk: This is the secret to a moist muffin. If you don’t have it on hand, you can make your own by mixing one tablespoon of vinegar or lemon juice with enough milk to make 1/2 cup.
-
1/4 cup vegetable oil: Adds richness and keeps the muffins tender. For a healthier option, you could use melted coconut oil.
-
1 large egg: Binds everything together to create a lovely texture.
-
2 teaspoons lemon zest: This brings a burst of fresh lemon flavor. Always zest before juicing for ease!
-
1 teaspoon vanilla extract: Adds depth and warmth to the flavor profile.
-
1/4 cup lemon juice: Freshly squeezed is best! This acidity lifts the flavors in the muffins.
-
For Streusel:
- 1/4 cup brown sugar: This adds a nice caramel note.
- 1/4 cup flour: Helps to bind the streusel.
- 2 tablespoons butter: Use cold butter for that irresistible crumbly texture.
- 1/2 teaspoon cinnamon: A pinch for warmth and comfort; feel free to adjust to your taste!
Step-by-Step Instructions
Ready to bake? Let’s do this!
-
Preheat Your Oven: Start by preheating your oven to 375°F (190°C). Don’t forget to line your muffin tin with cupcake liners or grease it well! It makes for easy cleanup.
-
Mix the Dry Ingredients: In a large bowl, whisk together the flour, granulated sugar, baking powder, baking soda, and salt. Make sure everything is well combined. Pro tip: stir just until combined to prevent dense muffins!
-
Combine the Wet Ingredients: In another bowl, mix the buttermilk, vegetable oil, egg, lemon zest, lemon juice, and vanilla extract until well blended. The zesty aroma will be divine!
-
Get Mixing: Pour the wet mixture into the dry ingredients. Gently fold them together until just combined. It’s okay if there are a few lumps—overmixing can lead to tough muffins!
-
Prepare the Streusel: While the batter rests for a moment, let’s whip up that delicious streusel topping. In a small bowl, combine the brown sugar, flour, butter, and cinnamon. Use your fingertips or a pastry cutter to mix them until you achieve a crumbly texture—this is where the magic happens!
-
Fill the Muffin Tin: Scoop the muffin batter into your prepared muffin tin, filling each well about two-thirds full. Don’t be shy—give them a generous scoop!
-
Top with Streusel: Sprinkle the streusel topping generously over each muffin. Trust me; this adds a delightful crunch that you won’t want to skip!
-
Bake: Place in the preheated oven and bake for about 18-22 minutes, or until the tops are golden brown and a toothpick inserted into the center comes out clean. The smell wafting from your kitchen will make it hard to wait!
-
Cool Down: Once baked, let the muffins cool in the pan for a few minutes before transferring them to a wire rack. This helps them finish baking and prevents the bottoms from getting soggy.
-
Serve and Enjoy: Now comes the best part—enjoying your freshly baked lemon muffins!
Serving Suggestions
These lemon muffins are lovely on their own, but to elevate them even more, consider serving them warm with a dollop of butter or a light dusting of powdered sugar. Presentation can transform a simple muffin into something special. Arrange them on a pretty cake stand or platter and add fresh berries or mint leaves for a pop of color—your guests will feel truly special!
Recipe Variations
Feeling adventurous? Here are some twists to make these muffins your own:
-
Blueberry Lemon Muffins: Add a cup of fresh or frozen blueberries for a burst of flavor.
-
Lemon Poppy Seed Muffins: Stir in a tablespoon of poppy seeds for crunch and visual appeal.
-
Lemon Almond Muffins: Replace half of the granulated sugar with almond flour for a nutty flavor.
-
Glazed Lemon Muffins: Drizzle a simple lemon glaze (mix powdered sugar with lemon juice) over the muffins for an extra sweet touch.
-
Vegan Option: Substitute the egg with a flax egg (1 tablespoon ground flaxseed mixed with 3 tablespoons water) and use almond milk instead of buttermilk.
Chef’s Notes
As I reflect on my journey, I remember how intimidated I felt trying to bake muffins for the first time. But I learned that baking is just like anything else—practice makes perfect! These lemon muffins have evolved in my kitchen over the years. I’ve fiddled with flavors, experimented with ingredients, and now they hold a special place in my heart (and my recipe book!). What started as a simple idea has now become a family favorite, and I’m thrilled to share it with you.
FAQs and Troubleshooting
-
Why did my muffins turn out dense?
- Overmixing can lead to dense muffins. Be gentle when combining your wet and dry ingredients!
-
Can I use other citrus fruits?
- Absolutely! Oranges and limes work beautifully—just adjust the quantity to balance their sweetness.
-
How do I store leftover muffins?
- Place them in an airtight container at room temperature for up to 3 days. You can refrigerate them for a longer shelf life, but they’ll lose some of their fluff.
-
Why didn’t my muffins rise?
- Check the freshness of your baking powder and baking soda. If they’re expired, your muffins might not rise as they should.
Now that you’ve armed yourself with this delightful Lemon Muffins with Streusel recipe, it’s time to create your own kitchen memories. I can’t wait to hear about your baking adventures! Remember, it’s all about the joy of creating—and enjoying—good food together. Let’s get baking, shall we? 🍋✨
PrintLemon Muffins with Streusel

Delightful, zesty lemon muffins topped with a crunchy streusel, perfect for any time of the day.
- Prep Time: 15 minutes
- Cook Time: 22 minutes
- Total Time: 37 minutes
- Yield: 12 muffins 1x
- Category: Breakfast
- Method: Baking
- Cuisine: American
- Diet: Vegetarian
Ingredients
- 1 and 1/2 cups all-purpose flour
- 1/2 cup granulated sugar
- 2 teaspoons baking powder
- 1/2 teaspoon baking soda
- 1/4 teaspoon salt
- 1/2 cup buttermilk
- 1/4 cup vegetable oil
- 1 large egg
- 2 teaspoons lemon zest
- 1 teaspoon vanilla extract
- 1/4 cup lemon juice
- For Streusel:
- 1/4 cup brown sugar
- 1/4 cup flour
- 2 tablespoons butter
- 1/2 teaspoon cinnamon
Instructions
- Preheat your oven to 375°F (190°C) and line the muffin tin with cupcake liners or grease it.
- Mix the dry ingredients: whisk together flour, granulated sugar, baking powder, baking soda, and salt in a large bowl.
- Combine the wet ingredients: mix buttermilk, vegetable oil, egg, lemon zest, lemon juice, and vanilla extract in another bowl.
- Pour the wet mixture into the dry ingredients and gently fold until just combined.
- Prepare the streusel by combining brown sugar, flour, butter, and cinnamon in a small bowl until crumbly.
- Fill the muffin tin with the batter, filling each well about two-thirds full.
- Top with the streusel mixture over each muffin.
- Bake for 18-22 minutes, or until golden brown and a toothpick comes out clean.
- Cool the muffins in the pan for a few minutes before transferring to a wire rack.
- Serve and enjoy your freshly baked lemon muffins!
Notes
Serve warm with a dollop of butter or dust with powdered sugar for an elevated treat.
Nutrition
- Serving Size: 1 muffin
- Calories: 250
- Sugar: 10g
- Sodium: 150mg
- Fat: 10g
- Saturated Fat: 2g
- Unsaturated Fat: 7g
- Trans Fat: 0g
- Carbohydrates: 34g
- Fiber: 1g
- Protein: 3g
- Cholesterol: 25mg
Keywords: lemon muffins, breakfast, baking, muffins, streusel

Indulgent Reese’s Chocolate Peanut Butter Cup Earthquake Cake
Indulgent Reese’s Chocolate Peanut Butter Cup Earthquake Cake
Welcome back to the delightful world of indulgent baking! Today, we’re diving into a true celebration of flavor and texture with a show-stopping dessert: the Reese’s Chocolate Peanut Butter Cup Earthquake Cake. If you’ve ever dreamed of sinking your teeth into a chocolate cake that’s bursting with peanut butter goodness, then you’re in for a treat!
Introduction
There’s something magical about the combination of chocolate and peanut butter. It’s a flavor pairing that leaves taste buds dancing and hearts swooning. And trust me, there’s no better way to experience this delightful duo than with an Earthquake Cake! This cake isn’t just a typical chocolate dessert; it’s an awe-inspiring masterpiece that comes with the promise of gooey, fudgy goodness balanced by the creamy richness of peanut butter cups.
Imagine this: a moist chocolate cake, a layer of rich chocolate pudding adding decadence, and chunks of Reese’s Peanut Butter Cups melted throughout, creating a satisfyingly messy ‘earthquake’ effect as it bakes. Sounds dreamy, right? And the best part? It’s surprisingly easy to whip up! Whether you’re planning a major celebration, a cozy dinner party, or just a casual family night in, this cake will steal the show and have everyone reaching for seconds (and thirds!).
So, tie on your apron and let’s walk through this joyous journey of flavors. Together, we’ll create a dessert that feels special yet approachable—just like the spirit of Ivory Apron!
Personal Story
Let me take you back to one of my earliest baking adventures in the kitchen. I was about ten years old, and I remember being captivated by the powerful aromas swirling around our home as my mom baked. One day, she decided to get creative with chocolate and peanut butter—a combination I loved but mostly found in simple sandwiches at lunch. She pulled out her recipe book and introduced me to the world of cakes, and we baked a chocolate-peanut butter cake together.
My little kid heart was filled with anticipation as I carefully measured out the cocoa powder and stirred the ingredients. The best moment was when we added chunks of peanut butter cups right into the batter! That first bite of gooey cake mingling with creamy peanut butter was pure bliss. That experience ignited my passion for baking, and I can still feel the warmth that enveloped me then. To this day, the combination of chocolate and peanut butter speaks to me, and it’s the foundation of this Earthquake Cake recipe. It’s not just food; it’s a nostalgic reminder of joyful moments spent in the kitchen.
Ingredients
Here’s what you’ll need for our delightful cake:
-
1 standard chocolate cake mix
Use your favorite brand; this is the base of our cake. If you’re feeling adventurous, you can opt for a dark chocolate cake mix for a richer flavor. -
3 large eggs
Eggs help bind everything together and add moisture. If you’re by chance out of eggs, you can substitute each egg with 1/4 cup of unsweetened applesauce or a mashed banana for a subtle twist. -
Water (or brewed coffee for richer flavor)
Using brewed coffee enhances the chocolate flavor beautifully. But if coffee isn’t your thing, plain old water works just fine! -
1 package instant chocolate pudding mix
This is where we elevate our cake’s creaminess. It adds a rich texture and indulgent taste! You can switch it up with vanilla pudding for a different flavor profile. -
6-8 Reese’s Peanut Butter Cups, chopped
The star of the show! These candy pieces add bursts of peanut butter bliss throughout the cake. You can substitute with any other peanut butter cup brand, or use a mix of chocolate and peanut butter candies. -
Creamy peanut butter (or crunchy for texture)
This will be swirled into the batter and gives it that signature peanut buttery flavor. If you prefer a little crunch, go for crunchy peanut butter; it brings delightful texture! -
Powdered sugar
For a light, sweet finishing touch! This isn’t strictly necessary, but it adds a lovely touch if you plan to dust the cake for presentation.
Step-by-Step Instructions
Ready to create some mouthwatering magic? Here’s how to make your Earthquake Cake!
-
Preheat and Prepare Your Pan
Preheat your oven to 350°F (175°C). Grease a 9×13-inch baking dish with cooking spray or butter. This will help our cake slide right out when it’s baked—nobody wants to face the cake catastrophe of a stuck dessert! -
Mix the Cake Batter
In a large mixing bowl, combine the chocolate cake mix, eggs, and water (or brewed coffee). Now, grab a whisk or electric mixer and beat the mixture on low for about 30 seconds. Then, bump it up to medium speed and mix for an additional 2 minutes. This helps aerate the cake, creating a lovely, fluffy texture. -
Add the Pudding Mix
Gently fold the chocolate pudding mix into your batter. Yes, it’s going to get ridiculously rich and delicious! Just make sure it’s well incorporated. -
Prepare the Peanut Butter Swirl
Before we dive in with the candy, let’s create that yum-factor! In a small bowl, mix together creamy peanut butter and a couple tablespoons of water (or milk) until it’s spreadable. This helps create the beautiful and creamy ripple effect throughout the cake. -
Combine Ingredients
Fold in the chopped Reese’s Peanut Butter Cups into the cake batter. This is where the magic starts to happen—those glistening chocolate and peanut butter pieces begin to dance throughout the batter! -
Transfer to the Baking Pan
Pour the cake batter into your prepared baking dish, spreading it into an even layer with a spatula. Now it’s time for that dreamy peanut butter swirl! Using a spoon, drop dollops of the prepared peanut butter mix on top and gently swirl it through the batter. Don’t worry about making it perfect; the chaos is what makes it an Earthquake Cake! -
Bake the Cake
Place the baking dish into the preheated oven and let it bake for about 30-35 minutes. Check doneness by inserting a toothpick in the center; it should come out clean, with a few moist crumbs attached. Don’t bake it too long or it can dry out—the last thing we want is a dry cake! -
Cool and Serve
Once baked, take it out of the oven and let it cool in the pan for about 10-15 minutes. After that, carefully flip it onto a wire rack or a serving platter. It’s hard to resist cutting into it straight away, but letting it cool slightly allows the flavors to deepen. -
Dust with Powdered Sugar
If you’re feeling fancy, dust some powdered sugar on top of the cake right before serving. It adds an elegant touch—perfect for impressing your guests!
Serving Suggestions
When it’s time to serve, cut yourself a generous slice—you’ll want to showcase the gooey layers and pockets of peanut butter cups in every piece! Pair it with a scoop of vanilla ice cream to create a heavenly contrast that chills the warm cake. Serving it with an extra drizzle of melted chocolate or a dollop of whipped cream would also be a delightful touch. Trust me, everyone will be requesting the recipe!
Recipe Variations
-
Minty Twist: Add a handful of crushed mint candies or peppermint extract into the cake batter for a refreshing surprise.
-
Nutty Surprise: Add a sprinkle of chopped nuts (like pecans or walnuts) to give your cake an irresistible crunch.
-
Swapping Flour: If you want a gluten-free option, use a gluten-free chocolate cake mix in place of the standard one.
-
Different Candies: Experiment with various types of chocolate candies, such as Milky Way or Snickers, for your own unique flavor experience.
-
Healthier Option: Use a reduced-fat cake mix and replace the peanut butter with a natural nut butter. You could also serve it with a fresh fruit salad on the side for a lighter touch.
Chef’s Notes
Baking this cake is always a delightful experience, but it also comes with its fair share of baking mishaps! I remember one time, in my excitement, I mistakenly grabbed the salt instead of the sugar. The resulting cake was a hilarious lesson in “don’t bake when tired.” As I shared bites of this “salty surprise” with friends, laughter filled the kitchen. This cake has truly evolved over time, from a simple chocolate cake to the rich and indulgent Earthquake Cake we’re whipping up today. It’s these little kitchen moments, both hilarious and heartwarming, that make baking such a joy.
FAQs and Troubleshooting
1. My cake didn’t rise. What happened?
Ensure your baking powder or cake mix isn’t expired, and double-check that you followed the recipe correctly. Sometimes, if the batter is over-mixed, it can also affect rising.
2. Why did my cake get hard?
This might happen if the cake is overbaked. Keep an eye on the time and always test with a toothpick.
3. Can I freeze the cake?
Yes! If you have leftovers (which is rare!), you can wrap individual slices in plastic wrap and store them in an airtight container in the freezer for up to 2 months.
4. How do I store leftovers?
Keep any leftover cake in an airtight container at room temperature for a day or two or in the fridge for up to a week. Just know that the sooner you eat it, the better!
Nutritional Info
(Note: Nutritional information can vary based on specific ingredients and portion sizes. It’s always a good idea to check labels for the most accurate details.)
- Serving size: 1 slice
- Calories: Approximately 400
- Carbohydrates: 60g
- Fat: 20g
- Protein: 6g
- Sugar: 30g
There you have it—a luscious, indulgent Reese’s Chocolate Peanut Butter Cup Earthquake Cake that’s bound to be the star of any event! Remember, it’s all about the joy of cooking together, creating beautiful moments around the table, and celebrating life’s sweetest moments (and desserts!). So gather your loved ones, pour a little something sparkling, and enjoy this deliciously rich creation! Happy baking!
PrintReese’s Chocolate Peanut Butter Cup Earthquake Cake

A rich and indulgent chocolate cake bursting with peanut butter goodness and chunks of Reese’s Peanut Butter Cups.
- Prep Time: 15 minutes
- Cook Time: 35 minutes
- Total Time: 50 minutes
- Yield: 12 servings 1x
- Category: Dessert
- Method: Baking
- Cuisine: American
- Diet: Vegetarian
Ingredients
- 1 standard chocolate cake mix
- 3 large eggs
- 1 cup water or brewed coffee
- 1 package instant chocolate pudding mix
- 6–8 Reese’s Peanut Butter Cups, chopped
- Creamy or crunchy peanut butter
- Powdered sugar (optional, for dusting)
Instructions
- Preheat your oven to 350°F (175°C) and grease a 9×13-inch baking dish.
- Mix the chocolate cake mix, eggs, and water (or brewed coffee) in a large bowl until well combined.
- Add the chocolate pudding mix and fold it into the batter.
- Prepare the peanut butter by mixing it with a few tablespoons of water or milk until spreadable.
- Combine the chopped Reese’s Peanut Butter Cups into the cake batter.
- Transfer the batter into the prepared baking dish and swirl in the peanut butter mix.
- Bake for about 30-35 minutes, or until a toothpick comes out clean.
- Cool for 10-15 minutes in the pan before transferring to a wire rack.
- Dust with powdered sugar before serving, if desired.
Notes
Pair with a scoop of vanilla ice cream or a drizzle of hot chocolate for an extra indulgent experience.
Nutrition
- Serving Size: 1 slice
- Calories: 400
- Sugar: 30g
- Sodium: 400mg
- Fat: 20g
- Saturated Fat: 8g
- Unsaturated Fat: 10g
- Trans Fat: 0g
- Carbohydrates: 60g
- Fiber: 2g
- Protein: 6g
- Cholesterol: 50mg
Keywords: chocolate cake, peanut butter, dessert, Reese's, indulgent

Beginner-Friendly German Chocolate Cheesecake: Coconut Swirl
Indulge in Classic Comfort: German Chocolate Cheesecake
Hello, friends! Today, I’m excited to share with you a recipe that has a special place in my heart and my kitchen: German Chocolate Cheesecake. If you’re anything like me, there’s just something so delightful about the combination of chocolate, creamy cheesecake, and the nutty sweetness of coconut and pecans. It’s a dessert that transforms any gathering into an instant celebration—whether it’s a cozy family dinner or a lavish holiday feast.
As I whisk together the ingredients for this decadent delight, I can’t help but remember the early days of my cooking adventures. You see, baking was never my strongest suit; I was always more of a savory chef, whipping up pasta, sauces, and hearty roasts. But then, one day, my best friend hosted a potluck. Her homemade German chocolate cake? It stole the show! As I savored each morsel, I knew I had to attempt to recreate that glorious flavor. Enter: German Chocolate Cheesecake. Inspired by my friend’s cake, I decided to put my spin on it and create a dessert that seamlessly blended the richness of cheesecake with that classic chocolate cake essence.
Let me take you on a journey of flavors and memories, as we dive into how to create this show-stopping dessert right at home!
A Kitchen Memory
Picture this: it was a sun-soaked afternoon, and my kitchen was alive with laughter and the rich aroma of baking chocolate. I had invited friends over for a casual get-together, and the pressure was on to impress. As I mixed the ingredients for my German Chocolate Cheesecake, the air was filled with playful banter and the enthusiastic recommendations for every new recipe I had concocted over the years.
As we gathered around the table, the centerpiece was, of course, my glorious cheesecake. I watched as my friends took their first bites, their faces lighting up in sheer bliss. It was a celebration of culinary triumph! That moment taught me that cooking is about sharing experiences, creating memories, and, of course, indulging in delicious flavors together. So let’s recreate that celebration and bring some joy to your kitchen!
Ingredients
Here’s what you’ll need to craft this beautiful German Chocolate Cheesecake:
-
1 1/2 cups graham cracker crumbs
The base of our cheesecake! You can substitute with crushed cookies such as Oreo or Digestive biscuits for a different flavor profile. -
1/2 cup unsalted butter, melted
This binds the crumbs together. Feel free to use coconut oil for a dairy-free twist—it adds richness and a hint of coconut flavor. -
4 packages (8 ounces each) cream cheese, softened
The star of the show! This creates that creamy, tangy base. For a healthier option, you can use Greek yogurt or vegan cream cheese. -
1 cup granulated sugar
Sugar adds sweetness and balances the flavors. If you’re looking for a lower-sugar option, try coconut sugar or a granulated sugar substitute. -
1 teaspoon vanilla extract
A must-have for any dessert, it enhances the flavors. Homemade vanilla extract is a wonderful addition if you have it on hand. -
4 large eggs
They help the cheesecake set properly. You can substitute with flax eggs (1 tablespoon ground flaxseed + 3 tablespoons water) if you prefer a vegan option. -
8 ounces semi-sweet chocolate, melted
This adds the rich chocolate flavor. Dark chocolate is a fantastic substitute for a more intense chocolate experience. -
1 cup sweetened shredded coconut
For that classic German chocolate cake profile! If you want a healthier version, consider using unsweetened coconut. -
1 cup pecans, chopped
These add a lovely crunch. Walnuts can be used as an alternative for a slightly different flavor.
Step-by-Step Instructions
Now that we have our ingredients ready, let’s dive into the steps for this delightful dessert.
Step 1: Prepare the Crust
-
Preheat your oven to 325°F (163°C). This gives the cheesecake plenty of time to bake evenly without cracking.
-
In a medium mixing bowl, combine graham cracker crumbs and melted butter. Mix until the crumbs are completely coated and resemble wet sand.
-
Press the mixture into the bottom of a 9-inch springform pan, using the back of a measuring cup to create a firm crust. You want a solid base that will hold up to the creamy filling!
-
Bake the crust for 10 minutes until it’s lightly golden and fragrant. This simple step adds that lovely crunch and depth of flavor to your dessert!
Step 2: Make the Cheesecake Filling
-
In a large mixing bowl, beat the softened cream cheese using an electric mixer on medium speed until smooth and creamy. Scrape down the sides to ensure no lumps remain.
-
Gradually add in the granulated sugar and continue mixing until well combined. This part is essential—your filling should be silky and luscious.
-
Add the vanilla extract and then mix in the eggs, one at a time, ensuring each egg is well incorporated before adding the next. Remember, don’t overmix! Just beat until combined to avoid adding too much air (which can cause cracks).
-
Melt your semi-sweet chocolate either in a microwave or over a double boiler, stirring often. Let it cool slightly before adding to the cream cheese mixture. Mix until fully incorporated and the batter is smooth.
Step 3: Assemble and Bake
-
Pour the cheesecake filling into the pre-baked crust, smoothing the top with a spatula. It’s looking beautiful already!
-
Bake for 55–60 minutes, or until the edges are set and the center has a slight jiggle. Note: your cheesecake will continue to firm up as it cools, so don’t worry if it looks a little soft!
-
Once baked, turn off the oven, crack the oven door open, and let your cheesecake cool inside for about an hour. This helps prevent cracking—yes, we want a flawless presentation!
-
After cooling, remove it from the oven and let it come to room temperature before refrigerating for at least 4 hours or overnight (if you can wait!).
Step 4: Add the Coconut-Pecan Topping
-
In a medium saucepan over medium heat, combine sweetened shredded coconut and chopped pecans with a bit of sugar and a splash of milk (or cream). Stir continuously for about 5 minutes until everything is toasted and deliciously fragrant. Let cool slightly.
-
Once your cheesecake has chilled, evenly spread the coconut-pecan mixture over the top. It not only looks inviting but adds that signature flavor we love in German chocolate cake!
Serving Suggestions
To plate this fabulous dessert, gently release the springform pan and slice the cheesecake into wedges. For an elevated presentation, serve each slice on a charming dessert plate garnished with a dollop of whipped cream and a sprinkle of toasted coconut. Fresh berries also make for a beautiful add-on!
Recipe Variations
Here are a few creative twists you can try with your German Chocolate Cheesecake:
- Flavor Infusion: Add a splash of espresso for a mocha version or a dash of cinnamon for a spicy warmth.
- Fruit Layer: Blend fresh raspberries or strawberries into the cheesecake batter for a fruity burst.
- Nut-Free Version: Replace pecans with crushed graham crackers or more coconut for those with nut allergies.
- Vegan Option: Use a nut-based cream cheese, coconut milk, and flaxseed eggs for a crowd-friendly dessert!
Chef’s Notes
This recipe has evolved quite a bit since those early kitchen experiments. I remember my first attempt: the cheesecake was not set, and the crust crumbled—what a mess! But with each try and the joy of sharing it with family and friends, I found the balance of flavors that brought the German chocolate cake inspiration to life.
One funny story—I once forgot to add the sugar entirely. Let’s just say that everyone enjoyed my “new recipe” called “Chocolate Brick”! But laughter filled the room, and after a few tweaks, we turned the night into a fun baking session. It’s all about those little kitchen blunders that turn into cherished memories, right?
FAQs and Troubleshooting
Q: My cheesecake cracked during baking. What did I do wrong?
A: Cracking can happen if the cheesecake bakes too quickly or if it has too much air incorporated. Always mix on low speed once eggs are added and let the cheesecake cool gradually in the oven.
Q: How do I know when my cheesecake is done?
A: The sides should be set, and the center will still have a slight jiggle like jelly. Remember, it will continue to firm up as it cools down!
Q: Can I freeze leftovers?
A: Absolutely! This cheesecake freezes beautifully. Just wrap it tightly in plastic wrap and aluminum foil. Thaw it in the refrigerator overnight when you’re ready to indulge again.
Q: What’s the best way to cut the cheesecake cleanly?
A: Use a sharp knife dipped in hot water—this technique helps create smooth, clean slices! Wipe the knife between cuts to keep the edges neat.
Nutritional Info (Optional)
Note: Nutritional info will vary based on ingredient brands and portion sizes. Here’s an approximate breakdown per serving (1 slice based on 12 servings):
- Calories: 480
- Protein: 8g
- Carbohydrates: 42g
- Dietary Fiber: 2g
- Sugars: 32g
- Fat: 34g
And there you have it! Your very own German Chocolate Cheesecake, perfected with love and laughter in your kitchen. Let’s get cooking, savor the moments, and fill your tables with joy—one delicious slice at a time! Cheers to unforgettable gatherings and culinary adventures!
PrintGerman Chocolate Cheesecake

A rich and creamy cheesecake inspired by classic German chocolate cake, featuring chocolate, coconut, and pecans.
- Prep Time: 20 minutes
- Cook Time: 70 minutes
- Total Time: 90 minutes
- Yield: 12 servings 1x
- Category: Dessert
- Method: Baking
- Cuisine: German
- Diet: Vegetarian
Ingredients
- 1 1/2 cups graham cracker crumbs
- 1/2 cup unsalted butter, melted
- 4 packages (8 ounces each) cream cheese, softened
- 1 cup granulated sugar
- 1 teaspoon vanilla extract
- 4 large eggs
- 8 ounces semi-sweet chocolate, melted
- 1 cup sweetened shredded coconut
- 1 cup pecans, chopped
Instructions
- Preheat your oven to 325°F (163°C).
- Combine graham cracker crumbs and melted butter in a medium mixing bowl.
- Press the mixture into the bottom of a 9-inch springform pan.
- Bake the crust for 10 minutes until lightly golden.
- Beat the cream cheese in a large mixing bowl until smooth.
- Add the granulated sugar and mix until well combined.
- Incorporate the vanilla and eggs, one at a time, mixing gently.
- Melt the semi-sweet chocolate and let cool slightly before adding to the mixture.
- Pour the cheesecake filling into the pre-baked crust.
- Bake for 55–60 minutes until set.
- Cool the cheesecake in the oven for 1 hour then refrigerate for at least 4 hours.
- Combine coconut and pecans in a saucepan with sugar and milk, and toast for 5 minutes.
- Spread the coconut-pecan mixture over the top of the cheesecake.
Notes
For a vegan option, use nut-based cream cheese and flaxseed eggs. Serve with whipped cream and fresh berries.
Nutrition
- Serving Size: 1 slice
- Calories: 480
- Sugar: 32g
- Sodium: 300mg
- Fat: 34g
- Saturated Fat: 19g
- Unsaturated Fat: 6g
- Trans Fat: 0g
- Carbohydrates: 42g
- Fiber: 2g
- Protein: 8g
- Cholesterol: 200mg
Keywords: cheesecake, German chocolate, dessert, baking, chocolate dessert

Cookie Butter Cookies
Indulge in Whimsy: Cookie Butter Cookies
Welcome, dear friends! I am beyond thrilled to share with you one of the easiest, but oh-so-delightful treats that has taken my kitchen by storm: Cookie Butter Cookies. If you’re a fan of that aromatic, spiced goodness that is cookie butter (think Biscoff!), you’re going to love this recipe. With just a handful of ingredients, you can whip up soft, melt-in-your-mouth cookies that not only taste like a dream but also make your kitchen smell like a cookie bakery in full swing!
Picture this: a cozy evening with the aroma of warm cookies wafting through your home, a cup of tea or coffee in your hand, and your loved ones gathered around. Sounds perfect, right? This recipe is my little secret to creating those sweet moments that linger long after the last crumb has vanished. So, let’s dive into the delicious world of cookie butter cookies and make some magic happen!
A Whimsical Memory
Let me take you back to a rainy afternoon I spent in my grandmother’s kitchen. I was just a small child, but watching her bake was nothing short of mesmerizing. She had a knack for instilling magic into every loaf of bread and batch of cookies. One day, while rummaging through her pantry, we stumbled upon a jar of cookie butter. I was intrigued by the notion that something so sweet and spiced could exist.
“Let’s make cookies with this,” she said, and I’ll never forget the joy and wonder we shared as we blended the creamy, caramel-like spread with flour and sugar. It turned that gloomy day into a delightful cooking adventure filled with laughter and sprinkles of sugar. To this day, every time I use cookie butter, I am transported back to that cozy kitchen, and it inspires me to create and share recipes that bring joy and warmth to others.
Ingredients
Now, let’s gather our ingredients! Here’s what you’ll need to rustle up these delightful cookies:
-
1 cup cookie butter (Biscoff)
Cookie butter is the star of this show! If you can’t find Biscoff, any cookie butter works, or you can make your own by blending crushed cookies with a little oil. Just remember, the more spiced the cookie butter, the richer the flavor! -
1/2 cup brown sugar
This adds moisture and a lovely depth of flavor. If you’re out of brown sugar, you can use granulated sugar, but the cookies will be less chewy. -
1/4 cup granulated sugar
A little extra sweetness to balance things out. This sugar can also be replaced with coconut or raw sugar for a different nuance. -
1 egg
The binding agent that holds everything together. If you want to keep these cookies vegan, you can use a flax egg (1 tablespoon ground flaxseed mixed with 2.5 tablespoons of water), or even applesauce! -
1 teaspoon vanilla extract
A splash of vanilla elevates everything! If you want an extra kick, try adding almond extract instead—delicious! -
1 1/4 cups all-purpose flour
This binds our cookies. If you want an earthy twist, swap out a portion for whole wheat flour or almond flour, but keep in mind that it may change the texture a bit. -
1/2 teaspoon baking soda
This is essential for those lovely soft cookie interiors. If you are out of baking soda, double the amount of baking powder, but don’t forget to adjust the flour! -
1/4 teaspoon salt
A pinch of salt helps enhance the sweet flavors and balances the cookie butter’s sweetness. You can use sea salt or kosher salt for a different texture. -
1/2 cup chocolate chips (optional)
This is where you can let your creativity shine! Dark, semi-sweet, or even white chocolate—choose your favorite! For dairy-free, go for vegan chocolate chips.
Step-by-Step Instructions
Let’s get those ovens preheated to 350°F (175°C) because we’re about to embark on a baking adventure! Here’s how to whip up your cookie butter cookies, one step at a time:
-
Mix the Sugars and Cookie Butter
In a large mixing bowl, combine your cookie butter, brown sugar, and granulated sugar. Using a hand mixer or stand mixer, blend them together until the mixture becomes smooth and creamy. This usually takes about 1-2 minutes. Trust me, this is the base of deliciousness! -
Add the Egg and Vanilla
Crack that egg into the bowl and add the vanilla extract. Mix until well combined—the batter should look silky and inviting. You could even take this moment to sneak a taste (just a tiny one, for quality control!). -
Sift the Dry Ingredients
In a separate bowl, whisk together the flour, baking soda, and salt. Sifting helps aerate the flour, ensuring a light and fluffy texture. Gradually add the dry mixture to the wet ingredients, mixing carefully until there’s no flour left visible. This is the time when it all starts to come together! -
Incorporate Chocolate Chips
Fold in your choice of chocolate chips with a rubber spatula or wooden spoon. You want them evenly distributed, so take your time here—it’s worth it! -
Scoop the Dough
Using a cookie scoop or two spoons, drop rounded tablespoons of dough onto a lined baking sheet. Leave enough space in between because these babies will spread out in the oven, becoming soft and chewy pockets of joy. -
Bake
Pop those trays in your preheated oven for about 10-12 minutes. You want them to be golden on the edges but still soft in the center because they’ll continue to cook a bit after you take them out. -
Cool Down
Once baked, let them cool on the baking sheet for 5 minutes before transferring them to a wire rack. This step is crucial for ensuring they set perfectly!
Serving Suggestions
When it comes to plating these cookie butter cookies, simplicity is key. Stack them on a beautiful plate, perhaps with a sprinkling of sea salt on top for an elegant touch. You could even place them in a glass jar with a ribbon tied around it for a charming gift! Consider serving them with a scoop of vanilla ice cream or a dollop of whipped cream for a bit of decadence.
Recipe Variations
Feeling adventurous? Here are some delightful variations you can try:
-
Nutty Delight: Add 1/2 cup of chopped nuts (like walnuts or pecans) to the dough for an added crunch.
-
Spiced Perfection: Incorporate a teaspoon of cinnamon or a pinch of nutmeg into the dry ingredients to elevate those warm flavors!
-
Coconut Twist: Swap out half of the flour for shredded coconut for a tropical vibe.
-
Fruity Fun: Fold in dried fruits like cranberries or raisins for a chewy texture and a burst of flavor.
-
Caramel Surprise: Add a few caramel bits to the dough for a fun surprise in every bite.
Chef’s Notes
These cookie butter cookies hold a special place in my heart because they capture the essence of simplicity and joy in baking. Every time I make them, it transports me back to the kitchen with my grandmother. You know, there’s something about using cookie butter that makes baking feel a little more like child’s play. It’s fun, it’s messy, and it’s bound to bring a smile to anyone’s face. Plus, they’ve become a favorite treat among my friends, often ending with some friendly cookie wars to see whose version is best!
FAQs and Troubleshooting
1. Why are my cookies flat?
Flat cookies usually mean the butter got too warm or you didn’t use enough flour. Make sure to measure accurately and consider chilling the dough for 30 minutes before baking for thicker cookies!
2. Can I freeze the dough?
Absolutely! You can freeze the dough before baking. Just scoop out the dough, place it on a parchment-lined tray, and freeze them until solid. Transfer to a freezer bag and bake straight from the freezer, adding a couple of extra minutes to the baking time.
3. Why are my cookies too dry?
Overbaking often leads to dry cookies. Remember: if you take them out while they still look slightly underbaked in the middle, that’s okay. They’ll firm up as they cool.
4. How can I make these gluten-free?
Substituting the all-purpose flour for a gluten-free all-purpose blend usually works beautifully! Just make sure your cookie butter is gluten-free, too!
Nutritional Info
For those curious about the nutritional aspect, here’s an approximate rundown per cookie (assuming about 24 cookies total, depending on size):
- Calories: 120
- Protein: 1.5g
- Carbohydrates: 18g
- Fat: 5.5g
- Fiber: 1g
- Sugar: 8g
And there you have it—cookie butter cookies that will charm anyone lucky enough to have one (or two!). I hope this recipe brings sweetness to your kitchen, invites conversation to your table, and inspires you to create your own beautiful memories. Happy baking, friends! Let’s make life just a little sweeter, one cookie at a time!
PrintCookie Butter Cookies

Delightful, soft cookies made with cookie butter for a warm, sweet treat.
- Prep Time: 15 minutes
- Cook Time: 12 minutes
- Total Time: 27 minutes
- Yield: 24 cookies 1x
- Category: Dessert
- Method: Baking
- Cuisine: American
- Diet: Vegetarian
Ingredients
- 1 cup cookie butter (Biscoff)
- 1/2 cup brown sugar
- 1/4 cup granulated sugar
- 1 egg
- 1 teaspoon vanilla extract
- 1 1/4 cups all-purpose flour
- 1/2 teaspoon baking soda
- 1/4 teaspoon salt
- 1/2 cup chocolate chips (optional)
Instructions
- Mix the sugars and cookie butter in a large mixing bowl until smooth and creamy.
- Add the egg and vanilla extract, mixing until well combined.
- Sift the flour, baking soda, and salt in a separate bowl, then gradually incorporate this into the wet mixture.
- Incorporate the chocolate chips until evenly distributed.
- Scoop rounded tablespoons of dough onto a lined baking sheet, leaving space between each.
- Bake in a preheated oven at 350°F (175°C) for 10-12 minutes until golden on the edges.
- Cool on the baking sheet for 5 minutes before transferring to a wire rack.
Notes
You can freeze the dough before baking for later enjoyment. Chill the dough for thicker cookies if needed.
Nutrition
- Serving Size: 1 cookie
- Calories: 120
- Sugar: 8g
- Sodium: 100mg
- Fat: 5.5g
- Saturated Fat: 2g
- Unsaturated Fat: 3.5g
- Trans Fat: 0g
- Carbohydrates: 18g
- Fiber: 1g
- Protein: 1.5g
- Cholesterol: 30mg
Keywords: cookies, cookie butter, dessert, sweet treat, baking
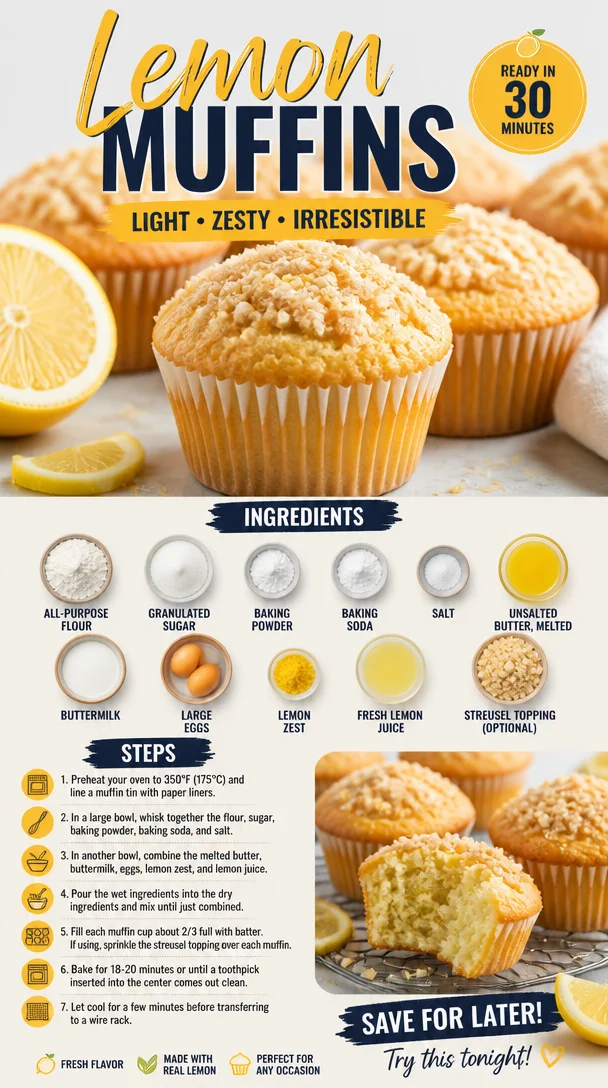
Lemon Muffins
Delightfully Zesty Lemon Muffins: A Sunshine-Packed Delight
Hello, fellow food lovers! Today, we’re diving into a dish that will brighten up your breakfast table or your afternoon snack time — Lemon Muffins. These muffins are a delightful combination of sweet and tangy, with a zesty burst of lemon that feels like sunshine in every bite. Perfectly fluffy with a hint of crumbly joy on top, they are a delicious way to start your day, share with friends, or savor with a cup of tea.
Now, let me take you on a little journey back to my childhood, where the aroma of freshly baked lemon muffins wafted through my grandmother’s kitchen. Every Sunday morning, as the sun peeked through the curtains, we would gather around her quaint wooden table, basking in the golden rays and the warmth of her love. My grandmother had a special knack for baking, and her lemon muffins were a family favorite. She taught me how to balance the perfect amount of sweetness with tartness, turning what could have been an ordinary muffin into something extraordinary.
We’d sit together, her gentle hands guiding mine as we measured ingredients and whisked them together, sharing stories about life, dreams, and the magic of cooking. There was something about mixing the batter and zesting the lemons that felt like a secret rite of passage. That simple act of baking became a cherished memory, one that inspired me to create inviting moments around the table for years to come. Now, it’s my turn to share this recipe with you, hoping to spark joy in your kitchens and create your own delightful memories.
Ingredients
Here’s what you’ll need to whip up these gorgeous Lemon Muffins:
-
1 1/2 cups all-purpose flour
A classic base for baking, all-purpose flour provides the structure needed for fluffy muffins. If you’d like a healthier option, try substituting half with whole wheat flour for added fiber. -
1 cup granulated sugar
Sugar adds sweetness and moisture, balancing the tanginess of the lemons. If you want to cut back on calories, coconut sugar or a sweetener of your choice can work just fine! -
2 teaspoons baking powder
This little powerhouse helps the muffins rise, creating that light and airy texture we all crave. Make sure your baking powder is fresh for the best results! -
1/2 teaspoon baking soda
Baking soda complements the acidity of the lemon juice, helping the muffins get that perfect lift. Store it in a cool, dry place to maintain its potency. -
1/4 teaspoon salt
A pinch of salt brings out all the beautiful flavors in your muffins. It may seem small, but it’s a key player! -
1/2 cup unsalted butter, melted
Butter infuses richness and moisture, creating a tender crumb. You can use coconut oil or a dairy-free butter substitute if you’re looking for a vegan option. -
1 cup buttermilk
Buttermilk adds depth of flavor and a touch of tanginess, contributing to that irresistible moist texture. If you don’t have buttermilk on hand, you can make your own by adding a tablespoon of vinegar to regular milk and letting it sit for a few minutes. -
2 large eggs
Eggs bind everything together and help with leavening. For an egg-free alternative, consider using flaxseed meal — mix one tablespoon of flaxseed with three tablespoons of water and let it sit for a few minutes until it thickens. -
1 tablespoon lemon zest
Highlighting the bright notes of lemon, zest adds an aromatic punch. Make sure to use organic lemons to avoid any waxy residues. -
1/4 cup fresh lemon juice
This is where the magic happens! Freshly squeezed lemon juice packs a vibrant punch. If you’re in a pinch, bottled lemon juice works—but fresh is best for flavor. -
1/2 cup streusel topping (optional)
For that beautiful, crunchy topping, combine flour, sugar, and butter for a decadent touch! Alternatively, you can leave this out for a lighter muffin.
Step-by-Step Instructions
Now that we’ve gathered all our ingredients, let’s get baking! Follow these steps, and I promise you’ll be the proud owner of the zestiest lemon muffins.
-
Preheat the Oven
Start by preheating your oven to 400°F (200°C). This ensures your muffins rise beautifully and get that perfect golden color. Trust me, the anticipation will make it even more delightful! -
Prepare the Muffin Tin
Grease your muffin tin with butter or line it with paper liners. If you’re using a non-stick muffin tin, greasing isn’t necessary, but it sure helps to be safe! -
Mix Dry Ingredients
In a large mixing bowl, whisk together the flour, sugar, baking powder, baking soda, and salt. This is the foundation of your muffins. Mixing them together thoroughly helps distribute the leavening agents evenly. -
Combine Wet Ingredients
In another bowl, mix the melted butter, buttermilk, eggs, lemon zest, and lemon juice until well combined. Feel free to dance as you whisk; it really adds flavor! -
Fold Wet into Dry
Gently fold the wet ingredients into the dry mixture with a spatula just until combined. Don’t overmix; a few lumps are perfect! Think of it as a delicate process — you don’t want to deflate your muffins. -
Fill the Muffin Tin
Spoon the batter into the prepared muffin tin, filling each cup about 3/4 full. This allows enough room for the muffins to rise without spilling over. If you’re using streusel topping, sprinkle it generously over each muffin. -
Bake
Place the muffin tin in the preheated oven and bake for 15–20 minutes, or until a toothpick inserted into the center comes out clean. The smell wafting through your kitchen will be heavenly! -
Cool and Enjoy
Once they’re baked, remove them from the oven and let them cool for a few minutes in the muffin tin before transferring them to a wire rack. This helps them firm up while keeping them deliciously moist.
Serving Suggestions
To showcase your beautiful lemon muffins, serve them on a lovely cake stand with a dusting of powdered sugar for a touch of elegance. Pair them with a side of fresh berries or a dollop of whipped cream for an extra special treat! And, of course, a cup of freshly brewed coffee or tea is an absolute must!
Recipe Variations
Feel free to get creative! Here are a few variations you can try:
- Blueberry Lemon Muffins: Add a cup of fresh blueberries for a delightful berry twist.
- Lemon Poppy Seed Muffins: Incorporate two tablespoons of poppy seeds for added crunch and flavor.
- Glazed Lemon Muffins: For an extra layer of sweetness, drizzle a lemon glaze made from powdered sugar and lemon juice over the cooled muffins.
- Vegan Lemon Muffins: Use almond or coconut milk in place of buttermilk and flaxseed for eggs to create a vegan-friendly option.
Chef’s Notes
Every time I whip up a batch of lemon muffins, I’m transported back to my grandmother’s kitchen. I often think about how her love for cooking shaped my passion for it. The beauty of this recipe is its simplicity; it’s a canvas that allows you to add your own flair. Over the years, I’ve seen these muffins evolve — some days they are just plain lemon, while others they burst with blueberries.
One kitchen story comes to mind: I once mistakenly used baking soda instead of baking powder and ended up with a muffin explosion in my oven! A lesson learned never to rush in the kitchen! So take your time, enjoy the process, and remember that every misstep is an opportunity to create something new.
FAQs and Troubleshooting
Q: My muffins turned out dense and heavy. What went wrong?
A: This could be due to overmixing the batter. Remember, gentle folding is key!
Q: Can I use all whole wheat flour?
A: You can! Just note that it may result in a denser muffin. A mix of whole wheat and all-purpose flour usually yields the best results.
Q: How can I keep my muffins fresh?
A: Store them in an airtight container at room temperature for up to three days, or freeze them for longer storage. They taste delightful even after freezing—just thaw and enjoy!
Q: What if I don’t have buttermilk?
A: No worries! Mix one cup of milk with a tablespoon of vinegar and let it sit for five minutes; voilà, you have homemade buttermilk!
Nutritional Info (Optional)
While I typically focus on the joy and connection that comes from cooking, a rough estimate for each muffin is about 180 calories, 5 grams of fat, 25 grams of carbohydrates, and 3 grams of protein.
And there you have it — my lemon muffin recipe that’s sure to brighten your day! Now, it’s your turn to tie on your apron, gather your ingredients, and create some special memories in your own kitchen. Happy baking, and remember, good food is all about showing up and sharing with those you love! 🍋🧁
PrintDelightfully Zesty Lemon Muffins

A delightful combination of sweet and tangy lemon muffins, perfectly fluffy with a hint of crumbly joy on top. Light and airy, these muffins are a perfect way to start your day.
- Prep Time: 15 minutes
- Cook Time: 20 minutes
- Total Time: 35 minutes
- Yield: 12 servings 1x
- Category: Dessert
- Method: Baking
- Cuisine: American
- Diet: Vegetarian
Ingredients
- 1 1/2 cups all-purpose flour
- 1 cup granulated sugar
- 2 teaspoons baking powder
- 1/2 teaspoon baking soda
- 1/4 teaspoon salt
- 1/2 cup unsalted butter, melted
- 1 cup buttermilk
- 2 large eggs
- 1 tablespoon lemon zest
- 1/4 cup fresh lemon juice
- 1/2 cup streusel topping (optional)
Instructions
- Preheat your oven to 400°F (200°C).
- Prepare your muffin tin by greasing it with butter or lining it with paper liners.
- Mix together the flour, sugar, baking powder, baking soda, and salt in a large mixing bowl.
- Combine the melted butter, buttermilk, eggs, lemon zest, and lemon juice in another bowl.
- Fold the wet ingredients into the dry mixture with a spatula until just combined.
- Fill each muffin cup about 3/4 full with batter.
- Bake for 15–20 minutes, or until a toothpick comes out clean.
- Cool for a few minutes in the tin, then transfer to a wire rack.
Notes
For an extra layer of sweetness, drizzle a lemon glaze made from powdered sugar and lemon juice over the cooled muffins. Store in an airtight container for up to three days.
Nutrition
- Serving Size: 1 muffin
- Calories: 180
- Sugar: 25g
- Sodium: 200mg
- Fat: 5g
- Saturated Fat: 3g
- Unsaturated Fat: 2g
- Trans Fat: 0g
- Carbohydrates: 25g
- Fiber: 1g
- Protein: 3g
- Cholesterol: 40mg
Keywords: lemon muffins, breakfast muffins, dessert, baking, easy recipes
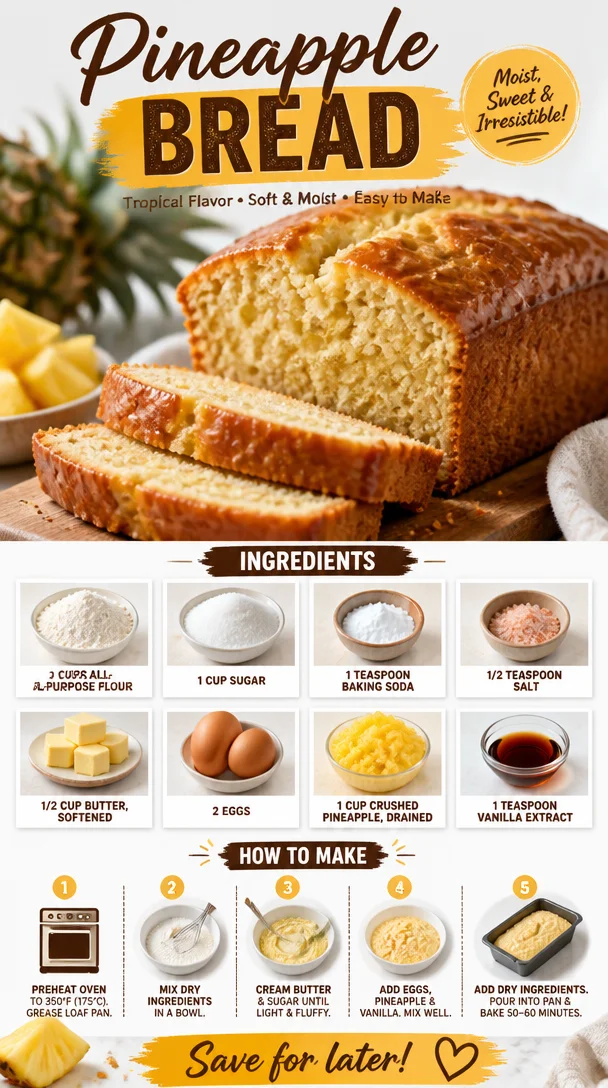
Pineapple Bread
A Slice of Sunshine: Pineapple Bread Recipe
Hello, fellow foodies! Whether you’re an experienced home chef or just starting your culinary journey, there’s something magical about baking. The aroma wafting through your kitchen, the gentle hum of your mixer—it’s as if your kitchen transforms into a cozy haven filled with warmth and creativity. Today, I’m excited to share a delightful recipe that embodies both sweetness and nostalgia—Pineapple Bread.
Picture this: it’s a bright summer afternoon, and the sun is shining through your kitchen window. The tantalizing scent of freshly baked bread made with juicy pineapple fills the air, evoking memories of family gatherings and carefree summer days. Pineapple Bread is not only incredibly easy to make but also a fantastic way to bring a tropical twist to your baking repertoire. Trust me when I say, once you get a taste of this succulent bread, you’ll be dreaming of sun-soaked beaches and endless summers no matter the season!
This recipe is perfect for breakfast, a snack, or even dessert—any time of the day is a good reason for a slice of this fruity, sweet delight. You won’t believe how simple it is, and I promise you’ll have your friends and family asking for more!
Let’s dive into this fruity adventure and make our kitchen feel like a tropical paradise!
My Pineapple Connection
Ah, Pineapple Bread! My connection to this treat goes way back to my childhood. I still remember weekends spent at my grandmother’s kitchen; the sun beaming through the curtains while she whipped up her famous Pineapple Bread. The way she’d mix the batter gently, humming softly to herself, created a rhythm that felt so comforting.
One day, I decided I wanted to help—not just to stir, but to learn the secret to that magical bread. I climbed up on a sturdy kitchen stool, and Grandma handed me the task of pouring in the crushed pineapple. The moment that juicy fruit met the batter was a revelation; I watched as the mixture transformed, realizing that cooking is more than following a recipe—it’s an experience laden with joy, love, and memories.
That Pineapple Bread recipe became synonymous with family gatherings. It was a favorite at picnics, birthday parties, and holiday celebrations. Now, I want to pass that same love and joy onto you with this easy and delightful Pineapple Bread recipe!
Ingredients
Let’s gather our ingredients. For this delightful Pineapple Bread, you’ll need:
-
2 cups all-purpose flour: This is your base for the bread. You can use whole wheat flour for a nuttier flavor or a gluten-free flour mix if you’re avoiding gluten.
-
1 cup sugar: Sweetness is key here! If you prefer, you can substitute coconut sugar for a hint of caramel flavor or reduce it to ¾ cup for a less sweet version.
-
1 teaspoon baking soda: This will give your bread a lovely rise. Make sure it’s fresh for the best results!
-
½ teaspoon salt: Just a pinch enhances all the flavors and balances the sweetness.
-
½ cup butter, softened: Butter creates a rich, tender crumb in the bread. Coconut oil or applesauce can be used for a dairy-free alternative.
-
2 eggs: They provide structure and moisture. You can substitute flax eggs (1 tbsp flaxseed meal + 2.5 tbsp water per egg) for a vegan option.
-
1 cup crushed pineapple, drained: The star of the show! Make sure to drain it well to prevent excess moisture; you can also use fresh pineapple for a fresher flavor.
-
1 teaspoon vanilla extract: For that beautiful aroma and depth of flavor. Feel free to add a splash extra if you love vanilla as much as I do!
Chef Insight
Having quality ingredients is key to delivering a mouthwatering dish. When selecting your pineapple, go for ripe, sweet fruit to ensure a luscious flavor that shines through.
Step-by-Step Instructions
Ready to bake? Grab your apron, and let’s get started!
-
Preheat the oven to 350°F (175°C). This is crucial for ensuring your bread bakes evenly and beautifully!
-
Prepare your baking pan. Grease a 9×5 inch loaf pan with butter or cooking spray. This will keep the bread from sticking and makes for easy cleanup later!
-
Mix dry ingredients. In a medium bowl, whisk together the flour, sugar, baking soda, and salt until well combined. This distributes the leavening agents and ensures your bread rises evenly!
-
Cream the butter. In a large mixing bowl, cream the softened butter until it’s light and fluffy. This usually takes about 2-3 minutes with an electric mixer. It’s a step you don’t want to skip, as it helps incorporate air into the batter for a fluffy texture.
-
Add the eggs and vanilla. Beat in the eggs one at a time, mixing well after each addition. Then, add in the vanilla extract! This is where your kitchen will start to smell wonderful.
-
Incorporate the crushed pineapple. Gently fold in the crushed pineapple. The mixture might seem a little wet, but that’s exactly what we want for a moist bread!
-
Combine wet and dry ingredients. Now, gradually add the dry ingredients into the wet mixture, stirring gently until just combined. Be careful not to overmix; a few lumps are perfectly fine!
-
Pour into the pan. Scrape the batter into your prepared loaf pan, smoothing the top with a spatula. Now’s the time to get creative—with a sprinkle of chopped nuts or coconut on top if you’d like!
-
Bake! Place the loaf in the preheated oven and bake for about 60 minutes or until a toothpick inserted in the center comes out clean. It might take a few extra minutes depending on your oven, but trust me—it’s worth the wait!
-
Cool & Enjoy! Once baked, remove the bread from the oven and let it cool in the pan for about 10 minutes before transferring it to a wire rack to cool completely. This step is tough, I know, but it’ll be worth it when you slice it warm later!
Chef Tips
- Testing for doneness: To ensure your bread is perfectly baked, give it a gentle shake. If it doesn’t jiggle, it’s ready.
- Storage: Wrap any leftover bread in plastic wrap and keep it at room temperature for about 2-3 days. You can also freeze slices for later—just make sure to wrap them tightly!
Serving Suggestions
Once your Pineapple Bread is cool, it’s time to slice into this dreamy creation! Serve a thick slice warm, perhaps spread with a bit of softened cream cheese or coconut spread for an extra delicious flair. Consider garnishing with some fresh fruit or even a sprig of mint for a refreshing touch!
Perfect for breakfast with coffee, an afternoon snack, or even a light dessert for dinner—it pairs beautifully with a scoop of vanilla ice cream or a dollop of whipped cream. Trust me; your friends will devour it in no time!
Recipe Variations
-
Nutty Delight: Add ½ cup of chopped pecans or walnuts for an added crunch and nutty flavor.
-
Coconut Twist: Mix in some shredded coconut to elevate that tropical vibe. Who doesn’t love coconut with pineapple?
-
Spice it up: Add a ½ teaspoon of cinnamon or nutmeg to the dry ingredients for a warm, comforting twist.
-
Zest it up: A tablespoon of orange or lemon zest can brighten the flavor and add a refreshing kick.
-
Fruity Fusion: Try adding ½ cup of blueberries or chopped strawberries for a delightful fruit medley!
Chef’s Notes
As I’ve made this bread through the years, I’ve found it’s one of those recipes that carries love from one kitchen to another. I’ve tweaked it in various ways, either by using whatever fruit is in season or playing around with different types of flours. Sometimes, I even reminisce about Grandma’s version and feel compelled to add a touch of nostalgia; I’ll bake this bread for family gatherings or simply to share with friends who need a bit of sunshine in their lives.
Honestly, every time I bake this bread, it feels like a warm hug from Grandma wrapped in golden slices. And that, my dear friends, is what cooking is all about—the stories we weave around the meals we make!
FAQs and Troubleshooting
1. My bread didn’t rise! What happened?
Make sure your baking soda is fresh! If your leavening agent is older, it might not work as effectively, resulting in a flat loaf.
2. Why is my Pineapple Bread too moist?
It could be due to excess moisture in the crushed pineapple. Make sure to drain it thoroughly before adding it to the batter.
3. Can I replace the eggs?
Absolutely! For each egg, use 1 tablespoon of flaxseed meal mixed with 2.5 tablespoons of water and let it sit until it forms a gel-like consistency.
4. How can I make this a low-sugar recipe?
You can reduce the sugar to ¾ cup, use a sugar substitute like monk fruit, or even omit it altogether if you have sweeter pineapple!
Nutritional Info (optional)
(Nutritional information can vary based on ingredient specifics and serving sizes, but a rough estimate for one slice of Pineapple Bread is: 200-250 calories, 8g fat, 35g carbohydrates, and 2g protein.)
And there you have it, a beautiful recipe for Pineapple Bread that’ll bring sunshine to your kitchen, no matter the season! Remember, cooking is about joy and connection, so gather those you love around your table and share this slice of happiness. With each bite, you’re wrapping your loved ones in warmth and affection—a gift that’s truly timeless. Happy baking!
PrintA Slice of Sunshine: Pineapple Bread Recipe

Delightful and easy-to-make Pineapple Bread that brings a tropical twist to your baking, perfect for breakfast, snacks or dessert.
- Prep Time: 15 minutes
- Cook Time: 60 minutes
- Total Time: 75 minutes
- Yield: 12 servings 1x
- Category: Dessert
- Method: Baking
- Cuisine: Tropical
- Diet: Vegetarian
Ingredients
- 2 cups all-purpose flour
- 1 cup sugar
- 1 teaspoon baking soda
- ½ teaspoon salt
- ½ cup butter, softened
- 2 eggs
- 1 cup crushed pineapple, drained
- 1 teaspoon vanilla extract
Instructions
- Preheat the oven to 350°F (175°C).
- Prepare your baking pan by greasing a 9×5 inch loaf pan with butter or cooking spray.
- Mix dry ingredients: In a medium bowl, whisk together the flour, sugar, baking soda, and salt until well combined.
- Cream the butter: In a large mixing bowl, cream the softened butter until light and fluffy.
- Add the eggs and vanilla, beating in the eggs one at a time, mixing well after each.
- Incorporate the crushed pineapple by folding it gently into the mixture.
- Combine the wet and dry ingredients, stirring gently until just combined.
- Pour the batter into your prepared loaf pan, smoothing the top with a spatula.
- Bake for about 60 minutes or until a toothpick inserted in the center comes out clean.
- Cool in the pan for about 10 minutes before transferring to a wire rack to cool completely.
Notes
Wrap any leftover bread in plastic wrap and keep at room temperature for 2-3 days. Freeze slices for later.
Nutrition
- Serving Size: 1 slice
- Calories: 250
- Sugar: 8g
- Sodium: 180mg
- Fat: 10g
- Saturated Fat: 5g
- Unsaturated Fat: 4g
- Trans Fat: 0g
- Carbohydrates: 35g
- Fiber: 1g
- Protein: 2g
- Cholesterol: 35mg
Keywords: Pineapple Bread, Tropical Dessert, Easy Baking

Patriotic 4th of July Monster Cookies: Quick Party Treat
Celebrate with 4th of July Monster Cookies: A Sweet, Festive Treat!
As the summer sun shines bright and the scent of barbecue fills the air, there’s one thing that truly captures the spirit of the 4th of July for me: baking up a storm in my kitchen! And what better way to celebrate America’s birthday than with a batch of vibrant, indulgent Monster Cookies? These spirited confections are the epitome of a festive treat—they’re chewy, chunky, and bursting with flavors that make your taste buds dance!
Picture this: friends and family gathered around, laughter echoing in the warm summer air, as you present a platter of these delightful cookies, each one a masterpiece of flavors and colors. What’s more? Monster Cookies are wonderfully forgiving, allowing even novice bakers to create a stunning dessert that impresses without the fuss. I’m excited to guide you through this family-friendly cookie adventure, so grab your apron, and let’s get baking!
A Cookie That Holds Memories
Let me take you on a little trip down memory lane. I remember the first time I ever made cookies for a party—ironically, it was another 4th of July gathering. Armed with just a worn-out cookbook and my mom’s old mixer, I whipped up a batch of chocolate chip cookies, thinking I could impress a few friends.
What I didn’t anticipate was how they would turn out! The cookies were a complete disaster; they spread too thin and ended up like puddles of goo on the baking sheet! But amidst the culinary chaos, I learned something invaluable: it’s not just about the cookies, but the joy of sharing, creating, and laughing together in the kitchen.
Fast forward a few years, and I’ve perfected my cookie game, adding colorful M&M’s to my classic recipe to create the ultimate Monster Cookies. Now, these festive favorites not only remind me of my early baking days but are also my go-to treat for any celebration—especially the 4th of July!
Ingredients
Here’s what you’ll need to make these festive 4th of July Monster Cookies:
-
1 cup browned butter
Browned butter adds a rich, nutty flavor that transforms basic cookies into something truly special. If you’re short on time, melted regular butter can work as a substitute, although you won’t get that toasty depth of flavor. -
1 cup brown sugar
This adds moisture and a hint of caramel sweetness. If you need a lighter option, you can use coconut sugar, though it may alter the taste slightly. -
1/2 cup granulated sugar
The granulated sugar balances the richness of the brown sugar and helps achieve the perfect chewy texture. You could substitute with a sugar alternative like agave syrup, but the amount will vary. -
2 large eggs
Eggs not only bind the ingredients together but also contribute to the cookies’ rise. For a vegan option, you can use flaxseed meal mixed with water as a substitute. -
1 teaspoon vanilla extract
Pure vanilla extract elevates the cookie’s flavor with a sweet aromatic essence. Try to use pure vanilla rather than imitation for best results. -
2 cups all-purpose flour
This creates the base of the cookie. You can use a gluten-free all-purpose flour blend if you’re looking for a gluten-free option. -
1 teaspoon baking soda
This is essential for leavening, giving your cookies that perfect soft-chewy texture. Don’t confuse it with baking powder; they are NOT interchangeable. -
1/2 teaspoon salt
A pinch of salt enhances the sweetness of your cookies and balances flavors. If you’re watching your sodium intake, feel free to reduce the amount, but don’t omit it altogether. -
1 cup chocolate chips
Semi-sweet chocolate chips are a classic choice, but feel free to mix things up with milk chocolate or dark chocolate, depending on your preference. -
1/2 cup M&M’s
These colorful candies are not only delicious, they also add a pop of fun and color, perfect for the 4th of July festivities! -
1/2 cup oats
Oats add chewiness to each cookie and a bit of heartiness. You can use quick-cooking oats in a pinch, but the texture will be slightly different.
Step-by-Step Instructions
Now that we have our ingredients gathered, let’s dive into the fun part—the baking!
-
Brown the Butter
Start by adding the butter to a saucepan over medium heat. Let it melt and continue cooking until it turns a lovely golden brown, with a nutty aroma wafting through your kitchen. Make sure to stir it occasionally to prevent burning. Once browned, remove from heat and let it cool for a few minutes. -
Combine Sugars
In a large mixing bowl, combine the cooled browned butter with brown sugar and granulated sugar. Using a hand mixer or a whisk, beat until the mixture is smooth and creamy—about 2-3 minutes. This fluffy mixture means we’re on the right track! -
Add Eggs and Vanilla
Next up, add in the eggs one at a time, mixing well after each addition. Then, pour in the vanilla extract, mixing until it’s well incorporated. This step will make your kitchen smell heavenly! -
Mix Dry Ingredients
In a separate bowl, whisk together the all-purpose flour, baking soda, and salt. Gradually add the dry mixture to the wet ingredients, mixing until just combined—overmixing can lead to tough cookies, and we don’t want that! -
Fold in Chocolate and M&M’s
Using a spatula, gently fold in the chocolate chips, M&M’s, and oats. The batter should look thick and luscious—just how cookie dough should be! -
Chill the Dough (Optional)
If you have time, it’s advantageous to chill the dough for at least 30 minutes. This helps to solidify the fats in the dough, leading to thicker cookies. It’s a small step that makes a big difference! -
Preheat the Oven
While the dough chills, preheat your oven to 350°F (175°C). Don’t skip this step; a well-preheated oven is key to even-baked cookies. -
Scoop and Bake
Line baking sheets with parchment paper. Use a cookie scoop (or two spoons) to drop generous mounds of dough onto the baking sheet, spacing them about 2 inches apart. Bake for 10-12 minutes or until the edges are lightly golden but the centers are still soft. Remember, they will continue to cook as they cool! -
Cool and Enjoy
Once baked, let the cookies cool on the baking sheet for a few minutes before transferring them to a wire rack. Warm cookies are the best, especially with a glass of milk!
Serving Suggestions
These beautiful Monster Cookies are perfect for sharing! You can plate them on a festive 4th of July-themed platter or create individual servings in colorful paper bags tied with ribbon for picnics and gatherings. A scoop of vanilla ice cream on the side wouldn’t hurt either—think cookie ice cream sandwiches or simply a delicious accompaniment.
Recipe Variations
Want to customize your Monster Cookies? Here are a few fun variations:
-
Add Nuts: Throw in chopped pecans or walnuts for an extra crunch.
-
Nut Butter Swirl: Mix in a spoonful of peanut butter or almond butter for a nutty twist.
-
Fruit Frenzy: Swap the M&M’s for dried fruits like cranberries or cherries for a chewy, fruity flavor.
-
Spice It Up: Add a dash of cinnamon or nutmeg for a warm, comforting undertone.
Chef’s Notes
I’d be remiss if I didn’t mention that these Monster Cookies have a little history of their own in my kitchen! The recipe has evolved over time based on what’s in the pantry or what I’m craving. Sometimes I experiment with different types of chocolate or even add a sprinkle of sea salt on top right before baking. Do you get the urge to take a bite of your freshly baked cookies while standing over the cooling rack? Guilty as charged! It’s all about the joy of indulging in the fruits of your labor.
FAQs and Troubleshooting
-
Why did my cookies spread too much?
This can happen if the butter is too warm or if you didn’t chill the dough. Make sure to let your cookies rest before baking! -
How do I know when my cookies are done?
Look for edges that are set and a slightly soft center. They’ll continue to firm up while cooling on the baking sheet. -
Can I freeze the cookie dough?
Absolutely! You can scoop the dough into balls and freeze them on a baking sheet. Once frozen, transfer them to a ziplock bag for later baking—great for last-minute cravings! -
What should I do if my cookies turn out too dry?
Overmixing can lead to dry cookies. Make sure to mix until just combined and not too much after adding the flour.
Nutritional Info
While I love indulging during festivities, moderation is key! Here’s a rough outline for one cookie (based on 24 servings):
- Calories: 180
- Total Fat: 9g
- Carbohydrates: 24g
- Protein: 2g
- Fiber: 1g
And there you have it! Your ultimate guide to creating delicious 4th of July Monster Cookies—made with love, laughter, and a pinch of nostalgia. So this holiday season, gather your loved ones, tie on an apron, and whip up a batch of these delightful cookies. Remember, it’s all about creating memories around your table while enjoying the sweet rewards of baking together. Happy 4th of July!
Print4th of July Monster Cookies

Celebrate America’s birthday with these vibrant, chewy Monster Cookies bursting with flavors and colors. Perfect for sharing at summer gatherings!
- Prep Time: 15 minutes
- Cook Time: 12 minutes
- Total Time: 45 minutes
- Yield: 24 servings 1x
- Category: Dessert
- Method: Baking
- Cuisine: American
- Diet: Vegetarian
Ingredients
- 1 cup browned butter
- 1 cup brown sugar
- 1/2 cup granulated sugar
- 2 large eggs
- 1 teaspoon vanilla extract
- 2 cups all-purpose flour
- 1 teaspoon baking soda
- 1/2 teaspoon salt
- 1 cup chocolate chips
- 1/2 cup M&M’s
- 1/2 cup oats
Instructions
- Brown the Butter: Add the butter to a saucepan over medium heat. Let it melt and continue cooking until it turns golden brown, stirring occasionally to prevent burning. Remove from heat and let it cool.
- Combine Sugars: In a large mixing bowl, combine the cooled browned butter with brown sugar and granulated sugar. Beat until smooth and creamy, about 2-3 minutes.
- Add Eggs and Vanilla: Add in the eggs one at a time, mixing well after each addition. Pour in the vanilla extract and mix until incorporated.
- Mix Dry Ingredients: In a separate bowl, whisk together flour, baking soda, and salt. Gradually add to the wet ingredients, mixing until just combined.
- Fold in Chocolate and M&M’s: Gently fold in the chocolate chips, M&M’s, and oats until the batter is thick.
- Chill the Dough (Optional): Chill the dough for at least 30 minutes for thicker cookies.
- Preheat the Oven: While the dough chills, preheat your oven to 350°F (175°C).
- Scoop and Bake: Line baking sheets with parchment paper. Scoop mounds of dough onto the sheets, spaced about 2 inches apart. Bake for 10-12 minutes or until edges are lightly golden.
- Cool and Enjoy: Let the cookies cool on the baking sheet for a few minutes before transferring them to a wire rack.
Notes
For a fun twist, consider adding nuts or a swirl of nut butter. These cookies can also be frozen for later enjoyment.
Nutrition
- Serving Size: 1 cookie
- Calories: 180
- Sugar: 10g
- Sodium: 150mg
- Fat: 9g
- Saturated Fat: 5g
- Unsaturated Fat: 3g
- Trans Fat: 0g
- Carbohydrates: 24g
- Fiber: 1g
- Protein: 2g
- Cholesterol: 30mg
Keywords: Monster Cookies, 4th of July, festive cookies, baking, summer desserts

Peach Galette
The Juicy Magic of Peach Galette: A Slice of Summer Love
Hello, fellow food lovers! Today, let’s whip up something that will make your taste buds dance and your kitchen feel like a cozy summer evening—Peach Galette! This rustic dessert is not only a feast for the eyes, but it’s also incredibly delicious and easy to make. Honestly, who can resist the sweet, juicy goodness of fresh peaches enveloped in a golden, flaky crust? Buckle up, because we’re about to embark on a delightful culinary journey that’s rich in flavor and steeped in memories!
The Allure of Peach Galette
There’s something magical about a galette, isn’t there? It’s essentially the laid-back cousin of pie—no need for perfection here! Galettes embrace imperfection, celebrating the goodness of fruit and simple ingredients. For me, peach galette is a beloved summer tradition, conjuring up memories of many sun-drenched afternoons spent baking with my grandmother.
A Nostalgic Kitchen Memory
Picture this: I’m about eight years old, standing on a stool in my grandmother’s sunny kitchen, surrounded by a whirlwind of flour clouds and sweet scents. She’s teaching me the art of making peach galette, her hands moving deftly as she rolls out the dough. I was always in charge of slicing the peaches—just enough so I could sneak a few bites in between steps (a chef’s perk!).
As she explained how to let the dough relax before folding it around the fruits, I felt the warmth of our shared laughter and the flutter of anticipation for the deliciousness to come. That memory is a slice of summer I always carry in my heart, and it’s the inspiration behind this simple, yet elegant dessert. So, are you ready to create your own peach galette memories? Let’s get started!
Ingredients
For the peach galette, you’ll need the following ingredients:
-
2 cups sliced peaches
Fresh, ripe peaches are best in this recipe! They give that juicy, sweet-and-sour flavor that takes the galette to another level. You can also use nectarines for a similar effect. If it’s winter and fresh peaches are scarce, feel free to use frozen peaches—just thaw and drain them beforehand. -
1 tablespoon sugar
A little sweetness enhances the natural flavors of the peaches. You can substitute with brown sugar for a deeper flavor or even coconut sugar for a slightly caramelized essence. -
1 teaspoon cinnamon
This aromatic spice brings warmth and depth. If you’re not a fan, nutmeg or ginger would also work beautifully. -
1 tablespoon lemon juice
This adds a lovely acidity, elevating the sweetness of the peaches. Feel free to use lime juice for a fun twist! -
1 pre-made pie crust
Save time with a pre-made crust, or you can whip up your favorite homemade version if you’re feeling ambitious! A whole wheat crust can add a nutty flavor if you’re looking for a hearty option. -
1 egg (for egg wash)
This is our secret to getting that beautiful golden brown finish on the crust. If you’re vegan, you can substitute it with a mixture of plant-based milk and a splash of vinegar. -
Vanilla ice cream (for serving)
Because what’s better than warm peach galette with creamy vanilla ice cream? You can also use whipped cream or vegan ice cream if you prefer.
Step-by-Step Instructions
Let’s dive into the fun part—making your peach galette! Don’t worry if you’ve never made one before; this step-by-step guide will lead you to a fruit-filled masterpiece.
-
Preheat the Oven
Begin by preheating your oven to 400°F (200°C). This ensures your galette bakes evenly and gets that nice, crispy crust we all crave. -
Prepare the Peaches
Wash, peel (if desired), and slice your peaches. Aim for about 1/4-inch slices for even cooking. Toss them in a mixing bowl with the sugar, cinnamon, and lemon juice. Let them sit for about 10-15 minutes to release some juices and get all scrumptious.Chef Tip: If you like a bit of tartness in your desserts, try adding sliced strawberries or blackberries to the peach mixture!
-
Roll Out the Dough
Lay your pre-made pie crust on a sheet of parchment paper. Using a rolling pin, gently roll it out to about a 12-inch circle—no need for it to be perfect! This rustic vibe is all part of the charm. -
Add the Peach Filling
Spoon the peach mixture onto the center of the dough, leaving about a 2-inch border. Make sure to include some of that delicious juice as you want your galette to be bursting with flavor! -
Fold the Edges
Now, carefully fold the edges of the dough over the peaches. It’s okay if it overlaps a bit—homemade is about love, not perfection! You want to create a little “wall” to contain the filling. -
Brush with Egg Wash
Beat the egg in a small bowl and use a pastry brush to gently brush the edges of the crust. This will give it that mouthwatering golden finish!Chef Hack: If you want extra sparkle, sprinkle a bit of coarse sugar on top after brushing the egg wash for a sweet crunch.
-
Bake
Transfer the parchment paper with the galette to a baking sheet and pop it in the oven. Bake for 30-35 minutes until the crust is golden brown and the peaches are bubbly. Keep an eye on it—the aroma will start wafting through your kitchen, tempting your taste buds! -
Cool Down
Let your galette cool for about 15 minutes before slicing. This helps settle the juices and keeps everything together when you serve. The wait is tough, but worth it!
Serving Suggestions
To serve your beautiful peach galette, place it on a rustic wooden cutting board or a colorful plate. Use a sharp knife to cut into wedges, and don’t be shy—serve it warm with a generous scoop of vanilla ice cream on top! Drizzle with a bit of honey for a touch of sweetness, or sprinkle some fresh mint leaves for a pop of color!
Recipe Variations
If you’re feeling adventurous, here are some fun variations you can try:
- Berry Bliss: Add a handful of blueberries or raspberries to the peach mixture for a mixed berry twist.
- Spiced Up: Incorporate 1/4 teaspoon of allspice or cloves for a deeper flavor profile that reminds you of fall.
- Nutty Flavor: Mix in some chopped nuts, like walnuts or pecans, to the filling for a delightful crunch.
- Coconut Delight: Sprinkle shredded coconut on top of the peaches before folding the dough over for a tropical flair.
- Peach Melba: Add a layer of raspberry jam underneath the peaches for a sweet and tangy surprise!
Chef’s Notes
This peach galette has become one of my all-time favorites over the years because of its versatility and ease. I’ve made it for everything from casual weeknight dinners to elaborate family gatherings, and it always steals the show. One of my most humorous memories was when I tried to impress my friends by making individual galettes. Let’s just say there was a lot of dough flying everywhere, and I ended up with more dough on my face than on the baking sheet! Just remember, cooking is about having fun!
FAQs and Troubleshooting
Q: My crust is too tough! What did I do wrong?
A: This can happen if the dough is overworked or if it gets too warm. Make sure to chill it before rolling out and handle it as lightly as possible.
Q: How do I store leftovers?
A: Cover your galette loosely with foil and store it at room temperature for a day or two. For longer storage, refrigerate it. Reheat in the oven to refresh its crunch.
Q: Can I use canned peaches?
A: Yes, canned peaches work in a pinch! Just make sure to drain them well to avoid excess moisture, or your galette may turn out soggy.
Q: My filling leaked out during baking. Why?
A: This sometimes happens if the peaches were too juicy or if the crust wasn’t folded securely enough. Try to capture those juices in the galette next time!
Nutritional Info (Optional)
While I won’t dive too deep into the nutritional nitty-gritty (because we’re here for joy, not guilt!), keep in mind that a slice of peach galette served warm, especially with ice cream, is all about balance. It’s a delightful treat that celebrates flavors without sacrificing joy.
So there you have it, friends—a beautiful, rustic, and utterly delicious peach galette that’s sure to become a family favorite. Tie on your apron, gather some fresh peaches, and get cooking! Let’s make some memories and have incredible food adventures together. Bon appétit!
PrintPeach Galette

A rustic dessert featuring juicy peaches enveloped in a golden, flaky crust, perfect for summer.
- Prep Time: 15 minutes
- Cook Time: 35 minutes
- Total Time: 50 minutes
- Yield: 8 servings 1x
- Category: Dessert
- Method: Baking
- Cuisine: American
- Diet: Vegetarian
Ingredients
- 2 cups sliced peaches
- 1 tablespoon sugar
- 1 teaspoon cinnamon
- 1 tablespoon lemon juice
- 1 pre-made pie crust
- 1 egg (for egg wash)
- Vanilla ice cream (for serving)
Instructions
- Preheat the oven to 400°F (200°C).
- Prepare the peaches by washing, peeling (if desired), and slicing them into 1/4-inch pieces.
- Toss the peaches in a mixing bowl with the sugar, cinnamon, and lemon juice.
- Roll out the pie crust on a sheet of parchment paper to about a 12-inch circle.
- Add the peach mixture to the center of the dough, leaving a 2-inch border.
- Fold the edges of the dough over the peaches to create a little wall.
- Brush the edges of the crust with beaten egg.
- Bake in the oven for 30-35 minutes until the crust is golden brown and the peaches are bubbly.
- Cool for 15 minutes before slicing and serving.
Notes
Serve warm with a scoop of vanilla ice cream and a drizzle of honey for extra sweetness.
Nutrition
- Serving Size: 1 slice
- Calories: 320
- Sugar: 14g
- Sodium: 180mg
- Fat: 12g
- Saturated Fat: 4g
- Unsaturated Fat: 6g
- Trans Fat: 0g
- Carbohydrates: 45g
- Fiber: 2g
- Protein: 3g
- Cholesterol: 20mg
Keywords: peach dessert, summer galette, rustic pie, easy dessert, homemade pastry

Peach Cookies
The Sweetest Peach Cookies: A Taste of Summer
Hello, dear food lovers! Today, we’re diving into a deliciously unique treat that brings a burst of summer to your kitchen — Peach Cookies! If you’re like me, you have a sweet spot (pun absolutely intended) for all things peachy. Whether you relish a juicy slice eaten right over the sink or revel in peach cobbler, there’s magic in the flavor of this succulent fruit, and these cookies are no exception!
Imagine a warm afternoon, the scent of freshly baked cookies wafting through the air, and the laughter of friends gathered around your table. There’s something so delightful about sharing baked goods with the people you love. And that’s exactly the vibe I want to achieve with these Peach Cookies! They’re inviting, mildly sweet, and just perfect for any occasion. So, grab your apron, and let’s get baking!
My Peachy Memory
Let me take you back to my childhood, a time when summer meant my grandmother’s backyard, a large wooden picnic table, and the sweetest, juiciest peaches you can imagine. Every summer, my family would gather for our annual peach-picking adventure. We’d arrive at the orchard, sun hats on, laughter filling the air, and carts ready to be filled. I can still picture my grandmother, a basket in one hand, a peach in the other, proclaiming that you couldn’t find a better peach than the ones right from the tree!
Once our baskets were filled to the brim, we’d head home, and that’s where the magic happened. Grandma would whip up her famous peach cobbler, but she always kept a secret stash of fresh peaches for her cookies. Those peach cookies were a staple at every family gathering, and they quickly became my favorite treat. The memories of those hot summer days, mingled with the sweet aroma of cookies baking in the oven, are forever etched in my heart. Now, I can’t help but recreate those moments, blending nostalgia with new culinary adventures.
Ingredients to Get You Started
To make these delightful Peach Cookies, you’ll need the following ingredients:
-
2 1/8 cups all-purpose flour: This is your base ingredient. For a gluten-free option, try using almond flour or a 1:1 gluten-free flour blend.
-
3/4 teaspoon salt: Just a pinch of salt enhances the sweetness and balances the flavors.
-
1/2 teaspoon baking soda: This will help your cookies rise perfectly. Don’t skip it!
-
1/2 cup unsalted butter (softened): The creaminess from butter gives the cookies their rich flavor. If you want to cut back on dairy, coconut oil can work well!
-
1/2 cup granulated sugar: This will keep your cookies sweet and give them a delightful crunch.
-
1/2 cup firmly packed light brown sugar: Brown sugar adds depth and moisture. If you don’t have it, you can substitute with more granulated sugar, but the flavor won’t be as rich.
-
1 large egg: This is essential for binding the ingredients together. For a vegan version, use a flax egg (1 tablespoon ground flaxseed mixed with 2.5 tablespoons water).
-
1/2 teaspoon vanilla extract: Vanilla brings out the sweetness and enhances the peach flavor.
-
2 large ripe peaches (peeled, pitted, and cut into 1/4-inch pieces; about 1 to 1 1/2 cups): Fresh peaches are the star of this recipe! If peaches are out of season, you can use canned peaches, just drain them well.
-
1/3 cup peach preserves: This adds a lovely sweetness and texture. You can substitute with apricot or raspberry preserves for a twist.
-
3 tablespoons sanding sugar: Use this for a sparkly finish on your cookies. Turbinado sugar works too!
-
1/4 teaspoon ground cinnamon: A hint of cinnamon elevates the overall flavor. If you’re a cinnamon lover, feel free to add more!
Step-by-Step Instructions
Now that we have our ingredients laid out, let’s get cooking! Here’s how to craft these Peach Cookies from scratch:
-
Preheat Your Oven: Start by preheating your oven to 350°F (175°C). This little step is essential for successful baking!
-
Prepare Your Baking Sheet: Line a baking sheet with parchment paper. This prevents the cookies from sticking and makes cleanup a breeze.
-
Mix Dry Ingredients: In a medium bowl, whisk together the all-purpose flour, salt, baking soda, and ground cinnamon until well combined. The simple act of whisking aerates the flour, making for lighter cookies!
-
Cream Butter and Sugars: In a large mixing bowl, beat the softened butter, granulated sugar, and brown sugar together until the mixture is light and fluffy (about 3–4 minutes). This is where the magic begins — it’s all about that air incorporated into the butter!
-
Add Egg and Vanilla: Next, add the egg and vanilla extract to the butter mixture. Beat until fully combined. Don’t rush this part; it’s key to creating that creamy texture!
-
Combine Wet and Dry Ingredients: Gradually add the dry ingredients to the wet ingredients. Mix until just combined; overmixing can lead to tough cookies.
-
Fold in Peaches and Preserves: Gently fold in the peach pieces and peach preserves. Watching those luscious chunks of peach tumble into the dough is part of the fun!
-
Scoop and Shape: Using a cookie scoop or tablespoon, drop rounds of dough onto the prepared baking sheet, leaving space between each cookie. Sprinkle a little sanding sugar on top for that extra sparkle!
-
Bake: Pop your baking sheet into the preheated oven and bake for 10–12 minutes, or until the edges are lightly golden. The center may look a little soft, but don’t worry! They will firm up as they cool.
-
Cool and Serve: After baking, let the cookies cool on the sheet for a few minutes before transferring them to a wire rack to cool completely.
Serving Suggestions
These Peach Cookies are delightful on their own, but if you want to elevate the experience, serve them warm alongside a scoop of vanilla ice cream. Trust me, there’s something magical about the combination of warm cookies and cold ice cream that creates a little party in your mouth! You can also drizzle them with honey or a light glaze for extra sweetness!
Recipe Variations
Here are a few fun twists you can try with this recipe:
-
Berry Peach Fusion: Add 1/2 cup of diced strawberries or blueberries to the peach mixture for a mixed berry version.
-
Nuts for Peaches: Incorporate chopped pecans or walnuts for some crunch.
-
Herbal Peach Twist: Add a teaspoon of fresh mint or basil to the dough for a refreshing herbaceous note.
-
Spicy Peaches: Want a zesty kick? Mix in a sprinkle of cayenne pepper with your dry ingredients for a sweet-and-spicy combo!
-
Vegan Delight: Utilize a flax egg in place of the regular egg, and switch the butter for coconut oil for a fantastic vegan treat.
Chef’s Notes
Creating these cookies has been a delightful journey for me. I often think about the time my kitchen became a mini peach paradise, with sticky fingers and laughter filling the air. And I remember the time I accidentally added too much cinnamon — I was worried my cookies would taste like Christmas rather than summer. But guess what? They turned out to be a surprising hit, and now, sometimes I throw in a bit extra just for fun! It’s all about experimenting and letting your kitchen adventures unfold.
FAQs and Troubleshooting
1. My cookies spread too much! What did I do wrong?
- If your cookies spread too much, it could be due to too warm butter or not enough flour. Make sure your butter is softened but not melted and be sure to measure your flour accurately.
2. Can I use frozen peaches?
- Yes! You can use frozen peaches. Just make sure to thaw them and drain any excess moisture before folding them into the dough.
3. My cookies burned on the bottom! How can I prevent that?
- Always check your oven’s temperature with an oven thermometer; it could be running hotter than the dial reads. Also, if your baking sheet isn’t insulated, consider placing it on top of another baking sheet.
4. Can I make the dough ahead of time?
- Absolutely! You can prepare the dough, wrap it well, and store it in the refrigerator for up to 2 days — just make sure to let it sit at room temperature for a bit before scooping and baking.
Nutritional Info (per cookie, estimated)
- Calories: 150
- Total Fat: 7g
- Saturated Fat: 4g
- Cholesterol: 20mg
- Sodium: 90mg
- Total Carbohydrates: 21g
- Dietary Fiber: 1g
- Sugars: 9g
- Protein: 2g
With that, your Peach Cookies are ready! I hope you enjoy these as much as I do. There’s nothing quite like a home-baked treat to sweeten up your day, and sharing them with your loved ones makes it all the more special. Now, wipe your hands, tie that apron string a little tighter, and let’s create more timeless moments in the kitchen together! Happy baking! 🍑✨
PrintSweet Peach Cookies

Delicious and inviting peach cookies that bring a taste of summer to any occasion.
- Prep Time: 15 minutes
- Cook Time: 12 minutes
- Total Time: 27 minutes
- Yield: 24 cookies 1x
- Category: Dessert
- Method: Baking
- Cuisine: American
- Diet: Vegetarian
Ingredients
- 2 1/8 cups all-purpose flour
- 3/4 teaspoon salt
- 1/2 teaspoon baking soda
- 1/2 cup unsalted butter (softened)
- 1/2 cup granulated sugar
- 1/2 cup firmly packed light brown sugar
- 1 large egg
- 1/2 teaspoon vanilla extract
- 2 large ripe peaches (peeled, pitted, and cut into 1/4-inch pieces)
- 1/3 cup peach preserves
- 3 tablespoons sanding sugar
- 1/4 teaspoon ground cinnamon
Instructions
- Preheat your oven to 350°F (175°C).
- Prepare a baking sheet lined with parchment paper.
- Mix together the flour, salt, baking soda, and cinnamon in a medium bowl.
- Cream the butter, granulated sugar, and brown sugar until light and fluffy.
- Add the egg and vanilla extract; mix until combined.
- Combine the dry ingredients with the wet ingredients until just combined.
- Fold in the peaches and peach preserves.
- Scoop rounds of dough onto the prepared baking sheet, spacing them apart.
- Bake for 10-12 minutes or until edges are lightly golden.
- Cool on the baking sheet for a few minutes before transferring to a wire rack.
Notes
Serve warm with a scoop of vanilla ice cream for an extra treat!
Nutrition
- Serving Size: 1 cookie
- Calories: 150
- Sugar: 9g
- Sodium: 90mg
- Fat: 7g
- Saturated Fat: 4g
- Unsaturated Fat: 2g
- Trans Fat: 0g
- Carbohydrates: 21g
- Fiber: 1g
- Protein: 2g
- Cholesterol: 20mg
Keywords: peach cookies, summer dessert, baking