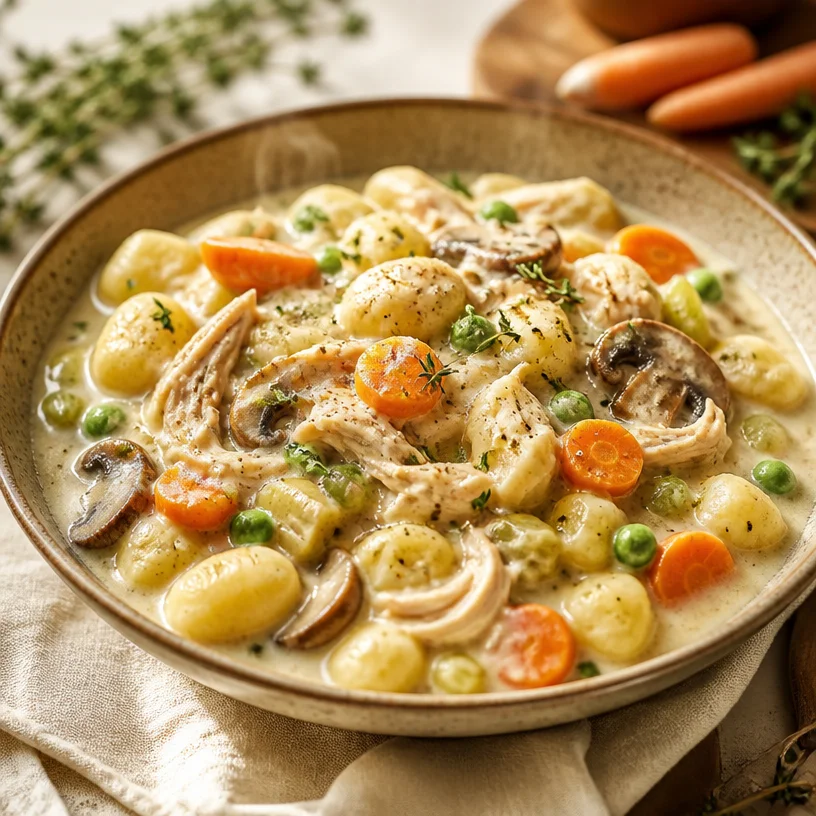
One-Pot Gnocchi Chicken Pot Pie: Creamy Weeknight Comfort
One-Pot Gnocchi Chicken Pot Pie: Cozy Comfort in Every Bite
Hello, fellow foodies! Today, we’re diving into one of my absolute favorite comfort foods that brings both warmth and nostalgia to the table—One-Pot Gnocchi Chicken Pot Pie! This dish is like a warm hug on a chilly day, a blend of creamy, flavorful goodness and nostalgic memories that make you feel right at home.
Introduction
Ah, the magic of a pot pie! It’s the ultimate in comfort food, and when you add gnocchi to the mix, it becomes something exceptionally special. Picture this: a hearty, creamy base filled with tender chicken, vibrant veggies, and pillowy gnocchi that soak up all those delicious flavors. And the best part? You only need one pot. Yes, please!
I remember the first time I made a pot pie from scratch. I was in college, trying to impress some friends during finals week with my culinary prowess. I had no idea what I was doing, but I threw together a mix of whatever ingredients I had on hand, hoping that the magic of cooking would come to my rescue. Spoiler alert: it did! The kitchen filled with a warm, inviting aroma, and I ended up serving up bowls of comfort that had my friends raving—so much so that we postponed our study session. That’s the beauty of food; it’s always more than just sustenance. It’s about connection, warmth, and shared moments around the table!
Let’s roll up our sleeves and dive into this one-pot wonder. Whether you’re hosting a dinner party or just looking for something cozy for the family, this One-Pot Gnocchi Chicken Pot Pie is sure to become a staple in your kitchen.
Personal Story
Years ago, I visited a quaint little restaurant in my hometown that served the most delightful chicken pot pie. It was bursting at the seams with tender chicken, vibrant vegetables, and a perfectly flaky crust. I remember savoring every spoonful, feeling a comforting wave wash over me. Fast forward to a sunny Saturday afternoon, and I decided to recreate that magic in my own kitchen. Armed with a handful of ingredients and a nostalgic heart, I experimented with flavors, discovering that the secret ingredient was always a pinch of love. My version evolved over time, embracing simplicity and comfort while swapping in gnocchi for that delightful twist. The smiles around my table when I served it were the ultimate reward!
Ingredients
Let’s gather our ingredients! Here’s what you’ll need for this comforting dish:
-
4 Tablespoons butter or vegan butter
This forms the base of your sauce. If you’re going dairy-free, vegan butter works beautifully! -
1 cup sliced carrots
Sweet and colorful, carrots add a lovely crunch. Substitute with peas or bell peppers if desired. -
4 oz mushrooms (sliced)
Mushrooms provide an earthy depth. If you’re not a fan, leave them out or substitute with zucchini. -
1 large or 2 small ribs celery (thinly sliced)
Celery adds a refreshing crunch. You could swap with parsnips for a sweeter flavor. -
1 large shallot or small onion (chopped)
For a bit of aromatic sweetness. If you prefer a stronger flavor, a red onion works too! -
Homemade seasoned salt and pepper
A dash of seasoning makes all the difference! You can use regular salt and pepper but try adding some smoked paprika for a unique twist. -
2 cloves garlic (pressed or minced)
Because garlic makes everything better, am I right? Use a pinch of garlic powder if fresh isn’t available. -
1 teaspoon poultry seasoning
This is my secret weapon for that classic pot pie flavor! -
Pinch dried thyme
A gentle herbal note. Fresh thyme works well too! -
3 Tablespoons gluten-free flour (or all-purpose flour if not GF)
This helps thicken our filling. Make sure to stir well to avoid clumping! -
2 cups chicken stock or broth
For a rich base; I love using homemade if I have it. Vegetable broth is a great alternative for a lighter option! -
1 cup milk (any kind, I use unsweetened almond milk)
This adds creaminess to our sauce. Any non-dairy milk should work fine! -
12 oz package gluten-free gnocchi
Yes, the star of the show! Feel free to use potato gnocchi or even homemade if you’re feeling adventurous. -
1-1/2 cups shredded chicken breast (~1/2 lb pre-cooked)
A great way to use leftovers! Rotisserie chicken is perfect here, too. -
1/2 cup frozen peas
A pop of color and sweetness. You can use fresh peas if you have them!
Step-by-Step Instructions
Alright, let’s get cooking! Follow these steps to create your One-Pot Gnocchi Chicken Pot Pie:
-
Melt the Butter
In a large pot over medium heat, melt the butter until bubbly. This is your flavor base! I love using a heavy-bottomed pot for even cooking. -
Sauté the Vegetables
Toss in the sliced carrots, mushrooms, celery, and shallots. Sauté for about 5-7 minutes until the shallots are translucent and the vegetables start to soften. This step is crucial; it’s where the flavor begins to develop. -
Add the Garlic and Seasonings
Stir in the minced garlic, poultry seasoning, thyme, salt, and pepper. Sauté for another 1-2 minutes until fragrant. Trust me, your kitchen will smell heavenly! -
Thicken the Mixture
Sprinkle in the gluten-free flour (or all-purpose) and stir well to coat the vegetables. This will help thicken our sauce. Cook for about a minute to get rid of that raw flour taste. -
Pour in the Broth and Milk
Gradually whisk in the chicken stock and milk, ensuring there are no lumps. Bring to a gentle simmer, stirring often. It’s okay if it looks a bit lumpy at first; just keep stirring! -
Add the Gnocchi and Chicken
Once your mixture is simmering, gently stir in the gnocchi and shredded chicken. Let it cook for about 3-5 minutes until the gnocchi float to the top, indicating they’re done! -
Finish with Peas
Stir in the frozen peas, let them warm through, and taste for seasoning. Add a pinch more salt or pepper if needed; your palate is the best judge!
Serving Suggestions
For a beautiful presentation, ladle the One-Pot Gnocchi Chicken Pot Pie into shallow bowls. Add a sprinkle of fresh herbs like parsley or thyme on top for a pop of color. Serve with crusty bread or a side salad for a full meal!
Recipe Variations
- Spicy Twist: Add a pinch of red pepper flakes or diced jalapeños for a spicy kick.
- Herb Infusion: Swap half of the chicken stock for white wine to deepen flavor and add a herby aroma.
- Vegetarian Delight: Omit the chicken and add chickpeas or diced tofu for protein.
- Cheesy Goodness: Stir in a handful of shredded cheese like cheddar or Gruyère just before serving for a creamy finish.
Chef’s Notes
Cooking is as much about the process as it is about the result. Over time, this recipe has evolved from classic chicken pot pie to a delightful gnocchi twist, combining textures and flavors that make every bite unique. I often find myself reminiscing about my early cooking attempts, from burnt sauces to over-seasoned meals—every mishap taught me a little more about what makes a dish truly special. And let’s be honest, sometimes the best part of cooking is laughing at the stories that come along with it!
FAQs and Troubleshooting
-
Why is my sauce too thick?
If your sauce becomes too thick, simply add a splash more broth or milk until you reach your desired consistency. -
Can I add other vegetables?
Absolutely! Feel free to incorporate your favorites—sweet corn, bell peppers, or even kale would work well. -
What if I don’t have gnocchi?
You can use small pasta shapes as a substitute! Just be sure to cook them according to package directions before adding them. -
Can I make this in advance?
Yes, you can! Simply store it in an airtight container in the fridge for up to 3 days. Reheat it gently on the stovetop, adding a little extra broth or milk to loosen it up.
Nutritional Info (if applicable)
While I won’t dive into specifics here, remember that balance is key. This One-Pot Gnocchi Chicken Pot Pie packs in protein, veggies, and comforting carbs. Remember to adapt the recipe according to your dietary needs!
So, there you have it! A warm, cozy, and delightful One-Pot Gnocchi Chicken Pot Pie that will surely be a hit around your table. Cooking is an adventure—let’s continue exploring flavors, sharing stories, and making memories together. Tie on that apron, pour a glass of something nice, and enjoy this beautiful dish. Happy cooking!
PrintOne-Pot Gnocchi Chicken Pot Pie

A cozy and comforting one-pot dish featuring creamy chicken, vibrant vegetables, and pillowy gnocchi.
- Prep Time: 15 minutes
- Cook Time: 30 minutes
- Total Time: 45 minutes
- Yield: 4 servings 1x
- Category: Main Course
- Method: Stovetop
- Cuisine: American
- Diet: Gluten-Free, Dairy-Free option available
Ingredients
- 4 Tablespoons butter or vegan butter
- 1 cup sliced carrots
- 4 oz mushrooms (sliced)
- 1 large or 2 small ribs celery (thinly sliced)
- 1 large shallot or small onion (chopped)
- Homemade seasoned salt and pepper
- 2 cloves garlic (pressed or minced)
- 1 teaspoon poultry seasoning
- Pinch dried thyme
- 3 Tablespoons gluten-free flour (or all-purpose flour if not GF)
- 2 cups chicken stock or broth
- 1 cup milk (any kind)
- 12 oz package gluten-free gnocchi
- 1–1/2 cups shredded chicken breast (~1/2 lb pre-cooked)
- 1/2 cup frozen peas
Instructions
- Melt the butter in a large pot over medium heat until bubbly.
- Toss in the sliced carrots, mushrooms, celery, and shallots. Sauté for 5-7 minutes until vegetables start to soften.
- Stir in the minced garlic, poultry seasoning, thyme, salt, and pepper; sauté for another 1-2 minutes until fragrant.
- Sprinkle in the gluten-free flour and stir well to coat the vegetables. Cook for about 1 minute.
- Pour in the chicken stock and milk, whisking to ensure no lumps. Bring to a gentle simmer, stirring often.
- Add the gnocchi and shredded chicken, cooking for 3-5 minutes until the gnocchi float to the top.
- Stir in the frozen peas and warm through. Adjust seasoning as needed.
Notes
For added richness, consider stirring in cheese just before serving. Store leftovers in an airtight container for up to 3 days.
Nutrition
- Serving Size: 1 serving
- Calories: 450
- Sugar: 6g
- Sodium: 600mg
- Fat: 18g
- Saturated Fat: 5g
- Unsaturated Fat: 10g
- Trans Fat: 0g
- Carbohydrates: 50g
- Fiber: 4g
- Protein: 22g
- Cholesterol: 60mg
Keywords: gnocchi, chicken pot pie, comfort food, one-pot meal, gluten-free
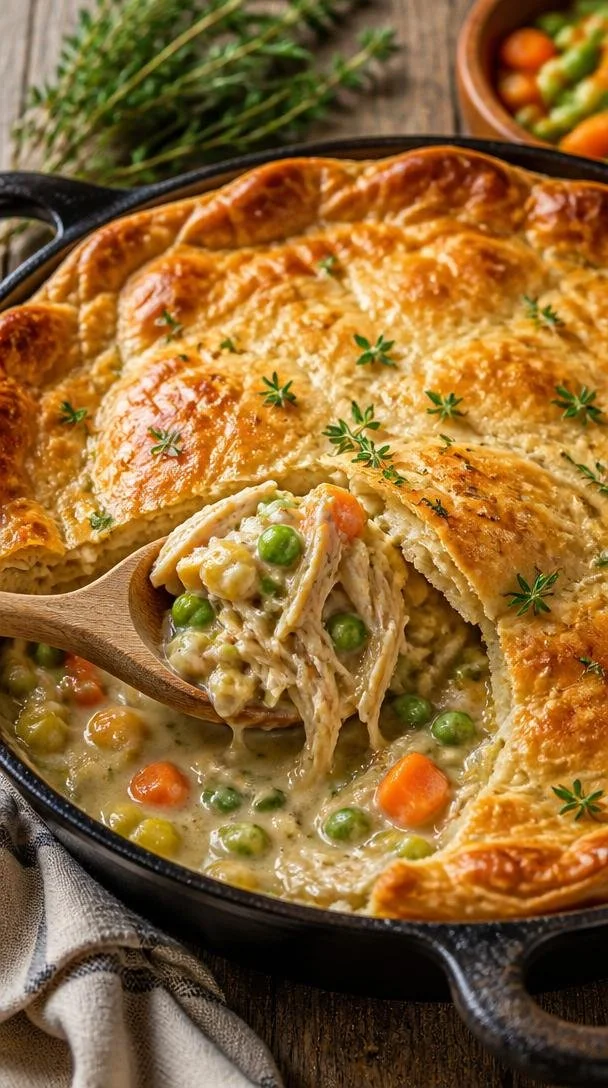
Minute One-Pan Chicken Pot Pie for Busy Weeknights
Homemade Chicken Pot Pie: A Comfort Food Classic
Hello, fellow food enthusiasts! Today, we’re diving into one of my all-time favorite comfort dishes: Homemade Chicken Pot Pie. There’s just something about the buttery crust, hearty filling, and the aromatic blend of spices that can make any day feel a little brighter. Whether you’re dealing with a busy weekday or celebrating a cozy weekend at home, this dish is a warm hug on a plate.
My Chicken Pot Pie Journey
Let me take you back in time to when I first discovered the magic of Chicken Pot Pie. I was a curious young chef, eager to make my mark in the culinary world. One chilly evening, my grandmother invited me into her kitchen. She had a way of making every gathering feel special, and on this occasion, she was preparing her famous Chicken Pot Pie. The smell of sautéed onions mixed with savory chicken filled the air as she expertly rolled out the dough.
I remember standing by her side, wide-eyed with wonder, as she explained the art of creating a flaky crust. “It’s all about the butter, my dear,” she said with a wink. I watched her skillfully combine ingredients, sharing tips like a seasoned pro, and with a few quick movements, she transformed simple components into a hearty dish that could warm the coldest hearts.
That evening, as we sat around the dinner table with family, I felt a deep sense of belonging and love. And that’s the beauty of food, isn’t it? It has the power to bring us together, to create nostalgia, and to evoke memories that last a lifetime. Here I am, sharing this cherished recipe with you, hoping it will bring you as much joy as it has brought to my life.
Ingredients
Now, let’s gather our ingredients to make this delicious Chicken Pot Pie. Each element plays a pivotal role, bringing flavor, texture, and comfort to the dish. Here’s what you’ll need:
-
1 pie crust (store-bought or homemade)
Whether you choose to make it from scratch or pick it up from the store, a good crust is essential. If you’re feeling adventurous, I recommend trying a buttery homemade crust with a touch of herb seasoning for an extra layer of flavor. -
2 cups cooked chicken, shredded
You can utilize rotisserie chicken for convenience, or poach some chicken breasts for a fresher option. Just ensure it’s well-seasoned so that the overall dish shines! -
1 cup frozen mixed vegetables (peas, carrots, corn, etc.)
This handy mix saves time and adds color. You can swap it out for fresh vegetables if you want, but you might need to cook them slightly longer to ensure they soften up. -
1/3 cup butter
This is the secret to rich, flavorful filling! You could substitute it with olive oil for a lighter version, but the creaminess of butter really enhances the dish. -
1/3 cup all-purpose flour
This helps to thicken the filling. If you’re aiming for gluten-free, you can swap it out for cornstarch or a gluten-free flour blend. -
1 cup chicken broth
A flavorful broth can elevate this dish significantly. Homemade would be ideal, but store-bought works just as well—just check for low sodium options if you’re watching your salt intake. -
1 cup milk
This adds creaminess, but if you prefer a lighter option, feel free to use almond milk or any non-dairy milk substitute. -
1/2 teaspoon salt
Essential for enhancing all flavors. Adjust according to taste, especially if using salted broth. -
1/4 teaspoon black pepper
Adds a little kick! You can adjust the spice level if you enjoy a bit more heat, or even add a dash of cayenne for some flair. -
1/4 teaspoon onion powder
A great way to infuse a depth of flavor without chopping onions. Feel free to use fresh onions if you prefer. -
1/4 teaspoon garlic powder
Because garlic makes everything better! Once again, fresh garlic can replace this if you want some extra flavor—just sauté it at the beginning with your onions.
Step-by-Step Instructions
Now, let’s get to the good part: cooking! Follow these detailed steps, and I promise you’ll be rewarded with a pot pie that will make your kitchen smell heavenly.
-
Preheat the Oven
Start by preheating your oven to 425°F (220°C). This is key for achieving that golden, flaky crust once the pie is baking—you want it crispy and inviting! -
Make the Filling
In a medium saucepan over medium heat, melt the butter. Once melted, add in the flour, whisking continuously to create a roux. Cook this mixture for about 2 minutes until it bubbles and turns a light golden color. This step builds a rich flavor base! -
Add Broth and Milk
Gradually whisk in the chicken broth and milk. Stir constantly until the mixture thickens and reaches a creamy consistency—about 5 minutes. Be patient and let it come together! -
Season It Up
Once thickened, add in your salt, black pepper, onion powder, and garlic powder. Taste and adjust seasoning if necessary. This is your chance to shine—don’t skip the tasting! -
Incorporate Chicken and Veggies
Stir in the shredded chicken and frozen mixed vegetables. Mix well to ensure everything is evenly combined and coated in that luscious sauce. Let it simmer for a few minutes to heat everything through. -
Prepare the Pie Crust
If using a store-bought pie crust, carefully fit it into your pie dish. For homemade, roll it out to about 1/8-inch thickness and lay it over your pie dish, trimming excess edges. -
Fill the Crust
Pour your warm chicken filling into the crust, spreading it evenly. You want that filling to reach the edges without spilling out. -
Top It Off
Cover with another layer of pie crust, sealing the edges by pinching them together. Cut a few slits in the top to allow steam to escape. This is important to prevent a soggy bottom! -
Bake the Pie
Place the pie in the preheated oven and bake for about 30-35 minutes, or until the top is golden brown and the filling is bubbling. The aroma will be irresistible! -
Cool and Serve
Once baked, let the pie cool for about 10–15 minutes before serving. This helps the filling set up a little, making slicing easier.
Serving Suggestions
When it comes to serving your Chicken Pot Pie, presentation matters—though perfection is not the goal! Serve it warm, right in the pie dish, or plate up generous slices on individual plates. Pair it with a simple mixed green salad for a fresh contrast, and perhaps a glass of your favorite white wine. It’s a great way to unwind and savor the moment.
Recipe Variations
One of the best parts about Chicken Pot Pie is how versatile it can be! Here are a few creative twists you might consider:
- Herb-Infused Crust: Add chopped fresh herbs like parsley or thyme to your pie crust for an aromatic touch.
- Spicy Kick: Toss in some diced jalapeños or a tablespoon of hot sauce for a spicy variation.
- Mushroom Medley: Replace half of the chicken with sautéed mushrooms for an earthy flavor.
- Dairy-Free Option: Use coconut milk instead of regular milk for a rich, dairy-free version.
- Vegetarian Delight: Swap out the chicken for hearty vegetables like chickpeas, potatoes, and bell peppers for a satisfying vegetarian option.
Chef’s Notes
This recipe has been a staple in my home for years, and it’s evolved as I’ve experimented with flavors. I once mistakenly used way too much garlic powder, thinking it would be a crowd-pleaser. Turns out, a little goes a long way! My friends dubbed it the "Garlic Pot Pie," and we all had a good laugh as we doused it with copious amounts of water.
Over time, I’ve learned that the secret to a truly great Chicken Pot Pie lies in the love you put into it. Cooking is a journey—don’t be afraid to make mistakes and learn from them. Your kitchen will always be there, ready to help you create something wonderful.
FAQs and Troubleshooting
1. My crust turned out soggy! What happened?
This usually happens if the filling is too watery or if the pie isn’t baked long enough. Ensure your filling thickens properly before pouring it into the crust and pay attention to baking time.
2. Can I make this dish ahead of time?
Absolutely! You can prepare the filling a day in advance and keep it in the fridge. Just assemble the pie when you’re ready to bake it.
3. What can I do with leftovers?
Leftover Chicken Pot Pie can be stored in an airtight container in the fridge for up to 3 days. Reheat it in an oven safe dish to keep the crust crispy!
4. I don’t have a pie dish. Can I use something else?
No pie dish? No problem! You can use a casserole dish, skillet, or even make individual pot pies in ramekins. Just adjust the cooking time as needed.
Nutritional Info
While Homemade Chicken Pot Pie is undoubtedly comfort food, be mindful of portion sizes if you’re watching your calories. Each serving typically contains around 400-500 calories, depending on the crust and ingredients used.
And there you have it! A Chicken Pot Pie that’s not only delicious but also filled with love and memories. I hope this recipe inspires you to gather around your table, share good food, and create cherished moments. Remember, cooking should feel elegant but never intimidating; you’ve got this! So tie on that apron and let’s create something timeless together. Bon appétit!
PrintHomemade Chicken Pot Pie

A comforting Chicken Pot Pie with a buttery crust and savory filling, perfect for any occasion.
- Prep Time: 15 minutes
- Cook Time: 35 minutes
- Total Time: 50 minutes
- Yield: 4 servings 1x
- Category: Main Course
- Method: Baking
- Cuisine: American
- Diet: None
Ingredients
- 1 pie crust (store-bought or homemade)
- 2 cups cooked chicken, shredded
- 1 cup frozen mixed vegetables (peas, carrots, corn, etc.)
- 1/3 cup butter
- 1/3 cup all-purpose flour
- 1 cup chicken broth
- 1 cup milk
- 1/2 teaspoon salt
- 1/4 teaspoon black pepper
- 1/4 teaspoon onion powder
- 1/4 teaspoon garlic powder
Instructions
- Preheat the oven to 425°F (220°C).
- Make the filling by melting butter in a medium saucepan, then whisking in flour to create a roux.
- Add chicken broth and milk, stirring until thickened.
- Season with salt, black pepper, onion powder, and garlic powder.
- Incorporate shredded chicken and frozen mixed vegetables.
- Prepare the pie crust in the pie dish.
- Fill the crust with the warm chicken filling.
- Top with another layer of pie crust, sealing edges and cutting slits on top.
- Bake for 30-35 minutes until golden brown.
- Cool for 10-15 minutes before serving.
Notes
You can prepare the filling a day in advance, and store it in the fridge until ready to bake.
Nutrition
- Serving Size: 1 slice
- Calories: 450
- Sugar: 3g
- Sodium: 700mg
- Fat: 20g
- Saturated Fat: 10g
- Unsaturated Fat: 8g
- Trans Fat: 0g
- Carbohydrates: 40g
- Fiber: 2g
- Protein: 25g
- Cholesterol: 70mg
Keywords: chicken pot pie, comfort food, cozy dinner
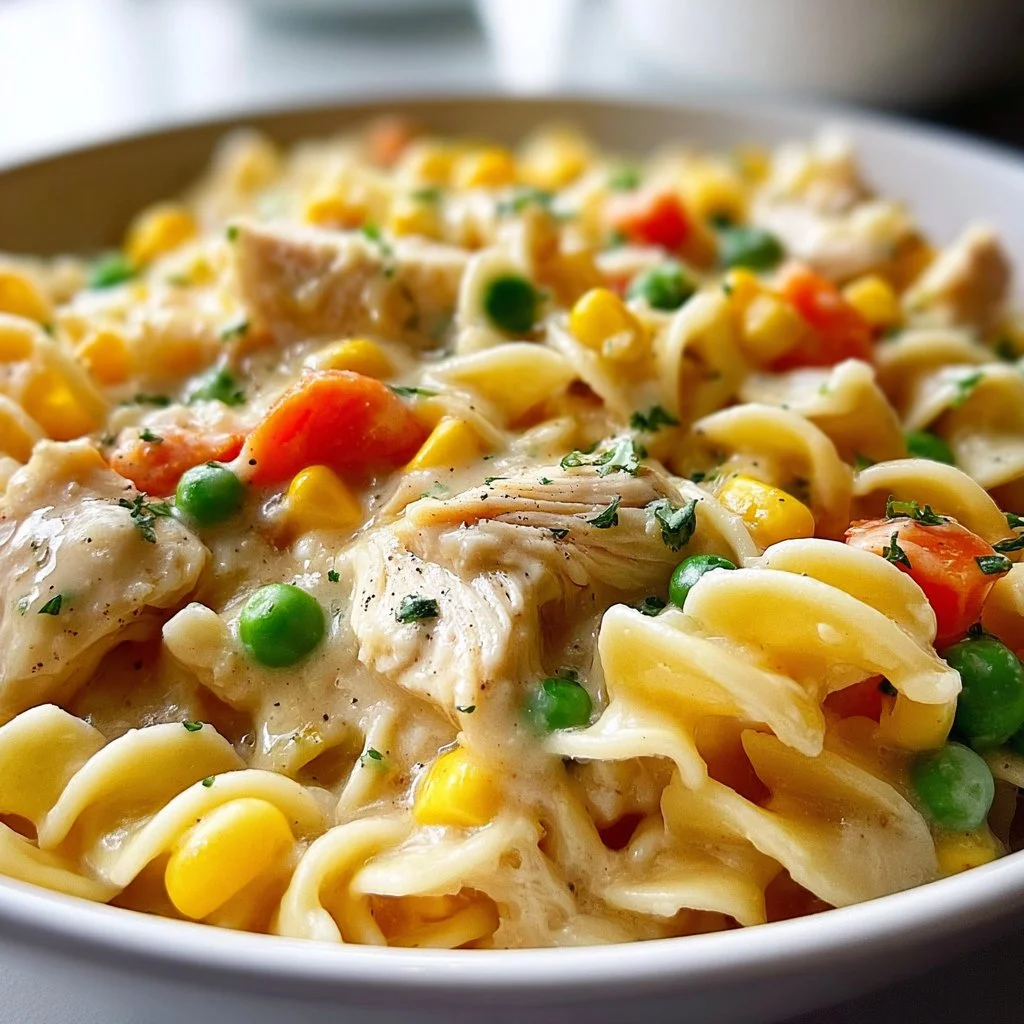
Classic Chicken Pot Pie Pasta
Comforting Classic Chicken Pot Pie Pasta: A Cozy Bowl of Happiness
Hello, fellow food lover! Today, I’m thrilled to share a delightful dish that combines the charm of a classic chicken pot pie with the ease of pasta. Imagine creamy, savory goodness coated around tender penne or rotini, all the flavors of your favorite pot pie transformed into a cozy bowl of pasta perfection—this is the magic of Classic Chicken Pot Pie Pasta! Perfect for weeknight dinners or impressing guests on a peaceful Sunday, this meal brings warmth and joy to the table.
Now, before we dive into the recipe, let me tell you a little story about my love for this dish.
Personal Story
Growing up, dinner time was sacred in our household. It was the one time of day when we all gathered, shared stories, and enjoyed the heartwarming aromas wafting from the kitchen. My mother would often make her beloved chicken pot pie, the ultimate comfort food—flaky golden crust, buttery chicken, and an array of colorful veggies peeking through. I always loved the anticipation as we would together peel back that crust to reveal the creamy filling beneath.
Fast forward to my own culinary adventures, and I wanted to recreate that nostalgia, but with a twist! One night, with a craving for both pasta and that warm feeling of home, I decided to marry the two. Thus, the Classic Chicken Pot Pie Pasta was born! It quickly became a favorite in my home, a recipe passed down through my heart instead of just my hands. I know you’ll find it as comforting as I do!
Ingredients
Here’s what you’ll need to whip up this amazing dish:
-
8 oz pasta (penne or rotini): The vehicle for all that creamy goodness! Both penne and rotini are great choices because their shapes hold onto the sauce beautifully. Feel free to swap with whole wheat or gluten-free pasta for a healthier option.
-
1 tablespoon olive oil: A smooth and flavorful base to sauté your onions and garlic. You can substitute with butter for that extra richness.
-
1 small onion, diced: Adds a sweet and savory depth to your dish. If you’re not a fan of onions, shallots or leeks can work well.
-
2 cloves garlic, minced: Ah, the magic of garlic! It infuses your dish with aromatic sweetness. If you’re in a pinch, garlic powder can be a quick substitute.
-
2 cups cooked chicken, shredded: A perfect way to use leftover rotisserie chicken or cooked chicken breasts. If you’re looking for a vegan option, roasted chickpeas or sautéed mushrooms are excellent!
-
1 cup frozen mixed vegetables (peas, carrots, corn): These add vibrant color and nutrition. You can use fresh vegetables, but be sure to chop them into bite-sized pieces.
-
2 cups chicken broth: This is the soul of the dish! You can use low-sodium broth or even veggie broth for a lighter twist.
-
1 cup heavy cream: Creaminess at its finest! You can substitute with half-and-half or a vegan cream alternative if you prefer.
-
1 teaspoon dried thyme: A classic herb used in pot pie; its essence is comforting. If you have fresh thyme, use 1-2 teaspoons instead for more robust flavor.
-
Salt and pepper to taste: Essential for seasoning! Remember to season as you go along for the best flavor.
-
1/2 cup grated Parmesan cheese: It adds a final touch of cheesy goodness. Nutritional yeast can be a great dairy-free alternative.
-
Fresh parsley for garnish: A sprinkle of green makes all the difference!
Step-by-Step Instructions
Now let’s get cooking! Follow these steps to create your Classic Chicken Pot Pie Pasta:
-
Cook the pasta: Start by bringing a large pot of salted water to a boil. Toss in 8 oz of your chosen pasta and cook according to package instructions until al dente. Remember to save a cup of pasta water before draining, just in case you need to loosen the sauce later!
Chef’s tip: Adding salt to the water enhances the pasta’s flavor, just like seasoning a dish!
-
Sauté the aromatics: While your pasta is cooking, heat 1 tablespoon of olive oil in a large skillet over medium heat. Once hot, add the diced onion and sauté for about 3-4 minutes until translucent. Next, stir in the minced garlic and cook for an additional minute until fragrant.
Little hack: Only add the garlic after the onion is starting to become translucent so it doesn’t burn!
-
Add the chicken and vegetables: Throw in your 2 cups of shredded chicken and 1 cup of frozen mixed vegetables into the skillet. Stir occasionally until everything is warmed through, roughly 3-5 minutes.
-
Pour in the liquids: Next, add 2 cups of chicken broth and bring the mixture to a gentle simmer. Let it bubble away for about 5 minutes.
-
Cream it up: Lower the heat and pour in your 1 cup of heavy cream, stirring to combine. Add in the dried thyme, and season with salt and pepper to taste. Let this cook for another 3-4 minutes until thickened slightly.
Chef Insight: If it looks a little too thick, that reserved pasta water will help achieve your desired consistency!
-
Combine with pasta: Once your sauce is ready, fold in the drained pasta and mix well to coat the noodles with that luxurious sauce.
-
Finish with cheese: Sprinkle in the 1/2 cup of grated Parmesan cheese and stir until it melts into the pasta, creating an even creamier texture!
-
Garnish and serve: Finally, remove the skillet from heat, plate your pasta, and garnish with fresh parsley.
Final tip: A squeeze of lemon over the top can brighten the flavors even more!
Serving Suggestions
Plating is a chance to show off your culinary creation! Serve your Classic Chicken Pot Pie Pasta in shallow bowls or wide pasta plates. A generous helping paired with a side of crusty bread for dipping is a surefire way to elevate the meal. Drizzle a bit of olive oil on top and sprinkle with extra Parmesan and parsley for that restaurant-worthy finish.
Recipe Variations
Here are some creative twists you can try to personalize your Chicken Pot Pie Pasta:
-
Add spices: For a kick, stir in some cayenne pepper or crushed red pepper flakes for a hint of heat!
-
Cheesy goodness: Swap in mozzarella or add a layer of cheesy baked crust on top for that pot pie crust experience.
-
Vegetable-loaded: Replace or supplement the frozen vegetables with fresh veggies like diced bell peppers, broccoli, or zucchini for added texture and nutrition.
-
Make it lighter: Use half-and-half instead of heavy cream, or swap the chicken for sautéed spinach and other seasonal spring greens for a light vegetarian version.
-
Mix up your pasta: Try with different shapes—farfalle, rotini, or even gluten-free pasta to make it your own!
Chef’s Notes
This Classic Chicken Pot Pie Pasta has truly evolved over time. I recall when I was first experimenting with it in my tiny apartment kitchen, the sauce was once too thick, and I ended up with more of a chicken casserole than a pasta dish! But through trial and error (and a bit too much pasta water at one point), I finally hit the sweet spot.
The best part is that everyone in my home loves it! They never quite know what to expect based on my ingredients since I love to switch it up, making it an exciting family favorite!
FAQs and Troubleshooting
1. My sauce is too thick; what do I do?
Don’t fret! Just add a splash of the reserved pasta water or more chicken broth until you reach your desired sauce consistency.
2. Can I use canned chicken?
Absolutely! It’s a great shortcut in a pinch. Just drain it well and add it during the step with the chicken and vegetables.
3. What if my pasta is overcooked?
If you’re ever stuck with overcooked pasta, try to use less broth or cream in your sauce to help salvage a bit of the texture.
4. Can I freeze this dish?
Yes! This pasta dish can be stored in an airtight container for up to 3 months. Just reheat it gently on the stove, adding a splash of water or broth to loosen it up.
Nutritional Info
While I typically encourage enjoying food in moderation and savoring every bite, if you’re curious, this dish is a fulfilling source of protein, fiber, and good fats! Homemade comfort food always feels better on the nutrition scale compared to takeout, wouldn’t you agree?
And there you have it! Your journey to classic comfort through my Classic Chicken Pot Pie Pasta has just begun. If you give this recipe a try, I can’t wait to hear how it turned out for you. Remember, good food isn’t about showing off; it’s about showing up! So, grab your apron, invite your loved ones, and let’s create unforgettable memories around your table! Happy cooking!
PrintClassic Chicken Pot Pie Pasta

A cozy bowl of happiness combining the charm of classic chicken pot pie with the ease of pasta.
- Prep Time: 15 minutes
- Cook Time: 30 minutes
- Total Time: 45 minutes
- Yield: 4 servings 1x
- Category: Main Course
- Method: Stovetop
- Cuisine: American
- Diet: Non-Vegetarian
Ingredients
- 8 oz pasta (penne or rotini)
- 1 tablespoon olive oil
- 1 small onion, diced
- 2 cloves garlic, minced
- 2 cups cooked chicken, shredded
- 1 cup frozen mixed vegetables (peas, carrots, corn)
- 2 cups chicken broth
- 1 cup heavy cream
- 1 teaspoon dried thyme
- Salt and pepper to taste
- 1/2 cup grated Parmesan cheese
- Fresh parsley for garnish
Instructions
- Cook the pasta: Start by bringing a large pot of salted water to a boil. Toss in 8 oz of your chosen pasta and cook according to package instructions until al dente, saving a cup of pasta water before draining.
- Sauté the aromatics: Heat 1 tablespoon of olive oil in a large skillet over medium heat. Add the diced onion and sauté for about 3-4 minutes until translucent, then stir in the minced garlic and cook for an additional minute.
- Add the chicken and vegetables: Throw in your 2 cups of shredded chicken and 1 cup of frozen mixed vegetables into the skillet, stirring occasionally until warmed through, about 3-5 minutes.
- Pour in the liquids: Add 2 cups of chicken broth and bring the mixture to a gentle simmer, letting it bubble for about 5 minutes.
- Cream it up: Lower the heat and pour in 1 cup of heavy cream, adding the dried thyme and seasoning with salt and pepper, cooking for another 3-4 minutes until slightly thickened.
- Combine with pasta: Fold in the drained pasta and mix well to coat with the sauce.
- Finish with cheese: Sprinkle in 1/2 cup of grated Parmesan cheese and stir until melted, creating a creamy texture.
- Garnish and serve: Plate the pasta, garnish with fresh parsley, and enjoy!
Notes
Add a squeeze of lemon to brighten the flavors. This dish can be stored in an airtight container for up to 3 months.
Nutrition
- Serving Size: 1 serving
- Calories: 500
- Sugar: 5g
- Sodium: 600mg
- Fat: 24g
- Saturated Fat: 12g
- Unsaturated Fat: 8g
- Trans Fat: 0g
- Carbohydrates: 45g
- Fiber: 3g
- Protein: 30g
- Cholesterol: 70mg
Keywords: chicken pasta, comfort food, easy dinner
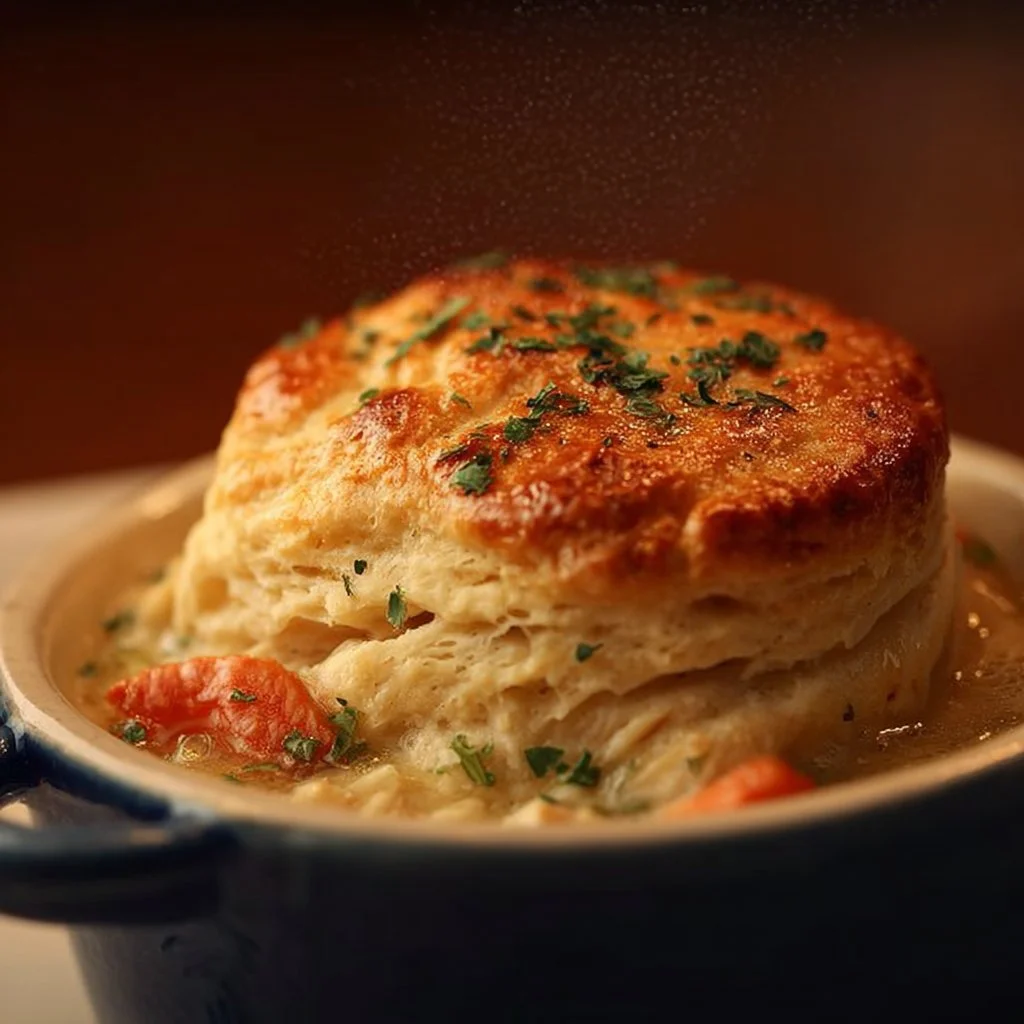
Red Lobster Biscuit Chicken Pot Pie
Red Lobster Biscuit Chicken Pot Pie: A Cozy Culinary Adventure
Ah, comfort food! There’s nothing quite like curling up with a hearty dish that wraps you in warmth and familiarity. If there’s one dish that embodies both comfort and culinary delight, it’s the Red Lobster Biscuit Chicken Pot Pie. This dish takes comfort food to the next level, combining tender, savory chicken, vibrant veggies, and the fluffy, iconic Red Lobster cheddar biscuits you know and love. It’s like a warm hug on a chilly evening or a reminder of cozy family dinners from your past.
Let’s embark on this culinary journey together! Imagine the rich aroma wafting through your kitchen as you whip up this tantalizing dish. As you prepare, you’ll blend the satisfying textures and flavors that make eating a delightful experience. Best of all? I’ll guide you step by step, making it easy for you to replicate this exceptional meal right in your kitchen. So grab your apron and let’s get started—you’re going to impress yourself.
Personal Story: A Lesson from My Grandma
I fondly remember sitting under my grandma’s kitchen table as she whipped up her famous chicken pot pie. The scent of her flaky pastry was something I would dream about. I can still see her rolling out the dough, her face lit up with joy. She often involved me in the cooking, teaching me how to knead the dough just right while sharing tales of family dinners and the importance of gathering around the table.
One day, she introduced me to her secret: a sprinkle of garlic powder added to the filling that elevated the entire dish. That little touch brought a burst of flavor and transformed an ordinary meal into something spectacular. This Red Lobster Biscuit Chicken Pot Pie pays homage to those cherished memories and combines it with the irresistible cheddar biscuits that I was always jealous of while trying to sneak bites from her leftover batch. Let’s create that kind of flavorful magic in your kitchen!
Ingredients
To make this delightful Red Lobster Biscuit Chicken Pot Pie, gather the following ingredients:
-
3 cups cooked chicken, diced
(You can use rotisserie chicken to save time—just shred it off the bone; it’s easy and delicious.) -
1 cup frozen mixed vegetables
(This typically includes peas, carrots, and corn, but feel free to substitute your favorites!) -
1 cup cream of chicken soup
(This adds creaminess and boasts lovely flavor; you can also use homemade soup for a fresher taste.) -
1 teaspoon garlic powder
(This will be used both for flavoring the filling and the biscuit topping. Adjust according to your taste!) -
1 teaspoon onion powder
(This brings a subtle sweetness and depth of flavor to the dish; it’s an unsung hero!) -
Salt and pepper to taste
(Always taste as you go; seasoning makes all the difference!) -
1/2 cup chicken broth
(Essential for keeping your filling moist and flavorful; low-sodium options work well here.) -
2 1/2 cups all-purpose flour
(A necessary base for those luscious biscuits; you can replace with gluten-free flour if needed.) -
1 tablespoon baking powder
(This is the leavening agent that will give your biscuits that delightful rise!) -
1 teaspoon salt
(For the biscuits; it balances the flavors beautifully.) -
1/2 cup unsalted butter, cold and cubed
(Cold butter is the key to flaky biscuits; don’t skimp on this part!) -
1 cup shredded cheddar cheese
(The star ingredient—use sharp cheddar for an extra oomph of flavor!) -
3/4 cup milk
(This hydrates the biscuit dough; you can also use a plant-based milk for a dairy-free version.) -
1 tablespoon garlic powder (for the Red Lobster touch)
(A hallmark of those beloved biscuits; it brings nostalgia in every bite.)
Step-by-Step Instructions
Now that we’ve prepped our ingredients, it’s time to dive into the cooking! Follow these steps for your Red Lobster Biscuit Chicken Pot Pie:
-
Preheat Your Oven
Preheat your oven to 375°F (190°C). A hot oven is crucial for a perfectly baked biscuit crust and a nicely bubbling filling! -
Prepare the Filling
In a large mixing bowl, combine your cooked chicken, frozen mixed vegetables, cream of chicken soup, garlic powder, onion powder, salt, pepper, and chicken broth. Mix well until everything is evenly coated. Don’t be shy with the seasonings; good food is tastily seasoned food!Chef Tip: Taste your filling before pouring it into the baking dish to ensure the flavors are just right. You might want to add a pinch of extra salt or perhaps a splash more chicken broth for moisture.
-
Pour into Baking Dish
Transfer that luscious filling into a greased casserole or baking dish. Spread it out evenly to set the base for the biscuit topping. -
Make the Cheddar Biscuits
In a large bowl, whisk together the all-purpose flour, baking powder, and salt. Next, add the cold, cubed unsalted butter. Using a pastry cutter or your fingers, work the butter into the flour until it resembles coarse crumbs. This step is crucial for that flaky texture—don’t rush it! -
Add Cheese and Milk
Gently fold in the shredded cheddar cheese, followed by the milk. Stir until just combined; the dough might be a bit sticky, but that’s okay! -
Drop the Biscuit Topping
Using a spoon or a cookie scoop, drop spoonfuls of the biscuit dough over the chicken filling. It doesn’t have to be perfect, so let the tangling tendrils of dough create a rustic look—those golden peaks will ooze the charm. -
Sprinkle with Garlic Powder
For that famous Red Lobster touch, light sprinkle about 1 tablespoon of garlic powder over the biscuit topping before popping it into the oven. -
Bake to Perfection
Place the dish in the oven and bake for about 30-35 minutes, or until the biscuits are golden brown and the filling is bubbling up. Your kitchen will smell like pure bliss; prepare for some serious culinary praises! -
Let It Rest
Once out of the oven, let your dish rest for about 10 minutes. This is tough, I know, but it helps the filling set a bit more and makes serving less messy.
Serving Suggestions
When serving your Red Lobster Biscuit Chicken Pot Pie, consider a simple but elegant plating. Use a large serving spoon to scoop out a generous portion, showing off the delicious filling and flaky biscuit. Pair it with a light side salad dressed with a tangy vinaigrette to balance the richness of the dish. Finish it off with a sprinkle of some fresh parsley or chives for a splash of color!
Recipe Variations
Feeling adventurous? Here are some delightful creative twists or dietary swaps to consider:
- Spicy Twist: Add a dash of cayenne pepper or diced jalapeños for a kick.
- Herb Infusion: Include fresh herbs like thyme or rosemary in the filling for added aroma and complexity.
- Vegetarian Option: Swap the chicken for hearty vegetables like mushrooms, zucchini, and bell peppers. Use vegetable broth for the filling.
- Biscuits on the Side: If you want a different experience, serve your filling and homemade cheddar biscuits separately, allowing guests to customize their portions.
- Cheesy Dream: Add more cheese! Mix in some cream cheese for an extra creamy filling.
Chef’s Notes
This recipe has evolved over the years, influenced by family gatherings, friends at dinner parties, and the need to create something special without too much fuss. I remember once trying to impress some friends with this dish but accidentally added too much garlic powder to the filling! It turned into a favorite mishap after a few laughs—we now jokingly call it "Garlic Galore Pot Pie." Cooking is about having fun and being imperfectly perfect, after all!
FAQs and Troubleshooting
Q1: My biscuits didn’t rise! What happened?
A: This could be due to either the butter being too soft or not enough baking powder. Ensure your butter is cool and check the freshness of your baking powder, so it packs a punch.
Q2: Can I freeze the pot pie?
A: Absolutely! Assemble the pot pie but avoid baking it until you’re ready to enjoy. You can freeze it before cooking for up to 3 months. Just add additional baking time when you bake it from frozen.
Q3: How do I store leftovers?
A: Store leftover pot pie in an airtight container in the refrigerator for up to 3 days. To reheat, pop it back in the oven for a bit to help restore the biscuit’s lovely texture.
Q4: What’s the best way to make the biscuits?
A: Remember, minimal handling is key! Mix until just combined and not a second longer for those beautifully soft, flaky biscuits.
Nutritional Info
While I like to keep things flexible around here, you could estimate that a serving of the Red Lobster Biscuit Chicken Pot Pie has about 450-500 calories, depending on the exact ingredients and portion size. It’s wholesome comfort food—you’ll savor every bite!
So, gather your loved ones, set the table, and dive into this cozy, nostalgic Red Lobster Biscuit Chicken Pot Pie. Here’s to creating small, beautiful moments around your dining table, no matter what day of the week it is. Happy cooking! 🌟
PrintRed Lobster Biscuit Chicken Pot Pie

A hearty dish combining tender chicken, vibrant veggies, and fluffy Red Lobster cheddar biscuits, perfect for a cozy meal.
- Prep Time: 15 minutes
- Cook Time: 35 minutes
- Total Time: 50 minutes
- Yield: 6 servings 1x
- Category: Main Course
- Method: Baking
- Cuisine: American
- Diet: Gluten-Free Option Available
Ingredients
- 3 cups cooked chicken, diced
- 1 cup frozen mixed vegetables
- 1 cup cream of chicken soup
- 1 teaspoon garlic powder
- 1 teaspoon onion powder
- Salt and pepper to taste
- 1/2 cup chicken broth
- 2 1/2 cups all-purpose flour
- 1 tablespoon baking powder
- 1 teaspoon salt
- 1/2 cup unsalted butter, cold and cubed
- 1 cup shredded cheddar cheese
- 3/4 cup milk
- 1 tablespoon garlic powder (for the Red Lobster touch)
Instructions
- Preheat your oven to 375°F (190°C).
- Combine cooked chicken, frozen mixed vegetables, cream of chicken soup, garlic powder, onion powder, salt, pepper, and chicken broth in a large mixing bowl.
- Transfer the filling into a greased casserole or baking dish.
- Whisk together flour, baking powder, and salt in a large bowl.
- Add cold, cubed unsalted butter and work into the flour until it resembles coarse crumbs.
- Fold in shredded cheddar cheese and then add milk, stirring until just combined.
- Drop spoonfuls of the biscuit dough over the chicken filling.
- Sprinkle garlic powder over the biscuit topping.
- Bake for about 30-35 minutes, or until biscuits are golden brown.
- Let the dish rest for about 10 minutes before serving.
Notes
Taste the filling before baking to ensure the flavors are just right.
Nutrition
- Serving Size: 1 serving
- Calories: 450
- Sugar: 5g
- Sodium: 600mg
- Fat: 22g
- Saturated Fat: 12g
- Unsaturated Fat: 8g
- Trans Fat: 0g
- Carbohydrates: 40g
- Fiber: 3g
- Protein: 25g
- Cholesterol: 80mg
Keywords: chicken pot pie, comfort food, Red Lobster biscuits, cozy meal, dinner recipe