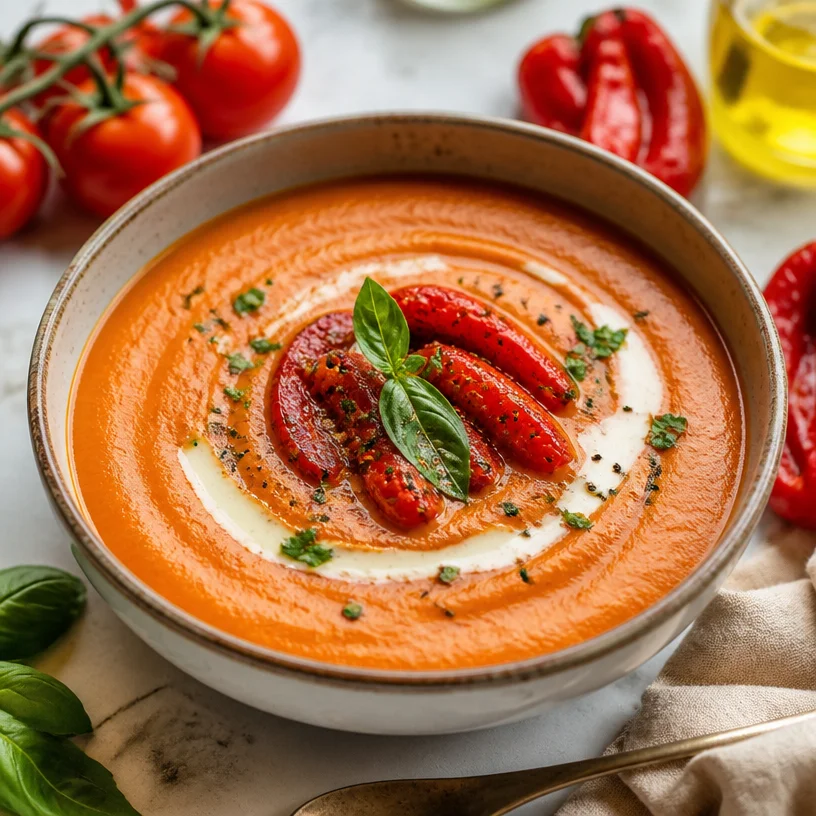
Creamy Roasted Red Pepper Soup: 20-Minute Weeknight Comfort
The Comforting Embrace of Roasted Red Pepper Soup
Hello, dear friends! Welcome back to my cozy kitchen at Ivory Apron. Today, we’re diving into a dish that warms the heart and soul: Roasted Red Pepper Soup. Picture this: it’s a brisk autumn evening, the sun has dipped below the horizon, and you come home to a home filled with the comforting aroma of sweet, smoky peppers mingling with tomatoes and a hint of cream. This soup is like a big hug in a bowl, perfect for any occasion whether you’re hosting a gathering or savoring a quiet evening.
What I love most about roasted red pepper soup is its versatility. Not only is it a comforting staple that can be whipped up with minimal fuss, but it also offers a beautiful canvas for creativity. You can serve it with crusty bread, sprinkle fresh herbs on top, or even add a splash of sherry for an extra kick. So let’s get cooking together and create something delicious that will surely impress!
A Heartfelt Memory
I still remember the first time I made roasted red pepper soup. It was a chilly Sunday afternoon, and my friends and I had gathered for our regular ‘Soup Sunday’—a tradition where we’d each bring a different soup recipe to share. I decided on roasted red pepper soup because I had just picked up a basket of fresh peppers from the local farmer’s market.
As the peppers roasted in the oven, their sweetness filled my kitchen, drawing my friends in like moths to a flame. We chatted and laughed over the bubbling pot, each of us eager to taste the delightful concoction. The moment we took our first sip, there was a collective “wow”—the rich flavors and creamy texture enveloped us, making for an unforgettable afternoon of warmth, friendship, and deliciousness. It’s memories like these that remind me of the joy of cooking and sharing food with loved ones, and I’m so excited to share this recipe with you!
Ingredients
Here’s what you’ll need to create this luscious roasted red pepper soup:
-
Roasted red peppers (about 4 large): The star of the show! You can roast them yourself or buy them jarred. If you’re feeling ambitious, roasting them at home brings out incredible flavors. Just be sure to peel them for a smoother soup.
-
Canned tomatoes (2 cups): Juicy and flavorful tomatoes provide a nice base for the soup. Opt for whole peeled or diced tomatoes—just avoid anything with added seasoning. If you’re looking for a fresh twist, you can use fresh heirloom tomatoes instead when they’re in season!
-
Heavy cream (1/2 cup): This creamy addition enriches the soup and gives it that luscious texture. If you’re aiming for a lighter option, you can substitute with whole milk or a nut cream (like cashew cream) for a dairy-free version.
-
Onion (1 large, diced): Onions add a sweet base flavor when sautéed and balance the dish. Yellow onions work best, but if you prefer something milder, a shallot will do nicely.
-
Garlic (3 cloves, minced): Garlic adds depth to the soup. Don’t skip it! If you’re in a pinch, garlic powder will work too—just use 1 teaspoon.
-
Vegetable broth (4 cups): A good broth is essential for flavor. Homemade is best, but store-bought works well too. For a low-sodium option, check labels when selecting your broth.
-
Olive oil (2 tablespoons): Perfect for sautéing the onions and garlic. You can also use coconut oil for a different flavor profile.
-
Salt and pepper: These simple seasonings enhance all the other flavors. Taste as you go, adjusting for your preference.
Step-by-Step Instructions
-
Roast the Peppers: If using fresh peppers, preheat your oven to 450°F (232°C). Halve the peppers, remove the seeds, and place them cut-side down on a baking sheet lined with parchment paper. Roast the peppers for about 25-30 minutes until the skins are blistered and charred. Once they’re done, transfer them to a bowl and cover it with a kitchen towel to steam for about 10 minutes—this makes peeling the skin a breeze!
-
Sauté the Aromatics: While the peppers are cooling, heat the olive oil in a large pot over medium heat. Add the diced onion and sauté for about 5-7 minutes, until they turn translucent and fragrant. Add the minced garlic and cook for another minute, stirring frequently, until it’s nice and aromatic—be careful not to burn it!
-
Add the Tomatoes and Broth: Once your aromatics are smelling great, add in the canned tomatoes (with their juice) and the vegetable broth. Stir to combine and bring the mixture to a low simmer.
-
Peel and Blend the Peppers: Once the peppers have cooled enough to handle, peel off the charred skins, and chop the peppers roughly. Toss them into the pot and stir everything together. Let it simmer for about 10-15 minutes to meld the flavors together.
-
Blend it Smooth: Using an immersion blender, carefully blend the soup until it’s completely smooth. If you don’t have an immersion blender, transfer the soup in batches to a countertop blender (just be cautious with the hot liquid!).
-
Add Cream and Season: Stir in the heavy cream, then taste and season with salt and pepper as desired. If you like a little heat, feel free to add a pinch of red pepper flakes or a splash of hot sauce at this stage.
-
Serve and Enjoy: Ladle the soup into bowls and enjoy while it’s hot. The combination of sweet roasted peppers and creamy goodness is sheer bliss!
Serving Suggestions
To plate, drape a swirl of creamy yogurt or more heavy cream over the top for a finishing touch. Add a sprinkle of fresh herbs—basil and parsley work beautifully. Serve your roasted red pepper soup with crusty French bread or warm focaccia for dipping. Enjoy every spoonful and don’t forget to share!
Recipe Variations
-
Spicy Kick: Toss in some diced jalapeños when sautéing the onions for a spicy twist.
-
Smoky Flavors: Incorporate a teaspoon of smoked paprika for a deep, earthy flavor that pairs perfectly with the roasted peppers.
-
Herb Infusion: Add some fresh thyme or rosemary while the soup simmers for an herbal boost.
-
Protein-Packed: Stir in some shredded rotisserie chicken or cannellini beans for a heartier version.
-
Vegan Delight: Skip the cream and use coconut milk or omit it completely for a lighter, plant-forward dish.
Chef’s Notes
This recipe has a special place in my heart, and I’ve made countless versions of it over the years. It started as a simple weekly staple and has morphed into something truly special every time I prepare it. I once added far too much garlic and ended up eating a whole batch by myself because I couldn’t bear to waste it!
Cooking is about balance and experimentation, so don’t be afraid to adjust the flavors to suit your palate. Each time I make this soup, I find ways to make it a little more my own, and I encourage you to do the same!
FAQs and Troubleshooting
Q: How can I make this soup thicker?
A: If you prefer a thicker soup, you can simply reduce the amount of vegetable broth you use or blend in a couple of cooked potatoes for added creaminess.
Q: Can I freeze roasted red pepper soup?
A: Absolutely! Just let the soup cool completely before transferring it to airtight containers. It should keep well in the freezer for up to 3 months. Reheat gently on the stovetop, adding a splash of broth if needed.
Q: My soup turned out too acidic. What should I do?
A: If you find your soup a bit too tangy, try adding a pinch of sugar or a drizzle of honey to cut the acidity.
Q: Is there a substitute for heavy cream?
A: Yes! You can use half-and-half or coconut milk for a lighter or dairy-free option.
Nutritional Info
(Approximate, serves 4)
- Calories: 300 per serving
- Protein: 6g
- Fat: 18g
- Carbohydrates: 28g
- Fiber: 3g
- Sugar: 5g
So there you have it, our delightful Roasted Red Pepper Soup recipe! I hope this warms your kitchen and your hearts, just like it does mine. Don’t forget to tag me on social media when you whip this up—I can’t wait to see your delicious creations! Happy cooking, my friends!
PrintRoasted Red Pepper Soup

A heartwarming roasted red pepper soup, perfect for chilly evenings and gatherings. Creamy and flavorful, this dish offers versatility and warmth.
- Prep Time: 10 minutes
- Cook Time: 40 minutes
- Total Time: 50 minutes
- Yield: 4 servings
- Category: Soup
- Method: Blending
- Cuisine: American
- Diet: Vegetarian
Ingredients
- Roasted red peppers (about 4 large)
- Canned tomatoes (2 cups)
- Heavy cream (1/2 cup)
- Onion (1 large, diced)
- Garlic (3 cloves, minced)
- Vegetable broth (4 cups)
- Olive oil (2 tablespoons)
- Salt and pepper (to taste)
Instructions
- Roast the peppers by preheating your oven to 450°F (232°C), halving them, and placing them cut-side down on a baking sheet to roast for 25-30 minutes.
- Sauté the onions in olive oil over medium heat until translucent, then add garlic and cook for another minute.
- Add the canned tomatoes and vegetable broth to the pot, stir, and bring to a simmer.
- Peel the cooled peppers, chop them, and add to the pot; let simmer for 10-15 minutes.
- Blend the soup until smooth using an immersion blender or countertop blender.
- Stir in the heavy cream, adjusting seasoning with salt and pepper as desired.
- Serve the soup hot in bowls with optional garnishes like yogurt or herbs.
Notes
This soup can be customized with spices or additional ingredients for variations. It freezes well for up to 3 months.
Nutrition
- Serving Size: 1 serving
- Calories: 300
- Sugar: 5g
- Sodium: 500mg
- Fat: 18g
- Saturated Fat: 10g
- Unsaturated Fat: 8g
- Trans Fat: 0g
- Carbohydrates: 28g
- Fiber: 3g
- Protein: 6g
- Cholesterol: 30mg
Keywords: soup, roasted red pepper, comfort food, autumn recipe, vegetarian soup
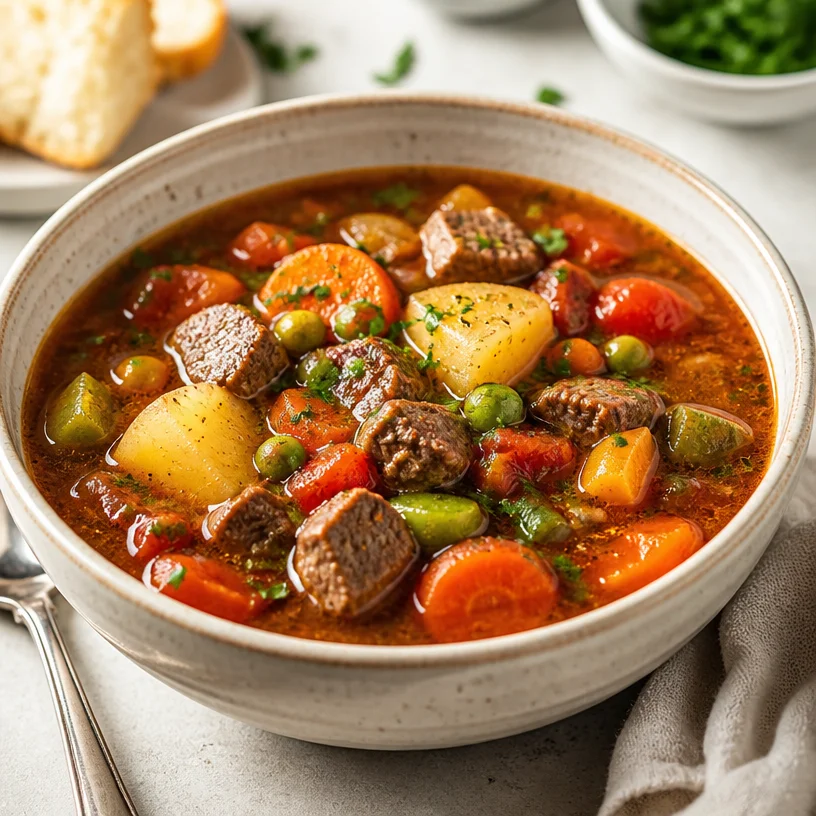
One-Pot Beef Vegetable Soup: 30-Minute Budget Family Meals
A Cozy Bowl of Comfort: Beef Vegetable Soup
Ah, the beauty of a hearty Beef Vegetable Soup! There’s something so wonderfully nostalgic about a pot bubbling away on the stove, filling the kitchen with the warmth of a home-cooked meal. It’s like a hug in a bowl—inviting, comforting, and utterly satisfying. As the air cools and we cozy up with blankets and good books, there’s no better time to whip up this timeless dish. Let me take you on a flavorful journey where we’ll blend tender beef with fresh vegetables, creating a masterpiece that will leave everyone asking for seconds.
But first, a little secret—this recipe is not just about the ingredients but about the love and memories woven into each spoonful. From the first time I crafted this dish for my family during a snowy winter evening to the countless lunch leftovers that transformed into a requested dinner, it’s one of those recipes that feels like home. So, tie on your apron, and let’s make some magic!
A Memory from the Kitchen
I can still hear the sound of laughter echoing through the kitchen the first time I made Beef Vegetable Soup. It was a chilly afternoon, and my family had gathered at our house for what we called “soup Sundays.” I remember standing on a stool, chopping vegetables alongside my grandmother—a culinary wizard in her own right. With every diced carrot and cubed potato, she shared stories of her own childhood, how her mother would make a pot of soup every week.
On that day, she taught me the delicate dance of balancing flavors, how to coax the natural sweetness out of each vegetable and infuse the broth with just the right amount of seasoning. The room was filled with the comforting scent of simmering beef and earthy herbs. When the soup was finally served, the clinking of bowls punctuated our family stories, each spoonful bridging generations. It wasn’t just dinner; it was a lesson about love, tradition, and the art of nourishing both body and spirit.
Ingredients
-
Beef (Chuck Roast or Stew Meat)
A good cut of beef, preferably from the chuck section, provides flavor and tenderness. If you’re looking for a leaner alternative, you can substitute with sirloin, though cook time may vary since sirloin is more tender. -
Potatoes (Yukon Gold or Russet)
Yukon Golds add a buttery flavor, while Russets get fluffy and dissolve slightly in the broth, thickening the soup. Don’t have these? Use sweet potatoes for a different twist! -
Carrots (Fresh)
Sweet and earthy, carrots infuse a beautiful color and flavor into the dish. If you’re short on fresh carrots, frozen peas or green beans can add a freshness too. -
Peas (Green Peas, Fresh or Frozen)
Peas add a pop of color and sweetness. Frozen peas work like a charm and are a great time-saver! -
Tomatoes (Canned Diced or Fresh)
Tomatoes add acidity and depth. If you have fresh ripe tomatoes, feel free to use them instead. Just remember to peel them for a smooth texture (a quick blanch will do the trick)!
Step-by-Step Instructions
-
Prep Your Ingredients
Start by washing, peeling, and chopping the vegetables. Cut the beef into bite-sized pieces and season generously with salt and pepper. Pro tip: Let your beef sit at room temperature for about 30 minutes before cooking for even cooking. -
Brown the Beef
In a large pot or Dutch oven, heat a tablespoon of olive oil over medium-high heat. Once the oil is shimmering, add the beef in batches, not crowding the pan. Sear the meat for about 3-4 minutes until it develops a rich, brown crust. This step locks in flavor! Once browned, remove the beef and let it rest while you sauté the veggies. -
Sauté the Vegetables
In the same pot, toss in diced onions and cook until they’re translucent. Add minced garlic, carrots, and potatoes, stirring occasionally. This process takes about 5 minutes and marries all those beautiful flavors together. If your fond bits are sticking to the pot, deglaze with a splash of red wine or broth! -
Combine Ingredients
Return the beef to the pot and sprinkle in your herbs (think thyme, bay leaf, or even a touch of rosemary). Pour in enough beef broth to cover everything—about 6-8 cups should do the trick. Bring to a gentle simmer, then reduce the heat to low. -
Let it Simmer
Allow the soup to simmer gently for at least 1 hour, but the longer, the better! If you can let it bubble for 2-3 hours, you’ll be rewarded with deeply infused flavors. Stir occasionally and skim off any foam that rises to the surface. -
Add Peas and Tomatoes
About 10 minutes before serving, stir in the peas and tomatoes. This maintains their vibrant color and texture. Taste and adjust seasoning with salt and pepper to your liking. Remember, balance is key! -
Serve and Enjoy
Once everything is harmoniously blended and cooked to perfection, it’s time to dish it up! Remove the bay leaf and serve the soup in warm bowls, accompanied by crusty bread or a sprinkle of fresh herbs.
Serving Suggestions
When it comes to the presentation, let’s keep it simple yet elegant. Ladle the soup into rustic bowls, and garnish with chopped parsley or a drizzle of olive oil for a touch of brightness. Serve alongside a warm loaf of sourdough bread for dipping – trust me, it’s a game changer!
Recipe Variations
- Vegetarian Update: Swap the beef for hearty mushrooms or lentils for a plant-based delight. Use vegetable broth as your base.
- Spicy Twist: Add a pinch of red pepper flakes or toss in some diced jalapeños for an extra kick.
- Herb Infusion: Swap thyme for fresh basil or dill to bring a unique flavor profile to your soup.
- Creamy Version: Finish your soup with a splash of cream or a dollop of crème fraîche for a rich, velvety texture.
Chef’s Notes
This Beef Vegetable Soup has become a staple in my kitchen over the years. Each time I make it, I find myself reminiscing about that chilly afternoon spent with my grandmother, a sprig of thyme in one hand and a ladle in the other. One memorable moment was when I realized I had run out of broth and used leftover coffee instead—don’t ask me how it happened! But you know what? It actually added a cozy depth to the flavor, reminding me that cooking is all about experimentation and finding joy in the unexpected.
FAQs and Troubleshooting
Q: Why is my soup too salty?
A: If you find your soup is over-seasoned, add a peeled, raw potato to absorb some saltiness. Let it simmer for 10–15 minutes, then remove the potato!
Q: How do I store leftovers?
A: Leftover soups can be stored in an airtight container in the fridge for up to 4 days. They also freeze beautifully for up to 3 months—just make sure to leave space in your container, as soups expand when frozen.
Q: Can I make this soup in a slow cooker?
A: Absolutely! Sauté the beef and veggies, then add everything to a slow cooker. Cook on low for 6-8 hours for a wonderful depth of flavor.
Q: My soup is too thick; how can I fix it?
A: Simply add more broth or water until you reach your desired consistency. Remember to taste and adjust seasoning as needed!
Nutritional Info
(If applicable, you can include estimated nutritional information per serving, such as calories, protein, fats, carbs, etc.)
There you have it—your go-to guide for crafting a warm, delightful pot of Beef Vegetable Soup that feels like a big hug from your kitchen. I hope you find as much joy in making it as I do. Remember, cooking is all about connection—both with the food and the people you share it with. Now go on, tie that apron, and let’s create something beautiful together!
PrintBeef Vegetable Soup

A hearty and comforting Beef Vegetable Soup filled with tender beef and fresh vegetables.
- Prep Time: 30 minutes
- Cook Time: 120 minutes
- Total Time: 150 minutes
- Yield: 6 servings 1x
- Category: Soup
- Method: Simmering
- Cuisine: American
- Diet: None
Ingredients
- 2 lbs Beef (Chuck Roast or Stew Meat)
- 3 Potatoes (Yukon Gold or Russet)
- 2 Carrots (Fresh)
- 1 cup Peas (Green Peas, Fresh or Frozen)
- 2 cups Tomatoes (Canned Diced or Fresh)
- 1 Onion (diced)
- 3 cloves Garlic (minced)
- 6–8 cups Beef Broth
- 1 tablespoon Olive Oil
- Salt and Pepper (to taste)
- Herbs (Thyme, Bay Leaf, Rosemary – to taste)
Instructions
- Prep your ingredients: Wash, peel, and chop the vegetables. Cut the beef into bite-sized pieces and season generously with salt and pepper. Let beef sit at room temperature for about 30 minutes.
- Brown the beef in a large pot with olive oil over medium-high heat until seared and browned.
- Sauté the diced onions until translucent, then add minced garlic, carrots, and potatoes, stirring well.
- Combine the beef back into the pot, add herbs, and pour in beef broth to cover everything.
- Let it simmer gently for at least 1 hour, longer for deeper flavors.
- Add peas and tomatoes about 10 minutes before serving, adjusting seasoning if needed.
- Serve in bowls with a garnish of chopped parsley or a drizzle of olive oil.
Notes
For a vegetarian version, substitute beef with mushrooms or lentils and use vegetable broth. Soup stores well in the fridge for up to 4 days or can be frozen for up to 3 months.
Nutrition
- Serving Size: 1 bowl
- Calories: 400
- Sugar: 5g
- Sodium: 600mg
- Fat: 15g
- Saturated Fat: 6g
- Unsaturated Fat: 6g
- Trans Fat: 0g
- Carbohydrates: 40g
- Fiber: 5g
- Protein: 30g
- Cholesterol: 80mg
Keywords: beef soup, hearty soup, vegetable soup, comfort food, winter soup
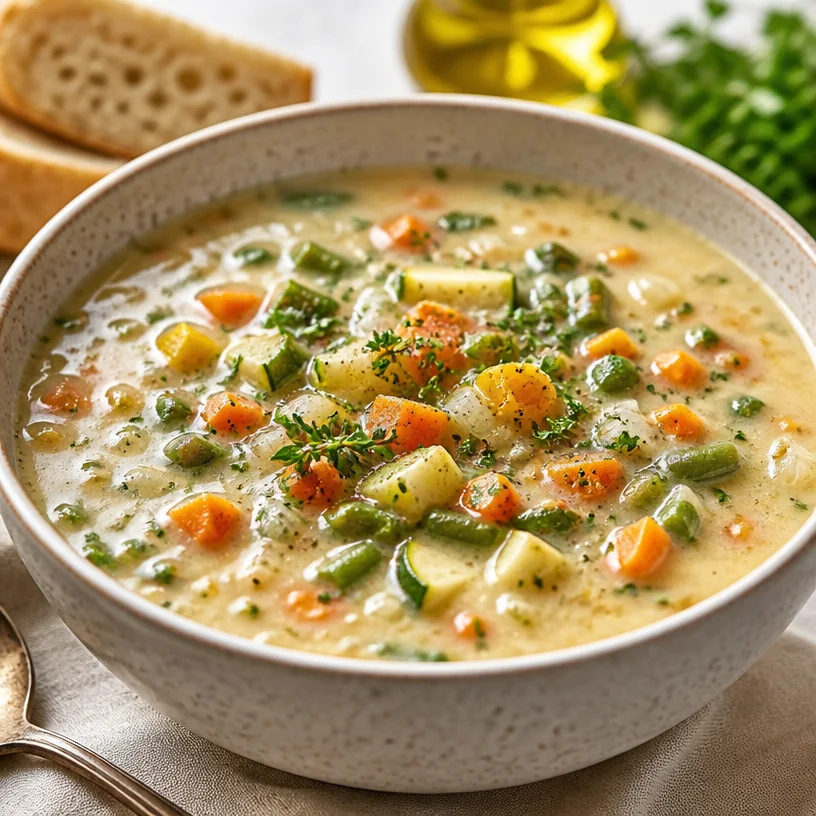
Minute Creamy Vegetable Soup for Busy Weeknights
Creamy Vegetable Soup: A Bowl of Comfort and Warmth
Hello, fellow food enthusiasts! Today, I’m thrilled to share a recipe that embodies the essence of comfort food: Creamy Vegetable Soup. As the seasons shift and the air grows crisp, there’s nothing quite like curling up with a steaming bowl of soup that warms not just your body, but your soul. This recipe is my go-to for cozy evenings at home, family gatherings, or anytime I want to bring a little happiness to the table. So, grab your apron, and let’s dive into this delightful dish!
A Warm Memory in Every Spoonful
Ah, vegetable soup! It takes me back to my childhood kitchen, where my mom would whip up a big pot of it on rainy days. The aroma of sautéed garlic and onions would waft through the house, setting the stage for something special. I can still picture my little self, perched on a stool, watching her work her magic. She always said that soup is a hug in a bowl, and I believe she was right. I remember how we would toss any vegetables we had into the mix, making it a fun, creative endeavor rather than a chore. We developed our own “clean-out-the-fridge” soup, which always turned out delicious! That’s what I love about this creamy vegetable soup — it’s flexible, forgiving, and most importantly, a way to bring people together.
Ingredients
Let’s gather our ingredients! Here’s what you’ll need for this creamy creation:
-
2 tablespoons olive oil: This is our base! A good-quality olive oil adds depth and flavor. Feel free to substitute with avocado oil or butter if you prefer.
-
1 onion, diced: Onions are the foundation of flavor in cooking. You can swap in shallots for a milder taste or green onions for a fresh touch.
-
2 cloves garlic, minced: Garlic infuses the soup with warmth. If you’re not a fan, consider using roasted garlic for a sweeter, mellower flavor.
-
3 carrots, chopped: Packed with sweetness, carrots provide color and nutrition. Baby carrots work if you’re in a pinch, just slice them up!
-
3 celery stalks, chopped: Celery adds crunch and depth. In a pinch, you can use fennel for a sweeter, more aromatic alternative.
-
1 zucchini, chopped: This summer staple brings a lovely texture to our soup. You could use yellow squash instead for a twist!
-
1 bell pepper, diced: Choose any color you love—red for sweetness, green for a bit of bite! For a smoky flavor, try using roasted poblanos.
-
1 cup green beans, chopped: Fresh green beans offer a lovely crunch. Have some frozen on hand? They’ll work great too!
-
4 cups vegetable broth: Homemade or store-bought, broth elevates the flavor. Swap with chicken broth or water if you’re in a pinch.
-
1 cup heavy cream or coconut milk: Creaminess is key! Coconut milk will add a delightful tropical essence, while dairy cream offers richness.
-
Salt and pepper to taste: Essential for bringing all those flavors together. Don’t forget to adjust as needed!
-
Fresh herbs (such as thyme or parsley) for garnish: Adds brightness and a pop of color. Basil or chives are also fantastic options!
Step-by-Step Instructions
Ready to get cooking? Let’s turn these ingredients into a comforting bowl of goodness!
-
Sauté the aromatics: In a large pot, heat the olive oil over medium heat. Add the diced onion and sauté for 2-3 minutes until translucent. Add the minced garlic and cook for an additional minute, making sure not to burn it. This step sets up the flavor base of your soup — your kitchen will smell divine!
-
Add the veggies: Toss in the chopped carrots and celery, stirring occasionally. Sauté for about 5 minutes until they begin to soften. This is where the magic starts; those veggies are soaking up all that flavor!
-
Bring in the colorful crew: Add the zucchini, bell pepper, and green beans to the pot. Stir well and let them cook for another 3-4 minutes until they’re vibrant and tender. You can already see a rainbow in your pot!
-
Pour in the broth: Carefully add the vegetable broth, ensuring all the vegetables are covered. Increase the heat until the mixture reaches a gentle boil. Once it’s bubbling, reduce the heat and let it simmer for 15-20 minutes, allowing all those lovely flavors to marry.
-
Cream it up: Stir in the heavy cream or coconut milk. If you want a thinner soup, you can add more broth at this stage. Let it cook for an additional 5 minutes to warm through. This is where the soup transforms into its creamy solace!
-
Season to perfection: Taste your soup and season with salt and pepper as needed. This is your opportunity to build flavor, so don’t shy away from seasoning!
-
Blend if desired: If you prefer a smooth texture, you can blend half or all of the soup using an immersion blender or a regular blender. For extra creaminess, blend in batches, returning the soup to the pot afterward.
-
Serve and garnish: Ladle your creamy vegetable soup into bowls and garnish with freshly chopped herbs. This little touch adds a burst of freshness and a pop of color — your guests will be impressed!
Serving Suggestions
When it comes to serving this creamy vegetable soup, less is more! I love serving it alongside crusty bread or a simple salad. A drizzle of olive oil on top just before serving elevates it even more. For those cozy nights, a sprinkle of grated cheese right on top adds a deliciously melty finish.
Recipe Variations
Looking to switch things up? Here are a few ideas to get your creative juices flowing:
-
Spicy kick: Add a teaspoon of red pepper flakes or a splash of hot sauce for a little heat!
-
Herb infusion: Try adding a bouquet garni of thyme, rosemary, or bay leaves while it simmers to introduce an aromatic herbaceous note.
-
Protein boost: Toss in some cooked chicken, beans, or tofu for added protein and heartiness.
-
Cheesy goodness: Stir in some grated cheese like cheddar or parmesan for an extra creamy, cheesy finish.
-
Seasonal swaps: Don’t hesitate to replace or add seasonal vegetables like butternut squash in the fall or peas in the spring.
Chef’s Notes
This creamy vegetable soup has evolved quite a bit over the years. I remember the first time I made it for a dinner party; I forgot I had invited a vegetarian friend! Thankfully, I had some vegetable broth on hand, and it turned out to be a hit! Now, I make sure to have different variations of this soup in my repertoire. Every season brings new veggies to play with, and I love experimenting. Each bowl tells a story, just like the memories I shared from my childhood. I hope it brings you just as much warmth and joy!
FAQs and Troubleshooting
Q: Why does my soup taste bland?
A: It’s all about seasoning! Make sure to taste as you go. Don’t be afraid to add salt, pepper, and herbs. Flavor is built layer by layer!
Q: Can I freeze this soup?
A: Absolutely! Allow the soup to cool completely before transferring it to airtight containers. It should keep in the freezer for up to 3 months. Just remember that cream can separate when reheated, so stir well!
Q: How can I make this soup vegan?
A: Simply use coconut milk instead of heavy cream and ensure your vegetable broth is vegan. This recipe is very adaptable!
Q: What if I don’t have all the ingredients?
A: Use what you’ve got! This soup is a fantastic “clean out the fridge” dish, so any leftover veggies can work. Just remember to complement textures and flavors.
Nutritional Info
While I love cooking for flavor, I also appreciate the health benefits of the ingredients we use. This creamy vegetable soup is packed with vitamins and minerals from the array of vegetables. With the addition of heavy cream or coconut milk, it also offers a boost of healthy fats.
So there you have it, my beloved food friends! A delightful, creamy vegetable soup recipe that’s sure to become a treasured staple in your kitchen. I hope you enjoy whipping it up just as much as I have over the years. Remember, cooking is about love and connection. So tie on that apron, savor the process, and let the good food moments unfold. Happy cooking!
PrintCreamy Vegetable Soup

A comforting and creamy vegetable soup, perfect for cozy evenings and family gatherings.
- Prep Time: 15 minutes
- Cook Time: 30 minutes
- Total Time: 45 minutes
- Yield: 4 servings 1x
- Category: Soup
- Method: Stovetop
- Cuisine: Comfort Food
- Diet: Vegetarian
Ingredients
- 2 tablespoons olive oil
- 1 onion, diced
- 2 cloves garlic, minced
- 3 carrots, chopped
- 3 celery stalks, chopped
- 1 zucchini, chopped
- 1 bell pepper, diced
- 1 cup green beans, chopped
- 4 cups vegetable broth
- 1 cup heavy cream or coconut milk
- Salt and pepper to taste
- Fresh herbs (such as thyme or parsley) for garnish
Instructions
- Sauté the aromatics: In a large pot, heat the olive oil over medium heat. Add the diced onion and sauté for 2-3 minutes until translucent. Add the minced garlic and cook for an additional minute.
- Add the veggies: Toss in the chopped carrots and celery, stirring occasionally. Sauté for about 5 minutes until they begin to soften.
- Bring in the colorful crew: Add the zucchini, bell pepper, and green beans to the pot. Stir well and let them cook for another 3-4 minutes until they’re vibrant and tender.
- Pour in the broth: Carefully add the vegetable broth, covering all the vegetables. Increase the heat until it reaches a gentle boil. Reduce the heat and let it simmer for 15-20 minutes.
- Cream it up: Stir in the heavy cream or coconut milk. Cook for an additional 5 minutes.
- Season to perfection: Taste your soup and season with salt and pepper as needed.
- Blend if desired: If you prefer a smooth texture, blend half or all of the soup using an immersion blender.
- Serve and garnish: Ladle your soup into bowls and garnish with freshly chopped herbs.
Notes
Serve with crusty bread or a simple salad. A drizzle of olive oil or a sprinkle of grated cheese just before serving enhances the flavor.
Nutrition
- Serving Size: 1 bowl
- Calories: 350
- Sugar: 5g
- Sodium: 400mg
- Fat: 12g
- Saturated Fat: 4g
- Unsaturated Fat: 6g
- Trans Fat: 0g
- Carbohydrates: 45g
- Fiber: 3g
- Protein: 15g
- Cholesterol: 30mg
Keywords: creamy soup, vegetable soup, comfort food, cozy recipe, easy soup

Minute One-Pan Garlic Parmesan Chicken & Potatoes Skillet
Garlic Parmesan Chicken and Potato Skillet: A Comforting Classic
Hello, fellow foodies! Today, I’m thrilled to share one of my all-time favorite dishes that packs a punch of flavor while being incredibly easy to prepare: Garlic Parmesan Chicken and Potato Skillet. This delightful meal is the epitome of comfort food, bringing together juicy chicken thighs and perfectly roasted potatoes all in one pan. It’s perfect for a weeknight dinner or a cozy gathering with friends. So, let’s dive into the flavors and joy of this dish!
A Taste of Nostalgia
You know, every recipe holds a special memory, and Garlic Parmesan Chicken and Potato Skillet is no different for me. I remember one rainy Tuesday evening when my friends had come over after a long day at work. We needed something hearty that wouldn’t keep us slaving away in the kitchen for hours. As the rain drizzled down outside, I decided to whip up this skillet meal. The aroma of garlic filling the air was enough to draw everyone into the kitchen, and soon, we were sharing laughs, stories, and more than a few “just one more bite” moments.
Sitting around the table with warm, gooey cheese falling off the tender chicken paired with golden, crispy potatoes felt like the ultimate hug in a bowl. After that night, this dish became a staple in my cooking repertoire—easy to make and even easier to enjoy. I can’t wait for you to experience that same comfort!
Ingredients
Here’s what you’ll need for this delightful dish:
-
4 chicken thighs: Juicy and tender, chicken thighs have the perfect amount of fat for flavor. If you prefer, you can substitute them with boneless, skinless chicken breasts, but remember they might cook a bit quicker.
-
4 medium potatoes, diced: Potatoes provide that comforting base for this meal. Feel free to use any variety you have on hand—Yukon gold, red, or even sweet potatoes for a different flavor profile!
-
3 tablespoons olive oil: This is our secret to achieving that lovely golden crust. If you’d like, avocado oil works similarly, but stay away from oils with strong flavors like sesame oil.
-
1 tablespoon minced garlic: Fresh garlic adds a fragrant punch. You can substitute it with garlic powder, but use about one teaspoon since it’s more concentrated.
-
1 cup grated Parmesan cheese: This cheese brings a nutty, salty flavor to the dish. Pecorino Romano can be a great alternative if you’re looking for something sharper in taste.
-
Salt and pepper to taste: Essential for elevating the dish, adjust these to your preference.
-
1 tablespoon chopped fresh parsley (for garnish): This adds a lovely pop of color and freshness to your plate. If parsley’s not your jam, try fresh basil or thyme!
Step-by-Step Instructions
Now, let’s get cooking! Follow these steps, and I promise you’ll have a delicious meal in no time.
-
Prep your ingredients: Start by washing and dicing your potatoes into bite-sized pieces. This ensures even cooking. Next, pat your chicken thighs dry with a paper towel and season both sides generously with salt and pepper. Seasoning before cooking helps lock in that flavor.
-
Heat the pan: Grab a large skillet (preferably cast iron for that perfect crust) and drizzle in the olive oil. Heat the pan over medium-high heat until the oil shimmers. This is a crucial step—make sure it’s hot enough before adding your chicken to get that glorious sear.
-
Sear the chicken: Place the chicken thighs skin-side down in the skillet. Don’t overcrowd the pan—if your skillet is small, cook in batches. Sear them for about 5-7 minutes until the skin is crispy and golden, then flip and cook for another 5 minutes. If your chicken starts to brown too much, lower the heat to medium.
-
Add the potatoes and garlic: Once the chicken is browned, toss in those diced potatoes and minced garlic around the chicken. Give them a good mix to coat everything in that residual oil and chicken flavor.
-
Cover and cook: Reduce the heat to medium-low and cover the skillet with a lid. Let it cook for about 20-25 minutes. During this time, the chicken will cook through, and the potatoes will become tender and flavor-packed. Stir occasionally to prevent sticking and ensure even cooking.
-
Add the cheese: When the chicken is cooked through (165°F internal temperature) and the potatoes are tender, sprinkle the grated Parmesan cheese evenly over the top, cover the skillet again, and let it melt for about 3-5 minutes. The melted cheese creates a creamy, delicious topping that pulls this dish together beautifully!
Serving Suggestions
Now that everything is cooked to perfection, it’s time to plate! Transfer the garlic Parmesan chicken and potato skillet onto a large serving platter. To elevate the presentation, sprinkle the dish with freshly chopped parsley. You can serve this alongside a simple green salad and a glass of your favorite white wine for a complete dining experience.
Recipe Variations
Looking to switch things up? Here are some fun variations to consider:
-
Lemon Herb: Add lemon zest and a splash of lemon juice before serving for a bright, zesty finish.
-
Spicy Kick: Toss some red pepper flakes in with the garlic for an extra layer of flavor.
-
Creamy Mushroom: Sauté sliced mushrooms when you add the garlic for a rich, earthy twist.
-
Veggie Boost: Adding some diced bell peppers or zucchini will introduce more color and flavor to the dish.
-
Herbed Cheese: Swap Parmesan for feta or goat cheese if you’re in the mood for something a bit tangier.
Chef’s Notes
This recipe has had its fair share of kitchen adventures! I remember one time experimenting with different cheeses and ended up with a crazy mix of cheddar and mozzarella. Believe me, it was a gooey disaster that littered my kitchen with cheese strings! But through those mishaps, I learned the beauty of simplicity and sticking to what works.
One last tip: Always taste as you go! Cooking is as much about your palate as it is about the recipe. Trust your instincts and adjust flavors as you see fit!
FAQs and Troubleshooting
Q: What if my chicken is undercooked?
A: No worries! Simply lower the heat and cover the skillet again, cooking for a few more minutes. Always check for the internal temperature to reach 165°F.
Q: Can I use the oven for this recipe?
A: Absolutely! You can sear the chicken on the stovetop and then transfer it to a preheated oven at 375°F to finish cooking—just make sure to use an oven-safe skillet!
Q: Why are my potatoes not crisping up?
A: Make sure your potatoes are diced evenly to ensure they cook at the same rate, and give them room to breathe in the pan. If they are packed tightly, they’ll steam instead of crisp.
Q: Can I make this recipe gluten-free?
A: Yes! All the ingredients listed are gluten-free. Just ensure your Parmesan cheese is certified gluten-free if you’re concerned about cross-contamination.
Nutritional Info
While I could give you the exact nutritional breakdown here, the best part is this dish offers a balanced combination of protein from the chicken, carbohydrates from the potatoes, and healthy fats from the olive oil. It’s not only delicious but also satisfying and nourishing!
So there you have it! Garlic Parmesan Chicken and Potato Skillet—a dish that feels like getting a warm hug while sitting at your favorite café. I hope you enjoy making this as much as I do. Tie on your apron, gather your ingredients, and let’s bring a little magic to your table tonight. Happy cooking!
PrintGarlic Parmesan Chicken and Potato Skillet

A comforting skillet meal featuring juicy chicken thighs and crispy potatoes, infused with garlic and topped with melted Parmesan.
- Prep Time: 15 minutes
- Cook Time: 30 minutes
- Total Time: 45 minutes
- Yield: 4 servings 1x
- Category: Main Course
- Method: Skillet
- Cuisine: American
- Diet: Gluten-Free
Ingredients
- 4 chicken thighs
- 4 medium potatoes, diced
- 3 tablespoons olive oil
- 1 tablespoon minced garlic
- 1 cup grated Parmesan cheese
- Salt and pepper to taste
- 1 tablespoon chopped fresh parsley (for garnish)
Instructions
- Prep your ingredients: Wash and dice the potatoes into bite-sized pieces. Pat the chicken thighs dry and season with salt and pepper.
- Heat the pan: Drizzle olive oil in a large skillet and heat over medium-high until shimmering.
- Sear the chicken: Place chicken thighs skin-side down in the skillet, searing for 5-7 minutes. Flip and cook for another 5 minutes.
- Add the potatoes and garlic: Toss in the diced potatoes and minced garlic, mixing to coat in oil and chicken flavor.
- Cover and cook: Reduce heat to medium-low, cover, and cook for 20-25 minutes until chicken is cooked through and potatoes are tender.
- Add the cheese: Sprinkle Parmesan cheese over the top, cover again, and let it melt for 3-5 minutes.
Notes
Always taste as you go to adjust flavors. For gluten-free, ensure Parmesan is certified gluten-free.
Nutrition
- Serving Size: 1 serving
- Calories: 400
- Sugar: 4g
- Sodium: 350mg
- Fat: 18g
- Saturated Fat: 6g
- Unsaturated Fat: 8g
- Trans Fat: 0g
- Carbohydrates: 32g
- Fiber: 3g
- Protein: 30g
- Cholesterol: 100mg
Keywords: chicken, skillet, comfort food, garlic, Parmesan, one-pan meal

One-Pan Chicken Romano: 20-Minute Weeknight Dinner
Crave-Worthy Chicken Romano: An Incredible Ultimate Recipe
Hey there, fellow food lovers! I’m so excited to share this amazing recipe for Chicken Romano with you. If you’re looking for a dish that feels elegant and comforting all at the same time, look no further! This dish, with its crispy golden exterior and cheesy, savory flavor, can transform any weeknight dinner into a special occasion, and it’s sure to impress even the most discerning palates.
Ellie, my dear friend—and let me tell you, she has quite the knack for finding the latest trendy restaurants—raved about a Chicken Romano dish at a little bistro downtown. As she described it, I could just envision the crispy panko crust, that lovely Romano cheese flavor, and the beautiful plating. Instantly, I was inspired to recreate it at home, not just for her but to make it a staple in my own kitchen.
This recipe is all about balance and joy. The flavors meld together beautifully, while the crispy texture plays perfectly against the tender chicken. Whether you’re hosting friends for a cozy dinner party, cooking for your family, or just indulging a little yourself on a Tuesday night, I promise this dish is here to elevate your dining experience. Plus, it’s so easy to prepare that you’ll find yourself whipping it up again and again!
So, grab your apron, pour yourself a glass of your favorite wine, and let’s dive into this crave-worthy Chicken Romano recipe!
Personal Story
Let me take you back to a delightful summer barbecue we had a few years ago. It was one of those perfect weekends, where the sun shone brightly, and the smell of good food hung in the air. I had invited over some friends and family, and I was determined to make the experience unforgettable. In the lineup was this fantastic Chicken Romano that quickly became the star of the show.
As I prepared the dish, I recalled my grandmother’s kitchen, where she taught me the importance of patience and care in cooking. I can still picture her, apron on, leaning over the stove with a spoon in hand and that cheeky grin, reminding me that cooking is an art. By the time the Chicken Romano was plated, everyone was gathered around, their conversations fading as they eyed the food in excitement. It was one of those magical moments when laughter, good vibes, and delicious smells danced around the table.
As I served the Golden Chicken Romano, I felt that familiar warmth of connection. From the first bite, everyone was hooked! It’s moments like these that fuel my love for cooking, reminding me that food is not just about sustenance; it’s about those shared experiences that linger in our hearts long after the plates are cleared.
Ingredients
So, let’s break down the ingredients you’ll need for this lovely dish!
-
4 boneless, skinless chicken breasts: The star of the show! Make sure they’re even in thickness for even cooking. If you want to substitute for a leaner option, turkey cutlets work well too.
-
1 cup grated Romano cheese: This is where the flavor magic happens. Romano has a sharper taste than Parmesan. If you can’t find it, feel free to swap it out for another hard cheese like Pecorino.
-
1 cup breadcrumbs (preferably Italian-style): They’ll give the chicken that delightful crunch. You can use panko for an extra crispy coating, or make your own from stale bread.
-
2 large eggs: These help bind everything together beautifully. For a vegan option, try using a flaxseed mixture (1 tablespoon of ground flaxseed mixed with 3 tablespoons of water) as a binding agent.
-
2 tablespoons all-purpose flour: A light dusting before you dip it into the egg mixture gives the perfect base. If you need a gluten-free option, almond flour can work wonderfully!
-
1 teaspoon garlic powder: For that extra punch of flavor! You could use fresh minced garlic, but keep in mind it might stick to the breadcrumbs.
-
1 teaspoon dried oregano: A classic herb that adds a Mediterranean flair. Fresh oregano could be chopped and substituted if available!
-
1 teaspoon salt: Essential for flavor enhancement. Adjust to taste, especially if you’re watching your sodium intake!
-
1/2 teaspoon black pepper: Just a touch for that subtle kick.
-
1/4 cup olive oil: We need this to pan-fry our chicken, creating that irresistible golden crust.
-
Fresh parsley, for garnish (optional): A beautiful touch of color and flavor. If you want to mix it up, try adding some fresh basil!
Step-by-Step Instructions
-
Prep Your Chicken: Begin by placing your chicken breasts between two pieces of plastic wrap. This helps to even them out. Grab a meat mallet or rolling pin, and gently pound the chicken until it’s about 1/2 inch thick. This not only ensures even cooking, but it also makes for a tender bite. Set aside.
-
Set Up Your Breading Station: In one shallow bowl, combine the flour, garlic powder, oregano, salt, and pepper. In a second bowl, whisk together the eggs. In a third bowl, spread out the breadcrumbs, and mix in half of the grated Romano cheese. Clear a space on your countertop to lay out the bowls in an assembly line style—trust me; this makes everything easier!
-
Dredge the Chicken: First, take each chicken breast and dip it into the flour mixture, shaking off any excess. Then, dip it into the egg mixture, ensuring it’s fully coated. Finally, press it gently into the breadcrumb mixture, making sure to cover all sides thoroughly. Place the breaded chicken on a plate.
-
Heat the Oil: In a large skillet, heat the olive oil over medium-high heat. You’ll know it’s ready when a pinch of breadcrumbs sizzles upon contact. This step is critical because it will create that crispy, golden layer we’re looking for.
-
Cook the Chicken: Once the oil is hot, carefully place the breaded chicken breasts into the skillet without overcrowding (you may need to do this in batches). Cook for about 4-5 minutes on each side, or until they’re golden brown and cooked through. To check for doneness, insert a meat thermometer into the thickest part of the chicken—160°F is your target!
-
Drain and Rest: Once cooked, transfer the chicken to a paper towel-lined plate to drain excess oil. Let them rest for a few minutes—this allows the juices to redistribute, making for an even juicier bite!
-
Plate and Garnish: Now it’s time for the fun part! Arrange your Chicken Romano on a serving platter or individual plates and sprinkle the remaining Romano cheese over the top along with fresh parsley for that beautiful visual appeal.
Serving Suggestions
This Chicken Romano is perfect served beside a fresh arugula salad tossed with lemon vinaigrette for a lovely contrast. You can also go for a simple pasta with marinara sauce or some roasted seasonal vegetables. And don’t forget a slice of crusty artisan bread to soak up all those delicious flavors!
Recipe Variations
Feeling adventurous? Here are some creative twists for your Chicken Romano:
-
Add a Kick: Try mixing crushed red pepper flakes into your breadcrumb mixture for a spicy touch.
-
Herb Variation: Swap out oregano for fresh basil or thyme for a different herbal note.
-
Cheesy Delight: Mix in some shredded mozzarella with the Romano cheese for an extra cheesy texture.
-
Zesty Twist: Add some lemon zest into the breadcrumb mixture for a refreshing citrus flavor.
-
Veggie Version: For a meatless option, try using eggplant or zucchini slices, breading them just like the chicken.
Chef’s Notes
Oh, how this recipe has evolved! It originally started as a simple breaded chicken dish, but over time, with every gathering and dinner party, it transformed into this crave-worthy Chicken Romano that I can’t get enough of. Each time I make it, I learn something new about flavors and textures that come together beautifully.
And let’s not forget the joyful moments that come along with cooking. I still chuckle when I think about the time I forgot to add the salt. My friend Sarah took a bite and, with the utmost politeness, asked, "Was it supposed to be a low-sodium version?" Lesson learned—always taste as you go!
FAQs and Troubleshooting
1. Why is my Chicken Romano soggy?
If your chicken ends up soggy, it might have been overcrowded in the pan or not cooked long enough. Ensure enough oil is heated before frying and avoid overcrowding, which can lower the oil temperature.
2. Can I bake Chicken Romano instead of frying?
Absolutely! Preheat your oven to 400°F, place the breaded chicken on a greased baking sheet, and bake for about 20-25 minutes or until golden brown and cooked through.
3. What can I serve with Chicken Romano?
This dish pairs beautifully with garlic mashed potatoes, a bright green salad, or even a side of pasta. You can choose sides based on the vibe you want to create for your meal!
4. Can I freeze Chicken Romano?
Yes, you can freeze the breaded raw chicken for up to 3 months. Just be sure to separate pieces with parchment paper to prevent sticking. When ready to cook, thaw overnight in the fridge and follow the cooking instructions as usual.
Nutritional Info
While nutritional values can vary based on specific brands and preparation methods, here’s a basic estimate for one serving of Chicken Romano (based on this recipe yielding 4 servings):
- Calories: 350
- Protein: 30g
- Fat: 20g
- Carbohydrates: 10g
- Fiber: 1g
And there you have it, folks! A delightful, delicious, and utterly crave-worthy Chicken Romano recipe that will not only satisfy your tastebuds but may even bring back your best kitchen memories. So get cooking and enjoy every moment around your table! Good food isn’t just about what’s on your plate; it’s about the love and laughter shared while you savor it. Happy cooking!
PrintCrave-Worthy Chicken Romano

A delightful Chicken Romano recipe featuring crispy, golden chicken coated in Romano cheese, perfect for any occasion.
- Prep Time: 15 minutes
- Cook Time: 30 minutes
- Total Time: 45 minutes
- Yield: 4 servings 1x
- Category: Main Course
- Method: Pan Frying
- Cuisine: Italian
- Diet: None
Ingredients
- 4 boneless, skinless chicken breasts
- 1 cup grated Romano cheese
- 1 cup breadcrumbs (preferably Italian-style)
- 2 large eggs
- 2 tablespoons all-purpose flour
- 1 teaspoon garlic powder
- 1 teaspoon dried oregano
- 1 teaspoon salt
- 1/2 teaspoon black pepper
- 1/4 cup olive oil
- Fresh parsley, for garnish (optional)
Instructions
- Prep your chicken: Place chicken breasts between plastic wrap and pound to about 1/2 inch thick. Set aside.
- Set up your breading station: Combine flour, garlic powder, oregano, salt, and pepper in one bowl; whisk eggs in another; spread breadcrumbs and mix in half of Romano cheese in a third bowl.
- Dredge the chicken: Dip each breast in flour, egg, and then breadcrumbs, ensuring all sides are coated.
- Heat the oil: In a large skillet, heat olive oil over medium-high until ready.
- Cook the chicken: Place breaded chicken in the skillet and cook for 4-5 minutes on each side until golden and cooked through.
- Drain and rest: Transfer cooked chicken to a paper towel-lined plate to drain excess oil. Let rest a few minutes.
- Plate and garnish: Arrange on a serving platter, sprinkle remaining Romano cheese, and add fresh parsley.
Notes
Serve alongside arugula salad, pasta with marinara, or roasted vegetables for a delicious meal.
Nutrition
- Serving Size: 1 serving
- Calories: 350
- Sugar: 1g
- Sodium: 400mg
- Fat: 20g
- Saturated Fat: 5g
- Unsaturated Fat: 10g
- Trans Fat: 0g
- Carbohydrates: 10g
- Fiber: 1g
- Protein: 30g
- Cholesterol: 150mg
Keywords: Chicken Romano, Italian recipe, comfort food, weeknight dinner, savory dish

Minute One-Pan Chicken Pot Pie for Busy Weeknights
Homemade Chicken Pot Pie: A Comfort Food Classic
Hello, fellow food enthusiasts! Today, we’re diving into one of my all-time favorite comfort dishes: Homemade Chicken Pot Pie. There’s just something about the buttery crust, hearty filling, and the aromatic blend of spices that can make any day feel a little brighter. Whether you’re dealing with a busy weekday or celebrating a cozy weekend at home, this dish is a warm hug on a plate.
My Chicken Pot Pie Journey
Let me take you back in time to when I first discovered the magic of Chicken Pot Pie. I was a curious young chef, eager to make my mark in the culinary world. One chilly evening, my grandmother invited me into her kitchen. She had a way of making every gathering feel special, and on this occasion, she was preparing her famous Chicken Pot Pie. The smell of sautéed onions mixed with savory chicken filled the air as she expertly rolled out the dough.
I remember standing by her side, wide-eyed with wonder, as she explained the art of creating a flaky crust. “It’s all about the butter, my dear,” she said with a wink. I watched her skillfully combine ingredients, sharing tips like a seasoned pro, and with a few quick movements, she transformed simple components into a hearty dish that could warm the coldest hearts.
That evening, as we sat around the dinner table with family, I felt a deep sense of belonging and love. And that’s the beauty of food, isn’t it? It has the power to bring us together, to create nostalgia, and to evoke memories that last a lifetime. Here I am, sharing this cherished recipe with you, hoping it will bring you as much joy as it has brought to my life.
Ingredients
Now, let’s gather our ingredients to make this delicious Chicken Pot Pie. Each element plays a pivotal role, bringing flavor, texture, and comfort to the dish. Here’s what you’ll need:
-
1 pie crust (store-bought or homemade)
Whether you choose to make it from scratch or pick it up from the store, a good crust is essential. If you’re feeling adventurous, I recommend trying a buttery homemade crust with a touch of herb seasoning for an extra layer of flavor. -
2 cups cooked chicken, shredded
You can utilize rotisserie chicken for convenience, or poach some chicken breasts for a fresher option. Just ensure it’s well-seasoned so that the overall dish shines! -
1 cup frozen mixed vegetables (peas, carrots, corn, etc.)
This handy mix saves time and adds color. You can swap it out for fresh vegetables if you want, but you might need to cook them slightly longer to ensure they soften up. -
1/3 cup butter
This is the secret to rich, flavorful filling! You could substitute it with olive oil for a lighter version, but the creaminess of butter really enhances the dish. -
1/3 cup all-purpose flour
This helps to thicken the filling. If you’re aiming for gluten-free, you can swap it out for cornstarch or a gluten-free flour blend. -
1 cup chicken broth
A flavorful broth can elevate this dish significantly. Homemade would be ideal, but store-bought works just as well—just check for low sodium options if you’re watching your salt intake. -
1 cup milk
This adds creaminess, but if you prefer a lighter option, feel free to use almond milk or any non-dairy milk substitute. -
1/2 teaspoon salt
Essential for enhancing all flavors. Adjust according to taste, especially if using salted broth. -
1/4 teaspoon black pepper
Adds a little kick! You can adjust the spice level if you enjoy a bit more heat, or even add a dash of cayenne for some flair. -
1/4 teaspoon onion powder
A great way to infuse a depth of flavor without chopping onions. Feel free to use fresh onions if you prefer. -
1/4 teaspoon garlic powder
Because garlic makes everything better! Once again, fresh garlic can replace this if you want some extra flavor—just sauté it at the beginning with your onions.
Step-by-Step Instructions
Now, let’s get to the good part: cooking! Follow these detailed steps, and I promise you’ll be rewarded with a pot pie that will make your kitchen smell heavenly.
-
Preheat the Oven
Start by preheating your oven to 425°F (220°C). This is key for achieving that golden, flaky crust once the pie is baking—you want it crispy and inviting! -
Make the Filling
In a medium saucepan over medium heat, melt the butter. Once melted, add in the flour, whisking continuously to create a roux. Cook this mixture for about 2 minutes until it bubbles and turns a light golden color. This step builds a rich flavor base! -
Add Broth and Milk
Gradually whisk in the chicken broth and milk. Stir constantly until the mixture thickens and reaches a creamy consistency—about 5 minutes. Be patient and let it come together! -
Season It Up
Once thickened, add in your salt, black pepper, onion powder, and garlic powder. Taste and adjust seasoning if necessary. This is your chance to shine—don’t skip the tasting! -
Incorporate Chicken and Veggies
Stir in the shredded chicken and frozen mixed vegetables. Mix well to ensure everything is evenly combined and coated in that luscious sauce. Let it simmer for a few minutes to heat everything through. -
Prepare the Pie Crust
If using a store-bought pie crust, carefully fit it into your pie dish. For homemade, roll it out to about 1/8-inch thickness and lay it over your pie dish, trimming excess edges. -
Fill the Crust
Pour your warm chicken filling into the crust, spreading it evenly. You want that filling to reach the edges without spilling out. -
Top It Off
Cover with another layer of pie crust, sealing the edges by pinching them together. Cut a few slits in the top to allow steam to escape. This is important to prevent a soggy bottom! -
Bake the Pie
Place the pie in the preheated oven and bake for about 30-35 minutes, or until the top is golden brown and the filling is bubbling. The aroma will be irresistible! -
Cool and Serve
Once baked, let the pie cool for about 10–15 minutes before serving. This helps the filling set up a little, making slicing easier.
Serving Suggestions
When it comes to serving your Chicken Pot Pie, presentation matters—though perfection is not the goal! Serve it warm, right in the pie dish, or plate up generous slices on individual plates. Pair it with a simple mixed green salad for a fresh contrast, and perhaps a glass of your favorite white wine. It’s a great way to unwind and savor the moment.
Recipe Variations
One of the best parts about Chicken Pot Pie is how versatile it can be! Here are a few creative twists you might consider:
- Herb-Infused Crust: Add chopped fresh herbs like parsley or thyme to your pie crust for an aromatic touch.
- Spicy Kick: Toss in some diced jalapeños or a tablespoon of hot sauce for a spicy variation.
- Mushroom Medley: Replace half of the chicken with sautéed mushrooms for an earthy flavor.
- Dairy-Free Option: Use coconut milk instead of regular milk for a rich, dairy-free version.
- Vegetarian Delight: Swap out the chicken for hearty vegetables like chickpeas, potatoes, and bell peppers for a satisfying vegetarian option.
Chef’s Notes
This recipe has been a staple in my home for years, and it’s evolved as I’ve experimented with flavors. I once mistakenly used way too much garlic powder, thinking it would be a crowd-pleaser. Turns out, a little goes a long way! My friends dubbed it the "Garlic Pot Pie," and we all had a good laugh as we doused it with copious amounts of water.
Over time, I’ve learned that the secret to a truly great Chicken Pot Pie lies in the love you put into it. Cooking is a journey—don’t be afraid to make mistakes and learn from them. Your kitchen will always be there, ready to help you create something wonderful.
FAQs and Troubleshooting
1. My crust turned out soggy! What happened?
This usually happens if the filling is too watery or if the pie isn’t baked long enough. Ensure your filling thickens properly before pouring it into the crust and pay attention to baking time.
2. Can I make this dish ahead of time?
Absolutely! You can prepare the filling a day in advance and keep it in the fridge. Just assemble the pie when you’re ready to bake it.
3. What can I do with leftovers?
Leftover Chicken Pot Pie can be stored in an airtight container in the fridge for up to 3 days. Reheat it in an oven safe dish to keep the crust crispy!
4. I don’t have a pie dish. Can I use something else?
No pie dish? No problem! You can use a casserole dish, skillet, or even make individual pot pies in ramekins. Just adjust the cooking time as needed.
Nutritional Info
While Homemade Chicken Pot Pie is undoubtedly comfort food, be mindful of portion sizes if you’re watching your calories. Each serving typically contains around 400-500 calories, depending on the crust and ingredients used.
And there you have it! A Chicken Pot Pie that’s not only delicious but also filled with love and memories. I hope this recipe inspires you to gather around your table, share good food, and create cherished moments. Remember, cooking should feel elegant but never intimidating; you’ve got this! So tie on that apron and let’s create something timeless together. Bon appétit!
PrintHomemade Chicken Pot Pie

A comforting Chicken Pot Pie with a buttery crust and savory filling, perfect for any occasion.
- Prep Time: 15 minutes
- Cook Time: 35 minutes
- Total Time: 50 minutes
- Yield: 4 servings 1x
- Category: Main Course
- Method: Baking
- Cuisine: American
- Diet: None
Ingredients
- 1 pie crust (store-bought or homemade)
- 2 cups cooked chicken, shredded
- 1 cup frozen mixed vegetables (peas, carrots, corn, etc.)
- 1/3 cup butter
- 1/3 cup all-purpose flour
- 1 cup chicken broth
- 1 cup milk
- 1/2 teaspoon salt
- 1/4 teaspoon black pepper
- 1/4 teaspoon onion powder
- 1/4 teaspoon garlic powder
Instructions
- Preheat the oven to 425°F (220°C).
- Make the filling by melting butter in a medium saucepan, then whisking in flour to create a roux.
- Add chicken broth and milk, stirring until thickened.
- Season with salt, black pepper, onion powder, and garlic powder.
- Incorporate shredded chicken and frozen mixed vegetables.
- Prepare the pie crust in the pie dish.
- Fill the crust with the warm chicken filling.
- Top with another layer of pie crust, sealing edges and cutting slits on top.
- Bake for 30-35 minutes until golden brown.
- Cool for 10-15 minutes before serving.
Notes
You can prepare the filling a day in advance, and store it in the fridge until ready to bake.
Nutrition
- Serving Size: 1 slice
- Calories: 450
- Sugar: 3g
- Sodium: 700mg
- Fat: 20g
- Saturated Fat: 10g
- Unsaturated Fat: 8g
- Trans Fat: 0g
- Carbohydrates: 40g
- Fiber: 2g
- Protein: 25g
- Cholesterol: 70mg
Keywords: chicken pot pie, comfort food, cozy dinner

15 Weeknight Dinners for When You’re Done Negotiating With Toddlers in 2026 | Fun Easy Recipes, Picky Eater Recipes, Cooking Recipes for Dinner
15 Weeknight Dinners for When You’re Done Negotiating With Toddlers in 2026
Hey there, fellow food lovers! If you’re anything like me, weeknight dinners can sometimes feel like a negotiation process worthy of a political summit. I mean, getting toddlers to eat something other than the five main food groups (chicken nuggets, mac and cheese, cereal, fruit snacks, and ice cream) can be an Olympic event of its own.
When I first embarked on my journey as a recipe creator at Ivory Apron, I was inspired not just by elegant dinners and sophisticated cuisine, but also by the experience of cooking for my little ones. It turns out the art of simplifying deliciousness while keeping it fun and inviting is a skill that serves us all, especially the parents among us. In this post, I’m thrilled to share 15 delightful weeknight dinner recipes that are simple, nourishing, and sure to please even the pickiest of eaters. These dishes will transform your dinner table into a delightful space—one that sparks joy instead of debates!
So grab your apron, and let’s dive into these weeknight wonders that will leave you and your little ones smiling—and maybe even negotiating for seconds instead of declines!
Personal Story
Speaking of negotiations, I vividly remember a particular dinner I hosted years ago. My son, then just a toddler, was determined to eat only “fun food.” He pointedly rejected my perfectly seasoned roasted veggies and opted for the brightly colored, cartoon-shaped pasta instead. That was the night I learned that presenting food in a whimsical way can be a game-changer! I vividly recall the moment I decided to up my game. I sautéed up some simple veggies but arranged them into a smiley face on his plate. Suddenly, the same food that had been “icky” just moments before transformed into an edible smile! It was a lightbulb moment—a reminder of the joy of creativity in the kitchen, especially when it comes to feeding our little ones.
With that inspiring episode in mind, I’ve crafted these recipes to be not only delicious but also visually appealing, making dinner time a time to look forward to, rather than dread. After all, who wouldn’t want to eat a “smiley face” stir-fry?
Ingredients
Here’s your shopping list (with a few helpful notes on each ingredient) for these easy weeknight dinners:
1. Protein (Chicken, Beef, Tofu, etc.)
- Tips: Choose a protein that your family loves—chicken breast or tights are great for chicken; if opting for tofu, get extra-firm for the best results.
- Substitution: Swap with legumes like chickpeas or lentils for a vegetarian option.
2. Fresh Vegetables (Carrots, Bell Peppers, Broccoli)
- Chef Insight: Colorful veggies not only make the plate pop but also provide essential vitamins. Don’t hesitate to get creative based on what’s in season!
- Substitution: Frozen veggies work in a pinch and save prep time.
3. Aromatics (Onions, Garlic)
- Tips: Fresh garlic and onions build a flavor foundation. If you’re short on time, pre-chopped or even garlic powder will do!
4. Spices & Herbs (Oregano, Basil, Paprika)
- Options: Use dried spices for convenience. Fresh herbs (like basil) are wonderful if you have them—they add an extra layer of flavor!
5. Sauce or Liquid (Soy Sauce, Stock, Tomato Sauce)
- Chef Insight: Sauces can really elevate a dish. A good stir-fry sauce or homemade marinara can change the game!
- Substitution: Vegetable or chicken stock can substitute for sauces if your kiddos prefer milder flavors.
6. Grains (Rice, Pasta, Quinoa)
- Tips: Whole grains (like quinoa) are great for nutrition. If using pasta, consider fun shapes to engage little eaters!
7. Cheese (Optional for Certain Recipes)
- Options: Cheese can transform a dish! Opt for shredded cheeses that melt easily for a smoother texture.
8. Nuts or Seeds (Optional)
- Note: Add these for crunch and nutrition, keeping in mind any nut allergies.
Step-by-Step Instructions
Let’s kick things off with our first night’s recipe: One-Pan Chicken and Veggie Bake.
-
Preheat the Oven: Set your oven to 400°F (200°C). If you want your chicken crispy, a preheated oven is key!
-
Prepare the Chicken: In a bowl, season the chicken breasts with olive oil, salt, and pepper. Here’s a pro tip: adding a squeeze of lemon will elevate the flavor!
-
Chop Your Veggies: While the chicken marinates, chop your favorite veggies into bite-sized pieces. I love using bell peppers and broccoli for vibrant color—plus they cook wonderfully together.
-
Combine on a Sheet Pan: Spread the chicken and veggies on a parchment-lined baking sheet. Make sure there’s enough space so they roast rather than steam (crowding is a no-no!).
-
Add Flavor: Sprinkle your choice of spices (oregano and paprika are favorites of mine) over everything. If your toddler loves garlic, throw in a few minced cloves!
-
Bake: Roast in the preheated oven for about 25-30 minutes, or until the chicken reaches an internal temperature of 165°F (74°C). Take a quick peek halfway through; feel free to stir!
-
Serve: Once done, let it rest for a few minutes before serving. This resting period allows the juices to redistribute, making the chicken moist and tender.
-
Enjoy: Plate it up! Serve with a side of whole grain rice or pasta, and voilà—you’ve got a family-friendly feast!
Chef Hacks: Always double up your chicken so you have leftovers for salads or wraps the next day. Bonus points for meal prep!
Serving Suggestions
Plating is key to making the dish appealing. For the One-Pan Chicken and Veggie Bake, stack the chicken on a plate, then nestle the colorful roasted veggies around it. For a touch of flair, garnish with fresh herbs or a sprinkle of cheese. Let your little ones sprinkle some parmesan on their plate; it might just seal the deal!
Recipe Variations
-
Mexican Night: Swap out chicken for seasoned ground beef or turkey and add corn. Serve with tortillas for a fun and interactive dinner!
-
Pasta Party: Instead of baking, toss everything with cooked pasta and a creamy sauce for a comforting pasta bake.
-
Veggie Delight: Go plant-based by using tofu instead of chicken and adding in mushrooms and zucchini for extra flair.
-
Herbed Chicken: Switch herbs based on your mood—rosemary and thyme make for a lovely roasted flavor.
-
Sweet and Savory: Throw a handful of dried cranberries on top before serving for a sweet burst that pairs beautifully with savory chicken.
Chef’s Notes
As I’ve refined this recipe over time, I’ve found how versatile it really is! I once added pineapple during the last five minutes of roasting, which brought a delightful sweetness that my kids adored. Remember, cooking is all about experimenting—don’t be afraid to try new things and iterate as you go. Each cooking session can yield something uniquely delightful!
FAQs and Troubleshooting
Q: My chicken came out dry. What happened?
A: Overcooking is usually the culprit! Always use a meat thermometer to check for doneness. Aim for about 165°F (74°C) for juicy chicken.
Q: Can I prep this dish ahead of time?
A: Absolutely! You can marinate the chicken and chop the veggies a day in advance. This makes weeknight dinners even easier!
Q: How do I make this healthier?
A: Opt for whole grains and load up on veggies. You can also use less oil and any low-sodium sauces.
Q: My kids refused to eat the veggies. Any tips?
A: Try making them fun shapes with cookie cutters or presenting them in a playful manner. Personalize their plates with veggie “art”!
Nutritional Info
(Per Serving approx.)
- Calories: 350
- Protein: 30g
- Carbohydrates: 40g
- Fat: 10g
- Fiber: 5g
And there you have it—15 delightful weeknight dinners that will bring joy to your table and make cooking a shared adventure with your little ones. Cook confidently, use those chef hacks, and remember that the best meals are served with a side of love and laughter. Happy cooking, and keep shining in that kitchen! Tie on your apron, pour something sparkling, and let’s create something timeless together!
PrintOne-Pan Chicken and Veggie Bake

A simple, flavorful, and visually appealing chicken and vegetable dish that’s perfect for busy weeknight dinners.
- Prep Time: 15 minutes
- Cook Time: 30 minutes
- Total Time: 45 minutes
- Yield: 4 servings 1x
- Category: Main Course
- Method: Baking
- Cuisine: American
- Diet: Gluten-Free, Dairy-Free
Ingredients
- 1 lb Chicken Breasts
- 2 tbsp Olive Oil
- Salt to taste
- Pepper to taste
- 1 Lemon (squeeze for flavor)
- 2 cups Fresh Vegetables (Carrots, Bell Peppers, Broccoli)
- 2 cloves Garlic (minced)
- 1 tsp Oregano
- 1 tsp Paprika
- 2 cups Whole Grain Rice or Pasta (for serving)
Instructions
- Preheat the oven to 400°F (200°C).
- Prepare the chicken by seasoning it with olive oil, salt, and pepper. Add a squeeze of lemon for extra flavor.
- Chop your chosen veggies into bite-sized pieces.
- Combine the chicken and veggies on a parchment-lined baking sheet, ensuring there’s enough space.
- Add spices like oregano and paprika, and minced garlic if desired.
- Bake for 25-30 minutes until the chicken reaches 165°F (74°C).
- Serve the dish with whole grain rice or pasta and enjoy!
Notes
Consider making the meal prep easier by chopping veggies and marinating chicken a day in advance.
Nutrition
- Serving Size: 1 serving
- Calories: 350
- Sugar: 3g
- Sodium: 300mg
- Fat: 10g
- Saturated Fat: 1.5g
- Unsaturated Fat: 8g
- Trans Fat: 0g
- Carbohydrates: 40g
- Fiber: 5g
- Protein: 30g
- Cholesterol: 70mg
Keywords: chicken, weeknight dinners, family-friendly, easy recipes, healthy meals

Low-Carb Fish Taco Bowls
Dive Into Deliciousness: Low-Carb Fish Taco Bowls
Welcome back to the kitchen, foodie friends! Today, I’m excited to take you on an unforgettable culinary journey with one of my favorite dishes: Low-Carb Fish Taco Bowls. This recipe not only showcases the beautiful flavors of fresh ingredients but also embraces a low-carb lifestyle. Trust me; dinner will never feel boring again!
Fish tacos are a beloved classic, and for good reason. The blend of fresh fish, zesty toppings, and creamy sauces creates a delightful explosion of flavors in every bite. When you combine that with gorgeous cauliflower rice and the crunch of sweet and spicy coleslaw, you’ve got yourself a taco bowl that feels indulgent yet utterly wholesome.
Picture this: you’re perched at your table with family or friends, surrounded by laughter and stories, as you dig into your vibrant bowls that look as stunning as they taste. That’s what I want for you! So, buckle up your apron, and let’s get cooking!
A Whiff of Nostalgia: My Fish Taco Adventure
While I adore every inch of food, fish tacos hold a special place in my heart. I remember the very first time I tried them—warm summer evenings spent near the coast, the sound of waves crashing, and the sweet scent of salt in the air. There was a tiny shack that served the most magnificent fish tacos; their creations were loaded with freshly battered fish, a smooth chipotle sauce, and a sprinkle of lime.
Every bite was like a mini-vacation on my plate! I began experimenting with my own versions, steering toward healthier options while not compromising that beachy spirit. The result? A low-carb fish taco bowl that captures the essence of those summer nights but fits seamlessly into everyday life.
What You’ll Need: Ingredients
Let’s break down the ingredients you’ll need to nail these Low-Carb Fish Taco Bowls:
-
4 Frozen Cod Fillets
Cod is mild and flaky, making it a great choice for tacos! You can substitute with tilapia or salmon if you prefer a different fish. Just keep an eye on cooking times, as they may vary! -
2 cups Pineapple Lime Cauliflower Rice
This is a delightful low-carb swap for traditional rice. If you haven’t got the pineapple lime flavor, you can use plain cauliflower rice and add a splash of lime juice and bits of fresh pineapple to boost those tropical vibes! -
2 cups Sweet and Spicy Coleslaw
Coleslaw adds a fantastic crunch! If you’re short on time, grab a pre-made one from the store, or make your own with cabbage, carrots, and your favorite dressing. It’s the perfect complement to the fish! -
2 tbsp Melted Unsalted Butter
This will keep the fish juicy. You could use olive oil for a healthier fat option if you’d like! -
2 tbsp Taco Seasoning
Homemade or store-bought, this is what brings the flavor pop! If you need a spice-free option, try a mix of cumin and smoked paprika instead. -
¼ cup Sour Cream (or Greek Yogurt)
Totally switching up the creaminess! Greek yogurt is a lighter option, and you could even use dairy-free yogurt if necessary. -
1½ tsp Lime Juice
Fresh is always best! It brightens up the dish and gives that zesty kick! -
1 tsp Honey
This adds a hint of sweetness to balance out the tang. Feel free to substitute with agave or maple syrup if you prefer. -
1 tbsp Milk
You can use any milk you love—dairy or non-dairy works! -
Pinch of Salt
Never underestimate the power of salt; it enhances all the flavors coming together! -
1 Sliced Avocado
Creamy goodness! An absolute must; avocado elevates these bowls. You could also try using guacamole for a fun twist! -
¼ cup Chopped Cilantro
For freshness and a pop of color; cilantro elevates the dish. If you’re not a fan, some chopped green onions could work as a fun substitute!
Let’s Get Cooking: Step-by-Step Instructions
Step 1: Prepare the Fish
Start by preheating your oven to 375°F (190°C). While it warms up, take the frozen cod fillets and pat them dry with some paper towels. This will help them crisp up beautifully in the oven. Next, brush the fillets with the melted unsalted butter, then sprinkle on the taco seasoning, making sure to coat them well. If you love heat, feel free to add a pinch of cayenne pepper for a zesty kick!
Step 2: Bake the Fillets
Arrange the seasoned fish fillets on a baking sheet lined with parchment paper or a silicone mat (hello, easy clean-up!). Bake them in the oven for about 15-20 minutes or until the fish flakes easily with a fork. The cooking time may vary based on the thickness of your fillets, so keep an eye on them—no one wants overcooked, rubbery fish.
Step 3: Cook the Cauliflower Rice
While the fish is baking, let’s get that cauliflower rice going. In a skillet over medium heat, toss in the pineapple lime cauliflower rice. Cook for about 5-7 minutes, stirring occasionally until it’s heated through. Don’t overcook it; we want it to remain light and fluffy! Adding a pinch of salt during this step helps amp up the flavors!
Step 4: Assemble the Creamy Sauce
In a small bowl, mix together the sour cream (or Greek yogurt), lime juice, honey, milk, and a pinch of salt. If your sauce is too thick, you can always add a splash more milk until you reach a creamy but pourable consistency. This is the magic sauce that will tie everything together.
Step 5: Enjoy the Crunch
Now let’s whip up that sweet and spicy coleslaw! If you’re using pre-made coleslaw, you might want to add a little bump of flavor with extra lime juice or a touch more honey. For homemade, simply toss your shredded cabbage and carrots with your favorite dressing—easy peasy!
Step 6: Prepare the Avocado and Cilantro
Slice the avocado while everything is cooking, and chop up that fresh cilantro! The avocado adds creaminess, while cilantro adds freshness. You’ll only need a sprinkle for garnish before digging in!
Step 7: Bowl Building!
Now, it’s time to create your beautiful taco bowls! Start by spooning a generous amount of cauliflower rice as your base, then place a piece of your perfectly baked fish on top. Next, pile on that sweet and spicy coleslaw, drizzle with the creamy sauce, and finish off with sliced avocado and chopped cilantro.
Serving Suggestions
When it comes to plating, think vibrant and rustic! You can serve everything right in bowls for a casual vibe, or you can arrange each component on a large platter, allowing guests to build their own taco bowls. The key is to keep it colorful and inviting! A sprinkle of extra cilantro or even some lime wedges on the side can add a delightful pop of freshness.
Recipe Variations
-
Zesty Shrimp Swap: Try swapping out the cod with shrimp! Just adjust the cooking time; shrimp cooks much quicker and offers that fantastic seafood flavor.
-
Spicy Fish Twist: Toss your fish in a spicy chipotle sauce before baking for an extra kick!
-
Grain-Free Options: Use shredded lettuce instead of cauliflower rice for those looking to ditch carbs altogether.
-
Different Proteins: Chicken or turkey seasoned with taco spices works exceptionally well for those who aren’t in the mood for fish!
-
Dairy-Free Delight: Substitute the sour cream with avocado yogurt or cashew cream for a smooth, dairy-free sauce.
Chef’s Notes
I’ll let you in on a little secret—this recipe evolves constantly! Some nights, I swap the coleslaw for mango salsa for a fruity twist. Other times, we garnish with pickled onions for an extra zing. Kitchen creations are always a reflection of personal taste and the ingredients you have on hand, so feel free to get creative! And if your kitchen gets a little messy, remember, it’s all part of the fun!
FAQs and Troubleshooting
Q1: What if my fish sticks to the baking sheet?
Use parchment paper or a silicone baking mat to prevent sticking. Plus, ensure the fillets are dry before seasoning!
Q2: Can I use fresh fish instead of frozen?
Absolutely! Fresh fish will work beautifully. Just adjust the cooking time, as fresh fillets may cook faster than frozen.
Q3: How do I store leftovers?
Store your leftover fish taco bowls in airtight containers in the fridge for up to two days. Reheat gently in the oven or microwave!
Q4: My sauce is too thick—what should I do?
No worries! Just add a splash more milk to thin it out. The goal is a smooth, creamy consistency.
So, what are you waiting for? Grab your apron, assemble those fresh ingredients, and indulge in these Low-Carb Fish Taco Bowls. This recipe combines flavor, freshness, and flexibility, making it perfect for any occasion! Maybe invite over a friend, sip some sparkling water, and share those home-cooked moments.
I can’t wait to hear how your dish turns out! Happy cooking!
PrintLow-Carb Fish Taco Bowls

Indulge in these vibrant Low-Carb Fish Taco Bowls featuring fresh fish, cauliflower rice, and a crunchy coleslaw, perfect for a wholesome dinner.
- Prep Time: 15 minutes
- Cook Time: 30 minutes
- Total Time: 45 minutes
- Yield: 4 servings 1x
- Category: Main Course
- Method: Baking
- Cuisine: Mexican
- Diet: Low-Carb
Ingredients
- 4 Frozen Cod Fillets
- 2 cups Pineapple Lime Cauliflower Rice
- 2 cups Sweet and Spicy Coleslaw
- 2 tbsp Melted Unsalted Butter
- 2 tbsp Taco Seasoning
- ¼ cup Sour Cream (or Greek Yogurt)
- 1½ tsp Lime Juice
- 1 tsp Honey
- 1 tbsp Milk
- Pinch of Salt
- 1 Sliced Avocado
- ¼ cup Chopped Cilantro
Instructions
- Preheat your oven to 375°F (190°C). Pat the frozen cod fillets dry with paper towels. Brush with melted unsalted butter and sprinkle with taco seasoning.
- Arrange the seasoned fish fillets on a lined baking sheet. Bake for 15-20 minutes or until the fish flakes easily.
- While the fish is baking, heat the pineapple lime cauliflower rice in a skillet over medium heat for 5-7 minutes.
- Mix sour cream (or Greek yogurt), lime juice, honey, milk, and a pinch of salt in a small bowl to make the creamy sauce.
- Whip up the sweet and spicy coleslaw, or enhance store-bought coleslaw with extra lime juice.
- Slice the avocado and chop fresh cilantro for garnish.
- Build your taco bowls by spooning cauliflower rice, topping with baked fish, coleslaw, creamy sauce, sliced avocado, and cilantro.
Notes
Feel free to substitute ingredients based on personal preference, such as using shrimp instead of cod or incorporating mango salsa for a fruity twist.
Nutrition
- Serving Size: 1 bowl
- Calories: 350
- Sugar: 5g
- Sodium: 400mg
- Fat: 12g
- Saturated Fat: 4g
- Unsaturated Fat: 6g
- Trans Fat: 0g
- Carbohydrates: 45g
- Fiber: 3g
- Protein: 15g
- Cholesterol: 30mg
Keywords: Fish Taco, Low-Carb, Healthy Dinner, Mexican Cuisine, Taco Bowls