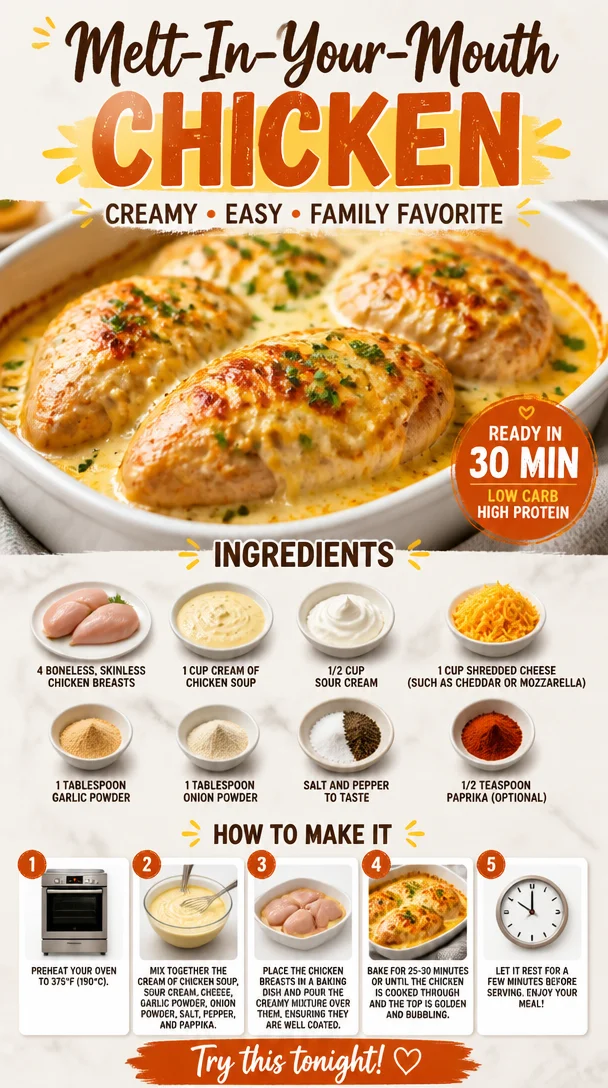
Melt-In-Your-Mouth Chicken
Melt-In-Your-Mouth Chicken: The Ultimate Comfort Dish
Hello, fellow food lovers! If you’re anything like me, there’s nothing quite like stepping into the kitchen, apron on, armed with delicious ingredients, ready to create something beautiful. Today, we’re diving into a recipe that is sure to become a beloved staple in your home: Melt-In-Your-Mouth Chicken. This dish embodies everything I love about cooking—rich flavors, creamy textures, and the ability to make any day feel a little more special.
Imagine this: It’s a chilly evening, and you’ve just wrapped up a long day. You enter your cozy kitchen, flick on the lights, and set out to make a comforting meal that warms the heart and home. Each time you take a bite of this succulent chicken, it’s like wrapping yourself in a warm hug. Trust me, whether you’re looking to impress your friends or just treating yourself, this dish is your new best friend. So, let’s roll up our sleeves, and get cooking!
My Chicken Journey
Let me take you on a little trip down memory lane. When I was growing up, my mom made a version of this dish every other week. It became an unspoken family tradition, an ingredient in our stories around the dinner table. We would set a big table, lights glaring against the soft glow of candles, and as we dug into the melt-in-your-mouth chicken, laughter would fill the air, dancing through the aromas of tasty spices.
One particular evening stands out vividly in my mind. It was my little brother’s birthday, and amidst the cake and presents, my mom’s chicken was the star of the show. Friends and family gathered, forks clinking against plates, voices raised in laughter, as we savored each tender bite. The smiles on everyone’s faces were irreplaceable. Afterward, my mom shared her secret to the perfect creamy sauce—a combination of cream of chicken soup and sour cream. Now, it’s my turn to share that love and warmth through this recipe with you.
Ingredients
Gather round, friends! Here’s what you’ll need to whip up this delightful dish:
-
4 boneless, skinless chicken breasts
This is your main event! Choose high-quality chicken for the best flavor. If you’re in a pinch, you can substitute with chicken thighs for a richer taste that also holds moisture beautifully. -
1 cup cream of chicken soup
The magic ingredient! This creamy goodness provides a rich base. If you’re searching for a lighter alternative, look for low-fat versions or make your own using chicken broth and a roux. -
1/2 cup sour cream
Creamy and tangy, sour cream adds depth. Greek yogurt can be an excellent substitute, giving you that same creaminess with a lovely tang! -
1 cup shredded cheese (cheddar or mozzarella)
Give or take, depending on your cheese preference! Cheddar brings a sharp bite, while mozzarella melts beautifully. Feel free to experiment with pepper jack for a spicy kick! -
1 tablespoon garlic powder
A home-cooked flavor must-have! You can use fresh minced garlic if you prefer—just remember, one clove roughly equals half a teaspoon of garlic powder. -
1 tablespoon onion powder
A great base flavor! If you want to swap it for fresh onion, about 1/4 cup of finely chopped onion will work as well. -
Salt and pepper to taste
Essential for bringing out the flavors! Don’t be shy here; taste as you go, and season to your liking. -
1/2 teaspoon paprika (optional)
Paprika adds a beautiful color and mild flavor. If you’re feeling adventurous, smoked paprika is a fantastic twist that adds a lovely flavor complexity.
Step-by-Step Instructions
Ready to cook? Let’s dive into the magic of creating this luxurious dish step by step!
Step 1: Preheat and Prepare
Start by preheating your oven to 350°F (175°C). Meanwhile, take those chicken breasts and pat them dry with a paper towel. A dry chicken will sear and cook better! Since we’re baking, you won’t get a crispy skin, but we’ll achieve tenderness and flavor that will leave you speechless.
Step 2: Season the Chicken
Sprinkle salt, pepper, garlic powder, onion powder, and paprika evenly over both sides of each chicken breast. Seasoning is key here! Giving your chicken a good rub ensures that every bite is flavorful. Let it sit for about 5 minutes to absorb those flavors while you prepare the creamy sauce.
Step 3: Mix the Sauce
In a mixing bowl, combine the cream of chicken soup and sour cream until smooth. Fold in the shredded cheese (saving a bit for topping later!). This creates a rich, luscious sauce that will blanket your chicken like a cozy comforter.
Step 4: Assemble
In a greased, oven-proof dish, place your seasoned chicken breasts. Spoon the creamy cheese mixture generously over the chicken, making sure each piece is blanketed thoroughly. No chicken left behind!
Step 5: Bake
Cover the dish with aluminum foil (remember to avoid letting the foil touch the cheese mixture) and bake for 25 minutes. After 25 minutes, remove the foil and sprinkle the reserved cheese on top. Bake uncovered for an additional 15-20 minutes, or until the chicken is cooked through and bubbling.
Step 6: Rest and Serve
Once out of the oven, let your chicken rest for five minutes. This is a crucial step that allows the juices to redistribute! Trust me, your patience will be rewarded.
Serving Suggestions
To serve your Melt-In-Your-Mouth Chicken, plate it up with a heap of fluffy mashed potatoes or a side of roasted vegetables. Drizzle some of that creamy sauce from the baking dish over the top to make it truly stunning. Add a sprig of fresh parsley or a squeeze of lemon for a pop of color and a hint of brightness.
This dish can also shine alongside a simple green salad or your favorite crusty bread, perfect for scooping up that creamy goodness.
Recipe Variations
-
Herb-Infused Chicken: Add a tablespoon of minced fresh herbs like thyme or rosemary for an aromatic twist.
-
Spicy Kick: Mix in chopped jalapeños or a dash of hot sauce to the sauce mixture for a spicy kick.
-
Mushroom Delight: Sauté some mushrooms and stir them into the sauce before pouring it over the chicken for an earthy flavor.
-
Lighter Version: Use low-fat cream of chicken soup and Greek yogurt instead of sour cream for a healthier twist without sacrificing the delicious taste.
-
Citrus Zest: A tablespoon of lemon juice or zest in the sauce adds a refreshing bite that cuts through the creaminess.
Chef’s Notes
As I reflect on how this recipe has evolved in my kitchen, it’s brought me closer to loved ones, just as it did in my childhood. I remember once I tried to swap out the sour cream with a non-dairy version during one of my dinner parties, and while it didn’t turn out quite as I had hoped, my guests laughed it off, proving that it’s really all about the company and the love shared at the table.
Cooking is a journey. Embrace the mess, the mishaps, and the splendid successes!
FAQs and Troubleshooting
Q: Why does my chicken still seem raw after baking?
A: Ensure your oven is properly preheated and check the internal temperature of the chicken. It should reach 165°F (75°C) to be safe to eat.
Q: Can I use frozen chicken?
A: It’s best to defrost chicken breasts before cooking for even cooking. If you decide to use frozen chicken, increase baking time and ensure it reaches the appropriate temperature.
Q: Can I make this recipe in advance?
A: Absolutely! Prep the dish, cover it tightly, and store it in the fridge for up to 24 hours. Bake when ready, adding a few extra minutes to the time as needed.
Q: What should I do if the sauce is too thick?
A: If your sauce turns out too thick, whisk in a splash of chicken broth or milk until you reach your desired consistency before pouring it over the chicken.
Now you’re all set to create a melt-in-your-mouth experience that is sure to delight! This easy-going recipe marries simplicity with elegance, bringing the spirit of home cooking to your table. I can’t wait to hear all about your kitchen adventures and the smiles you’ll create with this dish. Happy cooking!
PrintMelt-In-Your-Mouth Chicken

A comforting dish featuring tender chicken breasts smothered in a rich, creamy sauce, perfect for any cozy evening.
- Prep Time: 15 minutes
- Cook Time: 40 minutes
- Total Time: 55 minutes
- Yield: 4 servings 1x
- Category: Main Course
- Method: Baking
- Cuisine: American
- Diet: None
Ingredients
- 4 boneless, skinless chicken breasts
- 1 cup cream of chicken soup
- 1/2 cup sour cream
- 1 cup shredded cheese (cheddar or mozzarella)
- 1 tablespoon garlic powder
- 1 tablespoon onion powder
- Salt and pepper to taste
- 1/2 teaspoon paprika (optional)
Instructions
- Preheat your oven to 350°F (175°C) and pat the chicken dry.
- Sprinkle salt, pepper, garlic powder, onion powder, and paprika over both sides of the chicken.
- Combine the cream of chicken soup and sour cream in a bowl until smooth, then fold in the shredded cheese.
- Place the seasoned chicken in a greased oven-proof dish and cover with the creamy cheese mixture.
- Cover with aluminum foil and bake for 25 minutes, then uncover and sprinkle on reserved cheese before baking for an additional 15-20 minutes.
- Let the chicken rest for five minutes before serving.
Notes
Serve with fluffy mashed potatoes or roasted vegetables. For additional flavor, consider adding fresh herbs or a squeeze of lemon.
Nutrition
- Serving Size: 1 serving
- Calories: 350
- Sugar: 5g
- Sodium: 400mg
- Fat: 12g
- Saturated Fat: 4g
- Unsaturated Fat: 6g
- Trans Fat: 0g
- Carbohydrates: 45g
- Fiber: 3g
- Protein: 15g
- Cholesterol: 30mg
Keywords: chicken, comfort food, baked chicken, creamy chicken, family recipe
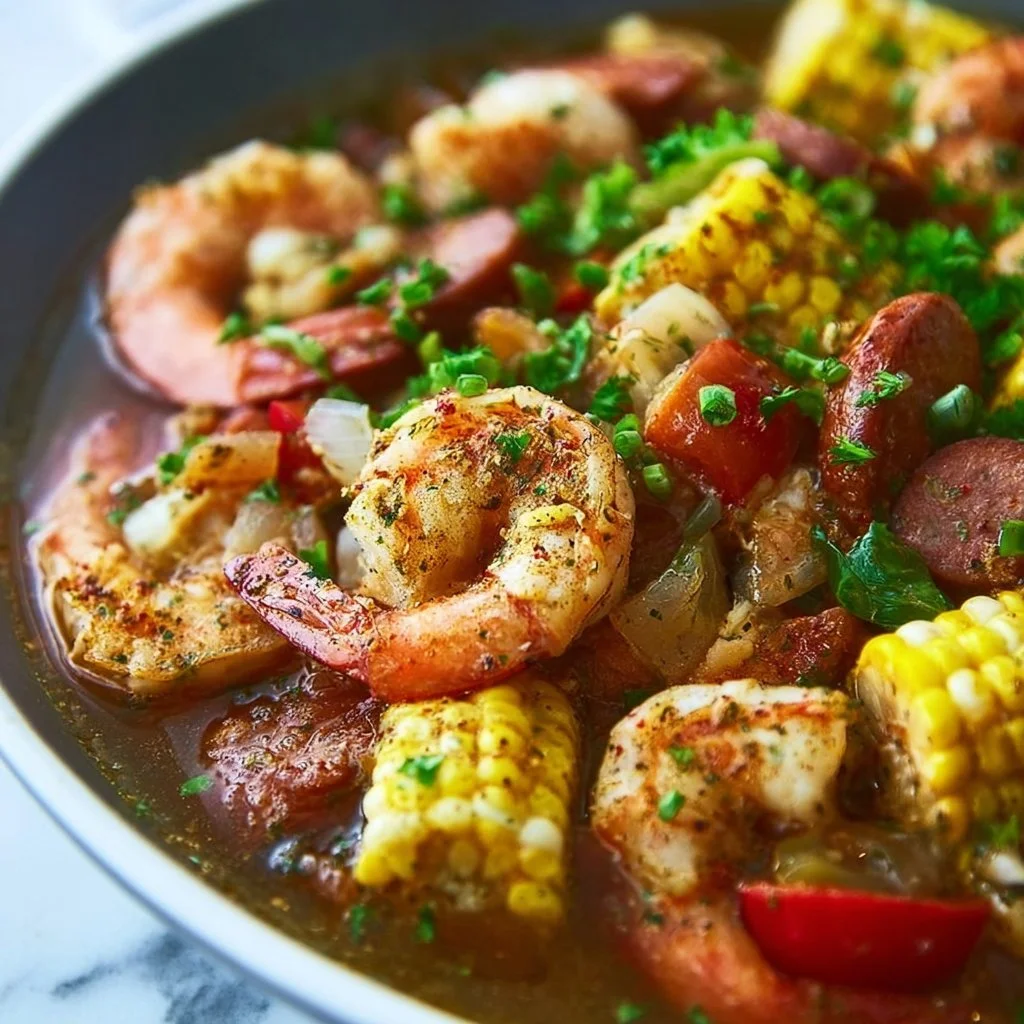
Slow Cooker Shrimp Boil
# Slow Cooker Shrimp Boil: An Effortless Feast

## Introduction

Hey, fellow food lovers! If you’re looking for a laid-back, crowd-pleasing dinner that has all your favorite flavors, you’ve landed in the right place. Today, we're diving into the world of a classic Southern tradition with a twist: a Slow Cooker Shrimp Boil! Picture this — succulent shrimp, tender potatoes, zesty sausage, and sweet corn all melting together in a symphony of flavors. Yep, it’s about to get delicious!

Now, I know what you might be thinking. "A shrimp boil? Isn’t that complicated?" Well, let me assure you, my friend, it doesn't have to be! With the trusty slow cooker, you can kick back and enjoy the aroma of the sea as it fills your kitchen while you prepare for a cozy dinner with friends or family. Plus, the most beautiful part of cooking is sharing a meal that bonds us together, so let’s make sure it’s a celebration worth remembering!

In this blog post, I'll guide you through my personal touch on the shrimp boil, along with stories that will make you smile, tips that’ll keep you cooking like a pro, and of course, that easy-breezy shine of effortless elegance that I strive for here at Ivory Apron. So, grab your apron, prepare to be whisked away to seaside vibes, and let’s get cooking!

## Personal Story

This shrimp boil holds a special place in my heart, just like the sun-drenched summer days spent at my grandparents' beach house. Every Fourth of July, the tradition was simple yet magical: a huge pot simmering outside, the sound of laughter floating through the salty air, and friends and family gathered around with makeshift tables made of picnic blankets.

I can still picture my uncle Mike proudly wearing his oversized bib, ready to tackle the feast. The dogs would trot around, hoping for a stray corn kernel, and my grandmother would squeeze lemon over the spicy, juicy shrimp, urging us all to dig in. There was something undeniably satisfying about the communal spirit of a shrimp boil — hands messy, laughter loud, and everyone instantly transformed into a family.

When I moved away and began hosting my own gatherings, I wanted to capture that same spontaneous joy. Thus, the slow cooker version was born! It allows me to recreate those cherished memories without the fuss of standing over a boiling pot in the heat. Plus, it gives me time to relax and mingle with my guests, just like those sunny days at the beach.

## Ingredients

Let’s make sure you have everything you need to whip up this delectable dish. Here’s your shopping list, along with some tips for each ingredient:

- **1 pound shrimp, deveined**
  - Fresh or frozen works great! If using frozen shrimp, just be sure to thaw them in the fridge overnight. Can't find shrimp? Try substituting with chicken or even lobster for a twist.

- **2 pounds potatoes, quartered**
  - I love using small baby potatoes — they cook evenly and are so tender! If you’re short on time, you can use pre-cut potatoes. Sweet potatoes can also add a lovely sweetness to the dish.

- **1 pound smoked sausage, sliced**
  - Andouille is classic, but don’t hesitate to explore! Turkey sausage is a lighter option, or you could even try chorizo for a spicy kick.

- **4 ears corn, halved**
  - Fresh corn brings a sweetness that’s hard to beat. Canned corn can substitute in a pinch, but it will lack that crunch. If you can’t find corn on the cob, frozen corn works beautifully too.

- **2 tablespoons Old Bay seasoning**
  - This iconic blend is a must! If you can’t find Old Bay, try a mix of paprika, garlic powder, and a hint of cayenne for heat.

- **4 cups water**
  - For the best flavor, consider using seafood stock or vegetable broth instead!

- **Salt and pepper to taste**
  - A little seasoning goes a long way. Start with a pinch and adjust as you go; you can always add more, but you can’t take it out!

- **Lemon wedges (for serving)**
  - Fresh lemon brightens up the dish, so don’t skip it! A twist of lime also offers a delightful twist.

## Step-by-Step Instructions

Alright, let’s roll up those sleeves and get to cooking. This slow cooker shrimp boil is as simple as it gets, and I’ll guide you through each step.

1. **Prepare Your Ingredients**: Start by washing your potatoes and corn. Quarter those potatoes and cut the corn in half. Give your shrimp a good rinse if they’re fresh. You want them sparkling clean!

2. **Layer the Ingredients**: In your slow cooker, begin by adding the quartered potatoes. They’ll need a little more time to cook than the other ingredients, so we’re giving them a head start. Next, layer on the sausage slices — this is where the flavor starts to build!

3. **Add Corn and Water**: Toss the corn halves into the pot, followed by the Old Bay seasoning and the water (or stock if you opted for that). Make sure to stir a little to evenly distribute the spices — we want every bite packed with flavor!

4. **Set the Slow Cooker**: Cover the slow cooker and set it on low for about 4 hours. This is the beauty of slow cooking — you can go about your day and let those flavors meld beautifully without any fuss.

5. **Check the Potatoes**: After 4 hours, take a quick peek and poke the potatoes with a fork. If they’re tender, it’s time to add in your shrimp. If they need more time, let them go for another half hour or so.

6. **Shrimp Power!**: When the potatoes are just right, stir in the shrimp. They cook quickly, so just let them simmer for about 15-20 minutes on low until they turn pink and opaque. This is where the magic happens — they soak up all those fantastic flavors from the broth!

7. **Season to Taste**: Before serving, taste a bite! Add salt or pepper if needed to elevate those flavors. You can always add more Old Bay if you’re feeling adventurous!

8. **Plate It Up**: Once everything is cooked just right, you’re ready to serve. Carefully scoop out the shrimp, potatoes, corn, and sausage into a large bowl or platter, letting that juicy broth pool around the bottom.

## Serving Suggestions

Here’s where the fun really begins! Serve your slow cooker shrimp boil family-style on a big, beautiful platter. Don’t forget to garnish with the lemon wedges — they’re an essential part of the whole experience. Encourage everyone to dig in with their hands, just like our beach gatherings. If you want to bring a touch of elegance, consider laying down some parchment paper on the table to catch those flavorful drips.

Pair it with a crisp green salad or some crusty bread to soak up the tasty broth. And don’t skimp on the drinks — sparkling lemonade or a chilled white wine would complement this dish beautifully!

## Recipe Variations

Feeling creative? Here are a few fun variations you can try:

1. **Spicy Kick**: Add sliced jalapeños or sprinkle with red pepper flakes for some extra heat.
2. **Herbed Delight**: Toss in freshly chopped parsley or dill right before serving for a fresh finish.
3. **Cajun Twist**: Swap Old Bay for a Cajun seasoning blend to give it that southern flair.
4. **Veggie Boost**: Add bell peppers, zucchini, or even artichokes for a pop of color and nutrition!
5. **Gluten-Free Twist**: Make sure to choose gluten-free sausage and paired ingredients, if required!

## Chef's Notes

I remember my first attempts at hosting a shrimp boil; I was so eager to impress! I barely sat down, running back and forth to the kitchen. One time, I accidentally sent a guest in search of napkins, but they came back with a family-sized pack of paper towels instead! We had a good laugh, and from that moment on, I learned to embrace the chaos of hosting. This shrink boil has evolved through the years — adding personal touches from each gathering and transforming into a staple on my dining table.

Oh, and a little tip: don’t forget to enjoy the process! If you find yourself feeling stressed, slow down and savor the moments. That’s what cooking is all about — creating spaces for connection, laughter, and joy.

## FAQs and Troubleshooting

1. **Why did my shrimp turn out rubbery?**
   - Overcooking is the culprit! Be sure to add the shrimp toward the end of the cooking time. They're quick to cook, so keep an eye on them.

2. **Can I make this ahead of time?**
   - Absolutely! Prep your potatoes and sausage, and layer everything in the slow cooker. Cook it when you’re ready, or put it in the fridge and reheat it on low when it’s party time!

3. **What can I do with leftovers?**
   - You’re in luck! Use leftover shrimp and sausage in a pasta dish, stir them into a rice bowl, or throw them in an omelet for a tasty breakfast!

4. **How can I make it spicier?**
   - If you like the heat, be bold! Add some cayenne pepper to the Old Bay, or toss in those jalapeños mentioned earlier to elevate the flavor profile.

## Nutritional Info

Although I refrain from being overly focused on numbers, here's an approximate breakdown per serving:

- **Calories**: 350
- **Protein**: 25g
- **Carbohydrates**: 45g
- **Fat**: 12g

Remember, this recipe is about enjoying good food and good company, so take the nutritional info lightly and delight in the flavors!

---

Now that you’ve got everything you need to recreate this Slow Cooker Shrimp Boil, I can’t wait for you to gather your loved ones and serve it up! Cooking is such a beautiful experience, and I hope this dish brings you as much joy as it brings me. Here’s to heartfelt gatherings, flavorful adventures, and making memories around the table. Happy cooking!
Slow Cooker Shrimp Boil

A classic Southern shrimp boil made easy in a slow cooker, featuring shrimp, potatoes, sausage, and corn with zesty flavors.
- Prep Time: 15 minutes
- Cook Time: 240 minutes
- Total Time: 255 minutes
- Yield: 4 servings 1x
- Category: Main Course
- Method: Slow Cooking
- Cuisine: Southern
- Diet: Seafood
Ingredients
- 1 pound shrimp, deveined
- 2 pounds potatoes, quartered
- 1 pound smoked sausage, sliced
- 4 ears corn, halved
- 2 tablespoons Old Bay seasoning
- 4 cups water
- Salt and pepper to taste
- Lemon wedges (for serving)
Instructions
- Prepare your ingredients by washing the potatoes and corn, quartering the potatoes, and cutting the corn in half.
- Layer the quartered potatoes in the slow cooker, followed by the sausage slices.
- Add the corn halves, Old Bay seasoning, and water, stirring to distribute the spices.
- Set the slow cooker on low for about 4 hours.
- Check the potatoes for tenderness after 4 hours, and adjust cooking time if necessary.
- Add the shrimp when potatoes are tender, and let them simmer for 15-20 minutes until cooked through.
- Season to taste with salt and pepper before serving.
- Plate the shrimp, potatoes, corn, and sausage into a serving dish, enjoying the broth.
Notes
Serve family-style with lemon wedges and encourage guests to eat with their hands for a communal experience.
Nutrition
- Serving Size: 1 serving
- Calories: 350
- Sugar: 5g
- Sodium: 400mg
- Fat: 12g
- Saturated Fat: 4g
- Unsaturated Fat: 6g
- Trans Fat: 0g
- Carbohydrates: 45g
- Fiber: 3g
- Protein: 25g
- Cholesterol: 130mg
Keywords: shrimp boil, slow cooker, Southern cuisine, seafood recipe, easy dinner
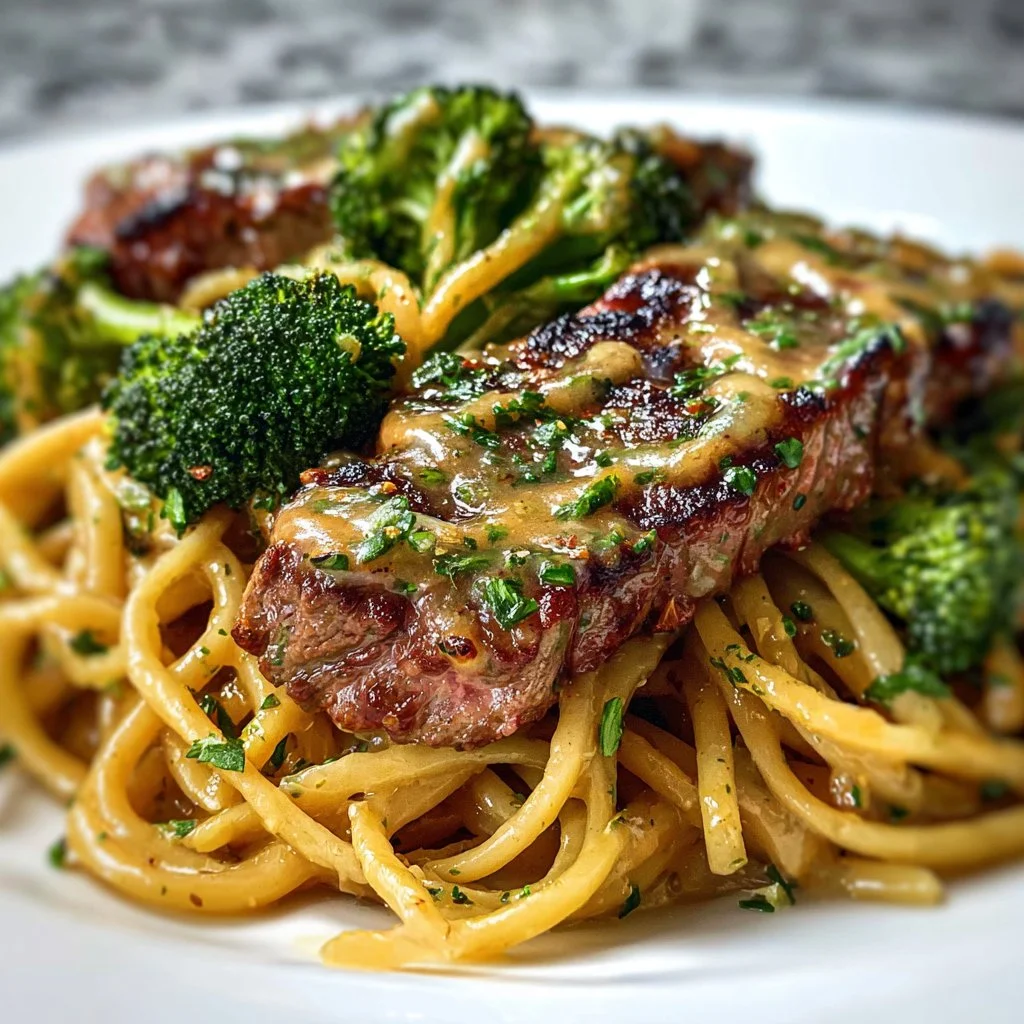
Cowboy Butter Steak & Broccoli Linguine Recipe
# Cowboy Butter Steak & Broccoli Linguine Recipe

## Introduction

Welcome to the delicious world of Cowboy Butter Steak & Broccoli Linguine! If you’ve ever thought that a meal could embody the very spirit of a cozy supper with a touch of Western charm, you’ve just hit the jackpot! This dish is all about the marriage of succulent steak, vibrant broccoli, and a luscious butter sauce that’s packed with flavor. It’s perfect for a date night, a family gathering, or even a casual weeknight culinary escape.

Imagine this: You’re snug in your kitchen, maybe a little music playing in the background, the savory aroma of sizzling steak is wafting through the air, and you know that in just a few short minutes, something wonderful is going to happen—a magical meal that brings people together at the table. This isn't just any ordinary pasta; we're turning up the flavor dial with Cowboy Butter, ensuring every bite feels like a warm hug.

So, what’s the deal with “Cowboy Butter”? It’s not just a cheeky name; it’s a robust compound butter that elevates every dish it graces. You’re going to love how it wraps itself around the steak and linguine, making each forkful an unforgettable experience. Grab your apron because we’re about to create something truly special!

## Personal Story

Ah, the memories of my childhood kitchen come rushing back as I think about a dish like Cowboy Butter Steak & Broccoli Linguine. I remember my father returning after a long week at work, his face lighting up at the sight of steak sizzling on the grill and a hearty pasta dinner in the mix. That was our evening routine—lively chatter, laughter, and of course, sharing food that meant love and home.

I would stand by my mom, eagerly asking questions while she cooked, and she’d say, “You can never go wrong with good butter and garlic, honey.” Those words stuck with me. Now, every time I make a dish that calls for butter, I’m transported back to those simple, yet meaningful moments. This recipe brings that same warmth to my table, and I hope it brings a little nostalgia to yours too!

## Ingredients

Here’s what you’ll need for this delightful meal:

- **1 lb sirloin or ribeye steak**: These cuts are tender and flavorful. Ribeye is richer due to its marbling, while sirloin is leaner. Both are fantastic choices! For a budget-friendly option, you can substitute with flank steak or chicken if you prefer.

- **1 tsp smoked paprika**: Adds a lovely smoky flavor. If you want to change it up, try regular paprika or even chili powder for a kick.

- **½ tsp garlic powder**: A pantry staple that enhances flavor. Fresh minced garlic can also be used, just double the amount!

- **½ tsp black pepper**: Freshly ground is the best option for a robust flavor. Whole peppercorns can be crushed if you’d like some extra texture.

- **Salt, to taste**: Always a key seasoning! Opt for kosher salt or sea salt for the best results.

- **2 tbsp olive oil**: This will help sear your steak beautifully. You can swap it out for avocado oil if you’re looking for a higher smoke point.

- **6 tbsp unsalted butter**: The star of our Cowboy Butter! Unsalted butter allows more control over seasoning. Feel free to use ghee for a lactose-free version.

- **4 cloves garlic, minced**: Fresh garlic will give your Cowboy Butter that fragrant boost. If you're not a huge garlic fan, you can reduce the amount.

- **½ tsp crushed red pepper flakes (optional)**: For those who like a little heat! Adjust to taste, or skip if you prefer a milder version.

- **1 tsp Dijon mustard**: It adds a rich tanginess to the butter. You can substitute with yellow mustard if needed or leave it out for a classic butter flavor.

- **Juice of 1 lemon**: Brightens the dish beautifully! Lime juice can be a great substitute if lemons aren't handy.

- **2 tbsp fresh parsley, chopped**: This herb adds freshness and color. Cilantro can work too if you're after a different flavor profile.

- **1 tbsp fresh chives, chopped**: Offers a mild onion flavor that complements the butter. Green onions can be used if you prefer.

- **12 oz linguine**: Perfect for capturing that luscious sauce! Gluten-free pasta or zoodles (zucchini noodles) can be used for a lighter version.

- **3 cups broccoli florets**: Broccoli not only adds flavor but also bright green color. Asparagus or green beans can be fabulous substitutes here!

- **½ cup reserved pasta water**: When cooking pasta, save that starchy water! It works wonders for making the sauce creamy.

- **½ cup grated Parmesan cheese (plus extra for serving)**: Adds a nutty, rich finish. Pecorino Romano is a flavorful alternative if you'd like something with a bit more bite.

## Step-by-Step Instructions

Now that we’ve gathered our ingredients, let’s dive into this mouthwatering journey:

1. **Cook the linguine**: Bring a large pot of salted water to a boil over high heat. Add linguine and cook according to package instructions, usually about 9-11 minutes. You want it al dente since it will keep cooking in the pan with the steak and broccoli later. Once it’s done, *don’t forget to reserve about a half-cup of that precious pasta water* before draining!

    *Chef’s Tip*: Always salt your pasta water generously. It’s your only chance to infuse flavor into the noodles!

2. **Prepare the broccoli**: Add the broccoli florets to the boiling pasta water during the last 2-3 minutes of the linguine cooking time. This ensures they cook just enough to be tender yet crunchy. Drain both together and set aside.

    *Pro Tip*: You can also steam the broccoli instead for a vibrant color and slightly different texture!

3. **Season and sear the steak**: While the pasta and broccoli are cooking, let’s work on that steak! Place your steak cubes in a bowl and season them with smoked paprika, garlic powder, black pepper, and a good pinch of salt. Make sure every piece is well-coated, as this will enhance the flavor.

    *Chef Hack*: For a deeper flavor, let your steak sit at room temperature for about 30 minutes after seasoning—this helps the spices penetrate more deeply.

4. **Heat the oil**: In a large skillet, heat 2 tablespoons of olive oil over medium-high heat. Once the oil is shimmering, add the seasoned steak in a single layer (do this in batches if necessary to avoid steaming).

    *Sizzle Alert*: You want that steak to sizzle right as it touches the pan for a beautiful crust!

5. **Sear the steak**: Cook the steak for about 3-4 minutes on one side without moving it, then flip and cook for another 2-3 minutes. The goal is a beautiful brown crust while keeping the center juicy. If you like it more well-done, just adjust the cooking time accordingly.

    *Chef Insight*: A meat thermometer can be your best friend here! Aim for 130-135°F for medium-rare.

6. **Add the butter and garlic**: Once your steak is cooked to perfection, reduce the heat to medium. Add the unsalted butter and minced garlic to the skillet. Stir them around until the butter melts and the garlic becomes fragrant (around 1-2 minutes).

    *Magic Moment*: This is where the Cowboy Butter action begins! You’ll be mesmerized by that buttery garlic aroma—just wait until it combines with your pasta!

7. **Incorporate the remaining ingredients**: Next, add the Dijon mustard, lemon juice, crushed red pepper flakes (if using), chives, and herbs. Toss to combine, letting all those beautiful flavors mingle together.

    *Don’t rush this part*—the more you swirl, the more delicious flavors come together!

8. **Combine linguine and broccoli**: Add your drained linguine and broccoli to the skillet along with the reserved pasta water and Parmesan cheese. Toss everything well to coat in the Cowboy Butter sauce.

    *Final Touch*: If the pasta seems dry, add a splash more of that reserved pasta water until you reach your desired consistency.

## Serving Suggestions

When it comes to plating, remember that presentation is key but does not have to be perfect! Twirl some of the linguine onto a plate, making a nest for those vibrant green broccoli florets and juicy steak. Sprinkle a little more grated Parmesan on top and a drizzle of the buttery sauce. Add a few fresh parsley leaves for a pop of color. Voila! Your table is ready for some serious compliments!

## Recipe Variations

Get a little creative with these flavor options:

- **Spicy Cowboy Butter**: Add a touch more crushed red pepper flakes or even a drizzle of sriracha for an extra kick.

- **Cheesy Spin**: Stir in some cream cheese for an even creamier sauce, or swap the Parmesan for a melty blend of Italian cheeses.

- **Vegetarian Option**: Skip the steak and opt for sautéed mushrooms as a meaty alternative or toss in roasted chickpeas for a hearty plant-based twist.

- **Zesty Addition**: Play with different citrus! Lime juice or a bit of orange zest can brighten up the Cowboy Butter in a fun way.

- **Herbaceous Delight**: Experiment with different herbs like thyme or basil for a fresh surprise in every bite.

## Chef’s Notes

You know, recipes are like old friends—there's a story behind every single one! This Cowboy Butter Steak & Broccoli Linguine has evolved over the years. It started as just a "what's in the fridge?" meal, but has transformed into this elegantly simple dish that I’m proud to share.

I remember my first attempt; I accidentally flipped the steak too soon and ended up with a rubbery mess. Yikes! But oh, what a learning experience! Now, every time I cook, I embrace imperfections; it’s all part of the process, right? It made me realize that cooking is about enjoying the moment—who cares if the garlic is a little browned?

## FAQs and Troubleshooting

1. **What if my pasta sauce is too thick?**
   Simply add a little more reserved pasta water or a splash of chicken or vegetable broth to loosen it up.

2. **How can I prevent my steak from overcooking?**
   Keep an eye on the internal temperature with a meat thermometer and remember that it will continue to cook a little after being removed from the heat.

3. **Can I make this in advance?**
   Absolutely! You can cook the steak and pasta ahead of time, just toss them together with the Cowboy Butter when you're ready to serve.

4. **Why is my steak tough?**
   Cooking it too long or at too high a heat might be to blame. Try using a more tender cut or allowing the steak to rest before cutting into it to maintain tenderness.

## Nutritional Info (if applicable)

*(Optional, add relevant nutritional facts if desired.)*

In closing, I hope this Cowboy Butter Steak & Broccoli Linguine receives the warmest welcome on your dining table, just as it has on mine. Remember, cooking is about love and togetherness, and I’m so honored to share this experience with you. Now, pour yourself a glass of something bubbly, tie that apron, and let's create beautiful moments around your table. Bon appétit!
Cowboy Butter Steak & Broccoli Linguine
A delightful meal featuring succulent steak, vibrant broccoli, and a luscious Cowboy Butter sauce over linguine.
- Prep Time: 15 minutes
- Cook Time: 30 minutes
- Total Time: 45 minutes
- Yield: 4 servings 1x
- Category: Main Course
- Method: Stovetop
- Cuisine: Italian
- Diet: Beef
Ingredients
- 1 lb sirloin or ribeye steak
- 1 tsp smoked paprika
- ½ tsp garlic powder
- ½ tsp black pepper
- Salt, to taste
- 2 tbsp olive oil
- 6 tbsp unsalted butter
- 4 cloves garlic, minced
- ½ tsp crushed red pepper flakes (optional)
- 1 tsp Dijon mustard
- Juice of 1 lemon
- 2 tbsp fresh parsley, chopped
- 1 tbsp fresh chives, chopped
- 12 oz linguine
- 3 cups broccoli florets
- ½ cup reserved pasta water
- ½ cup grated Parmesan cheese (plus extra for serving)
Instructions
- Cook the linguine: Bring a large pot of salted water to a boil over high heat. Add linguine and cook according to package instructions, usually about 9-11 minutes. Reserve about a half-cup of that precious pasta water before draining!
- Prepare the broccoli: Add the broccoli florets to the boiling pasta water during the last 2-3 minutes of the linguine cooking time. Drain both together and set aside.
- Season and sear the steak: Season steak cubes with smoked paprika, garlic powder, black pepper, and salt.
- Heat the oil: In a large skillet, heat 2 tablespoons of olive oil over medium-high heat. Add the seasoned steak in a single layer.
- Sear the steak: Cook the steak for about 3-4 minutes on one side without moving it. Flip and cook for another 2-3 minutes.
- Add the butter and garlic: Reduce the heat to medium. Add the unsalted butter and minced garlic to the skillet.
- Incorporate the remaining ingredients: Add Dijon mustard, lemon juice, crushed red pepper flakes, chives, and herbs. Toss to combine.
- Combine linguine and broccoli: Add drained linguine and broccoli to the skillet along with reserved pasta water and Parmesan cheese. Toss well to coat.
Notes
This dish can be varied with spicy or cheesy options. Serve with additional Parmesan on top!
Nutrition
- Serving Size: 1 serving
- Calories: 450
- Sugar: 3g
- Sodium: 500mg
- Fat: 22g
- Saturated Fat: 10g
- Unsaturated Fat: 9g
- Trans Fat: 0g
- Carbohydrates: 40g
- Fiber: 4g
- Protein: 30g
- Cholesterol: 70mg
Keywords: steak, linguine, cowboy butter, broccoli, pasta