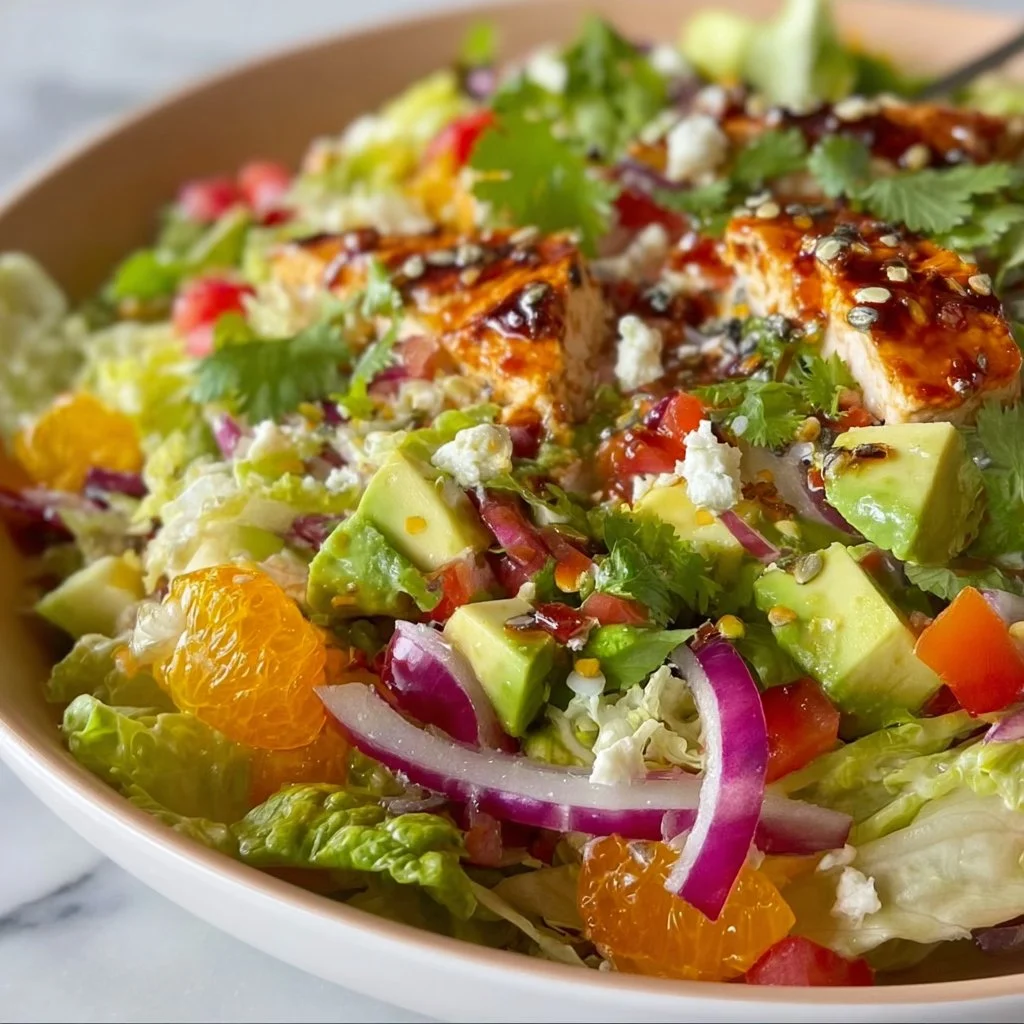
Santa Fe Salad
Santa Fe Salad: A Celebration of Freshness and Flavor
Hello, fellow food lovers! Today, we’re diving into a vibrant dish that perfectly captures the spirit of summer—refreshing, colorful, and packed with flavors that dance on your palate. Meet the Santa Fe Salad! This isn’t just any salad; it’s a hearty bowl of goodness that celebrates the sunny, laid-back vibes of the Southwest. Whether you’re hosting a casual dinner party, prepping your lunch for the week, or simply craving something light and bright, this salad is here to impress.
What I truly love about the Santa Fe Salad is how it brings together a medley of textures and tastes—from the crunchy mixed greens to the creamy avocado, and those bursts of sweetness from the cherry tomatoes. Each bite is a celebration. And the best part? You don’t need a culinary degree or Michelin-starred kitchen equipment to whip it up! Just grab your apron and let’s create a dish that feels both elevated and approachable, just like my philosophy at Ivory Apron.
As we journey through this recipe, you’ll notice that it’s not only about satisfying your hunger; it’s also about putting love and intention into your food. So, gather your ingredients, invite a friend, and let me share all the secrets behind this beautiful bowl of Santa Fe magic.
Personal Story
Every time I whip up a Santa Fe Salad, I’m transported back to my childhood, where summer BBQs were a way of life. My family would gather in the backyard, the sun hanging low in the sky, casting a golden hue over laughter and good food. We’d feast on grilled chicken, salsa with a kick, and, of course, my aunt’s famous Santa Fe Salad.
I remember the excitement of picking fresh tomatoes from the garden, and the sweet scent of cilantro filling the air as we prepped for our feast. My aunt would expertly toss everything together, adding a squeeze of lime at the end for that signature zing. We would eagerly grab our plates, scooping the colorful salad alongside the main dishes. I’d sneak in an extra helping, knowing that this salad was more than just a side; it was the heart of our gathering.
Years later, as I learned to cook and host my gatherings, I found myself recreating that same feeling through food. The Santa Fe Salad became one of my go-to dishes—a nostalgic nod to those carefree summer days and a testament to the joy of coming together over a shared meal.
Ingredients
Let’s gather our vibrant cast of ingredients for this Santa Fe Salad. Each one plays a critical role in creating that perfect balance of flavor and texture!
-
Mixed Greens: A blend of baby spinach, arugula, or spring mix works wonderfully here. For a heartier option, you can go for romaine or kale. Good greens provide a base that adds crunch and nutrition.
-
Cherry Tomatoes: Sweet, juicy, and bursting with flavor, cherry tomatoes make every bite delightful. If you can’t find any, grape tomatoes are a great substitute, or you can use regular tomatoes—just chop them into bite-sized pieces.
-
Black Beans: Packed with protein and fiber, black beans are a hearty addition. If you’re looking to mix it up, try pinto beans or chickpeas for a different flavor profile.
-
Corn: Sweet corn adds a nice crunch and sweetness. Fresh corn on the cob is amazing in summer, but you can use canned or frozen corn off-season—just be sure to drain and rinse if using canned!
-
Red Onion: A hint of sharpness from red onion adds depth to the salad. If red onion is too pungent for your taste, you can substitute it with green onions for a milder flavor.
-
Avocado: Creamy avocado brings richness and balances the flavors perfectly. If avocados are out of season, you can use a sprinkle of feta cheese for creaminess.
-
Cilantro: Fresh cilantro adds a bright, herbaceous note that lifts the dish. If you’re not a fan of cilantro, try fresh parsley or basil instead.
-
Lime Juice: For that zesty kick, fresh lime juice is unbeatable. If you’re in a pinch, lemon juice can work, though it has a slightly different flavor.
-
Olive Oil: A good quality olive oil ties all the flavors together. If you want to switch things up, avocado oil offers a neutral flavor and is great for drizzling.
-
Chili Powder: A sprinkle of chili powder offers just enough warmth to enhance the overall flavor. If you prefer a spicier kick, you can use cayenne pepper or smoked paprika for a smoky twist.
-
Salt and Pepper: Essential seasoning to bring all the flavors to life. Don’t be shy—season to taste!
Step-by-Step Instructions
Now that we’ve gathered our ingredients, it’s time to transform them into a gorgeous salad that promises to impress. With my step-by-step guide, you’ll be a salad-making whiz in no time!
-
Prep the Greens: Start by washing your mixed greens thoroughly under cold water to remove any grit. Spin them dry in a salad spinner or gently pat them with a clean kitchen towel. This step ensures your salad isn’t soggy—nobody likes a watery salad!
-
Chop the Veggies: Slice the cherry tomatoes in half. Chop the red onion finely, so it blends seamlessly into the salad without overpowering other flavors. I love using a sharp chef’s knife for this—just think of the tomato slices as little jewels waiting to brighten your salad.
-
Rinse the Beans: If you’re using canned black beans, make sure to drain and rinse them under cold water. This helps remove excess sodium and improves their flavor. If you have dried beans, you’ll want to soak and cook them beforehand for that home-cooked taste.
-
Prepare the Corn: If you’re using fresh corn, hold the cob upright in a bowl and cut the kernels off, letting them fall into the bowl to catch every morsel. If you’re using frozen corn, just toss it in and allow it to thaw slightly before mixing.
-
Dressing Time: It’s time to whip up a zesty dressing! In a small bowl, whisk together 3 tablespoons of olive oil, the juice of one lime, and 1 teaspoon of chili powder. Season with salt and pepper to taste. This dressing is where the magic happens—don’t skip it!
-
Mix It All Together: In a large mixing bowl, combine your greens, cherry tomatoes, black beans, corn, avocado chunks, and chopped cilantro. Pour the dressing over the top and gently toss everything together until well coated. Remember, the goal is to coat, not crush your beautiful ingredients!
-
Taste and Adjust: Give your salad a taste! This is the best part. If you want more zing, a splash more lime juice works wonders. Feel free to add more salt or pepper to suit your palate.
-
Plate It Up: Use a large serving bowl or individual plates—your choice! I love using beautiful bowls to showcase the vibrant colors of the salad. Don’t be afraid to layer it a bit for a visually stunning presentation!
-
Final Touches: If you have extra cilantro or some lime wedges, don’t hesitate to garnish with them. A little sprinkle of seasoning here can elevate the appearance and flavor.
Serving Suggestions
When it comes to serving, the Santa Fe Salad shines brightest when it’s colorful and inviting. For an elevated dining experience, serve it in a beautiful wooden bowl or on crisp white plates to contrast the vibrant colors. You can pair it with grilled chicken or shrimp for a complete meal, or serve it alongside fresh crusty bread for a light lunch. Don’t forget to add a few lime wedges on the side—there’s nothing quite like that fresh squeeze right before digging in!
Recipe Variations
Let’s get creative! Here are a few variations to keep things exciting:
-
Taco Twist: Add cooked ground turkey or beef, seasoned with taco spices, to turn this salad into a taco bowl! You could also swap out the black beans for refried beans.
-
Grilled Veggies: Throw in some grilled zucchini, bell peppers, or corn for a smoky, charred flavor that pairs perfectly with the fresh ingredients.
-
Quinoa Power: Boost the protein by adding cooked quinoa into the mix. It makes the salad heartier and even more filling.
-
Swap the Dressing: Try a creamy dressing such as avocado or cilantro dressing for a lush twist that’s still vibrant and delicious.
-
Make It Vegan: Simply omit any cheese or animal product. It’s already packed with delicious plant-based goodness!
Chef’s Notes
This salad recipe has been a staple for me for years. I love how it adapts with the seasons—using whatever fresh produce is on hand. I remember one time I had a bounty of fresh peppers, so I threw them in, and the salad was a hit with everyone!
Another fond memory was a picnic at the park where I made individual salad cups. Everyone loved having their portions ready to go—perfect for enjoying in the sun!
Cooking should be fun and spontaneous—so please feel free to add your touch to this Santa Fe Salad. Over time, you’ll develop your signature twist that friends will remember!
FAQs and Troubleshooting
Q: Can I make this salad ahead of time?
A: Absolutely! You can prep all the ingredients and store them separately in the fridge for a day or two. However, when ready to serve, avoid dressing it too early, as the greens can become wilted.
Q: What if I can’t find fresh cilantro?
A: No worries! You can use parsley or basil as a substitute, but if you want that specific cilantro flavor, look for it dried. The fresh taste won’t be there, but it’ll add some herb complexity.
Q: Is it okay to use frozen corn instead of fresh?
A: Yes! Just thaw it out and give it a quick rinse to freshen it up a bit. It holds just as much flavor and is convenient when fresh corn isn’t available.
Q: How can I store leftovers?
A: Store any leftovers in an airtight container in the refrigerator for up to 2 days. However, keep in mind that the texture will change as ingredients begin to release moisture.
Nutritional Info
While Santa Fe Salad’s nutritional profile can vary based on specific ingredients used, here’s a rough estimate for a serving of this glorious salad:
- Calories: Approximately 250
- Protein: 10g
- Carbohydrates: 30g
- Fat: 12g (mostly healthy fats from avocado and olive oil)
- Fiber: 8g
This salad is filled with vitamins, minerals, and plenty of fiber, making it an excellent choice for a nutritious meal or side dish.
And that’s how you create a Santa Fe Salad that not only delights the eyes but also warms the heart. I hope you found this journey through flavor and memory as enjoyable to read as it is to make! Cooking is a reflection of our experiences, and every dish tells a story. Ready to tie on that apron and share your own culinary adventures? Go ahead and make this salad your own! Happy cooking! 🥗✨
PrintSanta Fe Salad
A vibrant and refreshing salad featuring mixed greens, black beans, and a zesty lime dressing, perfect for summer gatherings.
- Prep Time: 15
- Total Time: 15
- Yield: 4 servings
- Category: Salad
- Method: Mixing
- Cuisine: Southwestern
- Diet: Vegetarian
Ingredients
- Mixed Greens (baby spinach, arugula, or spring mix)
- Cherry Tomatoes
- Black Beans
- Corn
- Red Onion
- Avocado
- Cilantro
- Lime Juice
- Olive Oil
- Chili Powder
- Salt and Pepper
Instructions
- Prep the greens by washing and drying them thoroughly.
- Chop the cherry tomatoes in half and finely chop the red onion.
- Rinse the black beans under cold water.
- Prepare the corn by cutting kernels off the cob if using fresh.
- Whisk together olive oil, lime juice, and chili powder for the dressing.
- Mix greens, tomatoes, beans, corn, avocado, and cilantro in a bowl.
- Pour the dressing over the salad and toss gently.
- Taste and adjust seasoning with more lime juice, salt, or pepper.
- Plate in a serving bowl or individual plates, garnishing with extra cilantro and lime wedges.
Notes
Feel free to add grilled chicken or shrimp for a complete meal. This salad adapts well to seasonal ingredients.
Nutrition
- Serving Size: 1 serving
- Calories: 250
- Sugar: 3g
- Sodium: 370mg
- Fat: 12g
- Saturated Fat: 2g
- Unsaturated Fat: 8g
- Trans Fat: 0g
- Carbohydrates: 30g
- Fiber: 8g
- Protein: 10g
- Cholesterol: 0mg
Keywords: salad, healthy, vegetarian, summer, fresh, Santa Fe salad
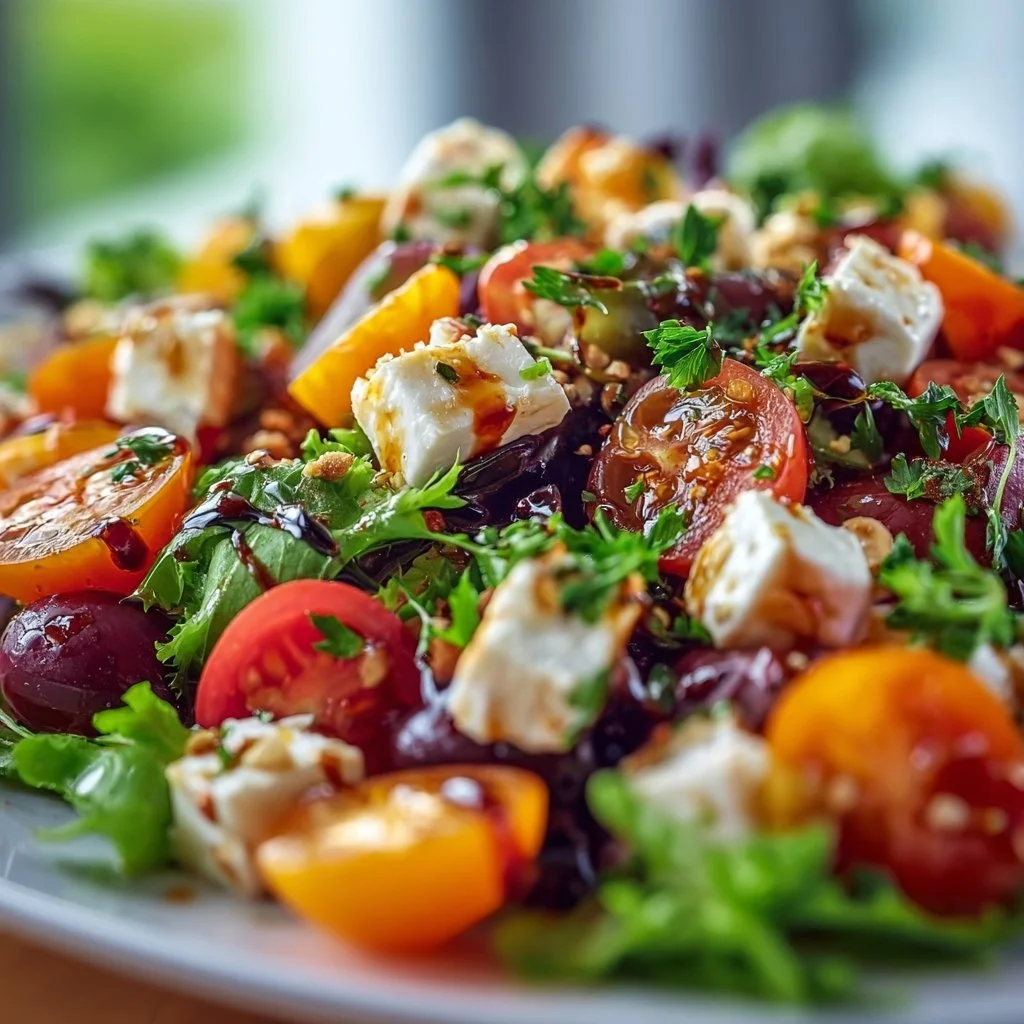
Marry Me Salad
The Perfect Marry Me Salad: A Recipe for Romance and Joy
Hello, fellow food lovers! Welcome back to Ivory Apron, where we transform kitchen moments into memorable creations! Today, we’re diving into a recipe so delightful, it’s practically got a love letter written all over it — yes, I’m talking about the Marry Me Salad! Imagine a bowl brimming with fresh, vibrant ingredients, harmonious flavors, and a crunch that’ll make your taste buds sing. This isn’t just a salad; it’s a celebration of love, friendship, and the sheer joy of sharing a beautiful meal at the table.
What’s in a name, you ask? Well, the legend goes that this salad is so delicious that one could fall head over heels for it—or at least feel like making a commitment. Whether you’re planning a romantic dinner for two, looking to impress your friends at a dinner party, or simply in need of a refreshing and healthy option for lunch, this salad is the perfect companion. With its lush greens, creamy avocado, and tangy feta, it’s both a visual feast and a taste sensation that brings a little elegance to everyday cooking.
In our time together today, I’ll share not just the recipe, but also stories, tips, and tricks that will make preparing this salad simple and fun. So grab your apron, and let’s whip up something truly special.
Personal Story
Let me take you back to a sunny Saturday afternoon when I first encountered the Marry Me Salad — a delightful blend of flavors that still dances in my memory. I was at my dear friend Julia’s house for an impromptu brunch gathering. Julia is known for her magical ability to transform simple ingredients into something extra-special, and that day was no exception.
As we gathered around her sunlit kitchen, she expertly tossed together a medley of greens, vibrant cherry tomatoes, and creamy avocado. I watched with awe as she explained the origins of the salad, her eyes sparkling with excitement. Every bite was a burst of culinary joy, and before I knew it, I had guiltily helped myself to seconds—and thirds.
That day not only sparked my love for this salad but also deepened my bond with Julia. It was about more than just food; it was about the laughter shared at the table, the instinctive ‘oohs’ and ‘aahs’ as we indulged, and the kind of culinary experience that leaves a mark on your heart. Ever since, the Marry Me Salad has become my go-to dish for gatherings, guaranteed to elicit smiles and, perhaps, even a few marriage proposals!
Ingredients
Here’s what you’ll need to create this delightful Marry Me Salad. Remember, great cooking starts with quality ingredients, so select the best you can!
-
4 cups mixed greens: A blend of baby spinach, arugula, and romaine makes for a refreshing base. Feel free to substitute with whatever greens you prefer or have on hand!
-
1 cup cherry tomatoes, halved: These sweet and juicy little gems add a pop of color and sweetness. If tomatoes aren’t in season, diced bell peppers can be a great alternative.
-
1 avocado, diced: Ah, the creaminess! It provides a rich texture to the salad. If you’re in a pinch, sub with a scoop of hummus or a sprinkle of creamy tahini for that velvety feel.
-
1/2 cup cucumber, sliced: Crisp and refreshing, cucumbers add a nice crunch. Try swapping in radishes for a zesty kick!
-
1/4 cup red onion, thinly sliced: It adds a beautiful punch of flavor. If you want to mellow it out, soak the slices in cold water for about 10 minutes to tone down the bitterness.
-
1/2 cup feta cheese, crumbled: The tanginess of feta complements the salad beautifully. If you’re vegan or dairy-free, try using almond feta or omit the cheese altogether.
-
1/4 cup walnuts, chopped: Crunchy and nutty, walnuts provide a delightful texture. Pecans or sunflower seeds can also work well if you prefer a different nut or seed.
-
1/4 cup olive oil: Fresh olive oil is key for that luxurious mouthfeel. For a twist, you might try a flavored oil like lemon-infused olive oil.
-
2 tablespoons balsamic vinegar: The perfect touch of acidity! A citrus vinaigrette can lend a refreshing alternative.
-
Salt and pepper to taste: Don’t skimp on seasoning! Adjust according to your taste.
Step-by-Step Instructions
Ready to craft this delectable Marry Me Salad? Let’s break it down, step by step, to ensure your kitchen adventure is seamless and enjoyable!
-
Prep Your Ingredients: Start by washing your mixed greens thoroughly and spin them dry in a salad spinner. You want them crisp and fresh! Slice the cherry tomatoes in half, dice your avocado, and slice your cucumber and red onion. This prep work not only makes cooking easier but elevates the whole experience!
-
Combine the Greens: In a large salad bowl, add your mixed greens. I like to arrange them as the foundation before layering in the other ingredients. It gives a beautiful rustic charm.
-
Layer and Toss: Add the halved cherry tomatoes, diced avocado, sliced cucumber, and thinly sliced red onion directly on top. Now, gently toss the ingredients together to combine. Here’s a little chef hack: Avoid smashing the avocado! You want the chunks to remain intact for that buttery, creamy texture.
-
Add Feta and Walnuts: Sprinkle the crumbled feta cheese and chopped walnuts over the salad now. The feta will slightly melt into the greens, bringing all the flavors together beautifully.
-
Dress the Salad: In a small bowl, whisk together the olive oil, balsamic vinegar, salt, and pepper. Once mixed, drizzle it over the salad. The key here is to start with less dressing; you can always add more later. Toss gently to coat everything evenly without bruising your greens or smashing your avocado!
-
Taste and Adjust: Give your salad a taste test. This is a moment of joy! Does it need more salt? A touch more acid? This is your creation, so feel free to adjust based on your palate.
-
Chill or Serve Immediately: You can let the salad sit for about 10-15 minutes to marry the flavors or serve immediately. If you choose to chill it, wrap it with a damp paper towel in the fridge to keep the greens fresh.
Serving Suggestions
Presentation is key when it comes to food, and as you know, I believe that even simple dishes deserve a dash of elegance. Serve the Marry Me Salad on a beautiful platter to showcase the vibrant colors of all the ingredients. You can garnish with extra feta and walnuts on top, perhaps a sprig of fresh basil or mint for that added pop of color. A slice of lemon or a few edible flowers can elevate the look even further — because, why not?
Pair this salad with a light, crisp white wine, or for a non-alcoholic option, a refreshing sparkling water with a twist of lime. It’s about making the meal feel special and elevating those small moments around your table!
Recipe Variations
Here are a few ideas to switch things up and customize the Marry Me Salad to your taste:
-
Grilled Chicken: Add strips of grilled chicken breast on top for a protein-packed variation that turns this salad into a complete meal.
-
Quinoa Boost: Toss in cooked quinoa for added texture and a healthful boost of nutrients.
-
Fruit Twist: Try adding slices of ripe pear or berries for a sweet contrast against the salty feta.
-
Spicy Kick: Add a pinch of red pepper flakes or sliced jalapeños for some heat — perfect if you’re feeling adventurous.
-
Herb-Infused: Experiment with a handful of fresh herbs like mint or cilantro for a fresh twist on flavors.
Chef’s Notes
As with any recipe, I’ve made this Marry Me Salad a million different ways over the years, and it’s always evolving. One of my favorite memories is making it for a spontaneous picnic in the park with friends. Everything was bright and sunny, and we all dug in with sheer delight— laughter, stories, and gorgeous food created the perfect day.
Another tip? If you have leftover ingredients, don’t let them go to waste! Feel free to incorporate them into your next meal. Toss over some cooked pasta for a quick lunch or layer it in a wrap for a delightful sammich. The beauty of this salad is that it serves as a canvas for creativity — make it your own!
FAQs and Troubleshooting
1. My avocado turned brown too quickly! What can I do?
- To help keep your avocado fresh, squeeze a little lemon or lime juice on it before adding it to the salad. This acidity helps prevent oxidation. If it does happen, don’t fret; it’s still safe to eat!
2. How can I prepare this salad ahead of time?
- You can wash and chop ingredients a day in advance, but add the avocado just before serving to avoid browning. Store everything in airtight containers in the fridge. Dress the salad right before serving for the freshest taste.
3. What if I don’t like feta cheese?
- You can certainly omit it or swap it out with goat cheese, fresh mozzarella, or skip cheese altogether. The salad will still shine beautifully!
4. My dressing turned out too sour! What can I do?
- If your dressing is too tangy, add a touch more olive oil to mellow out the flavors. A little pinch of sugar or honey can also balance the acidity!
Nutritional Info
Each serving approx. (based on salads without additional proteins):
- Calories: 200
- Protein: 5g
- Carbohydrates: 14g
- Fat: 15g
- Fiber: 5g
(Nutritional values will vary based on actual serving sizes and specific ingredients used.)
There you have it, my friends! The Marry Me Salad is not just a recipe; it’s a creation filled with heart, creativity, and joy. Remember, food has the magical ability to bring us closer together, so whether you’re sharing this salad with loved ones or enjoying it solo, I hope it adds a little sparkle to your day. Until next time, keep cooking, keep sharing, and don’t forget to savor those small moments around your table! Happy cooking!
PrintMarry Me Salad
A delightful blend of fresh greens, creamy avocado, and tangy feta, this Marry Me Salad is perfect for impressing loved ones or enjoying a refreshing lunch.
- Prep Time: 15 minutes
- Cook Time: 0 minutes
- Total Time: 15 minutes
- Yield: 4 servings 1x
- Category: Salad
- Method: No Cooking Required
- Cuisine: American
- Diet: Vegetarian
Ingredients
- 4 cups mixed greens (baby spinach, arugula, romaine)
- 1 cup cherry tomatoes, halved
- 1 avocado, diced
- 1/2 cup cucumber, sliced
- 1/4 cup red onion, thinly sliced
- 1/2 cup feta cheese, crumbled
- 1/4 cup walnuts, chopped
- 1/4 cup olive oil
- 2 tablespoons balsamic vinegar
- Salt and pepper to taste
Instructions
- Prep Your Ingredients: Start by washing your mixed greens thoroughly and spin them dry.
- Combine the Greens: In a large salad bowl, add your mixed greens.
- Layer and Toss: Add the halved cherry tomatoes, diced avocado, sliced cucumber, and thinly sliced red onion.
- Add Feta and Walnuts: Sprinkle the crumbled feta cheese and chopped walnuts over the salad.
- Dress the Salad: In a small bowl, whisk together the olive oil, balsamic vinegar, salt, and pepper.
- Taste and Adjust: Give your salad a taste test and adjust seasoning as needed.
- Chill or Serve Immediately: Let the salad sit for about 10-15 minutes or serve immediately.
Notes
You can customize this salad by adding grilled chicken, quinoa, or fresh herbs. Squeeze lemon juice on avocado to prevent browning.
Nutrition
- Serving Size: 1 serving
- Calories: 200
- Sugar: 3g
- Sodium: 200mg
- Fat: 15g
- Saturated Fat: 3g
- Unsaturated Fat: 11g
- Trans Fat: 0g
- Carbohydrates: 14g
- Fiber: 5g
- Protein: 5g
- Cholesterol: 15mg
Keywords: salad, vegetarian, healthy, avocado, feta, easy recipe
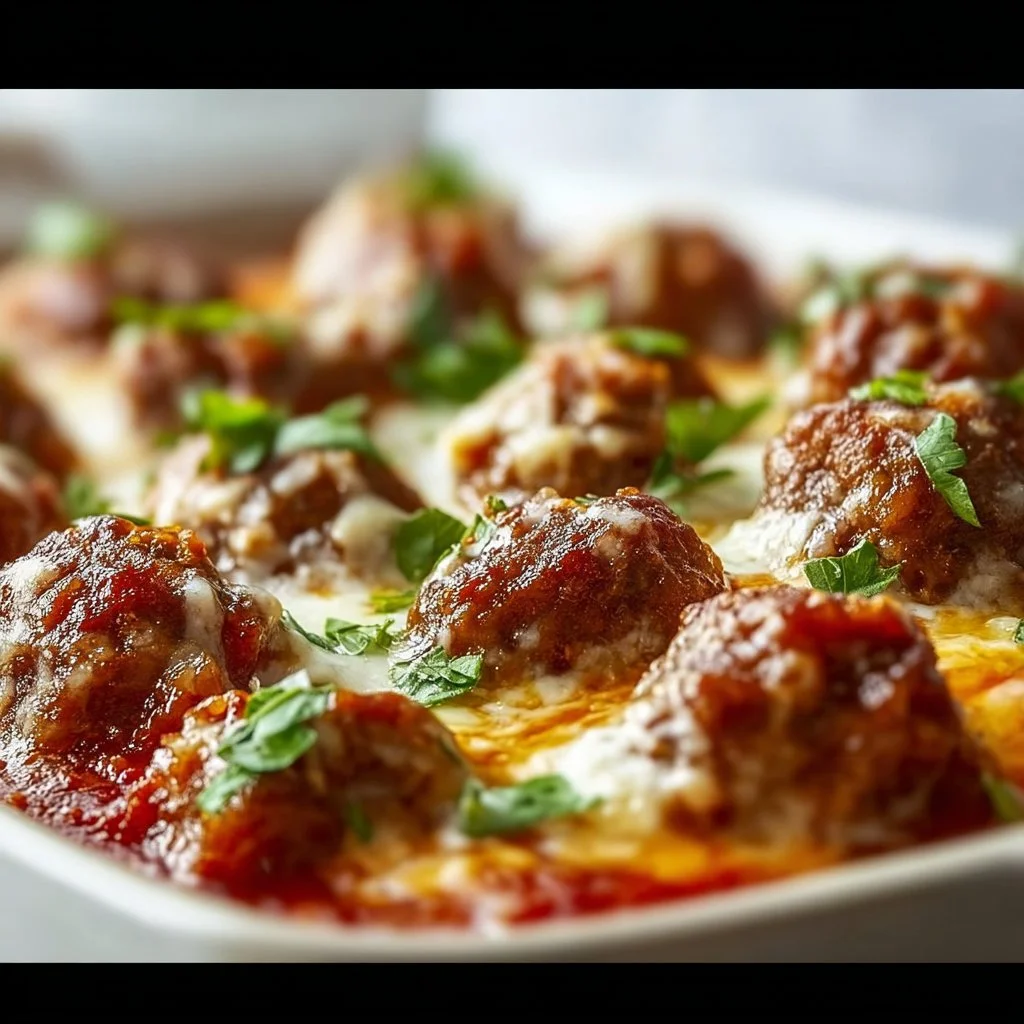
Keto Meatball Parmesan Casserole
Keto Meatball Parmesan Casserole: A Low-Carb Comfort Classic
Hey there, fellow foodies! Savannah here, and today we’re diving into a warm, cheesy dish that delivers all the comfort without the carbs: Keto Meatball Parmesan Casserole! 🌟 If you’ve ever found yourself wishing that you could enjoy your favorite Italian comfort food while still keeping your diet on track, then this recipe is a game-changer.
This casserole brings together juicy, flavorful meatballs, layers of gooey cheese, and rich marinara sauce — all in one delicious dish. Whether you’re a keto veteran or just dipping your toes into low-carb waters, this recipe is perfect for weeknight dinners or for impressing guests with minimal effort. Just think of this as a hug in a baking dish!
I’m here to show you that cooking should never feel overwhelming, even when you’re whipping up something a bit fancy. The secret? Quality ingredients and a pinch of love can take you a long way.
Gather around, tie on your apron, and let’s get cooking this Keto Meatball Parmesan Casserole that will have everyone singing your praises at the table!
Personal Story
Now, let me take you back to a cozy winter evening a few years ago. I was hosting a casual dinner party with a few close friends. The snow was falling gently outside, leaving a magical white blanket over everything, while inside, I lit some candles, and the kitchen filled with the mouthwatering aroma of simmering marinara sauce.
As I pulled my ground beef meatballs from the oven, I couldn’t help but be reminded of the first time I made meatballs with my grandmother. She had this incredible knack for making everything feel special, whether it was Thanksgiving dinner or a regular Tuesday. We would stand side by side, her knowing hands guiding mine, shaping the meatballs while sharing funny family stories that always seemed to melt away the hustle and bustle of life.
Recreating that warm, comforting scene with meatball parmesan made me feel connected to my roots, and I knew I had to share it with the world — but with a keto twist. Cooking is all about experiencing good times and flavors, and that’s exactly what this casserole is all about.
Ingredients
To create this Keto Meatball Parmesan Casserole, here’s what you’ll need:
-
1 lb Ground Beef (or Turkey)
Beef delivers a rich, savory flavor, but turkey is a lighter option. Choose lean ground meat for a healthier version or go with a fattier cut for added juiciness. If you’re opting for chicken, keep in mind it might not be as rich, so adding a bit of extra fat may help! -
1 cup Grated Parmesan Cheese
Parmesan brings a nutty, salty element to the meatballs and the casserole. If you’re lactose intolerant, try nutritional yeast for a cheesy flavor, or a dairy-free Parmesan alternative! -
1 cup Shredded Mozzarella Cheese
The gooey goodness of mozzarella is what dreams are made of! If you’re looking to switch it up, provolone or a dairy-free cheese can work well too. -
1 cup Sugar-Free Marinara Sauce
Look for sauces sweetened without sugar; they often use natural alternatives like erythritol. You can also make a quick sauce from scratch using crushed tomatoes and Italian herbs! -
1/4 cup Almond Flour
This is a fantastic low-carb binder that keeps your meatballs tender. If you need a nut-free option, crushed pork rinds work beautifully as a substitute! -
1 Egg
This is your binding agent, keeping the meatballs together while baking. If you’re vegan, flax eggs or chia eggs are great alternatives! -
2 Cloves Garlic (minced)
Garlic adds a punch of flavor. For convenience, feel free to use garlic powder if fresh isn’t on hand (1/2 tsp = 1 clove). -
1 tsp Italian Seasoning
This blend of herbs enhances the dish. You can throw together your own mix using basil, oregano, thyme, and rosemary if you prefer! -
Salt and Pepper to Taste
Seasoning is crucial; don’t be afraid to taste and adjust as you go! -
Fresh Basil for Garnish
Nothing elevates a dish quite like fresh herbs! If basil isn’t your jam, you could use parsley or even arugula.
Step-by-Step Instructions
-
Preheat the Oven
Preheat your oven to 400°F (200°C). This ensures your casserole comes out bubbly and golden — just the way we like it! -
Make the Meatballs
In a large bowl, combine the ground beef (or turkey), minced garlic, grated Parmesan, almond flour, egg, Italian seasoning, salt, and pepper. Pro Tip: Use your hands to mix everything together, but if you have sensitive skin or want to keep it clean, put on a pair of disposable gloves! -
Shape the Meatballs
Once combined, grab a small amount of the mixture and roll it into golf ball-sized meatballs. Place them on a baking sheet lined with parchment paper. Little Chef Hack: Dampen your hands with water for easier rolling — it helps prevent the meat from sticking! -
Bake the Meatballs
Slide the baking sheet into the oven and bake the meatballs for about 15-20 minutes, or until they’re browned and cooked through. You can use a meat thermometer to ensure they reach an internal temp of 165°F (75°C). -
Prepare the Marinara Layer
While the meatballs are baking, spread half of the marinara sauce on the bottom of a greased casserole dish. This will create a luscious base for your layers. -
Layer the Casserole
Once the meatballs are done, remove them from the oven and carefully place them over the marinara sauce in the casserole dish. Pour the remaining marinara sauce over the meatballs, ensuring they’re nicely coated. Chef’s Tip: Feel free to sprinkle extra Italian seasoning on top at this point for added flavor! -
Add the Cheese
Now it’s time for the cheesiness! Sprinkle the shredded mozzarella cheese generously over the marinara and meatballs. Go a little overboard — it’s hard to go wrong with cheese! -
Bake the Casserole
Cover the dish with foil and bake for another 15-20 minutes, then remove the foil and bake for an additional 5-10 minutes until the cheese is bubbly and slightly golden. -
Garnish and Serve
Once baked, remove from the oven and let the casserole sit for a few minutes. This gives it time to settle and makes serving easier. Just before serving, sprinkle with fresh basil for that beautiful touch!
Serving Suggestions
To plate your Keto Meatball Parmesan Casserole, scoop out a hearty portion onto each plate, ensuring you get some of that luscious marinara and gooey cheese with every serving. Pair it with a simple side salad dressed with olive oil and vinegar or some roasted veggies for a delightful contrast of textures.
Want to elevate it even further? Serve with a side of zoodles (zucchini noodles) or cauliflower rice for a complete low-carb meal that feels indulgent yet fits the keto lifestyle.
Recipe Variations
Here are a few fun twists to customize your Keto Meatball Parmesan Casserole:
- Spicy Kick: Add red pepper flakes to the meatball mixture for a little heat.
- Mushroom Medley: Mix in some finely chopped mushrooms with your meatballs for added umami flavor and moisture.
- Cheesy Blend: Use a blend of mozzarella and fontina cheese for a melty, gourmet twist.
- Herb Infusion: Swap out Italian seasoning for fresh herbs like thyme and basil for a fresher flavor.
- Vegan Version: Substitute the ground beef with a hearty mixture of lentils and mushrooms, and use a plant-based cheese for a delicious vegan twist.
Chef’s Notes
Cooking is always an adventure in my kitchen, and this casserole has seen its fair share of experimentation. I remember one time I tried to sneak some spinach into the meatballs, thinking it would add color and nutrition. While it did make a great Instagram pic, it didn’t fare so well on the taste buds! A little education on balancing flavors goes a long way.
Over time, I’ve evolved this dish to include various ingredients based on what I have on hand, always revolving around the same comfort-food fundamentals. Remember, it’s perfectly okay to make mistakes in the kitchen — that’s where you discover new recipes!
FAQs and Troubleshooting
1. Why did my meatballs fall apart?
This can happen if there isn’t enough binding agent or they’re handled too roughly. Always make sure to use egg and almond flour to help them hold together, and handle them gently when shaping.
2. Can I make this ahead of time?
Absolutely! You can assemble the casserole, cover it, and keep it in the fridge for up to 24 hours before baking. Just be sure to add a few extra minutes to the cooking time if you’re putting it in the oven straight from the fridge.
3. How can I tell when the casserole is done?
Look for bubbling, golden cheese on top, and check that your meatballs have reached an internal temperature of at least 165°F. A quick probe with a meat thermometer is the best way to ensure they’re cooked through.
4. What do I do if the cheese isn’t browning?
If your cheese isn’t browning, you can place the casserole under the broiler for a couple of minutes (watching closely so it doesn’t burn) to achieve that perfect, golden crust.
Nutritional Info (Optional)
Here’s a little breakdown to keep you informed as you enjoy this tasty casserole:
- Calories: Approximately 350-400 per serving (Depends on portion sizes and specific ingredients used)
- Protein: About 25-30g
- Fat: 25g
- Carbs: 8g net carbs
- Fiber: 3g
There you have it, my fabulous Keto Meatball Parmesan Casserole! It’s not just a dish; it’s a story, a connection, and an experience. Enjoy making it your own and bring that touch of warmth and family to your table. Happy cooking, and don’t forget to share your creation with me! Let’s keep those culinary conversations going! 🥂🍽️
PrintKeto Meatball Parmesan Casserole

A warm, cheesy Keto Meatball Parmesan Casserole that combines juicy meatballs, layers of gooey cheese, and rich marinara sauce.
- Prep Time: 20 minutes
- Cook Time: 35 minutes
- Total Time: 55 minutes
- Yield: 4 servings 1x
- Category: Main Course
- Method: Baking
- Cuisine: Italian
- Diet: Keto
Ingredients
- 1 lb Ground Beef (or Turkey)
- 1 cup Grated Parmesan Cheese
- 1 cup Shredded Mozzarella Cheese
- 1 cup Sugar-Free Marinara Sauce
- 1/4 cup Almond Flour
- 1 Egg
- 2 Cloves Garlic (minced)
- 1 tsp Italian Seasoning
- Salt and Pepper to Taste
- Fresh Basil for Garnish
Instructions
- Preheat the oven to 400°F (200°C).
- Combine ground beef (or turkey), minced garlic, grated Parmesan, almond flour, egg, Italian seasoning, salt, and pepper in a large bowl.
- Shape the mixture into golf ball-sized meatballs and place them on a lined baking sheet.
- Bake for 15-20 minutes or until browned and cooked through.
- Spread half of the marinara sauce on the bottom of a greased casserole dish.
- Layer the cooked meatballs over the marinara and pour the remaining marinara sauce on top.
- Sprinkle shredded mozzarella cheese generously over the meatballs.
- Cover with foil and bake for another 15-20 minutes; then remove foil and bake for an additional 5-10 minutes.
- Garnish with fresh basil before serving.
Notes
Feel free to customize with variations like spicy kick or mushroom medley. Perfect for weeknight dinners or casual gatherings.
Nutrition
- Serving Size: 1 serving
- Calories: 375
- Sugar: 3g
- Sodium: 450mg
- Fat: 28g
- Saturated Fat: 12g
- Unsaturated Fat: 10g
- Trans Fat: 0g
- Carbohydrates: 8g
- Fiber: 3g
- Protein: 30g
- Cholesterol: 80mg
Keywords: Keto, Meatballs, Casserole, Low-Carb, Italian Comfort Food
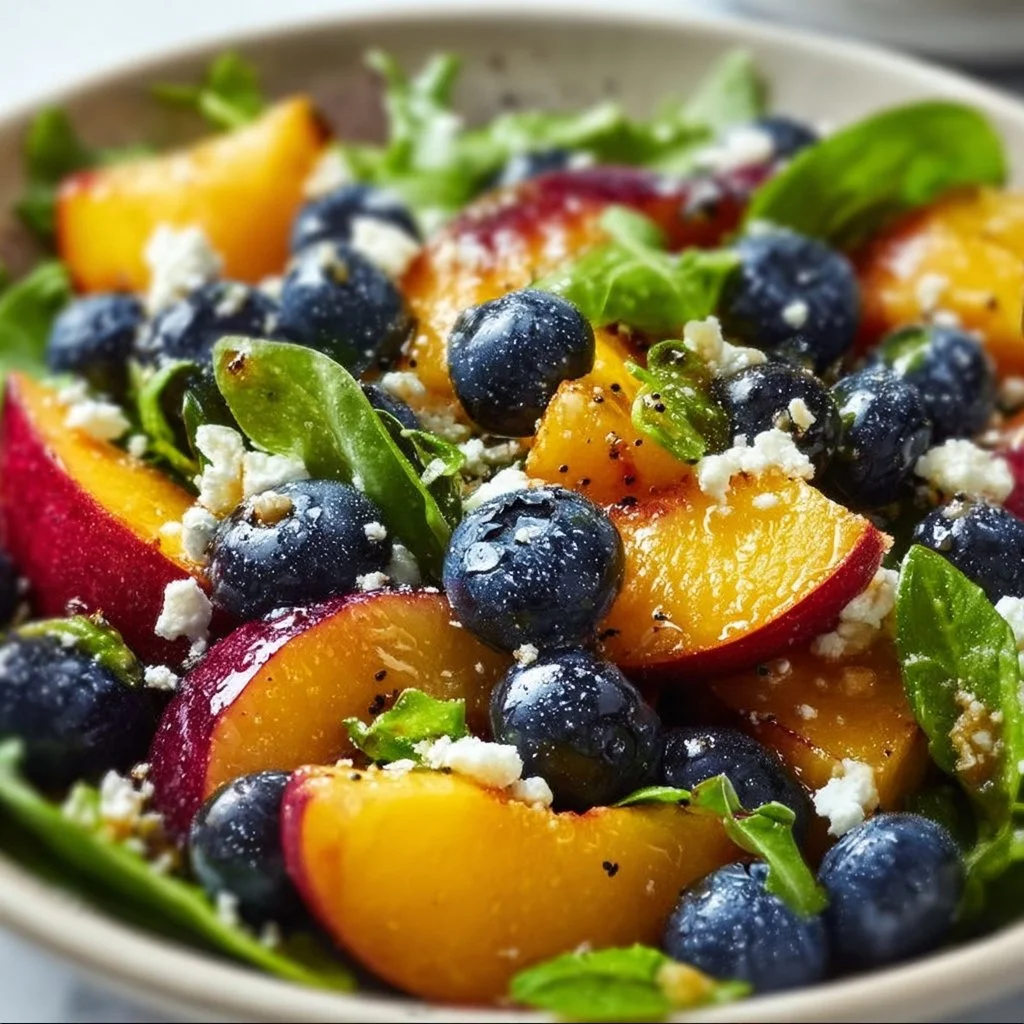
Peach and Blueberry Salad
Peach and Blueberry Salad: A Celebration of Summer Flavors
Hello there! If there’s one thing I adore about summer, it’s the explosion of colors and flavors that come with the season. Peaches and blueberries are two of my absolute favorites, so much so that I’ve made it my mission to create a dish that perfectly marries their sweet, summery goodness. Today, I’m thrilled to share my Peach and Blueberry Salad with you! This dish isn’t just visually stunning; it’s packed with flavor, health benefits, and a freshness that screams summer.
Salads often get a bad rap, right? Especially the kind that sound like they belong on a health enthusiast’s menu rather than the family dinner table. But let me assure you, this Peach and Blueberry Salad will change your mind. It’s a harmonious blend of sweet and savory, with juicy peaches, plump blueberries, crisp greens, and a tangy feta that ties it all together. Plus, it’s so easy to whip up that you’ll want to make it every week until the first signs of fall.
What I love about this salad is its versatility. It’s perfect for a backyard barbecue, a casual weekday dinner, or even a delightful brunch spread. The best part? You can customize it to suit your taste and dietary preferences. So, tie on that apron and let’s dive into this refreshing recipe!
Personal Story
Let me take you back to one of my favorite summer memories — a sun-drenched picnic at my best friend’s family orchard. We were young, carefree, and eager to escape the routines of school and responsibilities. Her parents owned a beautiful farm, and every summer, they would host a peach-picking day for friends and family. The sweet smell of ripe peaches filled the air. As we chased after each other among the trees, our buckets filled to the brim, we couldn’t resist taking bites out of the juiciest pieces we picked.
That day, after a long afternoon of fruit gathering, we spread out a colorful blanket on the grass and unpacked an array of dishes that showcased everything we had collected: jam, pies, and, of course, a vibrant salad that included all those wonderful summer fruits. The Peach and Blueberry Salad became the star of the show — bright, flavorful, and oh-so-refreshing, it was like summer captured in a bowl. This memory has stayed with me, reminding me that food is more than just meals; it’s about connections and celebrating good times with those we love.
Ingredients
Here’s what you’ll need for this luscious Peach and Blueberry Salad:
-
2 ripe peaches, sliced
Choose peaches that are slightly soft to the touch but not mushy; they should have a fragrant aroma. If you can’t find fresh peaches, nectarines work beautifully as a substitute, too! -
1 cup blueberries
Fresh blueberries are best for this salad, but frozen ones can work in a pinch. Just be sure to thaw and drain them first to avoid excess moisture. -
4 cups mixed greens
A delicious combination of baby spinach, arugula, and romaine adds texture and flavor. Feel free to use your favorites; kale or spring mix add a nice touch too! -
1/2 cup feta cheese, crumbled
Feta adds a salty creaminess that pairs wonderfully with the sweetness of the fruit. If you prefer a dairy-free option, try using crumbled tofu or nutritional yeast for a similar flavor. -
1/4 cup walnuts, chopped (optional)
Walnuts add a delightful crunch and a nutty flavor. If you have nut allergies, pumpkin or sunflower seeds make a great substitution! -
2 tablespoons olive oil
Use quality extra virgin olive oil for the best flavor. Avocado oil can be a luscious alternative for a different twist. -
1 tablespoon balsamic vinegar
This adds a beautiful depth to the dressing. If balsamic isn’t your fave, consider red wine vinegar or apple cider vinegar for a tangy kick. -
Salt and pepper to taste
A simple seasoning that enhances the flavors without overwhelming them. Freshly cracked pepper adds a nice touch!
Step-by-Step Instructions
-
Prep the Ingredients
Start by washing your fruit and greens thoroughly. Grab your beautiful peaches and slice them into thin wedges. The way the sunlight hits those peach slices is everything! Next, rinse your blueberries gently under cool water and set them aside to dry. For the greens, simply tear them into bite-sized pieces if they’re whole. A little rustic touch here will make the presentation pop! -
Toast the Walnuts
If you’re using walnuts, heat a small skillet over medium heat. Add the chopped walnuts and toast them for about 5-7 minutes until they’re fragrant and golden. Keep an eye on them to prevent burning. This step elevates their flavor, making your salad sing! -
Make the Dressing
In a small bowl, whisk together the olive oil and balsamic vinegar. Season with a pinch of salt and a couple of cracks of pepper. It should be well-balanced — not too oily and just tangy enough to kick things up a notch. If you’re feeling fancy, try adding a touch of honey or Dijon mustard for an extra depth of flavor. -
Assemble the Salad
In a large bowl, combine your mixed greens, sliced peaches, and blueberries. It looks gorgeous already, right? Gently fold in the crumbled feta and toasted walnuts (if using). Feel free to take a taste right here — you’re going to love it! -
Dress It Up
Drizzle your dressing over the salad and give it a gentle toss. You want to coat everything without bruising your delicate greens and fruit. Just a light hand here will do. -
Plate It Up
Transfer the salad to a large serving dish or individual bowls. Make sure to place extra peach slices and blueberries on top for that wow factor. It’s all about those layers and colors!
Serving Suggestions
For an elegant touch, consider serving this salad on a white platter to make the vibrant colors pop! Add a sprinkle of extra feta on top and perhaps a few sprigs of fresh basil or mint for aroma. Serve it alongside grilled chicken or fish for a delightful summer meal, or enjoy it as a light lunch on its own. A glass of chilled rosé or sparkling water infused with lemon would pair perfectly!
Recipe Variations
-
Grilled Peaches: For an added depth, try grilling the peach slices for a couple of minutes until you see those gorgeous grill marks. This caramelizes the sugars and enhances their sweetness!
-
Add Protein: Toss in some grilled chicken, shrimp, or chickpeas for a heartier dish that’s still light and flavorful.
-
Berry-Lover’s Dream: Substitute strawberries or raspberries for some of the blueberries to mix things up with different berry flavors.
-
Herb Infusion: Add fresh herbs like mint or basil to give the salad an aromatic twist.
-
Sweet & Salty: Drizzle a bit of honey on top for an extra burst of sweetness, or sprinkle some crispy bacon bits for a salty crunch.
Chef’s Notes
This Peach and Blueberry Salad has evolved over time in my kitchen — I love how a little experimentation creates a more refined version of the dish every year! The memory of that summer picnic always brings a smile to my face. The joy of sharing food and creating memories is what pushes me to refine and try new variations. Sometimes, I toss in a handful of other seasonal fruits or switch the cheese to goat cheese for a tangy flavor. Trust your instincts and play around with the ingredients; that’s what cooking is all about!
FAQs and Troubleshooting
-
What if my peaches are too firm?
If your peaches aren’t as ripe as you’d like, you can slice them and leave them at room temperature for a couple of days to soften up. You can also try a quick soak in warm water to speed up the process! -
How can I make this a meal-prep-friendly dish?
To make this salad ahead of time, keep the dressing separate until you’re ready to serve to prevent the greens from wilting. Layer the ingredients in a mason jar, starting with the heavier items at the bottom and finishing with greens at the top. -
Can I use frozen fruit?
Absolutely! Just remember that frozen fruit can tend to be more watery, so allow it to thaw and drain excess liquid before adding it to the salad. -
How can I lengthen the salad’s shelf life?
To keep things fresh, store the ingredients separately in airtight containers. Assemble the salad only when you’re ready to serve for maximum freshness.
Nutritional Info
Note: Nutritional information can vary based on specific ingredients used, so please consider this a guideline.
- Calories: Approximately 300 calories per serving (based on 4 servings)
- Protein: 12g
- Carbohydrates: 28g
- Fat: 18g
- Fiber: 4g
There you have it, folks! A community-inspired, deliciously simple Peach and Blueberry Salad that will make your taste buds sing. I hope you feel empowered to tie on that apron and try this dish out for yourself. Remember, cooking and hosting are all about joy and connection — and you’re capable of creating those beautiful moments in your kitchen. Happy cooking! 🍑🫐
PrintPeach and Blueberry Salad
A refreshing salad that combines juicy peaches and plump blueberries, perfect for summer gatherings.
- Prep Time: 15 minutes
- Cook Time: 10 minutes
- Total Time: 25 minutes
- Yield: 4 servings 1x
- Category: Salad
- Method: No Cooking
- Cuisine: American
- Diet: Vegetarian
Ingredients
- 2 ripe peaches, sliced
- 1 cup blueberries
- 4 cups mixed greens
- 1/2 cup feta cheese, crumbled
- 1/4 cup walnuts, chopped (optional)
- 2 tablespoons olive oil
- 1 tablespoon balsamic vinegar
- Salt and pepper to taste
Instructions
- Prep the Ingredients: Wash your fruit and greens thoroughly. Slice the peaches into thin wedges, rinse the blueberries, and tear the greens into bite-sized pieces.
- Toast the Walnuts: In a small skillet over medium heat, toast the chopped walnuts for about 5-7 minutes until fragrant.
- Make the Dressing: Whisk together olive oil and balsamic vinegar in a small bowl. Season with salt and pepper.
- Assemble the Salad: In a large bowl, combine mixed greens, peaches, and blueberries. Fold in feta and walnuts.
- Dress It Up: Drizzle the dressing over the salad and toss gently to coat.
- Plate It Up: Transfer to a serving dish and add extra peach slices and blueberries on top.
Notes
Try grilling the peaches for added flavor or adding protein like chicken for a heartier dish.
Nutrition
- Serving Size: 1 serving
- Calories: 300
- Sugar: 8g
- Sodium: 300mg
- Fat: 18g
- Saturated Fat: 4g
- Unsaturated Fat: 12g
- Trans Fat: 0g
- Carbohydrates: 28g
- Fiber: 4g
- Protein: 12g
- Cholesterol: 15mg
Keywords: salad, peach salad, blueberry salad, summer recipes, healthy salads
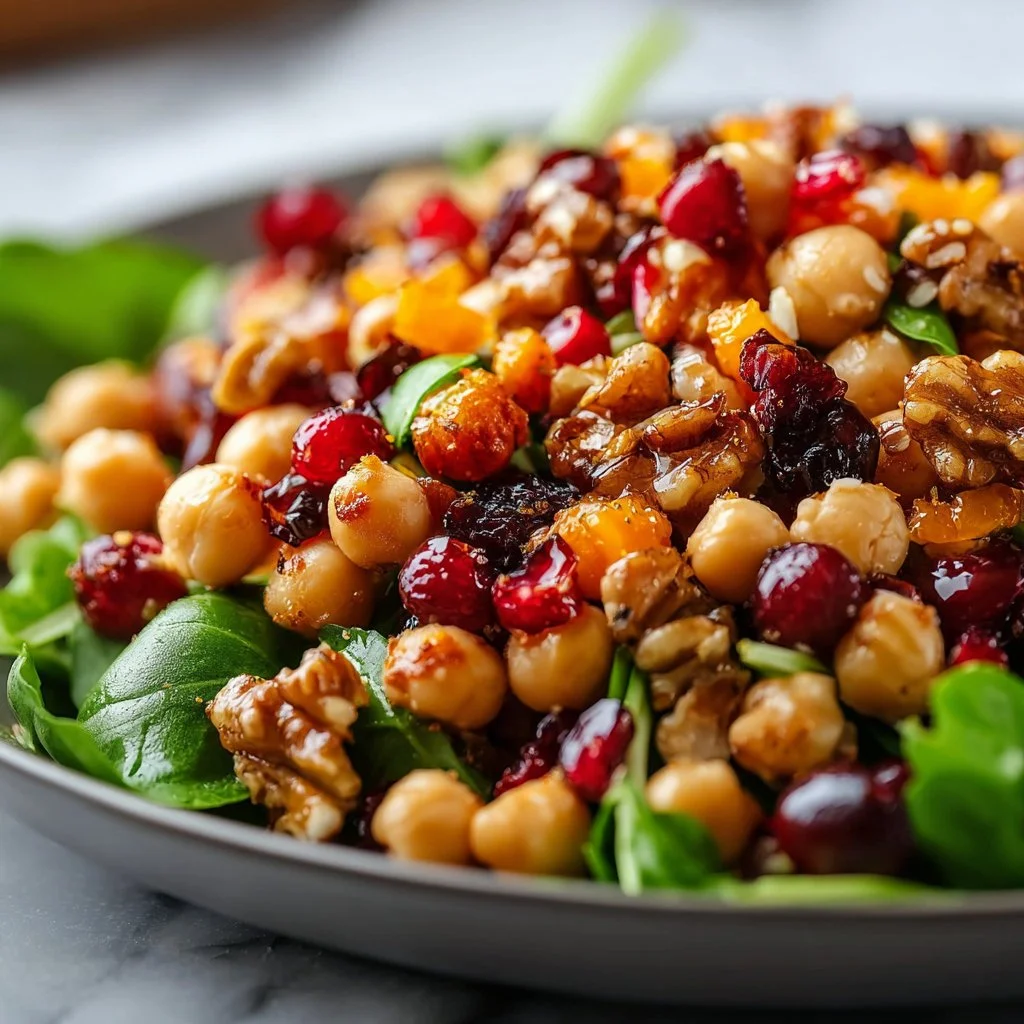
Cranberry Walnut Chickpea Salad with Orange Vinaigrette
Delightful Cranberry Walnut Chickpea Salad with Orange Vinaigrette
Hello, lovely foodies! Today, I’m thrilled to share a recipe that truly captures the essence of comfort and sunshine in a bowl — my Cranberry Walnut Chickpea Salad with Orange Vinaigrette. If you’re seeking a dish that’s not only bursting with flavor but is also quick and easy to whip up, you’re in for a delightful treat.
Imagine this: it’s a bright afternoon, the kitchen is filled with laughter, and you’re preparing a meal that not only nourishes your body but also warms your soul. This salad is a celebration of those moments — the perfect dish for lunch, dinner, or even that picnic you’re dreaming about. Whether you’re entertaining guests or enjoying a quiet evening at home, this vibrant salad is guaranteed to impress while requiring minimal effort.
What I love most about this salad is its balance of sweet and savory flavors, along with the satisfying crunch of toasted walnuts, the chewiness of dried cranberries, and the heartiness of chickpeas. And let’s not forget about the orange vinaigrette! It ties everything together and adds a zest that will have you coming back for seconds (or thirds). So grab your apron and let’s dive into this lovely dish that’s as beautiful as it is delicious!
Personal Story
I remember the first time I crafted this recipe; it was during a summer get-together at my close friend’s home. The sun was shining, and the air was filled with laughter and the smell of grilled veggies. Someone suggested we make a salad, but not just any salad—a dish that included all our summer favorites. As we rummaged through the pantry and picked fresh herbs from the garden, I stumbled upon a can of chickpeas. My mind immediately sparked with ideas!
Combining chickpeas with the sweet and chewy cranberries and the earthy crunch of walnuts felt like the perfect marriage. We even decided to make an orange vinaigrette from the fresh oranges that were begging to be peeled. That day, we mixed, tasted, and laughed until we created the Cranberry Walnut Chickpea Salad. It became a staple at our gatherings—a vibrant dish that captured the essence of our friendship and summer sunshine.
Ingredients
Here’s what you need to create your own delightful Cranberry Walnut Chickpea Salad:
-
1 can (15 oz) chickpeas, drained and rinsed: Chickpeas are the protein-packed stars of this salad. If you’re in a pinch, you can swap them for white beans or black beans for a different flavor profile.
-
1/2 cup dried cranberries: These little bursts of sweetness add an irresistible flavor. No cranberries? No problem! Try raisins or chopped dried apricots for a similar touch of sweetness.
-
1/2 cup chopped walnuts, toasted: Walnuts add a delightful crunch and nutty flavor. If you or someone you’re serving has nut allergies, sunflower seeds or pumpkin seeds are excellent alternatives.
-
1/4 cup red onion, finely chopped: Red onions provide a sharp, zesty taste. If you prefer a milder flavor, go for green onions or shallots instead.
-
2 cups mixed greens or baby spinach: Fresh greens are essential for a colorful, healthy base. You can mix it up with arugula, kale, or even shredded cabbage.
-
1 orange, juiced and zested: The juice and zest will bring a fresh citrusy zing. If oranges aren’t in season, lemons or limes can step in for a tart twist!
-
2 tablespoons olive oil: Extra virgin olive oil is a must for that smooth, rich flavor in our vinaigrette. Avocado oil is a great substitution if you want something a bit different.
-
1 tablespoon apple cider vinegar: This adds a nice tangy kick! You can use red wine vinegar or balsamic vinegar if that’s what you have on hand.
-
1 teaspoon honey or maple syrup: A little sweetness goes a long way to balance out flavors. You can also use agave syrup for a vegan-friendly option.
-
Salt and pepper, to taste: Don’t forget to season! This enhances all the flavors beautifully.
Step-by-Step Instructions
Now, let’s jump into the cooking process! Here are the steps to crafting your gorgeous Cranberry Walnut Chickpea Salad:
-
Prep Your Ingredients: Start by gathering all your lovely ingredients in one place. This not only makes the cooking process smoother but also helps you ensure that you have everything you need. Chop your red onion, zest your orange, and roughly chop your walnuts into smaller pieces. Don’t worry about perfection here; just aim for delightful bites!
-
Toast Your Walnuts: This is a crucial step, friends! In a dry skillet over medium heat, toss in those chopped walnuts. Keep an eye on them and stir occasionally to prevent burning. In just 3-5 minutes, they’ll turn a beautiful golden brown and release a nutty aroma that’ll have your tastebuds dancing. Remove them from the heat and let them cool while you continue with the salad.
-
Mix the Base: In a large bowl, combine the drained chickpeas, dried cranberries, finely chopped red onion, and those heavenly toasted walnuts. Gently fold them together to mix well — no need to mash those chickpeas! You want them intact for that satisfying bite.
-
Prepare the Vinaigrette: In a separate small bowl, whisk together the orange juice, orange zest, olive oil, apple cider vinegar, and honey or maple syrup. This step is all about balance! If you prefer a sweeter vinaigrette, feel free to add a tad more honey. Taste and adjust with salt and pepper to your liking.
-
Combine Everything: Pour that luscious vinaigrette over your chickpea mixture and gently toss to combine. This might be my favorite part — watching everything become enveloped in that gorgeous, vibrant dressing!
-
Add the Greens: Last but definitely not least, stir in your mixed greens or baby spinach. You want them to be coated lightly in the dressing without being bruised, so fold gently. This creates a lovely, vibrant base for your salad.
-
Plate It Up: I recommend letting the salad sit for about 10 minutes before serving. This allows all those wonderful flavors to meld together. When you’re ready to serve, twirl the salad onto a beautiful platter or individual bowls. Drizzle any extra vinaigrette over the top and sprinkle with additional walnuts for that impressive finish.
Serving Suggestions
When it comes to serving your beautiful Cranberry Walnut Chickpea Salad, presentation is key! For a polished touch, use a large white serving bowl that contrasts with the vivid colors of the salad. Garnish with a few orange slices or extra zest on top to really make it pop. If you’re hosting, serve it as a stunning side to your main dish, or enjoy it solo for a light, nutritious meal. Trust me, guests will be impressed and asking for seconds!
Recipe Variations
Feel free to get creative with this recipe! Here are a few different twists you might want to try:
-
Add Cheese: Crumbled feta or goat cheese can add a lovely creamy element to balance the crunch of the walnuts.
-
Switch Up the Greens: Try using kale or a hearty arugula for an extra peppery kick.
-
Spice It Up: A pinch of chili flakes or a dash of hot sauce can take your vinaigrette to another level!
-
Fruit Up: Toss in some diced apple or pear for an added sweet crunch.
-
Make It Meal-Ready: Add grilled chicken or quinoa for a protein-packed, satisfying meal.
Chef’s Notes
You know, the best part about the kitchen is the memories we create while cooking. I’ve had my fair share of mishaps — remember that time I almost burned that batch of walnuts? While I was chatting away with a friend, I sniffed that toasty aroma just in time! They’ll always have a special place in my heart (and my recipe). Over the years, this Cranberry Walnut Chickpea Salad has evolved from a simple combination of ingredients to an essential part of my gatherings. It’s so versatile, and you can easily adjust the flavors based on the season or occasion. And often, the simplest dishes are the ones that leave lasting impressions!
FAQs and Troubleshooting
Q: Can I make this salad ahead of time?
A: Absolutely! Just keep the dressing separate until you’re ready to serve to prevent the greens from wilting.
Q: How do I store leftovers?
A: Store any leftover salad in an airtight container in the fridge for up to 2 days. The flavors will continue to develop, making it even tastier!
Q: Can I use fresh herbs in this salad?
A: Yes! Chopped parsley or mint can add a fresh burst of flavor. Just remember to use them sparingly, as you don’t want them to overpower the other ingredients.
Q: The vinaigrette is too tart. What can I do?
A: If you find your vinaigrette is too tart, simply add a touch more honey or olive oil to balance it out. Taste as you go to find your perfect balance!
Nutritional Info (Optional)
This salad is packed with nutrients, so here’s a general rundown per serving:
- Calories: Approximately 250
- Protein: 8g
- Fat: 12g
- Carbohydrates: 30g
- Fiber: 7g
- Sugar: 6g
Conclusion
And there you have it, my flavorful Cranberry Walnut Chickpea Salad with Orange Vinaigrette! I hope you enjoy making this vibrant dish as much as I do. It’s not just a recipe; it’s an invitation to gather around the table, to share stories, and to create memories that will last a lifetime. So grab your apron, get cooking, and let’s make the world a little more delicious, one salad at a time. Happy cooking, friends! 🍊🥗
PrintCranberry Walnut Chickpea Salad with Orange Vinaigrette
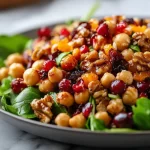
A vibrant salad bursting with flavor, featuring chickpeas, dried cranberries, toasted walnuts, and a refreshing orange vinaigrette.
- Prep Time: 15 minutes
- Cook Time: 5 minutes
- Total Time: 20 minutes
- Yield: 4 servings 1x
- Category: Salad
- Method: No cooking
- Cuisine: American
- Diet: Vegetarian
Ingredients
- 1 can (15 oz) chickpeas, drained and rinsed
- 1/2 cup dried cranberries
- 1/2 cup chopped walnuts, toasted
- 1/4 cup red onion, finely chopped
- 2 cups mixed greens or baby spinach
- 1 orange, juiced and zested
- 2 tablespoons olive oil
- 1 tablespoon apple cider vinegar
- 1 teaspoon honey or maple syrup
- Salt and pepper, to taste
Instructions
- Prep your ingredients: Gather all your lovely ingredients in one place. Chop your red onion, zest your orange, and roughly chop your walnuts.
- Toast your walnuts: In a dry skillet over medium heat, toast the chopped walnuts for 3-5 minutes until golden brown and aromatic.
- Mix the base: In a large bowl, combine chickpeas, dried cranberries, red onion, and toasted walnuts. Gently fold to mix.
- Prepare the vinaigrette: In a separate bowl, whisk together orange juice, orange zest, olive oil, apple cider vinegar, and honey. Adjust seasoning with salt and pepper.
- Combine everything: Pour the vinaigrette over the chickpea mixture and gently toss.
- Add the greens: Stir in your mixed greens or baby spinach, folding gently to coat.
- Plate it up: Let sit for about 10 minutes before serving. Serve in a beautiful bowl and garnish as desired.
Notes
Store leftovers in an airtight container in the fridge for up to 2 days. Keep the dressing separate until serving to avoid wilting.
Nutrition
- Serving Size: 1 serving
- Calories: 250
- Sugar: 6g
- Sodium: 300mg
- Fat: 12g
- Saturated Fat: 1g
- Unsaturated Fat: 9g
- Trans Fat: 0g
- Carbohydrates: 30g
- Fiber: 7g
- Protein: 8g
- Cholesterol: 0mg
Keywords: salad, chickpea salad, cranberry salad, walnut salad, vegetarian salad
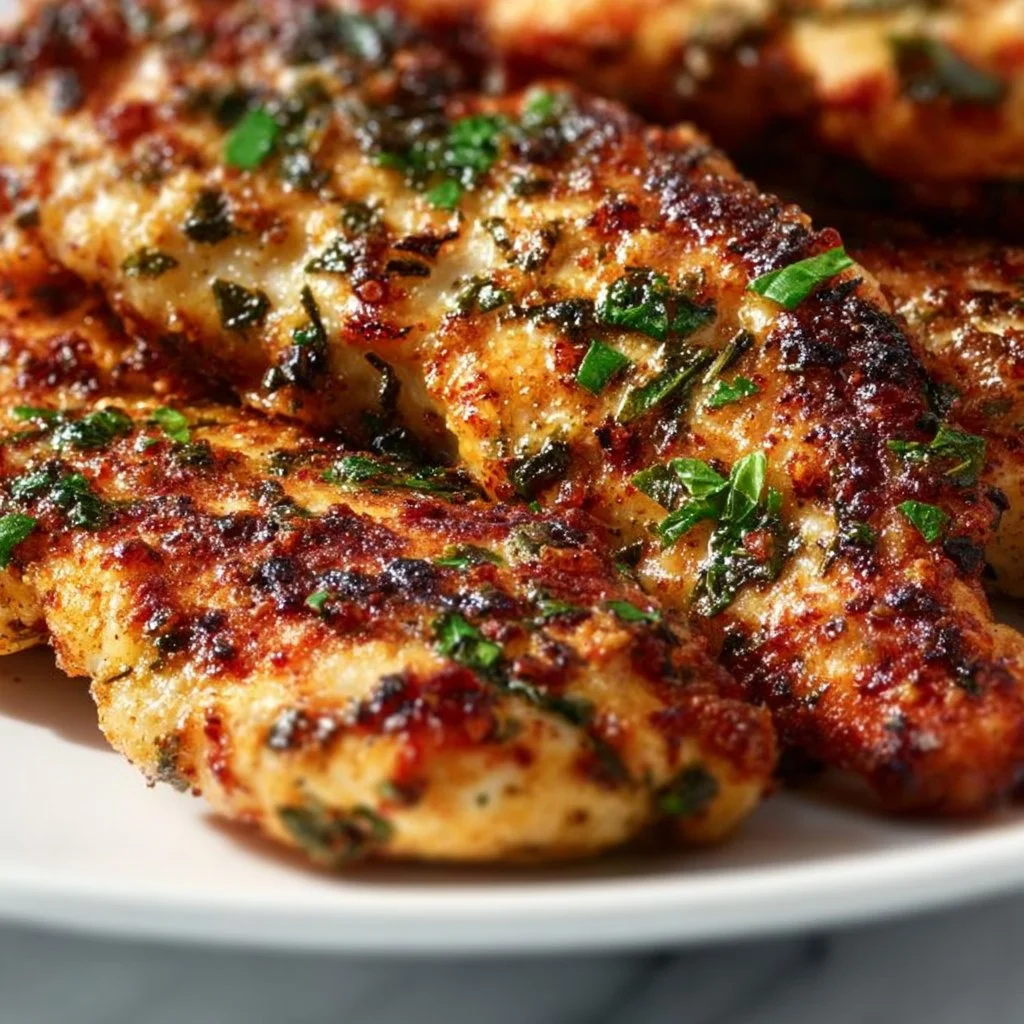
Mediterranean Chicken Tenders
Mediterranean Chicken Tenders: A Flavorful Adventure
Hello, fellow foodies! Today, we’re diving into the world of Mediterranean flavors with a dish that’s sure to impress while remaining easy and approachable. Say hello to Mediterranean Chicken Tenders! These succulent tenders are marinated in a blend of fresh lemon juice, aromatic herbs, and spices that will transport you straight to the sunny Mediterranean coast with every bite. You don’t need a culinary degree or a fancy kitchen to whip these up, just a sprinkle of intention and a dash of love.
I remember the first time I tried Mediterranean chicken tenders—there was this quaint little restaurant in town that was all the rage with its vibrant vibes and delicious food. I took my best friend there for a birthday treat, and we ordered everything on the menu! But it was those chicken tenders, coated in fragrant herbs and grilled to perfection, that stole the show. The crunchy golden exterior, combined with the tender, juicy meat inside, was simply irresistible. Since then, I’ve brought my own spin to this classic dish, and I can’t wait to share it with you!
So, whether you’re planning a cozy dinner at home, throwing a gathering, or looking to elevate your meal prep game, these Mediterranean chicken tenders will not disappoint. Let’s roll up our sleeves, tie on our aprons, and get cooking!
Personal Story
As a child, my love for cooking blossomed in my grandmother’s kitchen. The air was always infused with the comforting scents of her delicious meals, and she had this magic way of turning ordinary ingredients into extraordinary culinary delights. I remember one particular summer, helping her prepare a Mediterranean feast for our family reunion. She taught me how to layer flavors, introducing me to vibrant herbs and tangy citrus that would awaken our taste buds. I still use her tricks, especially when making these chicken tenders, which echo the love she instilled in me for home-cooked meals. Tasting them takes me back to those sun-soaked days, where laughter and stories flowed as freely as the olive oil we drizzled on everything!
Ingredients
To create these delightful Mediterranean Chicken Tenders, you’ll need the following ingredients:
-
1 lb chicken tenders: Start with fresh or thawed chicken tenders for the best texture. Use boneless, skinless chicken breasts as a substitute if needed—cut them into strips for similar size.
-
2 tablespoons olive oil: Look for good quality extra virgin olive oil; its fruity flavor will enhance the dish. Canola or avocado oil can serve as substitutes, but they won’t add the same richness.
-
2 teaspoons dried oregano: Oregano is a staple in Mediterranean cooking that adds earthy notes. Fresh oregano will work as well—just use around 1 tablespoon, chopped finely.
-
1 teaspoon garlic powder: This adds a warm, comforting flavor. Feel free to use freshly minced garlic for an even more robust taste—just adjust according to your preference!
-
1 teaspoon paprika: This spice adds a smoky depth to the chicken. Swap it out with smoked paprika for an extra layer of flavor or use chili powder for a kick!
-
Salt and pepper to taste: Season generously! Freshly cracked black pepper always makes a difference—consider using a mix of sea salt and kosher salt for a nuanced taste.
-
Juice of 1 lemon: Fresh lemon juice brightens the flavors and provides acidity. Lime juice or a splash of white vinegar can be good substitutes if you’re in a pinch.
-
Fresh parsley for garnish: This adds a touch of color and freshness to the dish. Basil or cilantro can also substitute if you’re looking to change things up!
Step-by-Step Instructions
Now, let’s get those chicken tenders marinating and cooking to perfection!
-
Marinate the Chicken: In a mixing bowl, start by adding the olive oil, dried oregano, garlic powder, paprika, salt, pepper, and the juice of one lemon. Whisk it all together until you have a harmonious mixture.
Chef’s Tip: Taste the marinade! Adjust the seasoning according to your preference—it should taste bright and flavorful!
-
Coat the Chicken: Next, add the chicken tenders to the bowl, ensuring each piece is coated in the marinade. Cover the bowl with plastic wrap or a lid, and let it marinate in the fridge for at least 30 minutes, but if you have more time, let it sit for up to 2 hours for deeper flavors.
Chef’s Hack: If you’re short on time, you can even marinate them while you prepare your side dishes—multi-tasking magic!
-
Preheat the Oven or Grill: Preheat your oven to 400°F (200°C) if you’re baking, or preheat your grill to medium-high heat if grilling. You can also use a stovetop grill pan for this recipe.
Chef’s Note: Using a grill pan indoors? Make sure your kitchen is well-ventilated to combat any smoke!
-
Cooking the Tenders:
- Oven Method: Place the marinated chicken tenders on a baking sheet lined with parchment paper. Bake for 15-20 minutes until they are golden brown and cooked through (internal temperature should reach 165°F/75°C).
- Grill Method: Grill the chicken tenders for about 3–5 minutes on each side until they develop beautiful grill marks and are cooked through.
Tip: If you’re grilling, try to avoid moving them around too much; let them sit and get those lovely grill marks!
-
Rest the Chicken: Once the tenders are cooked, remove them from the heat and let them rest for about 5 minutes. This is key to locking in moisture!
Chef’s Insight: This resting time also gives you a moment to toss a quick salad or prepare any sides!
-
Garnish and Serve: Slice the chicken tenders if desired, serve them warm, and sprinkle with freshly chopped parsley for a lovely finish.
Serving Suggestion: A side of tzatziki or a Greek salad would be the perfect pairing along with your succulent chicken. You’ll have everyone raving!
Serving Suggestions
When plating your Mediterranean chicken tenders, arrange them on a simple white platter for a classic look, and garnish with fresh parsley. You can also serve them on a bed of vibrant greens such as arugula or spinach, drizzled with a little more lemon juice and olive oil for that extra culinary flair. For a fun twist, serve with colorful, grilled veggies on the side, such as zucchini, bell peppers, or cherry tomatoes, adding brightness and crunch to your dish!
Recipe Variations
If you’re feeling adventurous or have specific dietary needs, here are a few fun variations to switch things up:
-
Mediterranean Spice Blend: Swap out the oregano and spices for a pre-made Mediterranean spice blend for a flavor punch.
-
Za’atar Chicken Tenders: Use za’atar seasoning instead of oregano for a different flavor profile that is aromatic and delicious.
-
Lemon Garlic Marinade: Add minced garlic and a touch of honey to the marinade for a sweet and tangy kick.
-
Crispy Oven-Baked Tenders: Coat the marinated tenders in breadcrumbs or panko before baking for a crispy texture.
-
Gluten-Free Option: Use gluten-free breadcrumbs if you want that crunchy bite with breaded tenders!
Chef’s Notes
This recipe has gone through several iterations in my kitchen over the years. I started with basic spices, but as I experimented, I discovered the beauty of fresh herbs and citrus that brightened the dish. One particularly memorable night, I mixed up my spices and accidentally grabbed cumin instead of paprika! Surprisingly, it turned out amazing, and that was the night I learned that the kitchen is all about creativity and adaptability. No meal should feel like a chore; rather, it should be a chance to express yourself!
FAQs and Troubleshooting
Q: What should I do if my chicken is tough?
A: Chicken can become tough if overcooked. Always use a meat thermometer to make sure your chicken doesn’t exceed 165°F (75°C).
Q: Can I make this dish ahead of time?
A: Absolutely! You can marinate the chicken tenders the night before, and when you’re ready to cook, just pop them in the oven or on the grill.
Q: What can I serve with Mediterranean chicken tenders?
A: These are versatile! Pair them with Greek salad, roasted vegetables, or even over a bed of couscous or quinoa drizzled with lemon vinaigrette.
Q: Can I freeze the chicken tenders?
A: Yes, you can freeze the marinated tenders! Just ensure they are properly sealed in a freezer bag, and they’ll stay fresh for up to three months. Thaw in the fridge before cooking.
Nutritional Info
Per Serving (based on 4 servings, excluding sides):
- Calories: ~250
- Protein: ~30g
- Fat: ~12g
- Carbohydrates: ~1g
- Fiber: ~0g
Cooking can be such a joyful experience, especially when you’re sharing these moments with friends and family. I hope these Mediterranean Chicken Tenders find a special place in your kitchen, just like they have in mine. So go ahead, tie that apron, gather your loved ones around the table, and enjoy each bite together! Happy cooking, my friends!
PrintMediterranean Chicken Tenders
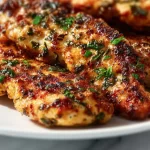
Delicious chicken tenders marinated in Mediterranean flavors, perfect for a cozy dinner or a gathering.
- Prep Time: 30 minutes
- Cook Time: 20 minutes
- Total Time: 50 minutes
- Yield: 4 servings 1x
- Category: Main Course
- Method: Grilling, Baking
- Cuisine: Mediterranean
- Diet: Gluten-Free, Dairy-Free, Nut-Free
Ingredients
- 1 lb chicken tenders
- 2 tablespoons olive oil
- 2 teaspoons dried oregano
- 1 teaspoon garlic powder
- 1 teaspoon paprika
- Salt and pepper to taste
- Juice of 1 lemon
- Fresh parsley for garnish
Instructions
- Marinate the Chicken: In a mixing bowl, add the olive oil, dried oregano, garlic powder, paprika, salt, pepper, and lemon juice. Whisk until combined.
- Coat the Chicken: Add chicken tenders to the marinade, covering each piece. Cover and refrigerate for at least 30 minutes or up to 2 hours.
- Preheat the Oven or Grill: Preheat oven to 400°F (200°C) for baking or grill to medium-high heat.
- Cook the Tenders: For the oven, place on a lined baking sheet and bake for 15-20 minutes. For grilling, cook for 3-5 minutes on each side.
- Rest the Chicken: Let the cooked tenders rest for 5 minutes to lock in moisture.
- Garnish and Serve: Slice if desired, serve warm, and sprinkle with parsley.
Notes
Taste the marinade and adjust seasoning as needed. Serve with tzatziki or Greek salad for the best pairing!
Nutrition
- Serving Size: 1 serving
- Calories: 250
- Sugar: 1g
- Sodium: 300mg
- Fat: 12g
- Saturated Fat: 2g
- Unsaturated Fat: 7g
- Trans Fat: 0g
- Carbohydrates: 1g
- Fiber: 0g
- Protein: 30g
- Cholesterol: 80mg
Keywords: Mediterranean, Chicken, Easy Recipe, Grilled, Baked Chicken, Healthy Dinner
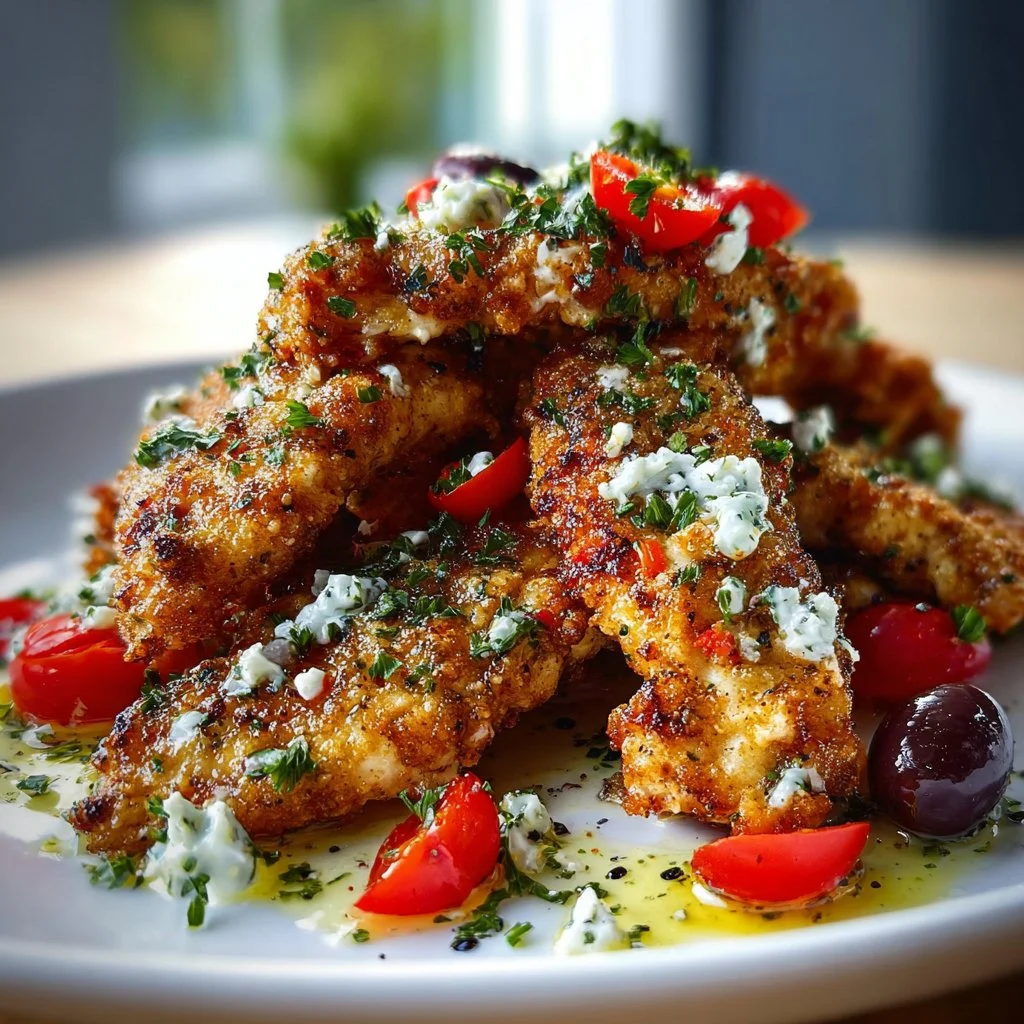
Greek Chicken Tenders
Flavorful Greek Chicken Tenders: Your New Go-To Recipe
Welcome back to Ivory Apron! Today, we’re diving into a dish that has quickly become a favorite in my home: Greek Chicken Tenders. Simple yet bursting with flavor, these tender bites of chicken marinated in a tangy, herby blend are perfect for weeknight dinners, casual get-togethers, or even upscale entertaining. The best part? You can whip them up in no time, making them a delicious choice when you want something special without the stress.
Think of this dish as a passport to the Mediterranean — each bite is like taking a sun-kissed trip to the Greek islands. I’m talking about juicy chicken morsels infused with the zest of lemon, aromatic garlic, and fresh herbs, all perfectly paired with a creamy Greek yogurt sauce that will make your taste buds dance. Plus, the vibrant colors and appealing presentation make for a meal that looks elegant, yet feels comfortably homemade.
In my years of cooking and hosting, I’ve learned that food has a magical way of bringing people together. These Greek Chicken Tenders are no exception; whether you’re serving them as an appetizer, tossing them into a salad, or enjoying them with a side of roasted veggies, they create a delicious moment that you and your guests will savor. So, tie on your apron, gather your ingredients, and let’s get cooking!
Personal Story
I’ll never forget the first time I truly embraced the flavors of Greece. It was a bright summer evening; my husband and I had just returned from a little trip to Santorini. We were enchanted by the sunlit streets, the vibrant blue waters, and of course, the delicious food we wouldn’t stop raving about. One night, we stumbled upon a quaint little taverna by the water, where the scent of grilled chicken and herbs wafted through the air as the sun dipped below the horizon.
We ordered a plate of grilled chicken skewers served alongside a homemade tzatziki, and each bite was a memory in the making. Trying to recreate that experience at home became my culinary quest! Fast forward to now, and these Greek Chicken Tenders have been inspired by that very moment. With fresh ingredients and a little love, I’ve brought those holiday flavors to my dining table, where they quickly became a family favorite — and I’m excited to share it with you!
Ingredients
Let’s get a closer look at what you’ll need to create these delectable Greek Chicken Tenders:
-
1.5 lbs chicken tenders (or sliced chicken breast): These chicken tenders are juicy and tender, perfect for absorbing the marinade. If you prefer, boneless, skinless chicken breasts work beautifully as well — just make sure to slice them into strips for quick cooking.
-
1/2 cup plain Greek yogurt: This ingredient adds creaminess and tang, making our marinate both rich and zesty. If you’re looking for dairy-free options, try a coconut yogurt or any plant-based yogurt that suits your taste!
-
3 tablespoons olive oil: A staple in Mediterranean cooking, olive oil not only enhances flavors but also aids in marinating and cooking. Feel free to use avocado oil for a different flavor profile.
-
2 tablespoons fresh lemon juice: Freshly squeezed lemon juice provides brightness and acidity – a crucial balance for the dish. If you’re in a pinch, bottled lemon juice can work, but nothing replaces the freshness of the real deal!
-
2 teaspoons lemon zest: This boosts the lemon flavor without adding extra liquid. Zest before juicing your lemons for ease. You can swap in lime zest for a fun twist!
-
3 garlic cloves, minced: Garlic adds an aromatic base that’s essential for depth of flavor. If you’re not a fan of raw garlic, roasted garlic offers a milder, sweeter profile.
-
1 tablespoon dried oregano: Oregano is a beloved herb in Greek cuisine. If you have fresh oregano, it’s even better – use about three times the amount as it loses potency when dried.
-
1 teaspoon salt: Essential for flavor enhancement. Remember, you can always add more, but it’s hard to remove it, so start small!
-
1/2 teaspoon black pepper: Freshly cracked black pepper elevates the overall flavor. If you want some heat, consider adding a pinch of cayenne or red pepper flakes.
-
Optional: 1/2 teaspoon ground cumin: Cumin adds a warm, earthy note that takes the flavors to another level. It can be skipped if you prefer a more traditional Greek flavor.
Let’s move on to the fun part: cooking these tasty tenders!
Step-by-Step Instructions
-
Prepare the Marinade: In a medium mixing bowl, combine the Greek yogurt, olive oil, lemon juice, lemon zest, minced garlic, dried oregano, salt, black pepper, and optional cumin. Give it a good whisk until all the ingredients are well incorporated. This is where the magic happens; the yogurt is going to tenderize the chicken and infuse it with flavor. It’s best to let the mixture sit for about 5-10 minutes to allow the flavors to meld.
-
Marinate the Chicken: In the same bowl or a large Ziploc bag, add your chicken tenders. Make sure they’re well-coated in that luscious marinade. If you have some time, let them marinate in the fridge for at least 30 minutes, or even overnight if you can plan ahead. The longer they sit, the more flavorful they’ll become.
-
Preheat Your Grill or Oven: If you’re using a grill, preheat it to medium-high heat. For oven cooking, preheat your oven to 400°F (200°C). The choice is yours, but grilling adds that fantastic smoky flavor!
-
Cook the Chicken: If you’re grilling, place the chicken tenders directly on the grill. Cook for about 5-7 minutes on each side until they are cooked through and have nice grill marks. If you’re using the oven, arrange the chicken on a baking sheet lined with parchment paper. Bake for 20-25 minutes or until they reach an internal temperature of 165°F (75°C).
-
Rest Before Serving: Once cooked, let the chicken tenders rest for 5 minutes. This step is crucial for juicy chicken as it allows the juices to redistribute throughout the meat. Trust me, it’s worth the wait!
-
Make Your Sauce: While the chicken is resting, you can whip up a quick dipping sauce or dressing. Simply mix some more Greek yogurt with a dash of lemon and a sprinkle of fresh herbs like dill or parsley. This light sauce is a perfect complement to the flavors of the chicken.
And voila! You’ve mastered the Greek Chicken Tenders.
Serving Suggestions
For a gorgeous presentation, serve the chicken tenders on a rustic wooden board or a white platter. Drizzle with your yogurt sauce and sprinkle with fresh herbs for a pop of color. Pair them with a light Greek salad with cucumbers, tomatoes, and feta, and you have a meal that looks as good as it tastes. For a heartier meal, serve over a bed of couscous or alongside roasted potatoes.
Recipe Variations
These Greek Chicken Tenders can easily be tweaked to suit your palate or dietary needs:
-
Herb-Infused: Swap in fresh herbs like thyme or rosemary for a different aromatic experience.
-
Spicy Kick: Add chopped jalapeños or crushed red pepper to the marinade if you enjoy a bit of heat.
-
Citrus Blend: Experiment with lime or orange zest and juice for a brighter flavor profile.
-
Vegan Option: Substitute chicken for tofu or tempeh, and use a dairy-free yogurt to make a plant-based version.
-
Skewered Delight: Thread the marinated chicken onto skewers with peppers and onions for a fun, grilled platter.
Chef’s Notes
As I mentioned earlier, cooking is all about love and sharing – and these Greek Chicken Tenders embody that. Over the years, I’ve experimented with this recipe flight of flavors, initially sticking to the classics and then growing bolder with additional spices and ingredients. I once hosted a friend’s birthday, and let’s just say we had a little too much “help” from a bottle of wine while preparing the marinade. It resulted in the most delicious “oops” moment when I accidentally added too much lemon juice! Despite that, the guests raved about a ‘new twist’ on my recipe. Lesson learned: embrace the accidents; they may lead to delicious discoveries!
FAQs and Troubleshooting
Q1: My chicken is dry; what did I do wrong?
A: One common mistake is overcooking the chicken. Always check the internal temperature with a meat thermometer. Remove it from heat as soon as it reaches 165°F (75°C).
Q2: Can I marinate the chicken longer than overnight?
A: You can, but be cautious! Recipes with acidic marinades can break down the chicken’s texture if left too long. Stick to 12-24 hours for the best results.
Q3: Can I use chicken thighs instead of tenders?
A: Absolutely! Chicken thighs will offer a richer flavor. Just keep in mind they may take a little longer to cook through.
Q4: How can I store leftovers?
A: Store any leftovers in an airtight container in the fridge for up to 3 days. You can enjoy them cold on a salad or reheated gently for another delicious meal!
Nutritional Info (if applicable)
While I won’t delve into exhaustive nutritional details here, it’s important to know that these Greek Chicken Tenders are a healthy, protein-packed option, thanks to the chicken and Greek yogurt. You can easily customize the recipe based on your dietary needs and make it your own!
There you have it! Your guide to creating unforgettable Greek Chicken Tenders that will surely impress. Thank you for joining me today, and happy cooking! I can’t wait to hear how your culinary adventures unfold. Don’t forget to share your creations and any adaptations you make; I love connecting with fellow foodies!
PrintFlavorful Greek Chicken Tenders
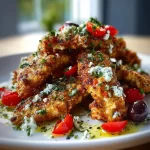
Juicy chicken tenders marinated in a tangy, herby blend, paired with a creamy Greek yogurt sauce for a delicious Mediterranean meal.
- Prep Time: 10 minutes
- Cook Time: 30 minutes
- Total Time: 40 minutes
- Yield: 4 servings 1x
- Category: Main Course
- Method: Grilling or Baking
- Cuisine: Greek
- Diet: Gluten-Free
Ingredients
- 1.5 lbs chicken tenders
- 1/2 cup plain Greek yogurt
- 3 tablespoons olive oil
- 2 tablespoons fresh lemon juice
- 2 teaspoons lemon zest
- 3 garlic cloves, minced
- 1 tablespoon dried oregano
- 1 teaspoon salt
- 1/2 teaspoon black pepper
- Optional: 1/2 teaspoon ground cumin
Instructions
- Prepare the Marinade: In a medium mixing bowl, combine the Greek yogurt, olive oil, lemon juice, lemon zest, minced garlic, dried oregano, salt, black pepper, and optional cumin. Whisk until well incorporated.
- Marinate the Chicken: Add your chicken tenders to the marinade and ensure they are well-coated. Marinate in the fridge for at least 30 minutes or overnight.
- Preheat Your Grill or Oven: Preheat the grill to medium-high heat or the oven to 400°F (200°C).
- Cook the Chicken: Grill for 5-7 minutes on each side or bake for 20-25 minutes until cooked through at an internal temperature of 165°F (75°C).
- Rest Before Serving: Let the chicken rest for 5 minutes before serving.
- Make Your Sauce: Mix Greek yogurt with a dash of lemon and fresh herbs for dipping.
Notes
For a lovely presentation, serve on a wooden board or white platter. Pair with a Greek salad or roasted potatoes for a complete meal.
Nutrition
- Serving Size: 1 serving
- Calories: 350
- Sugar: 5g
- Sodium: 400mg
- Fat: 12g
- Saturated Fat: 4g
- Unsaturated Fat: 6g
- Trans Fat: 0g
- Carbohydrates: 45g
- Fiber: 3g
- Protein: 15g
- Cholesterol: 30mg
Keywords: Greek chicken tenders, Mediterranean chicken recipe, healthy chicken tenders
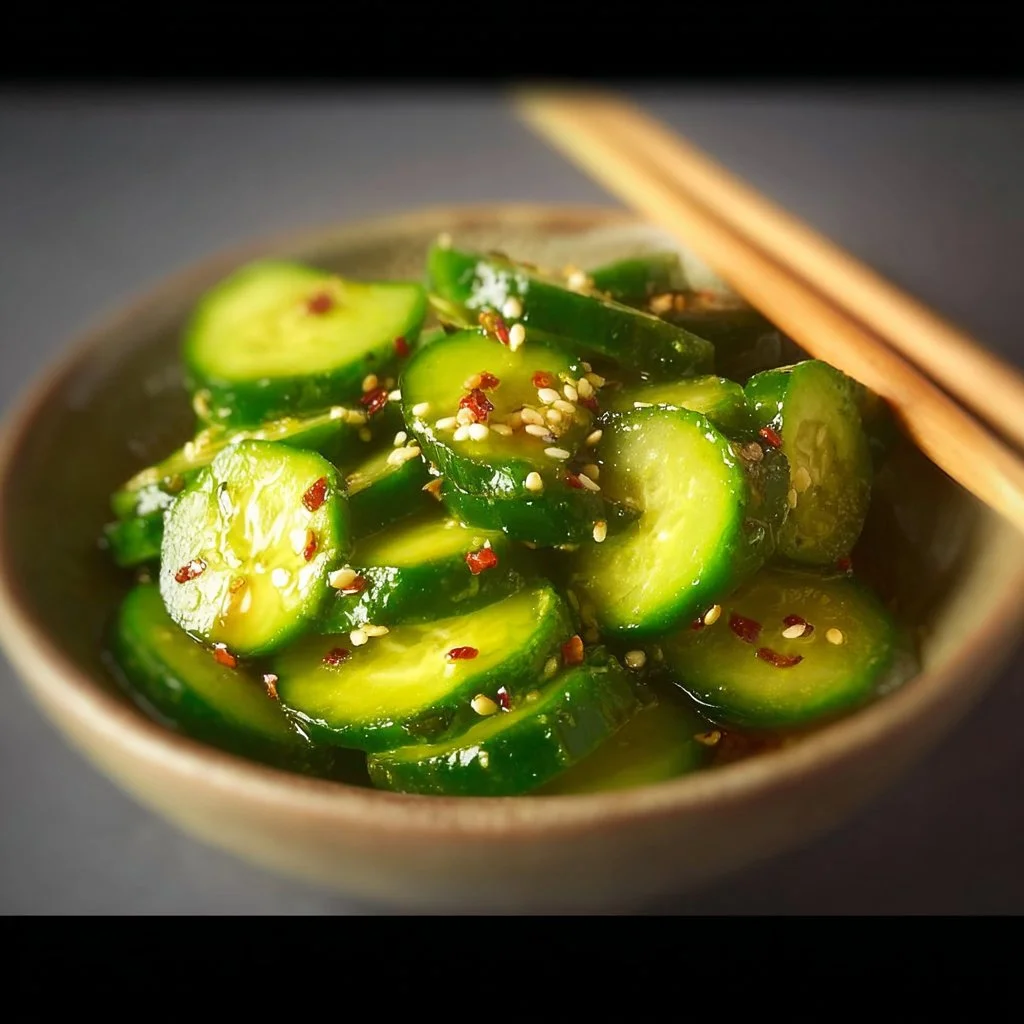
Easy Asian Cucumber Salad
# Easy Asian Cucumber Salad: A Crisp, Refreshing Delight

## Introduction

Hello, fellow food enthusiast! Today, we’re diving into a dish that captures the very essence of simplicity, flavor, and that ever-so-lovely crunch: the Easy Asian Cucumber Salad. This is not just any salad; it’s a colorful affair that pairs beautifully with just about anything. Whether you’re dishing it up alongside grilled meats, serving it as part of a vibrant spread at your next gathering, or enjoying it solo as a light snack, this salad is here to elevate your meal without requiring hours of kitchen labor.

Cucumbers are like the chill friends of the vegetable world; they’re laid-back, easy to work with, and somehow, they always manage to bring a refreshing vibe to the table. This Easy Asian Cucumber Salad combines crisp Persian cucumbers with an umami-packed dressing that’s both sweet and tangy, with just the right kick of heat. I promise you, this will become your go-to when you crave something light yet bursting with flavor.

Let’s dig in!

## Personal Story

I’ll never forget the very first time I made an Asian cucumber salad. I was in college, scrambling to impress friends who could cook way better than I could. One sunny afternoon, I invited a few pals over for a “cooking party,” which was really just an excuse to eat junk food and drink sparkling water while pretending like we were on a cooking show. As I rummaged through my meager kitchen supplies, I stumbled upon a few Persian cucumbers and, in a moment of inspiration (or panic), I decided to whip up a salad.

To my astonishment, it was a hit! The crunch of the cucumbers, combined with the zing of rice vinegar and the warmth of sesame oil, made my friends rave more than I could have imagined. I might have fumbled through the chopping and definitely dropped a few ingredients in the process, but that was the moment I recognized the power of simple, fresh ingredients. It’s funny how simple combinations can spark joy and memories, isn’t it? And from that day forward, this salad kept popping up at every gathering, slowly evolving into my signature dish.

## Ingredients

Here's what you’ll need to create your own Easy Asian Cucumber Salad and some tidbits to help you along the way:

- **5 Persian cucumbers**
  - *Why they work*: Persian cucumbers are thin-skinned and have fewer seeds, which means they are less watery and have a delightful crunch. If you can’t find them, English cucumbers make a great substitute!

- **1/2 tsp salt**
  - *Chef insight*: Salting the cucumbers allows them to release some of their water, making for a crisper salad. Just don’t over-salt it, or you’ll end up with a soggy mess!

- **1/2 tbsp sesame oil**
  - *Flavor tip*: This adds a nutty depth to the dressing. If you’re out of sesame oil, you can use canola or vegetable oil, but you’ll lose that lovely flavor.

- **3/4 tbsp light soy sauce**
  - *Substitution*: If you’re looking for a gluten-free option, tamari works well, or if you’re avoiding soy altogether, coconut aminos can provide a similar taste.

- **1/2–1 tbsp sugar**
  - *Sweetness adjustment*: The amount of sugar can be adjusted based on your preference for sweetness. Start with the lower end and add more if you like it sweeter.

- **3/4 tbsp rice vinegar**
  - *Zing factor*: This gives the salad its tangy bite. If you want something a bit more robust, try using apple cider vinegar or white wine vinegar.

- **1 tbsp chili oil**
  - *For that kick*: This is where the heat comes in! You can adjust the quantity to suit your taste, or swap it for a dash of sriracha for a different flavor profile.

- **1/2 tbsp garlic (minced, optional)**
  - *Boldness*: I love the flavor garlic brings, but it’s totally optional. If you’re looking for a fresher note, green onions could also be a lovely addition.

- **1/2 tbsp sesame seeds**
  - *Toasty finish*: Toast them slightly in a dry pan for an extra nutty flavor. It's a super simple trick that makes a world of difference!

## Step-by-Step Instructions

Now that we’ve covered the ingredients, let’s bring this salad to life! Gather your tools: a cutting board, a sharp knife, and a mixing bowl. Ready? Here we go!

1. **Prep the Cucumbers**
   Start by rinsing the Persian cucumbers under cold water. Using your knife, slice off the ends. You don’t want any bitter bits ruining your crunch! Now, slice each cucumber into thin rounds. Aim for about 1/4 inch thick. Too thick and they won't absorb the dressing as well, but too thin and they might lose their charm!

2. **Salt it Up**
   Toss the cucumber slices into a colander and sprinkle them with 1/2 tsp salt. Give them a gentle toss to make sure they’re all coated. Now, let them sit for about 10-15 minutes. This will allow the salt to draw out excess moisture, creating that fabulous crunch we’re after. During this time, why not pour yourself a refreshing drink and enjoy the aromas wafting through your kitchen?

3. **Whisk the Dressing**
   In a separate mixing bowl, combine the sesame oil, soy sauce, sugar, rice vinegar, and chili oil. Whisk it all together until the sugar is dissolved, creating a beautiful dressing that’s both glossy and fragrant. **Chef tip**: If your sugar doesn't fully dissolve, you can place the dressing in the microwave for about 10 seconds to warm it up and help dissolve it faster.

4. **Combine the Ingredients**
   Once the cucumbers have finished draining, give them a quick rinse to remove excess salt (we’re going for flavor, not sodium overload!). Transfer them back to a large bowl. Pour the dressing over the cucumbers and gently toss to combine. Use your hands for this; you want to really mix everything well without smashing the cucumbers!

5. **Garnish with Sesame Seeds and Garlic**
   If you’re using minced garlic (remember, it’s optional), sprinkle it in now. Then toss in the sesame seeds and give the salad another gentle mix until everything is evenly coated in that luscious dressing.

6. **Serve it Up!**
   Let the salad sit for about 5-10 minutes to allow the flavors to meld together. This is the perfect time to set the table and call your friends or family to the dining area. Presentation matters, but remember, you want it to feel inviting.

7. **Plating Tips**
   When it’s time to serve, grab a beautiful serving bowl and gently spoon the salad into it. Drizzle any remaining dressing over the top and sprinkle a few more sesame seeds for a polished finish. You can even add a handful of fresh herbs, like cilantro or mint, for an extra pop of color and flavor!

## Serving Suggestions

This Easy Asian Cucumber Salad is perfect for so many occasions! Try serving it with grilled proteins like teriyaki chicken or salmon. It also pairs wonderfully with a side of fried rice or as a fresh topping for tacos. You can even serve it as part of a larger Asian-inspired feast, alongside spring rolls or dim sum, for a full-on flavor explosion.

## Recipe Variations

Feeling adventurous? Here are some quick variations to help you mix things up:

- **Add Protein**: Toss in some cooked shrimp or cubed tofu to turn it into a heartier meal.
- **Fruit Twist**: Add thinly sliced mango or strawberries for a sweet contrast that brightens the dish.
- **Extra Crunch**: Throw in some shredded carrots or diced bell peppers for additional texture and color.
- **Herb Infusions**: Fresh cilantro, mint, or basil can add a delightful twist—just be mindful of balancing those flavors.
- **Heat It Up**: Love spice? Add a sliced jalapeño or a dash of red pepper flakes to kick things up a notch!

## Chef’s Notes

As I’ve experimented with this dish over the years, I’ve learned that the key to a great salad lies in the balance of flavors. Always taste as you go! I’ve also had my fair share of cucumber mishaps—like the time I accidentally used a bitter cucumber because I couldn’t tell the difference. Lesson learned: always taste before adding anything to your dish! Simplifying this recipe has really made it shine, and now it’s a staple at just about every gathering I host.

Cooking, after all, is about evolution and making those beautiful moments happen, so don’t be afraid to embrace changes and add your own flair!

## FAQs and Troubleshooting

**Q: My cucumbers are too watery. What did I do wrong?**
A: If you didn’t salt the cucumbers long enough, they may release excess water. Be sure to salt and drain them and consider patting them dry with a paper towel before mixing in the dressing.

**Q: Can I make this salad ahead of time?**
A: It’s best enjoyed fresh to keep that crunch, but you can prepare the cucumbers and dressing separately a few hours in advance. Just combine them right before serving!

**Q: What if I don’t have sesame oil?**
A: No worries! You can use any neutral oil like vegetable or olive oil, but it will change the flavor profile slightly. Start by adding a small amount of toasted sesame seeds to the dressing to compensate.

**Q: Can I double the recipe?**
A: Absolutely! This salad is easy to scale. Just make sure your bowl is large enough for all the ingredients and adjust the seasoning to taste since doubling can sometimes alter the balance.

## Nutritional Info

**(Per Serving, based on 4 servings):**
- Calories: 110
- Protein: 1g
- Fat: 7g
- Carbohydrates: 10g
- Fiber: 1g
- Sugar: 2g

(Note: Nutritional info may vary based on specific ingredients used and portion sizes.)

---

And there you have it! Your Easy Asian Cucumber Salad is ready to wow your taste buds and your guests. Don’t forget to add your special touch, and enjoy every crunchy bite at your table. Happy cooking, friends!
Easy Asian Cucumber Salad
A crisp and refreshing salad featuring Persian cucumbers in a sweet and tangy dressing, perfect as a side or light snack.
- Prep Time: 15 minutes
- Cook Time: 0 minutes
- Total Time: 15 minutes
- Yield: 4 servings 1x
- Category: Salad
- Method: No Cooking
- Cuisine: Asian
- Diet: Vegetarian
Ingredients
- 5 Persian cucumbers, sliced
- 1/2 tsp salt
- 1/2 tbsp sesame oil
- 3/4 tbsp light soy sauce
- 1/2–1 tbsp sugar
- 3/4 tbsp rice vinegar
- 1 tbsp chili oil
- 1/2 tbsp garlic (minced, optional)
- 1/2 tbsp sesame seeds
Instructions
- Prep the cucumbers by rinsing them and slicing off the ends, then cut into thin rounds.
- Salt the cucumber slices and let them sit in a colander for about 10-15 minutes.
- Whisk the sesame oil, soy sauce, sugar, rice vinegar, and chili oil in a bowl until combined.
- Combine the rinsed cucumbers and dressing in a large bowl, tossing gently.
- Add minced garlic and sesame seeds, mixing carefully to coat evenly.
- Serve the salad after letting it sit for 5-10 minutes to meld the flavors.
- Plate it in a serving bowl, drizzling any remaining dressing over top and garnishing with more sesame seeds.
Notes
This salad can be adjusted for sweetness and spice according to personal preference. For added crunch, consider adding shredded carrots or bell peppers.
Nutrition
- Serving Size: 1 serving
- Calories: 110
- Sugar: 2g
- Sodium: 200mg
- Fat: 7g
- Saturated Fat: 1g
- Unsaturated Fat: 6g
- Trans Fat: 0g
- Carbohydrates: 10g
- Fiber: 1g
- Protein: 1g
- Cholesterol: 0mg
Keywords: cucumber salad, Asian salad, refreshing salad, quick salad, healthy salad