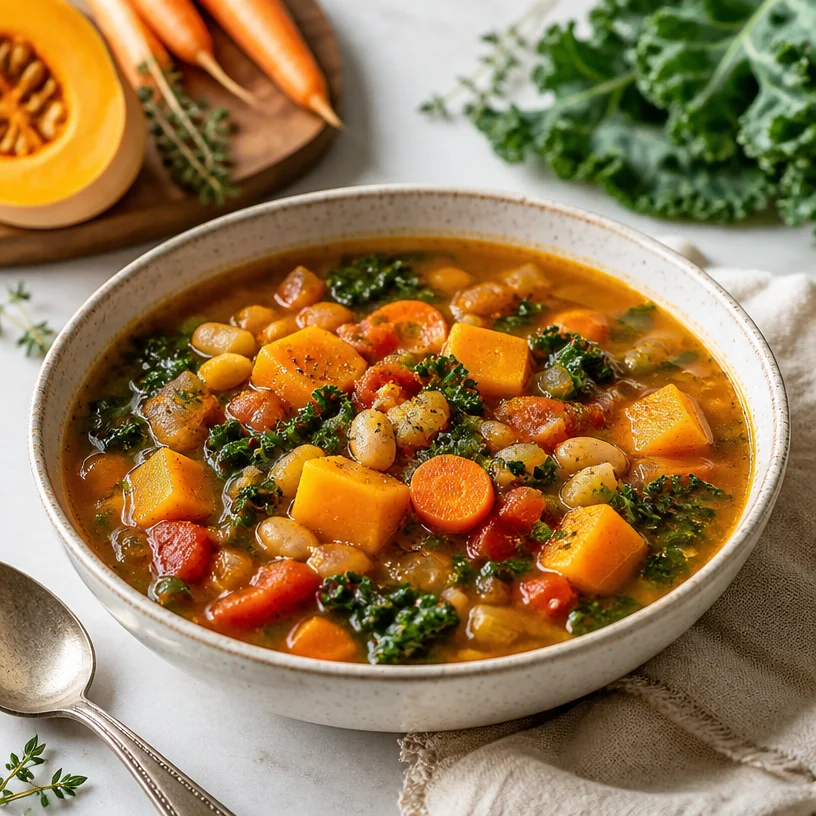
Harvest Vegetable Soup
Harvest Vegetable Soup: A Cozy Embrace of Flavor and Comfort
Hello, fellow foodies! Today, we’re diving into a recipe that feels like a warm hug on a chilly evening: Harvest Vegetable Soup. This dish not only brightens up your dinner table but also brings a heartwarming nostalgia that whispers of campfires and crisp autumn air. Grab your favorite chopping board and let’s get started!
A Taste of Nostalgia
Picture this: a bright fall afternoon, the leaves swirling around in hues of orange and gold, and the sweet aroma of spices drifting through the air. This is where my love for vegetable soup blossomed. Growing up, my grandmother had a magical way of transforming humble vegetables into a comforting bowl of goodness. No matter the season, her kitchen was a sanctuary, filled with laughter and the clinking of pots. She would beckon me into her cozy kitchen, where we’d chop, stir, and season together.
One particular evening, after a long day of playing outside, she surprised me with her signature harvest vegetable soup. As we stirred the bubbling pot, she shared the secret: it was all about fresh, seasonal ingredients. I’ve carried that lesson with me, and today, I want to pass it on to you through this delicious recipe.
Ingredients
Let’s gather our ingredients! Here’s what you’ll need to create this vibrant soup:
-
Squash (Acorn or Butternut): Sweet and nutty, squash adds creaminess to your soup. If you don’t have squash on hand, sweet potatoes make a delightful substitute!
-
Carrots: Bright and crunchy, they provide sweetness and texture. Can’t find carrots? Parsnips work beautifully as an alternative.
-
Kale: This leafy green adds nutrients and a lovely texture. If you’re not a fan of kale, try spinach or Swiss chard for a different yet scrumptious twist.
-
Tomatoes (Canned or Fresh): They bring that essential acidity and body to the soup. Crushed tomatoes or even a bit of tomato paste can serve as substitutes if you’re out of fresh ones.
-
Vegetable Broth: The base of our soup that brings everything together. Homemade is best, but store-bought works just as well. You can always use water in a pinch, although it might lack some depth!
-
Herbs (Thyme and Bay Leaf): Fresh or dried, these herbs elevate our dish beautifully. If you’re out of thyme, rosemary or oregano are fabulous alternatives.
-
Salt and Pepper: Essential for bringing out all those flavors. Consider adding a sprinkle of chili flakes for a bit of heat!
Step-by-Step Instructions
Alright, fellow chefs, it’s time to roll up those sleeves and cook! Here’s how to create this cozy cauldron of comfort:
-
Prep Your Veggies: Start by washing and peeling your squash and carrots. Cut the squash in half and scoop out the seeds. Dice into bite-sized cubes. For the carrots, slice them into half-moons or sticks—whatever tickles your fancy!
-
Sauté the Base: In a large pot, heat a couple of tablespoons of olive oil over medium heat. Add the diced squash and carrots first; allow them to sauté for about 5-7 minutes until they start to soften. Don’t forget to sprinkle a pinch of salt over them—this draws out their natural sweetness!
-
Add the Garlic and Tomatoes: Mince a couple of cloves of garlic (because, let’s face it, what’s soup without garlic?) and toss them into the pot. Sauté for an additional minute until fragrant. Then, pour in those luscious tomatoes. If you’re using canned tomatoes, make sure to stir in any juice!
-
Pour in the Broth: Next, add about 4 cups of vegetable broth to the pot. If you’re feeling adventurous, you can mix in a cup of white wine for added depth. Bring everything to a gentle simmer.
-
Add Kale and Herbs: Once your soup is simmering, it’s time to throw in the kale, thyme, and bay leaf. Let it cook for about 15-20 minutes, stirring occasionally, until all veggies are tender and the flavors meld together beautifully. You’ll know it’s ready when your kitchen smells divine!
-
Adjust Seasonings: Before you ladle out that lovely soup, taste it! Add more salt, pepper, or any other seasonings to make it your own. If you like a bit more acidity, a splash of lemon juice or vinegar works wonders.
-
Serve and Enjoy: Your harvest vegetable soup is now ready to be enjoyed! Ladle it into bowls, perhaps with a sprinkle of fresh herbs on top. How inviting does that sound?
Serving Suggestions
When it comes to plating, let your creativity shine! Serve this hearty soup with a slice of crusty bread for dipping—think sourdough or rye for extra flavor. A dollop of crème fraîche or a drizzle of olive oil over the top can also add a lovely finish. For a cozy feel, consider serving it in rustic bowls or even a hollowed-out bread bowl for added flair!
Recipe Variations
Looking to mix things up? Here are a few fun variations to keep your taste buds dancing:
-
Spicy Harvest Soup: Add some diced jalapeños or a pinch of cayenne pepper for an extra kick.
-
Creamy Version: Stir in a bit of coconut milk or heavy cream towards the end for a luscious, creamy texture.
-
Protein Boost: Toss in cooked quinoa or lentils for a heartier soup packed with protein.
-
Curry Twist: Add a tablespoon of curry powder during the sautéing step for an exotic flavor upgrade!
-
Grain or Pasta: Consider adding cooked rice, barley, or small pasta shapes for a more filling dish.
Chef’s Notes
Ah, this soup has been a canvas for my culinary experimentation! I remember one chilly afternoon when I had a bunch of leftover vegetables in the fridge. I decided to toss them all into the pot, and what came out was a delightful surprise! From that day onwards, I’ve embraced the “clean out the fridge” element of soup-making. It’s all about using what you have and let your taste guide you.
This recipe has evolved since those days spent with my grandmother. I’ve learned that there are no set rules in the kitchen; each bowl of soup tells a different story. Whether you stick to the ingredients listed or play around with your own favorites, you can’t go wrong!
FAQs and Troubleshooting
-
Can I make this soup ahead of time?
Absolutely! This soup actually tastes even better the next day as the flavors meld together. Store it in an airtight container in the refrigerator for up to 3 days, or freeze it for future cozy evenings! -
What if my soup is too thick?
No worries! Simply add a little more broth or water until you reach your desired consistency. Stir well, and let it simmer for a few more minutes. -
Can I add protein to this soup?
Definitely! Shredded chicken or cooked beans can be great additions. Just be sure to adjust the cooking times to ensure everything is heated through properly. -
What if I don’t have fresh herbs?
If fresh herbs aren’t available, dried herbs are just fine! Use about a third of the amount specified for fresh herbs, as dried will have a more concentrated flavor.
Nutritional Info (optional)
While I won’t bog you down with numbers, I can assure you this soup is packed with vitamins, minerals, and plenty of fiber! Each bowl is not only comforting but also nourishing for you and your loved ones.
So there you have it, my friends! The heartwarming recipe for Harvest Vegetable Soup, filled with memories and delicious flavors. I hope you enjoy making (and devouring) it just as much as I do. If you have any fun variations or stories of your own, I’d love to hear about them! Happy cooking! 🍽️
PrintHarvest Vegetable Soup
A warm and comforting vegetable soup that captures the essence of fall with fresh, seasonal ingredients.
- Prep Time: 15 minutes
- Cook Time: 30 minutes
- Total Time: 45 minutes
- Yield: 4 servings 1x
- Category: Soup
- Method: Stovetop
- Cuisine: American
- Diet: Vegan
Ingredients
- 1 Squash (Acorn or Butternut)
- 2 Carrots
- 2 cups Kale
- 2 Tomatoes (Canned or Fresh)
- 4 cups Vegetable Broth
- Herbs (Thyme and Bay Leaf)
- Salt
- Pepper
Instructions
- Prep your veggies: Start by washing and peeling your squash and carrots. Cut the squash in half and scoop out the seeds. Dice into bite-sized cubes. For the carrots, slice them into half-moons or sticks.
- Sauté the base: In a large pot, heat a couple of tablespoons of olive oil over medium heat. Add the diced squash and carrots first; allow them to sauté for about 5-7 minutes until they start to soften.
- Add the garlic and tomatoes: Mince a couple of cloves of garlic and toss them into the pot. Sauté for an additional minute. Then, pour in those tomatoes.
- Pour in the broth: Add about 4 cups of vegetable broth to the pot. Bring everything to a gentle simmer.
- Add kale and herbs: Once your soup is simmering, throw in the kale, thyme, and bay leaf. Let it cook for about 15-20 minutes.
- Adjust seasonings: Taste the soup and add more salt, pepper, or any other seasonings to make it your own.
- Serve and enjoy: Ladle it into bowls and serve with a sprinkle of fresh herbs on top.
Notes
Try serving with a slice of crusty bread or a dollop of crème fraîche for added richness.
Nutrition
- Serving Size: 1 serving
- Calories: 250
- Sugar: 6g
- Sodium: 500mg
- Fat: 8g
- Saturated Fat: 1g
- Unsaturated Fat: 5g
- Trans Fat: 0g
- Carbohydrates: 35g
- Fiber: 7g
- Protein: 6g
- Cholesterol: 0mg
Keywords: vegetable soup, harvest soup, cozy soup, fall recipes
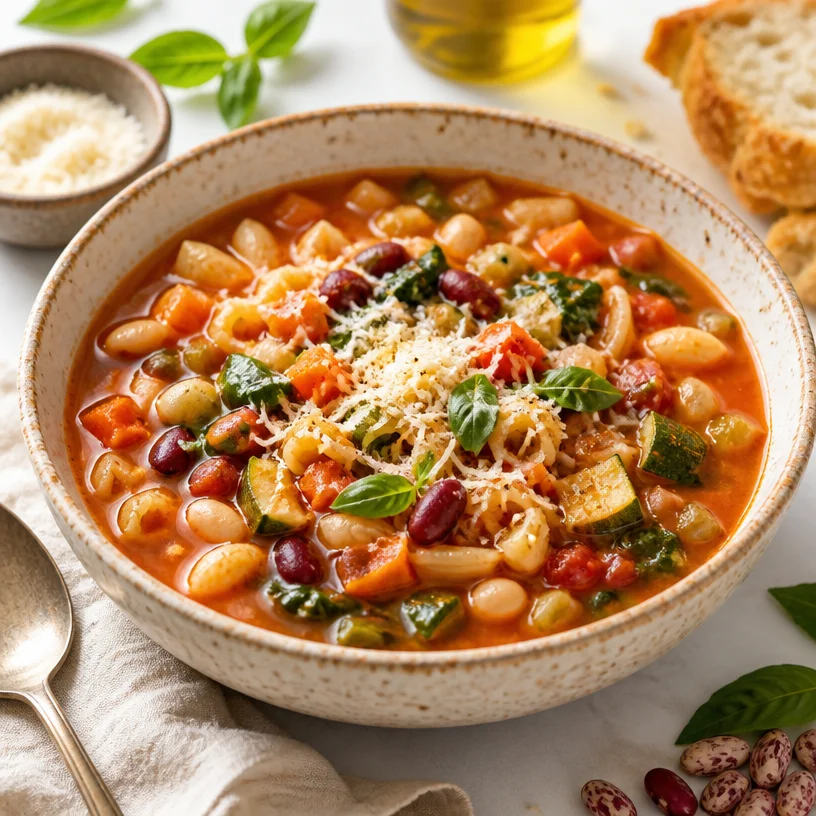
Minestrone
The Comfort of Minestrone: A Bowl Full of Memories
Hello, food enthusiasts! Today, we’re diving into a timeless classic that warms the heart and nourishes the soul: minestrone. This beautiful, rustic Italian soup is not just a simple dish; it’s a bowl of comfort filled with vibrant vegetables, hearty beans, and just enough pasta to make it filling. I can’t wait to share this recipe with you, so let’s get started!
A Little Memory Lane
When I think of minestrone, I can’t help but be transported back to my childhood. Picture this: a crisp autumn afternoon, the leaves outside swirling in hues of red and gold. My family would gather in our cozy kitchen, the air rich with the aroma of simmering tomatoes and fresh herbs. My mom would have her trusty old pot bubbling away on the stove, and I just knew that magic was happening inside.
As she chopped vegetables, I’d sneak bites of the raw zucchini and sweet red bell peppers, which was my cheeky way of getting excited for dinner. But the best part came when the soup was ready, and we’d all sit together around our table, bowls steaming and hearts full. Each spoonful of that minestrone reminded me of love and family, of stories and laughter shared. So, let’s recreate that magic, shall we?
Ingredients You’ll Need
For the perfect minestrone, gather the following ingredients:
-
Beans:
- Choose your favorites! Cannellini or kidney beans work beautifully. To keep things lighter, you can substitute with lentils or chickpeas for a unique twist.
-
Pasta:
- Small pasta shapes like ditalini or orzo are ideal. If you’re gluten-free, use a gluten-free pasta; just keep an eye on the cooking time!
-
Tomatoes:
- Canned diced tomatoes bring richness and depth. For a fresher taste, you can substitute with chopped fresh tomatoes during peak season.
-
Vegetables:
- Think zucchini, carrots, celery, and spinach. Use whatever veggies you have on hand! Kale, green beans, or even sweet potato can add a delightful variation.
-
Broth:
- Vegetable broth makes it rich and hearty, but chicken broth can also work beautifully if you’re not vegetarian.
-
Herbs:
- Fresh basil and parsley infuse layers of flavor. If you’re lacking fresh herbs, dried oregano or thyme can step in!
-
Olive Oil:
- A high-quality extra virgin olive oil is essential for that final drizzle of flavor — or use any cooking oil you prefer.
Step-by-Step Instructions
-
Prep Your Veggies:
- Start by dicing your carrots, celery, and zucchini into bite-sized pieces. This simple step is vital; you want uniform pieces to ensure they cook evenly. Don’t forget to mince garlic and chop your herbs for later!
-
Sauté the Base:
- In a large Dutch oven, heat 2 tablespoons of olive oil over medium heat. Once shimmering, toss in your onions, celery, and carrots. Sauté for about 5-7 minutes until they start to soften. This stage is where the magic begins; the aroma will fill your kitchen!
-
Add the Garlic:
- Once your veggies are tender, add the minced garlic and sauté for another minute. Cooking garlic too long can make it bitter, so keep an eye out — it should be fragrant and lightly golden.
-
Incorporate Tomatoes:
- Pour in your canned diced tomatoes and their juices. Stir everything together, allowing the mixture to simmer for 5-10 minutes. This helps deepen the flavor, making it rich and hearty.
-
Broth and Beans:
- Now, add about 6 cups of vegetable or chicken broth and your rinsed beans. Bring the soup to a gentle boil, then reduce to a simmer. This is when the soup really starts to come together, so let it bubble away for 15-20 minutes!
-
Pasta Time:
- Once your broth is simmering, add your pasta. Follow the pasta package instructions for cooking time, usually about 8-10 minutes. Stir occasionally to prevent sticking. A quick chef hack? Cook the pasta al dente in the soup for more flavor and less cleanup!
-
Finishing Touches:
- In the last few minutes, add your fresh spinach or kale and your chopped herbs. Season with salt, pepper, and a squeeze of lemon for brightness. This is the moment to taste and adjust — experience the joy of flavor balancing!
-
Serve with Love:
- Ladle the minestrone into warm bowls, drizzling a little extra virgin olive oil on top before serving. Feeling adventurous? Grate some Parmesan to sprinkle over each bowl!
Serving Suggestions
Present your minestrone with a side of crusty garlic bread for that delightful crunch! You can also top it with a sprinkle of freshly shaved Parmesan cheese or a handful of croutons for an added texture contrast. For an extra pop, why not add a few fresh basil leaves on top right before serving? It makes the dish look gorgeous and fragrant!
Recipe Variations
- Spicy Kick: Add a pinch of red pepper flakes when sautéing your vegetables for a delightful heat.
- Creamy Twist: Before serving, stir in a splash of heavy cream or coconut milk for a richer texture.
- Herbaceous Charm: Swap in different herbs like dill or thyme to mix up the flavor profile.
- Protein Boost: Toss in some cooked sausage or grilled chicken for additional protein.
Chef’s Notes
Minestrone is not just a recipe; it’s a canvas for your creativity! Over the years, this soup has morphed for me time and again. One cold winter night, I tried adding leftover roasted vegetables, and oh, was it a hit! Each bowl tells a story, whether it’s emptying out the fridge or experimenting with what’s in season.
Remember that cooking is about having fun, embracing mistakes, and finding joy in the experience. I’ve had my fair share of soupy mishaps, and that’s part of the adventure!
FAQs and Troubleshooting
1. My minestrone is too thick! What should I do?
Simply add more broth or water to reach your desired consistency. A splash of vinegar can also help brighten the flavors if it feels too heavy.
2. How do I store leftovers?
Cool the soup completely before transferring it to an airtight container. It will keep in the fridge for 3-4 days. The flavors will deepen, making it even better the next day!
3. Can I freeze minestrone?
Absolutely! Just make sure you leave out the pasta, as it can become mushy when thawed. Freeze the soup itself, and add freshly cooked pasta when you reheat it.
4. My pasta is mushy! What went wrong?
This is usually due to overcooking. Always check the pasta a minute or two before the package instructions recommend — it should be al dente, as it will continue to cook slightly once added to the soup.
Nutritional Information (Optional)
Minestrone is a well-rounded delight, typically high in fiber and packed with vitamins. A serving (1 cup) usually contains:
- Calories: 180
- Protein: 6g
- Carbohydrates: 30g
- Fat: 4g
- Fiber: 7g
So there you have it! A warm bowl of comforting minestrone, brimming with heart and soul. I hope this recipe brings as much joy to your kitchen as it has to mine. Let’s keep creating beautiful moments around the table, one dish at a time! Happy cooking! 🍽️
PrintComforting Minestrone Soup

A heartwarming classic Italian minestrone soup filled with vibrant vegetables, beans, and pasta, perfect for any cozy meal.
- Prep Time: 15 minutes
- Cook Time: 45 minutes
- Total Time: 60 minutes
- Yield: 6 servings 1x
- Category: Main Course
- Method: Cooking
- Cuisine: Italian
- Diet: Vegetarian
Ingredients
- 2 tablespoons olive oil
- 1 medium onion, diced
- 2 carrots, diced
- 2 celery stalks, diced
- 2 zucchini, diced
- 2 cloves garlic, minced
- 1 can (14 ounces) diced tomatoes
- 6 cups vegetable or chicken broth
- 1 can (15 ounces) cannellini or kidney beans, rinsed
- 1 cup small pasta (like ditalini or orzo)
- 2 cups fresh spinach or kale
- Fresh basil and parsley, chopped
- Salt and pepper to taste
- Squeeze of lemon
- Grated Parmesan for serving (optional)
Instructions
- Prep your veggies: Dice your carrots, celery, and zucchini into bite-sized pieces. Mince garlic and chop your herbs for later.
- Sauté the base: In a large Dutch oven, heat olive oil over medium heat. Toss in onions, celery, and carrots. Sauté for about 5-7 minutes.
- Add the garlic: Once veggies are tender, add minced garlic and sauté for another minute.
- Incorporate tomatoes: Pour in canned diced tomatoes and stir together, allowing to simmer for 5-10 minutes.
- Broth and beans: Add broth and rinsed beans, bring to a gentle boil, then reduce to a simmer for 15-20 minutes.
- Pasta time: Add pasta and cook according to package instructions, about 8-10 minutes.
- Finishing touches: In the last few minutes, add spinach or kale and chopped herbs. Season with salt, pepper, and a squeeze of lemon.
- Serve with love: Ladle soup into bowls and drizzle with olive oil, sprinkle with Parmesan if desired.
Notes
Minestrone is versatile; feel free to use any vegetables and beans you have on hand. Adjust spices and herbs to your liking!
Nutrition
- Serving Size: 1 cup
- Calories: 180
- Sugar: 5g
- Sodium: 800mg
- Fat: 4g
- Saturated Fat: 0.5g
- Unsaturated Fat: 3g
- Trans Fat: 0g
- Carbohydrates: 30g
- Fiber: 7g
- Protein: 6g
- Cholesterol: 0mg
Keywords: minestrone, Italian soup, vegetarian recipe, comfort food, hearty soup
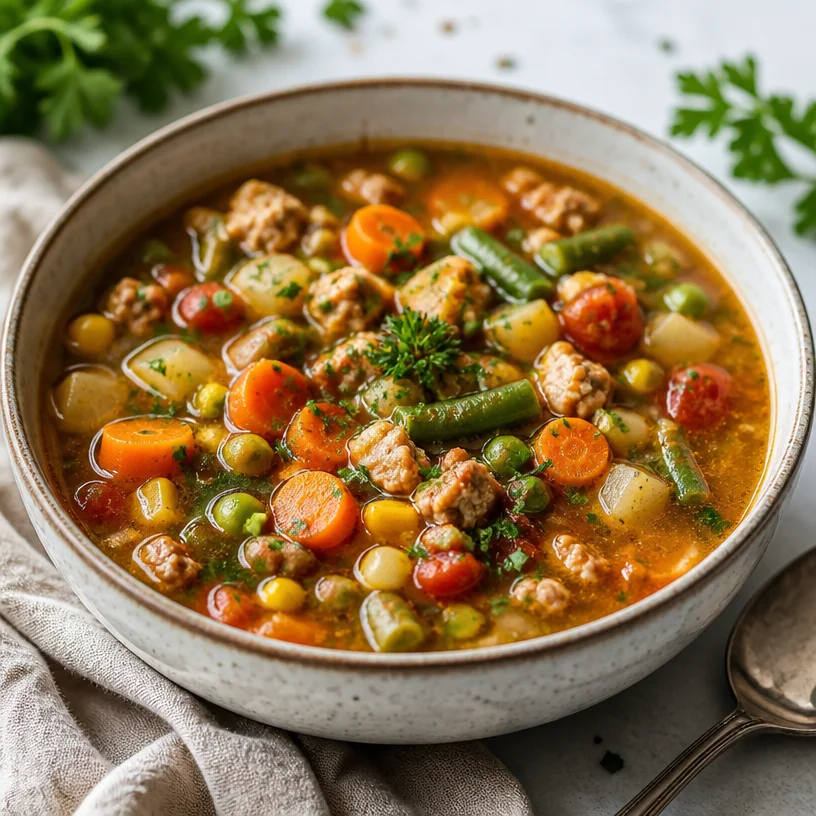
One-Pot Turkey Vegetable Soup: Easy Weeknight Meal Prep
Warm Your Soul with Homemade Turkey Vegetable Soup
Hello, lovely food friends! Today, I’m thrilled to share a recipe that’s close to my heart — a comforting bowl of Turkey Vegetable Soup. This dish is perfect for those chilly evenings or when you need a hug in a bowl. It’s not just about the ingredients; it’s about the memories, the warmth, and the love that goes into every pot we simmer. So grab your apron, and let’s dive into this delicious adventure together!
A Cozy Memory
One of my fondest memories involving turkey soup dates back to my childhood. Every Thanksgiving, once the feast was over and the last piece of pumpkin pie had been savored, my family would gather around in the kitchen. My mom, armed with her trusty stockpot, would gather the leftover turkey and a bounty of fresh vegetables. As I watched her chop carrots, celery, and onions with expert precision, I could already smell the comforting aroma of herbs wafting through the air.
In our home, making soup was more than a way to use leftovers; it was an event! We’d all gather around to share stories, sip on warm cider, and create a cozy ambiance with a flickering candle or two. The kitchen would transform into our gathering place, connecting us through laughter and delicious food. This tradition continued with my own family. Now, I love to carry on that spirit of hospitality and warmth, and there’s no better way to do that than with a pot of Turkey Vegetable Soup simmering away. Let’s recreate that warmth together in your kitchen!
The Ingredients You’ll Need
Here’s what you’ll need to whip up this delightful soup. Each ingredient has a role to play in creating something magical.
-
Turkey: The star of the show! You can use leftover roasted turkey or buy pre-cooked turkey breast. If you’re looking for an alternative, shredded chicken also works wonders here.
-
Mixed Vegetables: This can include carrots, celery, green beans, corn, and peas. Feel free to use fresh or frozen — I often have frozen veggies ready for a last-minute meal. They’re just as nutritious!
-
Broth: Use turkey broth for extra flavor, or vegetable/chicken broth if you’re in a pinch. Homemade is perfect, but store-bought can save time. Look for low-sodium varieties to control the saltiness.
-
Herbs: Fresh herbs like thyme, parsley, and bay leaves add depth to the soup. Dried herbs are a great substitute; just remember that their flavor is more concentrated, so use less.
-
Onions and Garlic: These are key for building a flavorful base. If you’re short on onions, leeks are a fantastic alternative.
-
Seasoning: Salt and pepper enhance all the flavors in the soup. Don’t skip this step, as seasoning is what brings your ingredients to life!
Step-by-Step Cooking Instructions
Alright, let’s get cooking! Follow these steps to create a delicious pot of turkey vegetable soup that warms you from the inside out.
-
Prep Your Ingredients: Start by giving your vegetables a good wash, peel, and chop. Aim for bite-sized pieces — they’ll cook evenly and be easy to enjoy in your soup!
-
Sauté the Aromatics: In a large pot, heat a tablespoon of olive oil over medium heat. Add diced onions and minced garlic, and sauté for about 3-4 minutes until they get soft and fragrant. This step is essential; it builds the flavor foundation for your soup, so don’t rush it!
-
Add Mixed Vegetables: Toss in your chopped mixed vegetables, stirring them into the aromatic mixture. Sauté for another 5-7 minutes, allowing them to soften a bit. The vibrant colors are not just pretty; they’ll enhance your soup’s flavor!
-
Pour in the Broth: Once your veggies are tender, it’s time to add the turkey broth. Pour in 6-8 cups (depending on how soupy you like it) and stir well. Bring this to a gentle simmer.
-
Turkey Time!: Add your turkey next. If you’re using leftover turkey, simply shred it into the pot. For pre-cooked turkey, chop or shred it before adding. Stir everything together and allow it to simmer for 20-30 minutes. This lets the flavors meld beautifully.
-
Herb Bliss: Add your herbs at this point. If using fresh herbs, toss in a handful of chopped parsley and a few sprigs of thyme. Toss in a bay leaf for that classic soup flavor! If you’re using dried, sprinkle in about 1 teaspoon of each — remember, dried herbs are more potent.
-
Final Touches: After 30 minutes of simmering, taste your soup and season with salt and pepper to your liking. You can also add a squeeze of lemon juice for brightness, which really elevates the dish.
-
Serve Hot: Ladle your hearty turkey vegetable soup into bowls, and don’t forget to sprinkle more fresh herbs on top for garnish, which adds a beautiful touch and extra flavor!
Serving Suggestions
For an elegant yet simple presentation, serve your Turkey Vegetable Soup in rustic bowls, perhaps alongside a slice of warm, crusty bread. A sprinkle of fresh herbs not only adds a pop of color but also enhances that fresh flavor. If you’re feeling extra, a dollop of Greek yogurt or sour cream adds creaminess that complements the flavors splendidly.
Recipe Variations
Here are a few fun twists you can explore to make this soup your own:
-
Spice it Up: Add a pinch of red pepper flakes or a dash of hot sauce for a kick. Perfect for those who love a little heat!
-
Add Grains: Throw in some cooked quinoa or pasta for added texture and heartiness. They make the soup even more filling!
-
Vegetarian Version: Skip the turkey and opt for extra beans or chickpeas along with the veggies, creating a protein-packed vegetarian delight.
-
Creamy Turkey Soup: Stir in a splash of cream or coconut milk in the last few minutes for a rich and creamy texture.
-
Herb Variations: Experiment with different herbs like basil, dill, or rosemary for a unique flavor profile.
Chef’s Notes
This Turkey Vegetable Soup recipe started as a way to use up those Thanksgiving leftovers but has evolved over time to become a staple in my kitchen all year round. I often find myself adapting it based on what’s in season or what leftovers I have on hand. One time, I added a handful of kale I had lingering in the fridge — talk about delicious! And let’s not tell anyone… I’ve been known to "accidentally" eat the whole pot in one sitting. Don’t worry—the soup is so good, it’s hard to resist!
FAQs and Troubleshooting
-
What if my soup is too salty?
If you find your soup is too salty, try adding a cubed potato to absorb some of the saltiness. Let it simmer for about 10 minutes, then remove the potato. -
Can I freeze the soup?
Absolutely! This soup freezes beautifully. Just make sure to cool it completely before transferring to an airtight container. It will keep for up to three months in the freezer. -
How can I thicken my soup?
If you prefer a thicker consistency, there are a few options: let it simmer without a lid to reduce it, blend a portion of the soup, or add a cornstarch slurry (1 tablespoon of cornstarch mixed with 2 tablespoons of cold water). -
Can I add other vegetables?
Yes! Feel free to get creative. You can add zucchini, spinach, or whatever vegetables you have on hand to customize your soup.
Nutritional Info (Optional)
For those who like to keep track, here’s a rough breakdown per serving (based on a recipe serving about 6):
- Calories: 200
- Protein: 20g
- Carbohydrates: 15g
- Fat: 8g
- Fiber: 4g
I hope you love making this Turkey Vegetable Soup as much as I do! It’s more than just a recipe; it’s about family, warmth, and sharing delightful moments with loved ones. Thank you for joining me in the kitchen today — here’s to many cozy meals and cherished memories to come! Happy cooking!
PrintHomemade Turkey Vegetable Soup

A comforting bowl of Turkey Vegetable Soup perfect for chilly evenings and family gatherings.
- Prep Time: 15 minutes
- Cook Time: 40 minutes
- Total Time: 55 minutes
- Yield: 6 servings 1x
- Category: Soup
- Method: Stovetop
- Cuisine: American
- Diet: Low Carb
Ingredients
- 2 cups leftover turkey, shredded
- 4 cups mixed vegetables (carrots, celery, green beans, corn, peas)
- 6–8 cups turkey broth (or vegetable/chicken broth)
- 1 tablespoon fresh thyme (or 1 teaspoon dried)
- 1/4 cup fresh parsley, chopped
- 1 bay leaf
- 1 medium onion, diced
- 3 cloves garlic, minced
- 1 tablespoon olive oil
- Salt and pepper to taste
Instructions
- Prep your ingredients: Wash, peel, and chop your vegetables into bite-sized pieces.
- Sauté the aromatics: Heat olive oil in a large pot and sauté onions and garlic for 3-4 minutes until soft.
- Add mixed vegetables: Stir them into the pot and sauté for another 5-7 minutes.
- Pour in the broth: Add the turkey broth and bring to a gentle simmer.
- Add your turkey: Shred leftover turkey and stir into the pot, simmering for 20-30 minutes.
- Add herbs: Mix in thyme, parsley, and bay leaf, adjusting as needed.
- Season to taste: After simmering, season with salt and pepper, and add lemon juice if desired.
- Serve hot: Ladle into bowls and garnish with fresh herbs.
Notes
For added flavor, try using homemade broth. Feel free to add other vegetables like zucchini or spinach.
Nutrition
- Serving Size: 1 serving
- Calories: 200
- Sugar: 4g
- Sodium: 600mg
- Fat: 8g
- Saturated Fat: 1g
- Unsaturated Fat: 7g
- Trans Fat: 0g
- Carbohydrates: 15g
- Fiber: 4g
- Protein: 20g
- Cholesterol: 75mg
Keywords: turkey soup, vegetable soup, comfort food, winter recipes, family recipes
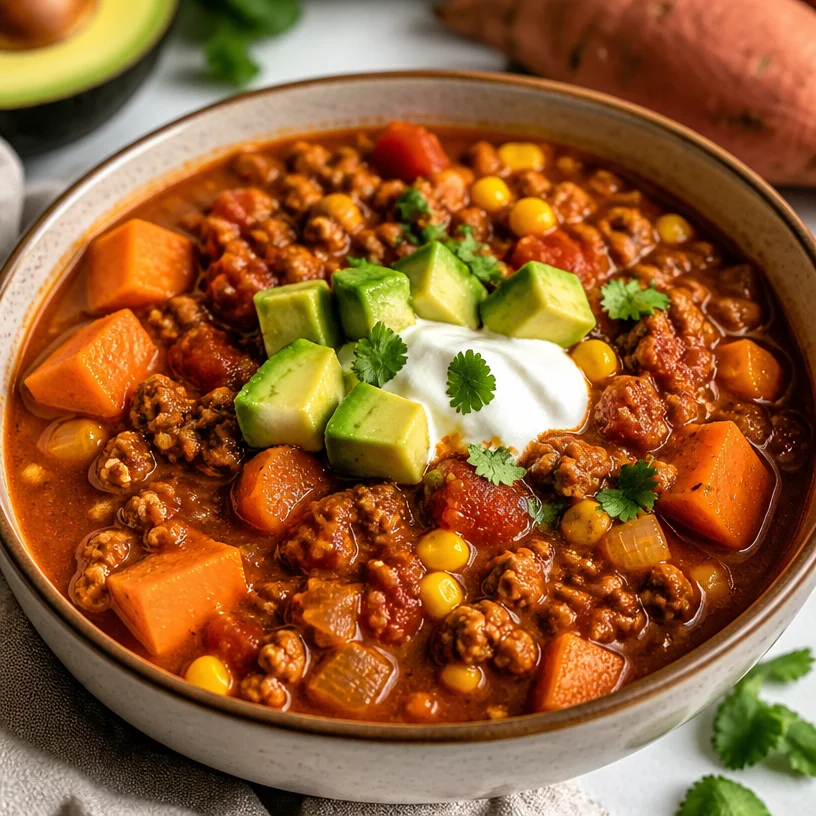
One-Pot Sweet Potato Turkey Chili (Weeknight Meal-Prep)
Sweet Potato Turkey Chili: A Soul-Warming Recipe for Any Day
Hello, food lovers! Are you ready to cozy up with a steaming bowl of chili? Today, I’m sharing one of my absolute favorite recipes—Sweet Potato Turkey Chili. This dish is not only delicious but also packed with nutrients to satisfy your cravings and warm your soul. Whether you’re gathering friends around the table for game night or just seeking a heartwarming meal for yourself, this chili is here to elevate your experience.
Why Sweet Potato Turkey Chili?
I’ll admit it—there’s something undeniably comforting about curling up with a bowl of chili on a chilly evening. As I was developing this recipe, I reflected on the fond memories associated with chili in my life. Growing up, Friday nights often meant a big pot of my mom’s classic chili simmering on the stovetop. The air would fill with rich aromas of spices, simmering meat, and something magical that made everyone come together.
As we gathered as a family, there was always laughter, stories, and an abundance of love. In those moments, chili represented more than just dinner; it encapsulated the warmth of home, connection, and togetherness. This Sweet Potato Turkey Chili is my nod to those memories, with my own twist on flavors and healthy ingredients that make it approachable and sophisticated.
Ingredients
Before we dive into the cooking, let’s gather our ingredients. Here’s what you’ll need:
-
1 lb ground turkey
A lean alternative to traditional beef, ground turkey is flavorful and has less fat. If you prefer, you can substitute it with ground chicken or even a plant-based meatalternative for a vegetarian version. -
2 medium sweet potatoes, diced
Sweet potatoes are nutrient-packed, adding a hint of sweetness and heartiness to the chili. You can easily swap these for regular potatoes or butternut squash. -
1 can diced tomatoes
These add a beautiful, tangy base to the chili. Fire-roasted diced tomatoes can enhance the flavor with a slightly smoky touch, or you can use fresh tomatoes if they’re in season. -
1 can corn, drained
Corn provides a lovely sweetness and crunch. If you have frozen corn on hand, that works great too—just toss in a cup! -
1 onion, chopped
Onions bring a foundational layer of flavor to almost any dish. Yellow onions are versatile, but you can also use red onions for a sharper bite or shallots for a more delicate taste. -
2 cloves garlic, minced
Garlic is the secret ingredient in so many beloved recipes! Fresh is always best, but if you’re in a pinch, you can use garlic powder (1 teaspoon is equivalent to 1 clove). -
1 tablespoon chili powder
This spice mix is crucial for that warm, spicy kick! If you want more heat, feel free to add a pinch of cayenne pepper or swap for a spicier chili powder. -
1 teaspoon cumin
Cumin adds an earthy, warm undertone that’s perfect for chili. If you’re out, coriander can offer a similar flavor profile. -
Salt and pepper to taste
Never underestimate the power of seasoning! Always taste as you go to adjust for your preference. -
4 cups chicken broth
A well-flavored broth serves as the liquid base for our chili. Feel free to use vegetable broth for a vegetarian version or low-sodium broth to control the salt level.
Step-by-Step Instructions
Ready to cook? Let’s get started!
1. Heat the Pan
In a large pot or Dutch oven, heat a drizzle of olive oil over medium heat. Olive oil adds a touch of flavor and helps to sauté the onions.
2. Sauté the Vegetables
Once the oil is heated, toss in the chopped onion. Sauté for about 5 minutes until the onions are translucent and fragrant. Add the minced garlic to the pot and cook for an additional minute until everything is aromatic.
Chef Hint: Moving the onions around the pan helps them cook evenly, avoiding any burnt bits. Plus, we’re building layers of flavor from the get-go!
3. Brown the Turkey
Next, add the ground turkey to the pot. Using a wooden spoon, break it apart and cook until it’s browned and no longer pink, which should take about 6-8 minutes. Season it with a pinch of salt and pepper as it cooks to elevate the dish.
Tip: Browning the meat adds complexity to the flavor, so take your time here!
4. Sweet Potatoes Join the Party
Add the diced sweet potatoes into the pot. Stir everything together and let it cook for an additional 5-7 minutes, allowing the sweet potatoes to slightly soften before adding the liquids.
Chef Hack: This little step ensures that your sweet potatoes are nicely incorporated with the other ingredients and absorb incredible flavors!
5. Spice It Up!
Now it’s time to add in the chili powder and cumin. Stir well to coat the turkey and sweet potatoes with those spices. Let it cook for another minute to toast the spices and enhance the flavor.
6. Add Broth and Tomatoes
Pour in the chicken broth and add the can of diced tomatoes, including their juice. Give everything a good stir, and bring the mixture to a gentle boil.
Chef’s Insight: The broth not only adds flavor but creates a lovely base for the chili to simmer and meld together. If you like it saucier, feel free to add a bit more broth!
7. Simmer to Perfection
Once boiling, reduce the heat to low and let your chili simmer uncovered for about 25-30 minutes, or until the sweet potatoes are tender but not mushy. Stir occasionally to ensure nothing sticks to the bottom.
Pro Tip: If you like a thicker chili, feel free to mash a few sweet potato pieces against the side of the pot and stir them back in—this naturally thickens the chili without any fuss!
8. Corn and Final Seasoning
In the last 5 minutes of cooking, stir in the drained corn. This gives the corn a little time to heat up while keeping its delightful crunch. Taste and adjust seasoning with salt and pepper as needed.
Serving Suggestions
When it’s time to serve, ladle a generous portion of Sweet Potato Turkey Chili into warm bowls. Top with fresh cilantro, a dollop of sour cream or Greek yogurt, and a squeeze of lime for an uplifting finish. Consider serving alongside a crusty piece of bread or some crunchy tortilla chips for a delightful contrast.
Recipe Variations
Here are some creative twists you can try:
- Spicy Kick: Add a diced jalapeño pepper for an extra layer of heat or sprinkle in some crushed red pepper flakes while simmering.
- Bean it Up: Toss in a can of black beans or kidney beans for additional protein and fiber—excellent for a heartier meal!
- Vegetarian Version: Swap the ground turkey for black beans or lentils to maintain that satisfying texture without the meat.
- Herbed Delight: Infuse fresh herbs like thyme or oregano for even more depth of flavor. Stir them in during the last few minutes of cooking.
- Sweet and Smoky: A tablespoon of smoked paprika will lend a lovely smoky note that elevates this dish to new heights.
Chef’s Notes
Sweet Potato Turkey Chili has evolved over the years for me as I discovered my love for hearty, wholesome ingredients. It initially started as a way to clear out the pantry, but now it has turned into a family favorite! I find joy in serving it at gatherings, and there’s always someone asking for the recipe.
One fond memory that still makes me chuckle was when I mistakenly added cinnamon instead of cumin during one of my cooking sessions. Let’s just say that was an unexpected flavor combination! Cooking is a journey of exploration, and don’t be afraid to have a bit of fun with it!
FAQs and Troubleshooting
1. My chili is too spicy! What can I do?
If you’ve added too much heat, one of the best tricks is to add a dollop of sour cream, Greek yogurt, or even a bit of sugar to balance out the spiciness.
2. How do I store leftovers?
Store any leftover chili in an airtight container in the fridge for up to 4 days. For longer storage, freeze in portions for up to 3 months. Just thaw overnight in the fridge before reheating!
3. Can I make this chili in a slow cooker?
Absolutely! Brown the turkey and sauté the onions on the stovetop, then transfer everything to the slow cooker. Cook on low for 6-8 hours or on high for 3-4 hours.
4. The sweet potatoes aren’t softening! What did I do wrong?
If your sweet potatoes are still firm, it could be that they were cut too large. Just keep simmering until they reach your desired tenderness.
Nutritional Info (Optional)
While I haven’t included specific nutritional values here, this Sweet Potato Turkey Chili is a fantastic source of lean protein, complex carbohydrates, and dietary fiber. Packed with vitamins and minerals, it’s a meal that not only satisfies but nourishes!
There you have it—a delicious, hearty Sweet Potato Turkey Chili that’s perfect for any occasion. I hope you enjoy making this recipe as much as I enjoy sharing it. So grab your apron and let’s cook together! Here’s to creating delicious moments around the table and making memories with every bite. Cheers!
PrintSweet Potato Turkey Chili

A comforting and nutrient-packed sweet potato turkey chili, perfect for cozy evenings.
- Prep Time: 15 minutes
- Cook Time: 35 minutes
- Total Time: 50 minutes
- Yield: 4 servings 1x
- Category: Main Course
- Method: Stovetop
- Cuisine: American
- Diet: Gluten-Free
Ingredients
- 1 lb ground turkey
- 2 medium sweet potatoes, diced
- 1 can diced tomatoes
- 1 can corn, drained
- 1 onion, chopped
- 2 cloves garlic, minced
- 1 tablespoon chili powder
- 1 teaspoon cumin
- Salt and pepper to taste
- 4 cups chicken broth
Instructions
- Heat the pan with a drizzle of olive oil over medium heat.
- Sauté the chopped onion for about 5 minutes until translucent, then add minced garlic and cook for another minute.
- Brown the ground turkey, breaking it apart and cooking until browned, about 6-8 minutes.
- Add the diced sweet potatoes and stir, cooking for an additional 5-7 minutes.
- Stir in the chili powder and cumin, cooking for another minute.
- Pour in the chicken broth and diced tomatoes, bringing the mixture to a gentle boil.
- Simmer uncovered for 25-30 minutes until sweet potatoes are tender.
- Stir in the drained corn in the last 5 minutes of cooking.
Notes
Top with cilantro, sour cream, or a squeeze of lime for serving. Store leftovers in the fridge for up to 4 days, or freeze for longer storage.
Nutrition
- Serving Size: 1 serving
- Calories: 350
- Sugar: 7g
- Sodium: 600mg
- Fat: 15g
- Saturated Fat: 4g
- Unsaturated Fat: 9g
- Trans Fat: 0g
- Carbohydrates: 45g
- Fiber: 7g
- Protein: 25g
- Cholesterol: 80mg
Keywords: sweet potato, turkey chili, comfort food, healthy recipe

Weeknight Garden Vegetable Lasagna: Simple, Veggie-Packed
Garden Vegetable Lasagna: A Harmonious Bounty of Flavor
Hello, dear foodies! Today, I’m excited to share with you one of my favorite recipes that blends the garden’s bounty with the cozy comfort of Italian cuisine: Garden Vegetable Lasagna. This dish is like a warm hug you can share around the dinner table, perfect for any season but especially delightful in the spring and summer when veggies are at their peak.
What I love about this lasagna is its incredible versatility — rich layers are packed with fresh vegetables, creamy ricotta, and gooey cheese. You’ll get the sumptuous taste of Italian classics while infusing them with wholesome goodness from your local farmer’s market or grocery store.
Whether you’re a seasoned chef or just starting your culinary journey, this lasagna is an approachable yet impressive dish that can elevate your weeknight dinners or wow your guests at a get-together. And don’t worry if you’ve never made lasagna before; I’ll guide you step-by-step through the process, sharing tips and kitchen secrets along the way. So roll up your sleeves, tie on that apron, and let’s get cooking!
Personal Story
I still remember the first time I made lasagna. I was a young cook, barely in my twenties, and I decided to host my friends for an extravagant Italian night filled with music, laughter, and, of course, food! Armed with my grandmother’s old recipe and the determination to impress, I set out to create an unforgettable experience.
The kitchen was a whirlwind of activity: the aroma of garlic sautéing, fresh basil tearing under my fingers, and the gentle bubbling of marinara sauce on the stove were enough to ignite my spirit. When it came time to serve, I unveiled my creation—a layered masterpiece of spontaneity and love.
To my delightful surprise, my friends not only enjoyed the lasagna, but they devoured it! That night became a cherished memory, a reminder that cooking brings people together in beautiful, personal ways. This Garden Vegetable Lasagna, inspired by that very first attempt, has become a tradition at my table—one that I hope will find its way to yours, too.
Ingredients
Here’s what you’re going to need for a mouthwatering Garden Vegetable Lasagna. Each ingredient adds its unique flair, and I’ve included a few pro tips along the way!
-
1 tablespoon olive oil
- A key player in bringing out flavors! You can substitute with avocado oil for a different taste.
-
1 small onion (finely chopped)
- Onions add a depth of flavor. If you’re sensitive to onions, shallots or leeks work beautifully too.
-
3 cloves garlic (minced)
- Garlic is a must for that aromatic punch! Feel free to use more or less, depending on your love for garlic.
-
1 medium zucchini (thinly sliced)
- Zucchini is tender and absorbs flavors well. For variation, eggplant makes a great substitute!
-
1 yellow squash (thinly sliced)
- Another squash that provides sweetness and color. You can use more zucchini in place of yellow squash, too.
-
1 red bell pepper (diced)
- For a pop of sweetness and crunch! Any color of bell pepper works here.
-
1 cup mushrooms (chopped)
- Mushrooms add earthiness; button or cremini mushrooms are excellent choices. For a gourmet touch, try shiitake mushrooms.
-
1½ cups fresh spinach
- Spinach wilts beautifully and boosts nutrients. Kale or Swiss chard can work as a hearty alternative.
-
3 cups marinara or tomato pasta sauce
- Use your favorite store-bought sauce or make a quick homemade one! A marinara with basil is my go-to.
-
½ teaspoon salt
- Enhances all flavors! Adjust based on your seasoning preferences and any added salt in the sauce.
-
½ teaspoon black pepper
- Adds warmth! White pepper is a fine substitute, especially for a milder flavor.
-
1 teaspoon Italian seasoning
- A blend of dried herbs like basil, oregano, and thyme brings authentic flavor. Fresh herbs work incredibly too.
-
1½ cups ricotta cheese
- Creamy ricotta is dreamy! Substitute with cottage cheese or a dairy-free alternative for a lighter option.
-
1 large egg
- Acts as a binder for the ricotta layer. For egg-free options, try ¼ cup of flaxseed meal mixed with water.
-
½ cup grated Parmesan cheese
- This cheesy goodness adds that coveted umami. Nutritional yeast can be a great vegan swap here.
-
1½ cups shredded mozzarella cheese
- Melty, gooey cheese is a must! Opt for low-fat mozzarella if you want a lighter dish.
-
9 lasagna noodles (cooked and drained)
- Use regular or whole wheat noodles; gluten-free varieties are available for dietary needs.
Step-by-Step Instructions
Now, let’s dive into the fun part: cooking! Here’s how to throw together this beautiful lasagna step-by-step.
-
Prep Your Ingredients: Start by washing and slicing your vegetables. The fresher, the better! This is an excellent time to put on some music and enjoy the moment in your kitchen. Let those chopping skills shine!
-
Sauté the Veggies: In a large skillet, heat the olive oil over medium heat. Add the chopped onions and sauté until translucent, about 3-4 minutes. Add the garlic and cook for another minute—this is when kitchen magic happens, and your house will smell divine! Toss in the zucchini, yellow squash, and red bell pepper, stirring for about 5-7 minutes until softened. Feel free to add a splash of water if they start to stick. Finally, throw in your mushrooms and spinach. Cook until the spinach wilts down. Season with salt, black pepper, and Italian seasoning. Set aside to cool slightly.
-
Mix the Cheeses: In a mixing bowl, combine the ricotta cheese, egg, and grated Parmesan. Stir until well blended. I love using a fork to mash the ricotta into a creamy mixture. It’s somewhat therapeutic, don’t you think? A bit more elbow grease never hurt anyone—almost like a mini workout!
-
Assemble the Lasagna: Preheat your oven to 375°F (190°C). In a 9×13-inch baking dish, spread a cup of marinara sauce on the bottom. This helps prevent the noodles from sticking. Layer 3 lasagna noodles over the sauce, followed by half of the ricotta mixture, half of the sautéed vegetable mixture, and a third of the shredded mozzarella. Repeat the layers: sauce, noodles, ricotta, veggies, mozzarella. Top it all off with the remaining noodles, sauce, and the rest of the mozzarella.
-
Cover and Bake: Cover your dish tightly with aluminum foil to prevent the top from burning. Bake in the preheated oven for 25-30 minutes. This helps the flavors meld together and makes for an incredibly moist lasagna.
-
Uncover and Broil: After your initial baking, remove the foil and switch your oven to the broil setting. Broil for an additional 3-5 minutes until the top is golden and bubbly. Keep a close eye during this step, as things can go from perfect to burnt very quickly!
-
Let it Rest: This is important! Allow the lasagna to sit for at least 10-15 minutes before slicing into it. This rest period helps the layers set and makes for easier serving. Plus, it gives you time to set the table—elegance without intimidation, right?
Serving Suggestions
When it’s time to serve, slice your lasagna into even squares and carefully lift them onto plates using a spatula. Garnish with fresh basil or parsley for a touch of vibrancy. Pair it with a light salad dressed with lemon vinaigrette—a perfect balance to the comforting richness of the lasagna. And don’t forget a glass of red wine; it’s a match made in culinary heaven!
Recipe Variations
Here are a few fun twists you can try:
- Add Protein: Layer in some cooked ground turkey, chicken, or beef for a heartier lasagna.
- Pesto Swirl: Mix in a few tablespoons of pesto with the ricotta for a vibrant flavor upgrade.
- Different Cheeses: Experiment with different cheeses like gouda or fontina for a unique melting experience.
- Grilled Veggies: Incorporate grilled vegetables for a smokier taste and excitement in each bite.
- Gluten-Free: Use gluten-free lasagna noodles or zucchini slices for a lighter option that’s just as delightful!
Chef’s Notes
This Garden Vegetable Lasagna has been through several iterations since that unforgettable night with my friends. Initially, it was quite straightforward, but over time, I found joy in layering flavors and cozy ingredients. Every time I make it, it feels like an adventure—a bit of improvisation here, a dash of creativity there.
One time, I used leftover roasted vegetables with some surprise artichokes! To my delight, they became a family favorite. Always remember: cooking is about joy and expression. Don’t stress about making it perfect. It’s about sharing the love, laughter, and warmth that only good food can bring.
FAQs and Troubleshooting
1. My lasagna turned out watery. What went wrong?
Using fresh veggies can release a lot of moisture. To avoid this, you can sauté your veggies a little longer or drain any excess liquid before assembling.
2. Is it necessary to cook the noodles first?
Pre-cooked noodles help ensure your lasagna doesn’t get too soggy. If you prefer, you can also use no-boil noodles, but you’ll need to increase the sauce quantity to ensure they cook properly.
3. Can I freeze lasagna?
Absolutely! Assemble the lasagna ahead of time and freeze it before baking. Just be sure to cover it tightly. When you’re ready, bake it from frozen and add an extra 15-20 minutes to the cooking time.
4. How can I make this vegan?
Substitute the ricotta with a mix of blended tofu, nutritional yeast, and a splash of lemon juice. For the mozzarella, there are many delicious vegan cheese options available on the market.
Nutritional Info (if applicable)
This lasagna slices up to be a pretty balanced meal, packed with vegetables, protein from the ricotta, and ample flavor. Although precise nutritional values can vary based on specific ingredients and portion sizes, a serving typically contains around:
- Calories: 320
- Protein: 18g
- Fat: 12g
- Carbohydrates: 40g
- Fiber: 4g
Feel free to adjust ingredients to suit your nutritional preferences!
There you have it, my friends! A delightful Garden Vegetable Lasagna that’s sure to impress everyone at your table. I can’t wait for you to try it out and savor every bite. Remember, it’s not just about the food—it’s about the love that goes into it. So, gather your loved ones, tie on your apron, and let the kitchen magic unfold! Enjoy!
PrintGarden Vegetable Lasagna

A delightful and hearty lasagna packed with fresh garden vegetables, creamy ricotta, and melty cheese, perfect for any dinner table.
- Prep Time: 15 minutes
- Cook Time: 40 minutes
- Total Time: 55 minutes
- Yield: 8 servings 1x
- Category: Main Course
- Method: Baking
- Cuisine: Italian
- Diet: Vegetarian
Ingredients
- 1 tablespoon olive oil
- 1 small onion (finely chopped)
- 3 cloves garlic (minced)
- 1 medium zucchini (thinly sliced)
- 1 yellow squash (thinly sliced)
- 1 red bell pepper (diced)
- 1 cup mushrooms (chopped)
- 1½ cups fresh spinach
- 3 cups marinara or tomato pasta sauce
- ½ teaspoon salt
- ½ teaspoon black pepper
- 1 teaspoon Italian seasoning
- 1½ cups ricotta cheese
- 1 large egg
- ½ cup grated Parmesan cheese
- 1½ cups shredded mozzarella cheese
- 9 lasagna noodles (cooked and drained)
Instructions
- Prep your ingredients: Start by washing and slicing your vegetables.
- Sauté the veggies: In a large skillet, heat the olive oil over medium heat. Add the chopped onions and sauté until translucent, about 3-4 minutes. Add the garlic and cook for another minute. Toss in the zucchini, yellow squash, and red bell pepper, stirring for about 5-7 minutes until softened. Add mushrooms and spinach, cooking until the spinach wilts down. Season with salt, black pepper, and Italian seasoning. Set aside to cool slightly.
- Mix the cheeses: In a mixing bowl, combine the ricotta cheese, egg, and grated Parmesan. Stir until well blended.
- Assemble the lasagna: Preheat your oven to 375°F (190°C). In a 9×13-inch baking dish, spread a cup of marinara sauce on the bottom. Layer 3 lasagna noodles over the sauce, followed by half of the ricotta mixture, half of the sautéed vegetable mixture, and a third of the shredded mozzarella. Repeat the layers: sauce, noodles, ricotta, veggies, mozzarella. Top with the remaining noodles, sauce, and mozzarella.
- Cover and bake: Cover your dish tightly with aluminum foil. Bake in the preheated oven for 25-30 minutes.
- Uncover and broil: After your initial baking, remove the foil and switch to the broil setting. Broil for an additional 3-5 minutes until the top is golden and bubbly.
- Let it rest: Allow the lasagna to sit for at least 10-15 minutes before slicing.
Notes
Letting the lasagna rest after baking helps the layers set and makes for easier serving.
Nutrition
- Serving Size: 1 serving
- Calories: 320
- Sugar: 5g
- Sodium: 500mg
- Fat: 12g
- Saturated Fat: 6g
- Unsaturated Fat: 4g
- Trans Fat: 0g
- Carbohydrates: 40g
- Fiber: 4g
- Protein: 18g
- Cholesterol: 65mg
Keywords: lasagna, vegetable lasagna, Italian, vegetarian, comfort food, baking

Crispy Roasted Brussels Sprouts: 15-Minute Weeknight Side
Discover the Delight of Roasted Brussels Sprouts
Hello there, food enthusiasts! Gather ‘round because today we’re diving into a delightful dish that’s sure to turn even the staunchest vegetable skeptics into converts: Roasted Brussels Sprouts. These little green gems may have had a bad rap in our childhoods, but trust me – when roasted, they become sweet, nutty, and downright delicious! I can almost hear the sizzle in the oven and see those crispy edges now. So, whether you’re prepping for a family dinner or seeking a standout side for your next get-together, let’s get started on this journey to roasted perfection.
Brussels sprouts are like those unassuming friends who surprise you with their hidden talents. You might glance at them on the grocery shelf and think twice, as they sit there, green and slightly knobby. But when they meet a hot oven, magic happens! The outer leaves caramelize to a golden brown, while the inner layers grow tender and luscious. Not only are they tasty, but they’re also packed with nutrients, making them a guilt-free pleasure.
In this blog post, I’ll guide you through a straightforward yet rewarding recipe that’s perfect for any occasion. So, roll up your sleeves, tie on your favorite apron, and let’s discover a fresh way to enjoy these underrated vegetables!
A Fond Memory
Reflecting on my love for Brussels sprouts takes me back to a memorable family holiday gathering. I remember it vividly – my grandmother’s dining table was laden with a feast that could make anyone drool. She would always prepare a large batch of roasted Brussels sprouts, an essential staple alongside the turkey and stuffing.
One year, as I was setting the table, I noticed the color of those sprouts just popping against the white serving dish. My grandma was generous with her seasoning, tossing them with olive oil, garlic, and a touch of balsamic vinegar, and roasting them until they were gloriously golden. As everyone gathered around, I watched my uncle, who had always declared his aversion, reach for a spoonful – and you could almost see the lightbulb go off! That first bite prompted laughter and astonishment. Suddenly, everyone was raving about how good the Brussels sprouts were, and the once-avoided vegetable became an honorary member of the holiday menu.
To this day, those roasted Brussels sprouts hold a special place in my heart, bringing back warmth and joy with every bite. And I strive to recreate that magic in my own kitchen to share with friends and family.
Ingredients
Now let’s go over the ingredients you’ll need to whip up these scrumptious roasted Brussels sprouts:
-
Brussels Sprouts: The star of the show! Opt for fresh sprouts with tight, unblemished leaves. If they’re larger, simply slice them in half to ensure even cooking. If fresh isn’t available, look for frozen sprouts – just be sure to thaw and pat them dry before roasting.
-
Olive Oil: This not only helps the sprouts roast beautifully but also adds a lovely flavor. Extra virgin is ideal for its rich taste, but you can use regular olive oil or even avocado oil.
-
Salt: A must to enhance all those savory flavors. Sea salt or kosher salt works best, but table salt is fine if that’s what you have on hand.
-
Pepper: Freshly cracked black pepper gives a robust flavor that pairs perfectly with the sprouts. If you’re feeling adventurous, try some red pepper flakes for a touch of heat!
-
Garlic Powder: Adds depth without the fuss of fresh garlic. It infuses the sprouts with flavor. If you prefer fresh garlic, feel free to swap in a couple of minced cloves – just watch for burning!
-
Onion Powder: This brings out earthy undertones. You can substitute it with finely chopped shallots or omit it if desired.
Step-by-Step Instructions
Ready to get roasting? Let’s dive into the cooking process!
-
Preheat the Oven: Start by preheating your oven to 425°F (220°C). This high temperature is crucial! It helps achieve the perfect char and caramelization that will make your sprouts sing.
-
Prep the Brussels Sprouts: Rinse the sprouts under cold water to remove any dirt. Trim the stems and remove any discolored outer leaves. Cut the larger sprouts in half to ensure they cook evenly; smaller ones can stay whole.
-
Season the Sprouts: In a large mixing bowl, toss the cleaned Brussels sprouts with a generous drizzle of olive oil. Aim for about 2 tablespoons, but feel free to adjust based on your preference. Add salt, freshly cracked pepper, garlic powder, and onion powder. This is the fun part – get your hands in there! Mix until all the sprouts are fully coated and seasonings are evenly distributed.
-
Arrange on a Baking Sheet: Spread the seasoned sprouts onto a large baking sheet in a single layer. Avoid overcrowding; these little guys need space to breathe and sizzle. If you’re making a larger batch, consider using two sheets.
-
Roast Away: Place the baking sheet in the preheated oven and roast for about 20-25 minutes, shaking the pan halfway through to promote even cooking. Keep an eye on them – you’re looking for golden-brown edges and a fork-tender center. If you want an extra crispy finish, turn the broiler on for the last couple of minutes – but watch closely, as we don’t want them to burn!
-
Taste Test: Once out of the oven, let them rest for a minute (if you can!) and sneak a taste. They should be a perfect combination of crispy on the outside and tender on the inside. If needed, adjust the seasoning with more salt and pepper to get that glorious flavor just right.
Serving Suggestions
Now comes the best part – serving these beauties! Transfer your roasted Brussels sprouts to a lovely serving platter. For a finishing touch, consider drizzling a bit of balsamic reduction or some freshly squeezed lemon juice over the top for that delightful brightness. You can also sprinkle some grated Parmesan or pecorino for an extra layer of flavor. Arrange them artfully, perhaps with some fresh herbs for a pop of color.
These roasted sprouts make a fantastic side dish for any meat or plant-based main course, or serve them as a part of a joyful veggie-centric spread. Share them on a beautiful table and watch how guests flock to them!
Recipe Variations
Feel free to get creative with your Brussels sprouts! Here are a few variations to switch things up:
-
Maple Glazed: Drizzle maple syrup over the sprouts before roasting for a sweet-tart combination that’s simply divine, especially in fall!
-
Spicy Garlic: Toss in some red pepper flakes and fresh minced garlic for an extra kick. Just be careful with the garlic – no one wants burnt bits!
-
Balsamic & Honey: Mix equal parts balsamic vinegar and honey to create a tangy glaze to drizzle on the sprouts just before they finish roasting.
-
Mediterranean Flare: Add kalamata olives, sun-dried tomatoes, and feta cheese for a Mediterranean twist and to elevate your flavor profile.
-
Lemon & Dill: Toss with lemon zest and fresh chopped dill after roasting for a fresh and zesty taste.
Chef’s Notes
These roasted Brussels sprouts are a dish that’s truly evolved with me over the years. I remember experimenting back in my kitchen days, trying to convince my friends to give Brussels sprouts a chance. I started with the classic combination of butter and garlic, but over time I found that roasting brought out their natural sweetness better than any stovetop method.
To this day, I’m continually inspired by the changing seasons and the availability of fresh produce. Every time I roast a batch, I find myself tweaking the recipe a little more, playing with spices and glazes to highlight their perfectly crunchy, tender qualities.
One funny story that always cracks me up is when I served them at a dinner party, and my friend mistook my carefully crafted balsamic drizzle for chocolate syrup. The look on his face was priceless when he took that first bite! Let’s just say he became a fan that night!
FAQs and Troubleshooting
Q: My Brussels sprouts turned out mushy. What happened?
A: This can happen if they are overcrowded on the baking sheet or not roasted at a high enough temperature. Make sure there’s enough space for the sprouts to brown and try roasting them at 425°F as suggested.
Q: How do I know when they’re done?
A: You’re looking for that beautiful golden color on the outside with just a little bit of crispy char. A fork should go through them easily when checked!
Q: Can I make these ahead of time?
A: While roasted Brussels sprouts are best served fresh, you can prepare them ahead by cleaning and seasoning them. Store them in an airtight container in the fridge and roast right before serving!
Q: What if I have leftovers?
A: Lucky you! Leftover roasted Brussels sprouts can be stored in the refrigerator for up to 3 days. Just reheat them in the oven to regain some of their crispy texture.
Nutritional Info
Although I don’t focus too much on strict nutritional guidelines, roasted Brussels sprouts are a fantastic source of vitamins K and C, fiber, and offer some healthy antioxidants. They’re low in calories and rich in nutrients, making them a wonderful addition to your meals!
Thank you for joining me on this colorful culinary adventure! I hope you feel inspired to bring Brussels sprouts into your kitchen and share the joy of roasting them with your loved ones. Let’s keep spreading that love of food and gathering together around the table. Happy cooking, and remember, good food is all about good company!
PrintRoasted Brussels Sprouts

Delightful roasted Brussels sprouts that transform skeptics into fans with their sweet and nutty flavor.
- Prep Time: 10 minutes
- Cook Time: 25 minutes
- Total Time: 35 minutes
- Yield: 4 servings 1x
- Category: Side Dish
- Method: Roasting
- Cuisine: American
- Diet: Vegetarian
Ingredients
- 1 pound Brussels sprouts
- 2 tablespoons olive oil
- 1 teaspoon salt
- 1/2 teaspoon black pepper
- 1 teaspoon garlic powder
- 1 teaspoon onion powder
Instructions
- Preheat the oven to 425°F (220°C).
- Prep the Brussels sprouts by rinsing them under cold water, trimming the stems, and removing discolored leaves.
- Season the sprouts with olive oil, salt, pepper, garlic powder, and onion powder in a mixing bowl.
- Arrange them on a large baking sheet in a single layer.
- Roast for 20-25 minutes, shaking the pan halfway through.
- Taste and adjust seasoning as necessary before serving.
Notes
For extra flavor, consider drizzling with balsamic reduction or lemon juice before serving.
Nutrition
- Serving Size: 1 serving
- Calories: 120
- Sugar: 2g
- Sodium: 300mg
- Fat: 7g
- Saturated Fat: 1g
- Unsaturated Fat: 6g
- Trans Fat: 0g
- Carbohydrates: 12g
- Fiber: 4g
- Protein: 4g
- Cholesterol: 0mg
Keywords: Brussels sprouts, roasted vegetables, healthy side dish
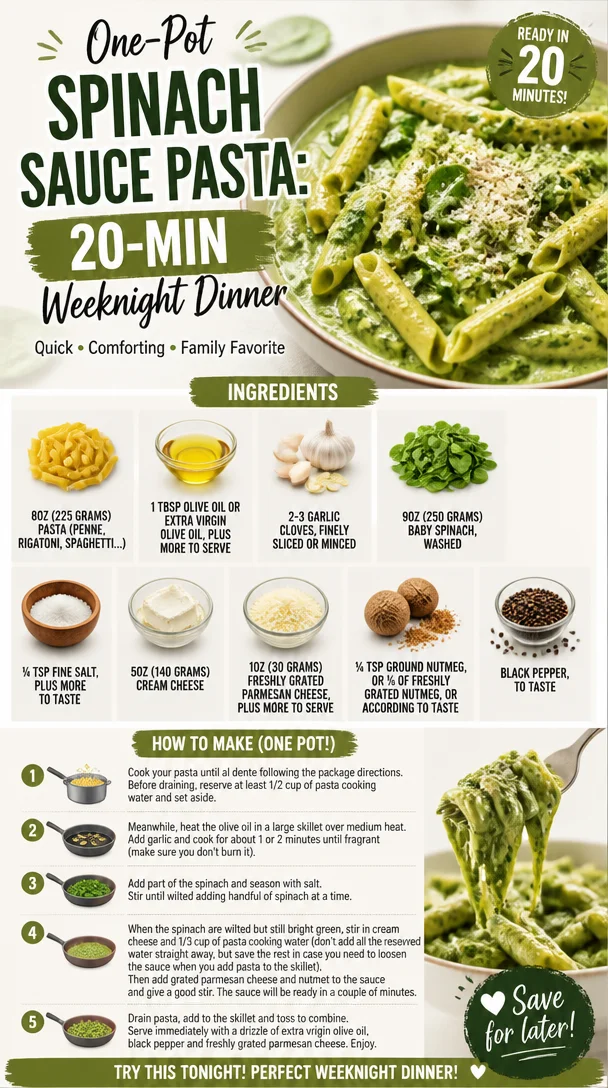
One-Pot Spinach Sauce Pasta: 20-Min Weeknight Dinner
Creamy Spinach Sauce Pasta: Elegant, Easy, and Effortlessly Delicious
Hey there, fellow foodies! Welcome back to my cozy corner of the kitchen, where we’re all about creating meals that feel luxurious but are oh-so-simple to whip up. Today, I’m excited to share one of my favorite recipes that captures the essence of elegance and comfort: Pasta with Spinach Sauce. This dish is deliciously creamy, green, and ready to impress your guests or make your weeknight dinner feel a little more special. Ready to dive in? Let’s set the table!
A Taste of Nostalgia
Let me take you back to a sunny afternoon spent at my grandmother’s house. I was about eight years old, standing on a stool, peering over the kitchen counter where she was deftly moving about, preparing one of her famous pasta dishes. The air was filled with the fragrant scent of sautéed garlic, and I remember the vibrant green of the spinach as she tossed it into the pan.
"Cooking is like magic," she said, with a twinkle in her eye, "You take a few simple ingredients and turn them into something extraordinary." Watching her toss the spinach into a glorious sauce and combine it with the freshly cooked pasta was nothing short of spellbinding.
That memory stuck with me, not just for the culinary skills my grandmother imparted but for the love and warmth that filled her kitchen. Today, when I cook this Creamy Spinach Sauce Pasta, I channel that same joy and sparkle. It’s not just about the food; it’s about creating beautiful moments around the table, just like Grandma used to do.
Ingredients
Here’s what you’ll need for this delightful pasta dish:
-
8oz (225 grams) pasta (penne, rigatoni, spaghetti, or your favorite)
- Use any pasta shape you love! Just keep an eye on the cooking time as different shapes can vary.
-
1 Tbsp olive oil or extra virgin olive oil
- A drizzle of high-quality olive oil adds richness. Don’t have olive oil? Any light oil will do in a pinch, but it’s worth the upgrade!
-
2-3 garlic cloves, finely sliced or minced
- Garlic is our aromatic superstar here! Want a milder flavor? Try roasting the garlic first for a sweeter profile.
-
9oz (250 grams) baby spinach, washed
- Fresh spinach is best for this recipe, but frozen spinach can work too; just make sure it’s thawed and drained.
-
¼ tsp fine salt, plus more to taste
- Seasoning is key! Start with less and add to your preference as you taste.
-
5oz (140 grams) cream cheese
- This creates that luscious creaminess! Don’t have cream cheese? You could use mascarpone or ricotta as alternatives.
-
1oz (30 grams) freshly grated parmesan cheese, plus more to serve
- Fresh cheese enhances flavor! If you’re in a pinch, pre-grated can work but won’t melt as beautifully.
-
¼ tsp ground nutmeg, or ⅓ of freshly grated nutmeg, or according to taste
- A tiny pinch of nutmeg warms up the flavors. Not a fan? Leave it out or switch it up with a dash of smoked paprika for a different vibe.
-
Black pepper, to taste
- Freshly cracked pepper adds a lovely kick! For a spicier twist, try red pepper flakes.
Step-by-Step Instructions
-
Cook the Pasta
Bring a large pot of salted water to a boil. Add your pasta and cook according to package instructions until al dente. Make sure to reserve about 1 cup of pasta water before draining! This starchy goodness will help you create a beautiful sauce. -
Sauté the Garlic
In a large skillet, heat the olive oil over medium heat. Once shimmering, add the minced garlic. Sauté for about 1-2 minutes, or until fragrant and golden. Be careful not to burn it—it can turn bitter! -
Add the Spinach
Toss in the baby spinach and sprinkle with salt. Cook, stirring occasionally, until the spinach wilts down, about 3-4 minutes. The vibrant color will remind you of sun-soaked days! -
Create the Sauce
Reduce the heat to low. Stir in the cream cheese until it melts and forms a creamy mixture. Add the reserved pasta water a little at a time until you reach your desired sauce consistency. This is where the magic happens! -
Flavor it Up
Add the grated parmesan and nutmeg. Stir until everything is well combined. Taste the sauce and adjust salt and pepper as needed. A good chef always tastes! -
Combine Pasta and Sauce
Add the drained pasta directly to the skillet. Toss gently to coat the pasta evenly with the spinach sauce. If the sauce is too thick, add more reserved pasta water, a tablespoon at a time. -
Serve
Plate your pasta, adding more parmesan and a drizzle of olive oil on top for that finishing touch. A sprinkle of pepper or a few fresh herbs could also brighten the plate.
Serving Suggestions
For an elegant presentation, twirl the pasta into a nest using a fork and spoon and place it in the center of your favorite plate. Add a light drizzle of olive oil and a sprinkle of fresh parmesan for a polished look. You can also toss in some toasted pine nuts or a squeeze of fresh lemon juice to brighten the flavors and make it pop!
Recipe Variations
Here are a few fun twists you can take with this dish:
-
Add Protein: Toss in some grilled chicken or shrimp for a heartier meal. You could also stir in some cannellini beans for a veggie-packed option!
-
Go Vegan: Substitute cream cheese with cashew cream (soaked blended cashews with a little water) and nutritional yeast instead of parmesan for a creamy sauce.
-
Pack a Punch: Incorporate sun-dried tomatoes or roasted red peppers for a burst of flavor and color.
-
Herb it Up: Fresh or dried herbs like basil or thyme can add an aromatic layer to your sauce. Sprinkle some in while cooking for a fragrant finish!
-
Extra Greens: Mix in other greens like kale or arugula for a nutritional boost and a flavor twist.
Chef’s Notes
This recipe has come a long way since my grandmother taught me the basics of cooking! Over time, I’ve learned the importance of balance in flavors and the joy of using fresh ingredients. I remember the first time I made this dish for a dinner party. I was nervous, but when my friends took their first bites, the compliments poured in. That moment solidified my belief that food is a love language, and a simple pasta can bring people together. Every time I make this dish, I reminisce about those early days in the kitchen with Grandma—her laughter echoing with each turn of the spatula.
FAQs and Troubleshooting
Q: My sauce seems too thick; how can I fix it?
A: No worries! Just add in a couple of tablespoons of reserved pasta water until it reaches your desired consistency.
Q: I ran out of garlic! Can I skip it?
A: While garlic adds tons of flavor, you can substitute with shallots or even a pinch of garlic powder in a pinch for a hint of that beloved garlic taste.
Q: Is it possible to make the sauce ahead of time?
A: Absolutely! You can make the sauce ahead and store it in the fridge. Just warm it up gently before adding the pasta and adjust the consistency with pasta water as needed.
Q: Can I freeze leftovers?
A: It’s best to consume this dish fresh; however, if you have leftovers, you can freeze the sauce separately. Just know that the texture may change a bit when thawed.
Nutritional Info (Optional)
For a single serving of this creamy spinach pasta:
- Calories: Approximately 450
- Protein: 14g
- Carbs: 55g
- Fat: 20g
- Fiber: 3g
This could vary based on the pasta choice and additional ingredients, of course!
And there you have it, my delightful Pasta with Spinach Sauce! I hope it brings as much joy to your kitchen as it does to mine. Remember, cooking is about having fun in the kitchen and enjoying the company of loved ones. So, grab your apron, gather around the table, and let’s keep those beautiful kitchen moments alive together. Happy cooking!
PrintCreamy Spinach Sauce Pasta

An elegant and easy pasta dish featuring a creamy spinach sauce that is perfect for impressing guests or enjoying a cozy dinner at home.
- Prep Time: 15 minutes
- Cook Time: 20 minutes
- Total Time: 35 minutes
- Yield: 4 servings 1x
- Category: Main Course
- Method: Baking
- Cuisine: Italian
- Diet: Vegetarian
Ingredients
- 8oz (225 grams) pasta (penne, rigatoni, spaghetti, or your favorite)
- 1 Tbsp olive oil or extra virgin olive oil
- 2–3 garlic cloves, finely sliced or minced
- 9oz (250 grams) baby spinach, washed
- ¼ tsp fine salt, plus more to taste
- 5oz (140 grams) cream cheese
- 1oz (30 grams) freshly grated parmesan cheese, plus more to serve
- ¼ tsp ground nutmeg, or according to taste
- Black pepper, to taste
Instructions
- Cook the Pasta: Bring a large pot of salted water to a boil. Add your pasta and cook according to package instructions until al dente. Reserve about 1 cup of pasta water before draining.
- Sauté the Garlic: In a large skillet, heat the olive oil over medium heat. Add the minced garlic and sauté for about 1-2 minutes until fragrant and golden.
- Add the Spinach: Toss in the baby spinach and sprinkle with salt. Cook, stirring occasionally, until the spinach wilts down, about 3-4 minutes.
- Create the Sauce: Reduce the heat to low. Stir in the cream cheese until it melts and forms a creamy mixture. Add the reserved pasta water gradually until reaching your desired consistency.
- Flavor it Up: Add the grated parmesan and nutmeg. Stir until well combined and adjust seasoning as needed.
- Combine Pasta and Sauce: Add the drained pasta directly to the skillet. Toss gently to coat the pasta evenly with the sauce.
- Serve: Plate your pasta, adding more parmesan and a drizzle of olive oil on top. Optionally, sprinkle with pepper or fresh herbs.
Notes
For an elegant presentation, twirl the pasta into a nest and top with additional parmesan and a drizzle of olive oil. You can also add toasted pine nuts or a squeeze of fresh lemon juice.
Nutrition
- Serving Size: 1 serving
- Calories: 450
- Sugar: 5g
- Sodium: 400mg
- Fat: 20g
- Saturated Fat: 10g
- Unsaturated Fat: 8g
- Trans Fat: 0g
- Carbohydrates: 55g
- Fiber: 3g
- Protein: 14g
- Cholesterol: 35mg
Keywords: Creamy, Spinach, Pasta, Easy Dinner, Vegetarian Recipe
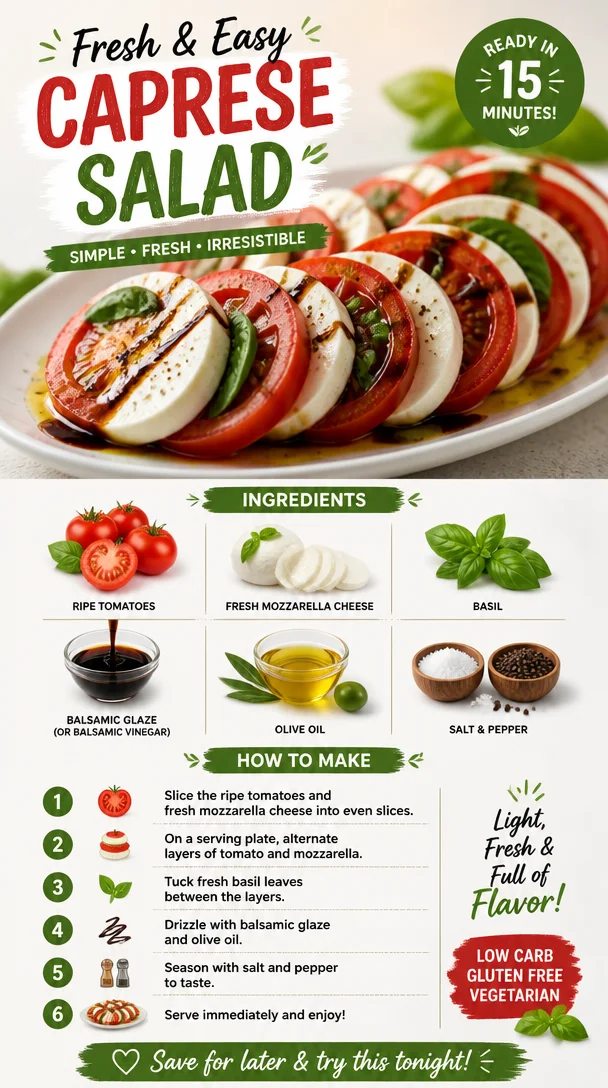
Caprese Salad
Caprese Salad: The Perfect Summer Delight
Hello, dear food lovers! Today, I’m super excited to share one of my all-time favorite dishes: Caprese Salad. This vibrant Italian classic embodies everything I adore about cooking: simplicity, fresh ingredients, and the ability to create a beautiful dish that delights the senses. Whether you’re hosting a summer get-together or just treating yourself to a fresh, light meal, Caprese Salad is a surefire winner that never fails to impress.
Picture this: the sun is shining, birds are chirping, and you’re gathering around the table with your loved ones. There’s something magical about summer evenings, isn’t there? The air is filled with laughter, the clinking of glasses, and the enticing aroma of delicious food wafting from the kitchen. And right in the center of your table? A stunning platter of Caprese Salad, inviting everyone to dig in. Each bite brings together the juicy sweetness of ripe tomatoes, the creaminess of fresh mozzarella, and the fragrant burst of aromatic basil—all drizzled with a tangy balsamic glaze that ties everything together beautifully.
This salad isn’t just food; it’s an experience. It’s the taste of summer, the essence of Italian cuisine, and a simple way to showcase the beauty of fresh ingredients. So, let’s dive into the heart of this dish and learn how to create a Caprese Salad that not only looks exquisite but tantalizes the taste buds too.
A Nostalgic Memory
Ah, Caprese Salad and me—we go way back! I remember the first time I had a truly authentic Caprese Salad. It was during a summer trip to the Amalfi Coast with my family. We stumbled upon a quaint little trattoria nestled between vibrant lemon trees and azure waters. It was there that I was introduced to the wonders of fresh mozzarella and sun-ripened tomatoes. The dish arrived on a rustic wooden table, its colors popping against the Mediterranean backdrop.
With each bite, my taste buds danced with delight. The mozzarella was soft and creamy, the tomatoes juicy and sweet, and the basil brought in such a fragrant freshness. It was a simple dish, but the quality of the ingredients made all the difference. I learned then that sometimes the best meals are born from the best ingredients—and that lesson has stayed with me. Since that day, Caprese Salad has become my go-to summer dish, and now, I’m thrilled to share it with you!
Ingredients
Let’s gather our ingredients and get ready to create this delicious salad. Here’s what you’ll need:
-
Ripe Tomatoes
Look for the ripest, juiciest tomatoes you can find. Heirloom tomatoes are an excellent choice for their flavor and vibrant colors. If you can’t find fresh ones, cherry tomatoes will do in a pinch—just cut them in half for a sweet bite! -
Fresh Mozzarella Cheese
For that creamy texture, fresh mozzarella is key. Look for the balls packed in water for the best flavor. If you’d like a lower-fat option, you could try part-skim mozzarella, but keep in mind it won’t have the same luxurious creaminess. -
Basil
Fresh basil adds an aromatic lift that is essential to this dish. If you can’t find fresh basil, try substituting with a sprinkle of dried basil, but it won’t have quite the same impact! -
Balsamic Glaze (or Balsamic Vinegar)
A drizzle of balsamic glaze elevates the salad with a sweet tang. If you prefer a less sweet option, you can go with traditional balsamic vinegar; just be mindful to use it sparingly, as it’s stronger in flavor. -
Olive Oil
A good quality extra virgin olive oil is crucial for drizzling over your salad—think of it as the finishing touch! It adds flavor and richness. -
Salt and Pepper
Simple yet essential! Use fresh cracked black pepper and flaky sea salt to season your salad. A pinch of salt can really enhance the flavors of the tomatoes.
Step-by-Step Instructions
Step 1: Prepare Your Ingredients
Start by washing your tomatoes under cool, running water. Pat them dry with a clean towel. If you’re using large tomatoes, slice them into thick rounds (about 1/4 to 1/2 inch thick). For cherry tomatoes, halving them will create delightful little bite-sized pieces.
Step 2: Slice the Mozzarella
Next, let’s take care of that creamy mozzarella! Slice the fresh mozzarella into similar-sized rounds to match the tomatoes. If you happen to have mozzarella pearls, they’re fantastic for an easy, rustic salad presentation.
Step 3: Arrange the Salad
Now comes the fun part! On a large serving platter, alternate layers of tomato slices and mozzarella. You can arrange them in a circle, line them up, or just pile them haphazardly—there’s no right or wrong here! As you layer, tuck in fresh basil leaves in between. This not only adds flavor but also makes the salad look stunning.
Step 4: Drizzle with Olive Oil and Balsamic
Once you have beautifully arranged your salad, it’s time to dress it up! Drizzle a generous glug of extra virgin olive oil over the entire salad. Then follow that with a drizzle of balsamic glaze (or vinegar, if that’s what you have). Don’t be shy—this is what brings all the flavors together!
Step 5: Season to Taste
Finally, it’s time to add the finishing touches. Season your Caprese Salad with a sprinkle of flaky sea salt and a few cracks of fresh black pepper. This little moment is where your salad becomes magic, accentuating the flavors of all those fresh ingredients.
Step 6: Serve and Enjoy
Now, step back and admire your creation—it’s a beauty! Serve your Caprese Salad immediately at room temperature for the best flavor. Watch it disappear as everyone digs into this delightful dish!
Serving Suggestions
When it comes to plating, keep it simple yet elegant. A beautiful wooden board or a flat white platter truly showcases your colorful layers. You might even consider garnishing the salad with a few extra basil leaves or a sprinkle of crushed red pepper flakes for a hint of heat. Serve alongside some crusty bread or grilled chicken for a complete meal, or enjoy it solo as a refreshing appetizer.
Recipe Variations
-
Caprese Skewers: Assemble cherry tomatoes, mozzarella balls, and fresh basil onto skewers for a fun appetizer!
-
Avocado Twist: Add slices of creamy avocado for a rich texture and flavor boost.
-
Pesto Drizzle: Swap out the balsamic for a fresh basil pesto drizzle for an herbaceous twist.
-
Mediterranean Style: Include Kalamata olives and slices of roasted red bell pepper for a Mediterranean flair.
-
Grilled Caprese: Grill the tomatoes and mozzarella for a smoky flavor profile—perfect for summer barbecues!
Chef’s Notes
Caprese Salad holds a special place in my heart, not just for its fresh flavors but also for the stories it gathers around the table. Over the years, I’ve played around with different ingredients and variations to make this dish my own. I once hosted an Italian night for friends and made Caprese Salad a centerpiece dish. I told everyone to bring their favorite Italian wines—needless to say, we ended up spending the night laughing over great food and even better company! Remember, cooking isn’t just about following a recipe; it’s about making memories and sharing love through the food you create.
FAQs and Troubleshooting
1. My tomatoes are bland. How can I fix this?
Make sure to choose fully ripe, in-season tomatoes—they should be vibrant in color and firm yet slightly yielding when pressed. If you end up with a lackluster tomato, a sprinkle of salt and a dash of balsamic can help enhance the flavor right away!
2. Can I make Caprese Salad in advance?
While this salad is best enjoyed fresh, you can slice your tomatoes and mozzarella in advance. Just store them separately in the fridge and assemble right before serving to keep everything fresh.
3. The basil is bruised and wilting. What did I do wrong?
Basil is delicate, so be gentle while handling it. Store it in a glass of water on your countertop—similar to a bouquet—rather than the fridge, which can cause wilting.
4. There’s too much balsamic glaze on my salad! How can I fix it?
No worries! Add more fresh ingredients—like extra tomatoes and mozzarella—to balance out the flavors. Just remember that less is often more when it comes to dressings.
Nutritional Info
While I generally lean toward the more relaxed side of eating, it’s always good to know what’s going on in our meals. A standard serving of Caprese Salad (without additional toppings) can be about:
- Calories: 300 (depending on oil and portion size)
- Protein: 16g
- Fat: 20g (largely healthy fats from olive oil and mozzarella)
- Carbohydrates: 8g
So, there you have it—a refreshing dive into the world of Caprese Salad! I hope you find joy in preparing, sharing, and indulging in this delightful dish. Remember, cooking is all about bringing people together, so gather your loved ones and let the magic of good food create lasting memories. Happy cooking!
PrintCaprese Salad
A vibrant Italian classic salad made with fresh mozzarella, ripe tomatoes, and aromatic basil, drizzled with balsamic glaze.
- Prep Time: 10 minutes
- Cook Time: 0 minutes
- Total Time: 10 minutes
- Yield: 4 servings
- Category: Salad
- Method: No Cooking
- Cuisine: Italian
- Diet: Vegetarian
Ingredients
- Ripe Tomatoes
- Fresh Mozzarella Cheese
- Basil
- Balsamic Glaze (or Balsamic Vinegar)
- Olive Oil
- Salt and Pepper
Instructions
- Prepare your ingredients by washing the tomatoes and slicing them.
- Slice the mozzarella into rounds.
- Arrange the salad by alternating layers of tomato and mozzarella on a platter.
- Drizzle olive oil and balsamic glaze over the salad.
- Season with salt and pepper to taste.
- Serve immediately at room temperature.
Notes
For variations, try adding avocado, olives, or grilled ingredients.
Nutrition
- Serving Size: 1 serving
- Calories: 300
- Sugar: 5g
- Sodium: 300mg
- Fat: 20g
- Saturated Fat: 6g
- Unsaturated Fat: 12g
- Trans Fat: 0g
- Carbohydrates: 8g
- Fiber: 2g
- Protein: 16g
- Cholesterol: 30mg
Keywords: Caprese Salad, Italian Salad, Fresh Ingredients, Summer Salad
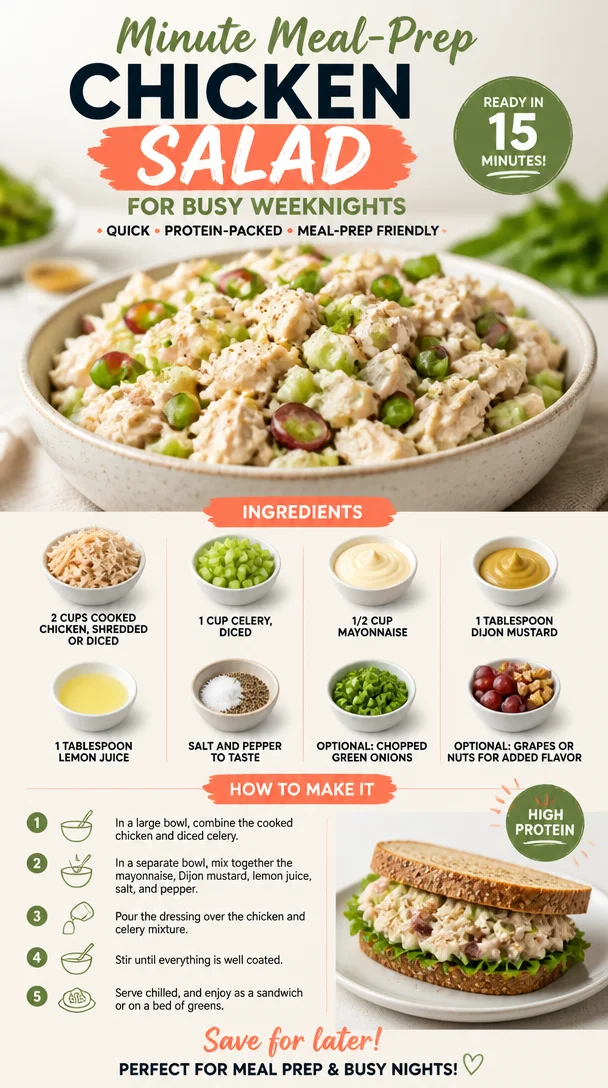
Minute Meal-Prep Chicken Salad for Busy Weeknights
The Ultimate Easy Chicken Salad: A Simple Classic for Every Occasion
Hello, lovely friends! Today, we’re diving into the world of one of my all-time favorite dishes: Easy Chicken Salad. Whether it’s a sunny picnic in the park or a cozy lunch at home, this dish is your go-to for something deliciously satisfying and fuss-free. The best part? You can whip it up in no time, with ingredients you probably already have at home!
Let me set the scene. Picture this: sunny afternoons, the scent of freshly cut grass wafting through the air, and laughter echoing from friends gathered around. Everyone is interested in two things: good company and delicious food! I remember one summer backyard barbecue when I decided to bring my version of chicken salad. Nothing fancy, just the classic goodness we’ve all come to love. But oh, how it stole the show!
By the end of the day, I had a circle of friends savoring every bite, sneaking spoonfuls straight from the bowl, and asking for the recipe. It was a reminder of how simple ingredients can create moments filled with joy and connection. Chicken salad became more than just a dish; it turned into a delightful memory that I cherish to this day.
So, gather ‘round because I can’t wait to share my easy chicken salad recipe with you — one that’s not just super tasty, but also gives you the chance to play around, customize, and make it your own!
Ingredients
Let’s take a look at what you’ll need to create this delightful chicken salad:
-
2 cups cooked chicken, shredded or diced: Use leftover rotisserie chicken for an effortless option, or simply boil some chicken breasts. You can even substitute with grilled or baked chicken for added flavor.
-
1 cup celery, diced: The crunchy texture adds a delightful contrast. If celery isn’t your jam, feel free to swap it out with diced bell peppers or cucumber.
-
1/2 cup mayonnaise: This creamy base is what holds it all together. For a healthier twist, use Greek yogurt or a dairy-free mayo alternative!
-
1 tablespoon Dijon mustard: It brings in a tangy zip! If you don’t have it on hand, regular mustard or even a splash of vinegar can work.
-
1 tablespoon lemon juice: This citrusy note brightens up the flavors. Lime juice can also be a delicious alternative!
-
Salt and pepper to taste: Don’t skimp on seasoning! Always make sure to taste and adjust as needed.
-
Optional: chopped green onions, grapes, or nuts: These goodies add extra flavor and texture! Think of toasted almonds for crunch or sweet grapes for a delightful twist!
Step-by-Step Instructions
Now, let’s get cooking! Here’s how to make your Easy Chicken Salad step-by-step:
-
Prepare Your Chicken: Start by shredding or dicing your cooked chicken into bite-sized pieces. If you haven’t cooked your chicken yet, no worries! Just boil some chicken breasts in salty water for about 15-20 minutes, or until they’re tender and cooked through. Remove from the pot, let them cool, and then shred!
-
Chop Your Veggies: Dice your celery finely. If you’re adding in any optional ingredients like green onions or grapes, now is the time! Remember, finesse in chopping adds to the texture and appeal of the salad, so take your time, and enjoy the prep.
-
Mix the Base: In a large bowl, combine the mayonnaise, Dijon mustard, and lemon juice. Stir them together thoroughly to create a creamy base. Here’s a little tip: if your mayo seems a bit thick, add a splash of water or more lemon juice until it reaches your desired consistency!
-
Combine It All: Add the shredded chicken and diced celery to the mayo mixture. Sprinkle with salt and pepper. Now comes the fun part — fold everything together gently. You want it well combined but still fluffy and light.
-
Taste Test Time: This is the moment of truth! Grab a spoon and taste your chicken salad. Adjust seasoning as needed, adding more salt, pepper, or even a touch more mustard if you’d like.
-
Chill Out: For the best flavors, cover the bowl and pop it in the fridge for at least 30 minutes before serving. This allows the flavors to meld beautifully together. Trust me, it makes a big difference!
Serving Suggestions
Ready to serve your chicken salad? Scoop generous portions onto a bed of mixed greens, or serve it in a fresh whole grain wrap. You could even stuff it into hollowed-out avocados for a stunning presentation! Drizzle with a little extra lemon juice before serving, and voila — a dish that’s as beautiful as it is delicious.
Recipe Variations
Feeling adventurous? Here are some creative twists you can try:
-
Mediterranean Chicken Salad: Add diced cucumber, olives, and crumbled feta cheese for a refreshing Mediterranean vibe!
-
Curry Chicken Salad: Incorporate curry powder and some chopped apples or raisins for a sweet and savory combo that’s sure to impress.
-
Southwestern Chicken Salad: Throw in black beans, corn, and diced jalapeños for a zesty kick.
-
Herbed Chicken Salad: Mix in fresh herbs like dill or parsley for an uplift in flavor that sings freshness.
-
Nuts & Fruits Delight: Add walnuts or pecans for crunch, along with dried cranberries or grapes for a sweet contrast.
Chef’s Notes
This chicken salad has been a staple in my kitchen for years, evolving with every gathering and celebration. I can’t begin to tell you how many variations I’ve tried — some that went hugely well and others that may have caused a tiny kitchen disaster (hey, we all have our off days!).
One particularly funny memory involved attempting to impress my friends by adding a splash of wine to the salad! Let’s just say, it wasn’t my finest hour — but we had a great laugh and finished every last bite anyway.
FAQs and Troubleshooting
1. Can I use canned chicken?
Absolutely! Canned chicken is a great shortcut. Just make sure to drain and rinse it for the best texture.
2. What can I use instead of mayonnaise?
If you’re looking for a healthier option, Greek yogurt or avocado mash are wonderful alternatives.
3. How long does chicken salad last in the fridge?
Properly stored in an airtight container, your chicken salad should be good for about 3-4 days. Just be sure to note any additions, as some ingredients might shorten the shelf life!
4. Help! My chicken salad is too dry!
No problem! Just add a bit more mayonnaise or some chicken broth to moisten it up. Mix thoroughly, and you’ll be back on track.
Nutritional Information (Optional)
Cooking chicken salad doesn’t have to come with a hefty calorie count! Each serving of this Easy Chicken Salad (assuming six servings) can contain approximately 250 calories, depending on how much mayonnaise you use.
Wrap Up
And there you have it, friends! A delightful, easy chicken salad that’s perfect for any occasion — picnics, potlucks, or even just an easy weeknight dinner. Remember, this dish is all about making beautiful moments around the table, no matter how simple or extravagant the meal may be.
I can’t wait for you to tie on your apron and give this recipe a try! Enjoy the process, make it uniquely yours, and most importantly, share it with the people you care about because good food truly is about showing up!
Happy cooking!
PrintUltimate Easy Chicken Salad
A simple and classic chicken salad perfect for any occasion, easy to prepare and customizable.
- Prep Time: 15 minutes
- Cook Time: 20 minutes
- Total Time: 35 minutes
- Yield: 6 servings 1x
- Category: Salad
- Method: Mixing
- Cuisine: American
- Diet: Gluten-Free
Ingredients
- 2 cups cooked chicken, shredded or diced
- 1 cup celery, diced
- 1/2 cup mayonnaise
- 1 tablespoon Dijon mustard
- 1 tablespoon lemon juice
- Salt and pepper to taste
- Optional: chopped green onions, grapes, or nuts
Instructions
- Prepare your chicken: Start by shredding or dicing your cooked chicken into bite-sized pieces.
- Chop your veggies: Dice your celery finely. Add any optional ingredients if desired.
- Mix the base: In a large bowl, combine the mayonnaise, Dijon mustard, and lemon juice.
- Combine it all: Add the shredded chicken and diced celery to the mayo mixture. Sprinkle with salt and pepper.
- Taste test time: Grab a spoon and taste your chicken salad. Adjust seasoning as needed.
- Chill out: Cover the bowl and refrigerate for at least 30 minutes before serving.
Notes
This chicken salad can last in the fridge for about 3-4 days when stored properly.
Nutrition
- Serving Size: 1 serving
- Calories: 250
- Sugar: 2g
- Sodium: 350mg
- Fat: 15g
- Saturated Fat: 2g
- Unsaturated Fat: 8g
- Trans Fat: 0g
- Carbohydrates: 5g
- Fiber: 1g
- Protein: 20g
- Cholesterol: 60mg
Keywords: chicken salad, easy recipe, picnic food, healthy salad, quick meal
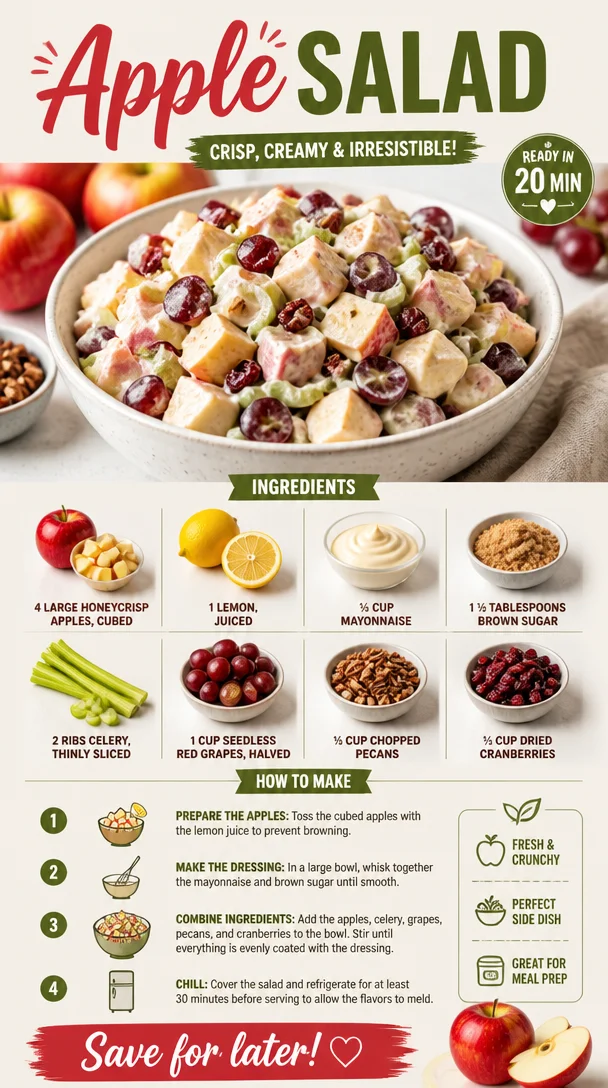
Apple Salad
The Ultimate Apple Salad: A Crisp and Refreshing Delight
Hello, my fellow food enthusiasts! Today we’re diving into a dish that’s as refreshing as a crisp autumn day: the delightful apple salad. This recipe is not just a salad; it’s a celebration of flavors and memories that I can’t wait to share with you. Are you ready to elevate your salad game? Let’s get started!
Introduction
Picture this: the air is filled with a hint of chill, and the leaves are turning shades of gold and crimson. This time of year always means one thing for me — it’s apple season! There’s just something magical about walking through an orchard, basking in the sun, and picking the freshest, juiciest apples straight from the trees. The feeling of that crunch as you bite into a freshly picked Honeycrisp apple is enough to awaken anyone’s taste buds!
But let’s be real; apples aren’t just an autumn treat. They’re a perennial favorite in kitchens all year round! That’s why I’ve developed this vibrant apple salad that’s perfect for any occasion—whether it’s a joyful family gathering, a friendly potluck, or a simple weeknight dinner. With the creaminess of mayonnaise, the tang of lemon, and the crunch of celery and pecans, this salad combines a symphony of flavors and textures that’s hard to resist.
What I love most about this apple salad is not just the deliciously refreshing taste but also the way it brings people together around the table. It has this wonderful knack for feeling both nourishing and slightly indulgent at the same time. Plus, it’s so easy to whip up that it might just become your new go-to for any gathering! So, let’s roll up our sleeves, tie on our aprons, and embark on this delightful culinary adventure together.
Personal Story
Growing up, my family was all about cozy dinners and hearty meals, but the true highlight of any food gathering was my grandmother’s apple salad. Each fall, she would meticulously prepare it for our Thanksgiving feast — a vibrant dish nestled between her renowned roasted turkey and velvety mashed potatoes. She always let us kids get involved, and I specifically remember clamoring around the kitchen, excitedly waiting to mix the ingredients together!
The star of the show was, of course, the Honeycrisp apples. I still taste the moment when I first bit into that salad. It was a delightful explosion of sweetness from the grapes, the subtle nutty warmth of pecans, and a creamy dressing that tied it all together beautifully. As we gathered around the table, our laughter mingled with the sounds of clinking forks and satisfying mmm’s. It felt like more than just a dish; it was a moment of pure joy.
My grandmother always said that cooking is a way to show love, and I carry that wisdom into my kitchen today. Get ready, because I’m about to give you the secrets to the ultimate apple salad — one that will surely become a cherished tradition in your home just like it has in mine.
Ingredients
Here’s what you’ll need to create this delightful apple salad:
-
4 large Honeycrisp apples, cubed
Why Honeycrisp? They’re sweet, juicy, and have that perfect crispness, making them a top choice for salads. If you can’t find them, Fuji or Gala apples work beautifully too! -
1 lemon, juiced
Fresh lemon juice not only brightens the flavors but also prevents the apples from browning. You can substitute with lime juice for a zesty twist! -
⅓ cup mayonnaise
Creamy and rich, mayonnaise is the heart of the dressing. For a lighter option, Greek yogurt is a fantastic substitute that adds a tangy flavor. -
1 ½ tablespoons brown sugar
This adds a touch of sweetness to balance the tartness of the apples and lemon. Feel free to adjust the sweetness to your taste, or use honey instead! -
2 ribs celery, thinly sliced
Celery introduces that wonderful crunch to the salad. If you’re not a fan, try using chopped green apples for an extra tart kick. -
1 cup seedless red grapes, halved
These juicy gems add sweetness and a burst of flavor. You could substitute with other berries like blueberries or strawberries for a vibrant twist! -
½ cup chopped pecans
Nuts bring some richness and texture. If you prefer, walnuts or almonds can be a great alternative. -
½ cup dried cranberries
Cranberries offer a lovely chewy texture and a tart contrast to the sweet apple. Raisins work as a good substitute if cranberries are hard to find!
Step-by-Step Instructions
Step 1: Prepare Your Apples
Start by washing your Honeycrisp apples thoroughly — we want every bit of that crispness to shine! Cube them into bite-sized pieces. As you cut the apples, don’t forget to squirt them generously with fresh lemon juice. This keeps them looking fresh and prevents browning. You can even toss them lightly as you cut to ensure a consistent coating.
Step 2: Mix the Dressing
In a large mixing bowl, whisk together the mayonnaise, brown sugar, and the remaining lemon juice. Aliasing the brown sugar with the mayo creates a creamy, luscious dressing that clings to all those apple pieces. Taste it — don’t be afraid to adjust the sweetness according to your preference!
Step 3: Combine and Toss
Add the cubed apples, sliced celery, halved grapes, chopped pecans, and dried cranberries into the bowl of dressing. Using a gentle folding motion, mix everything together, ensuring each apple piece is well-coated in the dressing. This is where the magic happens! You’ll start to see the colors mingle — bright greens, reds, and creamy whites popping against each other.
Step 4: Chill in the Fridge
Cover your mixing bowl with plastic wrap or a lid and refrigerate the salad for at least 30 minutes. Chilling allows the flavors to meld beautifully while adding that refreshing, crisp texture — it becomes an enchanting medley of tastes once cooled.
Step 5: Serve and Enjoy
When you’re ready to serve, give the salad a gentle toss to refresh everything. I like to present it in a beautiful bowl garnished with a few extra pecans and cranberries sprinkled on top for visual appeal. Trust me; a little extra love in presentation goes a long way!
Serving Suggestions
For serving, consider placing the apple salad on the table in a beautiful, wide bowl, allowing everyone to serve themselves. Pair it with crusty bread or even as a side to roasted chicken or grilled sandwiches. You could even serve it in individual cups as a refreshing starter for a dinner party — presentation always adds that elegant touch!
Recipe Variations
-
Vegan Twist: For a plant-based version, swap out the mayonnaise for a vegan mayo or cashew cream. This adds creaminess without the eggs!
-
Spicy Kick: Add a teaspoon of Dijon mustard into the dressing for a spicy tang that enhances the flavor profile wonderfully!
-
Herb Infusion: Experiment with adding some freshly chopped mint or basil to the salad. It adds an unexpected herbal freshness that’s simply delightful.
-
Cheesy Addition: Crumbled feta or goat cheese sprinkled on top can introduce a creamy, salty element that pairs beautifully with the sweetness of the apples.
-
Nut-Free Option: If you or your guests are nut-sensitive, feel free to omit the nuts entirely or swap in toasted sunflower seeds for that delightful crunch without the allergens.
Chef’s Notes
This apple salad has a special place in my heart because it embodies so many childhood memories spent in the kitchen with my family. Over the years, I’ve played with the ingredients and learned what works and what doesn’t. One time, I mistakenly used spoiled mayo, and the whole dish went sideways! But that mishap sparked my creativity, and from that day on, I used fresh yogurt as an option, which turned out to be a hit.
Cooking is about experimentation and connecting with those around us. Each time I prepare this dish, I think of how my family would gather around the table, whether for special occasions or a casual weekday dinner. It brings warmth, laughter, and love into my home, which is what I hope for you.
FAQs and Troubleshooting
1. My apples turned brown too quickly; how do I prevent this?
Don’t be shy with the lemon juice! It not only adds flavor but also creates a barrier on the apple surface that prevents browning. If you’re prepping in advance, keep the salad chilled until you’re ready to serve.
2. What can I do if my dressing is too thick?
If you find your mayonnaise dressing too thick, just add a bit of water or additional lemon juice to thin it out. Stir until you reach your desired consistency.
3. Can I make this salad ahead of time?
Absolutely! This salad can be prepared up to 24 hours in advance. Just remember to keep it refrigerated, and give it a light toss before serving.
4. How do I ensure that the salad stays crunchy?
Serve it immediately after mixing to enjoy a crunchy texture, and avoid letting it sit for too long after dressing. If you’re making it ahead, you can keep the dressing separate and mix just before serving.
Nutritional Info
While I love to indulge in my recipes, I’m also conscious of balanced meals. This apple salad packs a punch with vitamins, fiber, and healthy fats, making it a nutrient-rich side. Each serving can contain approximately:
- Calories: 200
- Protein: 2g
- Carbohydrates: 28g
- Fat: 10g
Remember, nutrition can vary based on specific ingredient brands and quantities used, so feel free to adjust to your dietary needs!
Today we’ve crafted something extraordinary together—an apple salad that not only satisfies your palate but also your heart. I hope it finds a cherished place in your kitchen rituals and brings your loved ones together around the table. Happy cooking, friends! Let’s create those delicious moments; you’ve got this!
PrintThe Ultimate Apple Salad
A crisp and refreshing apple salad combining the flavors of Honeycrisp apples, tangy lemon, and crunchy pecans, perfect for any occasion.
- Prep Time: 15 minutes
- Cook Time: 0 minutes
- Total Time: 30 minutes
- Yield: 4 servings 1x
- Category: Salad
- Method: No-Cook
- Cuisine: American
- Diet: Vegetarian
Ingredients
- 4 large Honeycrisp apples, cubed
- 1 lemon, juiced
- ⅓ cup mayonnaise
- 1 ½ tablespoons brown sugar
- 2 ribs celery, thinly sliced
- 1 cup seedless red grapes, halved
- ½ cup chopped pecans
- ½ cup dried cranberries
Instructions
- Prepare your apples by washing them thoroughly and cubing them into bite-sized pieces. Toss with lemon juice to prevent browning.
- Mix the dressing by whisking together mayonnaise, brown sugar, and remaining lemon juice in a large bowl.
- Combine the cubed apples, sliced celery, halved grapes, chopped pecans, and dried cranberries in the bowl with the dressing, and gently mix.
- Chill the salad in the fridge for at least 30 minutes to allow the flavors to meld.
- Serve and enjoy, garnished with extra pecans and cranberries if desired.
Notes
Feel free to adjust the sweetness of the dressing to your taste. This salad can be made ahead of time and stored in the refrigerator.
Nutrition
- Serving Size: 1 serving
- Calories: 200
- Sugar: 16g
- Sodium: 150mg
- Fat: 10g
- Saturated Fat: 1g
- Unsaturated Fat: 9g
- Trans Fat: 0g
- Carbohydrates: 28g
- Fiber: 3g
- Protein: 2g
- Cholesterol: 5mg
Keywords: apple salad, refreshing salad, fall recipes, healthy recipes, Thanksgiving salad